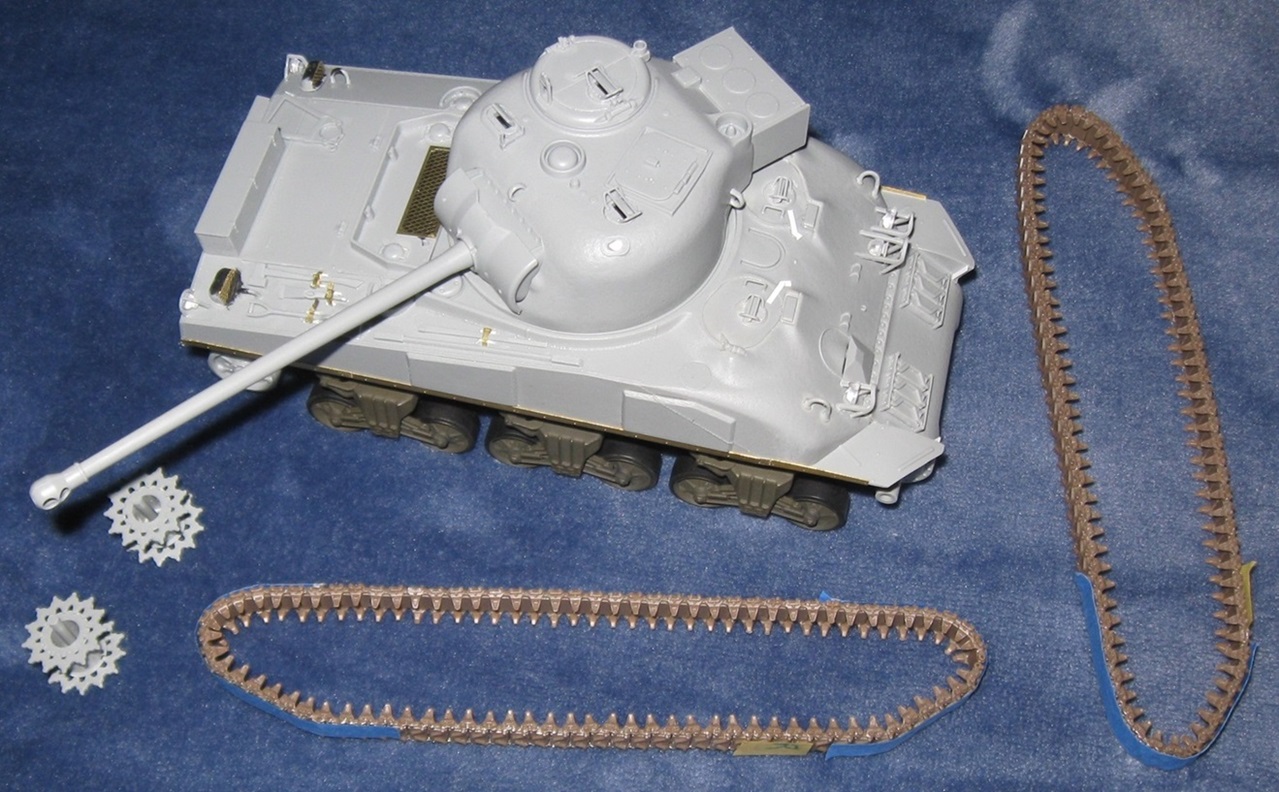
Damraska’s AFV Projects

@Armor_Buff Thank you. I feel like the latest round of models may actually turn out okay.

Hobby Boss VK1602 Leopard (Chibi Panther): Most airbrush work is done.

Airbrush work on all suspension elements and the underside of the tank is done. The next two airbrush steps require really complex masking.

Like most modelers, I use a block of styrofoam to hold parts on toothpicks. My block constantly drops little pieces of rubble that cling to everything. In an attempt to get that under control, I made these new blocks with taped edges. If this does not work, I will order some stytofoam for florists.

3 Likes

Finished: Cyber Hobby 6398 Panzer IV Ausf. F1 mit Vorpanzer

One of my problem children is finally finished. :face_exhaling: This model was my third entry in the Unfinished Business 2023 campaign. Initial work probably began sometime in 2019 or 2020. The project restarted in late June or early July of 2023. After good initial progress, painting problems resulted in one delay after another.

My goal with this project was to make monotone, dark gray camouflage look interesting. My first attempt to paint ‘interesting’ was truly awful. :face_with_diagonal_mouth: What you see here is the second attempt, painted over the first. While the model did not turn out as planned, I tried many new things and learned a lot in the attempt.

To my horror, I just discovered this is my first completed model in over 6 months. :flushed: Little setbacks with broken parts, lost parts, and painting really slow me down. However, my skill level continues to slowly improve and each time an old project is completed, everything else speeds up.

As always, all feedback is welcome, including the kind that stings.

7 Likes

Feels great to get one over the line, doesnt it?

I really like the cold metal effects on this. The weathering is excellent and the pioneer tools and that excellently chipped bucket do exactly what you want them to do - add visual interest.

If i had any comments it would be that I think the running gear and lower hull sides could do with some mud and dust effects as they look a bit “clean” to my eyes but that’s me. I also think the overall effect is quite dark (which looks good and is very nicely done) but maybe it needs some more lighter mud effects to break up the dark finish a little - but as with all things aesthetic, that is purely my subjective view.

I maintain - perhaps contentiously - that dunkelgrau/Panzer is a harder finish to pull off well and convincingly than dunkelgelb three tone etc. I think its a lot less forgiving and requires you to really think about how you modulate the grey and be really careful with the highlighting so it doesnt look overdone or cartoony. I also think weathering is more difficult because you have to make what you are doing show up above the grey, but it canot look too gaudy or artificial. Dunkelgelb is a lot more forgiving, I think. So with that in mind what you’ve produced is excellent - it is balanced, visually appealing, you’ve kept it sensible, you’ve modulated the colours and really made the tools and the bucket and weathering work for you as opposed to against you. As I say, I’d have been tempted to push it a bit further but I can absolutely see why you chose not to.

Super job mate, its lightyears better than anything I’ve ever managed in Panzer grey. Fair play to you.

Looking forward to seeing the next build - you looked like the Leopard/mini Panther was not far off, do keep us posted on how you get on. Really interested to see how you approach the camo on that one.

4 Likes

Doug, well done on the Pz. IV F.

Congratulations :confetti_ball: on first completion of the year!

3 Likes

@BringupthePIAT Thank you for your kind words and critique. I agree with all your points on painting and finishing. Panzer Dunkelgrau is much darker than most modeler’s depict and really difficult to make interesting. My intention was to keep everything above the fenders fairly dark and everything below the fenders fairly light. Unfortunately, I did not get the balance right. While working on the model, I bought many new products including pigments, pigment fixers, and mud effects. Some of those products appear on the model but I decided to avoid using anything that could result in a catastrophic failure.

Chibi Panther is in the home stretch and should finish up in the next two or three weeks. The paint scheme is, ummm, ‘extremely exotic’ and requires a ton of complex masking.

@Armor_Buff Thank you, Wade! Thank you for all the advice you provided over the last few months. Your system for using oil paints produces much better results than the one I cooked up.

3 Likes

Finished: Hobby Boss (formerly TriStar) 80136 Panzer 38(t) Ausf. B

Primary and detail painting was completed with Vallejo Model Air acrylic paints over Badger black acrylic primer. Finishing consists of Vallejo matte clear acrylic over Mig and Winsor and Newton oil paints. Tamiya transparent red and transparent green were used for the tail lights.

This is yet another painting experiment and learning project. Unlike the previous model, this one does not include any chipping, dry brushing, or streaking. Instead, everything above the fenders relies on panel shading and oil washes. Everything below the fenders was accentuated with light colors.

Did the experiment work? There are pros and cons.

Am I now comfortable with acrylic paints? Yes. All acrylic painting on this model went smoothly. Finally.

Am I now comfortable with oil paints? Oh heck no. They are pure evil in squeeze tubes.

What is the best thing about this model? The head of the sledge hammer. It looks pretty cool.

Will I paint the next model this way? No.

As always, all feedback is welcome, good or bad. For example, the jack block and tail lights could be better. The jack is too clean. Dry brushing is a thing. It needs to have a bucket!!!

8 Likes

Oh yes! :rofl: :joy: :smiling_face_with_tear: :grinning: :rofl: :joy:
Ken

3 Likes

Very nice work on the Pzr IV and 38t Doug. They look great.

3 Likes

Thank you, Peter. I am trying hard to learn from you and the other great modelers who frequent these forums and improve.

3 Likes

Finished: Cyber Hobby 6497 Sturmpanzer IV (with an assist from AFV Club)

This was my entry for the Unfinished Business 2024 campaign. More pictures of this model appear in that discussion.

9 Likes

Yes! Congratulations Doug. A lesser man would have binned this kit two disasters ago. It looks excellent. Really great finish on it. The tracks and muffler are fantastic. A huge win for you and wonderful results.

4 Likes

Thank you for all your encouragement and advice. Your suggestion to apply a less aggressive umber wash, building up the shadows, was particularly helpful. It caused me to remember something from long ago, something very important, that should make future painting easier, especially when I transition to olive drab vehicles in the near future.

4 Likes

You’re very welcome Doug, that’s why we’re here.

4 Likes

Finished: Mobile Area Denial Munition, Autonomous, Neutral – MADMAN

This was my entry for the All Things Apocalyptic and Adorable campaign. More pictures of this model appear in that discussion.

9 Likes

Finished: MiniArt 35133 GAZ-AAA

This was my entry for the Convoy! campaign. More pictures of this model appear in that discussion.

9 Likes

Dragon Firefly IC and Jagdsherman

These two models, both old projects, each made one earlier appearance in this log. The hull of the Firefly IC is now assembled with bogie trucks installed and most exterior features fitted. The scratch built Jagdsherman is utilizing many spare parts from the Firefly. In this way, both models are progressing in lock step.

7 Likes

Dragon Firefly IC

After a three day break from model building, I am back at it. As noted earlier, this Firefly will represent Zemsta II (Polish: Revenge II). One picture, taken from the right side, exists. The tank appears to wear T54E2 tracks. Another Firefly in the same unit, Zyrafa (Polish: Giraffe), clearly wears such tracks. This project uses T54 tracks from Bronco. To my eyes, they look more like T54E2 tracks than T54E1 tracks, but I could be in error. Individual link tracks with a lot of parts to not bother me. However, in my opinion, these tracks are not well designed; I would not purchase them again.

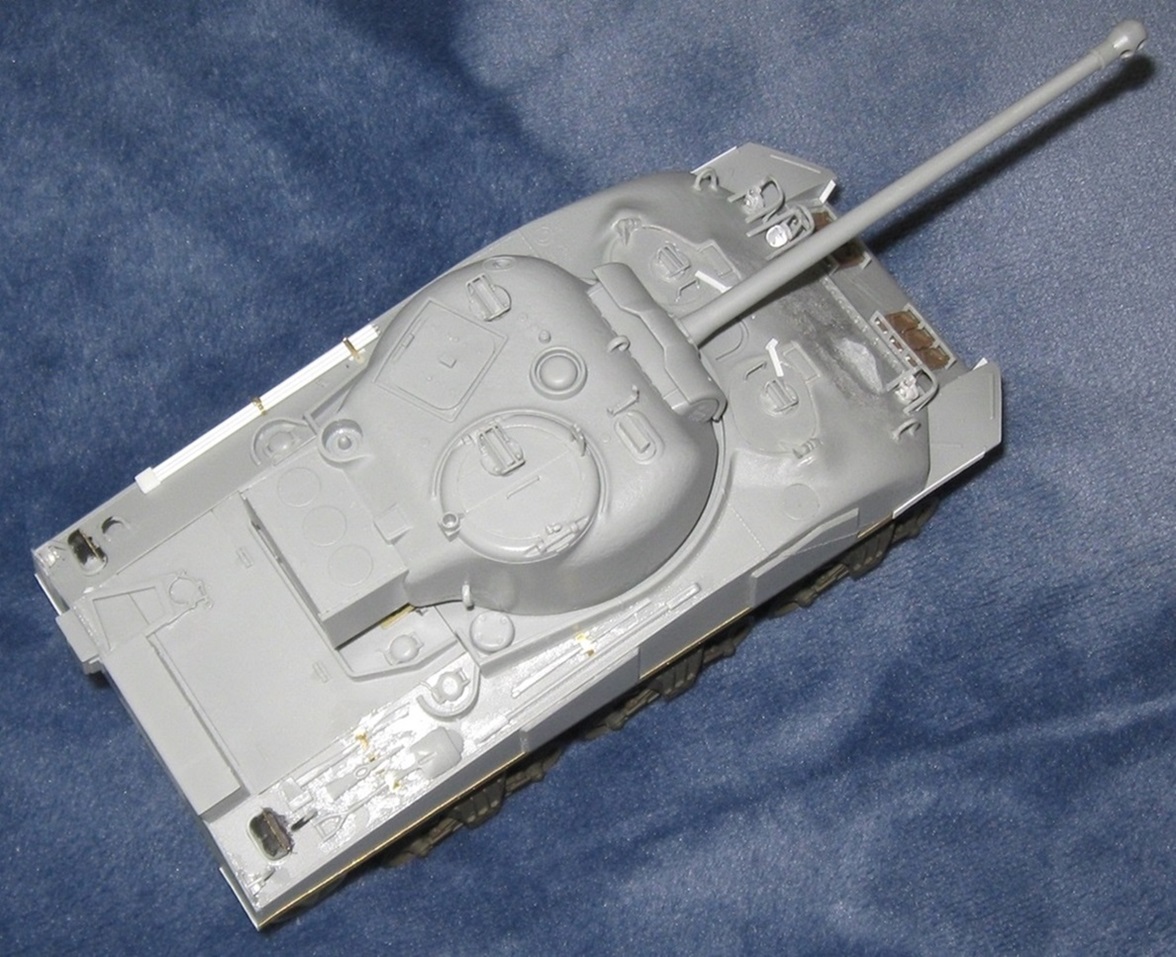
This model comes with a commendable number of brass parts. On my project, some brass parts were replaced with sheet stock because the latter are much easier to affix.

I chose to use plastic parts for the light and siren guards. That was probably a mistake but brass brush guards are a gigantic pain in the tail end.

Something is wrong with the attachment bars for the sand shields. The geometry at the front shoulders, where the front fenders meet the composite cast hull area, cannot possibly work as represented in the model. My hypothesis is that the real front fenders have a slight upward bias, front to back. I have not yet decided if or how to deal with this issue.

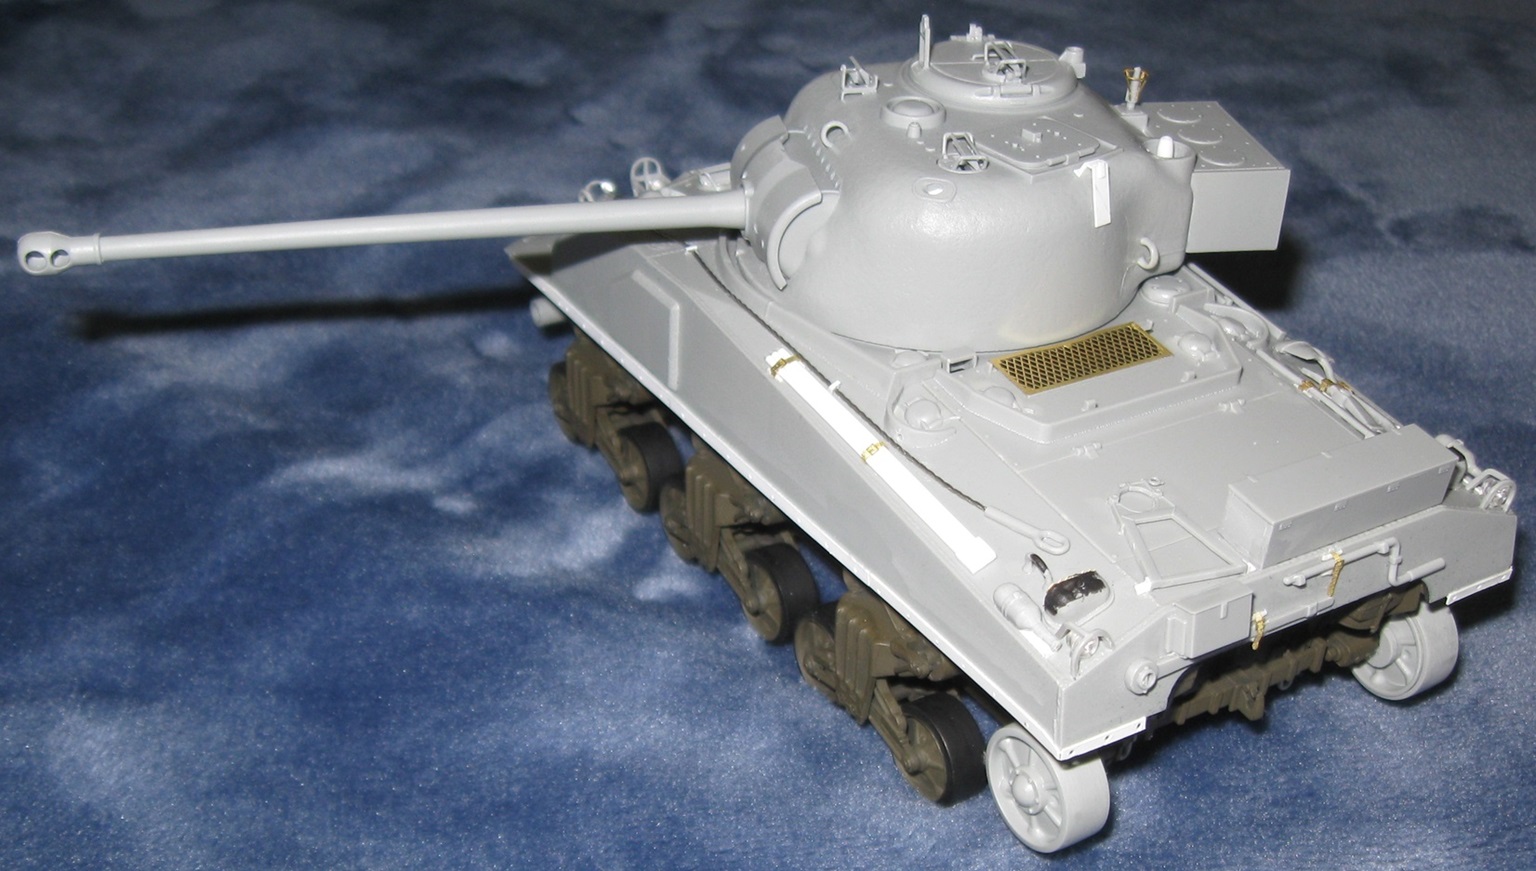
Some artwork of Zemsta II shows the turret with a left side pistol port. This model does not have that port. At least one other Firefly in the same unit does not have the port. In my opinion, the model is probably correct.

The model comes with a British fabricated box for the right rear engine deck. The single picture of Zemsta II does not show the tail. Zyrafa has some kind of box in that position. My model uses the box.

Fireflys have a small box on the upper left rear tail plate. This is probably a phone. Some drawings and pictures show the box mounted with the lid proud of the engine deck. Some show the lid flush with the engine deck. My model has it flush. That may change.

Firefly tool layout varies a lot. My model represents a best guess. On Zemsta II, a very large duffel bag covers most of the tools on the right rear engine deck.

The model comes with two styles of spare track block hangers with two styles of track. After building up and gluing one set of hangers, I realized all possible configurations are wrong. This will require some effort to correct. It is unclear what track block hangers, if any, were used by Zemsta II or other Fireflys in the same unit. My interpretation will be a guess.

The model offers two configurations for the commander’s M2 heavy machine gun. Fireflys in pictures rarely (if ever) have them fitted. British doctrine was to button up during air attacks and hope for the best. I have no idea what the Poles thought of British doctrine, nor what they did with those machine guns. My interpretation will be a guess.

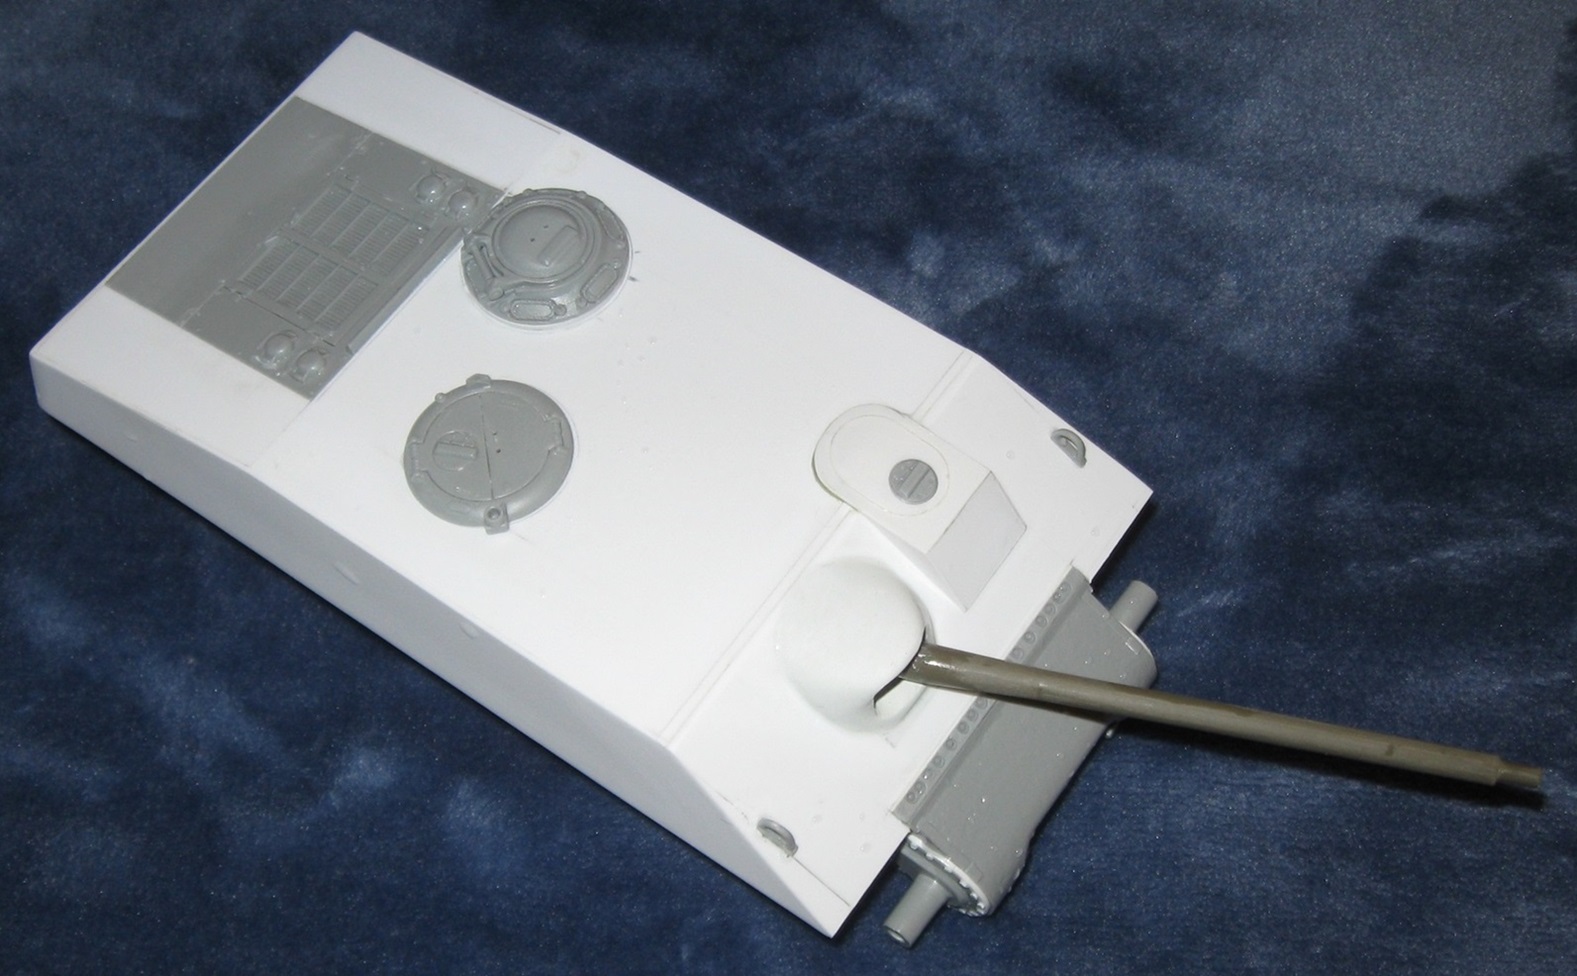
Two versions of the plate that covers the bow machine gun are included. My choice is a guess. There should be fairly prominent welds all around the plate.

British mechanics seem to have removed the dust cover attachment loop over the bow machine gun and the mounting bosses for the 75mm gun travel lock. Unfortunately, I missed this fact and now need to remove them.

Fireflys gun cleaning rod parts are usually stowed on the left rear engine deck. My model still needs those parts.

As a final note, this model includes many options. The instructions do not provide information about what options to use for each subject. In many cases, they do not show how to place parts. Additional references are an absolute requirement.

Work progresses more slowly on my Jagdsherman. Last night, I came to a unexpected realization–the model was designed for wide tracks! What the heck was I up to here? This is a real bummer because I do not currently have the parts to execute such a plan.

Otherwise, the model is in good shape but requires some very minor shimming and weld bead work. The casement for the 90mm gun needs more extensive revision. The gun shield I came up with 15 years ago is flat out ugly and requires complete replacement.

3 Likes

Dragon Firefly IC

The phone box on the tail plate was removed and reattached half a millimeter higher. This better matches the appearance in most photos.

The mattock head was moved backwards a few millimeters, bringing the tie down handles into line with those for the axe and shovel.

The front sand shield mounting bosses were removed and replaced with plastic card stock.

The 75mm travel lock mounts were removed and underlying cast texture restored,

The armored cover over the bow machine gun was removed and replaced about one millimeter higher. Weld beads were added around the cover.

The dust cover holder around the bow machine gun was removed. Cast texture was restored to this area.

Both spare track hangers were removed and completely replaced with new hangers and the correct track blocks.

A cleaning rod was fabricated and added to the right rear engine deck.

Plastic brush guards remain in place. Perhaps I can sand them a bit thinner.

Curiously, the model does not include a starting crank or track tension tool. Fortunately, I found both in the spare parts box. I also found a spare M2 heavy machine gun to replace the one I borked. :face_with_diagonal_mouth:

One evening of construction to go…

In one very fortunate turn of events, while looking for parts to fix this model, I found 6 middle type bogie top skids for my M12 Gun Motor Carriage project. :slightly_smiling_face:

Wow. In the picture above, the tool area on the right rear of the model looks terrible! :flushed: Moving the tools around required a fair bit of cutting and sanding. Did I promise a glue bomb? I should have promised a glue bomb. :upside_down_face:

4 Likes

Dragon Firefly IC

Last night, I found a series of pictures clearly showing how the sand shield bolt strips on a Firefly IC connect to the hull. Contrary to my belief, the bottom edges of the bold strips are not flush with the sponson bottoms. They hang an inch or two below that edge. Old bolt strips were removed and new ones fabricated. Now everything lines up in a logical manner.

The model includes a sledge hammer, engine crank, and idler wheel adjustment wrench but the instructions do not show them installed. Based on pictures and drawings, that is wrong. My model now has the latter two items installed on the rear plate, secured by some straps. The positioning is a best guess. The sledge should go where the long storage box on the rear deck is currently located. It will ride with some junk on the rear deck.

This model is now ready for paint. Well, more paint.

After taking some measurements, It is now my belief that the Jagdsherman was originally designed to use a VVSS suspension, T54E1 tracks, and an outer set of duckbills. No E9 spacing blocks are required. I have a set of AFV Club T51 tracks that includes duckbills so those will go to the Jagdsherman.

Work on Chibi Panther stalled because it requires some very complex painting masks. Work on those masks is now underway.

5 Likes

Jagdsherman

This project was started in 2008 or 2009. The idea was to build a Jagdpanzer IV style tank hunter on a M4 medium tank hull mounting the 90mm gun from a T26E3. To keep ground pressure down and thus increase mobility, the machine is designed to always use VVSS compatible tracks with duckbills. The sponsons are wide enough to accommodate this. All armor surfaces are sloped for better ballistic protection, just like a Jagdpanzer IV. The frontal armor plate is sharply sloped, necessitating a cutout enclosure for the driver.

The hull is constructed almost entirely from sheet plastic. Some plates were slightly under sized. In order to achieve a perfect shape, various edges were shimmed and then sanded back.

Both antenna mounts installations were poorly done. These were removed and surface imperfections sanded back.

The gun casement, sculpted from Milliput, was sanded extensively until the desired geometry was achieved.

After completing both sponson floors, the upper and lower hull assemblies were permanently joined and then sanded to shape. Long welds were added at the seam between hull wall and sponson floor. Bolt heads were added to suspension mounting brackets, final drive covers, and the strip connecting the transmission cover to the hull.

It may not look like much changed, but all plate joins are now more precise and ready for adding weld beads.

4 Likes