Damraska’s AFV Projects

Hey, hey.

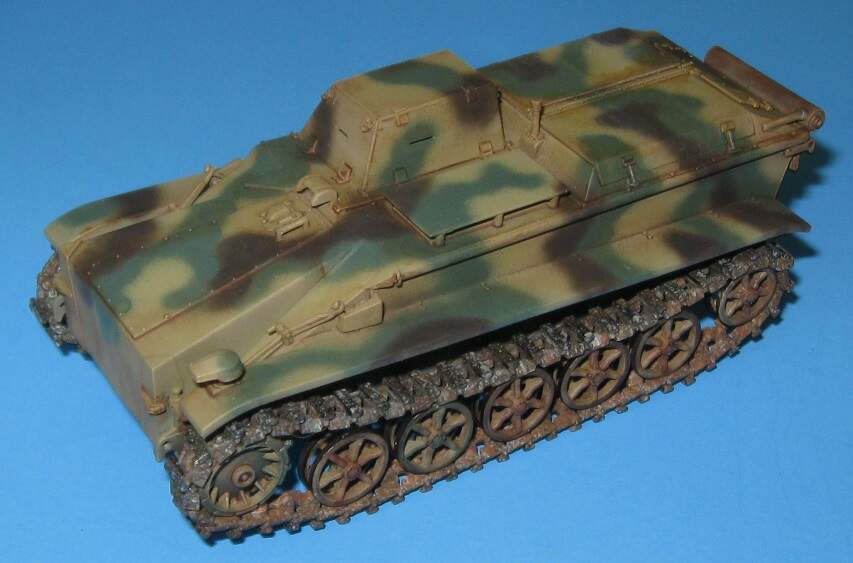
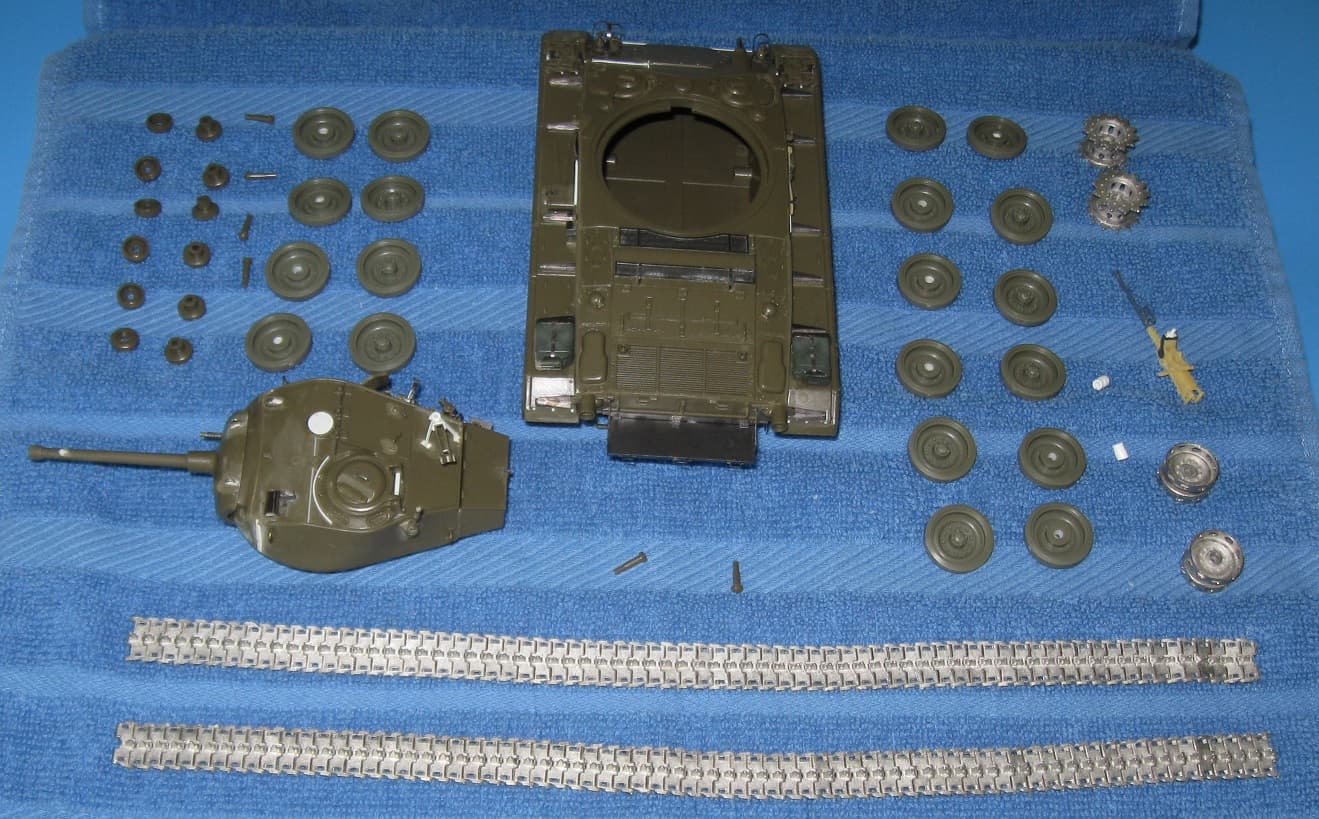
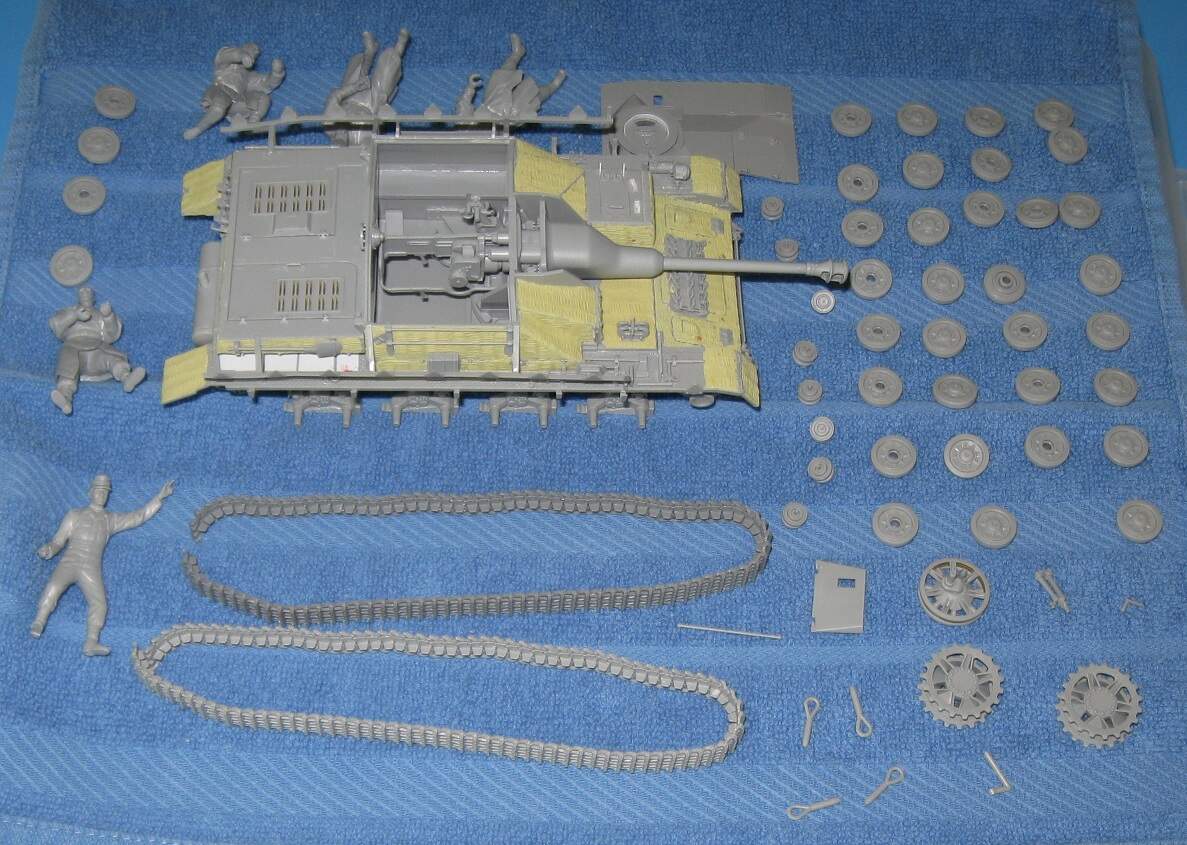
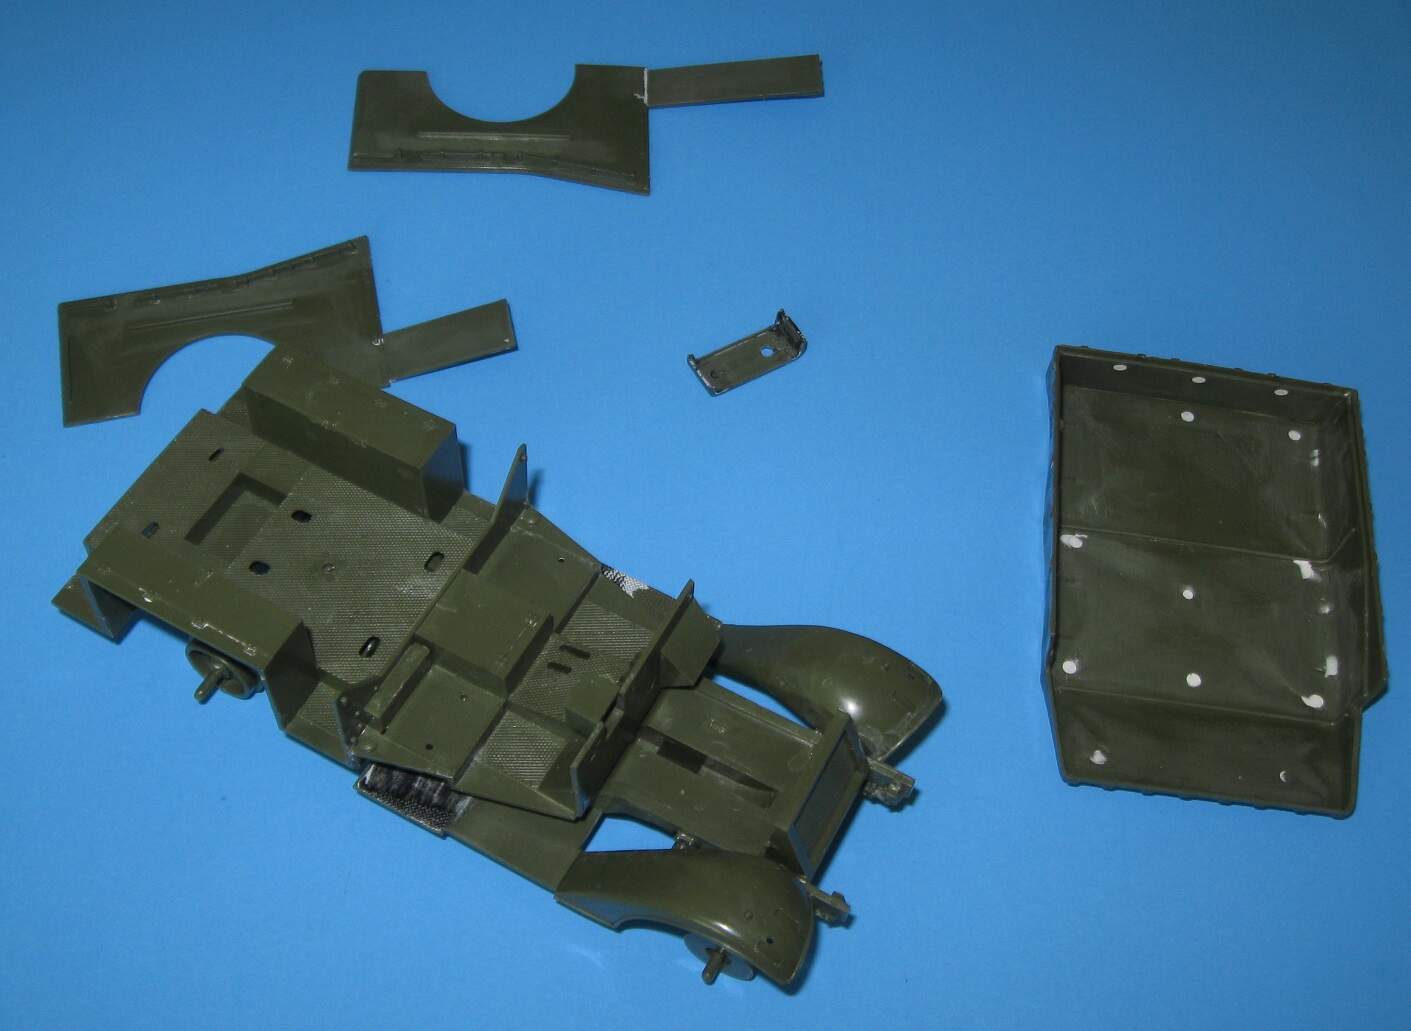
As I have written elsewhere, I returned to model building in January of this year, for real this time, after a 12 year hiatus. During those years I actually picked up and worked on about a dozen models, usually for a week or two, but only two models ever made it past construction. One of those models ended up in the trash and the other sits in a box, languishing for 5 years and counting.

Ever since I was a kid, I wanted to paint great figures and build awesome models. From 2000 to 2010, I actually got pretty good at models but when my health took a nose dive, that came to an end. Now I am making another go at it with three goals. One, I want to become a very good (but not necessarily great) figure painter. Two, I want to become a very good (but not necessarily great) model maker. Three, I want to execute one and two in a way that does not cause further health problems. As part of goal three, I am switching from enamel to acrylic paints with some success.

Model building is an artistic endeavor and model builders face the same challenges as all artists–learning, improving, producing finished works, and remaining motivated. Builders of historical vehicles face the additional challenge of producing models that accurately reflect reality. This last issue works for and against model builders. On the one hand, artists typically strive to develop a unique style instead of copying something, whereas model builders strive to copy things exactly. On the other hand, most artists need not worry about research and accuracy, things that often cause model builders great consternation.

After much consideration, I came to the conclusion that, to improve and succeed, I need to build models, try new techniques, build accurately, remain motivated, and finish stuff. Building accurately requires research and works against finishing projects. Trying new techniques results in failures which work against remaining motivated and finishing stuff.

My original goal for 2022 was to finish the numerous incomplete models in my closet. After 10 weeks, I am already spinning my wheels because trying new techniques and failing leads to loss of interest. After watching some very successful artists talk about their approach and work flow, I am altering my flight path which brings me to the subject of this thread.

For 2022, I am challenging myself to complete one 1/35 scale figure or model every week for 52 weeks. At least 26 projects must result in a completed model. Every project must include at least one new painting method or building technique. If a painting method or building technique fails, I may reuse that method or technique again until achieving success. In this way, the challenge will involve both constant practice and constant learning.

Most very successful artists recommend seeking constant feedback, paying attention to that feedback, and using feedback to make improvements. In other words, they recommend an iterative approach to art. I am making this thread in the feedback section of an armor modeling forum in hopes of gaining such input on my work. If you are reading this and want to play along, feel free to call out an error, recommend a video, suggest a technique, or just rate a model. This effort will probably result in some fairly bad models but if things go to plan, the ones near the finish will look significantly better than the ones at the start.

Most successful artists recommend completing many projects instead of a few super projects as this maximizes learning and skill growth. To this end, I will favor budget and speed over accuracy. To be clear, I will pursue accuracy and make corrections where possible, but only within the constraints of budget and rapid project completion. I may even build a second copy of a model, incorporating things learned and feedback from the first.

As of today, April 1, 2022, I am already 14 weeks behind so…time to turn up the effort.

Onward

3 Likes

Hi Doug, welcome back! Looking forward to seeing your work.

BTW: Here’s a currently running campaign you might consider: ‘Wow you’ve got a great figure!’

—mike

1 Like

You just got to start cutting plastic or painting. As Mike said we have a nice figure campaign going with lots of tips and how to’s. Join in on the fun. :+1:

I had intended to follow up that first post with some pictures but we are experiencing technical difficulties. Please stand by.

The current figure painting campaign was a major factor in my decision to include figure painting in my personal challenge. Since I have never painted a 1/35 scale figure and may not succeed, I am not comfortable joining that campaign at this time. I bookmarked some figure painting videos and will start with those.

Since the middle of January, I cut plastic, paint, or sculpt almost every day. Most of my time is spent experimenting and fixing mistakes. Rather than make a bunch of threads, I can put everything here and hope for the best. :slight_smile:

1 Like

I’m cheering you on and wishing you much success!

1 Like

We’re built for comfort, not for speed. :couch_and_lamp: :smile:
Good luck anyway, and enjoy. I’ll be following your progress.:smiley:

—mike

Thank you for the comments and well wishes, phil2015 and justendit! The figure campaign has many months to go so if I have some success, I will join in.

I started this PaK 38 back in January as a practice mode. It only took a couple evenings to build but painting took much longer, mostly due to lack of proper equipment and materials. At one point, after trying some acrylic washes, it went into the trash. Realizing that was a waste of a practice model, I washed it off and continued painting. I feel like I have gone as far as I can with this canvas so it just needs one last flat clear coat, final assembly, and some pigment for the tires.

This Bogward IV is another practice model I started in January, right after deciding to make another go at plastic model building. Like the PaK 38, it made a brief journey to the trash can. To my great surprise, this thing looks much better in the photo than to my naked eye. It still needs some detail painting, decals, an antenna, and more weathering.

Years ago, I stumbled upon a standard method for painting tracks, which I described here in another thread. After watching some videos on track painting, I decided to give the ‘splatter’ method a try. (I have no idea if the technique actually has a name, but it involves a whole lot of paint splatter.) I painted these tracks as I normally would, then used the splatter method to make them even more visually interesting. I cannot decide if I like the result or not.

2 Likes

With three models near completion, I just prepared two more for painting.

This Italeri M24 Chaffee was started between 12 and 14 years ago. I pulled it out of the closet a few weeks ago, finished up the last of the construction, and washed it for painting. I attempted to back date the model to a World War II vehicle. The kit tracks were for a post World War II vehicle, vinyl, and just sucked, so I replaced them with the earlier, all metal type made by Fruil. The road wheels were stolen from a AFV Club M41. (If I could go back in time, I would not do that again.) To make them fit the Italeri kit, I added little plastic tube thingys inside each one. I have no idea what the two loose pieces of white tube are for. This build makes use of a photo etch set from Eduard and some random parts from who knows where. The M2 machine gun is a Frankenstein creation. I have no memory of why I did that.

This Dragon Sturmgeshutz IV was started in January and is now finished and washed for painting. It was a complete pain in the tail end to build. There was a huge gap where the casement met the hull. Fitting the gun sucked. It needed zimmerit. Then, having applied all the zimmerit, I discovered a photo of a vehicle I wanted to model, and it does not have zimmerit! ARRRGGG! The photo etch parts kept falling off, perhaps because my super glue went bad. (Not sure what is going on there.) Eventually, I replaced most of the photo etch with parts fabricated from plastic card. The rails for the shurzen were super fiddly to install.

Edit: One of the idlers is missing. Now where the heck did that get to?

I plan to paint this solid Panzer Dark Yellow as I want to improve upon the Jagdpanzer IV I am about to finish.

The 5 figures in the picture come from the PaK 38 above and a Dragon E100. They shall be sacrificed to the Muse Clio.

2 Likes

As if I am not making things hard enough for myself…

Here we have a Revell M3A1 Scout Car which was originally issued by Peerless Max in 1974. This was pulled out of the closet and started two weeks ago as another practice model. My original intent was to quickly build and paint this vehicle as I want to try a different technique for pin washes. Yeah. No. Somewhere in hell, evil model builders spend eternity filling knockout pin holes on an infinite stack of models like this one. Otherwise, considering the age of the model, it is actually quite good. This issue came with a pretty decent canvas top which I intend to use.

Here you can see where I attempted to brush paint Vallejo gray primer into some nooks and crannies, then add a coat of Vallejo black. Do NOT do this! WARNING: FAILED EXPERIMENT! I sanded out as much as I could and will spray a proper coat of primer. Also, Vallejo primer is impervious to rubbing alcohol.

Was the tail plate of this model really so problematic that it needed TEN ejector pins? I think the guy who cut this mold was just trolling model builders.

After stalling on the seemingly endless supply of knockout pin marks, I found a really good walk around of this vehicle and now intend to jazz up the outside. We’ll see how that goes.

Here we have my poor, sad, sad and poor little Tamiya Panzer II. The experiments I have inflicted on this little thing amount to model torture and I broke off the stupid headlight again. Rather than try to salvage this paint job, I have decided to spray over everything and start over. We’ll see how that goes.

This will be my last one for today. This was part of an experiment conducted about 5 days ago. I stretched sprue for about an hour and used it to make a tree and some grass. The process is time consuming but produces interesting results. I am currently exploring methods of making realistic plastic leaves, perhaps using heated plastic and a push mold.

My goal for this week is to finish the PaK 38, Bogward IV, and Jagdpanzer IV. It’s good to have goals.

Onward.

3 Likes

Hi, those models sure look good!
Reading your opening post, with those tasks and goals… sounds almost like a job… don’t forget, this is supposed to be a hobby, and you should have fun, enjoying the building, painting etc…
in short, don’t forget to have fun!

Wait. I’m supposed to have fun doing this stuff?

Also, thank you. I am trying very hard to improve.

Last night, I assembled the body panels and worked on the rear wheel wells. The kit leaves the rear wheel wells as big, open boxes. If you opened the storage bins over those wheels and dropped something inside, it would fall through to the ground. I found a really good M3A1 Walk Around and used those pictures to fabricate the sheet metal liners inside the rear wheel wells. They turned out pretty good, all things considered, but I still need to add the fasteners and weld lines. I do not want to spend too much time on the underside of the vehicle since no one will ever see it, but this particular problem actually shows when looking at the model side on. Now I fear I will need to adjust the ride height.

The radiator gave me some trouble. After a bunch of test fitting, I glued it in place about a week ago. Last night, after mounting the engine compartment panels, I realized the nose piece would not fit. After carving up the nose piece, it still would not fit. Next followed about an hour of surgery to take apart the front panels, remove the radiator, reshape the chassis frame and radiator, then put everything back together.

The front wall of the crew compartment also has some issues but the instrument panel will hide that.

The front fenders do not sit flush to the front body panels. That needs fixing with Milliput.

I had to shave the rear frame back a little bit to get a snug fit on the rear body panel. I shaved off the alignment pins and tabs on the rear compartment body panels because they do not exist on the real vehicle.

I kinda goofed. There is a storage box molded into the floor of the floor pan. It is hollow from the underside but should not be. Unfortunately, I forgot to fill the hole before attaching the floor pan to the chassis. No one will ever see the issue but I may try to cluge a fix this evening.

The storage box on the right front fender does not fit very well. After some sanding and scraping and elbow grease, it looks much better.

I think I can still get all visible surfaces with my airbrush but this model has so many nooks and crannies I have concerns.

Onward.

4 Likes

Finished: Dragon Model Limited 6444 5cm PaK w/Crew (without the crew)

This was the first of three practice models I started back in January, after deciding to return to model building. It was built ‘out of the box’ over two or three evenings. Relearning to paint continues to offer the greatest challenge to my efforts.

The model was base coated with Model Master enamels, weathered with Vallejo acrylics, then weathered again with oil paints. My only references came from a few online photos. In truth, I know very little about these machines.

The undersides ended up looking far more interesting than the top! Hopefully, I can translate that into better results on future models. I kept chipping and rusting to a very minimum under the pretext that these machines went almost straight from the factory into battle and did not last very long. I did practice chipping and rusting on the trailing arm spades, since those get knocked into the ground and logically suffer the most wear. My efforts were tentative at best for fear of over doing things and ruining everything. The results of the chipping are not very good but the learning experience was helpful.

When I build a model, I usually have some sort of story in my head, for why things are the way they are. This was a practice model and I never developed a story for it. I will paint the figures that came with this model as individual projects. Some day, they PaK and figures may come together as part of a diorama but that is not a current goal.

This is my first completed model since 2010. So, one down, 51 to go.

Onward.

Edit: This is the first time I am seeing this at high magnification. The umber wash looks really heavy. I need to pull back on that in the future. The biggest construction mistake appears on the underside, where I can still see parts the seam along the bottom of the travel slide. My putty skills definitely need work.

4 Likes

Hi Doug I think you hit the proverbial on the head about having a story in mind when building a model, it should be able to say something about itself even when static & not in a diorama or vignette. I really like your PaK because it does just that, bravo – if the umber’s a tad heavy it could be easily moderated with a dilute wash of the predominant grey. So…you must have some serious display space ready for all this…? It’s a grand plan, very best of luck with it.

Also great to see another Borgward , I’m glad you un-binned it – looks fine to me & a rare animal, as far as I remember the first shown since mine on the old site six years ago. The following might (or depending on your point of view might not!) help with the weathering etc. , I converted the pair to early versions as seen at Kursk with the original Dragon Mk III command tank behind)…


:tumbler_glass:

2 Likes

@Damraska you’re very ambitious to go for 52 completed this year, good luck!
I haven’t been able to see most of your pics due to a network issue here but what I’ve seen, it looks like you’re on the right track.
I just started back relearning and learning to model again after 12-14 years so I understand where you’re coming from I think. I started back just to finish up a couple old projects that have been sitting, finished the first and got the second in primer. Now I’ve busted into two new ones lol.

But to my point - I believe it’s important to not be too hard on oneself and get frustrated but keep on progressing with practice and enjoy the journey. Can’t wait to see the rest of your work!

Hi Dioramartin and thank you for the nice comment!

After looking at the PaK for a few days I decided to leave it alone. To the naked eye it looks okay and if I try another wash, it may result in catastrophic failure. If I manage to paint some decent figures, I want to revisit the PaK and make a base for it. In the mean time, I will tone down future oil washes to avoid what happened to my PaK, Bogward, and Jagdpanzer IV.

For storage I purchased 8 large, weather seal storage containers. Building the models frees up the space previously taken by their boxes, which then gets occupied by a filled storage tub. According to my calculations, everything should fit. Fingers crossed.

Your diorama with the Bogwards and Panzer III looks wonderful and very atmospheric. It strongly reminds me of many photographs taken during that battle. You did some things with your Bogwards I am planning, such as adding the fuel canister racks, tool boxes, ropes, and a bucket. A few days ago, I found 4 half painted buckets in a storage box. Your camouflage and marking look correct, unlike mine.

Hey GEdmonds and thank you for the well wishes! Right back at you. Let’s get those old projects done. New ones, too!

While I continue to experience many frustrations–I am looking at you acrylic paints–finishing the PaK was very hopeful. It is in my nature to critically assess things, figure out what went wrong, and try to fix them.

Please pardon me for making so many forum posts. I feel like every person deserves a thoughtful reply.

Now, if I may, I would like some feedback on my Bogward. My goal with this model was to practice painting three tone camouflage, not mimic a specific vehicle. Now I need to finish things up and try to make it look somewhat realistic.

The left and right side have a German Cross at the end of the hull, about the only place it would fit. However, I plan to put some stowage on the fenders. Why paint a cross in a place that will get covered up with stowage?

The front of the vehicle includes a tactical marking. Why put such a marking on a box you intend to blow up?

The rear includes a tactical marking, a German Cross, and a platoon vehicle number. I do not think I have ever seen a vehicle with markings arranged in this way. Please note the yummy silvering–sigh. At least I took the picture and caught it. How am I going to fix it? I don’t know!

Does the configuration above, paint scheme and markings, look reasonable?

2 Likes

I have no knowledge of German markings but your camo is very well done. As for the silvering , one strategy would be to pierce the decal in multiple places with the tip of a new #11 blade to allow decal setting solution to flow underneath.

Thanks Doug & I think you’re right to leave the PaK as is, I did wonder if the strong light was exaggerating the umber. From memory I think I winged the BIV camo (faded brown stripey-spray, like the tank) in lieu of any reliable colour-photo refs. Whatever, I don’t think anyone can tell either of us we’re wrong. But I must have found pics showing them carrying typical gear…which they presumably removed before sending them to target, I understand they often didn’t return. That’s what my guys are supposed to be doing anyhow.

As for markings I can’t now recall where I got the (Kursk) refs, all I know is I didn’t make ‘em up. If BIV’s carried crosses at all I think only on the back, although mine didn’t. In two photos I just looked at, neither had crosses on the sides but did have the rectangular data box citing weight etc. And yeah odd to paint unit markings on the part that goes bang but they did – the driver’s front plate seems slightly more permanent(?)

What Sean said about silvering. If that doesn’t solve it, as a last resort I’d suggest trying successive dilute flat/matt washes of a kinda dirty lightish dunkelgelb colour over the whole vehicle. That would fade the camo (which IMHO it could do with anyway) & help integrate the decals with their surroundings - and might mask most if not all silvering too. But just one very dilute wash at a time & check dried result before doing another. Then do your weathering/pin washes etc. over that, and if the problem has persisted it’s truly amazing how often mud & oil would splash over markings!
:tumbler_glass:

2 Likes

When I build something, I usually comb the internet for reference photos and collect them into a folder named after the project. To date, I have not seen a German Cross on a single Bogward. Many had equipment on the fenders, just like yours.

I am really starting to question my decision to add those crosses. Real markings are just never good enough for me. Maybe I should remove them and push the ‘14’ to the center of the rear plate. Or I could put some pinup art on it. Tough call.

With regards the silvering, I will try the methods suggested by you and Seanmcandrews. My airbrush was clogging badly when I sprayed the gloss coat and must have missed some spots.

One piece of good news: the decals on the Zimmerit of the Jagdpanzer IV did not silver. That surprised me but I sprayed the gloss coat during a different paint session when the airbrush was working properly.

1 Like