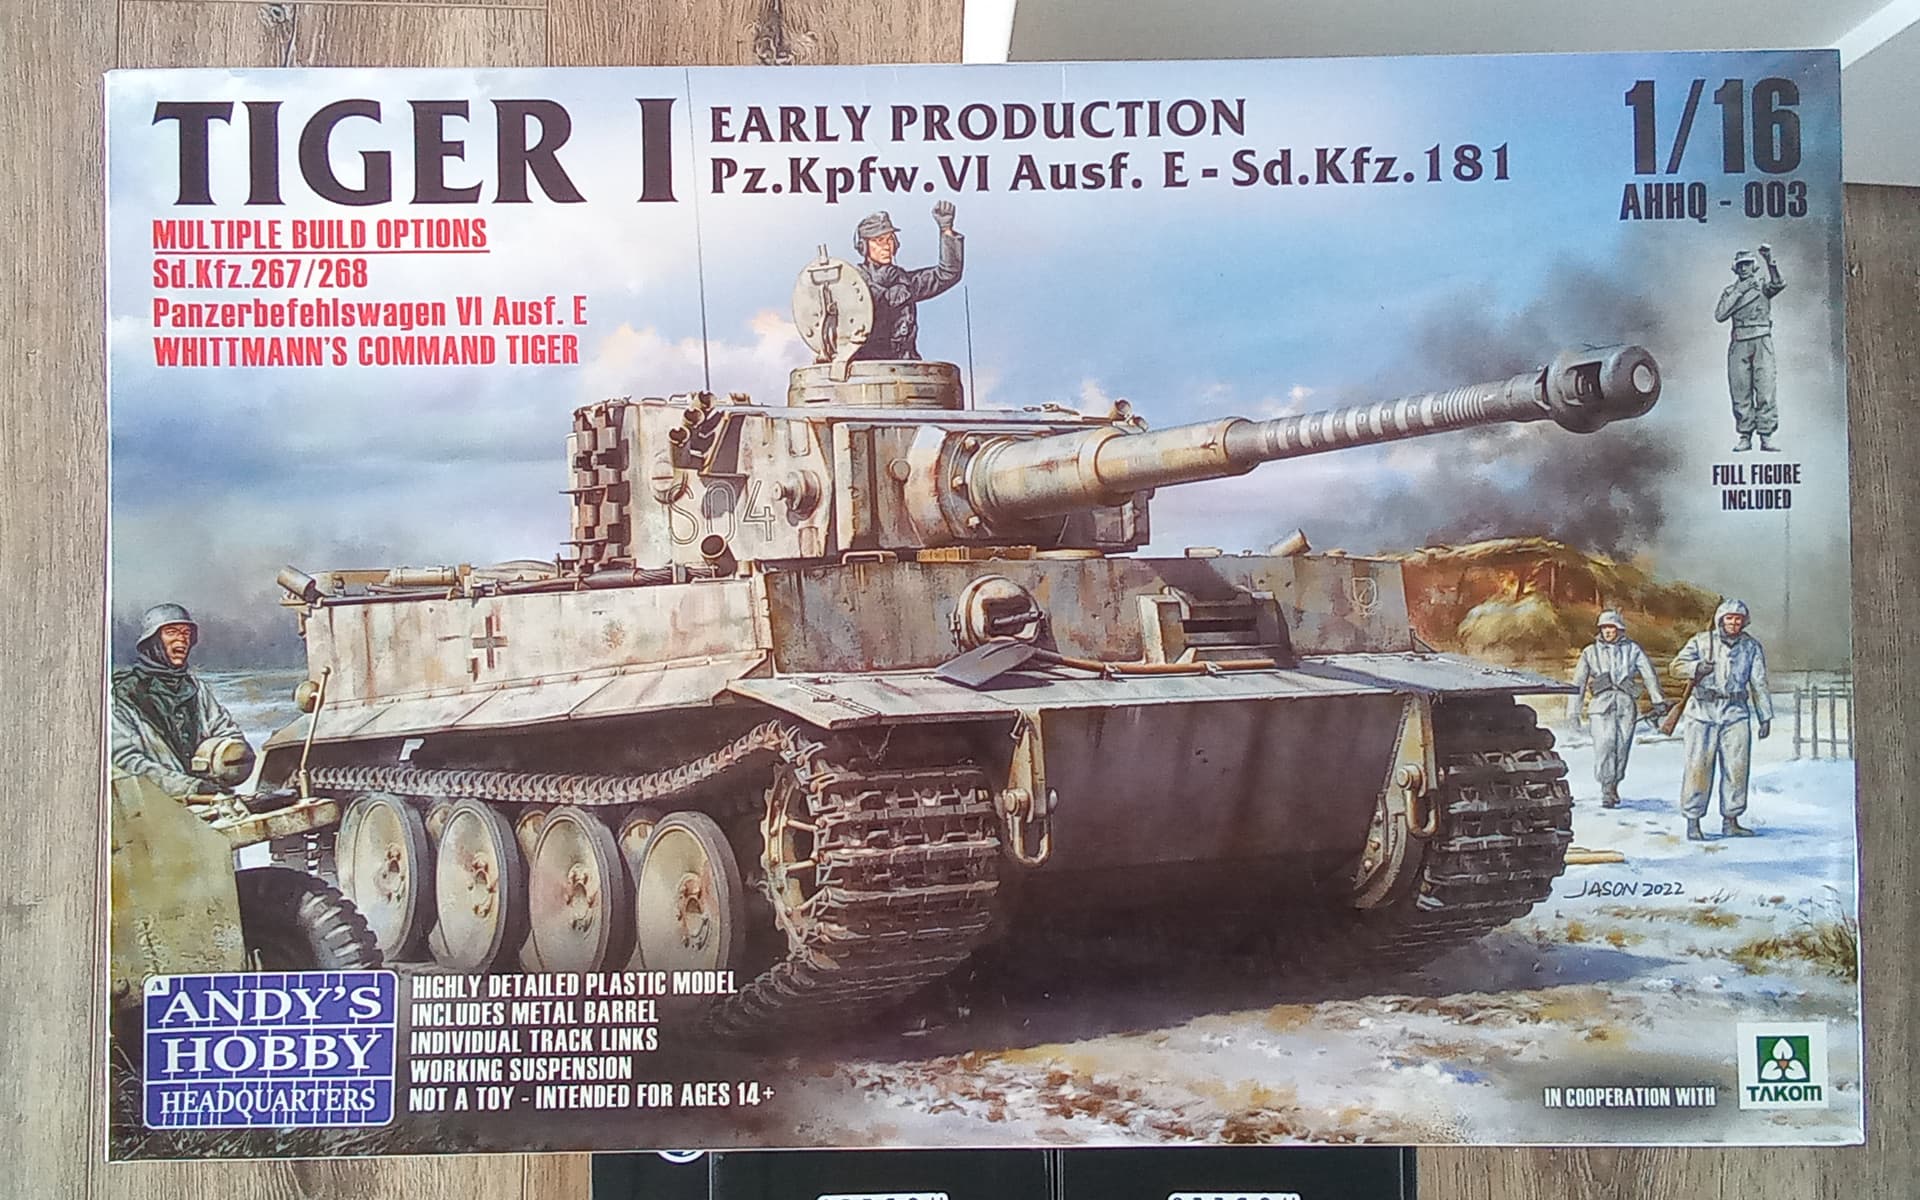
The aim is to finish this in a timely manner and still enjoy the hobby. I’m looking at an SS Kursk setting, and am waiting to hear from Echelon Fine Decals for Totenkopf ‘932’. I may have to go with another option if these are not available.
I’ve read Donald’s build log, and have received some direction from David B about 932, so am looking forward to the build. I’ll post progress images here to keep momentum and prevent stalling, I don’t want this became a shelf queen.
This looks like an exciting project Kylie! I have this [tank] kit in the stash and it’s summer here; the “honey-do” list is long and I have no chance of starting mine anytime soon. So, I’ll live vicariously watching your build & paint. Those figures are posed very realistically and excellently detailed. This should turn out to be an outstanding scene.
ok, I’ve gone and purchased Peddinghaus’ das reich tiger s21 with cuff titles, in 1/16, as I’d given up on hearing from Echelon. Now to gather references on this vehicle; David B, any info gratefully received.
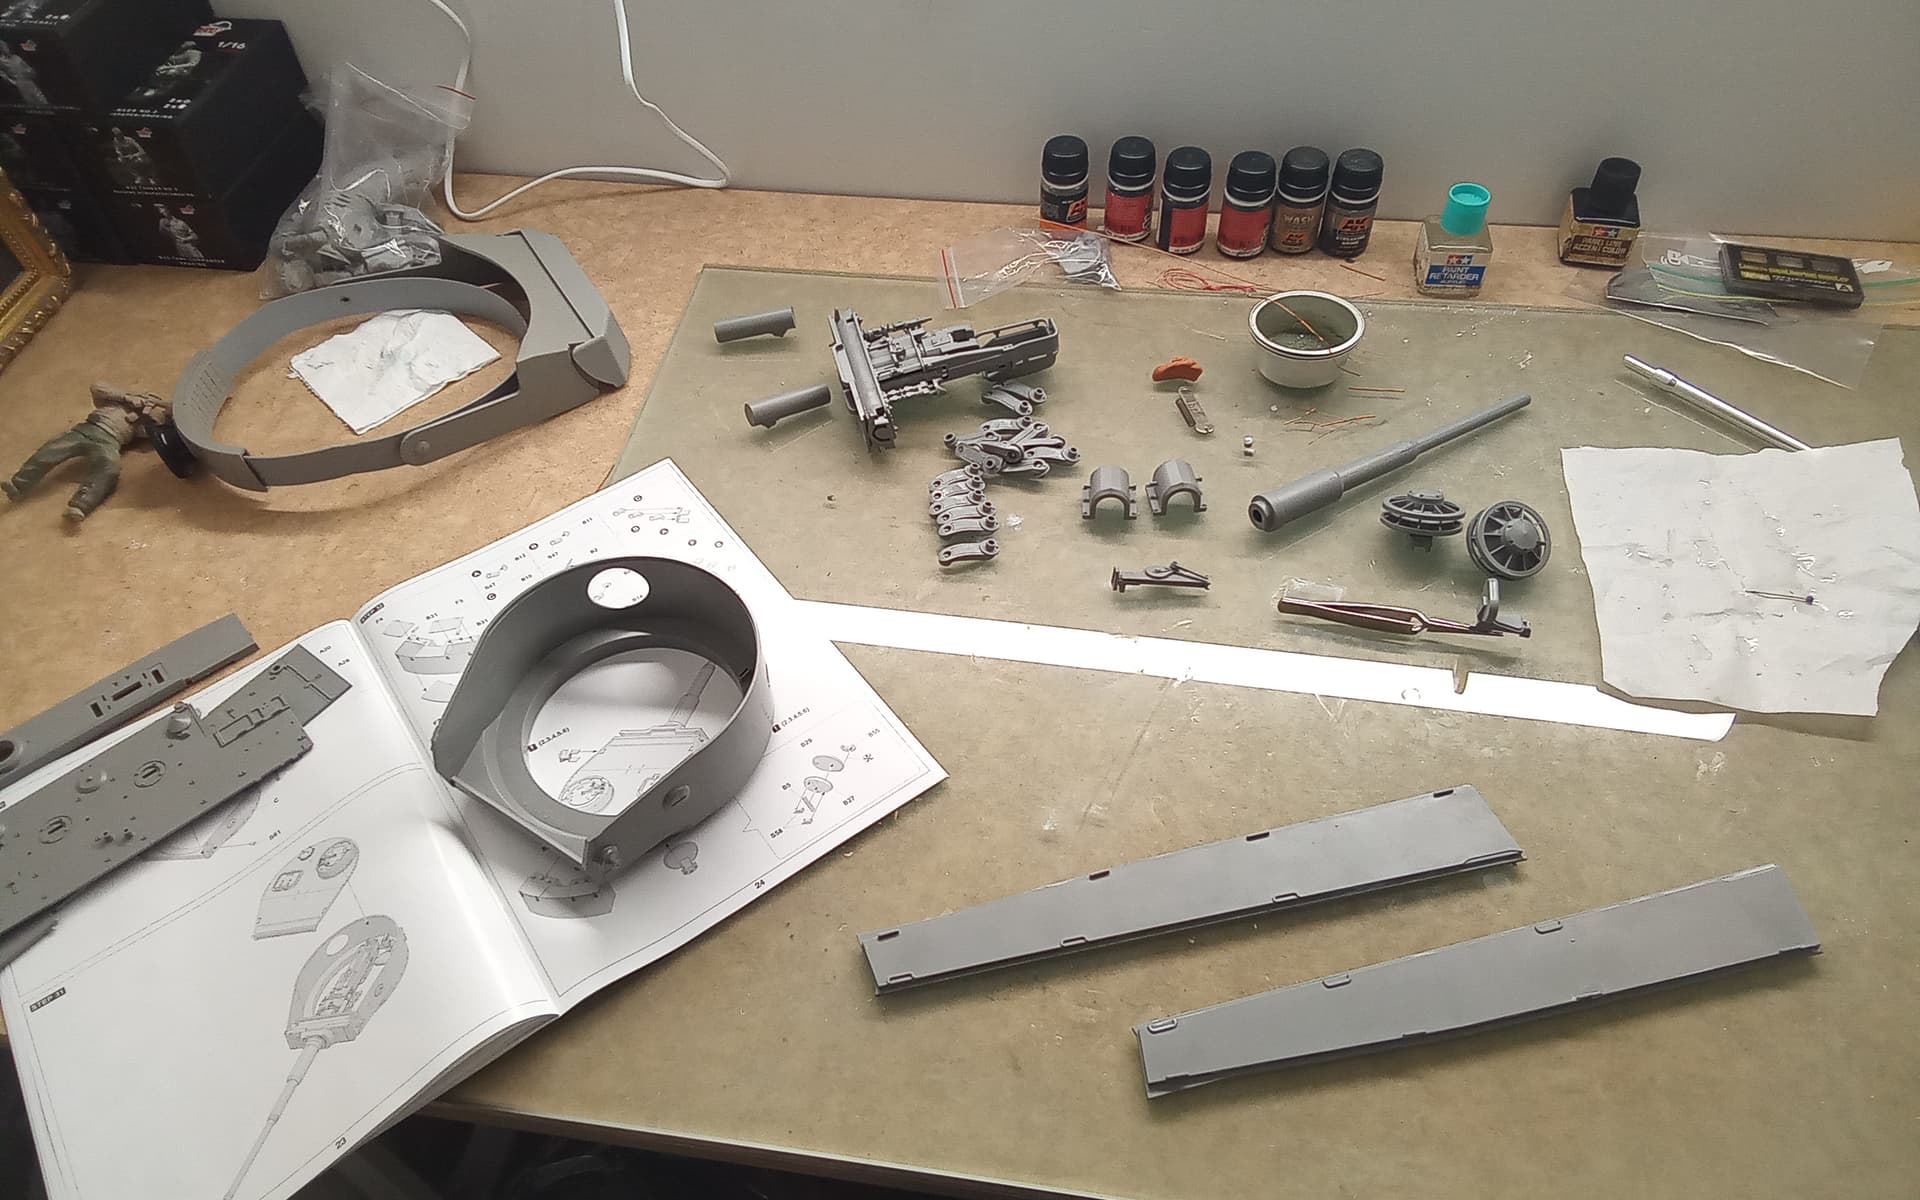
Still putting this beast together, but having fun along the way. It is fairly basic for such a large kit, which is why it is a cheap buy.
The hull side walls, the thick peices bottom right, are made up of two plates each and I was near pouring super glue around the edge to form a bond and keep them together. There are other sub-assemblies visible, the hull tub is on the floor, being too large to keep on the workbench. Besides, there is little to add to it.
Tomorrow’s weather is foul, which I’m happy with as more building time; Friday, I’m out for a pig shoot, then back at it for the weekend. Monday next week I’m back to work and progress will slow.
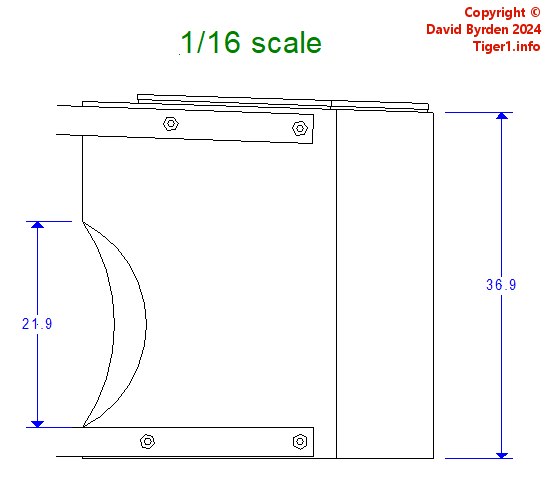
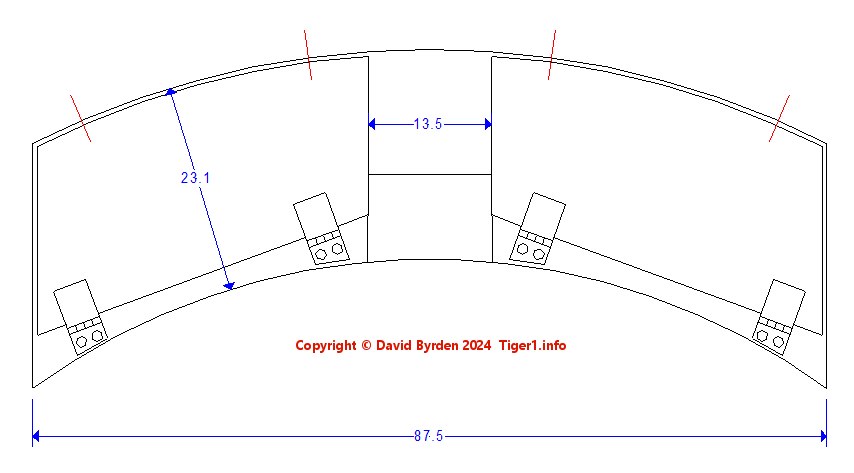
And, as per Tiger 1.info, I’m looking for a wide turret bin:
The 8th company had a single Befehlstiger, one of the first ever built. Its other nine Tigers were a slightly later version with standard side skirts and the S-mine system. They all had the 1.4m wide turret bin, which did not fit properly; this company’s unique solution was to cut a notch in each side.
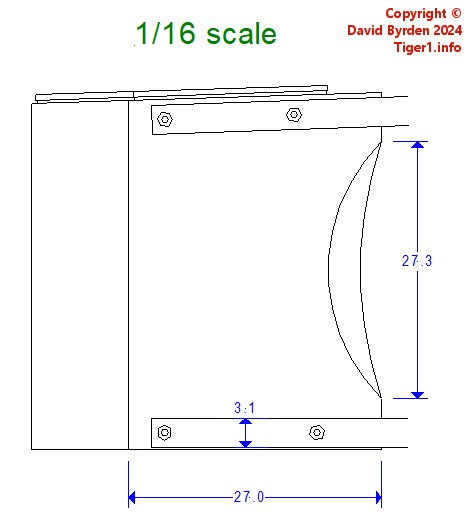
The curved rear wall is centered on the turret center, therefore that thickness of 23.1 is uniform all the way across.
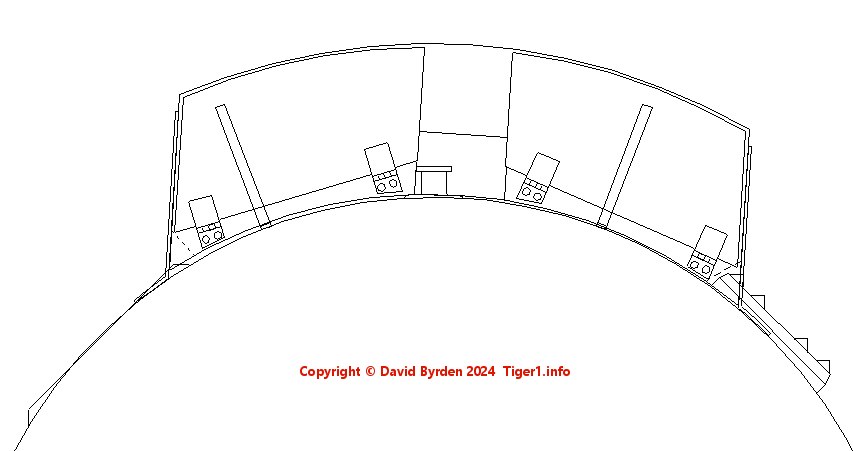
And this is how it sits on the turret for Das Reich Tigers. The underneath support brackets are drawn, and dotted lines show the cutouts at the corners.
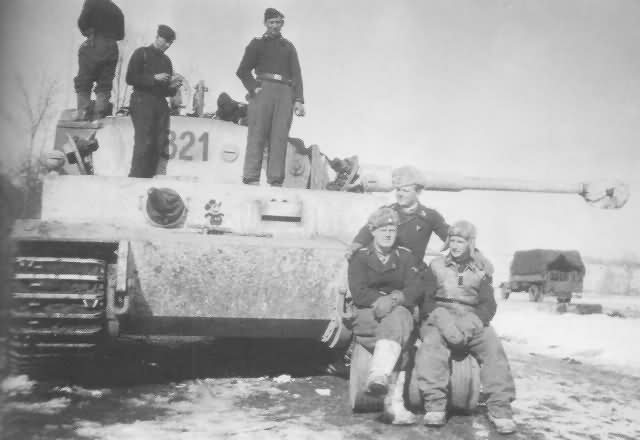
Tiger S21, like most of the Tigers at the battle of Kharkov, was a slightly earlier version than Andy’s kit represents. Tiger 932 was a great subject but S21 will need a few alterations.
Dragon have released a few kits of this version, so I can rattle off the changes, but I will check them and come back.
No storage for a starter handle at the bottom rear wall
The starter handle shaft is stored on the glacis plate, there is no shovel (did Das Reich think they were too good to be digging holes?)
The clips at the rear end of the cable, on the hull side, were laid out in a different way, with the ends of the cable being a lot closer together.
In some cases, the gun cleaning rod was made of only 5 parts, longer than the usual 6 part set. The clips to hold it were farther apart and, of course, one side had fewer slots. I will check the situation of S21 and get back to you.
Thank you, David, massively appreciated. I’ll be taking my time on that turret bin!. And invest in some large bottles of RAL 8000 / RAL 7008.
Yes, I did want to go with 932, but did not know when Echelon would be back to business, and I did not want this languishing while I waited.
And as for the spade, it begs the question, where was it stored? Or did DR see no need for it at all? If the tank is bogged down, were they really going to dig it out?
The gun cleaning rod was in 5 parts. The holders on the left side of the tank had slots for only 2 parts, so you will have to modify what the kit provides, as far as I know.
Also, the rod sections were longer (of course) and the holders were further apart than usual. On this diagram, position the holders using the bolts of the side skirt.
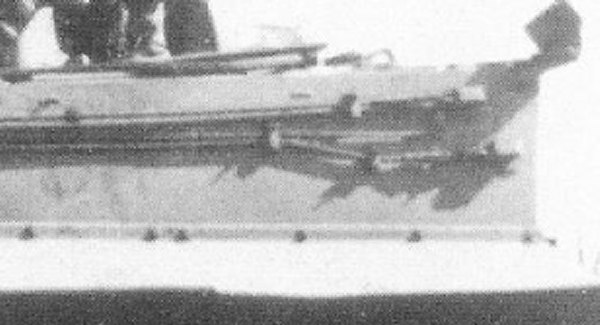
This is the arrangement of holders for the track cable.
This is Tiger S21 and you can see that it has the “thick” mantlet.
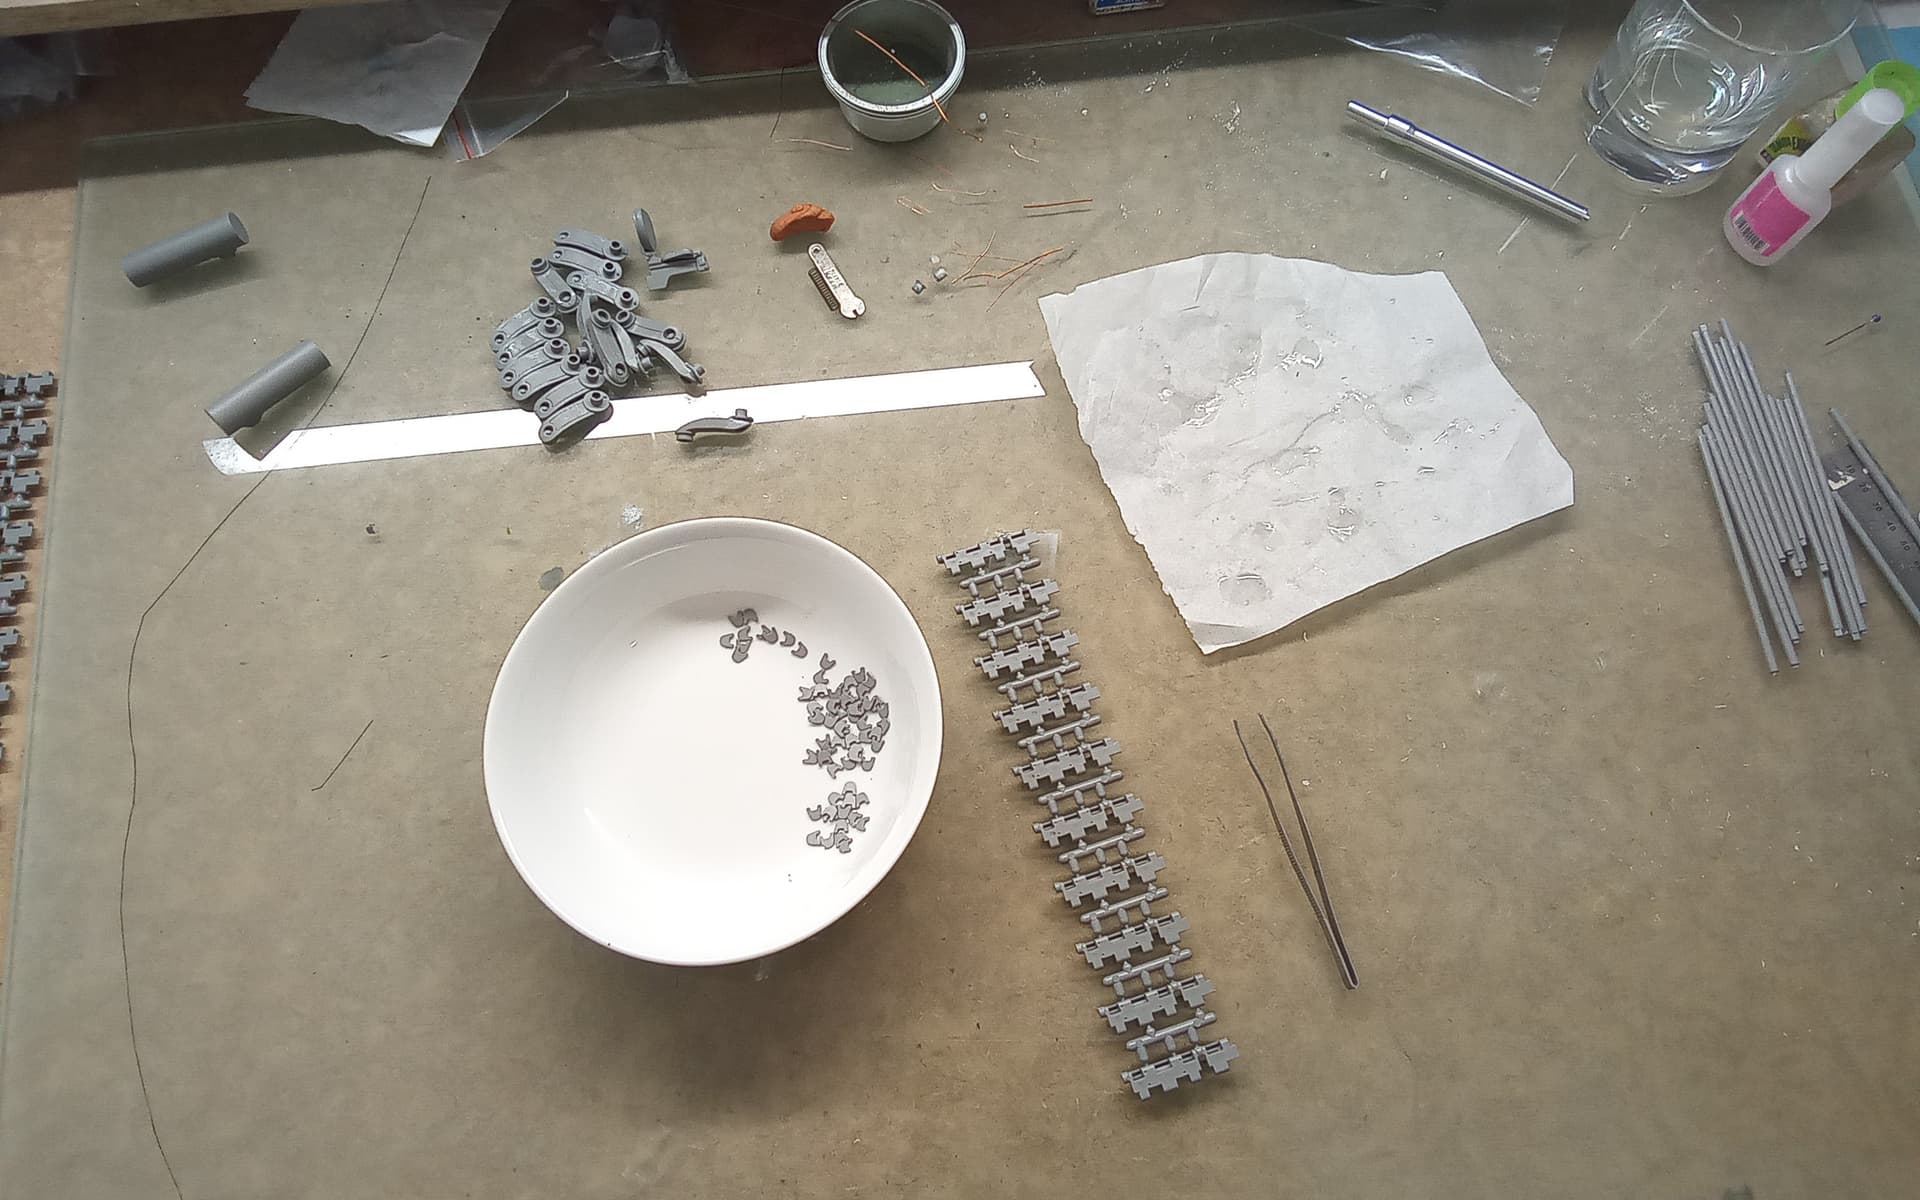
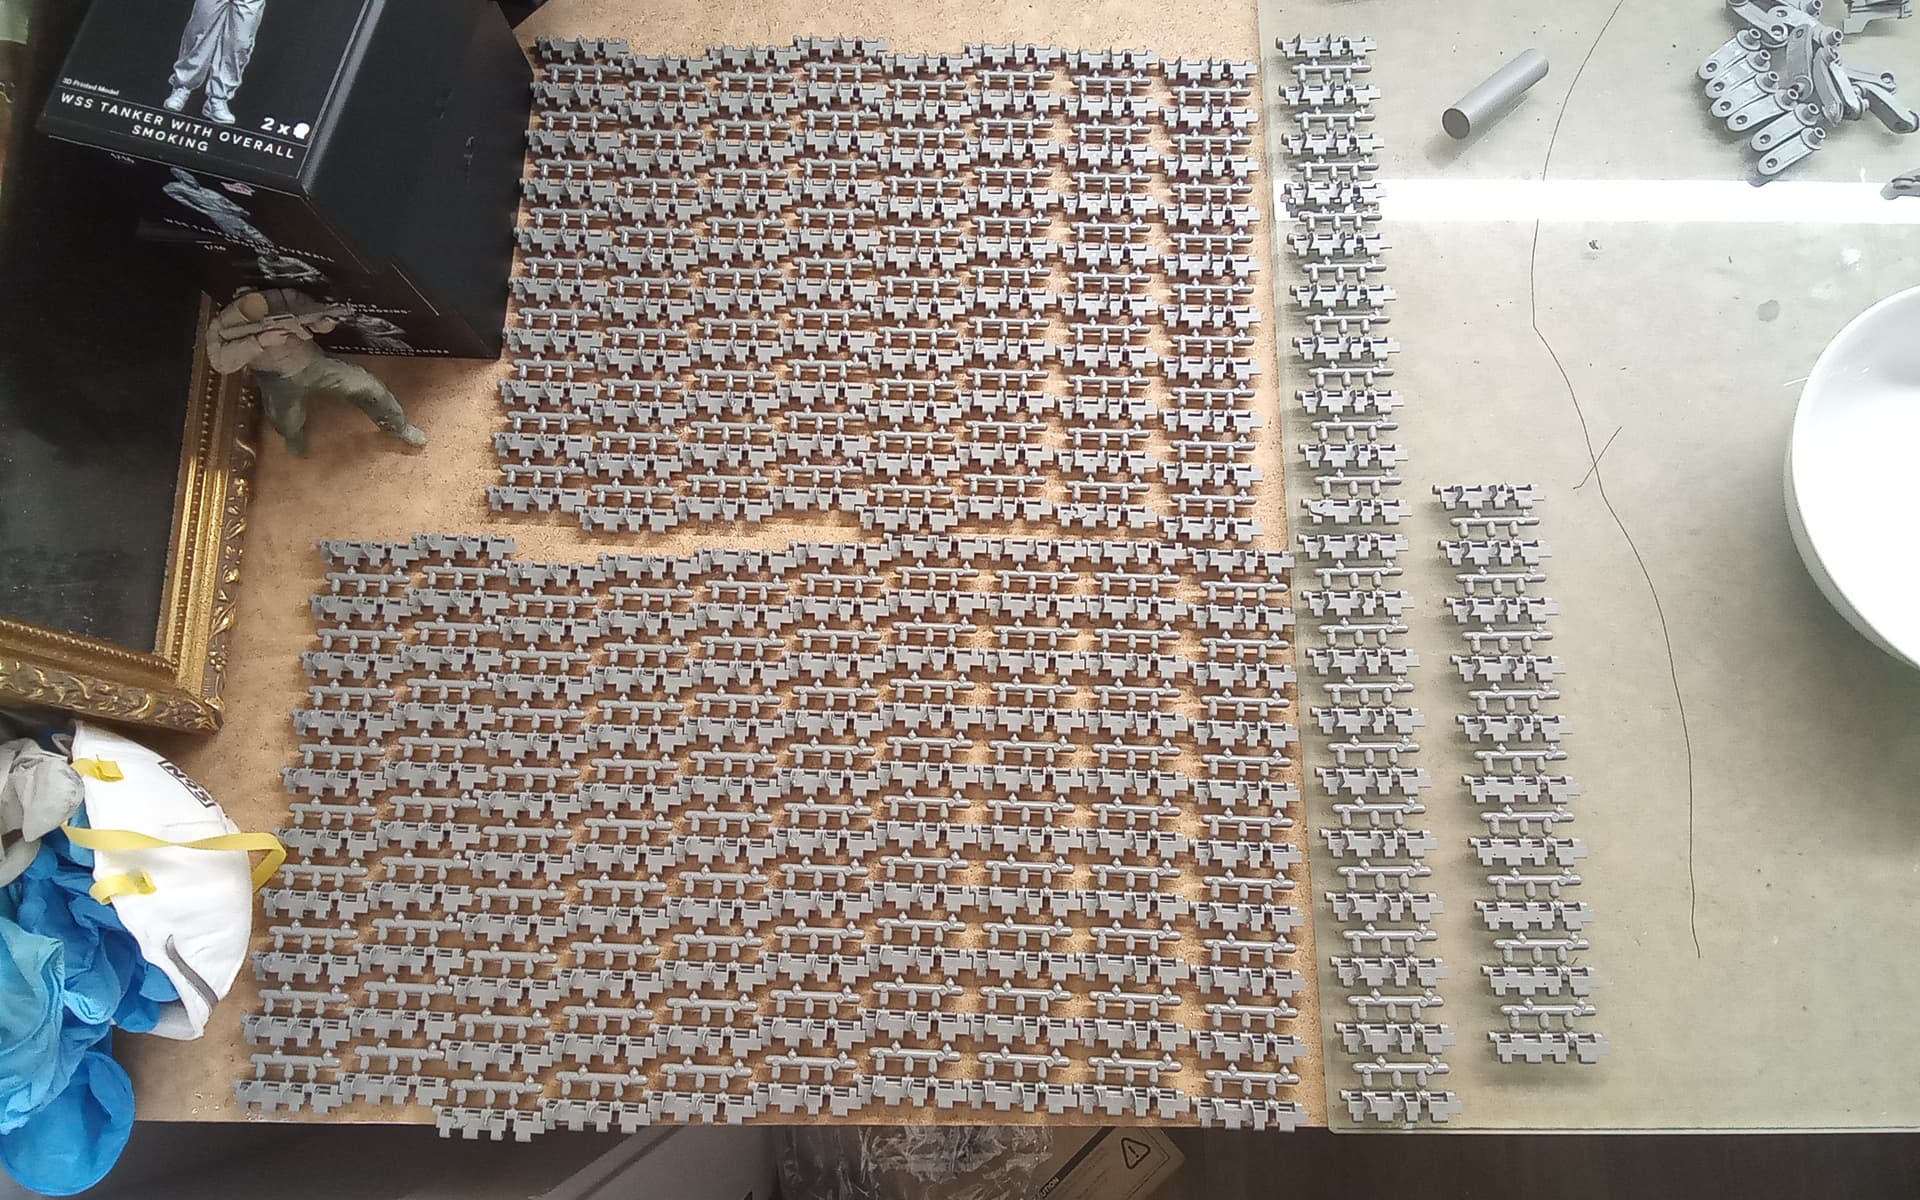
The fast way to do this is $100 3D printed tracks, otherwise get comfortable and put on a good album with a sniff drink, I’m working on a single malt and listening to some Tool. Happy days
When I did mine I left all the guide horns attached to their sprue…glued them to the track, and then snipped them off…this way you can do 10 at a time.
I tried one 10 tooth run,but that didnt work for me for whatever reason,I ended up doing one at a time like the OP did,it wasnt hard or trying,just repetitive.
Gents, a question, if I may… How did you achieve the ground clearance of the tank, please? I’ve read the clearance of the kit is out, as in, the real thing is 470mm which is 29.3mm in scale, but the kit isn’t. I’m at this stage now and have assembled the axel to the swing arm to the torsion bar, snipped the locating peg, rested the tank on 29.3mm blocks of wood, fitted, not glued, the wheels, resting on the tracks, now glue the torsion bars where they meet the hull. Have I just created a lot of work for myself unnecessarily or nailed it?
Genuine question, how robust was German rubber in 1943? I’m wondering whether I need to distress the rubber rims on this big kitty. I know oil was at a premium during the war, and Germany developed synthetics early. It may be academic, but it was something that occurred to me.
You absolutely nailed it Kylie. Remembering to put the tracks in there was a crucial element. Glue it!
Also, distressing the tires is up to you but I wouldn’t. From examining dozens of Panzer tires, they were of good quality in '43 and robust, gouges didn’t happen as often as you might think. It’s more of a modeler’s fad.
It really depends on the quality of the rubber as well as the terrain the tank is driving on. Matt @SSGToms covered the rubber pretty well. That leaves the terrain. If the tank is being driven on hard surface roads, sand, mud, dirt, ex. the Russian Steppes, then wear would be minimal. On the other hand, lots of rocks, gravel, debris from a ruined town or factory, can tear up the rubber very quickly.
The last element is time. If it is a new tank, or recently arrived in the area, the rubber will be undamaged. If it has been driving through rocks and debris for 6 months, the rubber will be ripped up.
After all that, for a Tiger in open country, I would do little or no damage to the rubber on the road wheels.
Ken
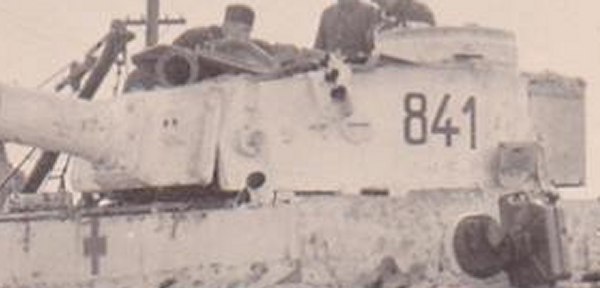
In other news, looking for images of S21, which tiger1.info informs me started life as 841, then 821, then S21, I came across the following image of 821 and noticed a certain rodent on the front mantlet; now my question is, would this cartoon have been on S21?