I am building my second model and this one has plastic tracks.
The first one had vinyl ones, they were a little tricky but in the end they ended up fine.
I could easily paint them by themselves, weather them and then mount them on the finished model.
Now I see these ones and I am confused and afraid of making (cemented) mistakes:
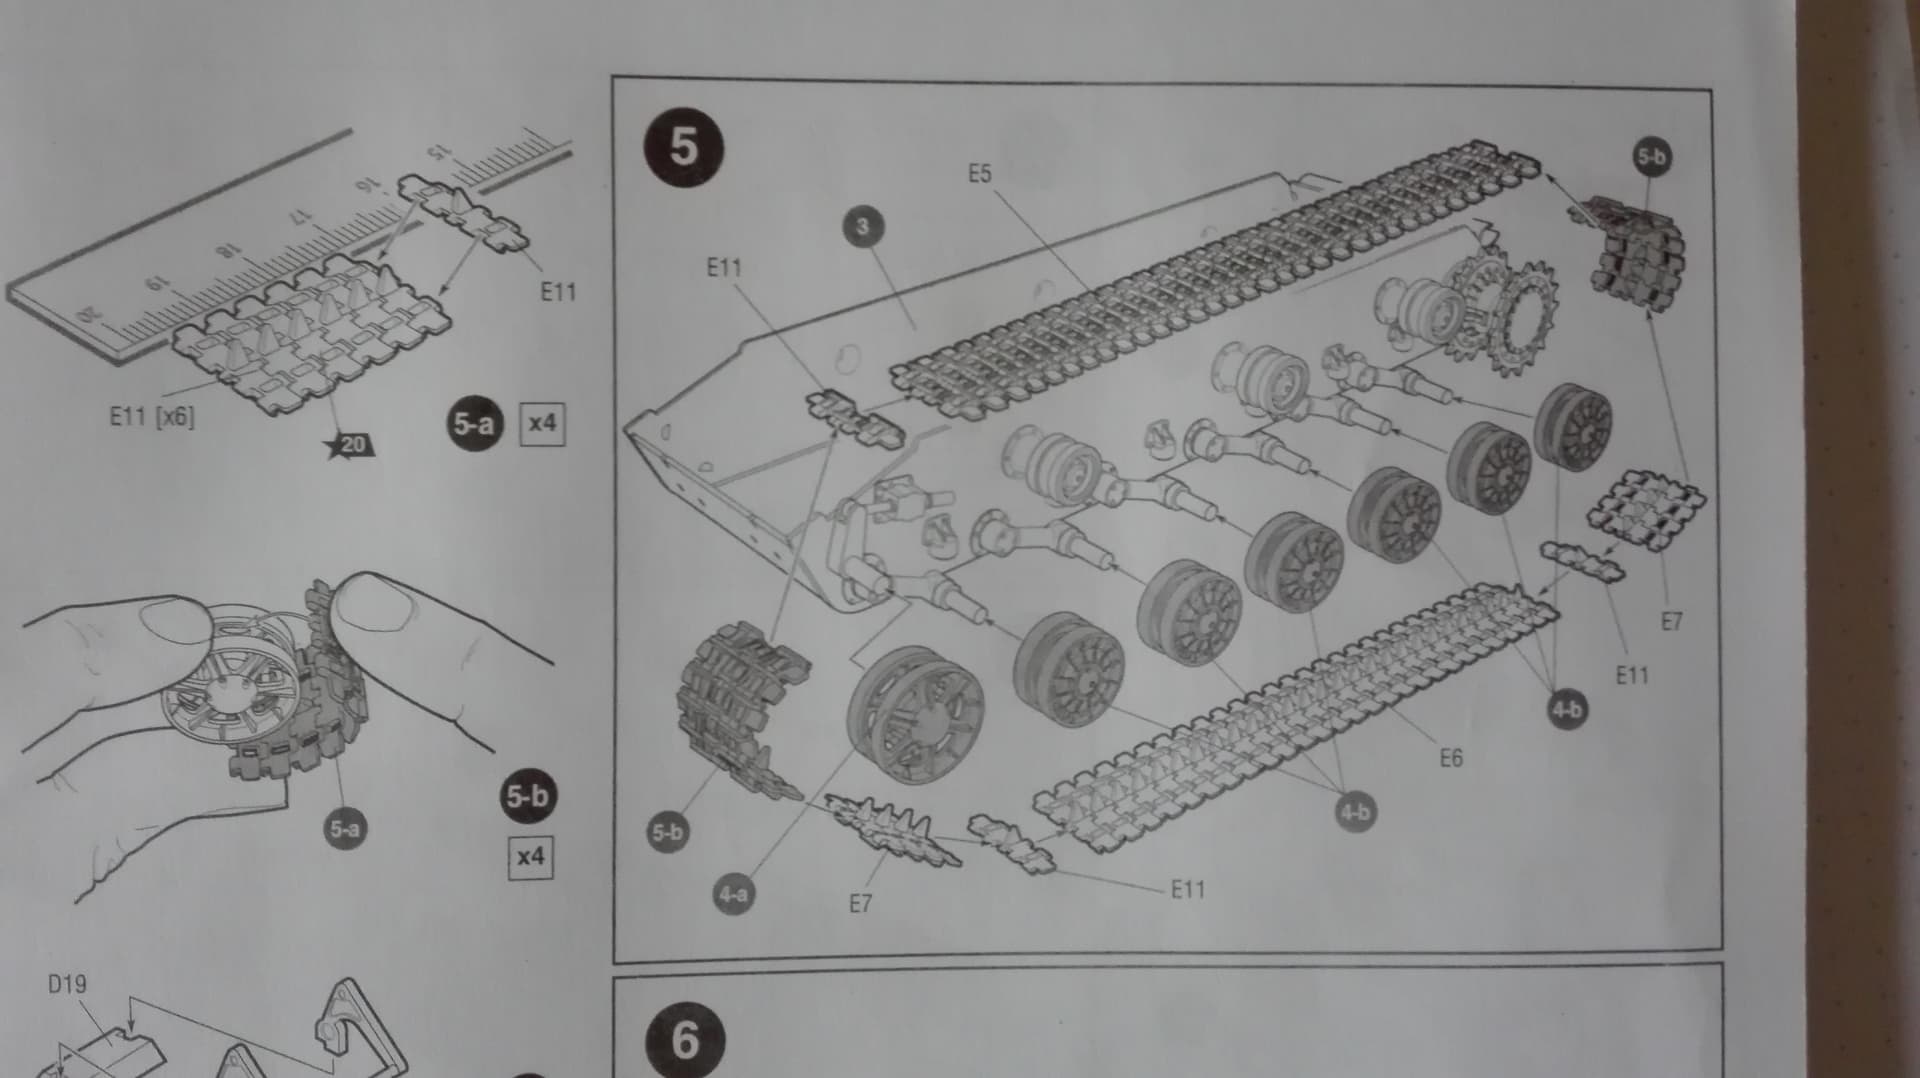
First, the number of the smallest links (E11) provided seems to be much more than actually needed.
Second, the instruction expect me to mount the tracks right away, but I think this will make the whole weathering extremely difficult.
Third, how am I supposed to make that “curved” section, should I paste the links right on the wheel? Then why they show them assembled on a flat surface next to a ruler?
Since a while I have individual track-links on my models so this lenght-and-link is not very familiar for me but let me suggest two things:
Try to assemble the tracks onthe kit with the wheels on it but do not fully assemble because you will need to femove them for painting (hull, wheels and the tracks, too). You will need to glue the indy tracks on the cutting mat and once they are together and wait about 4-6 minutes, you can put them around the sprocket and idler wheels. Make sure that you do not glue them to the wheels.
Also check that the wheels can be installed and will remain on the kit, unglued.
Also you need to check that the tracks do fit into the sprocket wheel (I did have an issue with this one time, it was hard to fix).
Secondly, use classic plastic cement (like Revell’s), some thing that cures “slowly” so you will have enough time to adjust the ind tracky onto the sprocket and idler wheels.
Also you will need to match the long sections to the curved (glued indy) tracks but do not glue the, together. Let the small openings keep the together. Wait a good hour to curenthe curved parts, tham remove the tracks and the wheels.
If the curved sections would be (unintentionally) glued to the wheels, you will likely be able to paint them later but it will be more difficult than off-the wheels.
Leftovers are there usually incase you break some while you build. Or they can be used depending on the vehicle as added armor.
My suggestions is to build the entire run from top middle of sprocket to top middle idler as one long run, and then do two short runs from the flat section they provide for the bottom to the top middle idler and another from bottom to top middle drive sprocket.
I can’t stress enough the importance of a slow drying glue like testors liquid cement or revell liquid cement. I do it by dry fitting the run for day the top section against a straight edge, then apply testors liquid cement to each join with a thin brush. Let it set for about 10-15 minutes. At this stage the tracks should hold together and be somewhat stiff but flexible enough to bend around the wheels and create sag with. If you’ve waited long enough they should also have some memory and hold whatever position you push them into. I would check back periodically to make sure they are keeping their sag. The benefit of two long runs is that you can take the tracks off, paint, and then put them back on and glue together the two runs
Further to what @Mead93 said, once you’ve got the shape/sag you want and depending on how much tolerance is in your your running gear/track, you can fix the complete track run to your drive sprockets and idlers creating one semi-solid unit.
Pop that on when you’re done with the hull and then gently install your road wheels. There should be enough flex in the track to allow it.
The downside to this method is you’ll need to be a little more patient with masking parts off when it comes to painting. In theory you can do this with the entire set of road wheels, but it’ll further complicate painting for every wheel you add.
If what I describe is confusing, I’ll be doing a set of tracks on flakpanzer early next week. I need to cut out and clean up 64 more links tomorrow but I can take in progress shots when I do them
I also prefer indy tracks. If not included in the kit (eg Tamiya or Academy vinyl tracks) then I simply order a/m indy version. If workable, even better.
That is quite complicated, my English is really basic, unfortunately.
Anyway, now looking at the booklet instructions they seem clearer… I could just imitate them 1:1, maybe keeping the whole track assembly divided into 2 pieces (each one with one of the straight long links glued to one of the curved ones) without gluing them.
I could then easily prime, paint and weather and then connect the two parts along with the wheels.
The only problem I see with this, besides the obvious one that stuff could not fit where is supposed to, is that there will be no sagging, as the booklet places the straight long link on top.
Frankly I could live with that.
As for the glue, I am using the Tamiya Limonene glue as I am very sensitive to the smell (Revell almost made me dizzy).
It’s an extremely slow glue, I think it ended up will do fine with the curved links.
Is the model a Tamiya 1/35 KV-1 1941 Early Item No.TAM35372 ? If so it’s a fantastic model to build. A true joy in my experience.
Like the others I greatly dislike link & length tracks and have much preference to indy link or quality vinyl.
My experience building the Tamiya KV-1 1941 early. Ended up being a build, paint, build, paint assembly for me.
Assemble lower hull, paint lower hull, assemble & paint wheels etc. I used a bit of white glue to gently tack road wheels etc all in place before doing the link & length runs.
Assemble one entire track run with slow setting liquid cement per instructions. Sync the track on top of the sprocket and DO NOT glue the ends together. Drap track around suspension. Hold in place with rubber bands.
Do other side
Remove set tracks and paint them.
Install completed suspension and tracks, continue with build.
Use masking tape or index card(s) to mask suspension and tracks as needed for additional painting of the test of the model.
@Nightgaunt . The simplest answer . Is to add the road wheels the the tank . Crimp ( lightly squeeze the suspension arms end with pliers so the wheels fit snugly but can still be removed.)
Build the tracks as specified.
Then the road wheels and assembled track can be removed.
Once painted and weathered the wheels and track can be put back on
Thanks for the help guys, will try something this morning and see what happens.
By the way, it’s a Zvezda kit and this time I am not impressed at all, it gave me lots of trouble with many spots clogged by leftover plastic (had to use a hand drill to fit stuff) and the left and right wheel arms “holes” were all wrong so I had about 1 cm of height difference between the left and right wheels, had to brute-force one of the sides (the glue had melted the inside of the holes so I could do that) and twist them until they were somewhat on par with the other correct side.
So far it has not been enjoyable at all, the ISU was an older kit with worse instructions but at least everything fitted correctly.
EDIT:
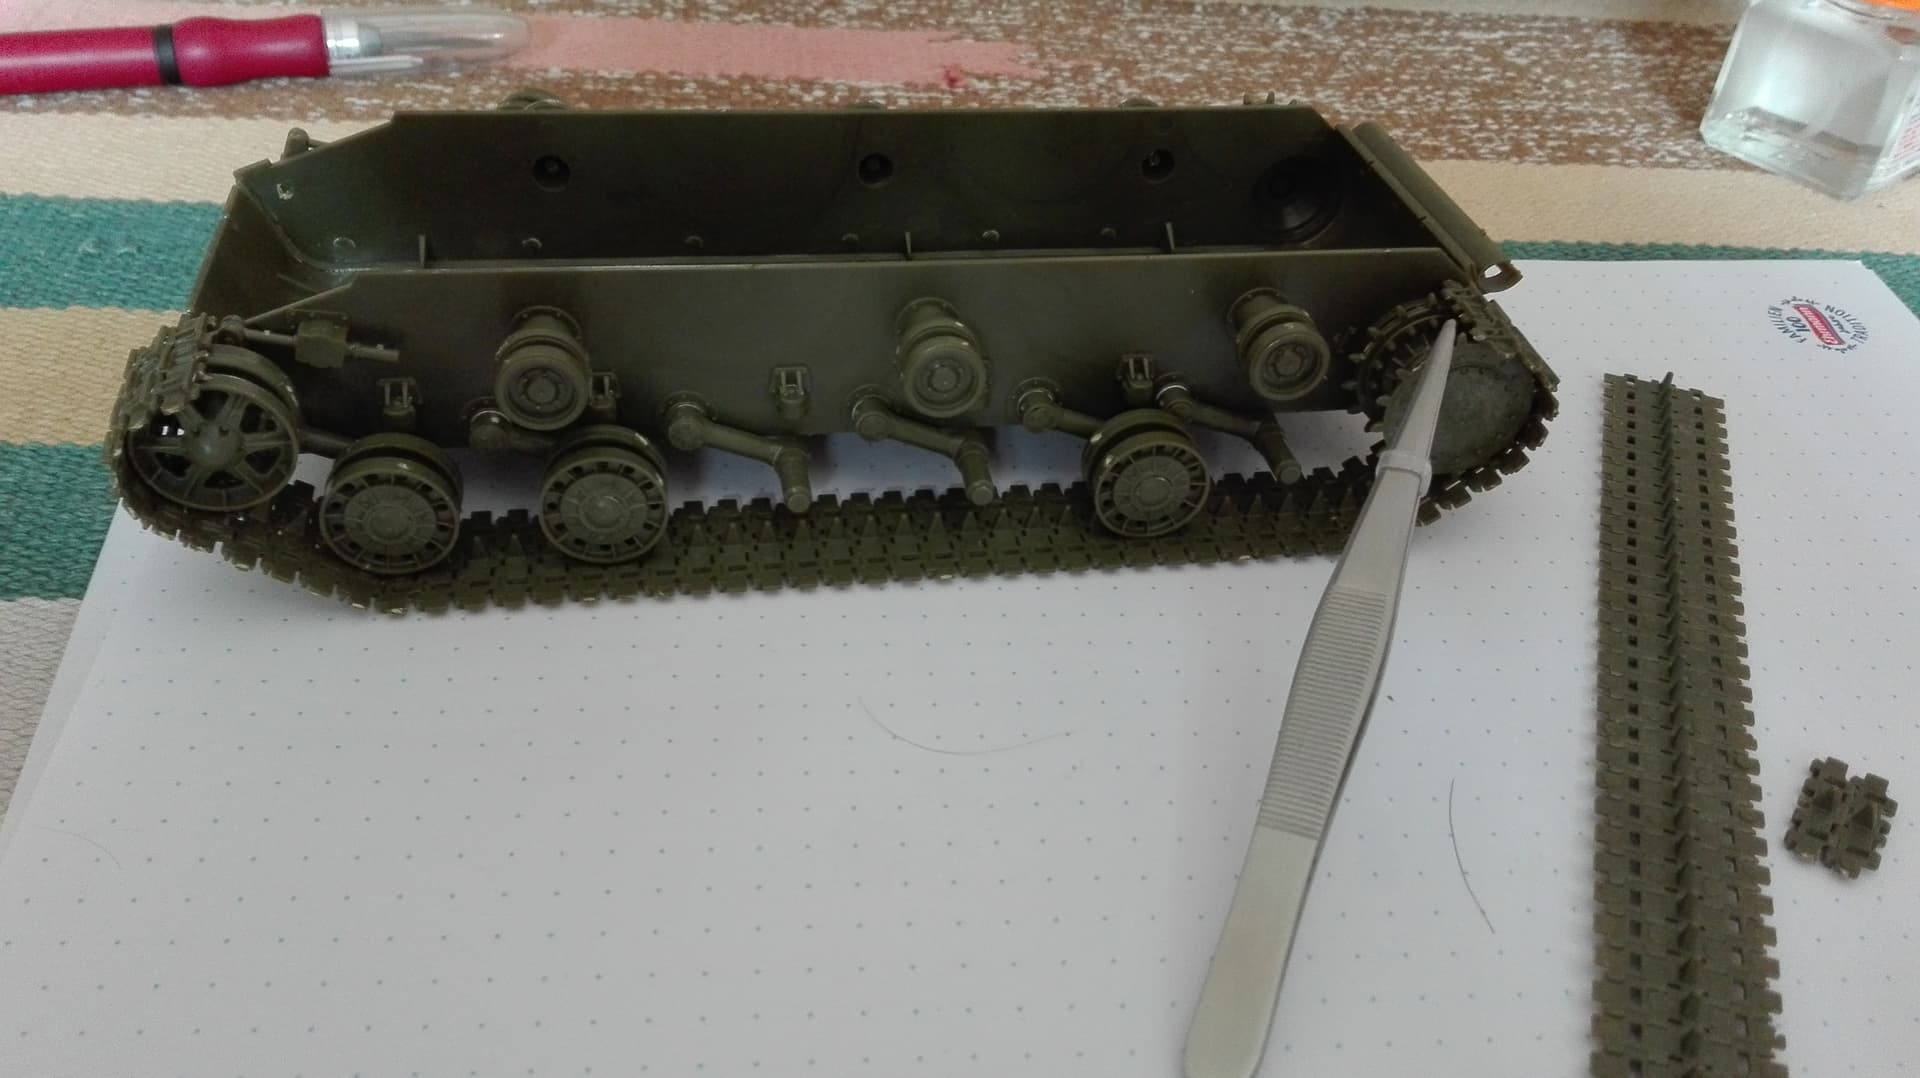
I have made the first couple of “track bends”, that was easy as the glue was very forgiving, now I let them to dry on the wheel (making sure that remain separated from the wheel)
Namely, I forgot that, as per instructions, I had glued the top wheels, so I couldn’t slide the track assembly once it was made, so in order to remove it from the model I had to detach it in two different points and removed the top part.
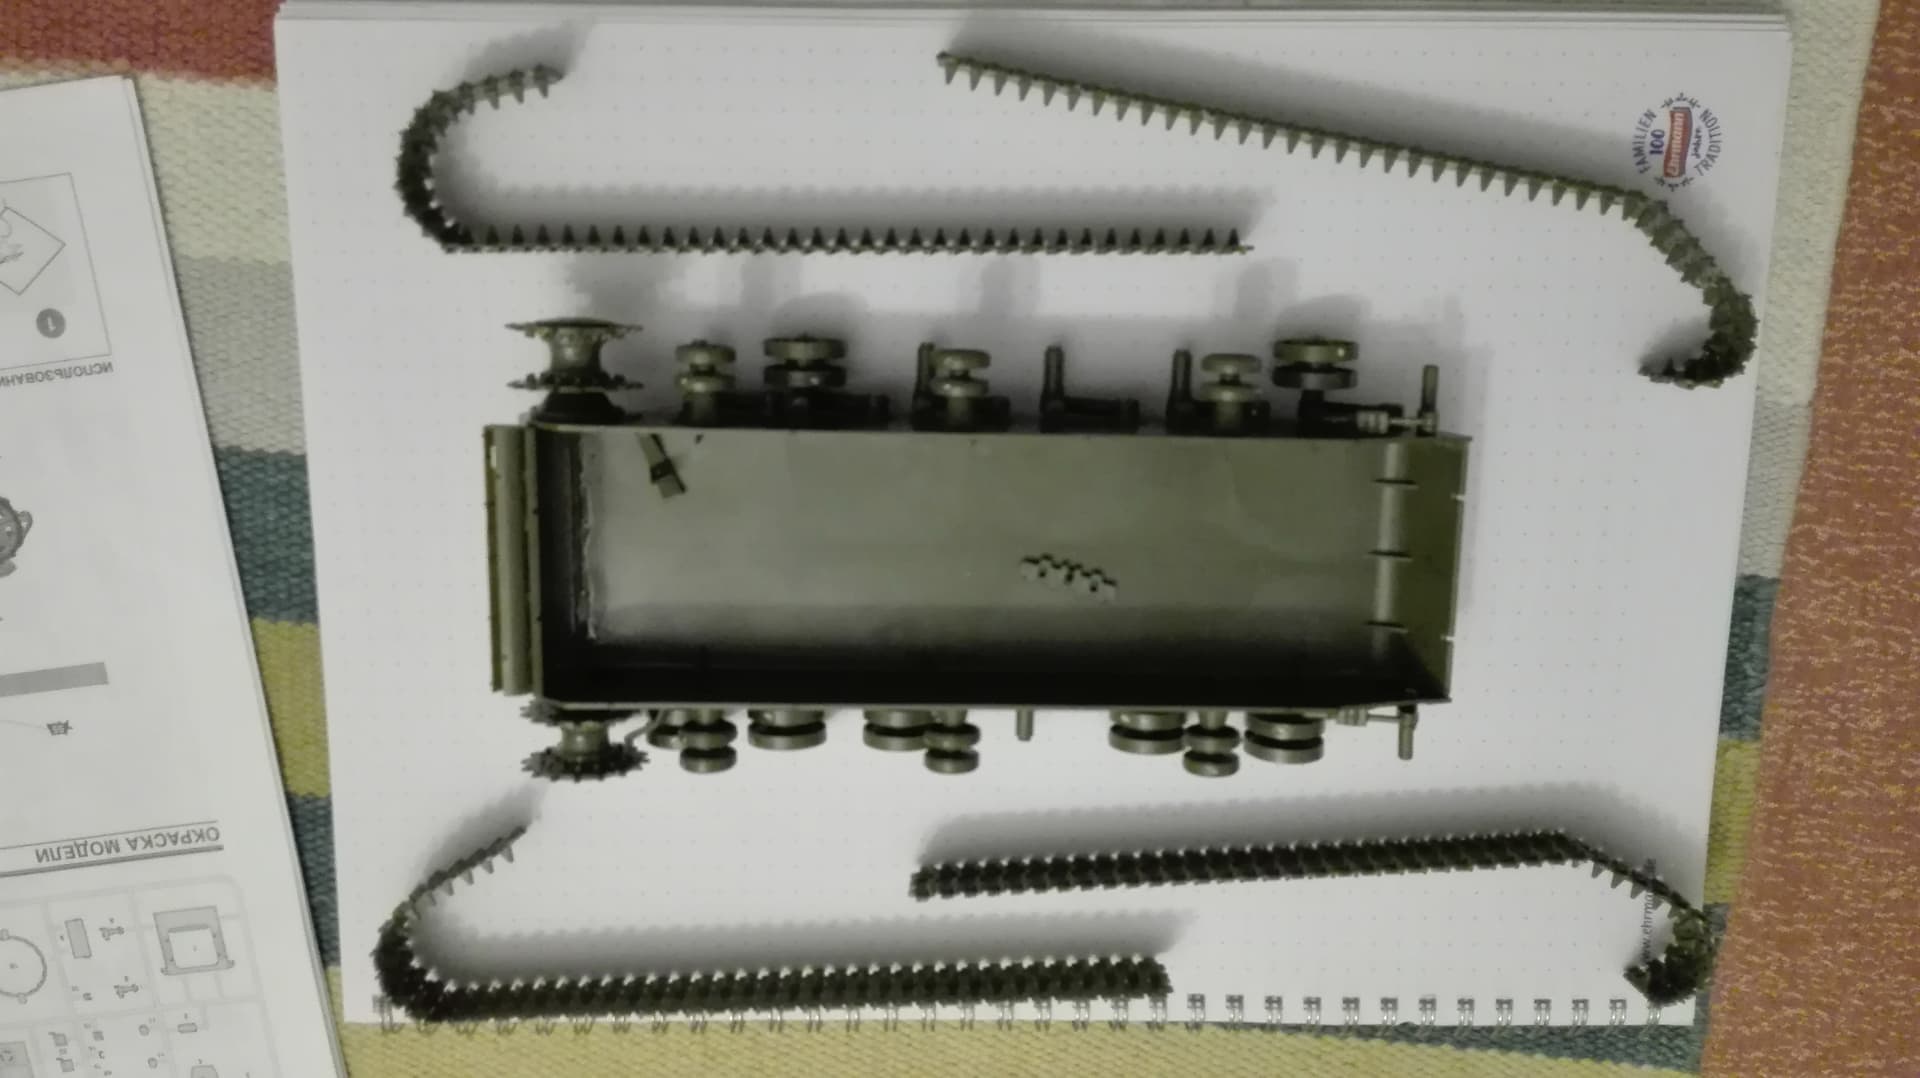
As you can see I only mounted some of the wheels, just the ones that fitted more loosely, so I can remove the entire track length easily.
Then I was thinking that I could just paint, weather them, remount the as they are in the picture and then add the horizontal missing pieces.
I think you have a workable idea, because this is how I deal with individual track links and is also how I intend to deal with the link and length tracks in the models in my stash. I would go ahead and glue the roadwheels on. Then assemble the tracks around the running gear, but in two separate sections each side. I usually do a lower section which snaps around the front sprocket and an upper one which meets the first section at the front sprocket and goes around the rear idler. When dry, you can then carefully slip them off, weather the tank and the tracks separately, then reassemble them and touch in anywhere that gets damaged or missed. The only problem may be the mudguards if they are very close to the tracks, but I have been using this technique for many years.
That should work in theory…provided the track can be slid into place with the fenders & hull in place. Might be worth taping hull together with fenders to test before proceeding.
@Nightgaunt . What you are doing will work . I have done that with some more difficult kits .
You are doing great , your problem solving is good .
Keep up the good work
I thought it would have been easier to remount them placed like that. The links are really flimsy, hope they will hold the priming/painting/weathering.
Hopefully they will also retain some flexibility, I don’t expect to go as smoothly as I hope.
The approach you have taken is more or less what I was describing! I think this will serve you well. I agree with @Armor_Buff check the fender clearance. Some tracks can be hard to get back on once the fenders are in place