Quick question - I’ve started to assemble wheels. Looking at many, many burnt out images I can’t see a consistent pattern. Have T72’s got rubber tyres? Do they burn or melt?
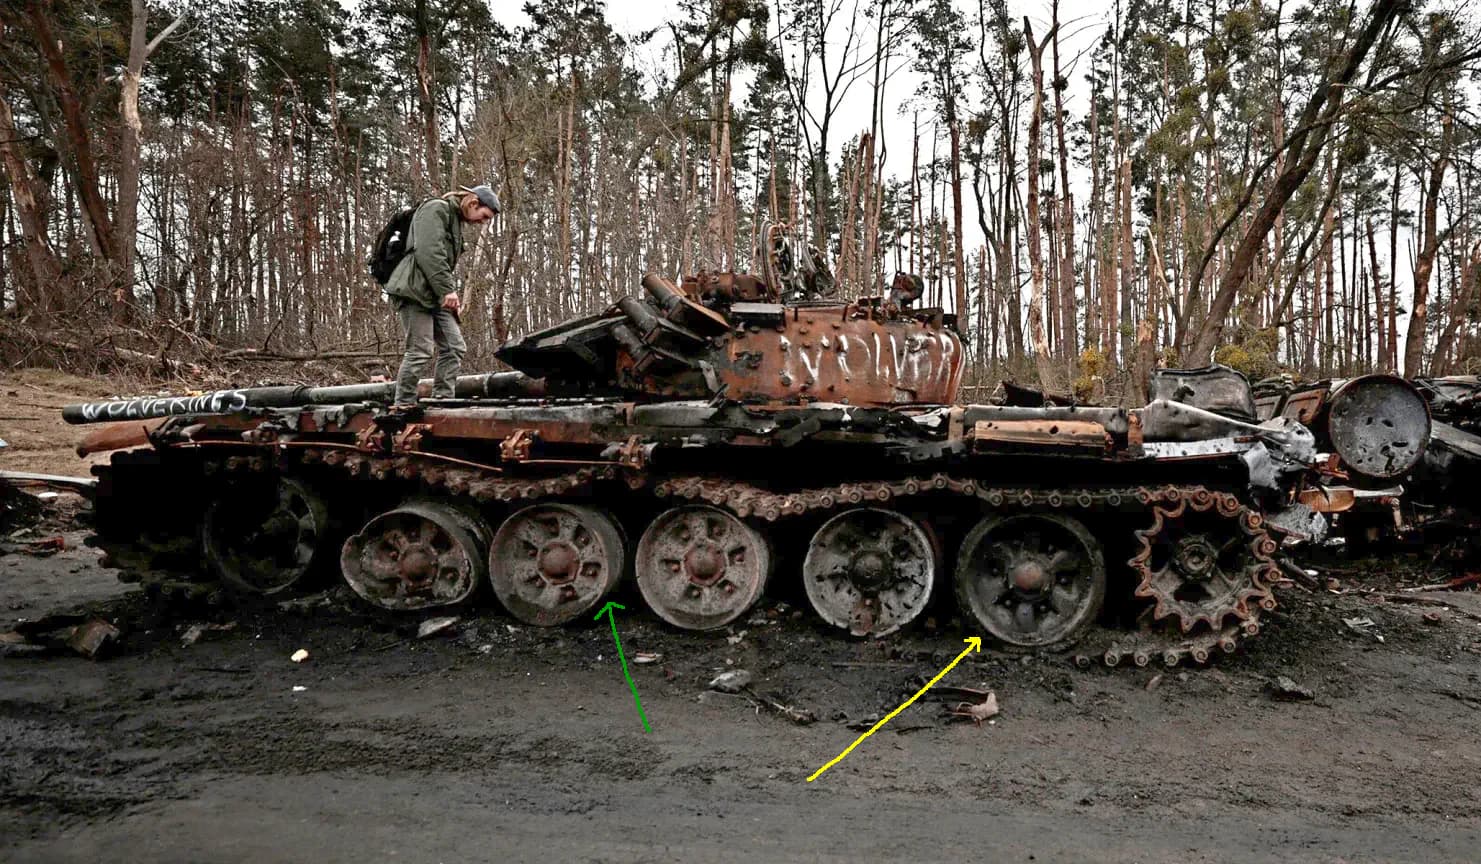
I don’t want all wheels melted/burnt out. Just a few with the tyres gone. As per the below image. )No I don’t know nor care if it’s a T72!! ![]() ). But it’s the look I’m after. So question - green arrow with rubber burnt off. Yellow arrow with complete tyre. Yes no? I know the one in front of the green arrow has a flat tyre.
). But it’s the look I’m after. So question - green arrow with rubber burnt off. Yellow arrow with complete tyre. Yes no? I know the one in front of the green arrow has a flat tyre. ![]()
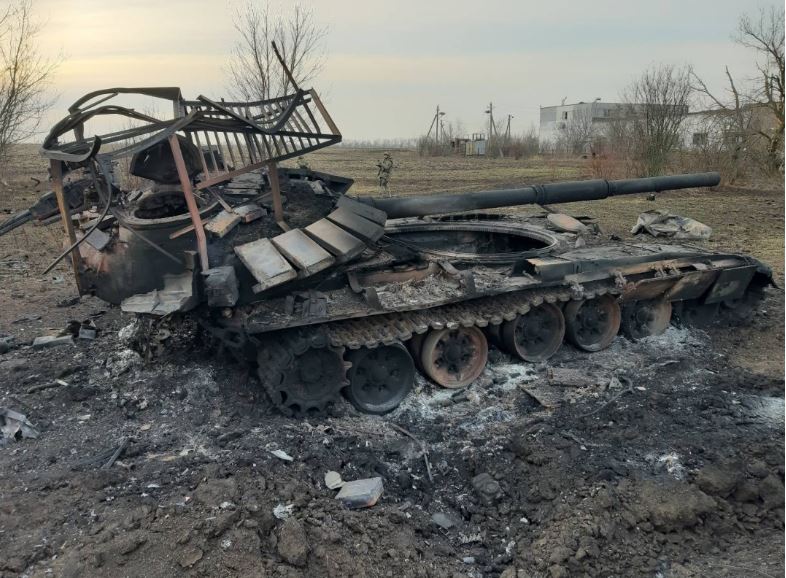
Certainly looks like rubber rims on this one with all that greyish ash…
Wheels don’t melt, insufficient time exposure to high enough temps. The wheels are close enough together that the tendency is one sets fire to the next, whether or not the fuel load’s gone up over them. It’s possible one or two at one end don’t burn if there’s a strong enough wind blowing away from them – that possibly explains both the unburned wheel in your photo and the lack of ash, which may have been so dispersed ![]()
1 Like
Panzer Art has released a set of burn out wheels for the T-72 (# RE35-027)

There are probably other options…
H.P.
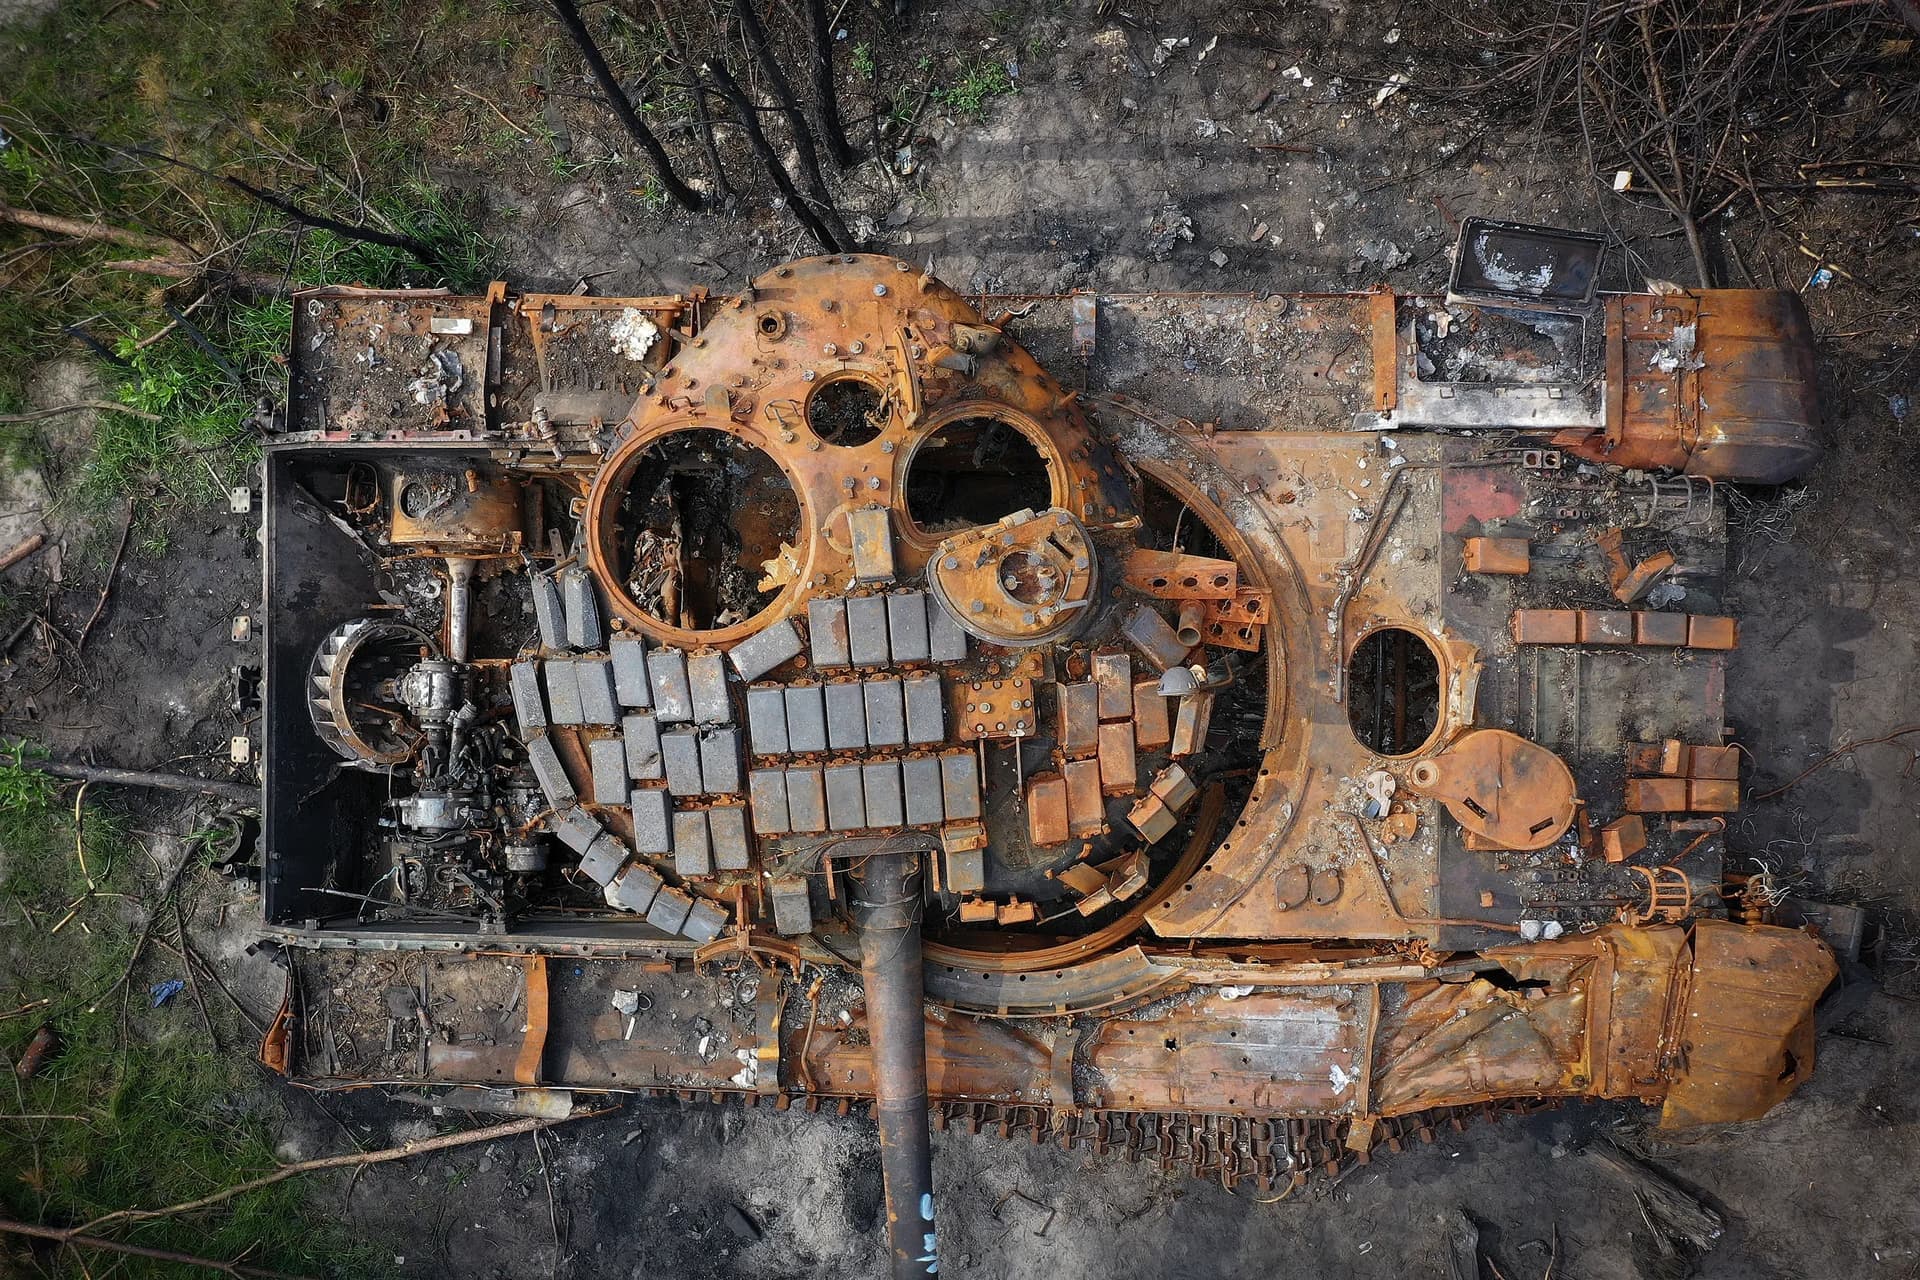
Your analysis seems to be correct. Also, the 4 middle wheels have the paint burned off, showing the white/light grey look of the burned aluminum. The last wheel and sprocket are unburned, still showing green paint.
Ken
Wheels.
Not as easy as I thought it would be!! ![]()
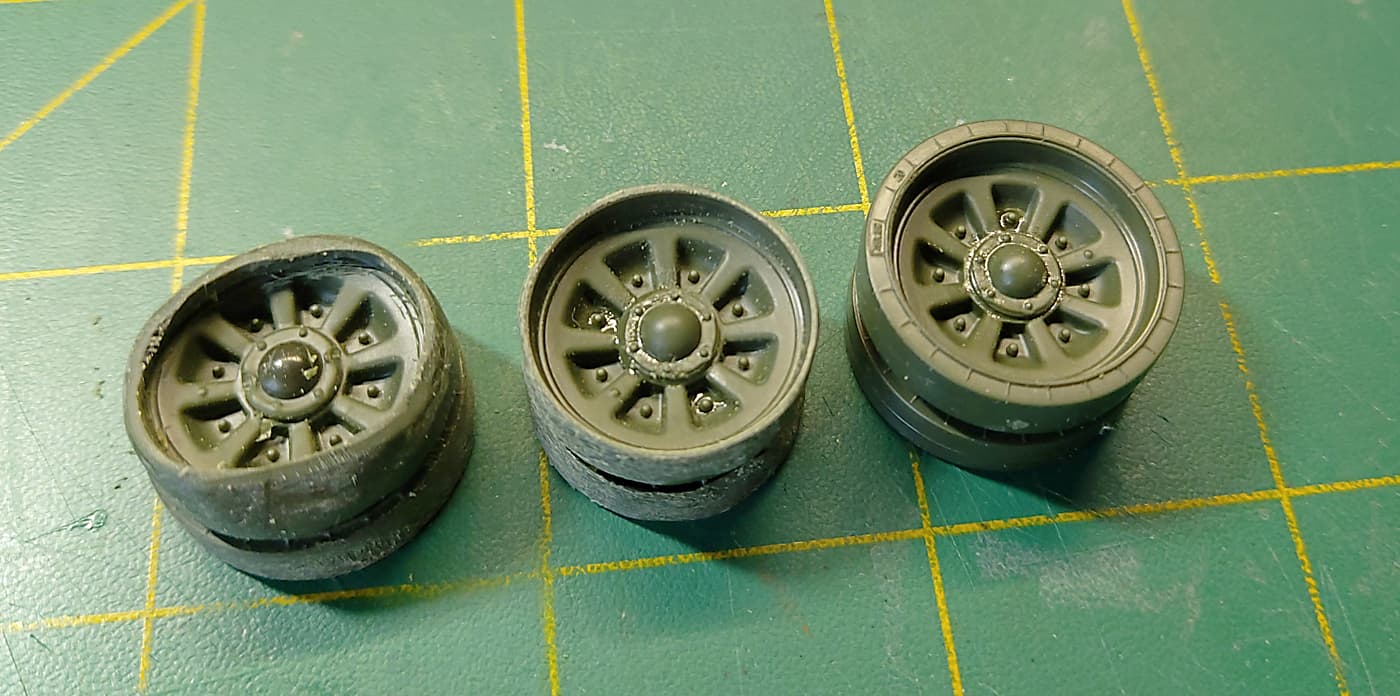
On the right a standard kit assembly. Middle is with tyres removed. Left tyres removed and rim melted. Now there is clean up to do but you can see the difference. I had to use a dremel to grind down the tyres. Not as easy as the plastic wanted to melt.
2 Likes
Nice job on them!
Ken
Try just getting them close with the Dremel then fine tuning the finish with a file.
Done. I spent a lot more time yesterday than I thought it would take. Grinding off the melted tyre proved harder than I thought.
Note - I melted one rim and a few other bits of the kit to change their shape. Once cooled the plastic became very hard and almost impossible to file. I’ve never experienced this with other kits. It may be the type of plastic AH are using.
1 Like
No pain, no gain, Destroyed vehicles are a ton of work. However if there is a well done destroyed vehicle it will garner more view time by people than a straight forward build.
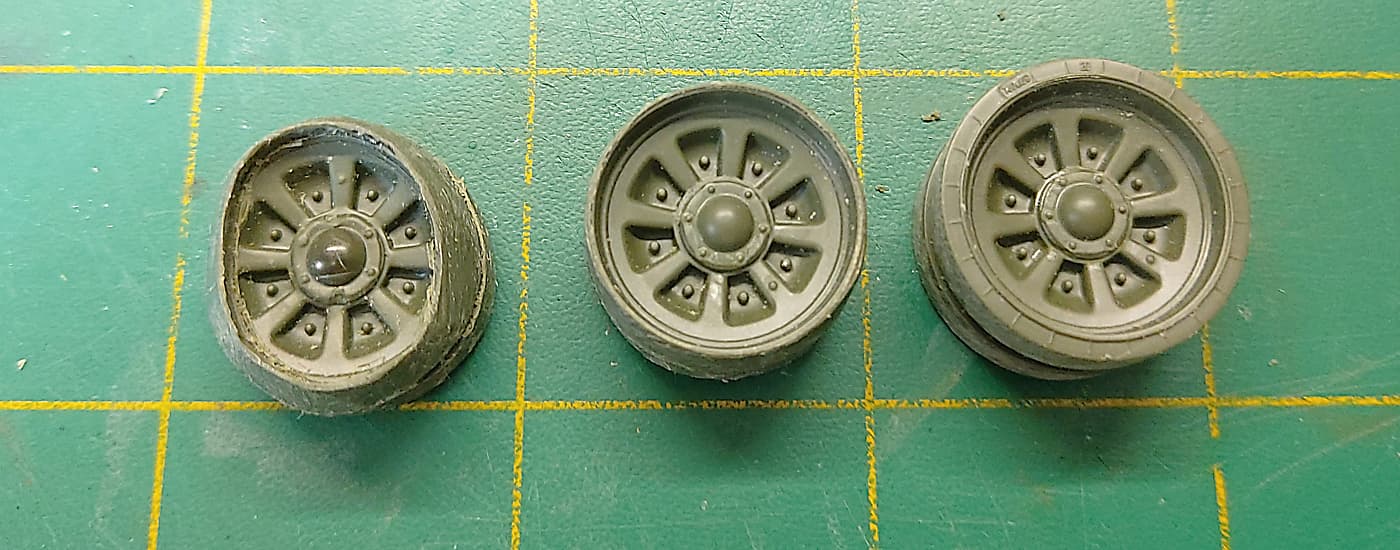
An image after yesterdays work.
Still some cleaning up to do but the tyres are now much finer. Next time I’ll grind one tyre/rim right off and build my own rim from styrene. May be the quickest way.
3 Likes
OK back at the work bench.
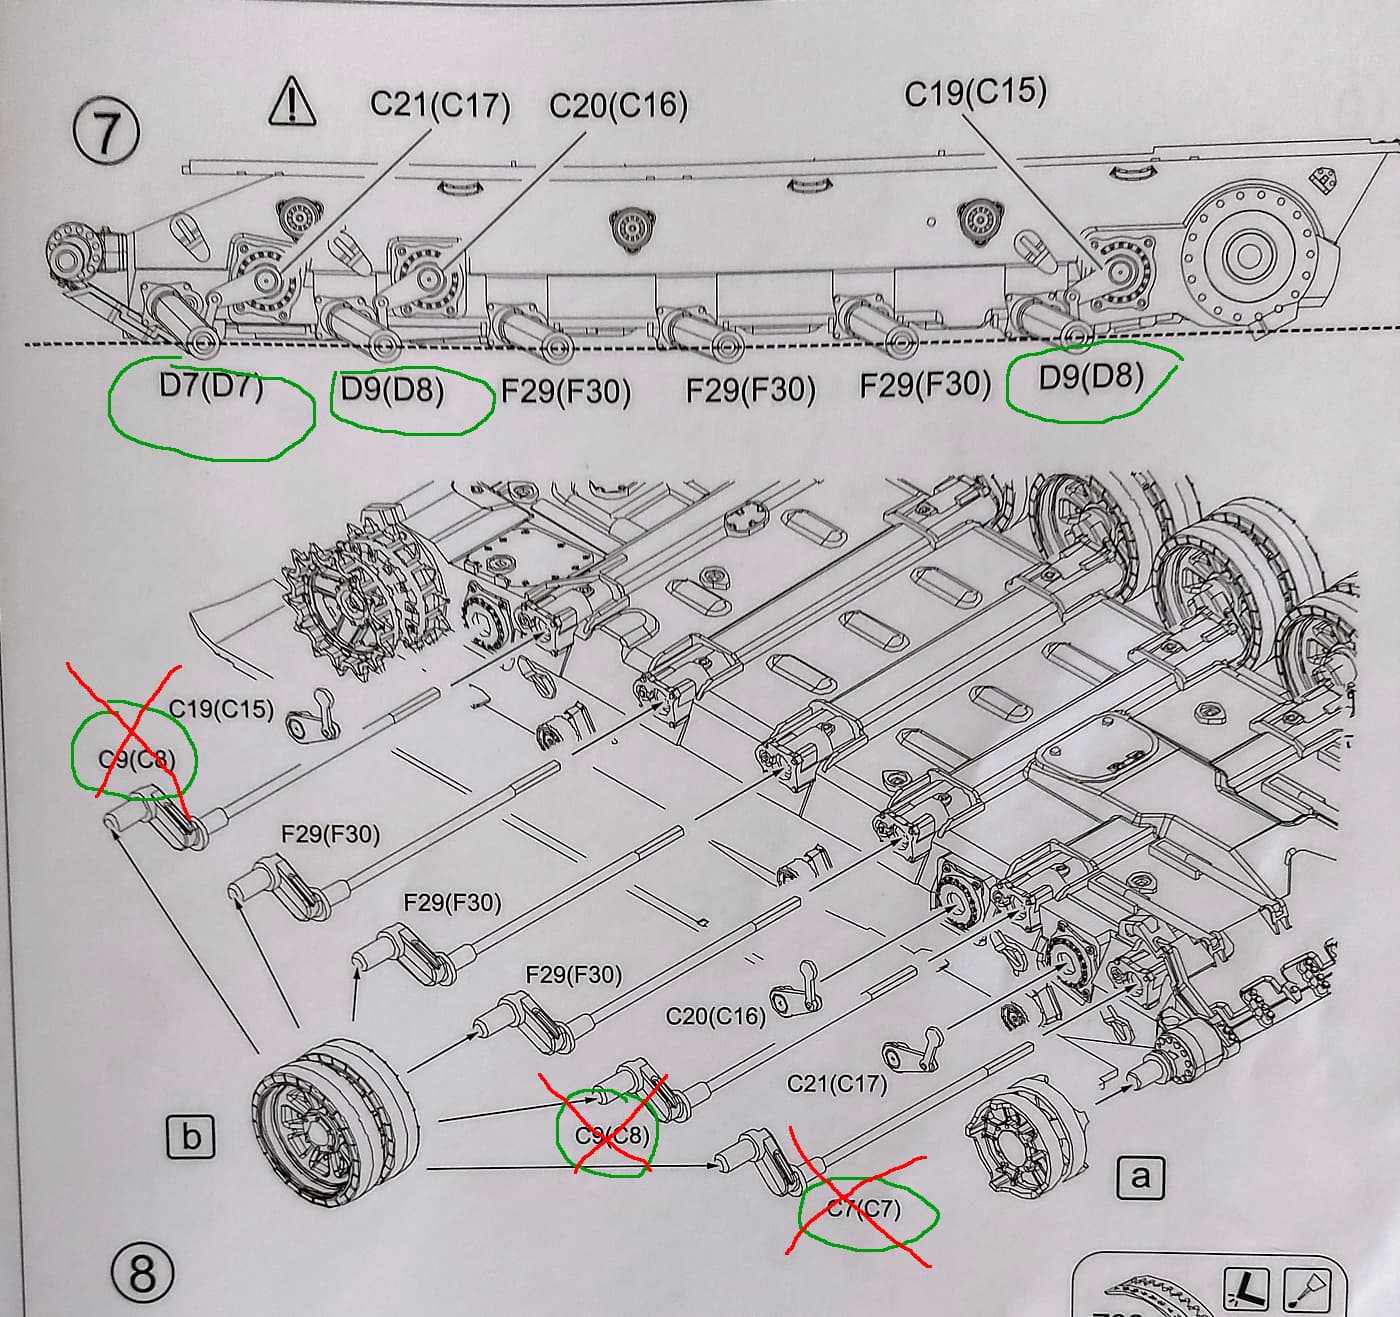
I’m building the hull. I intend to build and destroy as I go. But first a caution for those considering this kit. See image below. The top diagram shows parts D7(D7), D9(D8) and D9(D8). Green circles. Now below are the same parts labeled C9(C8), C9(C8) and C7(C7). The top image are the numbers that are correct. I also found getting the darn thing level a challenge. But seeing mine will be wrecked I was too fussy. AM give you the dotted line as a guide.
If the hull burned hot, the torsion bars will lose their springiness and will settle.Just found a nice example of burned T-72 style roadwheels (on a BREM-1) :


H.P.
2 Likes
Thanks Frenchy. The inner rim itself has burnt away.
Not much happening.
I ‘modified’ the rear tanks. You can see where a shell has penetrated to inside of the hull. Mostly dry fitted.
From now on I have to think logically of what happened and what forces affected what areas.
4 Likes
Following with great interest. Something I’ve been wanting to try myself for awhile but have been too chicken to try. ![]()
![]() Perhaps with your SBS I’ll grow some cojones and take the plunge.
Perhaps with your SBS I’ll grow some cojones and take the plunge.
Ditto. Following with great interest also. Lovely work so far…Cheers mark
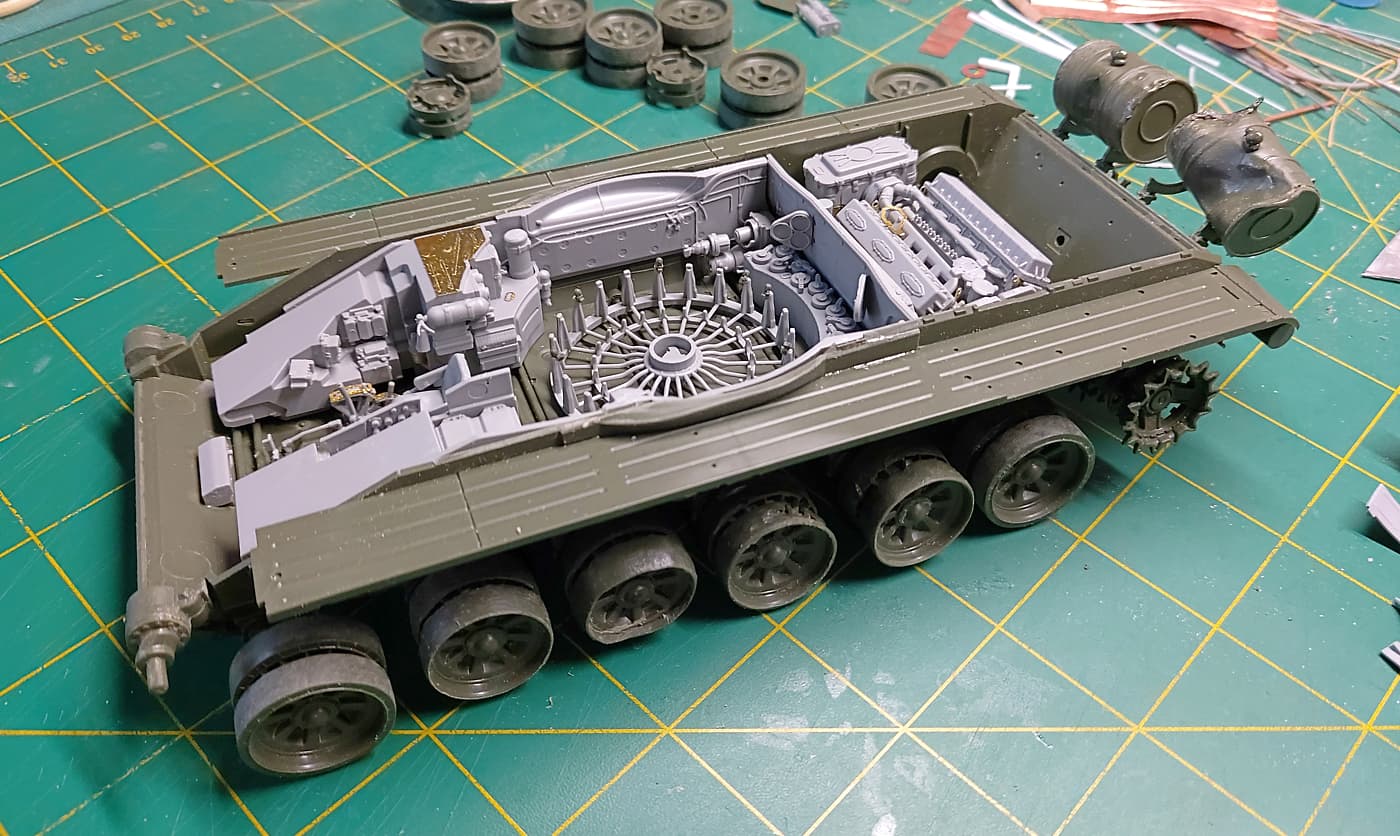
Wet miserable day here today so a bit of work done. I’ve finished the wheels. Only the front and rear tyres have survived!!! OK tires. ![]() I’ve killed a couple of the wheels. Frenchy’s above images were a great help. Thanks.
I’ve killed a couple of the wheels. Frenchy’s above images were a great help. Thanks.
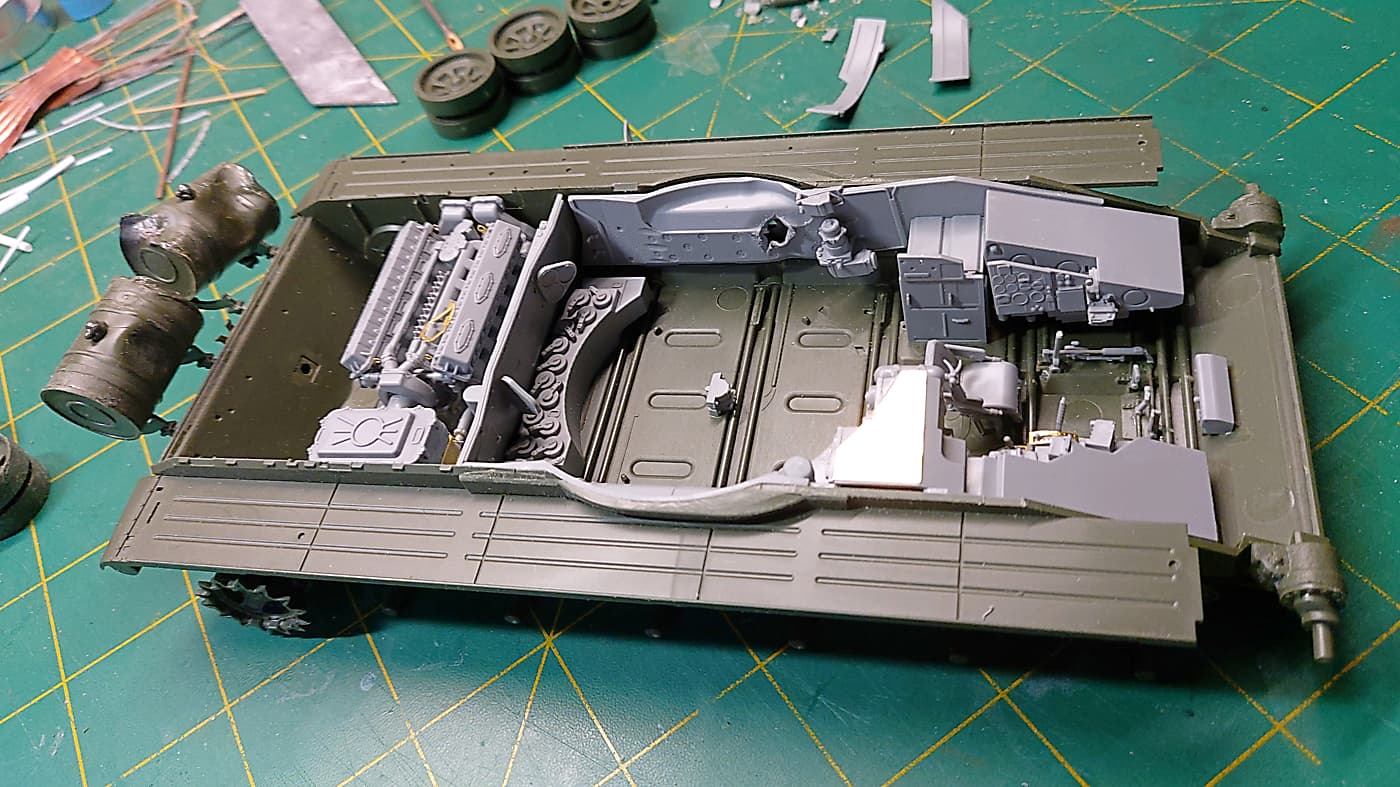
The interior is a bit tricky. In theory there was a bang and the turret blew off. A short fire afterwards. So damage but not so much that everything is molten metal. So what to melt and what to preserve. What bulk heads would have deformed? The blast went out over the engine in my scenario. Would the ammo turntable melt or survive? I know the drivers seat wouldn’t have survived but I installed it just to get an idea of where the blast went and what would burn.
It’s all dry fitted so I can ‘destroy’ or ‘modify’ many items. I’m not sure how sturdy the fenders would be. Most images I’ve looked at the fenders are relatively intact.
Ideas and feed back welcome.
2 Likes
I would of thought if the ammo rack cooks off, that is where most damage will be seen such as melting/ massive disfigurement of metal - in and around the lower hull area…
The force of the explosion will push up and away on the turret, throwing it away from the hull and it will suffer damage, but more limited to blast damage and localised fires from the smaller flammable bits of turret equipment ??? If the turret is only slight dislodged, the fire damage and explosion damage would get worse ???