That would ruin Sunday lunch time …
3 Likes
I have seen the bottom one before that top Picture is great. Thank you!
So I decided to pull the trigger and buy the amusing hobby T90A with an interior.
I plan to either use the internal parts as is or recreate them and 3D print them so I can re-sell the kit intact. Either way, I am at the stage with the turret where I have to stop and wait for the additional parts to arrive.
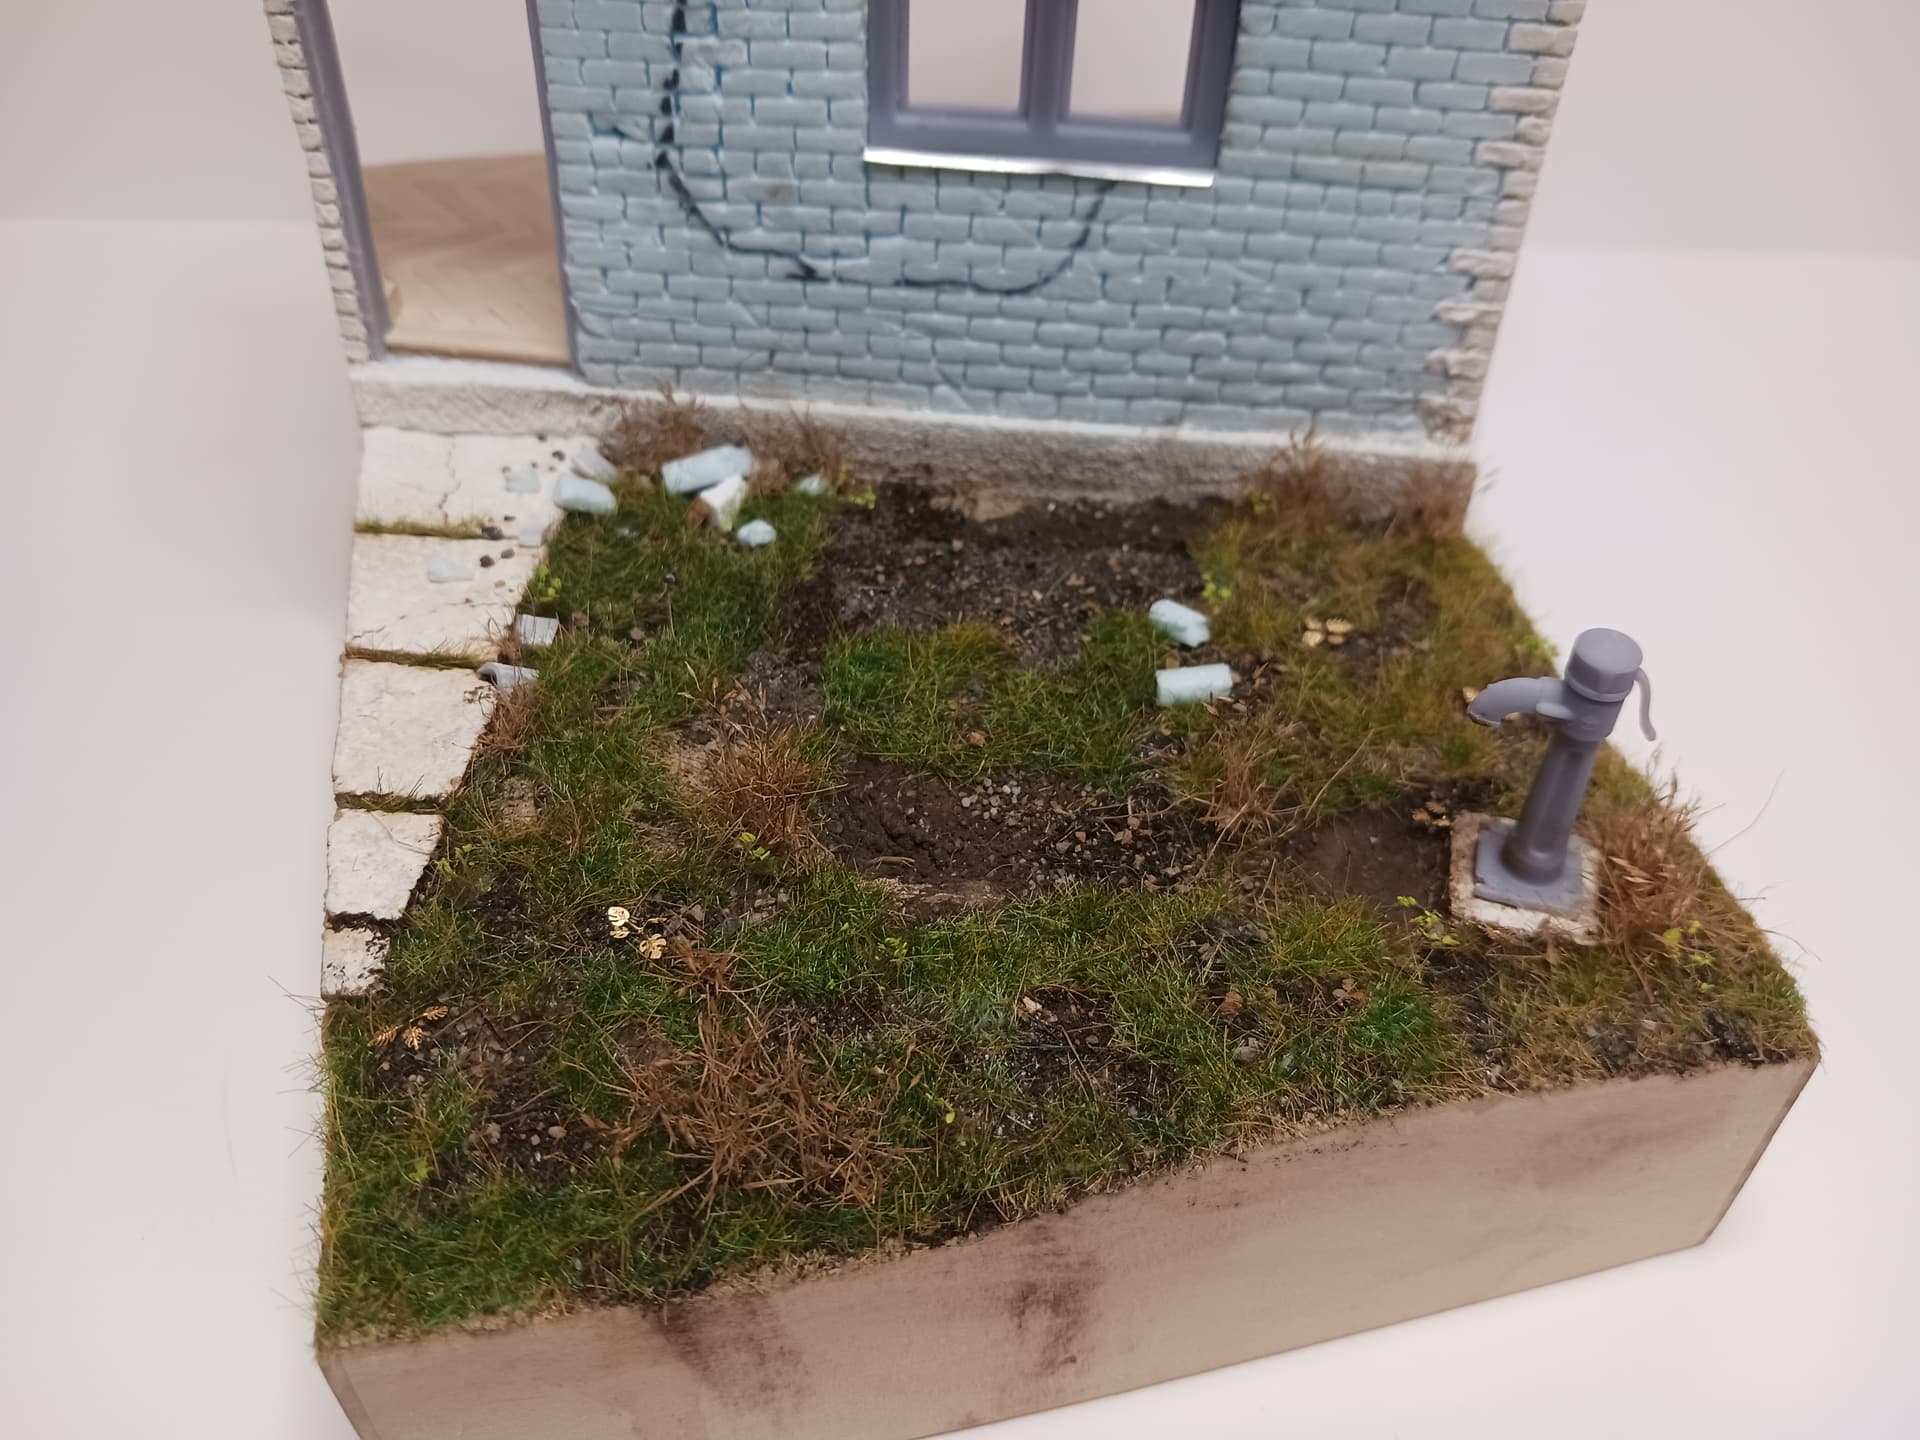
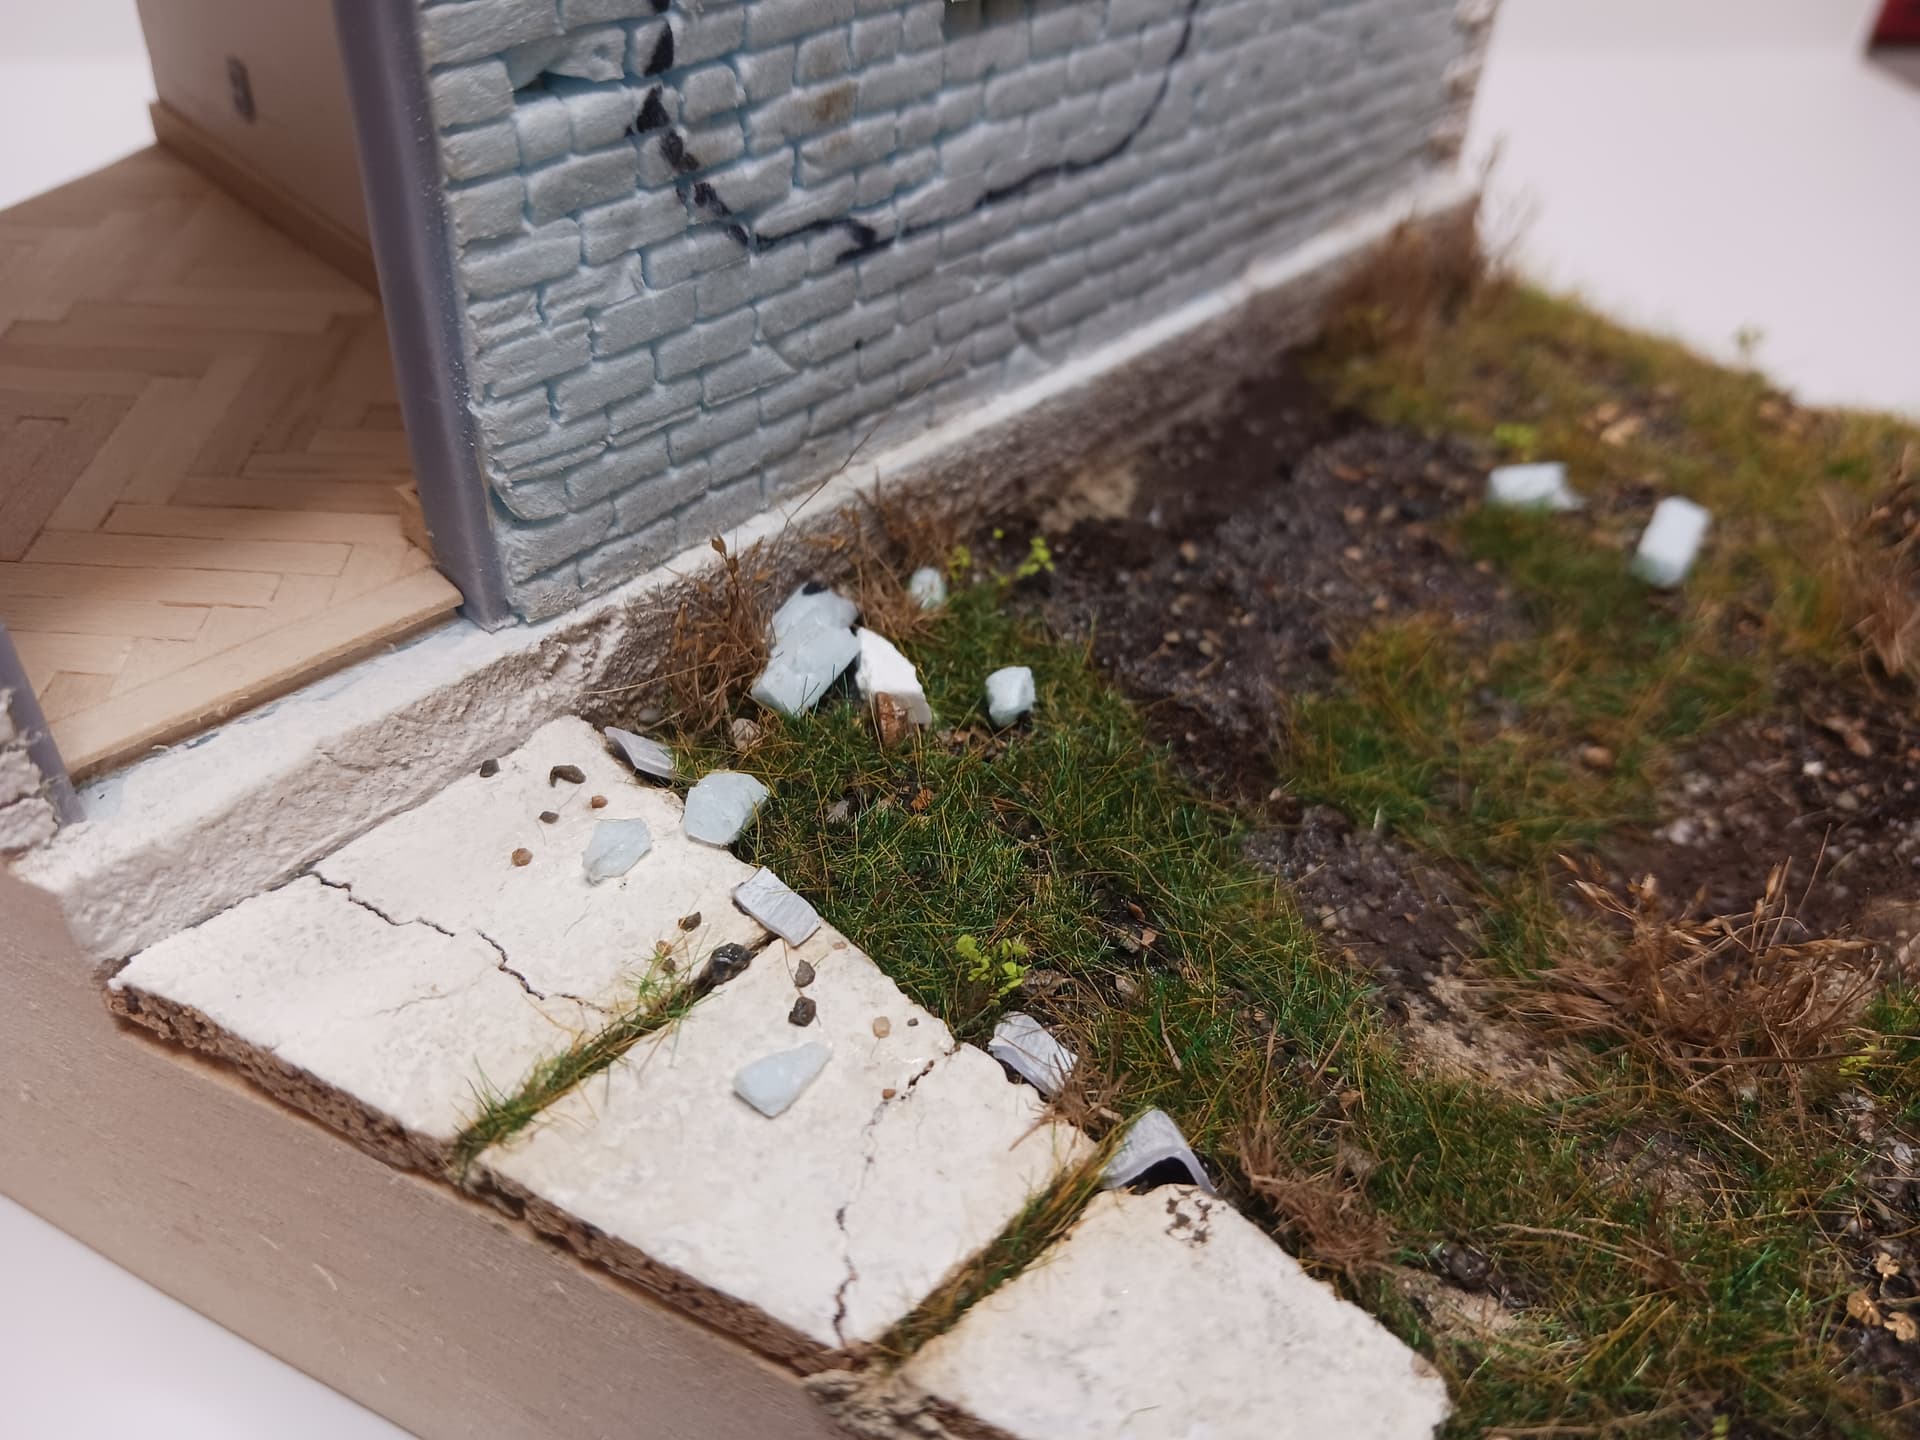
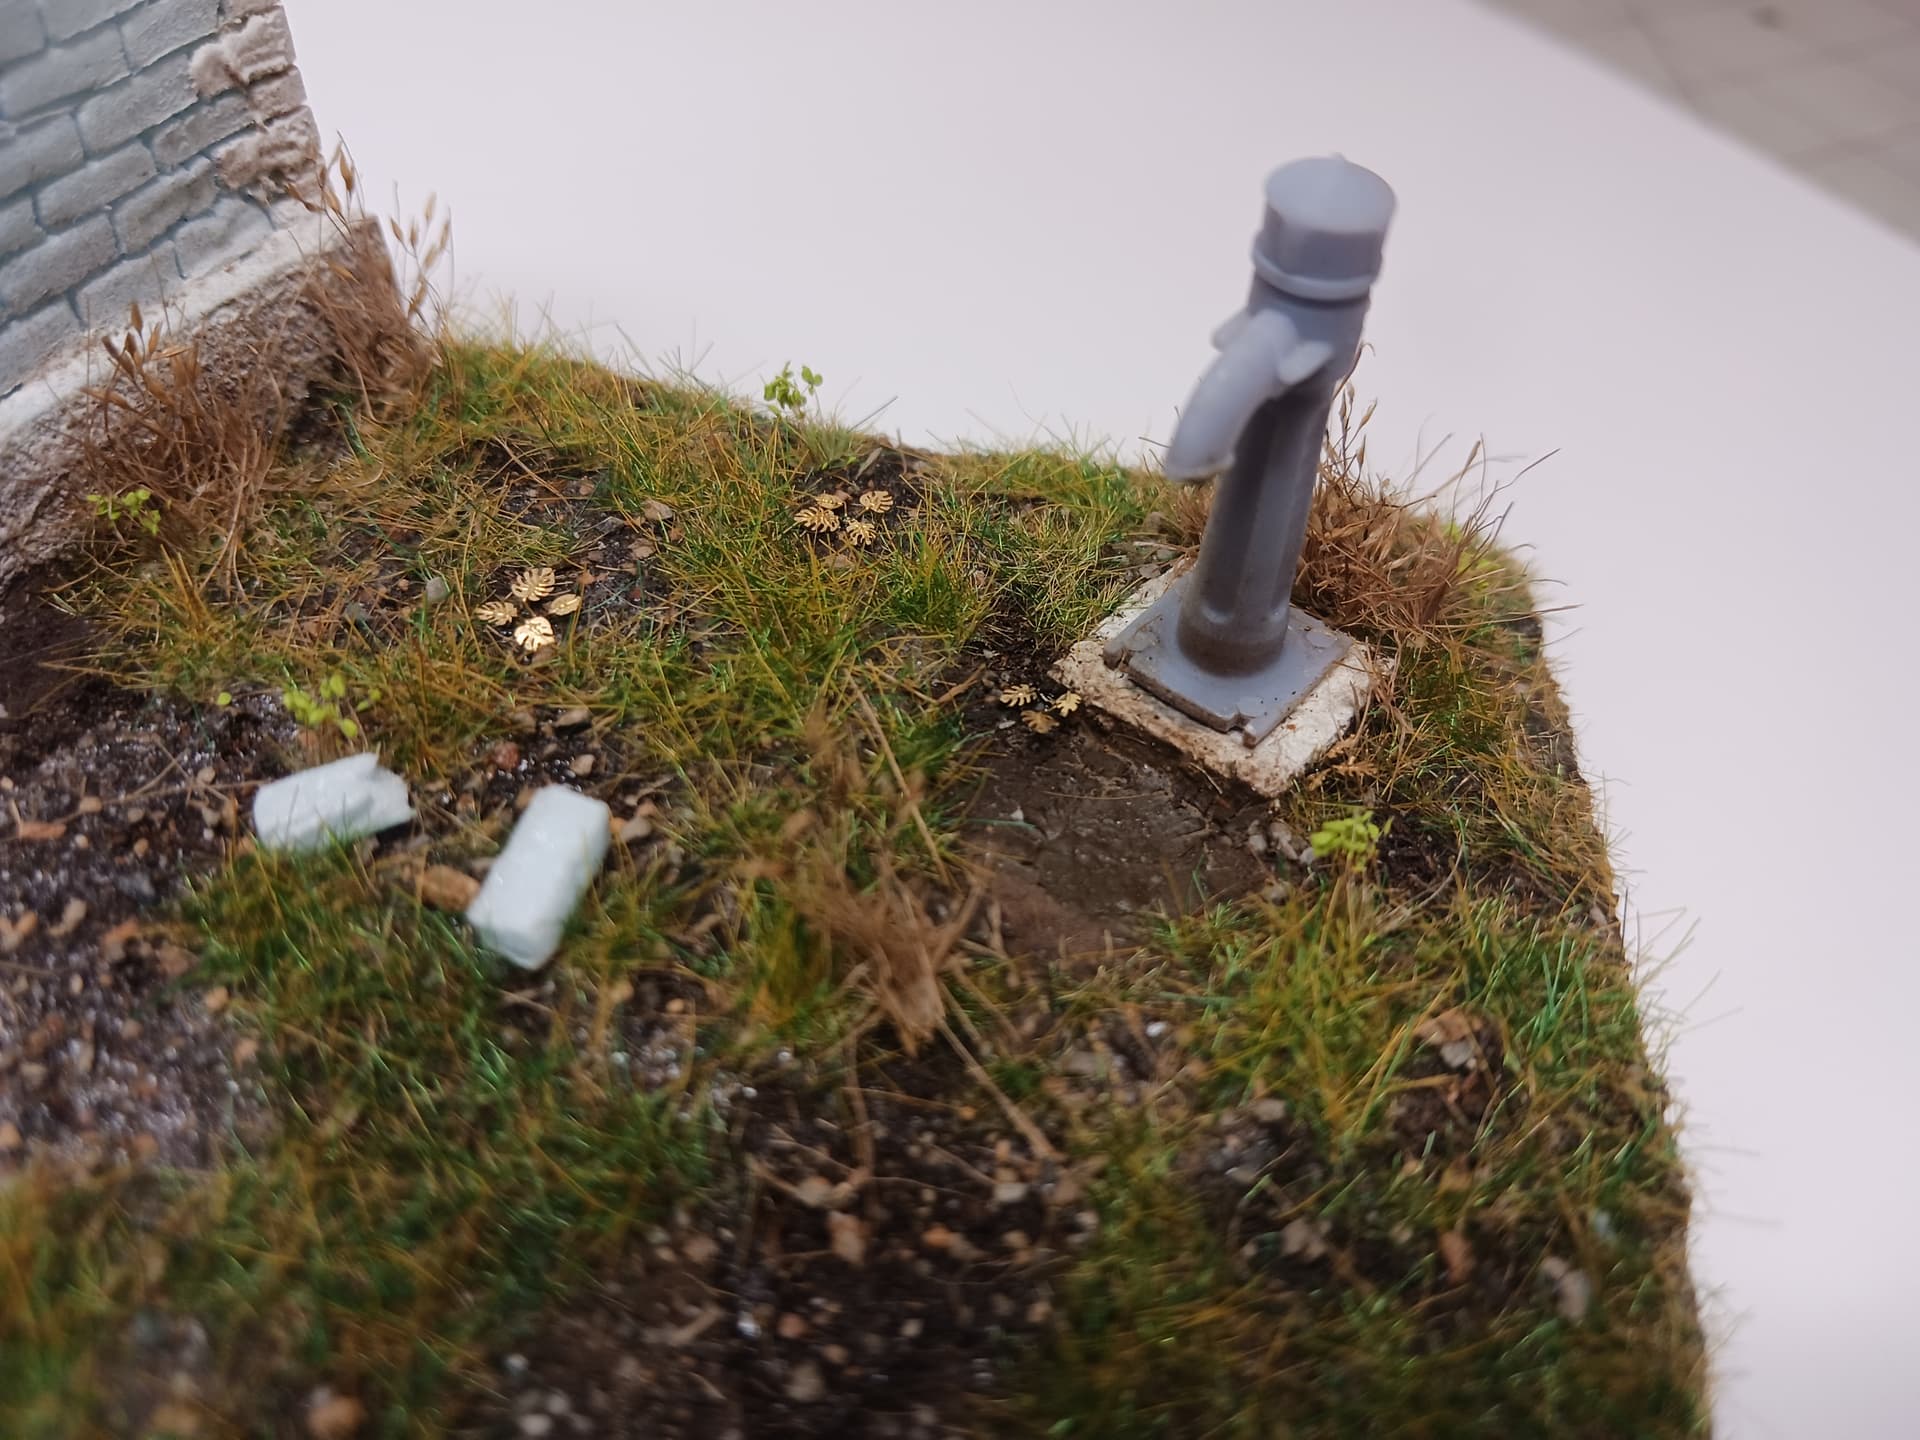
In the meantime, I have been making progress with the house itself and really getting into it. Here is the progress so far. Everything you see that is 3D printed in grey is only dry-fitted.
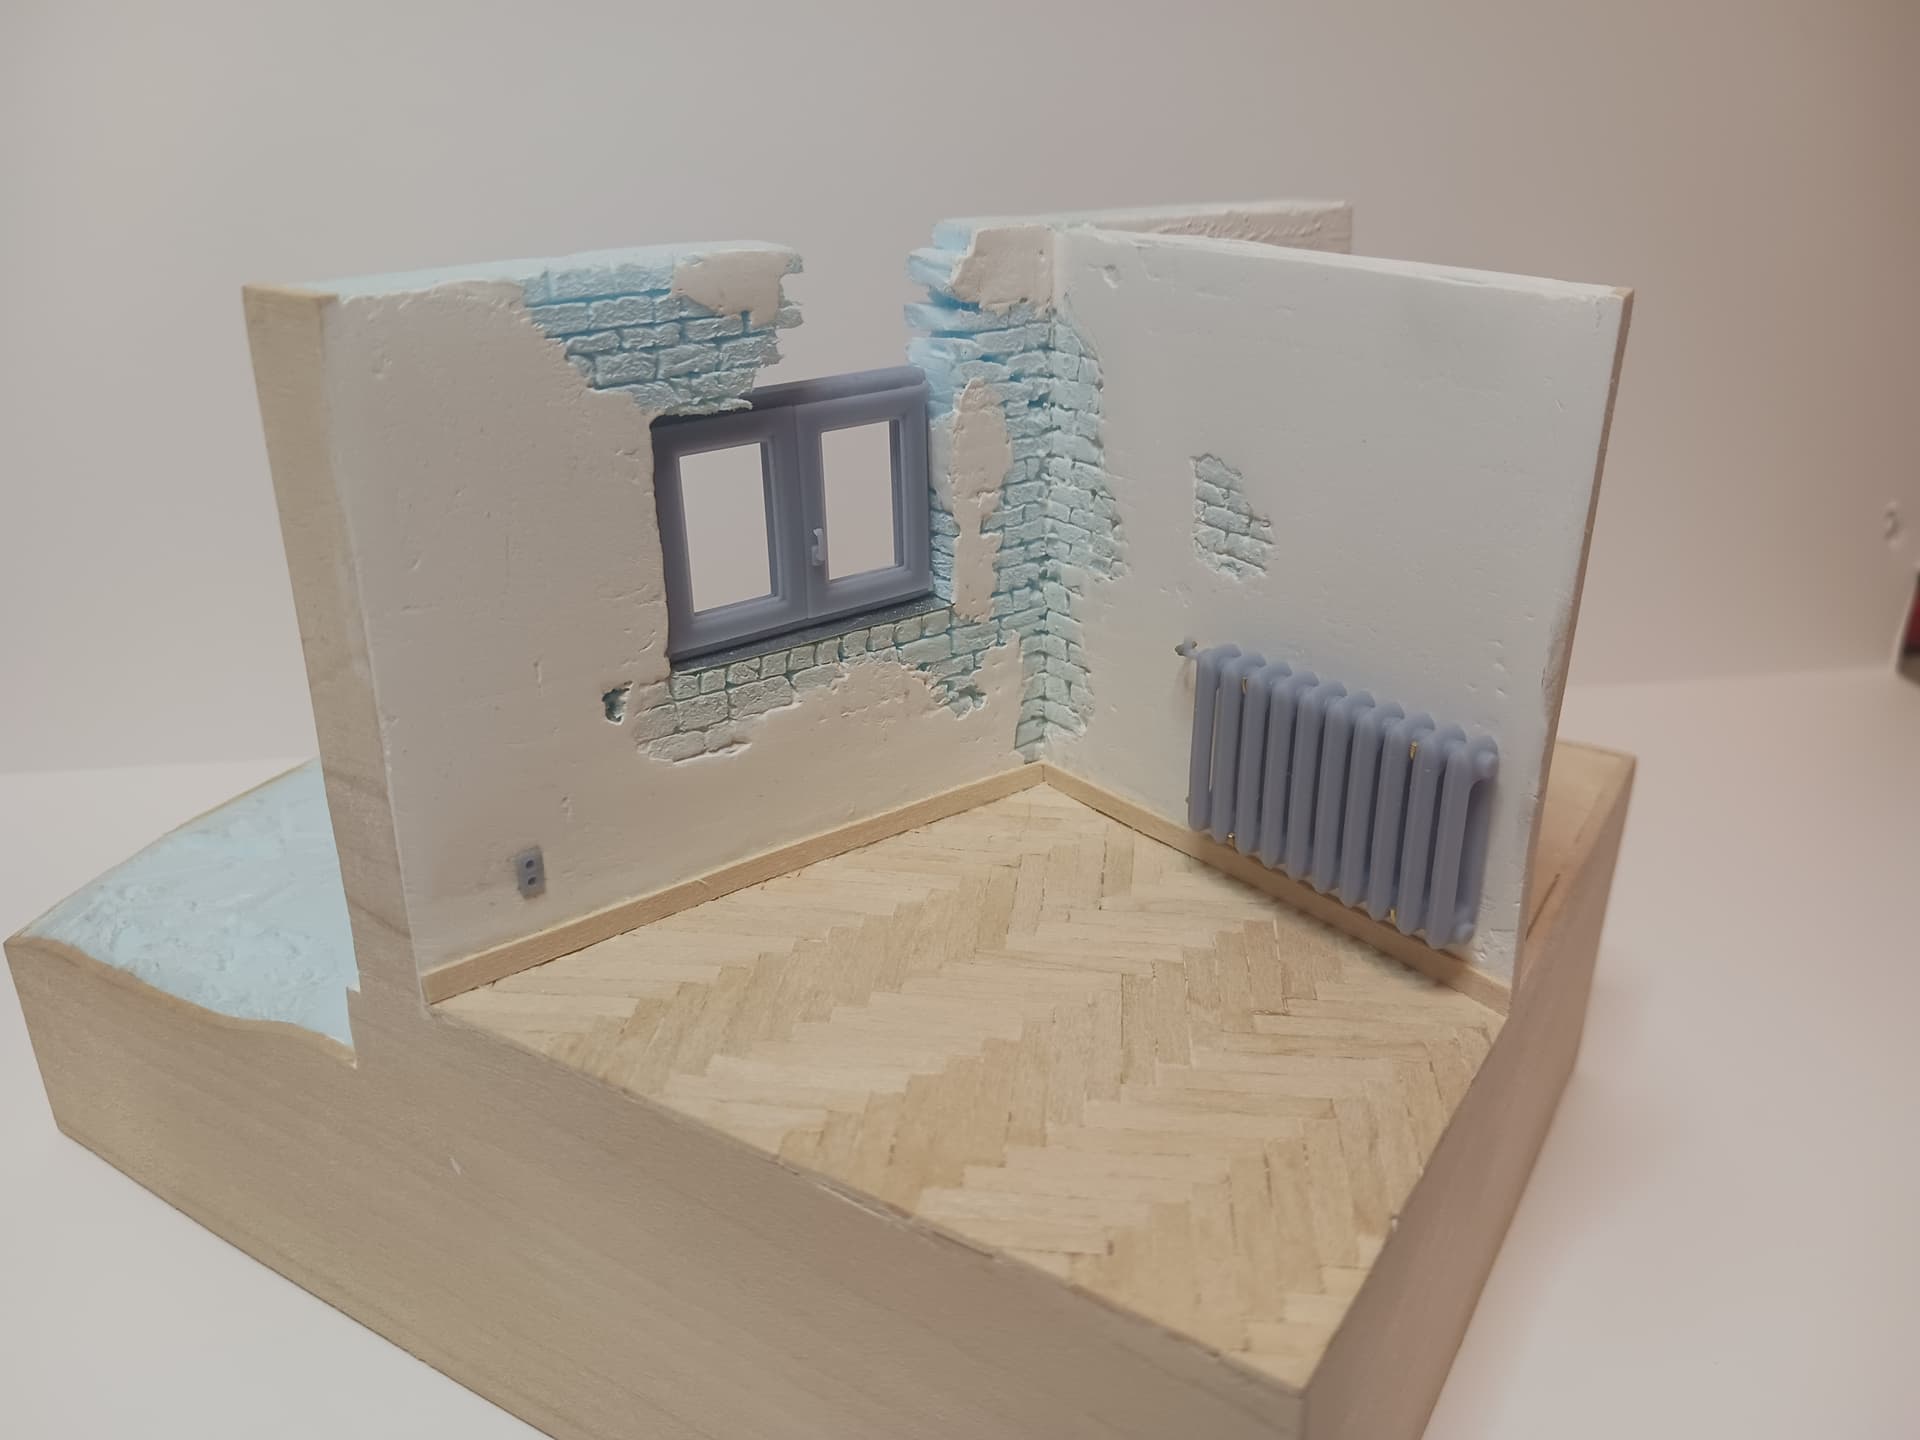
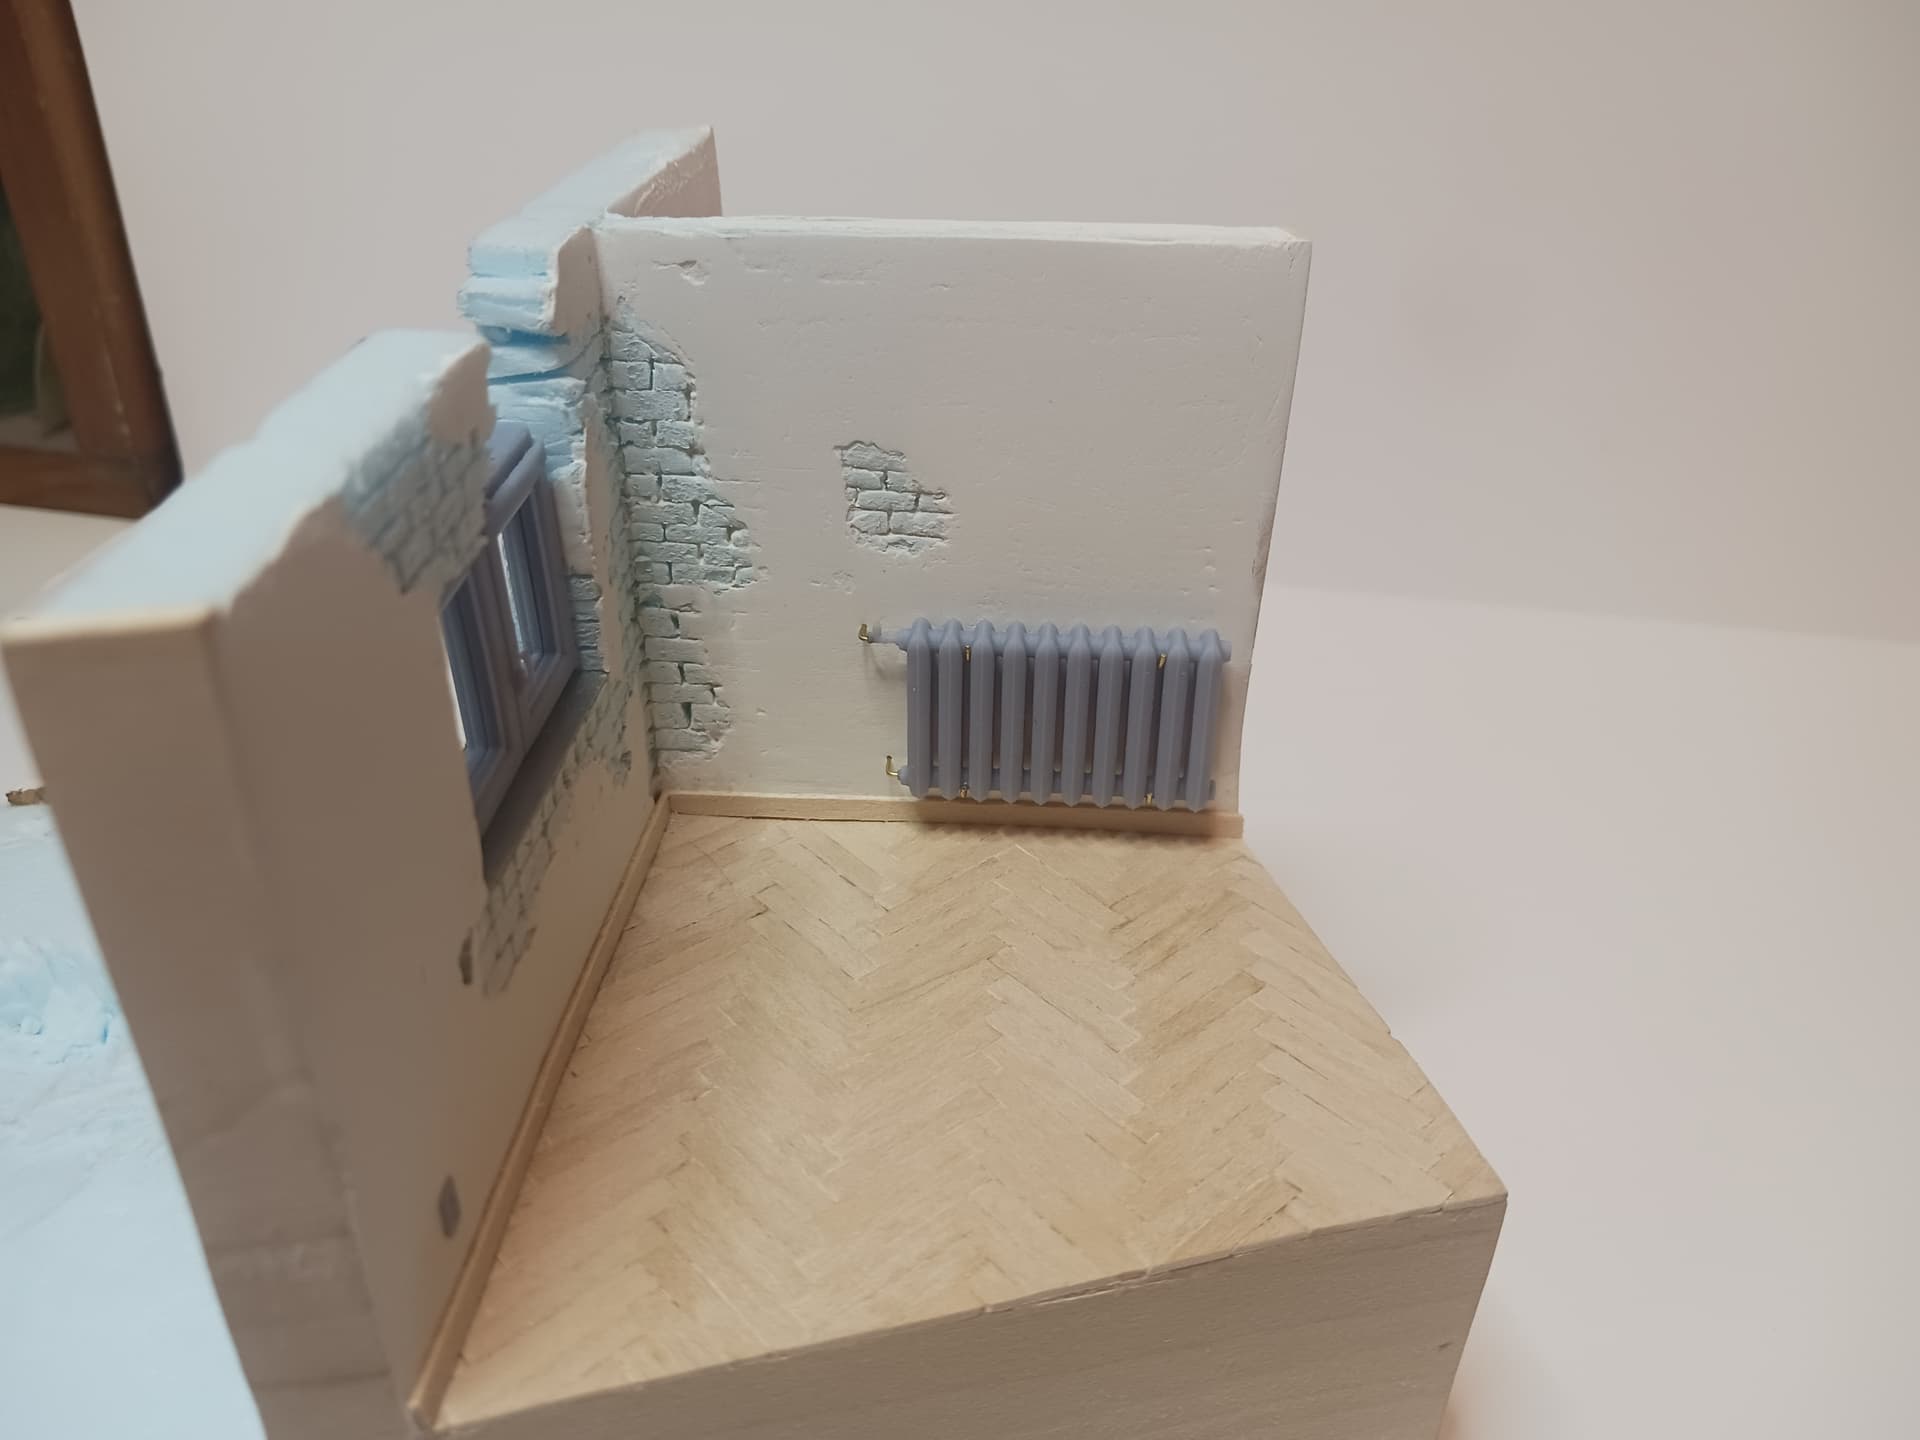
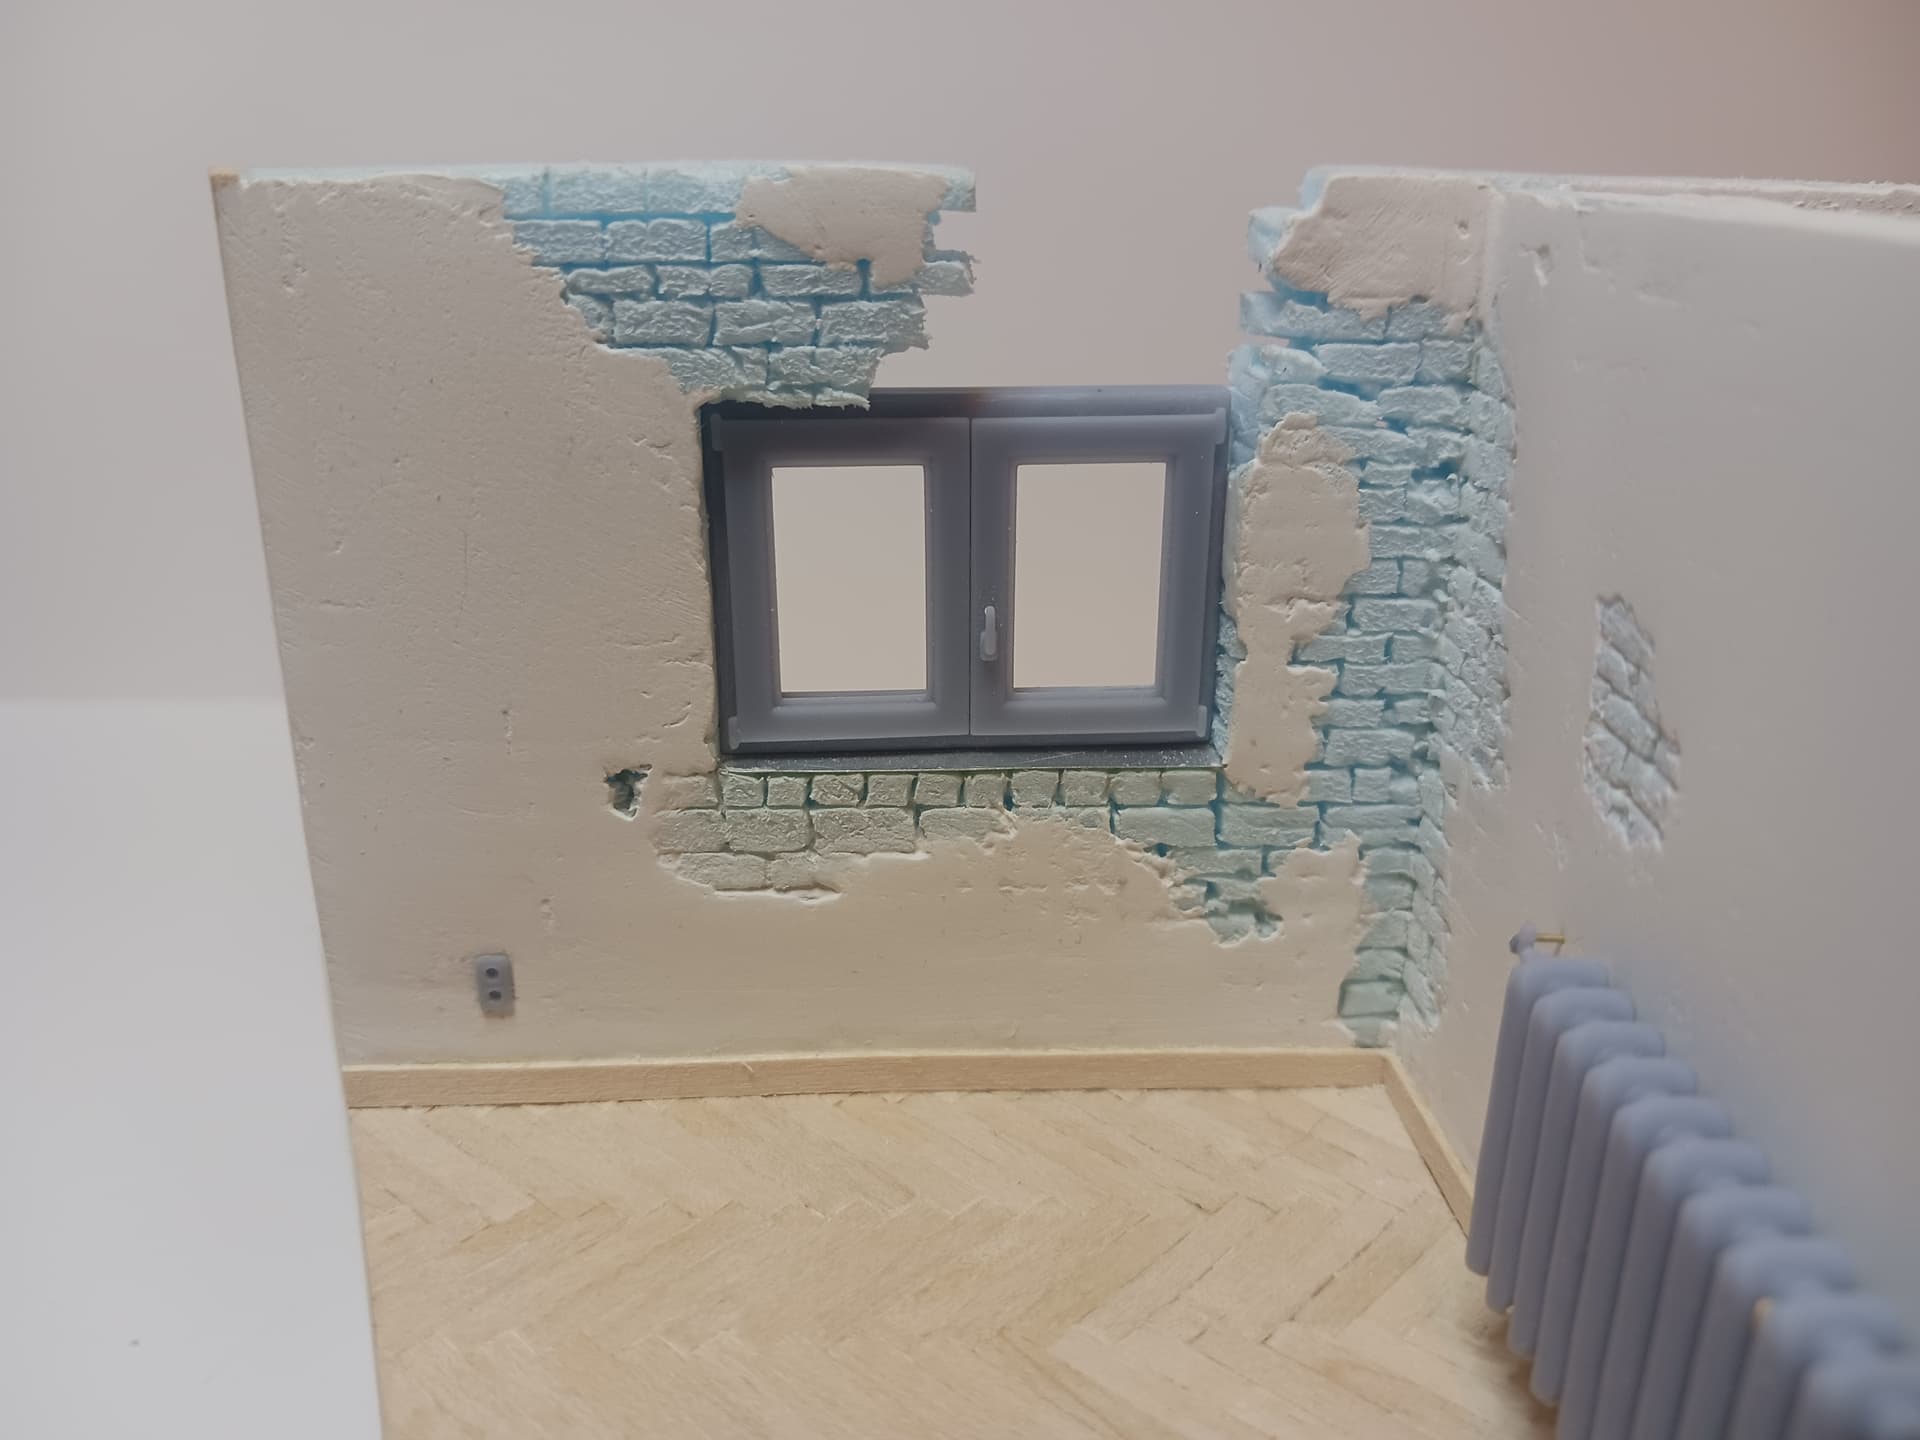
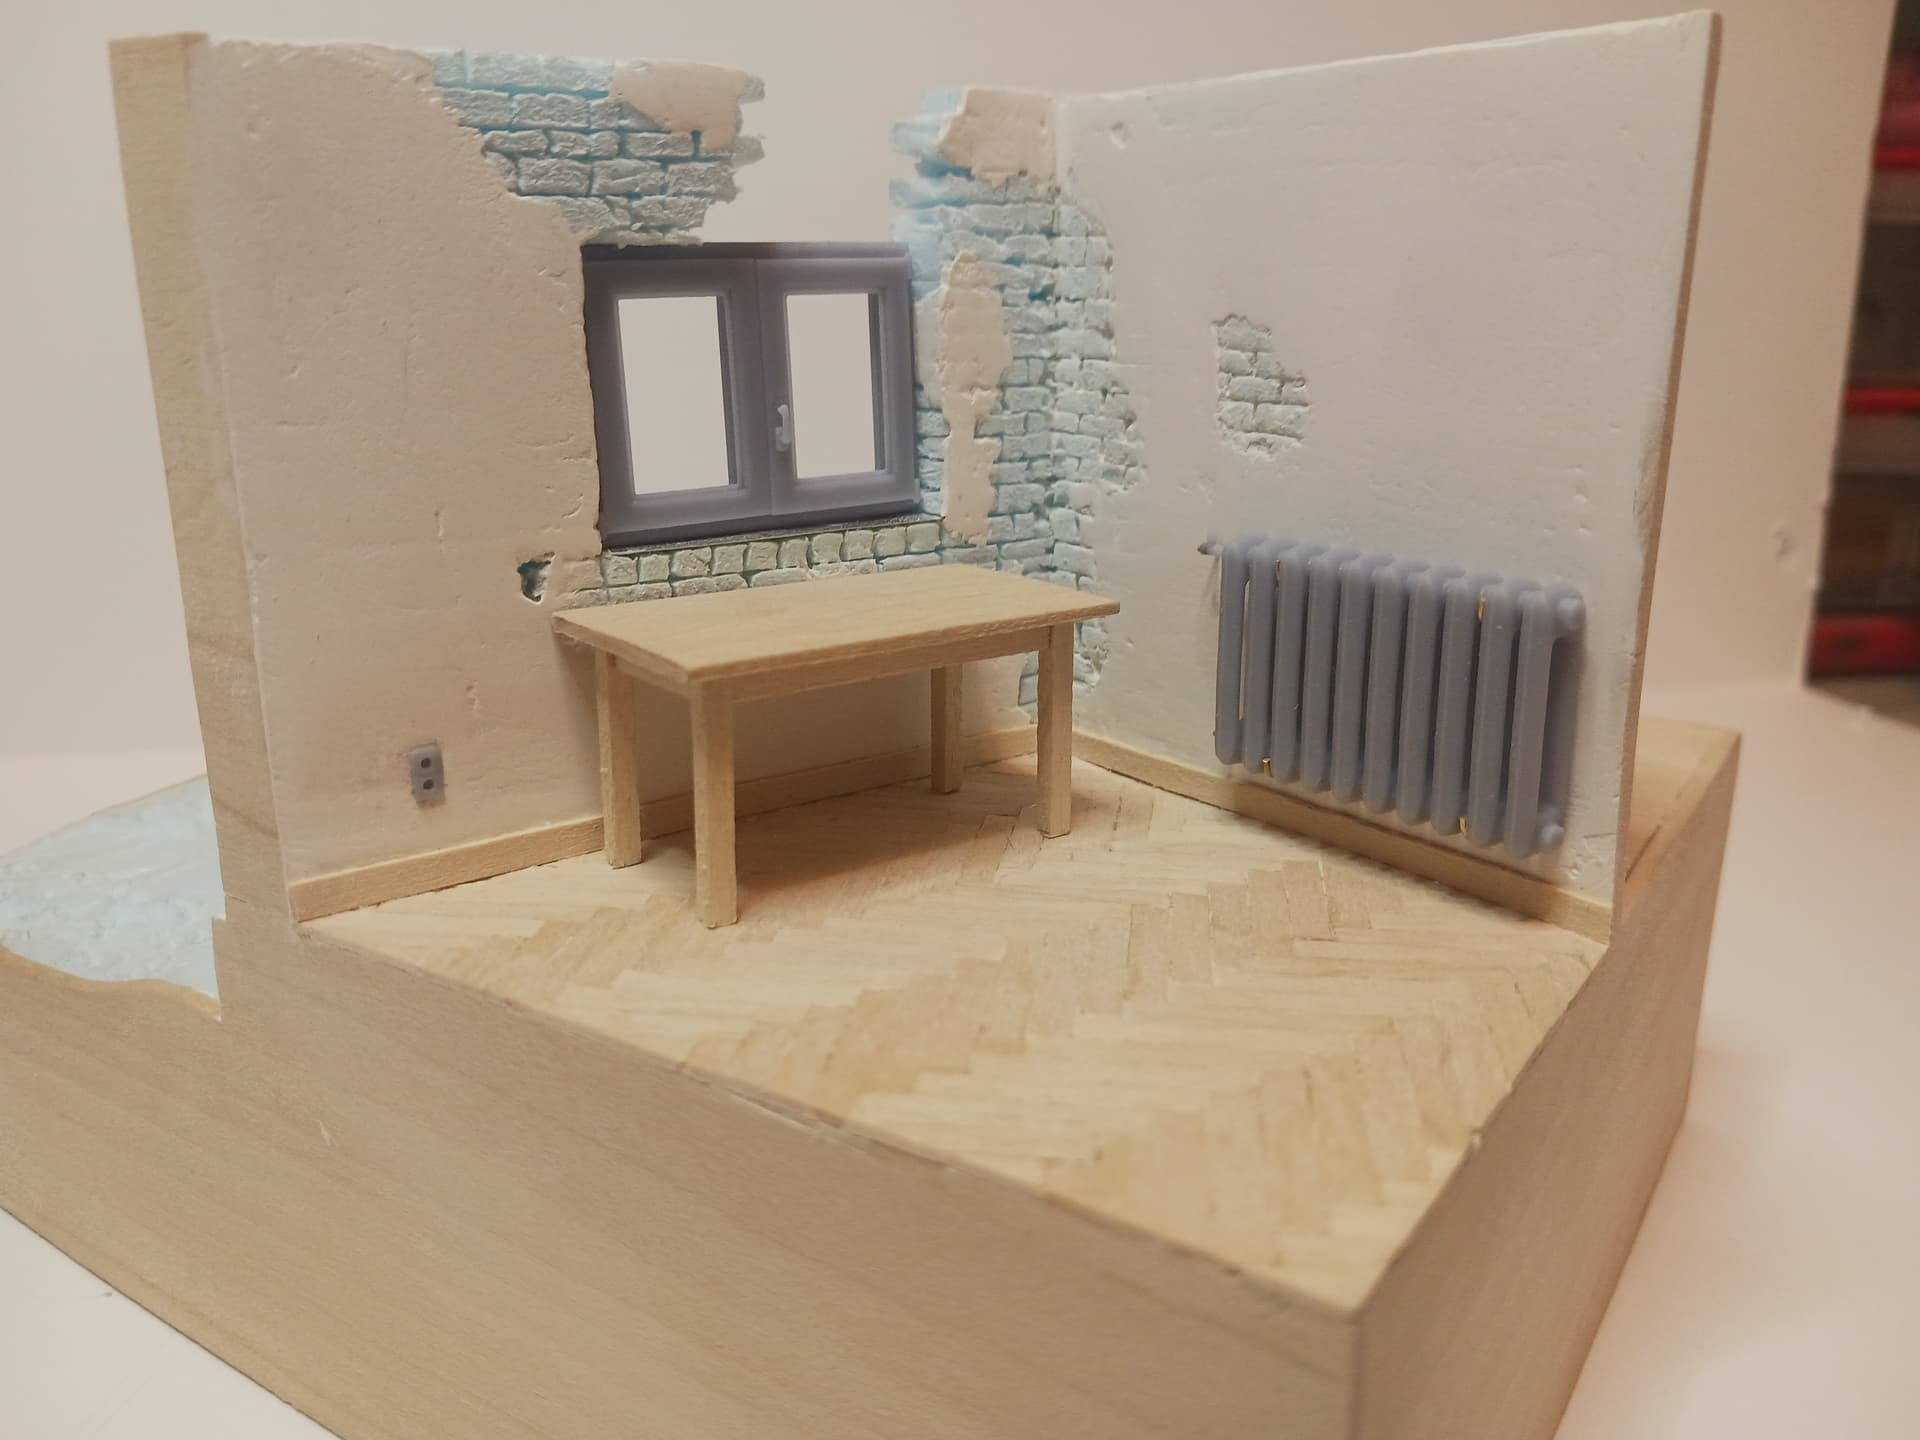
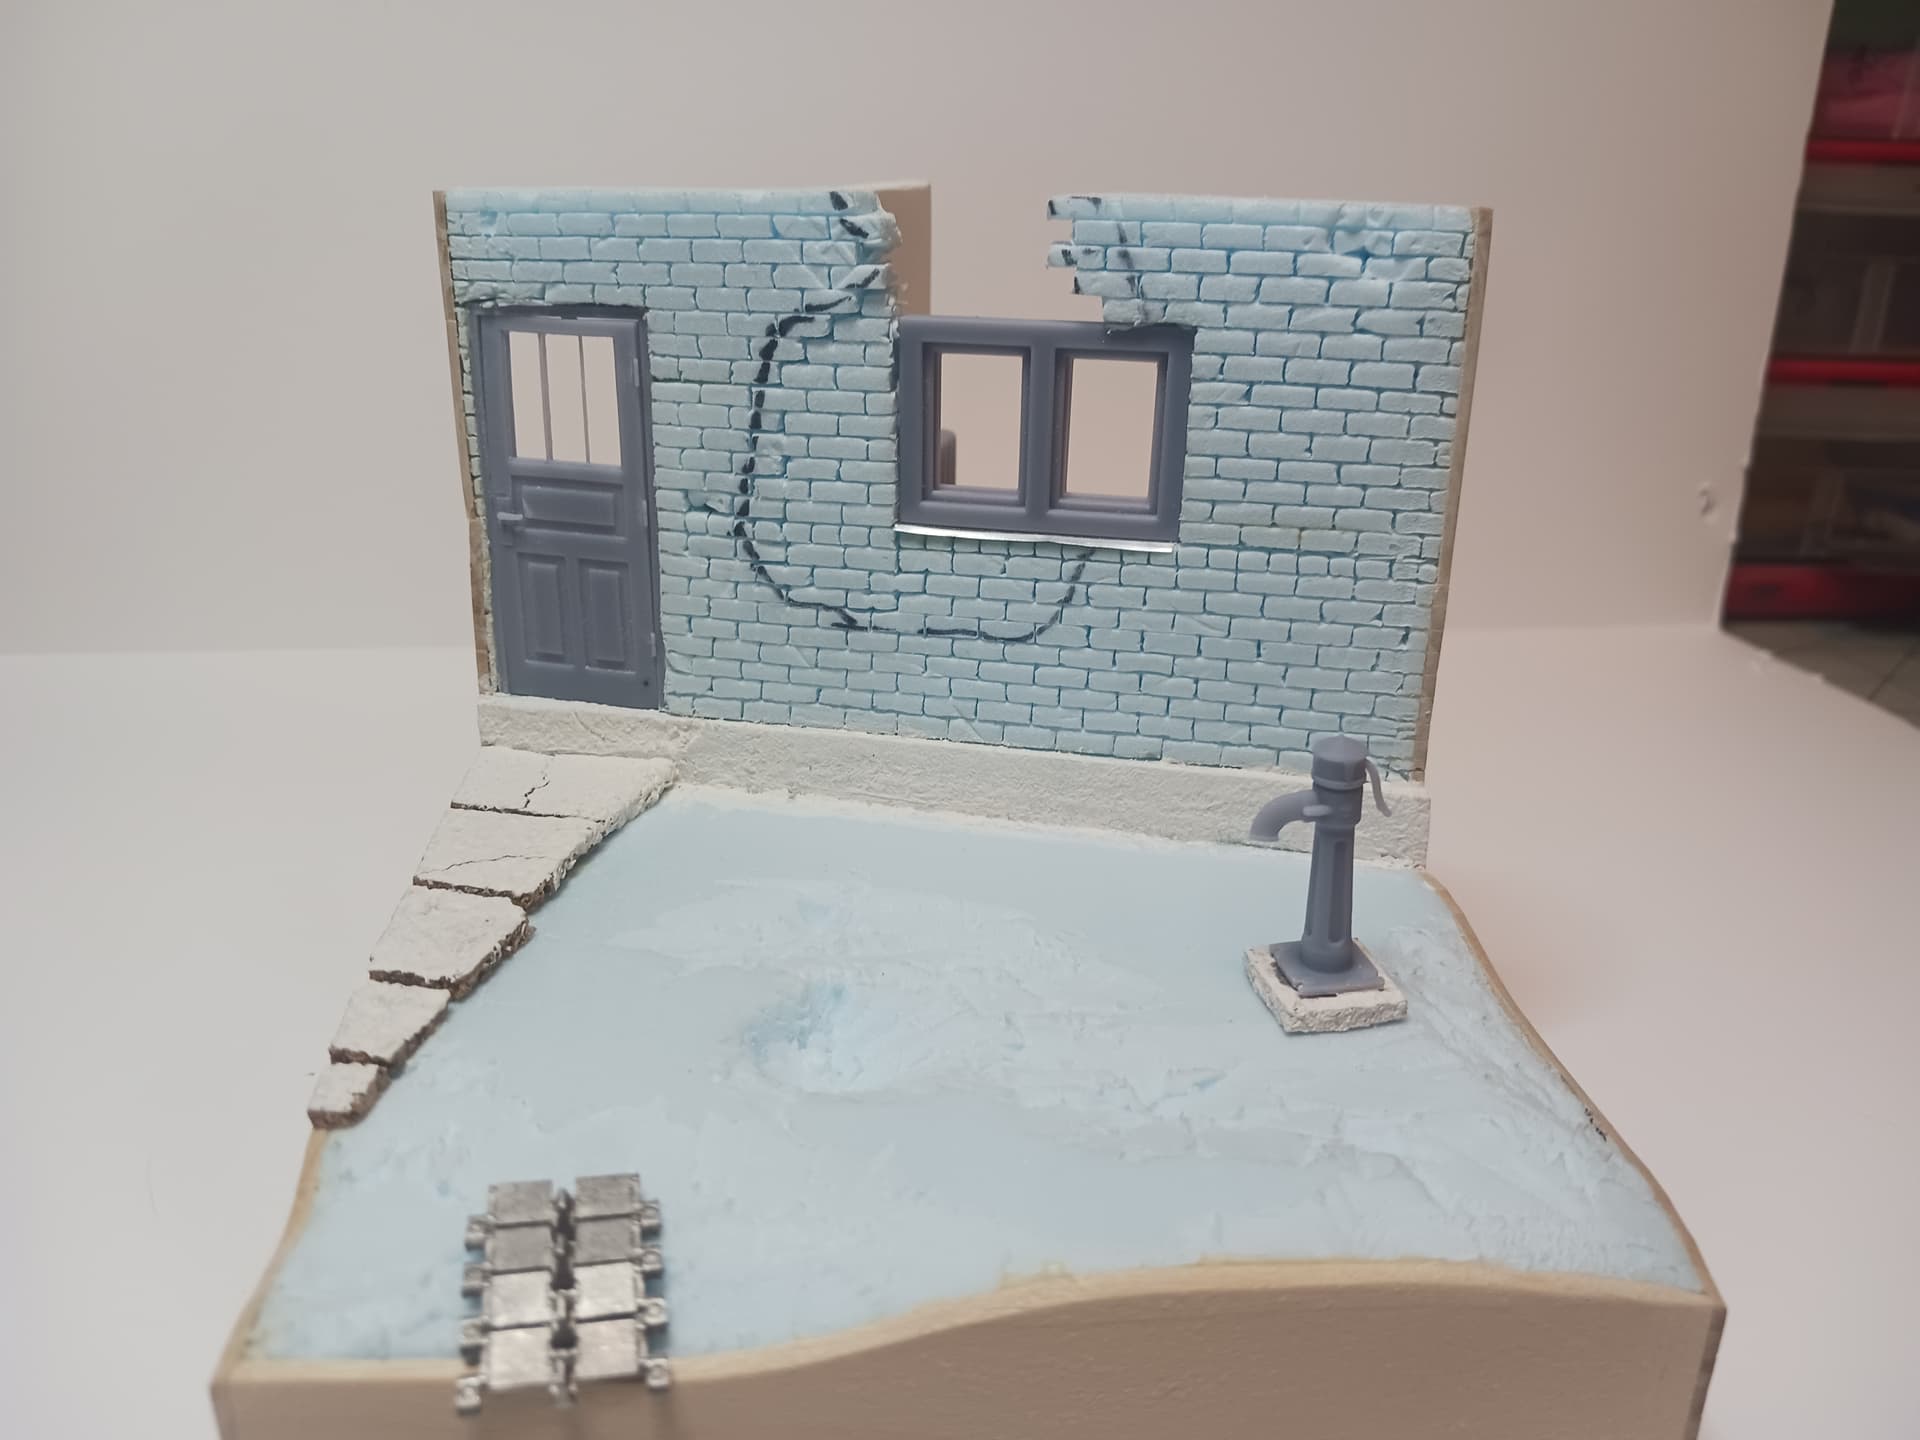
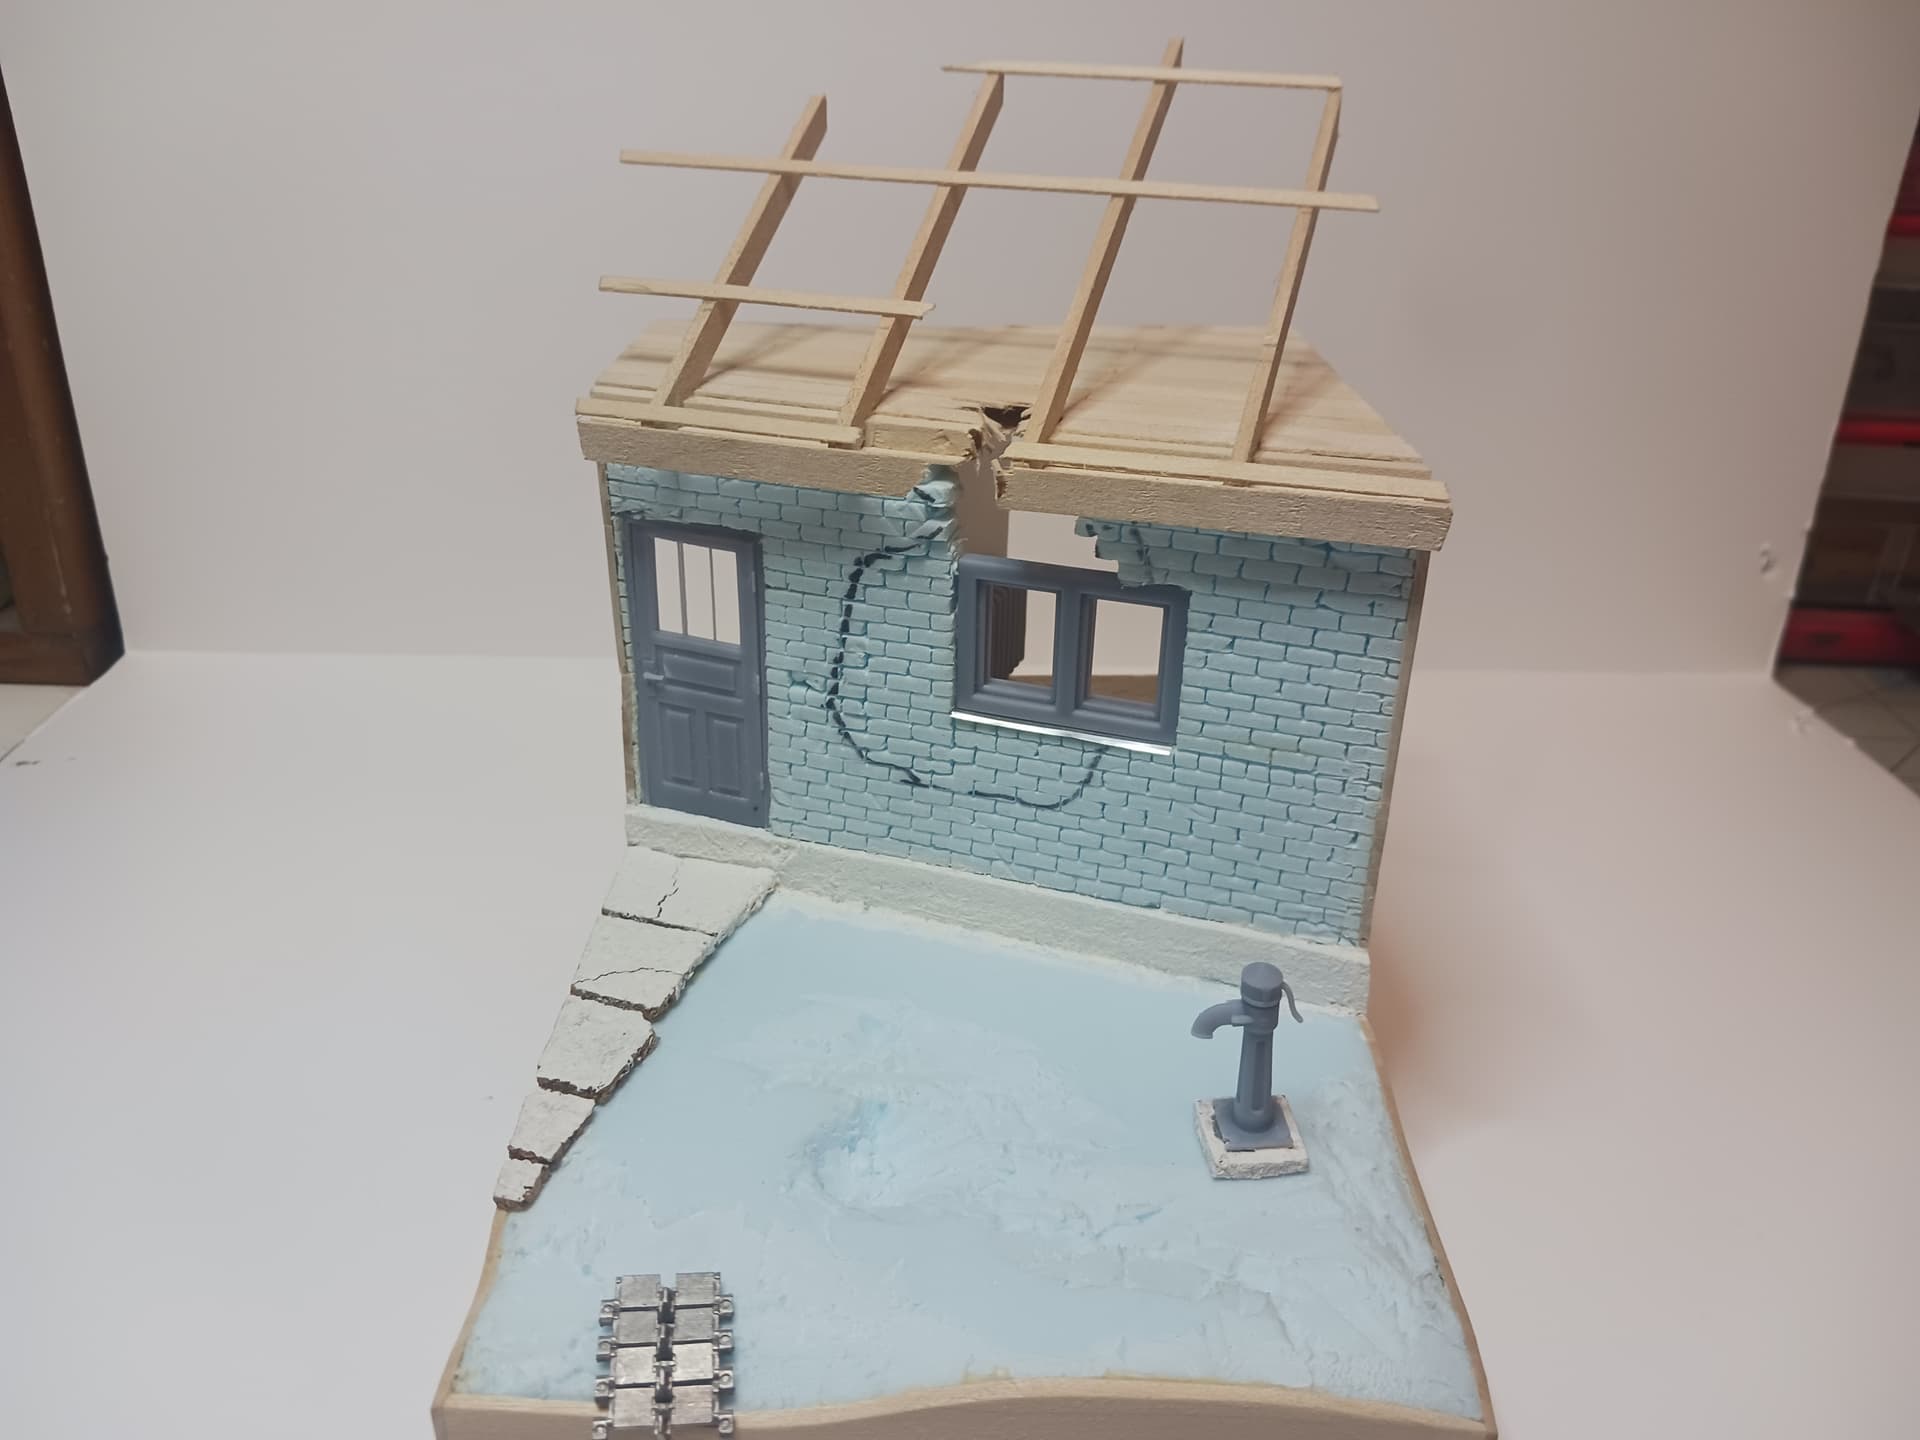
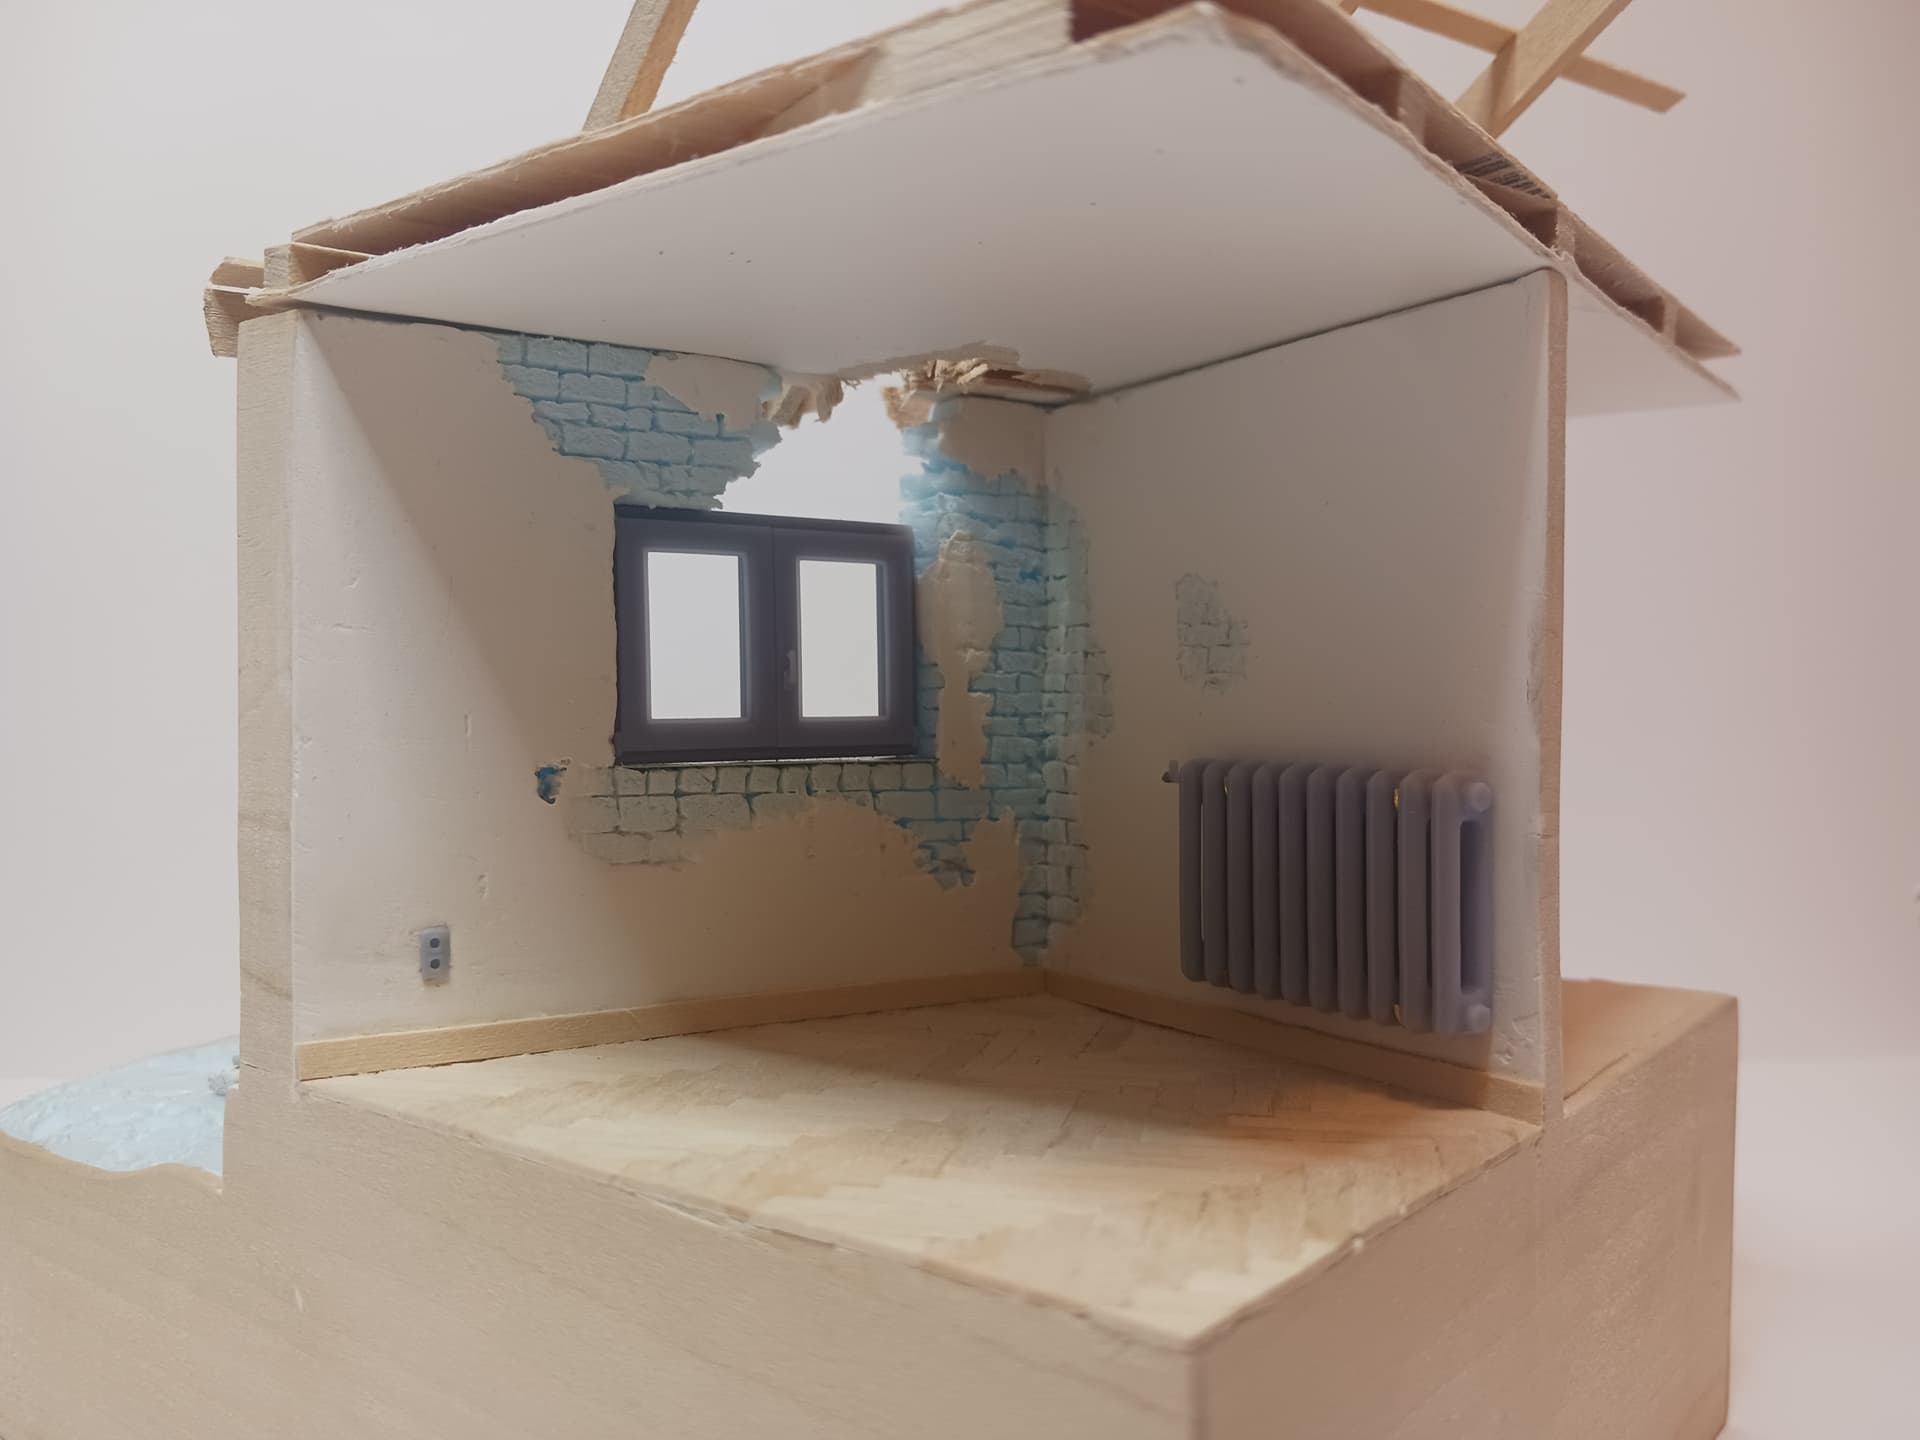
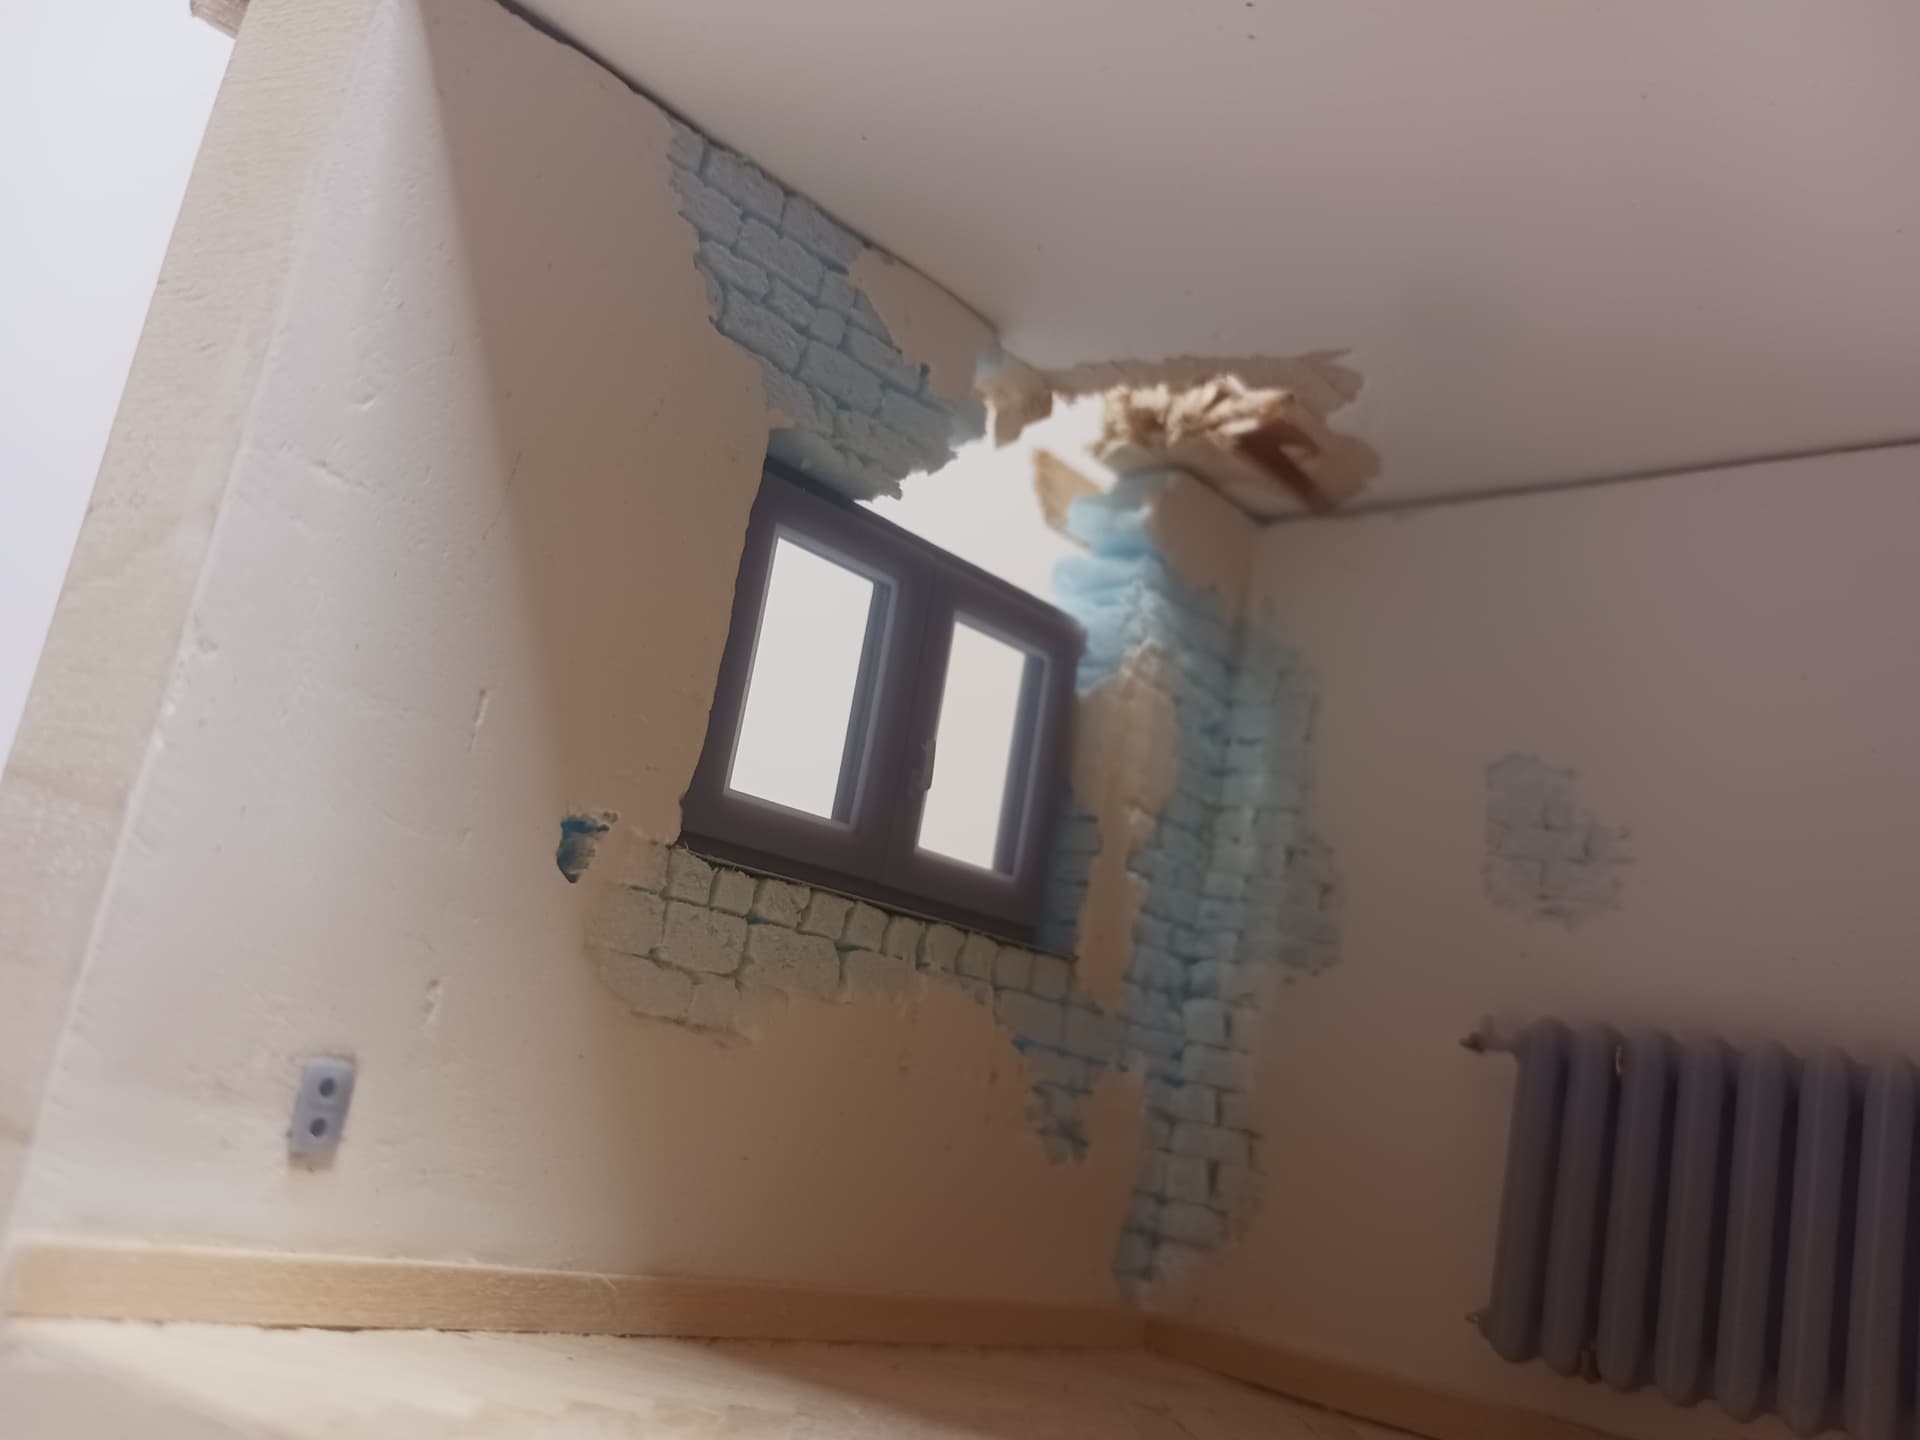
Still lots of work to do but I am starting to really see it coming together!
I am not 100 Percent on what I want to do precisely with the bigger room but I am going off the memory of what I had growing up in similar houses in Ukraine and from my recent visit. As you can see with the table I was thinking a bit of a dining room. The table would have some covers ( the window will also have a broken curtain), plates, or salt and pepper shakers. Maybe an ashtray on the window sill. Long story short I want to make it look really lived in.
What are your thoughts or criticisms?
14 Likes
I like what you are doing on the interior- like a mini-building site at the minute! The peeling rendering on the inside around the window looks awesome and the little power socket in the wall is a great, realistic touch.
1 Like
Excellent scenario!
2 Likes
Beautiful so far, I’m hooked! Looking frwrd to the next installment.
Cheers Dave ![]()
1 Like
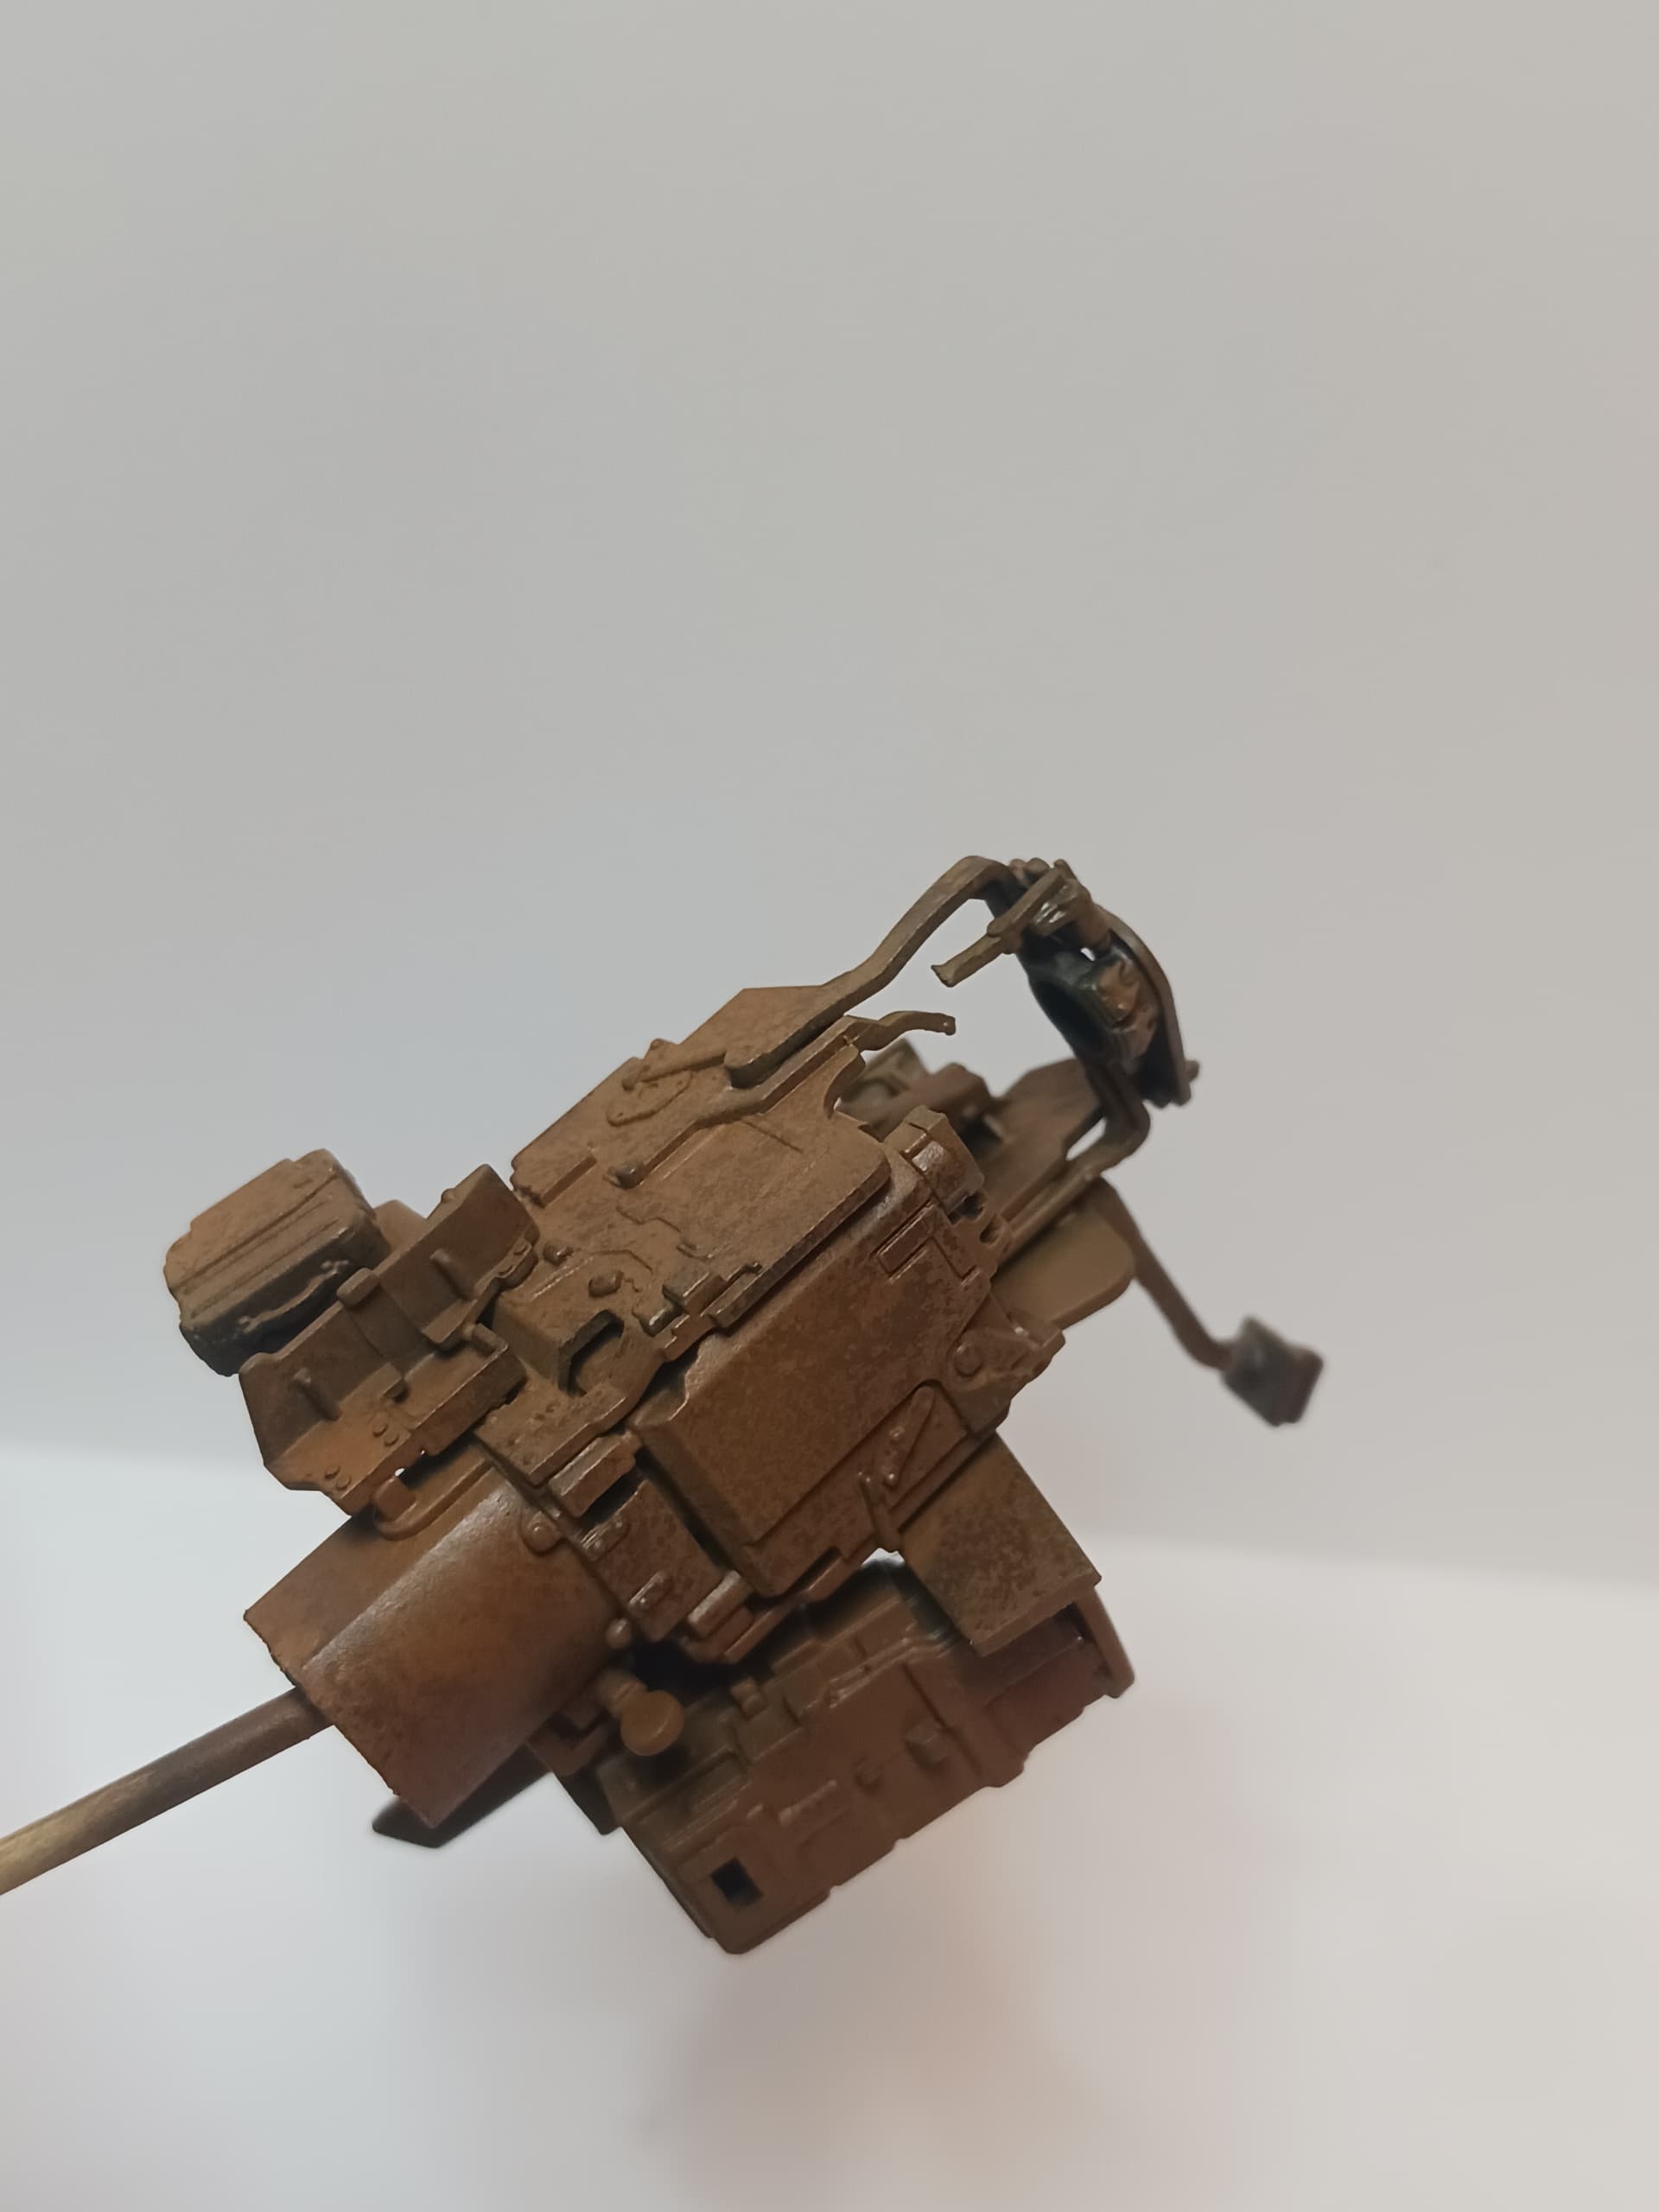
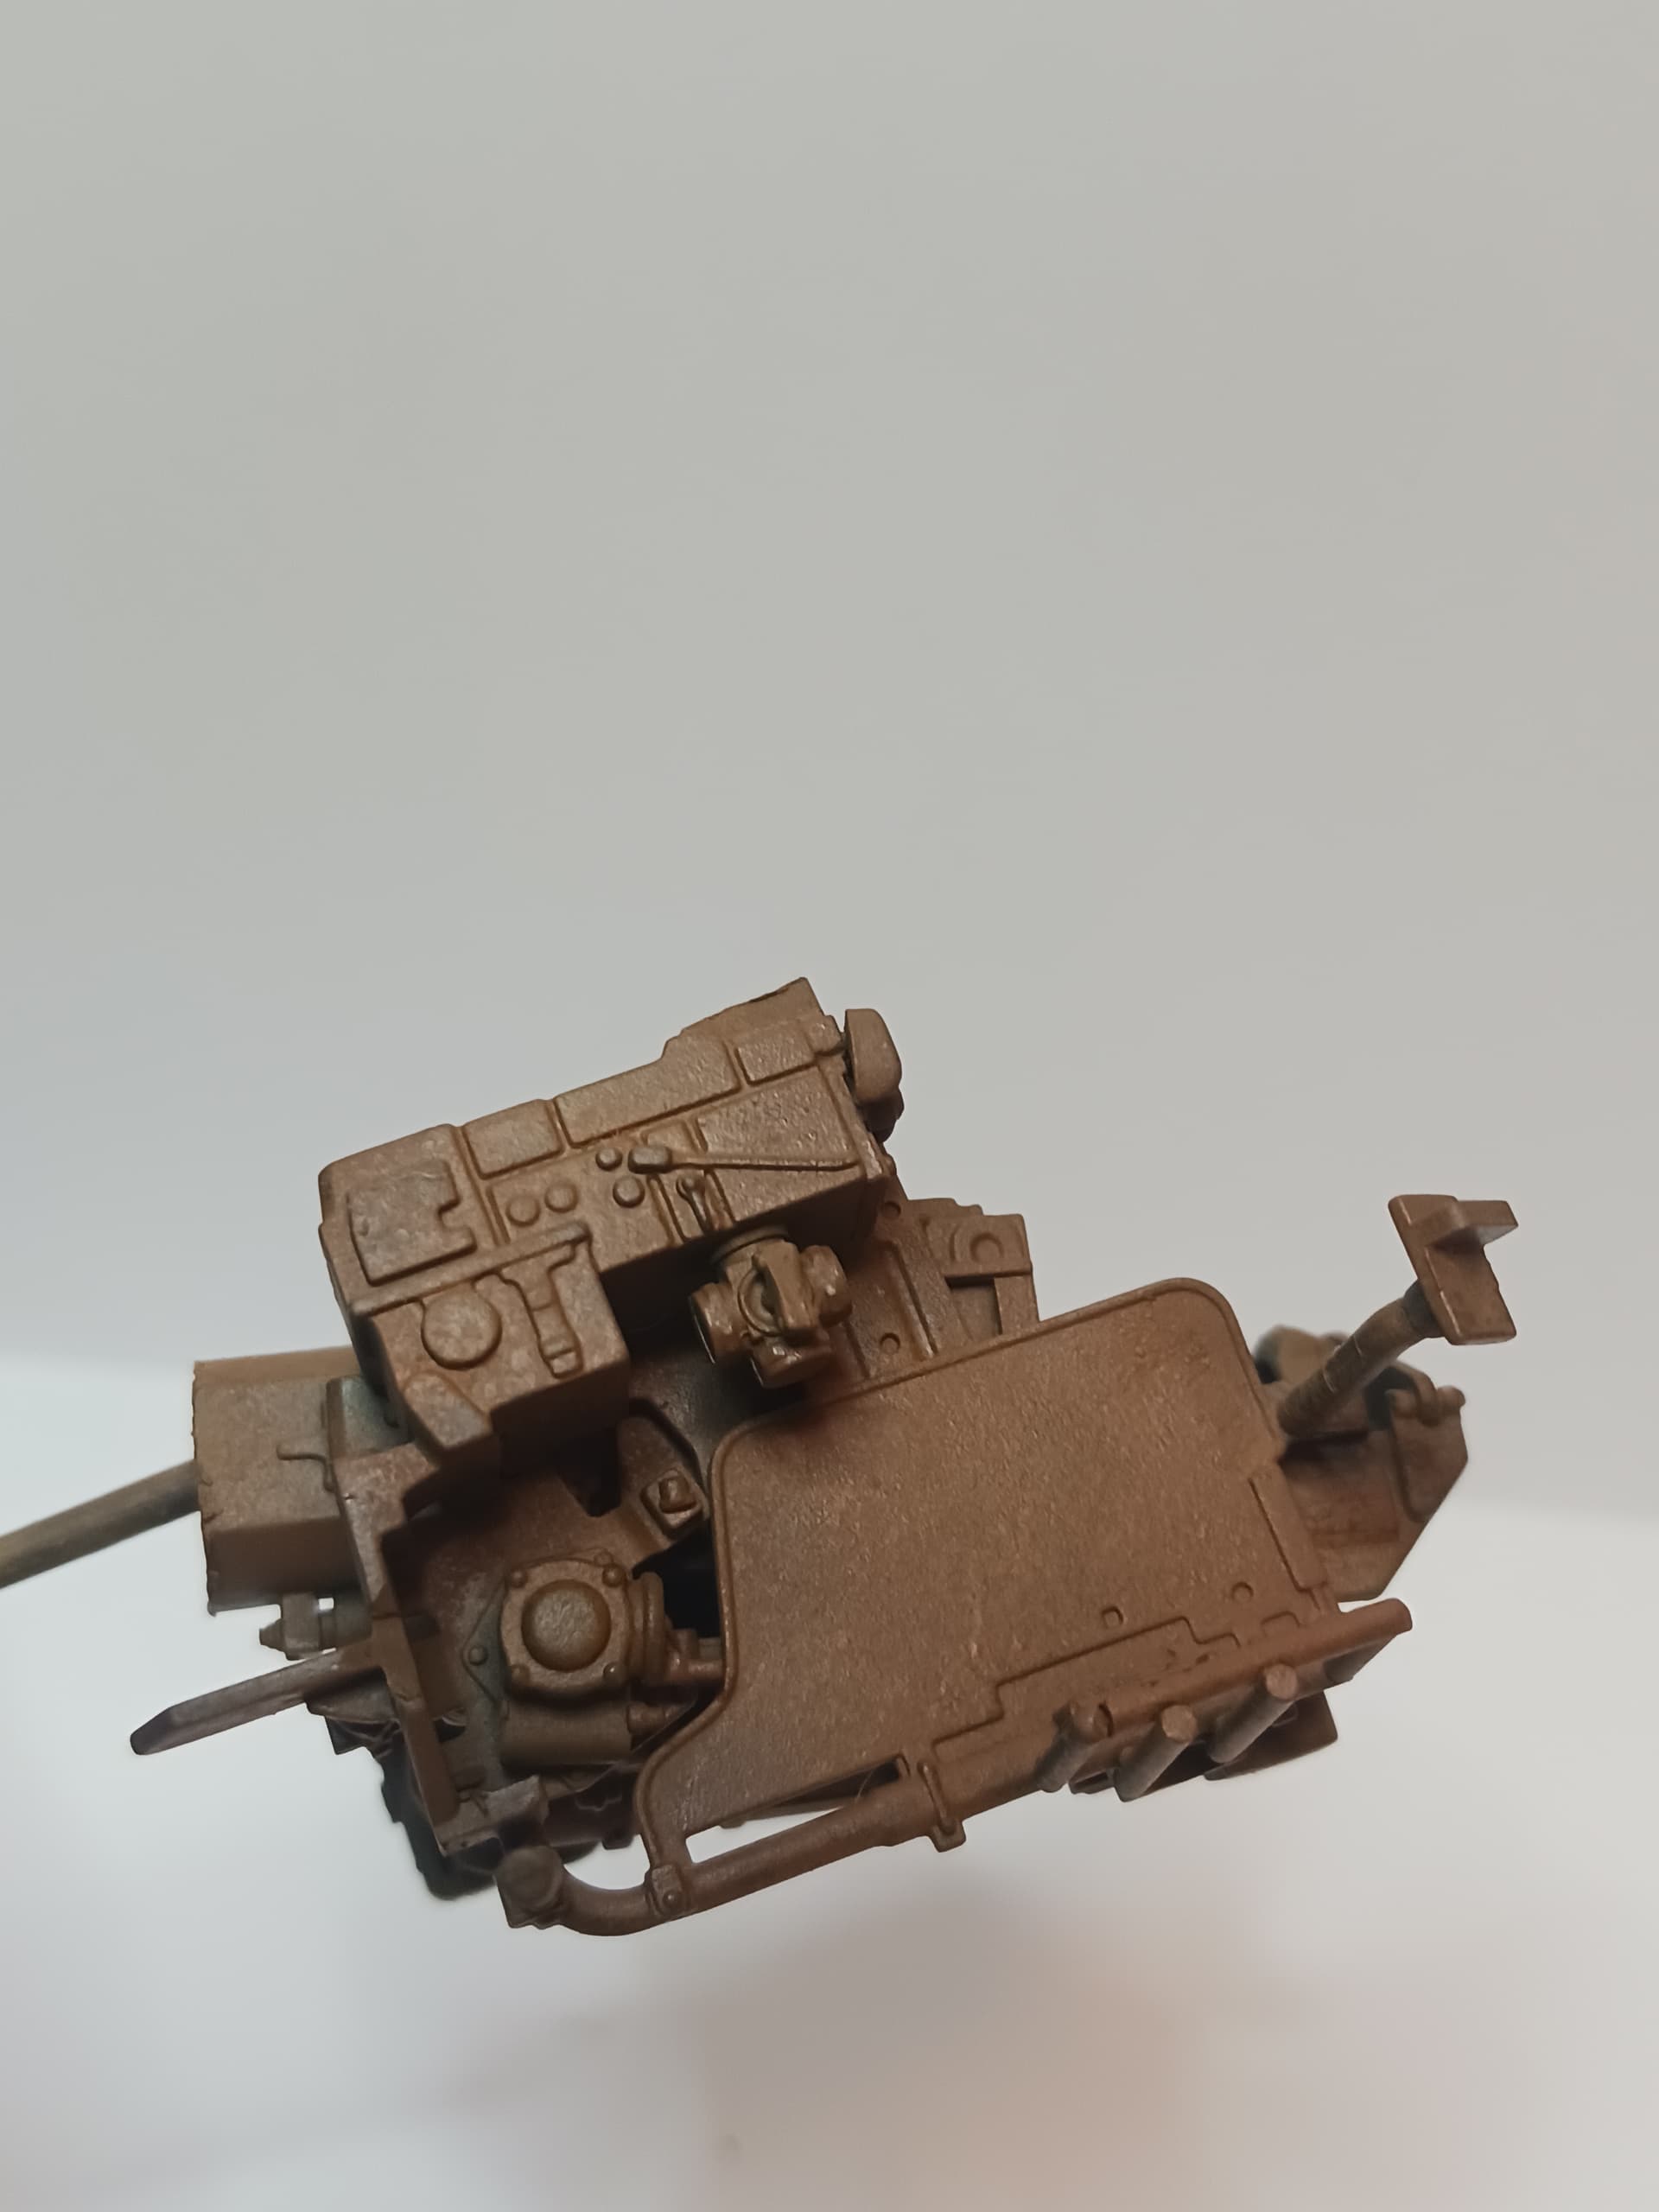
A little more time and a little more progress. I think I am calling the turret done! after some surgery and 3d printing, I was able to insert the inside parts from the amusing hobby kit which I honestly was a bit disappointed with. While being quite accurate for the internal parts the actual quality of the model is not very good, some parts I found to be a bit oversimplified as well. The hull looks great though!
Anyways here is what it looks like:

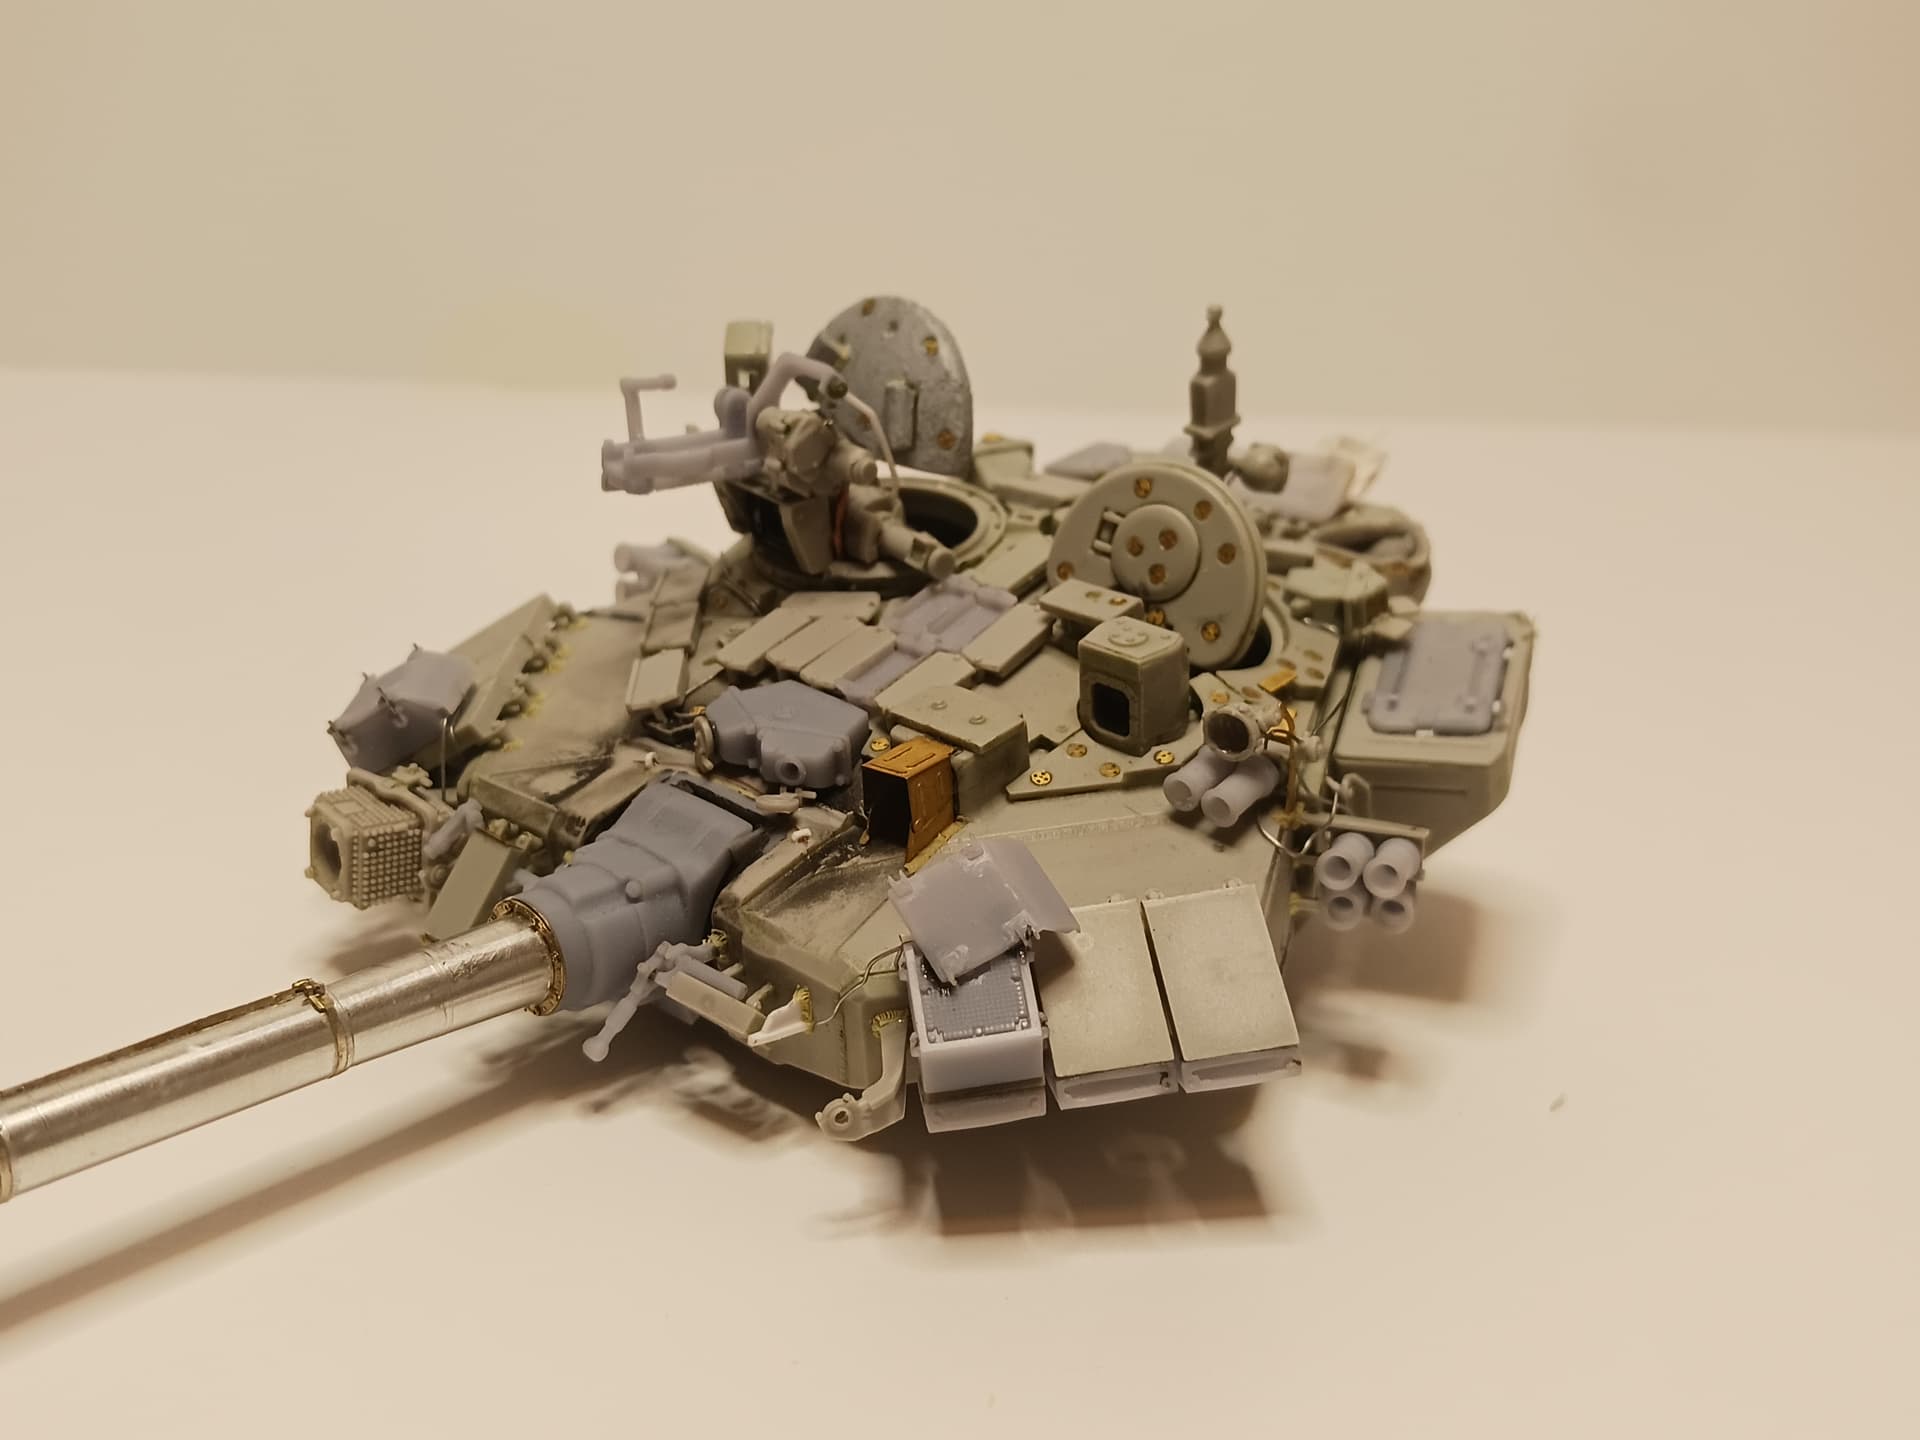
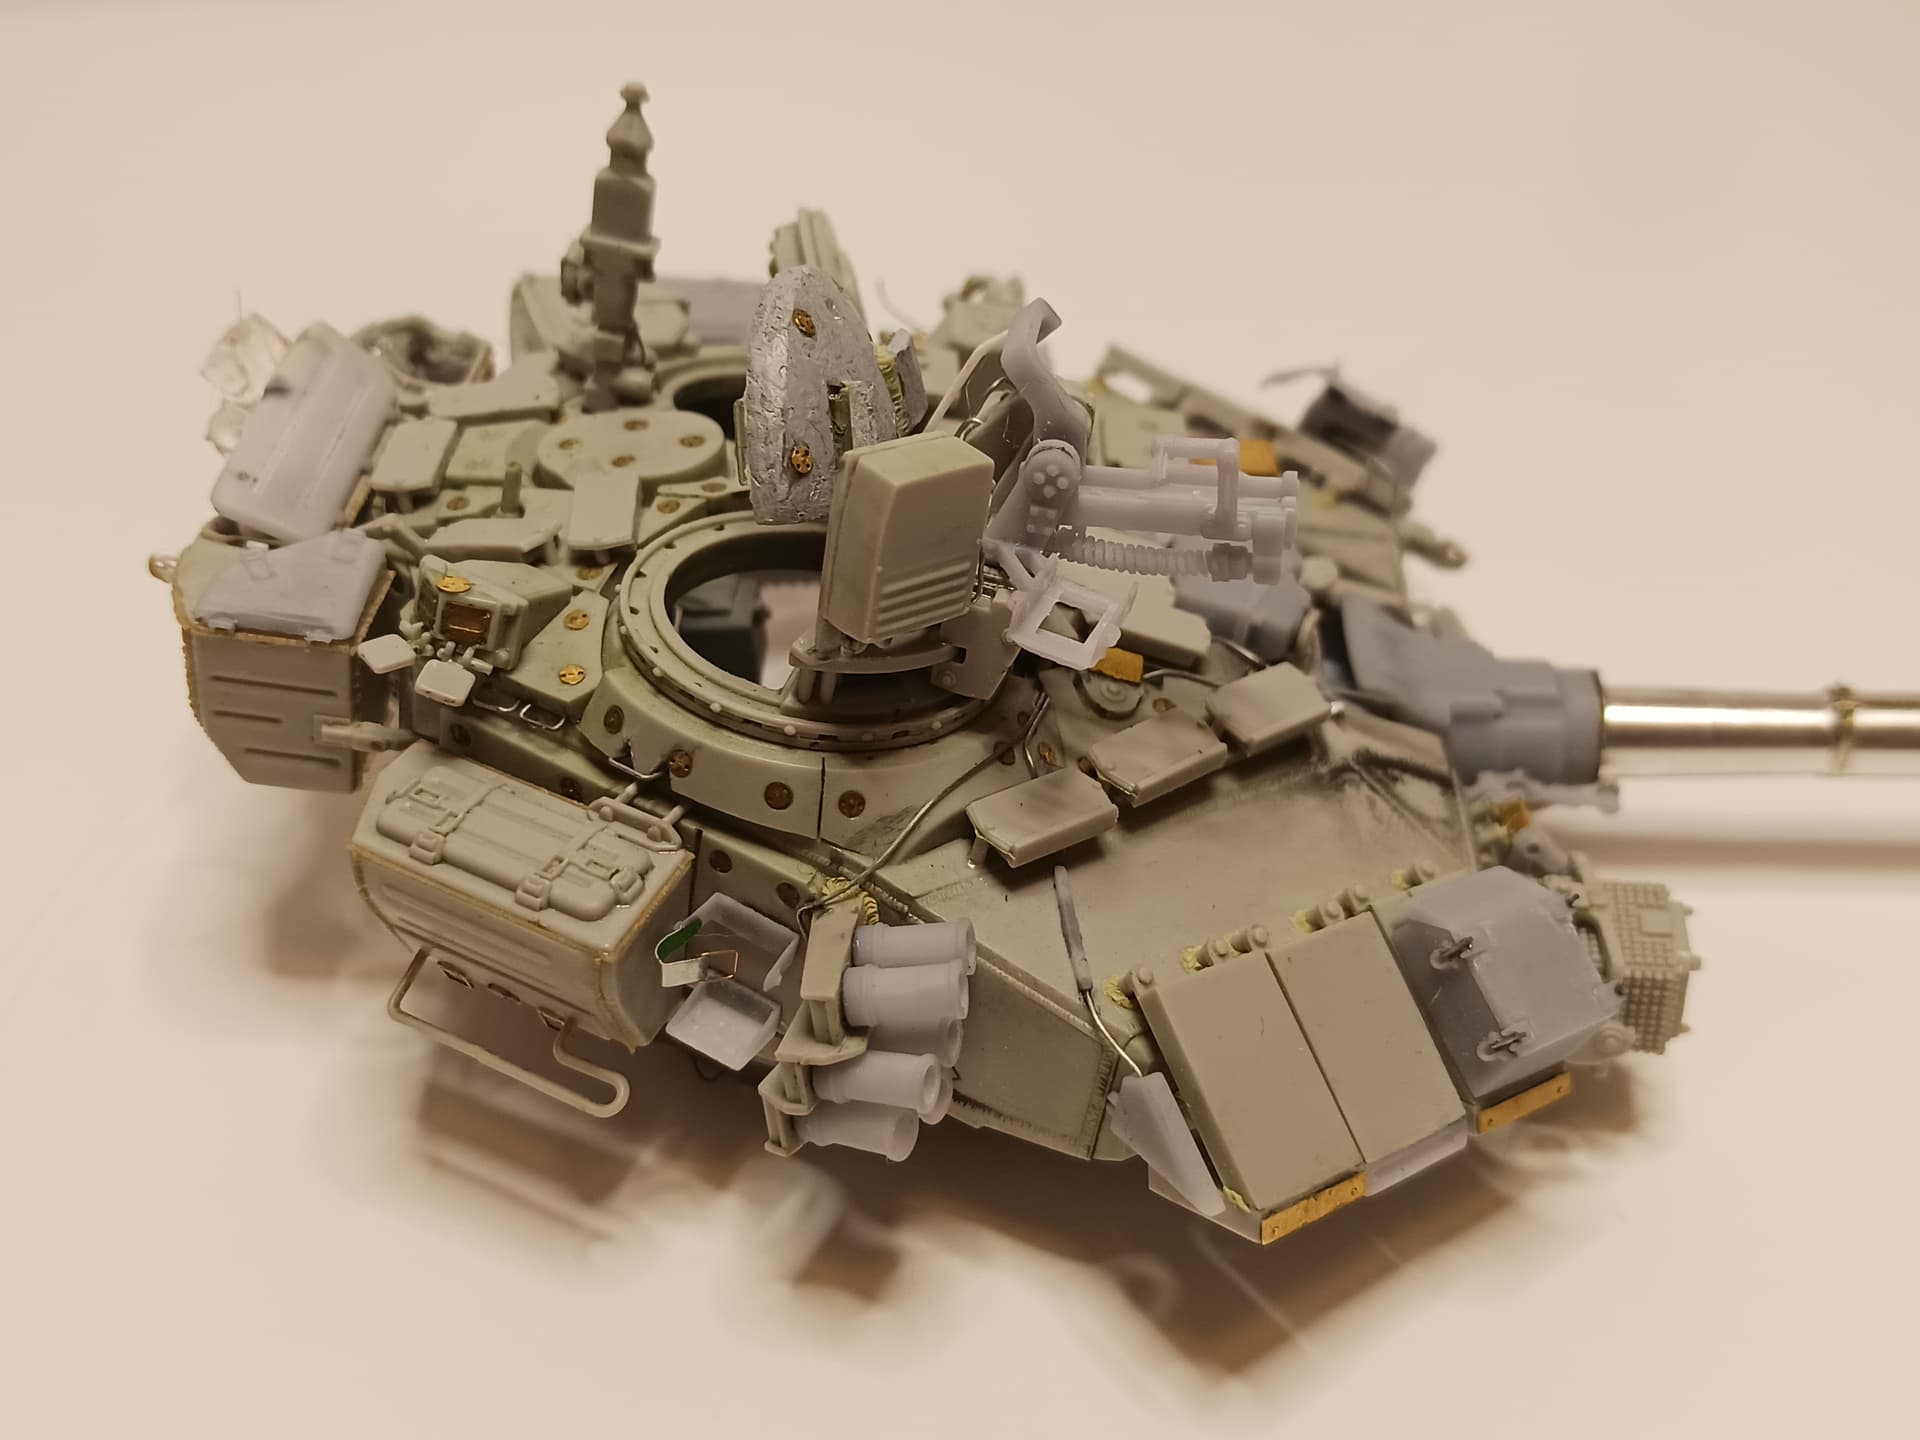
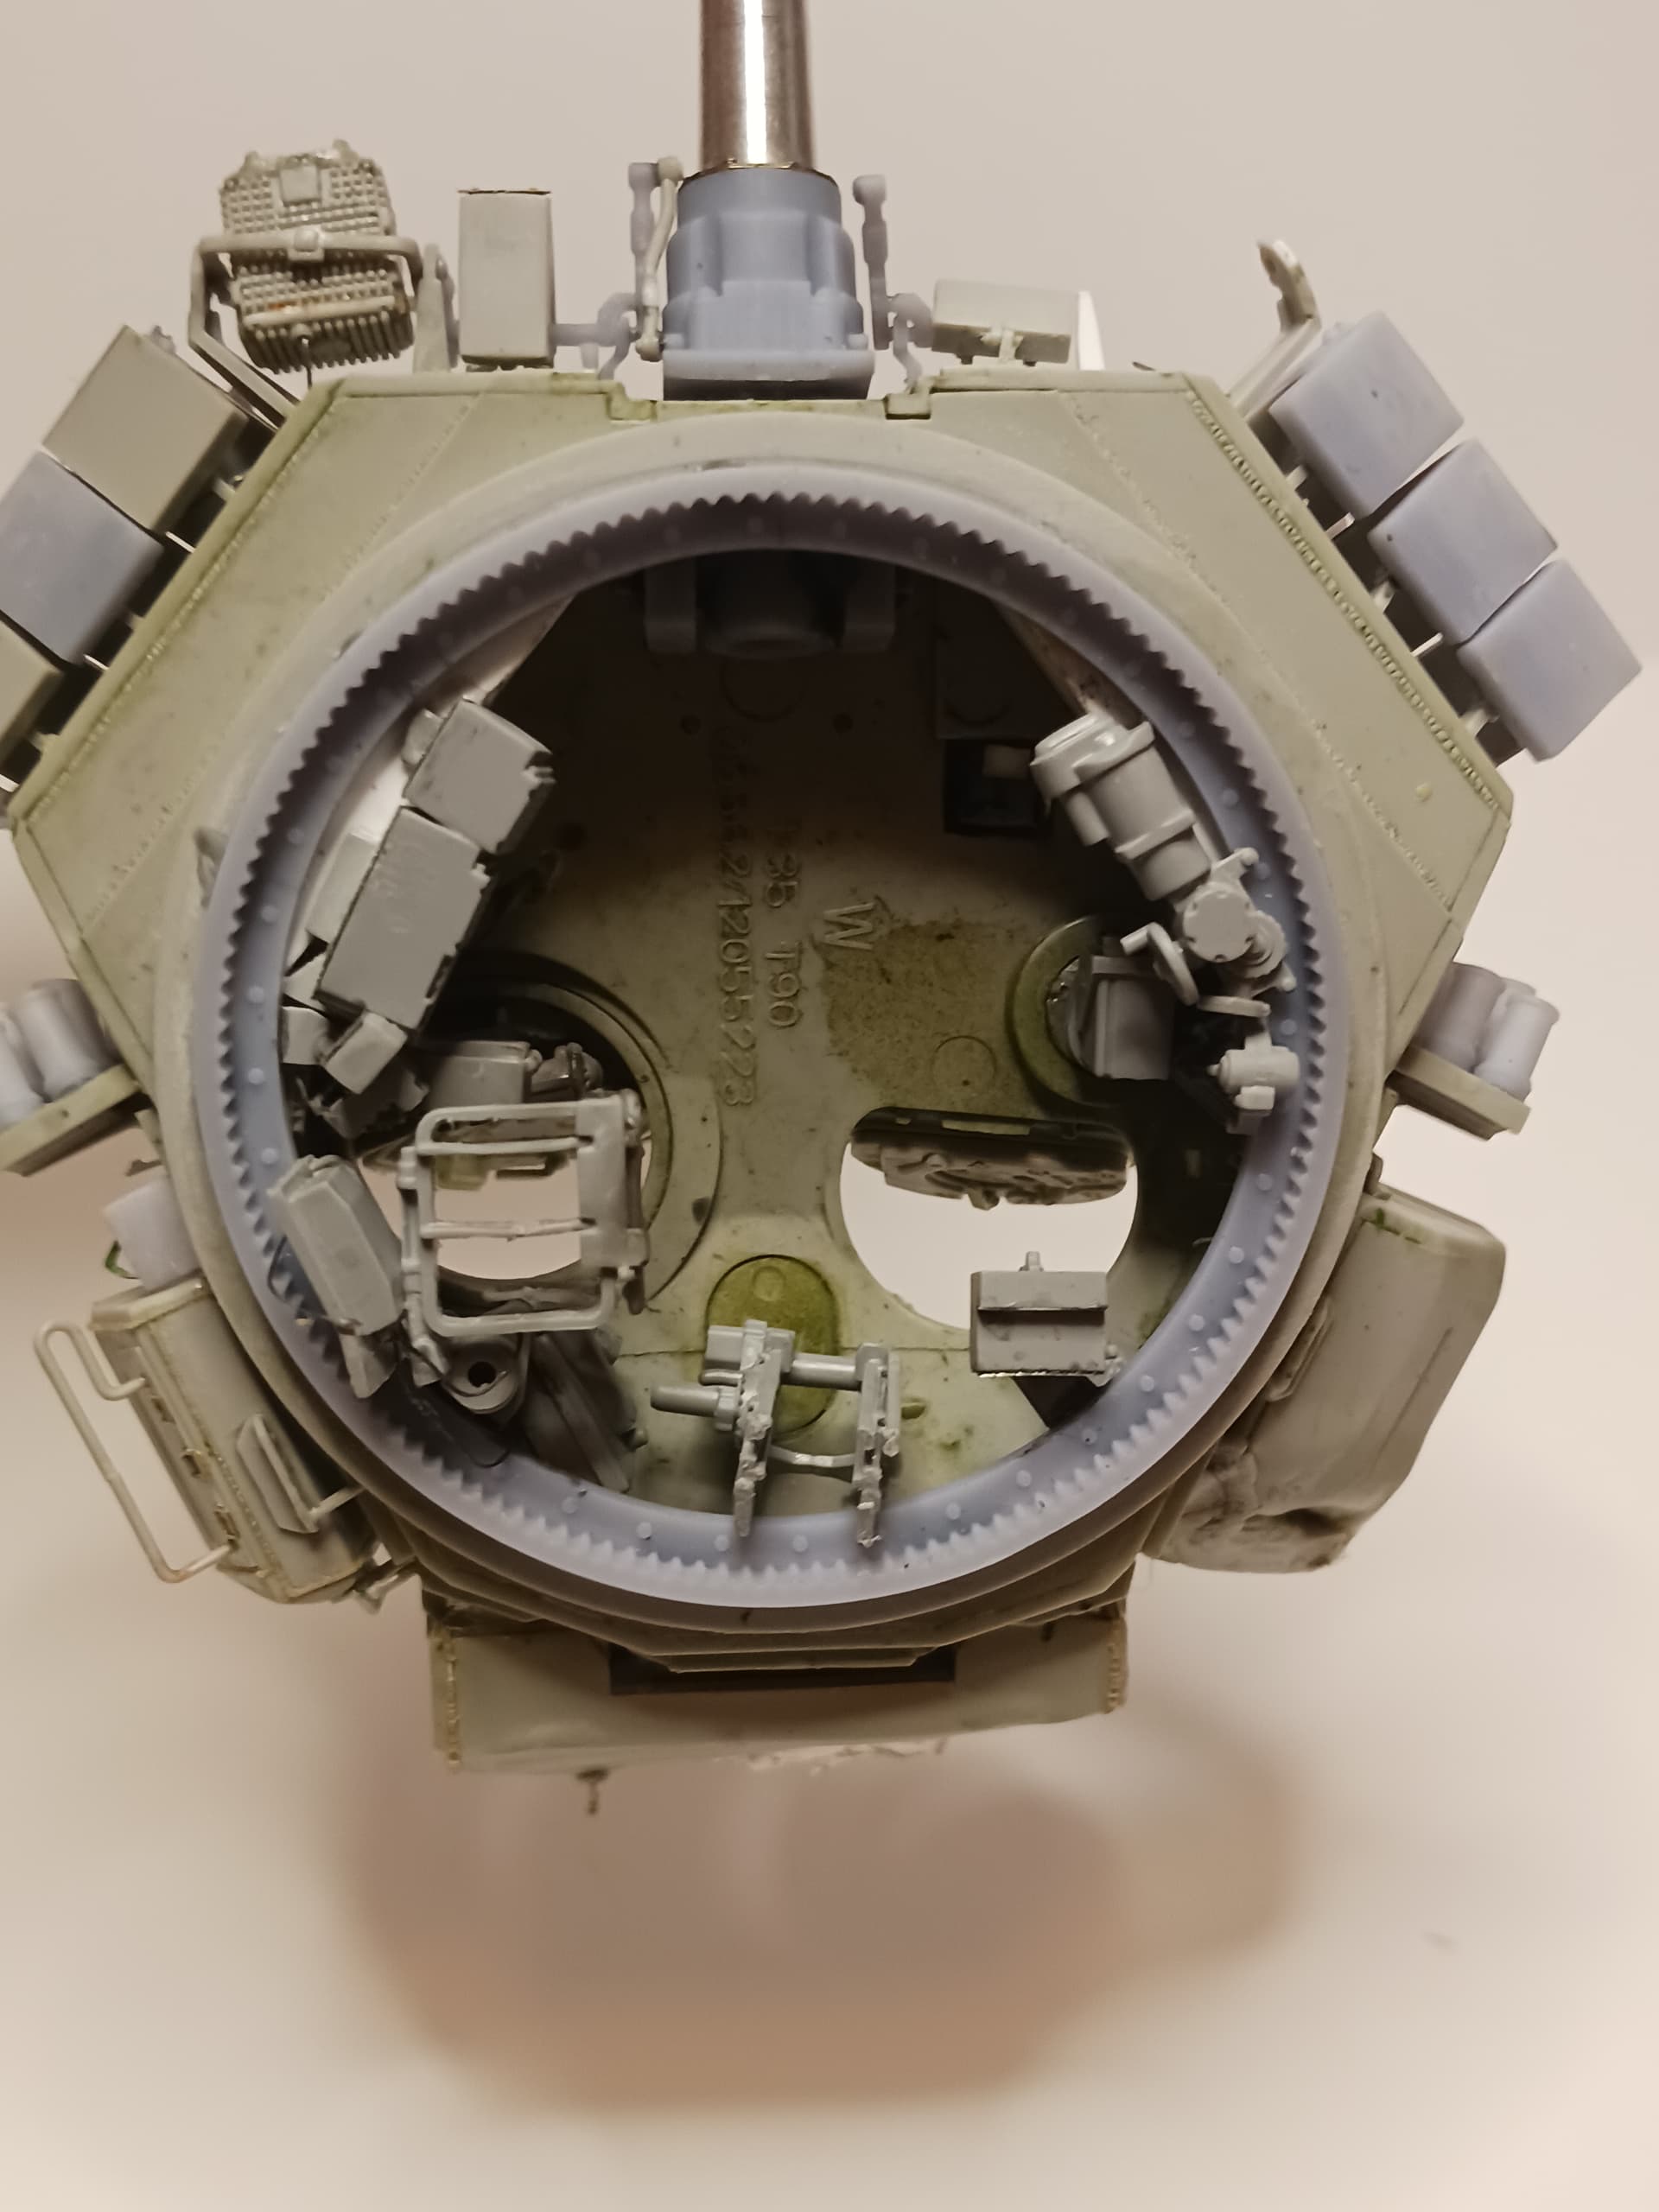
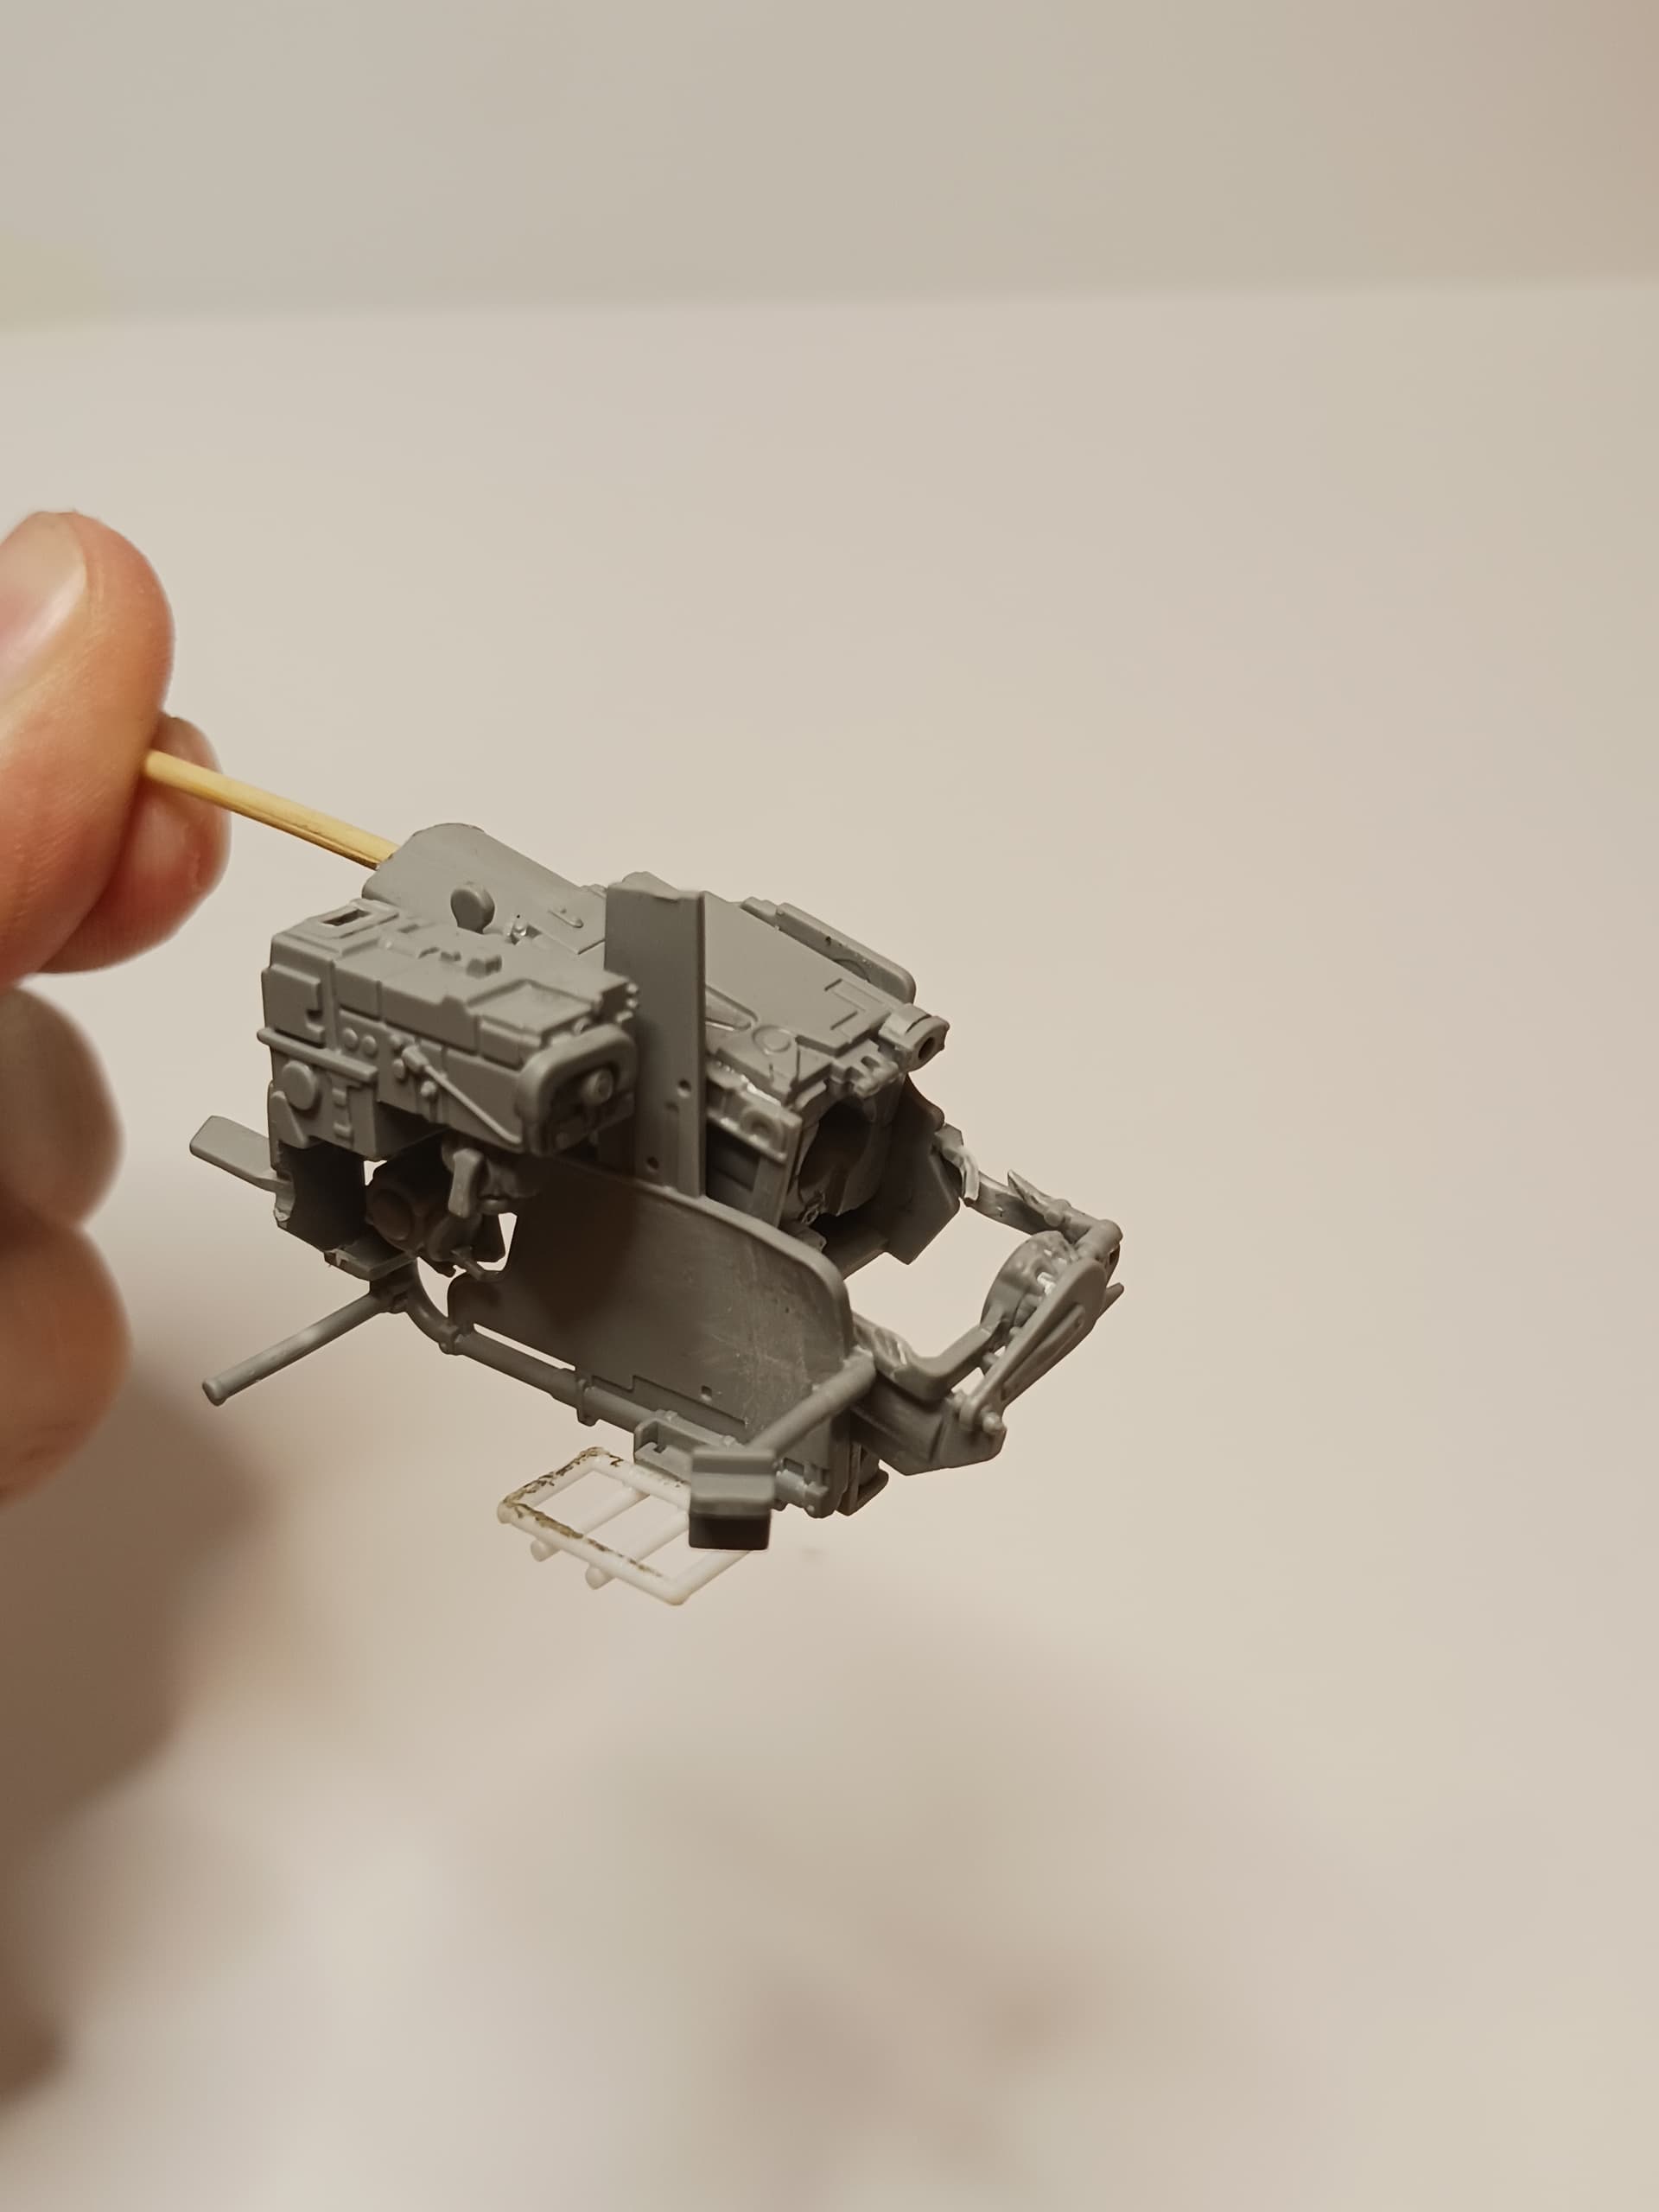
I kept the breach and gunners station separate for painting. All that is left to do is to clean up some superglue and wash it!
I also laid down the grass and some leaves, and debris on the ground. I do plan to airbrush the grass like on my other models so this is not the final colour. I also plan to put in other plants and flowers, I just wanted the grass down first as it will be painted with the rest of the house.

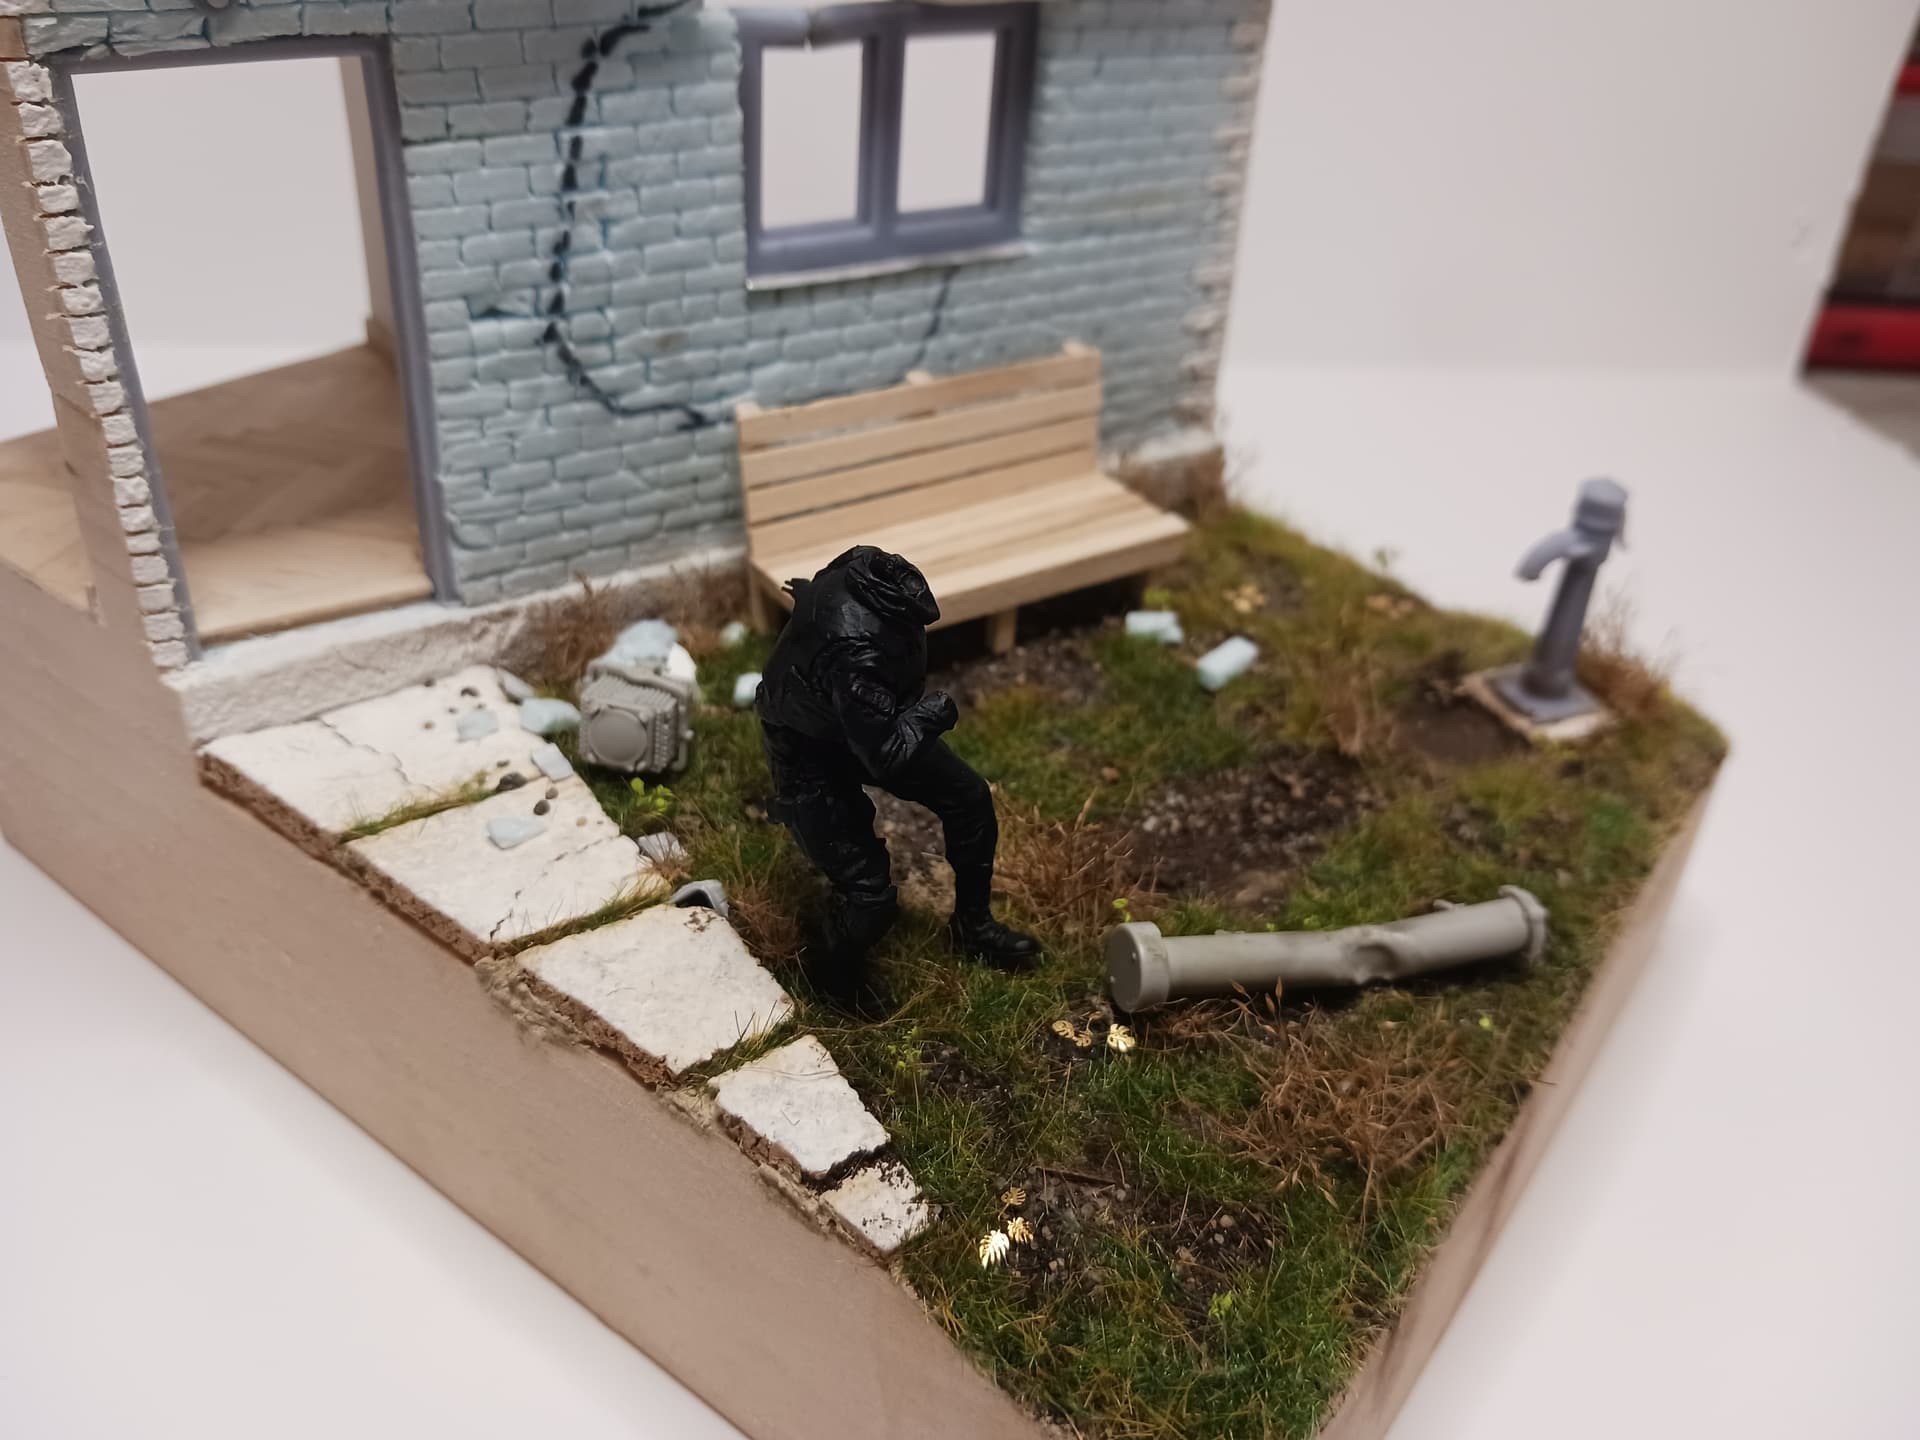
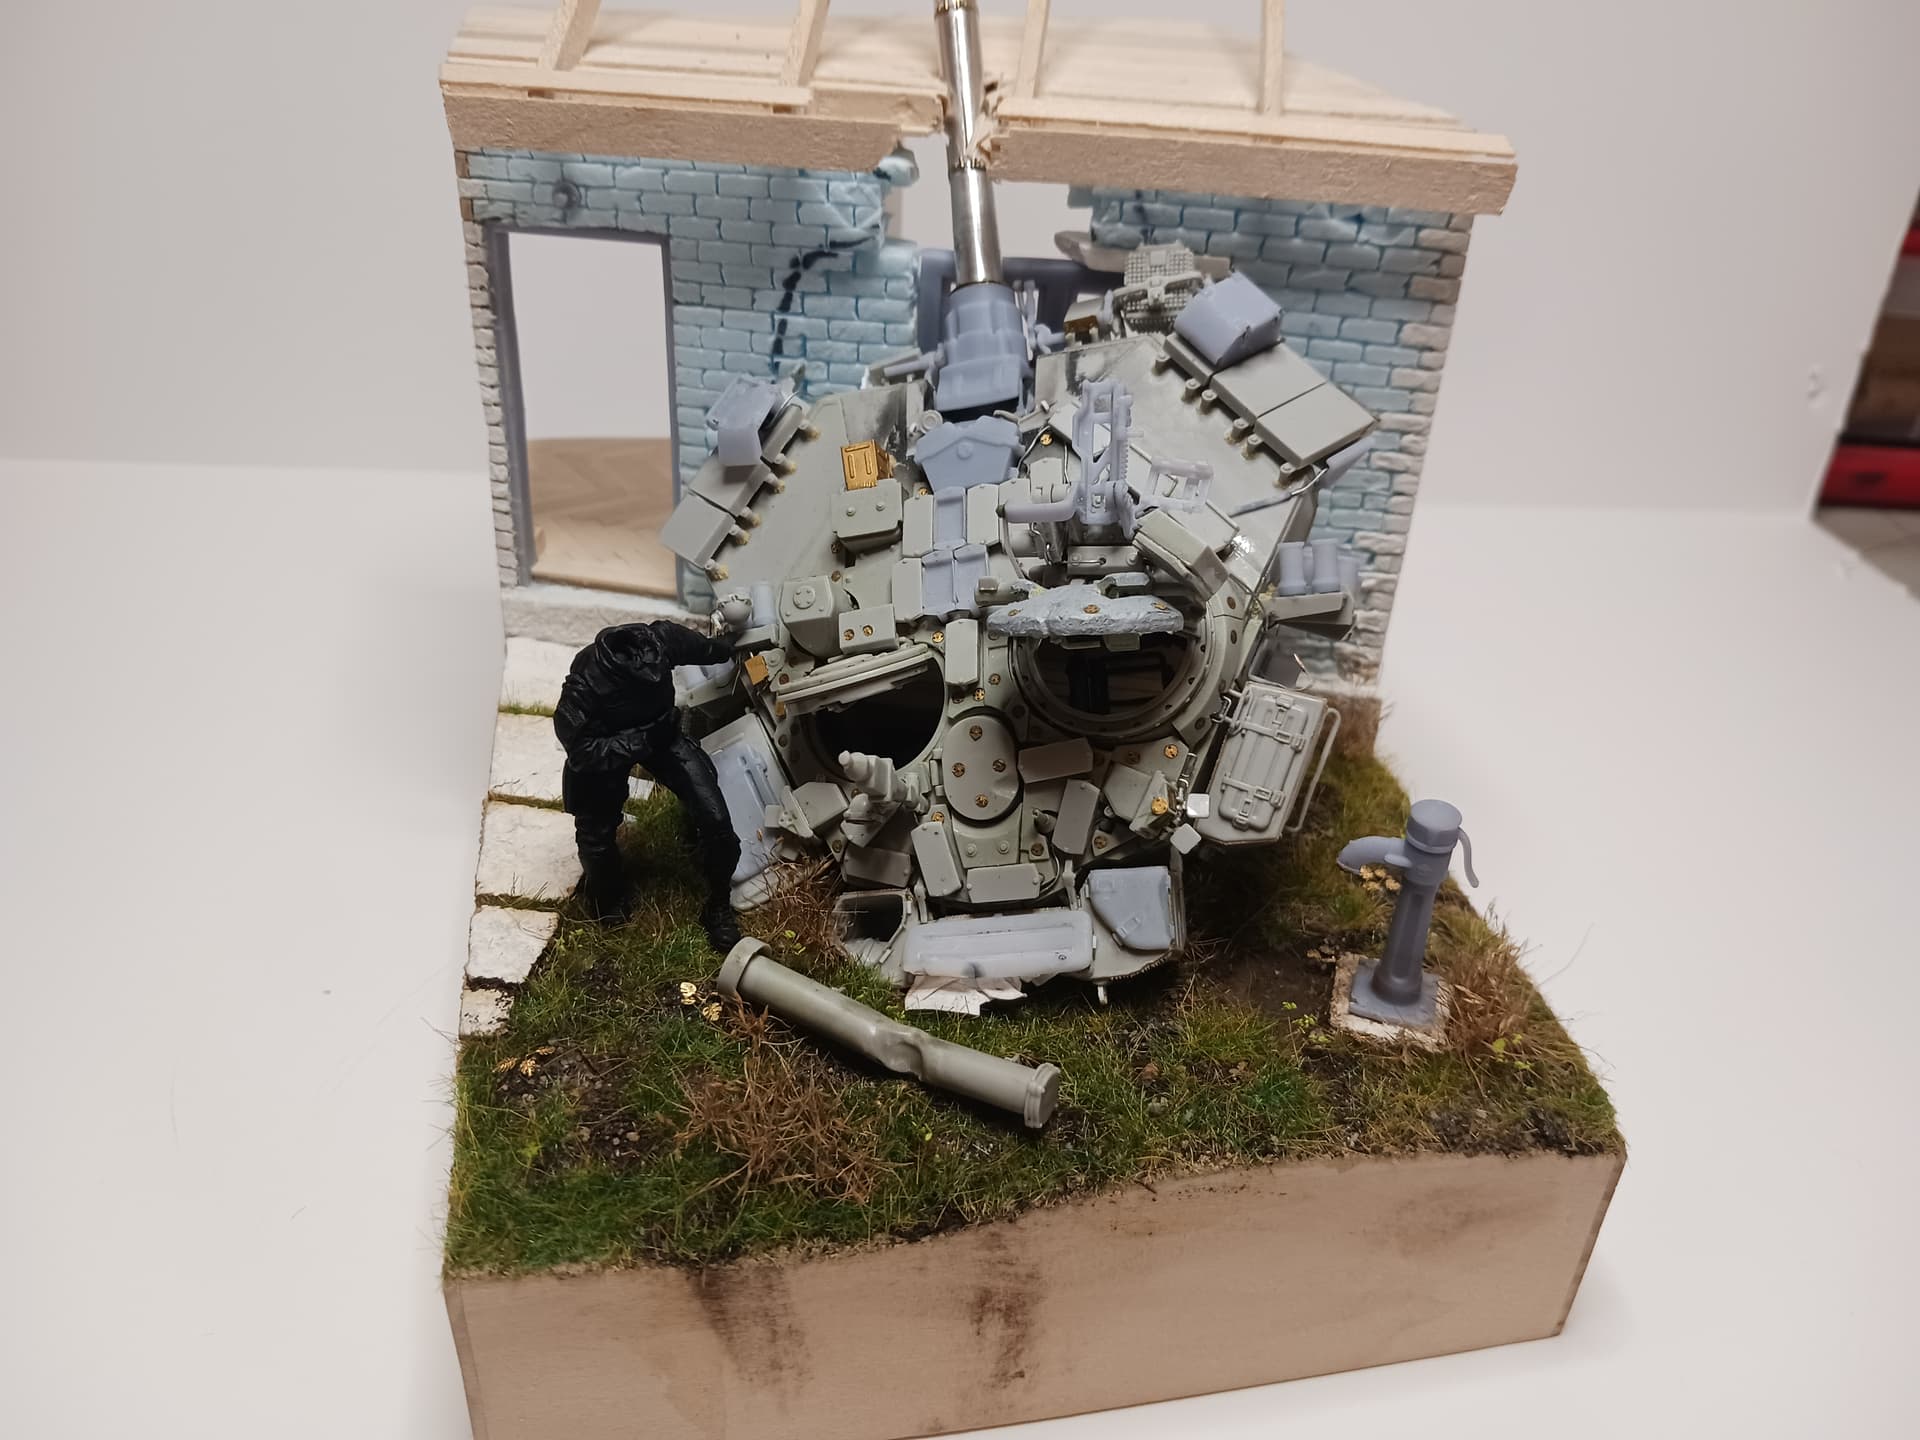
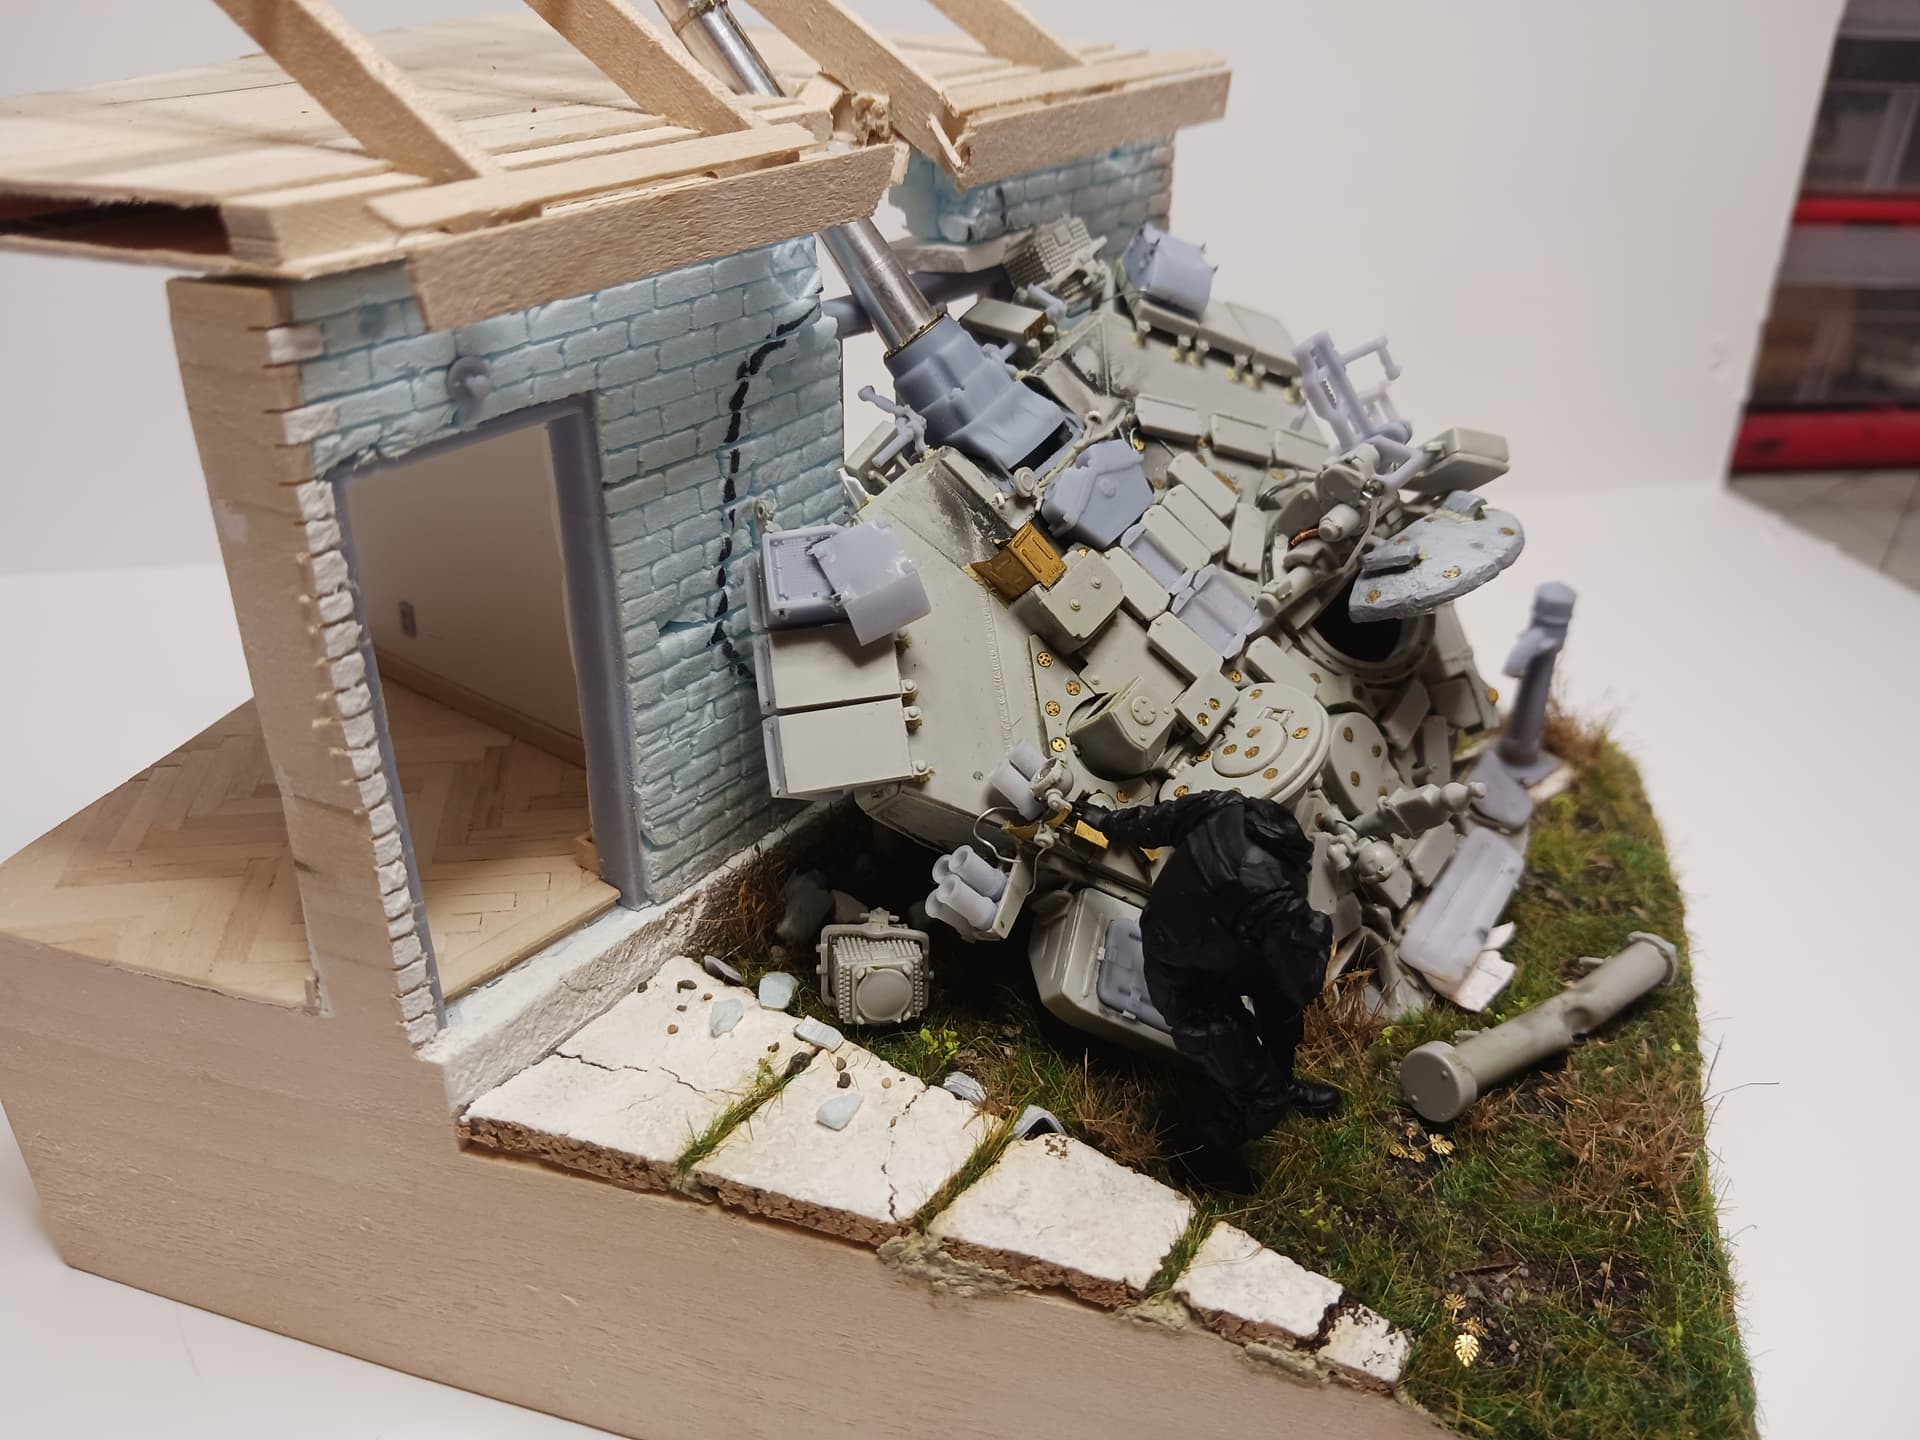
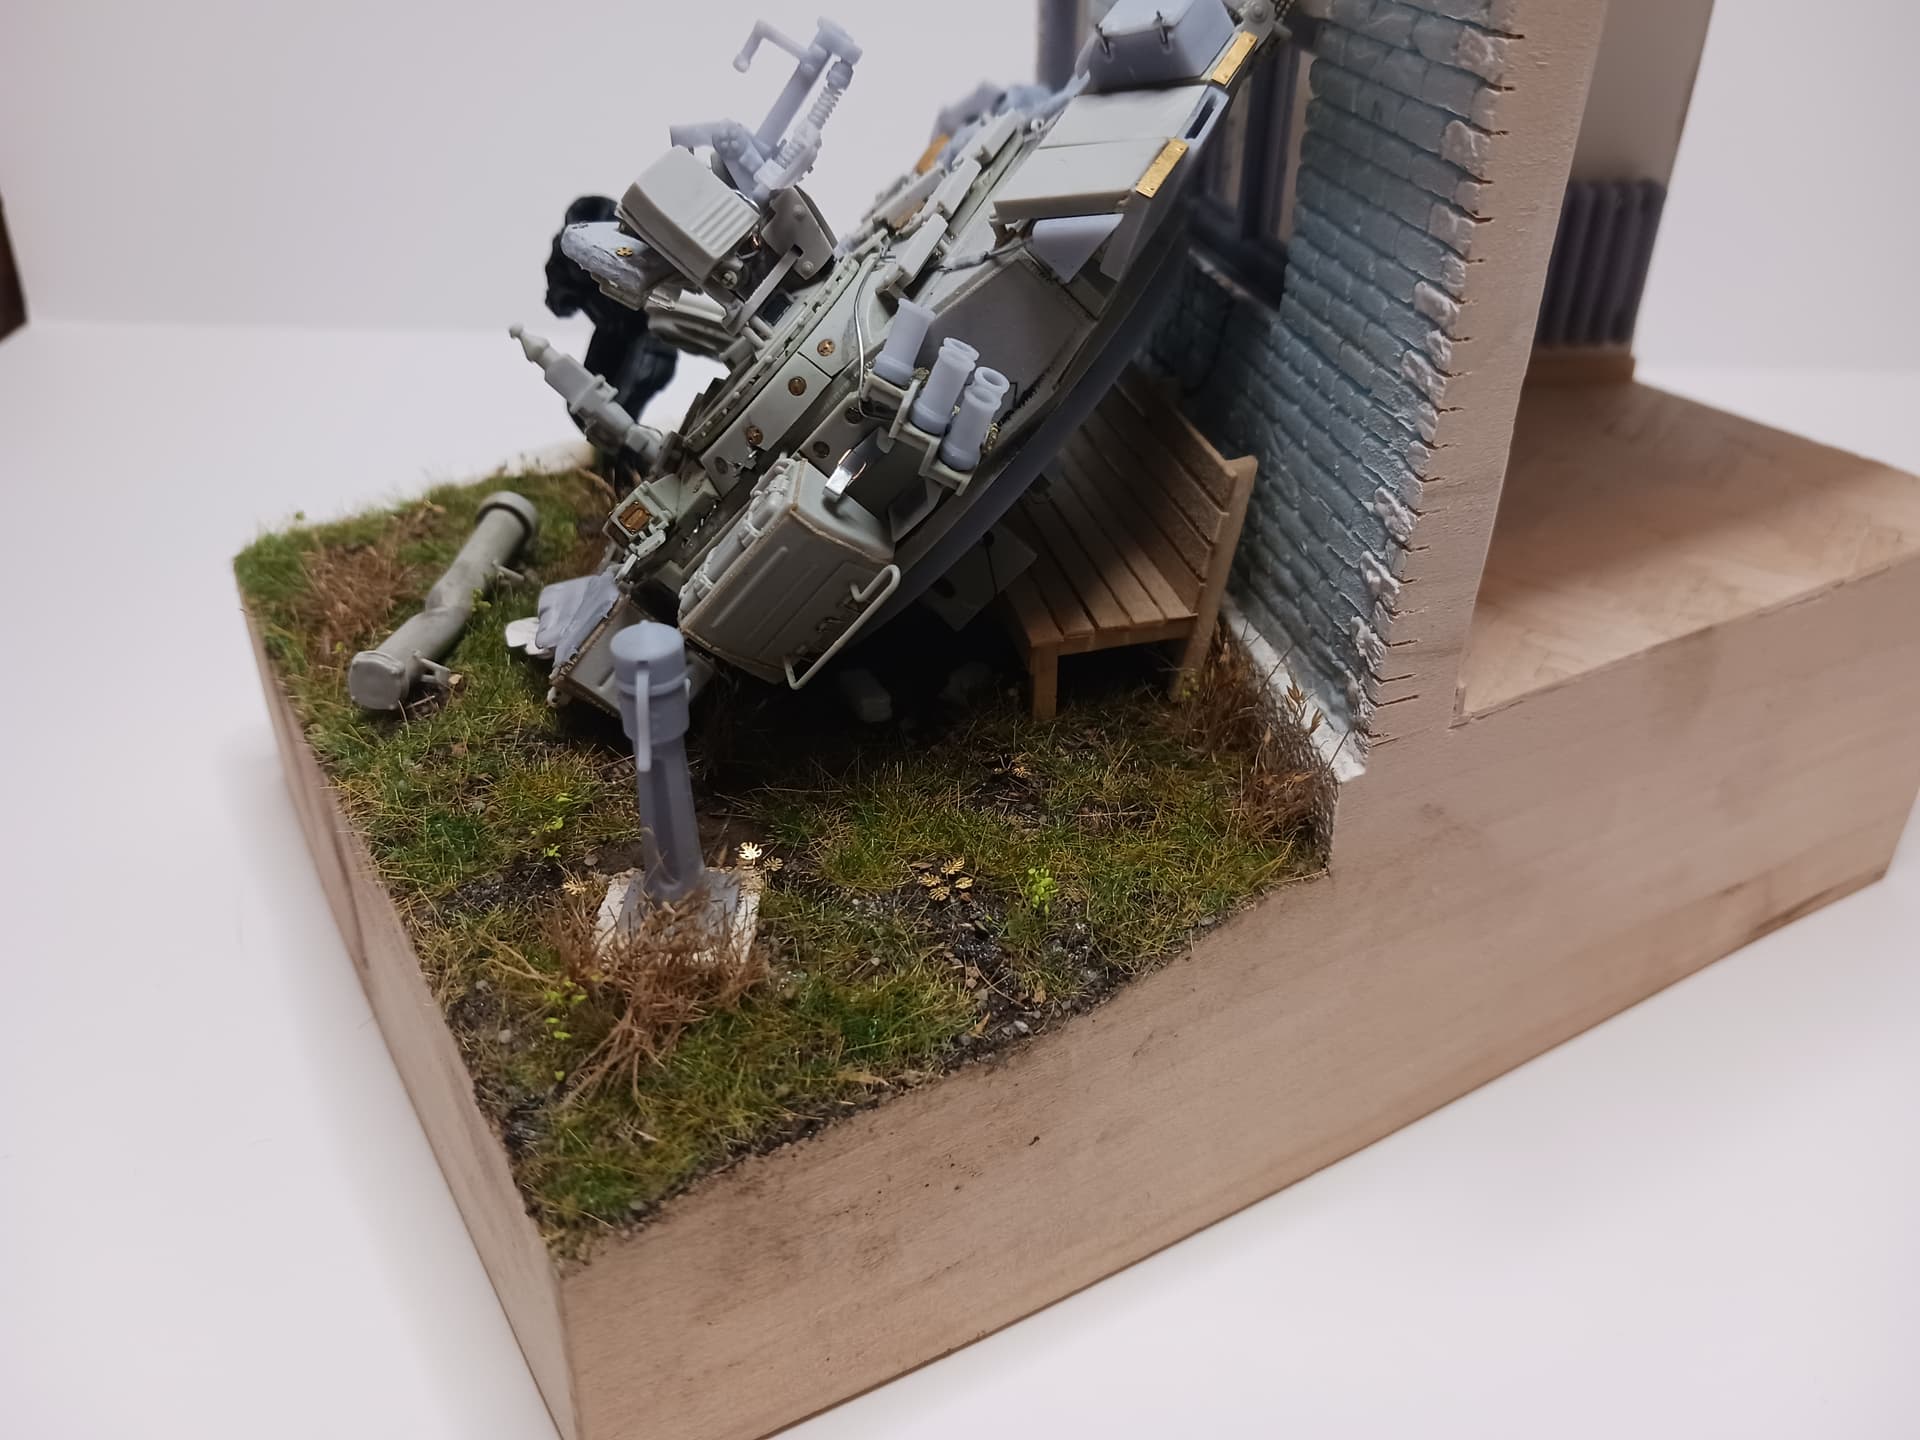
Critique welcome! Also, I broke and bent the window frame and plan to add extra things to not make it look like the only thing holding up the turret is the ceiling and window frame.
18 Likes
Yeah….it’s too freaking awesome looking. ![]()
![]()
3 Likes
That’s coming together beautifully- the details in the yard are really well thought out.
1 Like
Brilliant ![]()
![]()
![]()
2 Likes
Awesome idea, plan, and execution! Aaand it’s based on real events!
Cheers Dave ![]()
2 Likes
Very well done! Great details and layout.
1 Like
Hey guys,
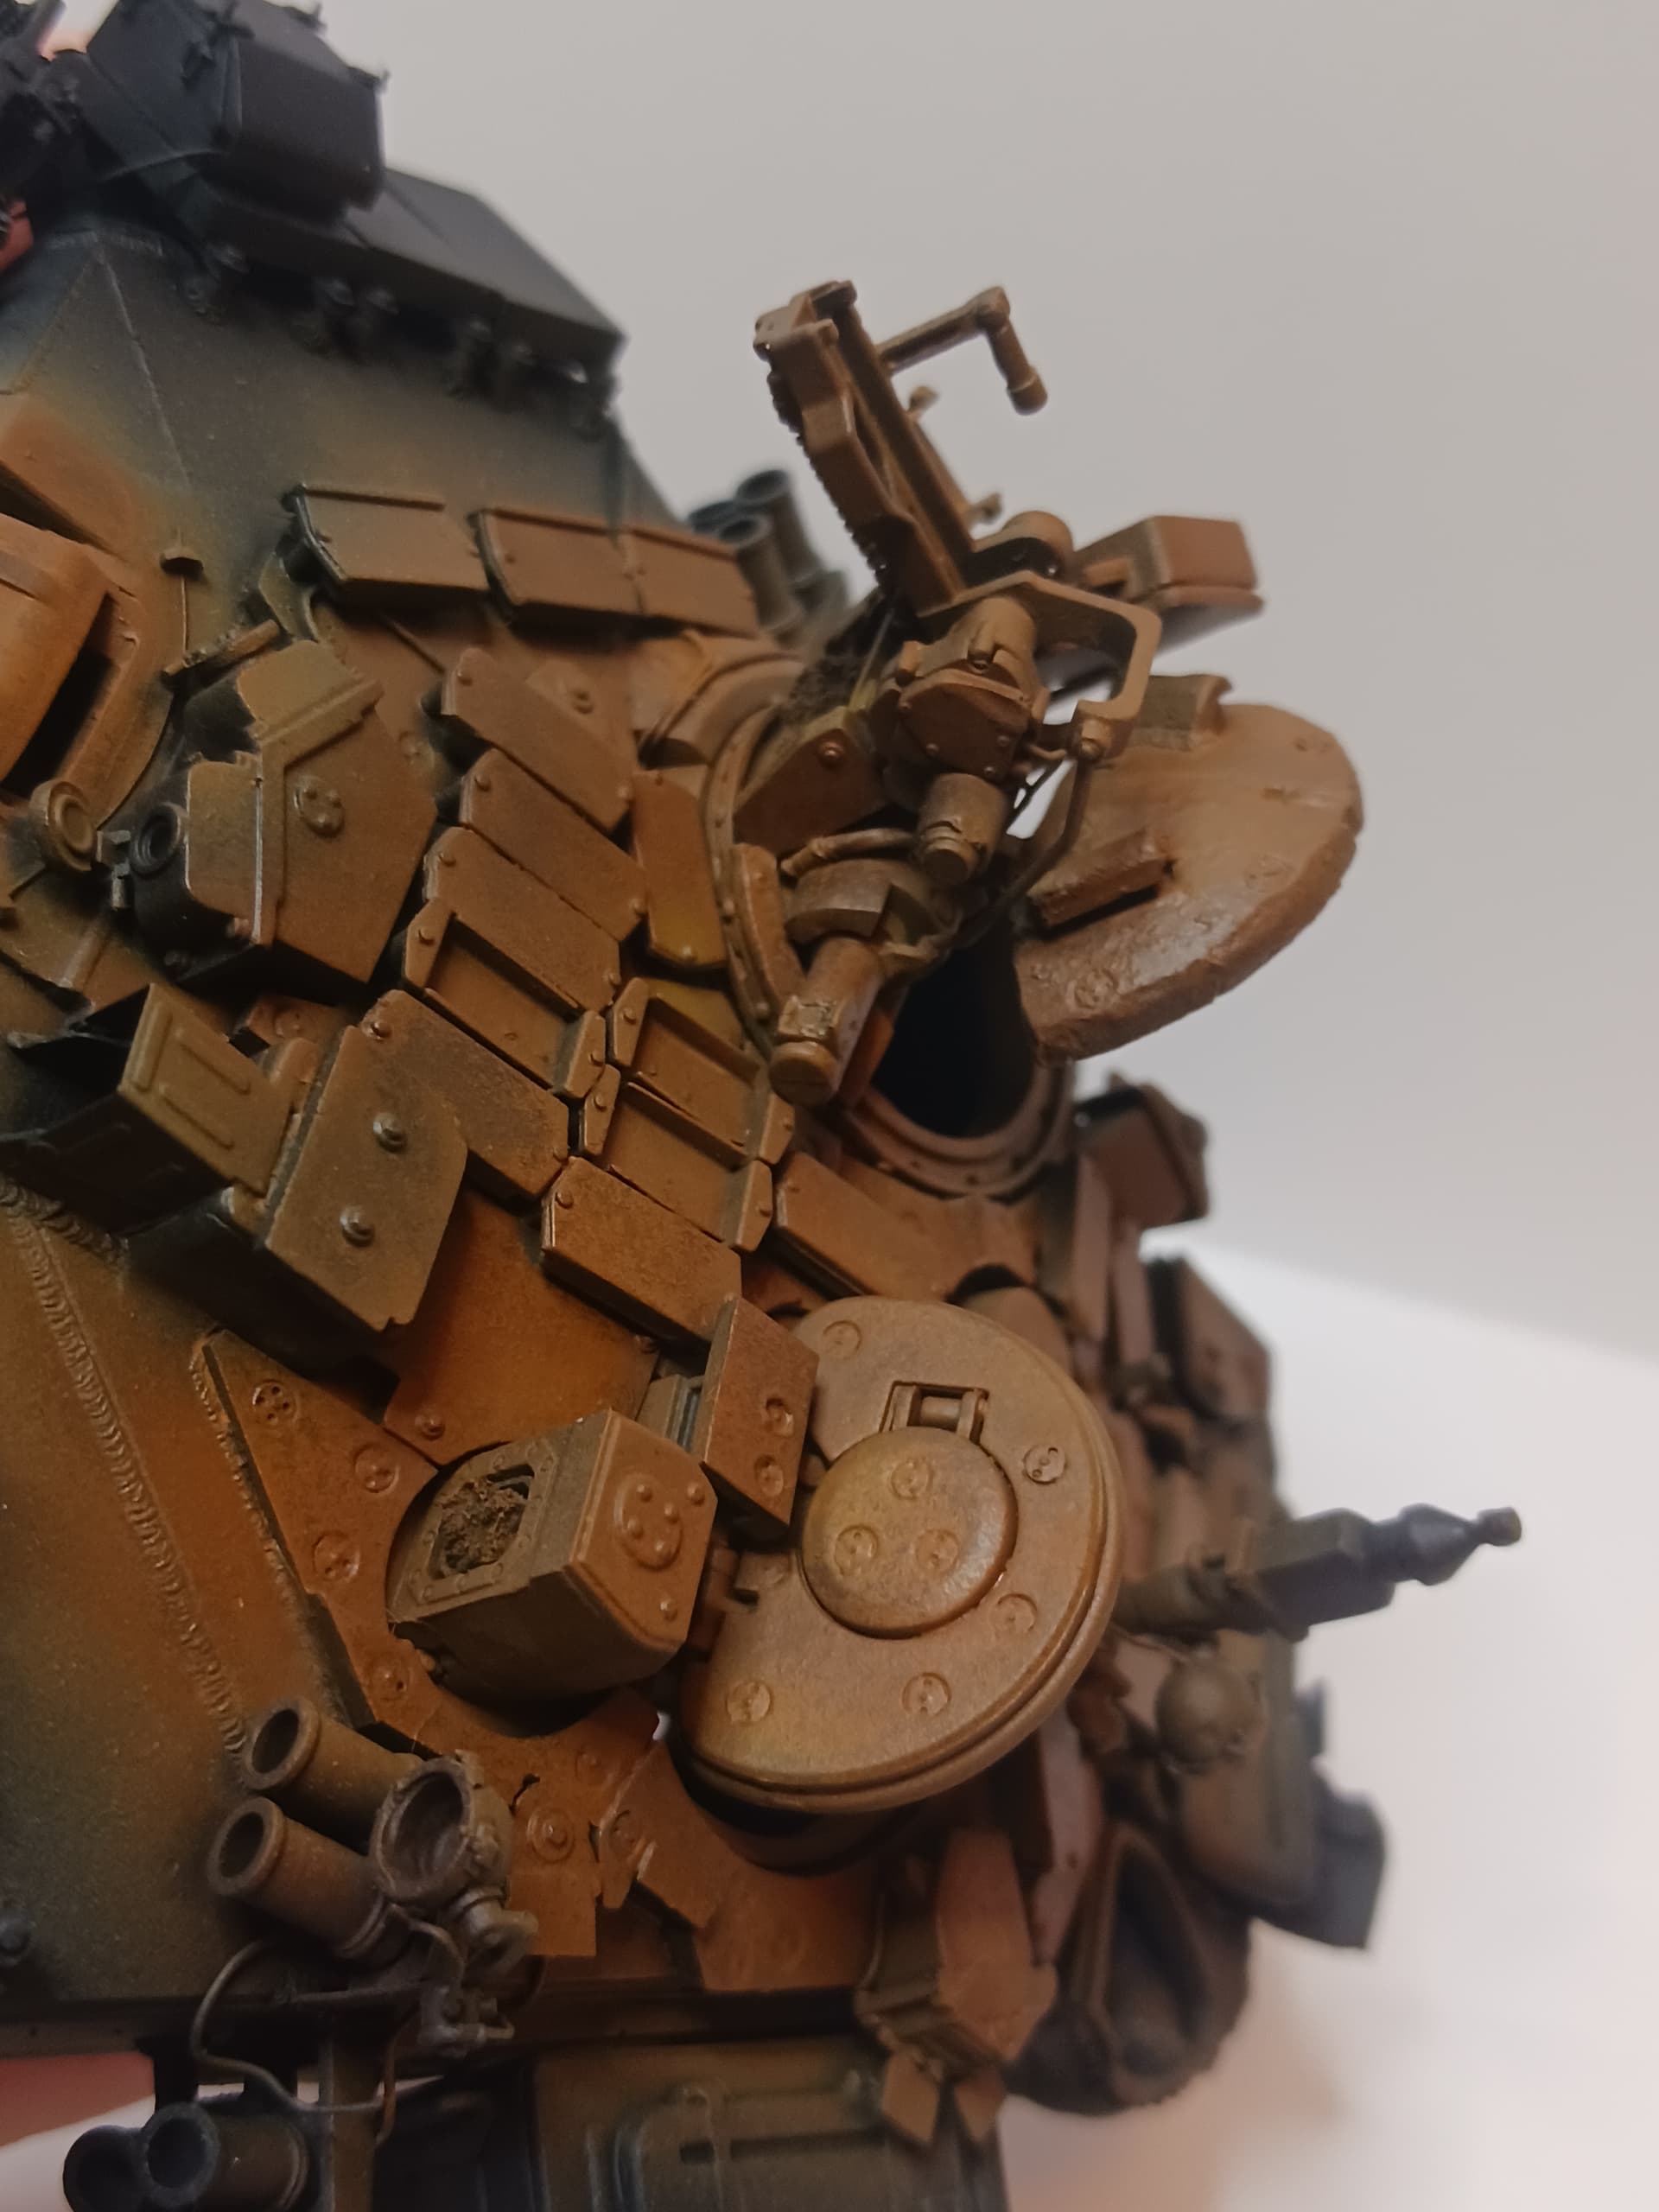
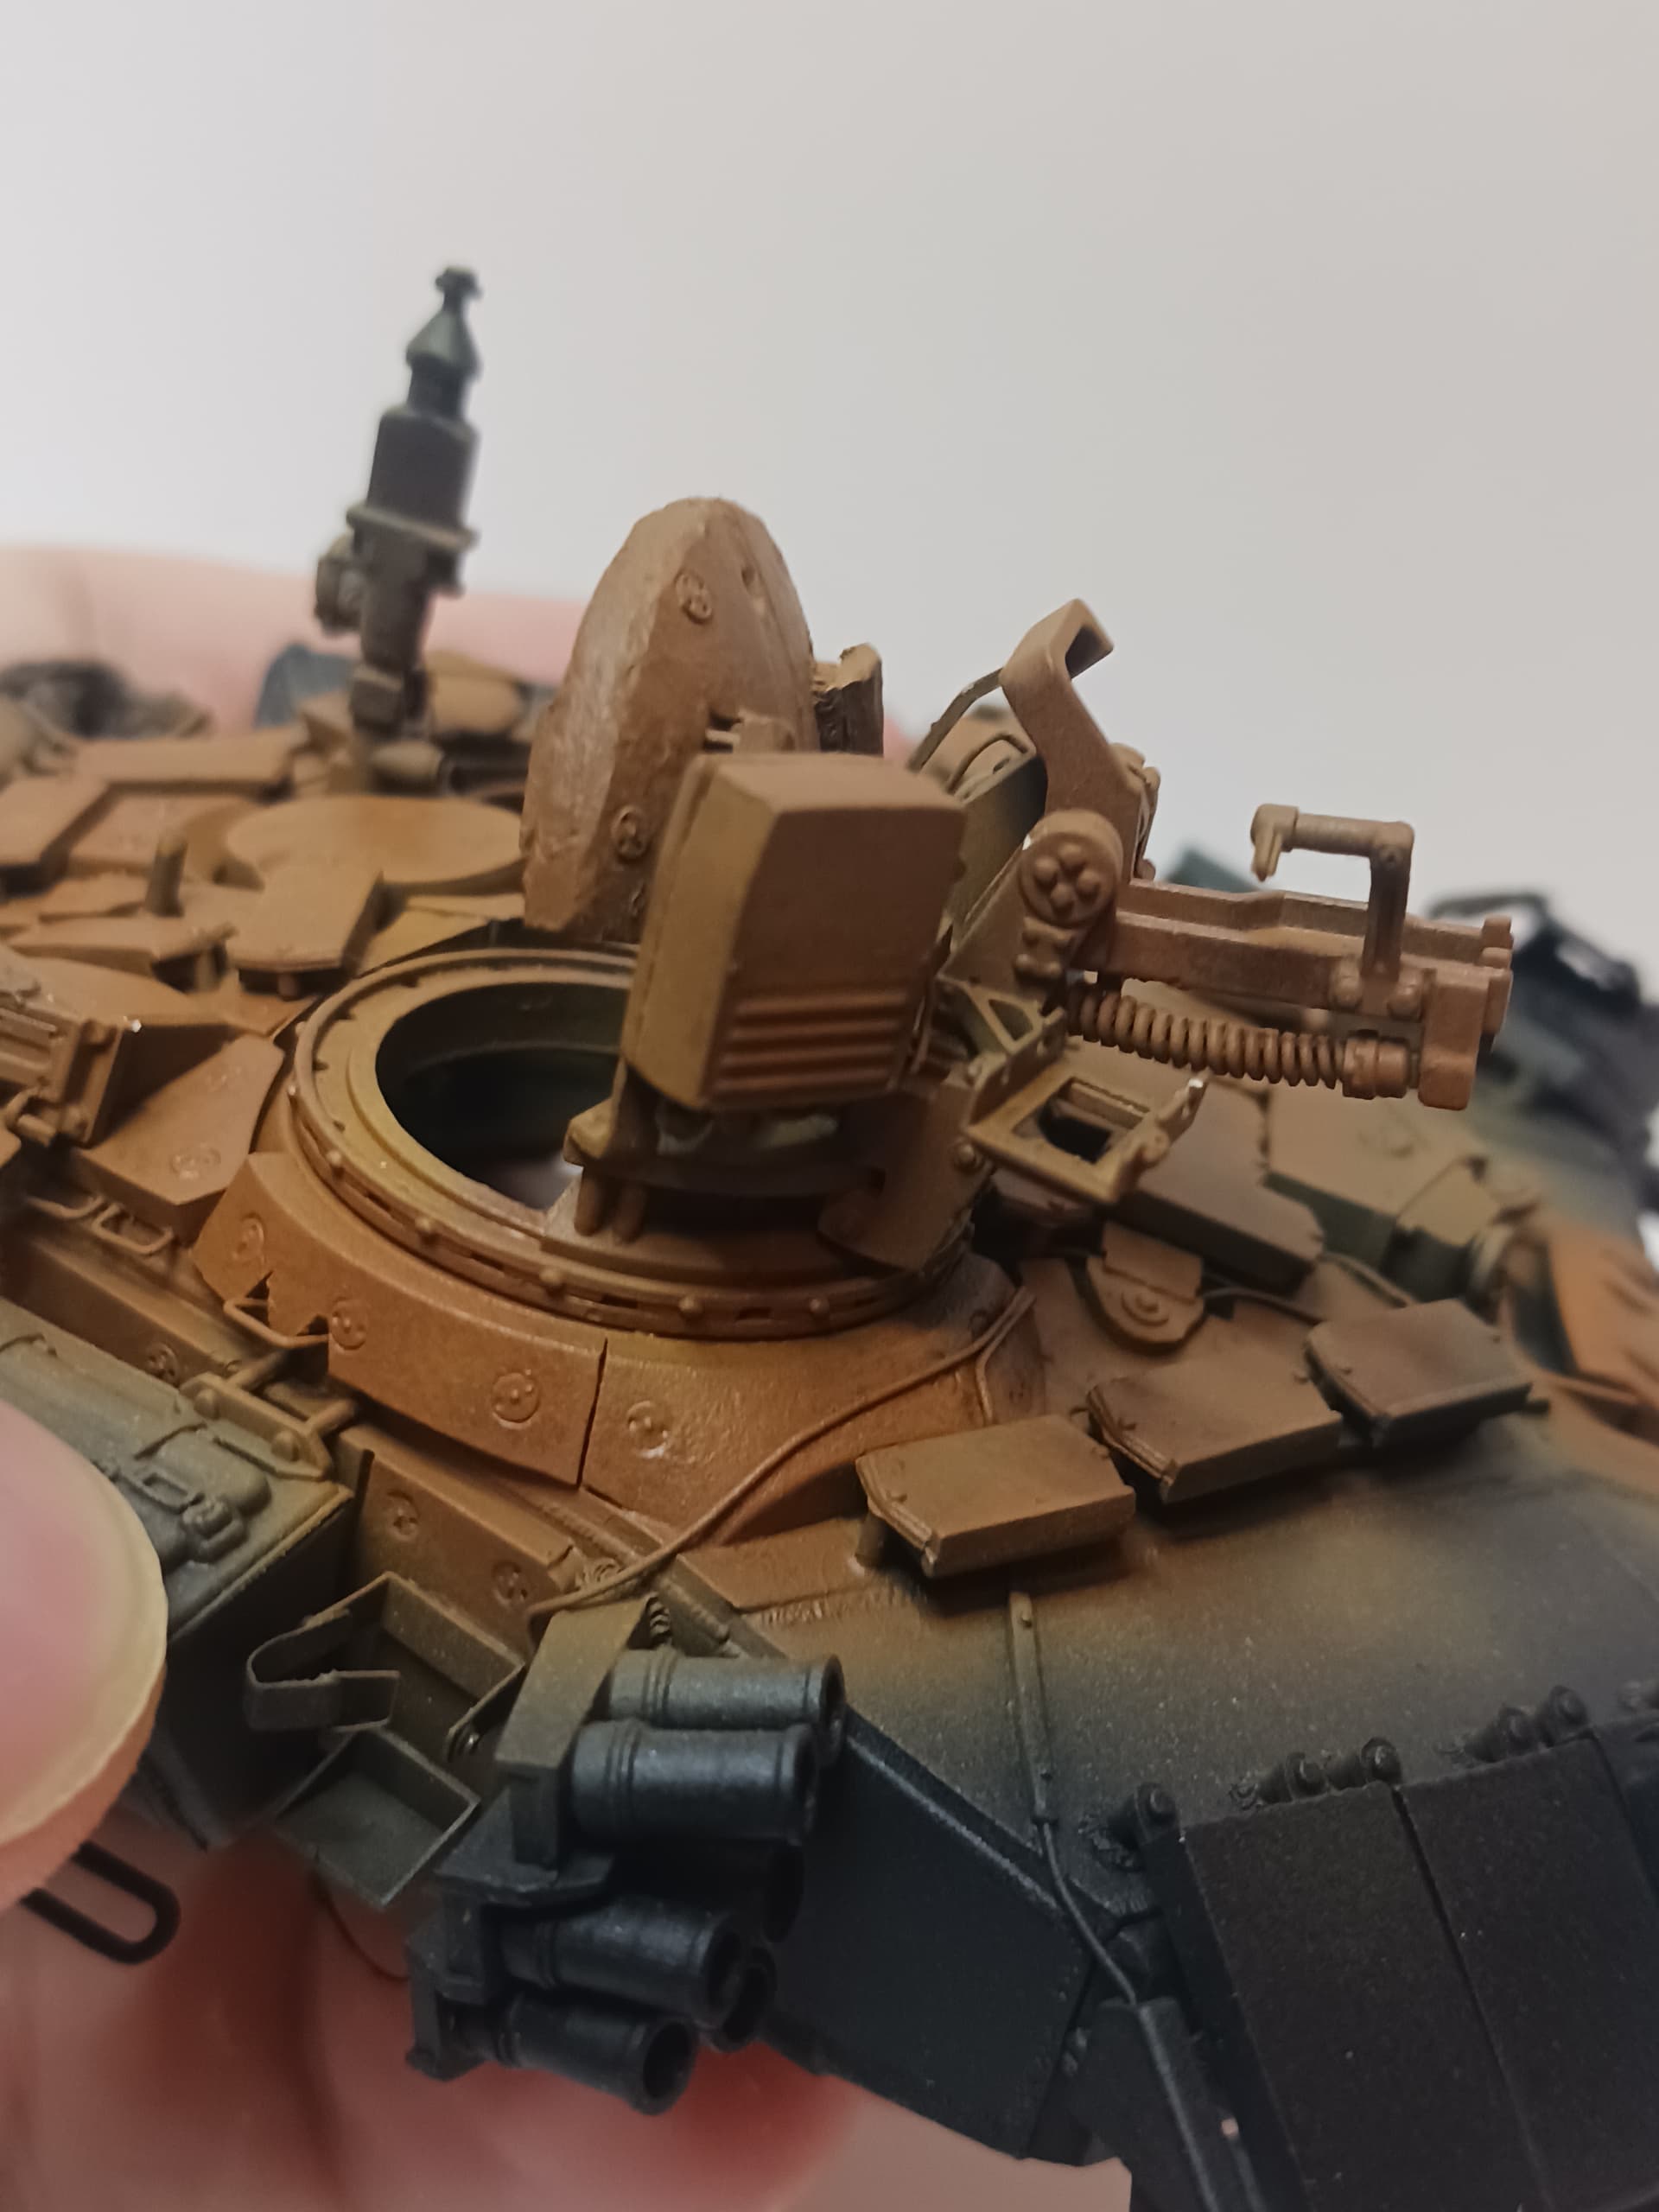
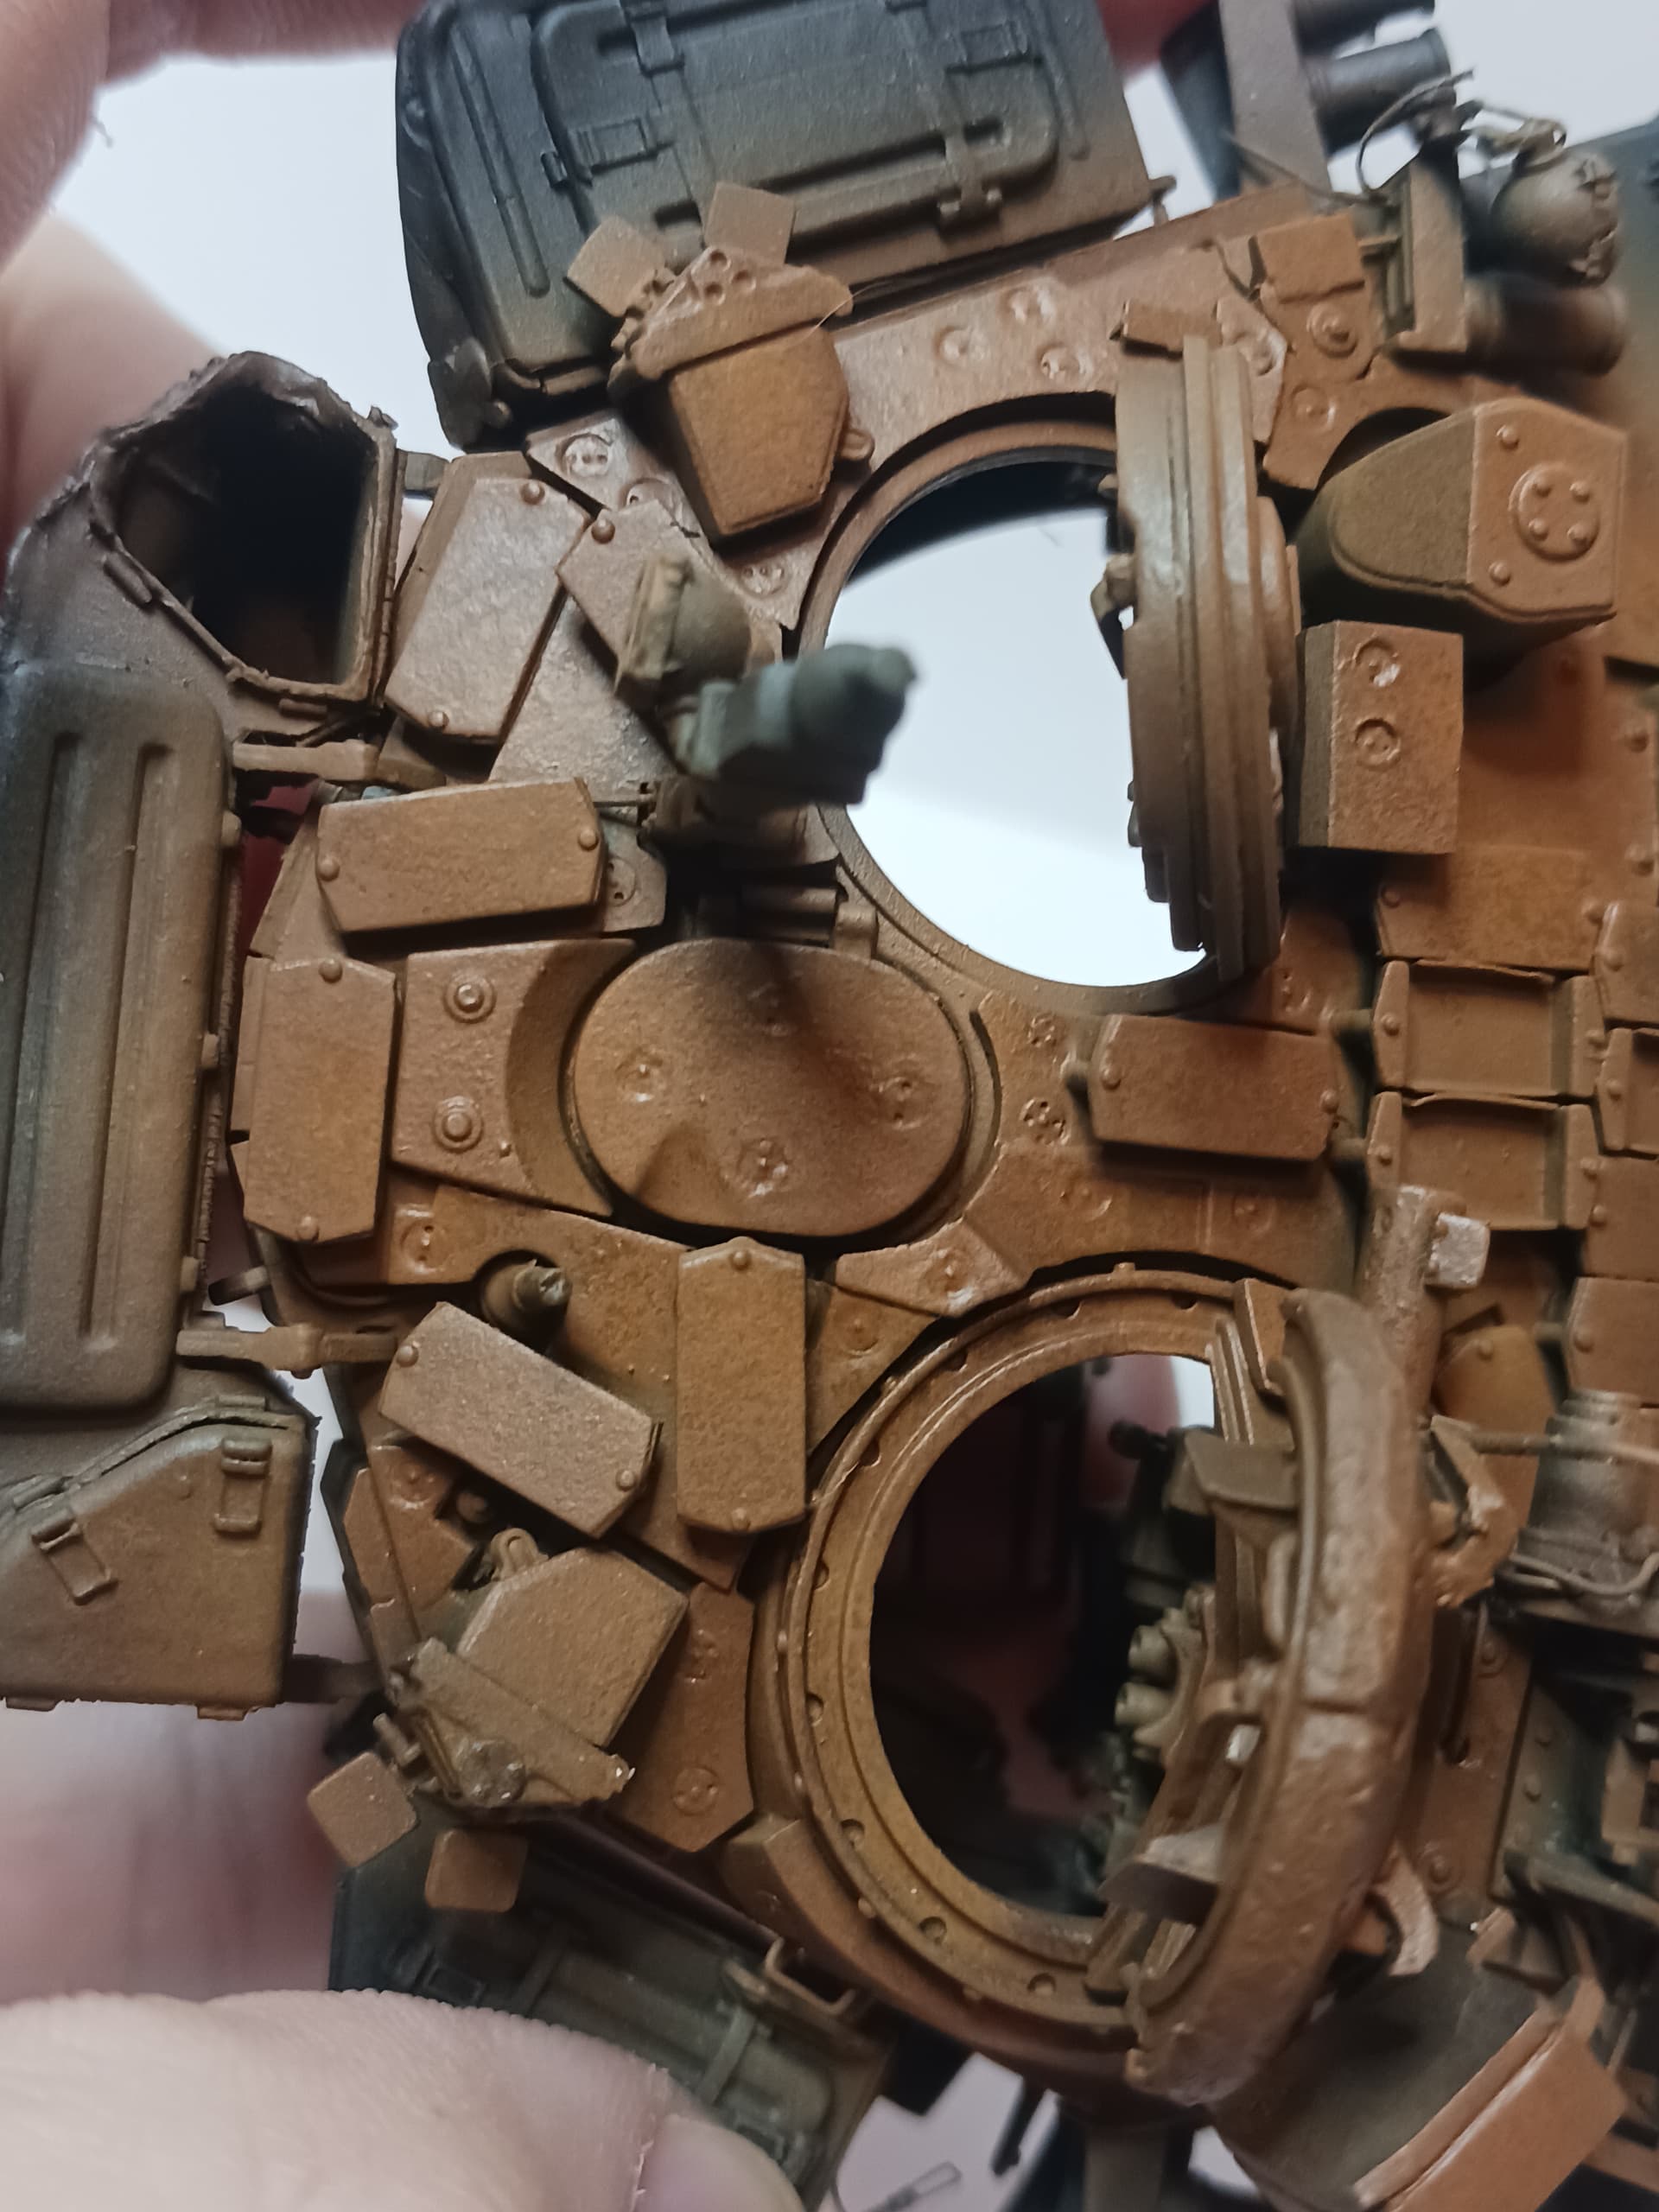
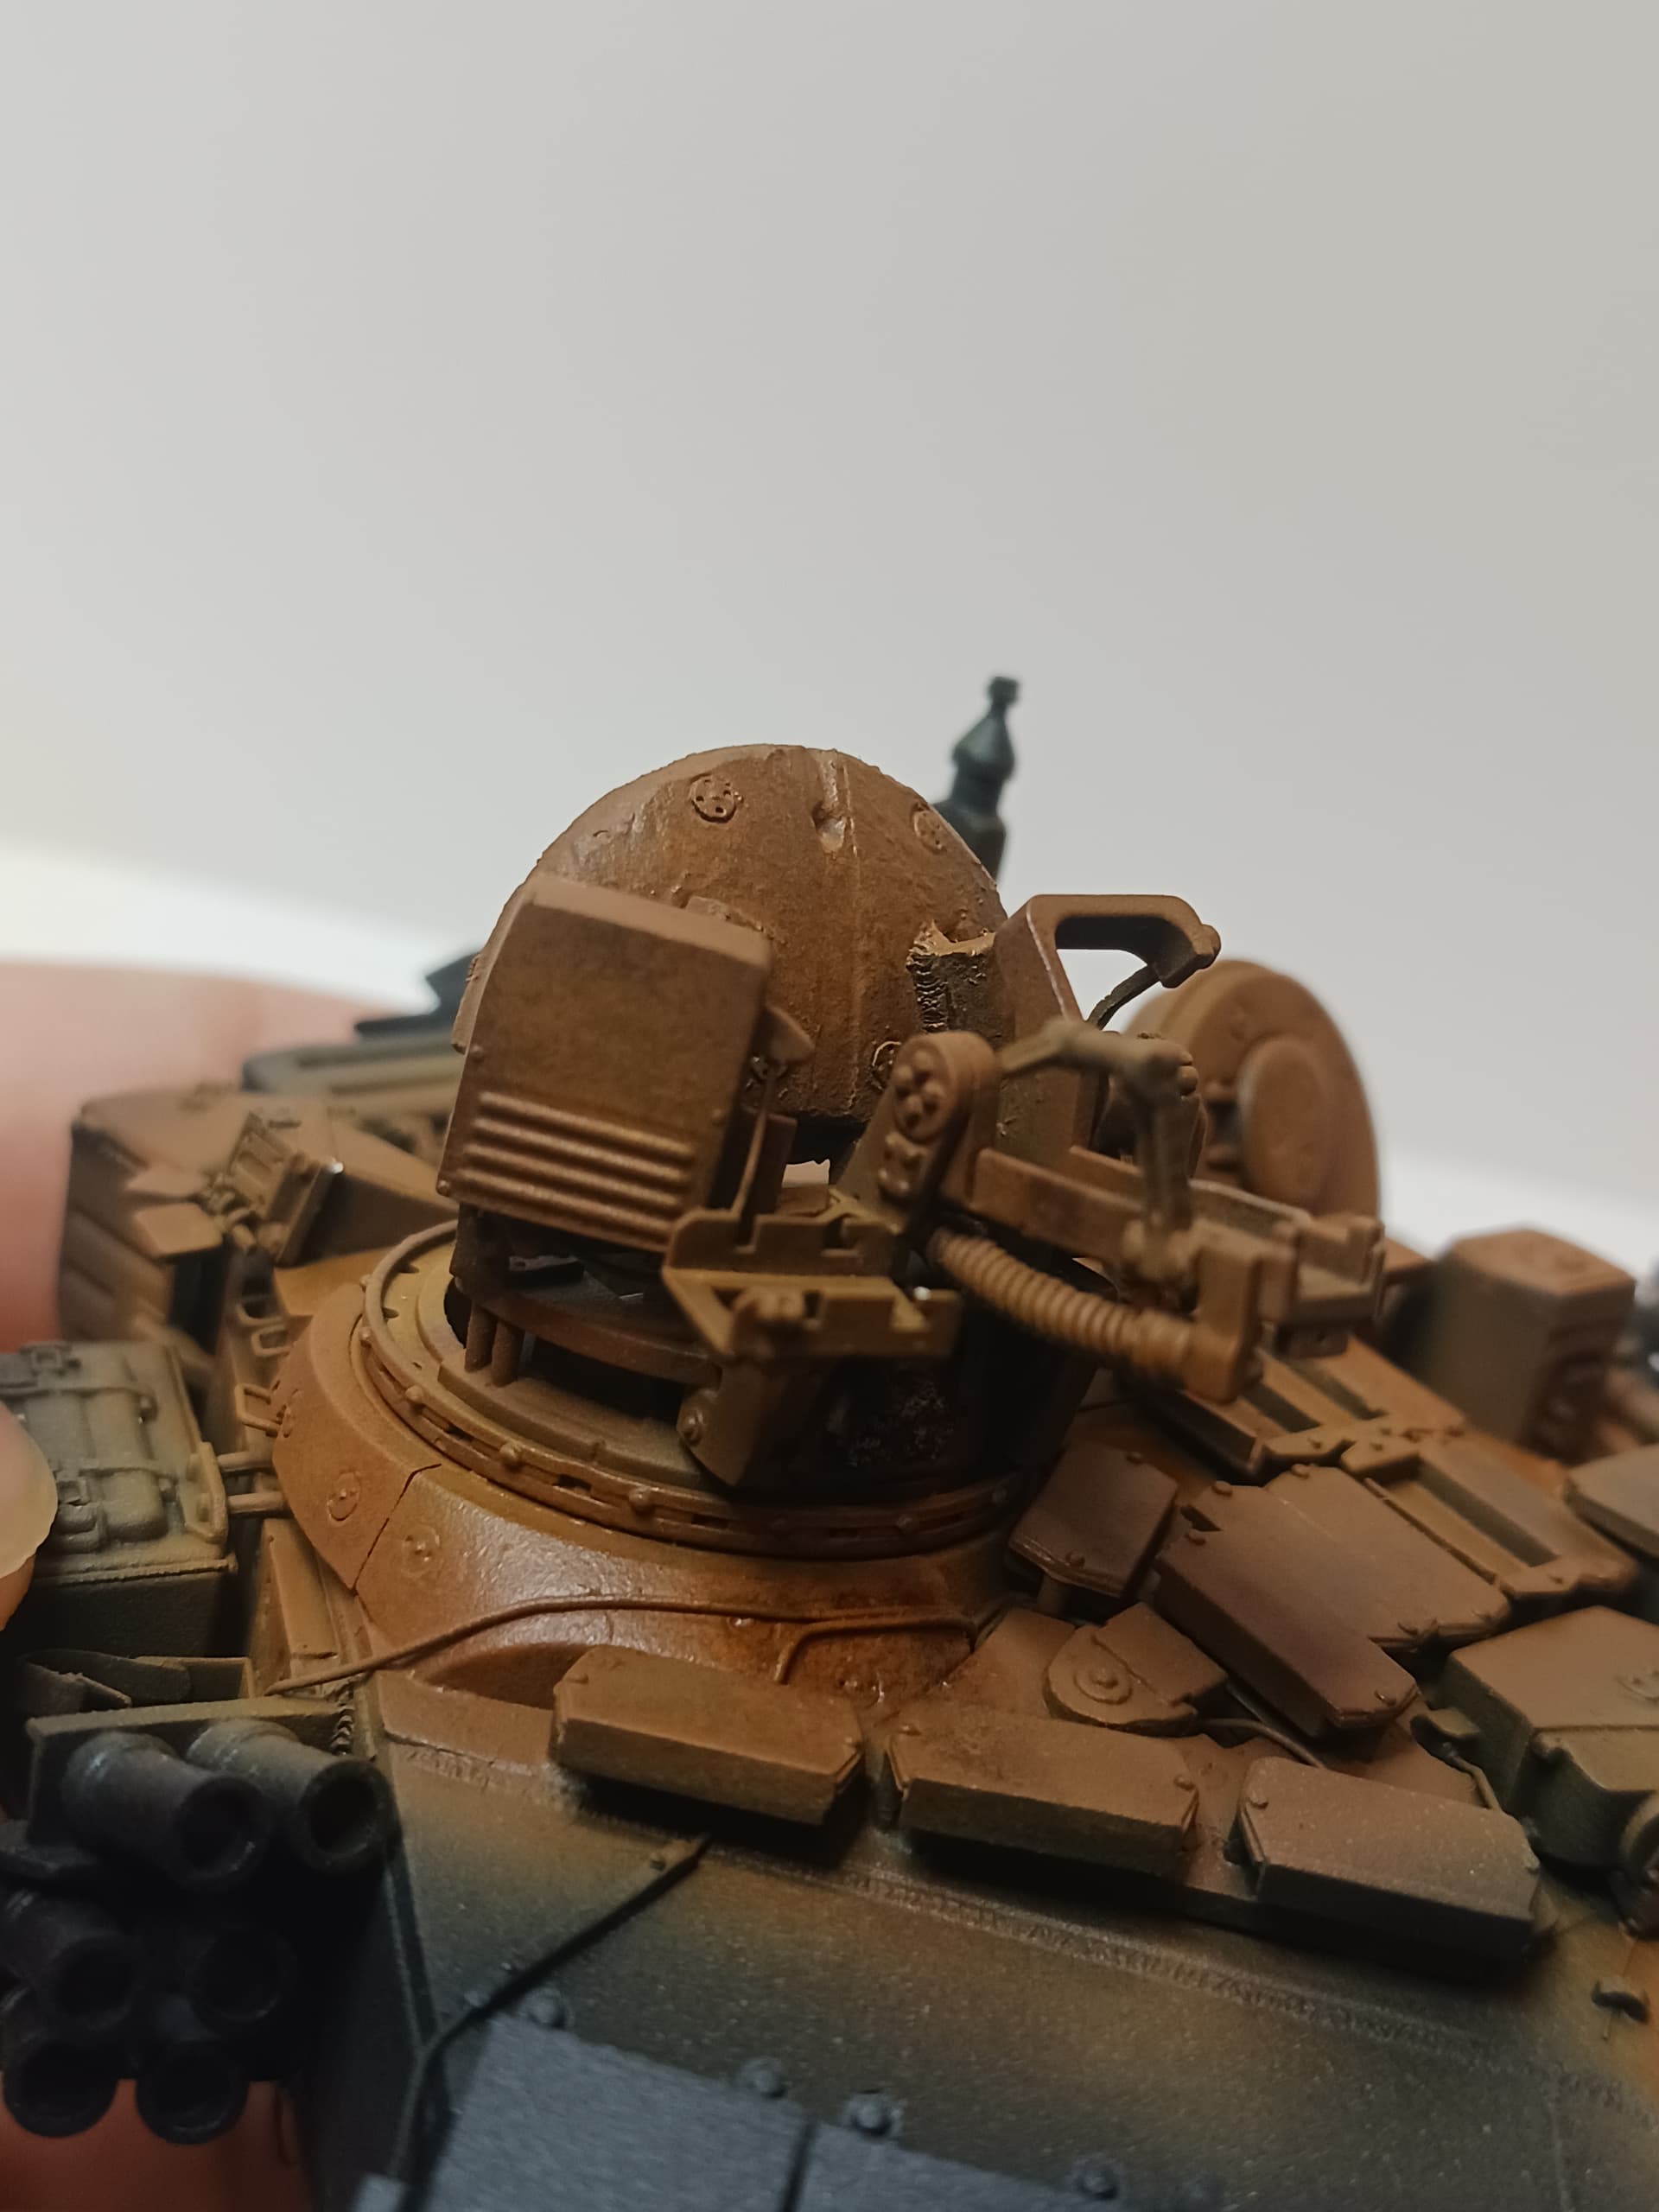
I started painting the turret and decided to start with the rusted-out parts. After looking at reference photos two things stood out the most for me. The texture of it and how unlike old wrecks the rust is very bright and vivid rather than the dark rust of old tanks.
SO I decided to practice on a piece of styrene trying to develop a technique to represent that texture here were the results:
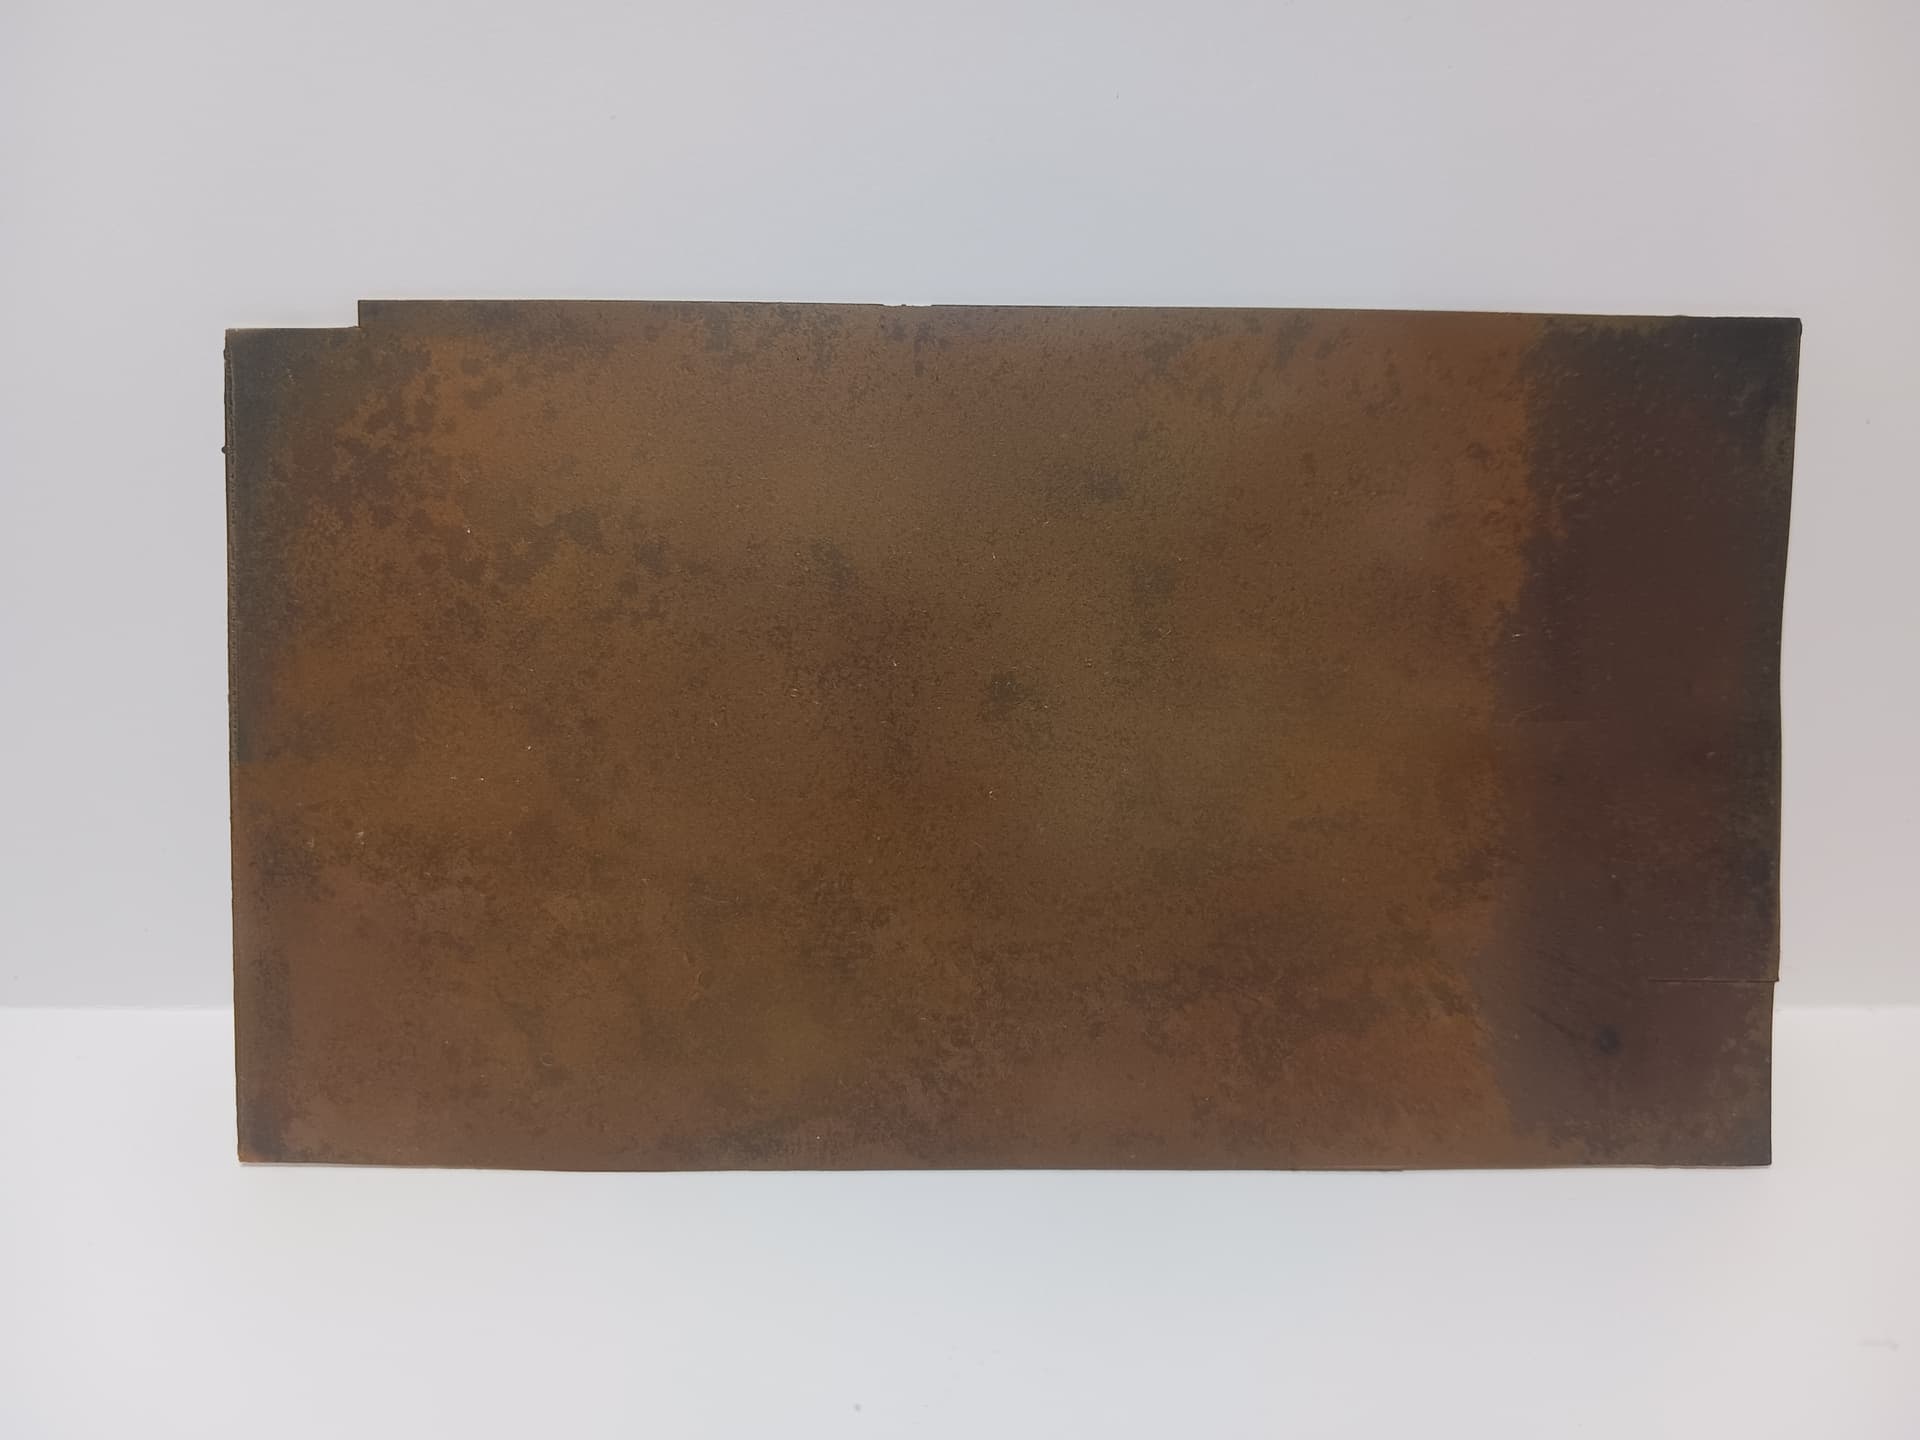
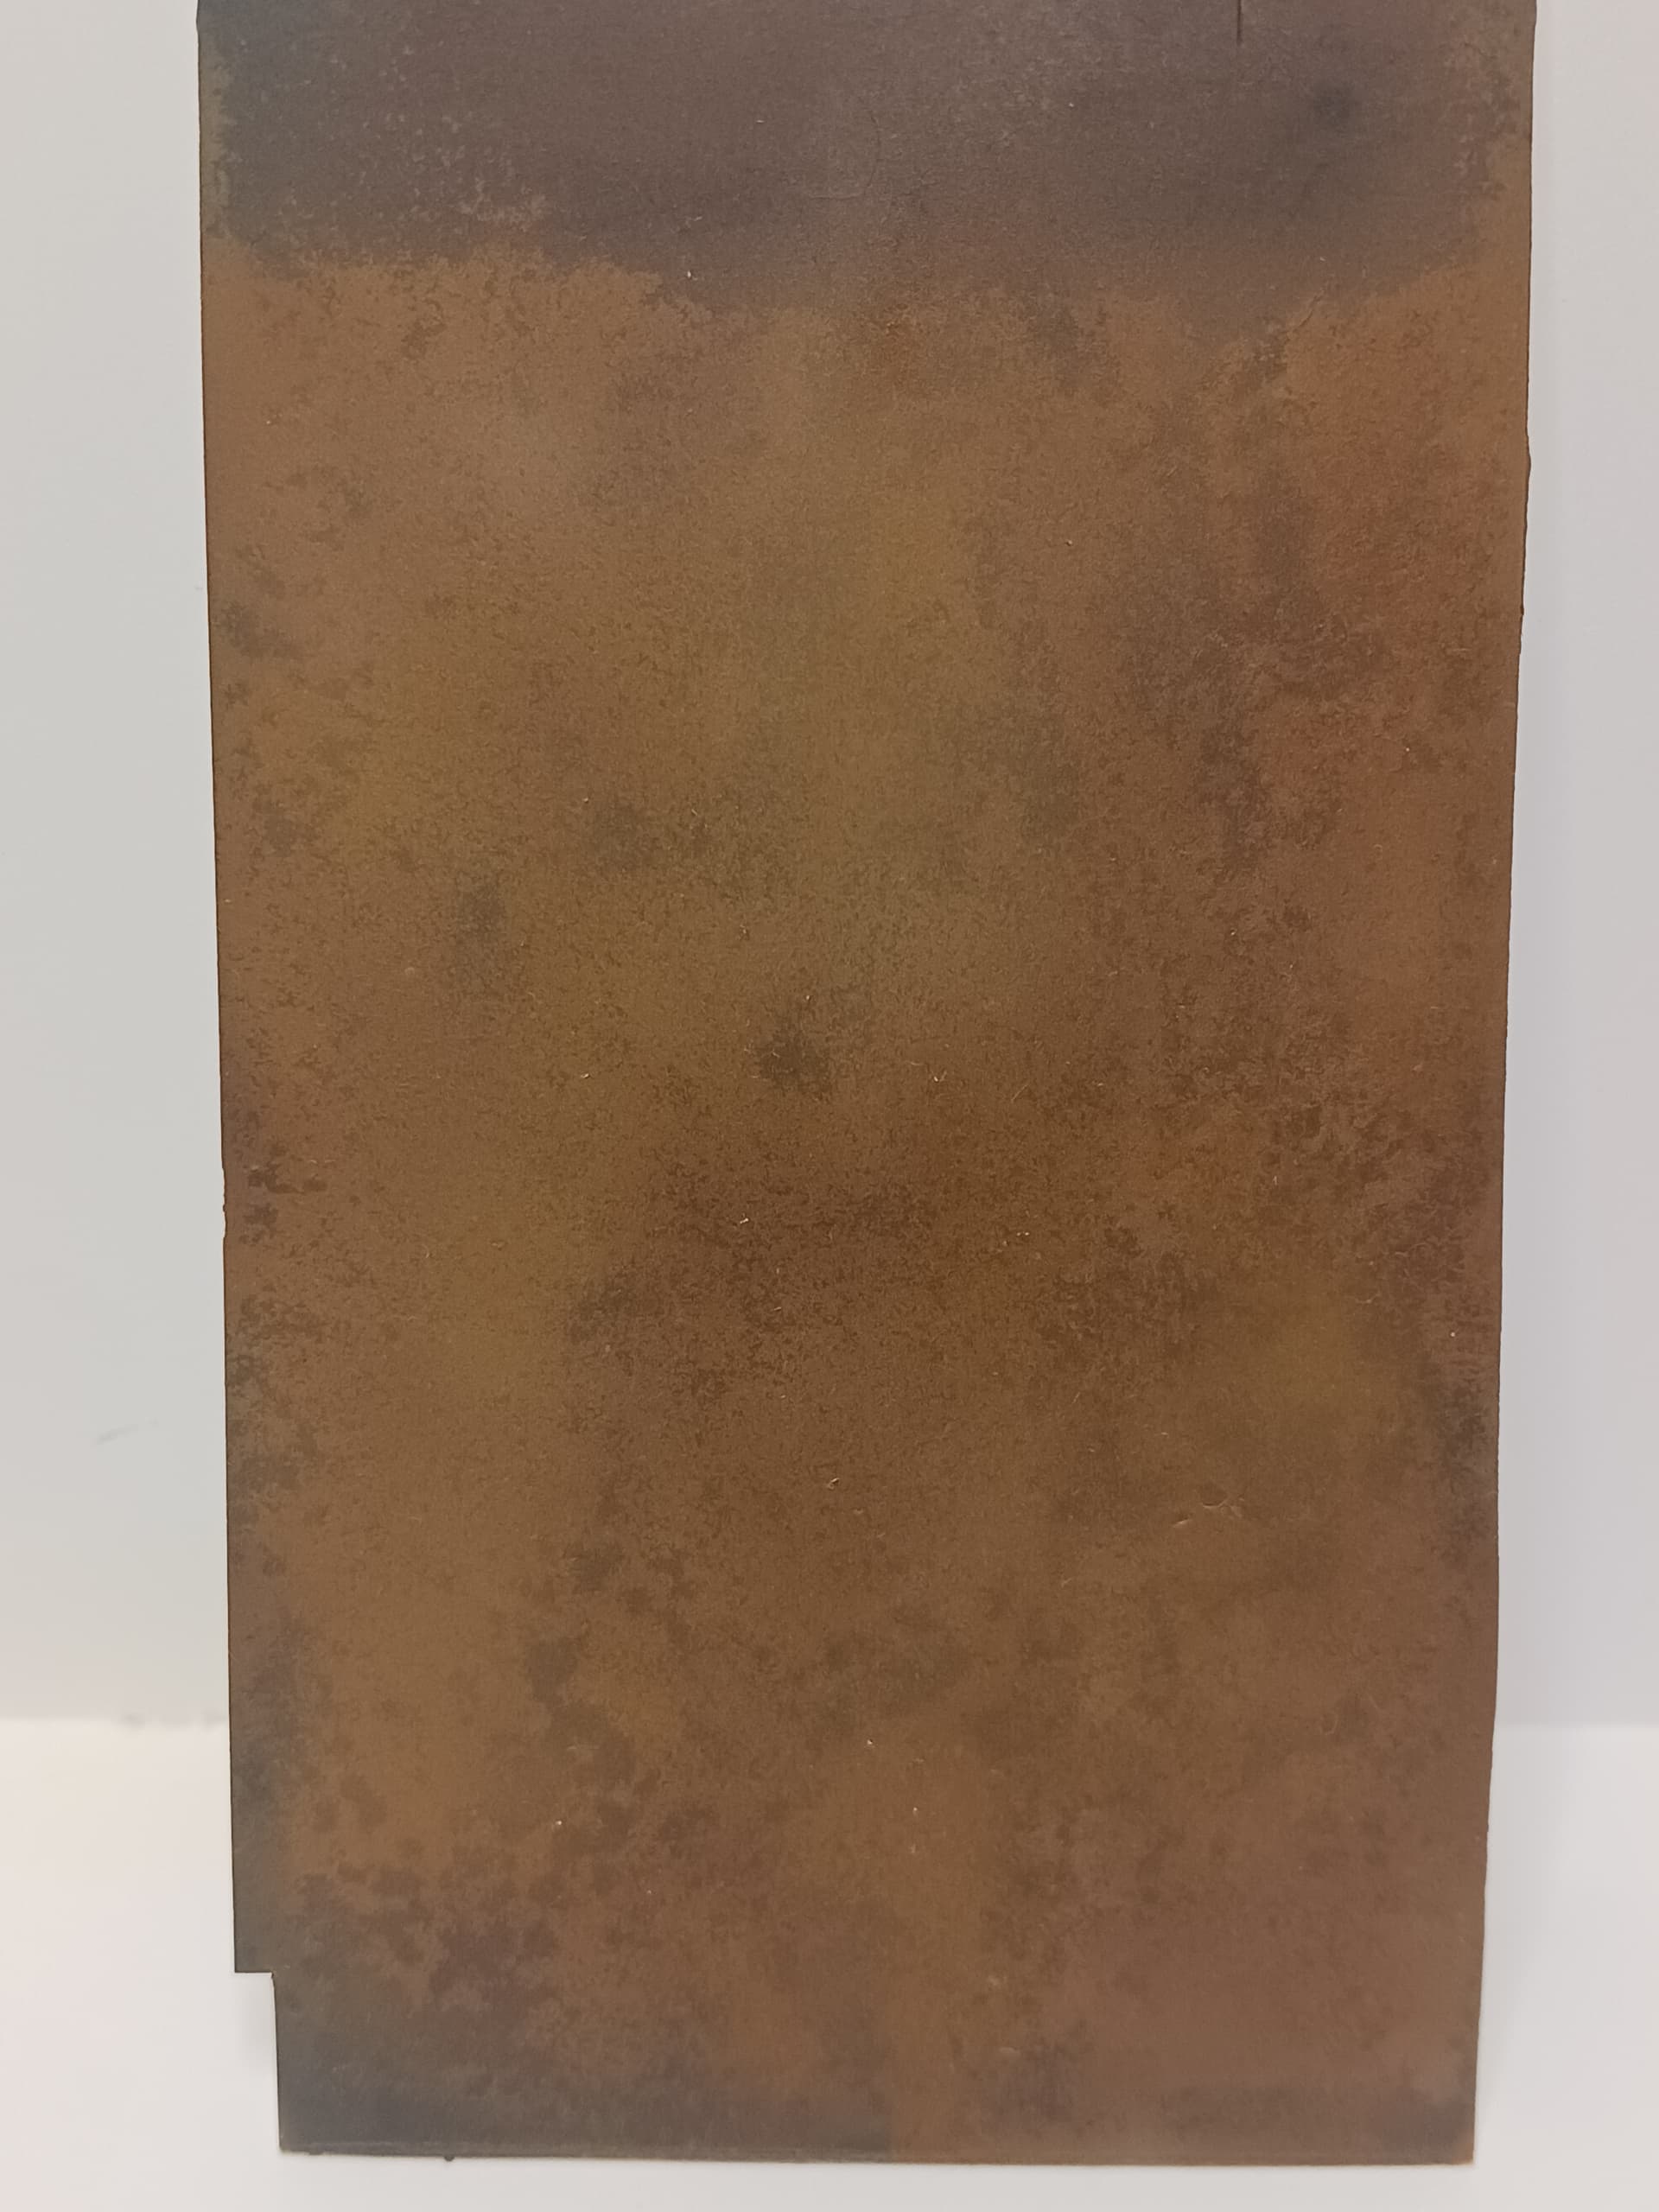
These were done with purely Tamiya acrylics and chipping fluid.
I was decently happy with this as a base for further effects with oils and other acrylics and enamels so I decided to move on to the turret and based on reference photos the rust was always to the back of the turret. Unfortunately, the results were not quite what I wanted them to be and ended up being too dark and red for what I wanted. And Yes I know that it is too shiny, I ran out of satin varnish ![]()


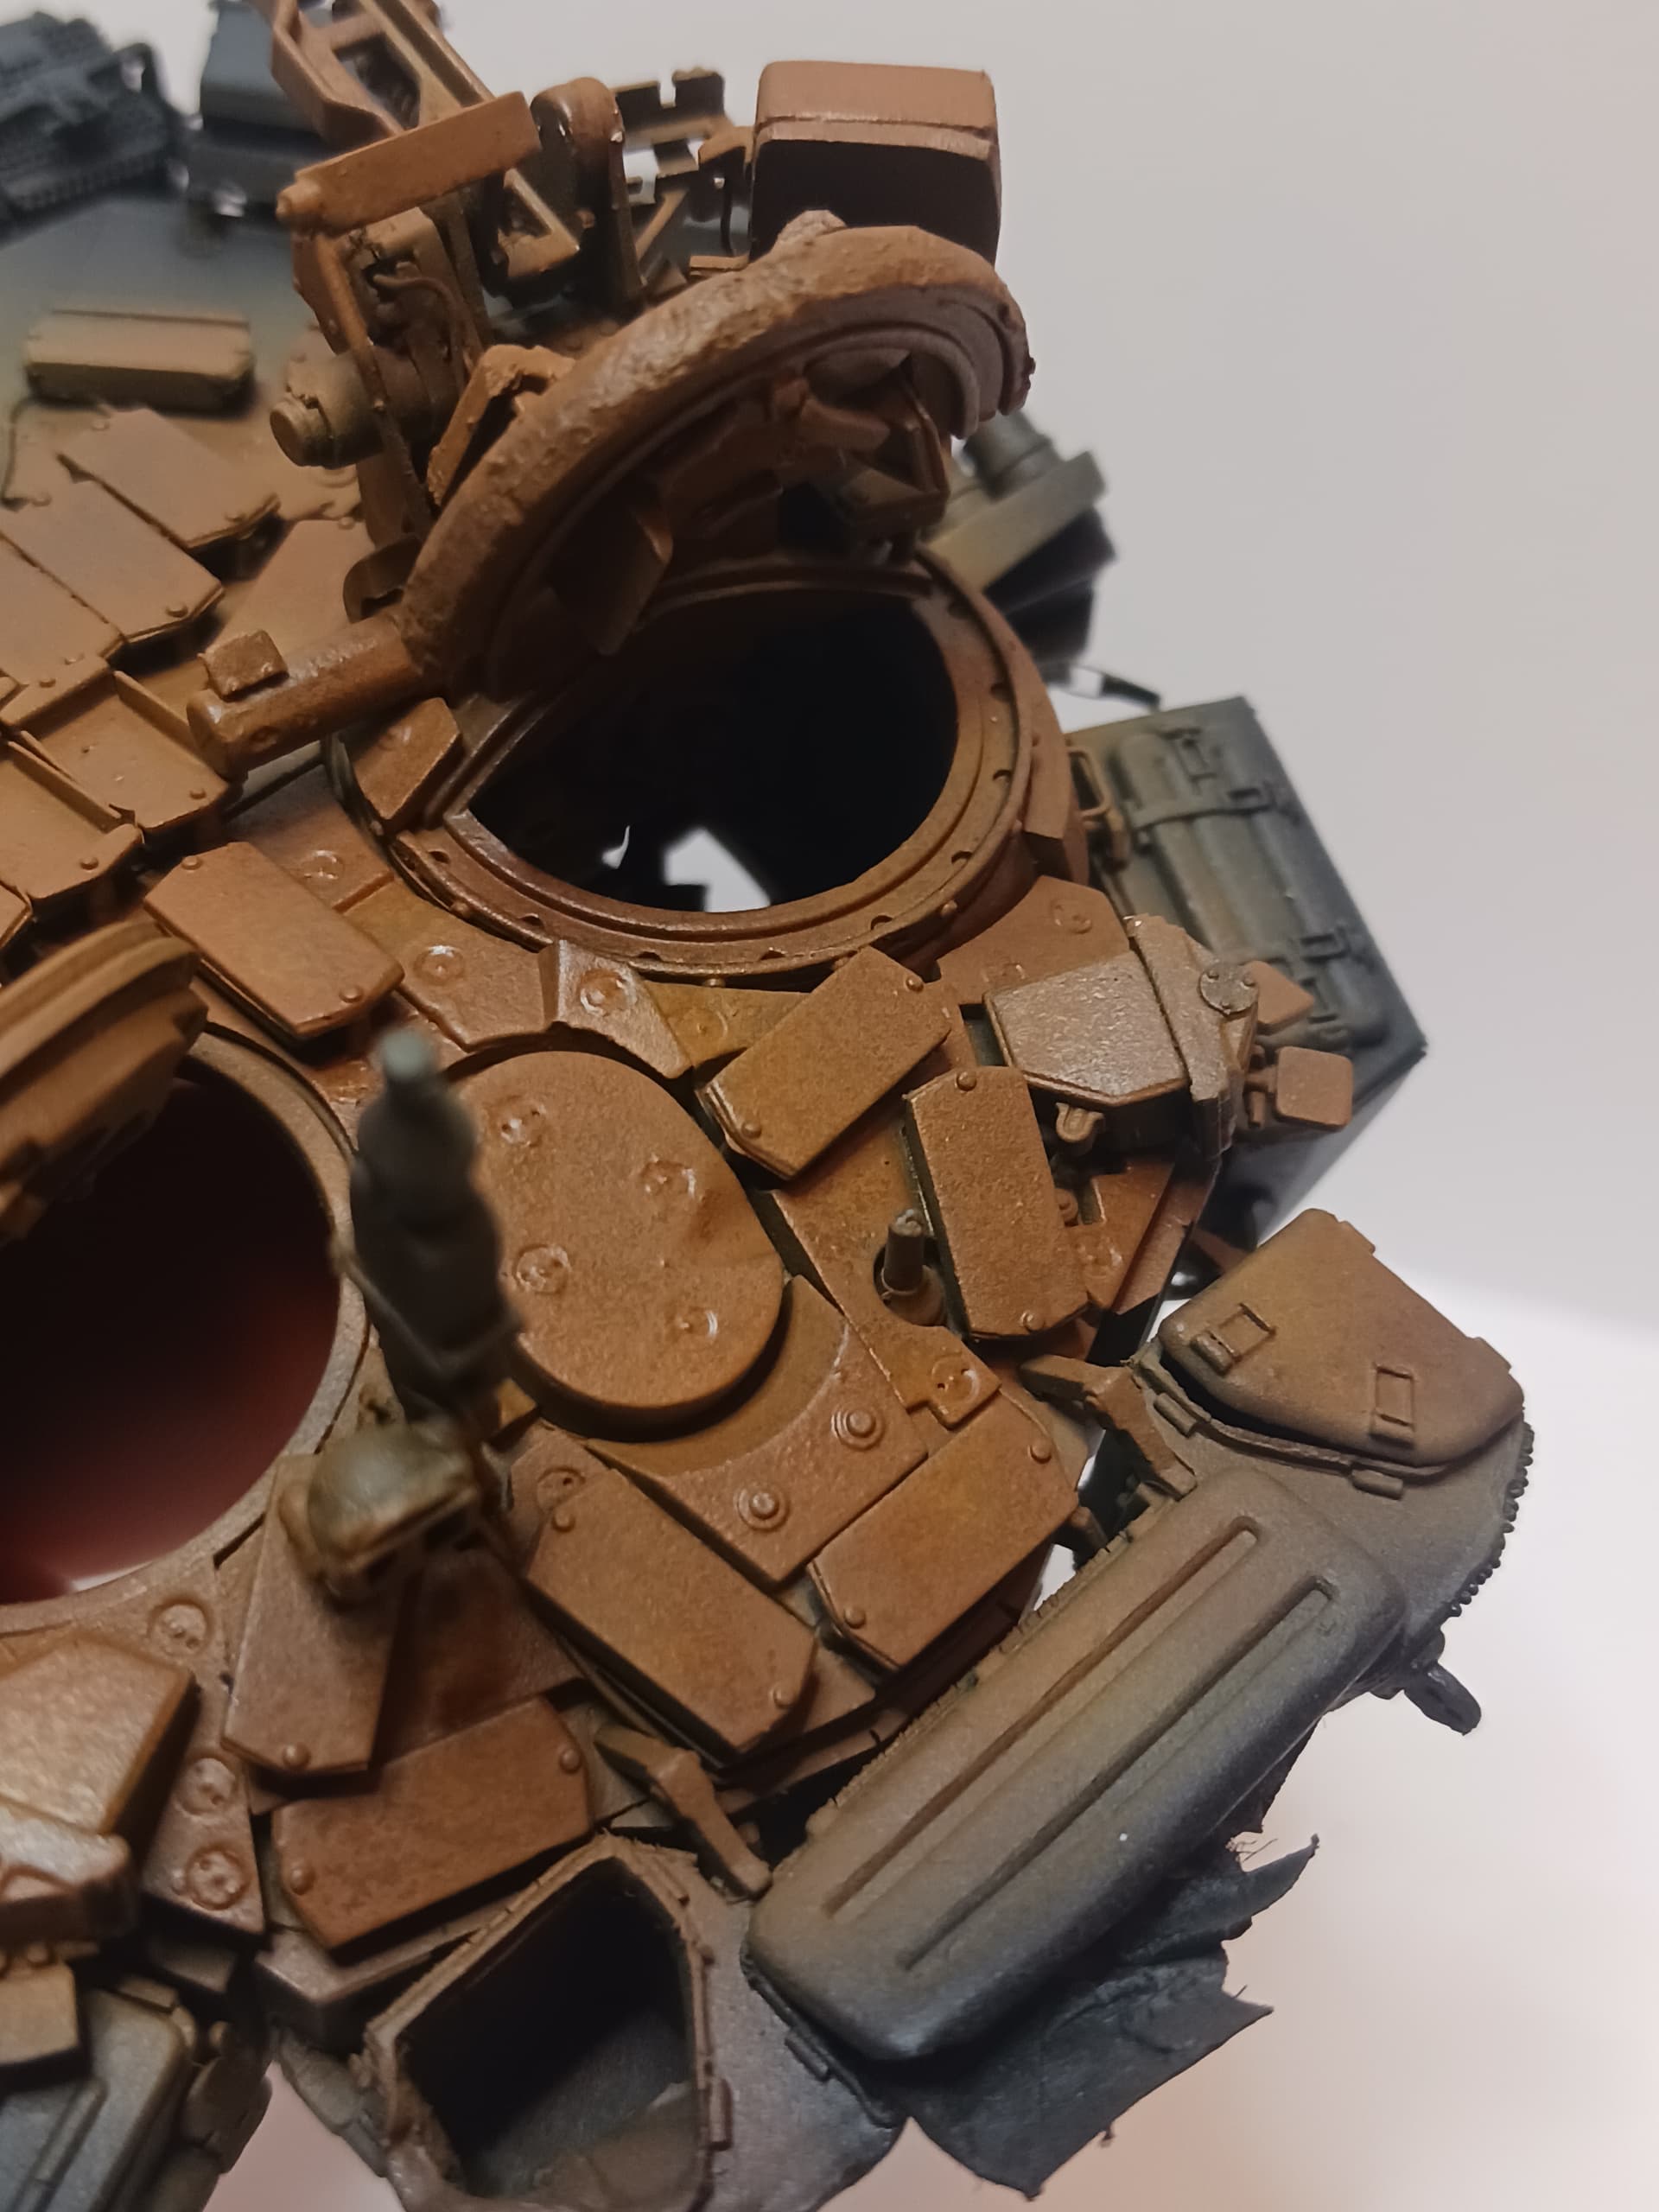
One thing that is obvious right way is how monotone it all is… but I plan to do more highlights of smaller details and some oils and spatter work with other products as well as paint the ERA bricks differently using these as a reference:
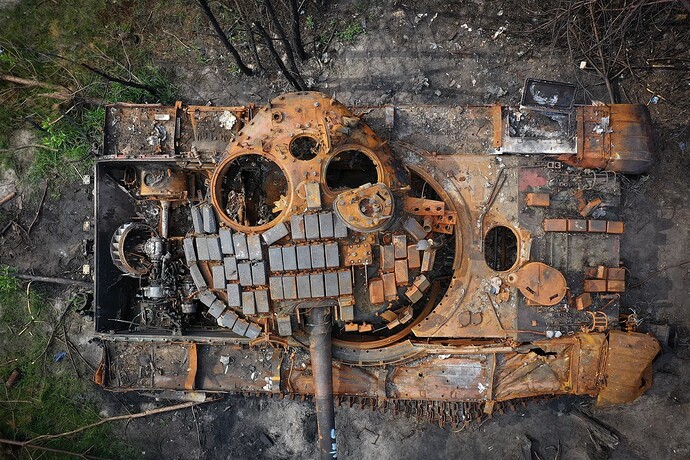
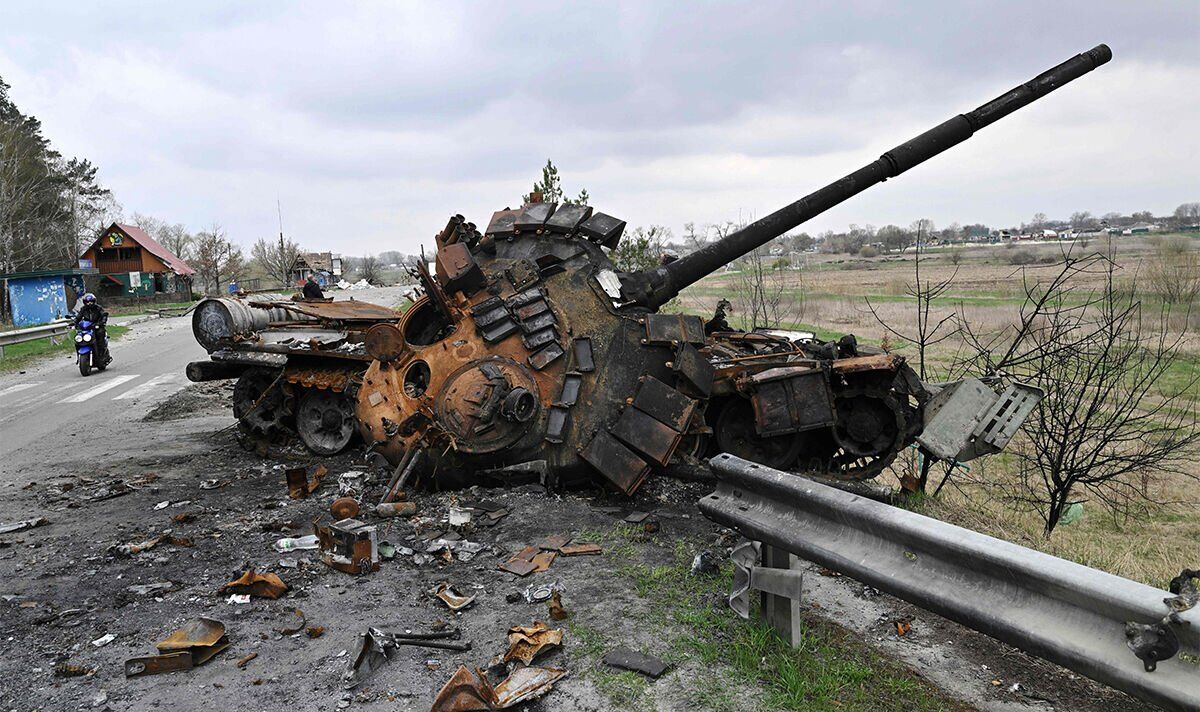
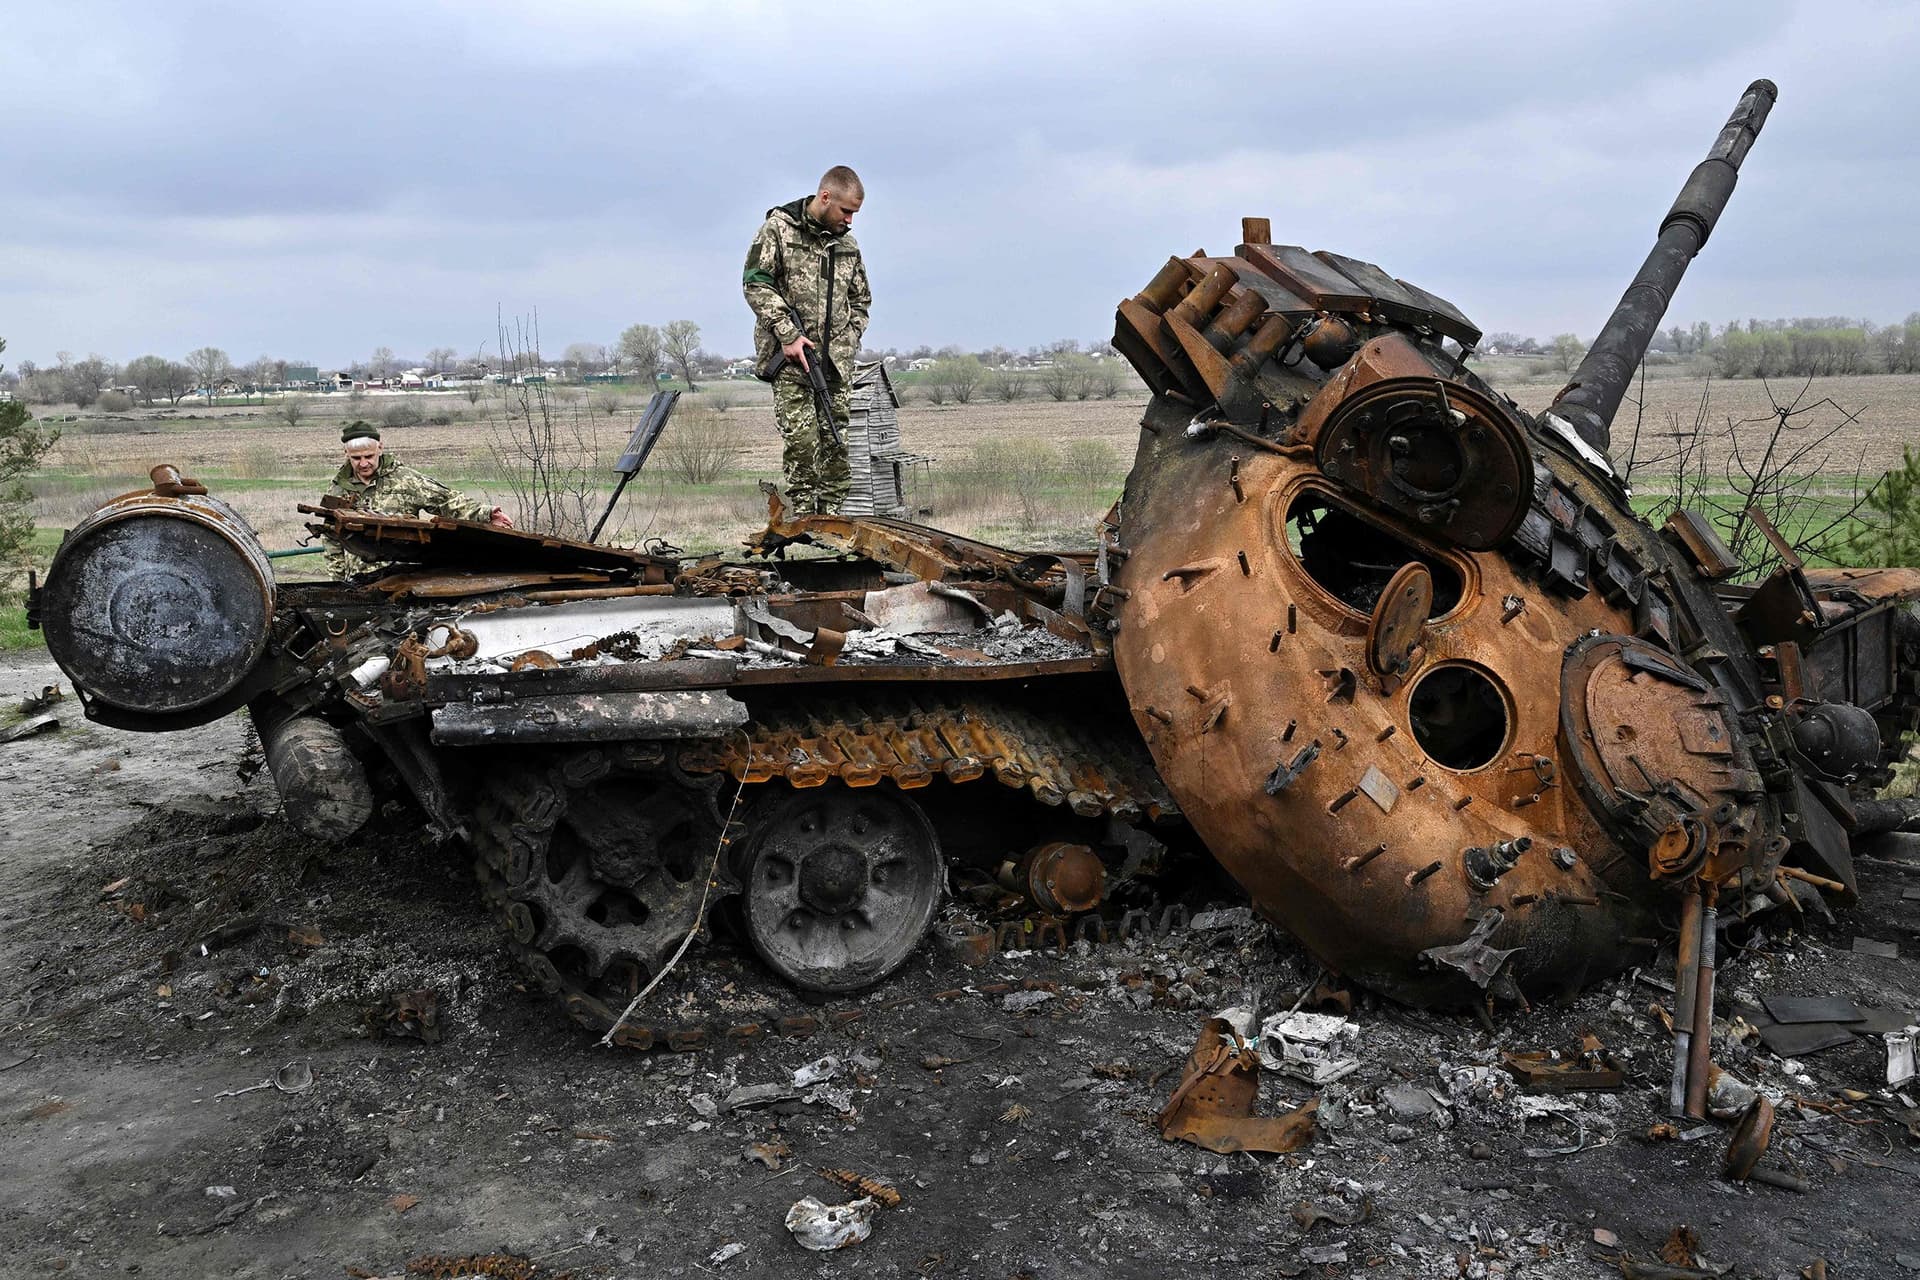
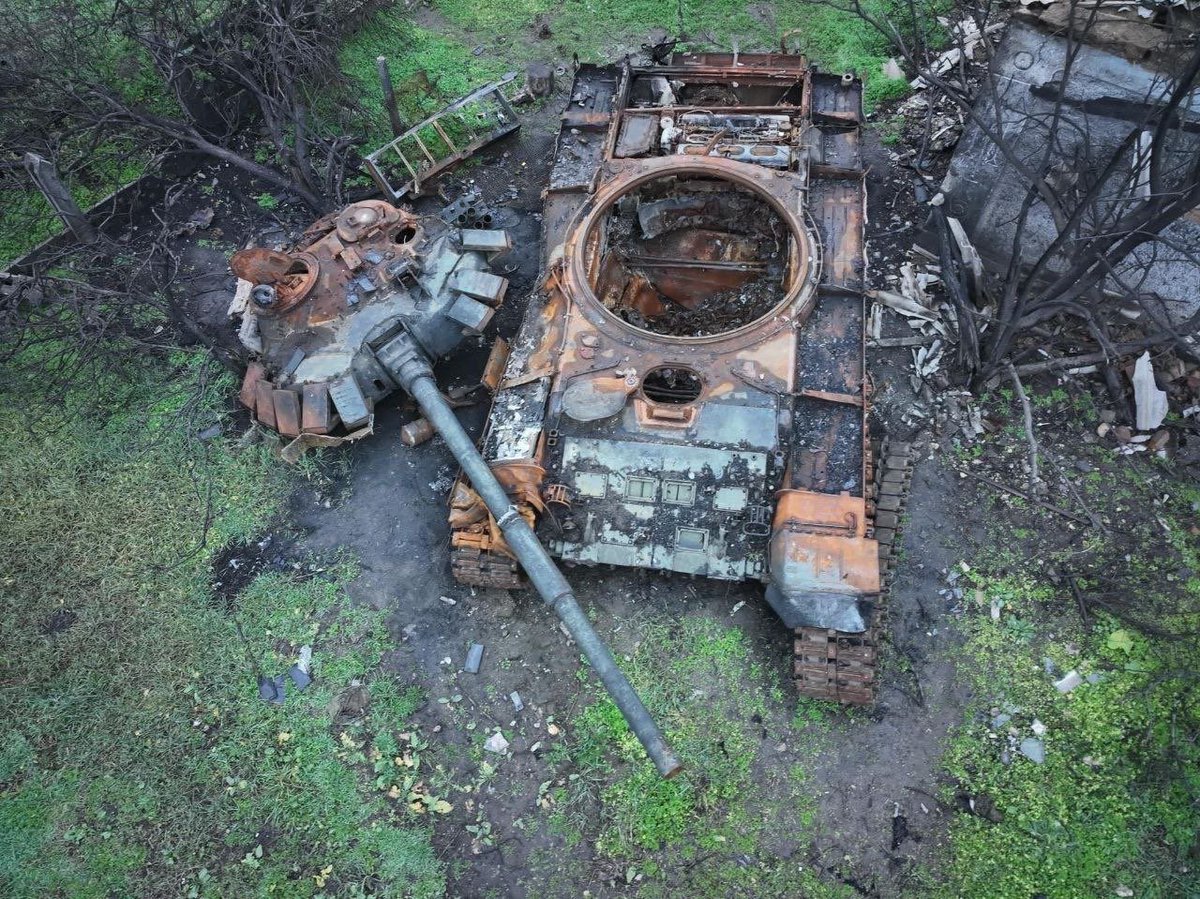
My plan is to preserve a decent amount of the original paint at the front and top of the turret and barrel to create a striking difference. I also want to add a lot more soot and just black-and-white smoke residue on the rusty parts. What do you guys think so far? I know that it is just the base colour but I feel like it is going in a slightly weird direction.
11 Likes
If you feel the rust came out too dark, you can mist over it with a light orange color to lighten it up. If you prefer brush painting, dry-brush the orange to hit the high spots and bring out the detail. Otherwise your plan sounds good and should match up well with the photos you have posted.
Ken
3 Likes
I agree. You’ve made a good start. Successive applications of ligher rust colors should get you where you want. ![]()
![]()
3 Likes
Looks great so far but be aware that the anti neutron cladding on top of the hatches and on various areas around the turret would burn off in a fire leaving only the fasteners in place , so for best realism either rethink your burn pattern or consider removing the cladding in these areas.
1 Like
Couple of other things as well. Some of the components ( stowage boxes, possibly the sight/rangefinder housing) are aluminum so wouldn’t rust and would possibly melt if the fire was intense enough. Good catch on noticing the general burn patterns on the hull & turret, I’m guessing these areas don’t get corroded because the multi layer armor prevents any internal fire from scorching the outer surface.
1 Like
Also, depending the power of the explosion that caused the turret to jack in the box, there may well of not been enough time to have an extensive turret fire causing in depth external fire damage and therefore lesser rust.
2 Likes
The rust on the boxes right now is just overspray.
Also at the time of the build, I thought those were simply additional armor and I do not want to go backward in the build.
1 Like
The science of turret tossing is quite complex lol.
I will push back the soot and paint to reduce the amount of rust. Good advice though!
3 Likes