Any of those sound great … Would be nice if he did have flight in a tempest … I always think they look aggressive…
I have semi happy memories of a Chipmunk flight during my very brief stint in the Air cadets lol… And that was a very very long time ago😁
Just checked the log book. Confirmed he did fly the Tempest between the Mustang and Vampire. Two flights only as the squadron quickly moved to the Vampire, but it is in the build.
2 Likes
Excellent news … Another one to look forward to
After some time away from the bench for various reasons, I’ve finally found some time to get back to the next build.
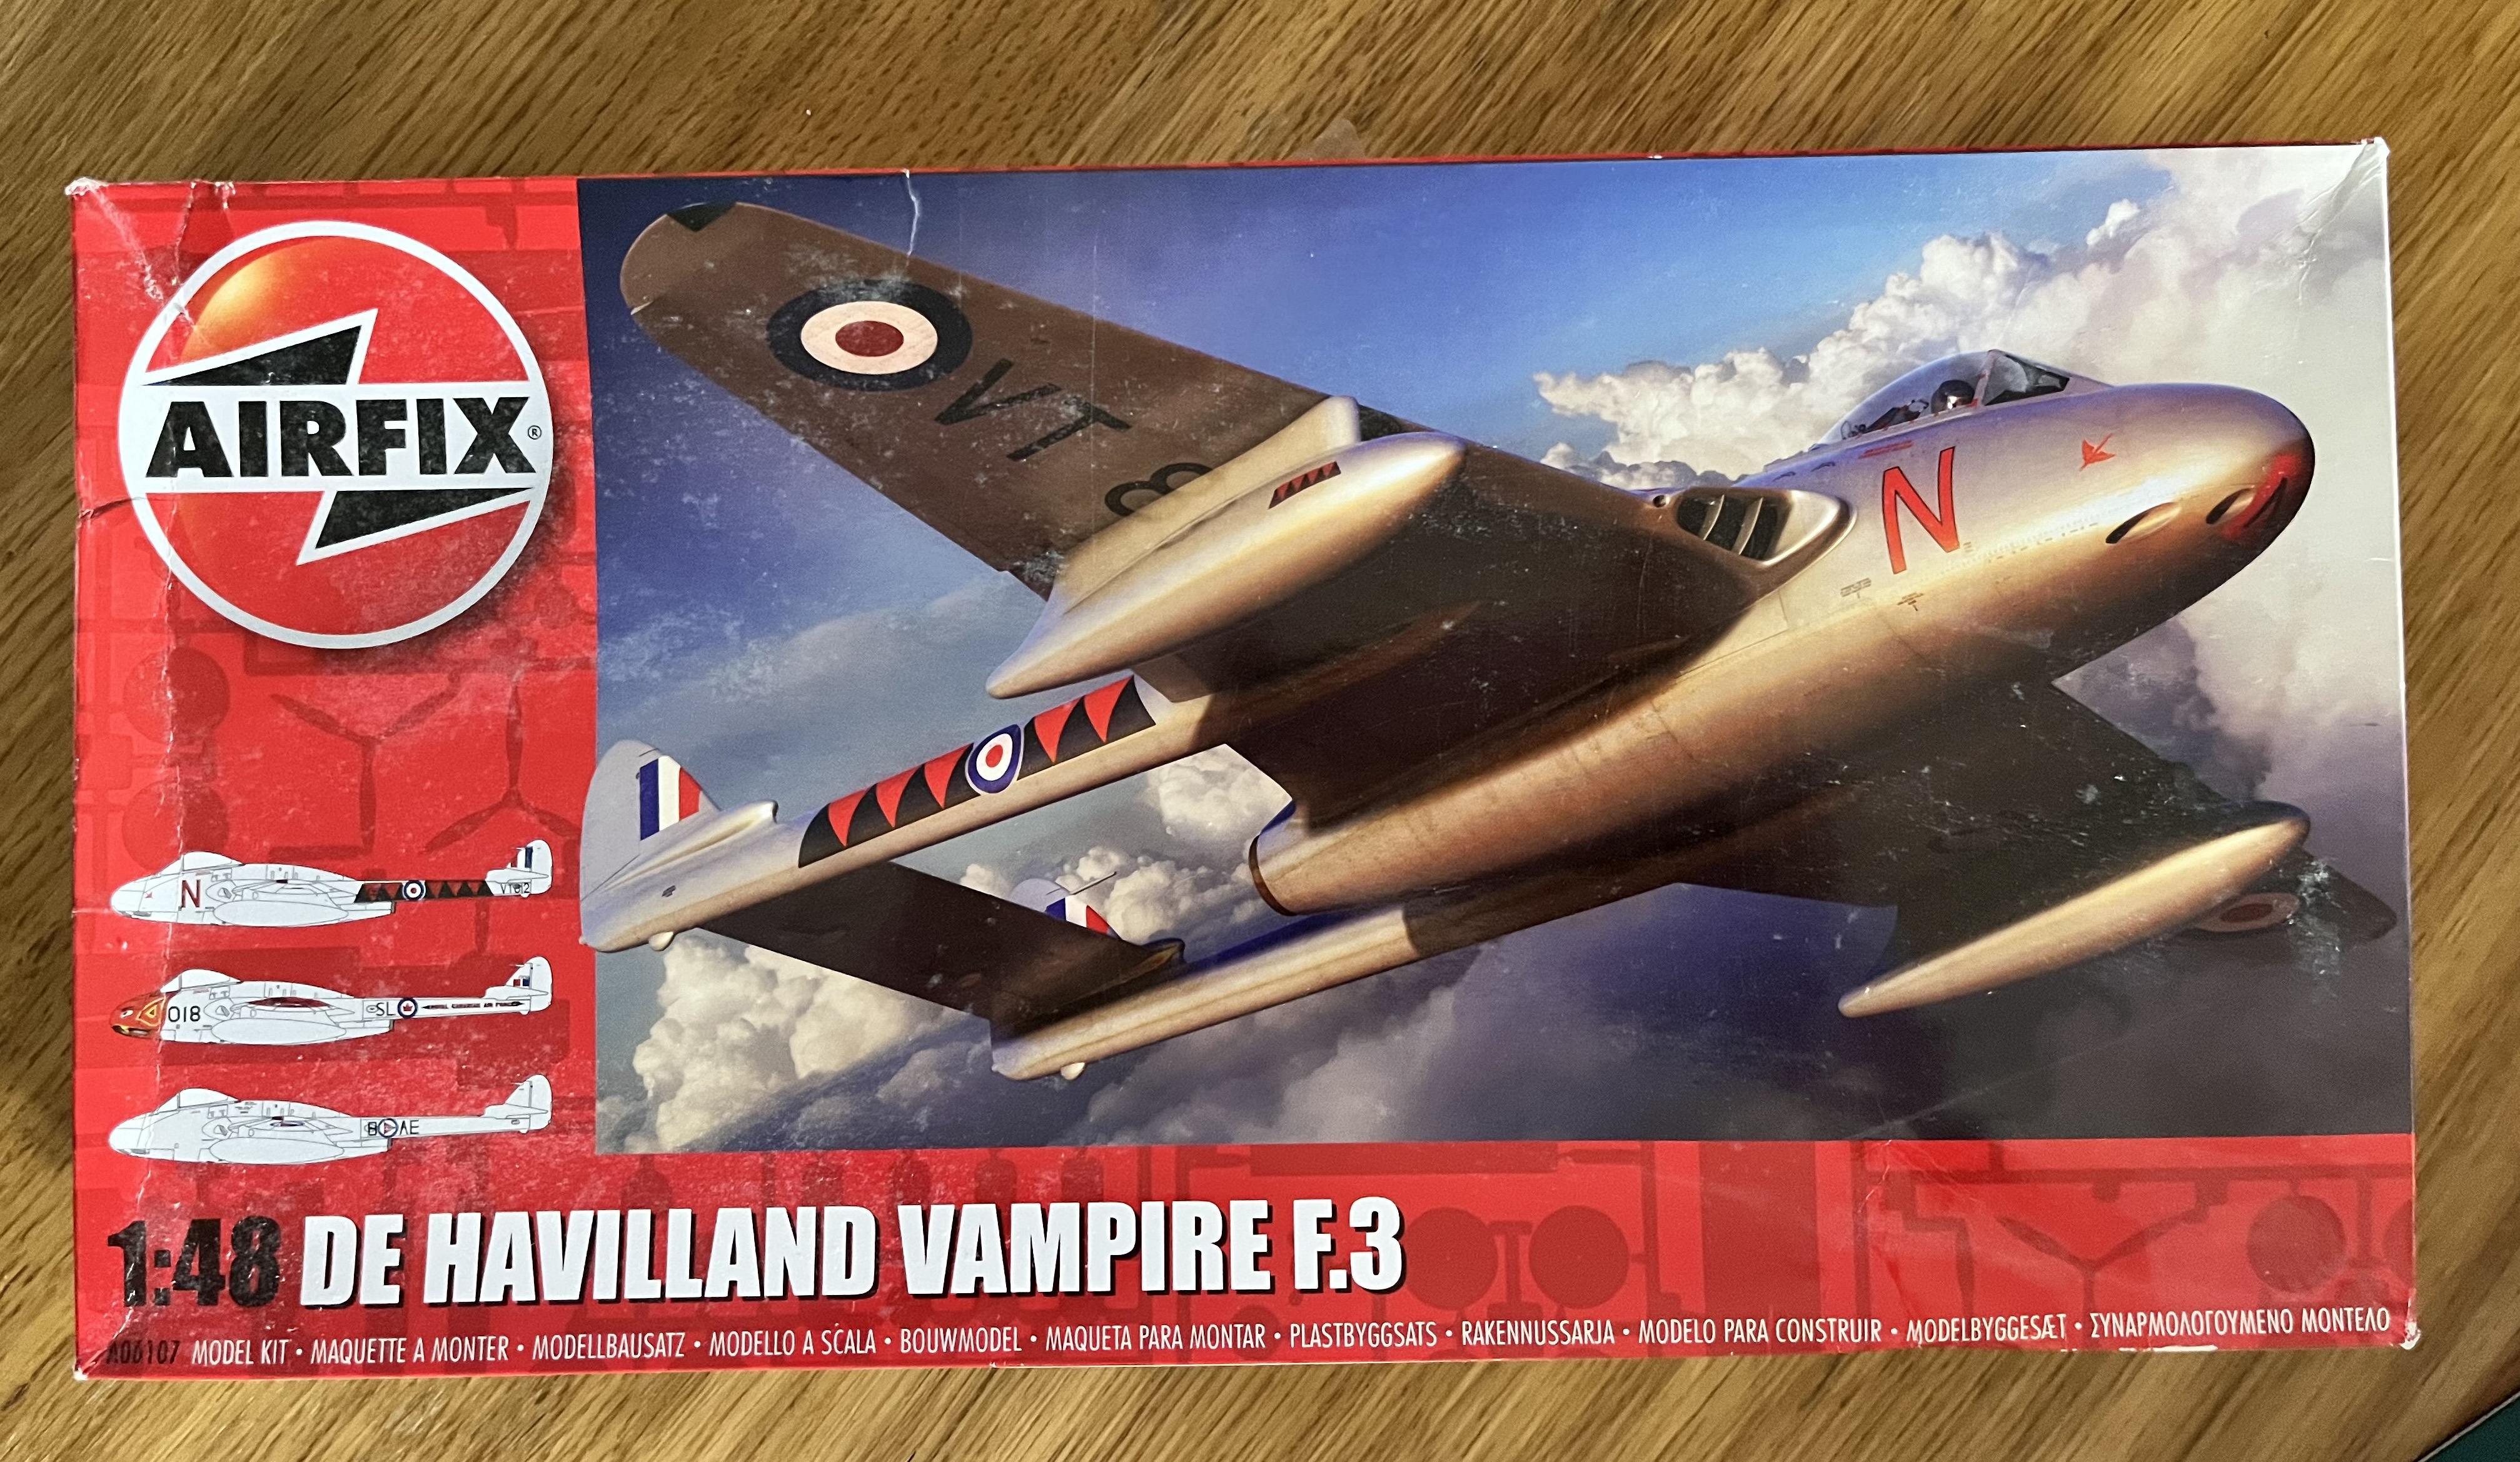
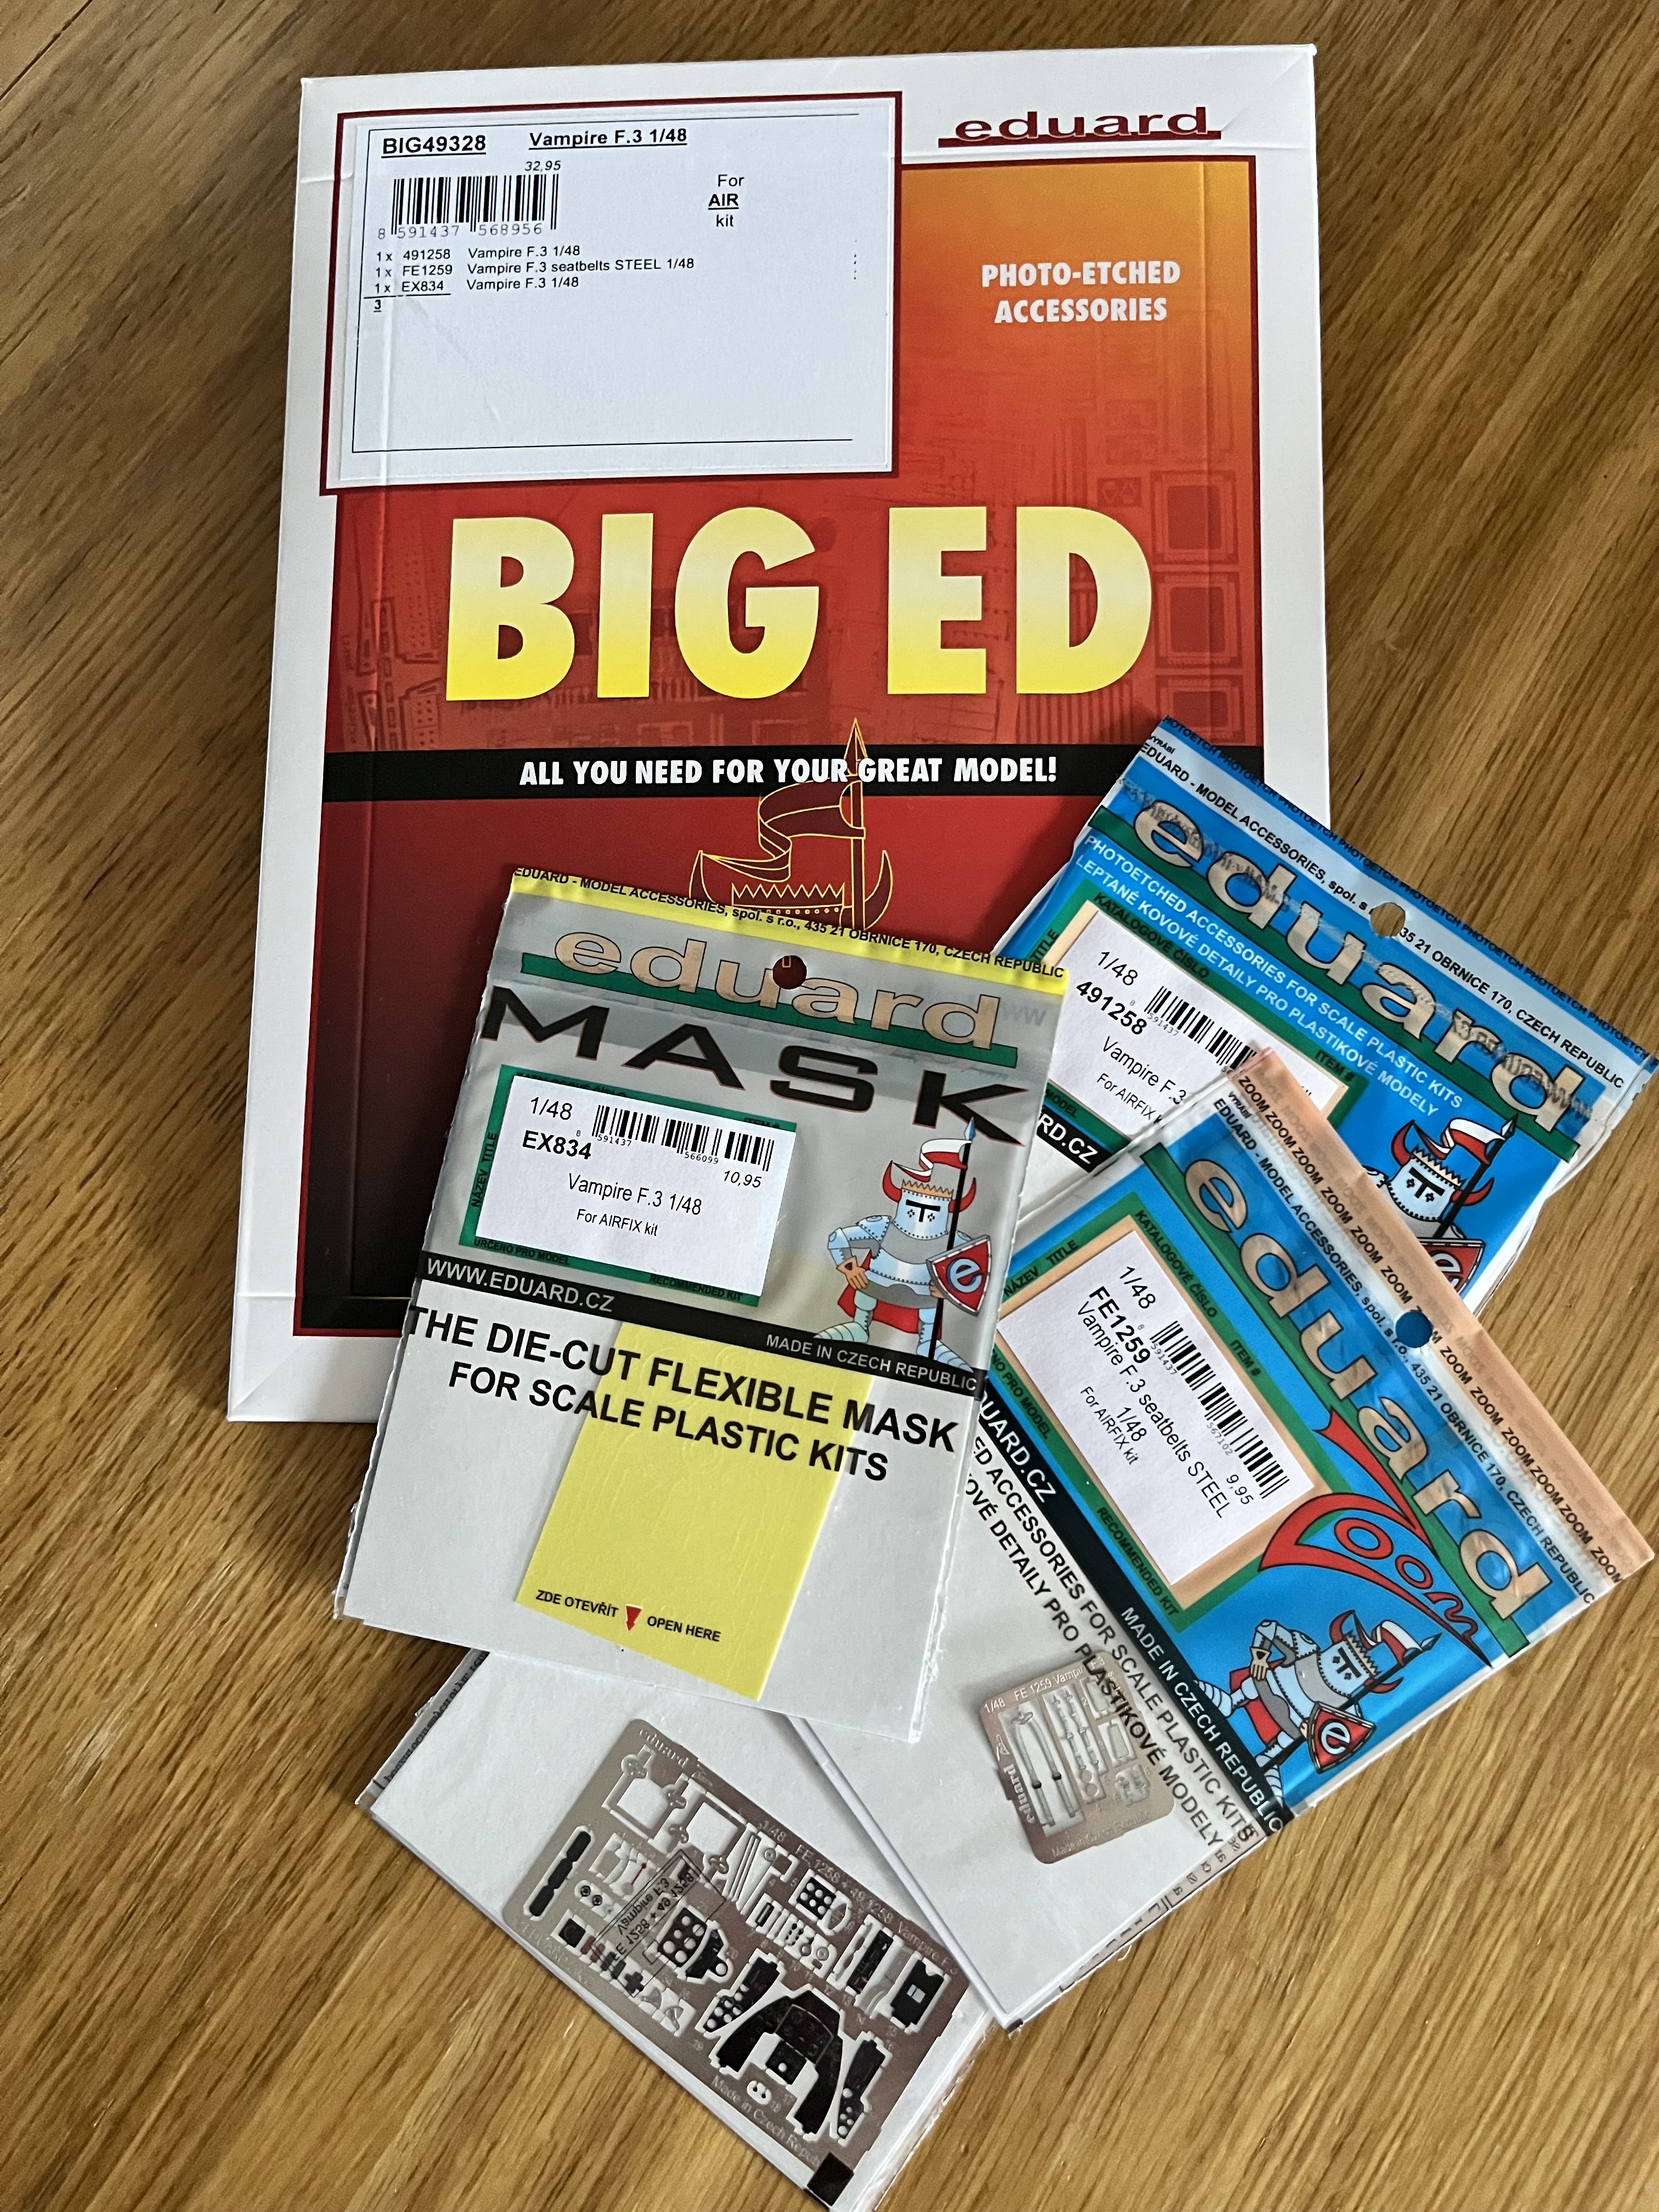
Also picked up some aftermarket for a bit of extra detailing.
3 Likes
Excellent, I was only thinking about this a few days ago mate … Whats the history with the Vampire ??
He was posted to 247 Squadron in late March 1947 having received an above average assessment as a fighter pilot for his time in 213 Squadron. I believe they were then based in Nicosia, Cyprus.

He then first flew the Vampire with 247 on 19th May 1947. Initially he flew the Mk I, later moving to the Mk III as the squadron upgraded their aircraft, with the first flight in that type on 2nd December 1948. He also flew the Mk V as well before the squadron graduated to the meteor in late 1949. There was some overlap in flights of the Vampire and Meteor into 1951 as he was posted to Squadron 72 in March 1950 which were still operating the Vampire Mk V.
I believe he also later flew the Vampire T11 as well.
If my calculations are correct he totalled 320 hours 15 minutes flight time in Vampires across the Mk I, III and V.
5 Likes
Amazing career… looking forward to this one now ![]()
I’d be happy just to be able to be an average fighter pilot lol… ![]()
1 Like
Me too. Unfortunately ocular migraines scuppered my chances of trying.
2 Likes
Interesting to read… I had two big problems I could not overcome for becoming a pilot: my eyes and I get sick in a plane. oh well. So I got to be a medic…
1 Like
Off to a start. A little drilling needed first. Instructions call for a 2mm bit to drill location holes for the fuel tanks to be attached later. 2mm seemed huge at first, but a check of the fuel tank mounts revealed they are indeed that size. Should be a strong attachment at least.

It seems odd not to start with the cockpit on an aircraft, but may jump around a bit anyway taking into account painting and PE.
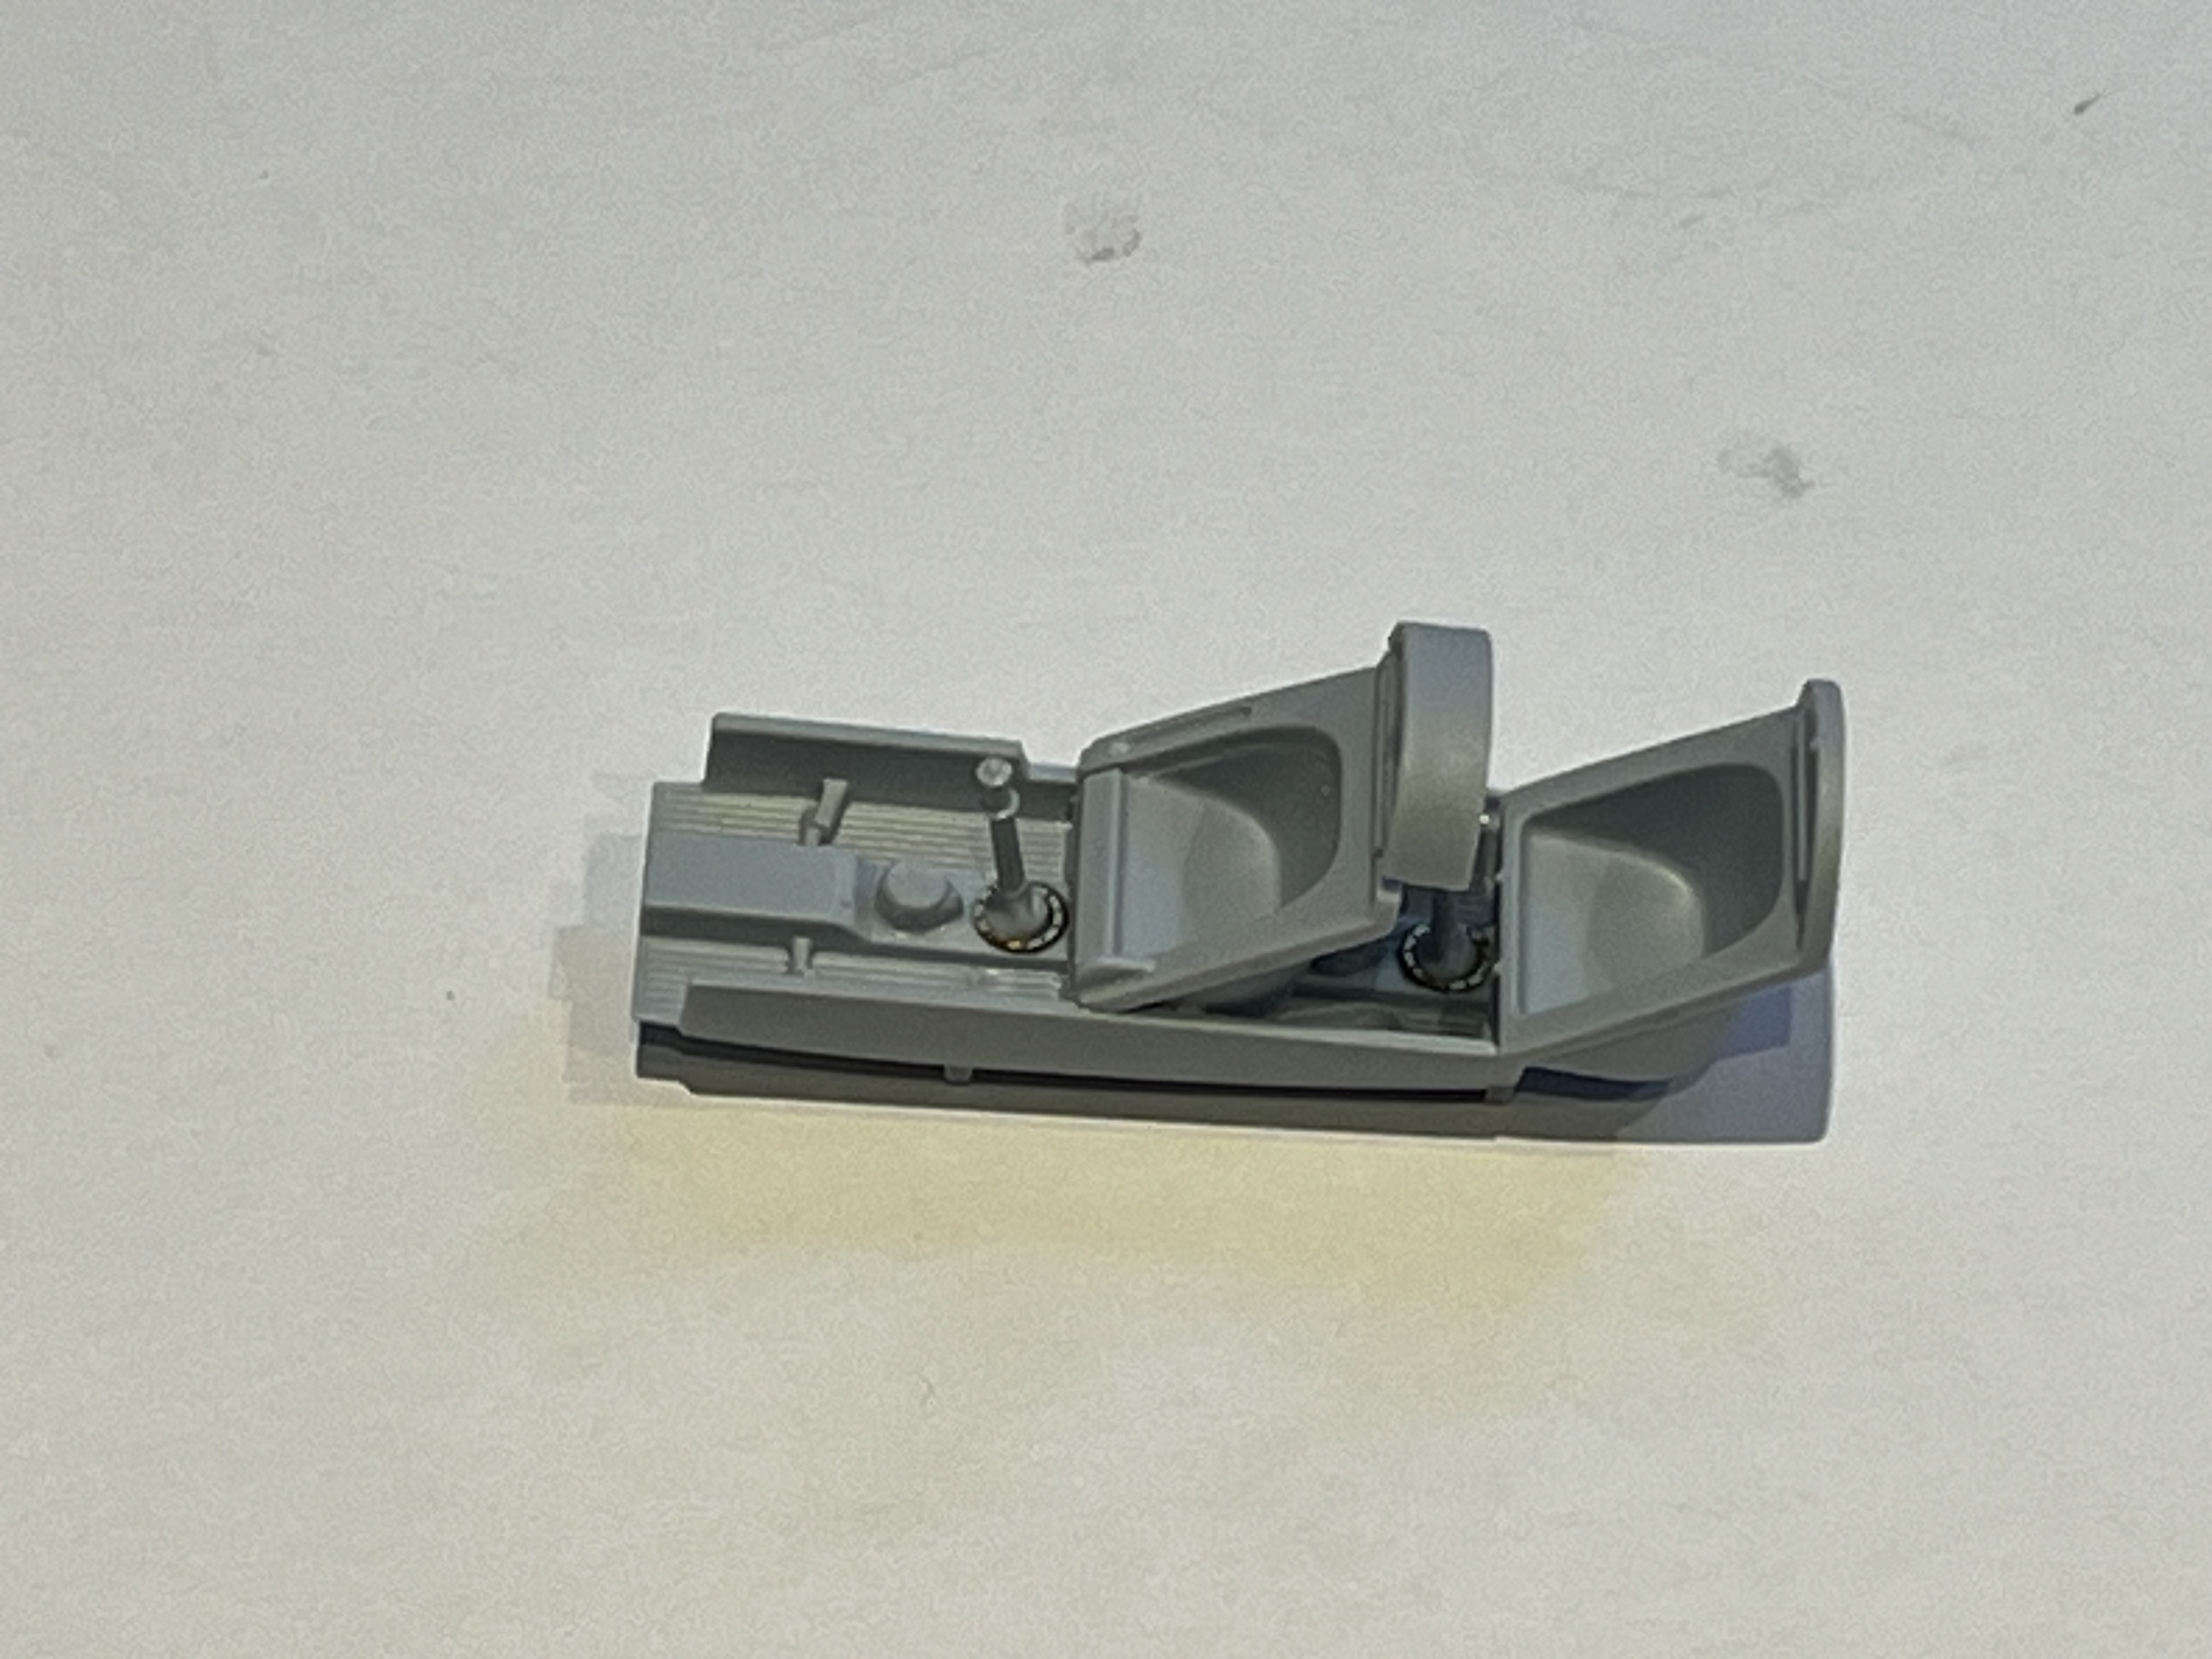
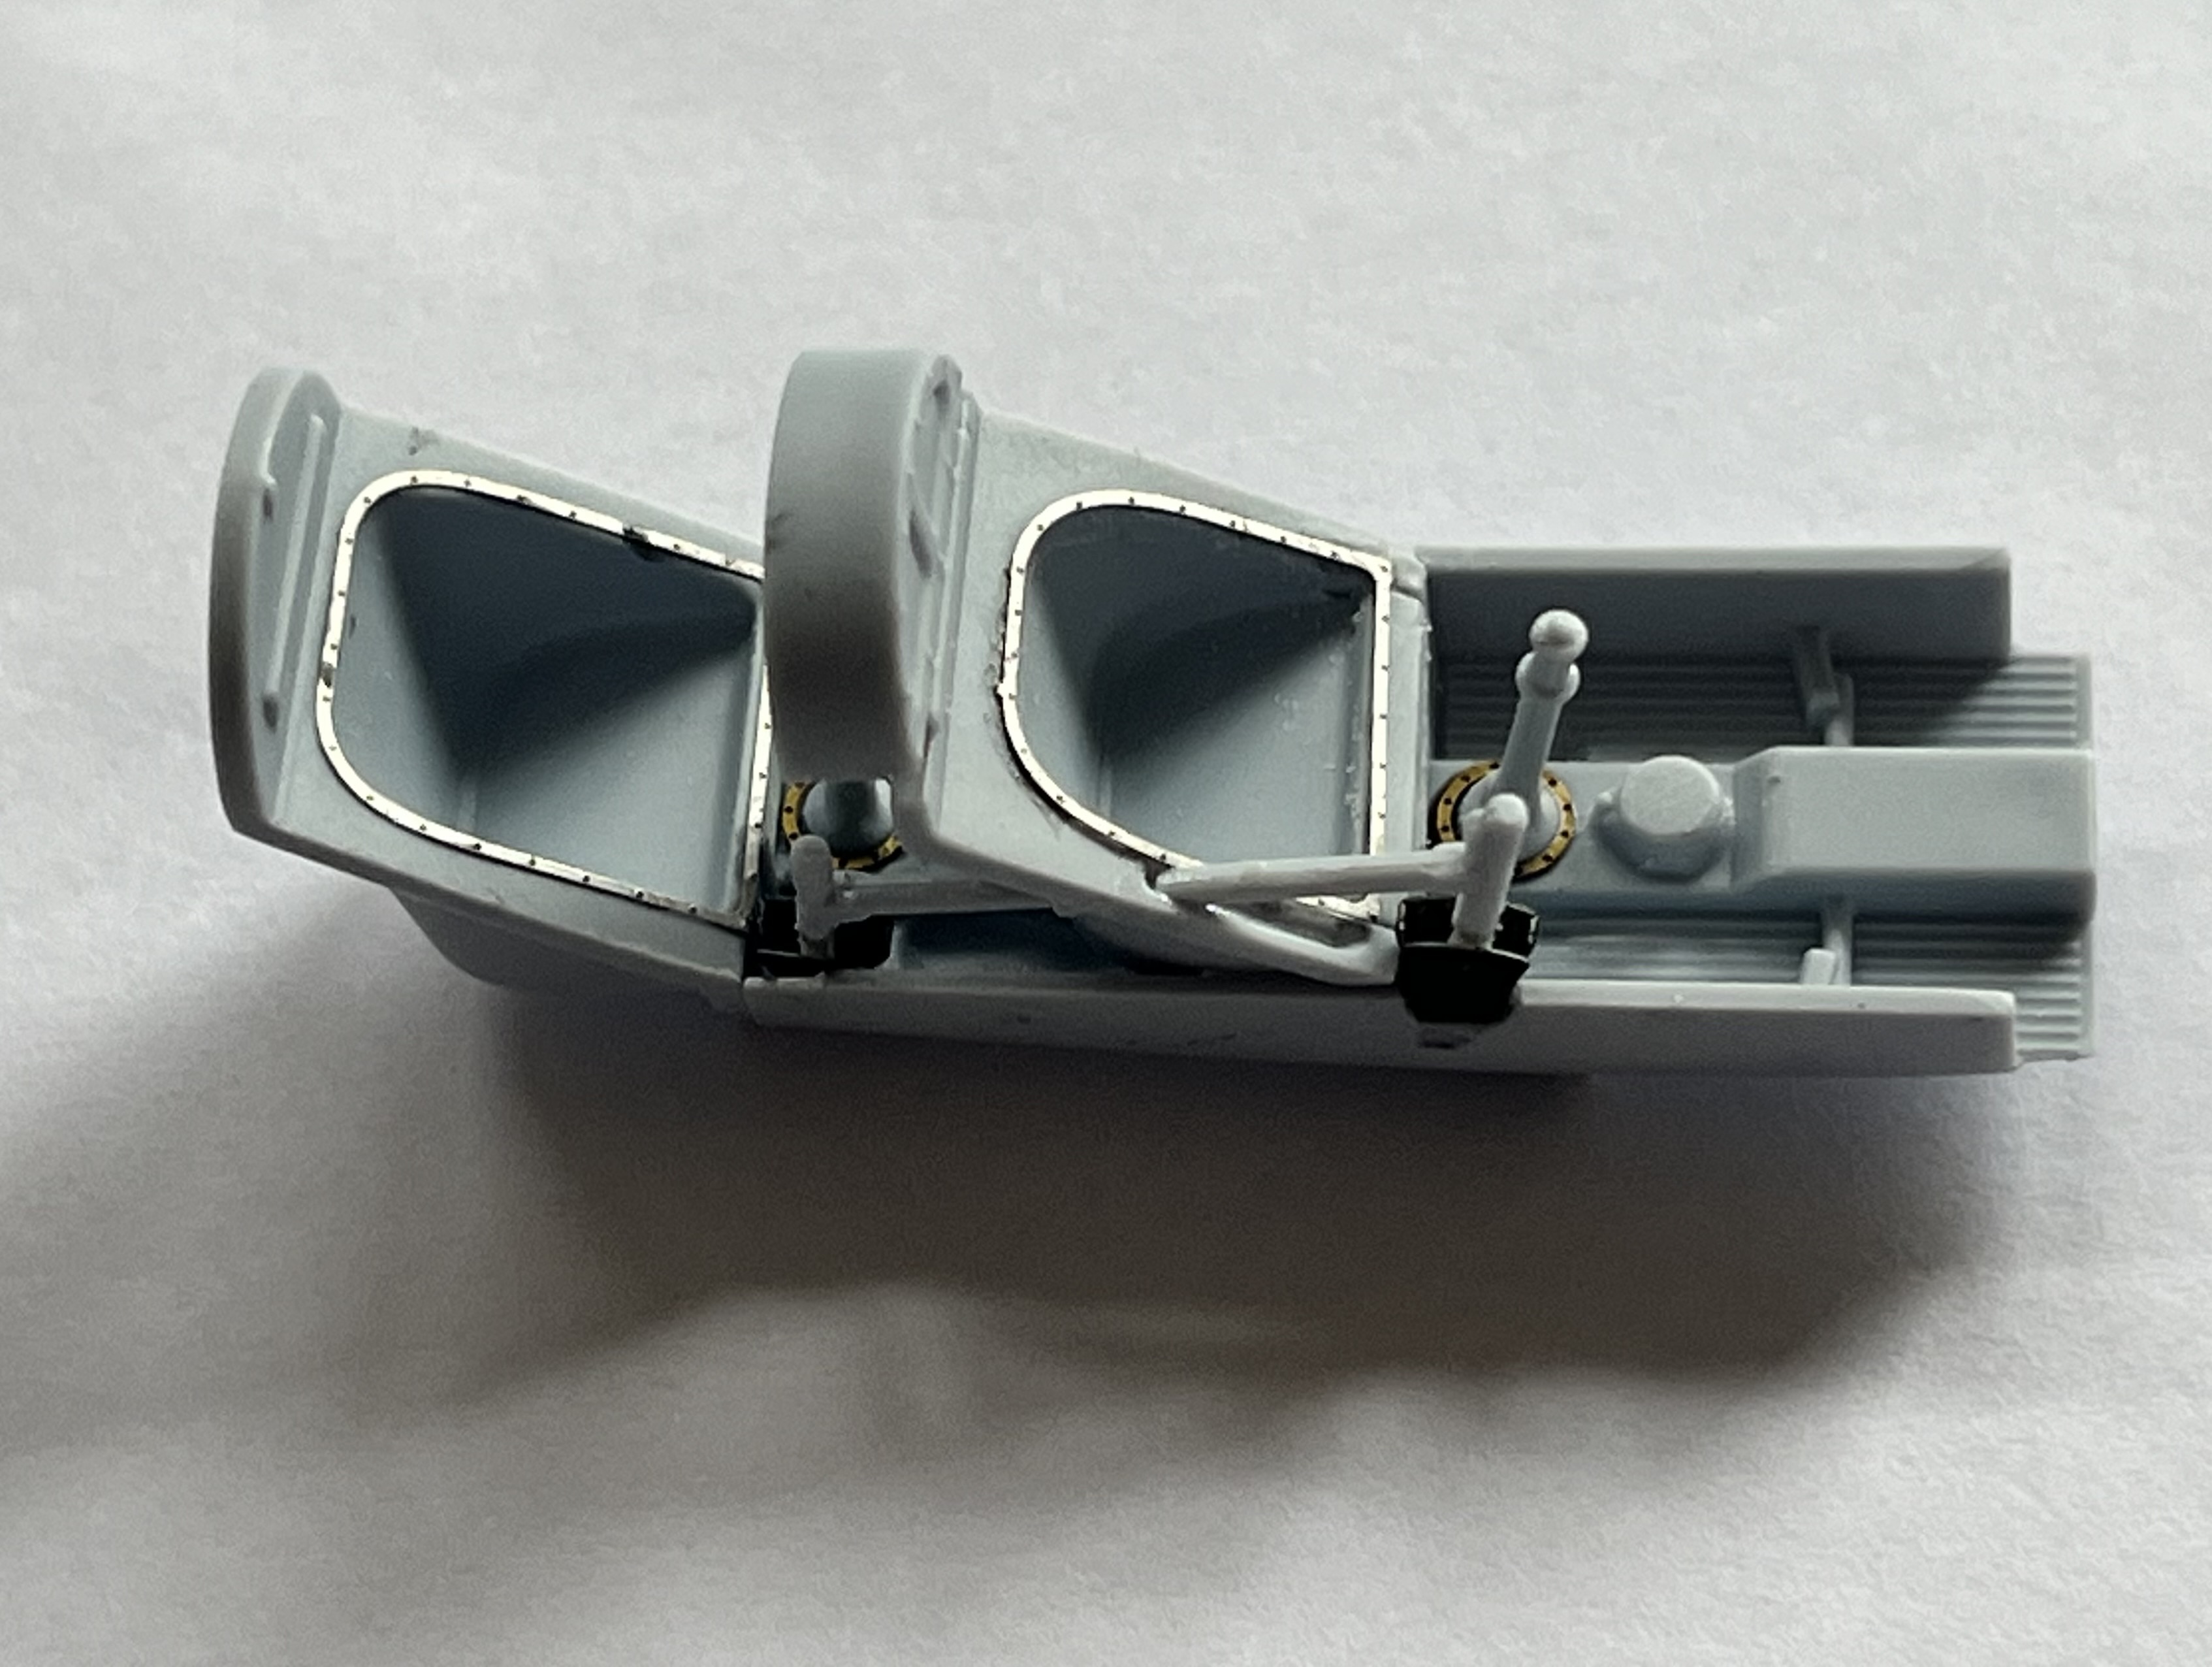
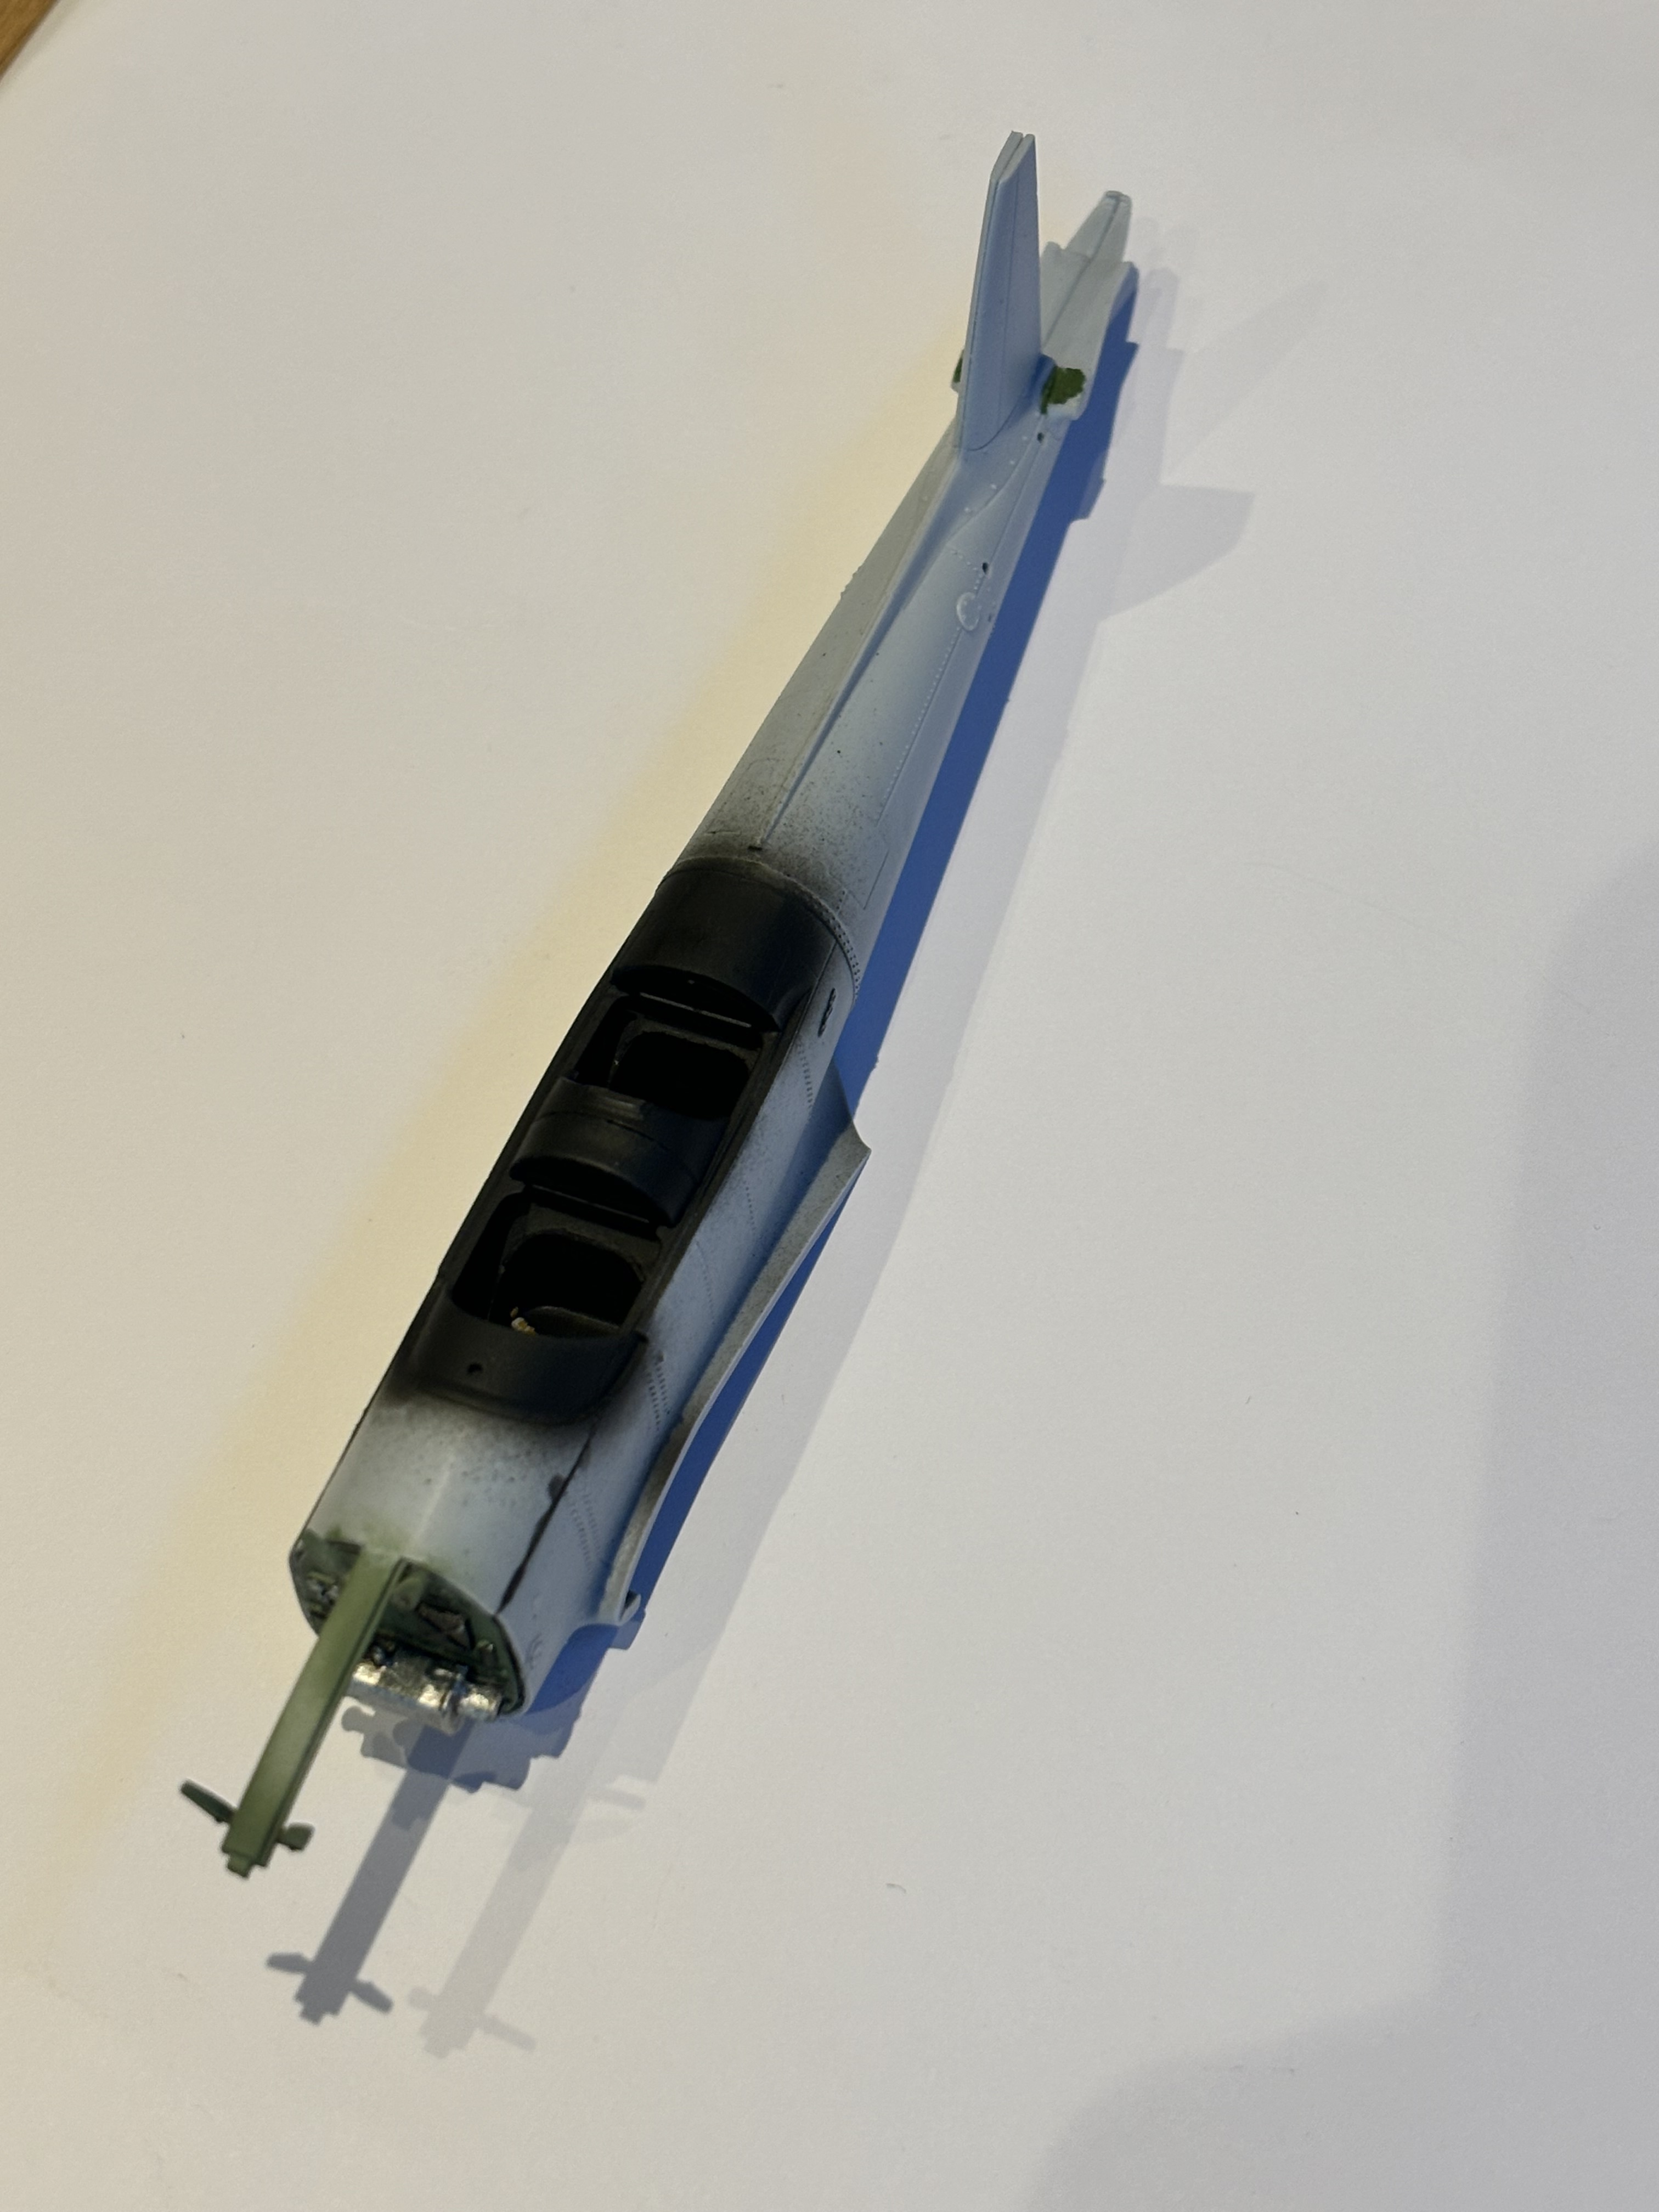
Next up calls for the engine intakes and the exhaust, both of which need to be silver. Getting rid of seam lines internally then trying to paint with the parts joined could be problematic. Equally painting first then joining will leave those seam lines quite visible. Shouldn’t be too much of an issue on the intakes as they will be covered somewhat by grilles. The jet exhaust is a different story though.


2 Likes
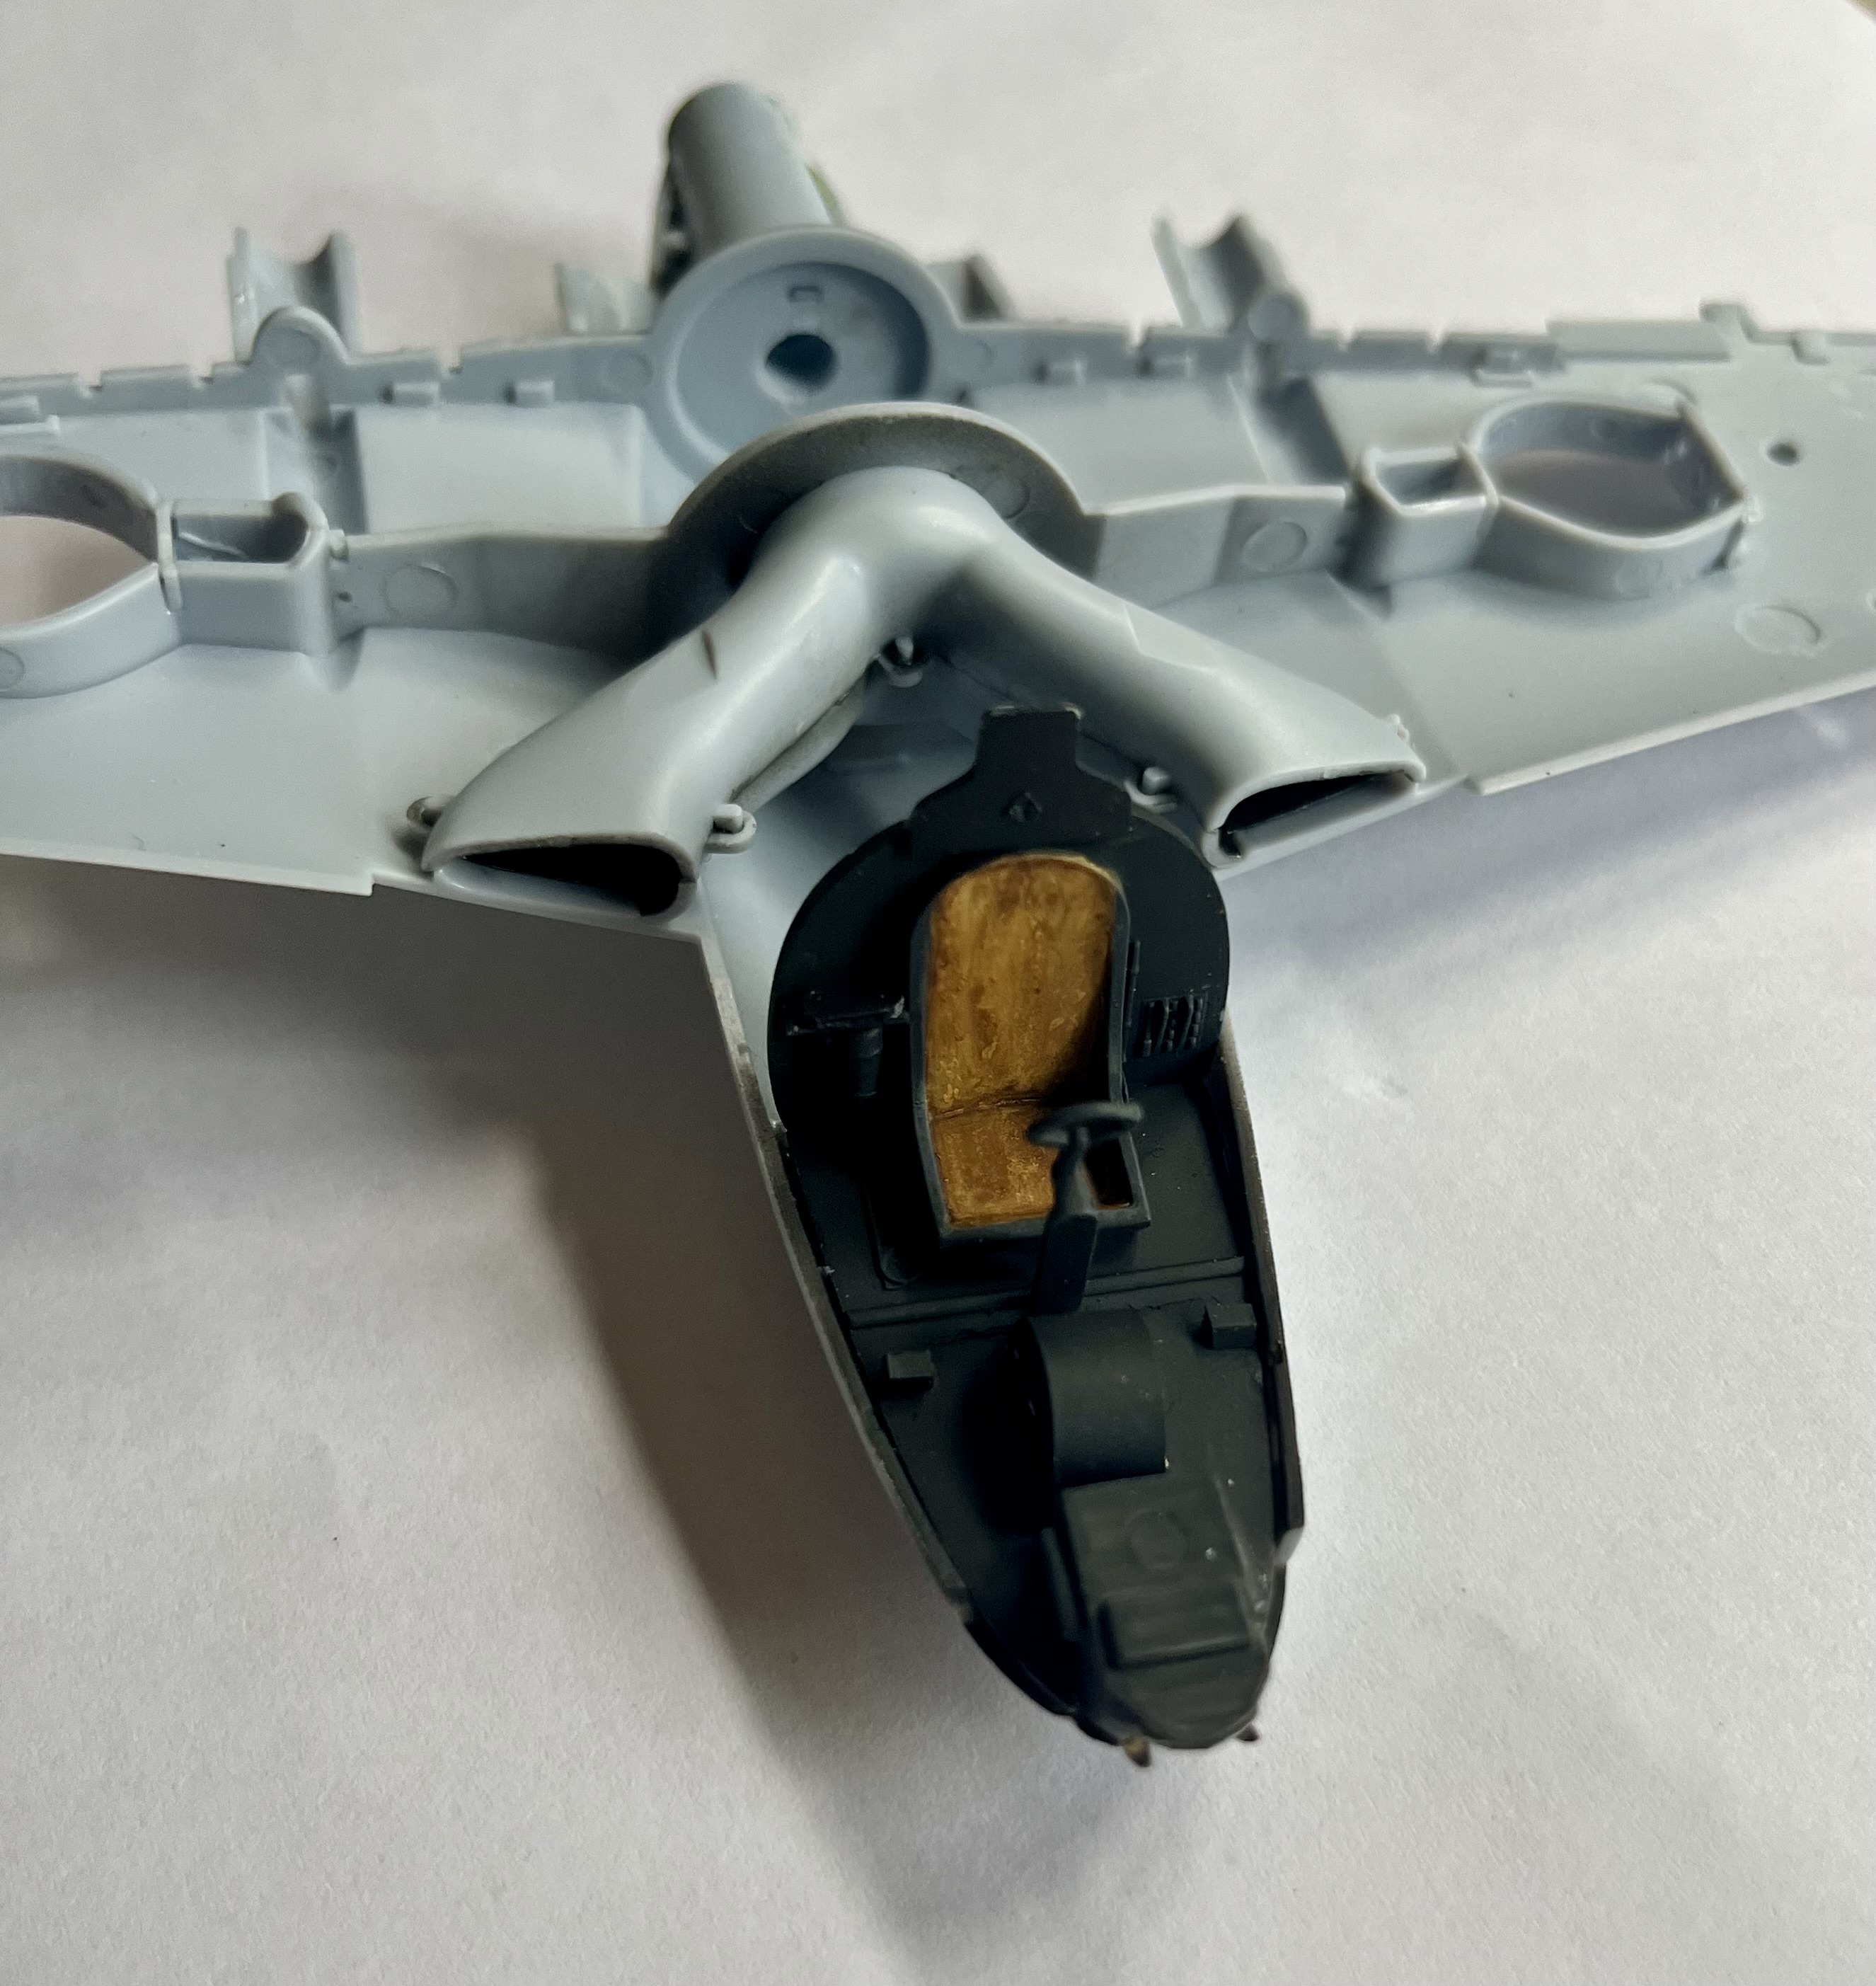
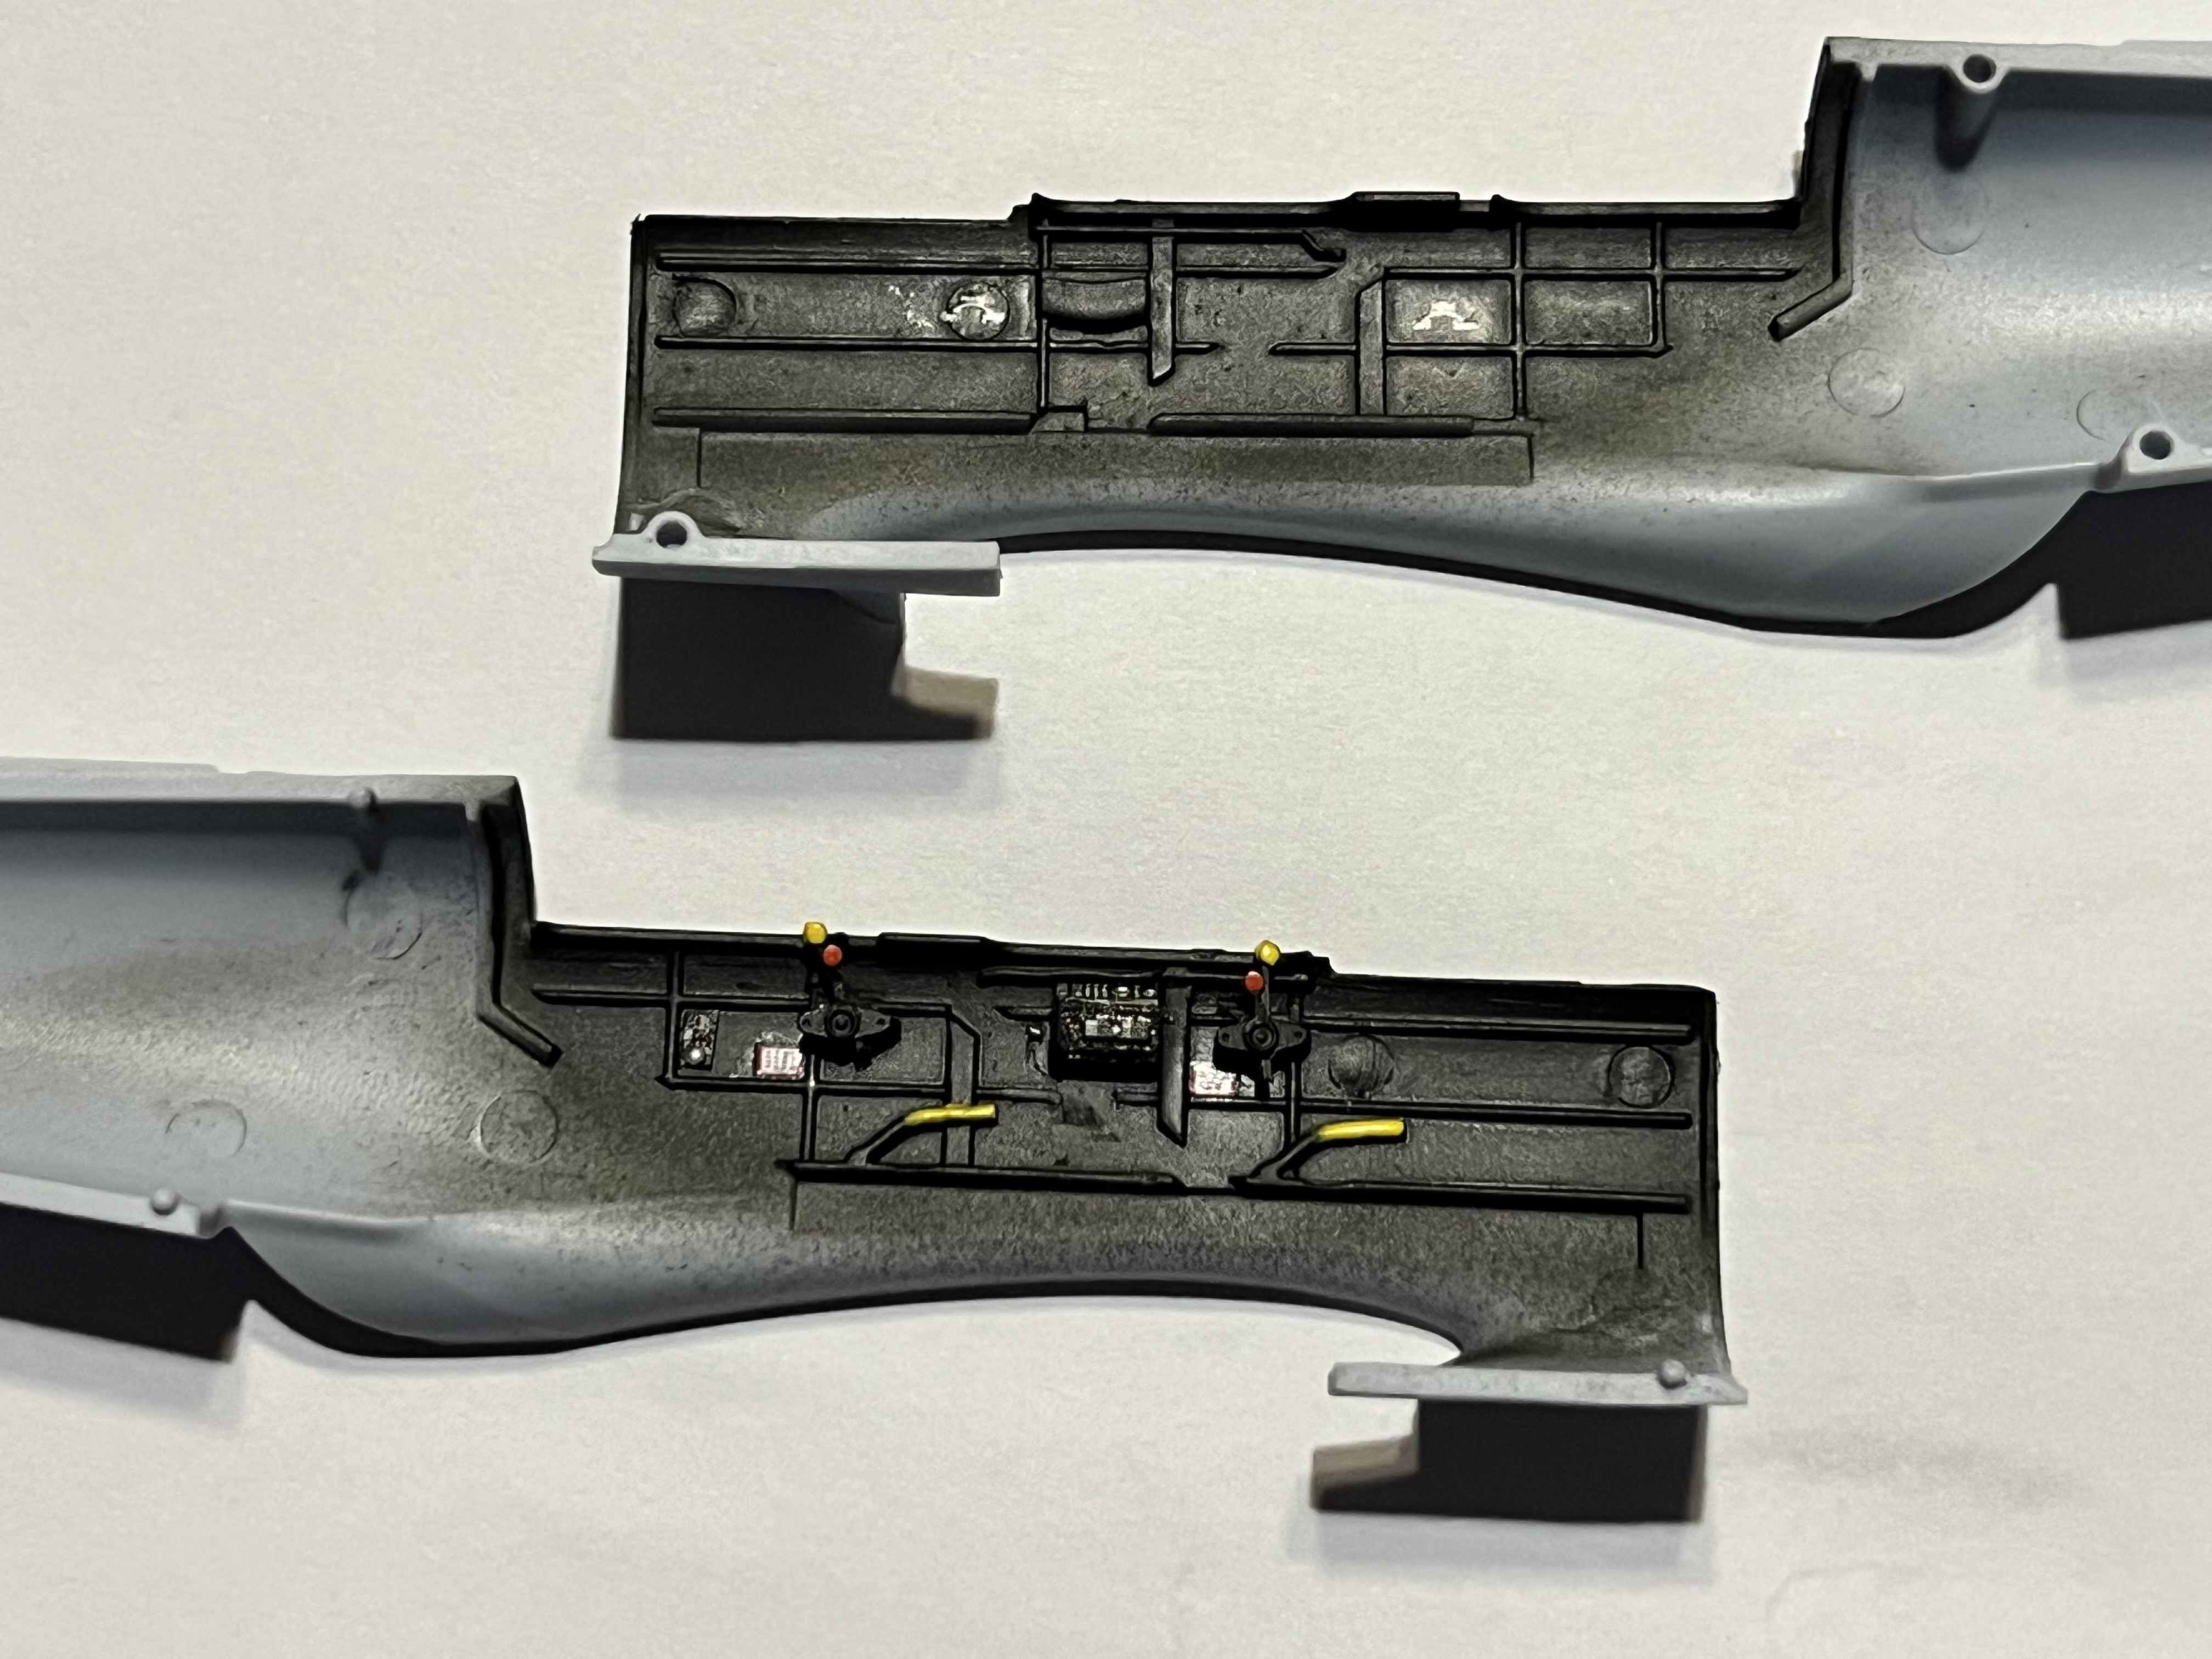
Whilst I ponder the jet exhaust and intake issue, I’ve moved onto the cockpit.
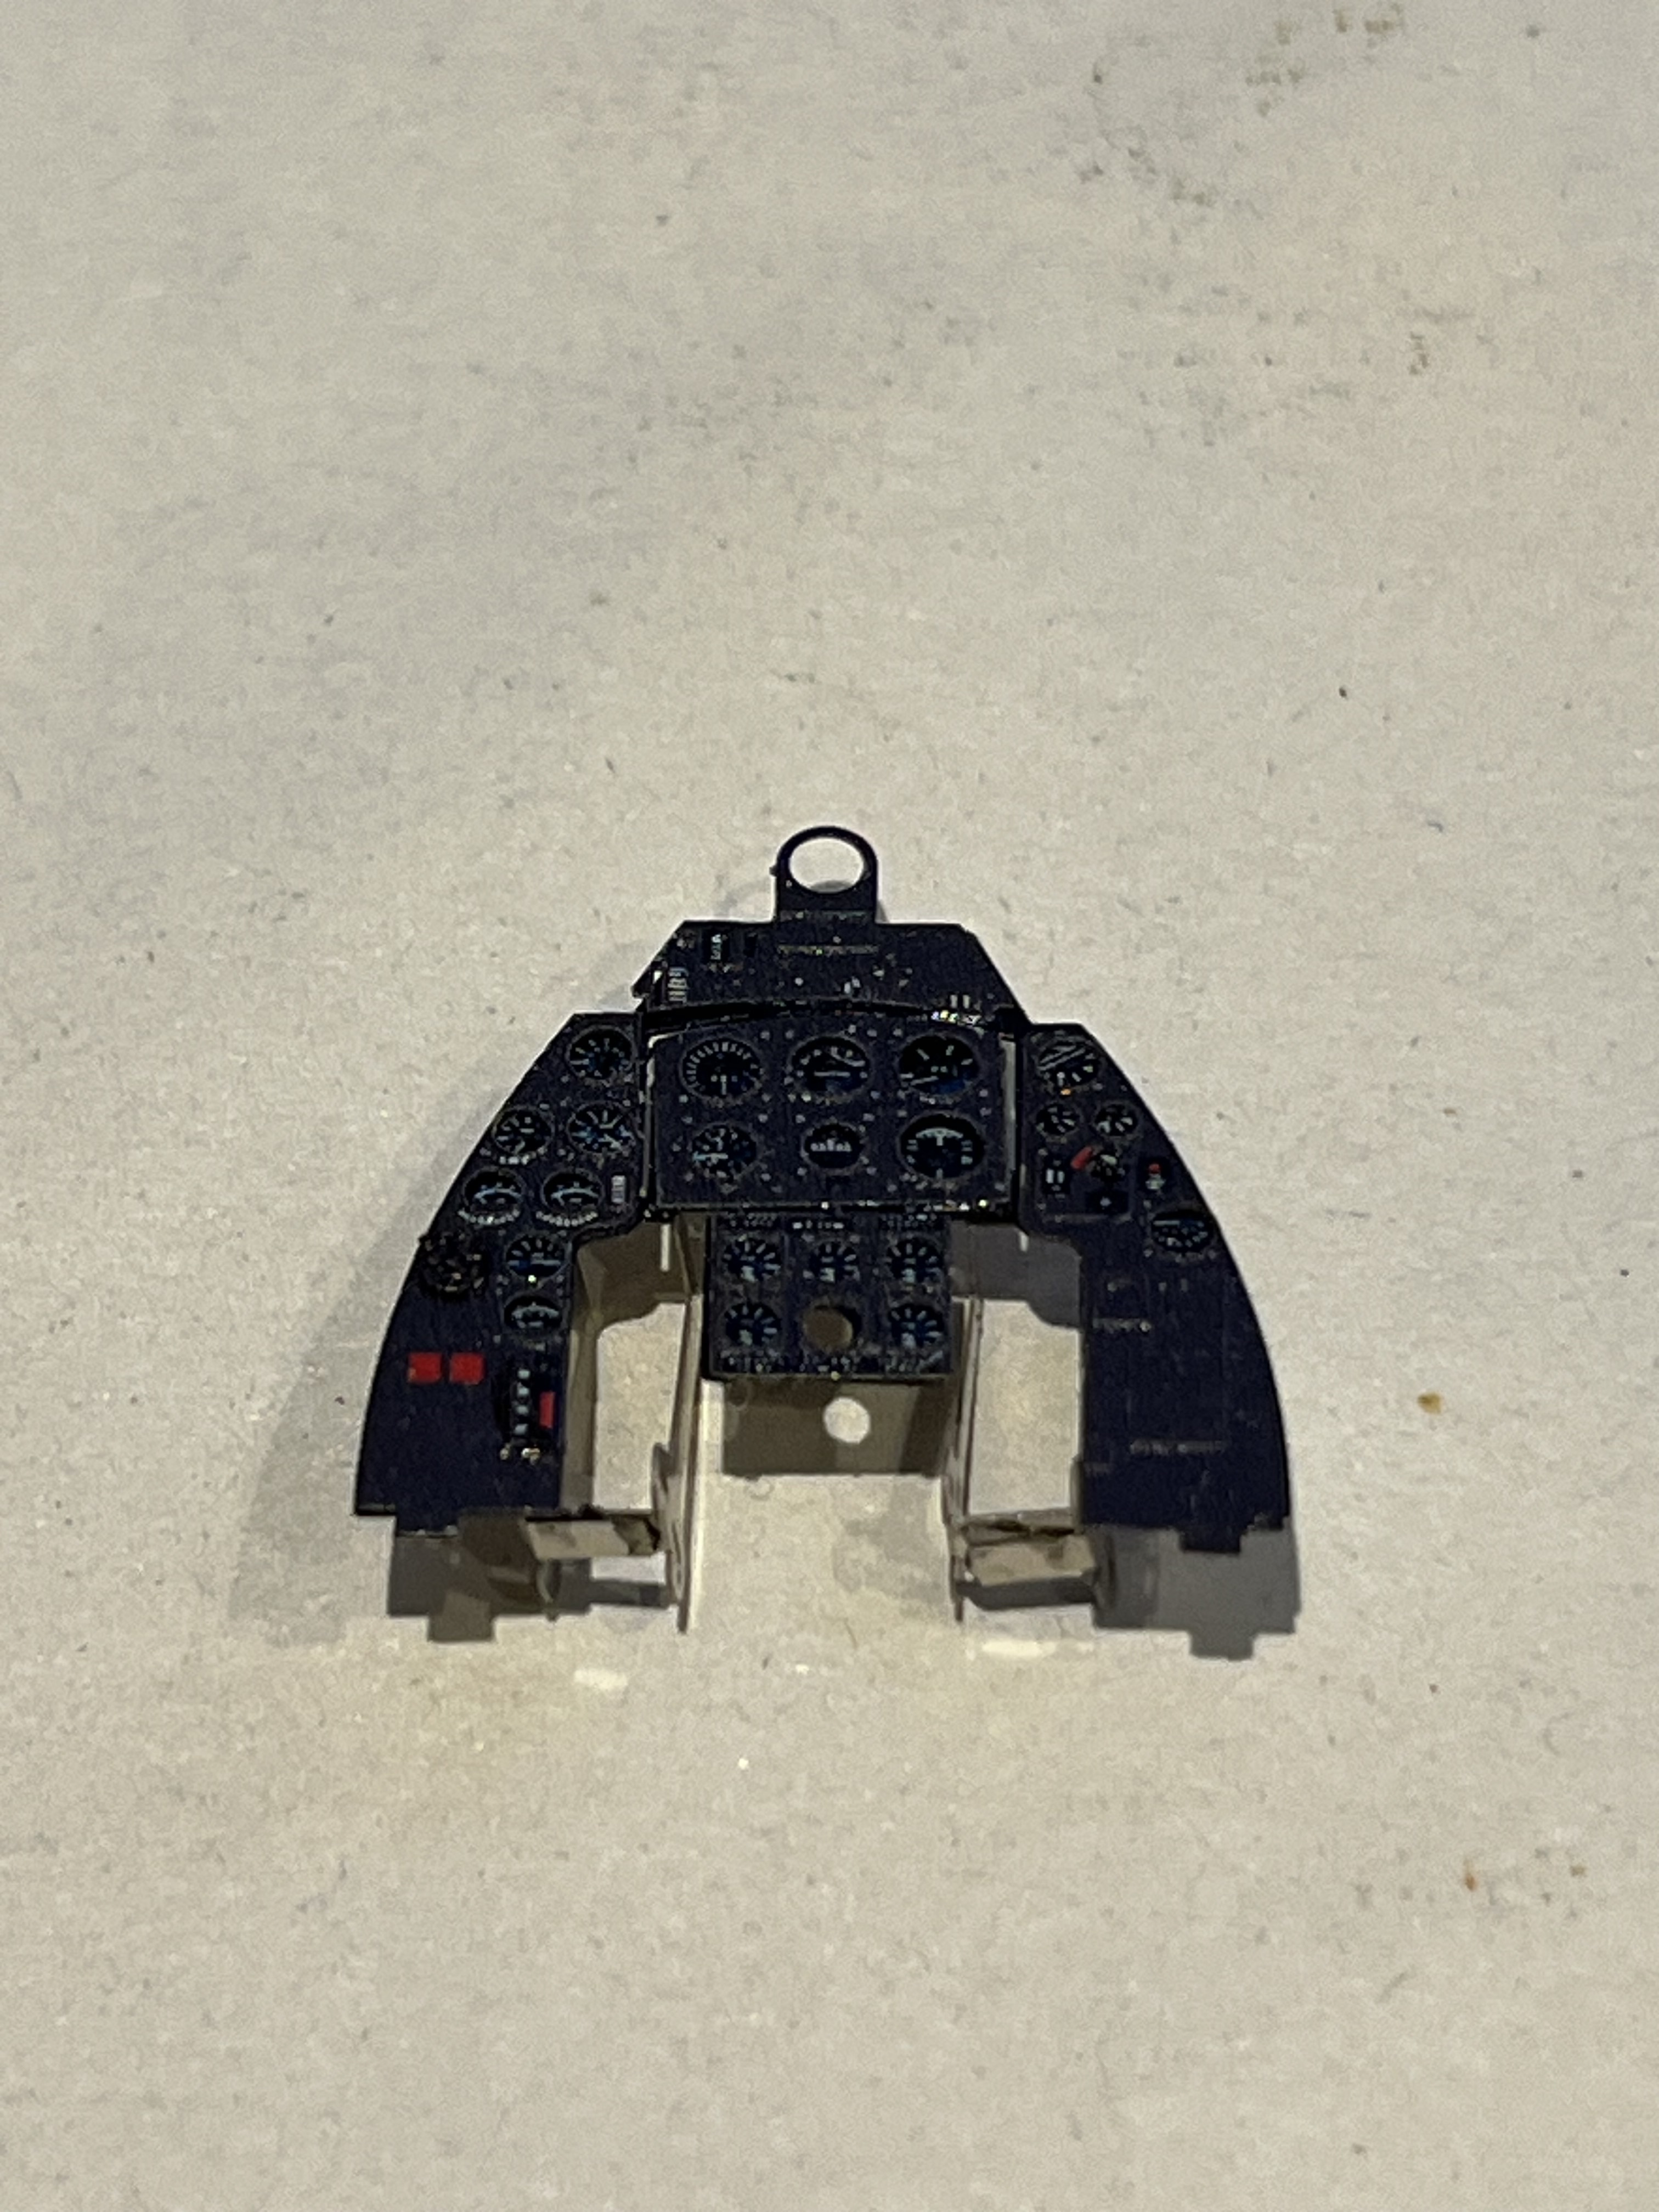
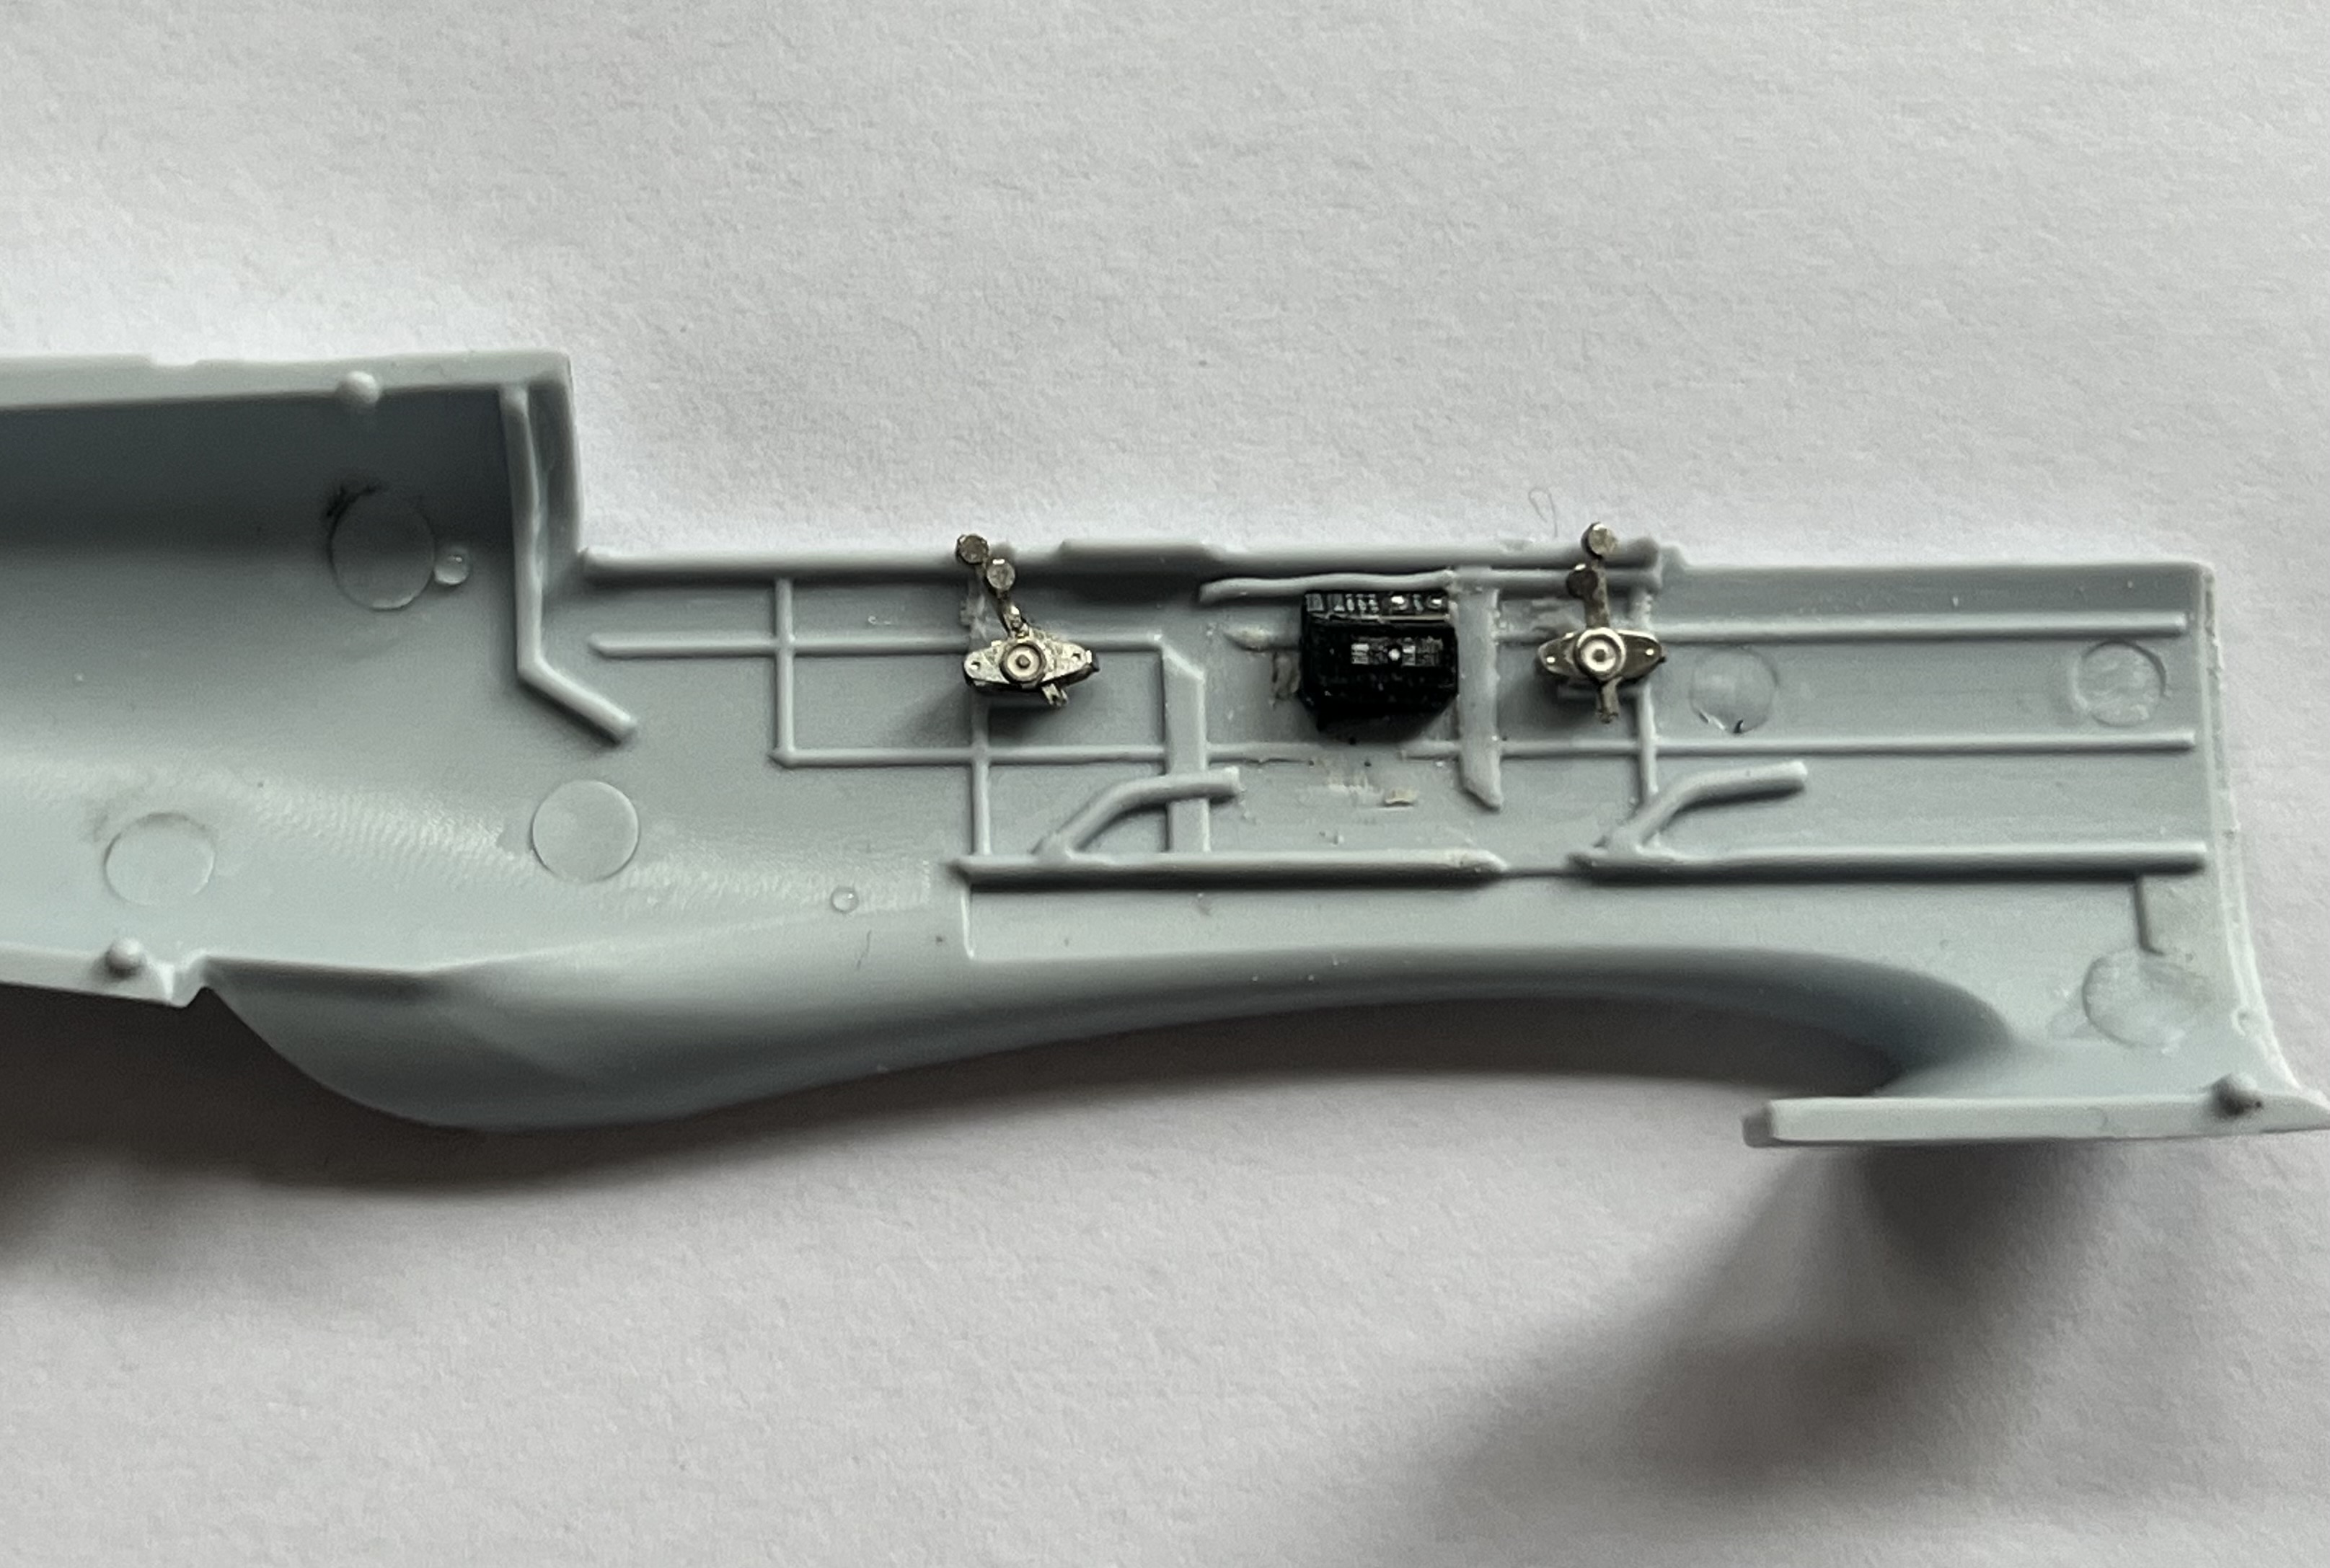
In order to install some PE I had to remove some plastic. I got a little over zealous with the razor saw and accidentally removed the locating ‘braces’ for the instrument panel. This actually worked out as the replacement PE instrument panel is much thinner, so added some spare plastic to act as new braces to provide a tighter fit. Looks a bit untidy but will be hidden. Some excess CA glue to clean up before painting.

Eduard always excel with their instrument panels.
Some thoughts on the kit so far. Whilst detail is not up to the standard of some manufacturers, (Eduard for example, or most recent Airfix releases judging by the Anson in my stash), it is however decent enough. Fit so far is pretty good and in some places almost push fit. I’ve got some warping on the upper fuselage though to sort when I get to that stage. The plastic is a bit strange and different from other Airfix kits I’ve seen. Don’t know how to describe it - sort of feels ‘plinky’?!? Isn’t soft like Miniart plastic and sands fine, so don’t suppose it matters really.
3 Likes
Decided best to paint and then glue the intakes and jet exhaust. I can then fill and sand the most visible parts and then touch up with paint.
Rather than drag out the airbrush multiple times I carried on with some of the cockpit detail. I’ll then base paint the cockpit in one. First sanding off some of the plastic detail to replace with PE.


Once that’s done the kit instructions call for the details to be added to the insides of the upper fuselage along with some fine PE details. A little bit of clean up of exceeding CA and then will be ready for paint.

4 Likes
Been away from the bench longer than wished, but now had a chance to catch up on a bit of building.
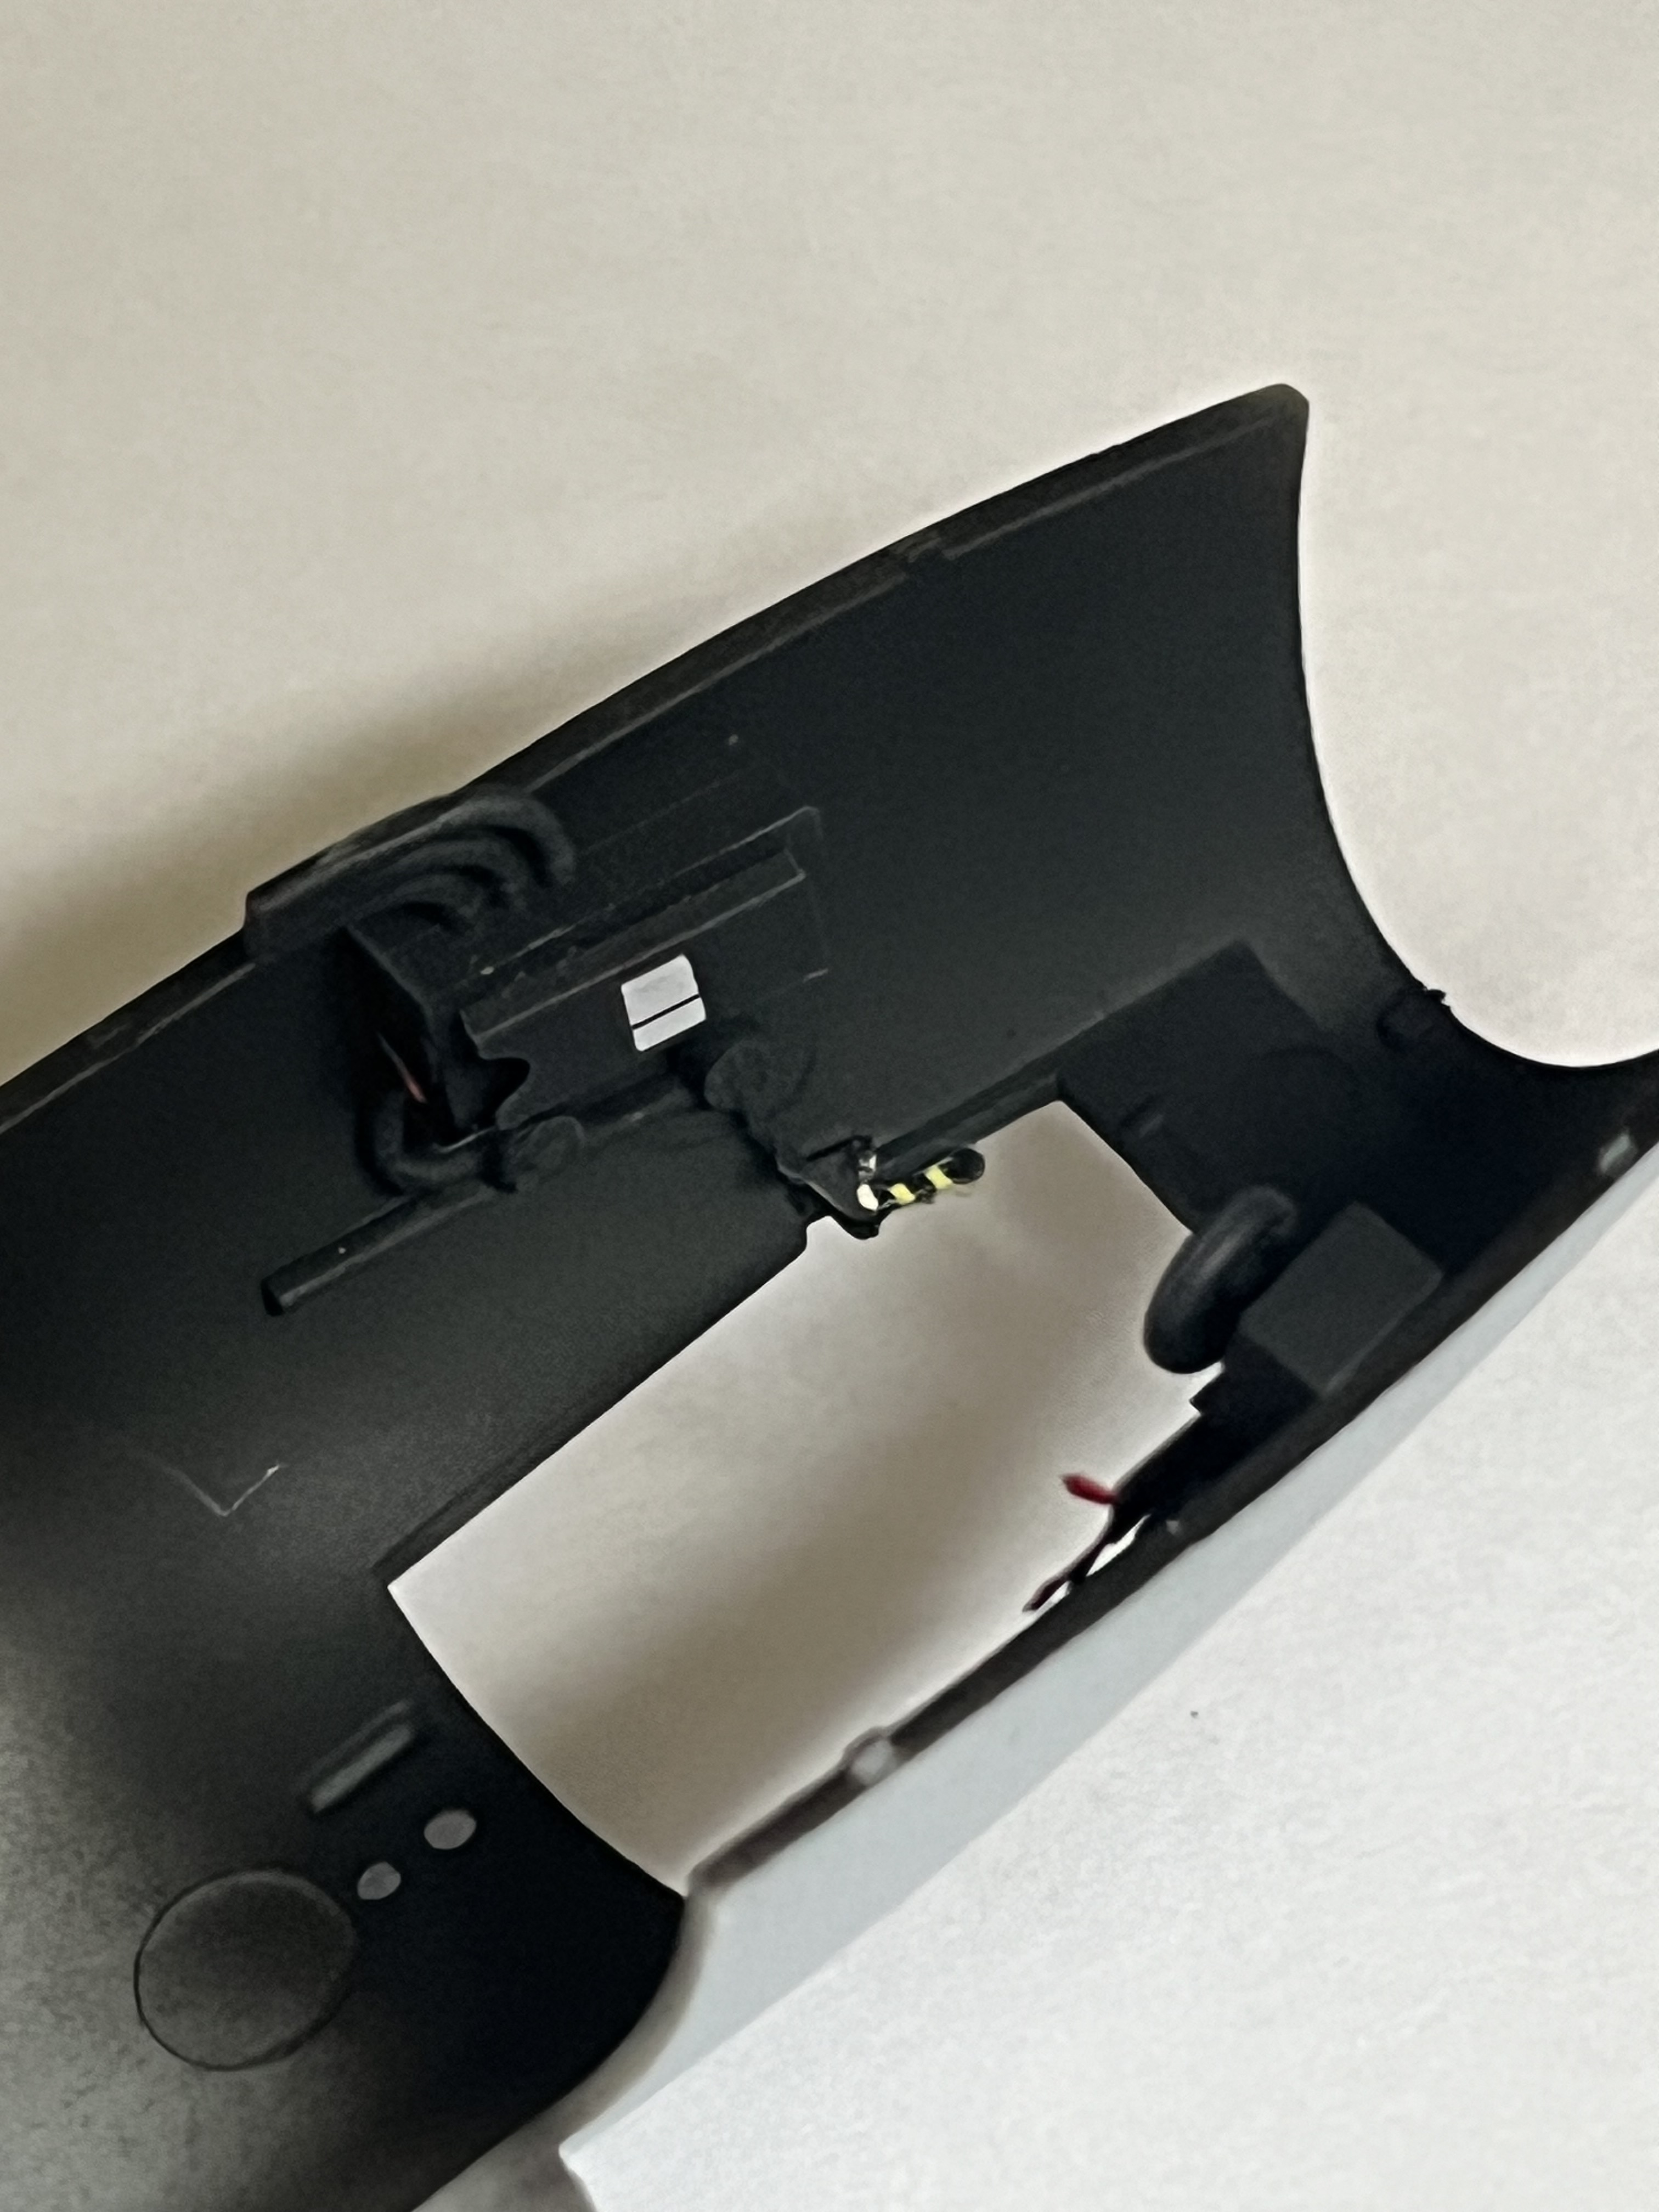
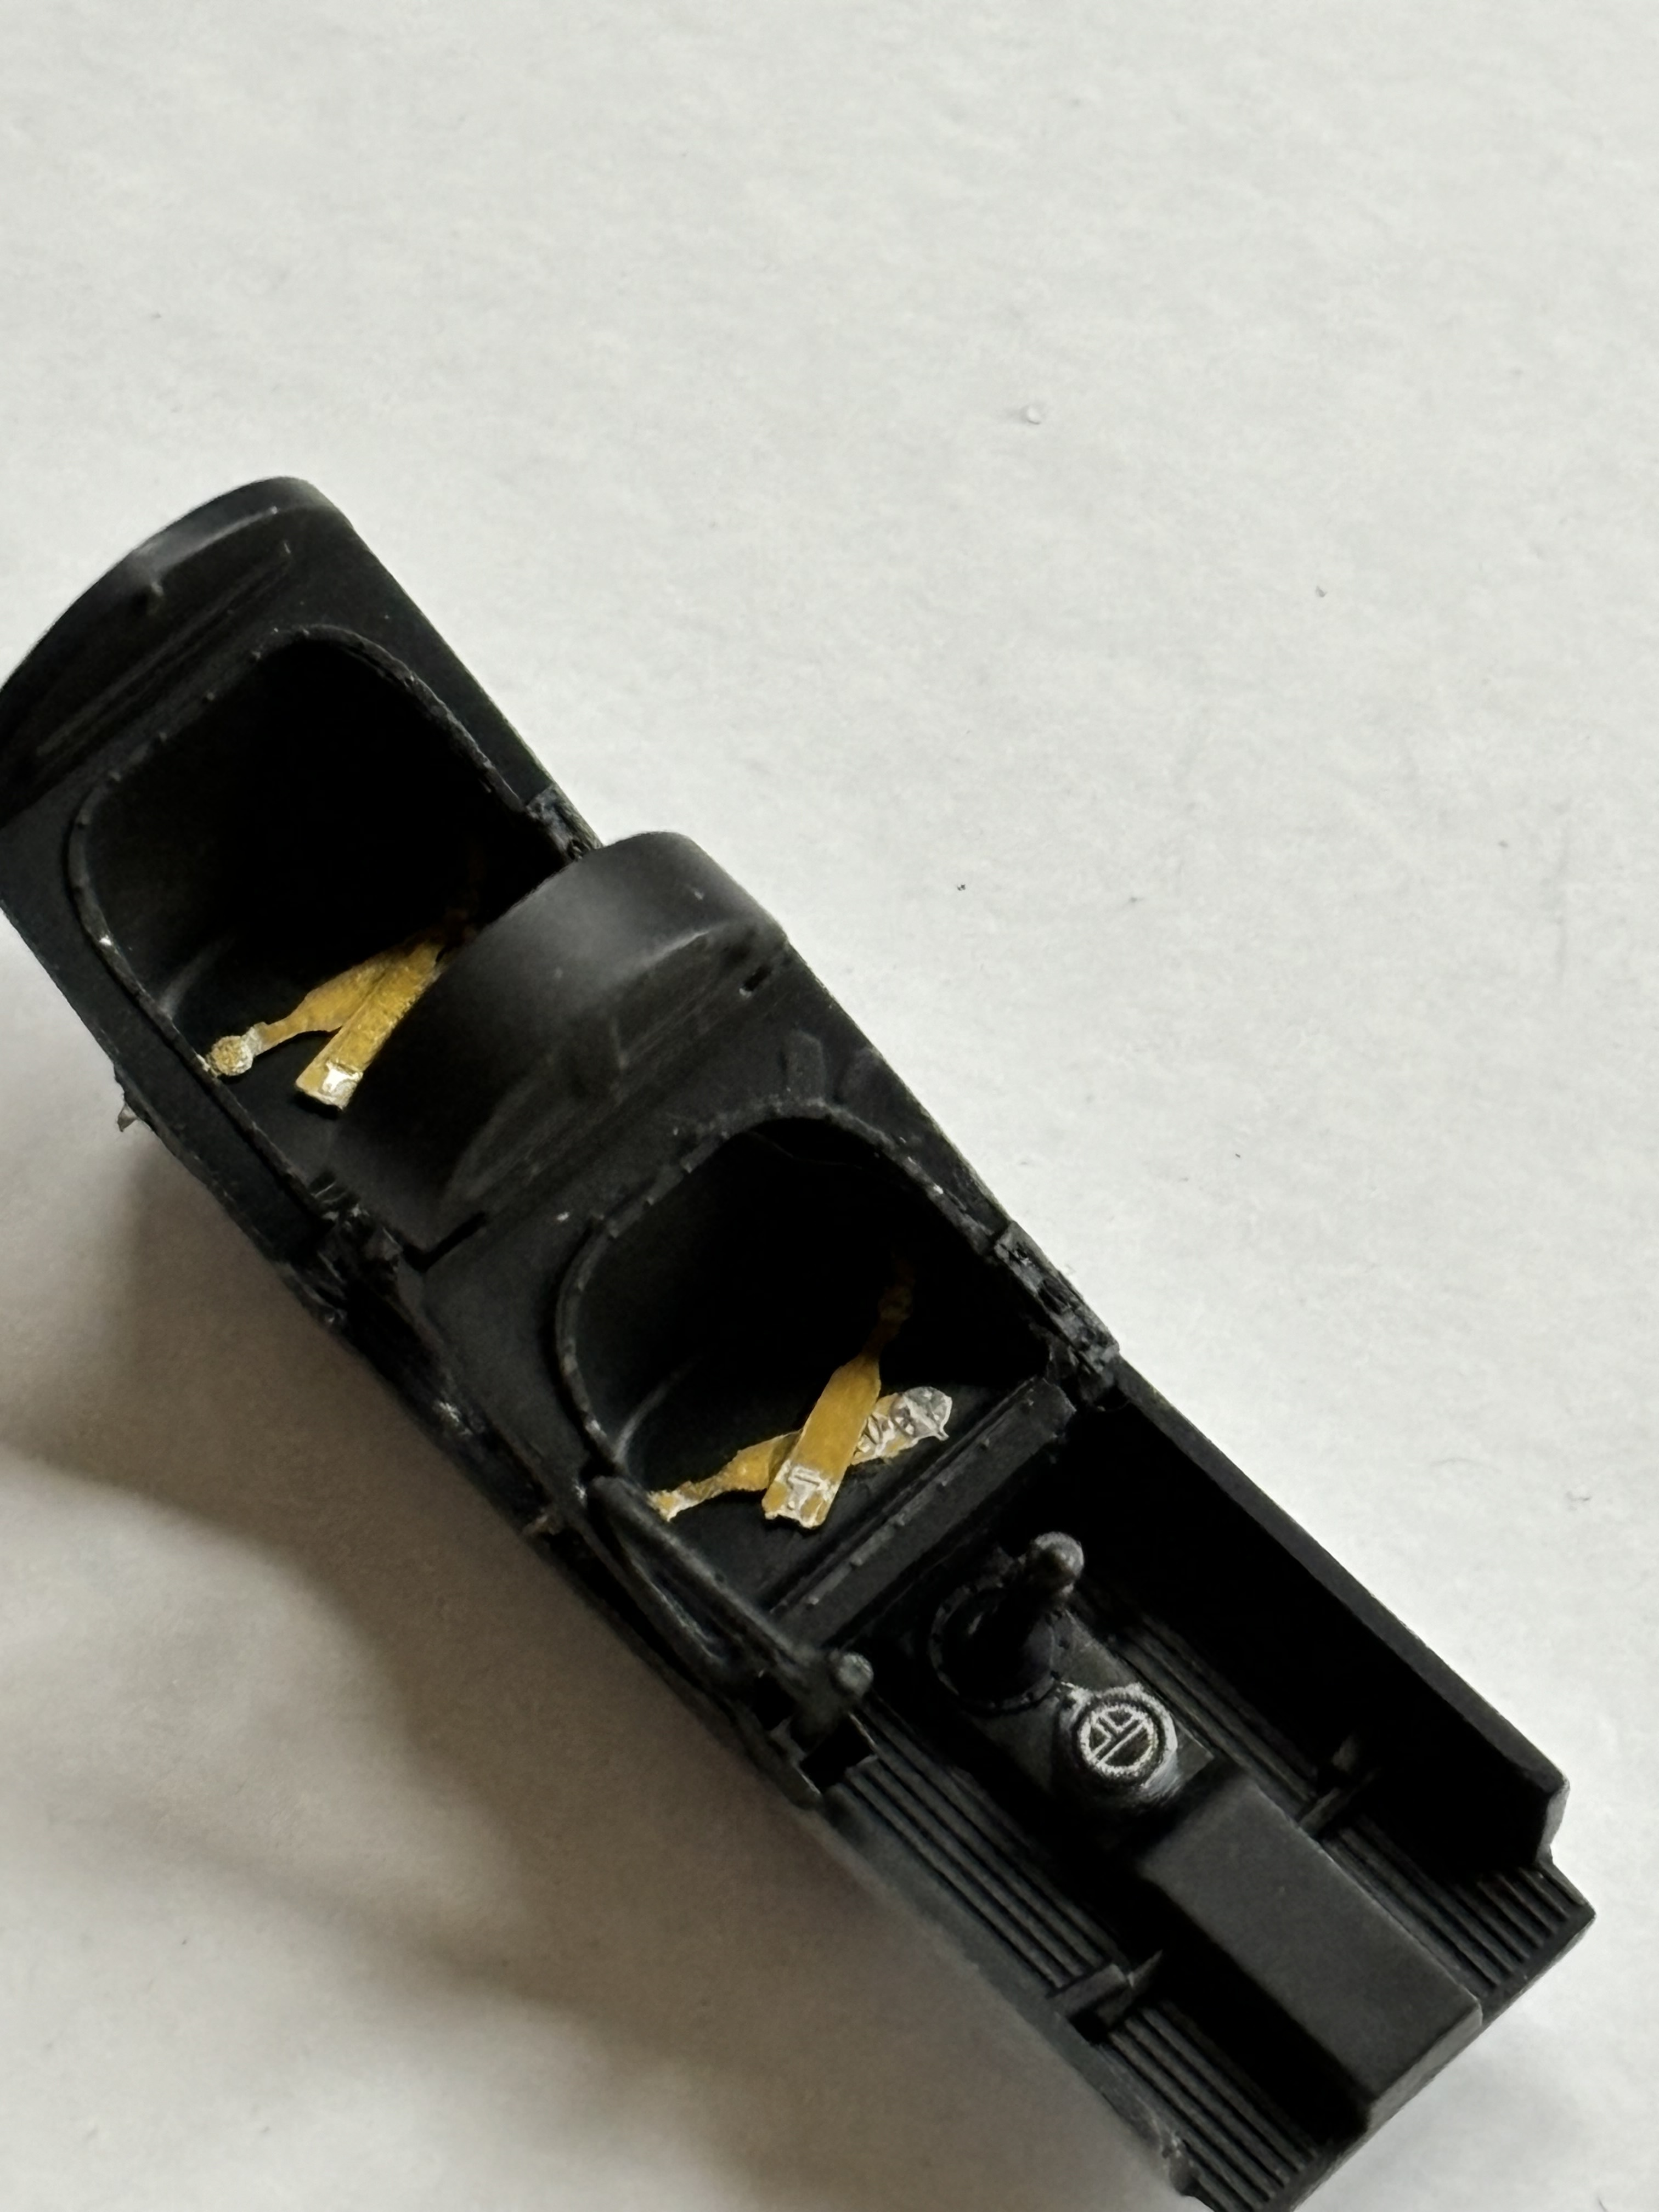
I’ve added a base coat to the interior. As the vampire cockpit was black, I used NATO black to lighten slightly and hopefully make some of the detail more visible, especially when closed up. Photos of the cockpit show the seat having a thin leather lining. The distressed effect is a bit more subtle than it comes out in the photo.
The black does hide a lot of detail, but the PE and a little detail painting helps.

5 Likes
Well for the first time a kit has defeated me. Despite the early signs of decent fit, my particular one had a badly warped upper fuselage. Spent most of the Christmas period trying to fix it, hence no recent posts. However it’s too badly warped and no matter how much tape, filler and other things have managed to get it corrected.

I’ll come back to the vampire again with a new kit in the future and keep this kit for spares when o do.
2 Likes
Anyway, onwards and upwards. I’ve got the Chipmunk T10 trainer in my stash so this will be the next build.
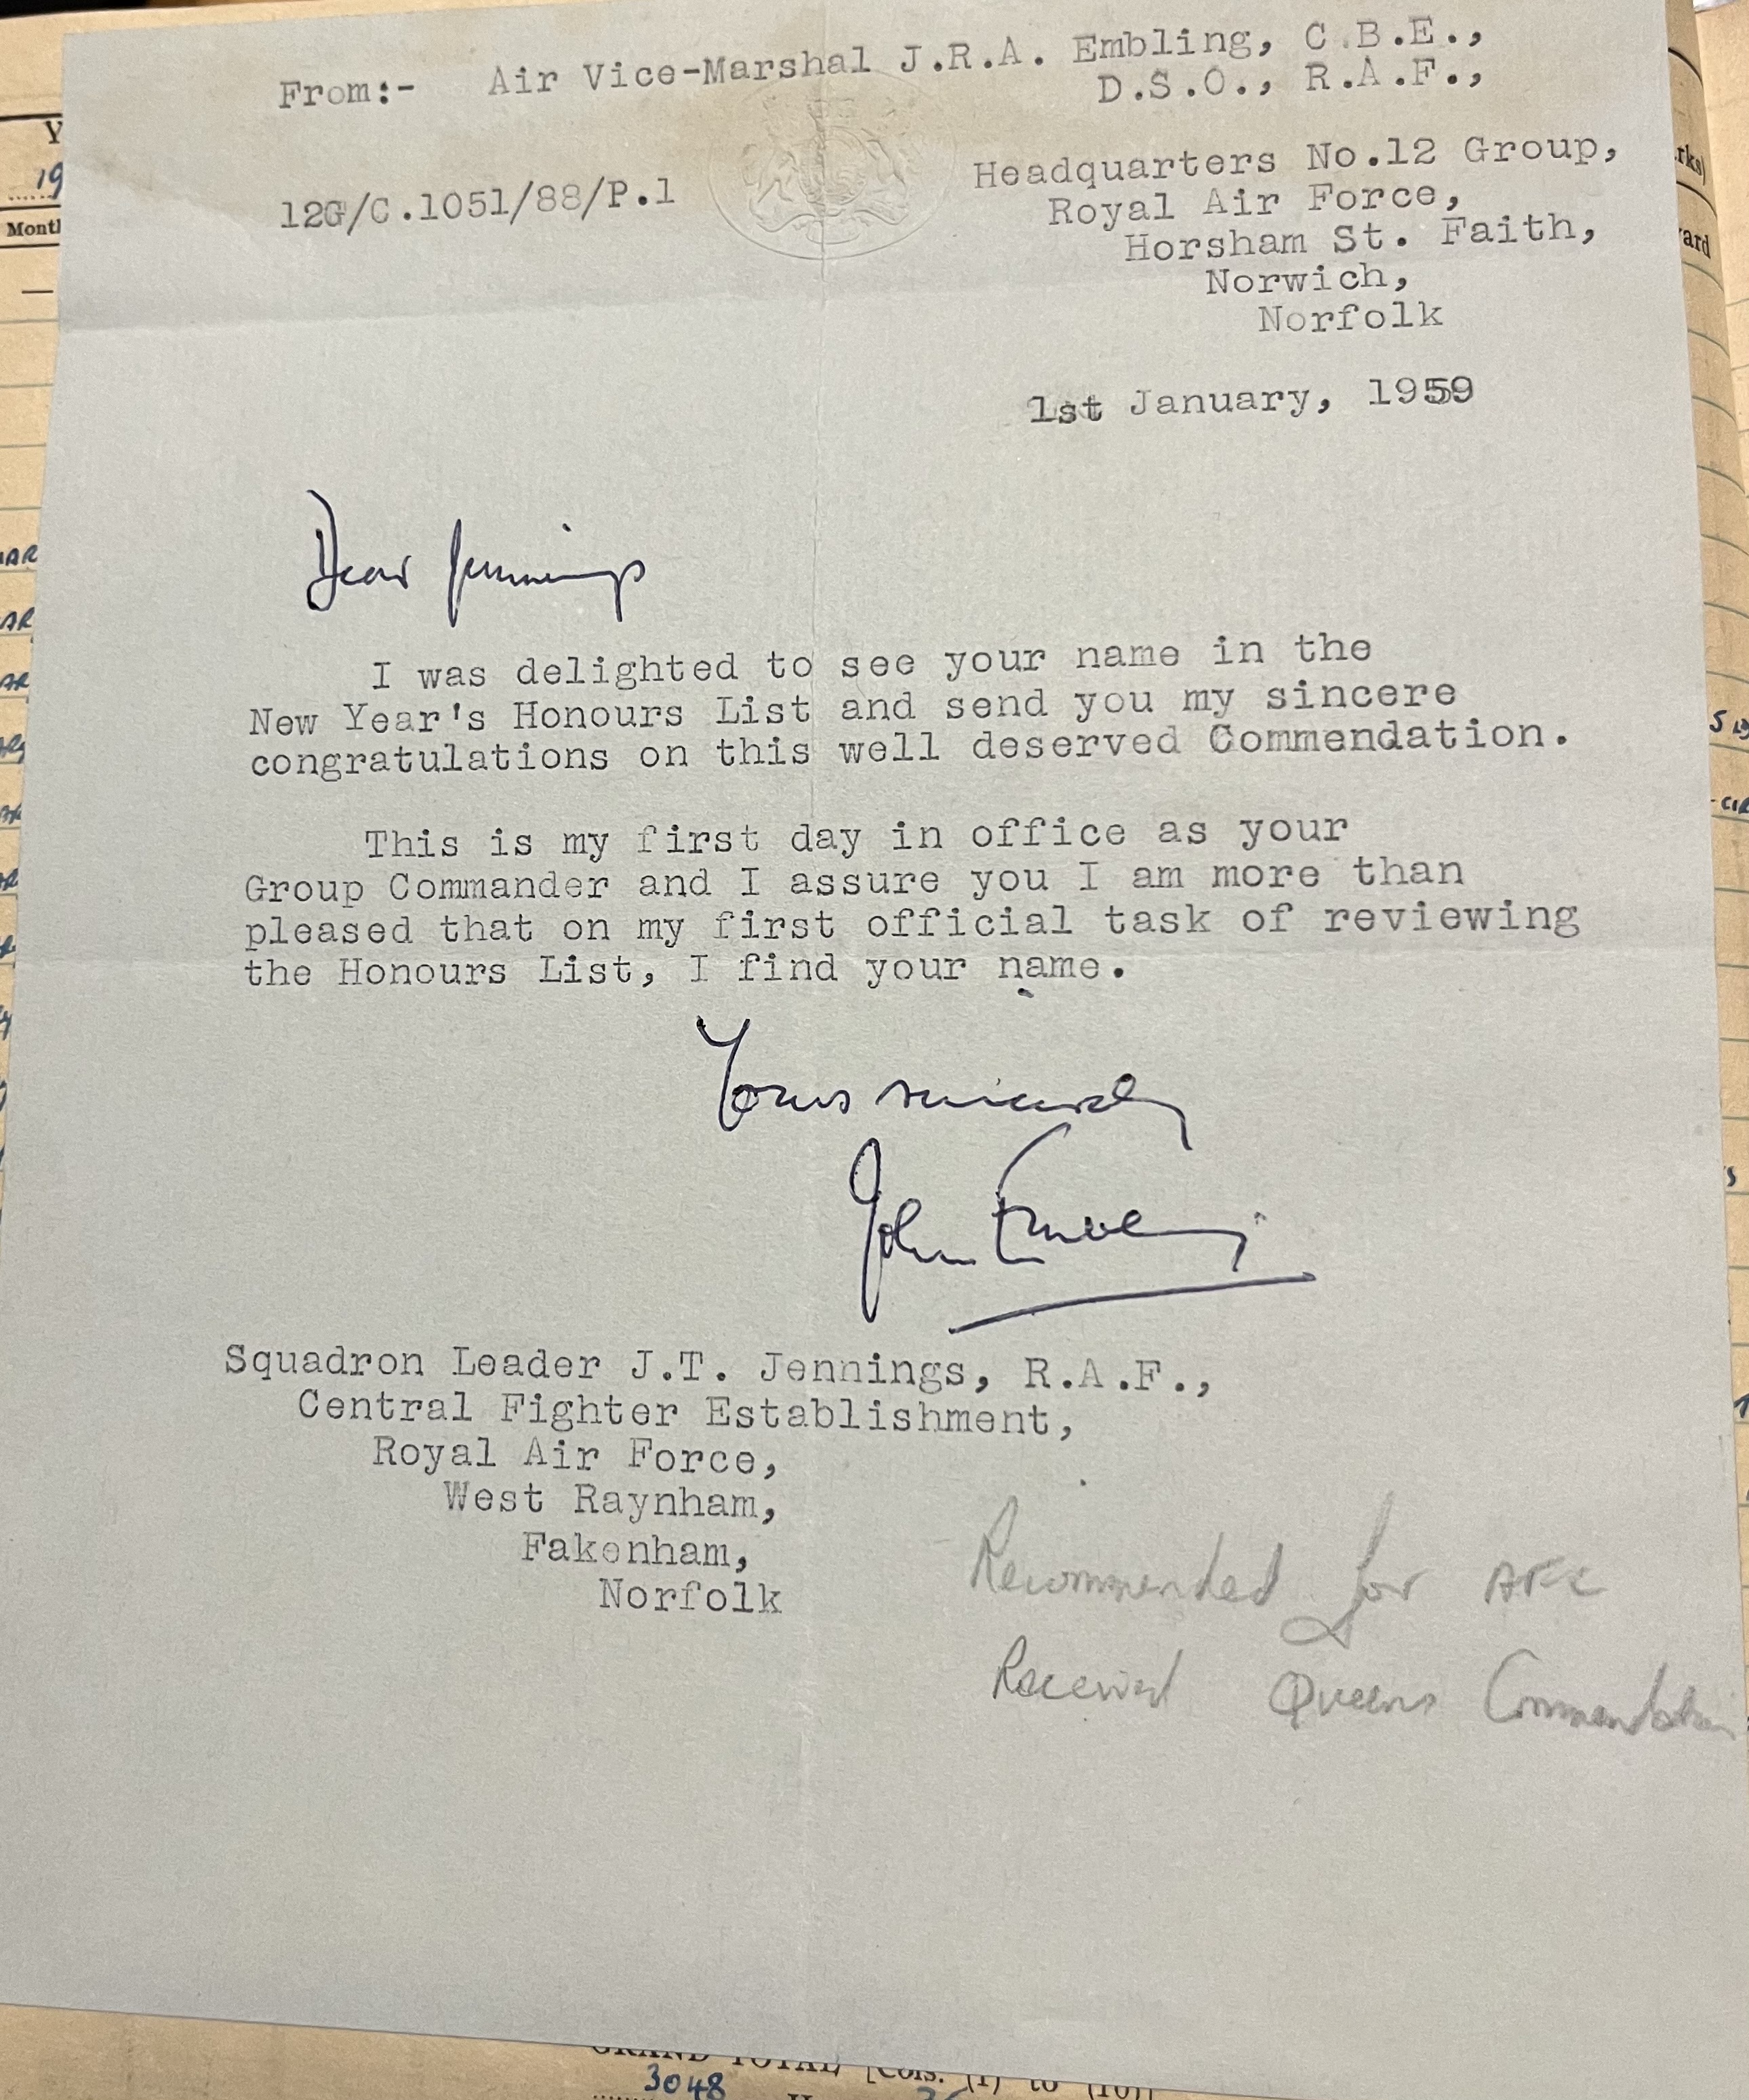
He flew it in January 1959 whilst on his RAF staff course. He’d just finished courses at the fighter combat school and received a Queen’s commendation in the New Year’s Honours.


4 Likes
Great history and references… Shame about the Vamp, but the Chipmunk should be a fun build ![]()
1 Like
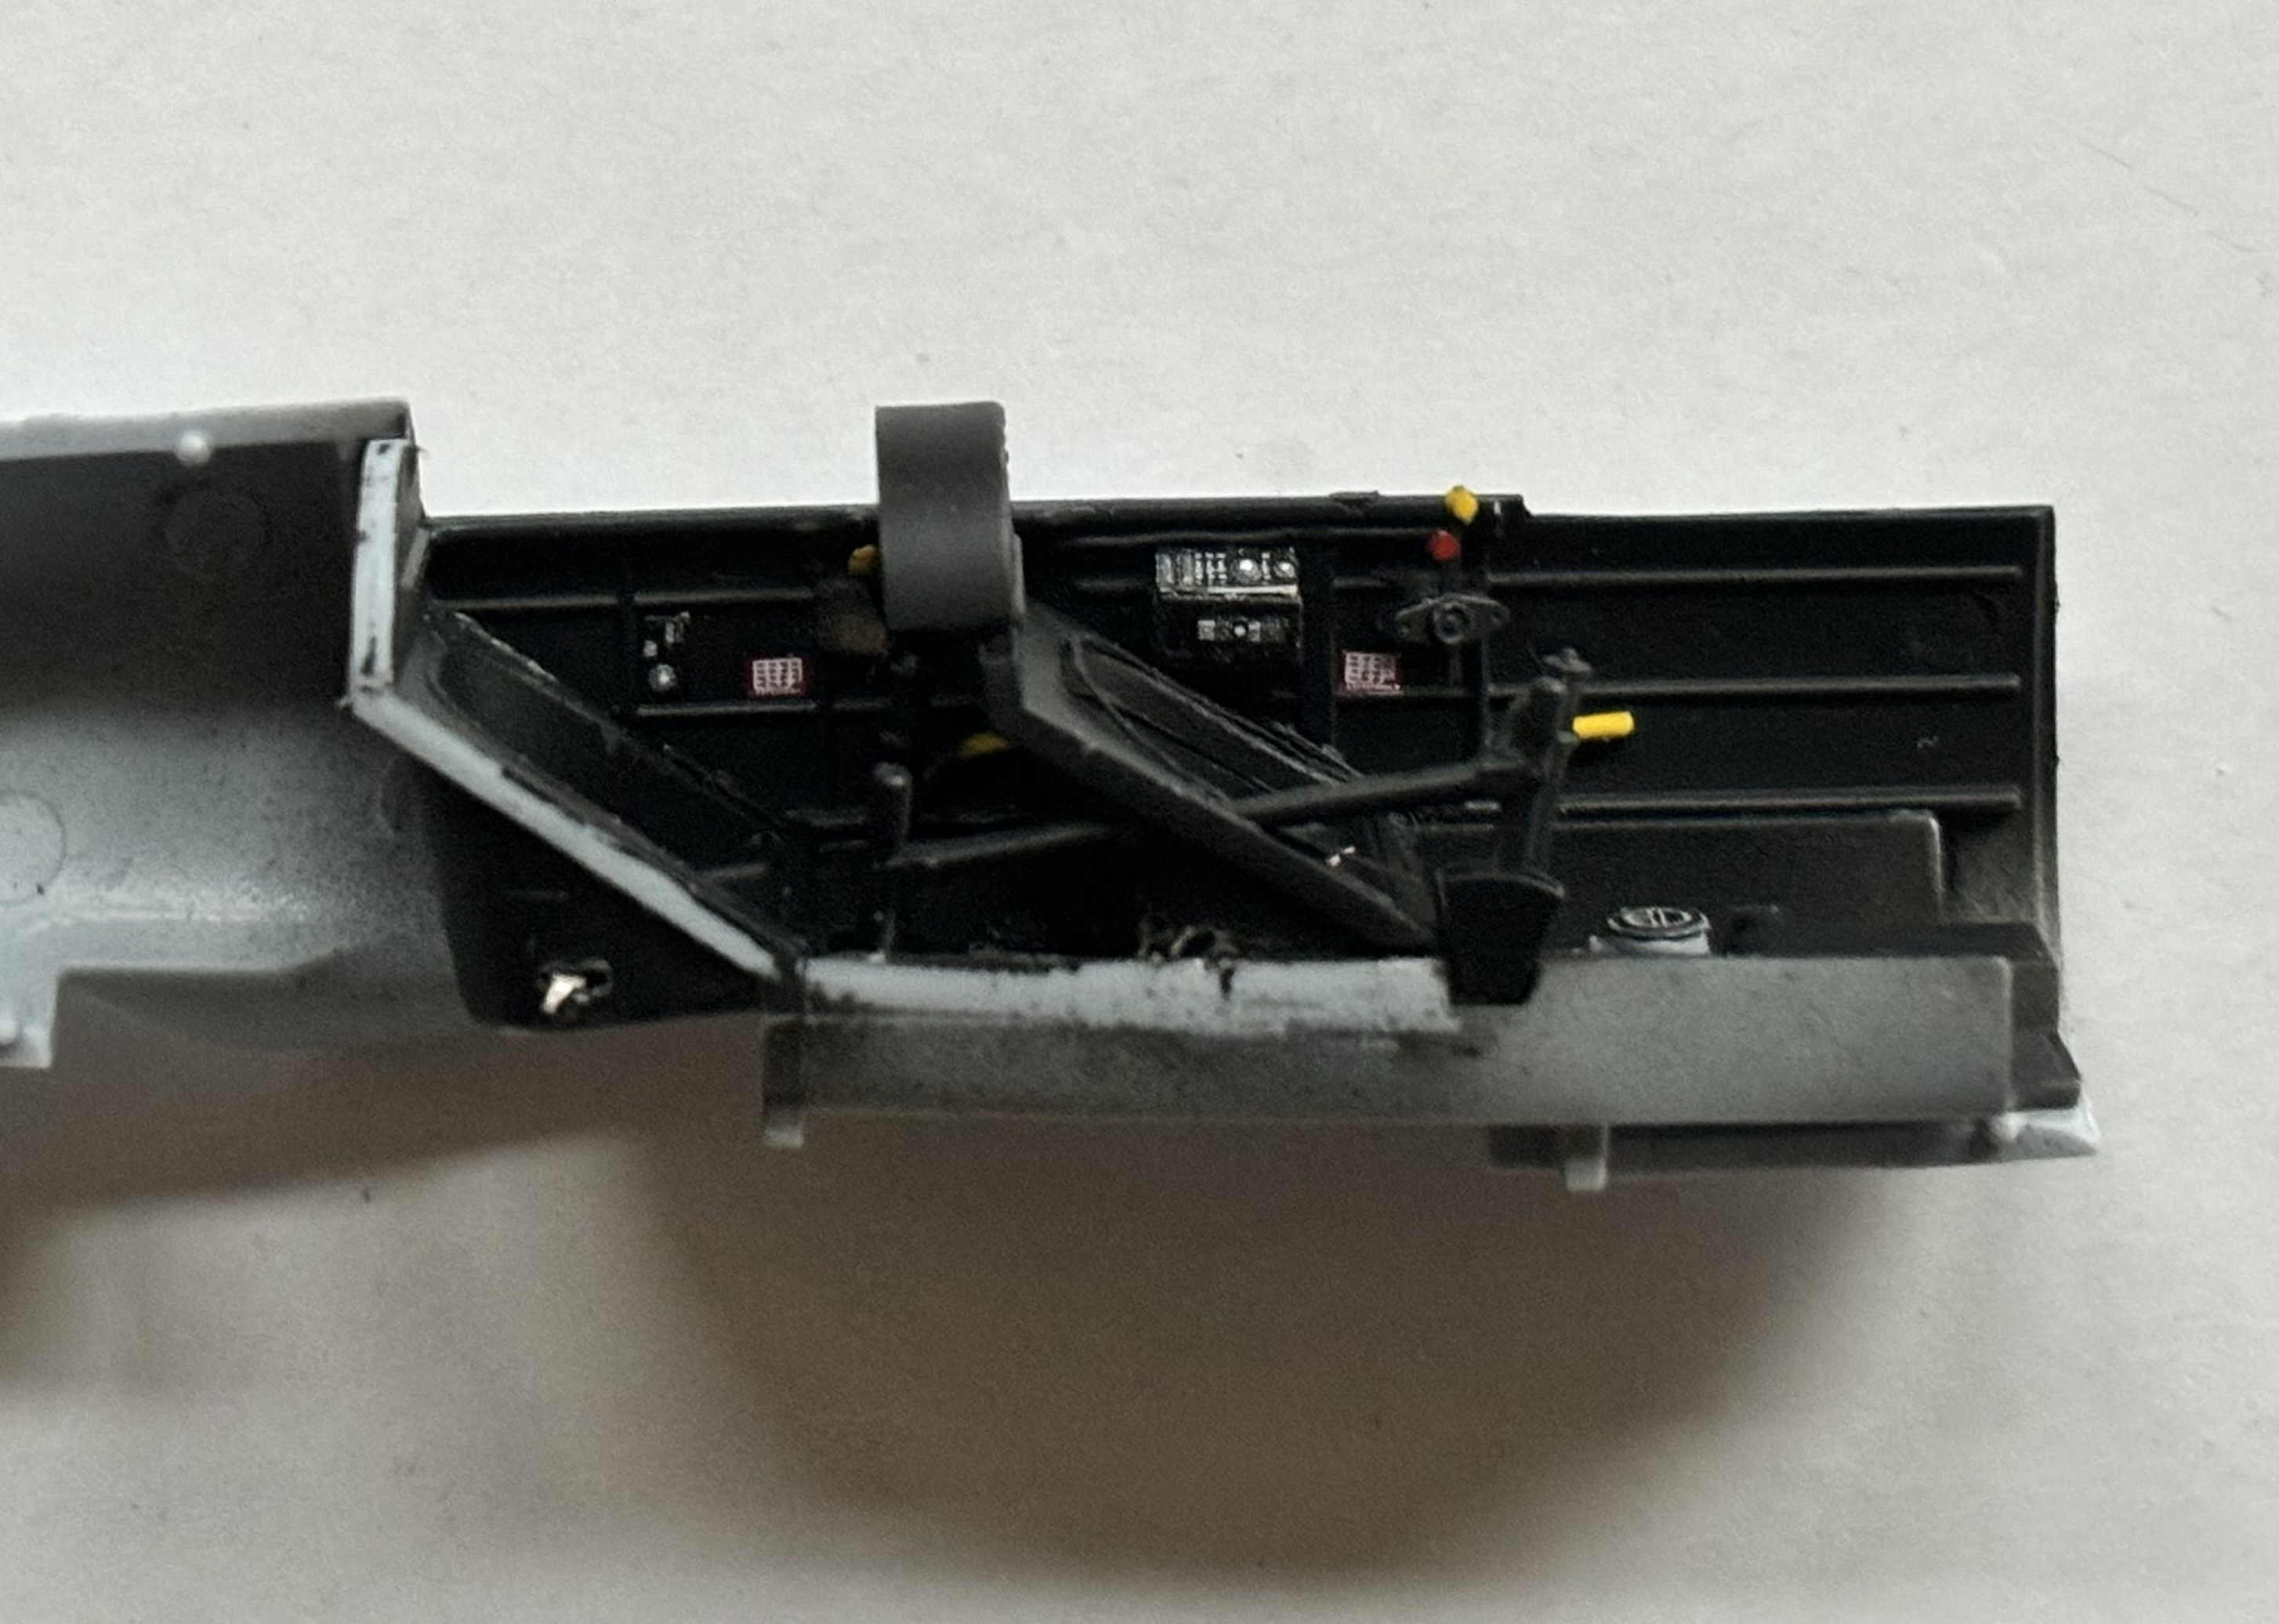
Some good progress on the Chipmunk. PE additions are fairly straightforward. There’s a couple more items to add, but post base coat.
I may add some lead wiring to replicate cables, but looking at the cockpits online they’re fairly basic.

5 Likes
Interior base coat is now down and detail painting done. Having dry fit the fuselage I’m content I don’t have to worry about the pin marks as will be hidden from sight.
Got a bit further with the build than the above suggests. Just ran out of daylight to take photos with proper detail. Will catch up with the post this weekend and post more progress.
3 Likes
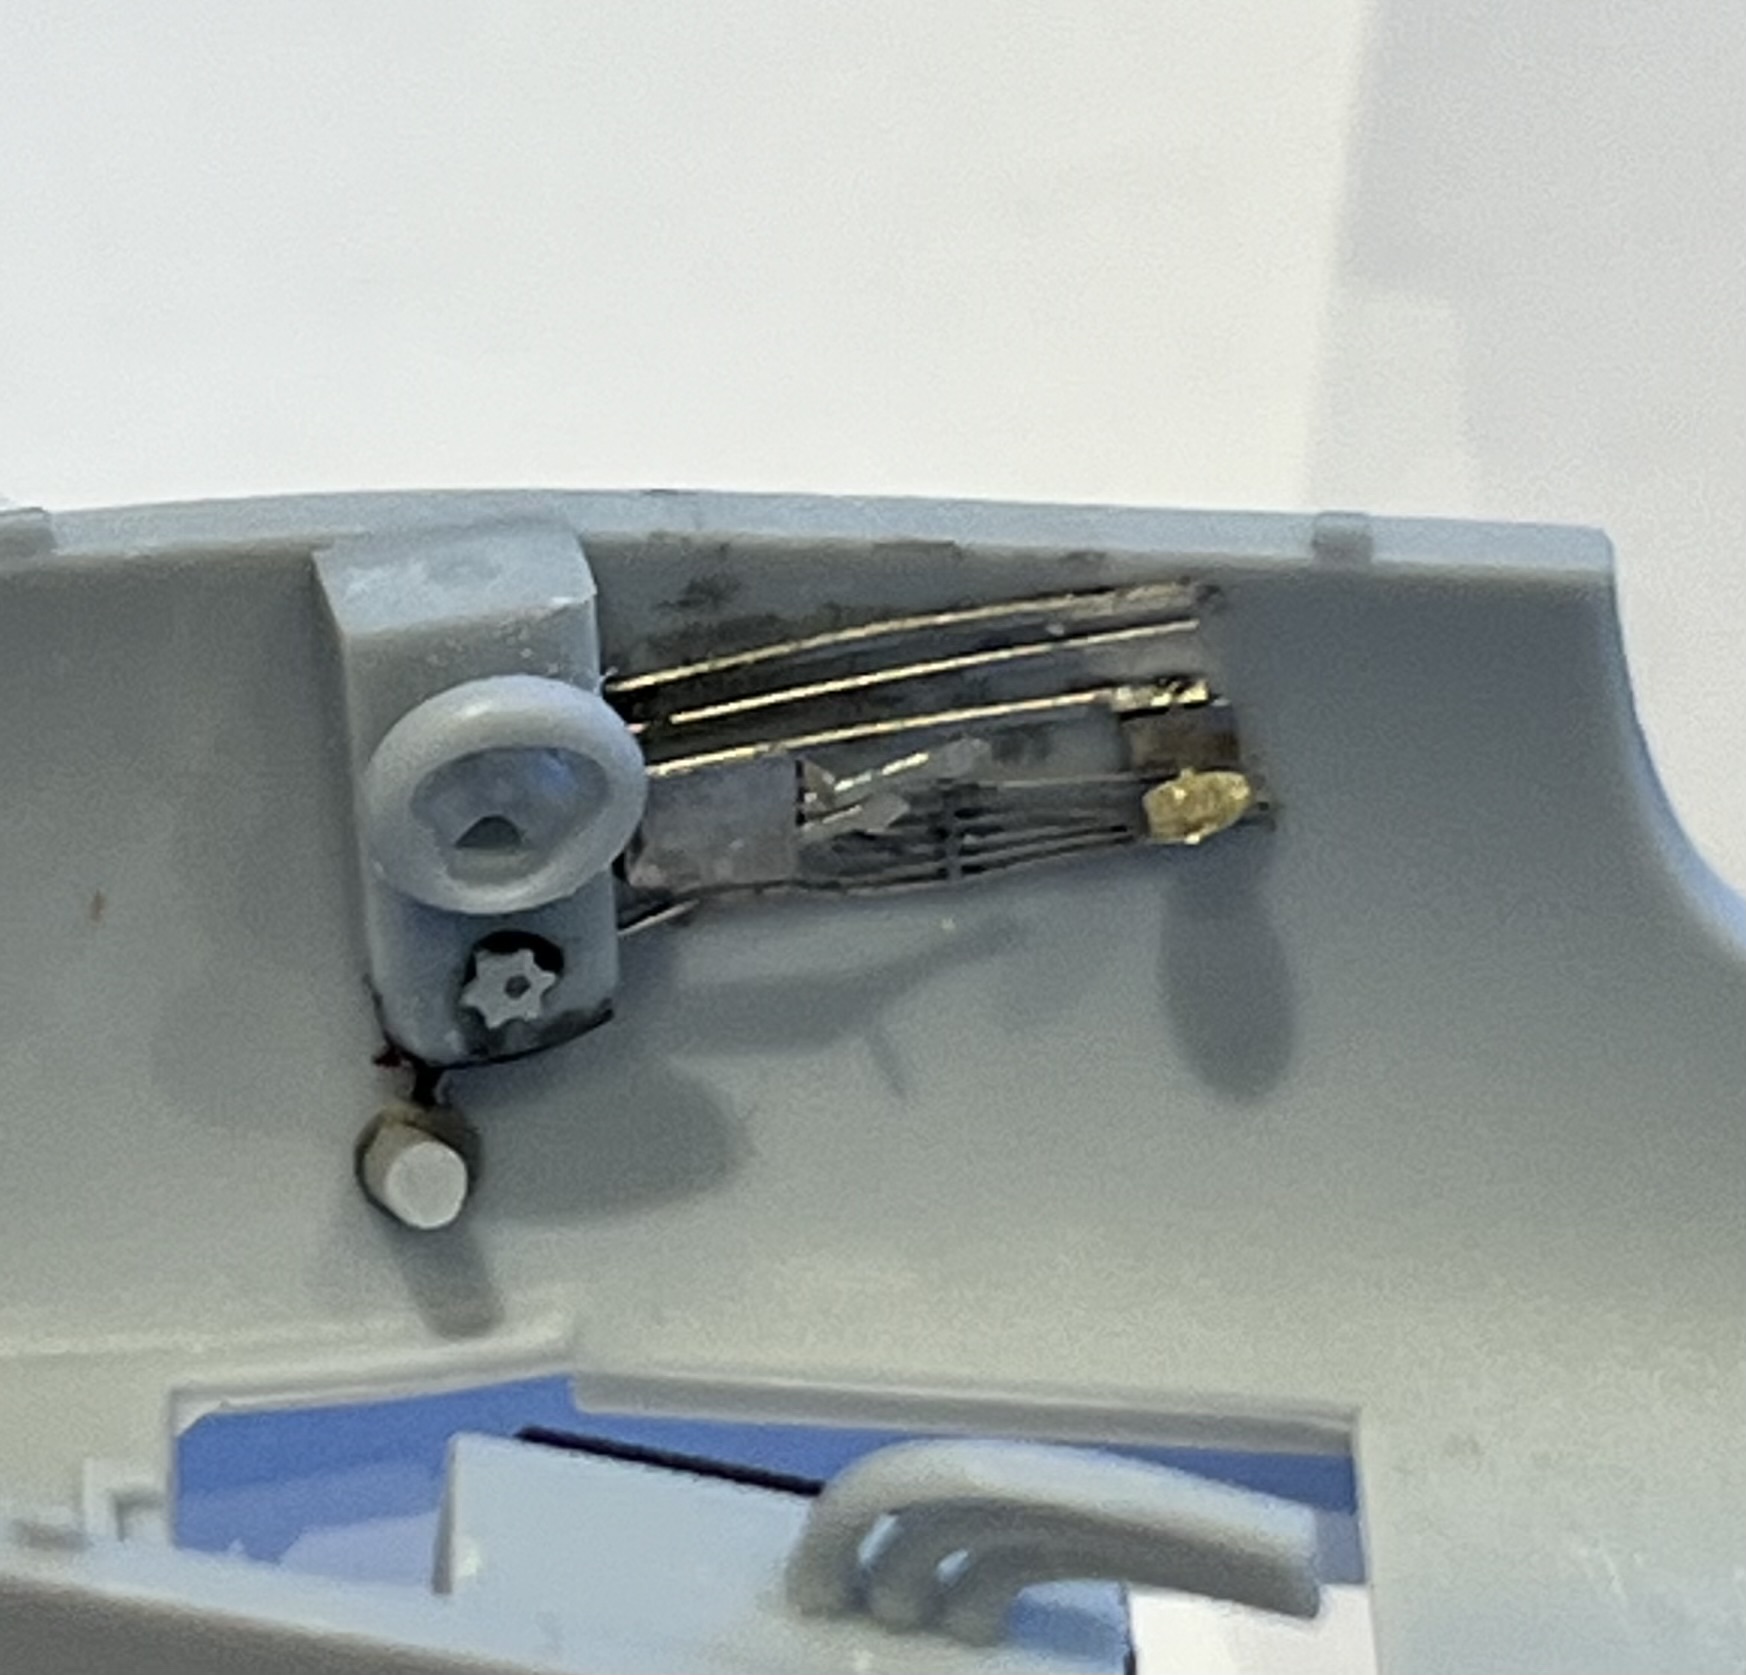
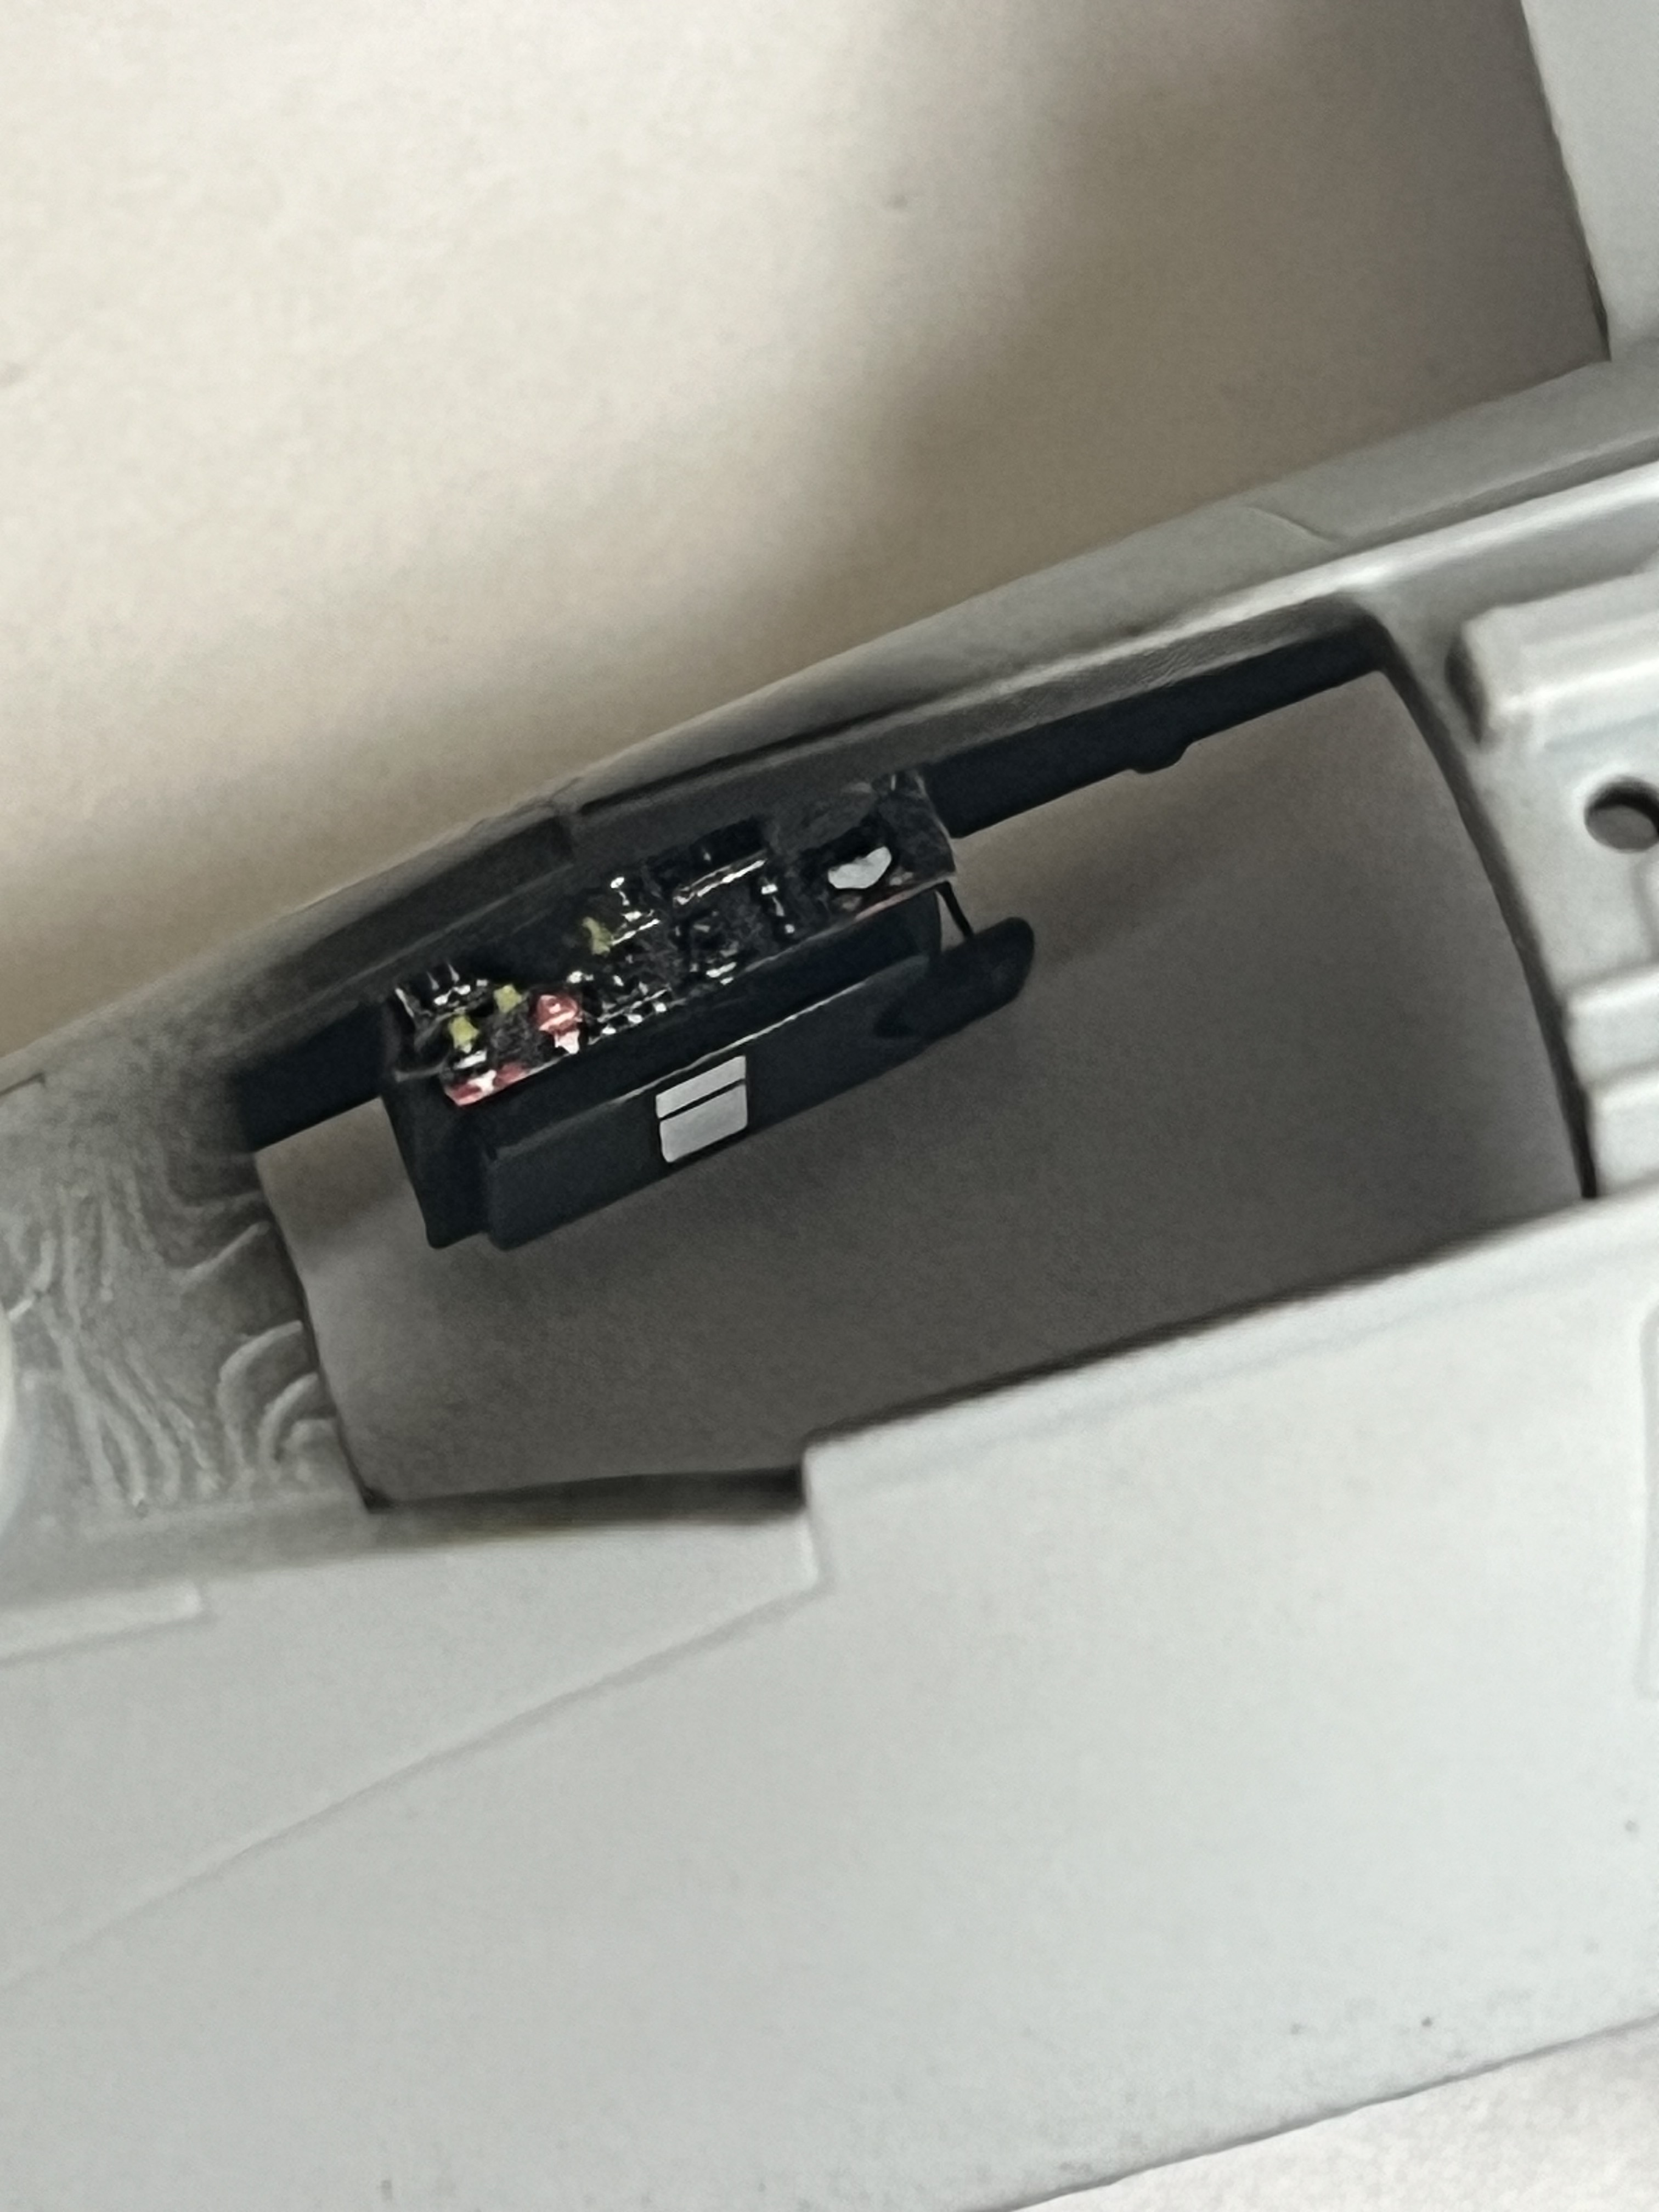
Added the seatbelt part of the harness to the seats. I’ll add the shoulder straps separately a little later.
The cockpit fit tightly into the fuselage half without any fit issues. Similarity good fit in putting the two fuselage parts together. I had a bit of seam filling underneath. I also had to sand the rear instrument panel to fit as I had to compensate for the added PE. Other than that all went smoothly. The black on top looks alittle messy but will be tidied up once the canopy is on and the main base coat is down.

3 Likes
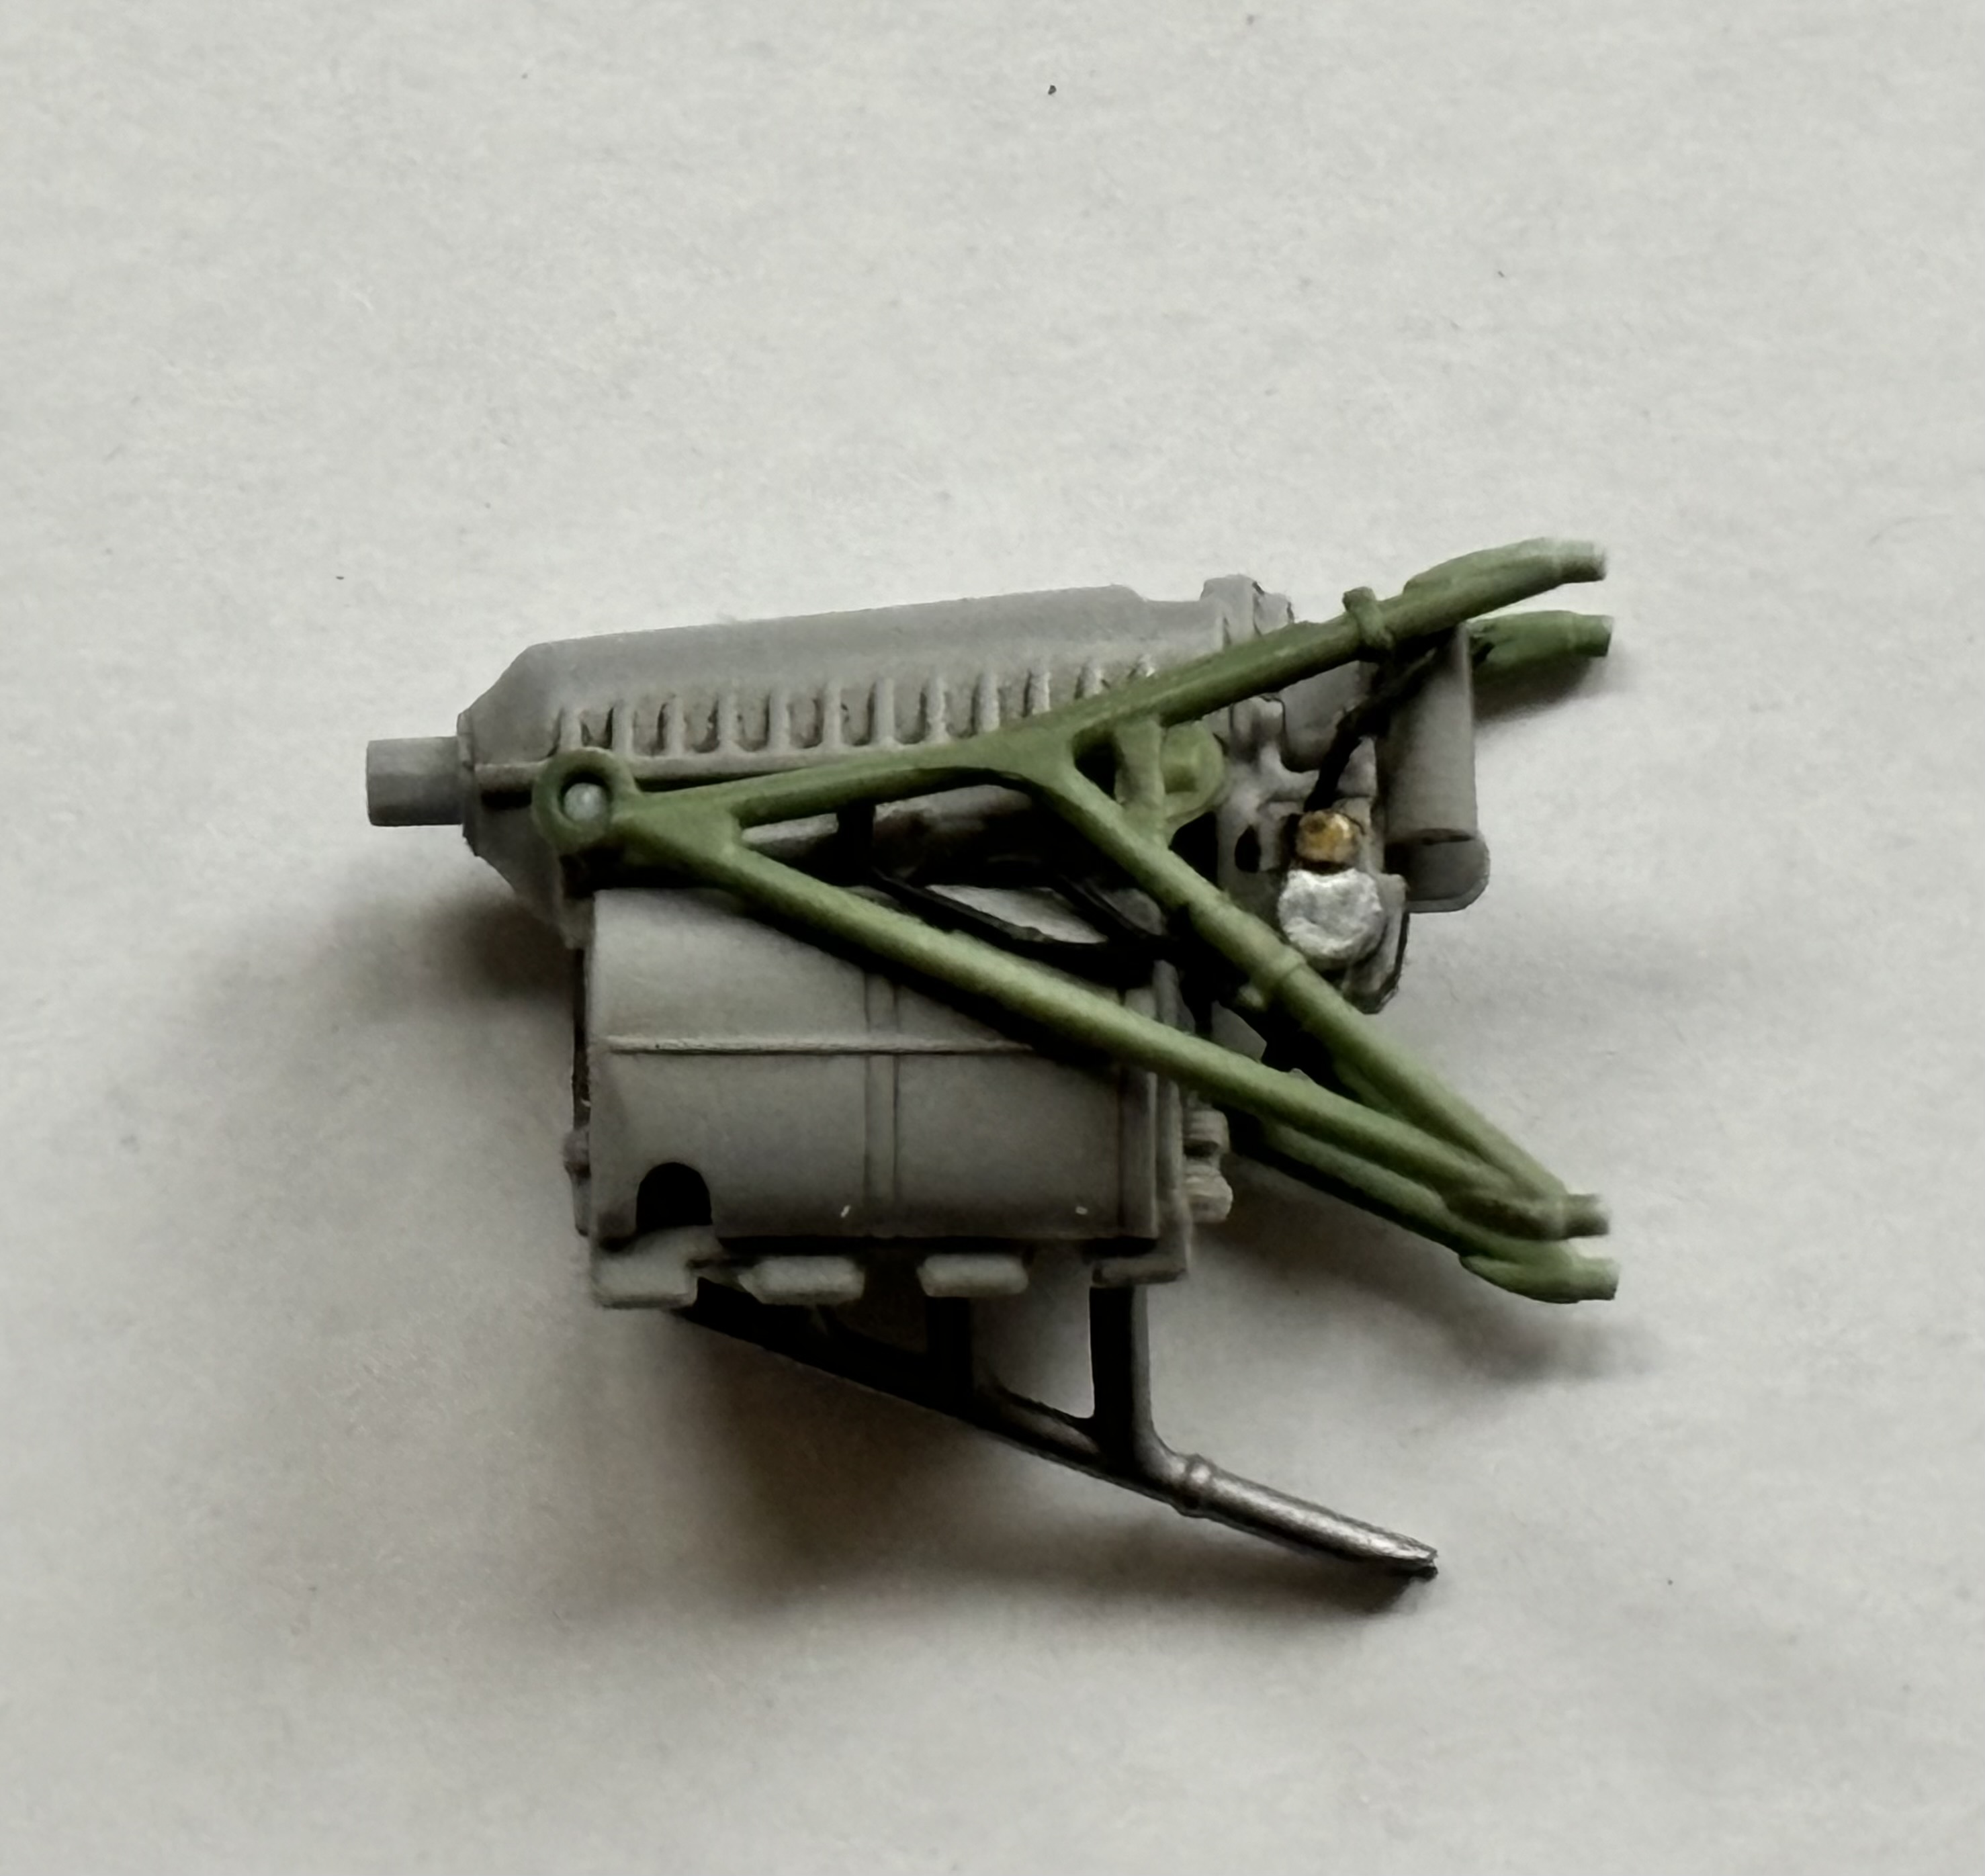
I’ve now started on the engine. This kit has an option for the engine cowls to be open which I think I’ll do.
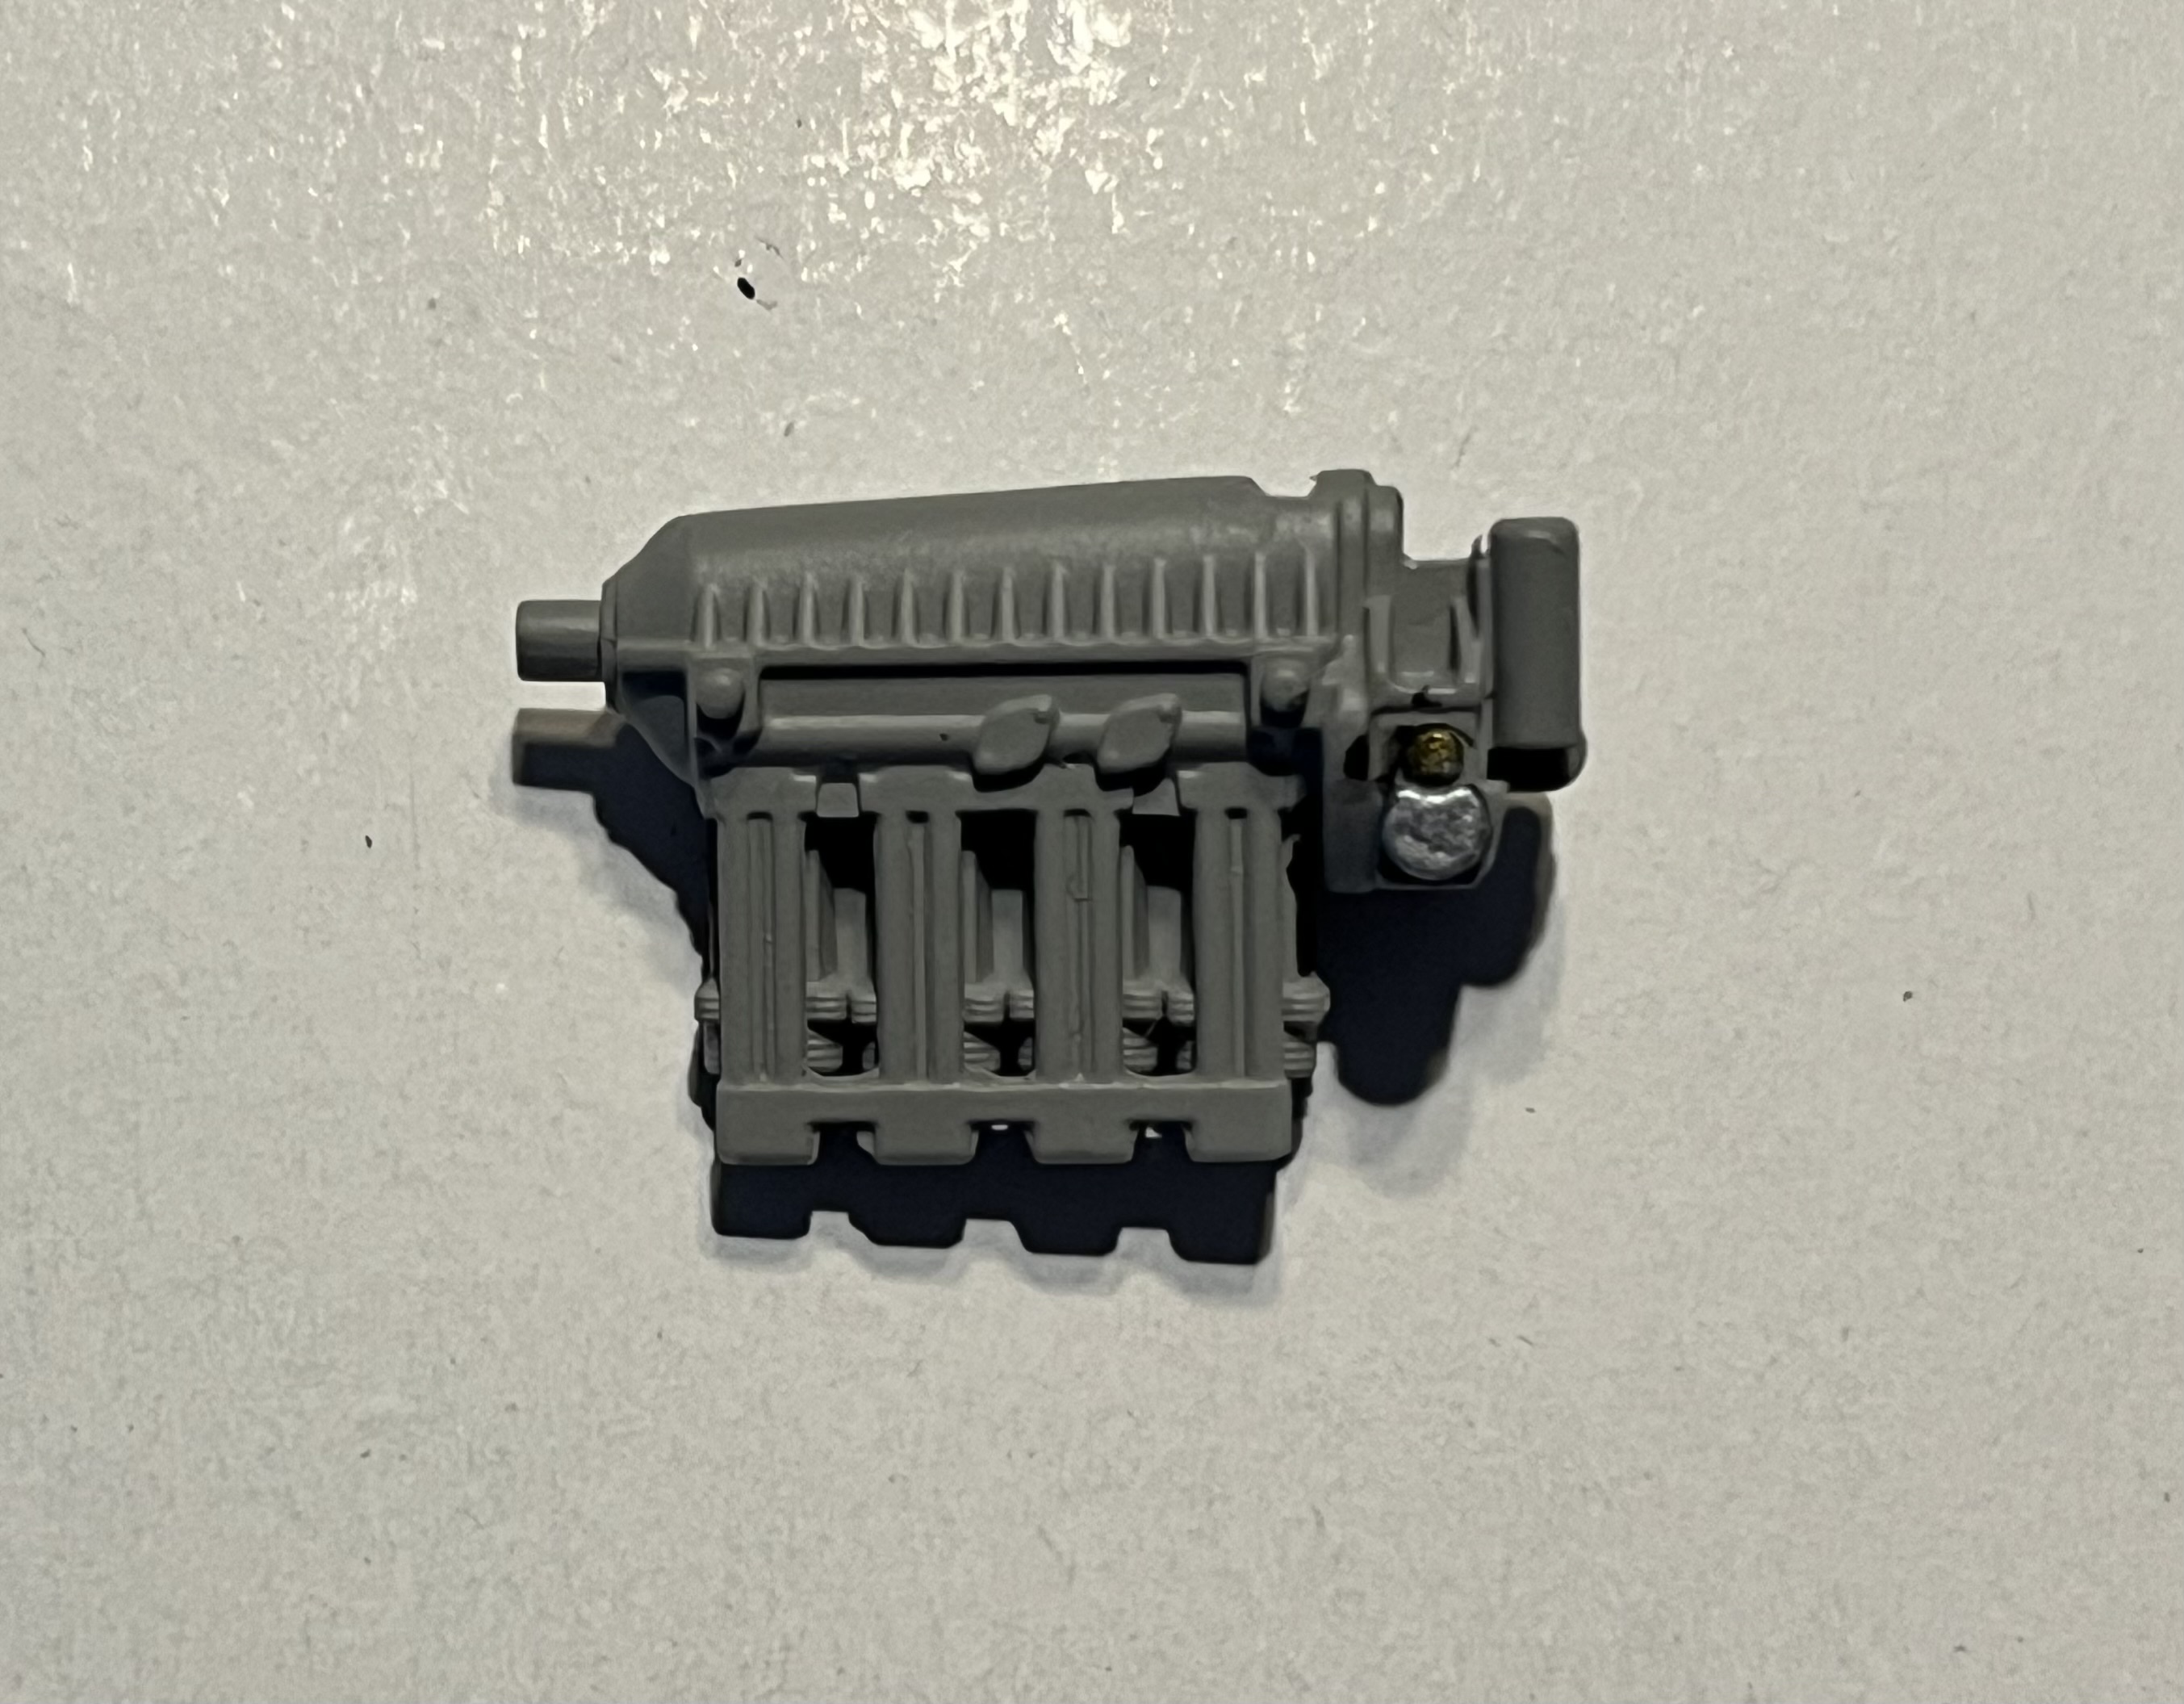
To that end I added some wiring detail, but looking online it’s a fairly simple engine.
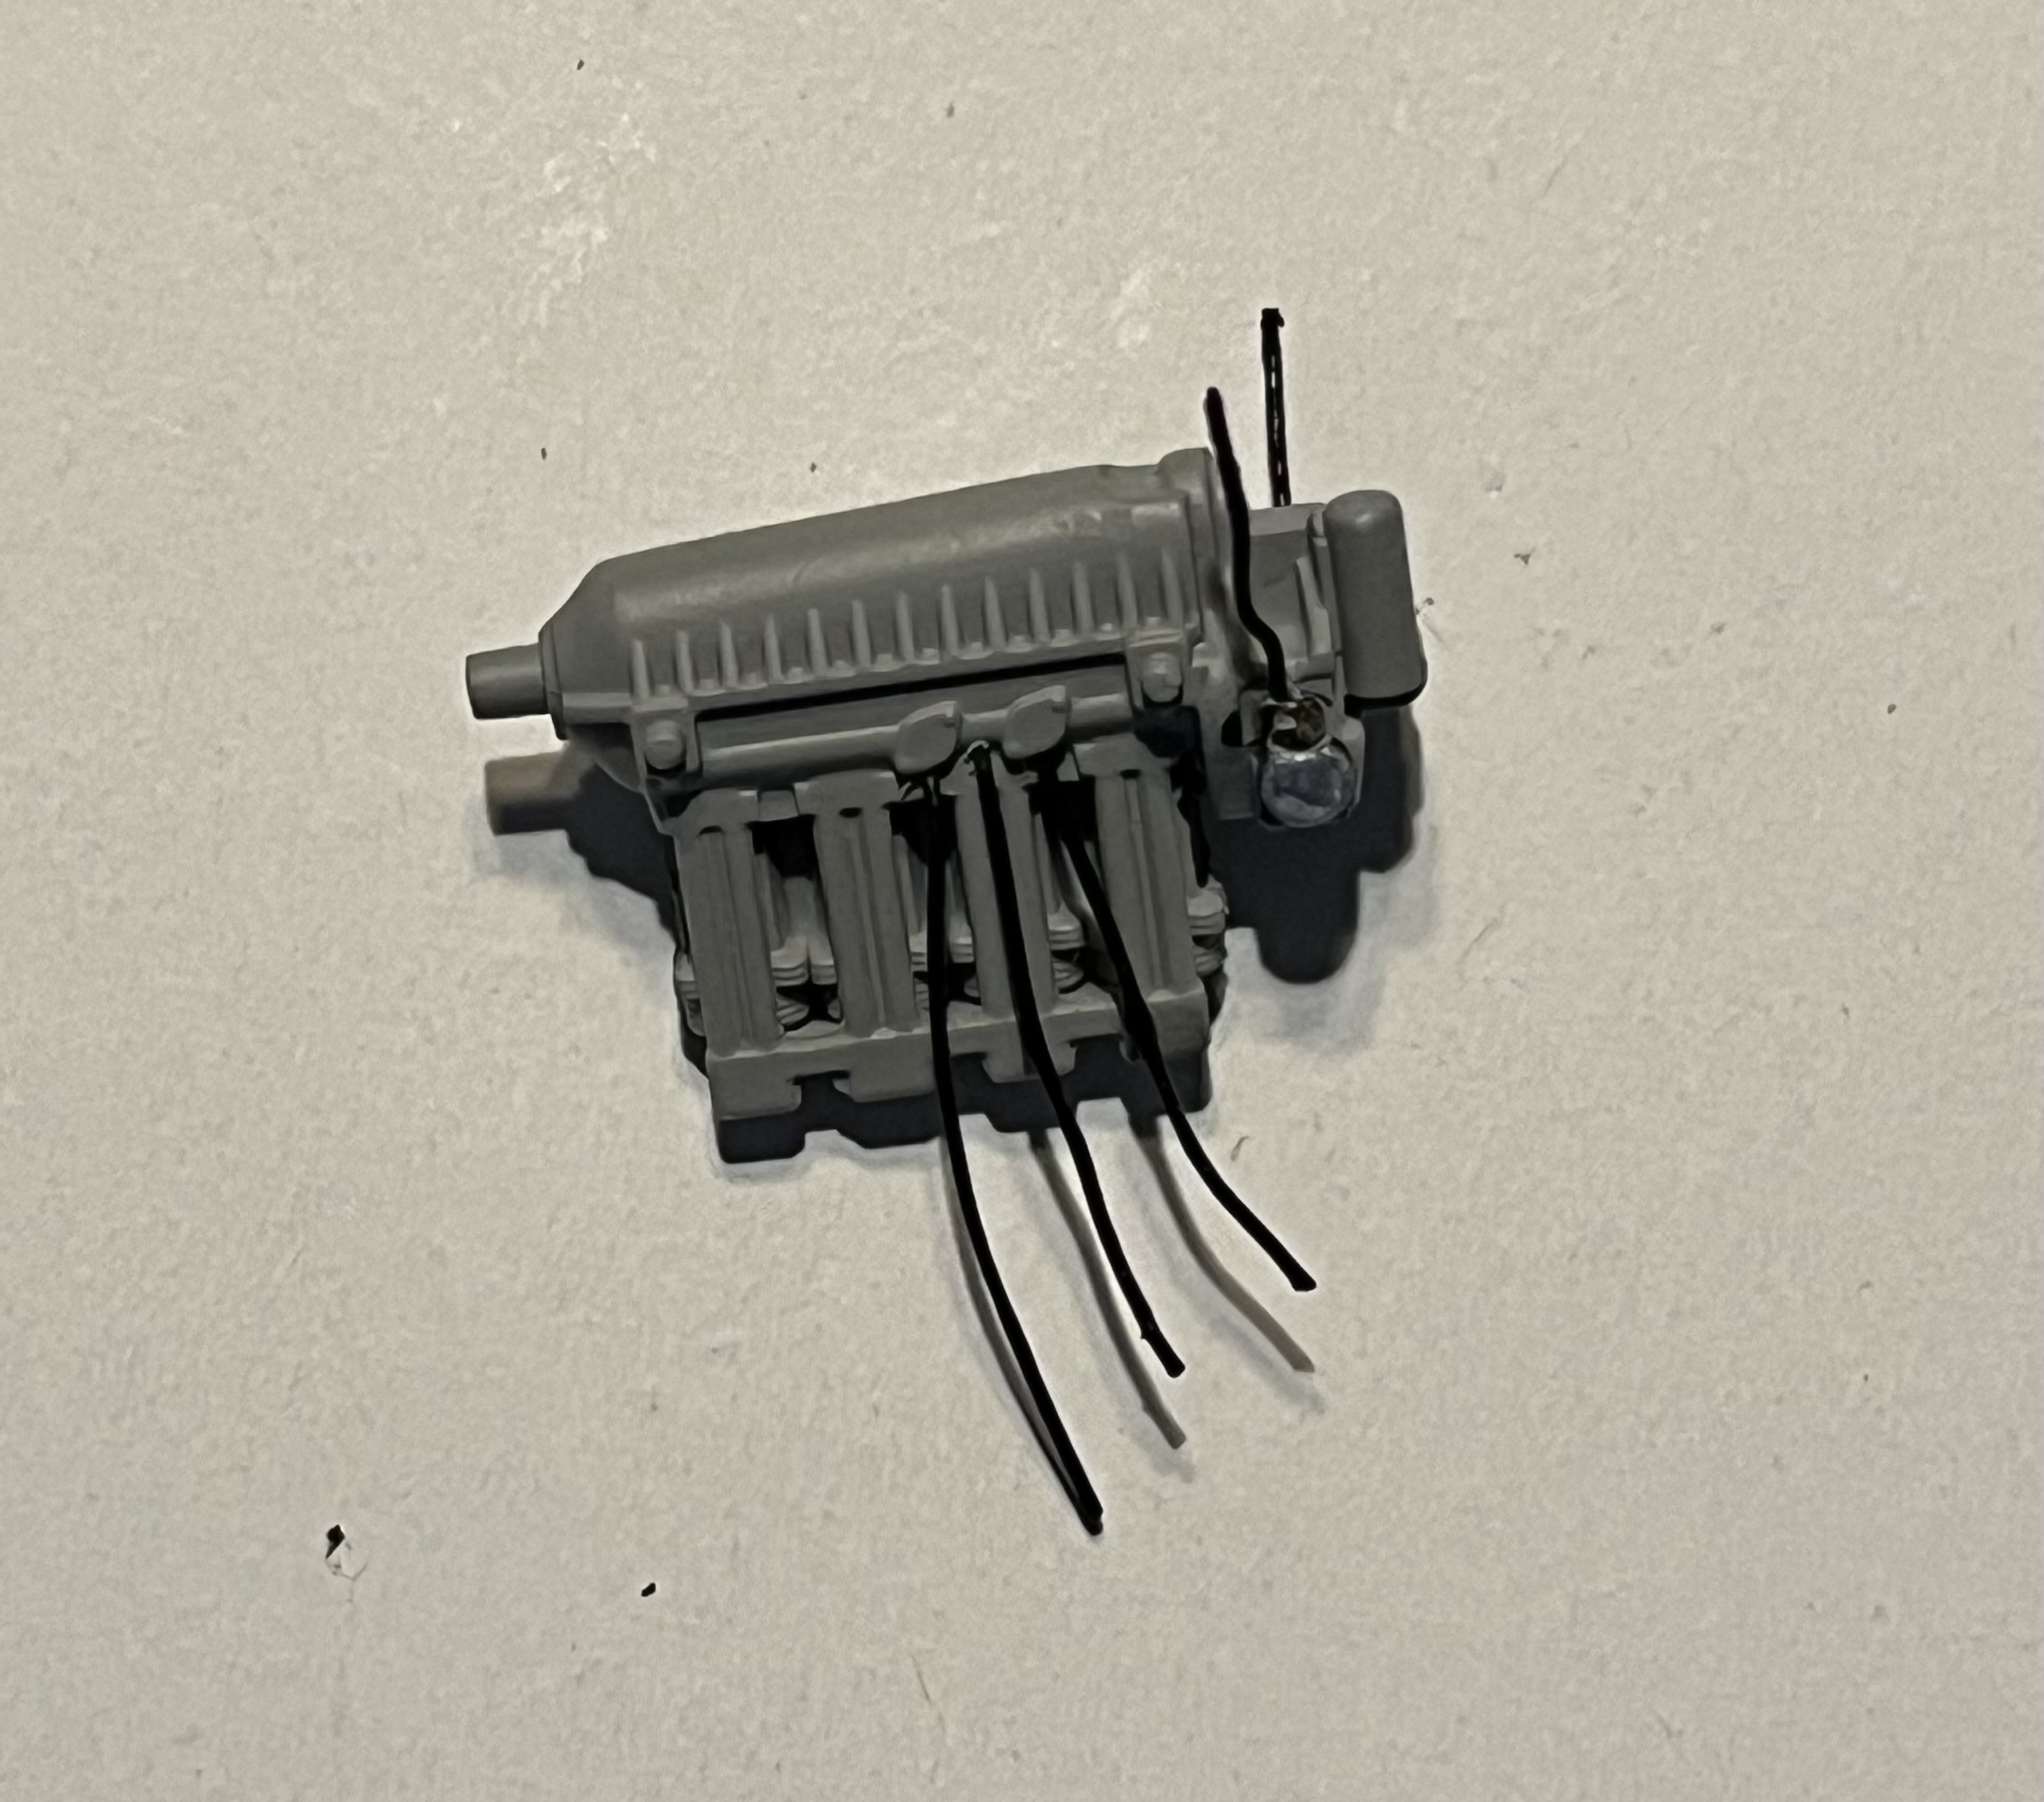
Engine was mainly medium grey with some gunmetal, Tamiya and Alclad respectively. Lastly added a bit of detail with silver and brass. I then used engine grime enamels as a subtle wash.

4 Likes