My previous attempt at digital camouflage on a PLA ZTZ-99A ended in cursing, Easy-Off oven cleaner and a toothbrush. I’d attempted to use the DN masking kit and I guess I wasn’t smart enough to remove the masks without destroying the underlying paint. It was a mess. I did eventually save it though. It ended up overall green.
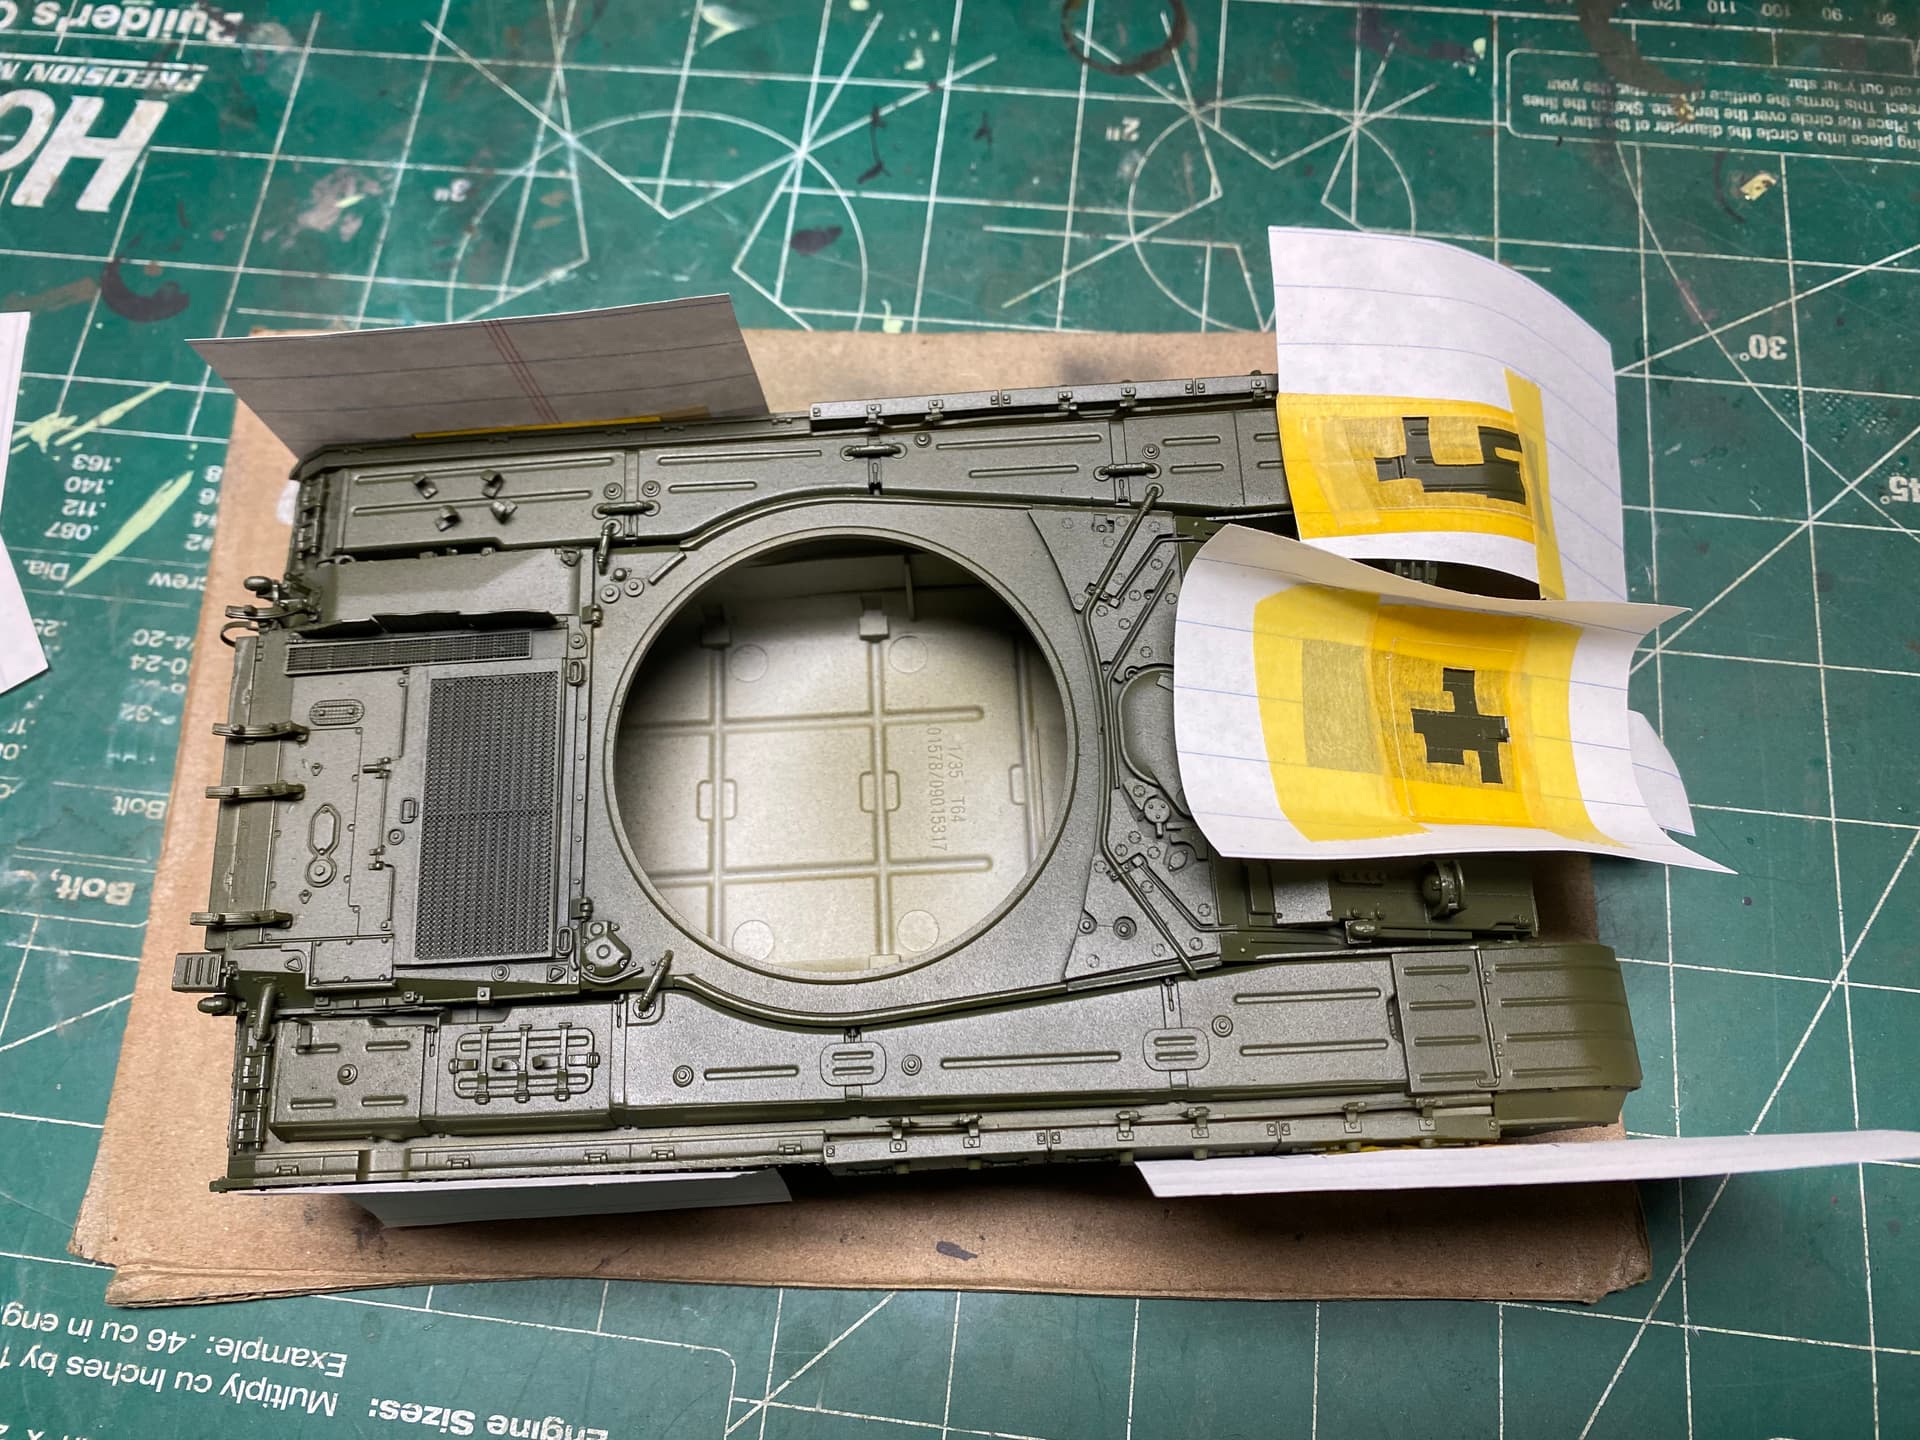
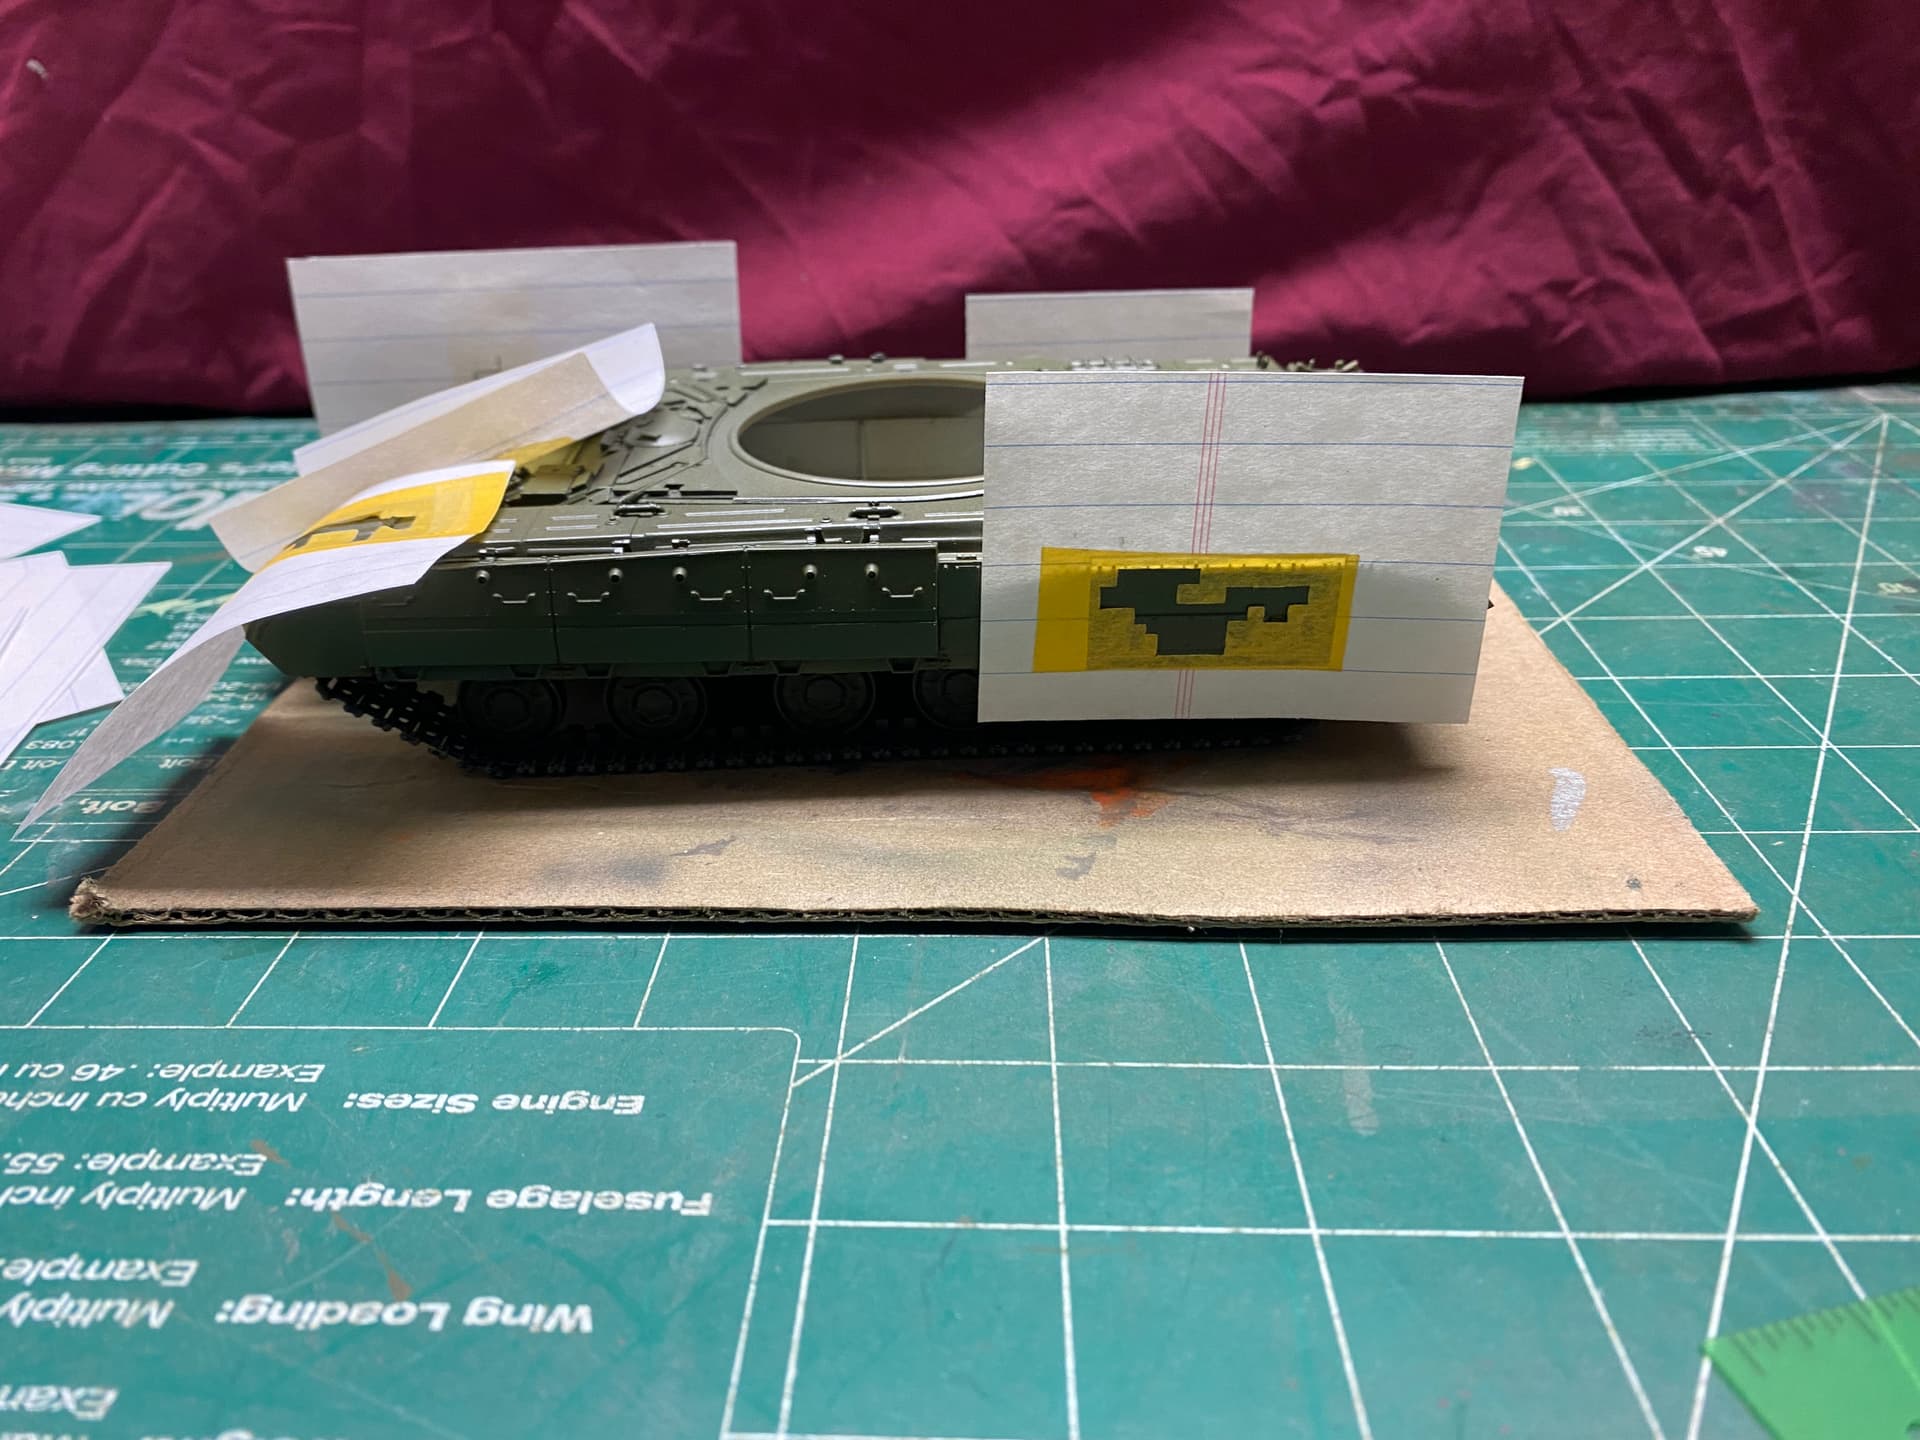
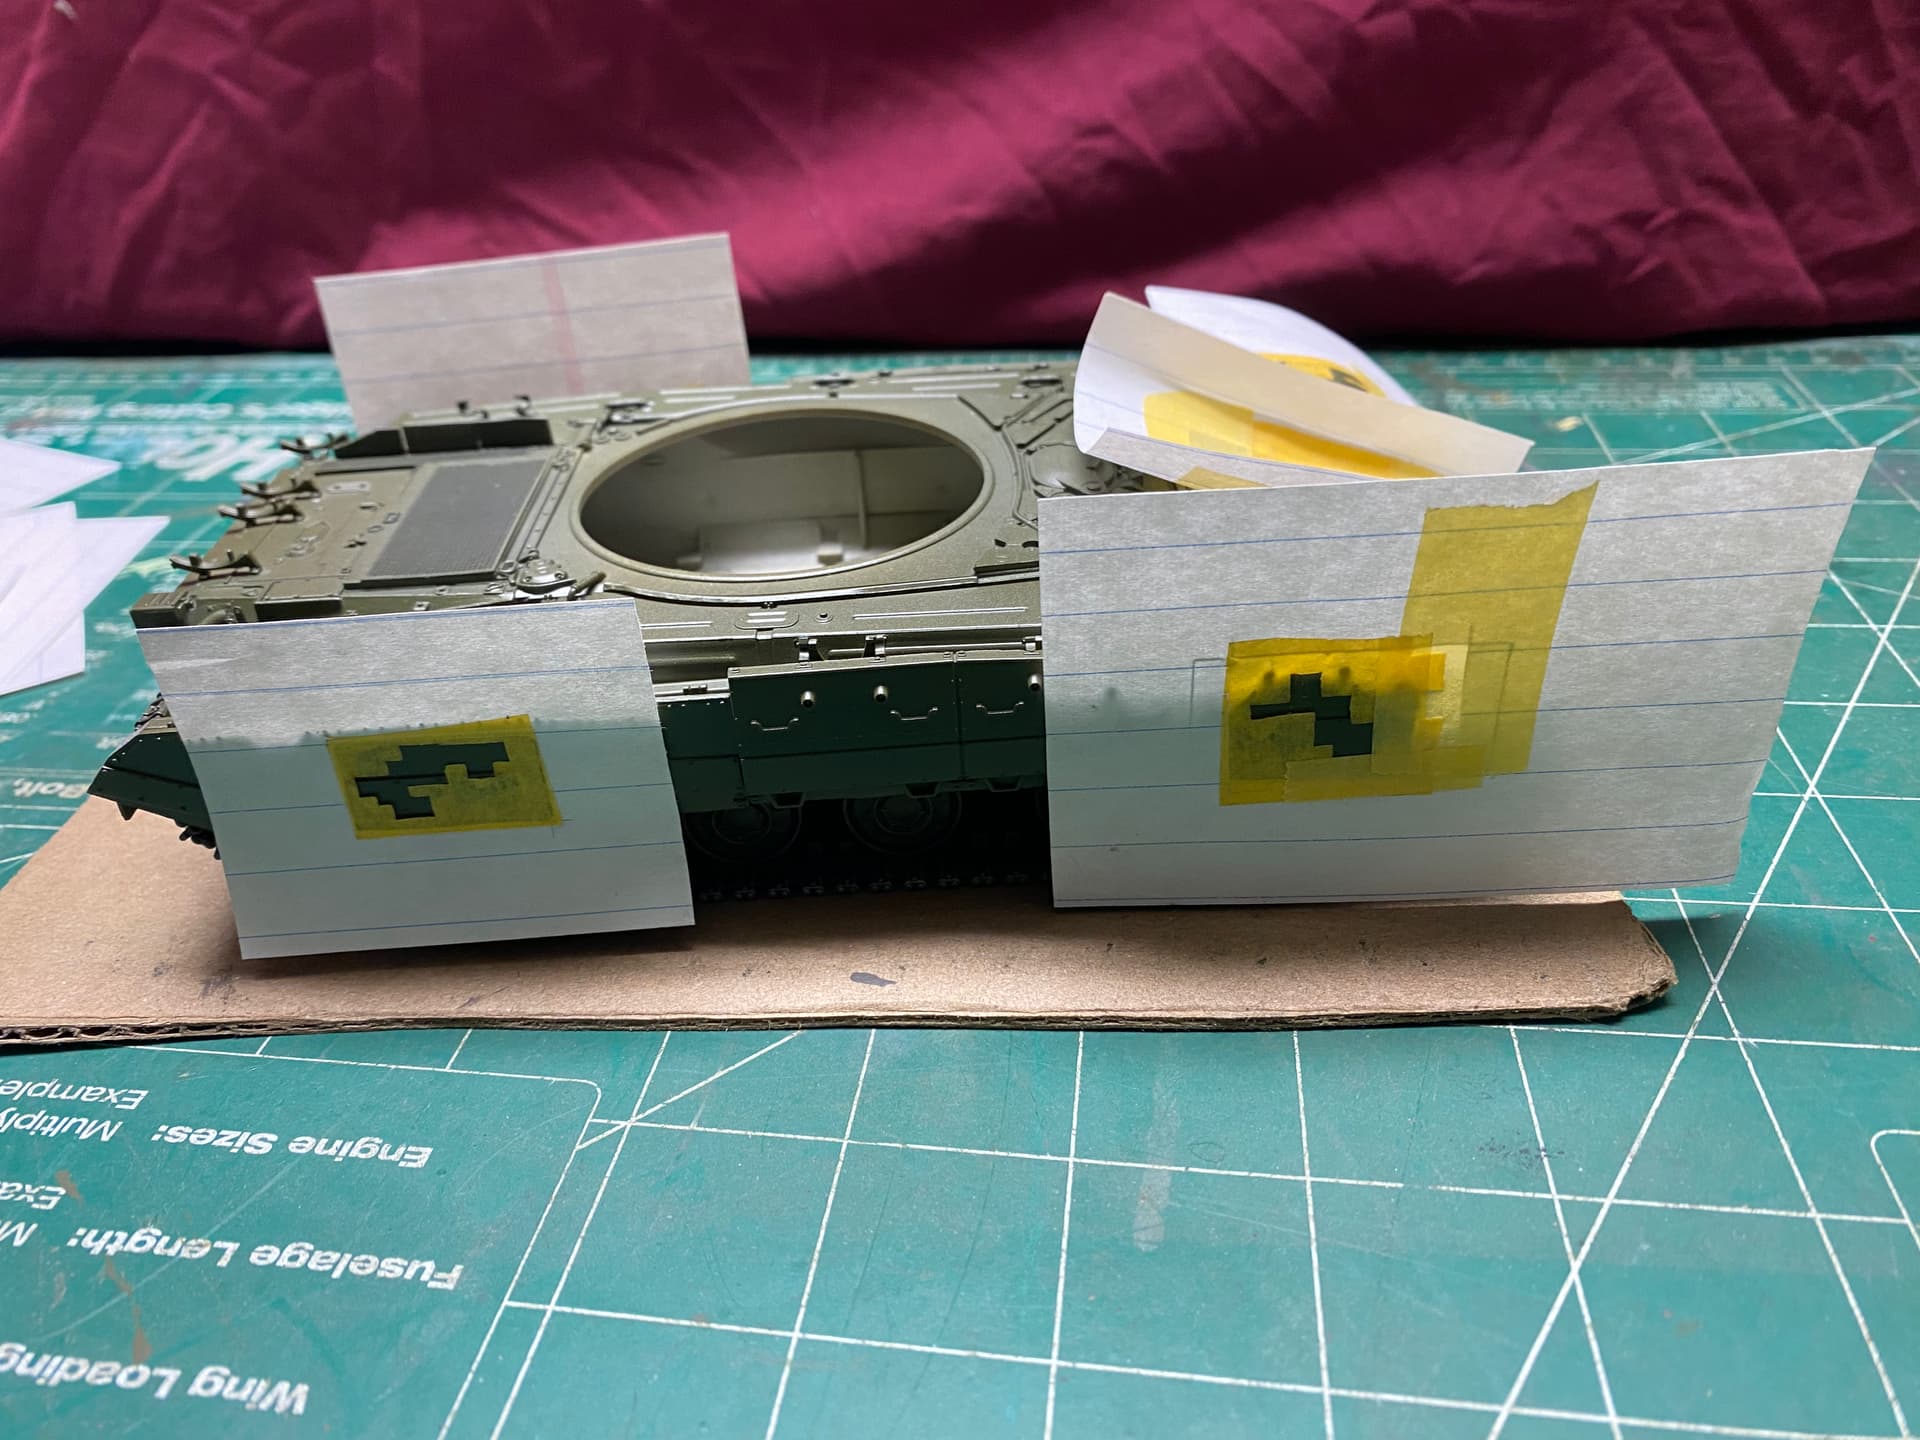
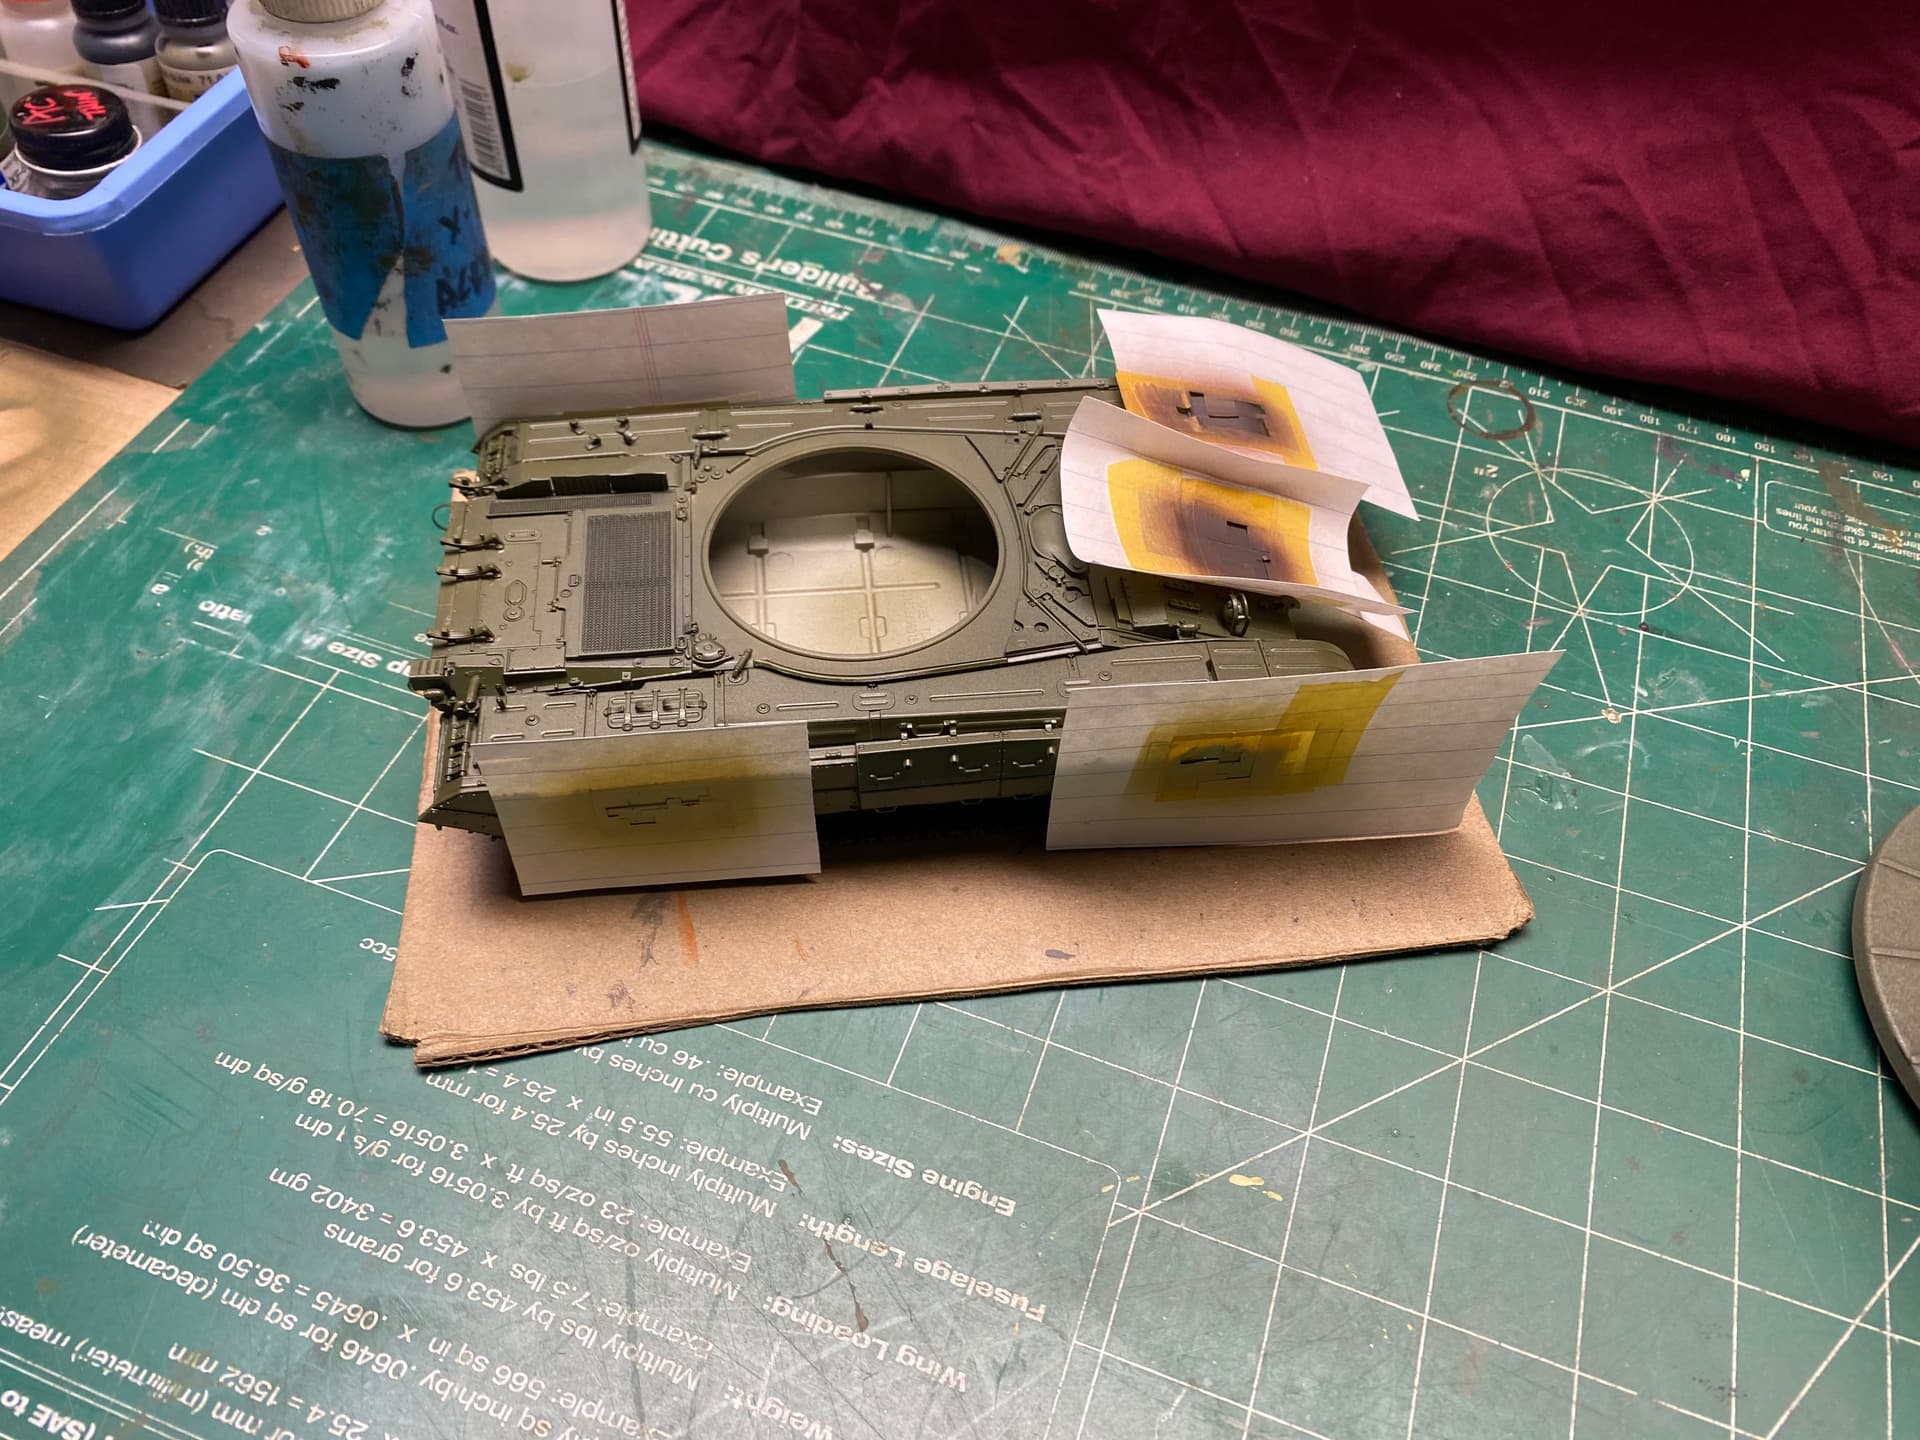
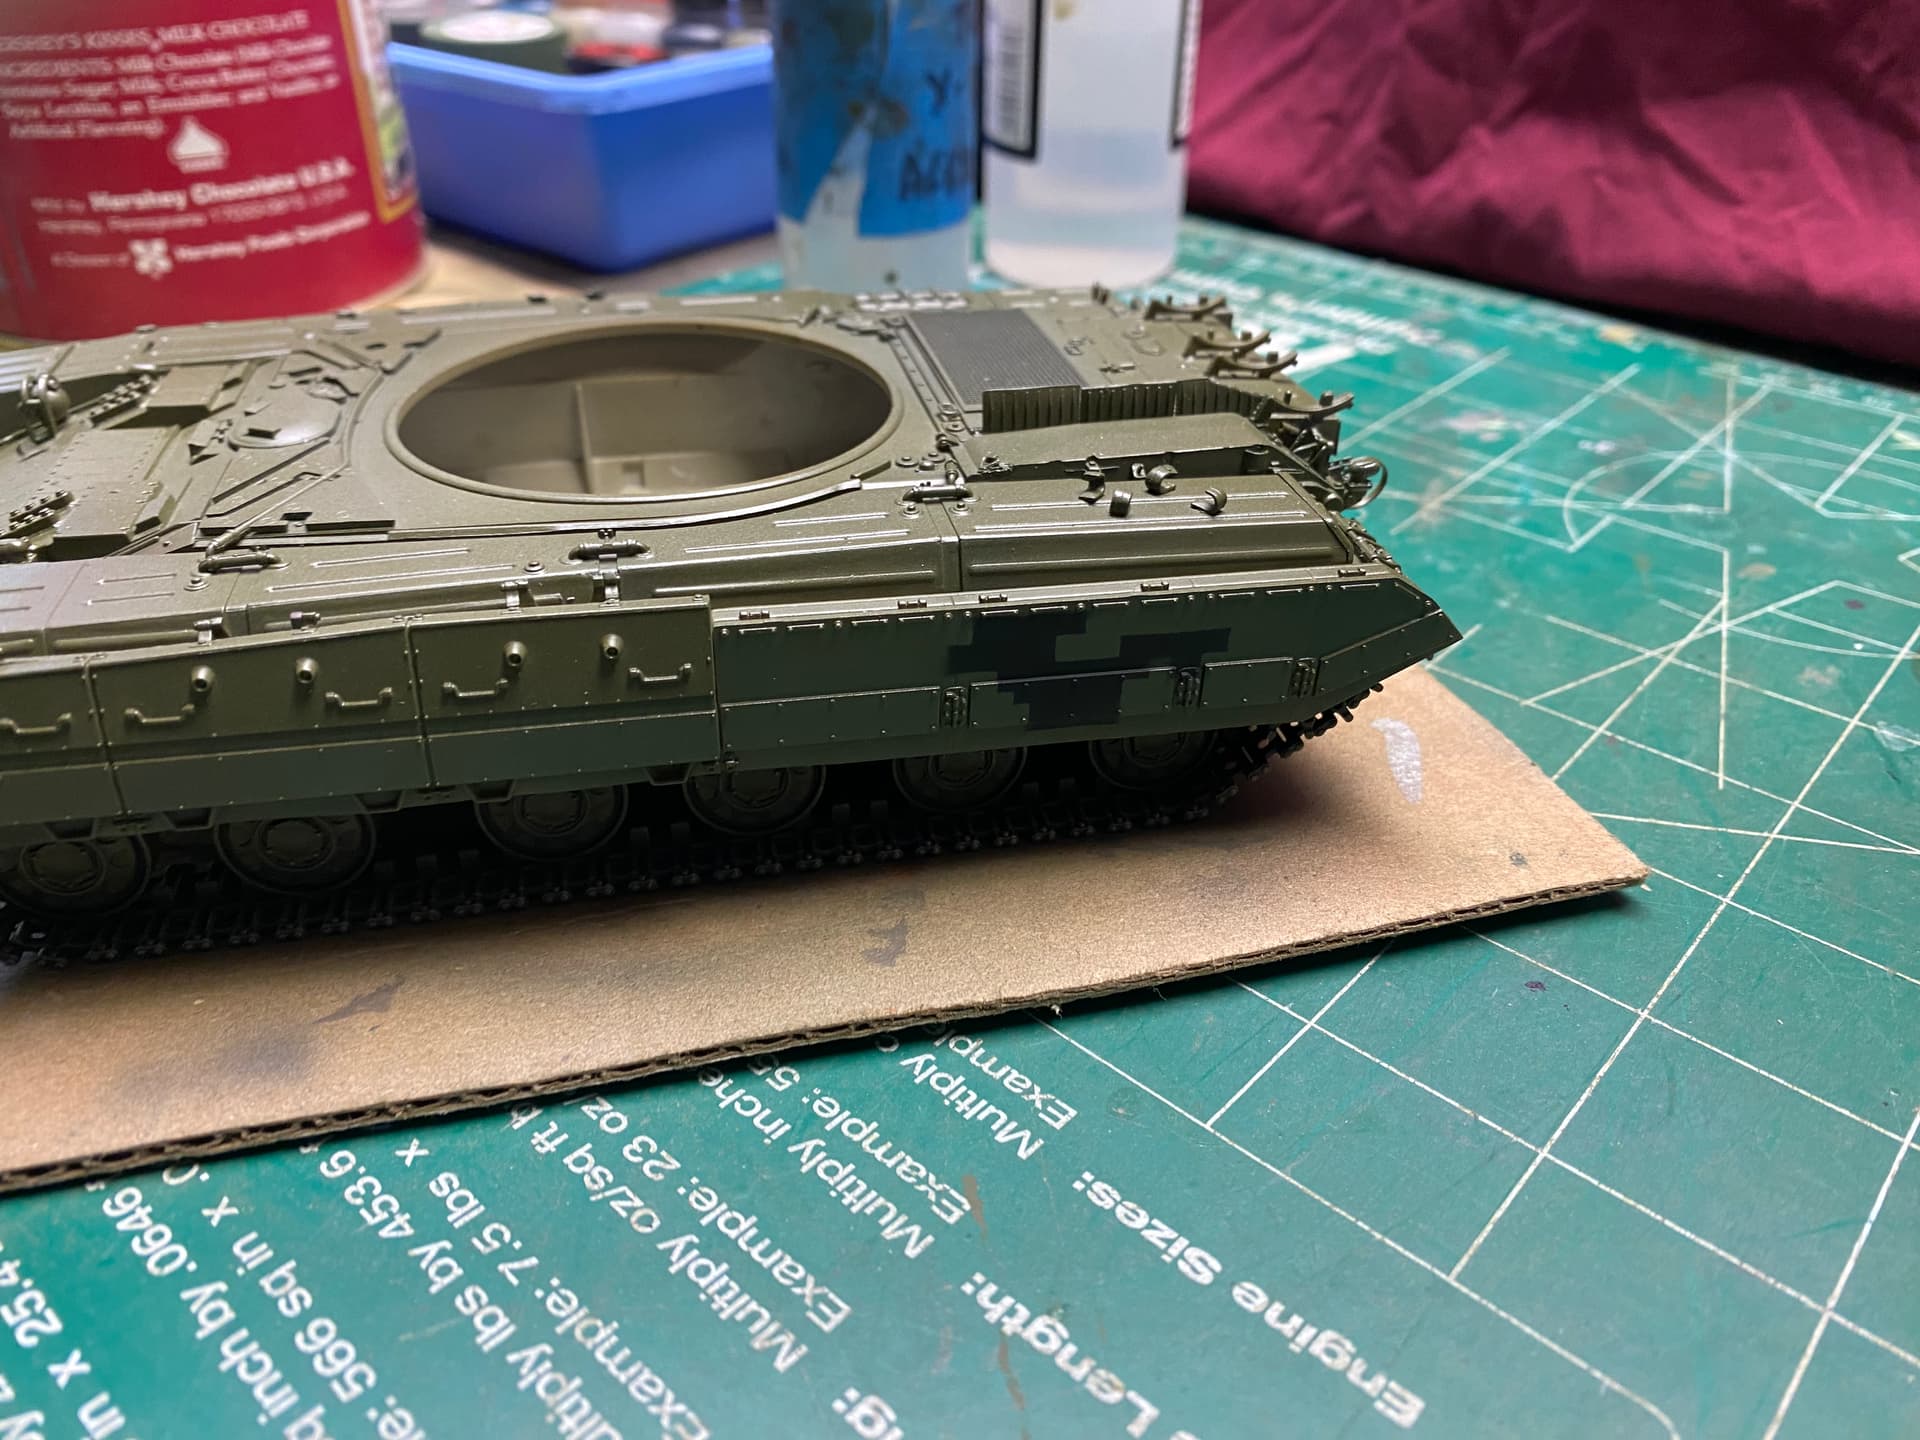
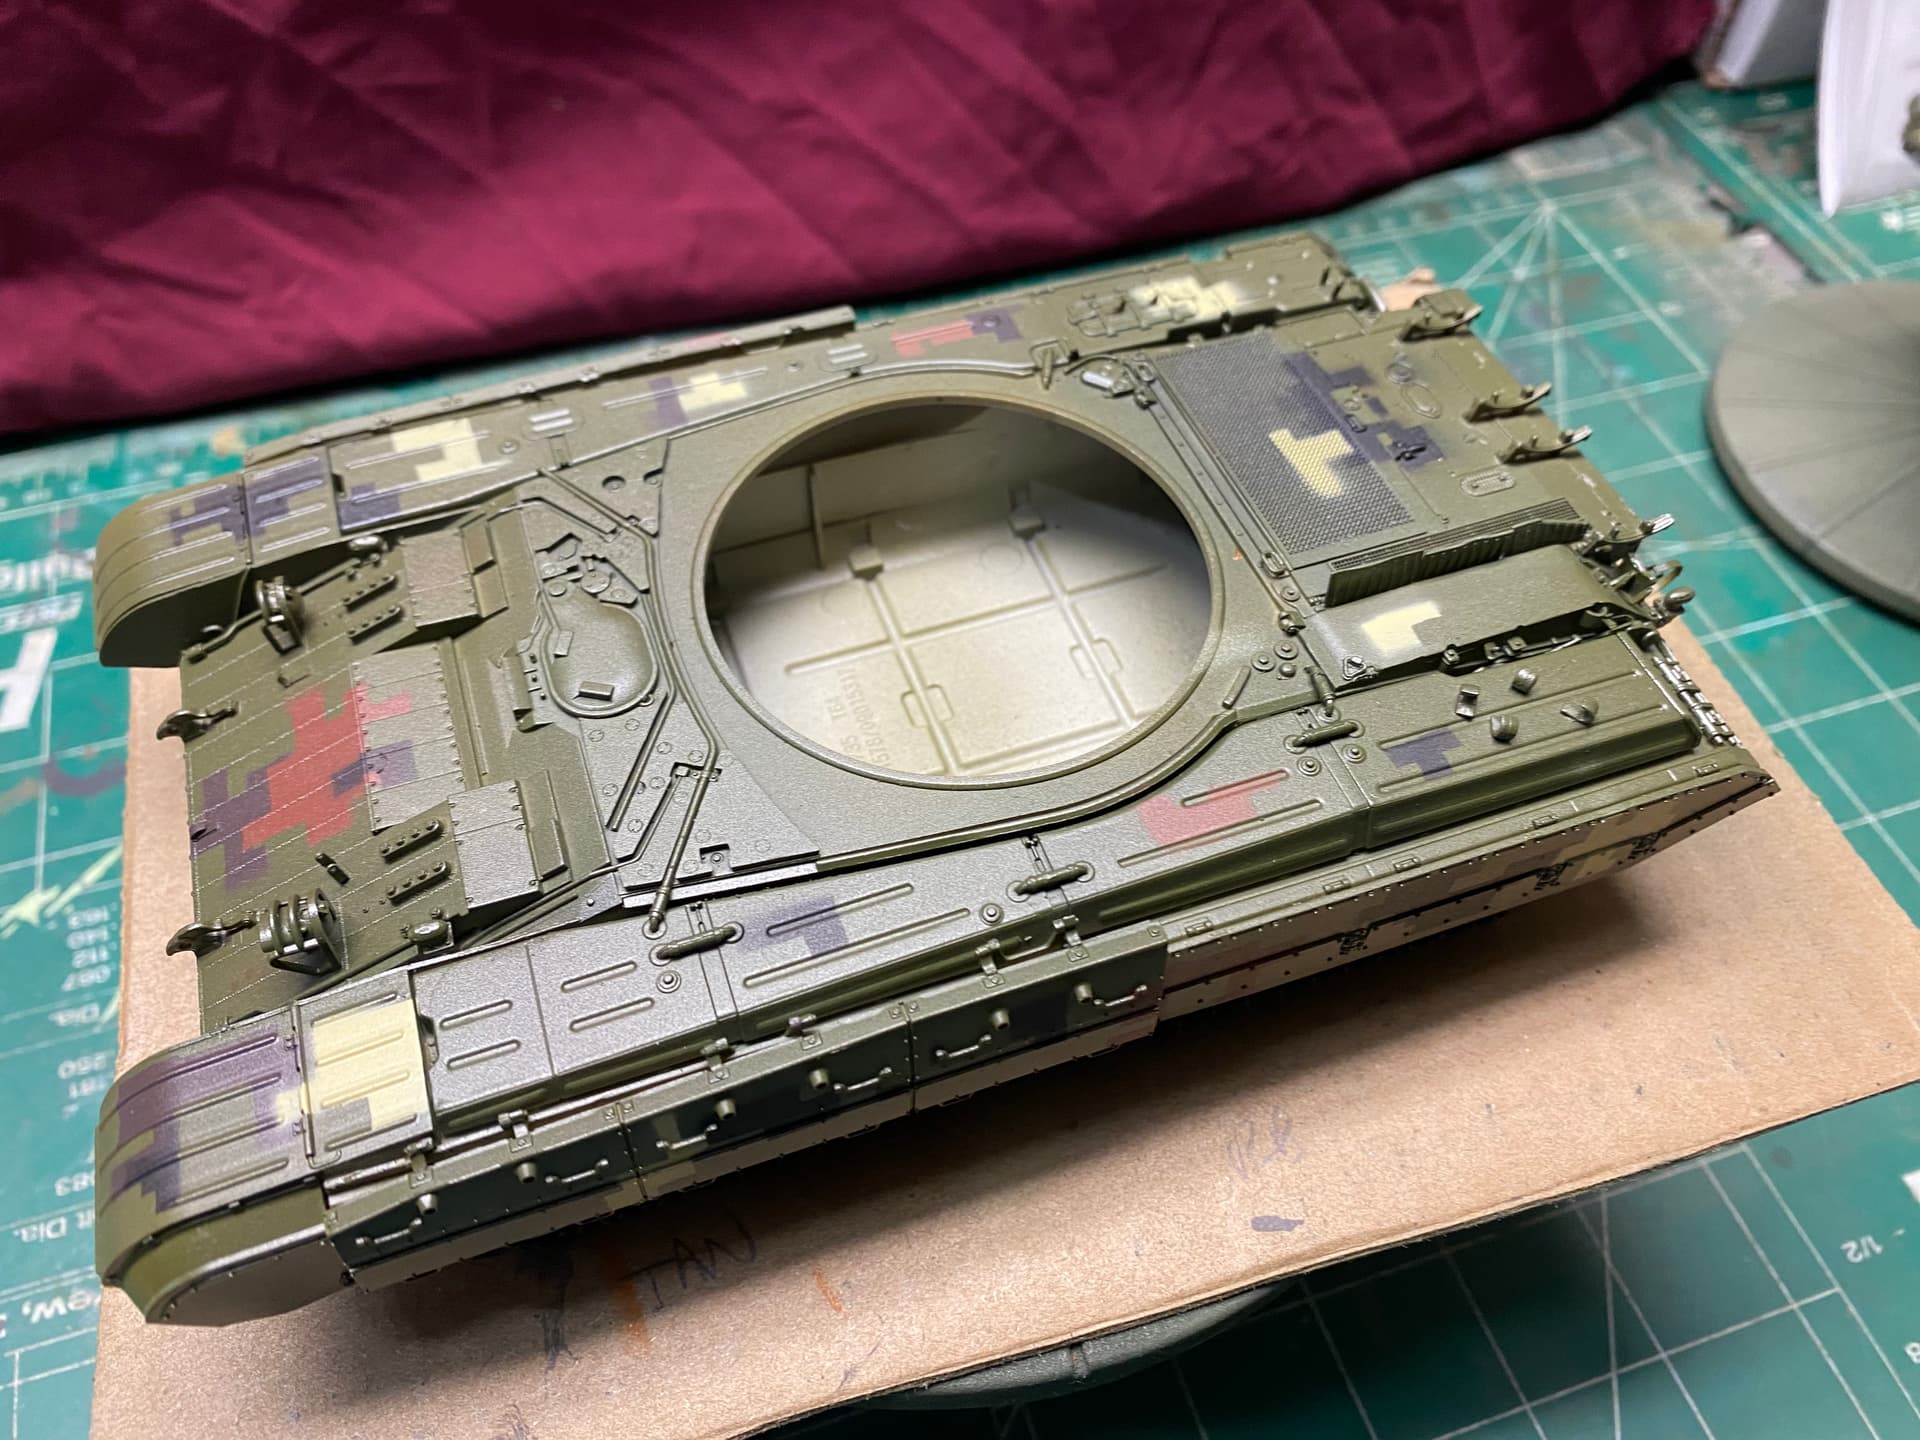
So this time around I gloss coated the base color on the T-64BM and made my own “female” masks out of notebook paper, Tamiya tape and some leftover DN masks from the ZTZ…
The masks seem to stick okay but I wonder if satin clear would have more tooth for the tape to stick to….
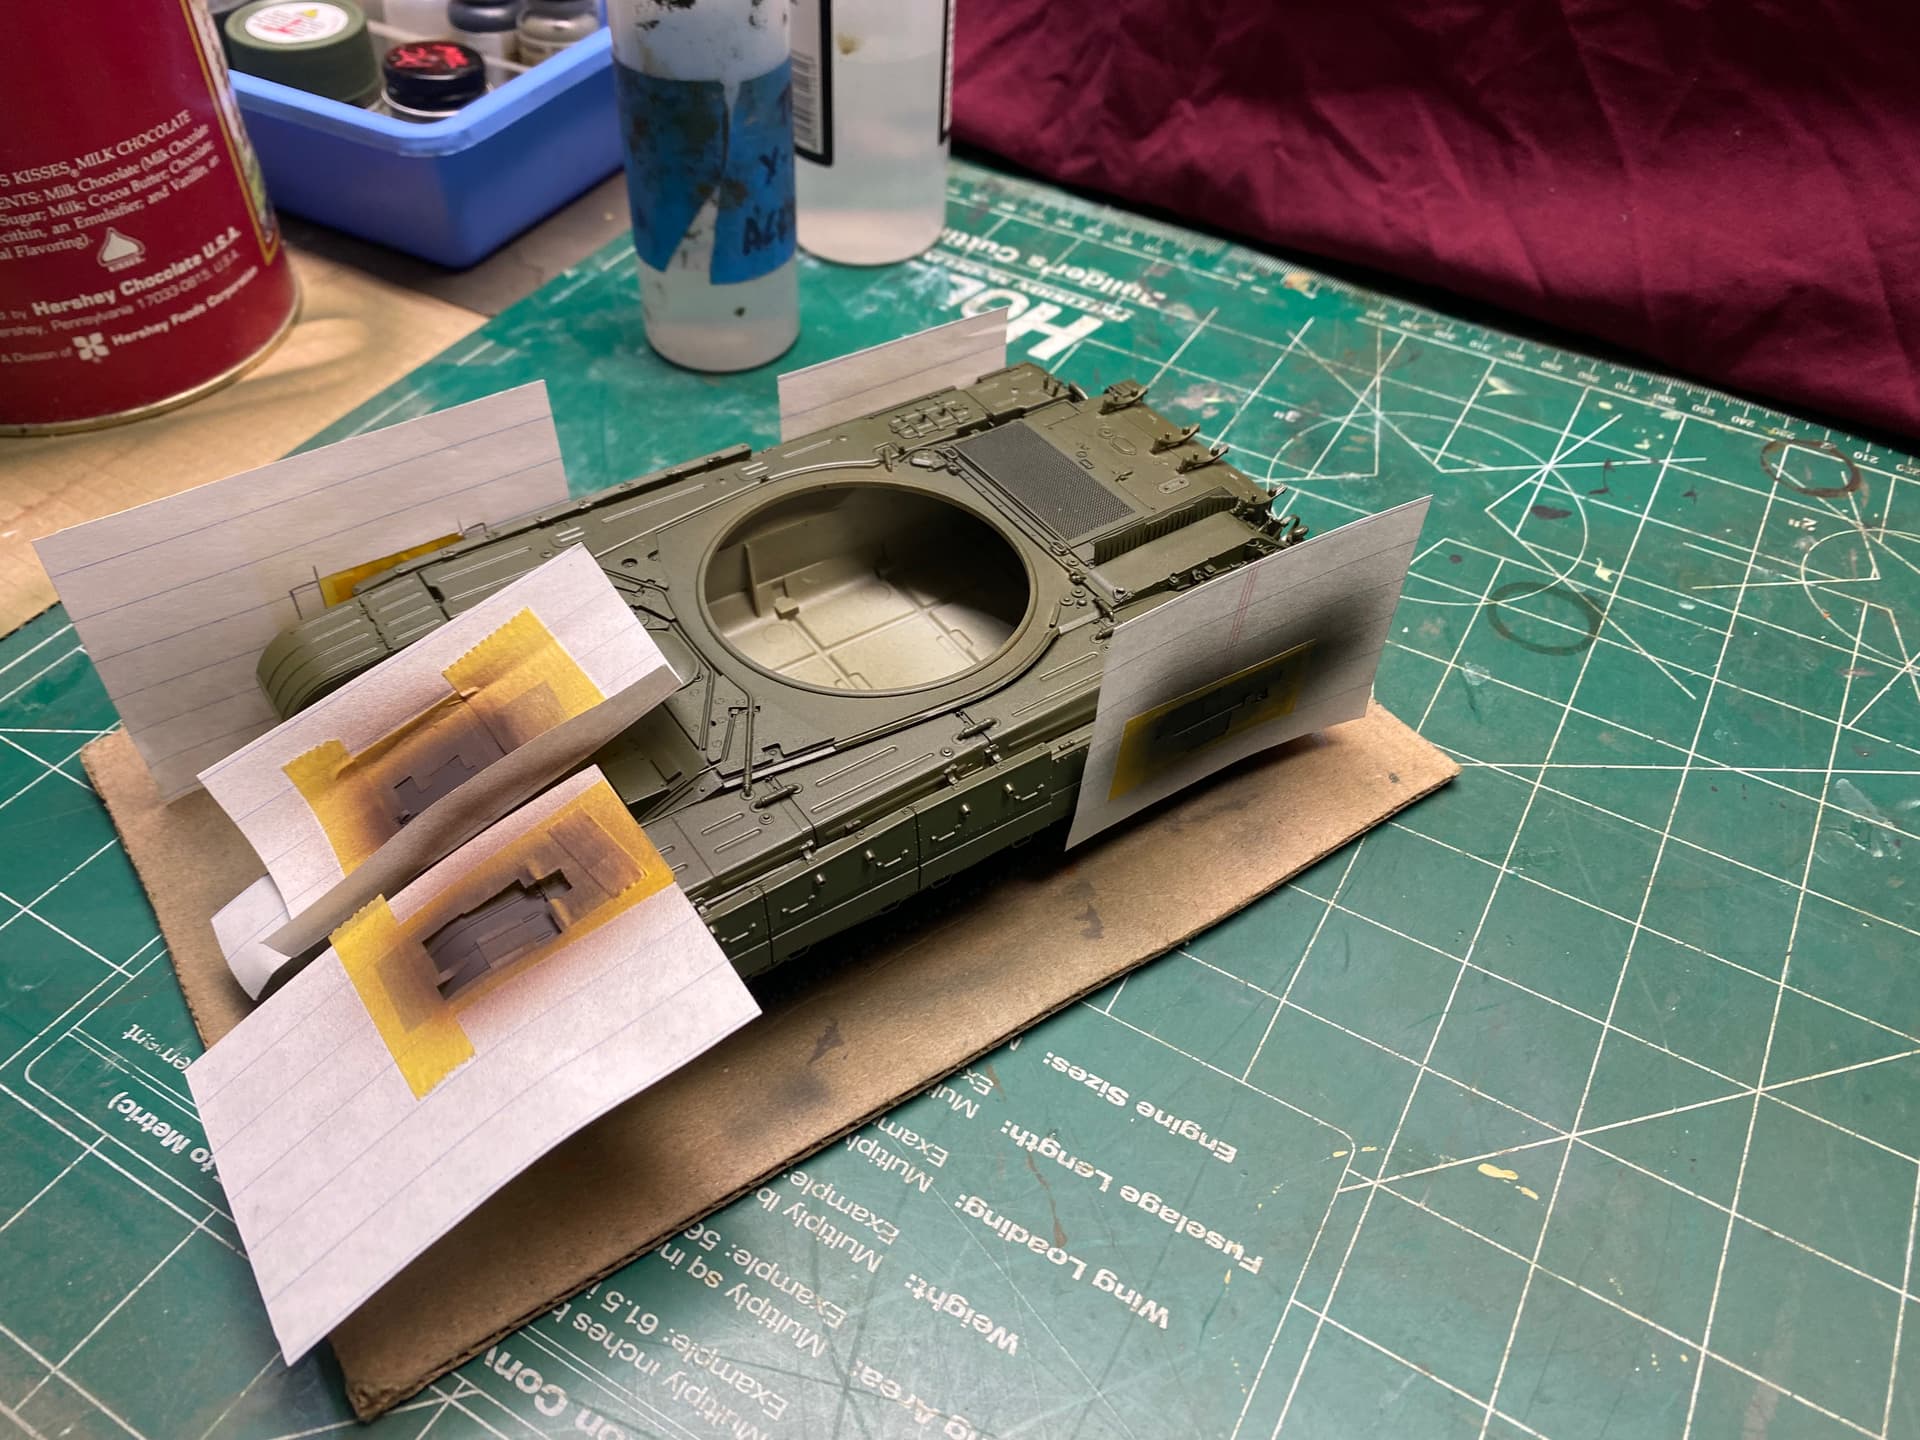
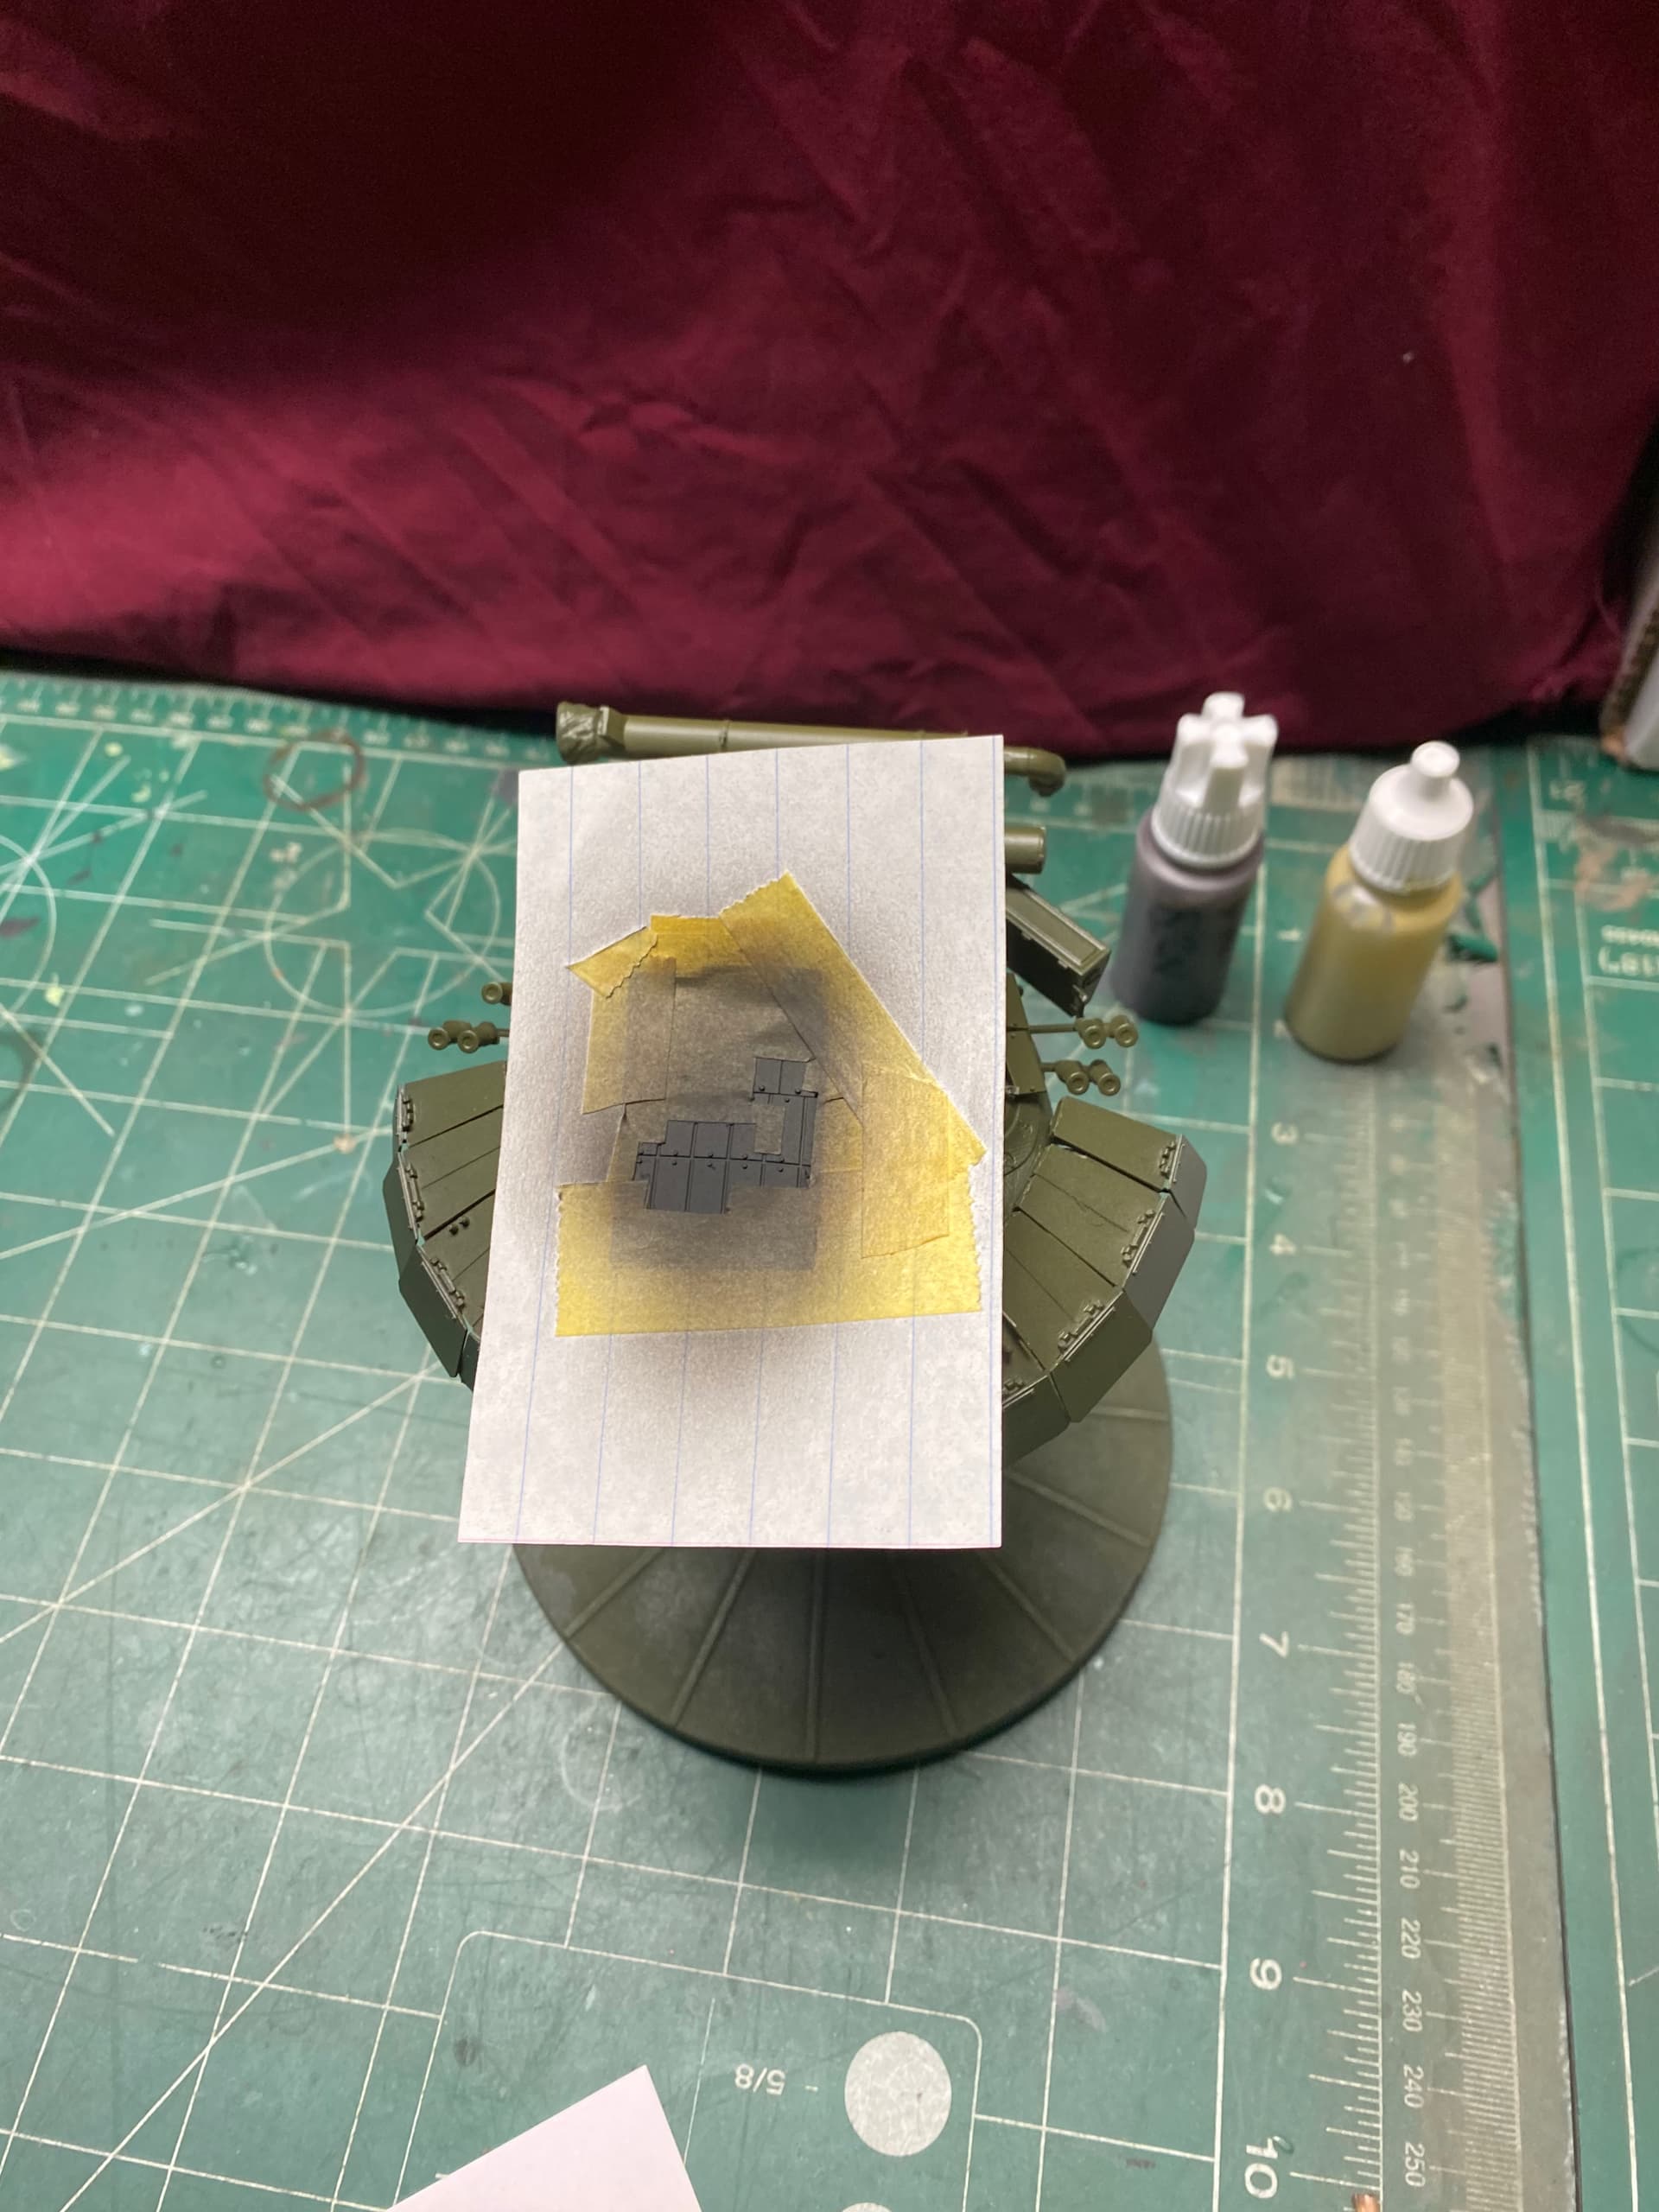
Anyhow, I shot my test masks with flat black, middle stone and dark brown this morning. I used my spiffy new Chinese electric air brush from the rapacious online retailer:
Waited a bit and pulled the masks. I was even able to save them by attaching them to the backer of a speed equipment sticker. The brown is too dark, but every thing seemed to work….
Only kidding, looks really good,and well done on saving the masks as well. You could even get away with the edges being a bit rougher looking at some of the images seen from the actual war vehicles … nice job
Been wanting to try the digital camo for some time. Your effort and success has inspired me to take the plunge. Not being an original thinker I will simply copy your method.
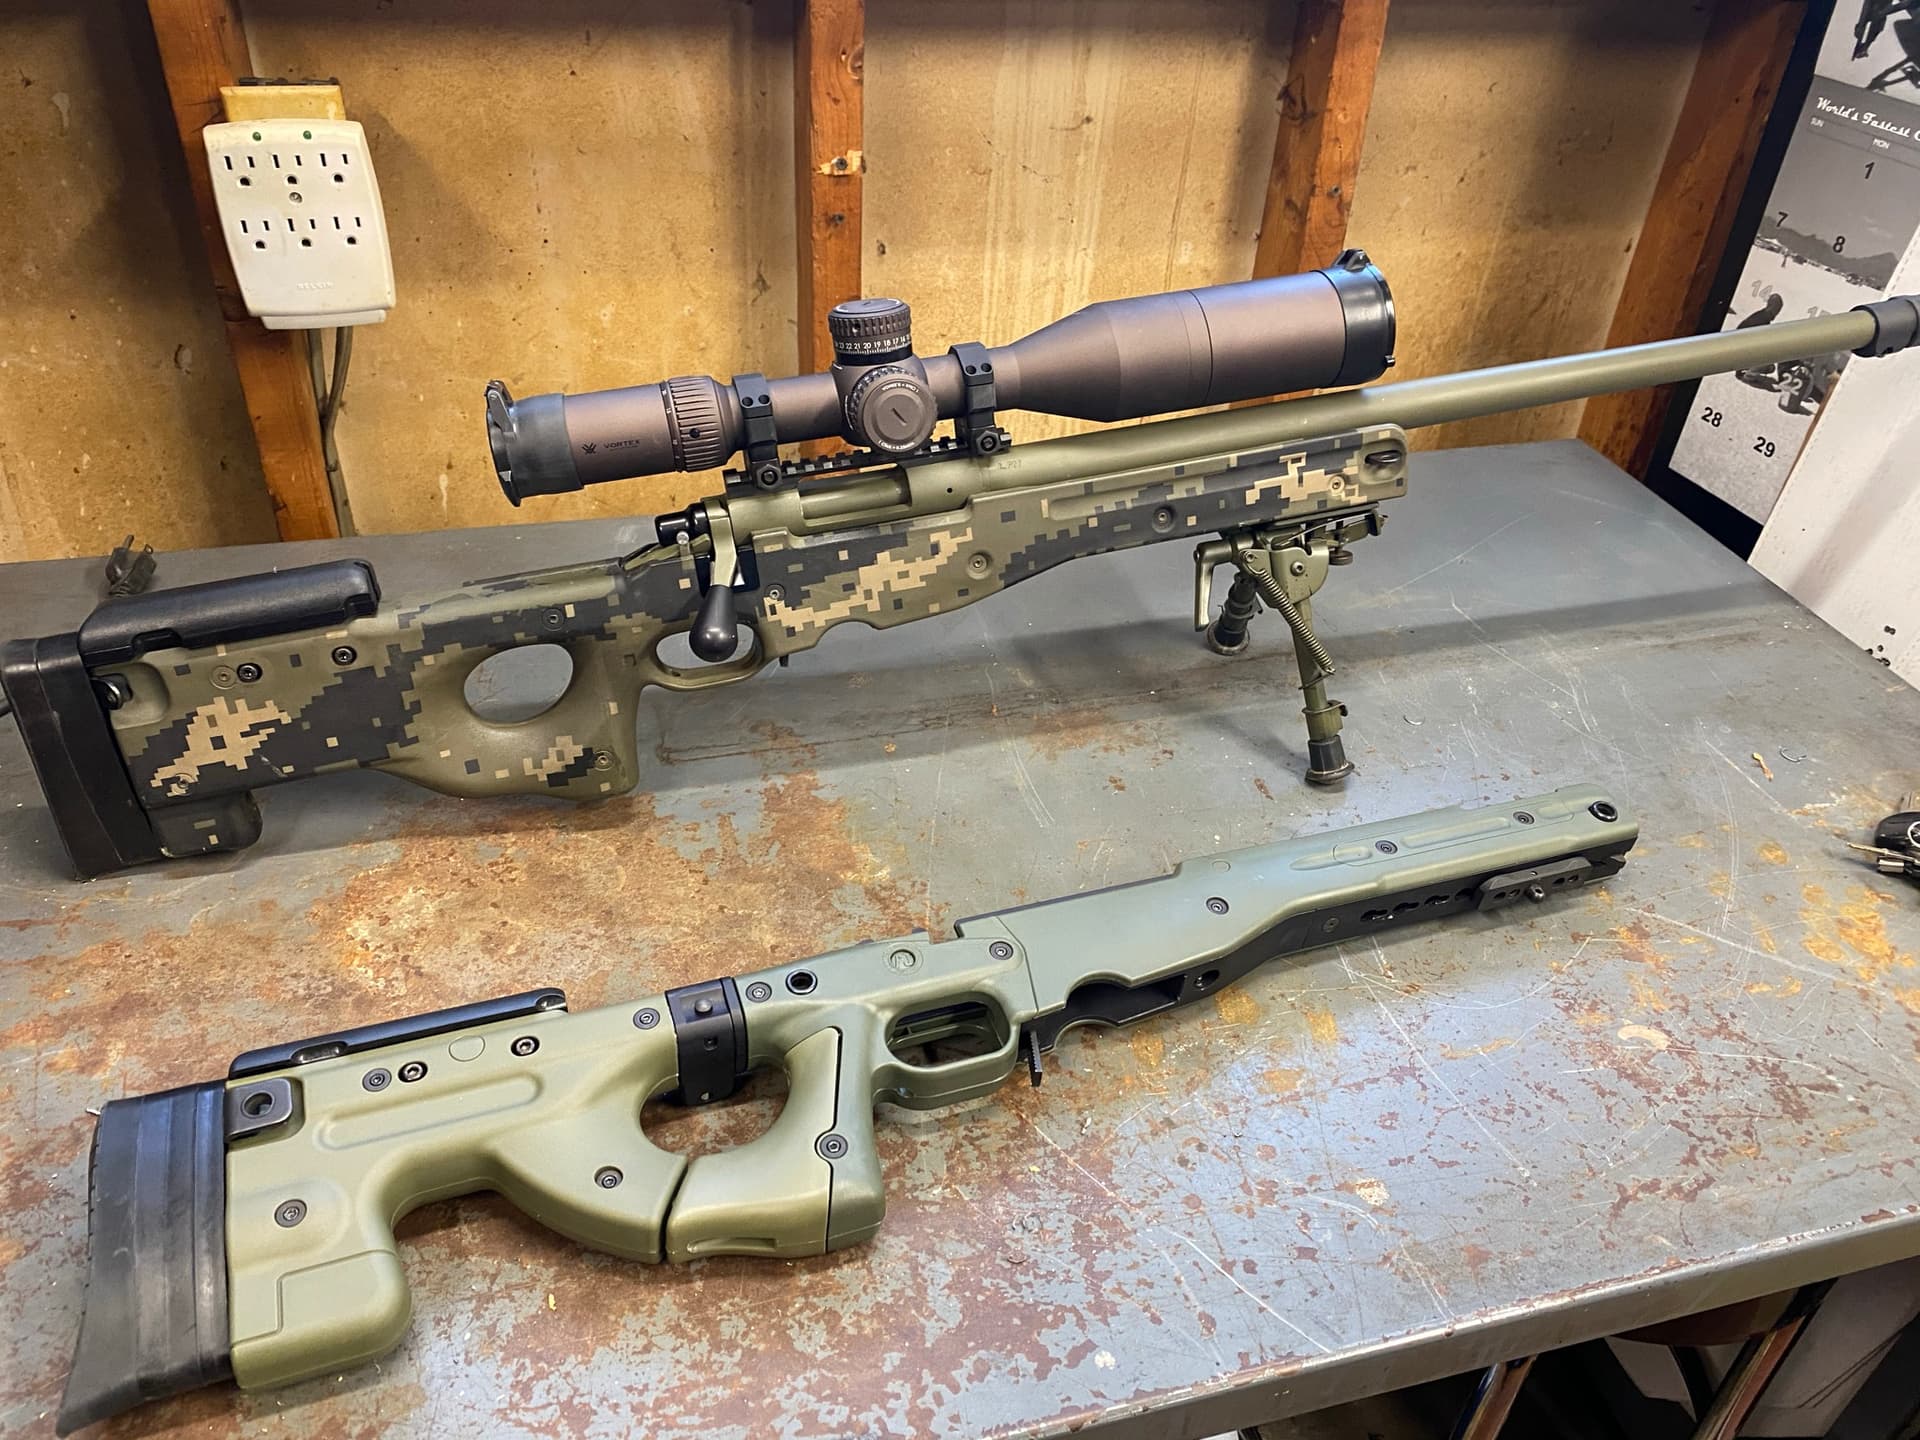
Are you going to try and overlay some of the light over the dark or close by it like on the rifle skins. A lot of the vehicles have it like that as well ?
Yes, I’m going to attempt more patterns and overlays.
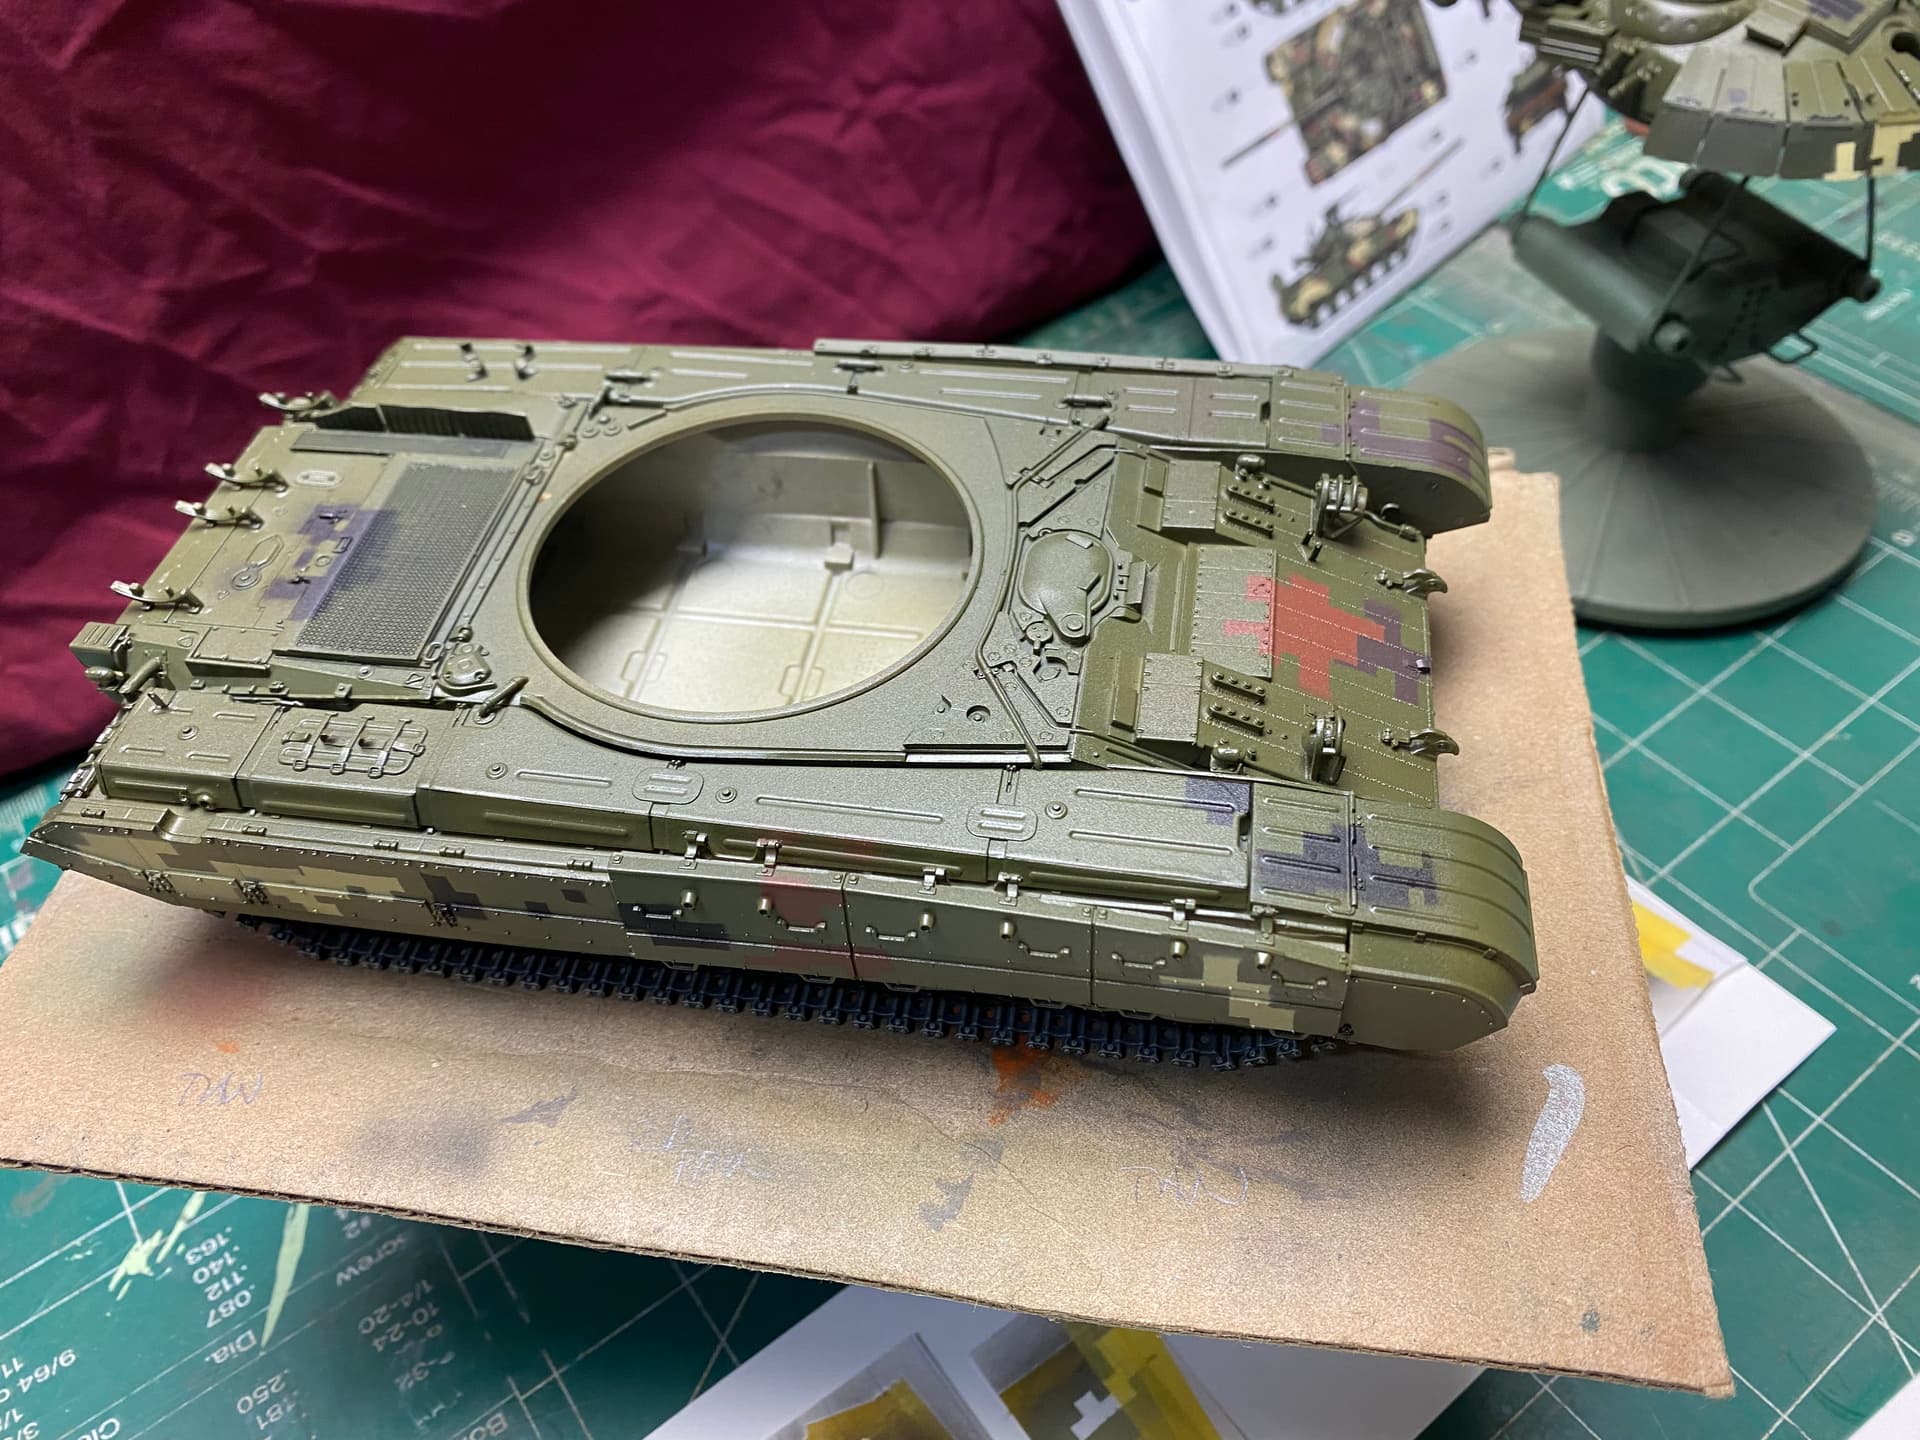
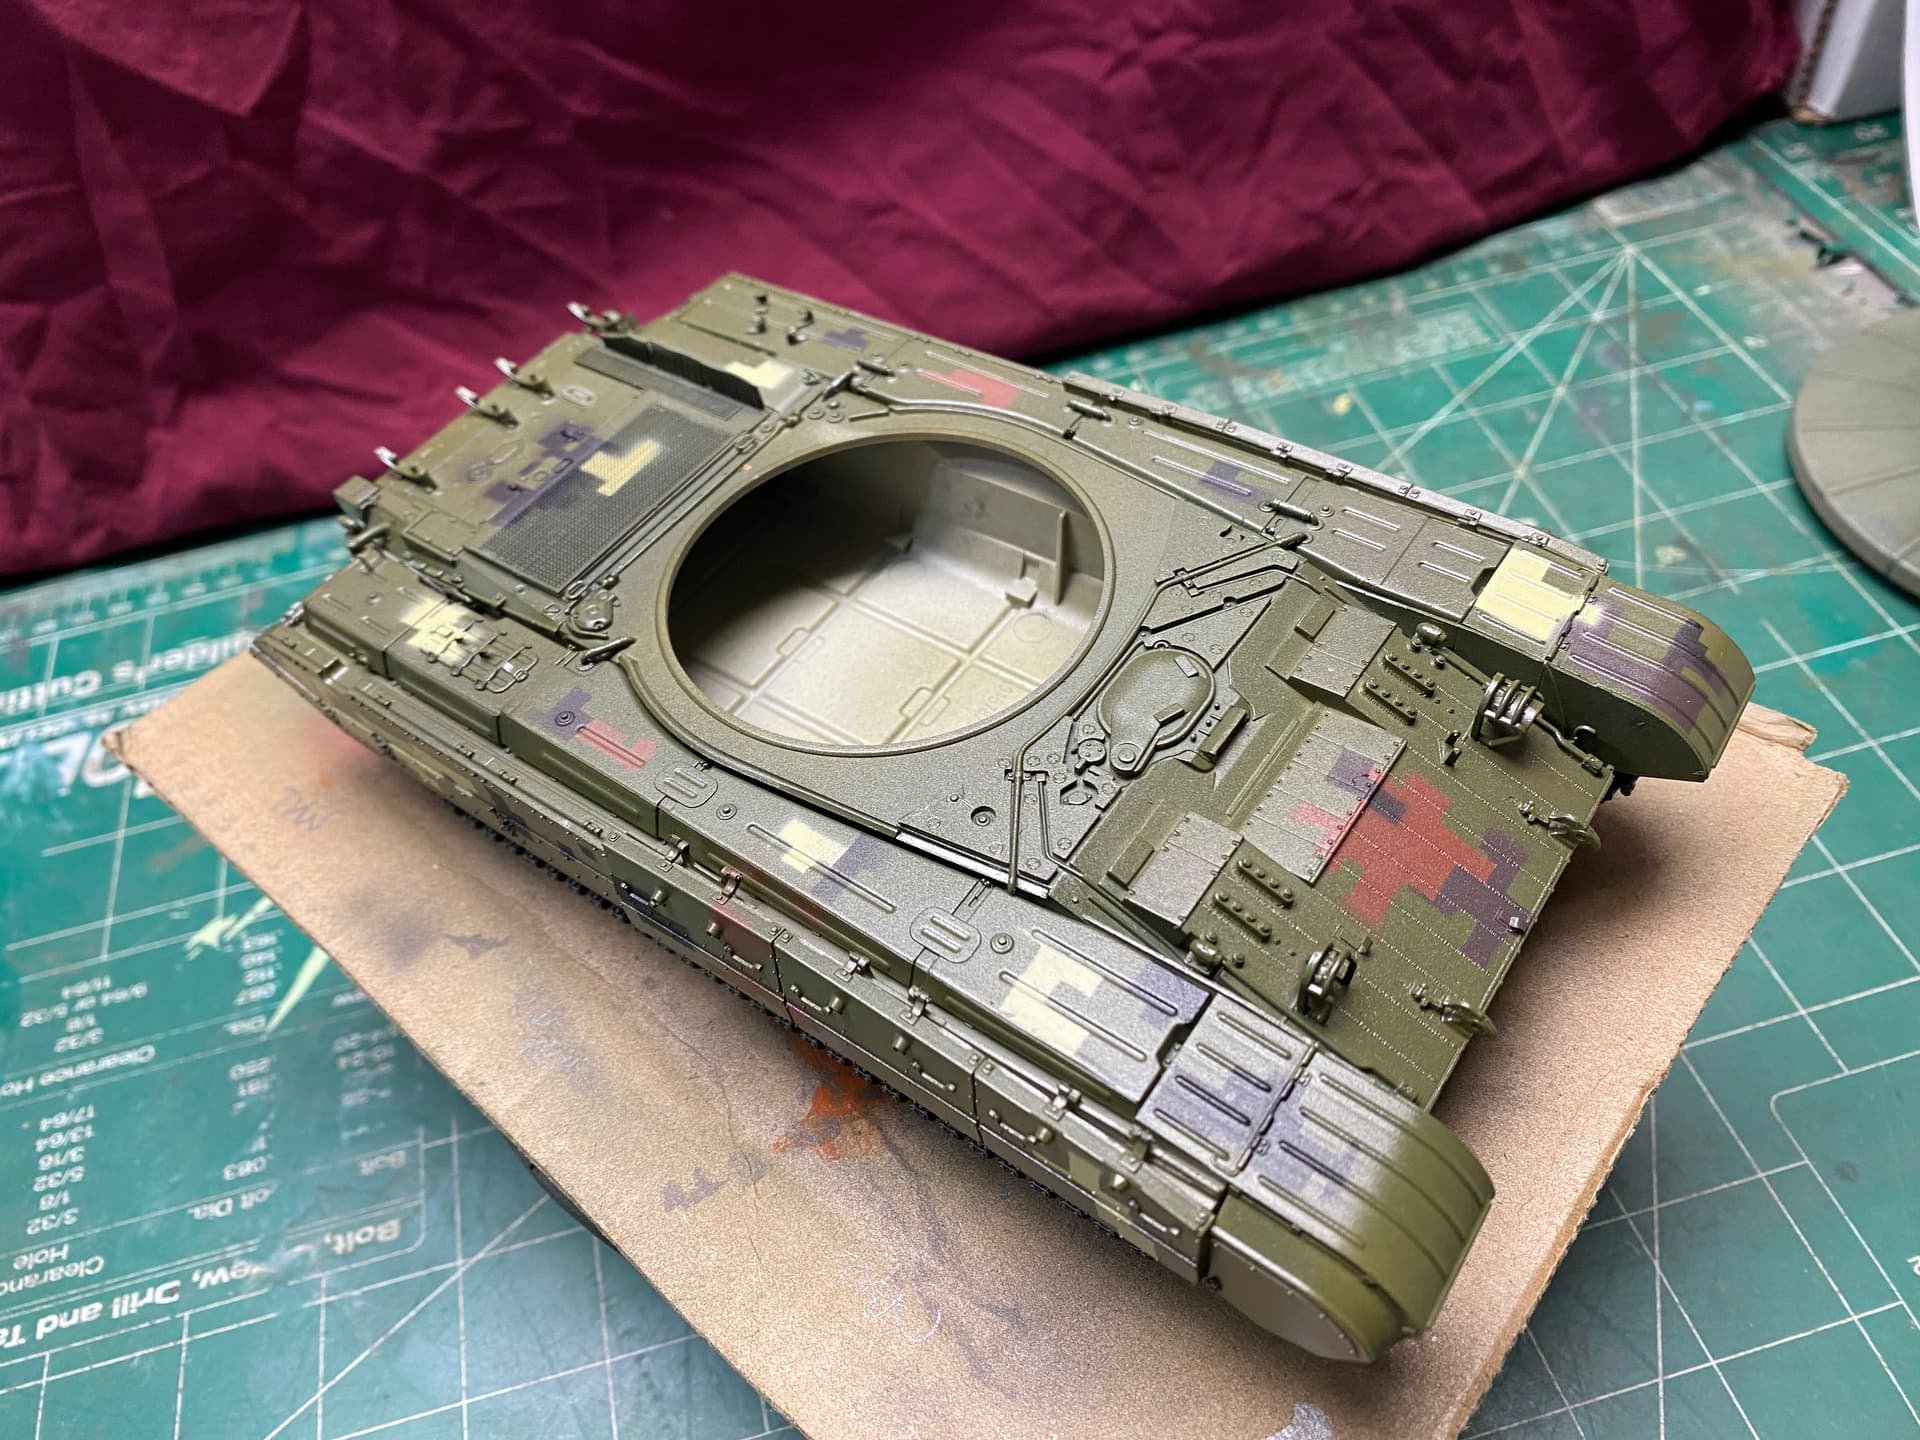
I’m trying to decide if I should redo the dark brown in a red brown shade (since I saved both the masks) or just leave it be and use red brown on the rest of it.
I’m also thinking about shooting it was some satin clear, thinking the tape will stick better because it was almost impossible to get the DN masks off the flat finish on my ZTZ-99A that I mentioned earlier….
Hey congratulations man, those look really really good! Nice shapes and definition and good color saturation. Nice sharp lines. Keeping it on the gloss clear base will give you the best tape adhesion and sharpest lines. Keep moving and shooting! It’s coming along excellent!
Right before I posted this thread I did a search to make sure I wasn’t going over ground that had already been covered and I saw your recommendation for the Tamiya grid making sheets and ordered them, so thanks for that.
@SSGToms, I’ll stick with the gloss. I’ll prolly do a light coat of gloss over the spots I’ve already digitalized to protect the paint. This is gonna be a slow process, I think.
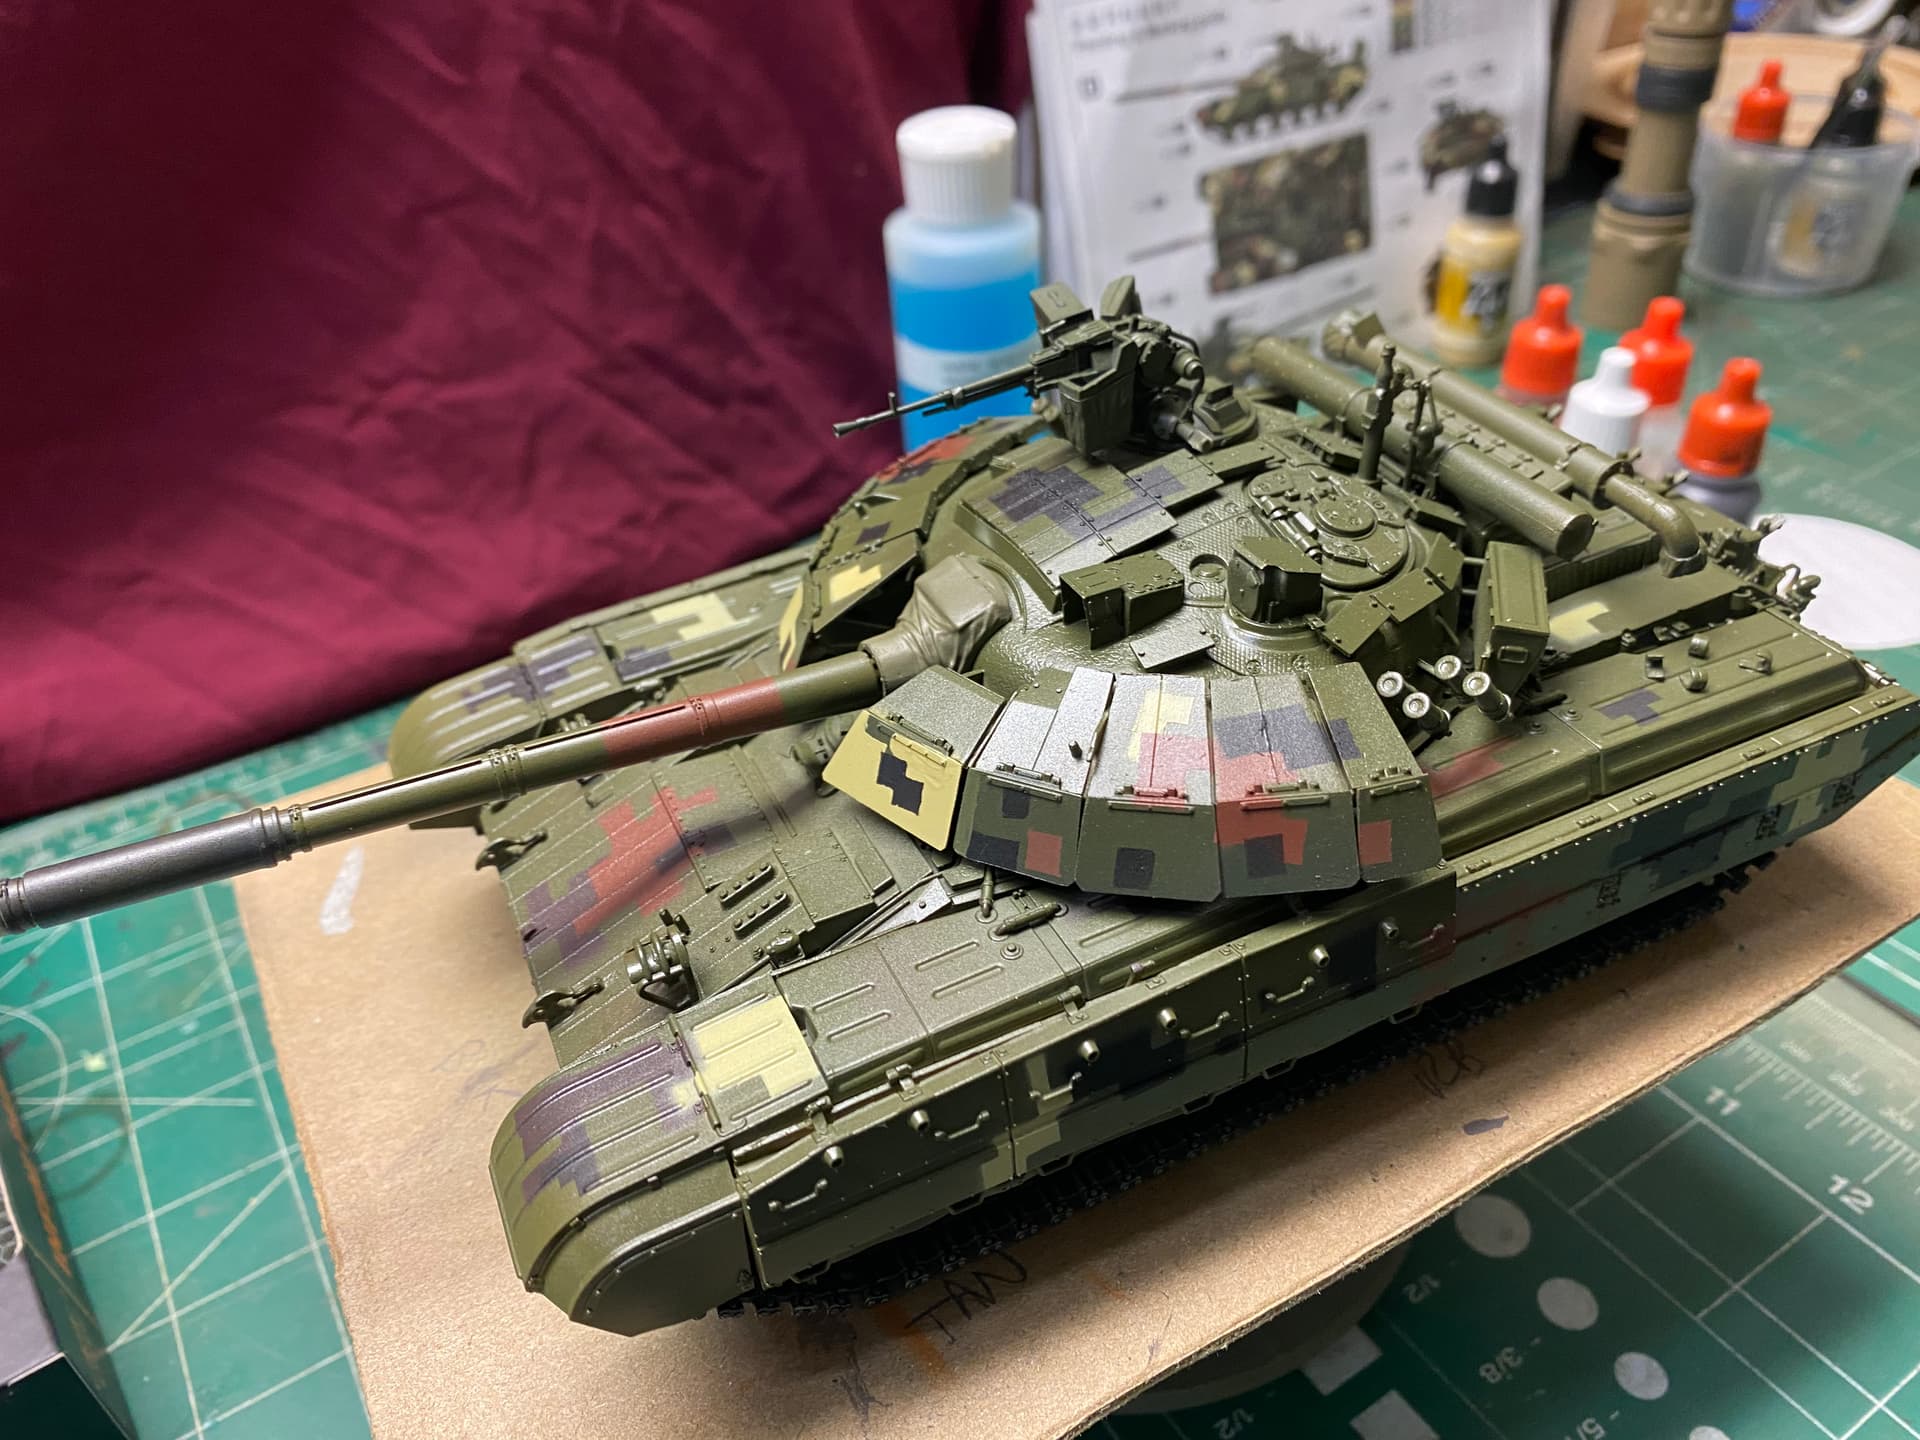
For what I remember, the usual shape of Ukrainan geometric blotches should be more simple, a sort of L with different angulations. No much resemblance with the more complex Chinese pattern.
About paint peeling off while removing the masks: if you use Tamiya or Gunze acril-poliuretanic paints, you could improve a lot the grip on the plastic by adding some lacquer thinner while airbrushing it, even without primer.
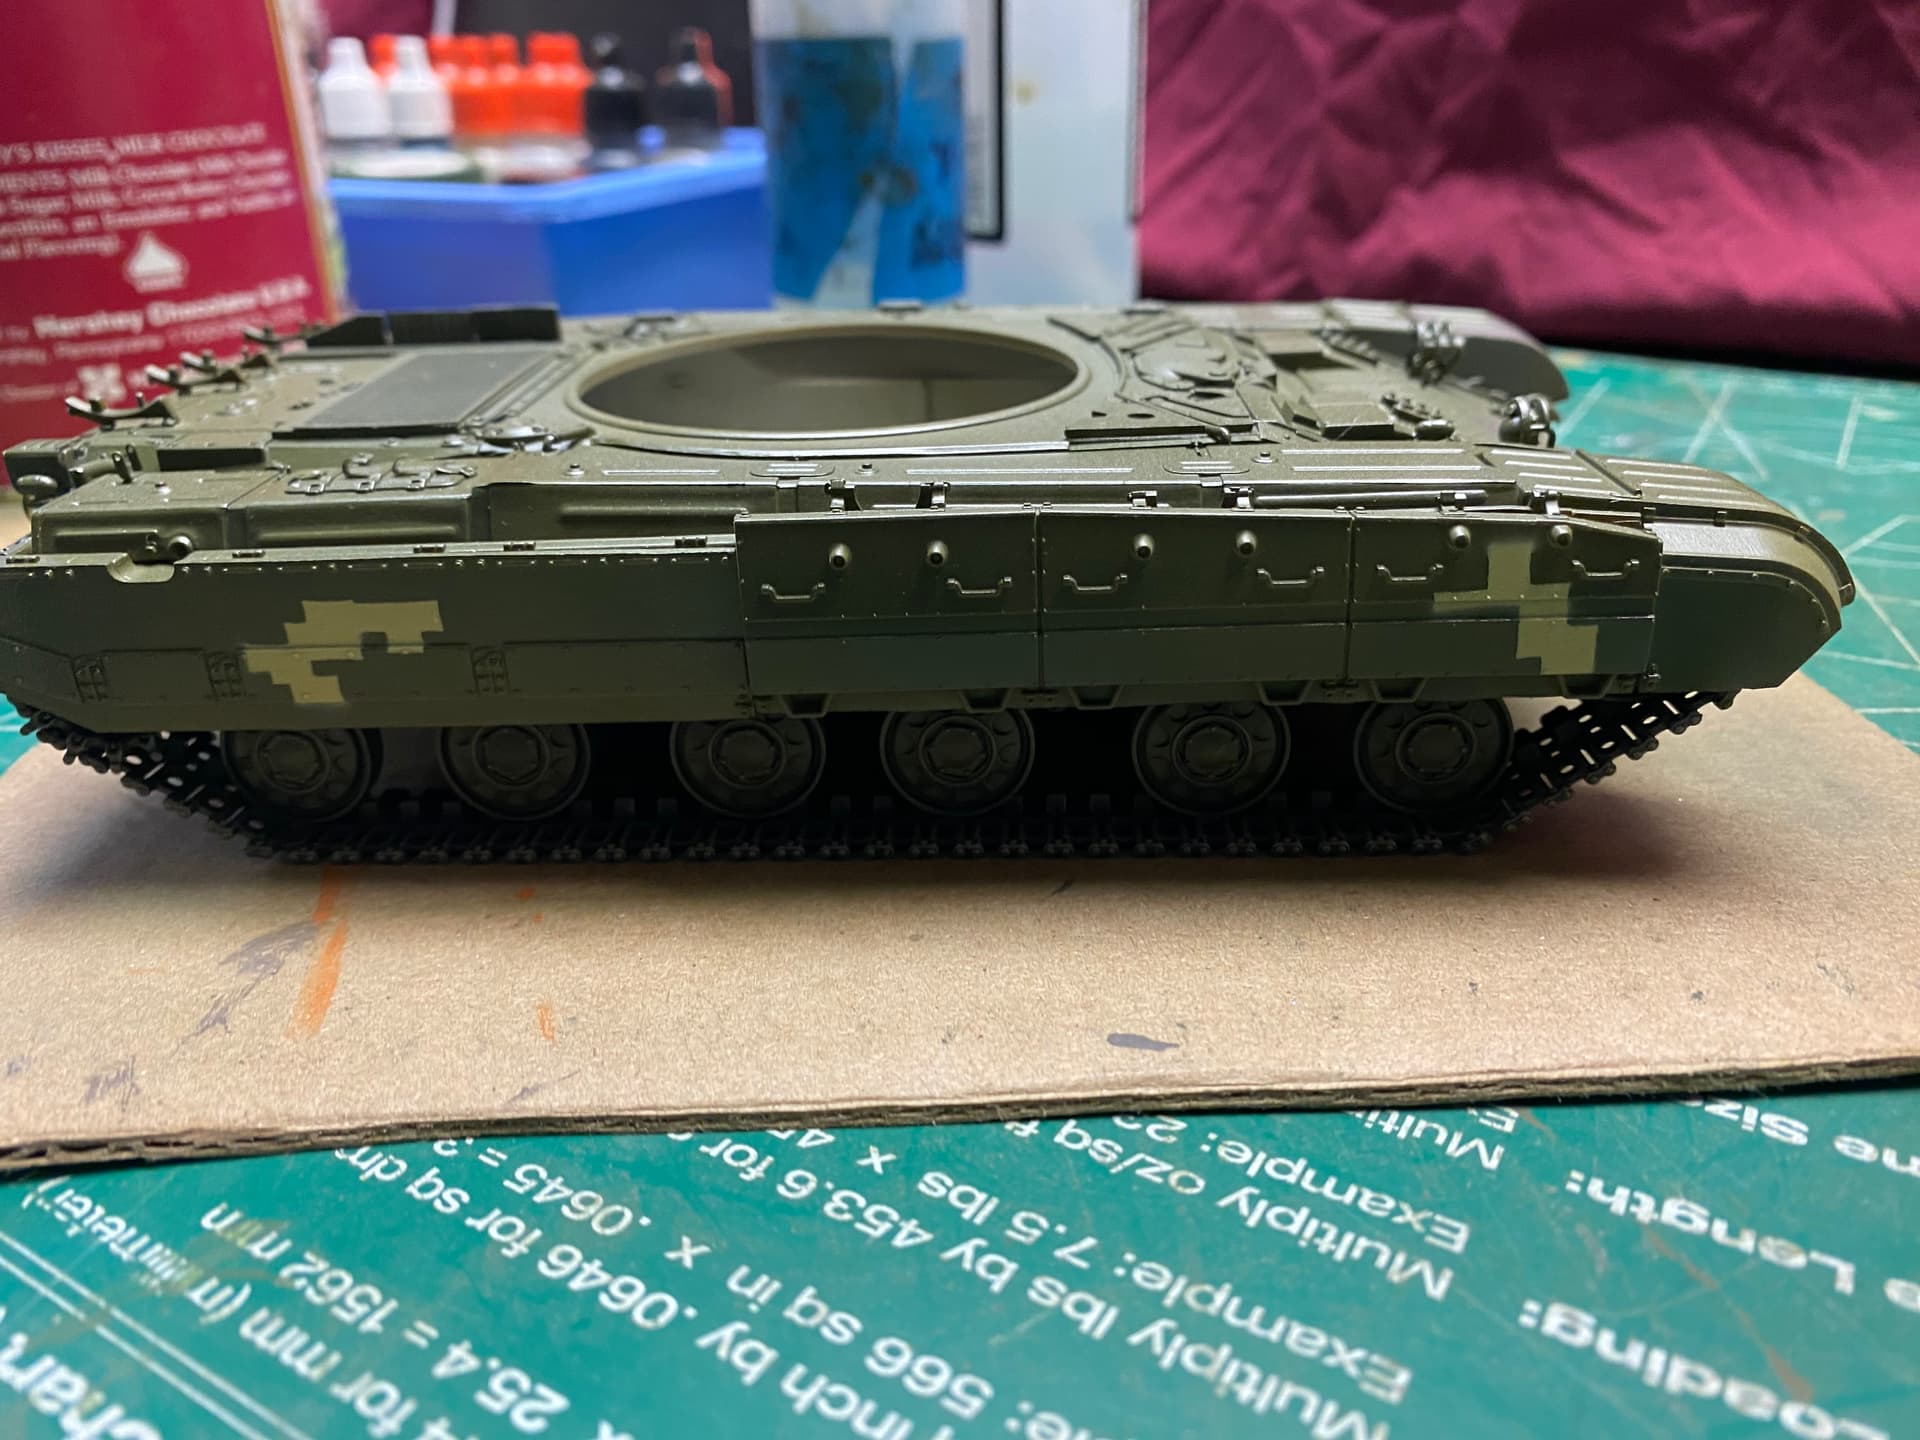
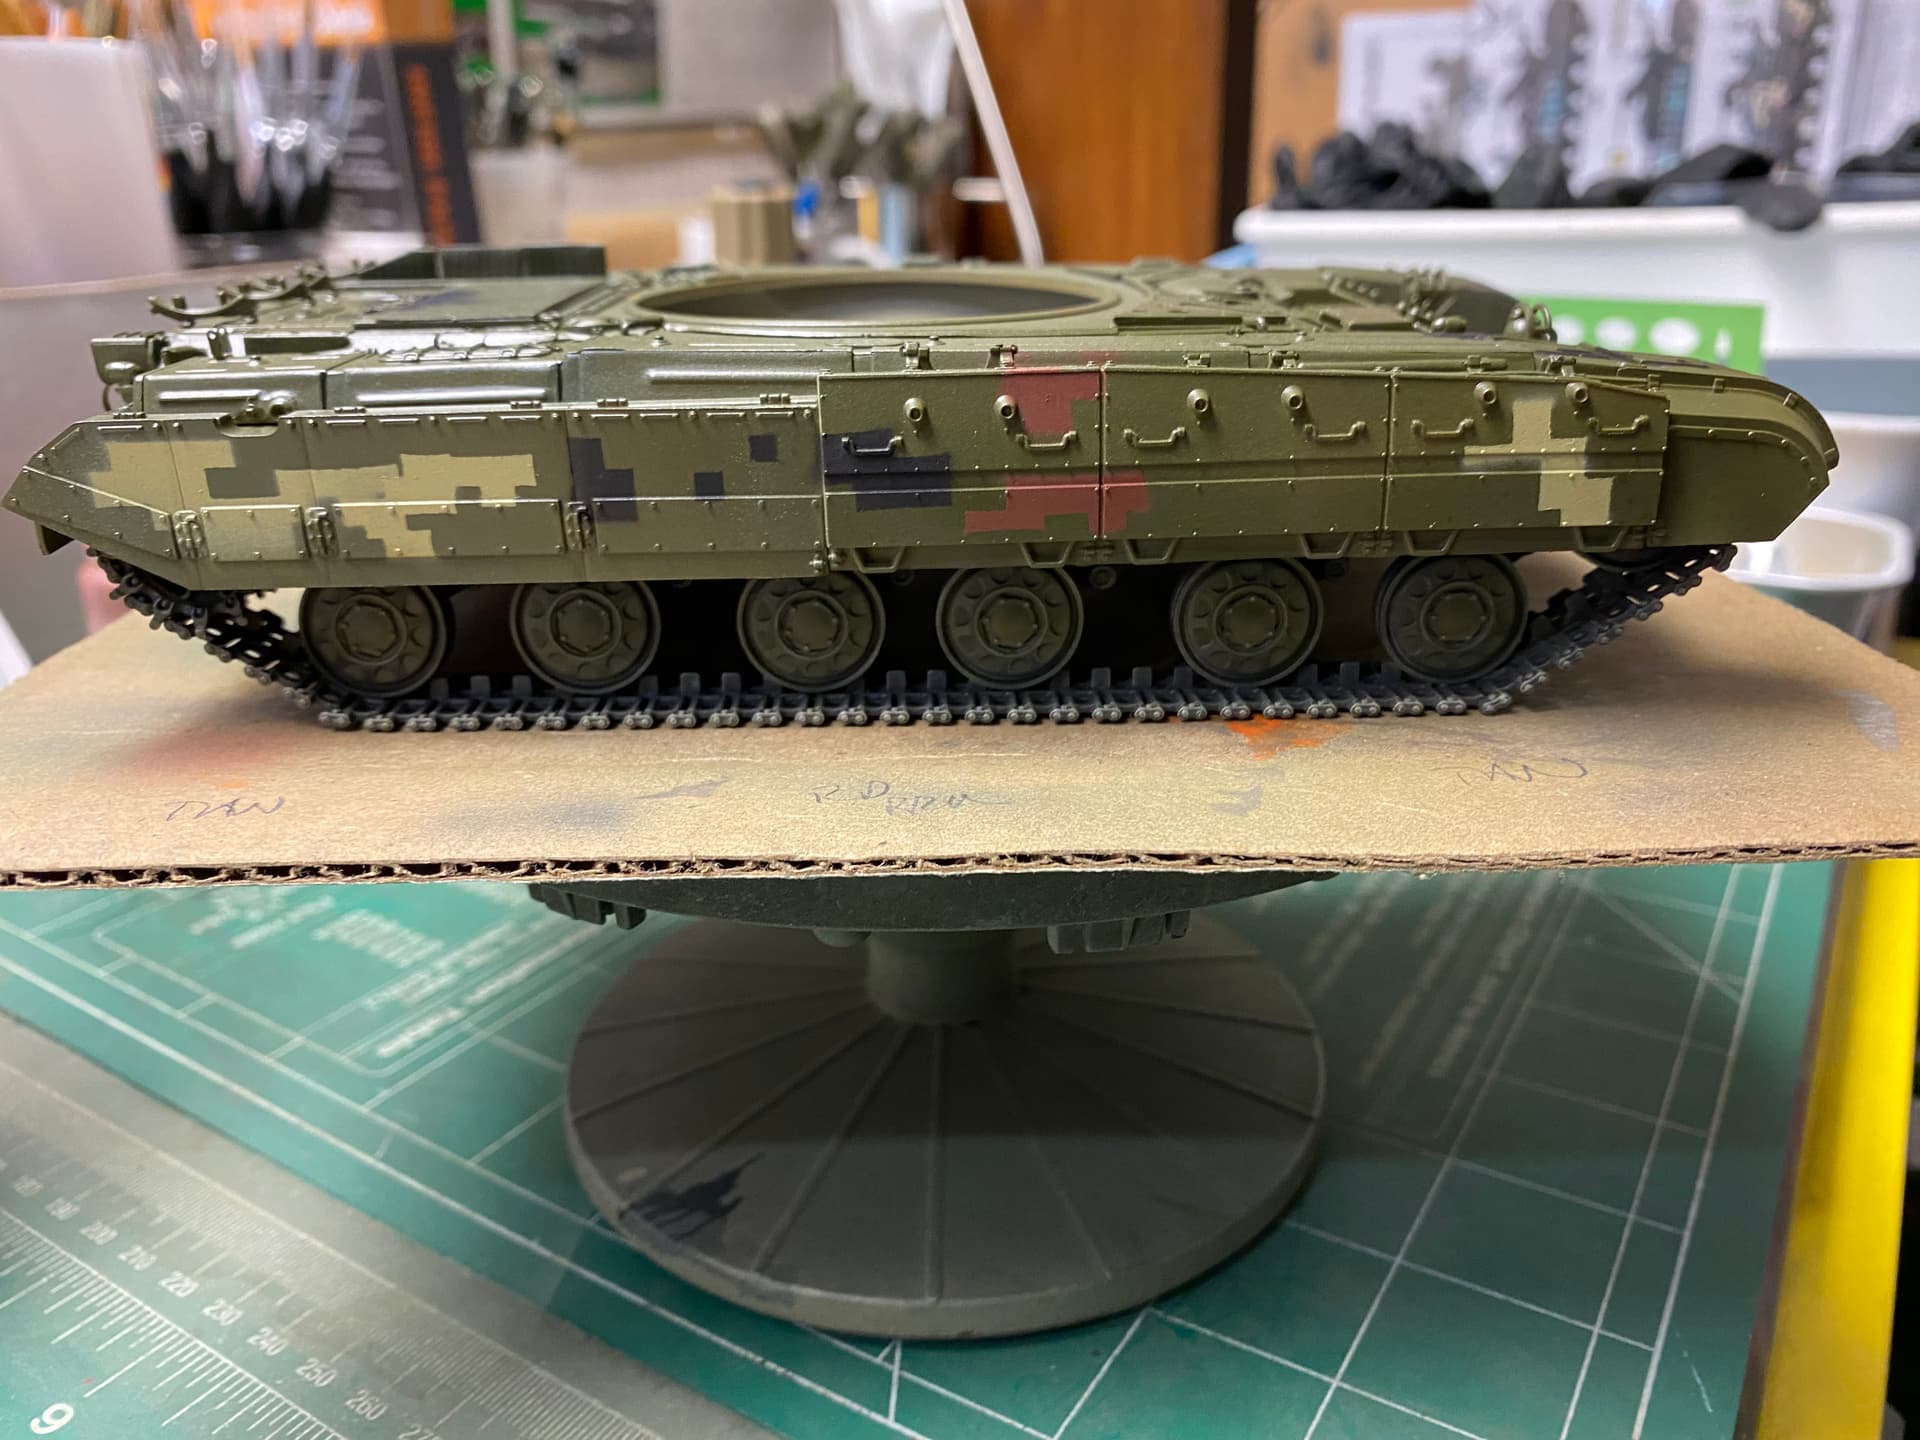
If you weren’t happy with the turret then you should be with the hull and the effect you’re getting with that. Great balance of colours and varying angles and layouts with the templates… It is looking very very good.
Good effort with getting max use from the templates as well … They look like they are holding up well
I think you’ve done a first rate job. You’d think it might be easy to pull off “just a bit of masking is all” and I appreciate you sharing your mask solution and your step by step. For those of us that never tackled something like this your post really opened my eyes as to the care you took on the balance and layout. Great job!
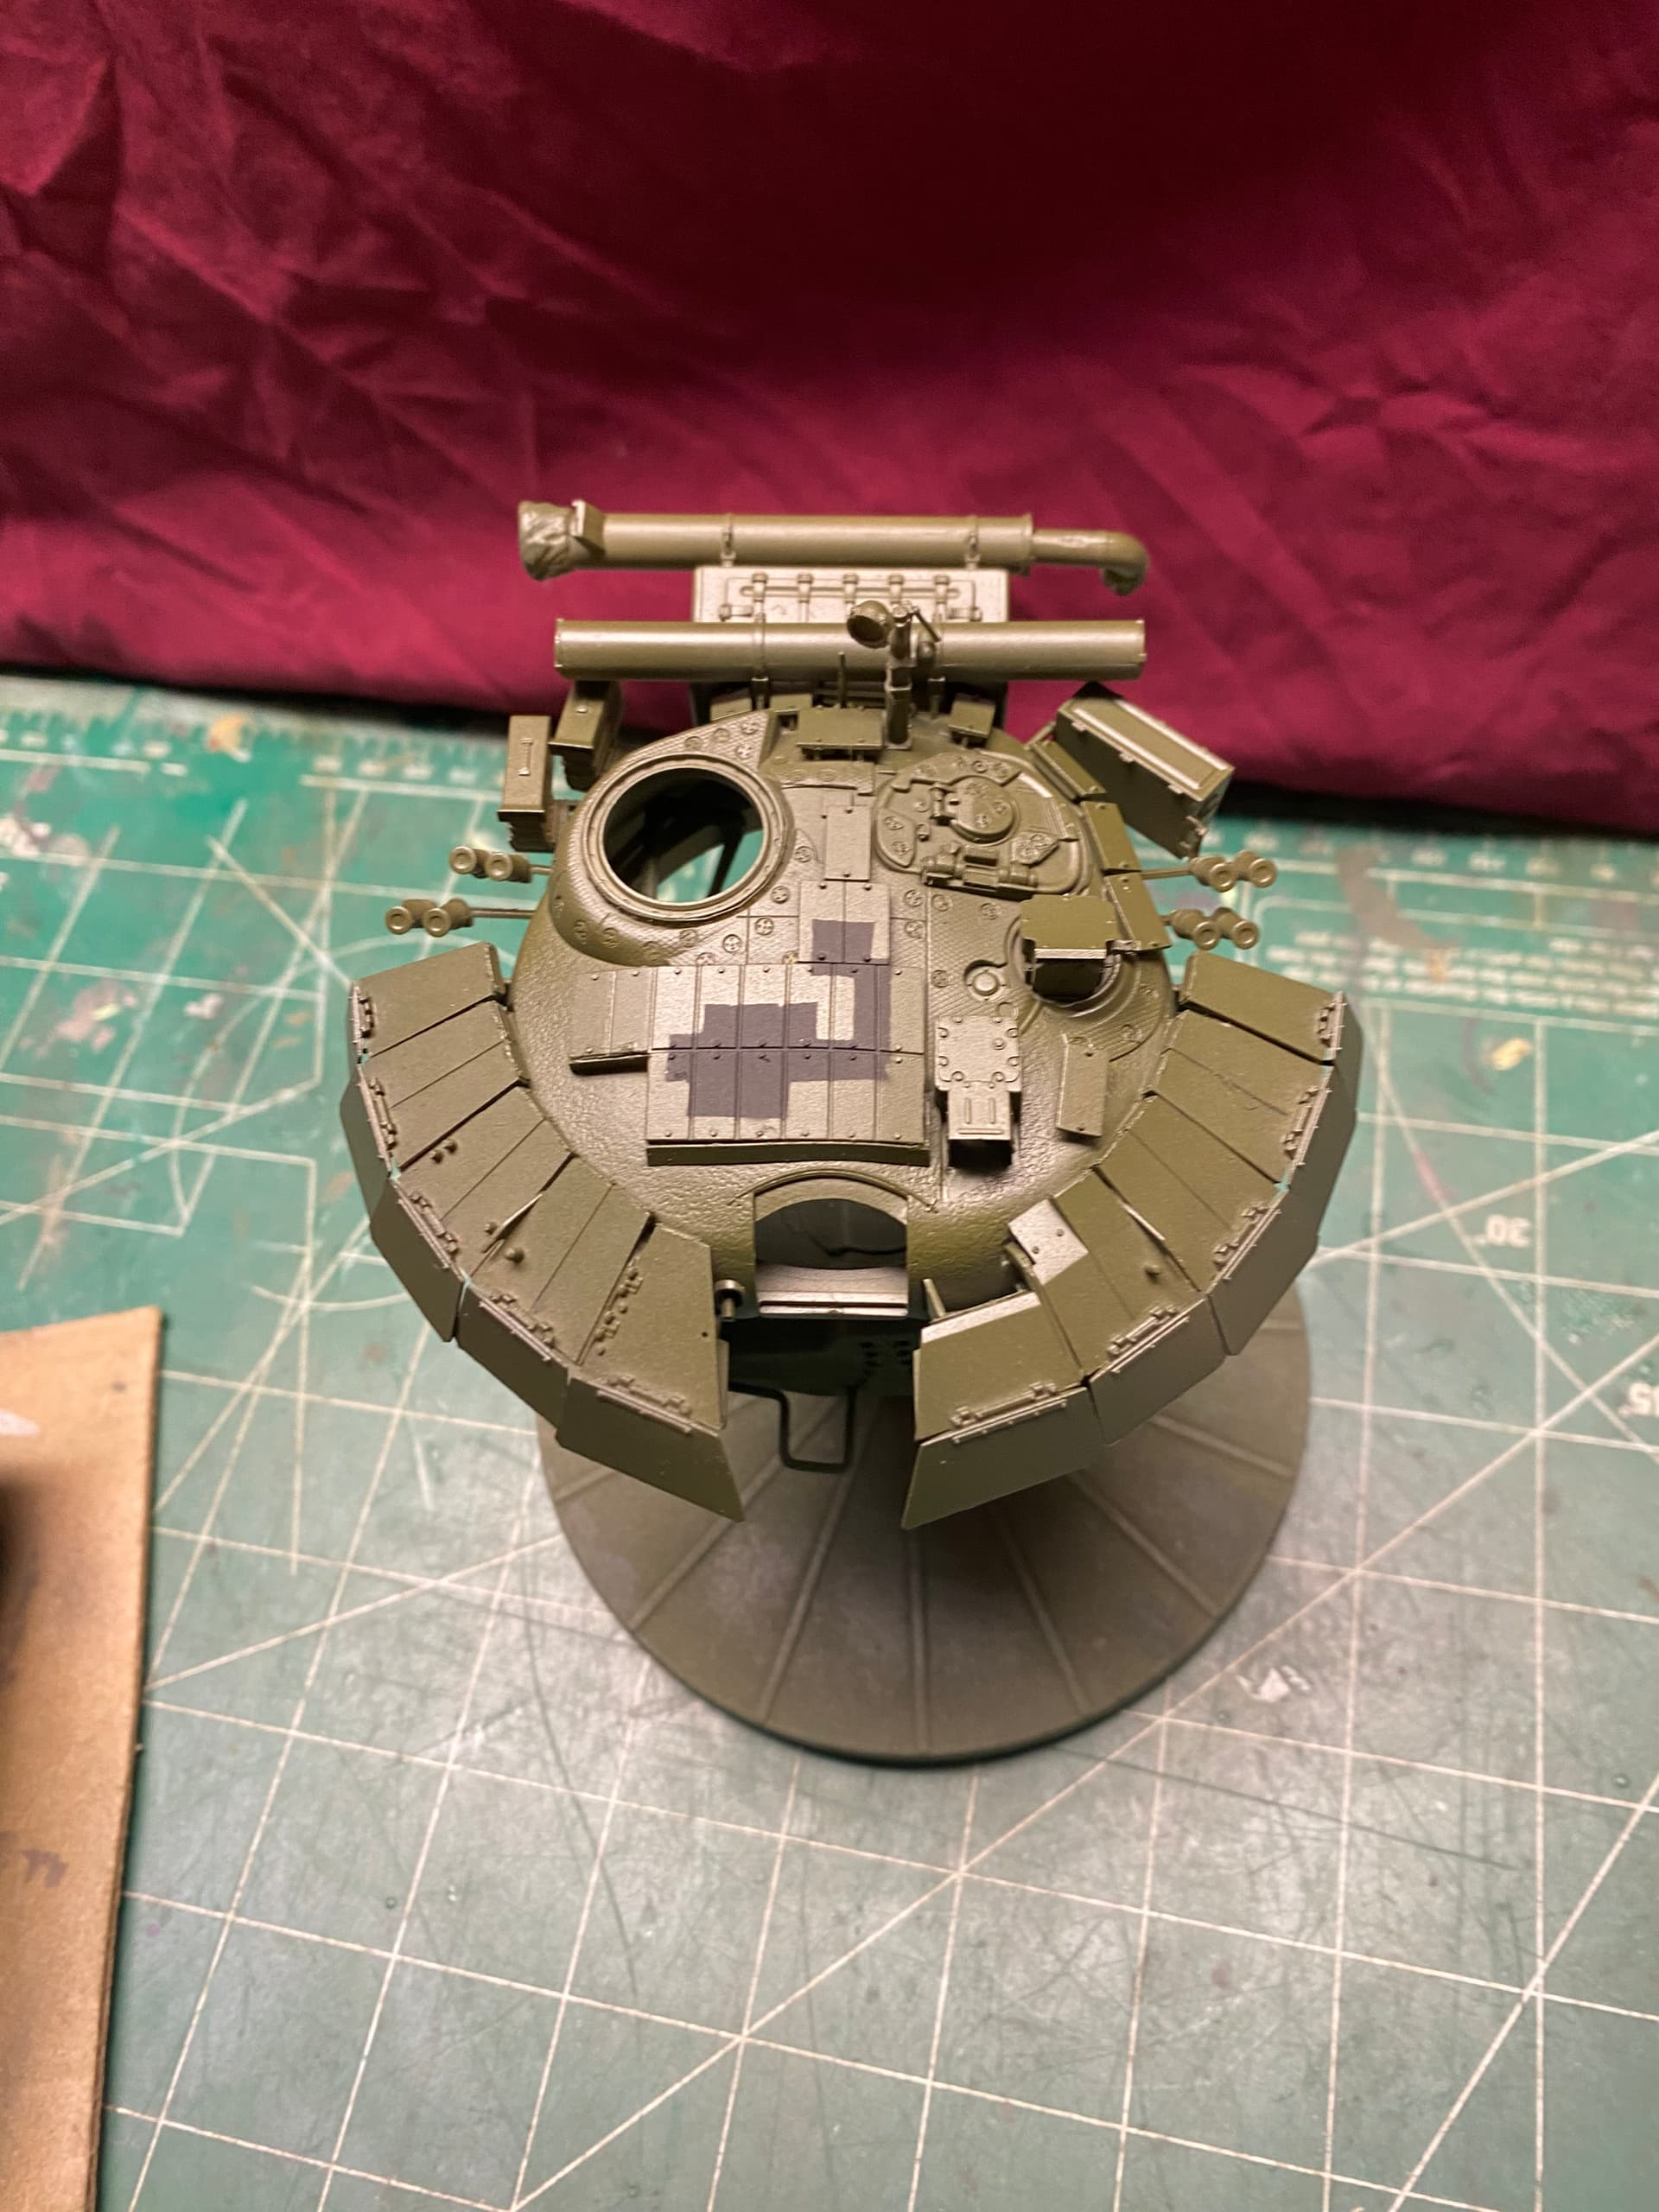
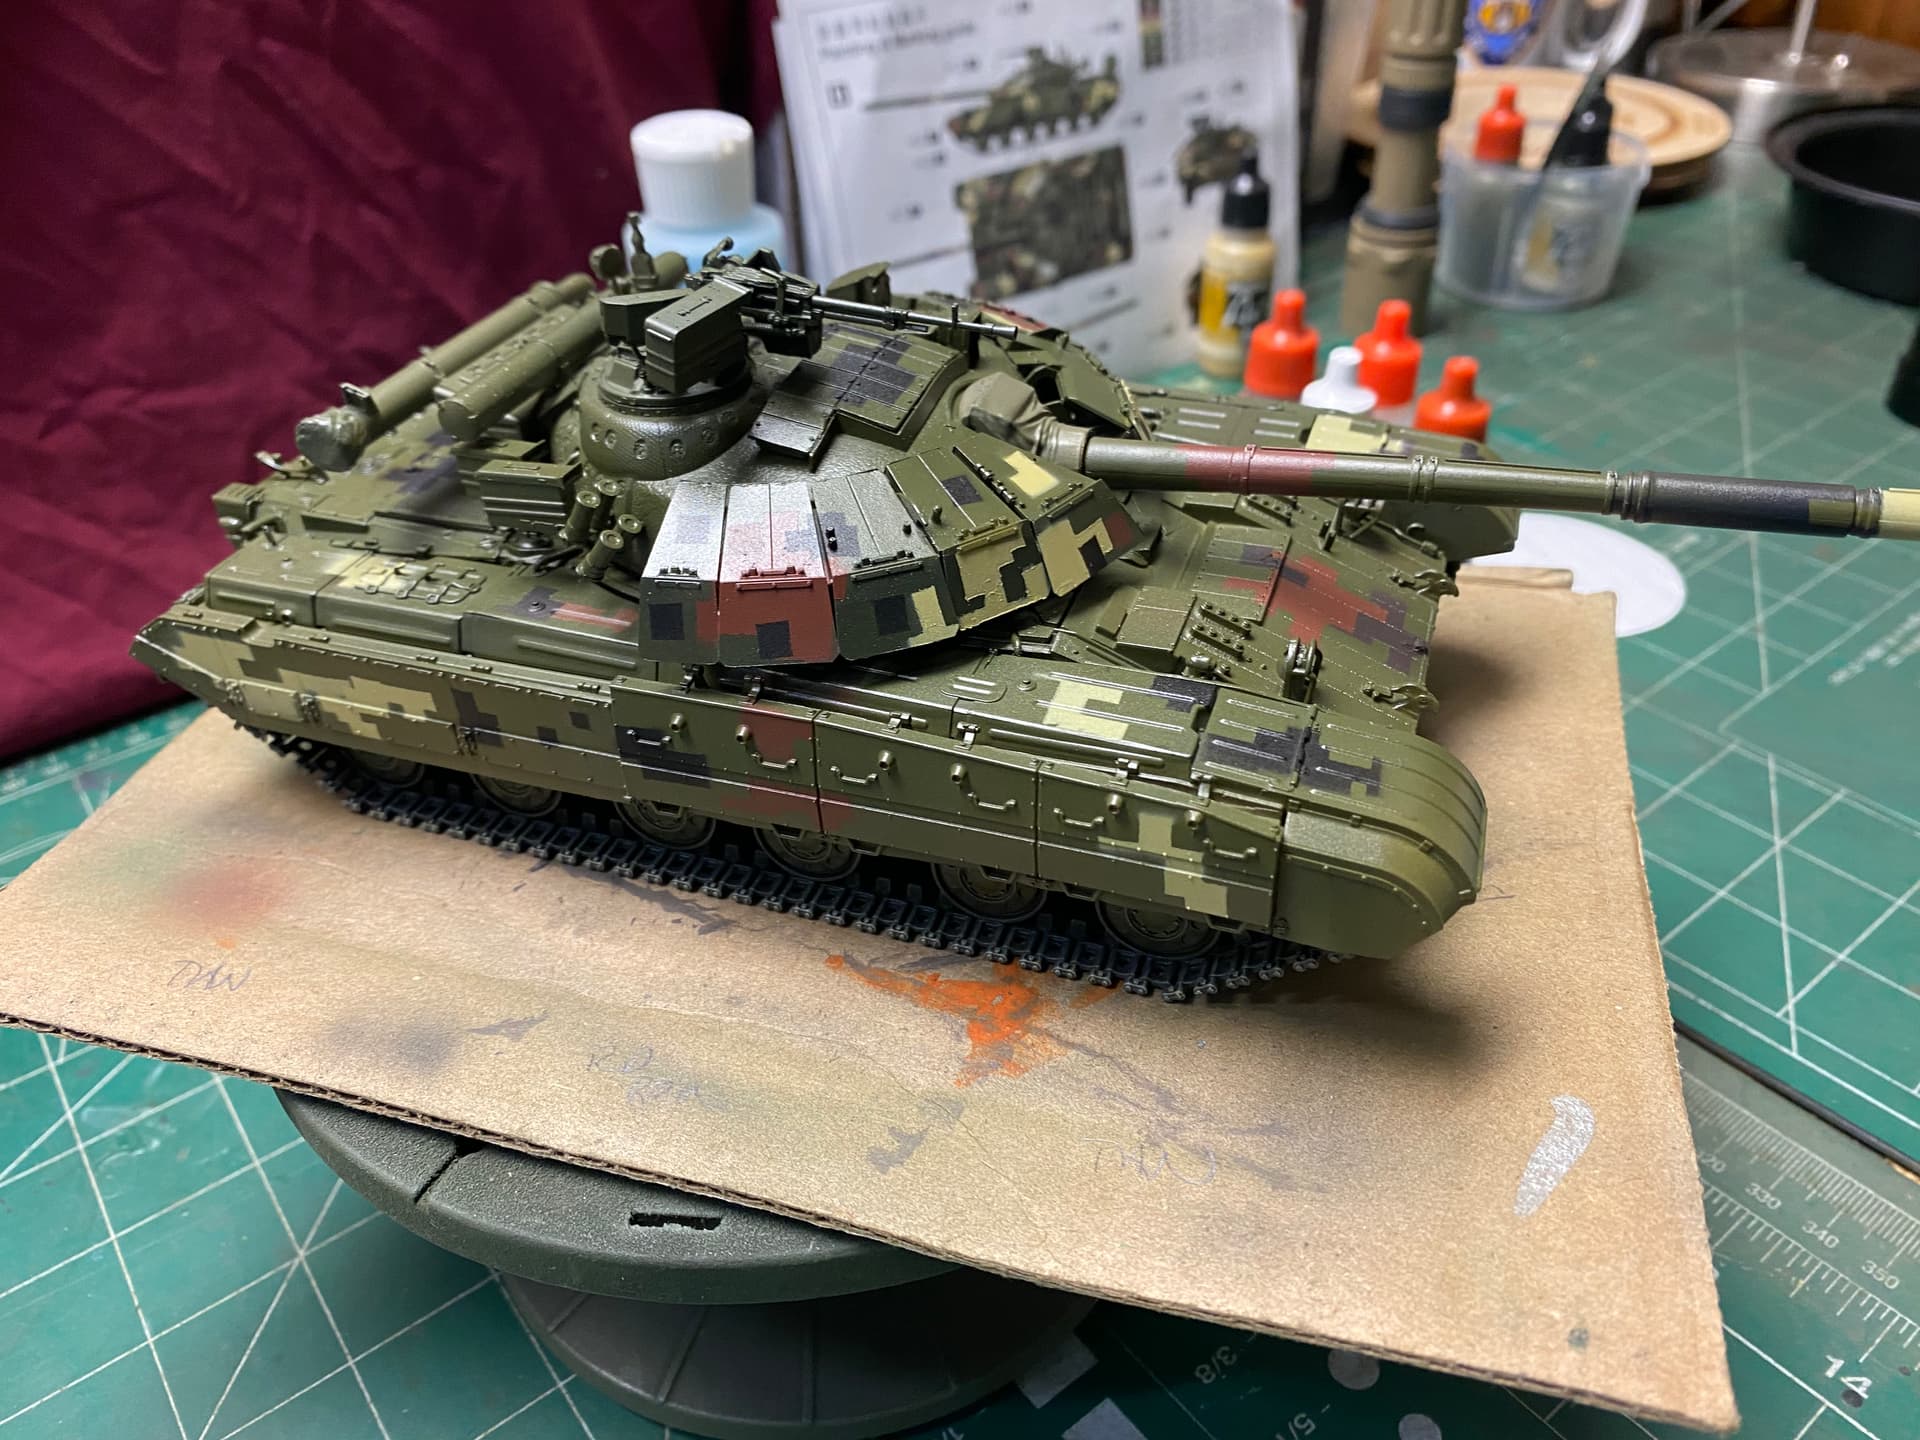
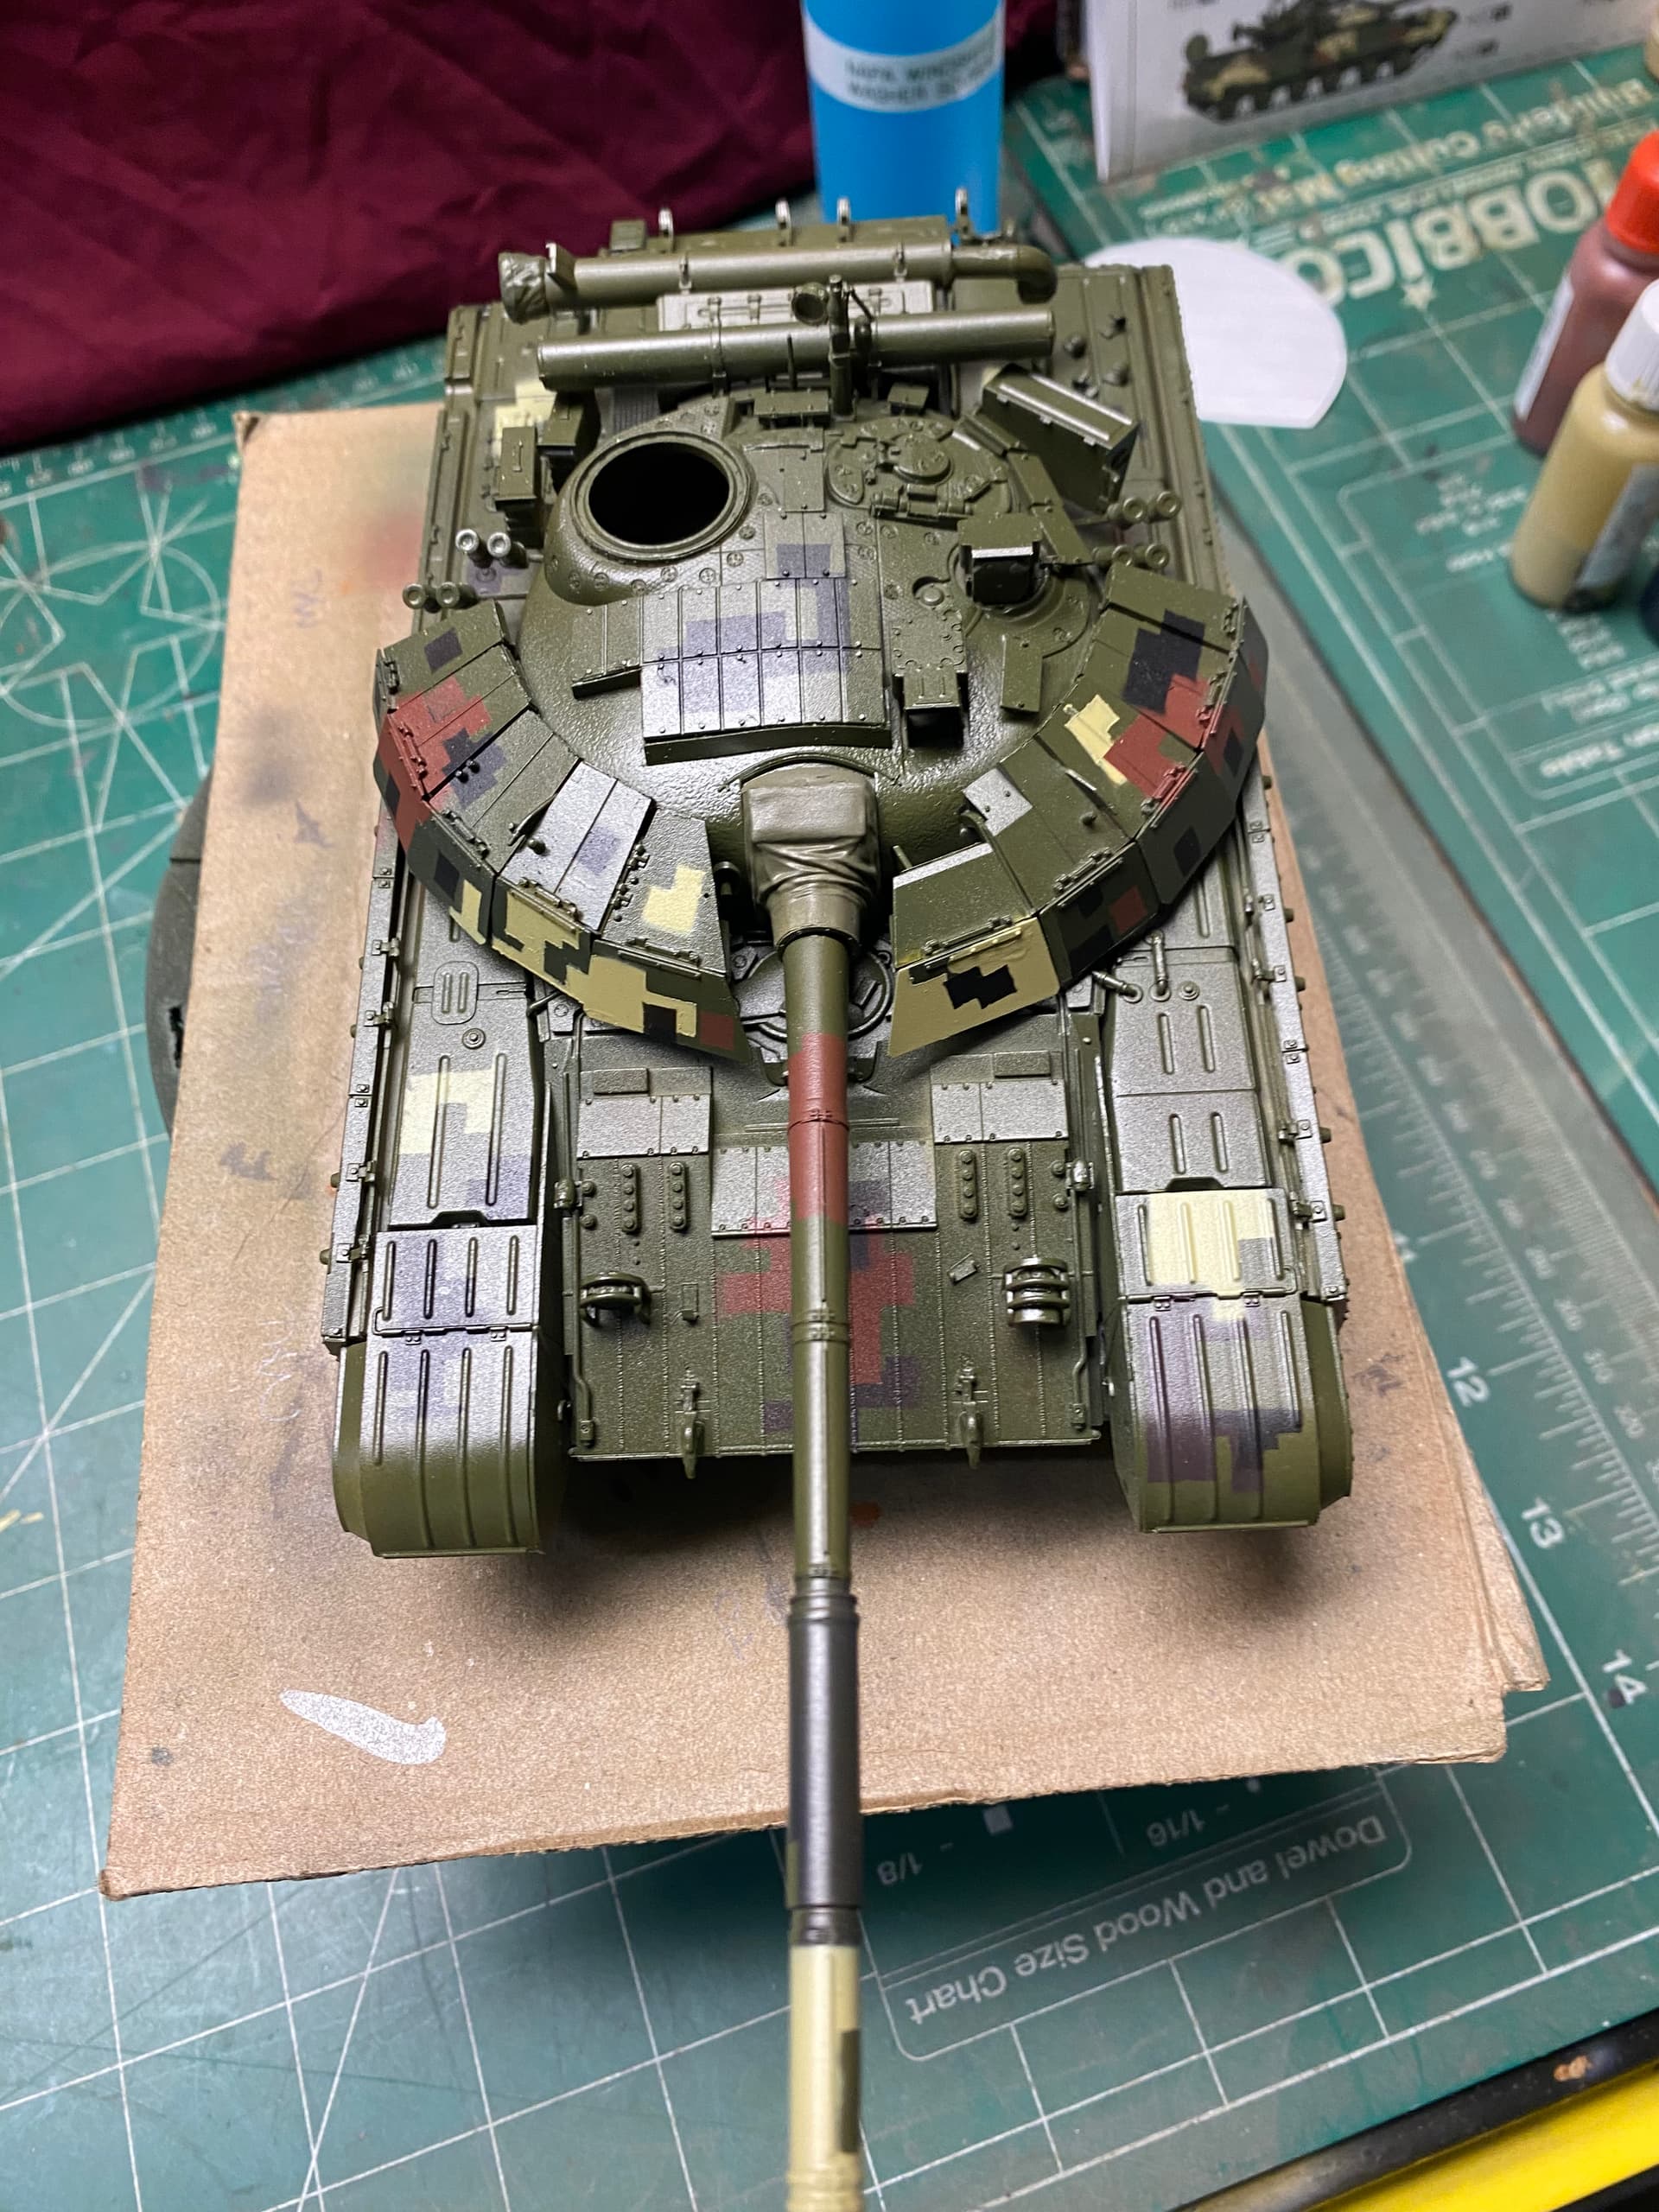
So other than some touch up, and possibly adding some middle stone patterns to each end of the turret skirts, I think I’m pretty much done with the camo portion of this build: