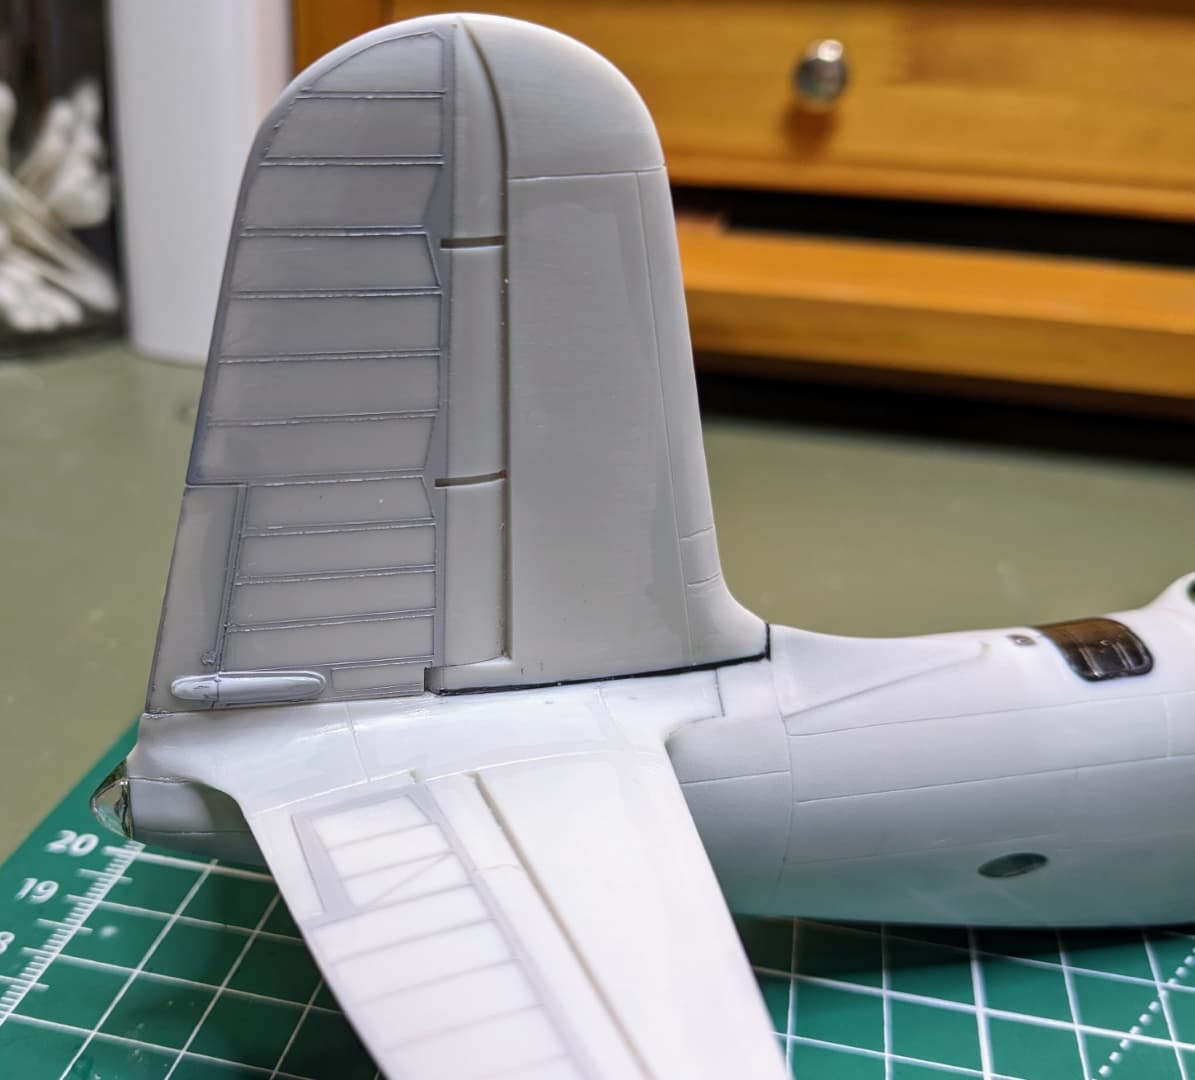
And a few more small details
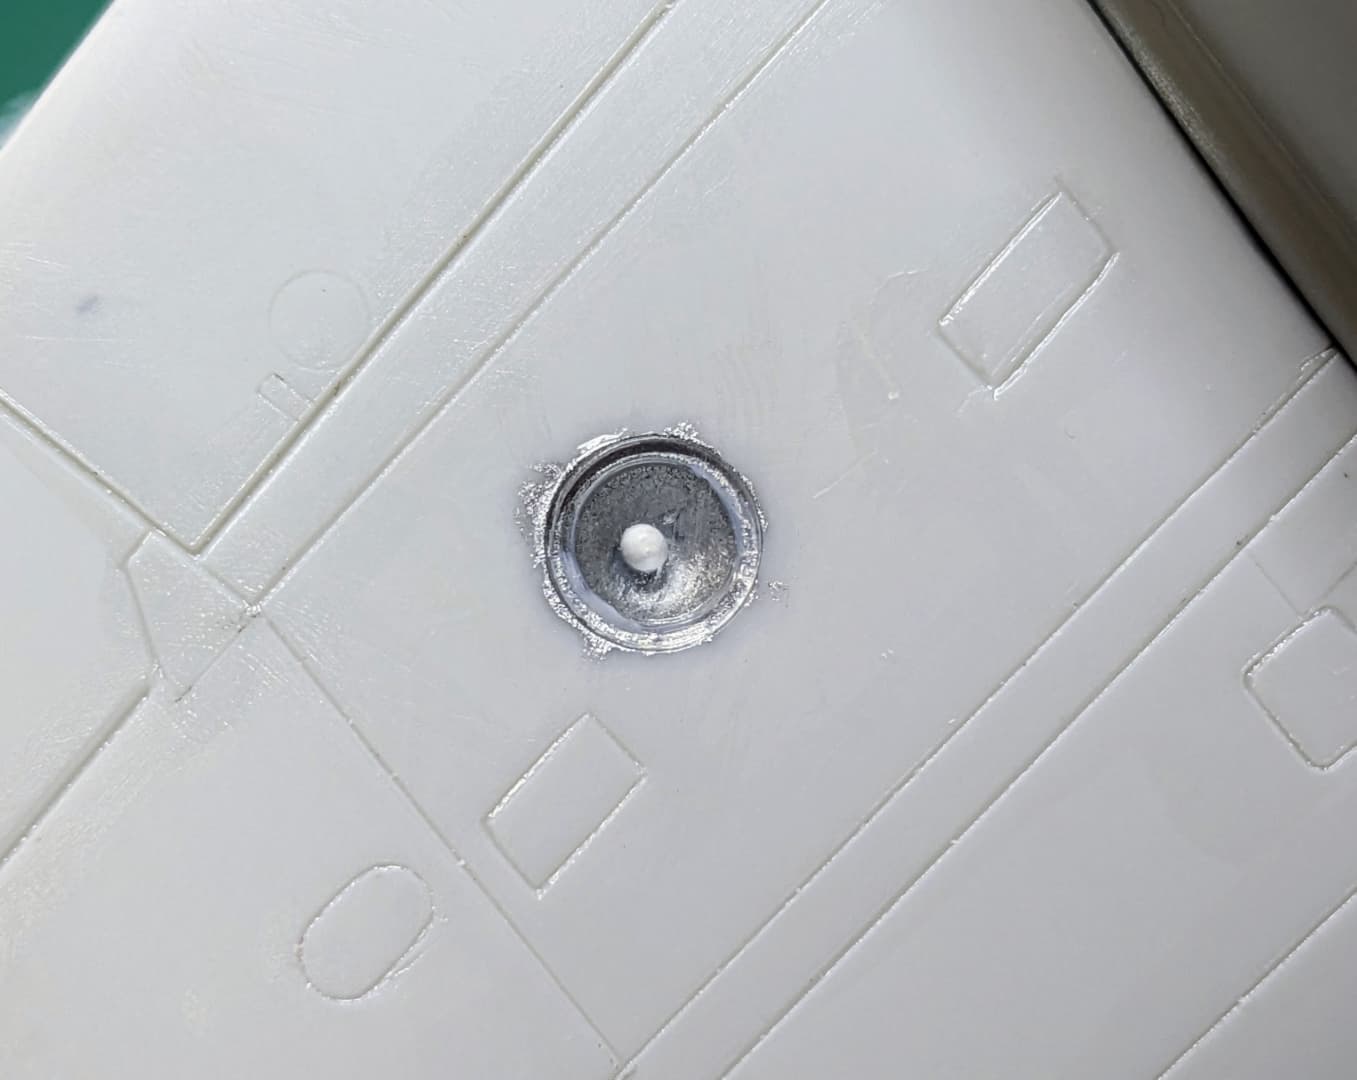
Landing lights on the lower wing surface
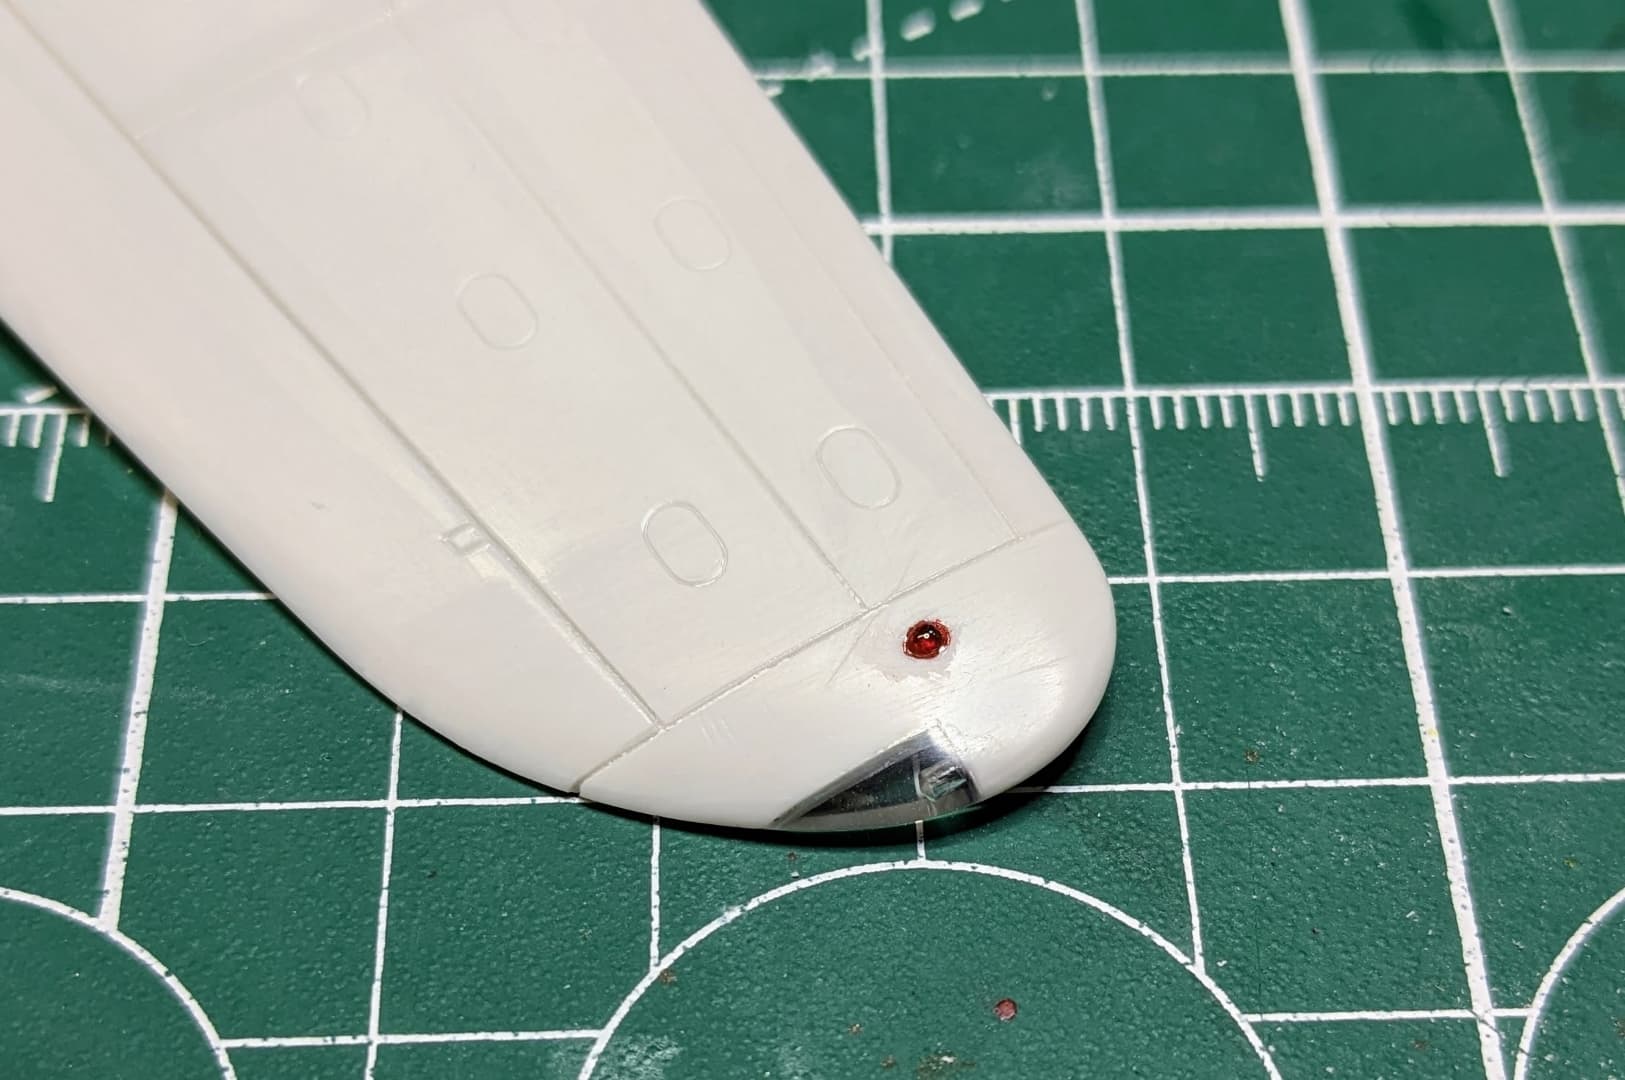
Wing tip navigation lights - drill small dimple in the wing tip, paint silver, carefully apply UV curing glue in an oval shape (try to anyway - I wasn’t so successful) , paint with clear green and red
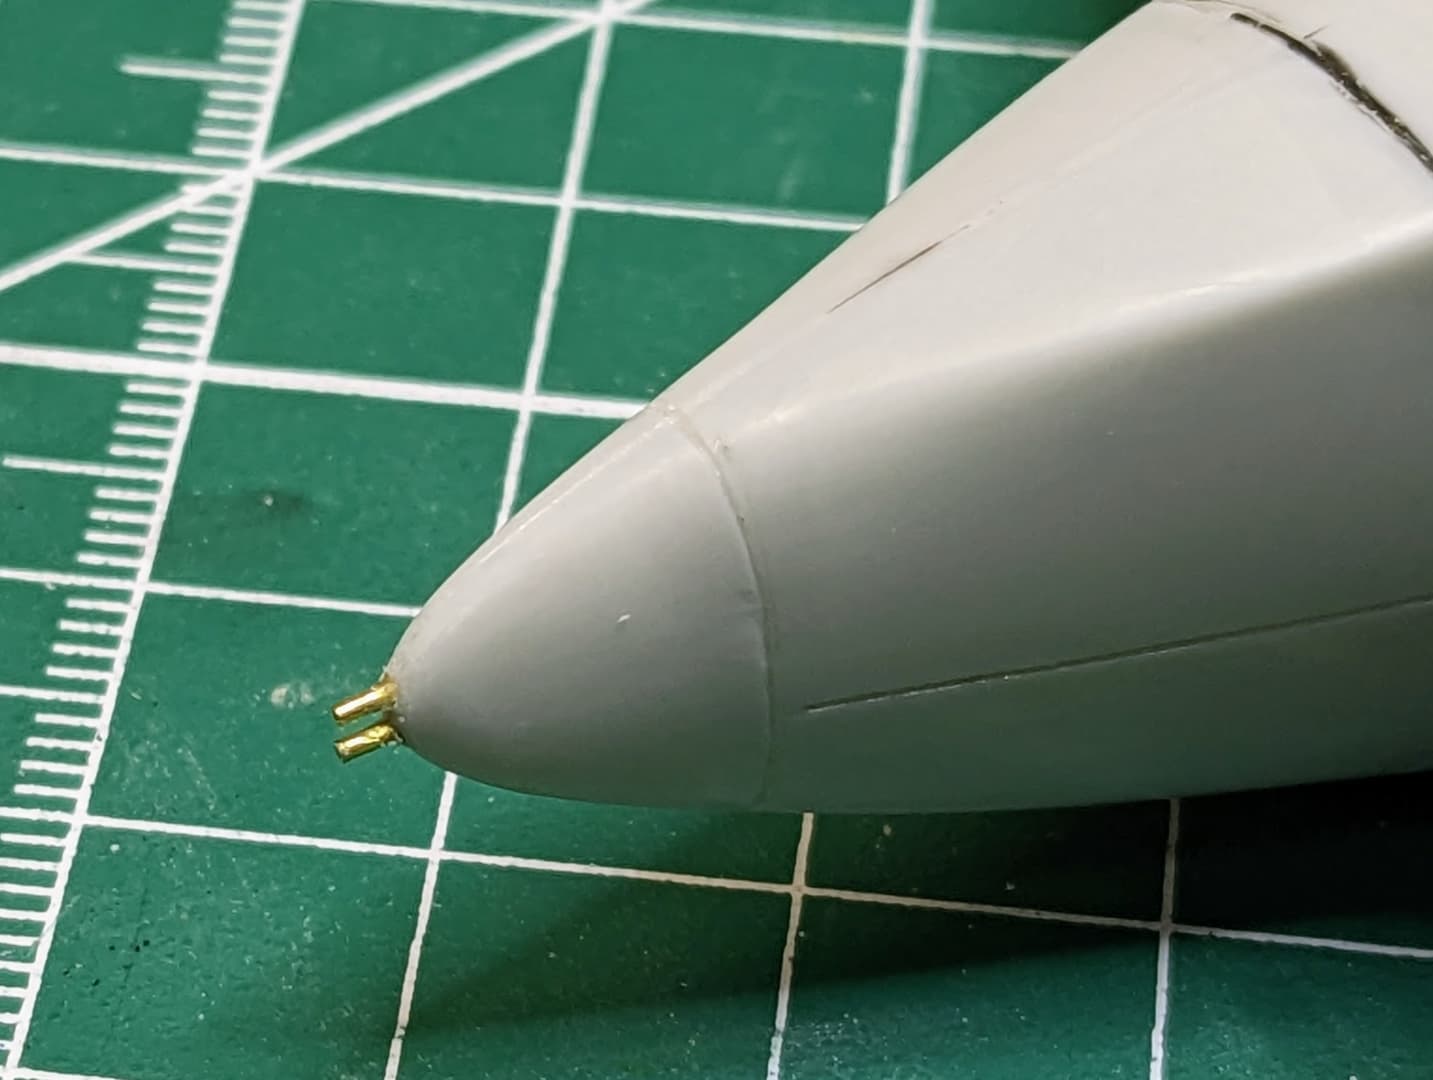
Fuel dump tubes on the engine nacelles made with micro brass tubing. These came back to haunt me later when finishing the riveting as I dropped one of the wings and it landed right on these, broke them off and made a small split in the nacelle that had to be repaired.
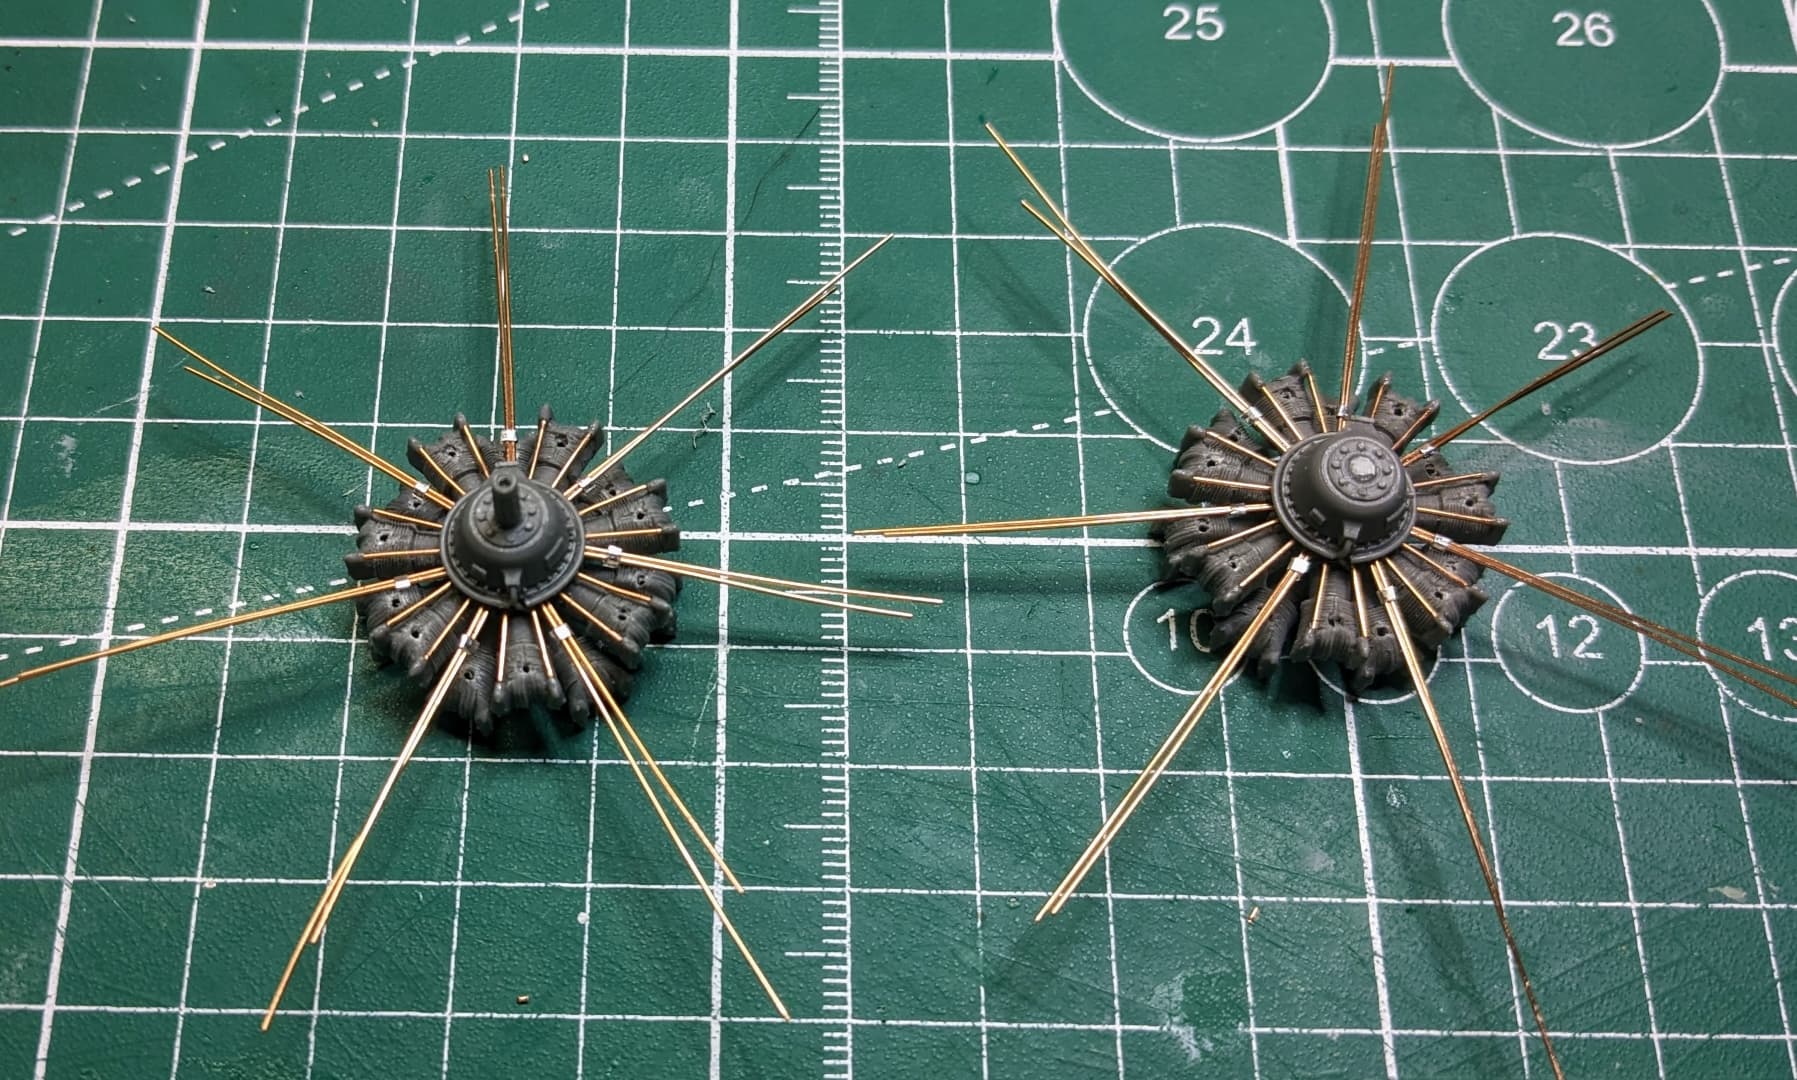
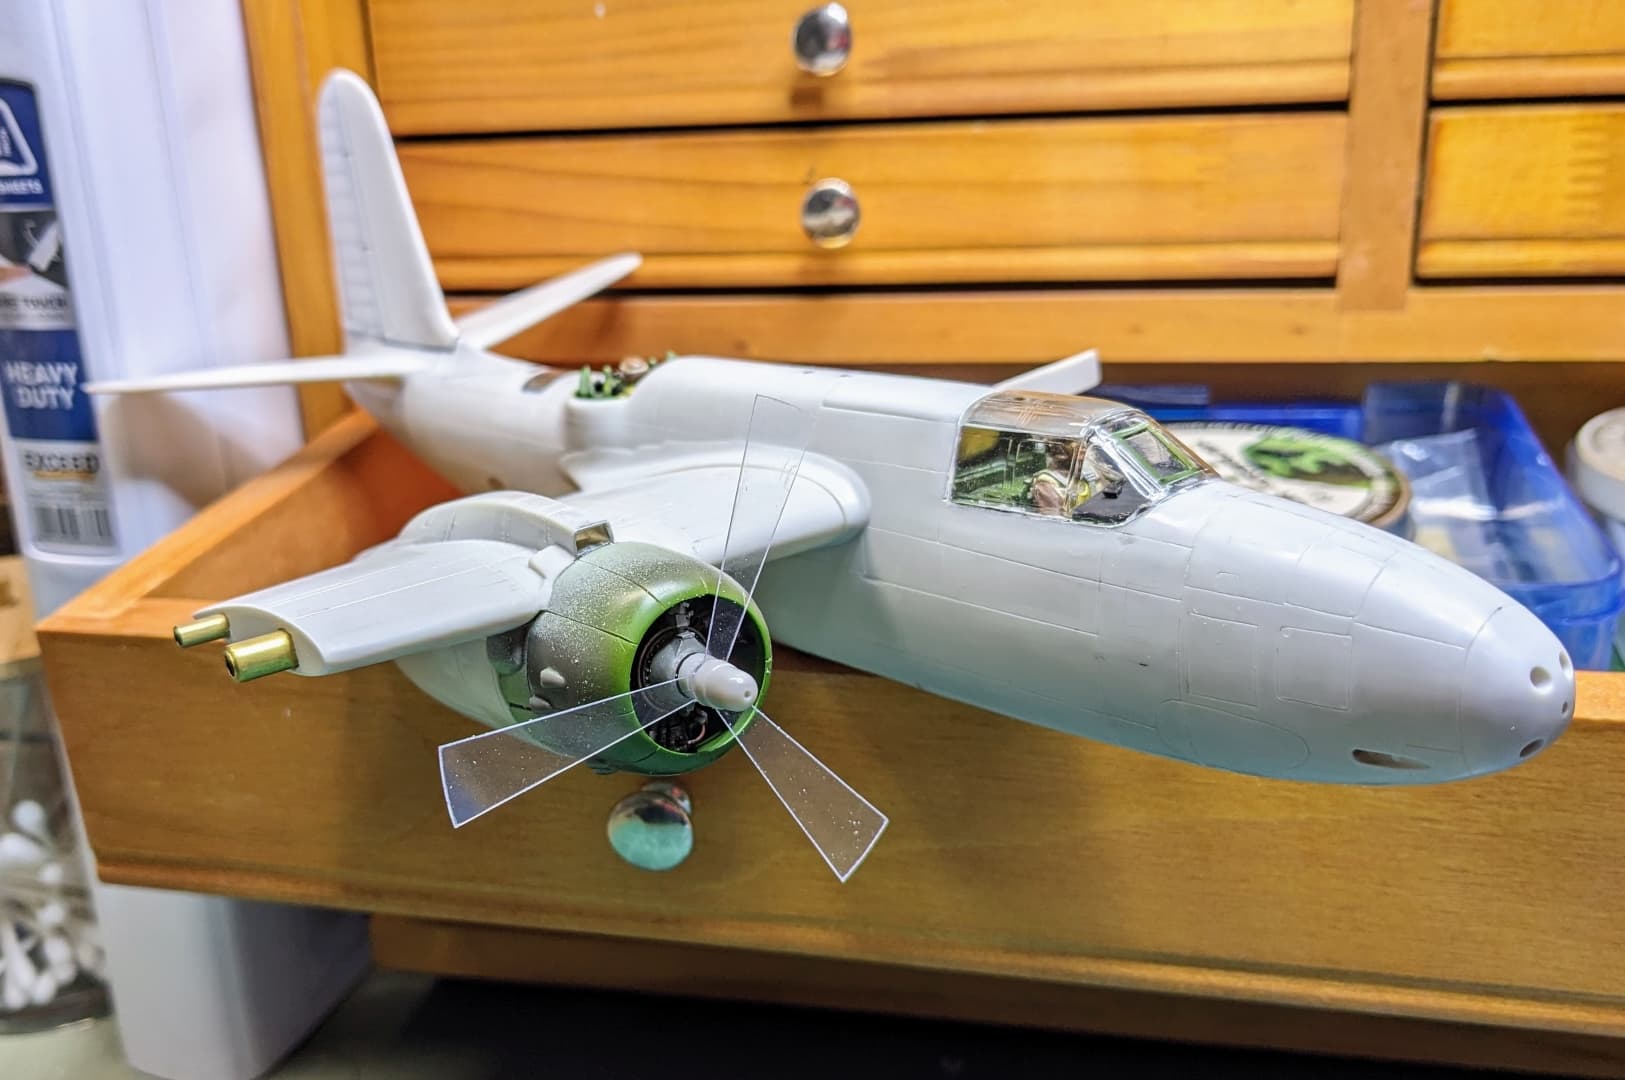
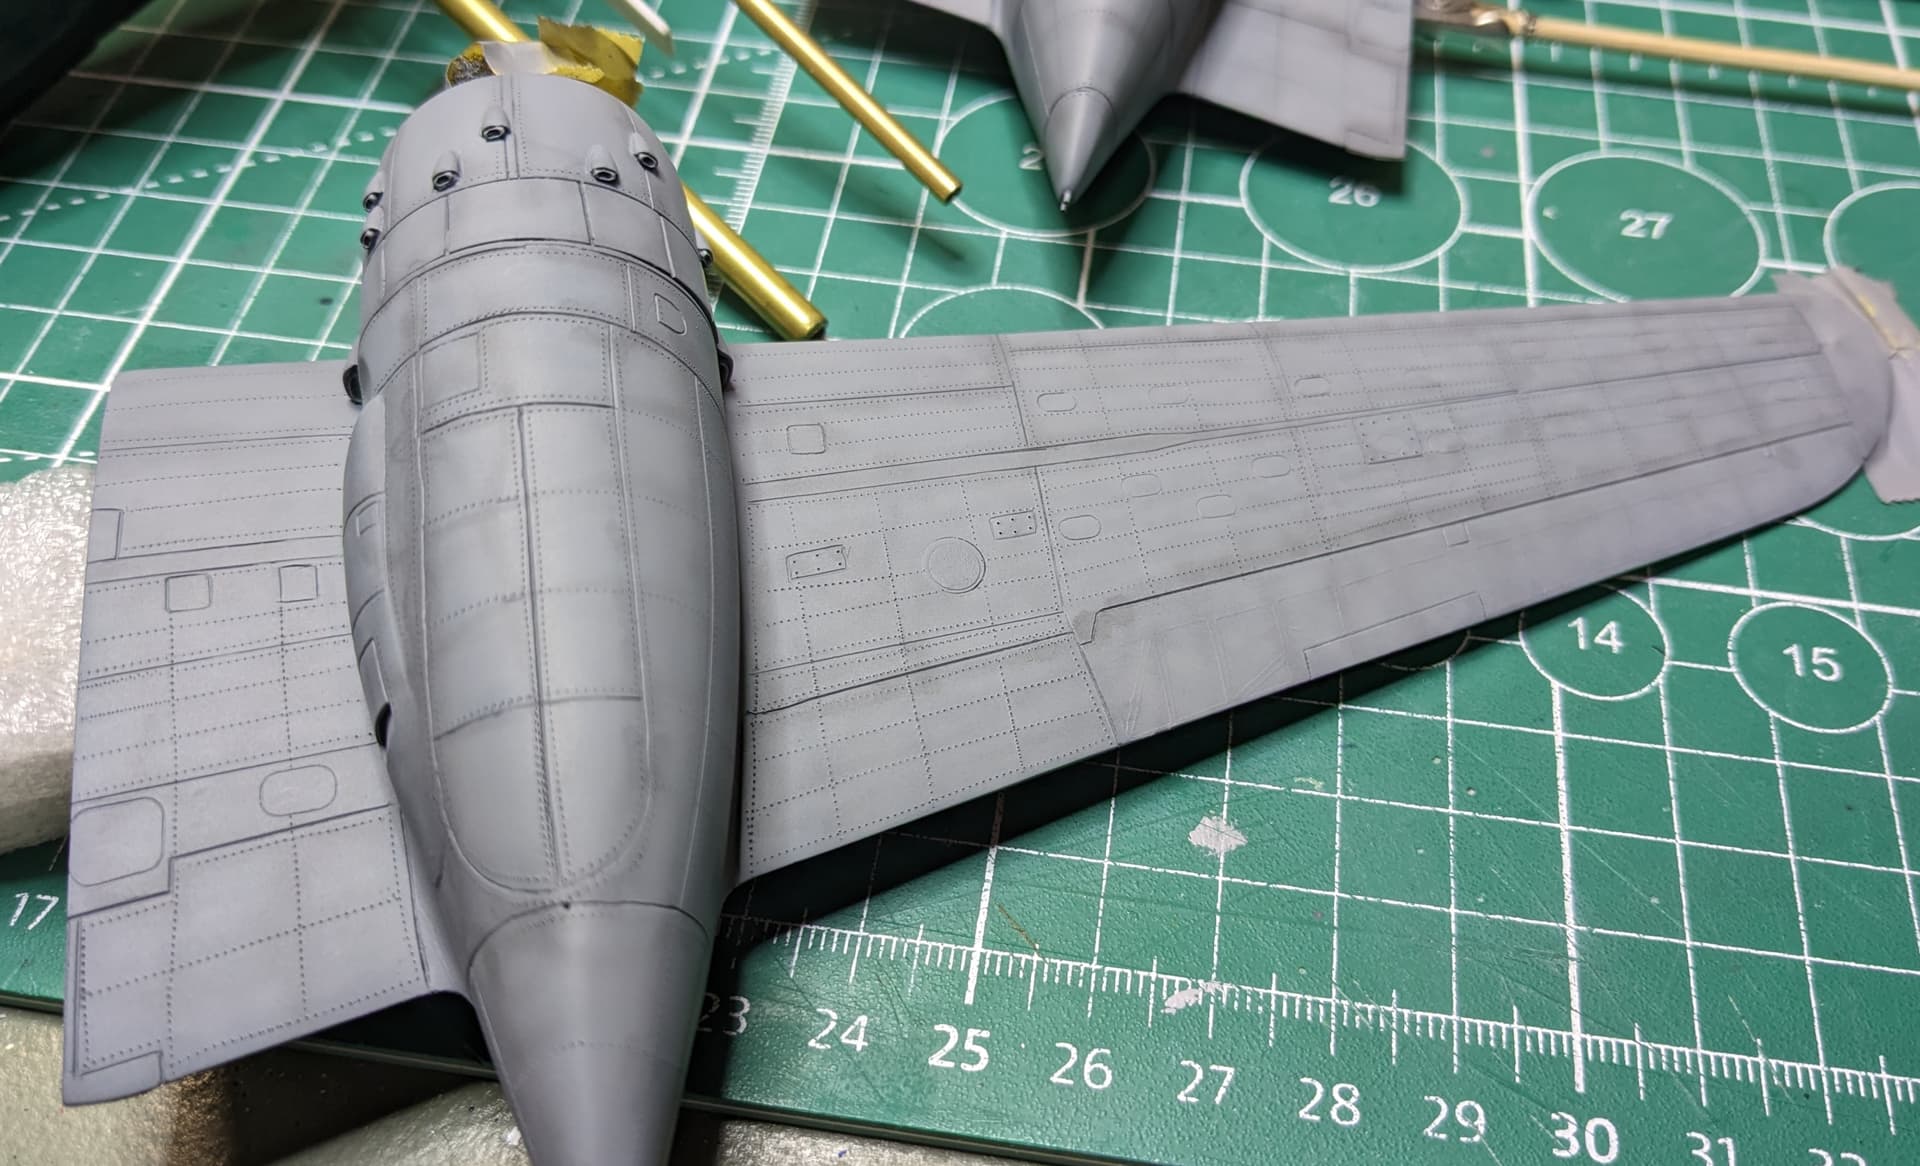
Quickboost engines. These are vastly superior to the kit engines. I added pushrod tubes and spark plug leads from copper wire. My technique for painting is to first paint the metal bits with Mr Hobby metal primer (by brush), then airbrush the entire engine in stainless steel (Mr Hobby Super Stainless). Then apply a brown/black wash to the motor to bring out the details. Do some detail brush painting using Vallejo paints, and then overcoat with Tamiya flat clear using the airbrush. Finally, do a bit of drybrushing for highlights and scratches.
Here’s the final effect of using the Quickboost engines and the Quickboost cowlings. Of course the model isn’t painted yet in this photo.
10 Likes
Great progress and you are really going at a good pace as well … Engines and all the lights look super.
1 Like
Thanks John. Keep in mind that much of this was done over the last couple of months. I am rapidly catching up to where I am actually at in the build (painting). I certainly do not work this fast on modeling. In fact, I am rather slow at it!! 
2 Likes
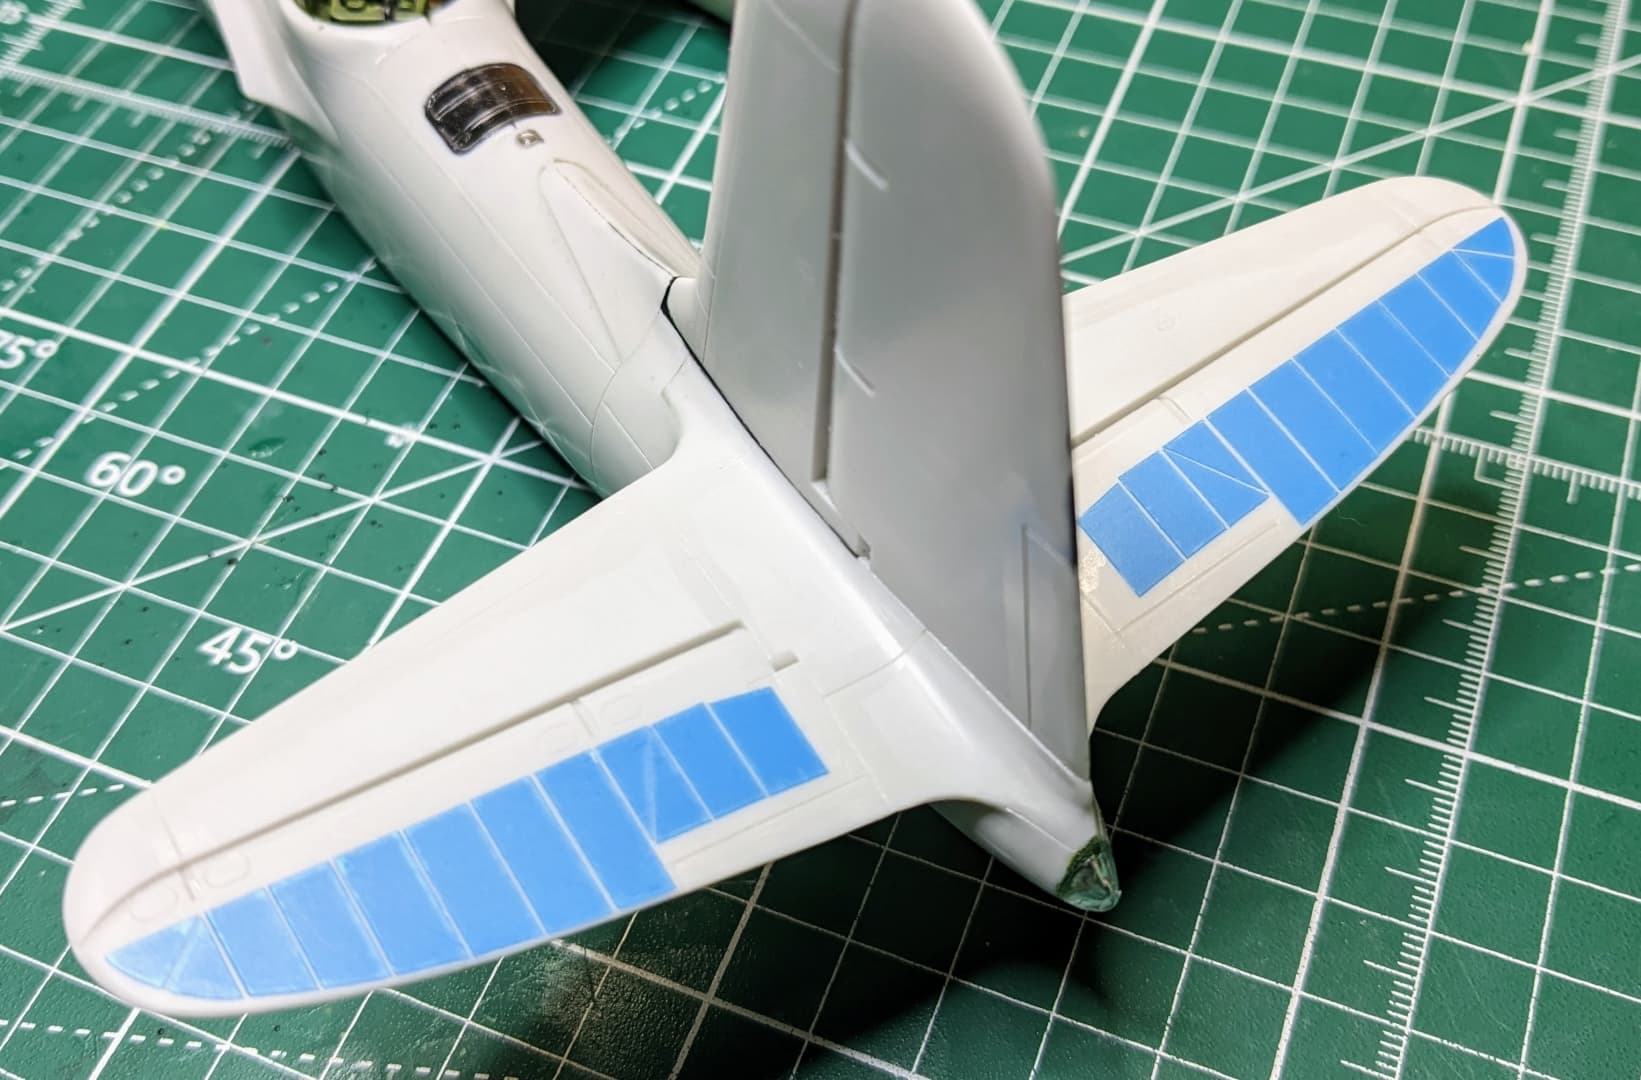
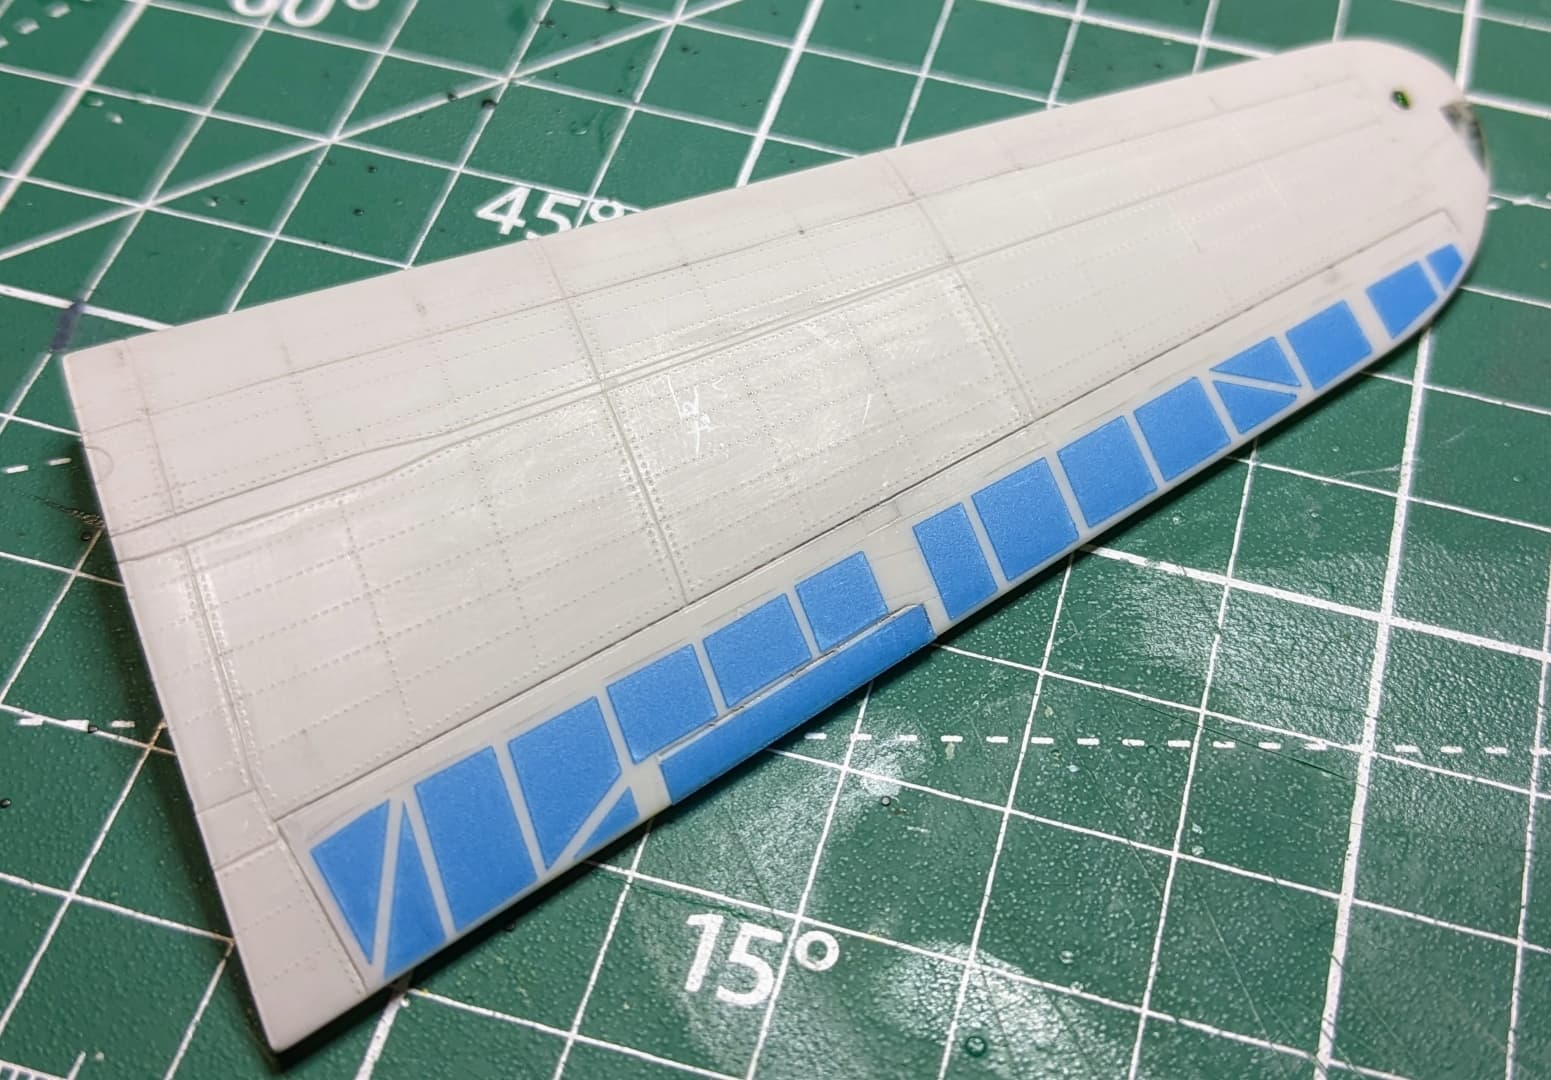
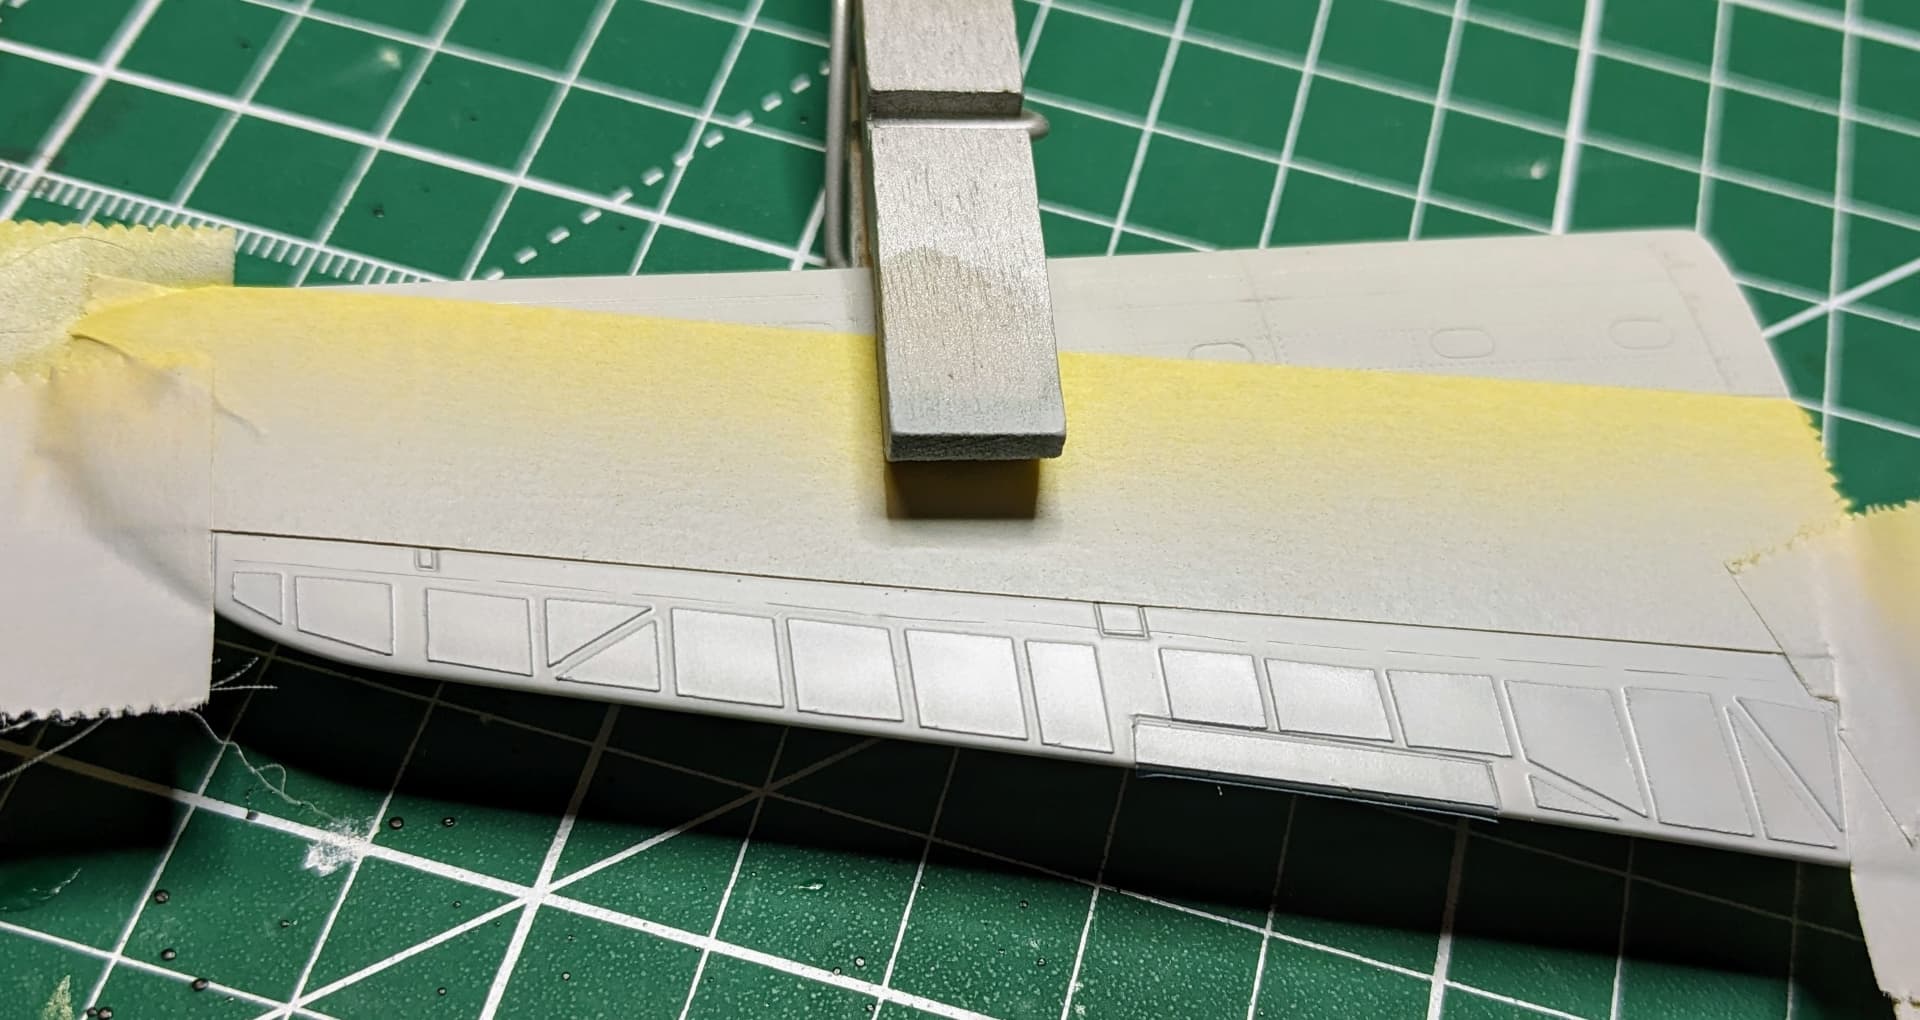
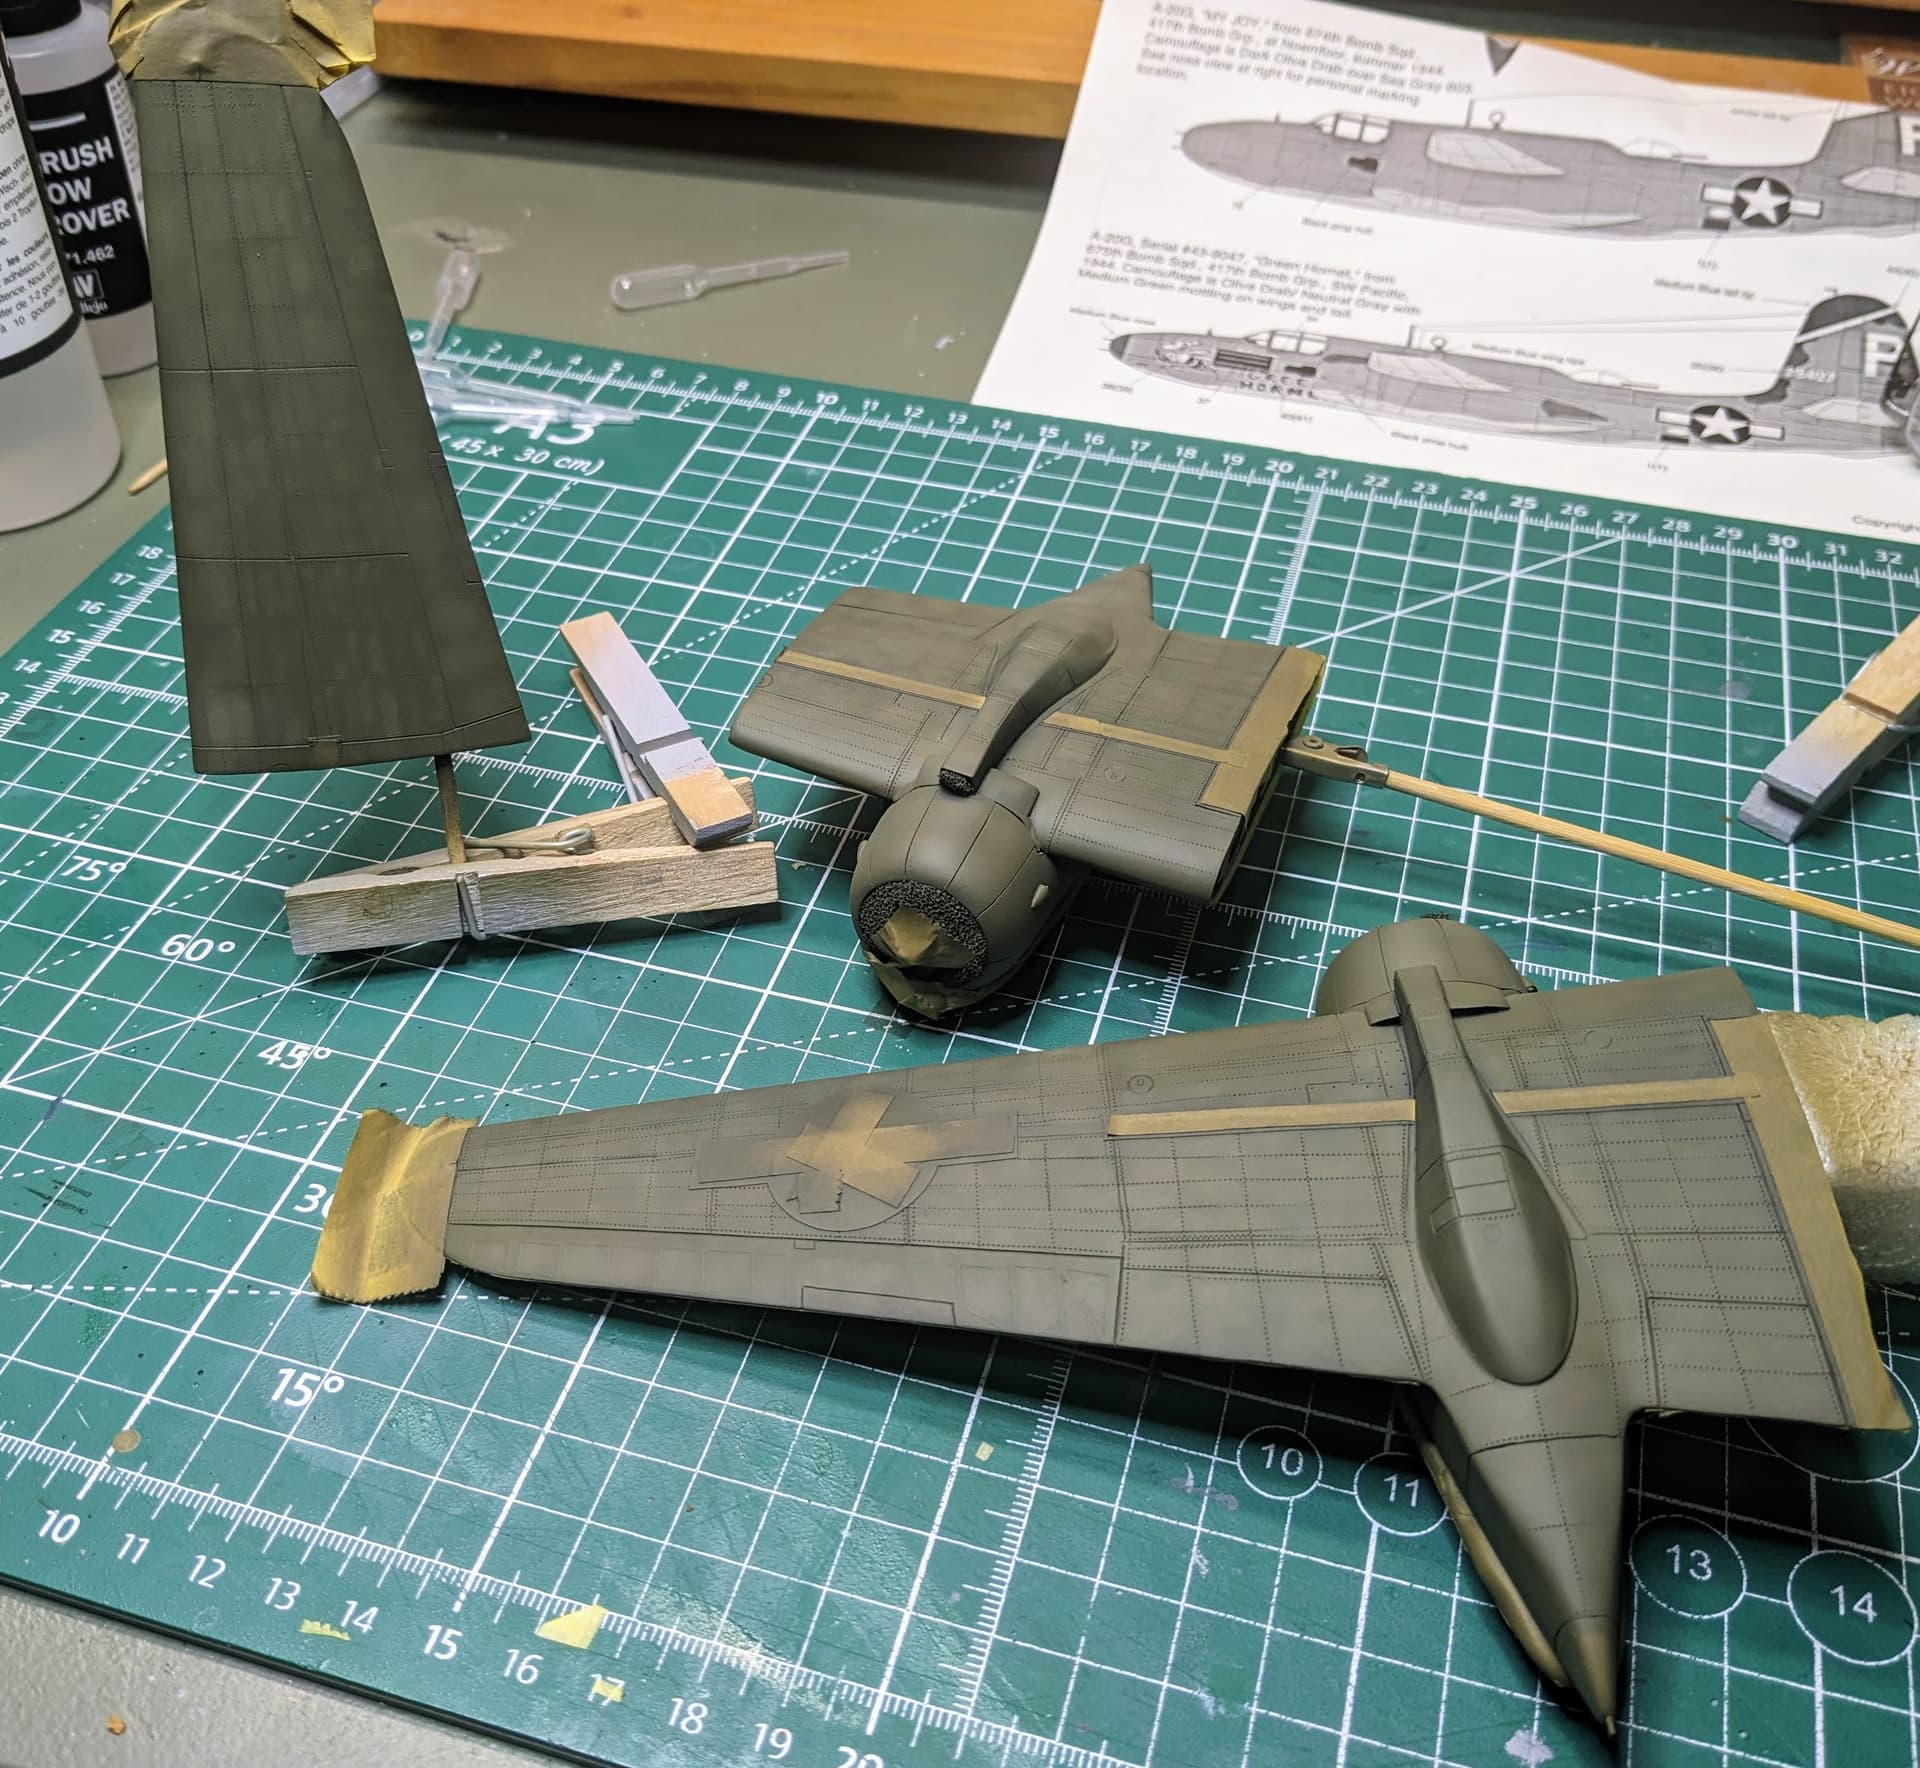
I’d like to show a technique I tried for the first time on this build. The A-20 has fabric covered flight controls but the kit doesn’t represent this in any fashion. Fabric covered flight controls on some WWII aircraft are similar in appearance to metal covered flight controls. They do not always seem to have the rippled fabric we often see on models. The A-20 seems to fall into this group from looking at photos.
The drawings I used for riveting also showed a fabric structure on the flight controls. I wanted to see if I could duplicate this look.
What I did was copied the flight control part of the drawing into Inkscape and duplicated the structure as an svg file (vector drawing). From there I imported it into my Silhouette Studio software for my vinyl cutter and printed out masks for the fabric areas.
Next I applied a coat of primer to these areas. Then peeled away the masks
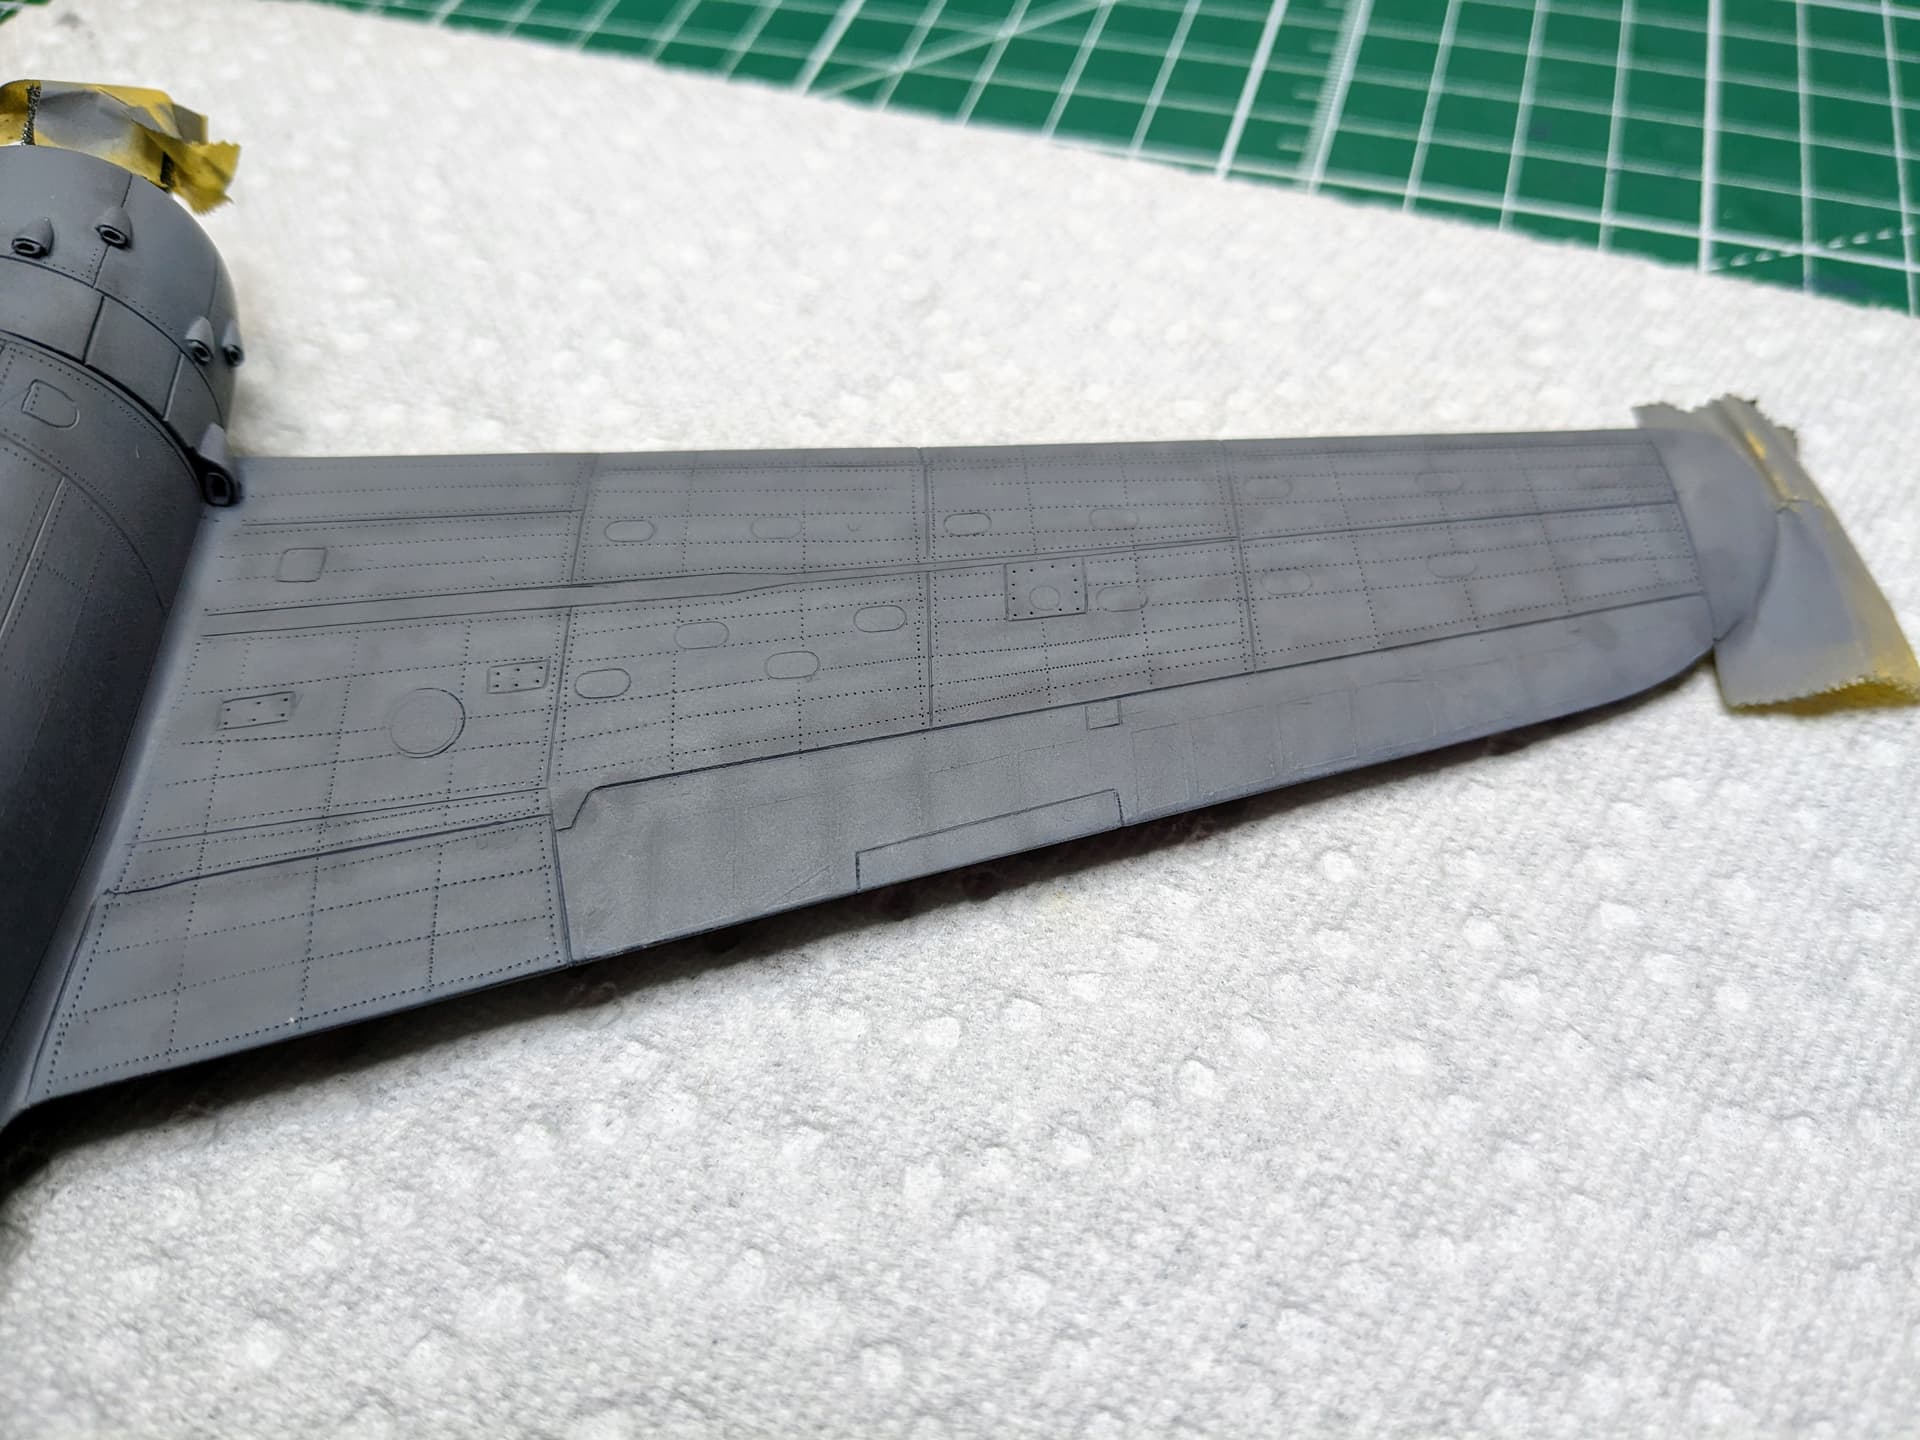
Now here’s where the experimentation went a bit south. The edges of the masked areas were a bit sharp and raised as you can see in the pictures. This as after spraying using a spray can of Mr Surfacer 1500 Gray. My thinking was that I would very lightly sand them and then they would show up under the final coat of paint.
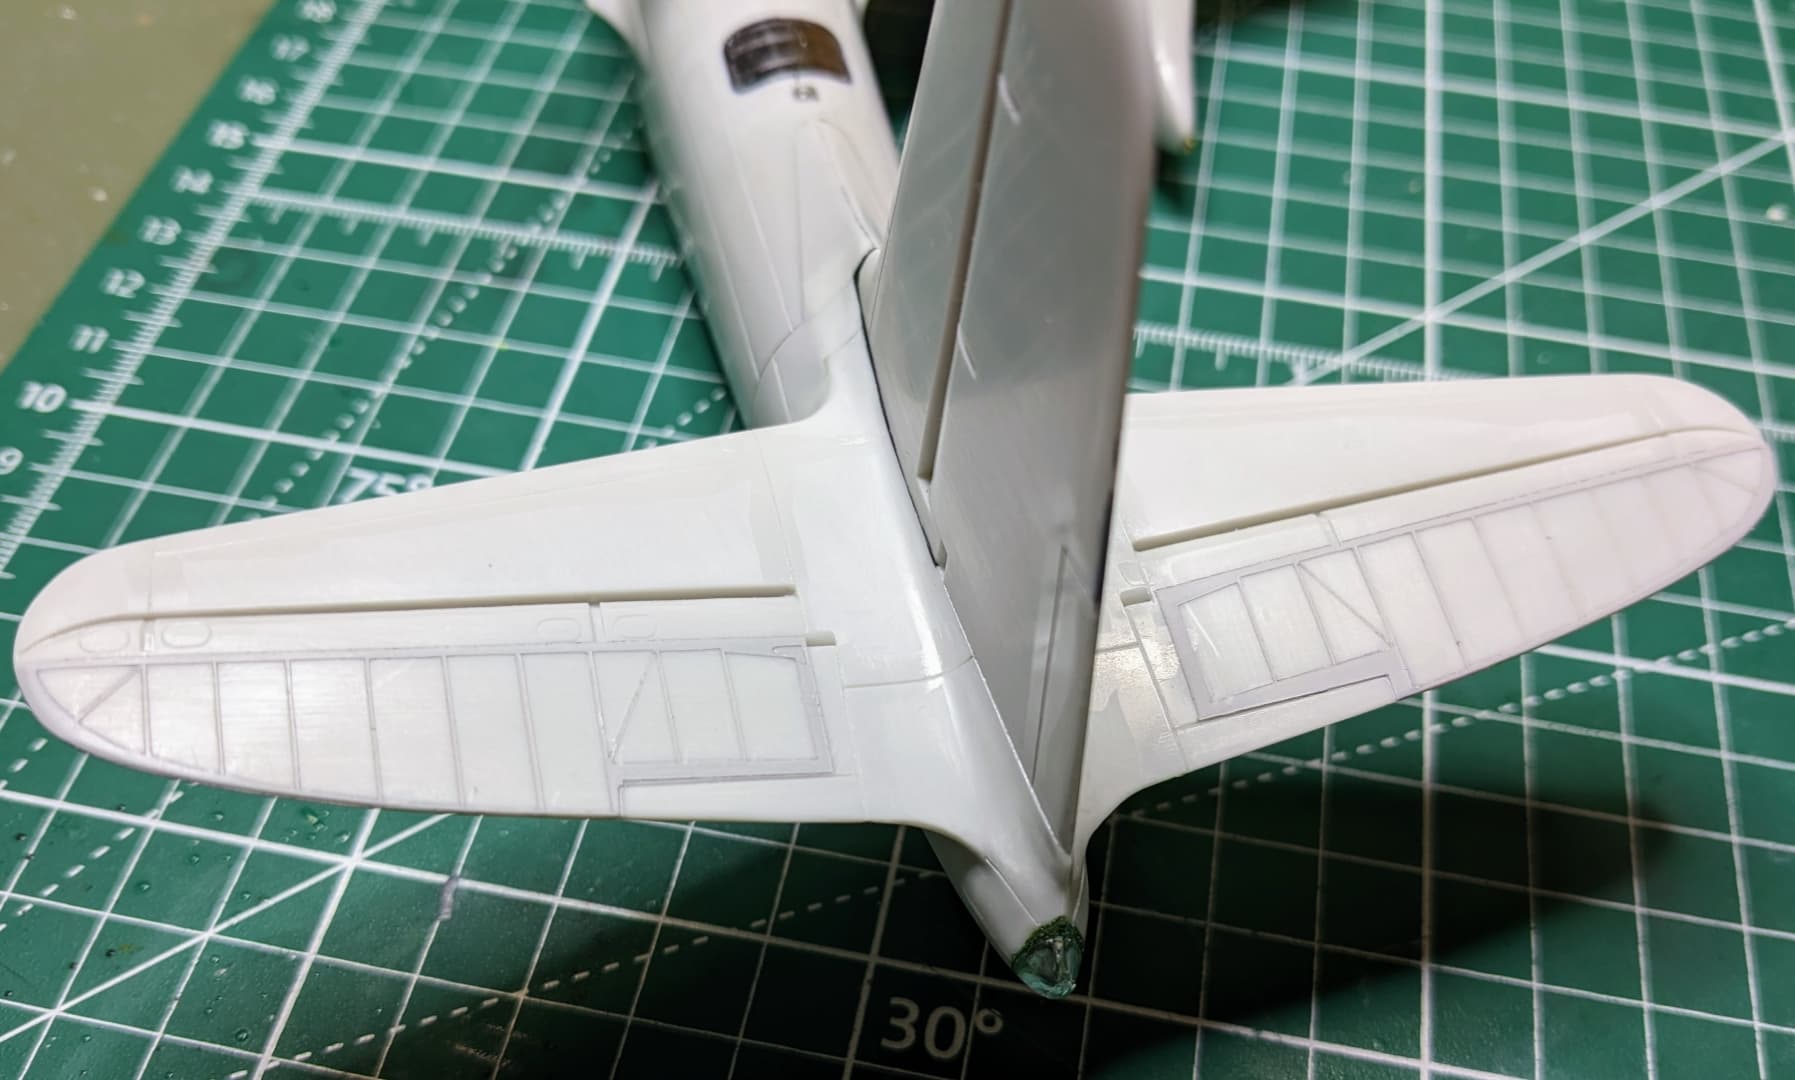
I think that this technique has promise, but I need to perfect it some. After overcoating the model with primer and then the final paint color, the fabric effect is barely visible , and in fact on some of the surfaces it is not visible.
So I would consider this experiment a partial success in that it proves that this effect can be duplicated. Where I think it needs work is determining the amount of “thickness” primer initially applied, and the degree of final clean up before painting the model. If may be that it should be applied after priming the model but before painting.
Anyway, it was an interesting attempt and it doesn’t detract from the model as is. But I did want to share this as I have not heard of it being done before and perhaps someone else can improve on it.
9 Likes
I love the idea and the process, I really want the ability to make my own masks etc. Could you reverse the idea? And making masks you could apply to the model to give the desired effect of tape? Perhaps using putty would leave a more substantial raised area? That sanding would knock down but not erase?
Cheers
Chris
1 Like
Hi Chris,
I thought about what you mentioned about reversing the process, but the masks are too prominent and don’t look right (I tried it out). As for using putty, I think it would be hard to get an even surface over the masks. But it would be worth trying on a test mule.
As I mentioned above, I think either it will take an extra coat of primer, and / or apply the masks and primer for the fabric tape after the model itself has been primered. Then there would be one less coat of paint over them.
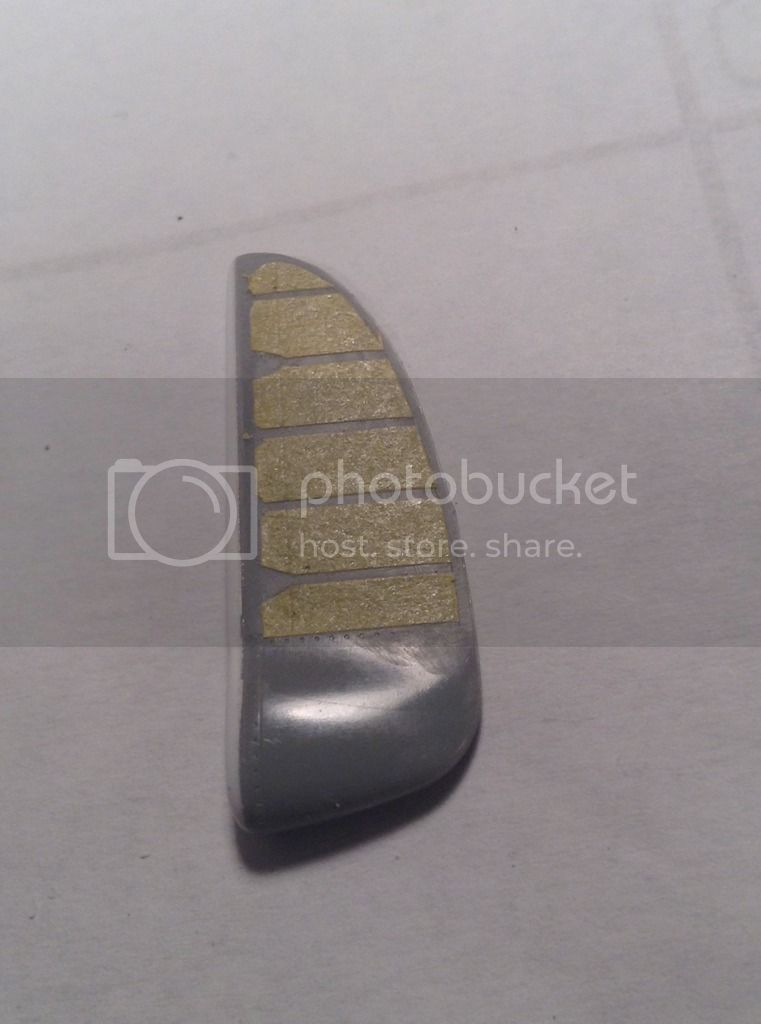
Hi Carl - following this with great interest. Nice
work .
You are on the right track with the masks/ primer etc for the fabric control surfaces- I think you only need to build up the primer more . Here are some shots of my Hayabusa build some years back on the old Aeroscale site , done at the time of the Photobucket disaster.
4 Likes
Thanks for the confirmation Richard. Next time I will apply more primer. 
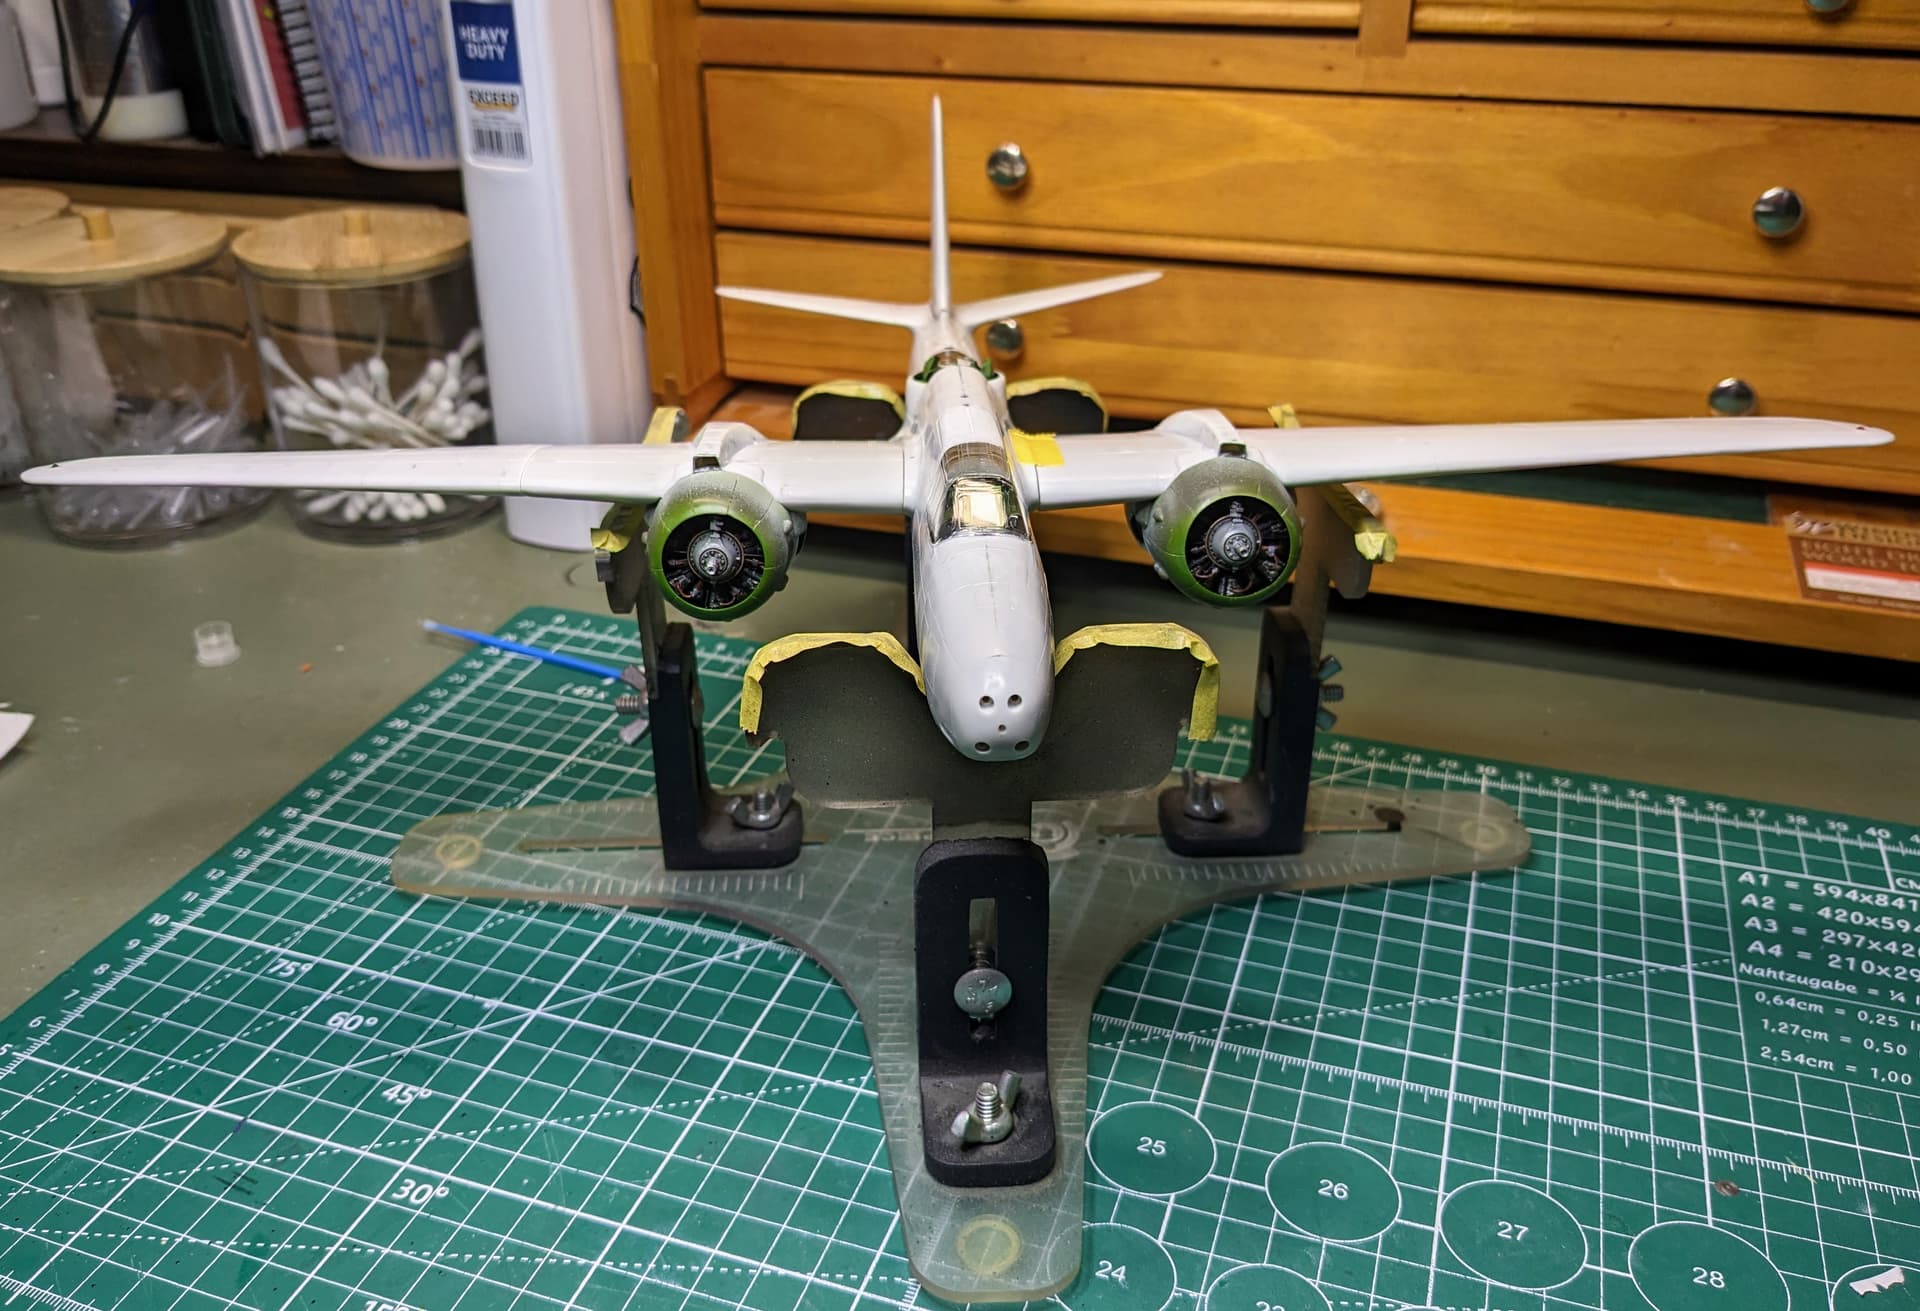
In the meantime, I need to get this puppy in the air, which means propellers, a few remaining external details, and dealing with the riveting.
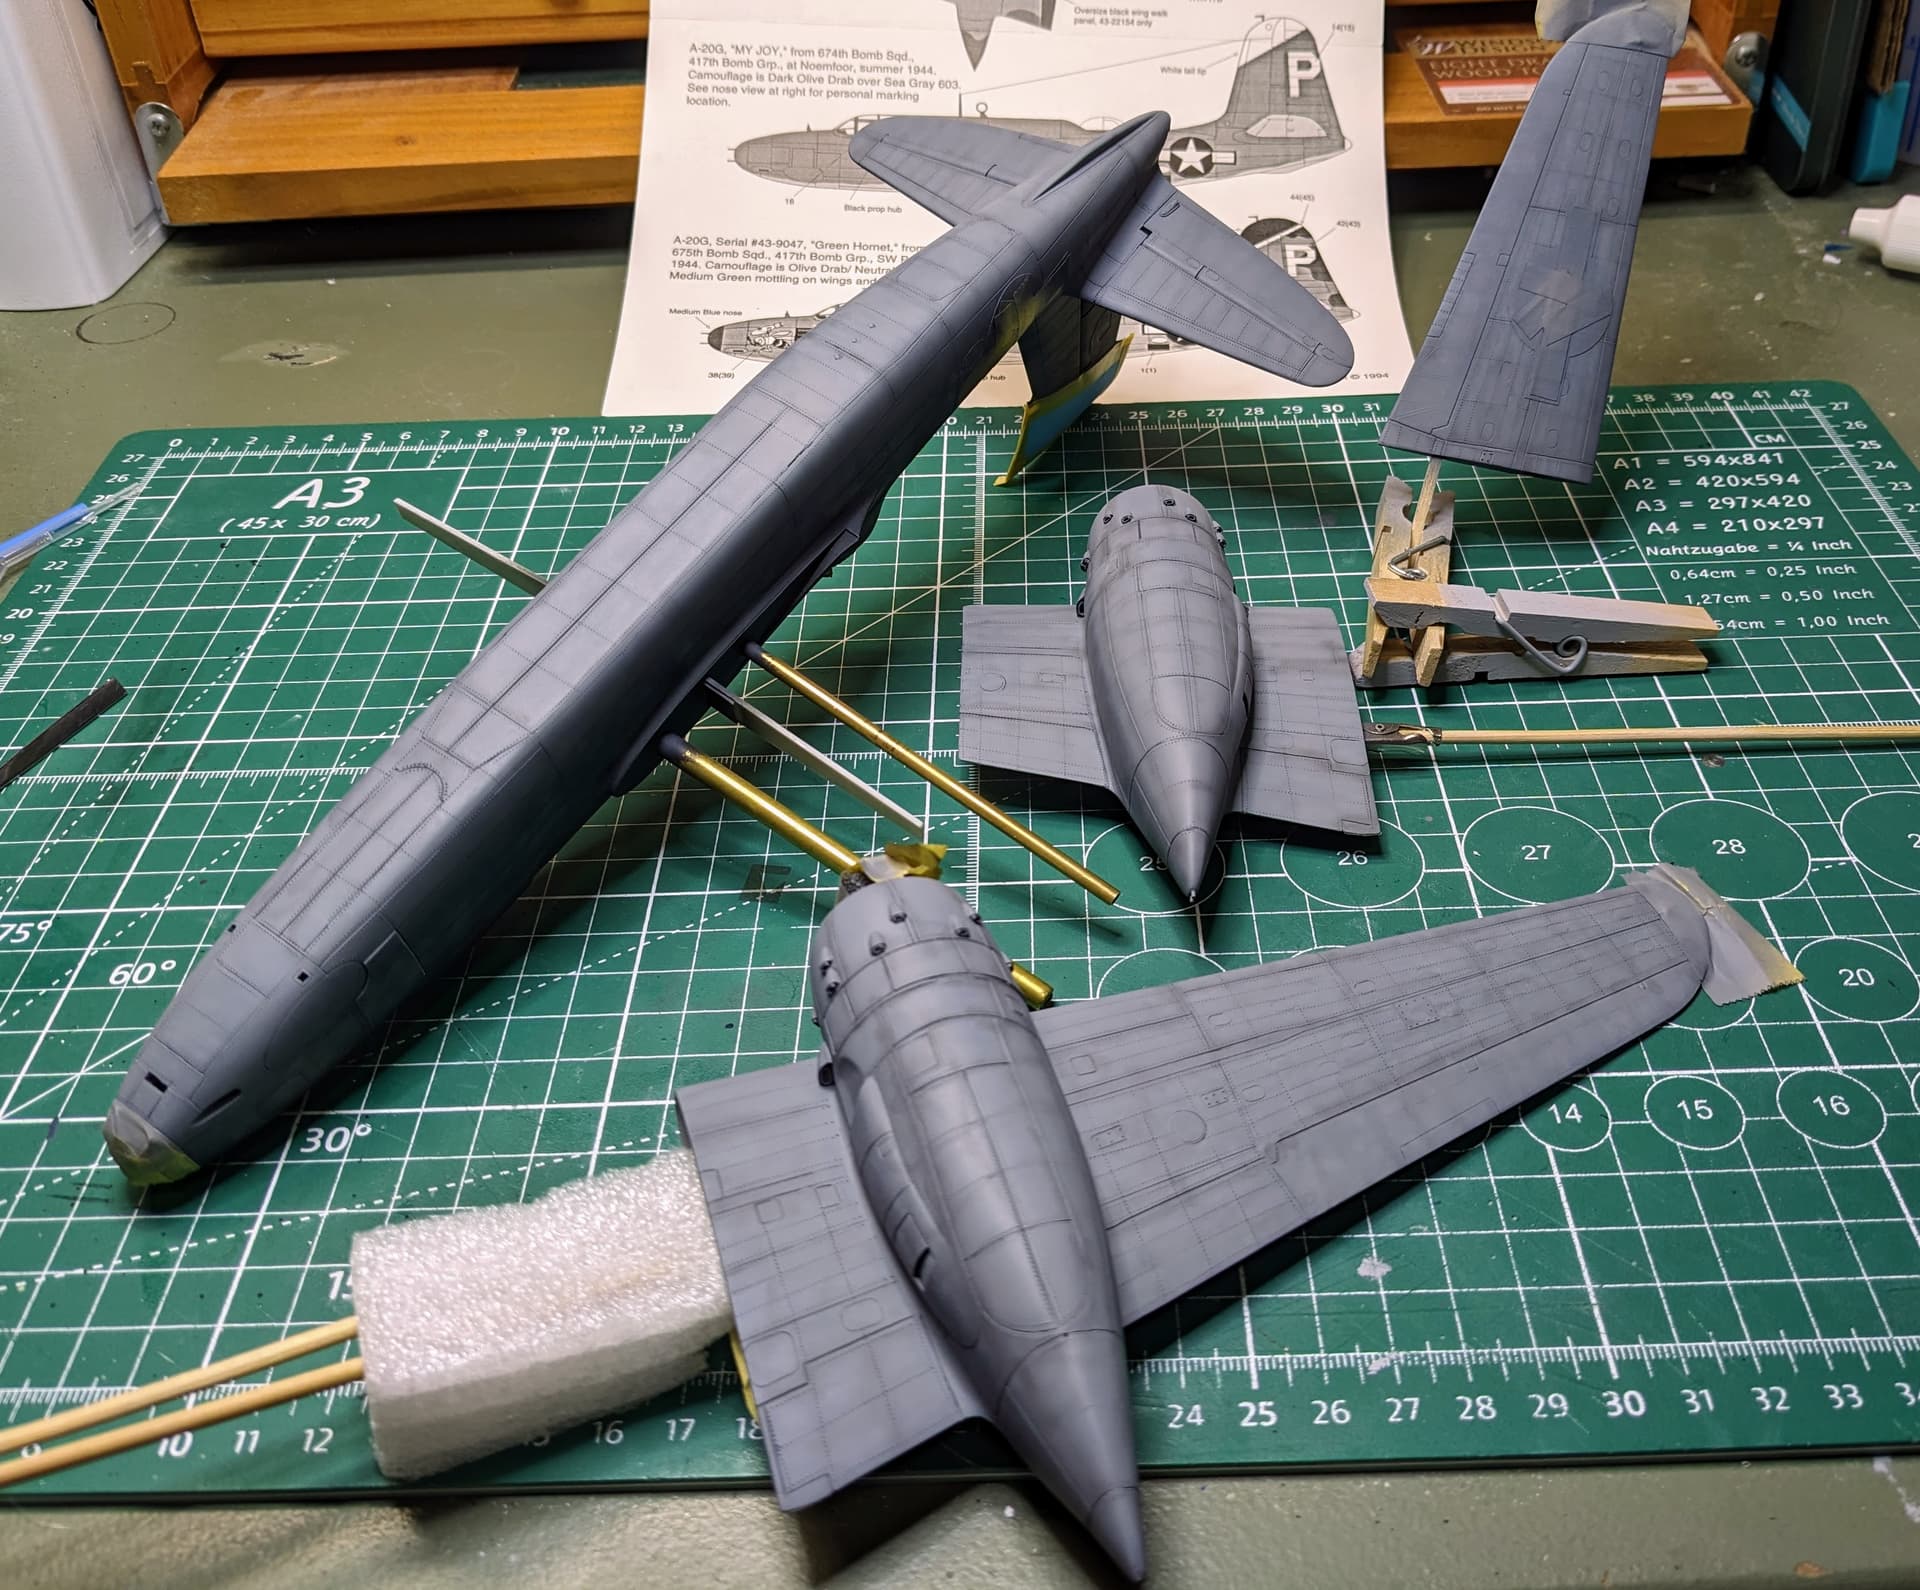
I am trying a new approach (for me anyway) to simulating spinning propellers. Of course, this was learned from other great modelers. I have not painted these yet, but I will attempt to paint them in such a way that they look like they are in motion. The propeller hub was trimmed down since you wouldn’t really see the blade seats while the props are in motion.
And here is a teaser of what it will look like.
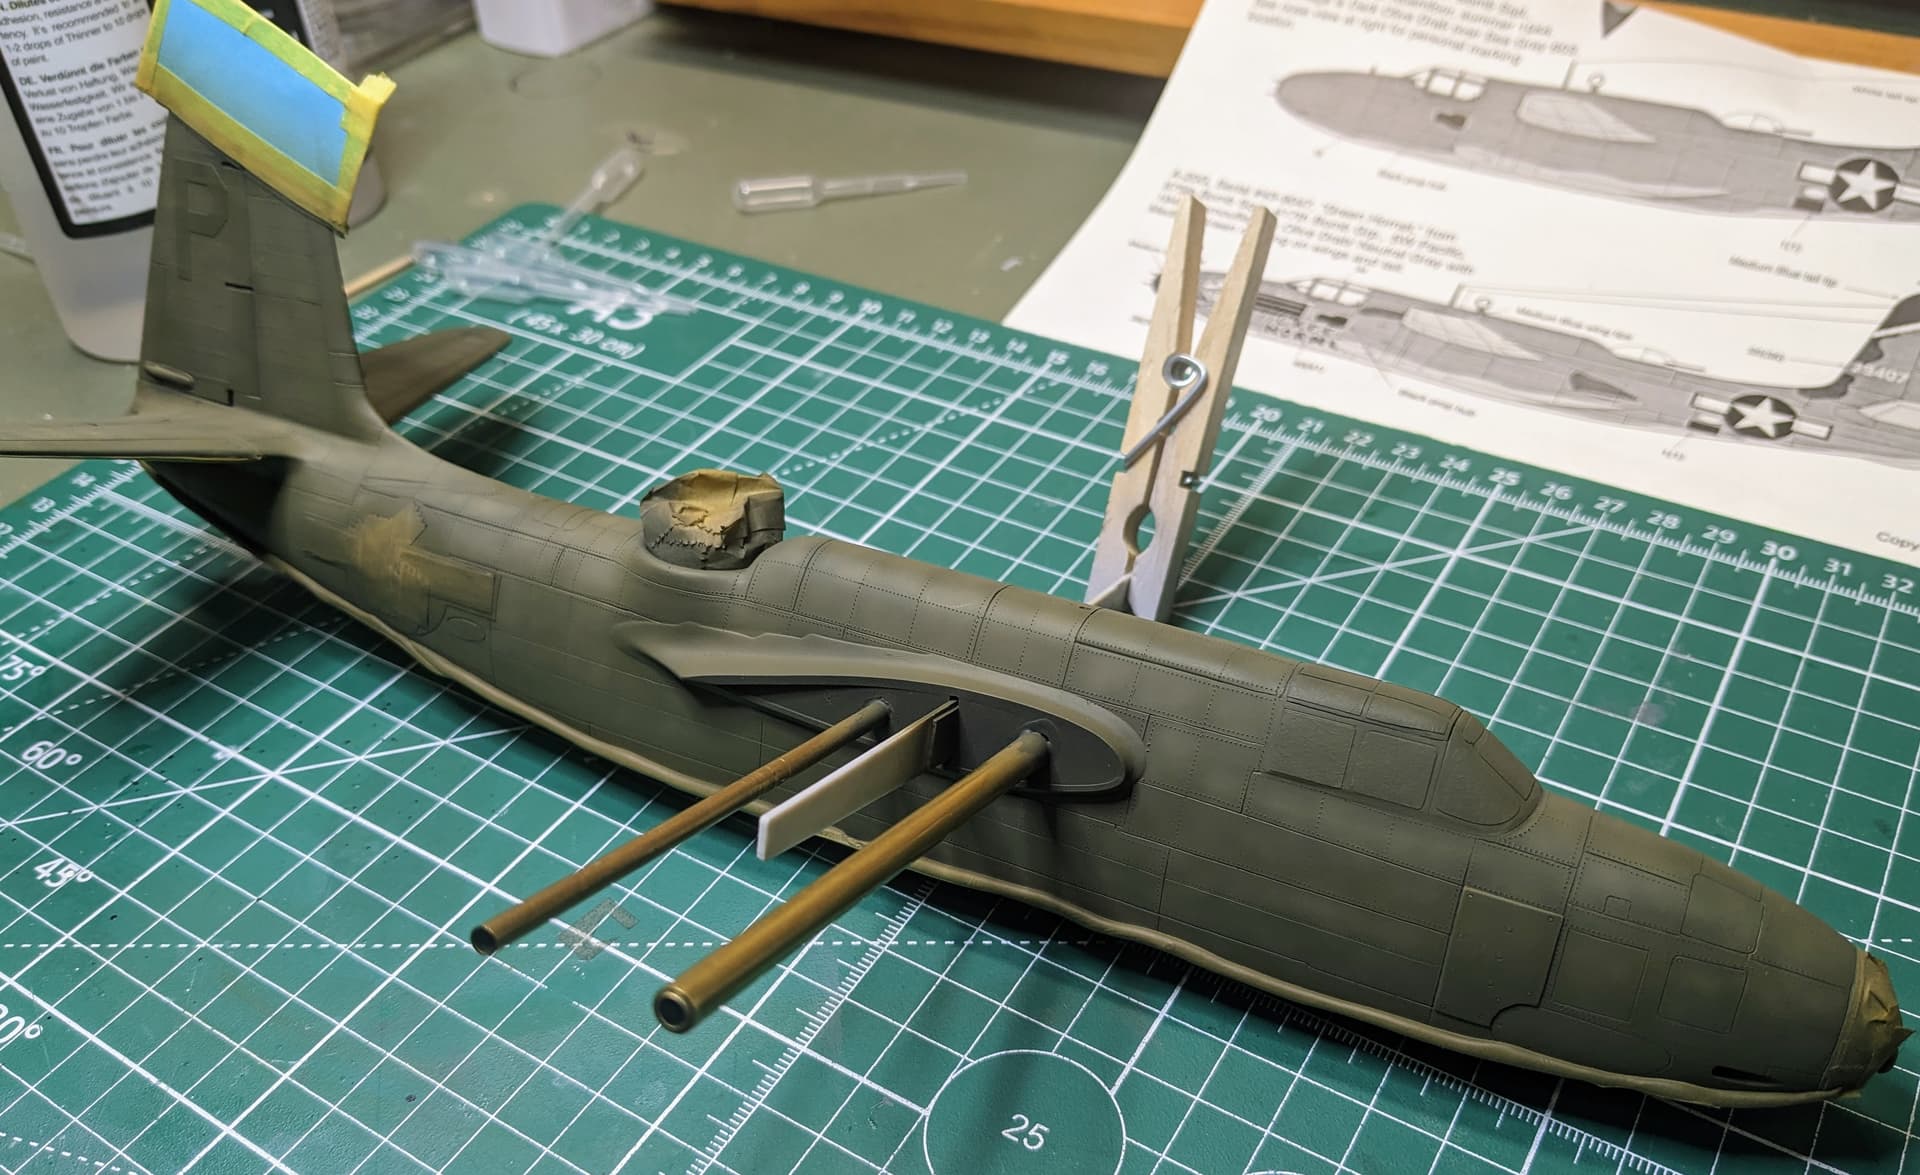
I plan on having my plane carrying additional bombs under the wings, so I picked up a set of Eduard 500 pound bombs. The bomb racks I scratch built using a couple of photo references.
I also wanted to improve the armor plate on the fuselage nose. The kit has none. I first tried using aluminum tape, but it didn’t look right under paint. So instead I bonded styrene sheet (I can’t recall if it was .005 or .010 thickness.
And then the primer was added. Once that was cured, I spent a week doing the riveting. There were many spots that needed to be re-done as can be seen in this photo. All those white areas are where I had to fill bad spots with Mr Surfacer 500 and then re-apply the riveting.
Finally, I am getting close to where I am actually at in the build, so I’m afraid the posts are going to be slowing down soon.
8 Likes
Again, another great update Carl. The progress shots look great with how it built up and the whole process you devised. Looking good 
1 Like
Very ingenious idea. The props already look good. Really looking forward to your next installment. 
—mike
Thanks John and Mike.
So I am working on two parts of the model project now, which pretty much bring me up to real time on the build. That is the painting and the display that the model will be mounted in.
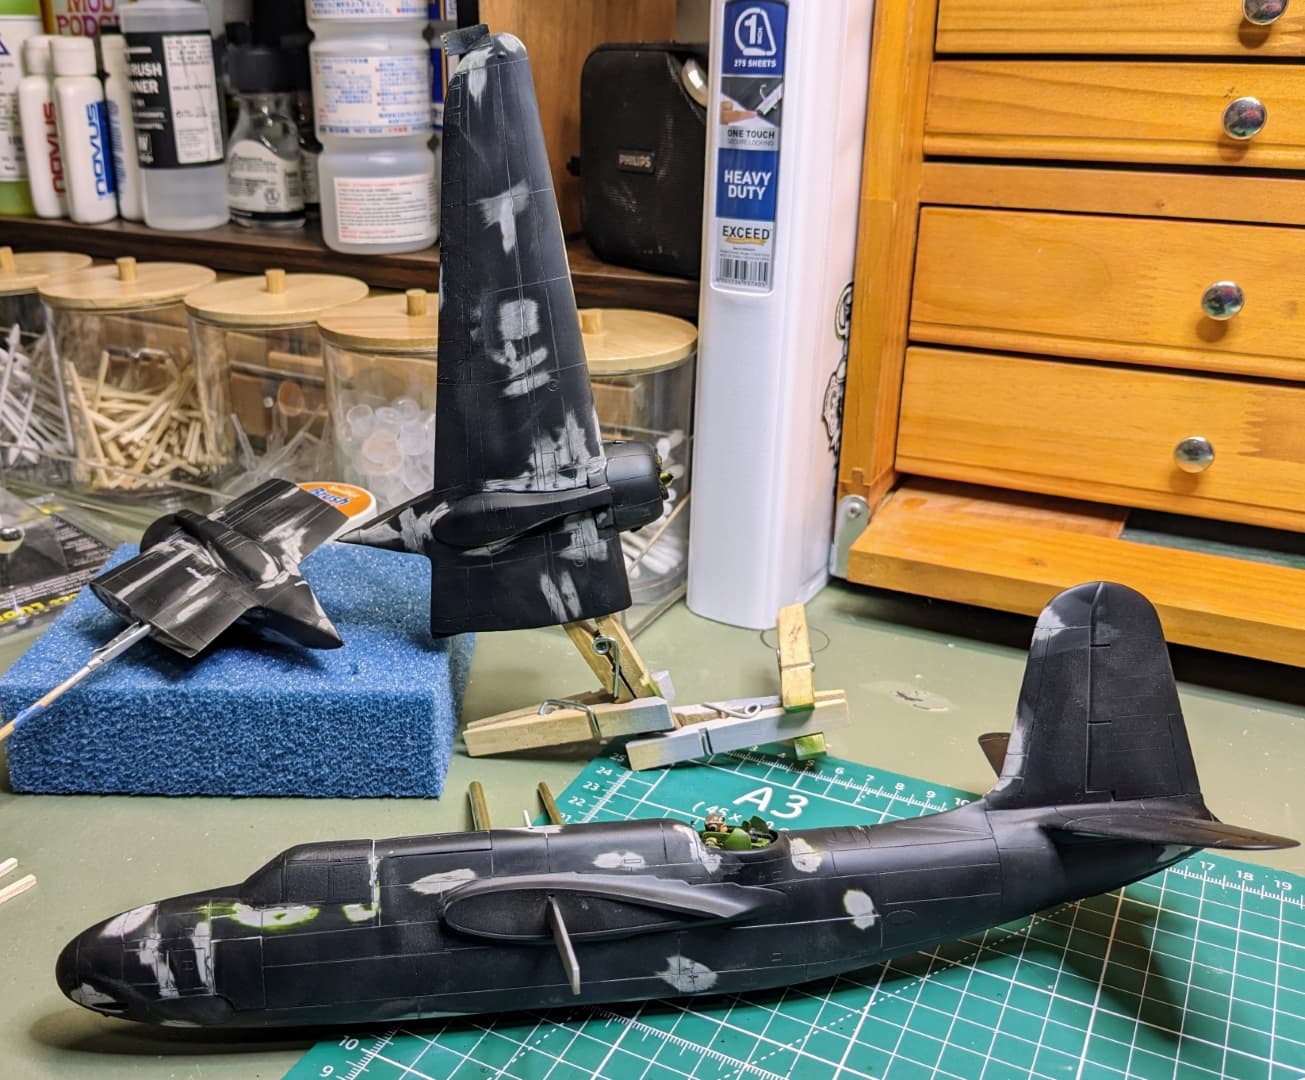
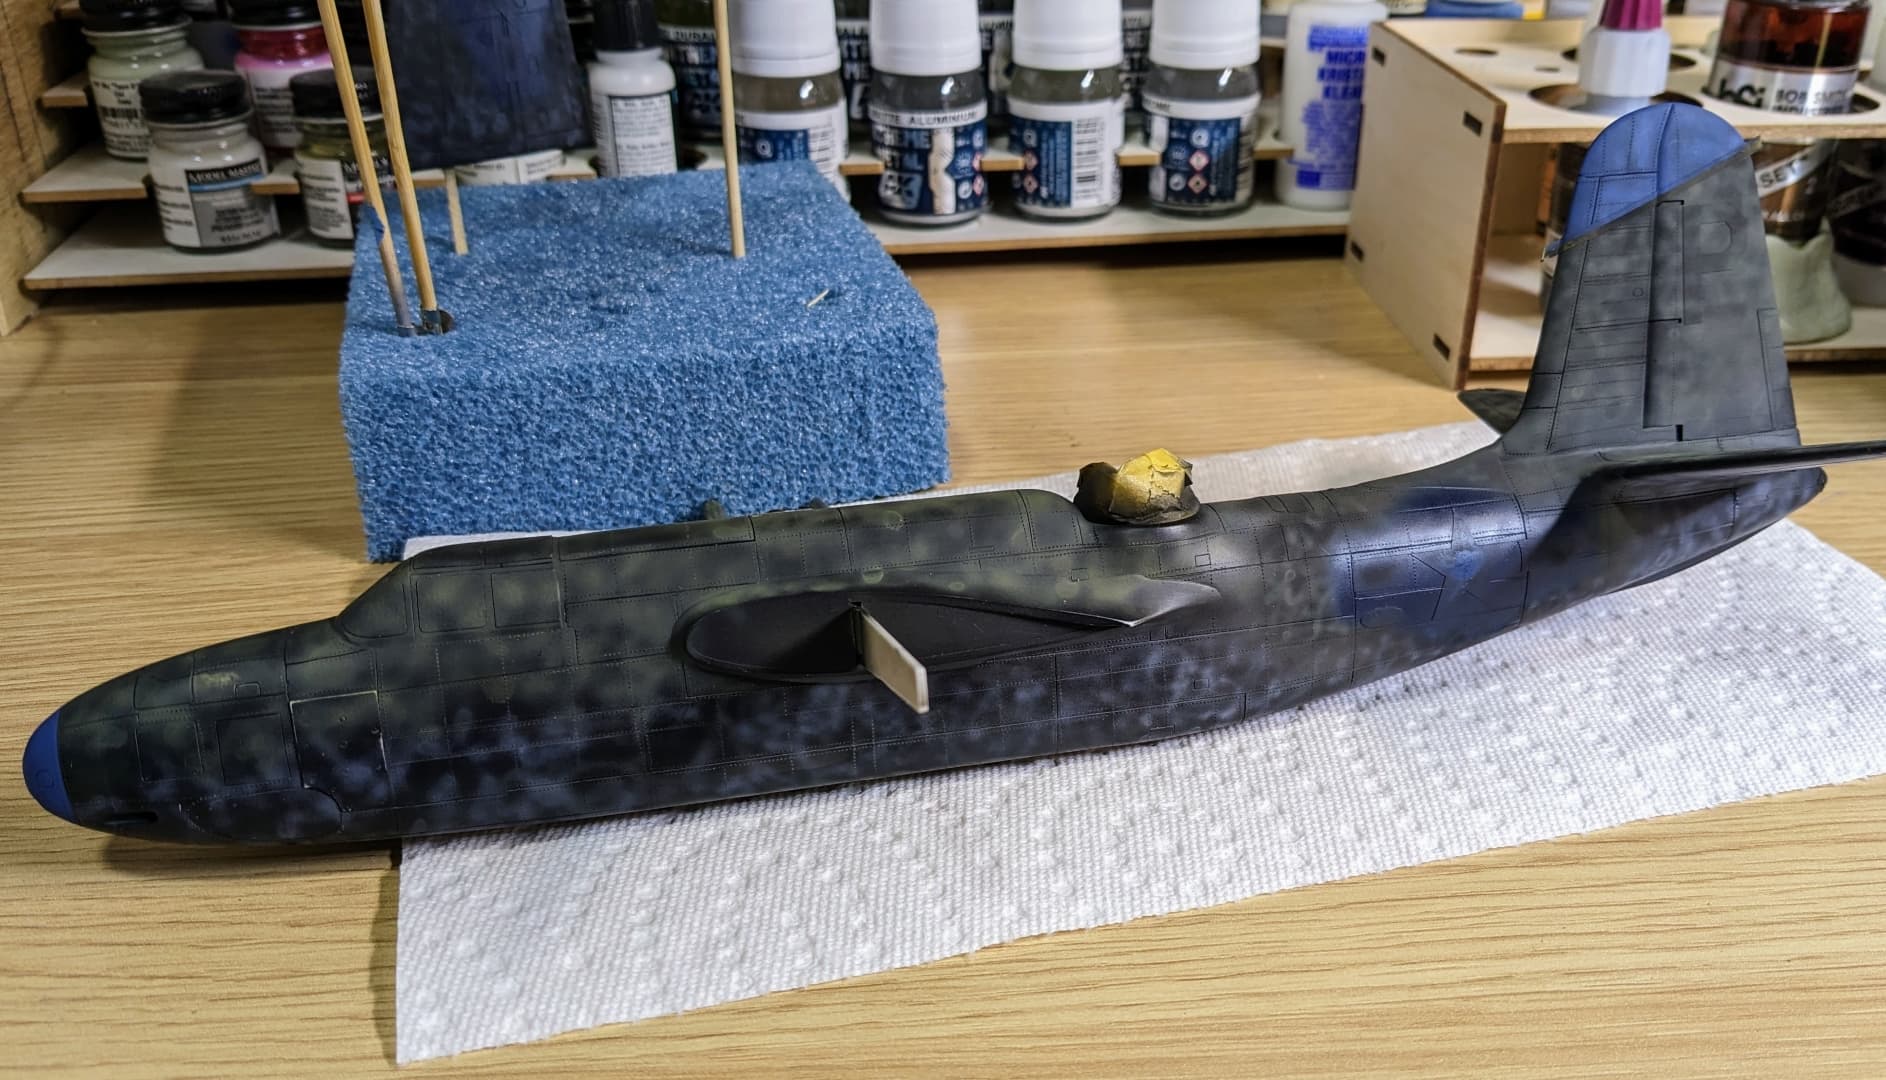
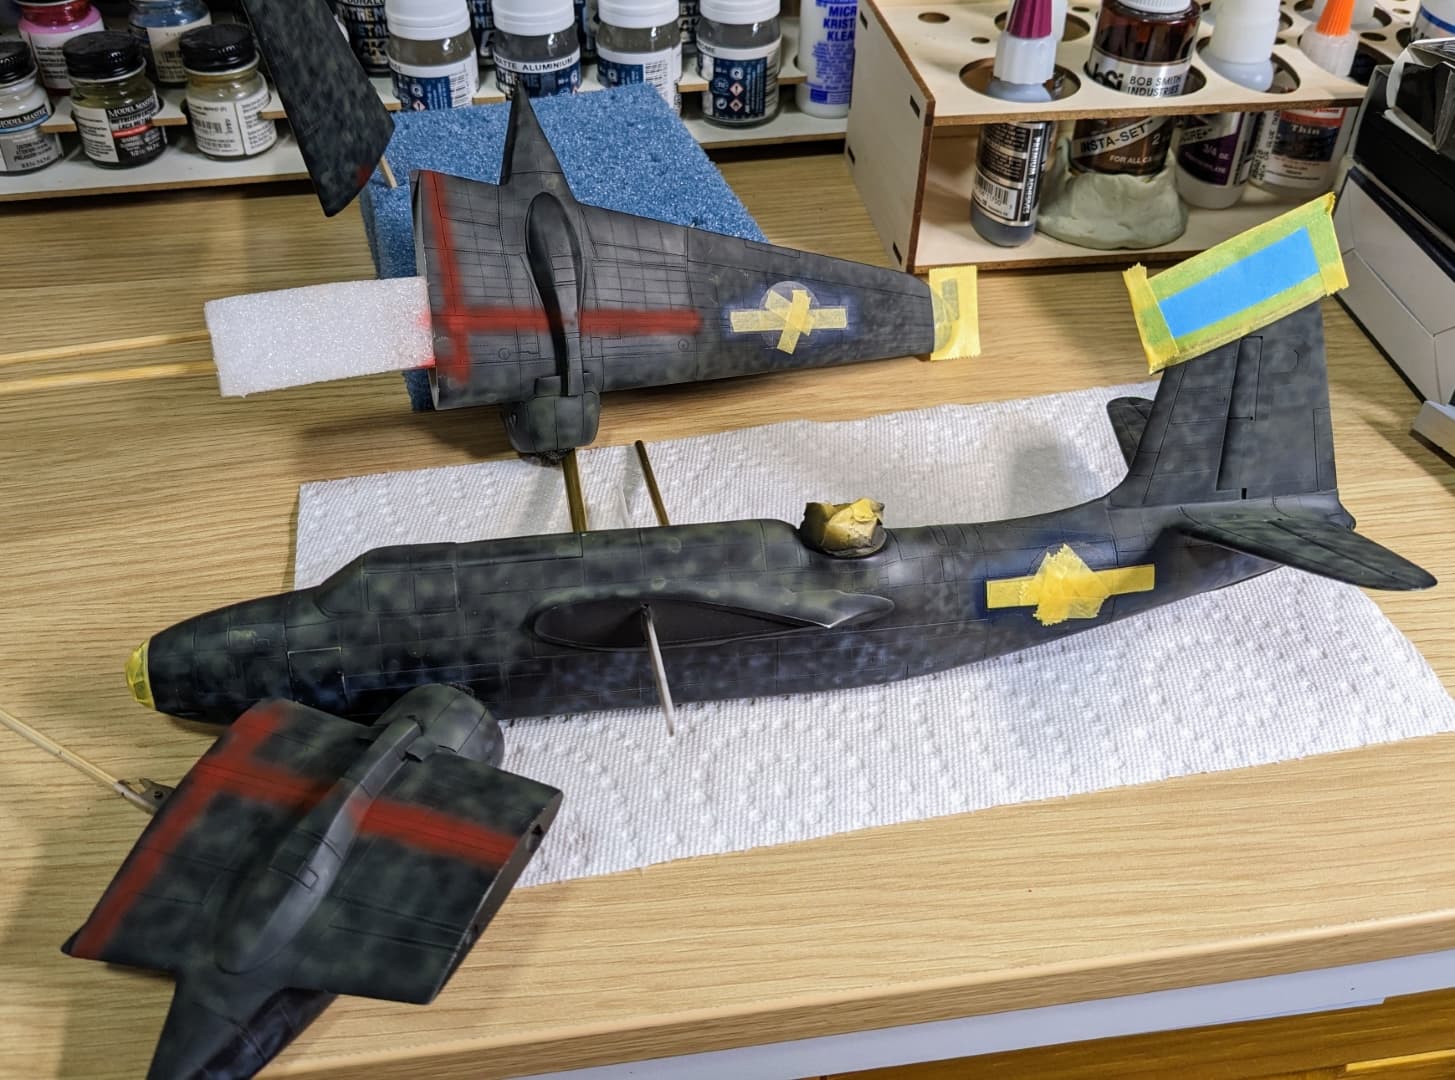
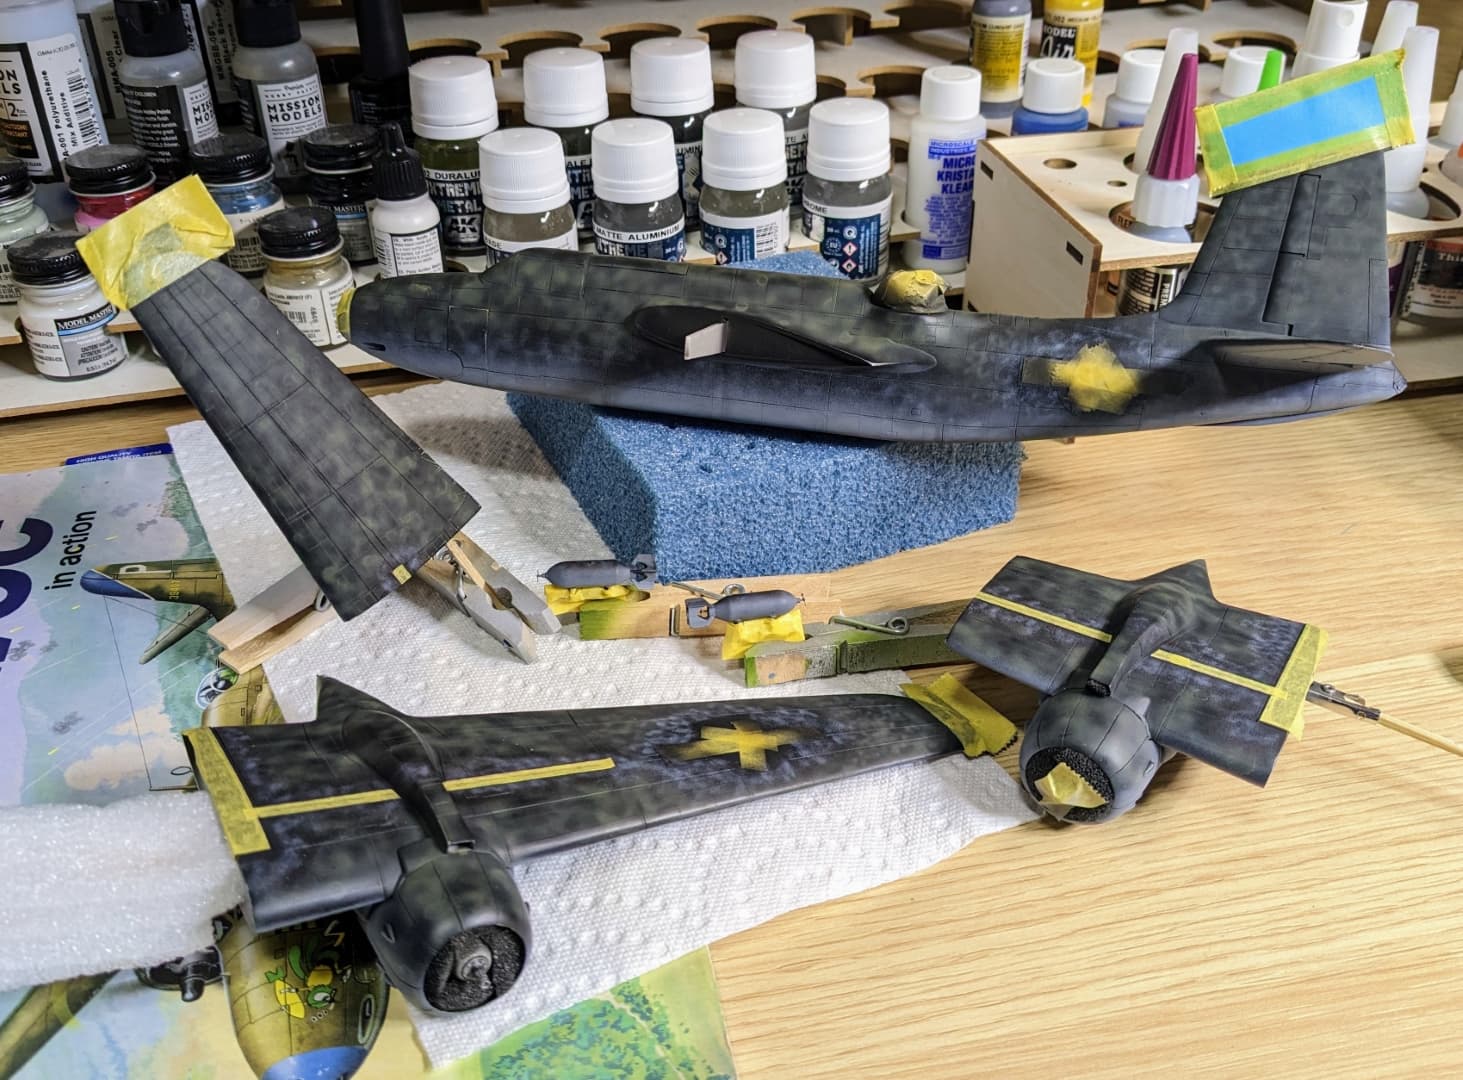
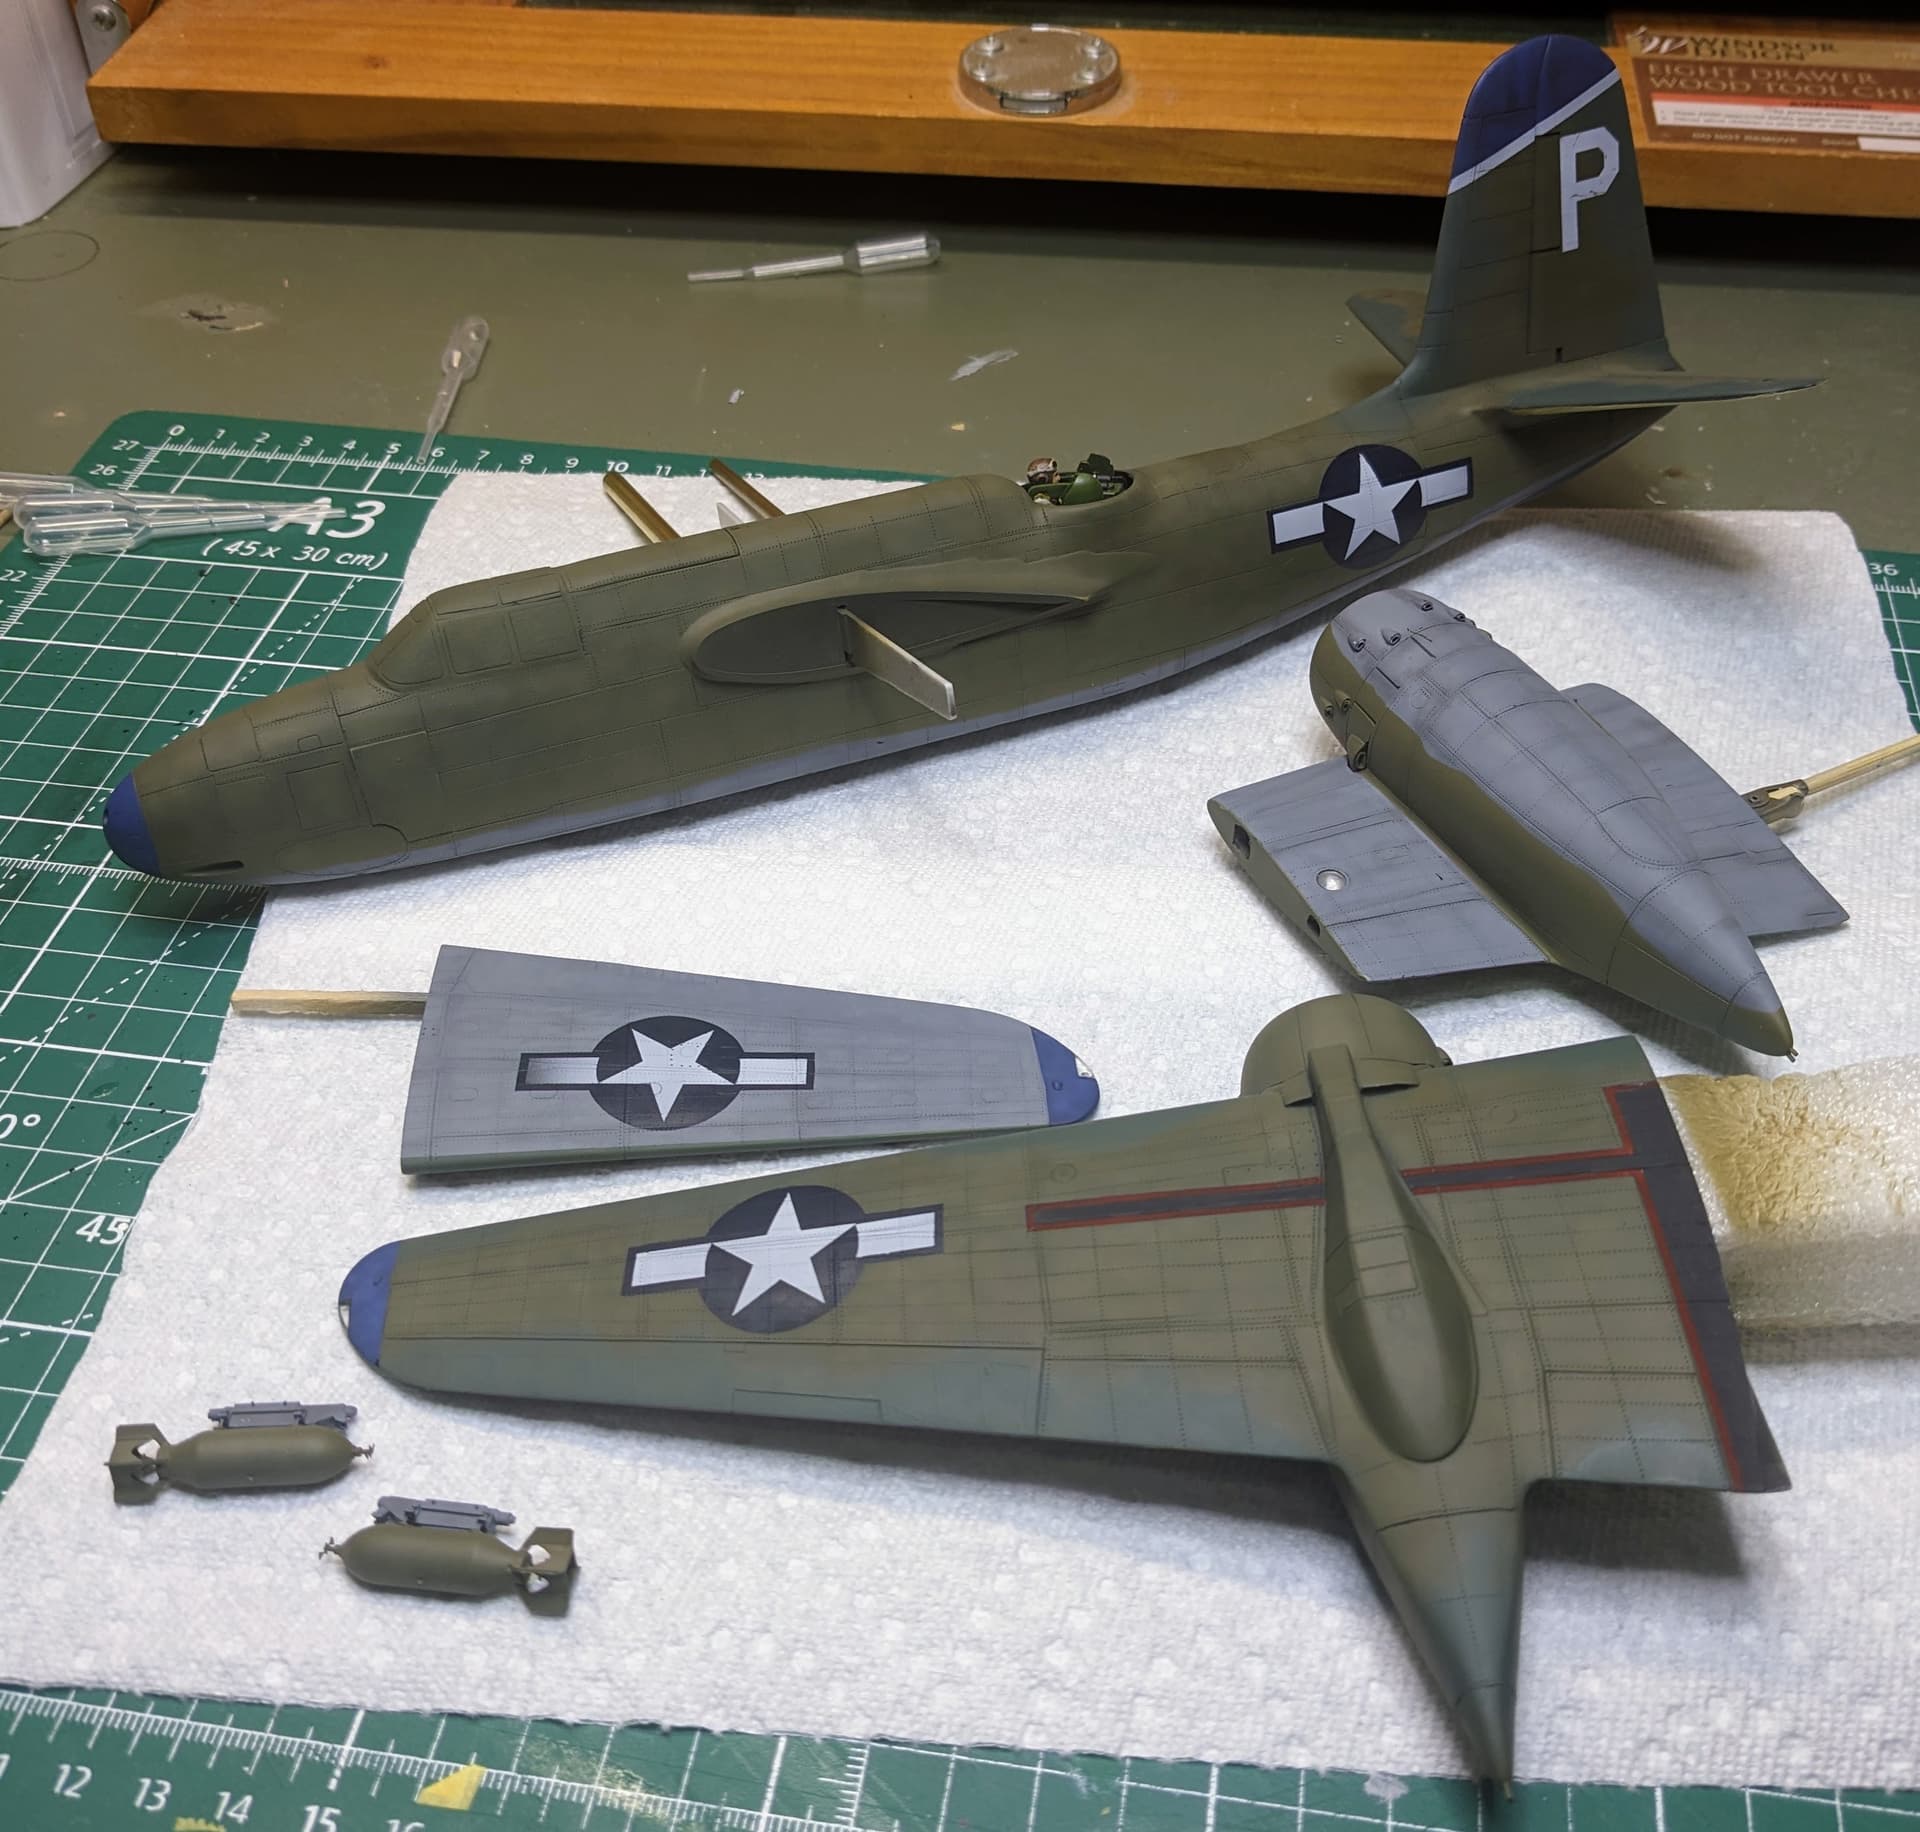
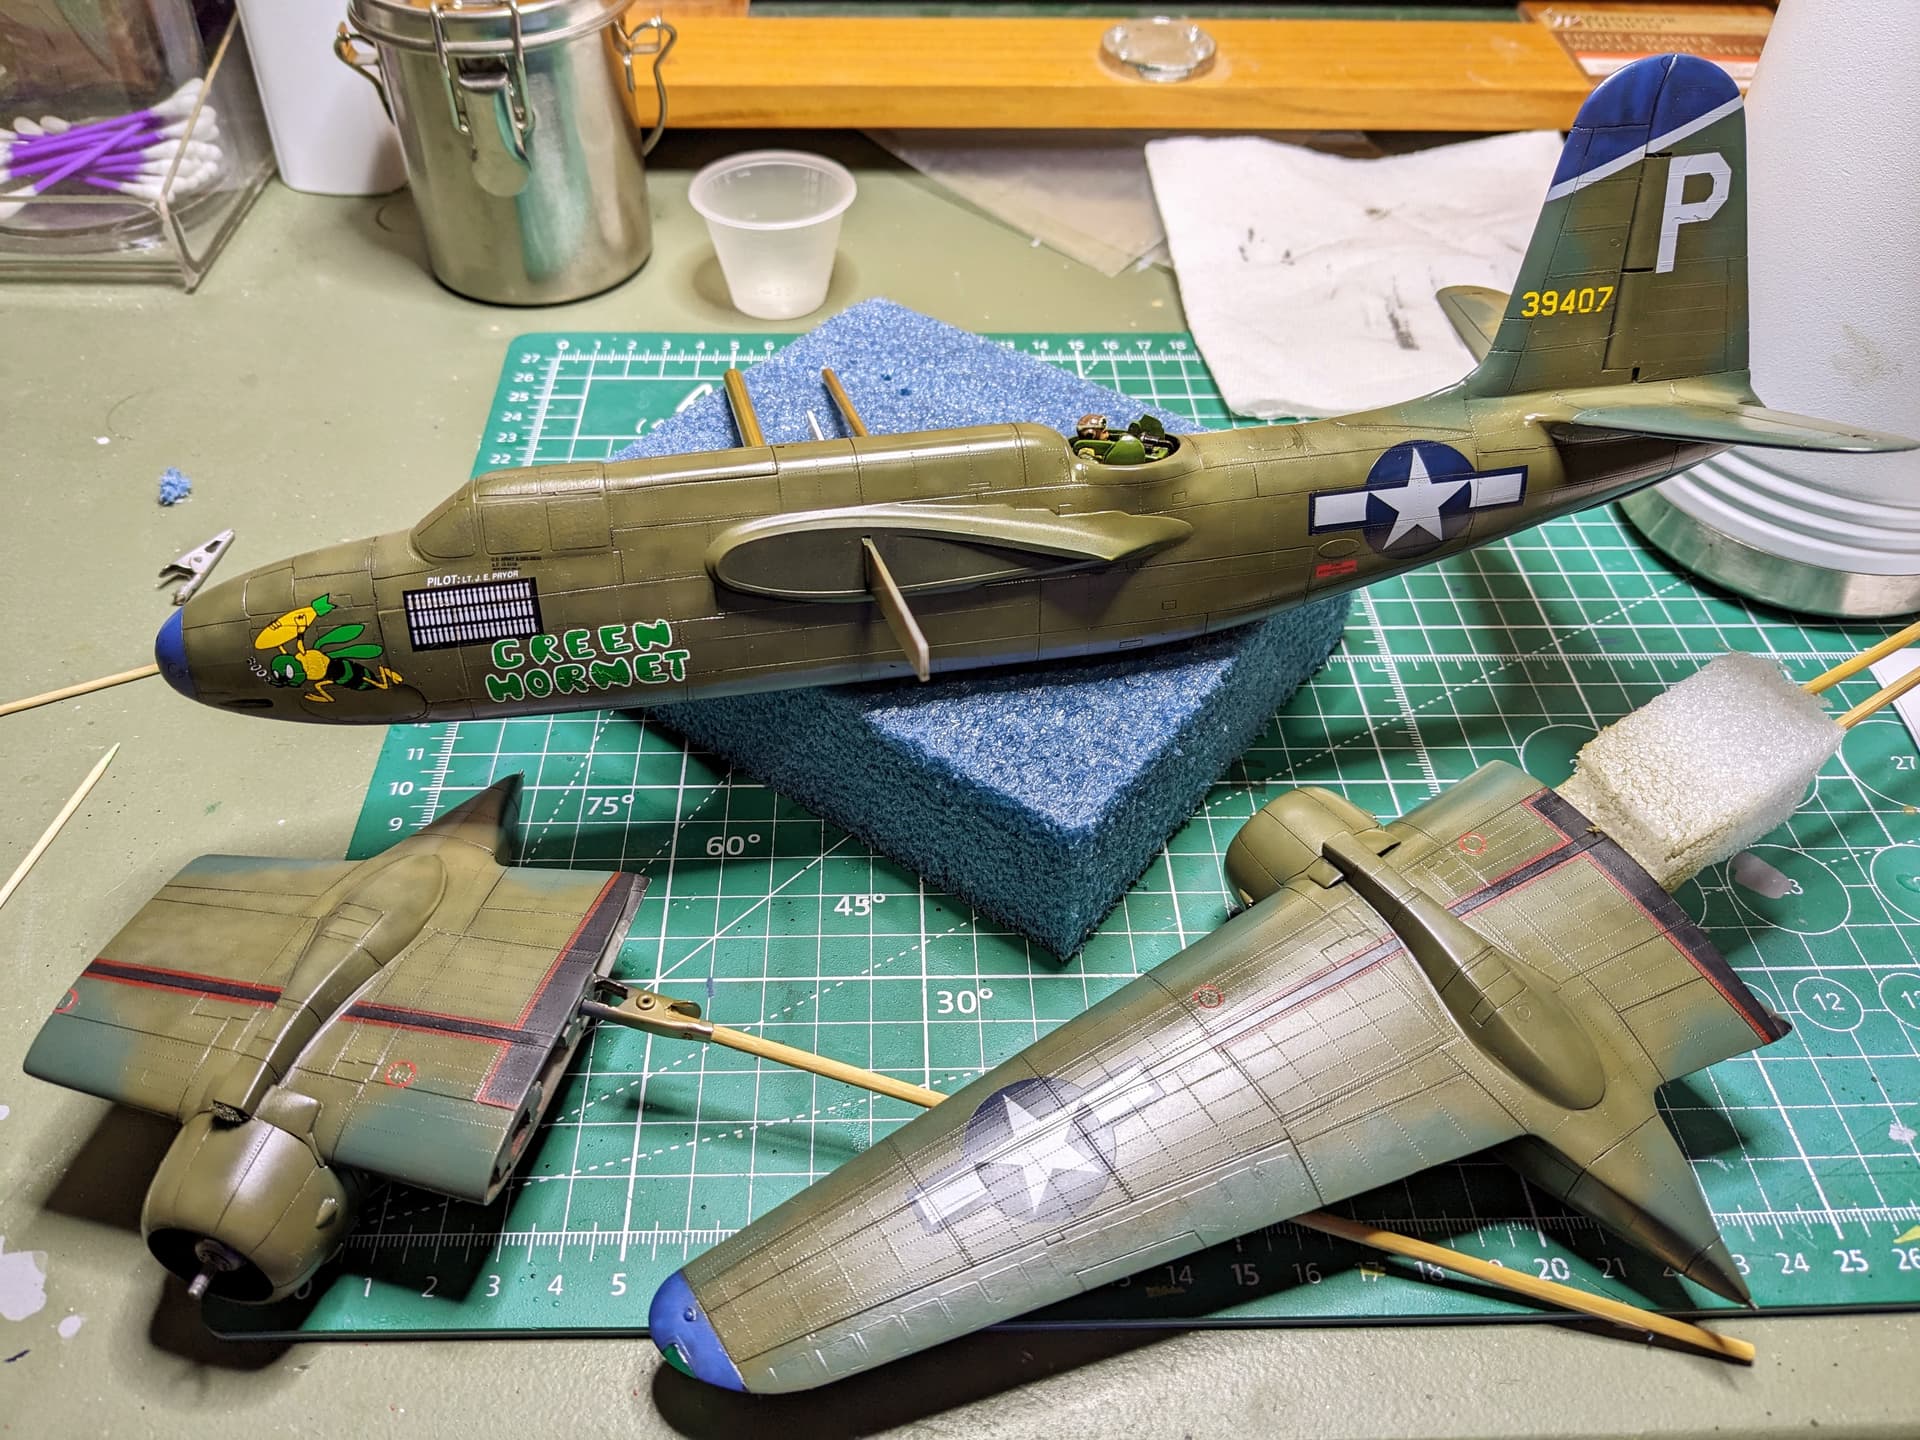
I’ve elected to paint as much of the markings as is practical this time. I will be using decals only for the nose art and smaller lettering. Everything else will be done using masks. The model was black based and mottled first and then I spent some time creating national insignia and the large lettering for the tail and began the process of painting these.
My previous experience with mask left small outlines of color in various areas. I believe this is because I painted them after painting the model the final colors. This time around, I am doing all the masking and painting of everything before applying the final colors. I started with white which I purposely left somewhat bare because I am going to try to up my weathering game with this model as well. Once the white was down, I applied the masks for the white parts of the markings. IN addition to the letter and national insignia, there is a white stripe on the vertical stabilizer.
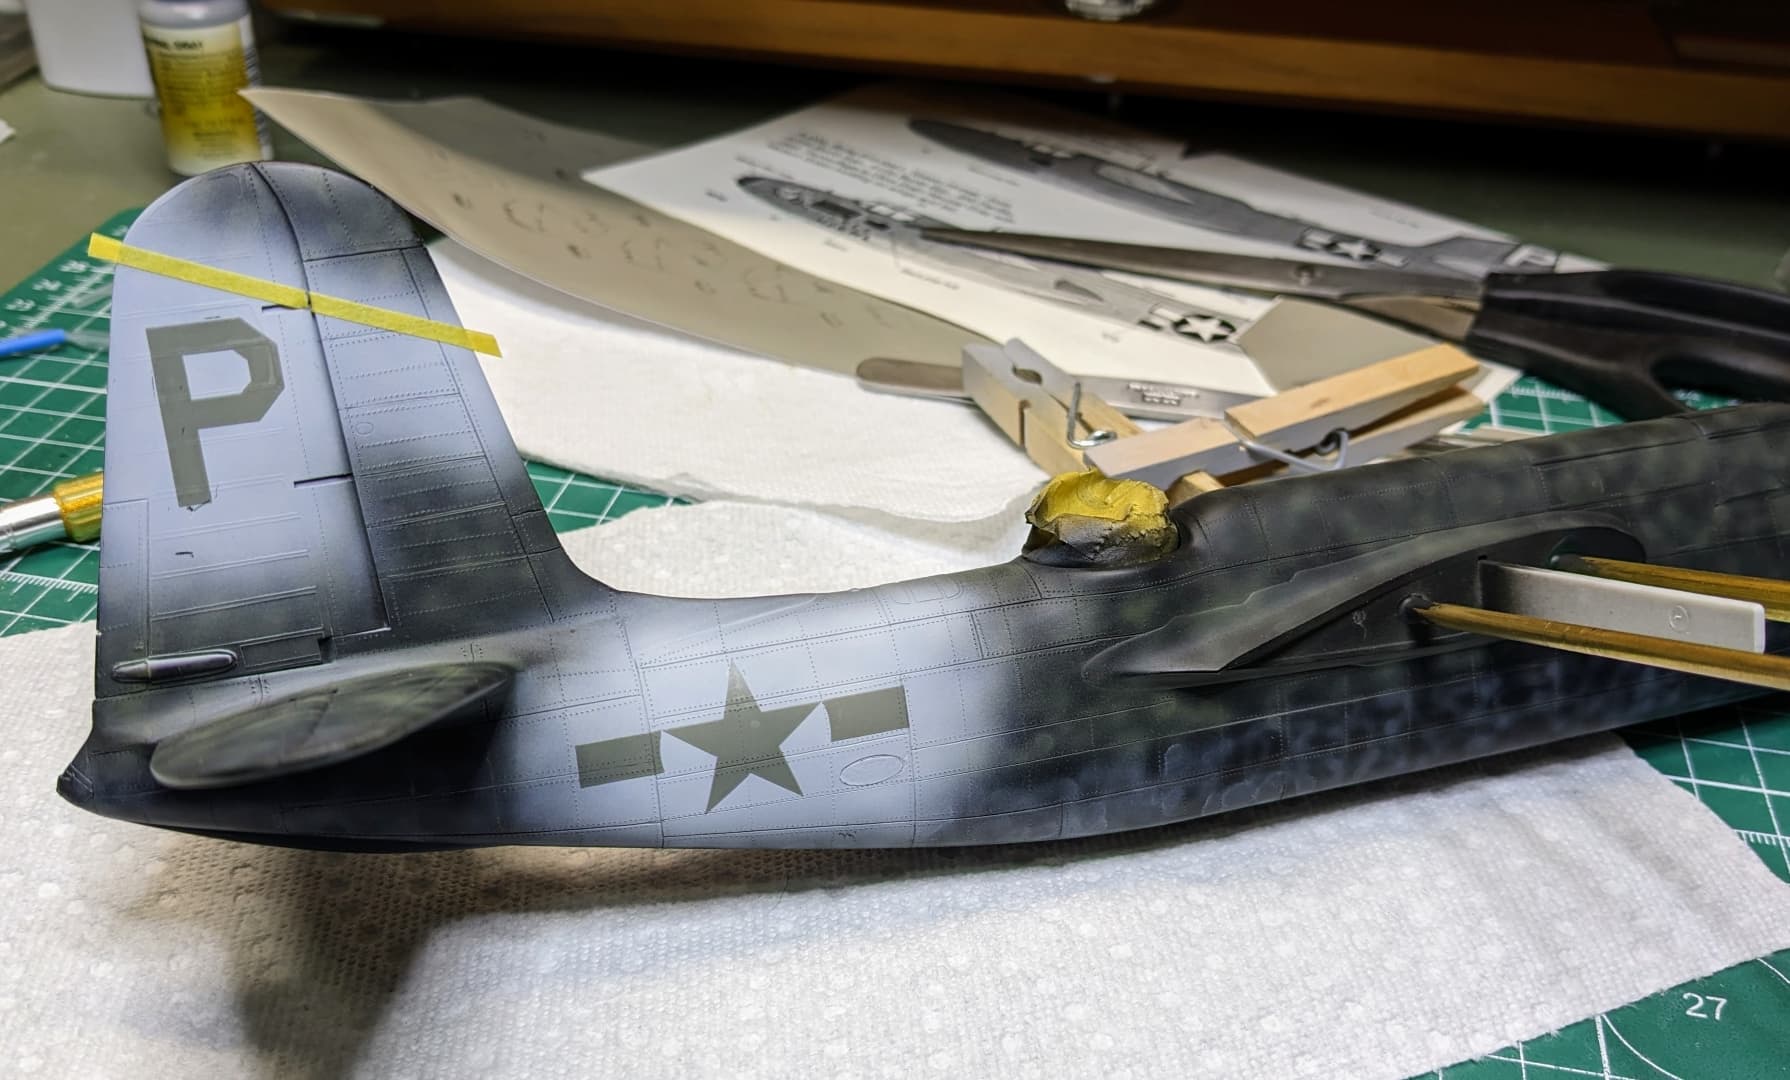
I then restored the black basing and mottling in the white over sprayed area and applied two different blue colors. One for the national insignia and the other for the medium blue trim on the nose, wingtips, and vertical stabilizer tip. The remaining mask for the national insignia was applied as was masking for the medium blue areas.
This aircraft has black wing walks with a red edge on the upper wing surfaces. So red was painted in these areas and the red edge masked off.
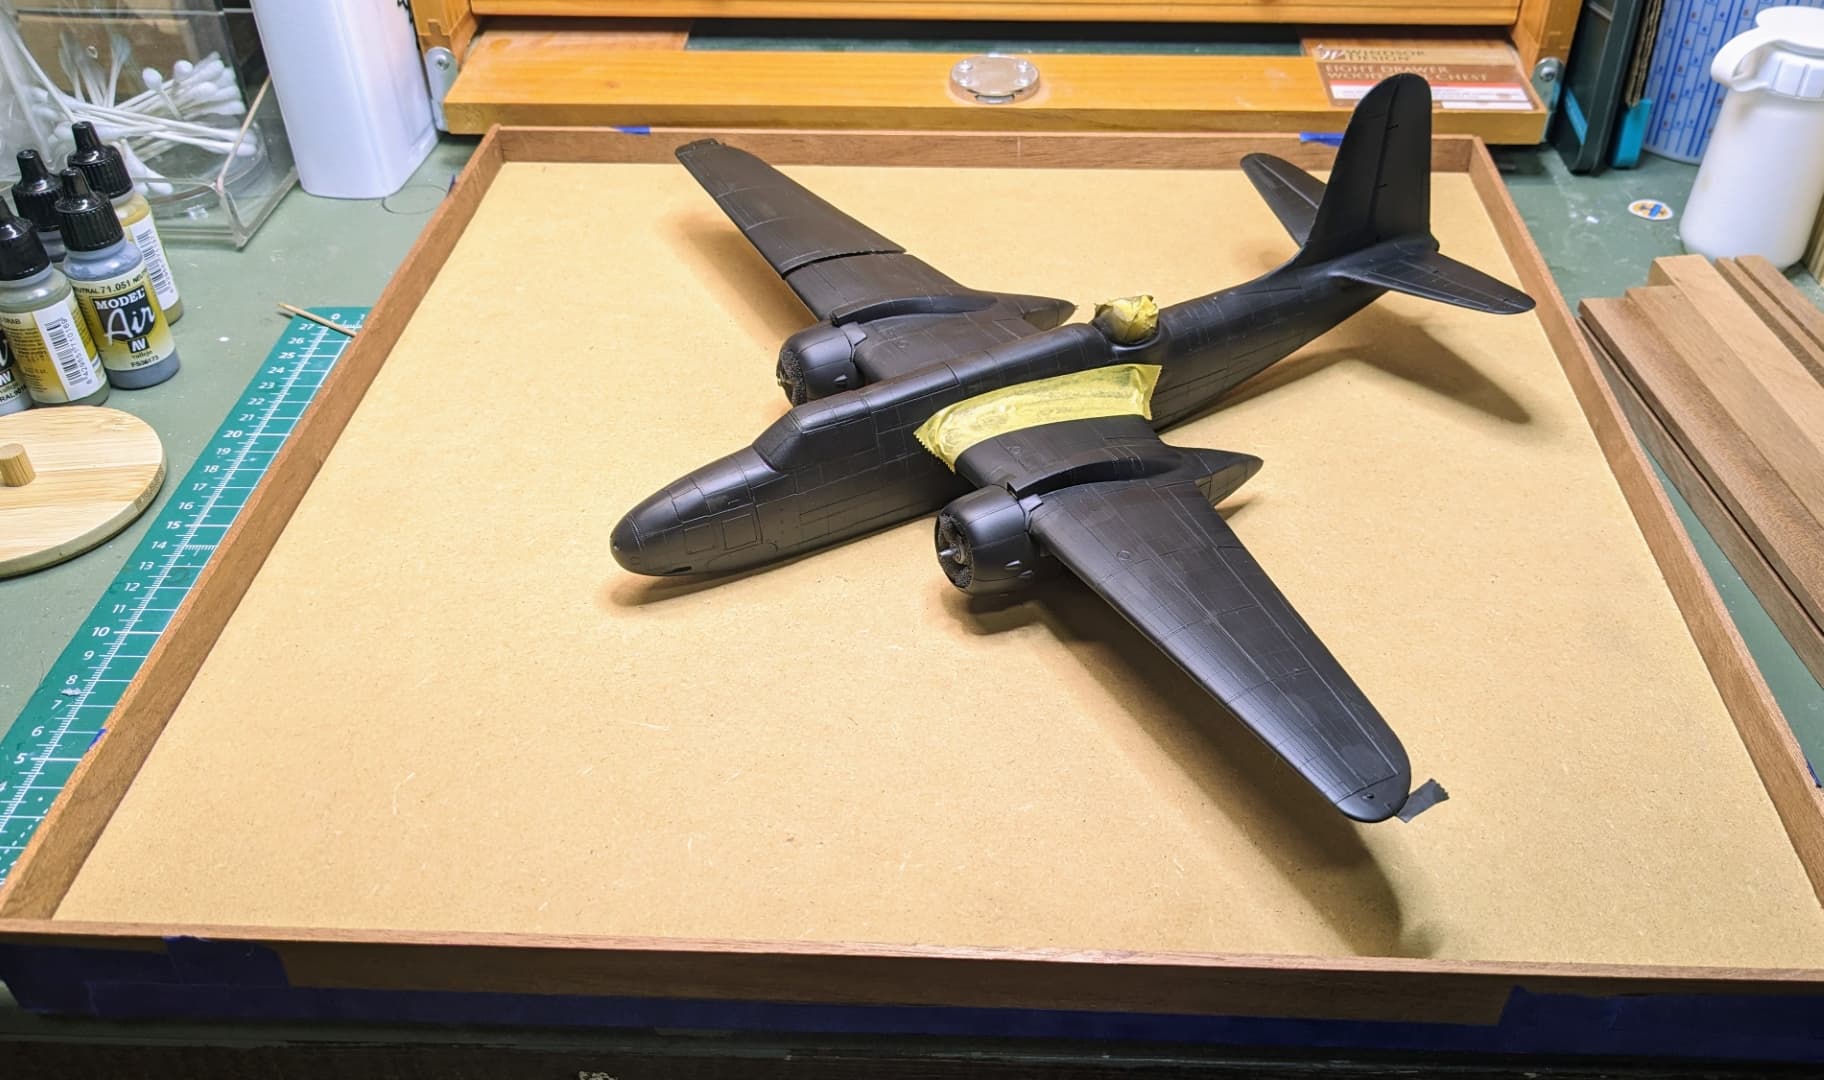
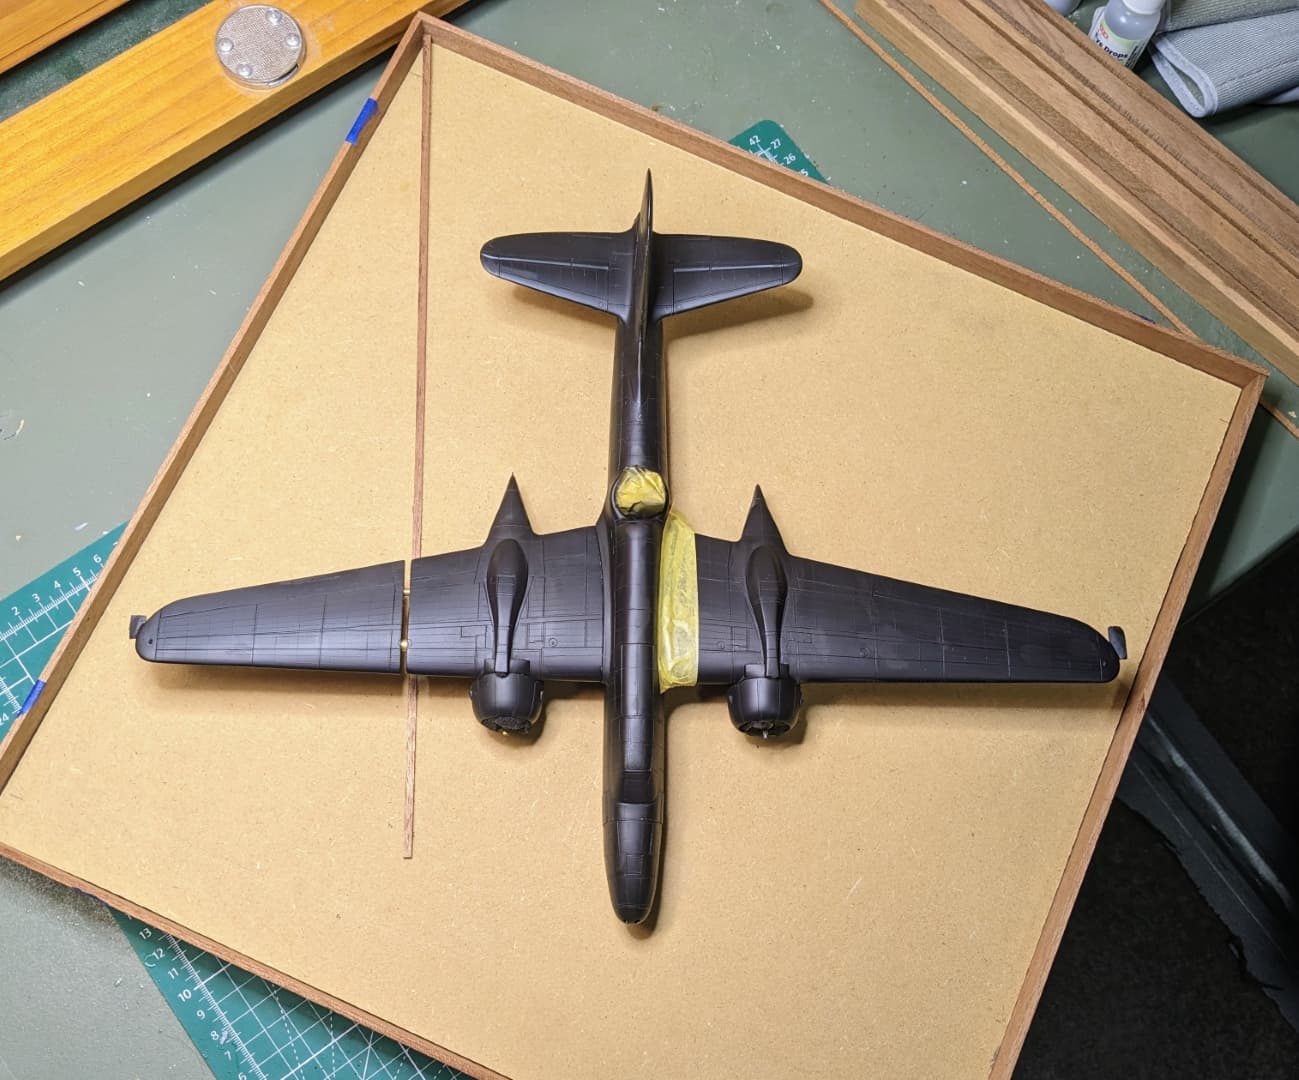
Finally I painted the walkways with a black mixture. I think it was Tamiya NATO black, but cannot remember. Black basing was restored as was mottling. The model is ready for paint except for a small repair I had to do on the aft end of one of the engine nacelles.
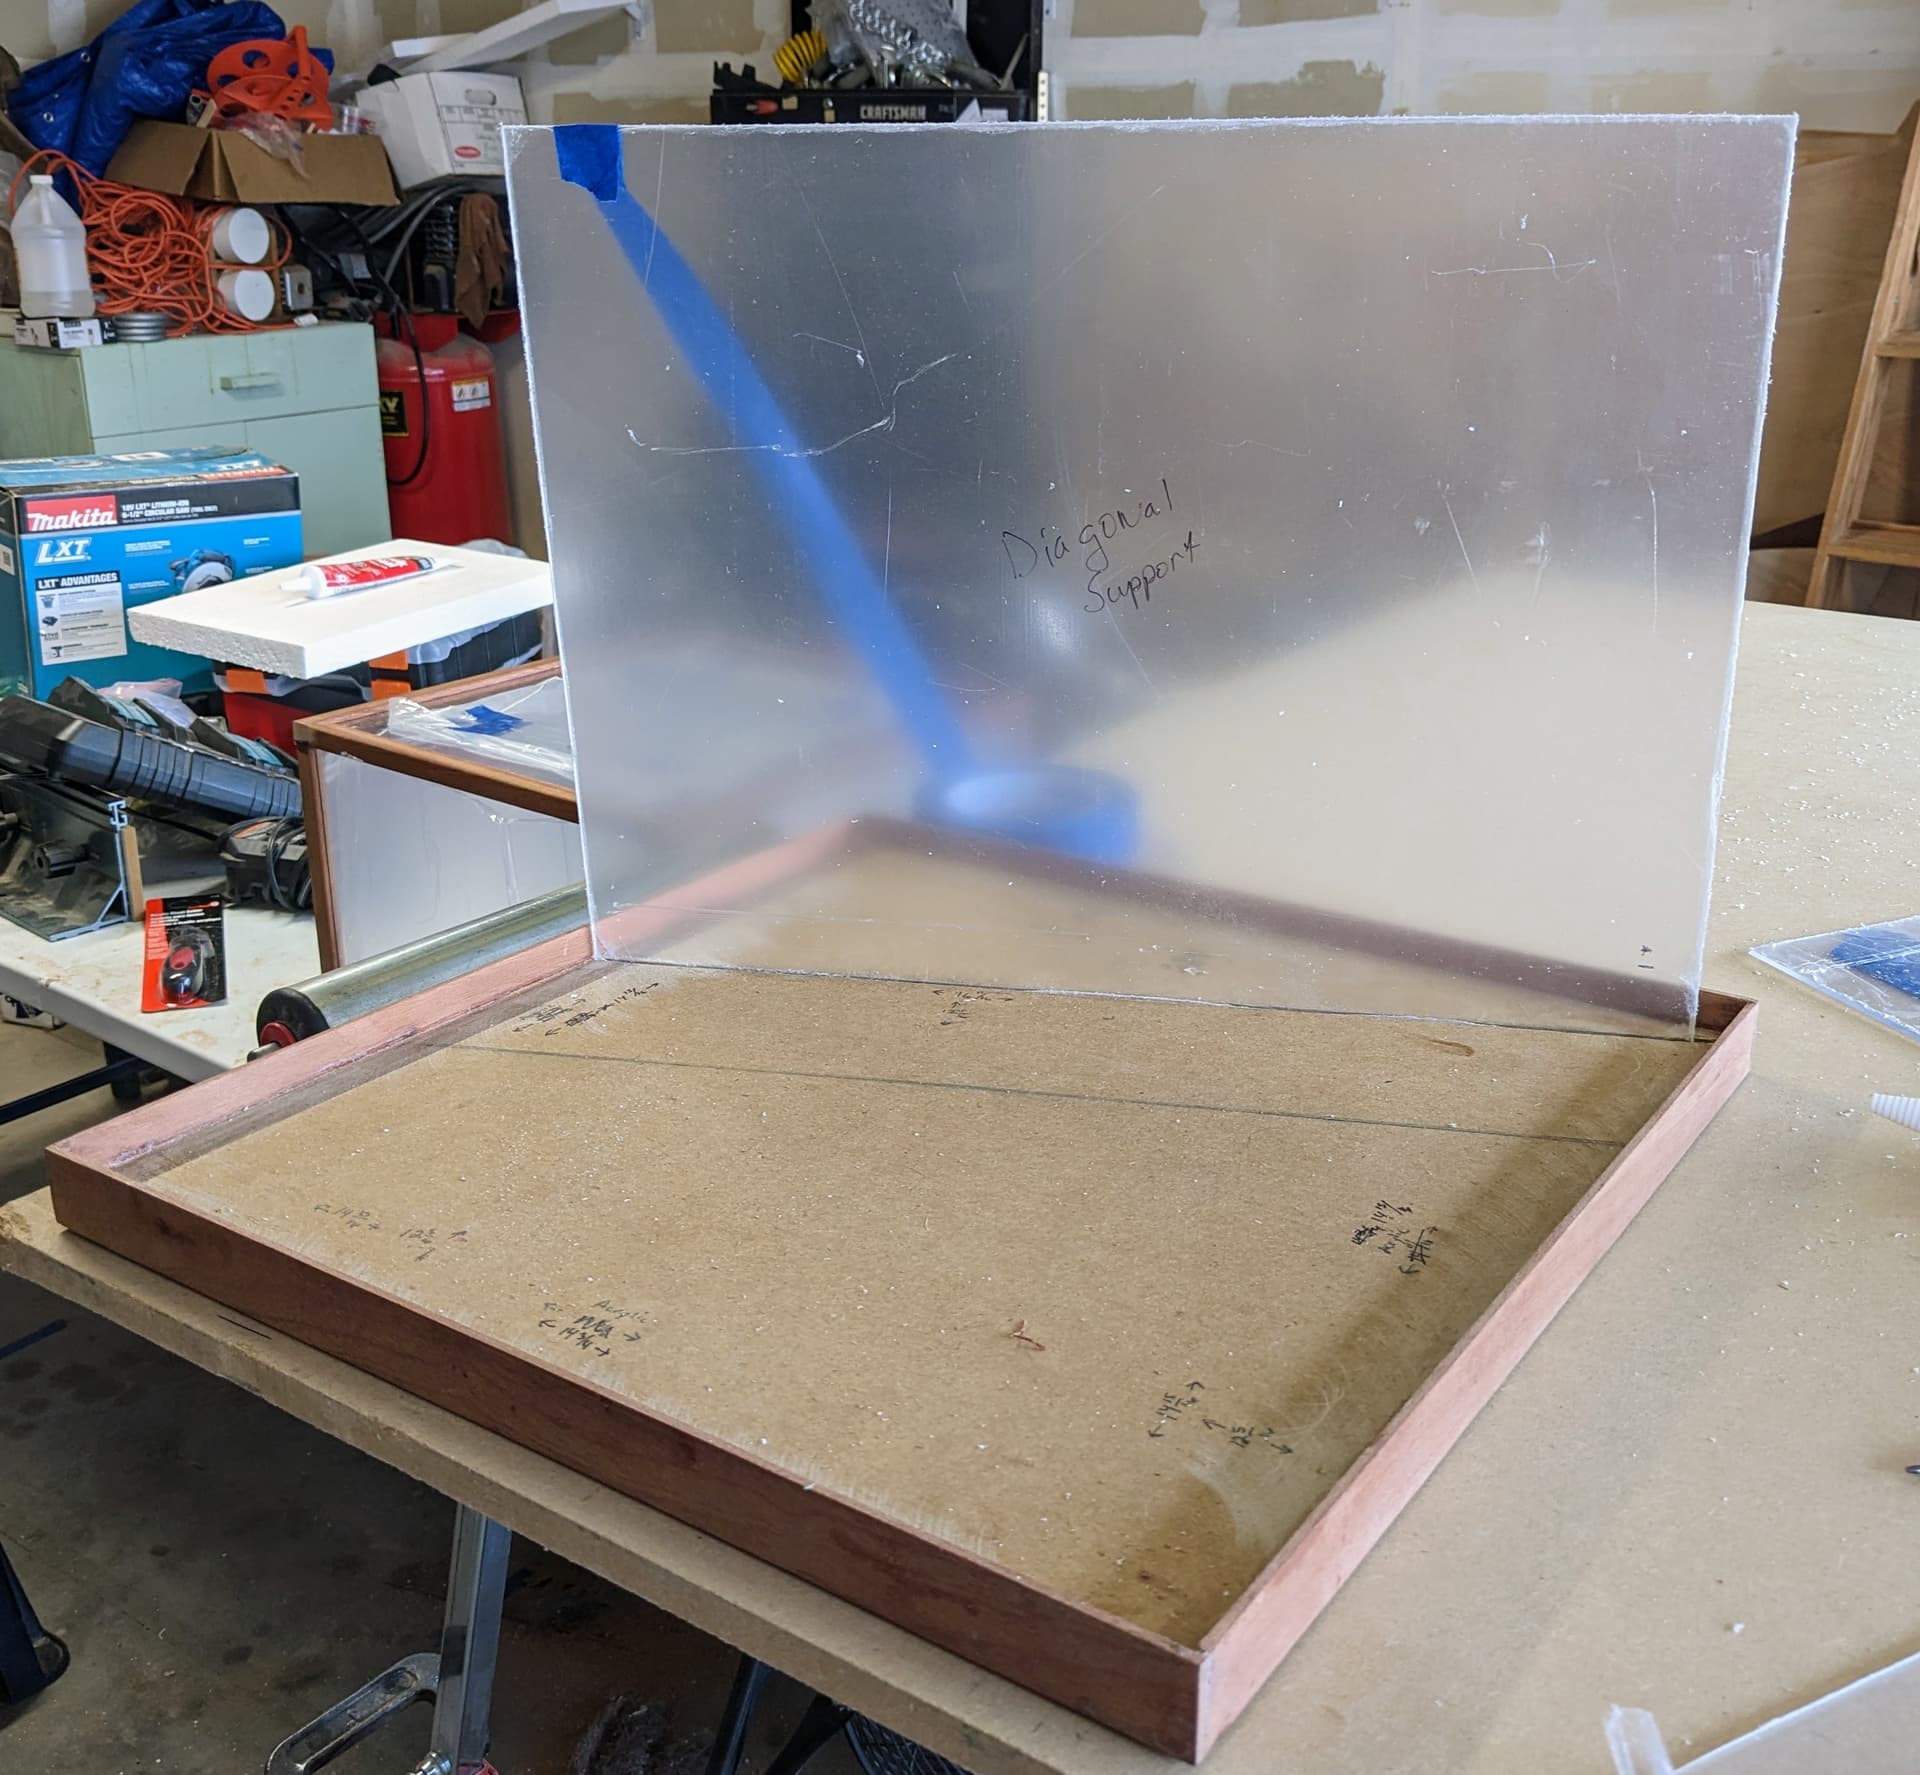
I plan to display this model in an enclosed display made from acrylic sheet and wood. The base will have simulated ocean and as I mentioned early in this thread, the model will be supported at the wing by an acrylic sheet that runs diagonally across the display form the right rear corner. Here I am double checking that layout and determining the actual location of the slot in the base for the acrylic support sheet.
I’ll have more on the display at another time as the weather has prevented me from working on this in my garage. The painting was also delayed because our house is not well insulated and it was bitterly cold this week.
8 Likes
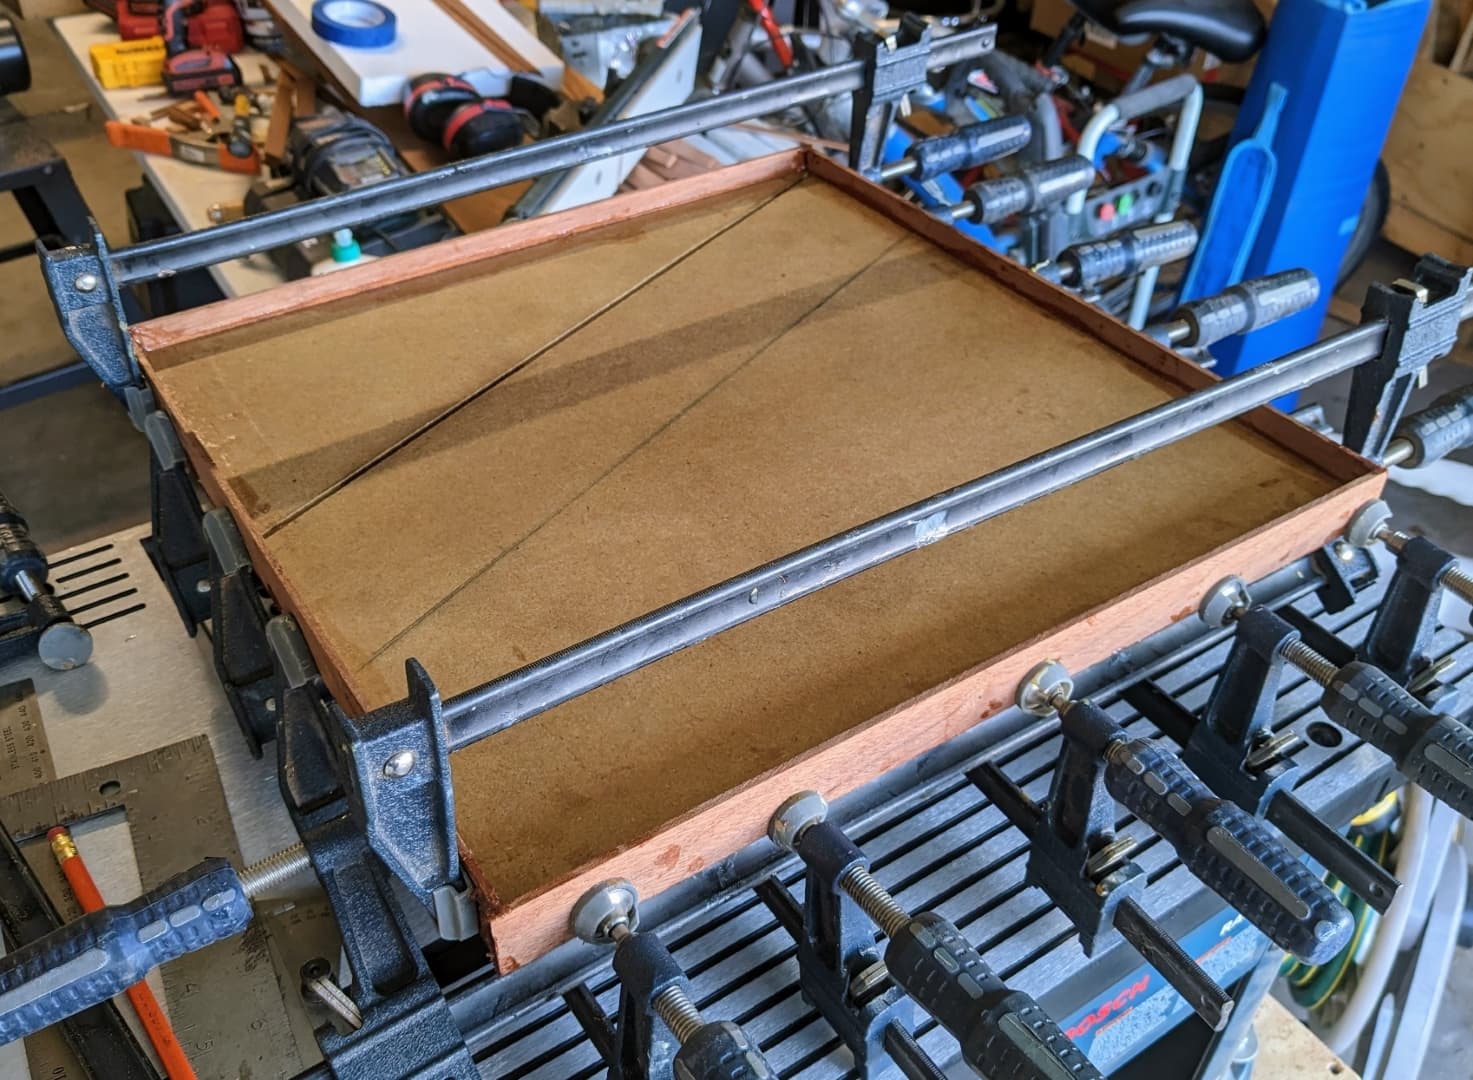
I’m nearly ready to continue painting later today, but in the meantime, I had to take advantage of warmer temperatures to get some of the woodwork on the display case accomplished. As mentioned previously, it is acrylic and wood construction with wood reinforcing the edges of the acrylic sheets and a diagonal acrylic sheet internally that supports the model.
What this mean was creating corner vertical pieces with slots for the acrylic and one corner having a third slot matching the diagonal slot. It’s not perfect, but I think it will work. I glued up the top piece yesterday, trapping the first piece of acrylic. Today I am gluing the vertical supports in position to the top piece.
This is the bottom piece which I showed in yesterdays post. When cleaned up and varnished, it will have a brass name plate attached (which I already have). This is where the ocean part of the display will be and acrylic support sheet will fit in the slot cut into the base. The ocean will be on both sides of the acrylic sheet (although I am considering adding a spit of beach on the backside, (we’ll see). BTW, the other line on the base is a pencil line I used to line up a jig for cutting the diagonal slot with my circular saw. And that back right corner is where the one vertical support will have to have three slots.
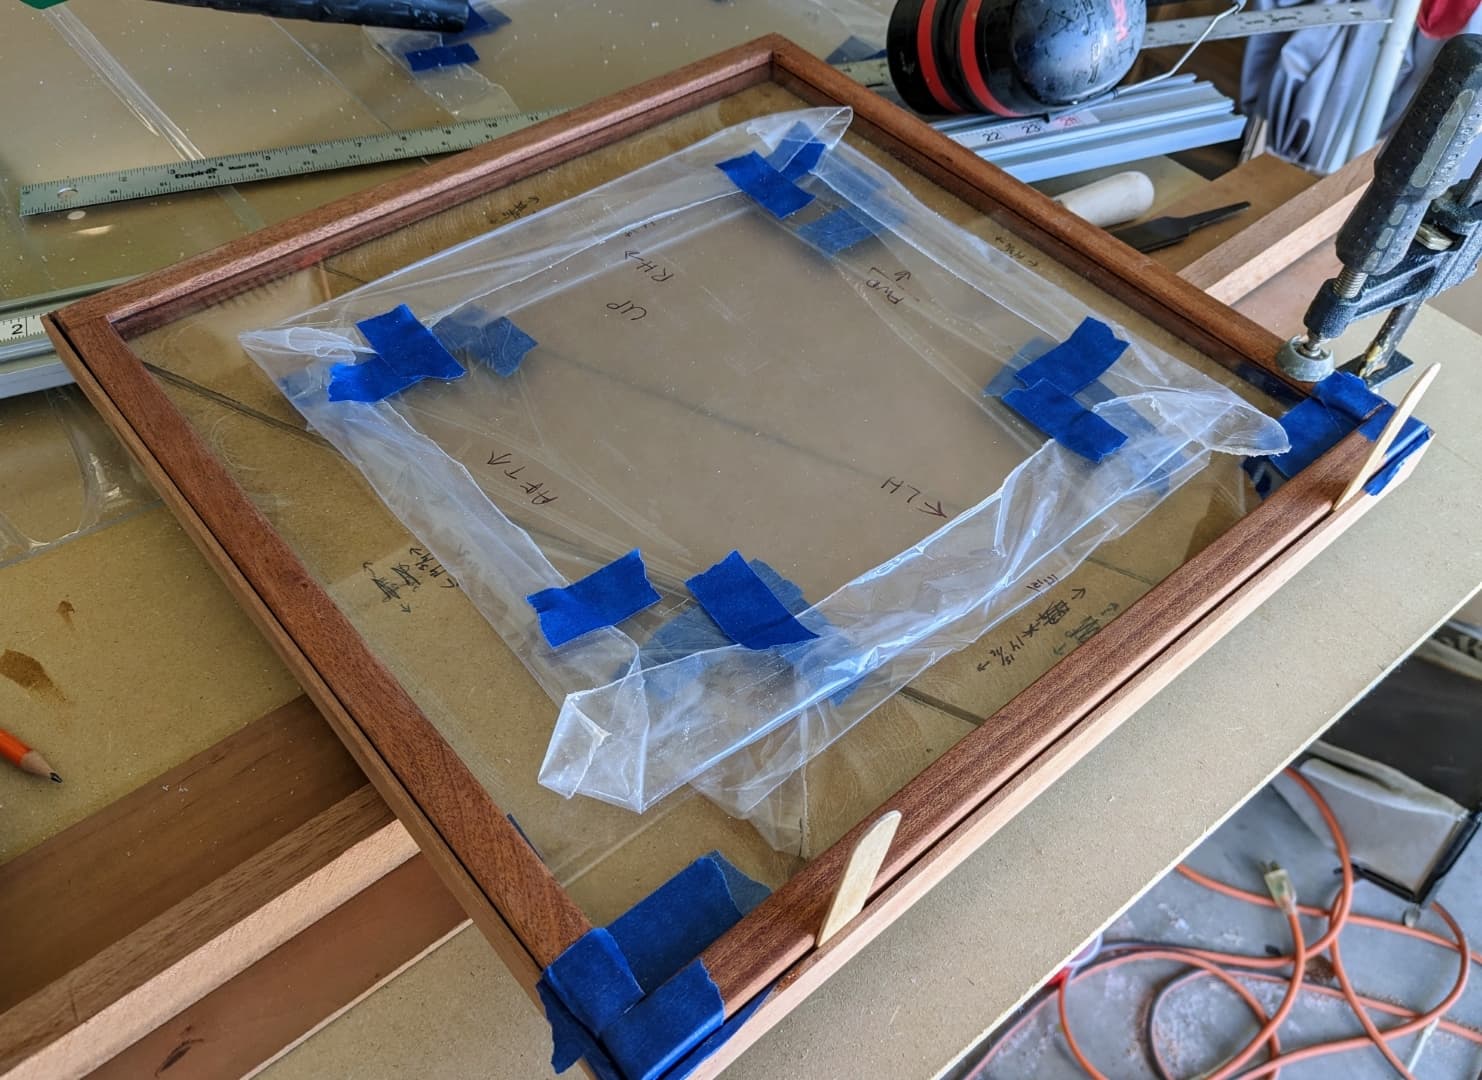
Here’s the top piece with the acrylic sheet after gluing together three sides first (to correctly size the acrylic) and then glue on the remaining edge piece. It’s in the bottom because I want to ensure the top is the same as the bottom.
This morning I glued up the vertical supports and placed the bottom on it to keep them in line while the epoxy cures. So it’s upside down in this photo. I’ll probably pin these to the top for added strength although the side acrylic sheets will have to be bonded to the vertical supports and top in order to allow me to remove the top in one piece, so that will add some additional strength.
I have a bit of edge routering to do , some sanding, and then finish the wood with tung oil and varnish. I know this finish looks good because it’s the way I did the cabin cruiser I built. Sorry, shameless plug, but the 10 years it took to build this is why I was away from modeling for a long time.
8 Likes
Very cool on all fronts… And that cabin cruiser looks sweet
1 Like
I have enough photos for an update.
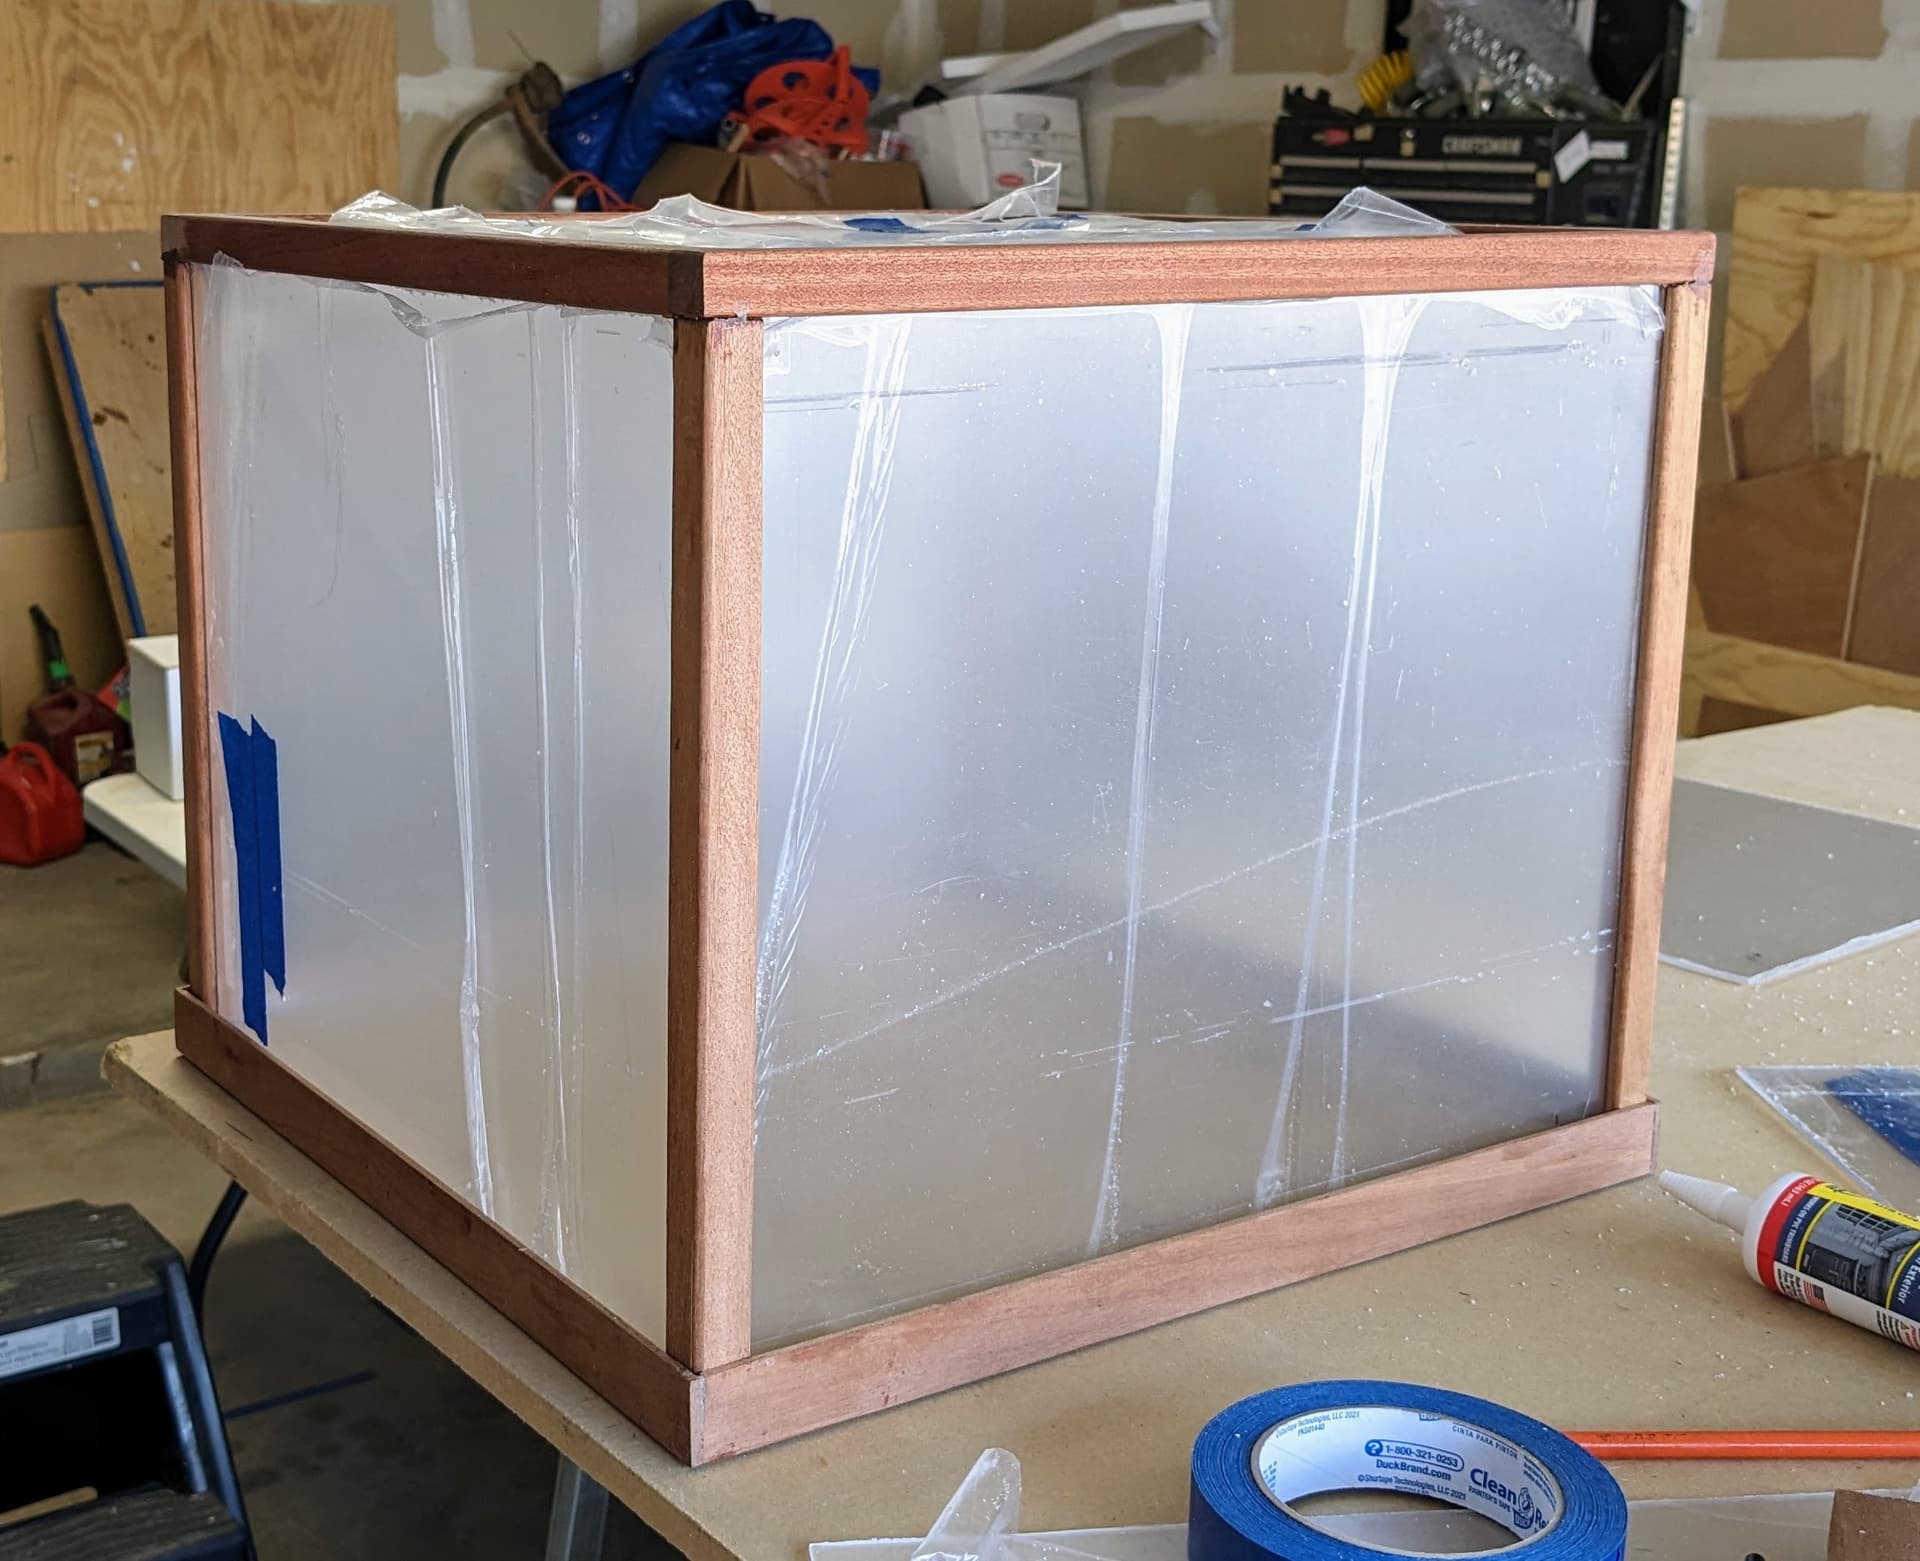
First off, the display case has had some additional work accomplished. The first photo shows what it will look like (of course the protective wrap will be removed from the acrylic).
The second photo shows (sort of) how the acrylic support sheet will be placed in the display. I am still working on this part but my main goal is to make sure it will be stiff enough to support the model when the cover is removed for periodic cleaning or whatever other reason.
I’ve also been doing the painting. Most of the base coats are on. I still have one more main color, (a green), to apply to the topsides. I’m trying to give the appearance of worn paint. I’m still pretty new to this type of weathering and I am pretty happy with the look of the model so far, but the paint does not have that chalky look of sun bleached paint. I am hesitant to try and duplicate that look with an airbrush for fear of messing up what I have already. I am thinking perhaps that I can accomplish that chalky look later using oil filters and a flat coat.
I will also be adding a panel line wash and some sponge chipping. I thought about going the chipping fluid approach, but decided to leave that technique (also untried by me) to another model.
10 Likes
Man oh man, I am pleased as punch. This is by far the best paint job I have ever done. It may not be up to the best out there yet, but I am personally very happy. I will give it 24 hours, then clear coat so I can apply the few decals I have to use. And then on with more weathering. I found several tutorials on fading paint with oils and I am going to use that approach. I have a test mule to try it out on first. Yee Ha!
12 Likes
That’s a great feeling for sure! It’s looking good!
1 Like
You should be happy with it …paint looks excellent
It does indeed look good!
Thanks Johnny and Spitfire
Well this has been a up and down week. The A-20 is moving along just fine. The display case, not so much.
The decaling went well, although I have to say that I was somewhat disappointed by the Aeromaster decals. They were thicker than I remember and it took several applications of Mr Softer before I got them to behave. But that is behind me now. A coat of gloss clear, a pinwash later and I am nearly ready for the next phase, oil paint weathering. But first I want to add some exhaust staining and then a coat of satin clear.
Now as for the display case.
Here is the display case as of Sunday. Major assembly basically done, I was preparing to apply tung oil.
Then on Monday, while performing the tung oil treatment, the upper part of the case decide to commit suicide and dove off the table onto the floor. Ugh.
So I started putting it back together today. I think I can salvage this, but it was pretty frustrating after two weeks of working on it.
8 Likes