Hey Carl,
That’s a lovely concept with great execution. I hope your display case lid is repairable. Keep up the good work - this looks like a work of art in the making.
With best wishes from a chilly Switzerland,
Steve.
Hey Carl,
That’s a lovely concept with great execution. I hope your display case lid is repairable. Keep up the good work - this looks like a work of art in the making.
With best wishes from a chilly Switzerland,
Steve.
The A20 is coming along great guns Carl, really nice job. Complete bummer about the display box and all that hard work, however, knowing your skill level and dedication, I know you will salvage this, and get it all back on track … keep the faith ![]()
Thanks Steven and Johnny. I got the idea for the display from a fellow I found on the Internet that does similar type displays. At first I didn’t know how he did it, but the displays looked very realistic. I spent some time looking at the images he posted and came away with the mistaken impression that they were done in the manner I am doing this display. It turns out he was using what is called a front surface mirror and building half models. I only found this out later after discovering he had a patent on the idea and I looked over the patent.
Nonetheless, I still think this idea will work and while maybe not as realistic looking, it will still be an approach that opens up new possibilities for display. I believe it will help that the primary viewing angle will hide the gap in the wing because of the engine nacelle. Probably the biggest remaining concern I have now is the strength of the bond holding the wing and the plane to the acrylic sheet. I will be using slow cure epoxy for maximum strength and make sure that the bonding surfaces are roughed up for additional adhesion. This size of model is probably near the top of what is possible with the support I came up with and would need something more substantial for a larger model.
And I want to also give credit to another modeler for the spinning propeller design. An earlier model of mine used the circular disc and it looks okay, but I think this approach looks better. That modeler, builds inflight displays quite often and he uses the propeller design I am using. His models look quite nice and I want to try and duplicate his approach.
That’s the beauty of the Internet, with all the issues that have come along with it, it has opened up sharing of ideas.
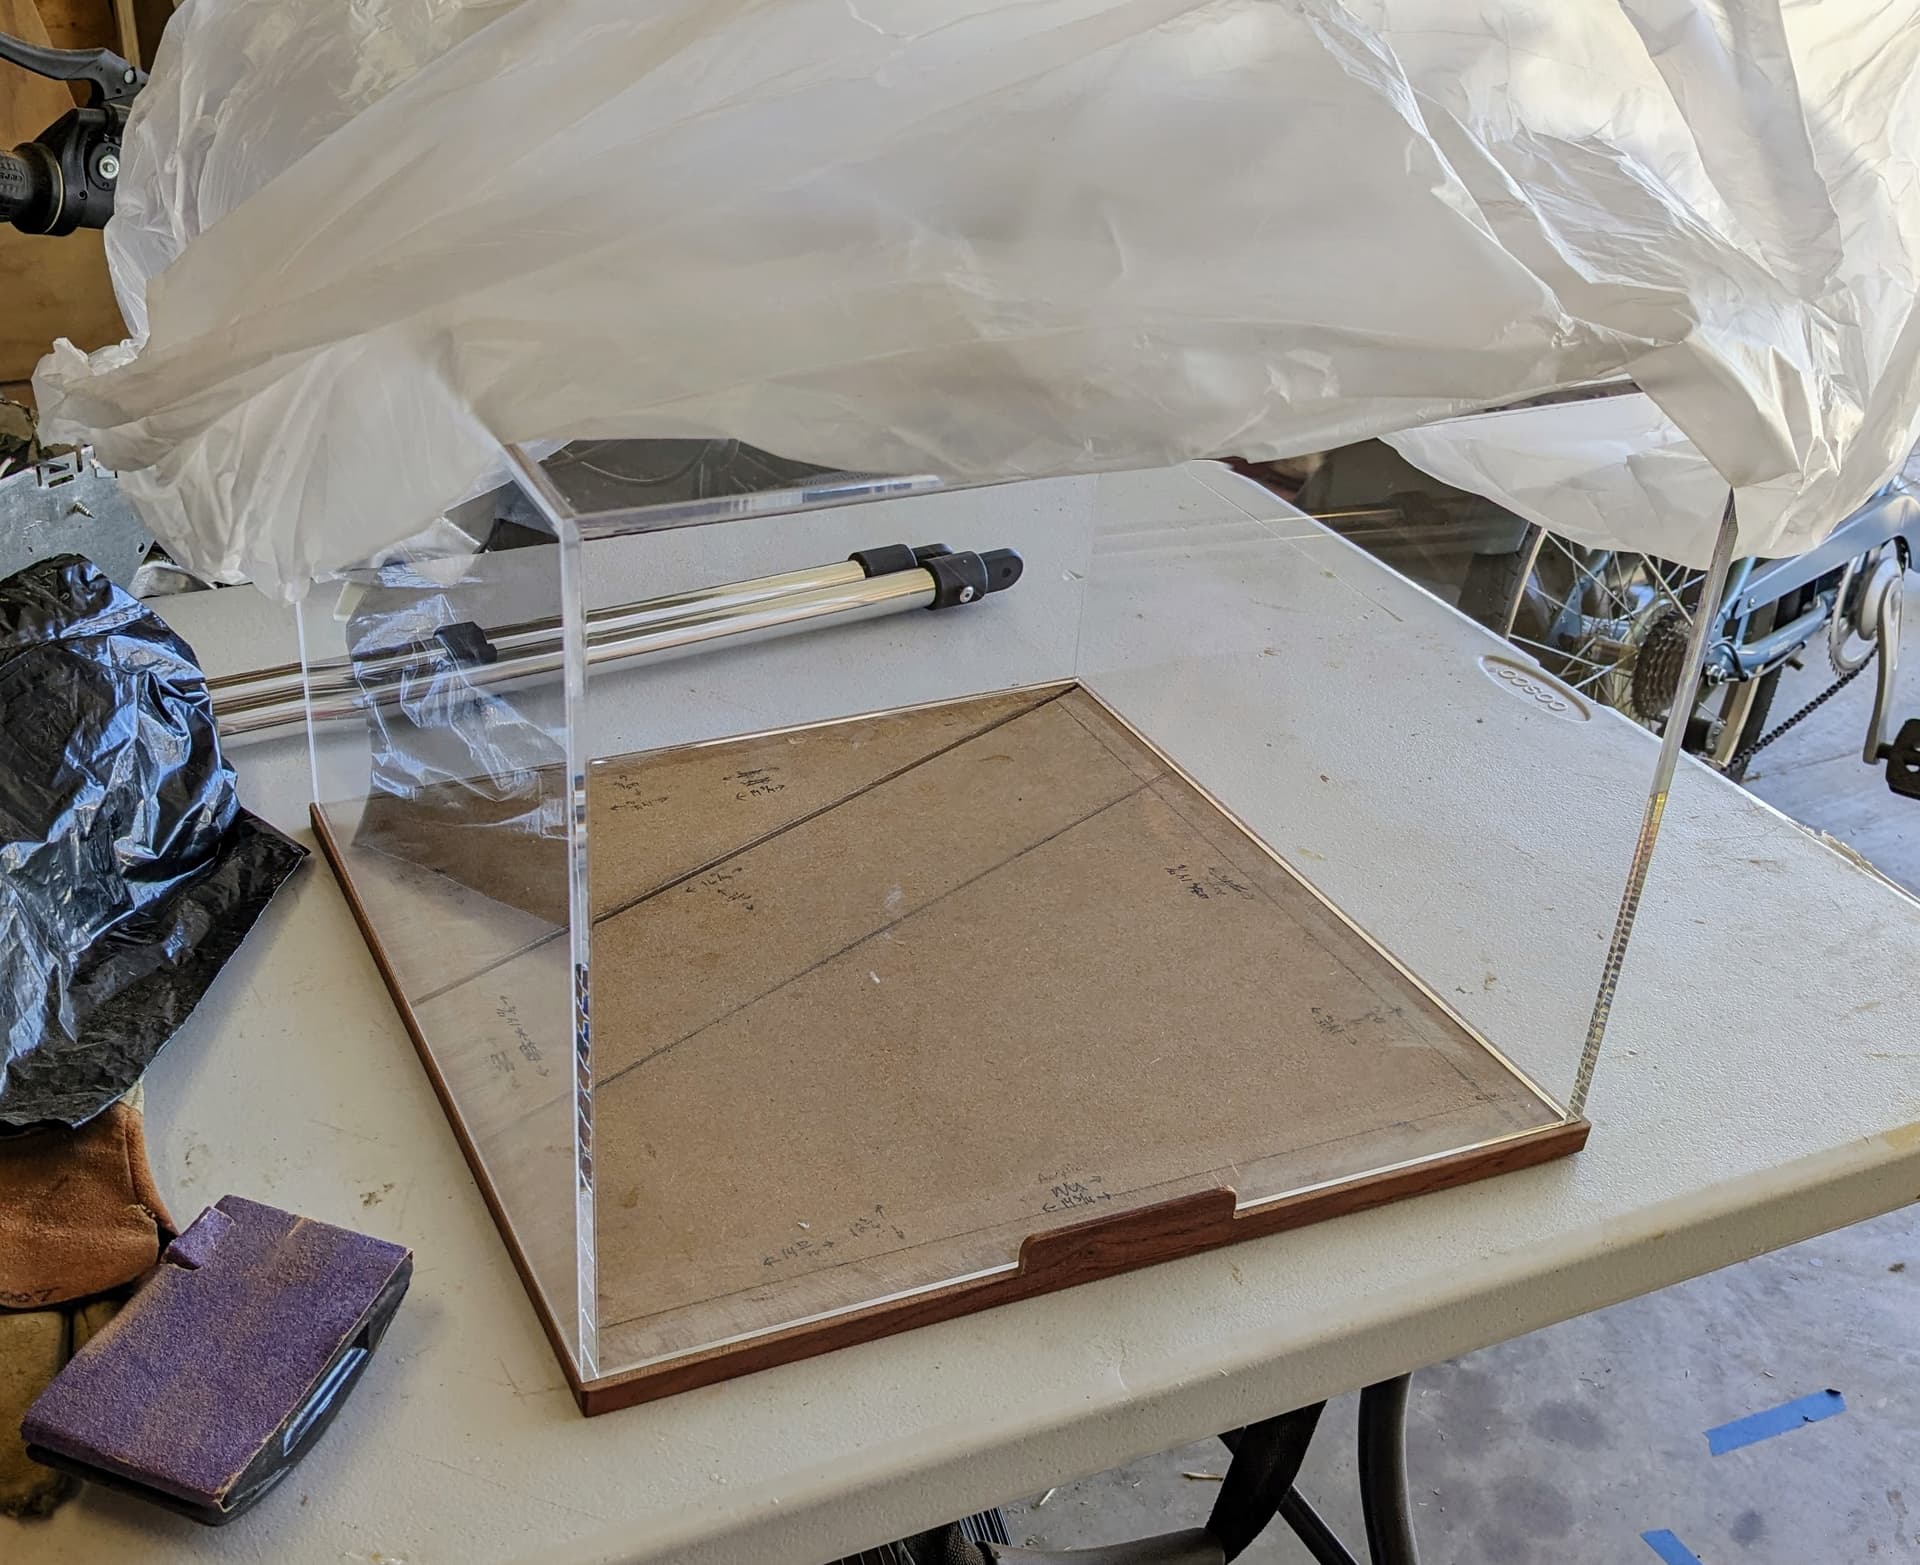
Well the display case is not to be. I kept running into too many problems, eventually culminating in unrecoverable issues. Of course there was the original suicidal leap off the table. I was recovering from that, getting pieces assembled again. I had decided to glue in the acrylic sheets this time to strengthen the cover. Alas, the original reason for not doing this occurred, one of the glued in pieces developed some cracks visible in the viewing area.
After a day of thinking about it, I decided to continue working with it and try to ignore the cracks, assuming I might be able to stabilize them with some thin acrylic cement.
I got the cover fully assembled and it was much more sturdy than previously. However, the internal acrylic support sheet for the model, no longer fit and had to be reworked. I managed to get this fitted, but the acrylic no longer lined up with the groove cut in the base. It was close, but off just enough to require either widening the grove or shortening the internal acrylic sheet (which is what I elected to do).
So you can see a pattern developing here, plans made, attempts at accomplishing the tasks according to the plan, unexpected difficulties, alternatives explored and attempted.
Okay, so all of this was going along and it still looked like I was going to be able to use the case, albeit not quite as nice as I had originally hoped. At this point I started peeling off the protective plastic and guess what. The tung oil I had applied last week had seeped under the protective plastic. Reasoning I could simply wipe this off, that’s what I tried to do.
Despite my best efforts, and using a variety of different solvents, there was substantial residue on the clear areas that would not come off. I thought this was the end of it.
A day later I elected to try one thing (again the pattern repeats). I happened to have a buffer along with several fine grades of sandpaper. Using the buffer and progressively finer grades of sandpaper, I managed to remove the residue. Now to get rid of the sanding scratches. The buffer had several grades of buffers and I have several different grades of polishing creams.
I had my doubts about the acrylic being able to withstand the buffer without cracking, but I reasoned that at this point, I didn’t really have anything to lose by trying. SO I spent some time buffing one pane of the acrylic and managed to get it fairly clear, but not crystal clear, you could still see faint scratches.
Last ditch effort time. I know from modeling that Future applied to canopies does a remarkable job of making them shine and crystal clear. I applied a bit of future to the acrylic sheet and it did clear up the scratches, but the surface was lumpy and despite my best efforts, I could not level it out.
I could have tried buffing the Future but I gave up at this point. There are a couple of reasons. First off, I had doubts that would work. Secondly, I didn’t believe the cracked acrylic sheet would ever stand up to the sanding and buffing process.
So, I am going an alternative route for the display, albeit, an additional expense. I am purchasing a standard sized acrylic five sided box. I will have to remake the base to fit, since it is a bit of an odd size. And I will have to remake the internal acrylic support. But I am hopeful this time will work out better. We’ll see.
Damn, that’s an absolute bummer about the case …so much work that went into it … Kudos for sticking with the idea and case , albeit in a new form… ![]()
![]()
Sorry to hear that the case hasn’t gone well. A real shame as it was looking really nice.
The A-20 looks fantastic! Worth all of the work that has gone into it.
I’ve got a couple of these AMT A-20’s and you’ve given me a lot of inspiration to build one.
I’m really intrigued by what the finished article is meant to look like, in your mind, as it were. I’m building a 1/24 P-51D, the first aircraft I’ve built in decades, and have exactly the same wish to display it in flight with the wheels up, and like you, don’t want a post underneath. I must admit I hadn’t thought of rods through the wing, which makes sense as it hides more of them.
Thanks everyone, I am sure that I’ll get something I can live with once the new cover arrives. For me, the disappointing part is the lost effort. When I build something like this again in the future, I think that a different design for the wooden part of the case will be needed. Something that is strong without the need to glue in the acrylic, and something that allows a relatively easy way to install (and replace) the acrylic as needed. This would eliminate the need to try and keep the acrylic from getting damaged and I could stain the case before installing the acrylic.
As for the A-20, I am holding off a bit on more work because I have an upcoming trip in a couple of days and need to focus on some other (non modeling related) tasks. But I am basically ready to do the oil weathering next.
Matthew, I am not sure this idea would work as well for a larger scale model like the 1/24th scale Mustang without a lot of engineering thought into the attachment point. The tubes in the wings will support the model, but the weak point will be the attachment to the acrylic. I am fairly sure I can get away with it on my A-20 using epoxy, but I think a larger model would need thicker acrylic and some sort of mechanical connection.
One thing to keep in mind is that there is no getting around the gap created in the wing where it is attached to the acrylic. The acrylic I am using is 1/8" thick so the gap is not too bad, but a plane in 1/24th scale would need something thicker.
However, never say die, because there might be some way to minimize the gap’s appearance. IN the case of my model, the viewing angle from the side hides the attachment point. From the top you would see it as well as the acrylic sheet.
I guess this doesn’t help with the visualization. I will definitely post pictures of the completed project when it’s ready.
Bummer about the box. Live and learn, they say. Check out Scale Model Craft or Scale Model Craft Youtube Bill builds dioramas inside furniture grade display stands. or created furniture grade cases for his dioramas. ![]()
I’ve been experimenting with oils trying to find the best way to repro the fading of the Olive Drab paint. I found several videos outlining various techniques and I am trying some of them on my test mule. I did learn one thing I didn’t know before. OD is made from dark yellow and black. I tried with regular yellow and it came out green, but dark yellow can be adjusted to match OD with some careful attention to mixing ratios. I’ll post something when I get a chance, but have to take a trip for several days first.
Really nice work on a pretty “fair to middlen” kit. Great details.
Thank you for posting this beauty ![]()
Thanks Whitney, It’s actually not a bad kit. Some fit problems typical of the era, but definitely not limited run bad. Detail is weak, but there are aftermarket parts. However, I hope that ICM will come out with one in 1/48 to match their other bomber kits.
I hear tell that there is a 1/32nd scale a coming ![]()
![]()
![]()
Too big for me! I mostly confine bombers to1/72 scale but the A-20 is just too nice in 1/48 to pass up. I have an Accurate Miniatures B-25C conversion for the same reason. I have one 1/32 scale Trumpeter F-100 that I have had for years mainly because I have not steeled myself up to the massive amount of work that kit is going to need to make it better.
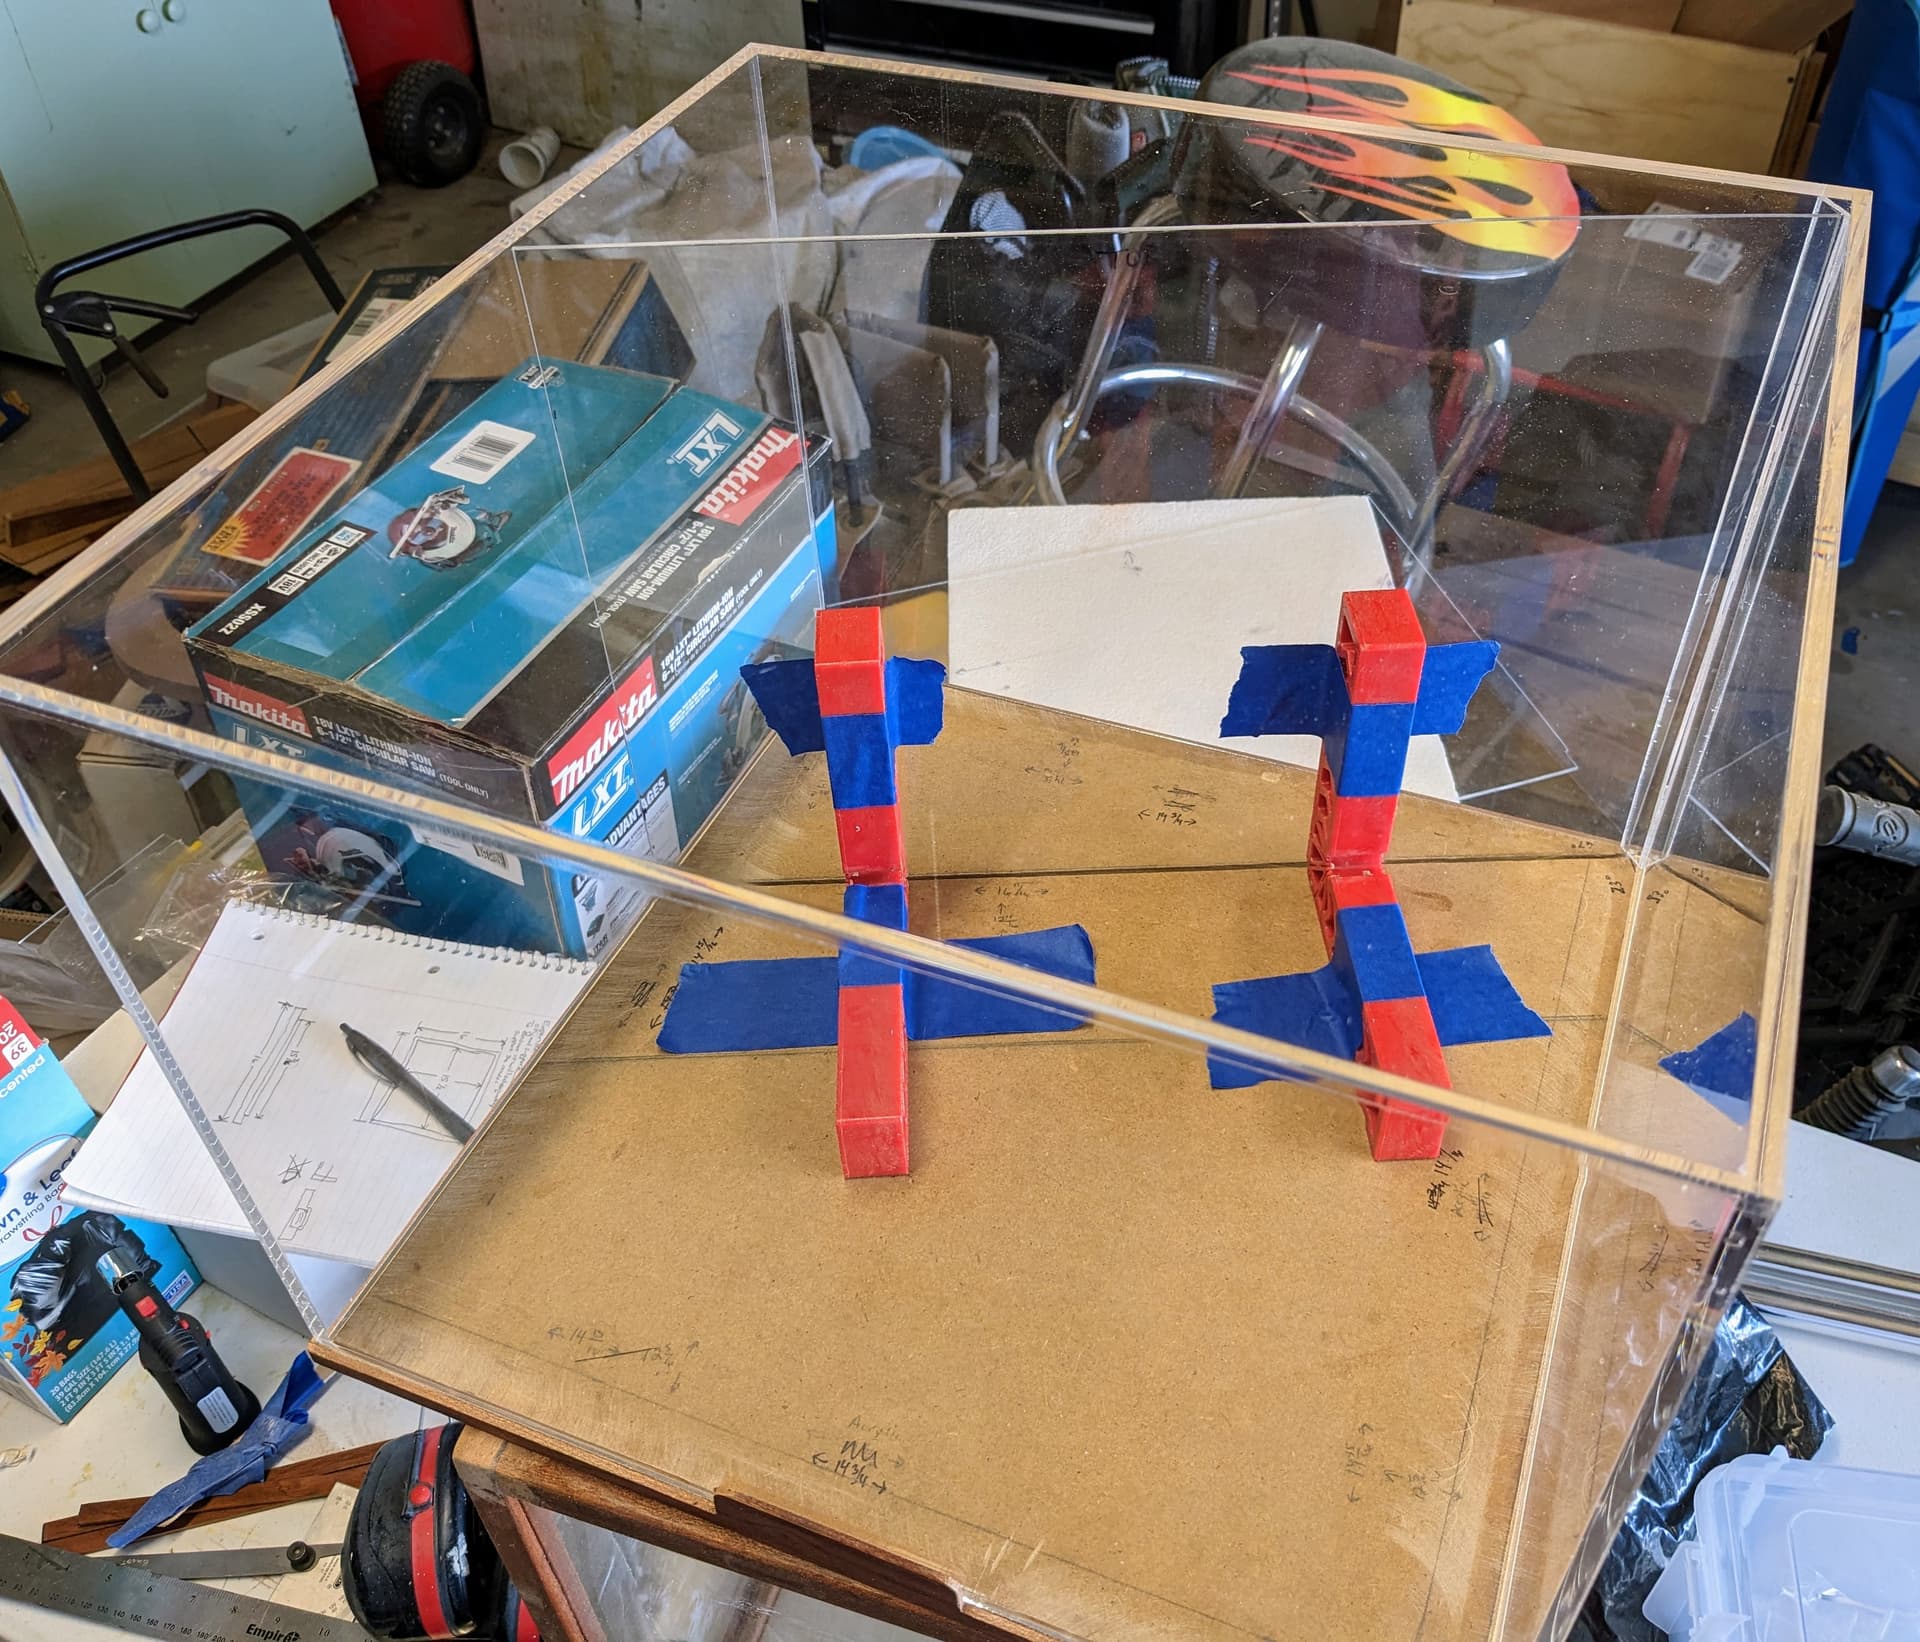
Here is a small update since the return of my trip out of state. Nothing new on the model itself, but I have received the replacement display case cover and it’s a beaut. I had to make some modifications to the base in order for it to fit, but that has been accomplished. The small vertical tongue on the sides is for the brass plaque.
Additionally I had to make a new acrylic support sheet. Although not shown here, that support sheet has been drilled to hold the support rods on the model and is ready to go when I get to installing the airplane.
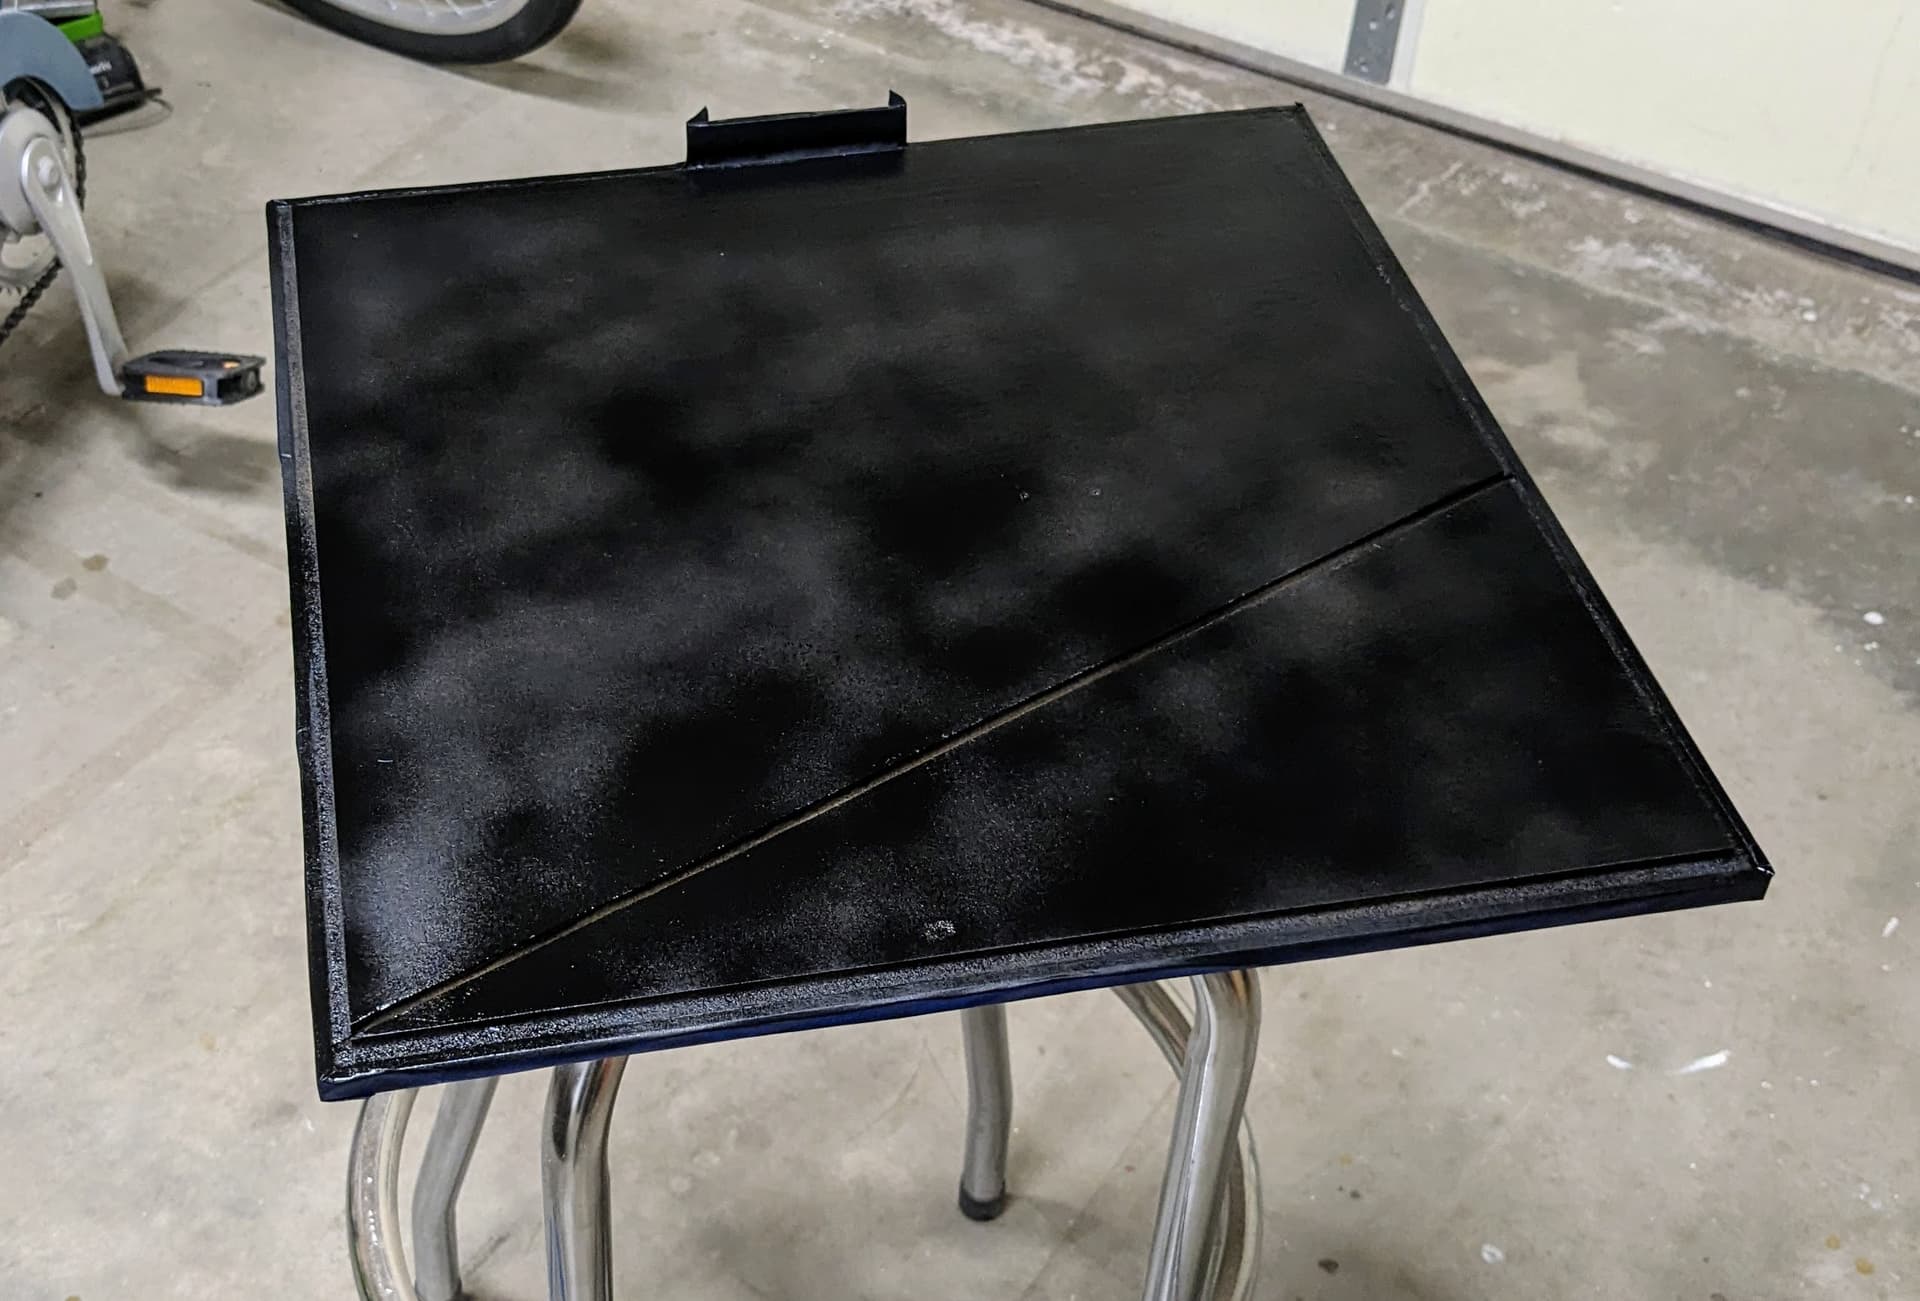
I prepared the base by first coating the upper surface with thinned PVA white glue Then I reapplied tung oil and varnish to the exposed wooden areas. And finally I’ve just sprayed the base with black laquer paint to protect it from the next step which is applying the simulated ocean. That is going to require a considerable amount of thinned PVA white glue when recreating the ocean and I wanted to make sure the base didn’t warp from the water in the thinned PVA white glue mixture I will be using.
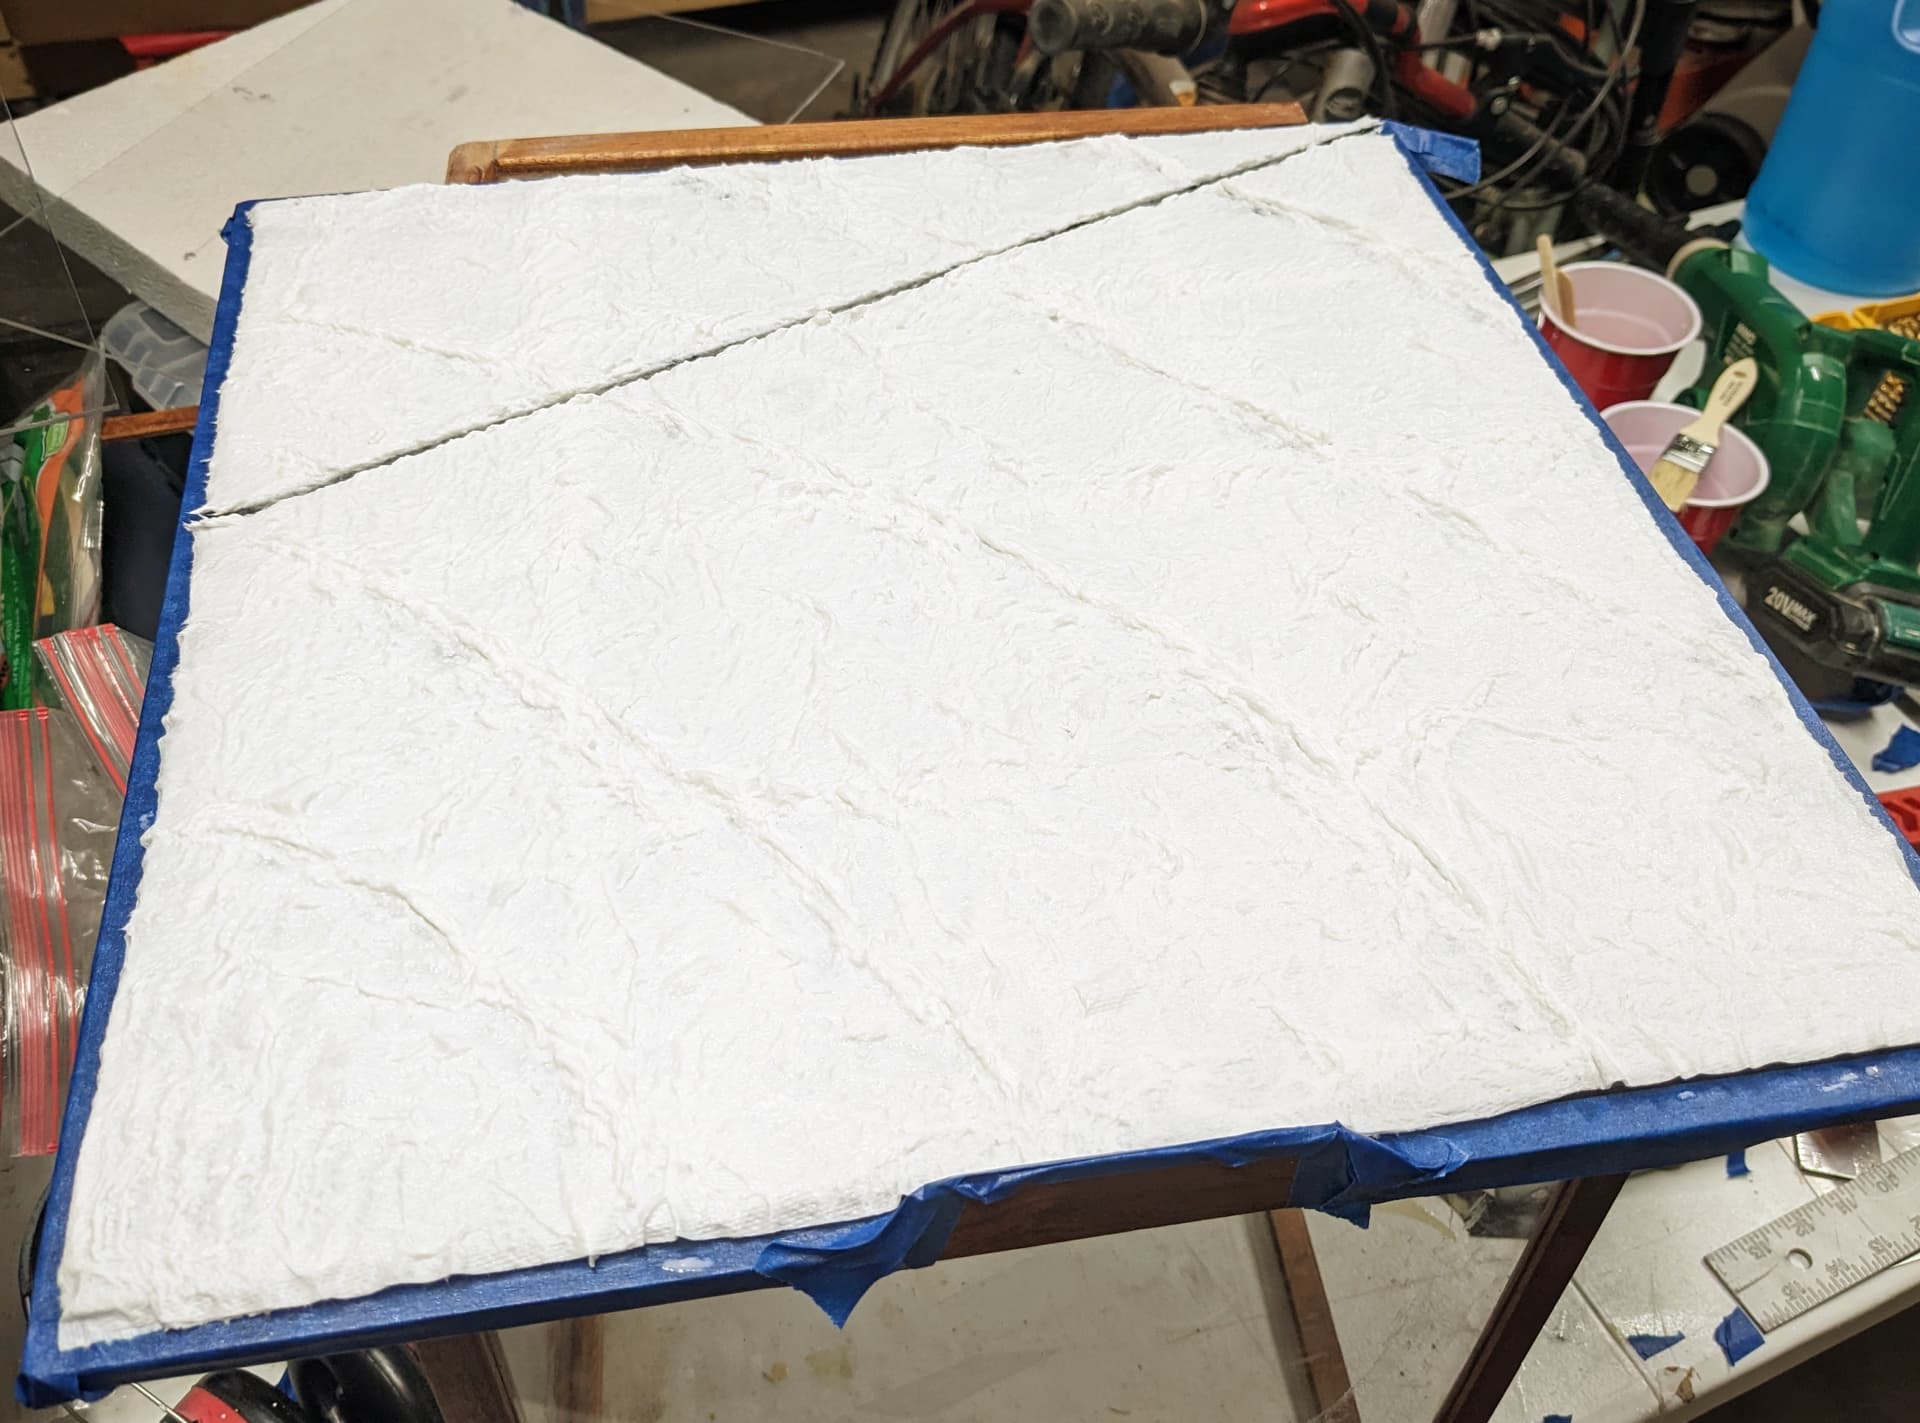
First phase of the toilet paper ocean . Three layers of toilet paper with water thinned PVA white glue, then some stippling and forming of the soaked paper. I’ll let it dry for three days before I go to the next step (clear gloss medium).
Really great news that this is all back on track ![]()
Thanks Johnny! ![]()
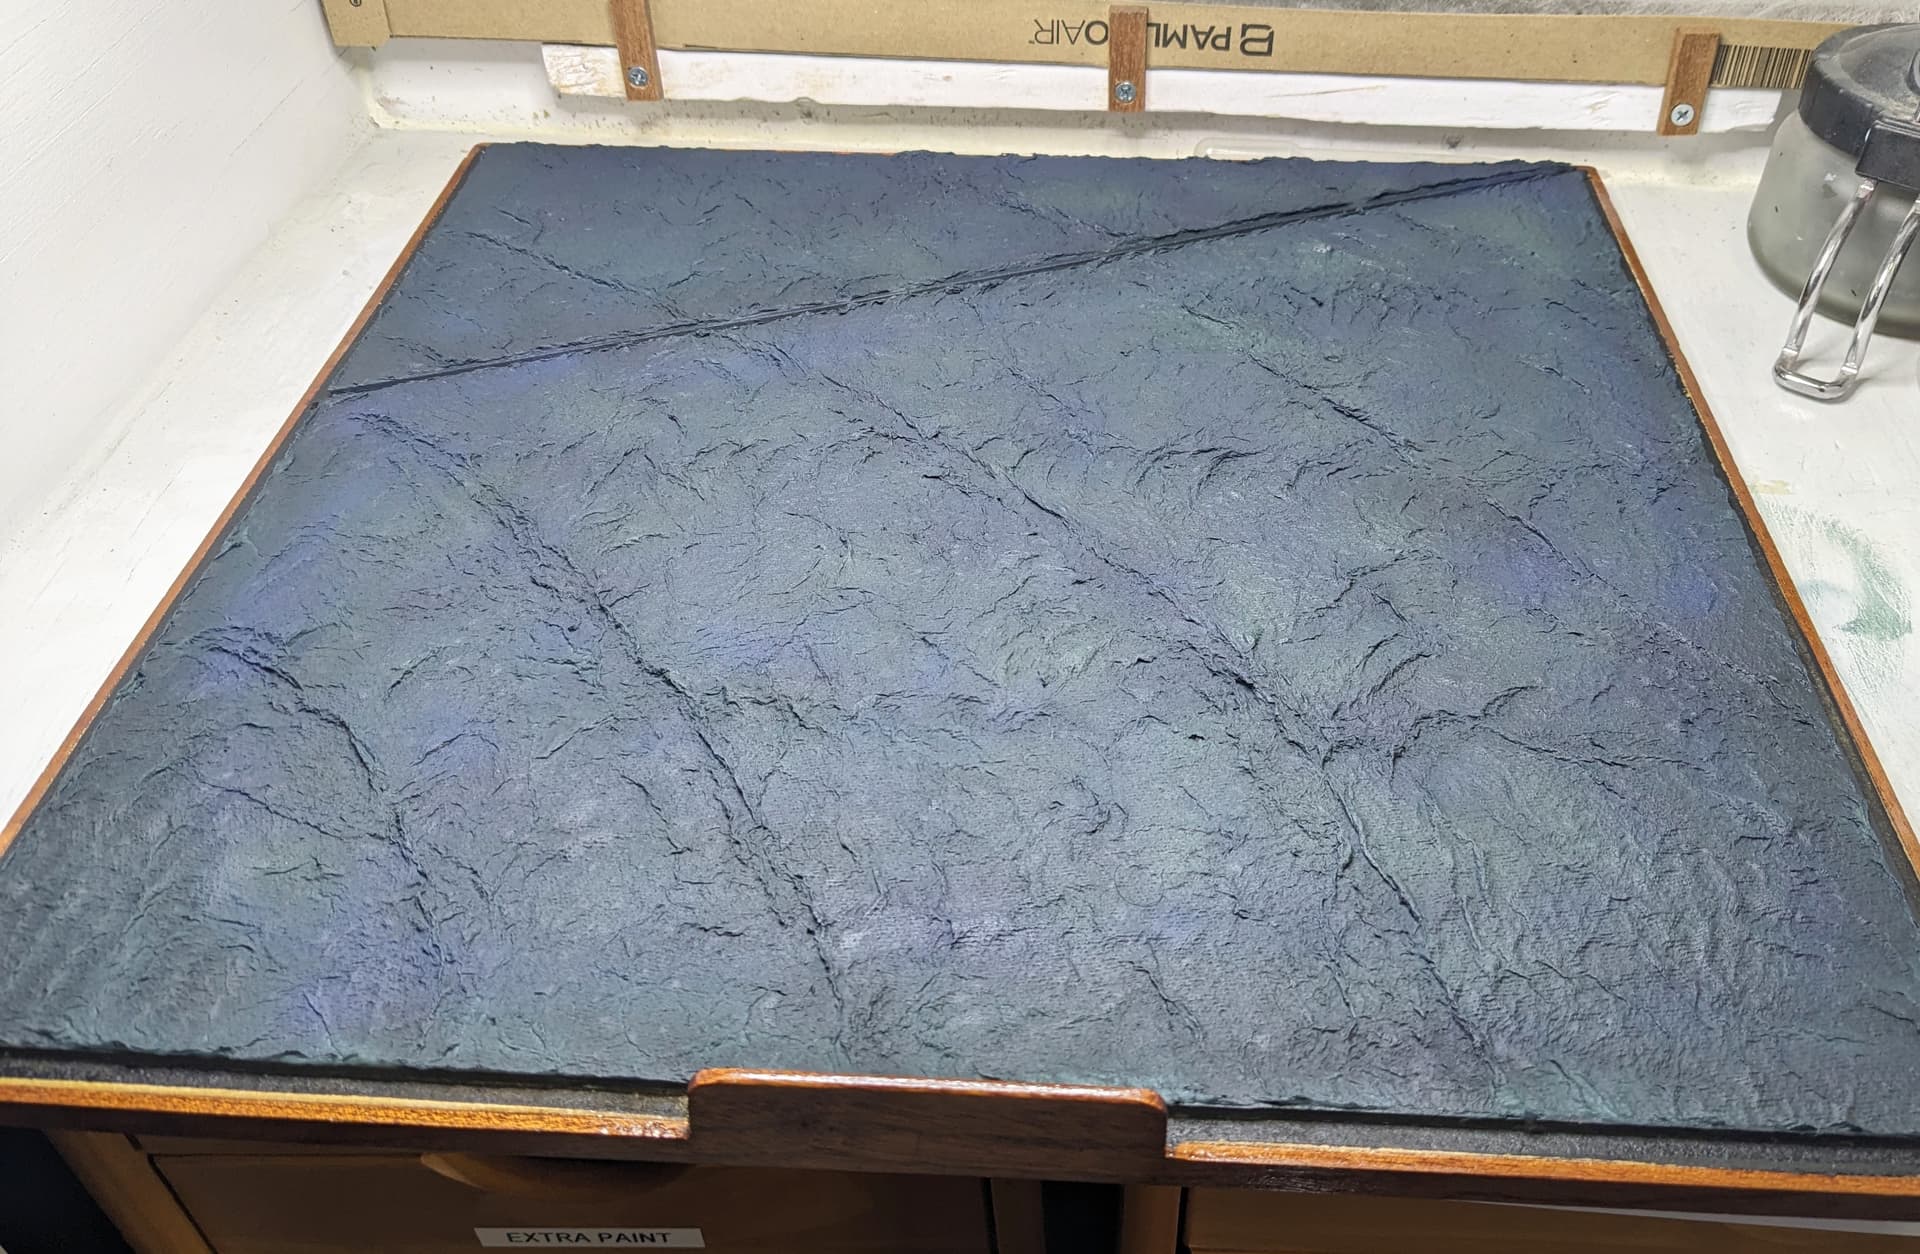
I got the basic colors down on the ocean now. Next up will be multiples coats of gloss to give it some depth, and then I will work on doing the whitecaps. It was actually fairly easy doing this, although I’ve been worrying about it for days. It did take an entire bottle of Tamiya paint plus used up some other colors that were partially empty, so an order for more paint is going to have to occur.
Considering the height of the waves (and that they are in the middle of the ocean) I’d refrain from whitecaps…
Very nice!