Looking very good so far. I agree with what Erwin said and not go crazy with the whitecaps if its that calm …
just lots of different depth shades and tones …
Looking very good so far. I agree with what Erwin said and not go crazy with the whitecaps if its that calm …
just lots of different depth shades and tones …
Thanks for the advice guys. It’s difficult to judge (for me) how far to go. I was only planning on a light dry brushing of the wave crests, mainly just to brighten up the surface a bit. I have done some more coloring and added the first layer of gloss. I definitely like how it looks so far, but I am sure part of this is “first time doing it excitement” and I already have some ideas on how to do things next time.
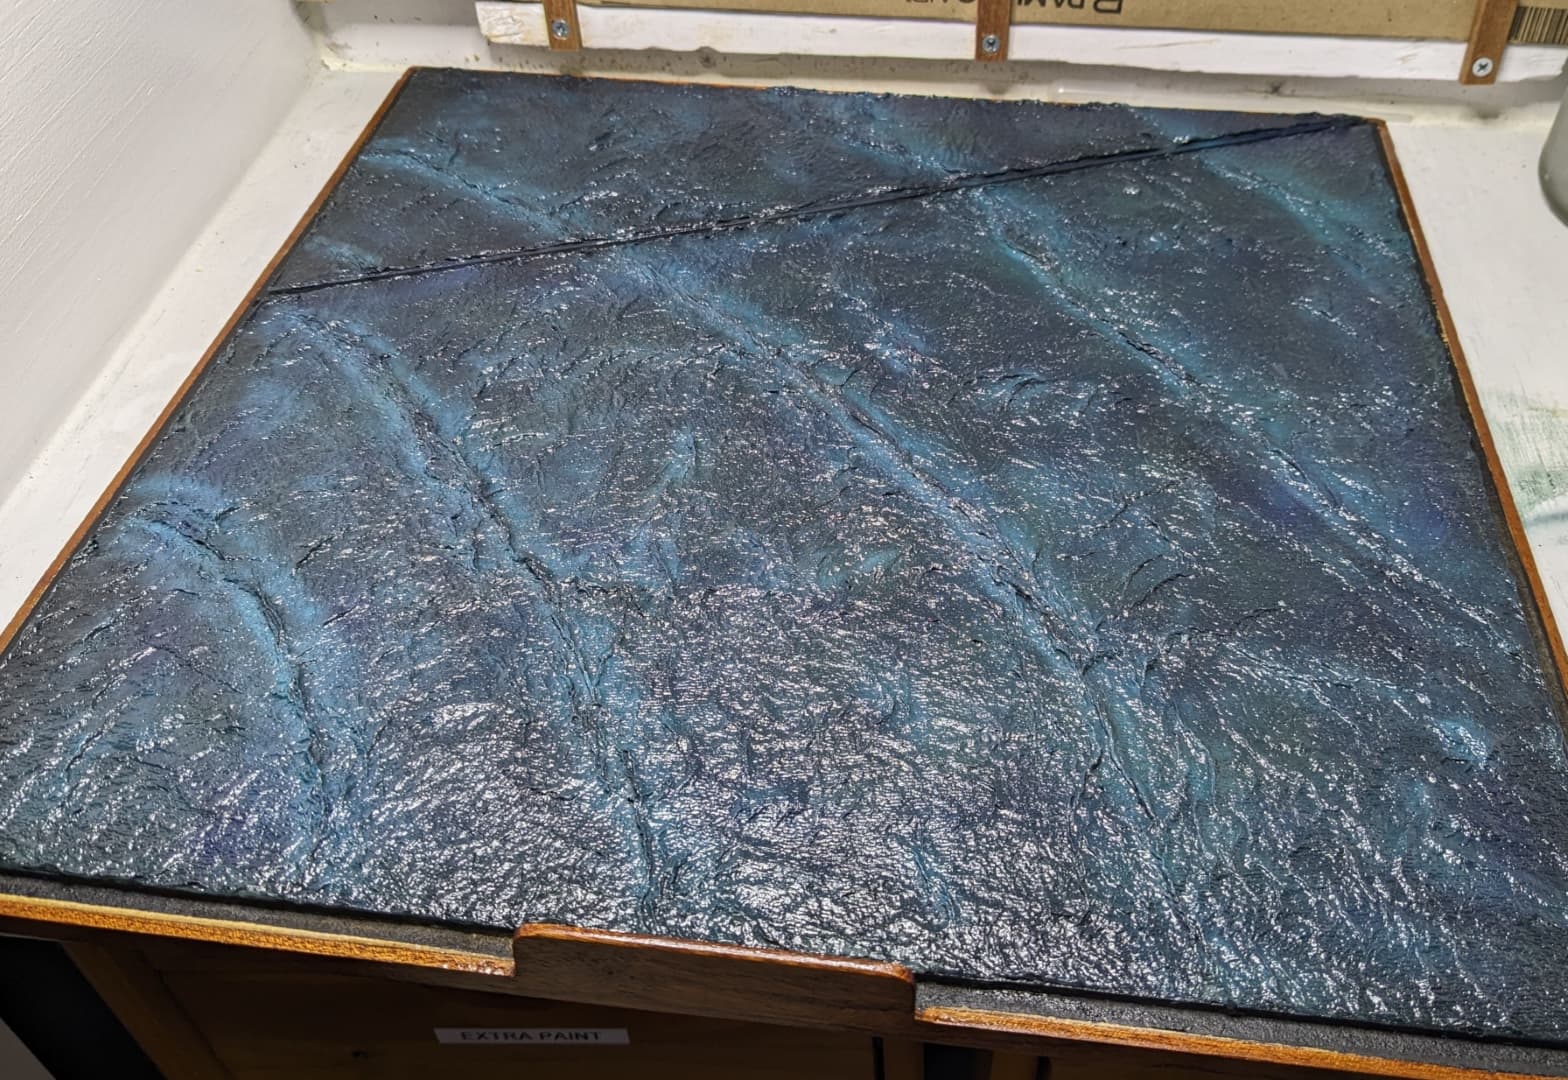
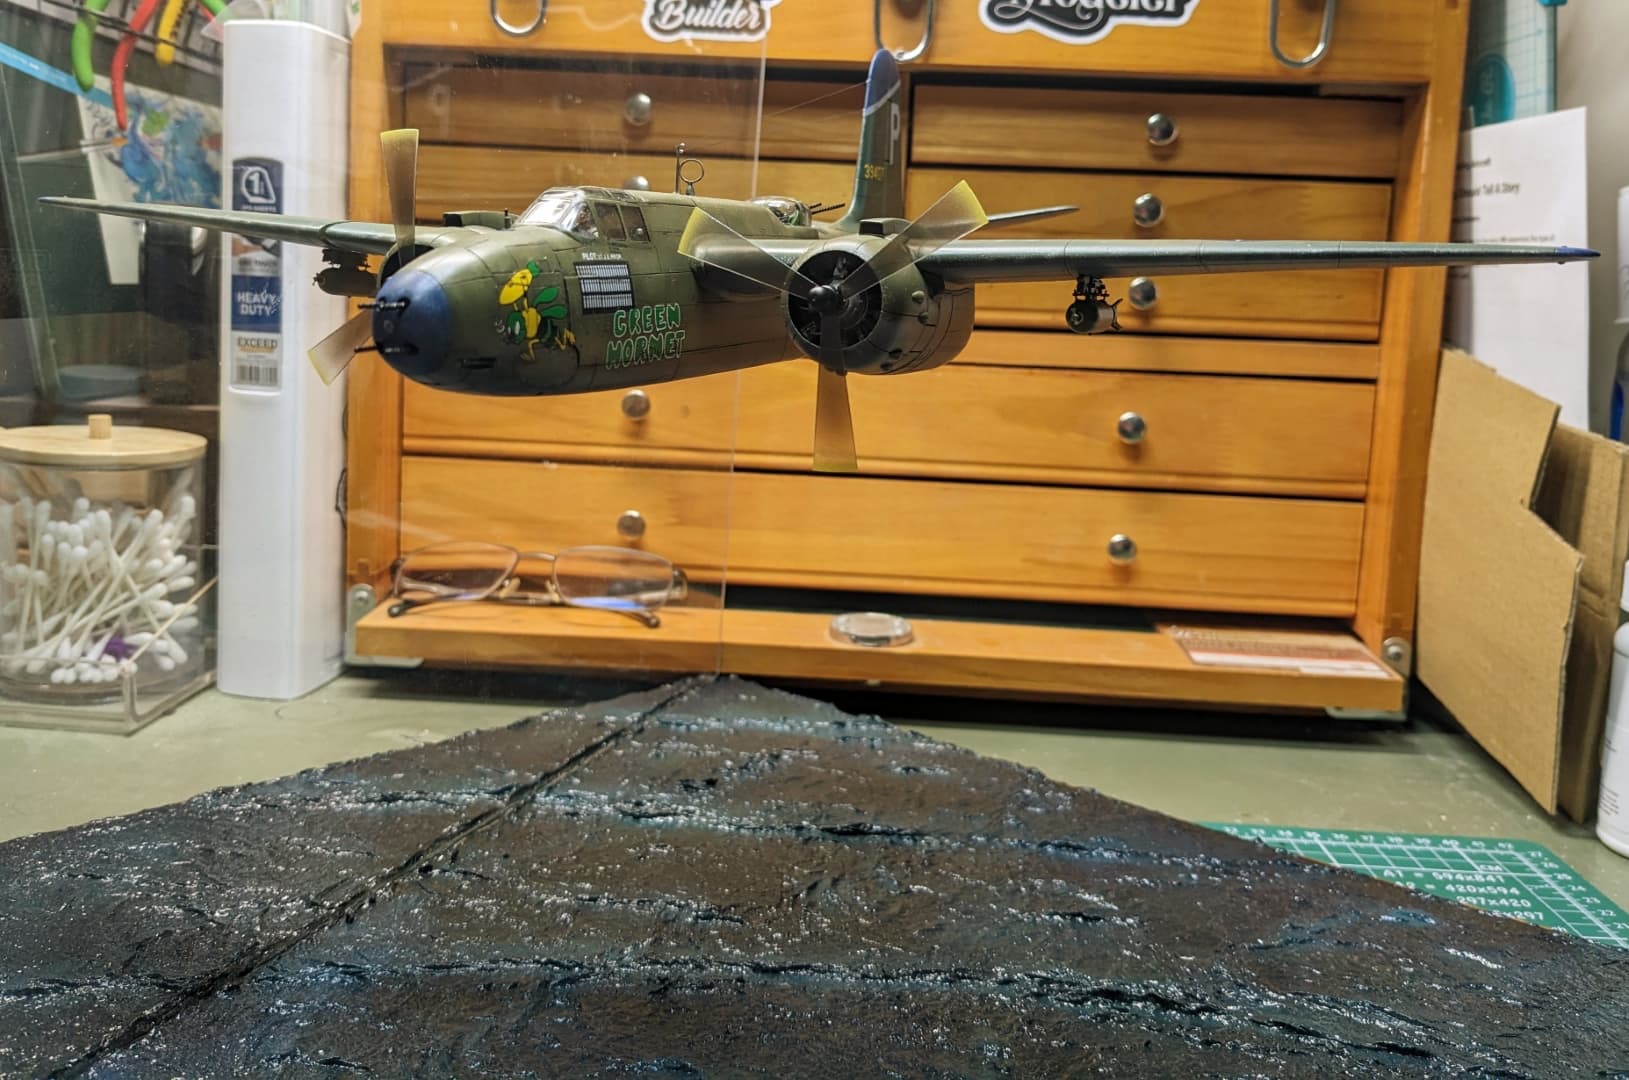
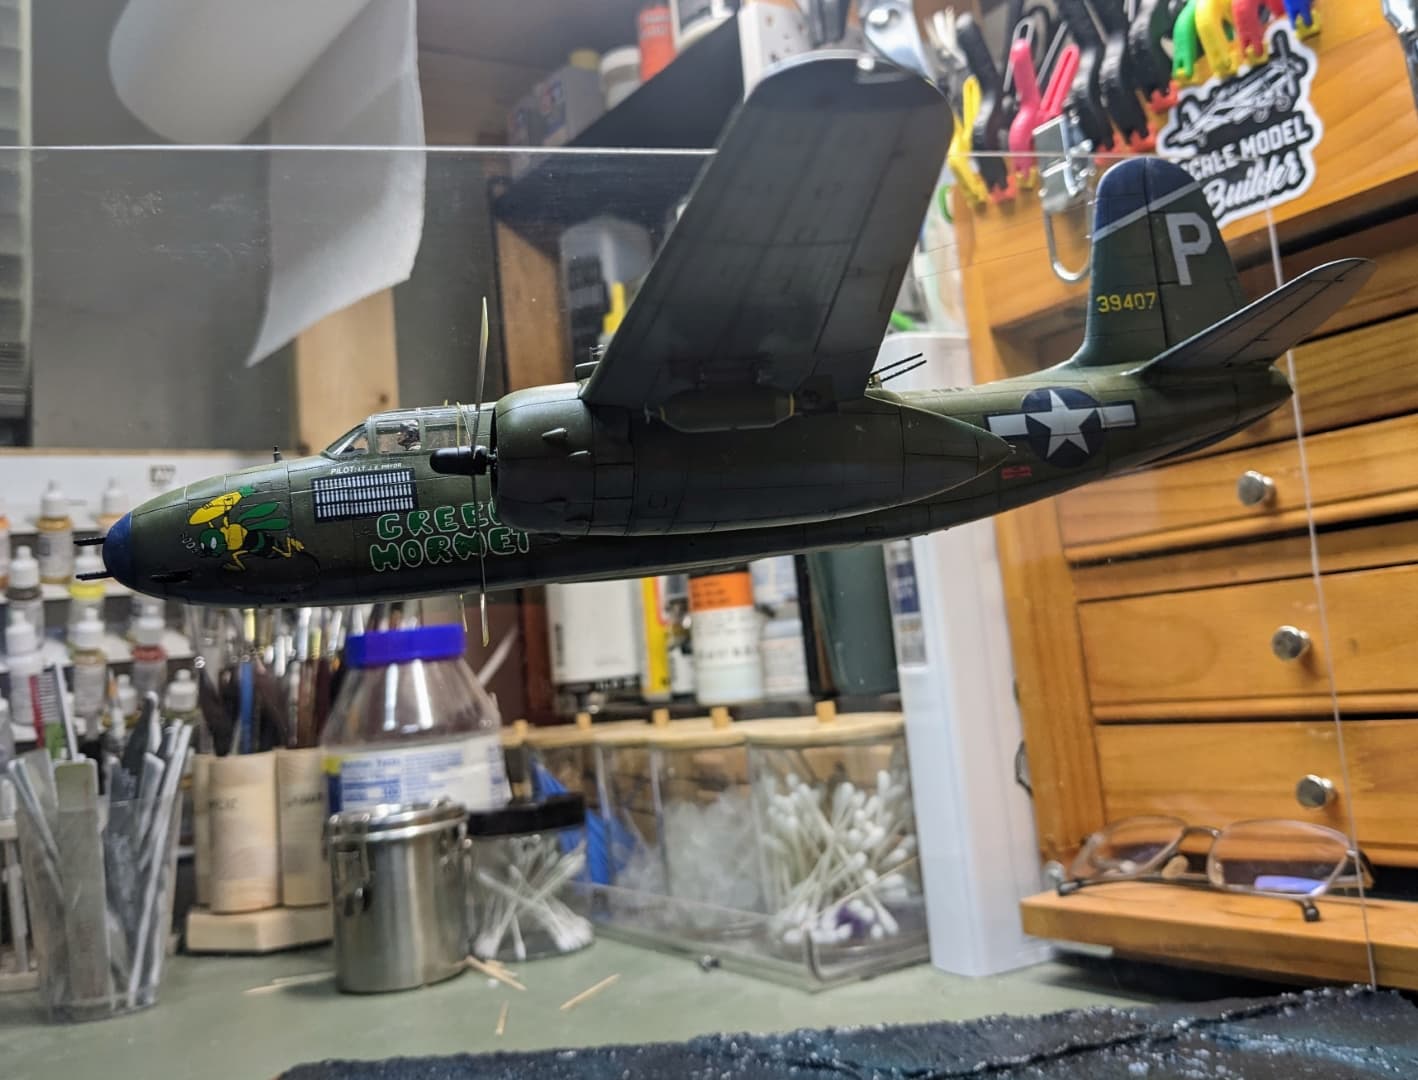
So here is how it looks as of last night.
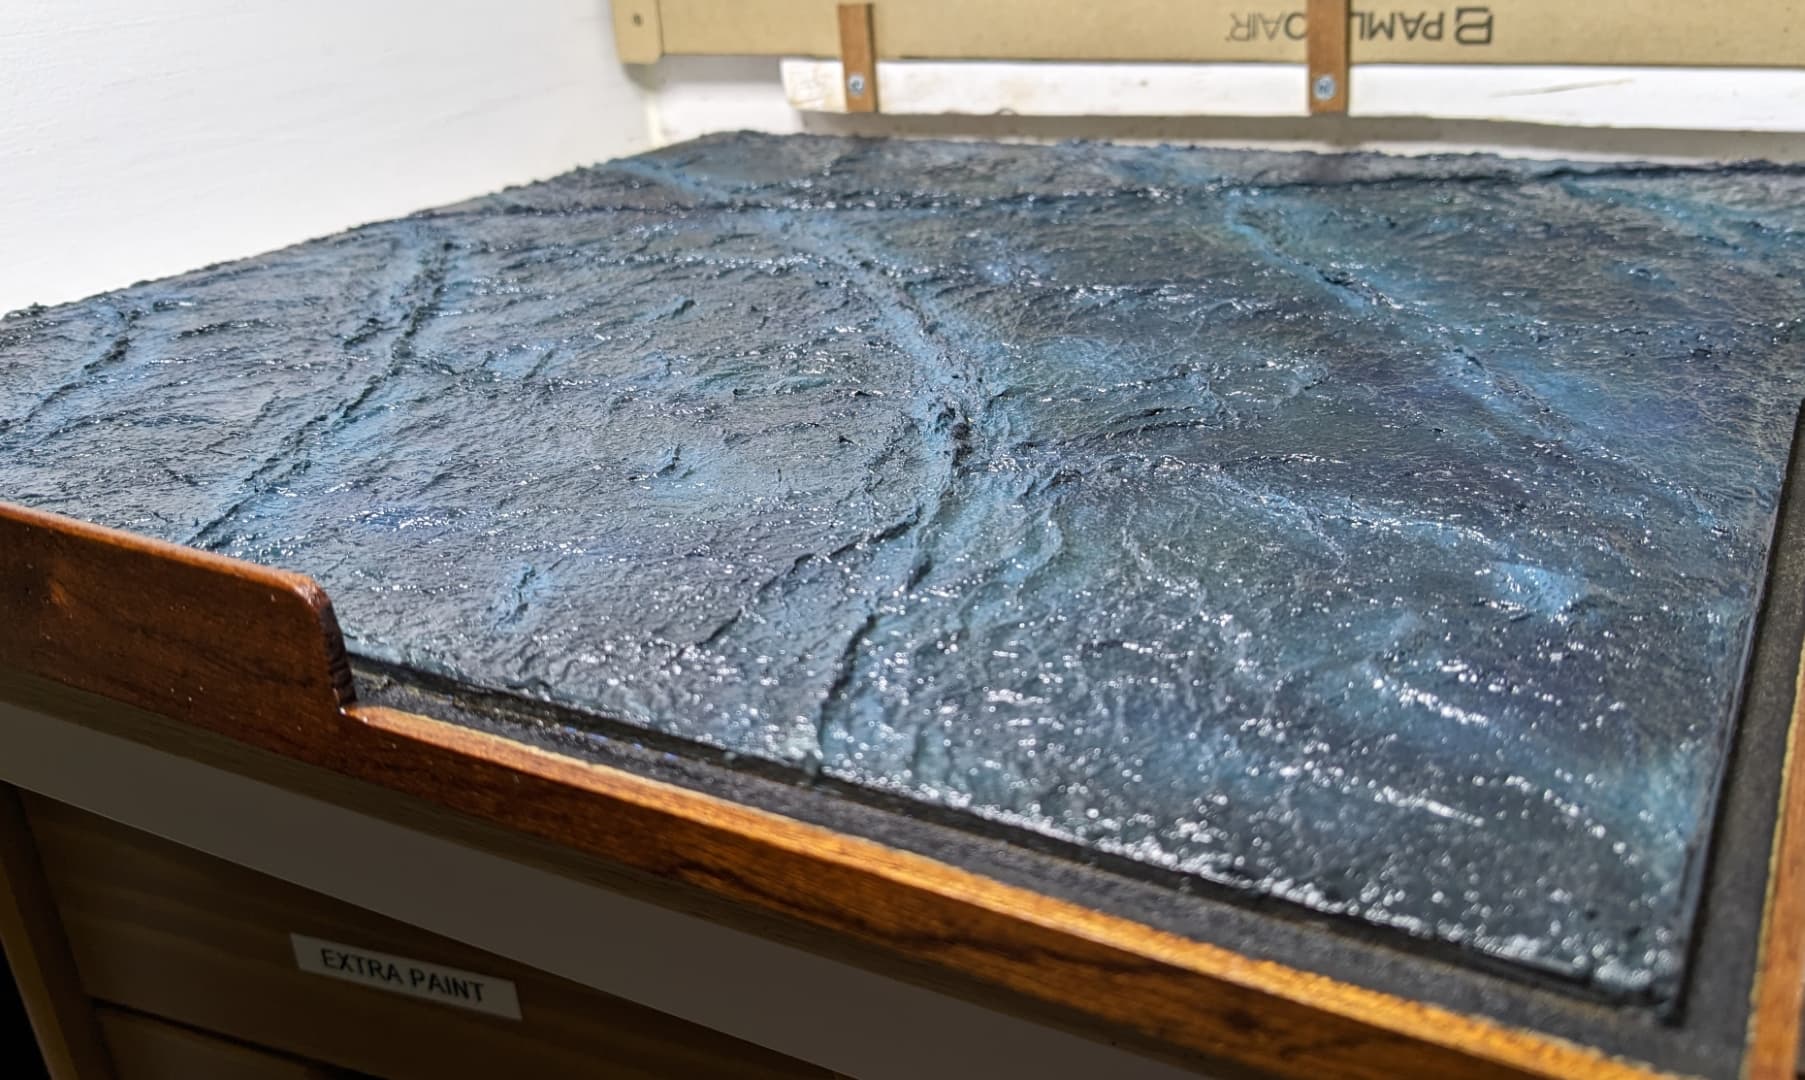
And here it is from closer to the eventual viewing angle.
From a totally non-expert view – that is looking great and I wouldnt be doing much more … I guess, you could do a gentle flick of white on a couple of the higher peaks that are more pronounced that you can see on the middle bit … other than that … you are very close I think ![]()
![]()
Carl @mrintense56, if you wanted to give a better perspective of the plane’s altitude you might add a pod of whales or a submarine or fishing trawler . . . just a thought. Your seascape looks pretty good but the larger waves look like rolling surf headed for the beach or rogue waves depending on the waves’ height. At any rate the viewer’s attention will be focused on the plane and the water surface will surely enhance the visual aspect of the scene. nice job, this was a big project, can’t wait to see the finished product.
Cajun
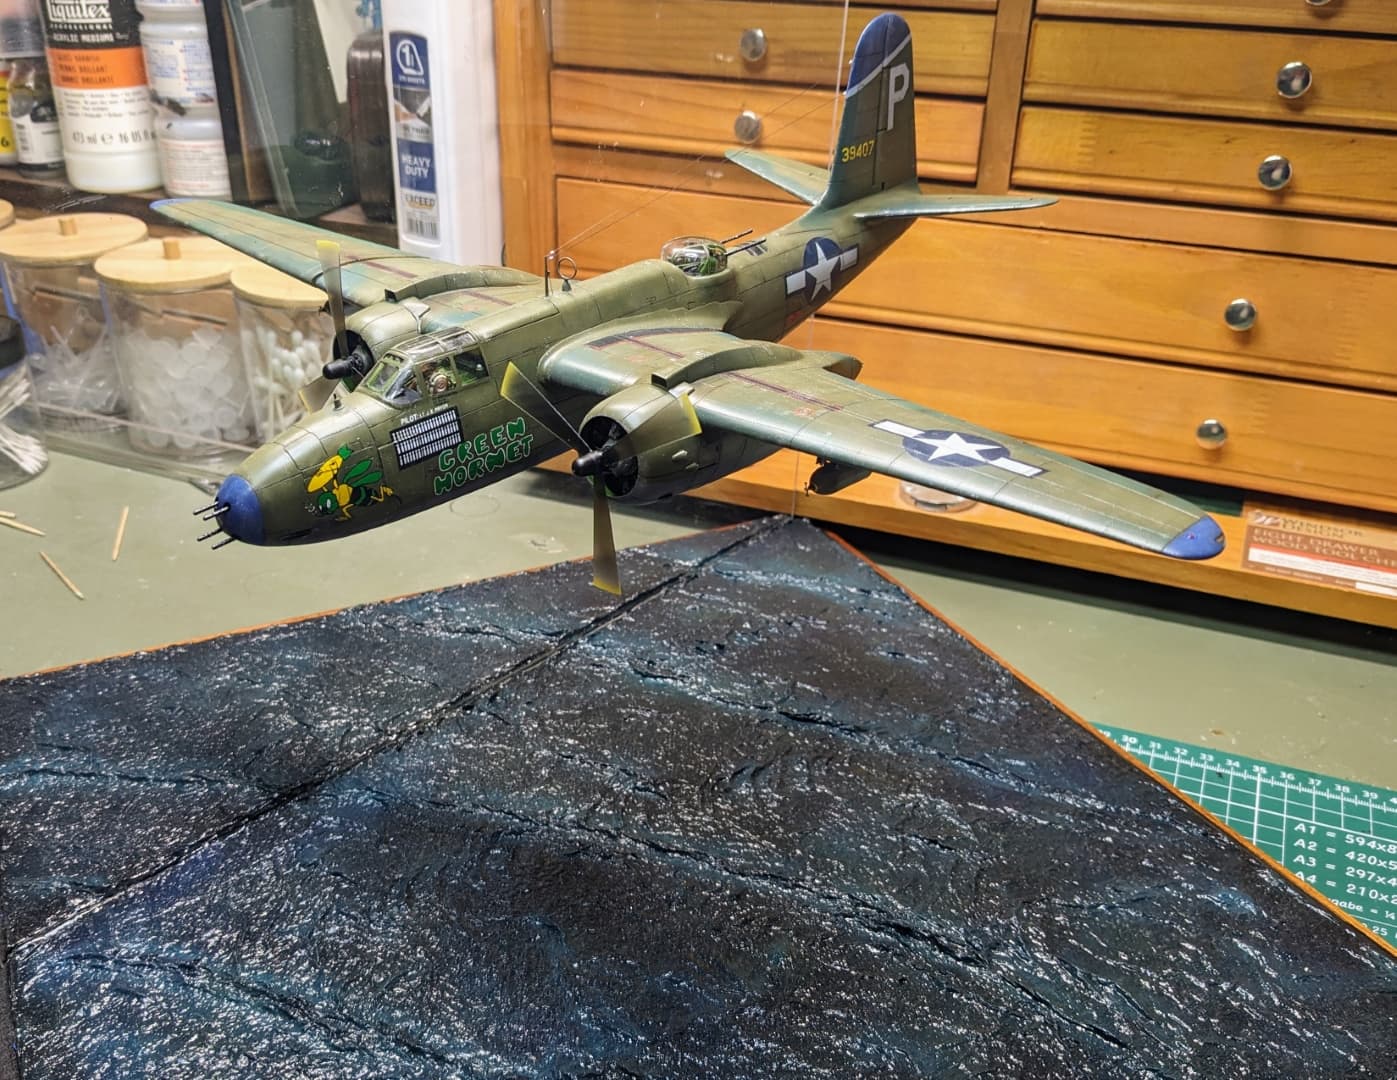
Yeah, this was a first attempt at a water scene. I am going to say that the waves are rolling in towards a beach that is off the diorama base. The display is supposed to be the A-20 flying 50 or 60 feet off the water but the display height won’t allow a scale 50 or 60 feet, so it’s somewhat compressed in size. I am going to leave the water as is other than adding a few more layers of gloss for depth and a slight dry brushing of some of the wave tops. Not perfect, but I consider it a good first effort and a valuable learning experience.
I think it is a terrific first attempt … I’d be very happy with it ![]()
Thanks Johnny.
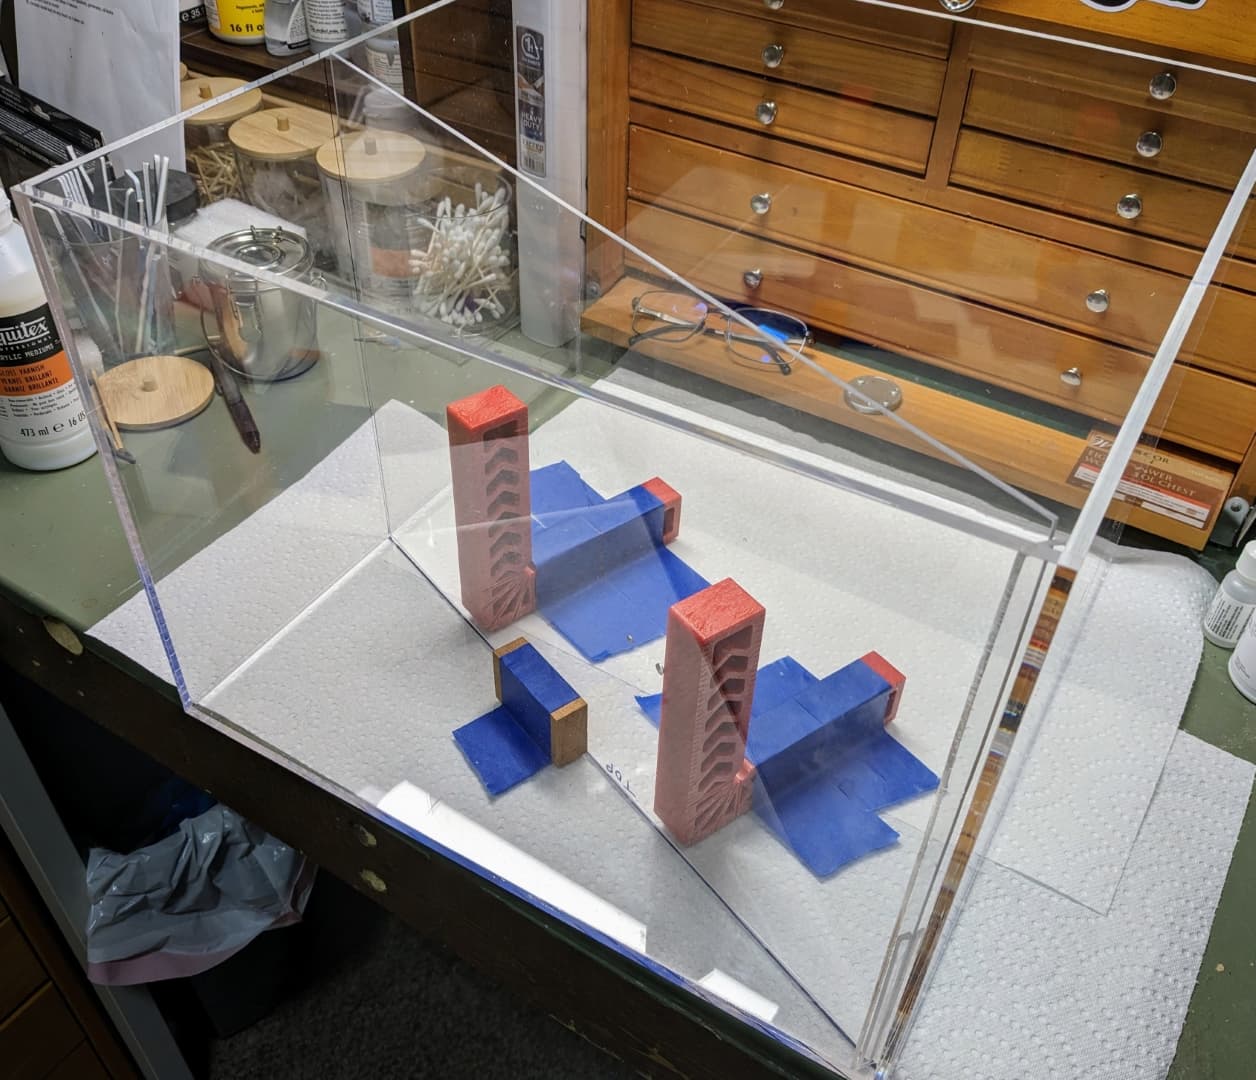
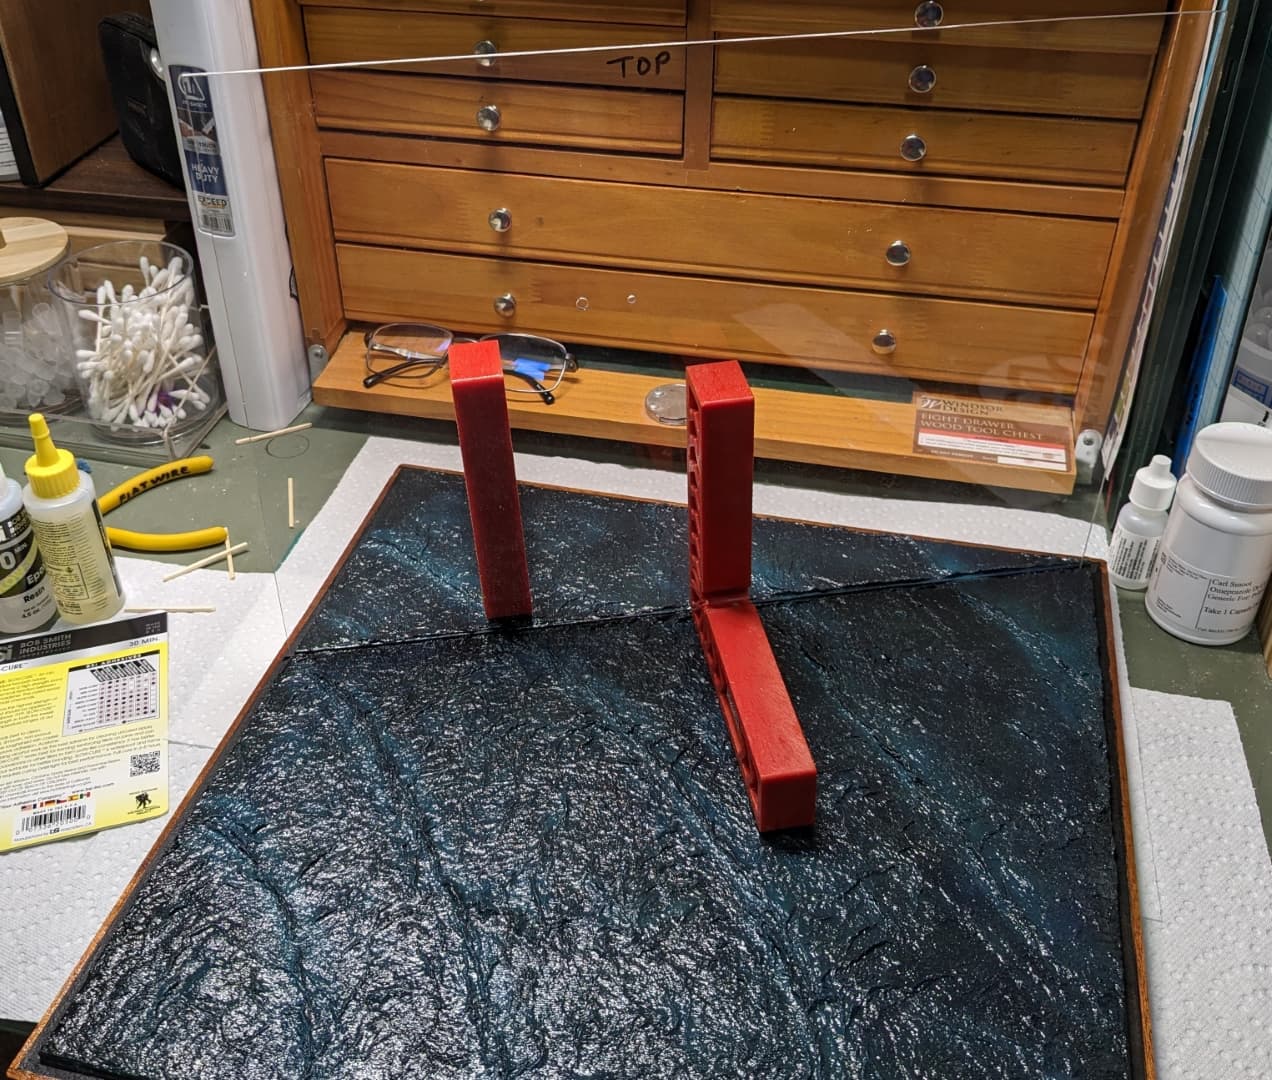
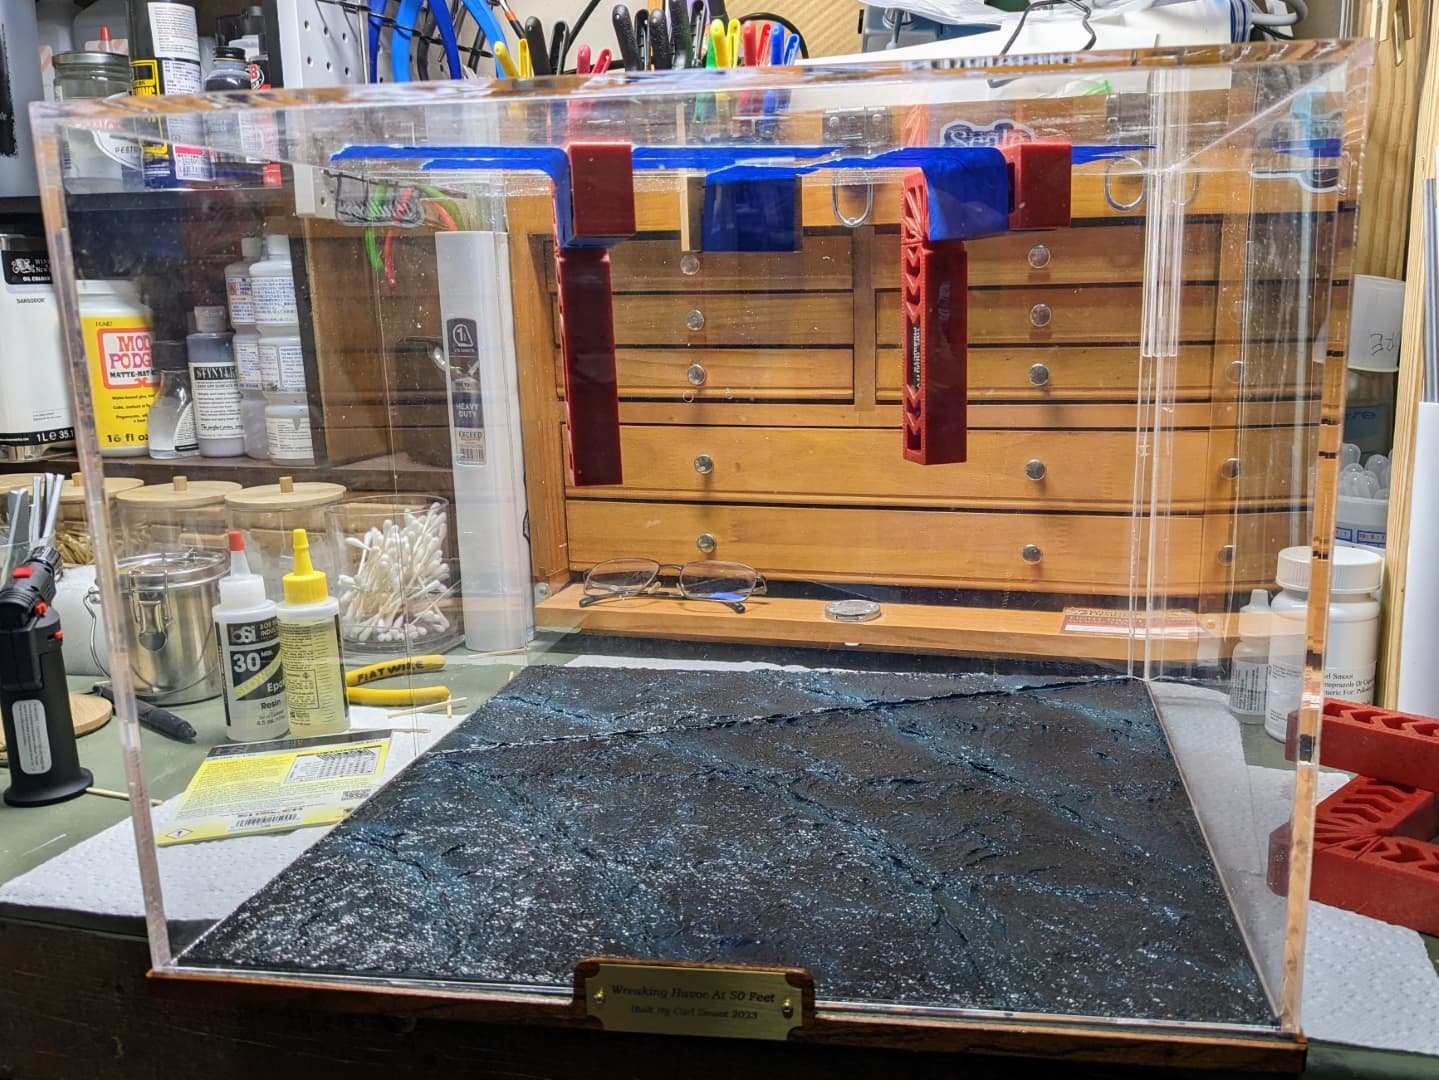
Another task I was stressing about has seemed to work out without too much trouble. That was gluing in the acrylic support sheet in the base while holding it in the correct position.
What I did was to tape supports to the cover (upside down) and then glue the acrylic into the base using 30 minute epoxy. I temporarily held that in place with other 90 degree supports until the epoxy started getting harder and then replaced them with the cover. This will remain on for 24 hours and tomorrow I will reinforce the glue joint for the support.
These will support the upper edge of the acrylic support while the epoxy cures at the base
Temporarily supporting the glued in acrylic support until the epoxy starts to kick off
The supports are replaced with the display top which will remain on for 24 hours to allow the epoxy to fully cure.
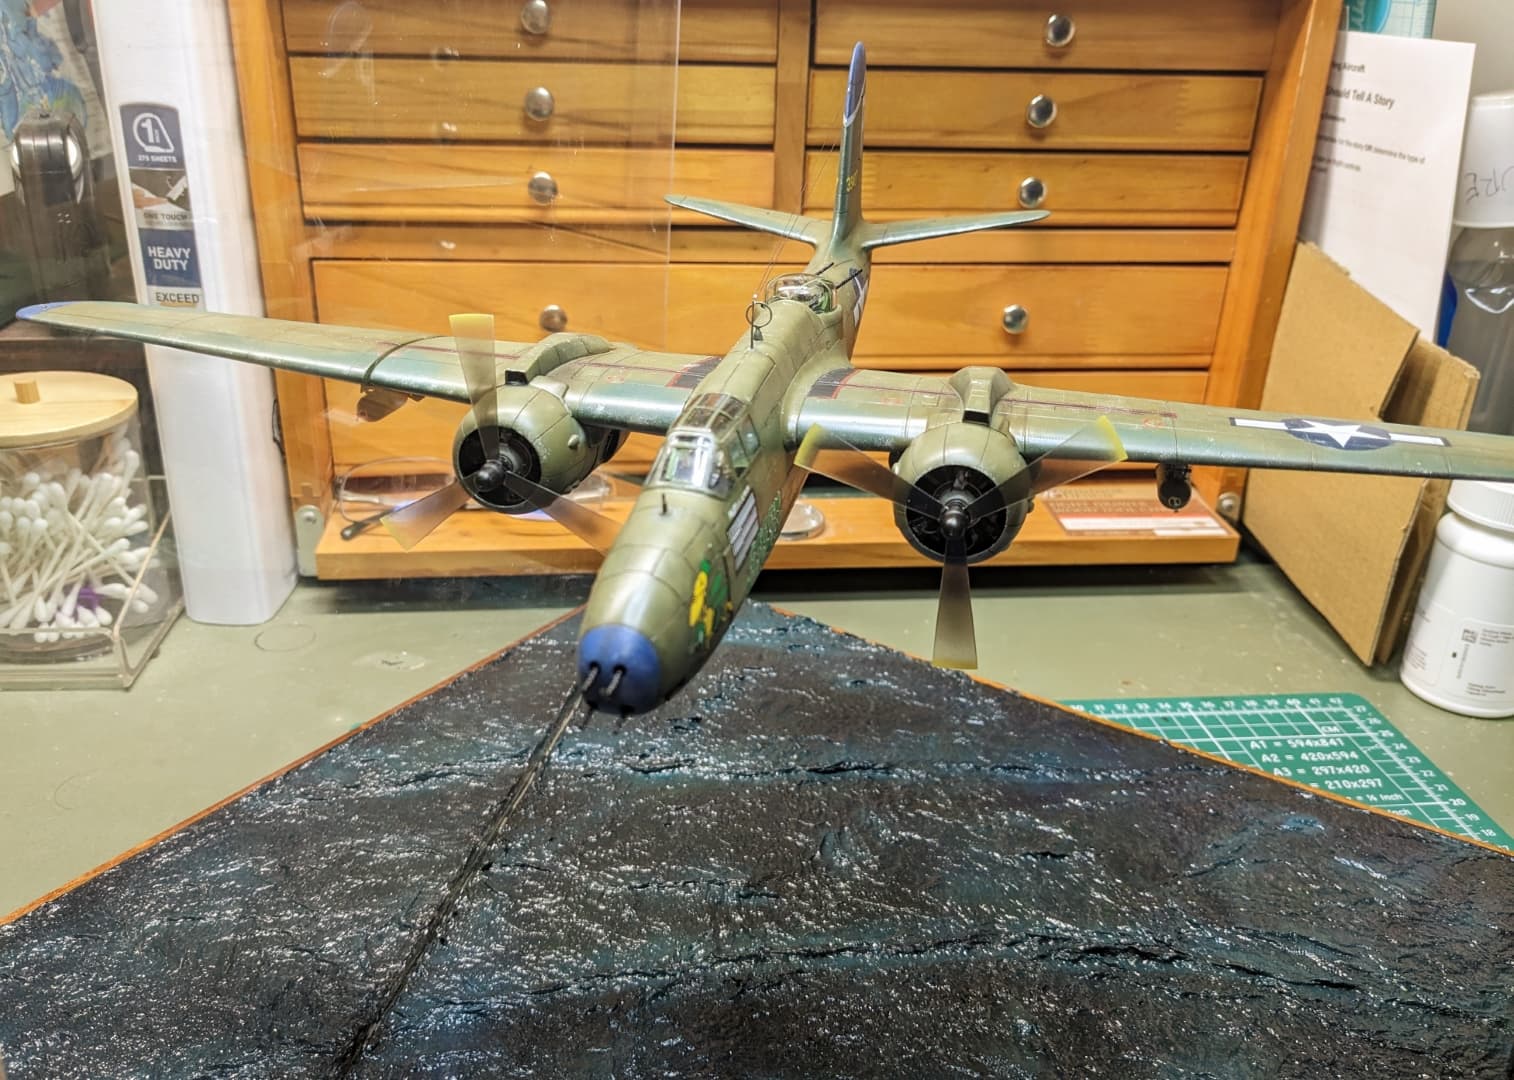
And this shot showed me that the idea of supporting the model with an acrylic sheet should work out without out too much distraction from support structure.
Nicely done ! Looking forward to seeing the aircraft mounted .
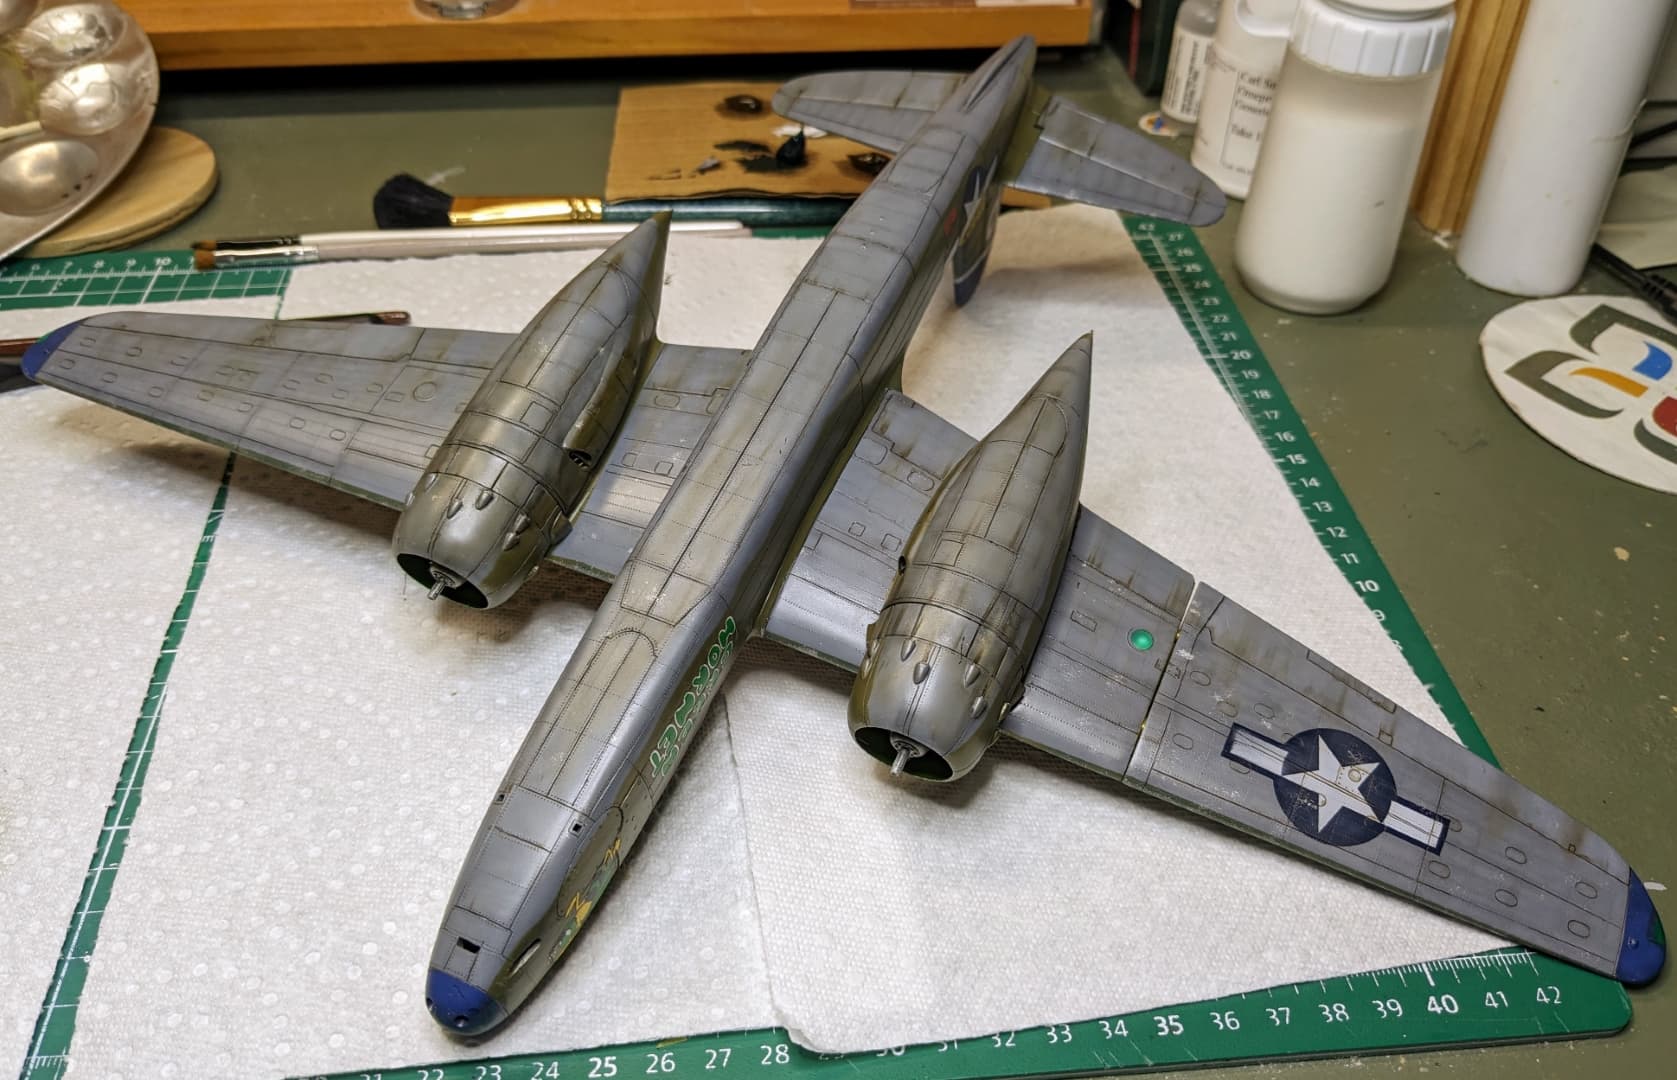
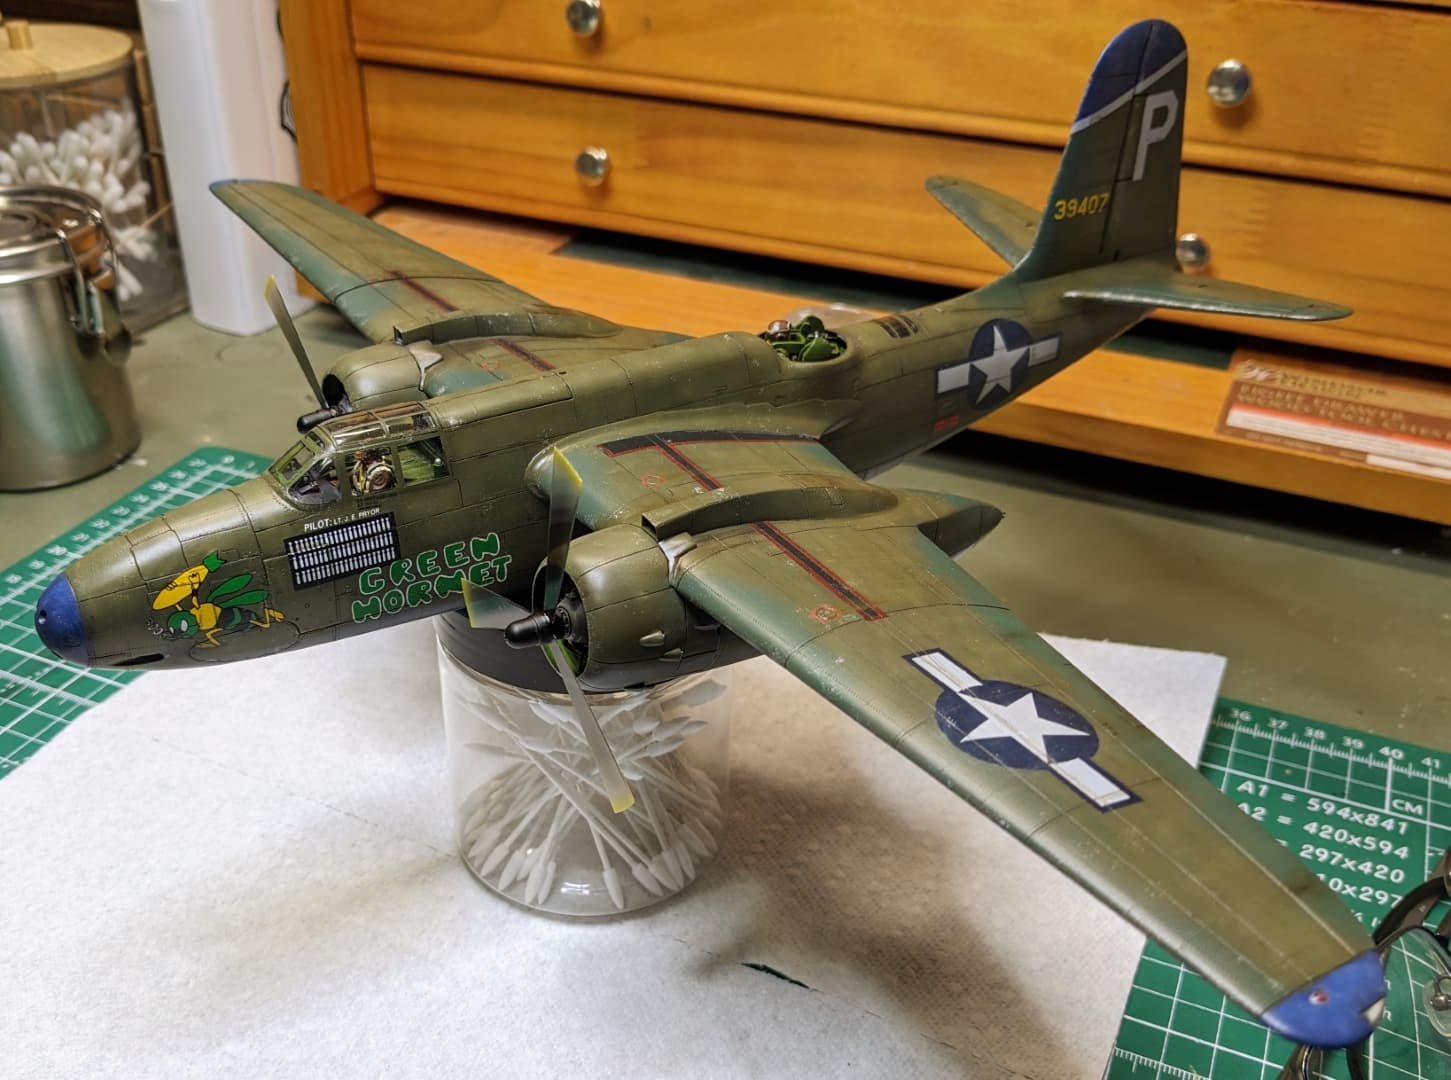
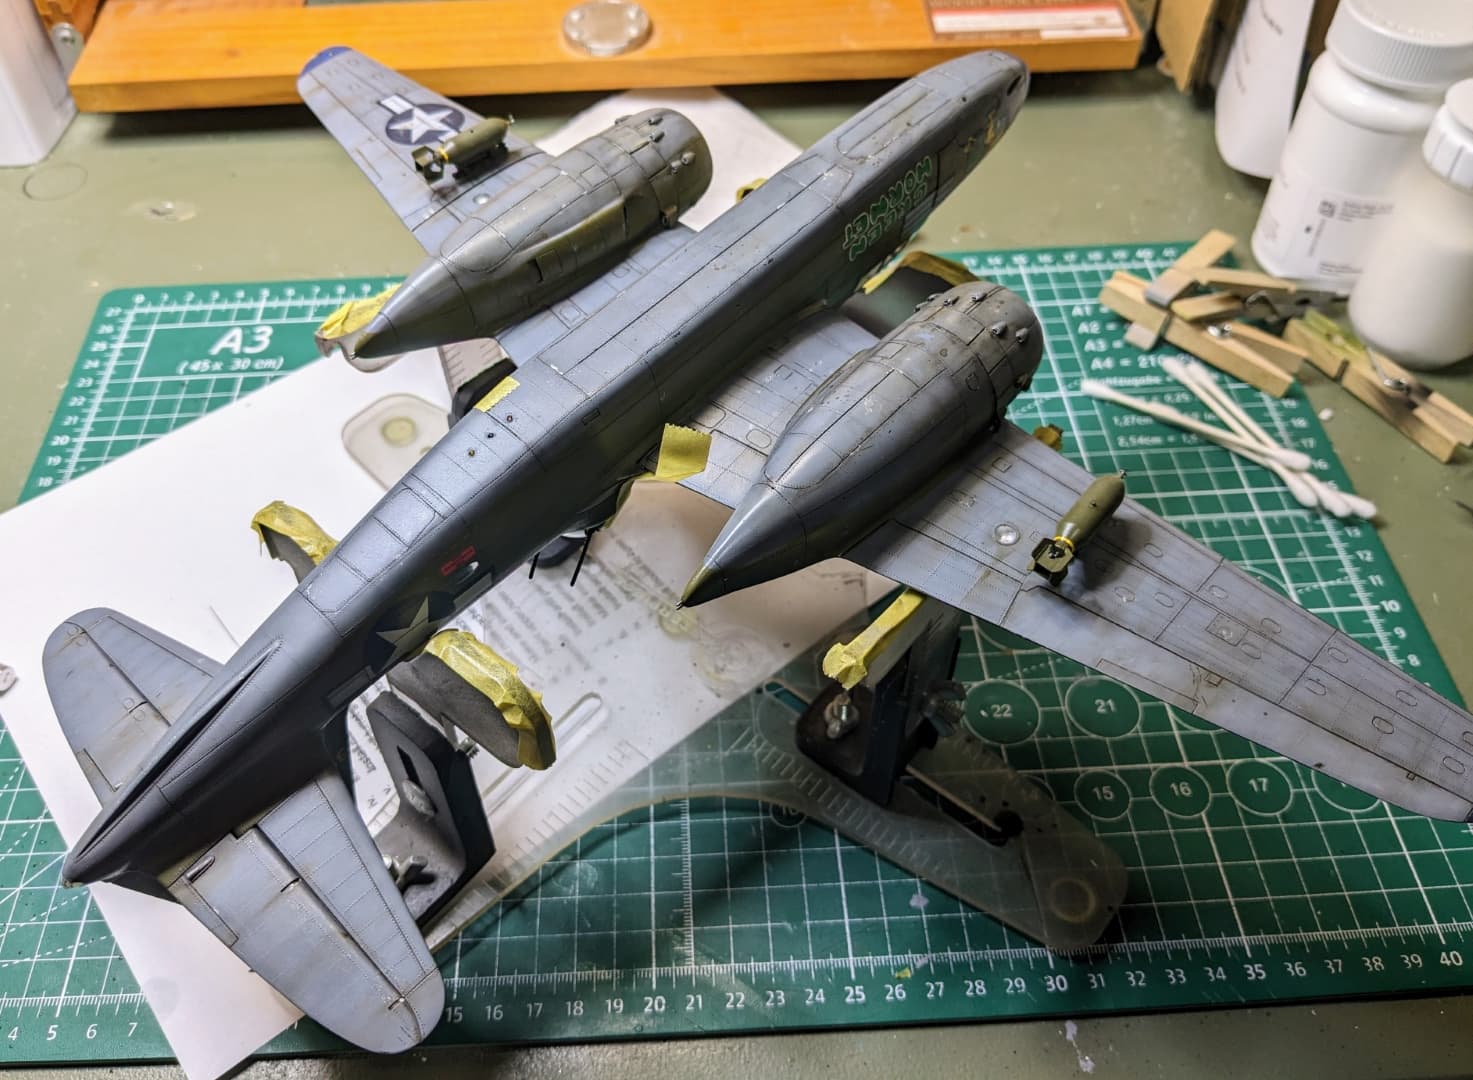
Working on the weathering. Bottom so far. Still considering if more work is needed. These planes were pretty beat up.
That’s looking really nice … Good job Sir ![]()
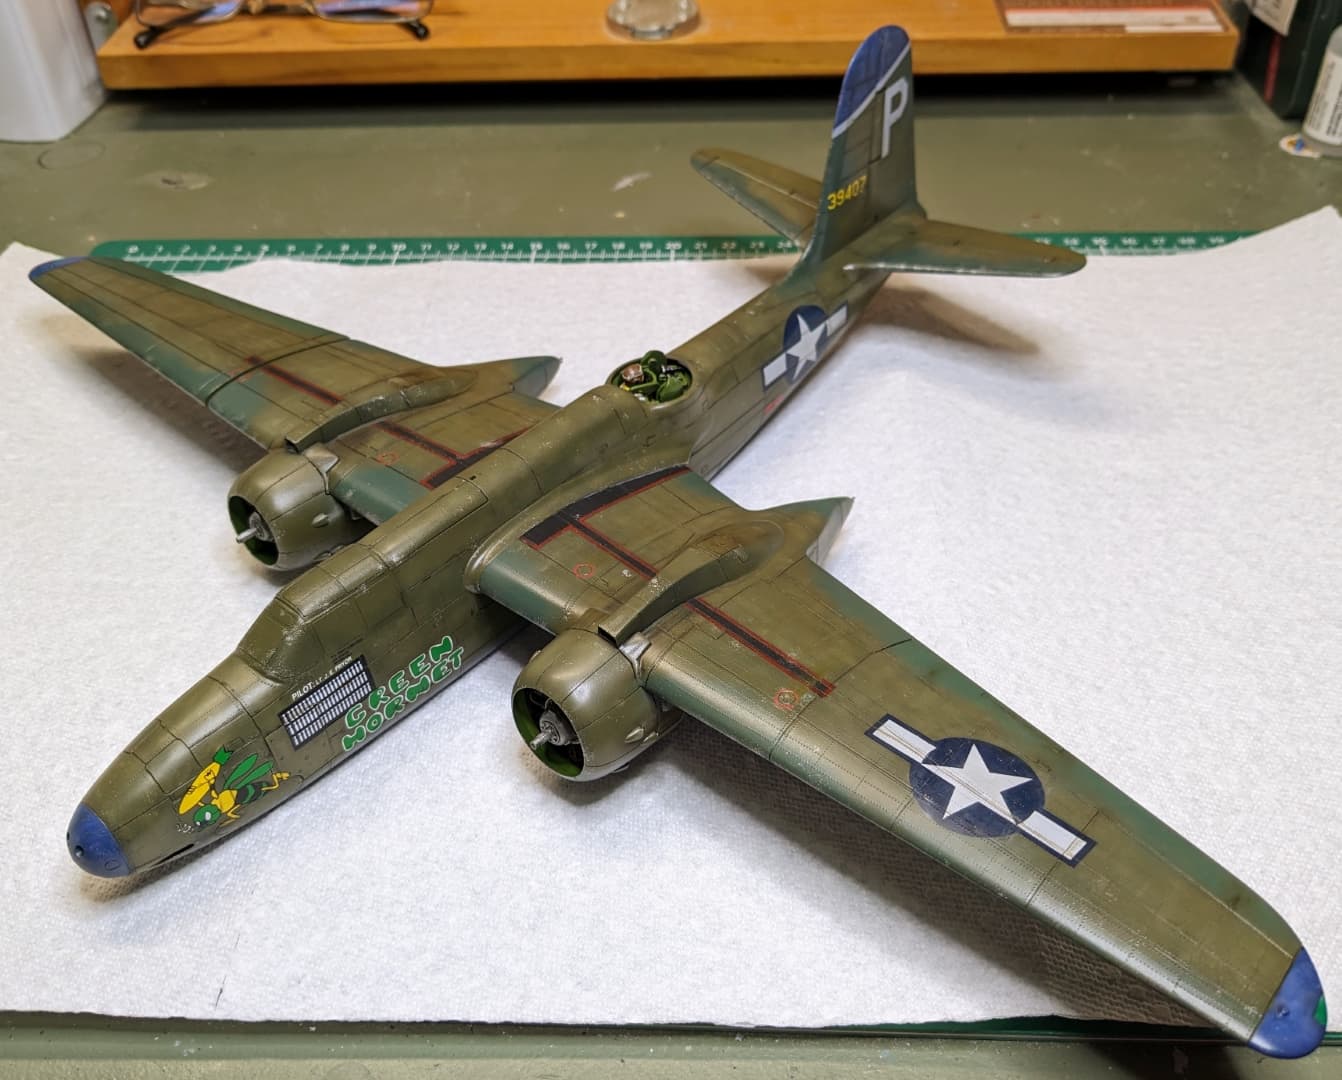
Flat coat, unmasking, and the props painted. They are temp installed here just for the photo.
Still have a bunch of small details to add and a bit of touch up on the paint.
Brilliant colouring on that … Looks so good… And the bright blue and green / yellow really make it pop.
Been following along, and it’s really looking great!
Thanks Johnny and Taffy! ![]()
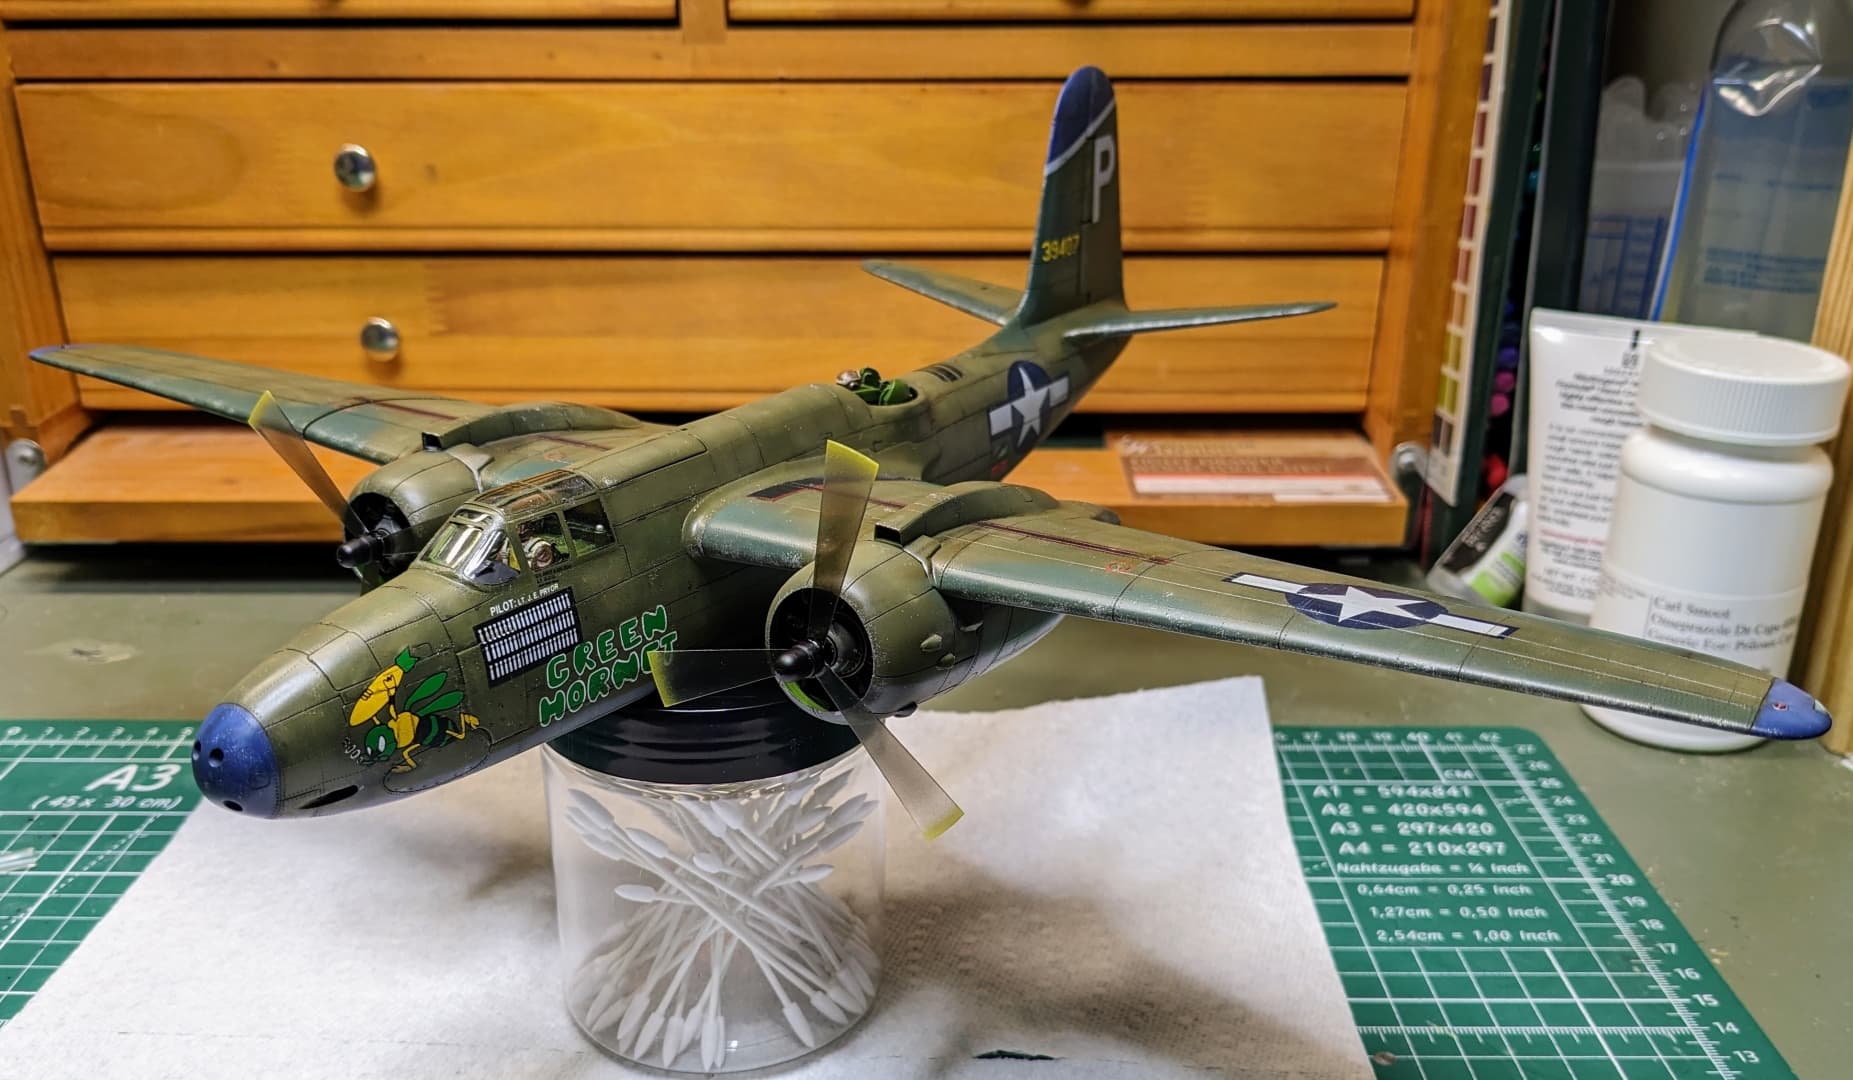
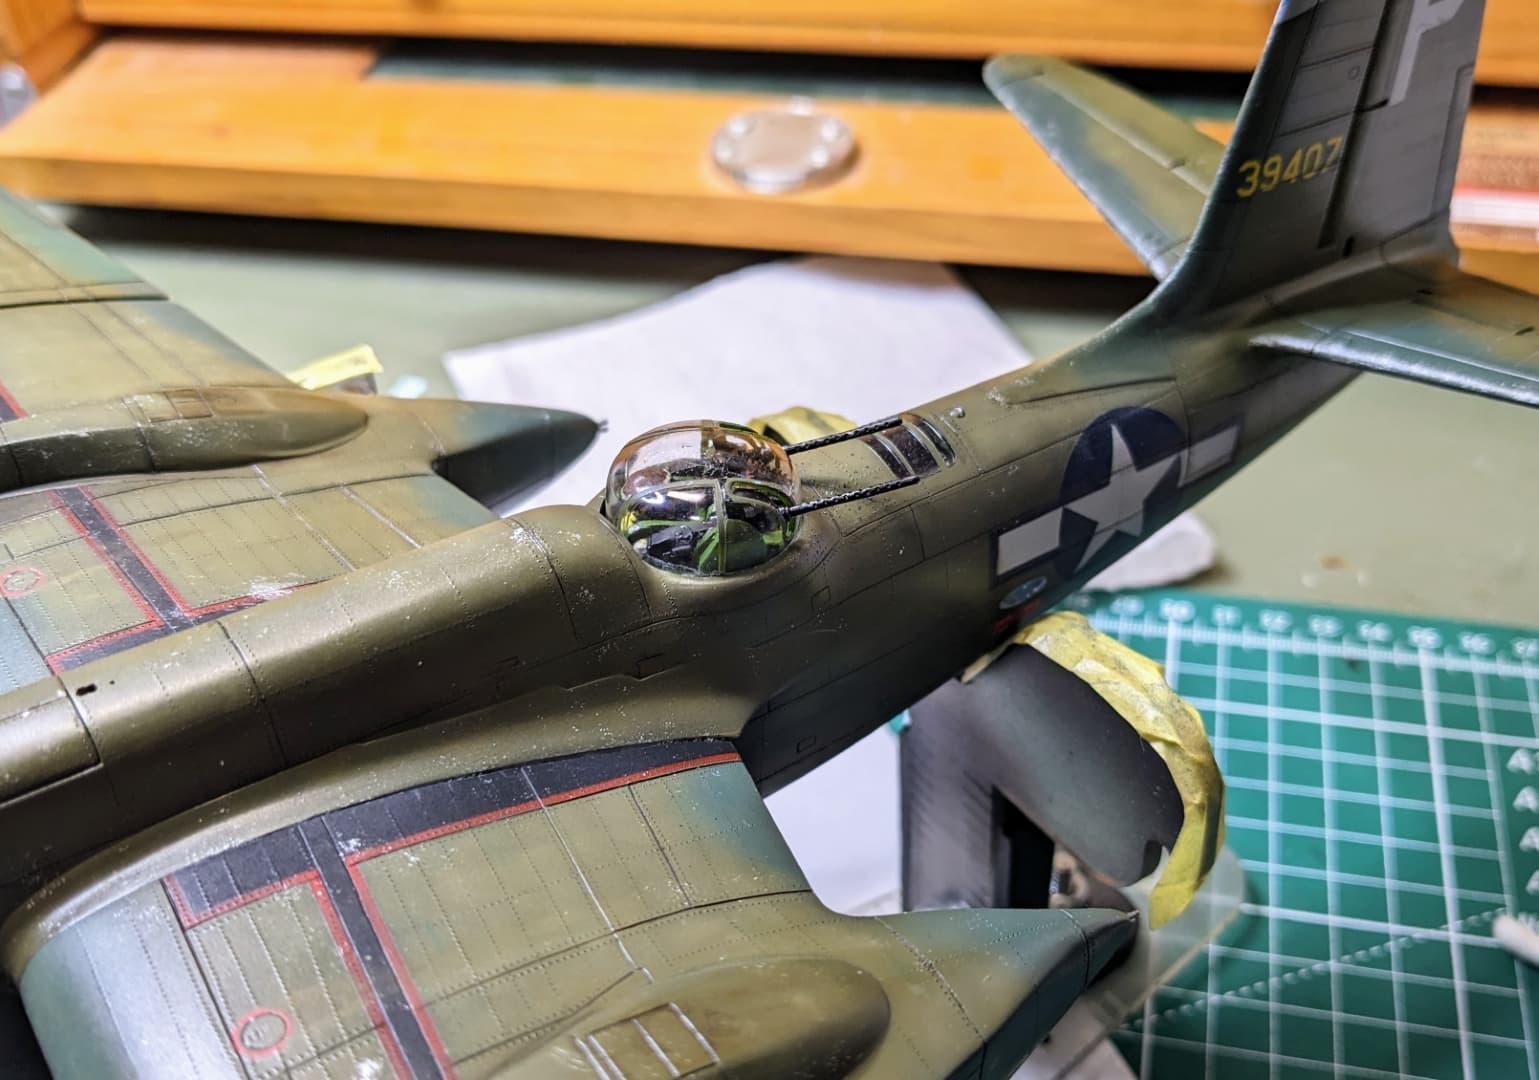
Well, the model is finished. It’s not perfect, but I am happy with the final result.
I had a few hiccups at the end, the worst being the ammo belts for the turret. They were hard to get set in place and I finally did. Later when I glued on the turret dome, I had to tape it down while the glue set and I didn’t notice that one of the ammo belts had come off. Nothing I can do about it now. The other thing is I think I should have cut more off the resin nose guns, they look a bit to long to me.
I started this last round by installing the turret details and the wing bombs.
Last night and today, I installed the model to the base and added the final bits, nose guns, aerials, propellers.
Hope you all like it. Many firsts for me in this build.
That is superb …and the clear perspex was a real stroke of genius… Looks stunning ![]()
Very nice work - impressive and thanks for sharing.
If I may I think your first instincts regarding white caps may have worth trying.
Nice work… and lots of it! ![]() Thank’s for allowing us to follow along!
Thank’s for allowing us to follow along!
—mike
Thanks Richard, Mike, and Johnny as well as others who have liked the post.
Here are a few final notes on this build.
I decided not to do the white caps on the water given how low the aircraft was flying and the way the waves looked.
I normally put a build behind me after completion, not going back to it to fix anything I am less than satisfied with. My preference is to learn from this and apply the lessons on the next build.
I will repair a model if something breaks on it in the display shelf, unless it is is a really old build that I plan on eventually replacing. That hasn’t happened yet, but I have several candidates from my earlier years that will be replaced eventually. I don’t have the room to keep everything I’ve ever built.
I set some goals of doing a water scene, better weathering, riveting, in flight display not using a post, figure painting improvement, as well as improving my general painting and building skills. For the most part, I think I’ve met those goals. Many of these will continue to be carried forward into my next builds.
Thanks again for taking the time to review my build and respond.
Oh Hell yes! I’ve been very anxious to see this project completed and dying to see the canopy mask come off . . . very very very nice! I wasn’t getting your vision with the plexi-glass pane but now, well of course! Brilliant! This is a showcase presentation, the plane is finished perfectly, very nice, very nice! I really like what you’ve done with the props . . . sheese . . . you might as well retire, you’ll never top this one, don’t knock it off the table either we can’t take the disapointment. Hmmm . . . what cha gonna do next hmmm?
Cajun ![]()