My odyssey to create an accurate Dragon Wagon Soft Cab goes back probably when Tamiya first released the kit. I was the guy who made the master pattern for the Trakz resin kit. Back then I did not have much to go on, pictures were limited and I did not have access to an actual vehicle to take measurements off of.
It was a lot of photo interpretation and guess work and I created drawings using CorelDraw which is really more for graphics than drafting. I made this and other patterns the old fashion way with my Sherline lathe and mill.
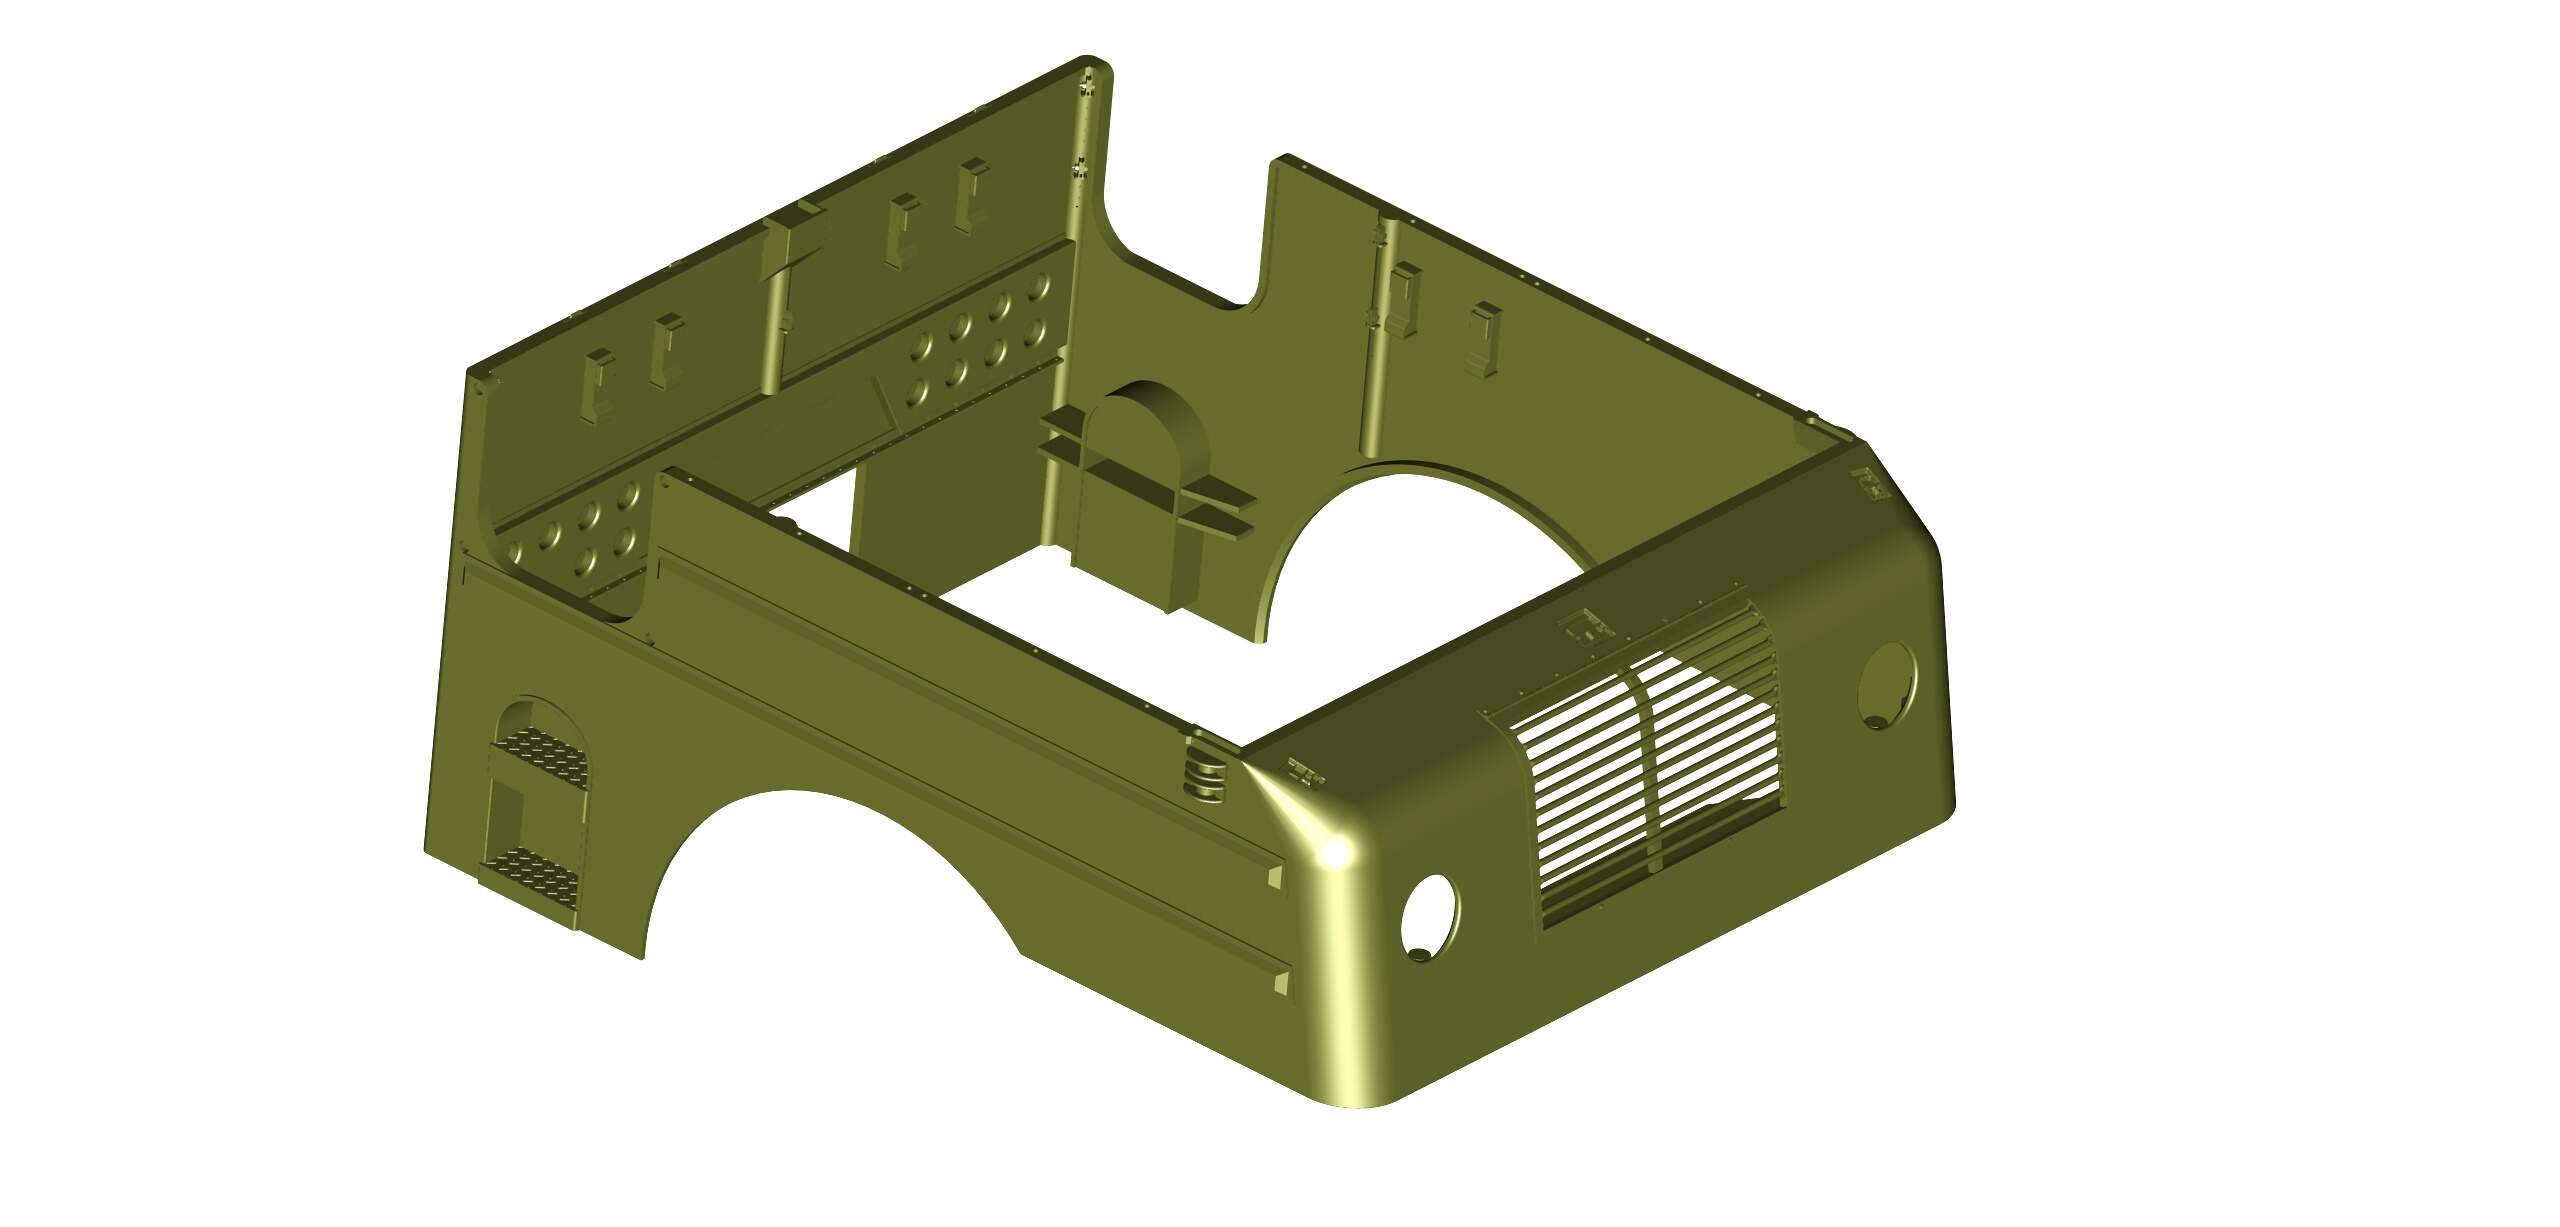
Around 2012 I got my first CAD program which was Punch! ViaCAD which allowed to me to design in 3D. Later on I finally had access to an actual M26A1 Soft Cab and was able to extensively photograph and measure it. Even so there were problems with designing it on the computer (particularly the rounded front corners) and this project became “digital” shelf queen.
The other issue I had, was how to sell it once I was done with it, places like Shapeways would be too expensive and so this project would sit on the back burner until recently until I opened up an Etsy store to sell digital files.
Nicely done. I’ll be following along closely. I’ve always wanted to make the Canadian version (Mighty Mouse).
Fast forward to a couple of weeks ago when I once returned to this project. There is still a heap of work to do and several setbacks, I love ViaCAD until I hate it! It does not like complex objects with many angles that don’t follow an X-Y-Z path.
I learned long ago to make sure I save my drawing before I try any major operation!
On the actual vehicle the corner forms a semi-sphere that goes into a cone shape, the builders simply hammered the corner sheet metal into shape over a form (and on the actual vehicle its not as neat as the CAD program makes it).
This was one of the reasons it sat on the “shelf” for so long. I could not figure a way to do it and it was a good two years before I came up with a solution (from a dream of all places).
The roll cage.
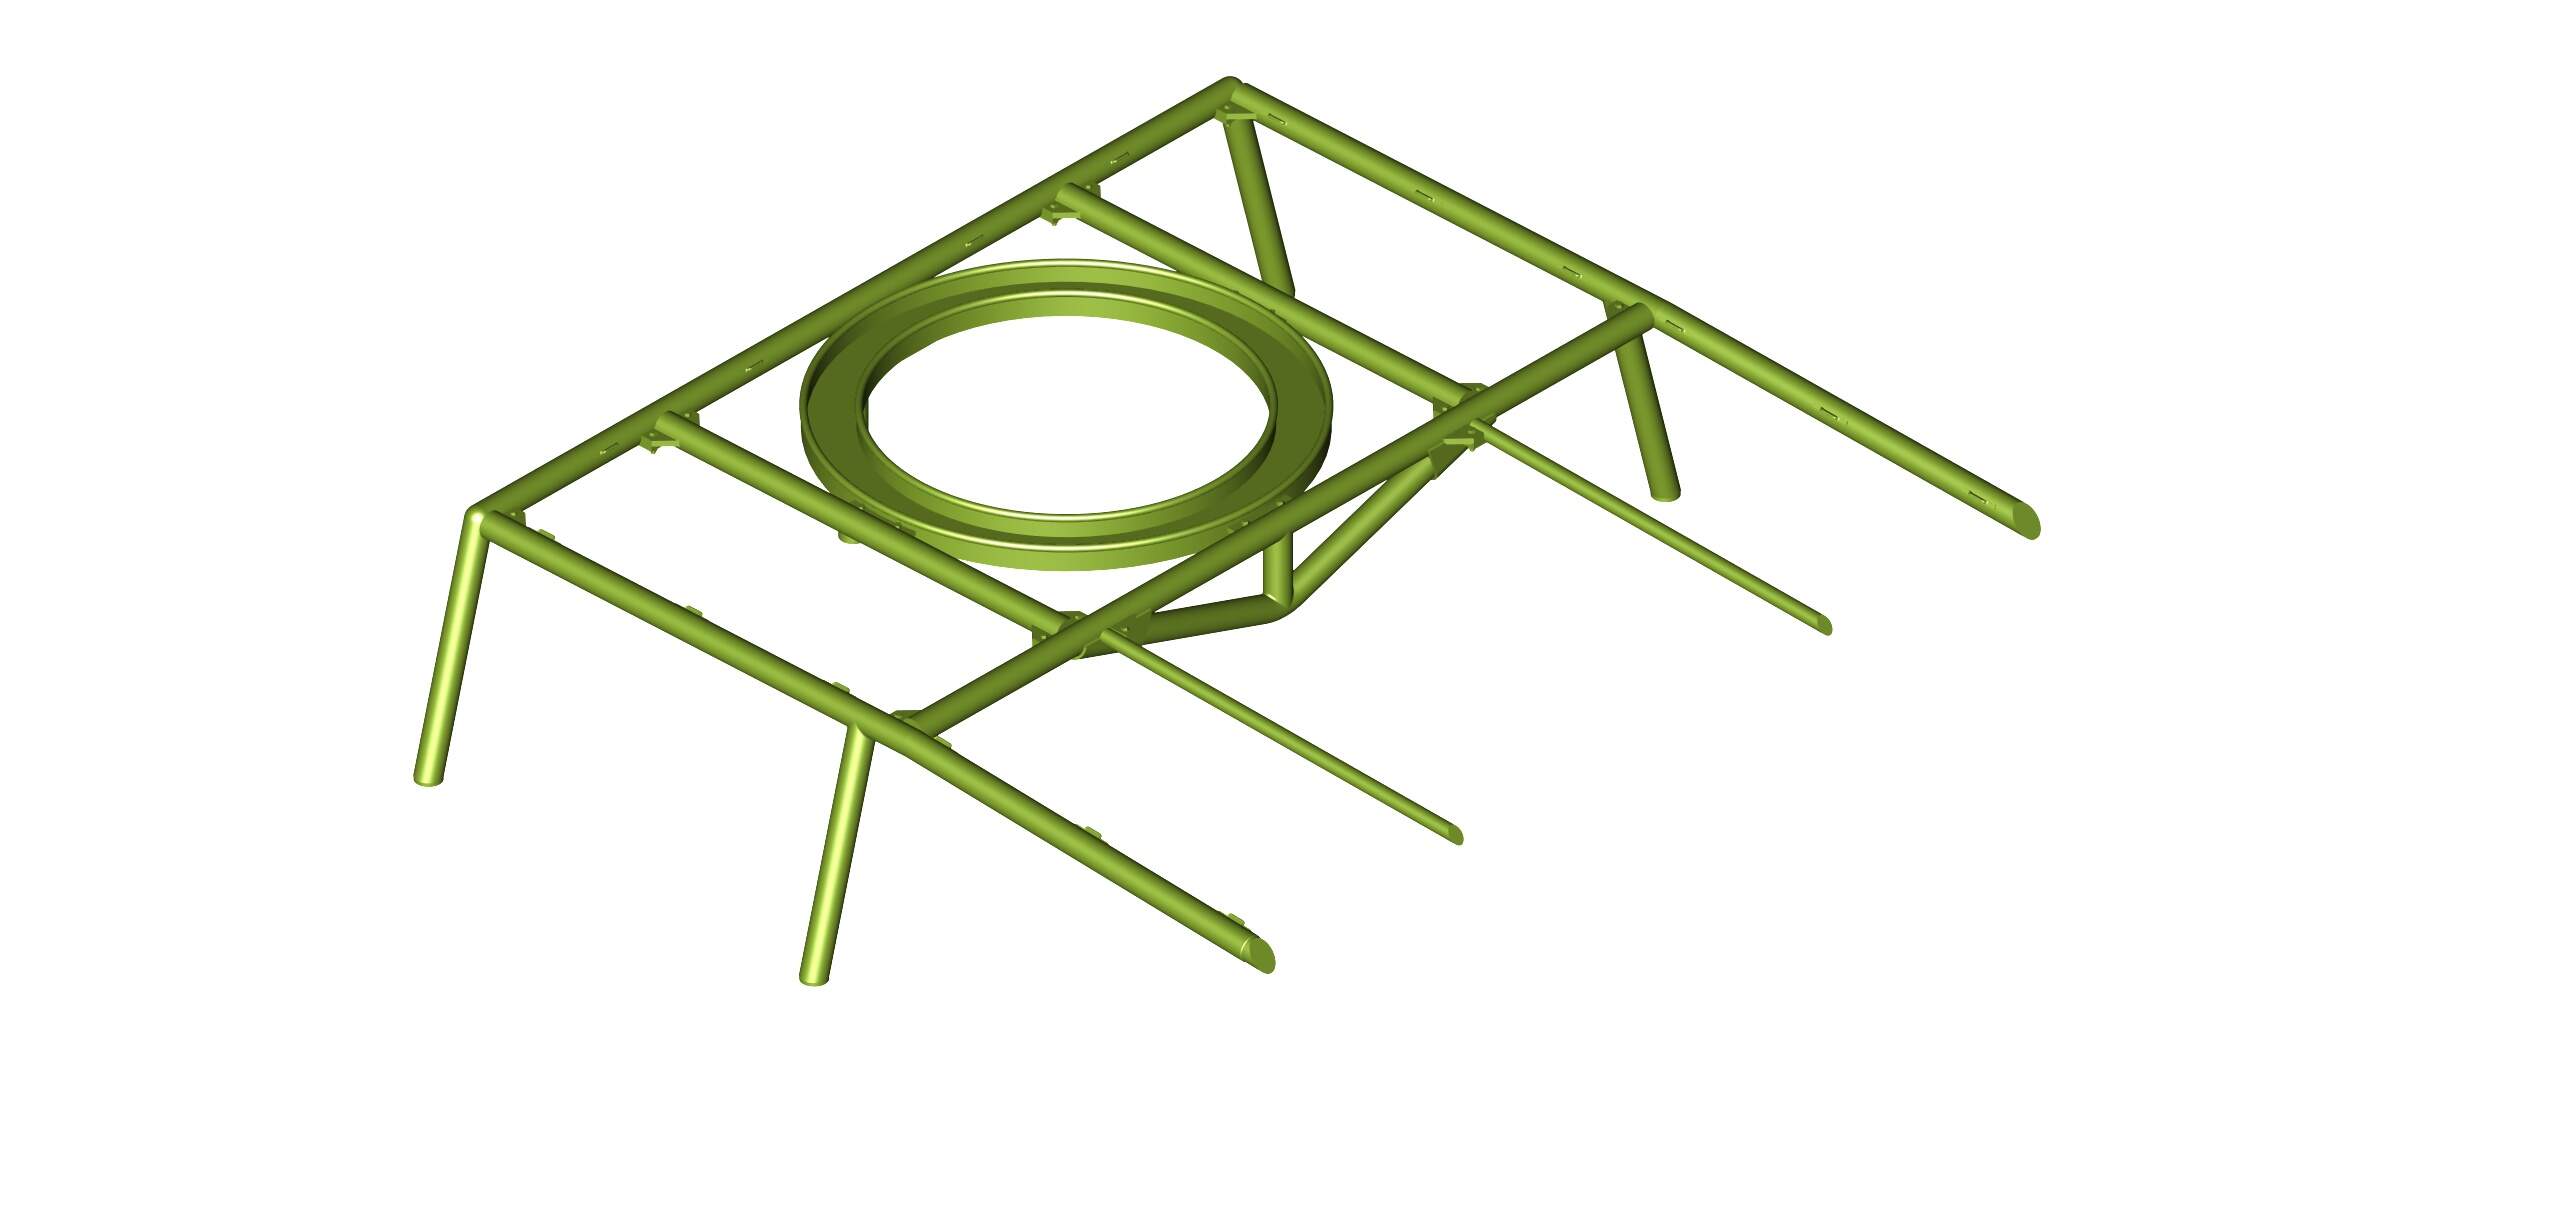
This is where the home 3D printers will really shine printing out this part, since they add sprues to the file there is no need for me to break it down into individual parts or add a bunch of bracing.
I think I have that conversion in my stash

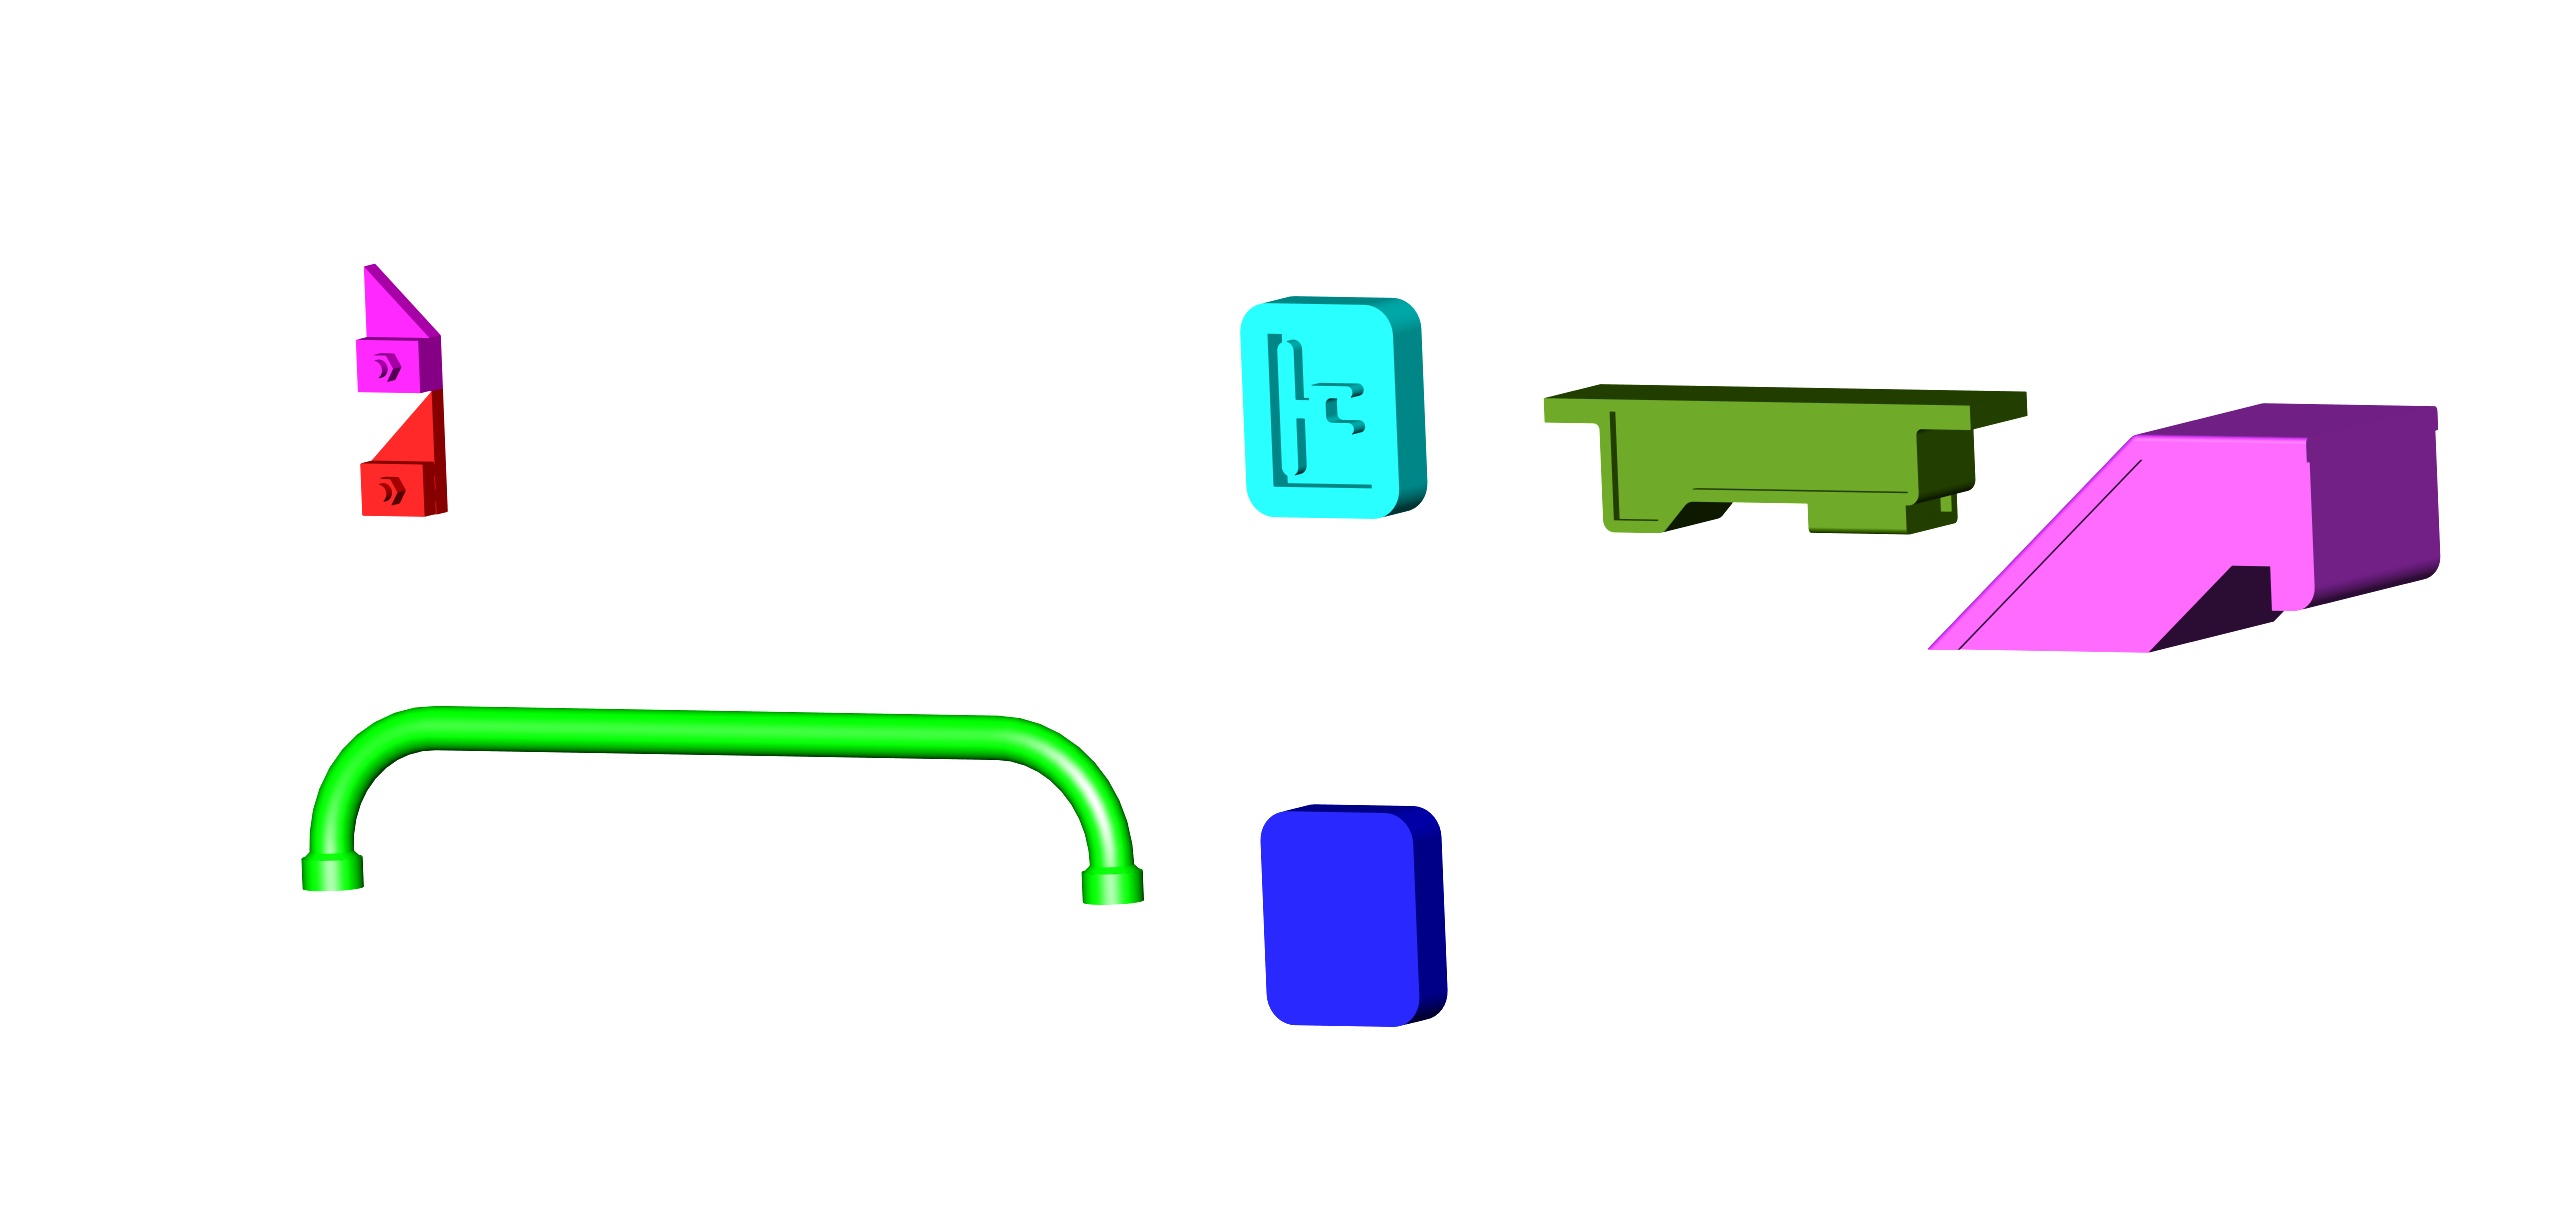
I describe working with a 3D CAD program as like with Play-Do and Legos. You either draw a shape in two dimensions and extrude it to a 3D shape or weld basic 3D shapes like cylinders, blocks, etc. into a more complex part.
Here are some of the darings that go into making the cab!


Following this build
Saw one of these in Wyoming last year.
That is a great museum especially for softskins.
Thanks for sharing your CAD development story! I’m really looking forward to reading and seeing more as this project progresses along!
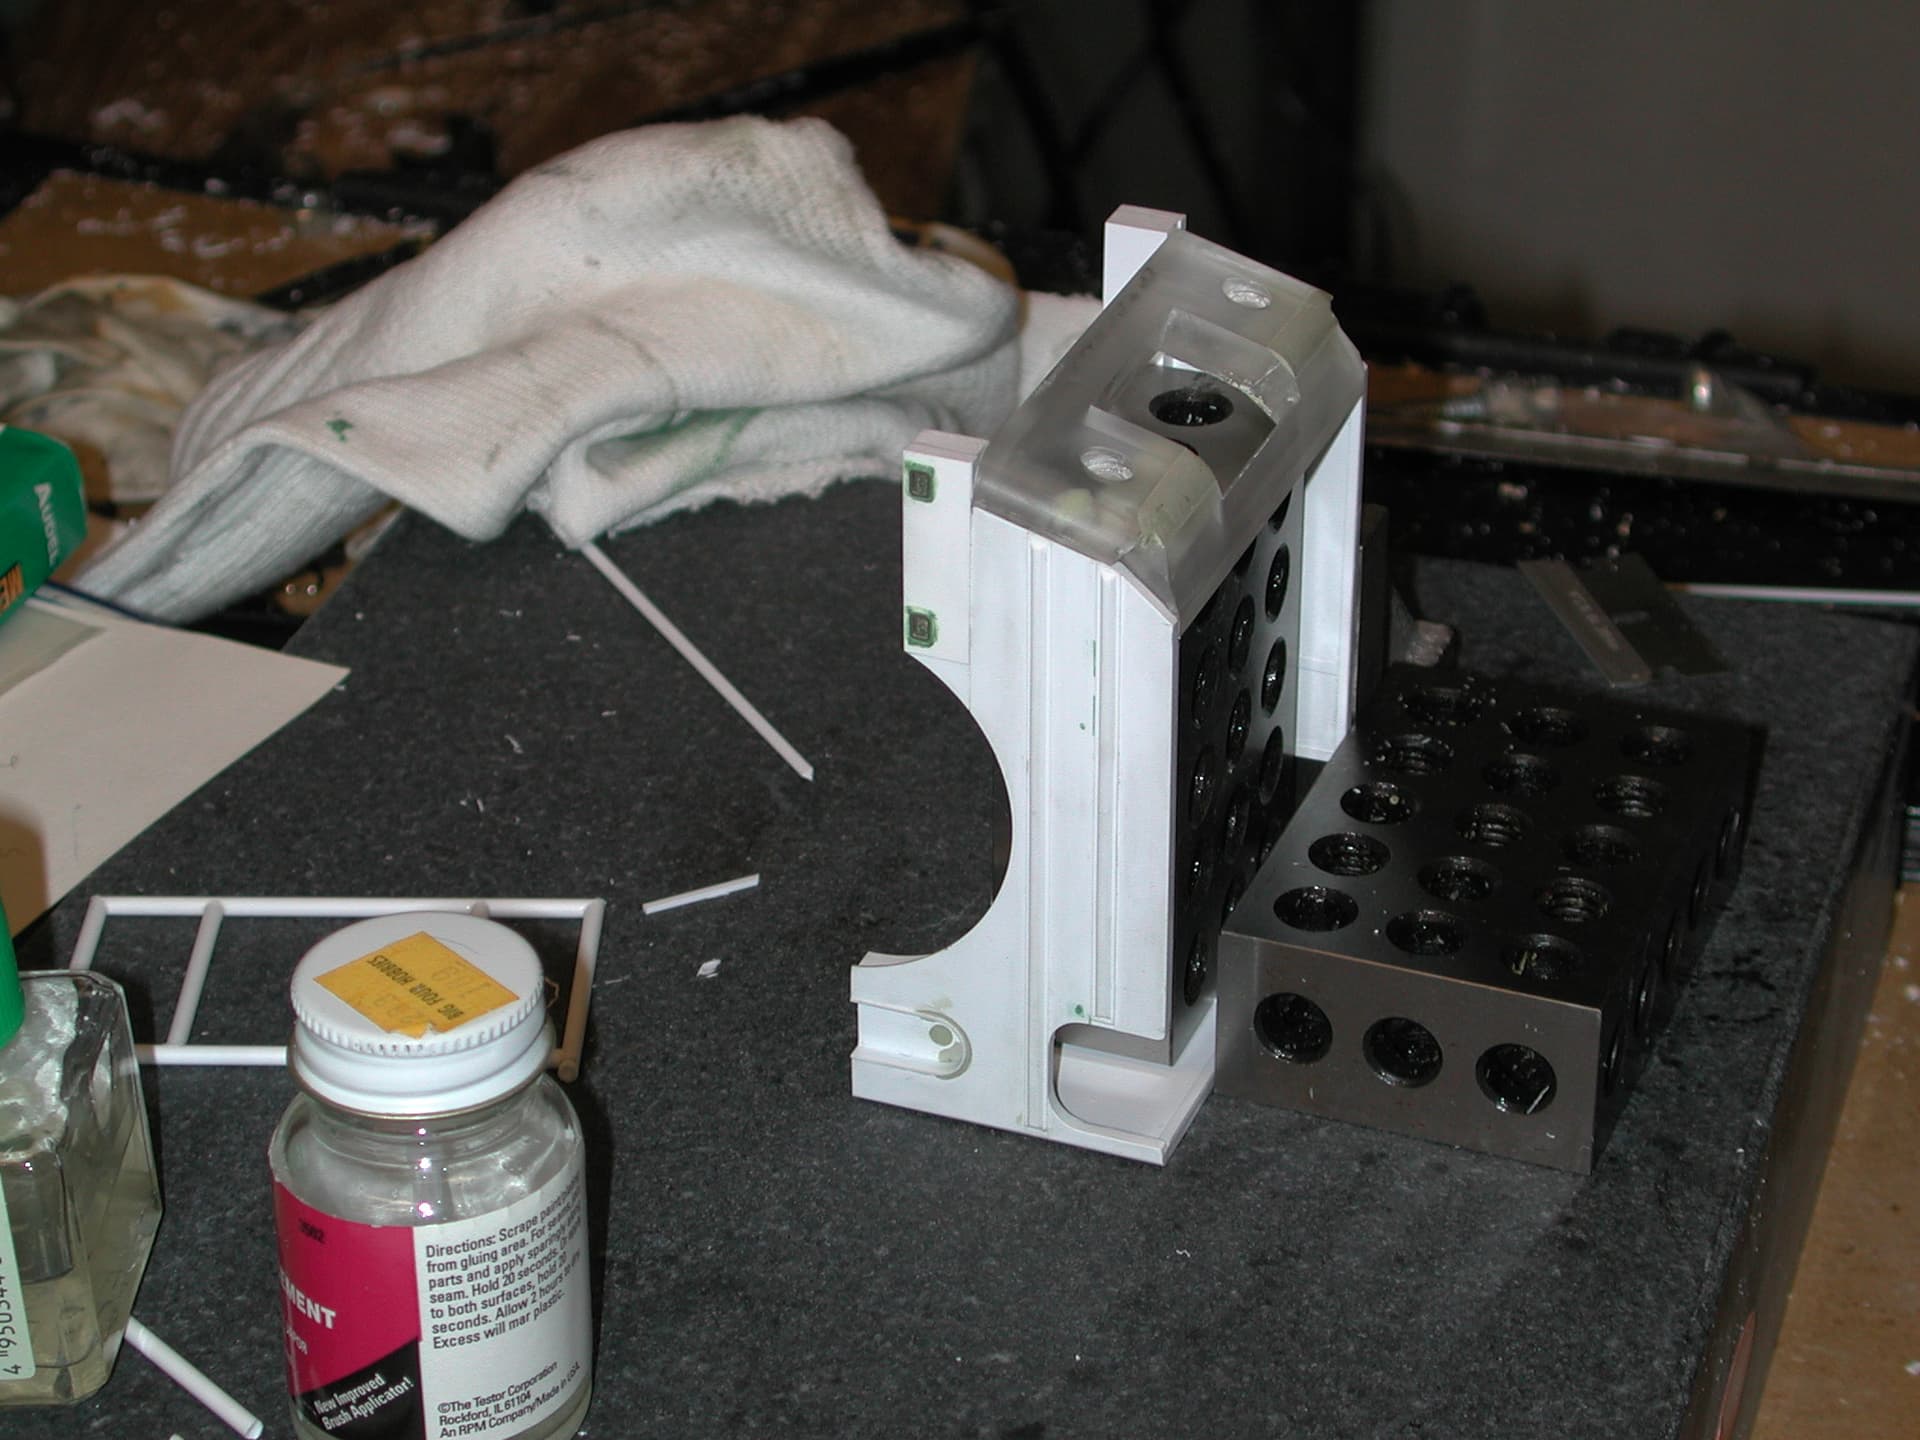
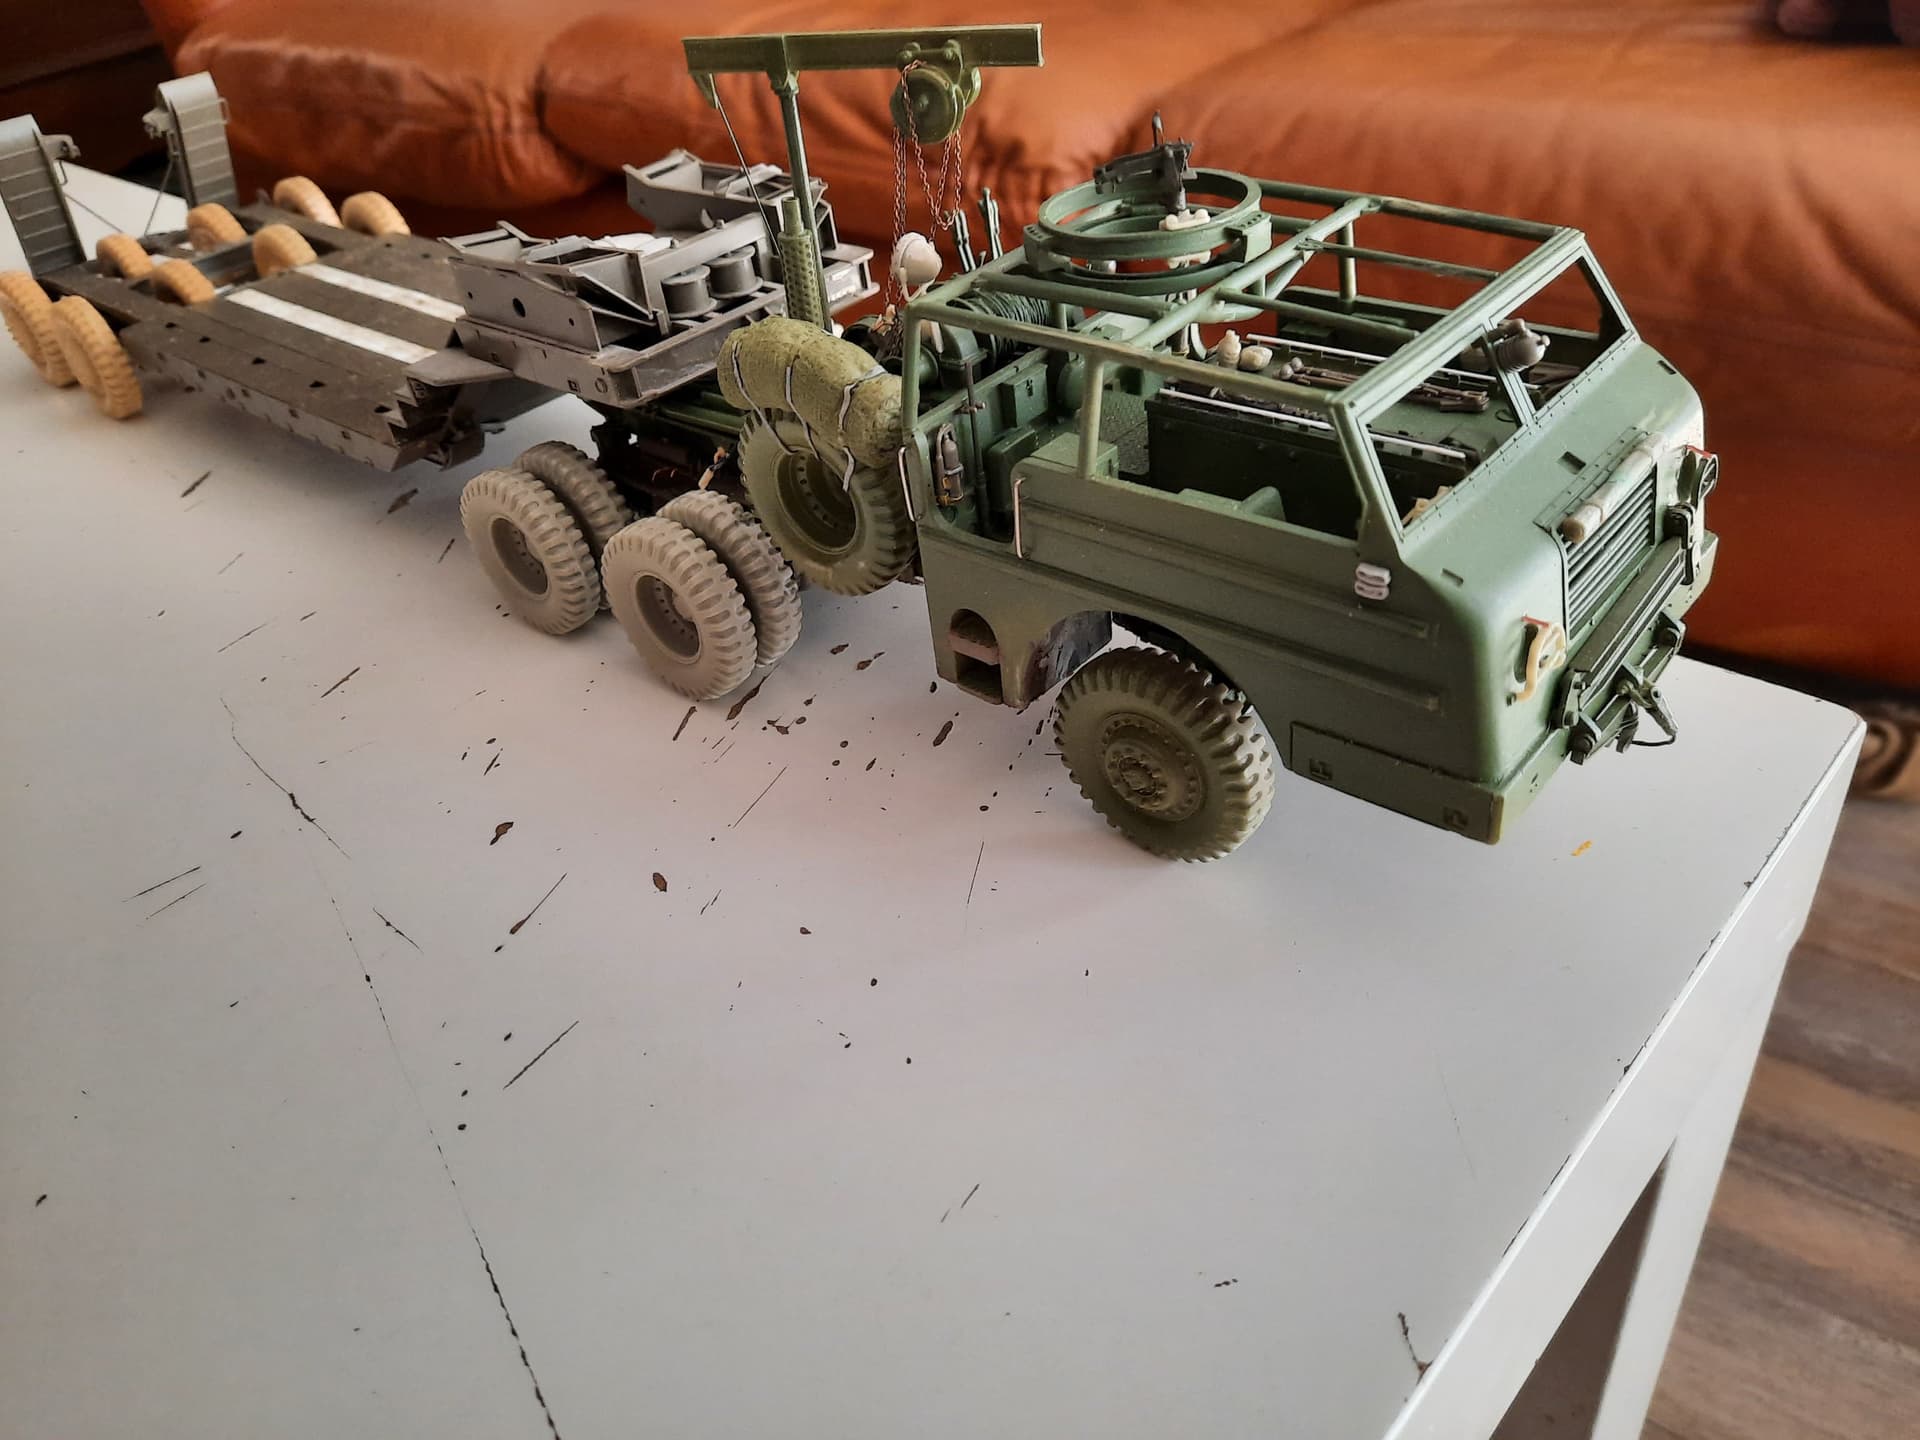
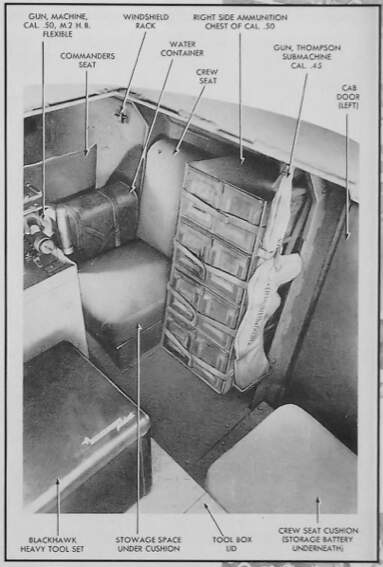
More work on some of the other parts. I improved the .50 cal ammo can rack to replace the one in the plastic kit. The real rack was built up from a series of metal strips and I replicated it here.
The .50 cal rack also held the Thompson sub-machine gun although these were probably phased out after WWII in favor of the M3 “Grease Gun”.
Love to see that for sale for the hard cab.
One of the other things I want to tackle is the elusive Blackhawk toolbox. In pictures from the manual there is no clear shots of the tool box, just hints of the box peeking out in the photos, but from what little you can see it appears to have square corners with a rounded lid and a front metal flap that covers the drawers.
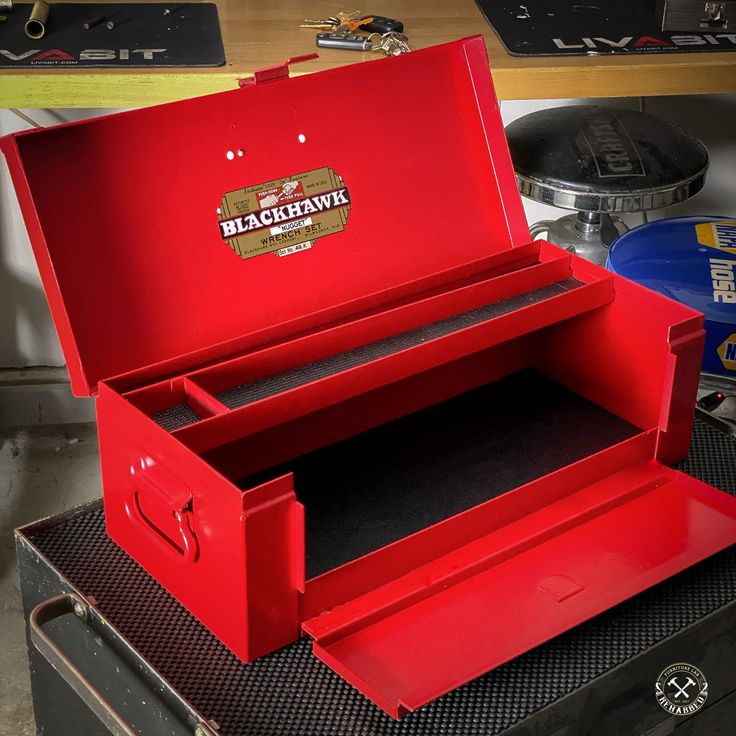
Pictures from Pat Stansell’s and David Doyle’s “Dragon Wagon” of a factory new soft cab M26A1 show a Blackhawk toolbox with the more common rounded corners and lid much like this box: https://www.worthpoint.com/worthopedia/vintage-blackhawk-master-mechanic-1891982658
Furthermore the box looks bigger, sitting atop the angle-iron brackets rather than inside of them.
There is a hobby for everything! Apparently there are message boards dedicated to collecting old toolboxes and I think I might have found a match: https://www.garagejournal.com/forum/threads/i-love-auctions-blackhawk-yellow-porn-inside.231893/
Even thought it’s a Caterpillar toolbox they did not make it it themselves but contracted it out to Blackhawk.
Great find!
Can you please show the pics here? My phone won’t let me download them.
I think you have to be a member of the forum to download any of those pictures.
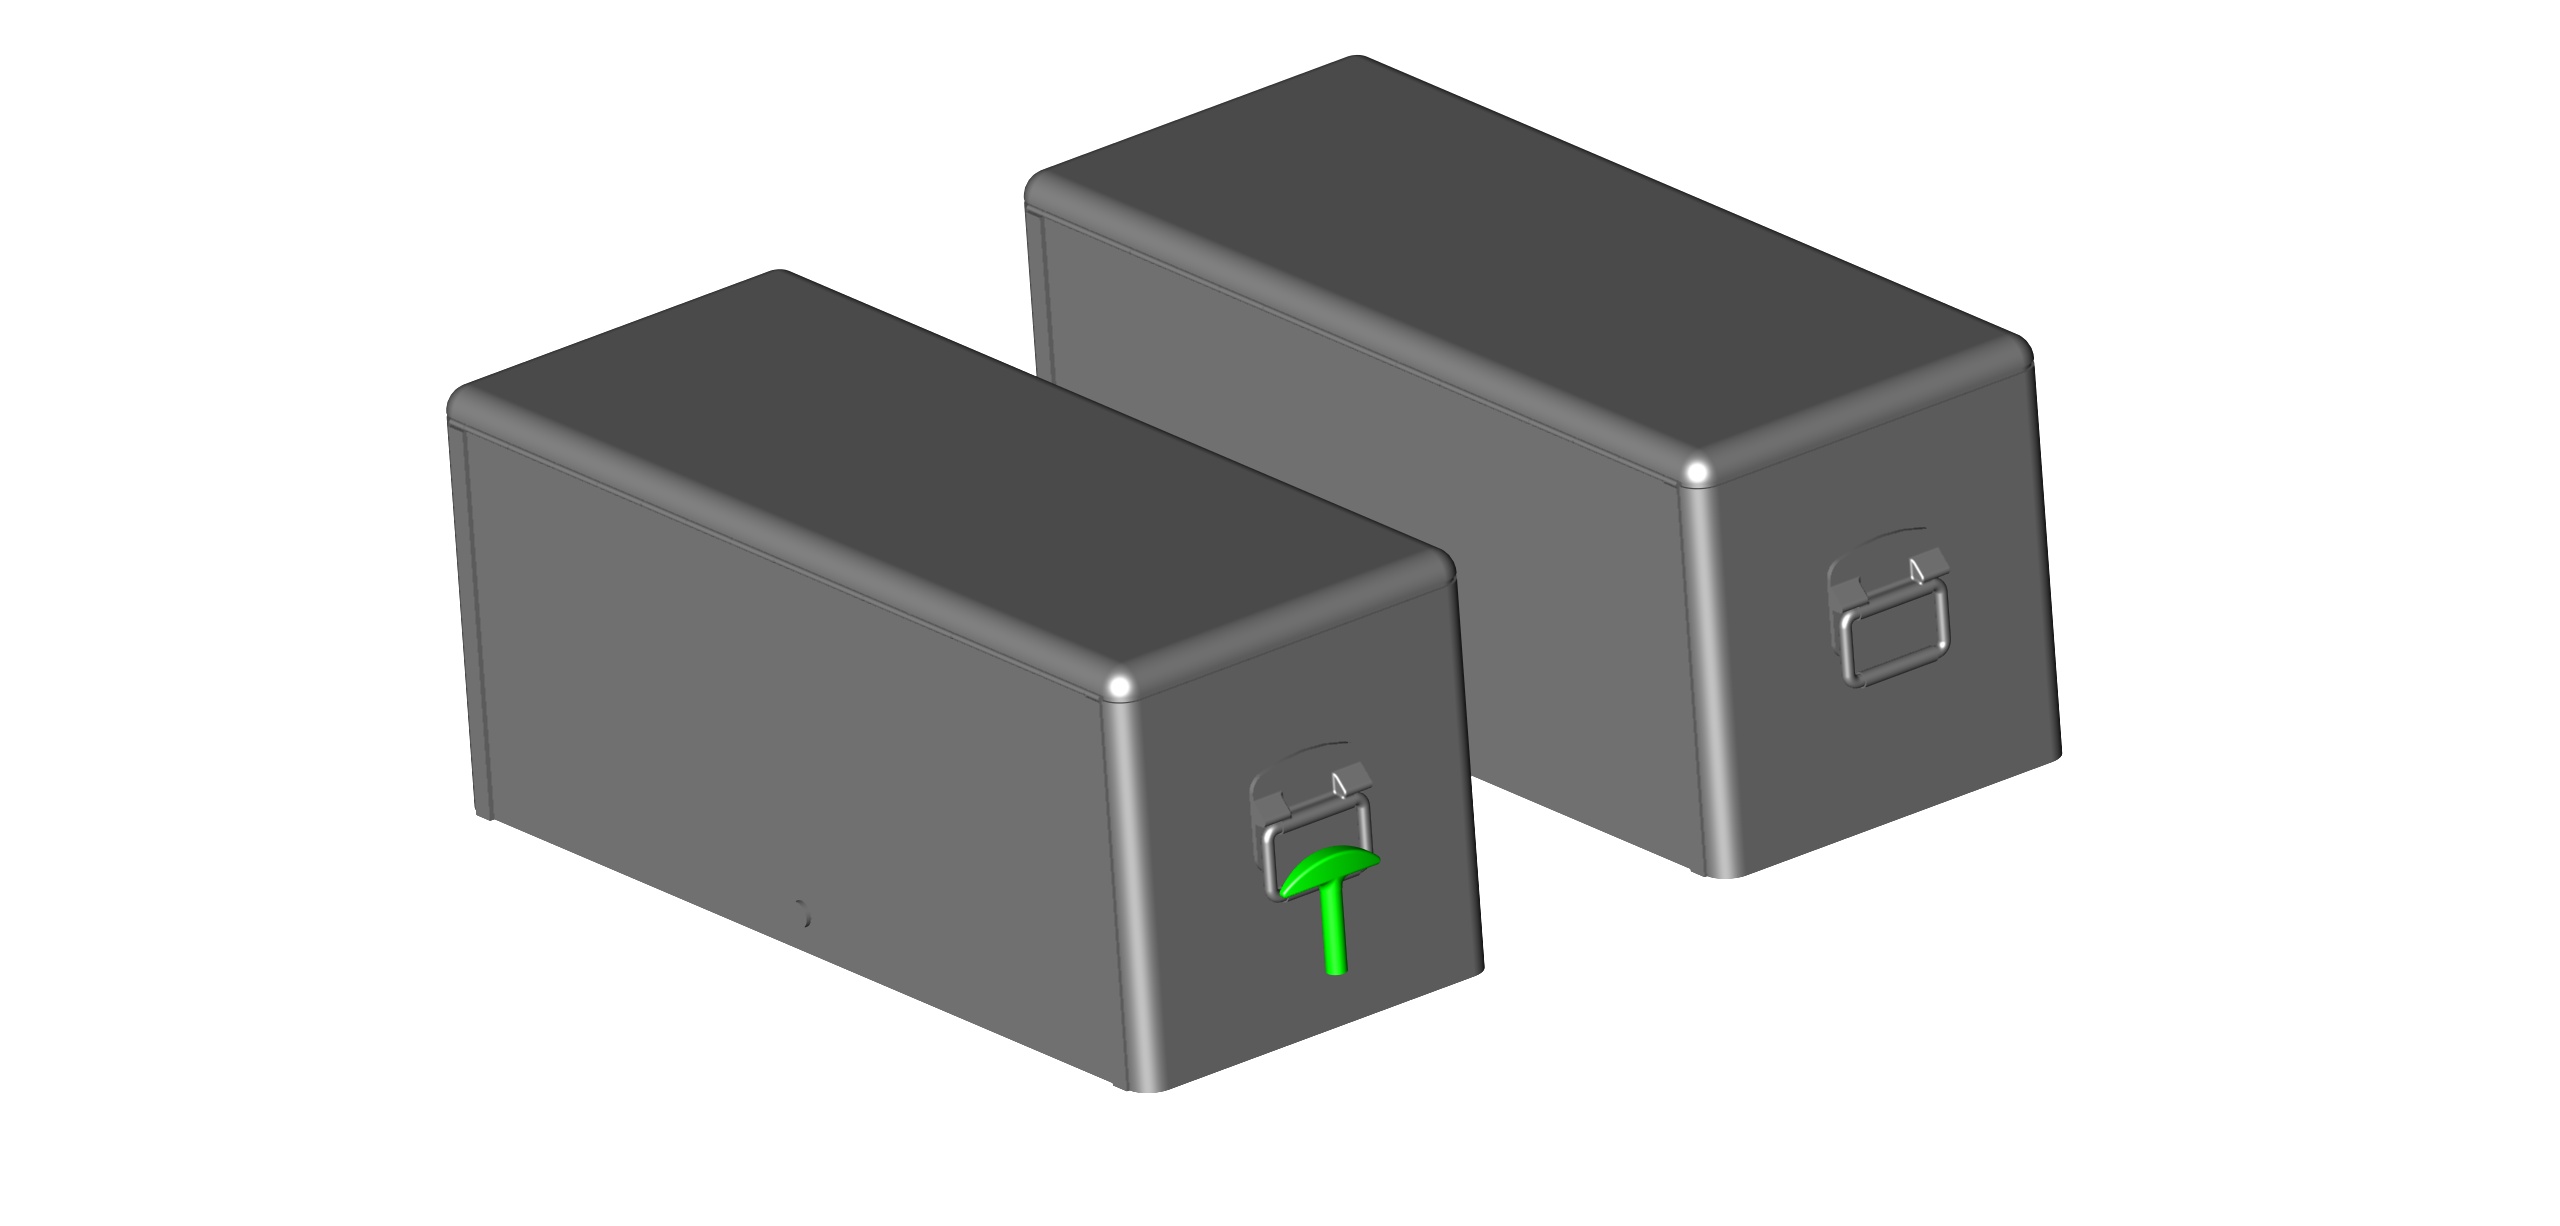
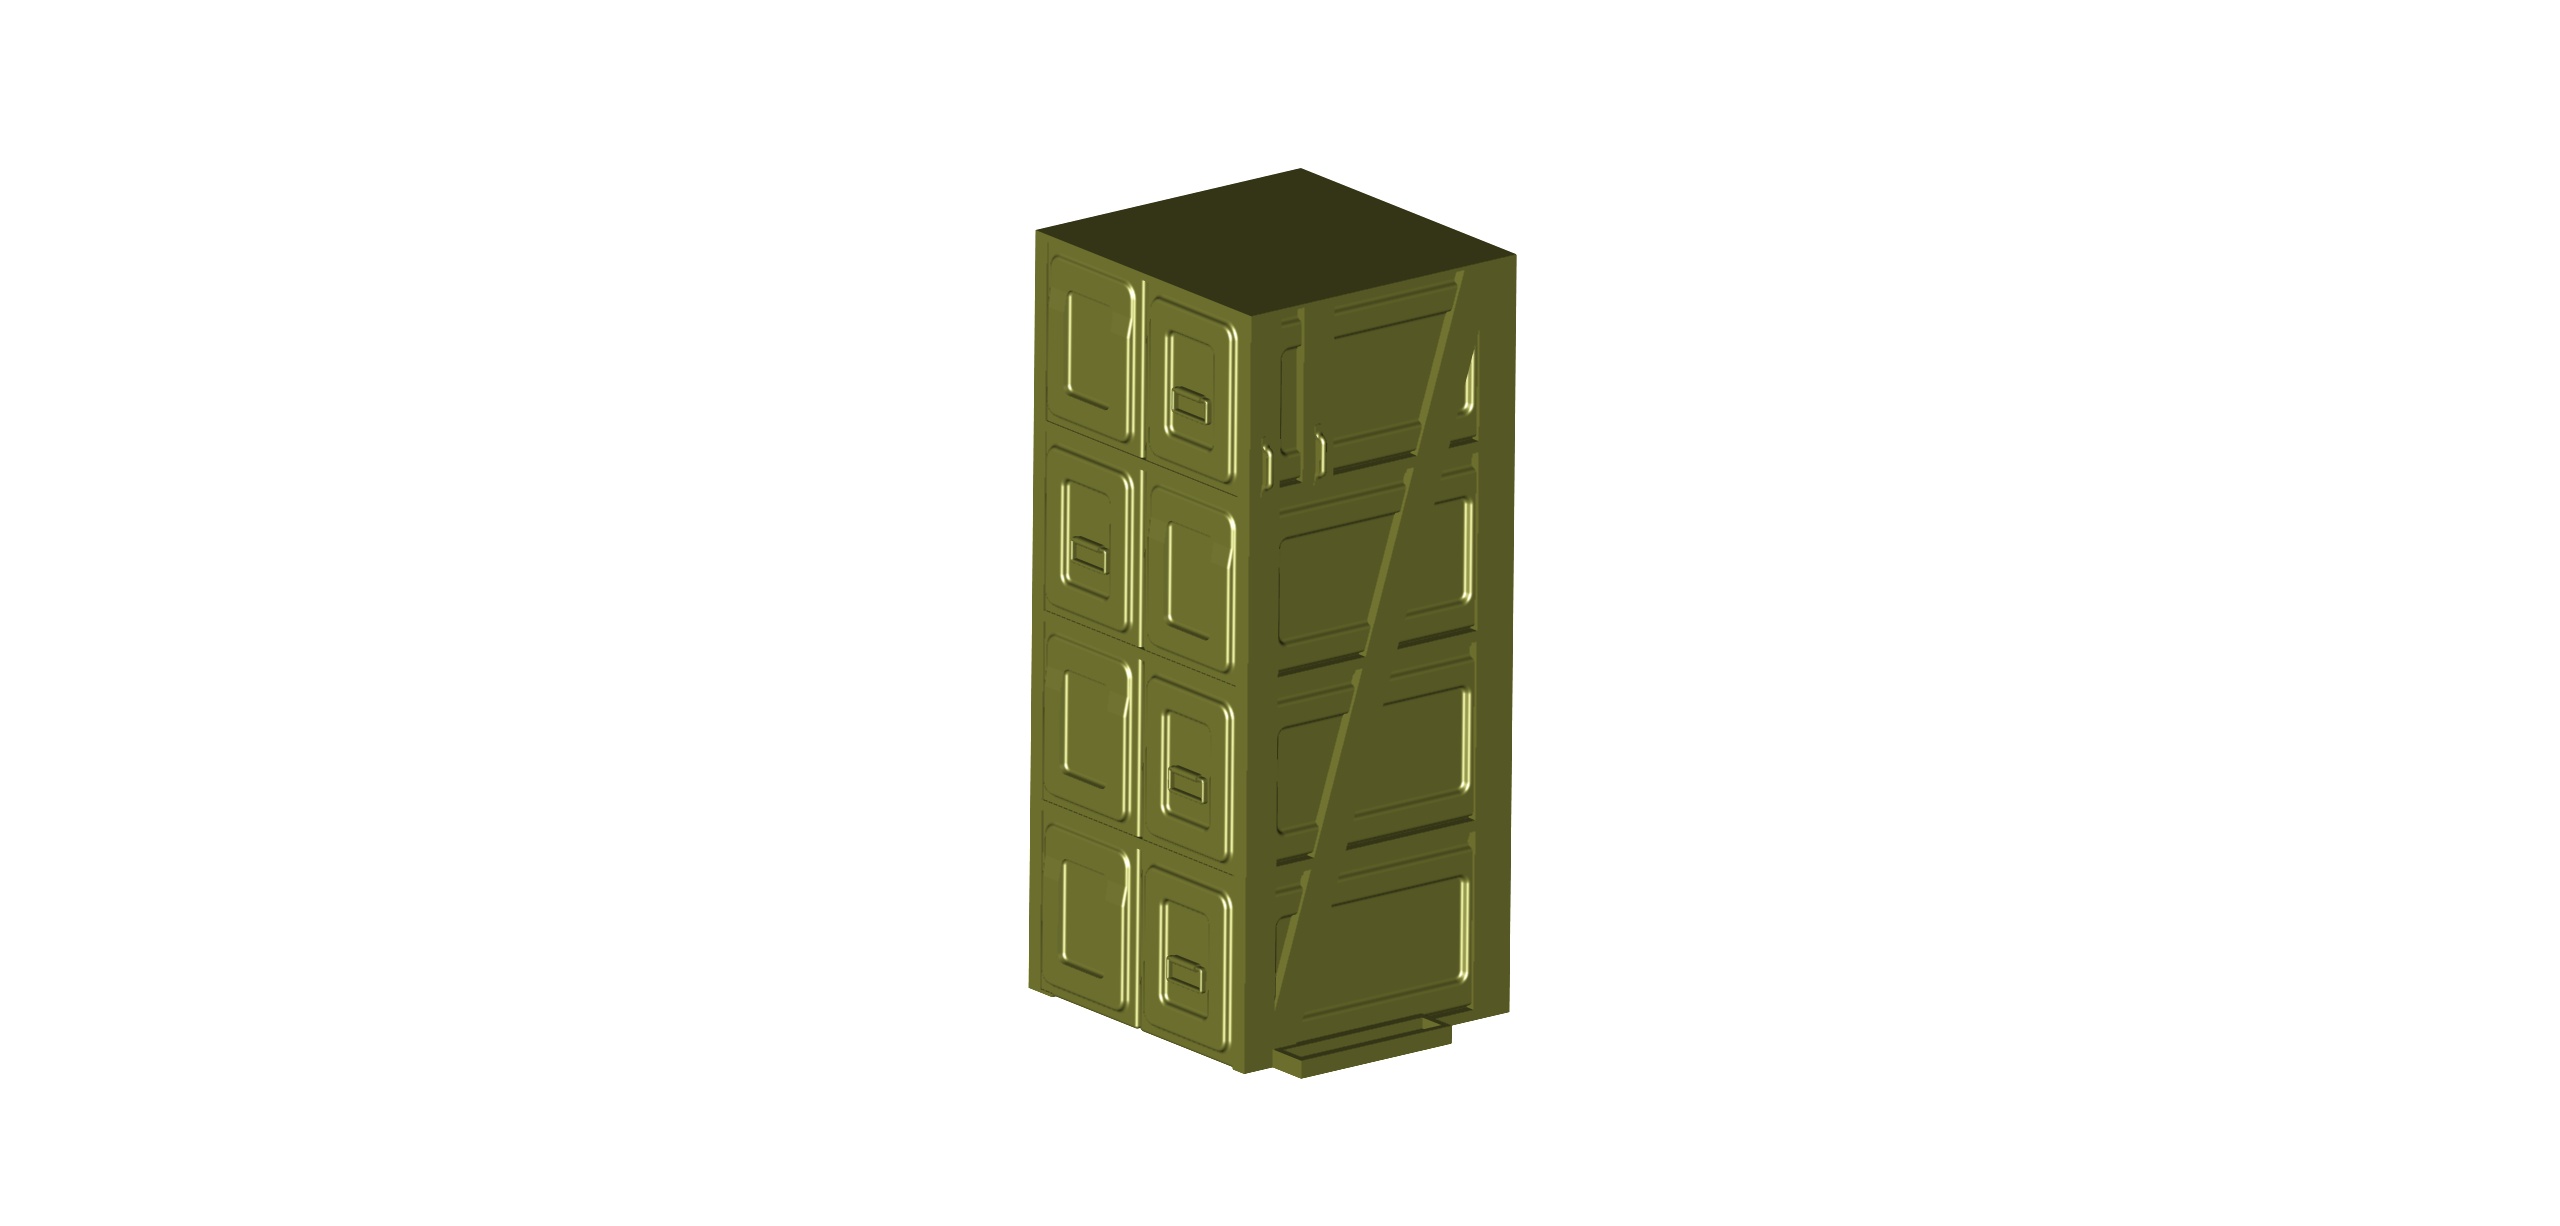
I think I settled on the Blackhawk Toolbox shape.
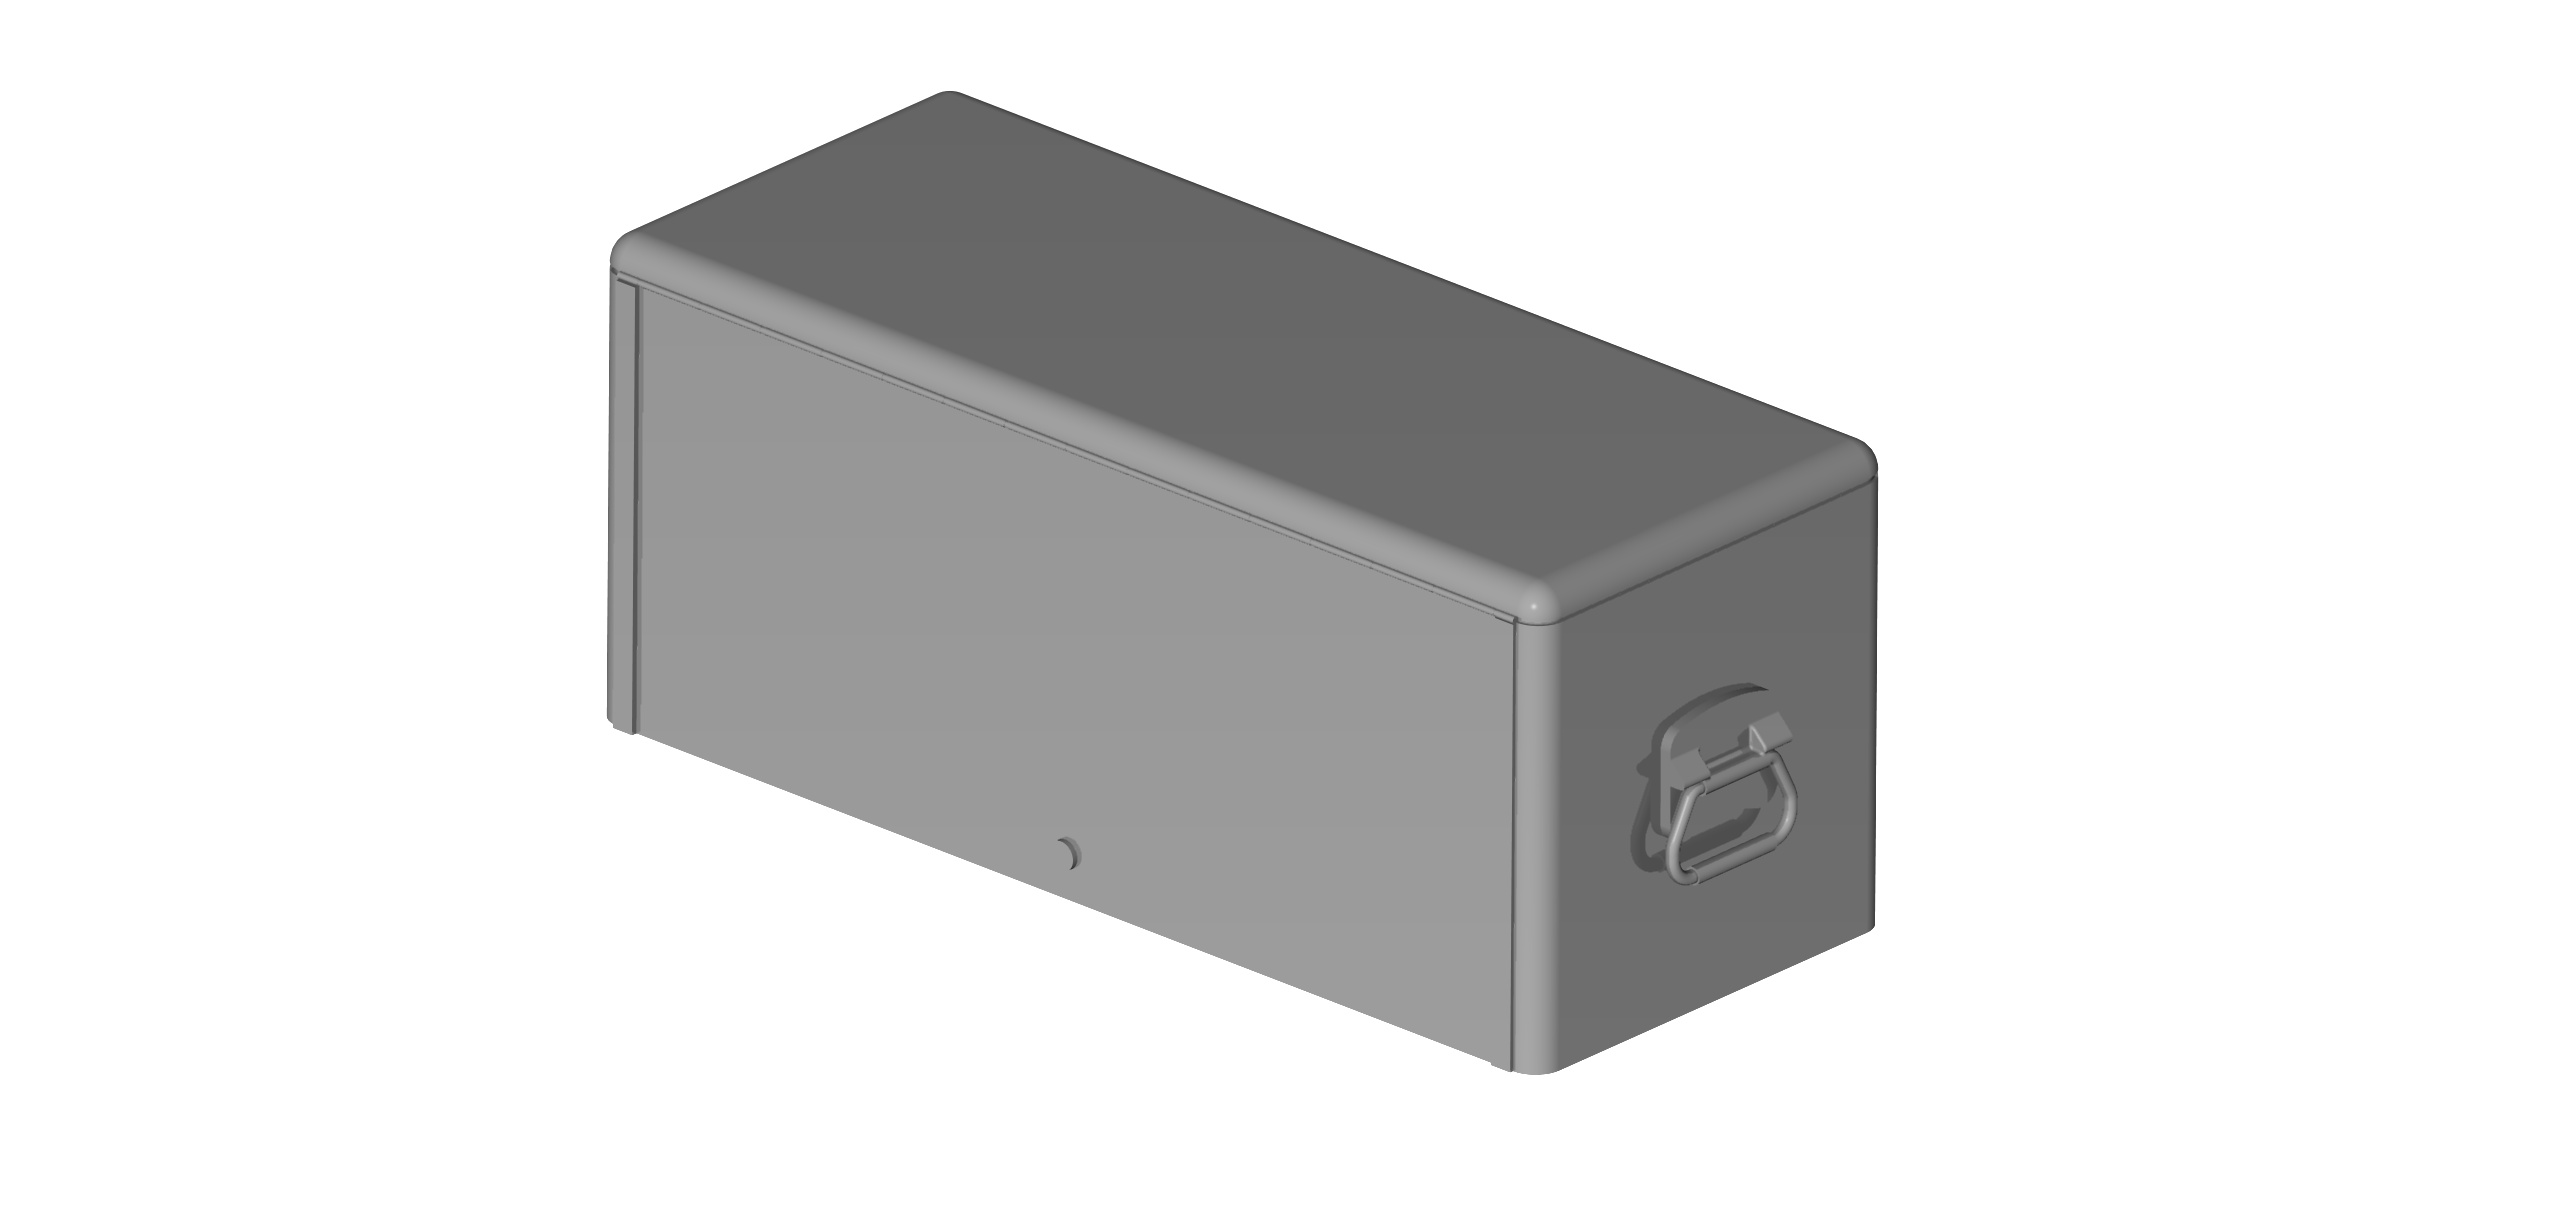
The handle will have to be molded in so it can be printed. I might also do two boxes, one with the Jeep hood hold downs and one without.
While waiting for the test shots to come back from Shapeways, I’m doing more work on the Blackhawk Toolbox (or Tool Chest as Blackhawk calls it). Examining the photos again it looks like the handles are simple rectangles and not the “D” shape that I rendered so I changed it.
Also I’m working on the hold downs which appear to be Jeep hood latches. On some restored Dragon Wagons they have CCKW hood latches which have a distinctive appearance to them, much like the handle to a cane.