I’m going in he opposite direction.
I began with some resin pieces of the MFH kit and all I got was troubles. I was making the 2 radiators to replace the originals, but finally, I leave again the Tamiya radiators. But painted in black as I saw in the pictures.
So except for the photoetched parts, I won’t make any resin.
Edit: It’s not the MFH kit. It’s from Hobby Design
1 Like
You must do what works for you.
1 Like
I am pleased to say that my rivet dilemma has been addressed by the Hobby Design accessories pack!
That is a bonus, now I need to source some burnishing liquid to darken the rivets.
Till next time! 
1 Like
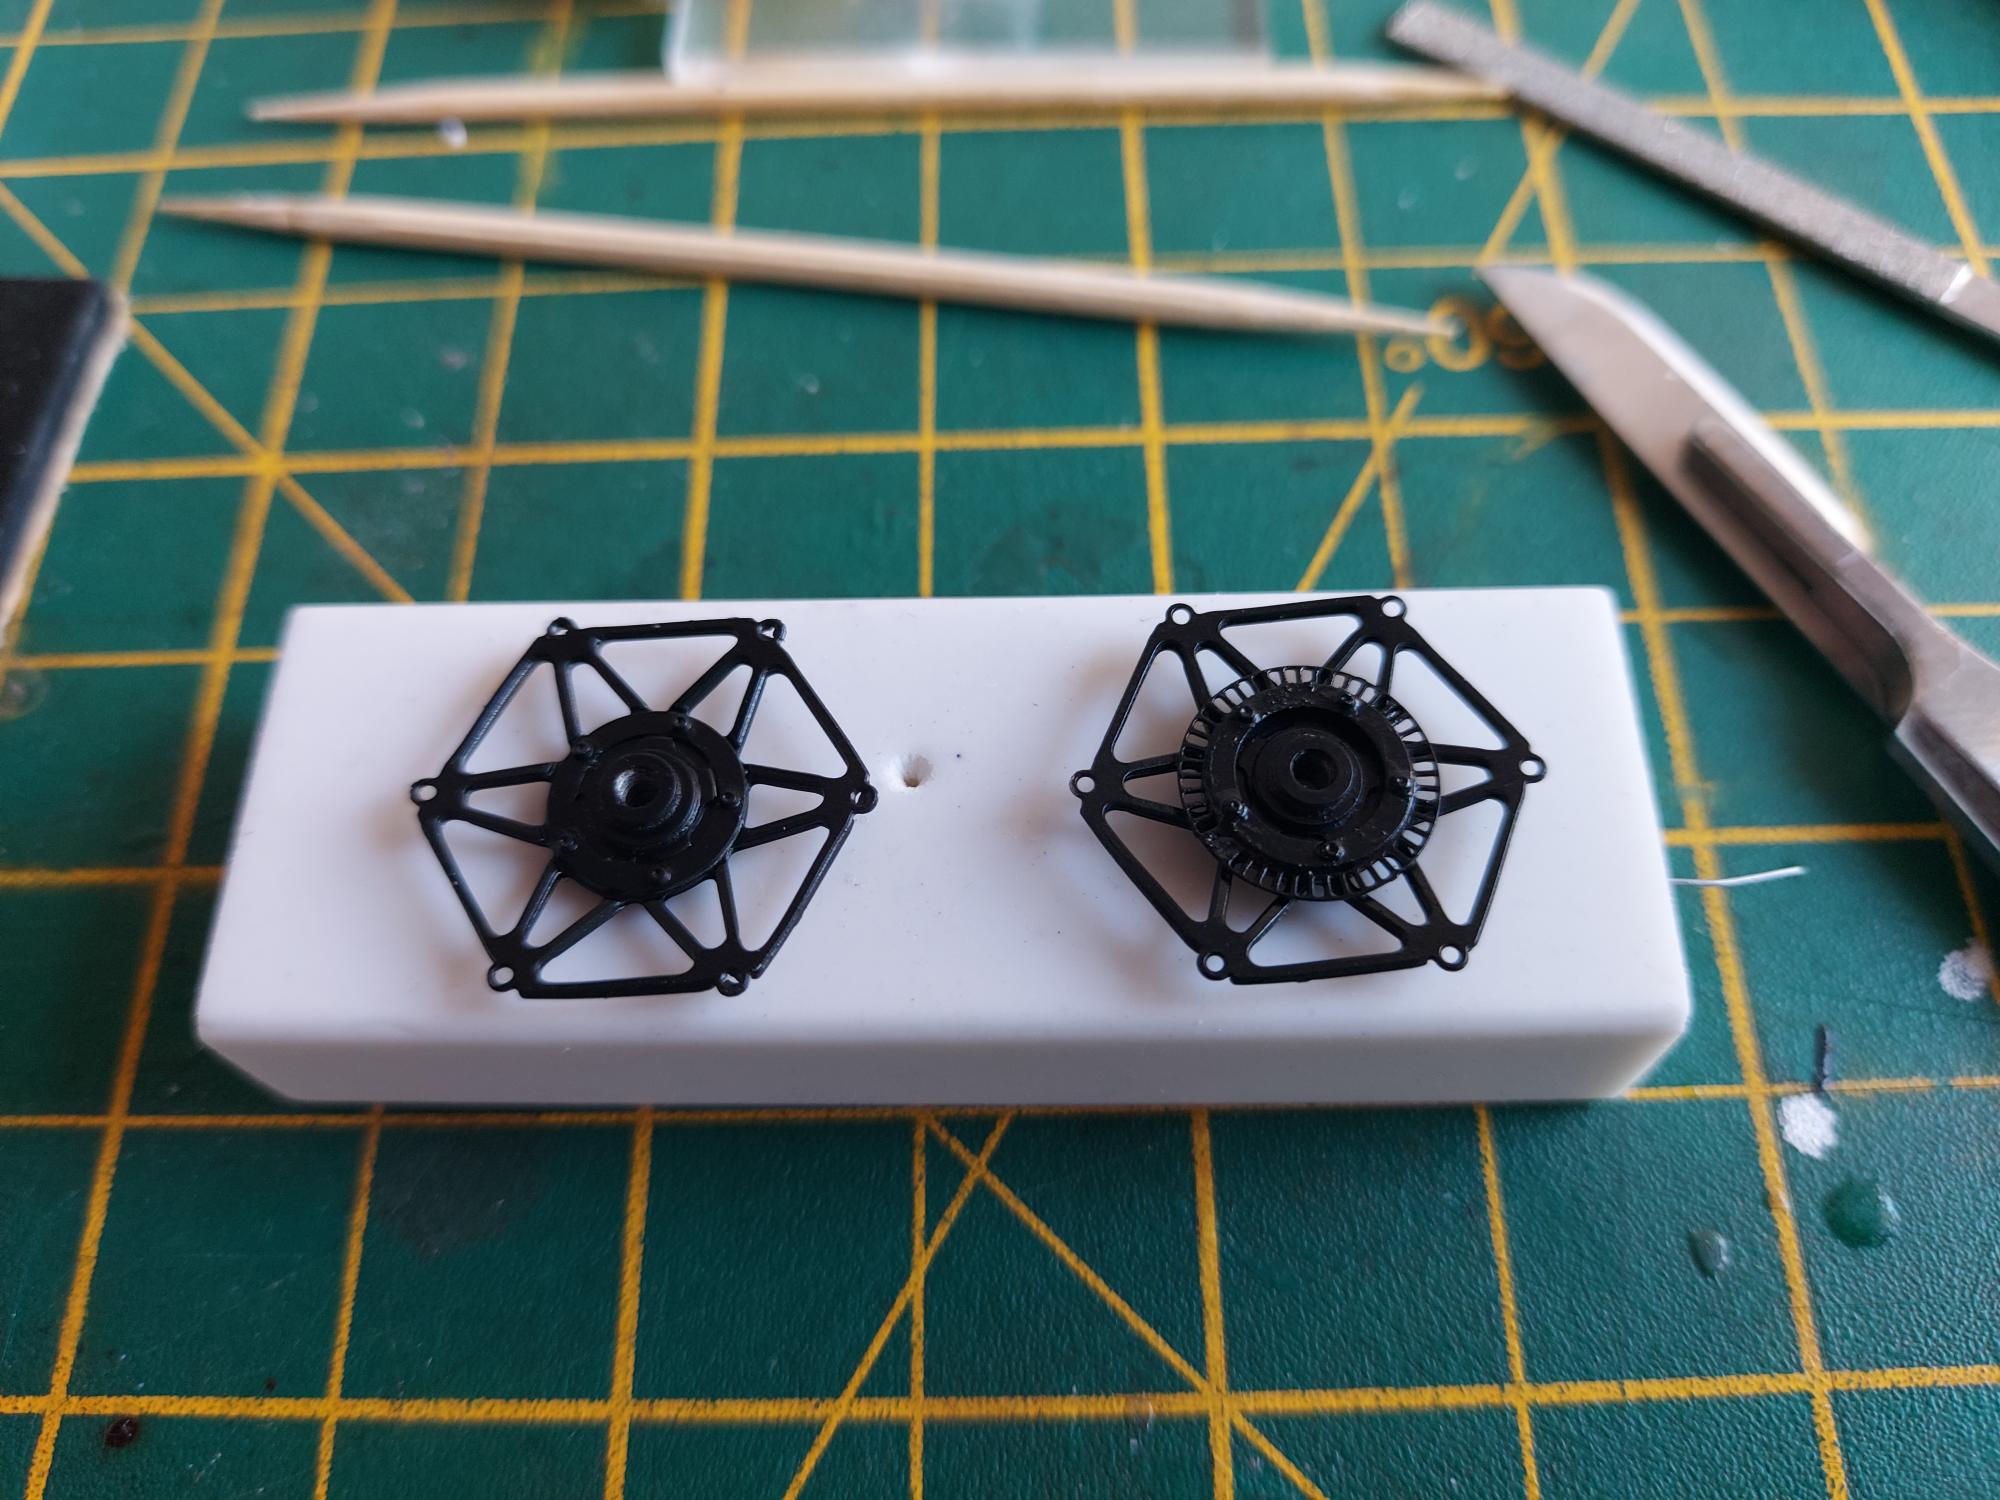
Hi all, it’s been a while.
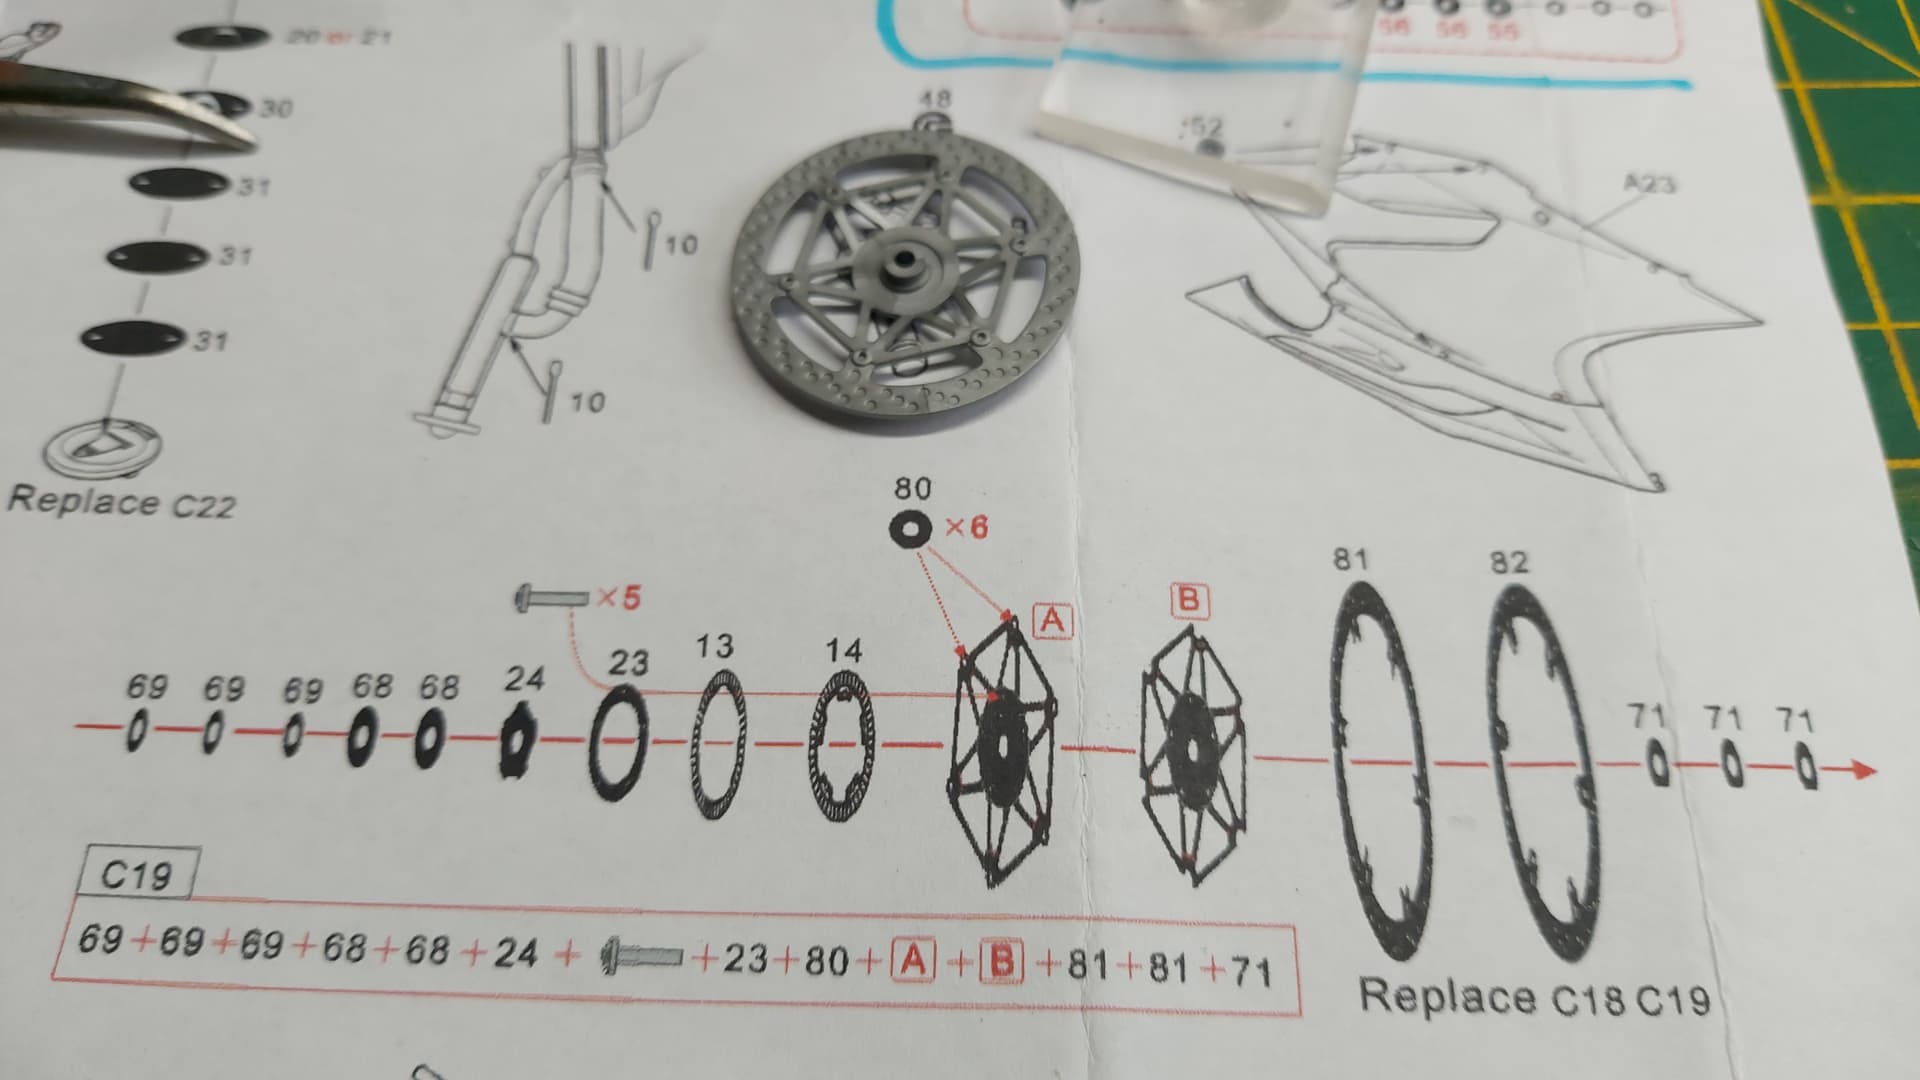
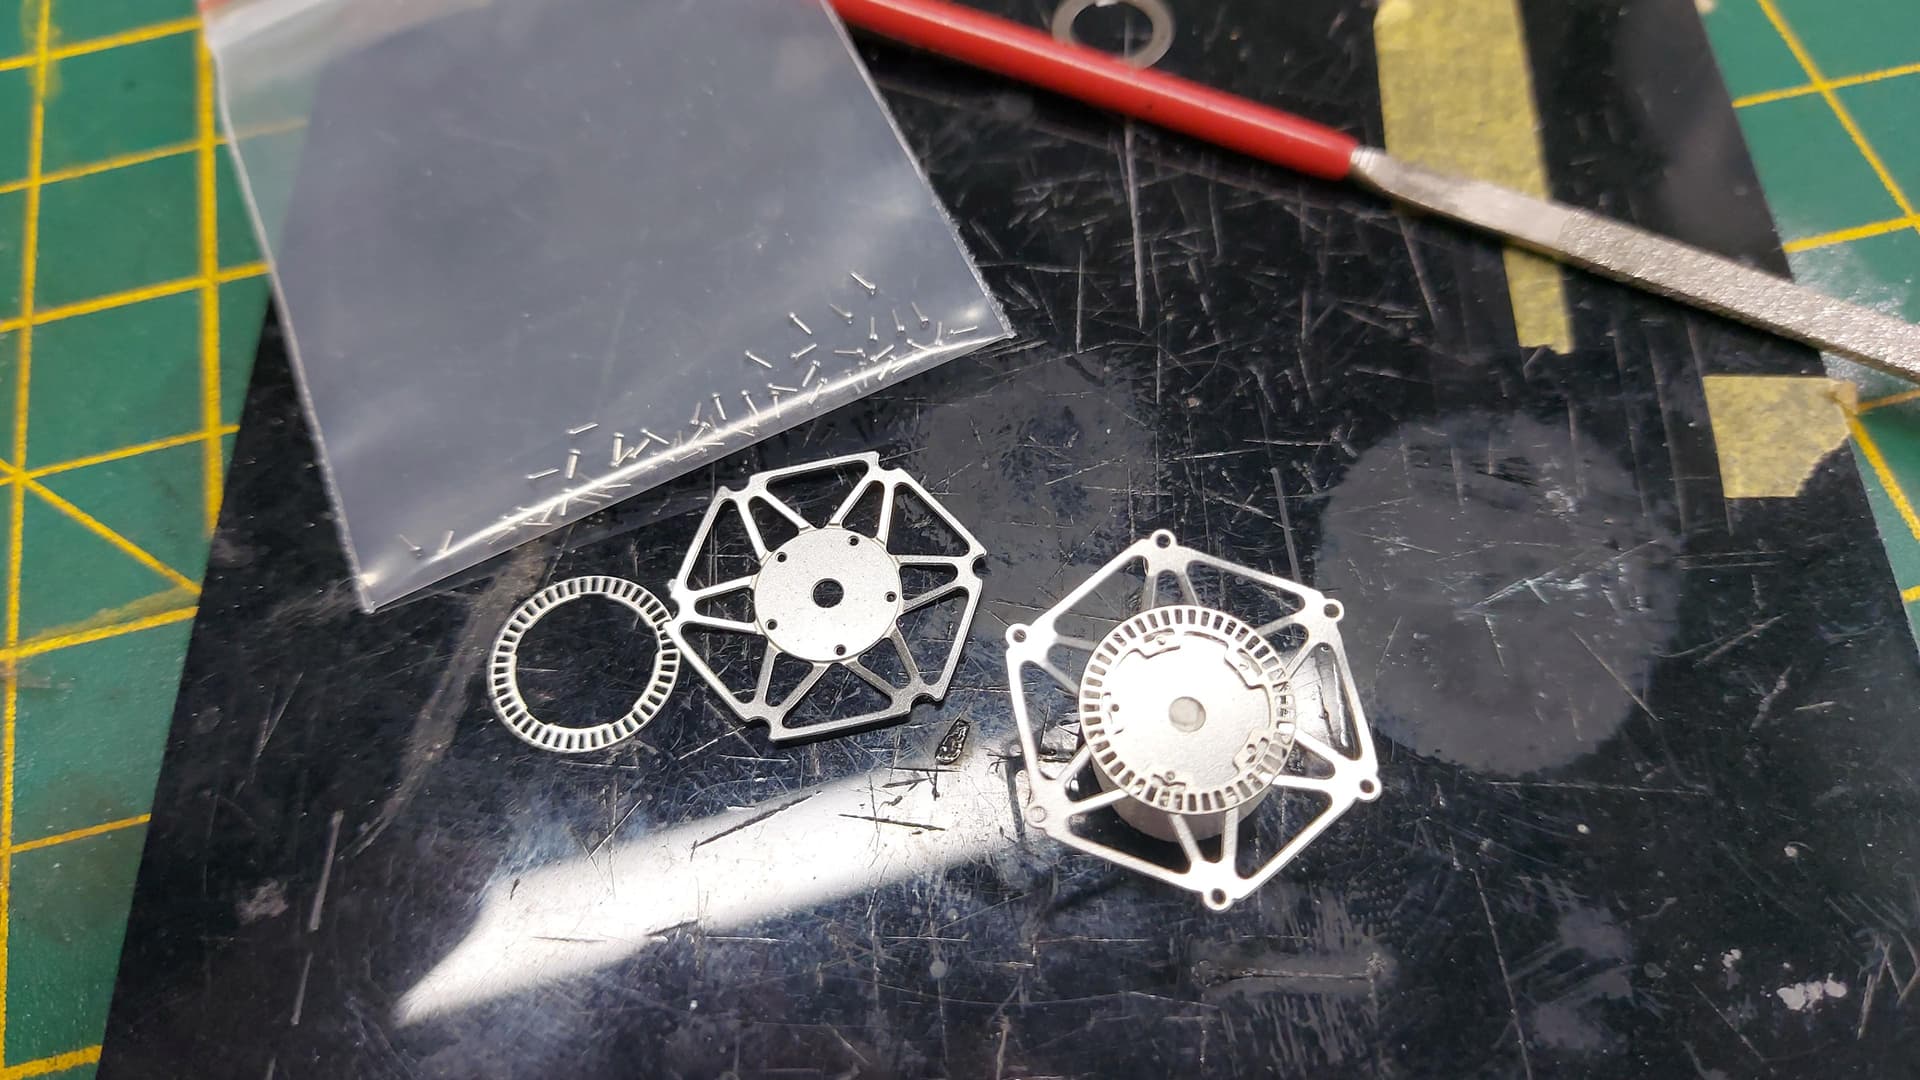
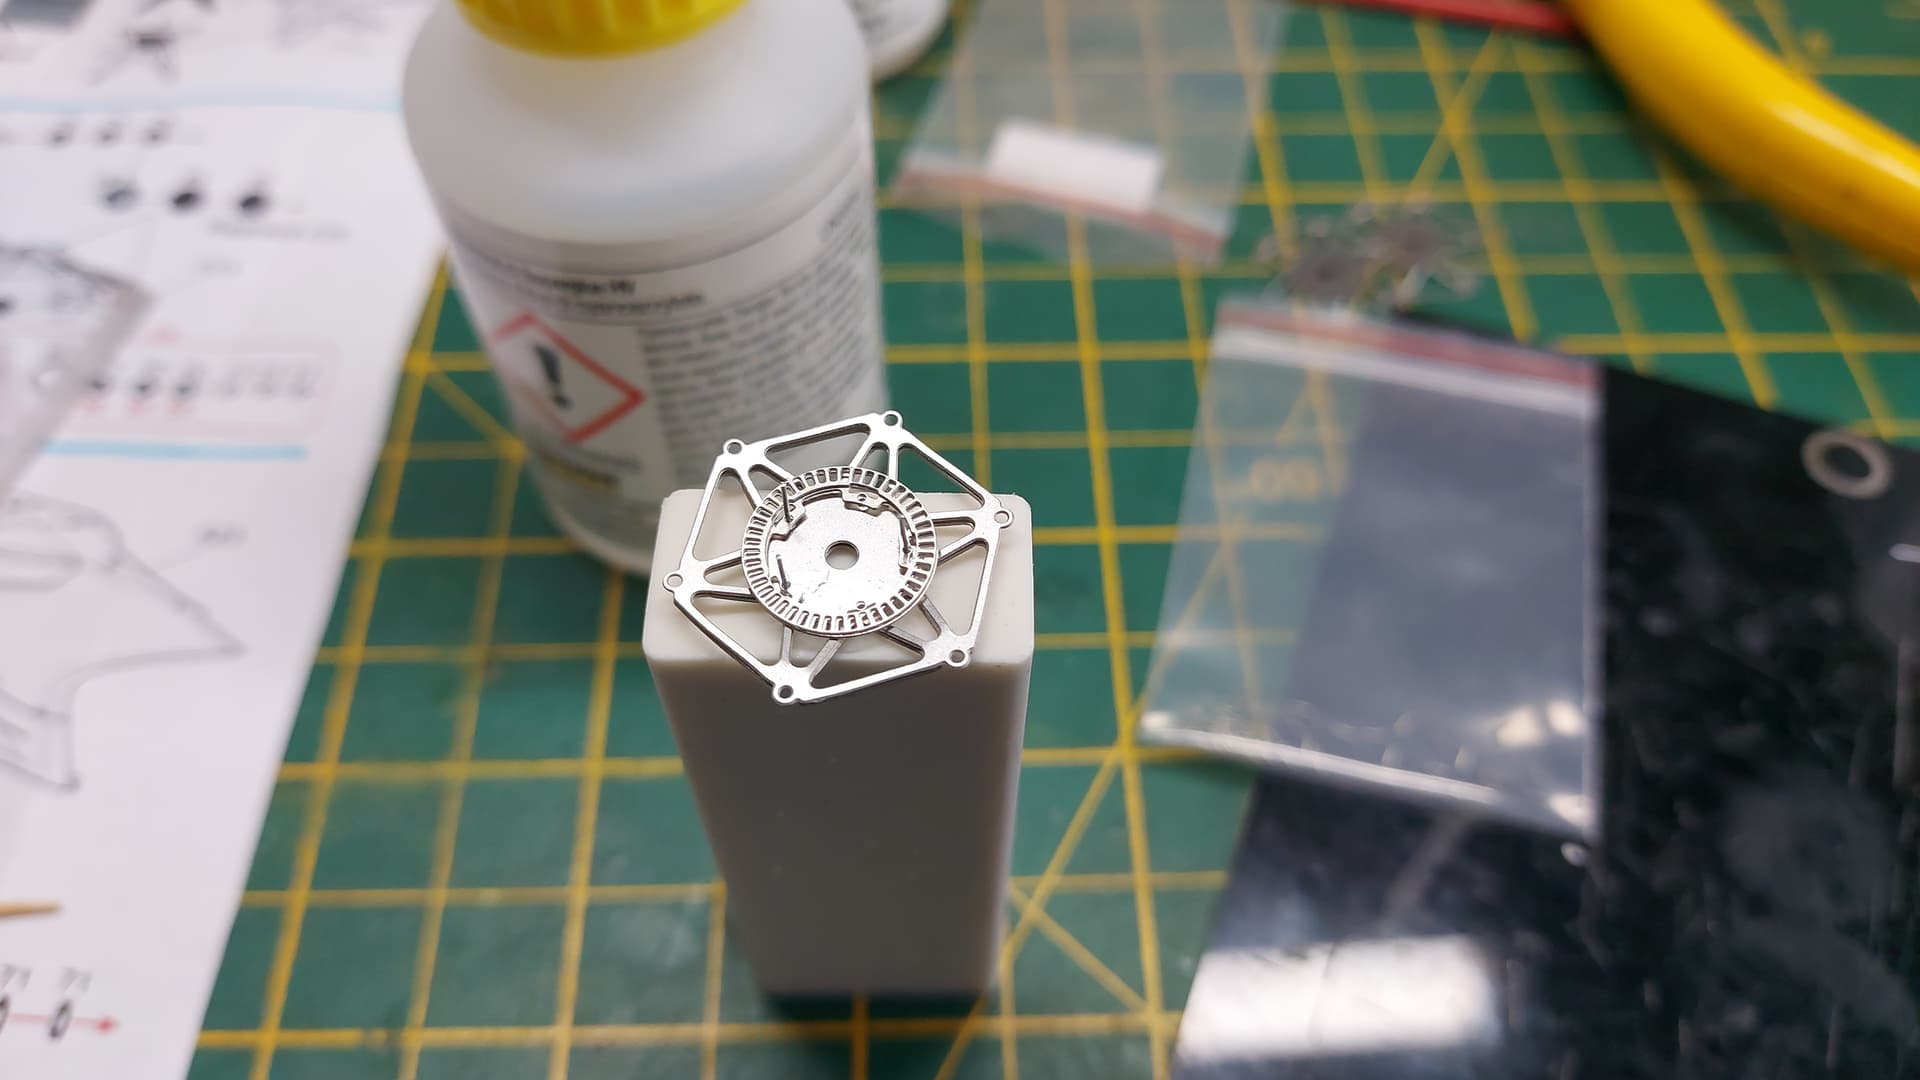
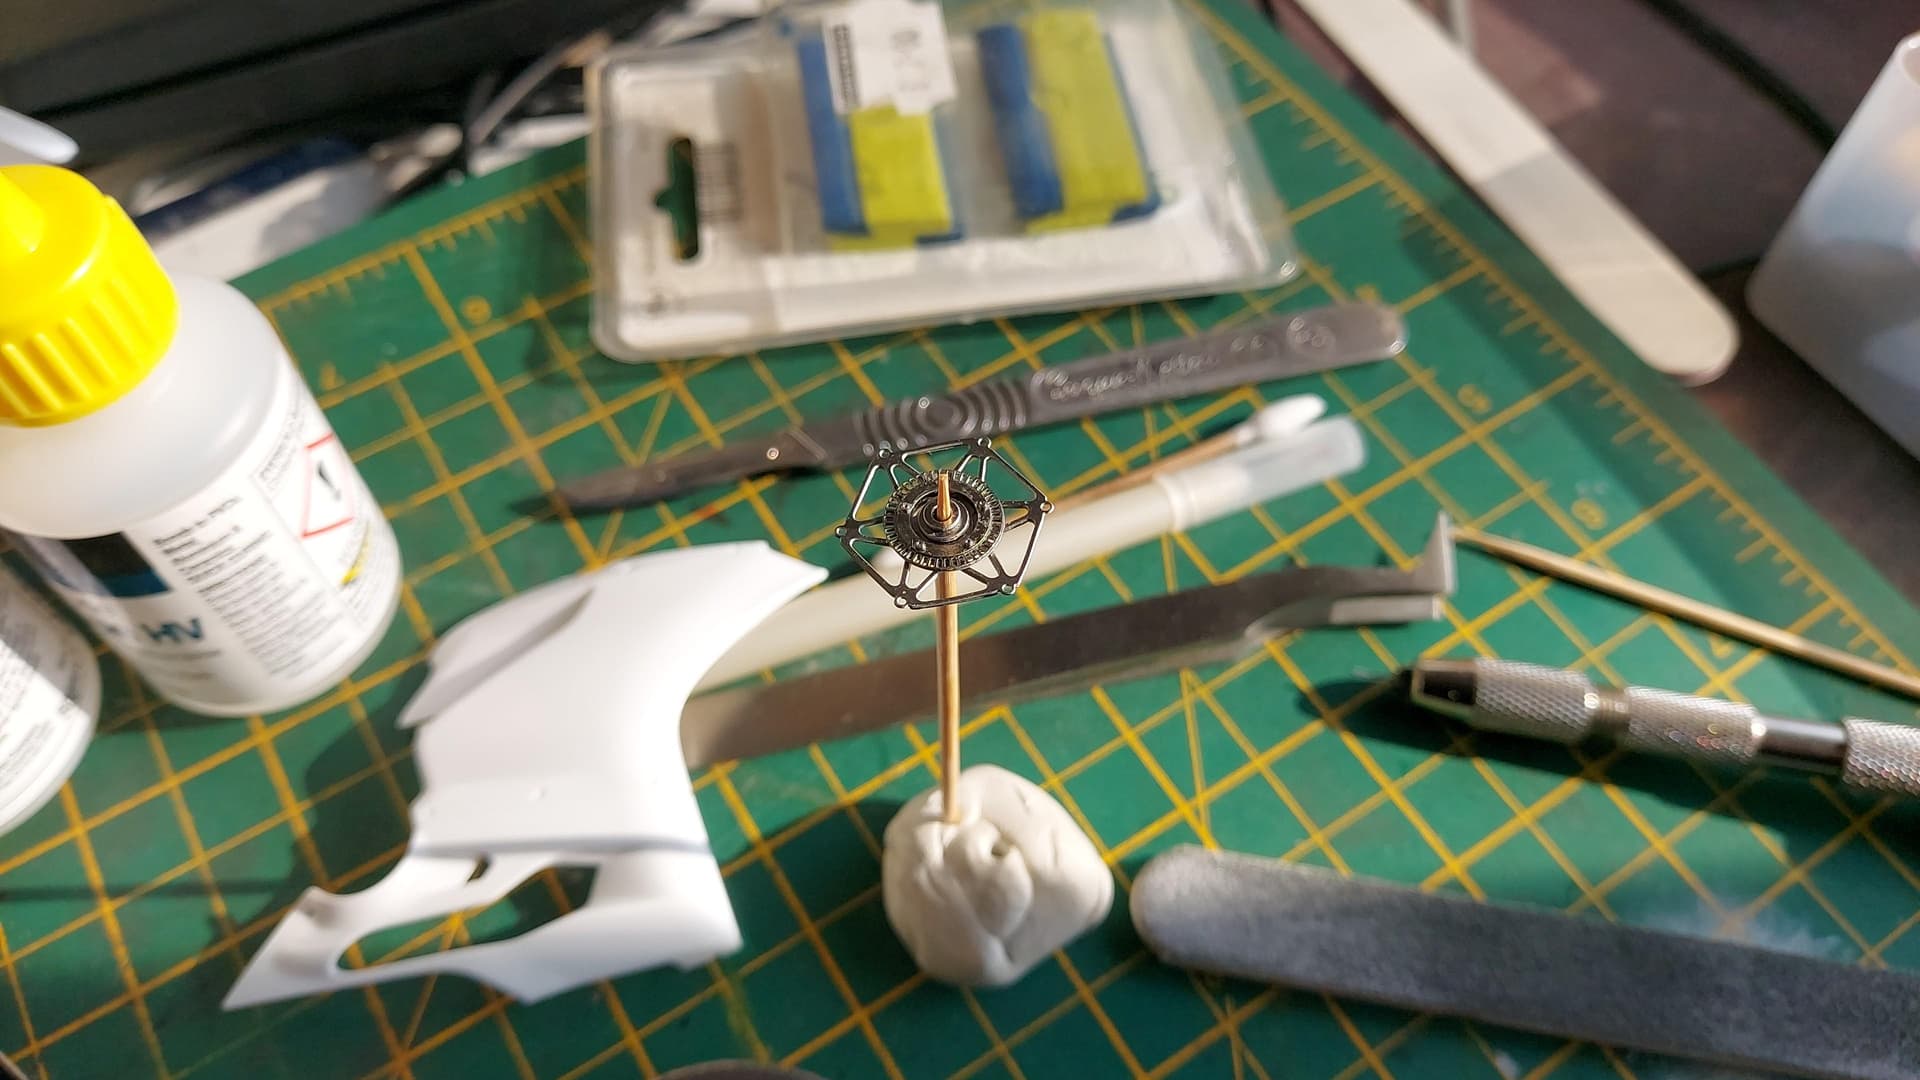
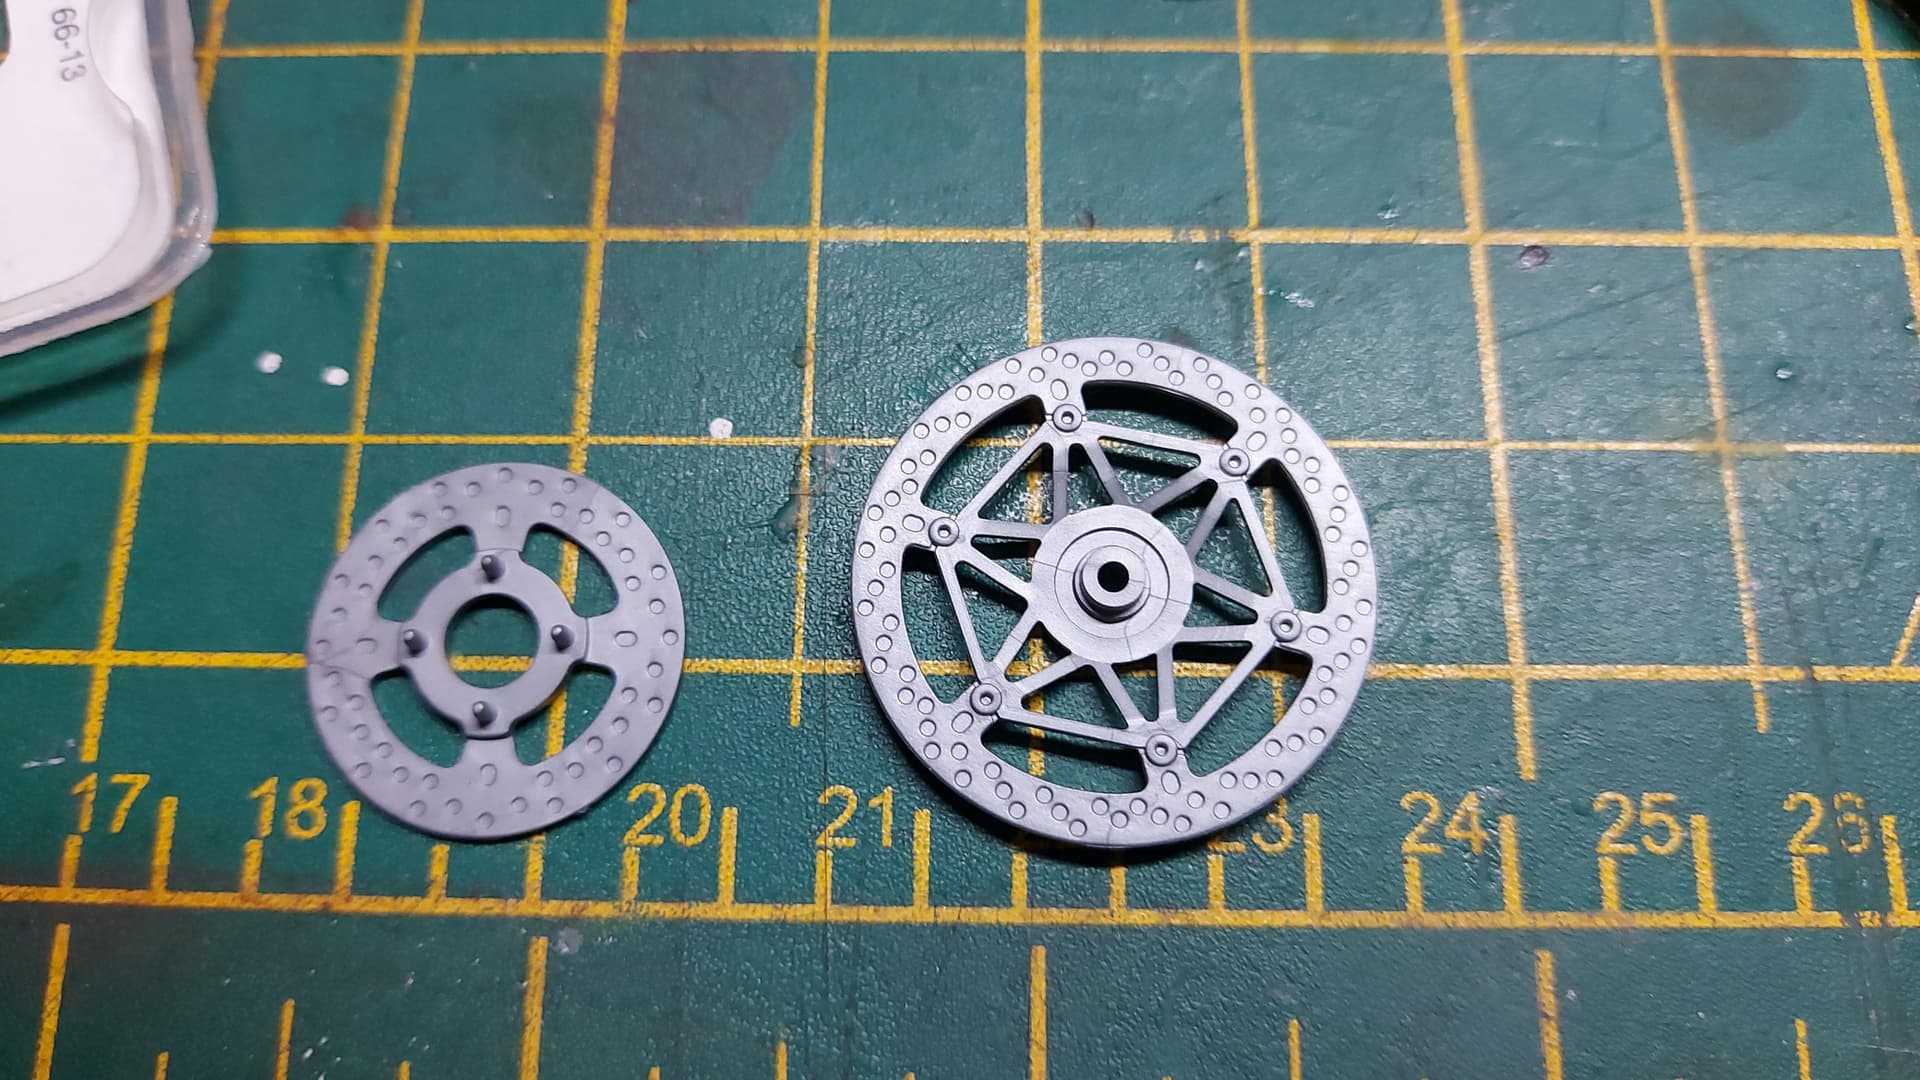
The modelling has been side lined by life’s demands but I managed to make a start on the disc brakes and have now assembled one front brake hub.
I need my head read, I forgot just how small and fiddly the bits were, but the results speak for themselves and justify my decision to head down this rabbit hole.[image]
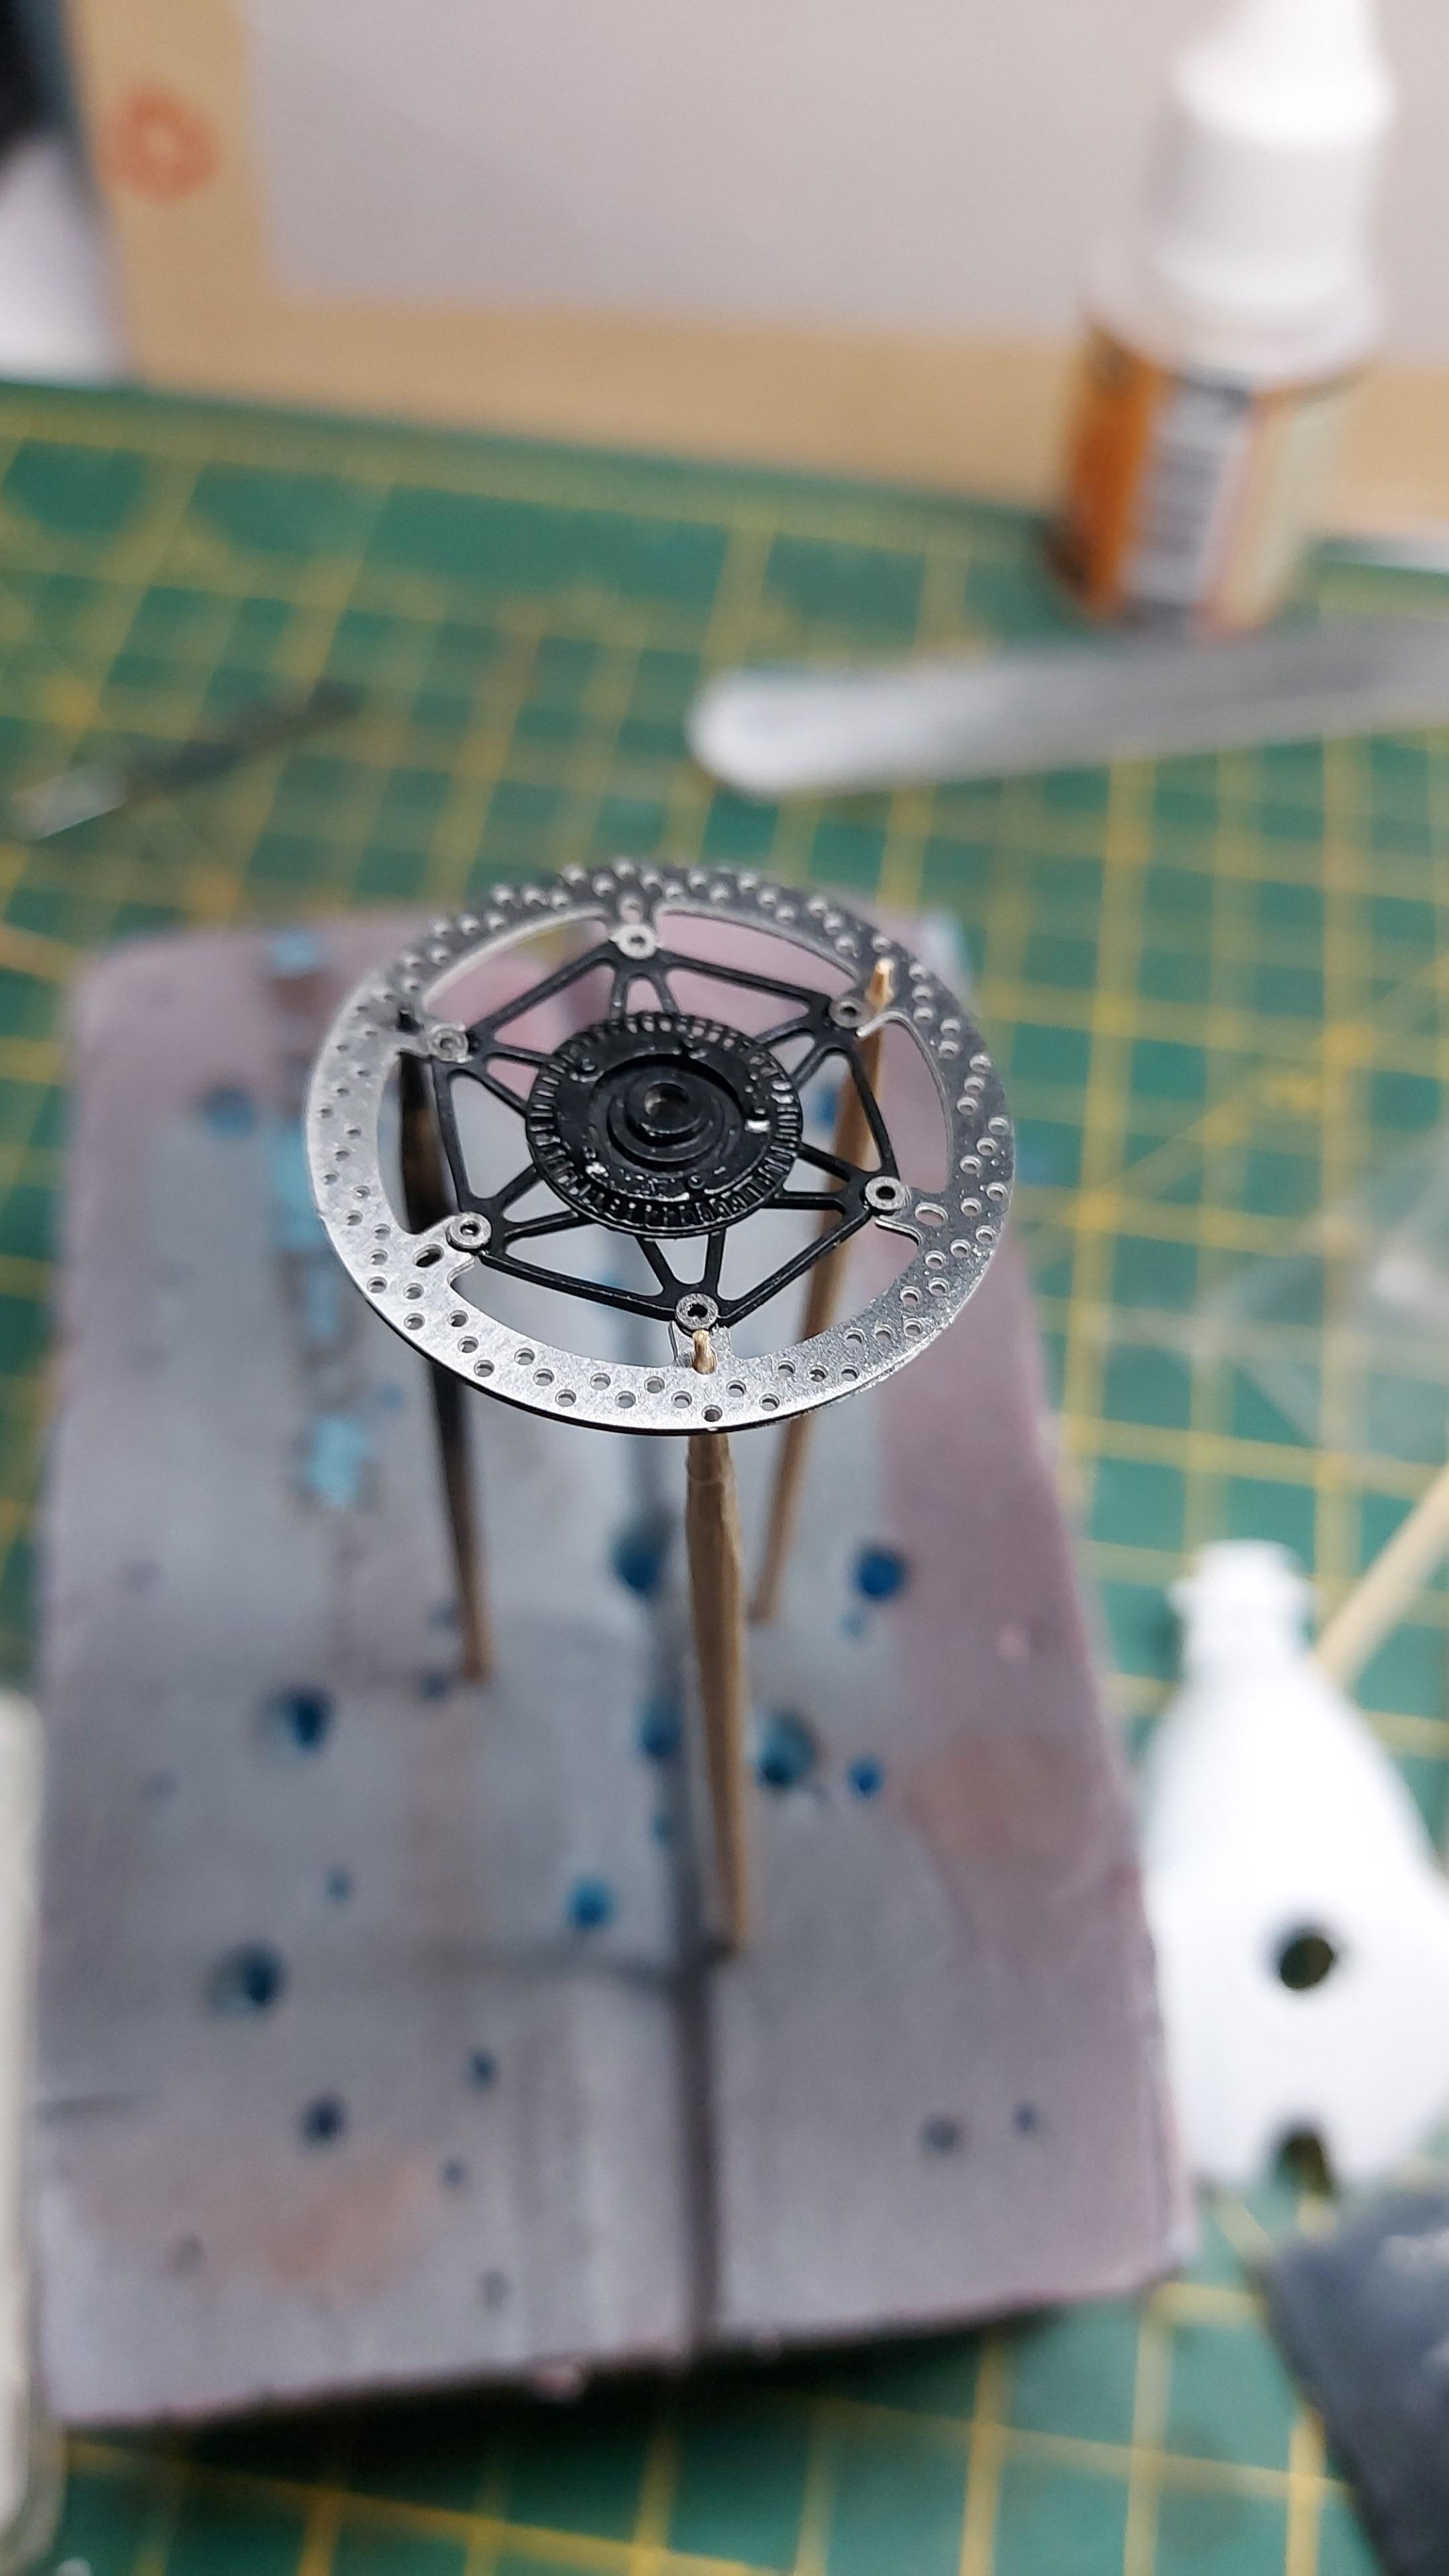
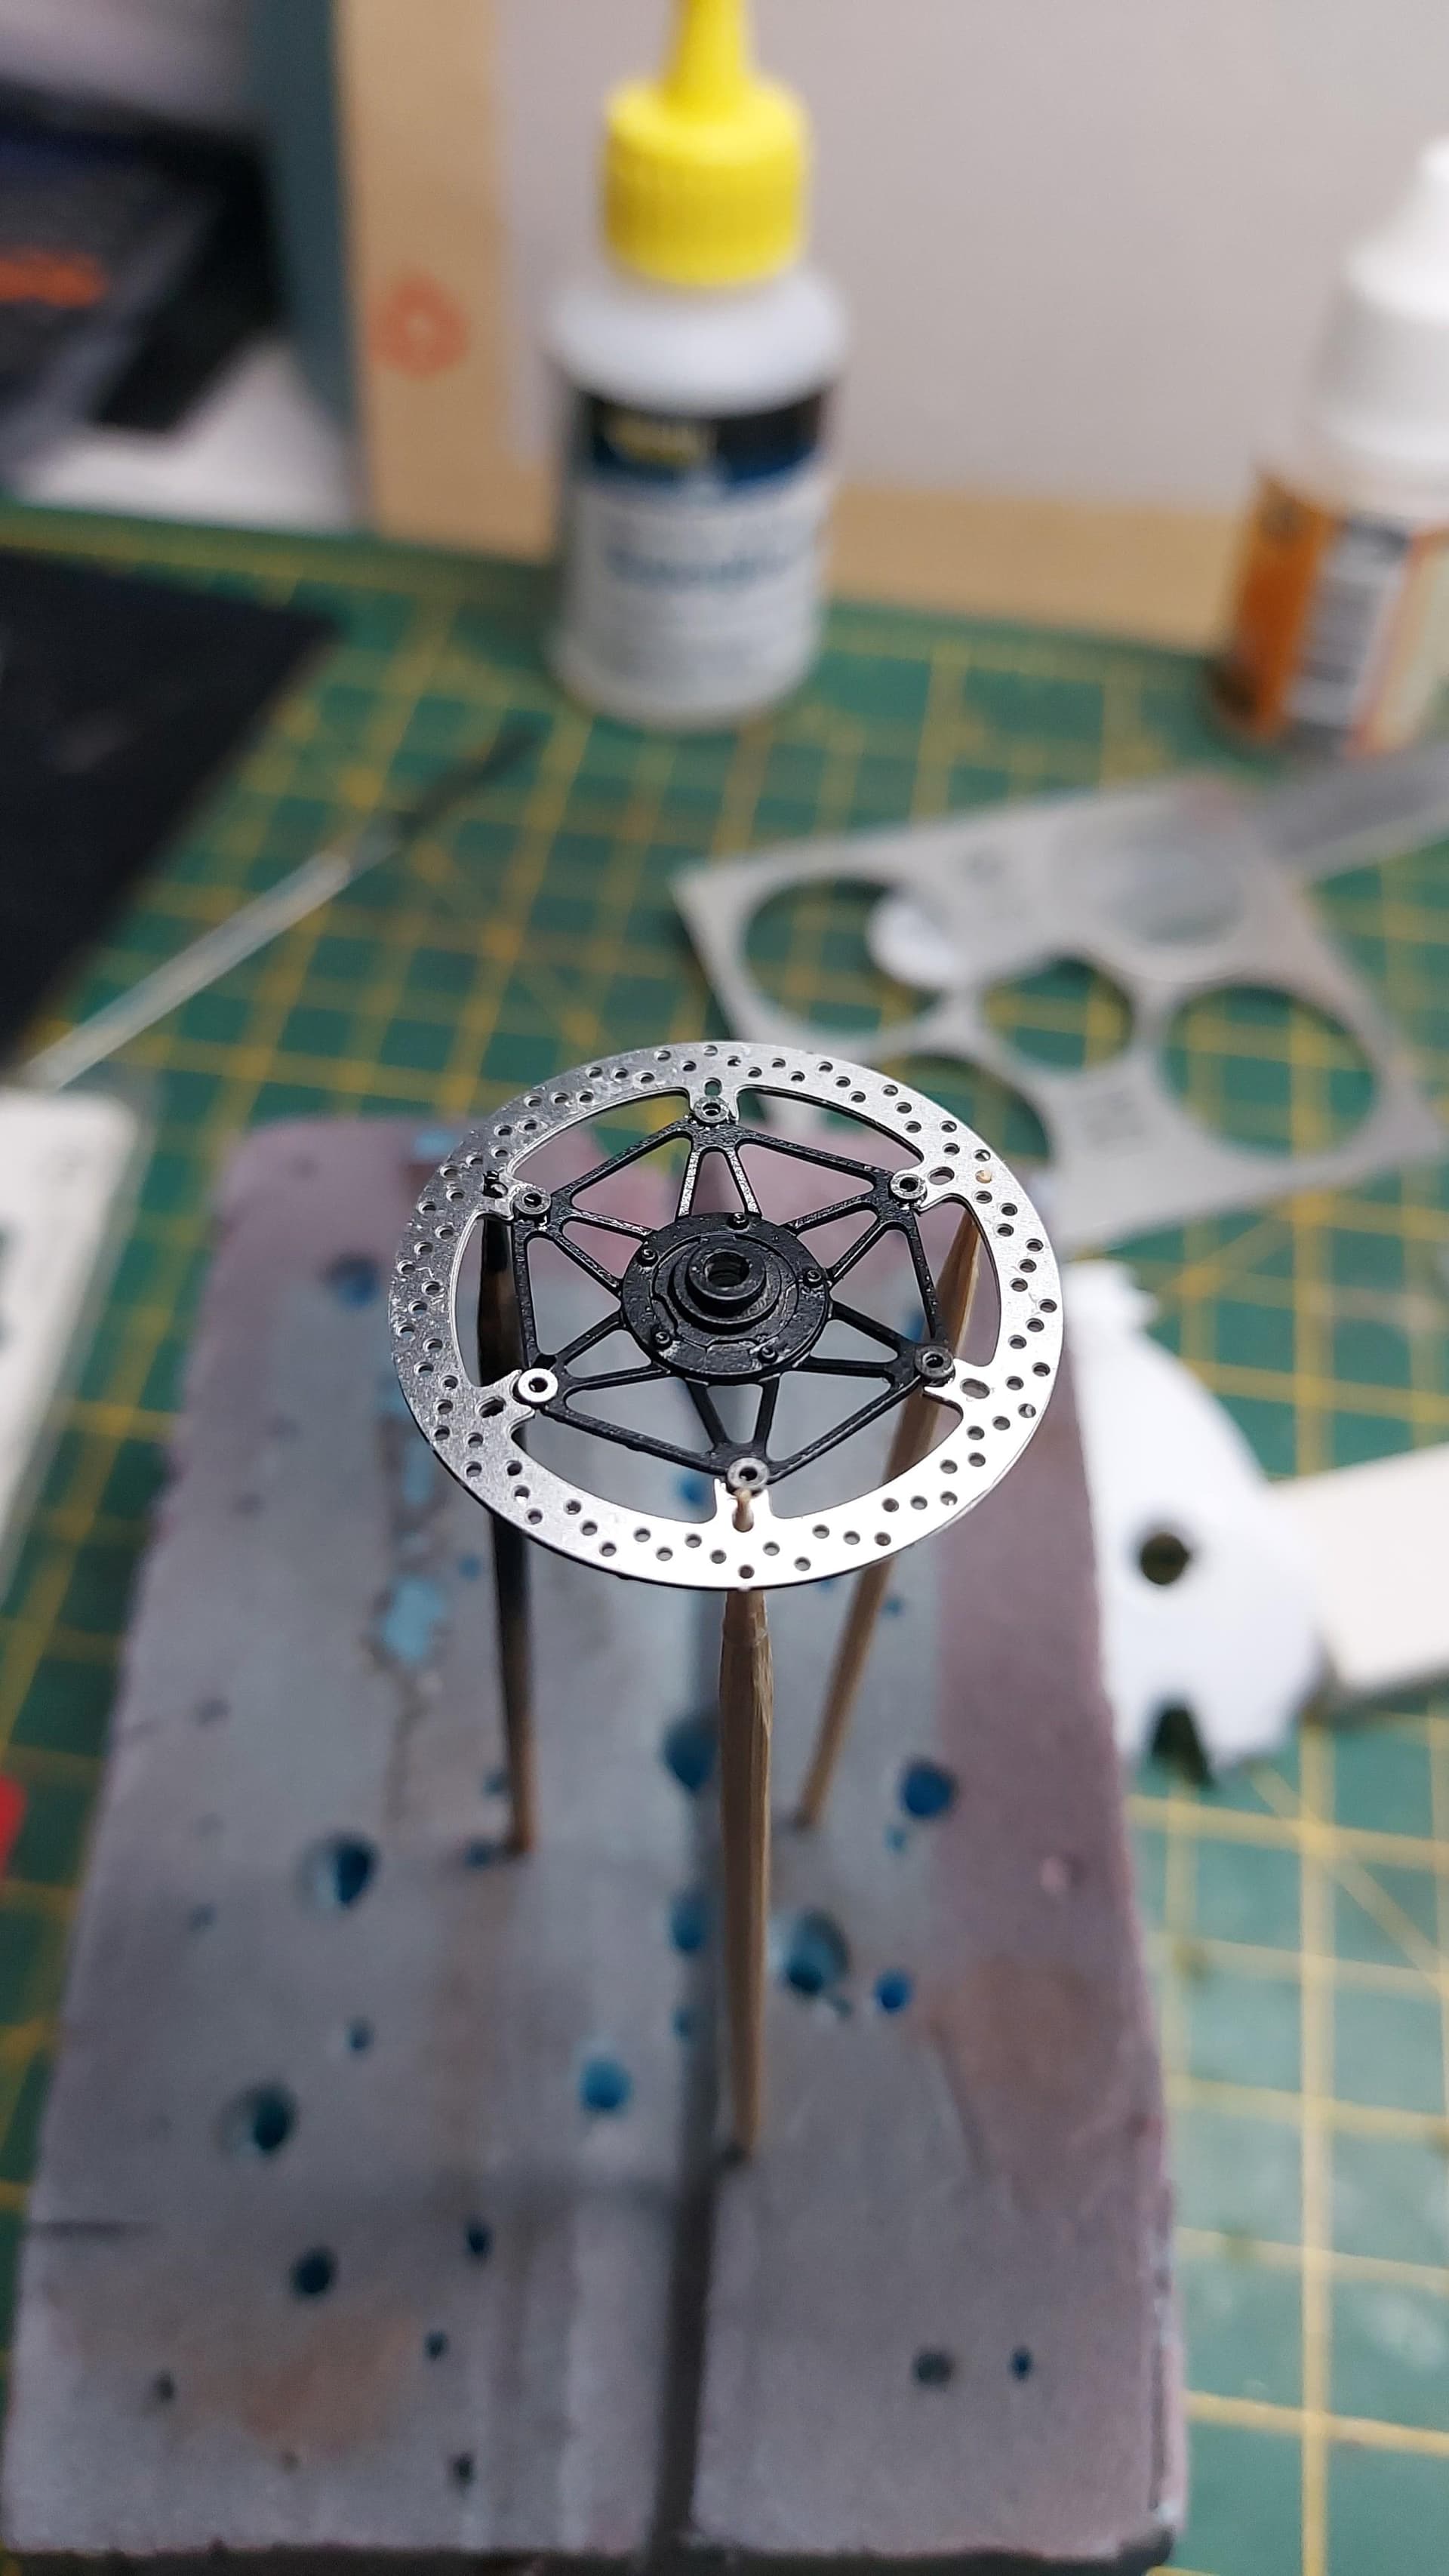
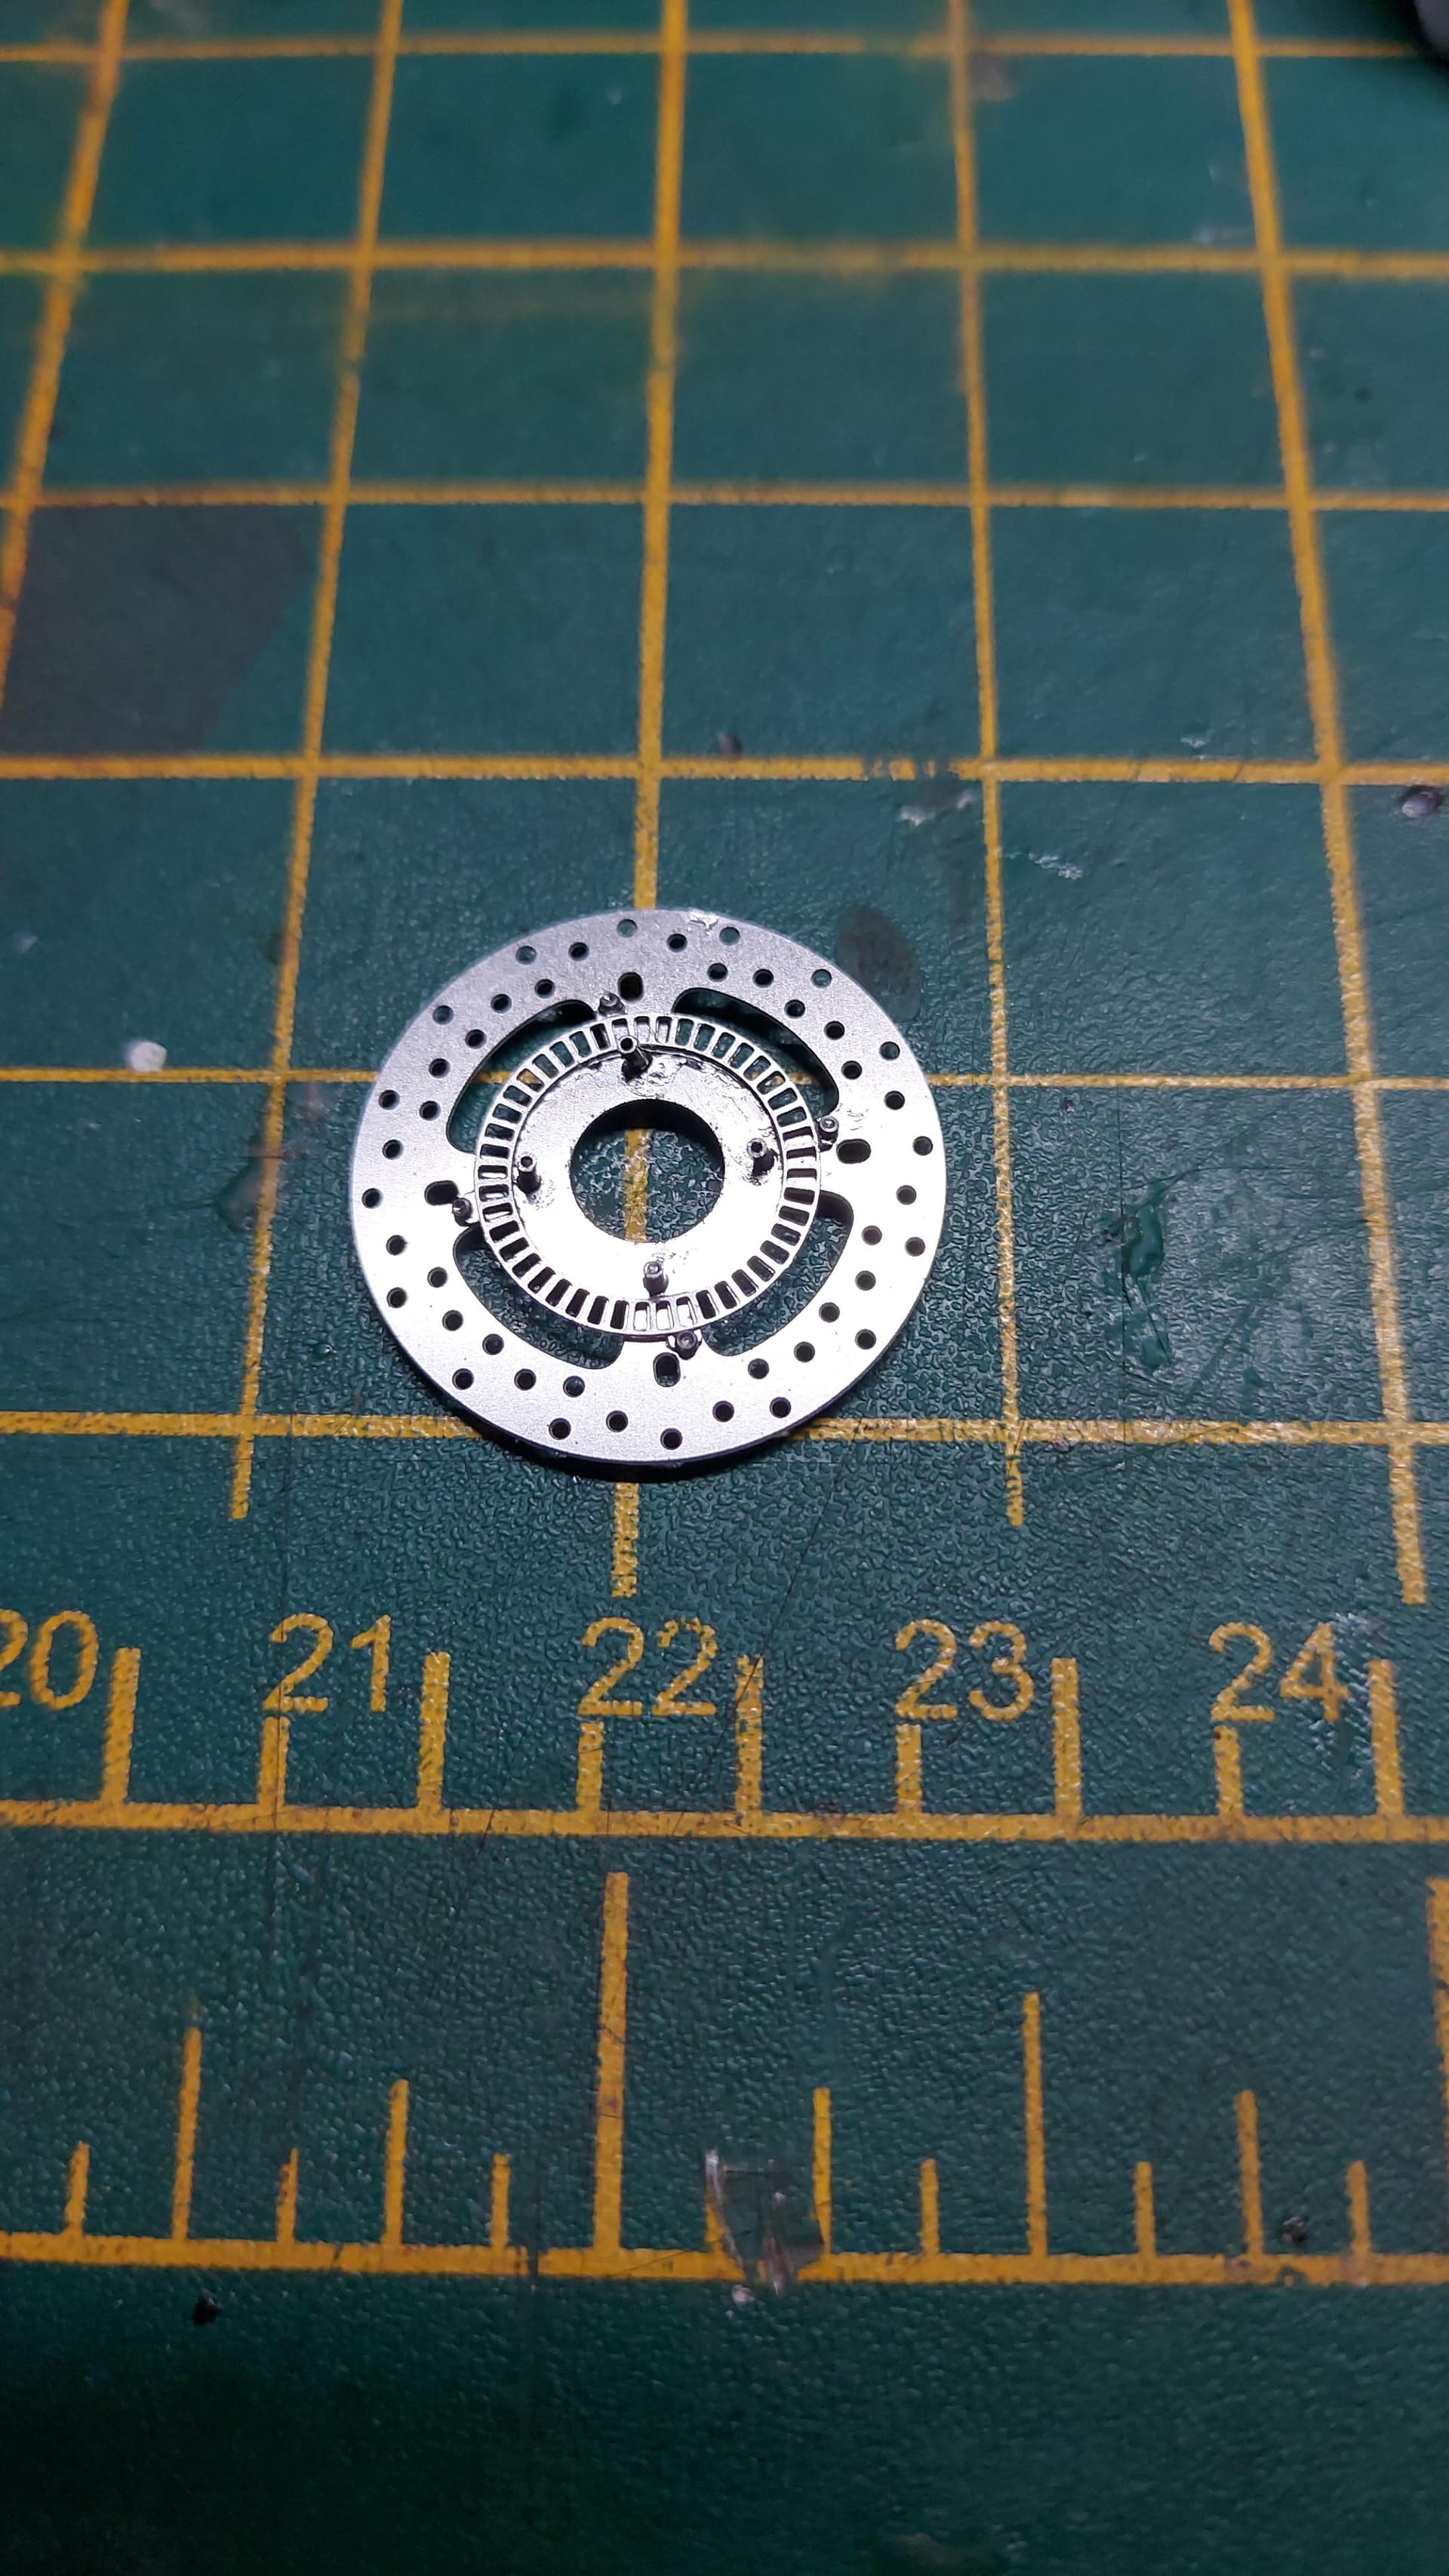
Well here are some images showing the the assembly process and the plastic part that is to be replaced.
I now need to assemble the second front hub and the rear hub,
airbrush satin black prior to fitting the disc brake PE.
Thanks for watching!
5 Likes
Ha, 27 parts for a brake disc. You’d be right at home building a MFH kit. They do look great though!
cheers
Michael
1 Like
Nice work Gavin - I wonder if we can get a group rate for psychology….
2 Likes
Yeah, I think we should be able to wangle something in terms of group discount. 
Anyway, I have finally managed to complete the disc brakes and well worth the effort. I thought it was about time to give an update.
Compared to the original moulded parts, they are worlds apart.
I am not doing the concealed PE as that would be a wasted effort. I’m just doing the visible stuff.
Battled with the airbrush as the compressor threw me curve ball. The regulator got clogged with rust water and I had to drain it and ordered a new pressure regulator. Need to review my maintenance regime .
Till next time! 
5 Likes
Lovely work Gavin, great to see another update and we really need more bikes on the threads here!
Cheers, D
1 Like
Nicely done Gavin - glad to see another update on this project and as Damian noted , more bikes is more fun !
Keep at it .
Cheers - RT
1 Like
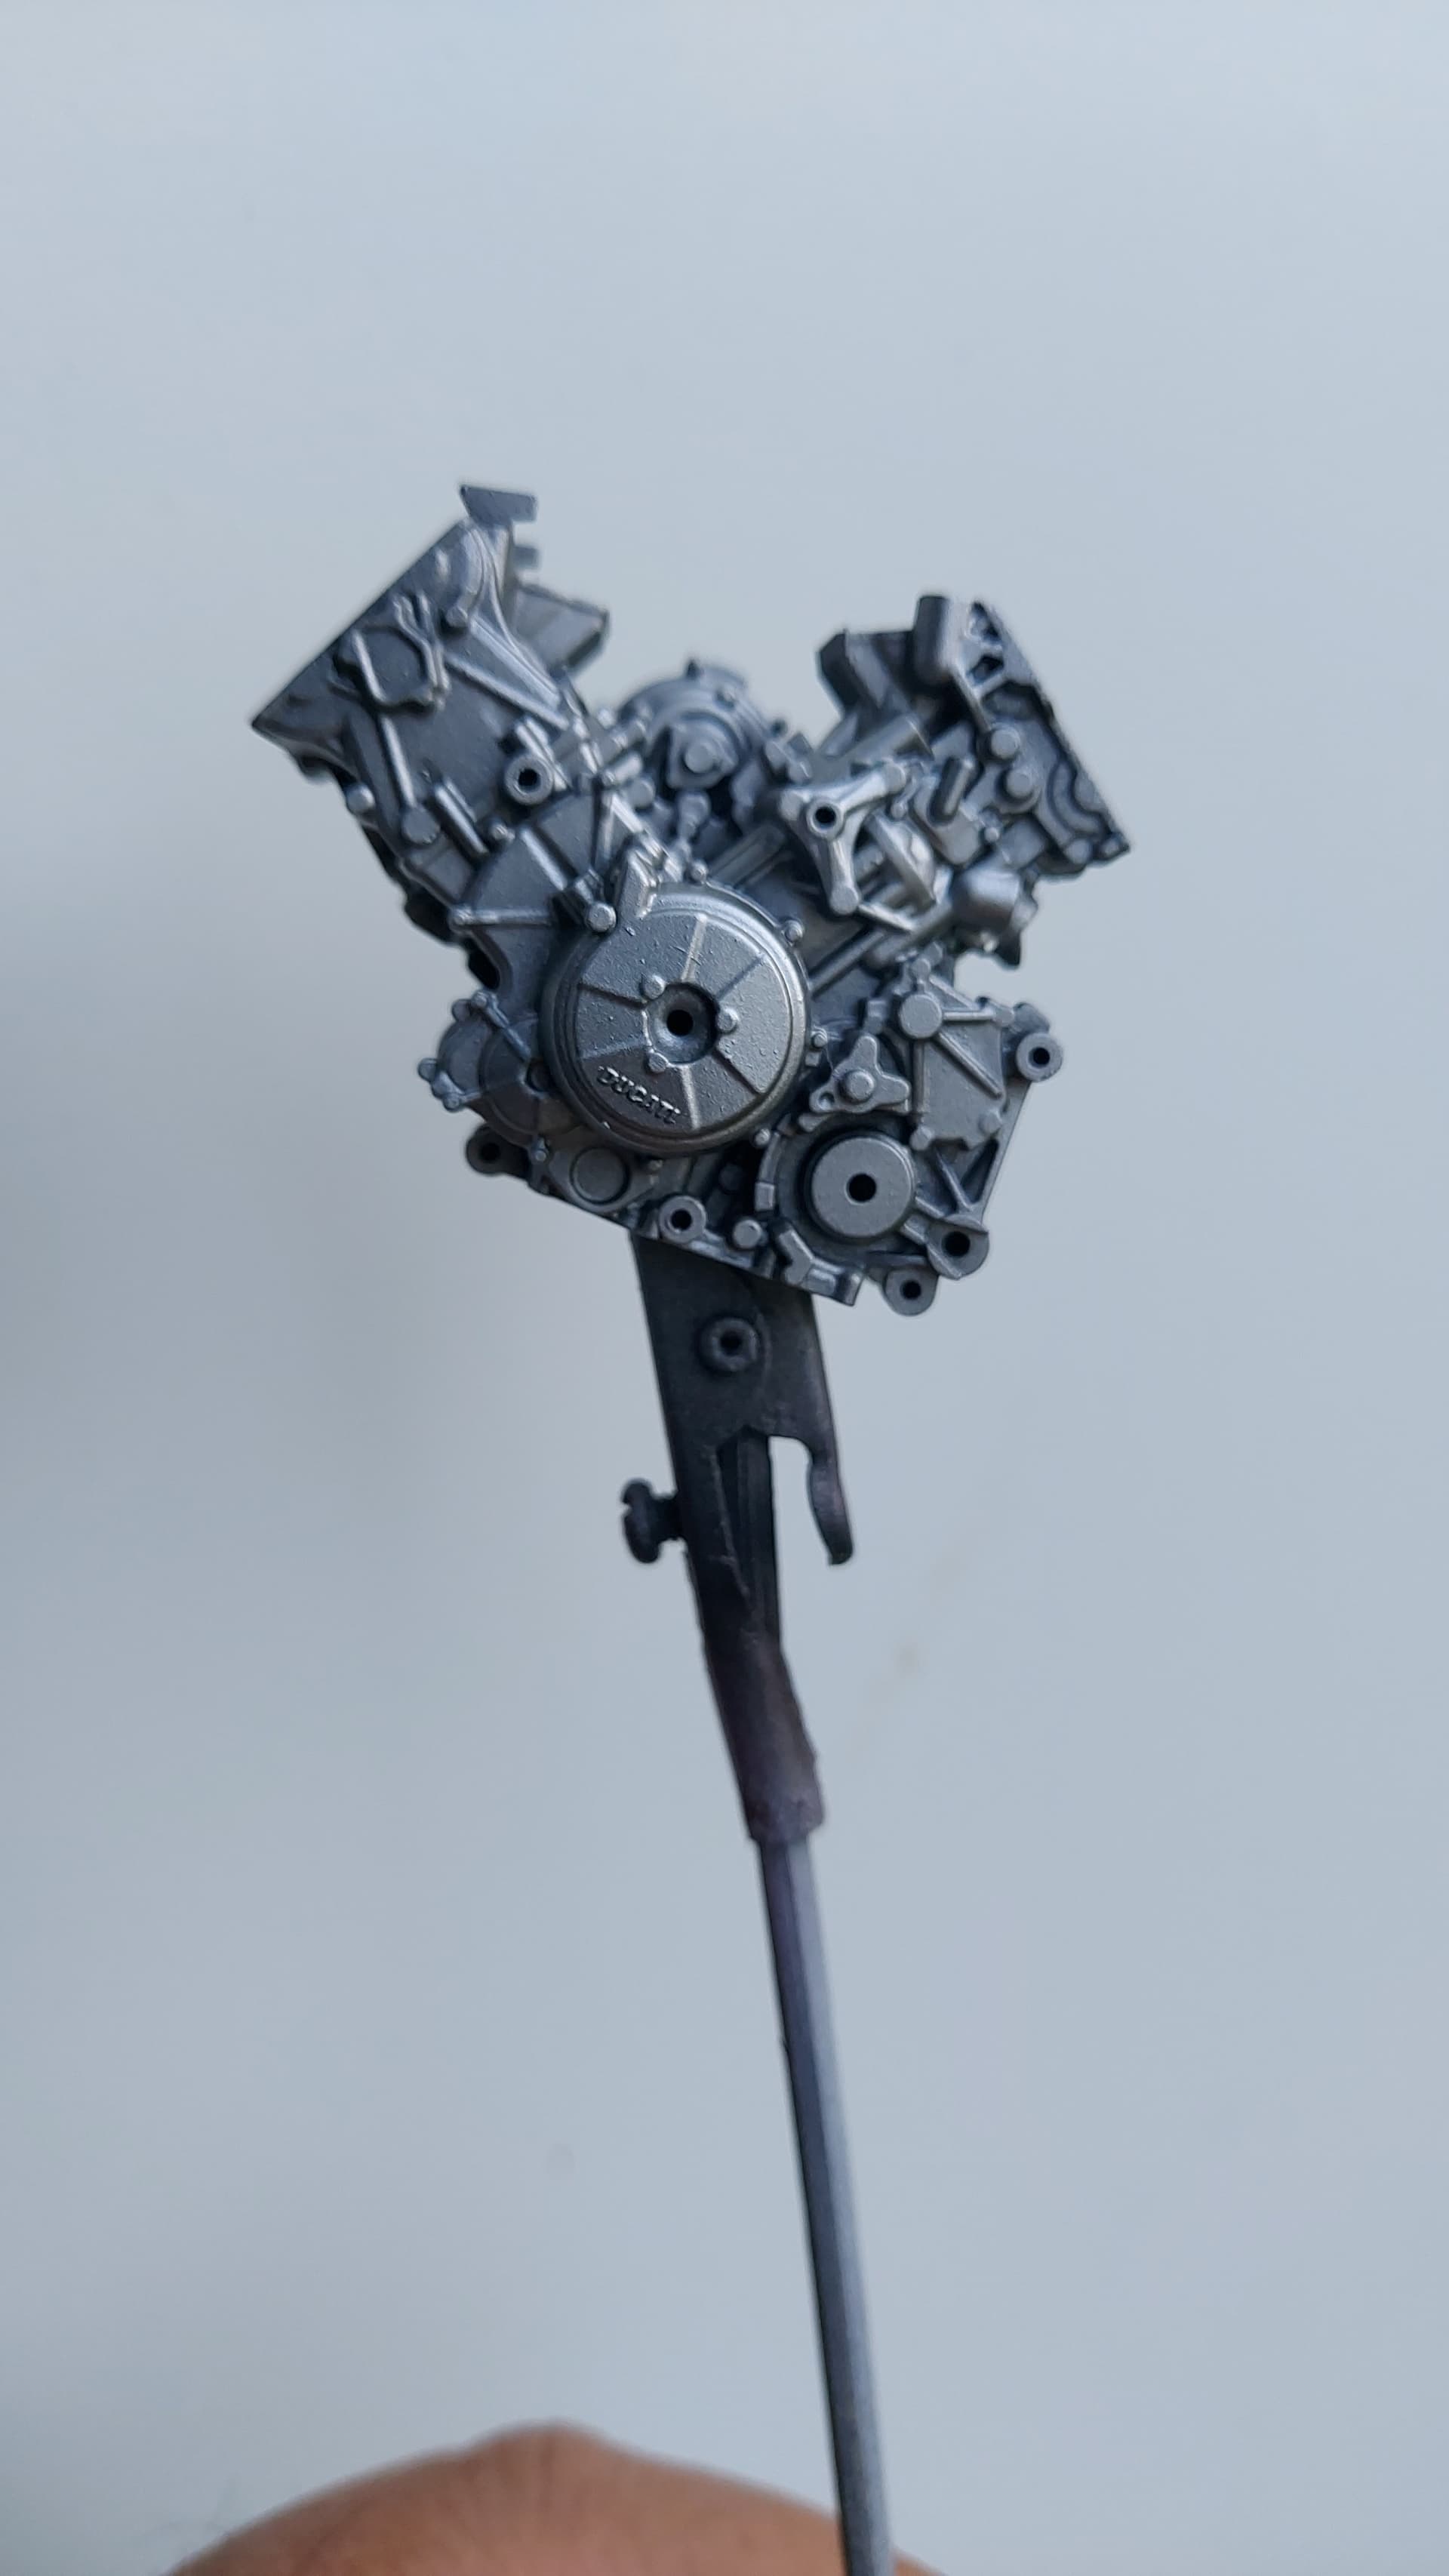
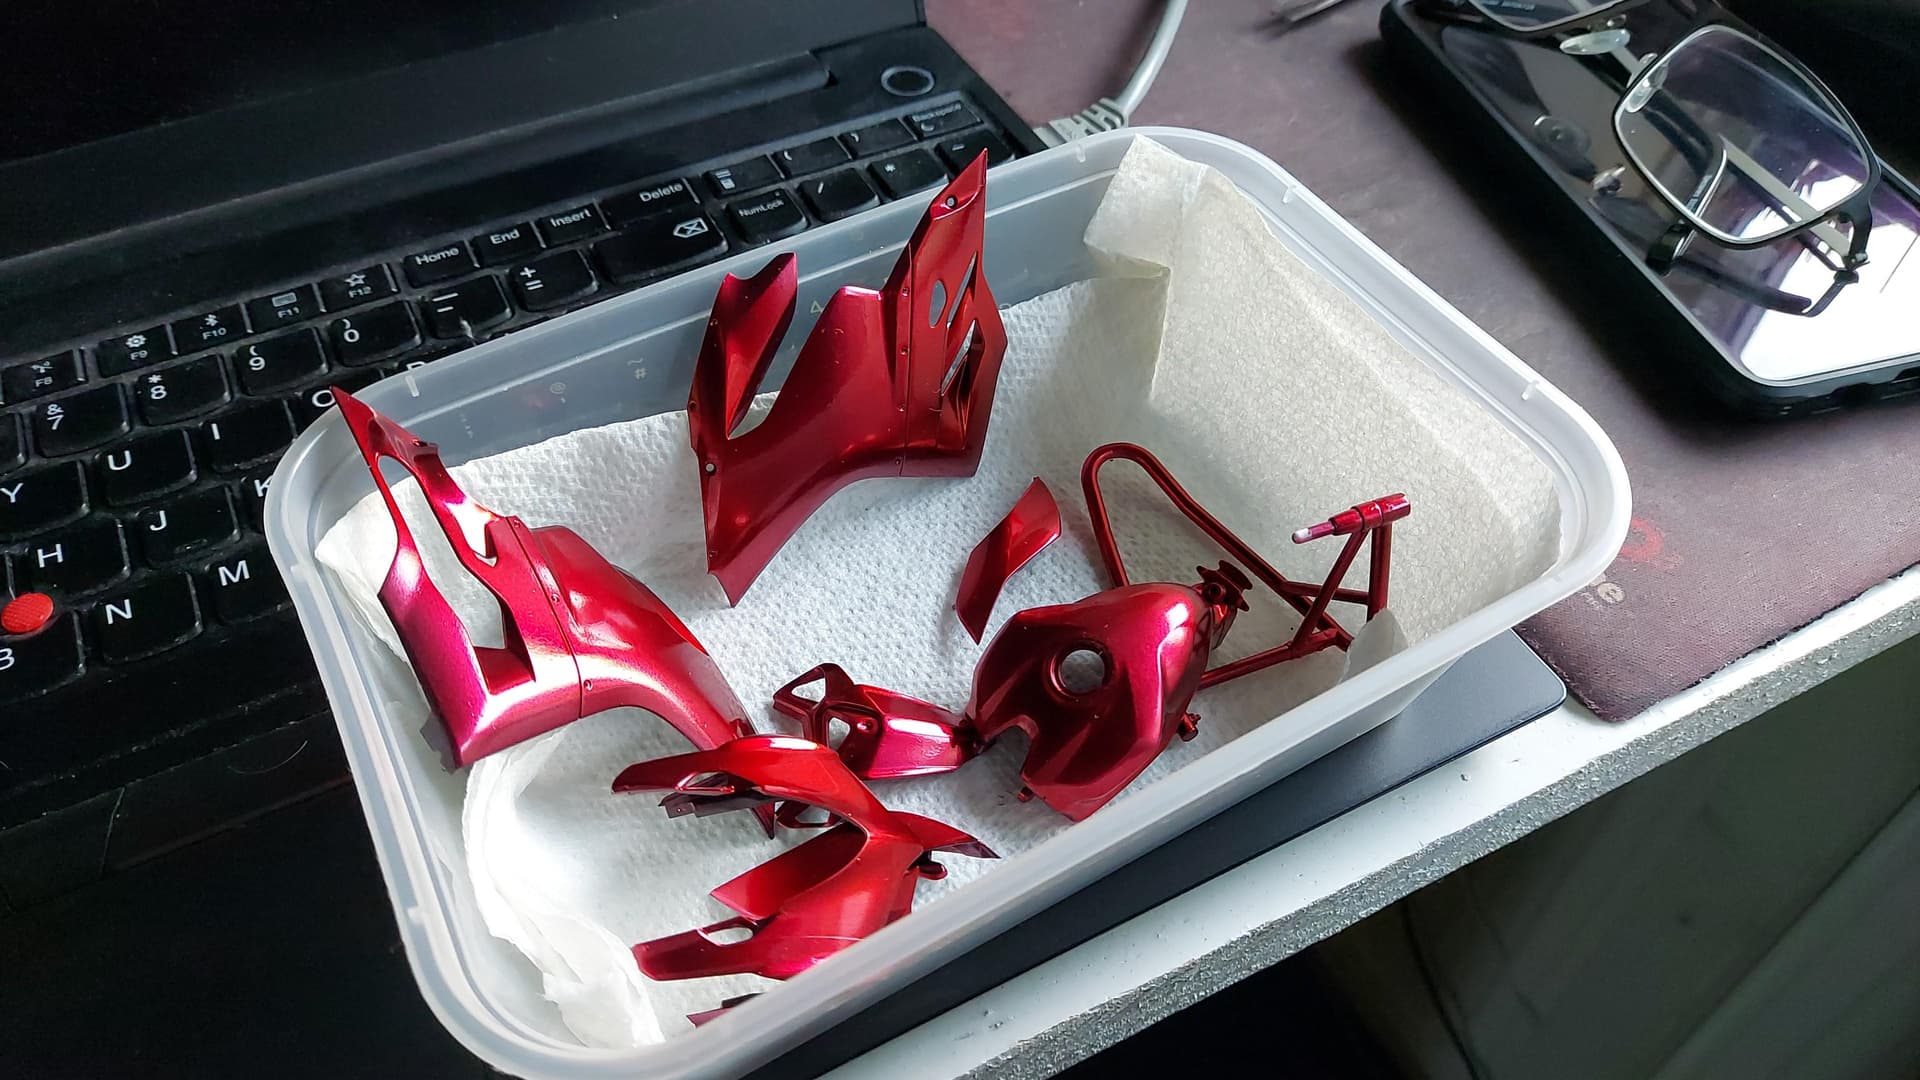
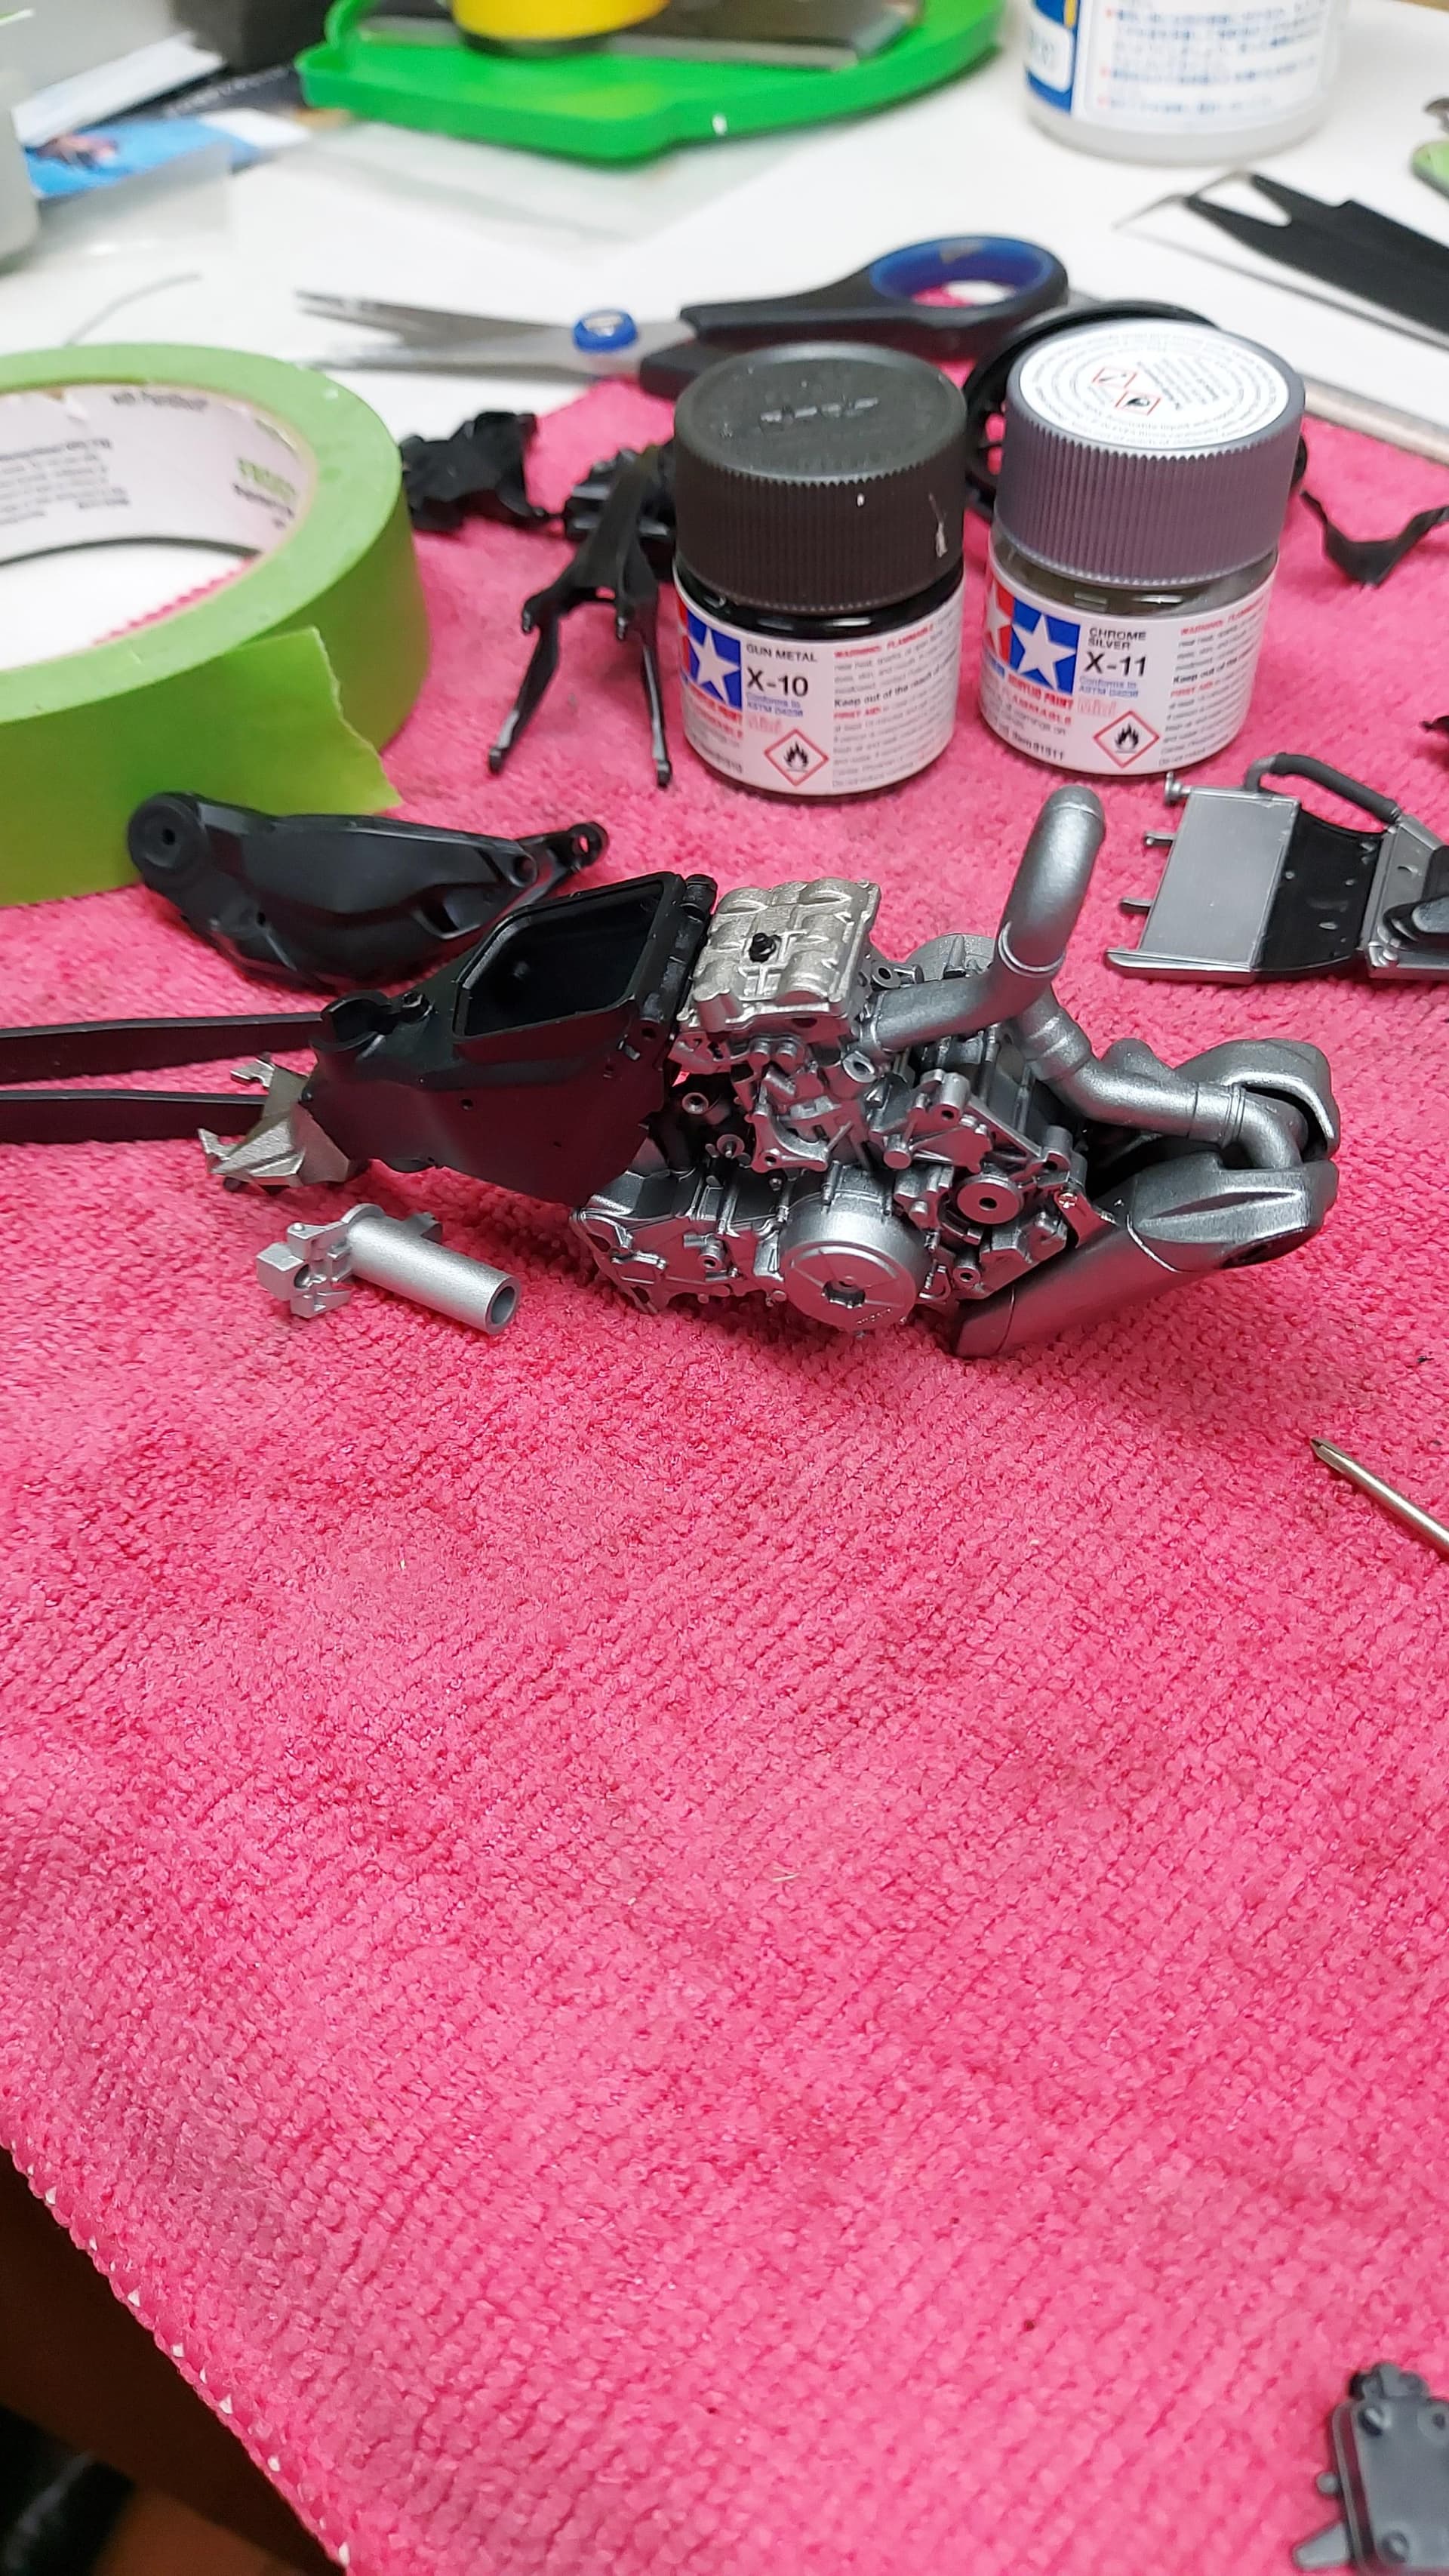
Finally decided to put down some colour on my Ducati build and did some impromptu experimenting with the Alclad colours, using a flat black base before applying the dark aluminium for the engine block and applying the gloss black base before the bright silver candy base then the candy red. I’m really chuffed with the results.
Thanks for looking!
5 Likes
Nice Gavin ! Colors look great .
1 Like
I’m back… in the famous words of Slim Shady!
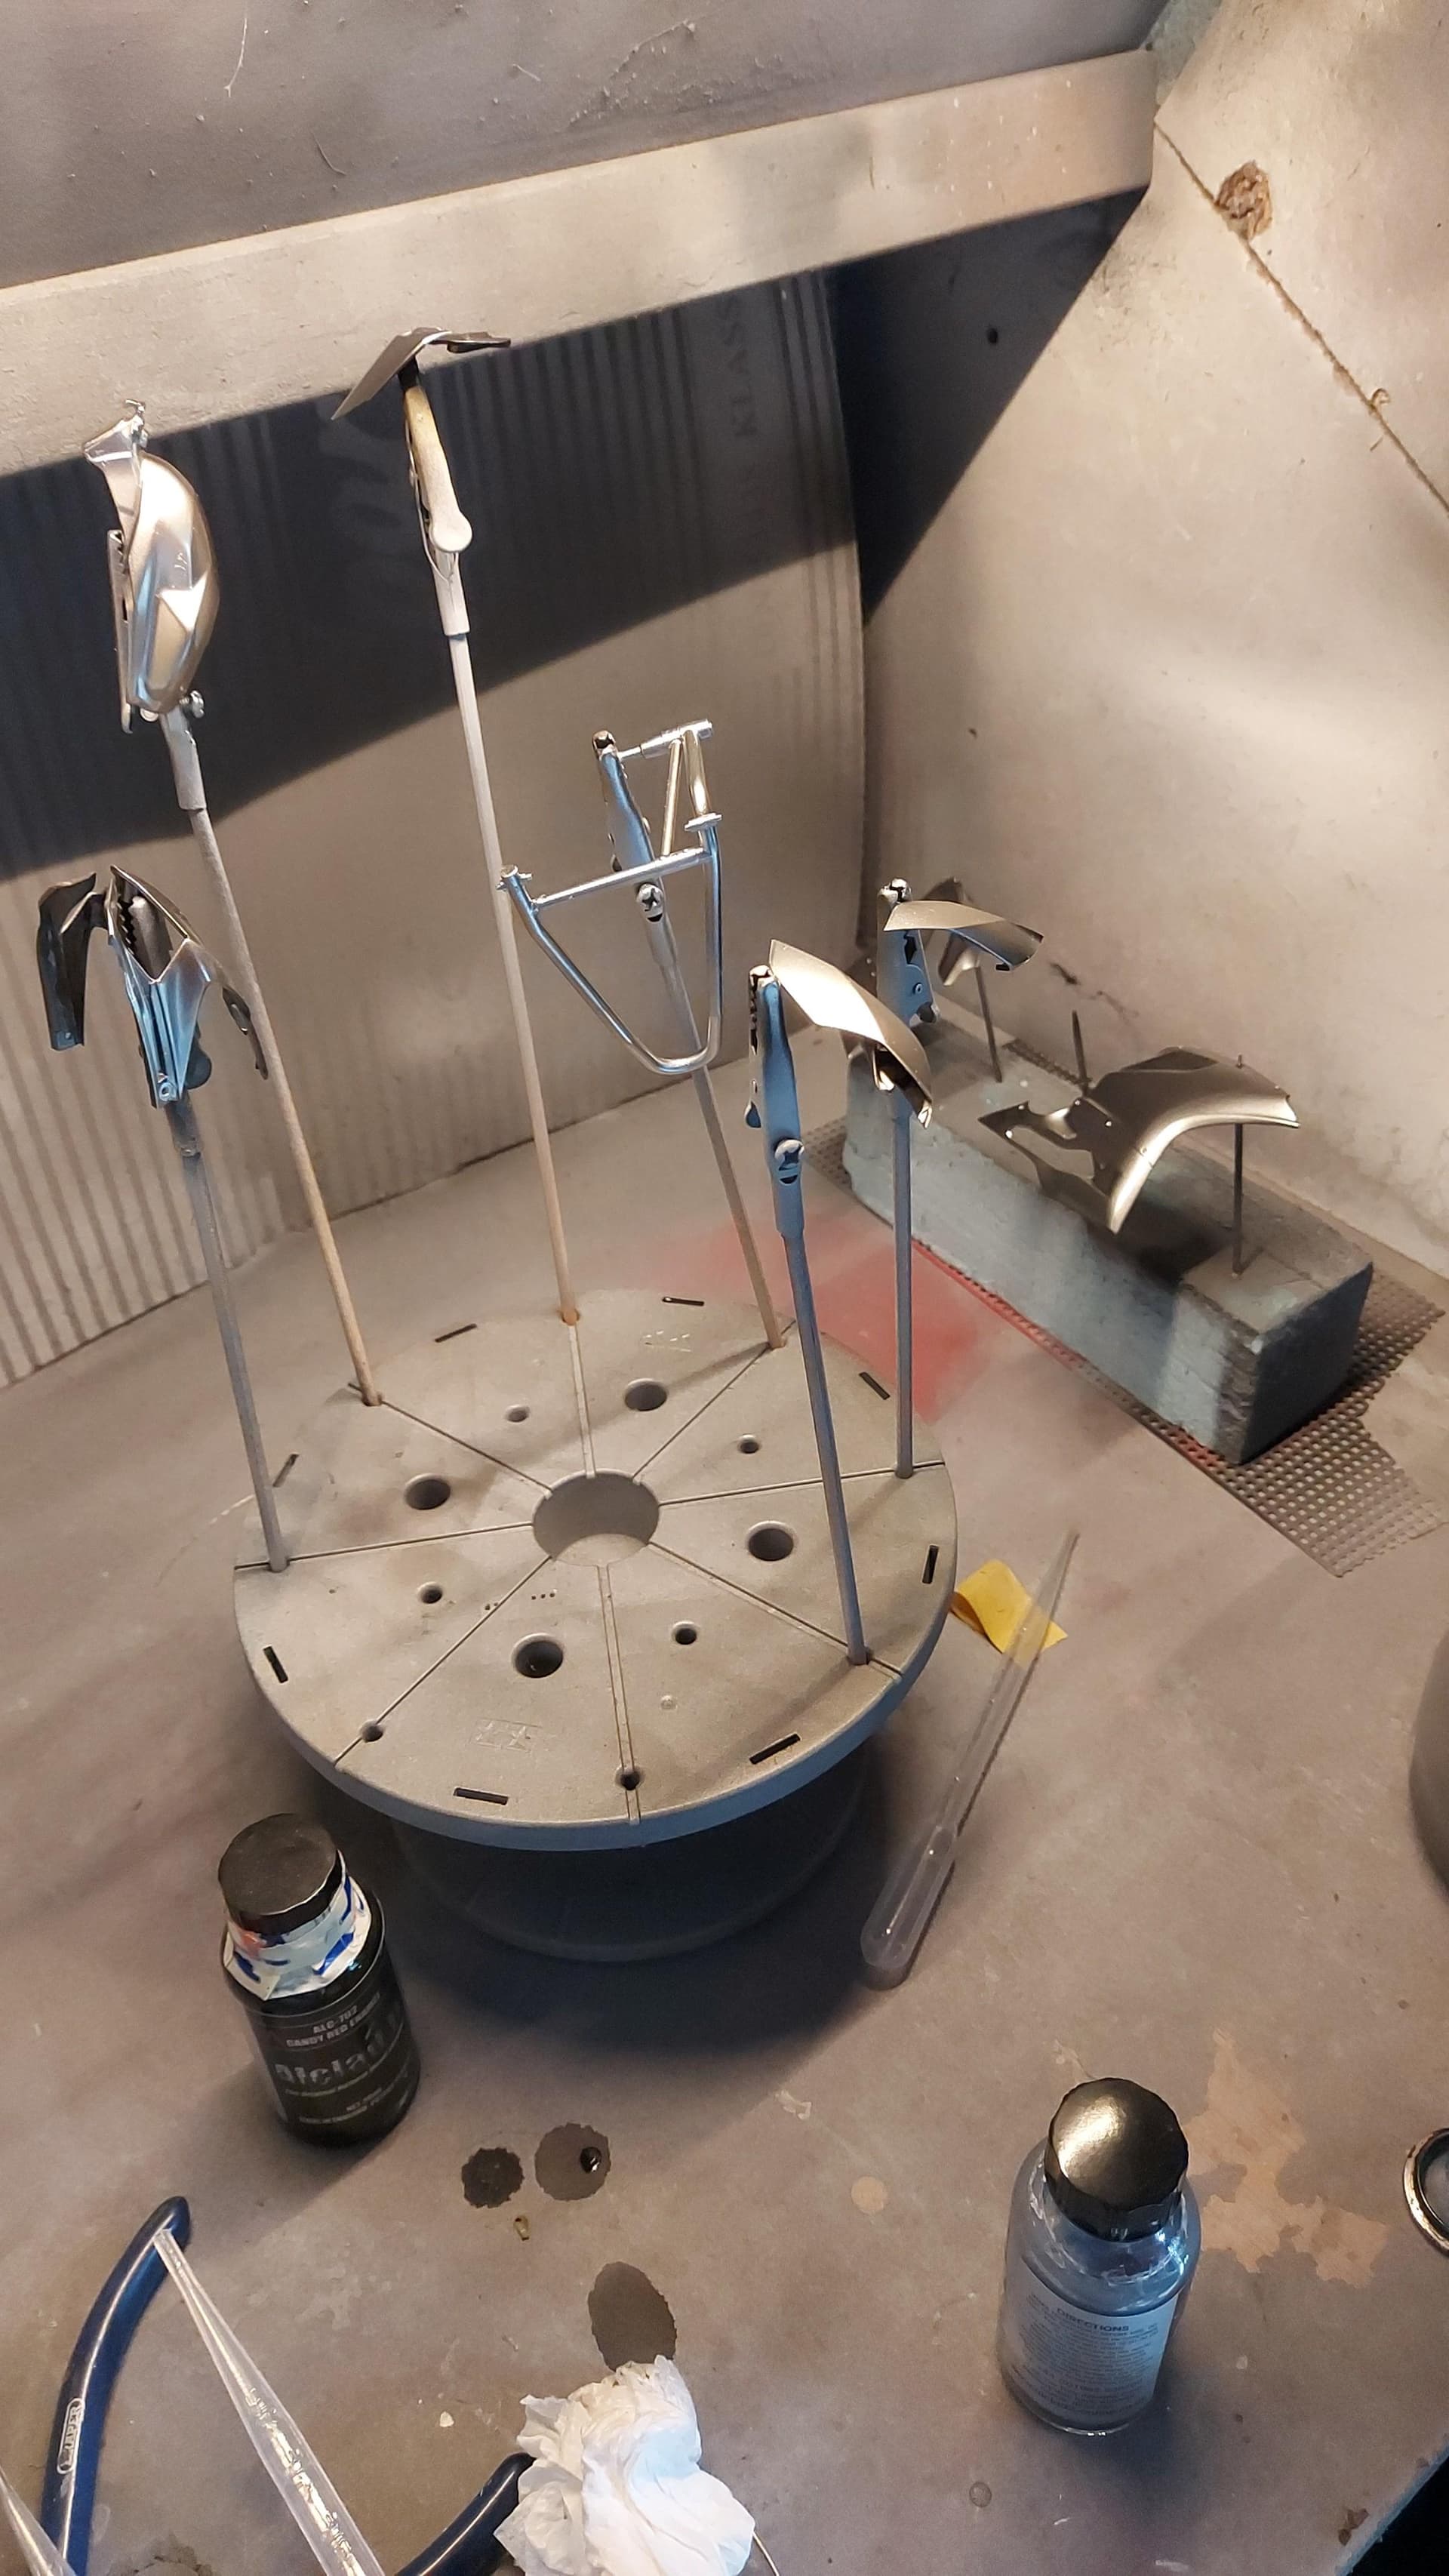
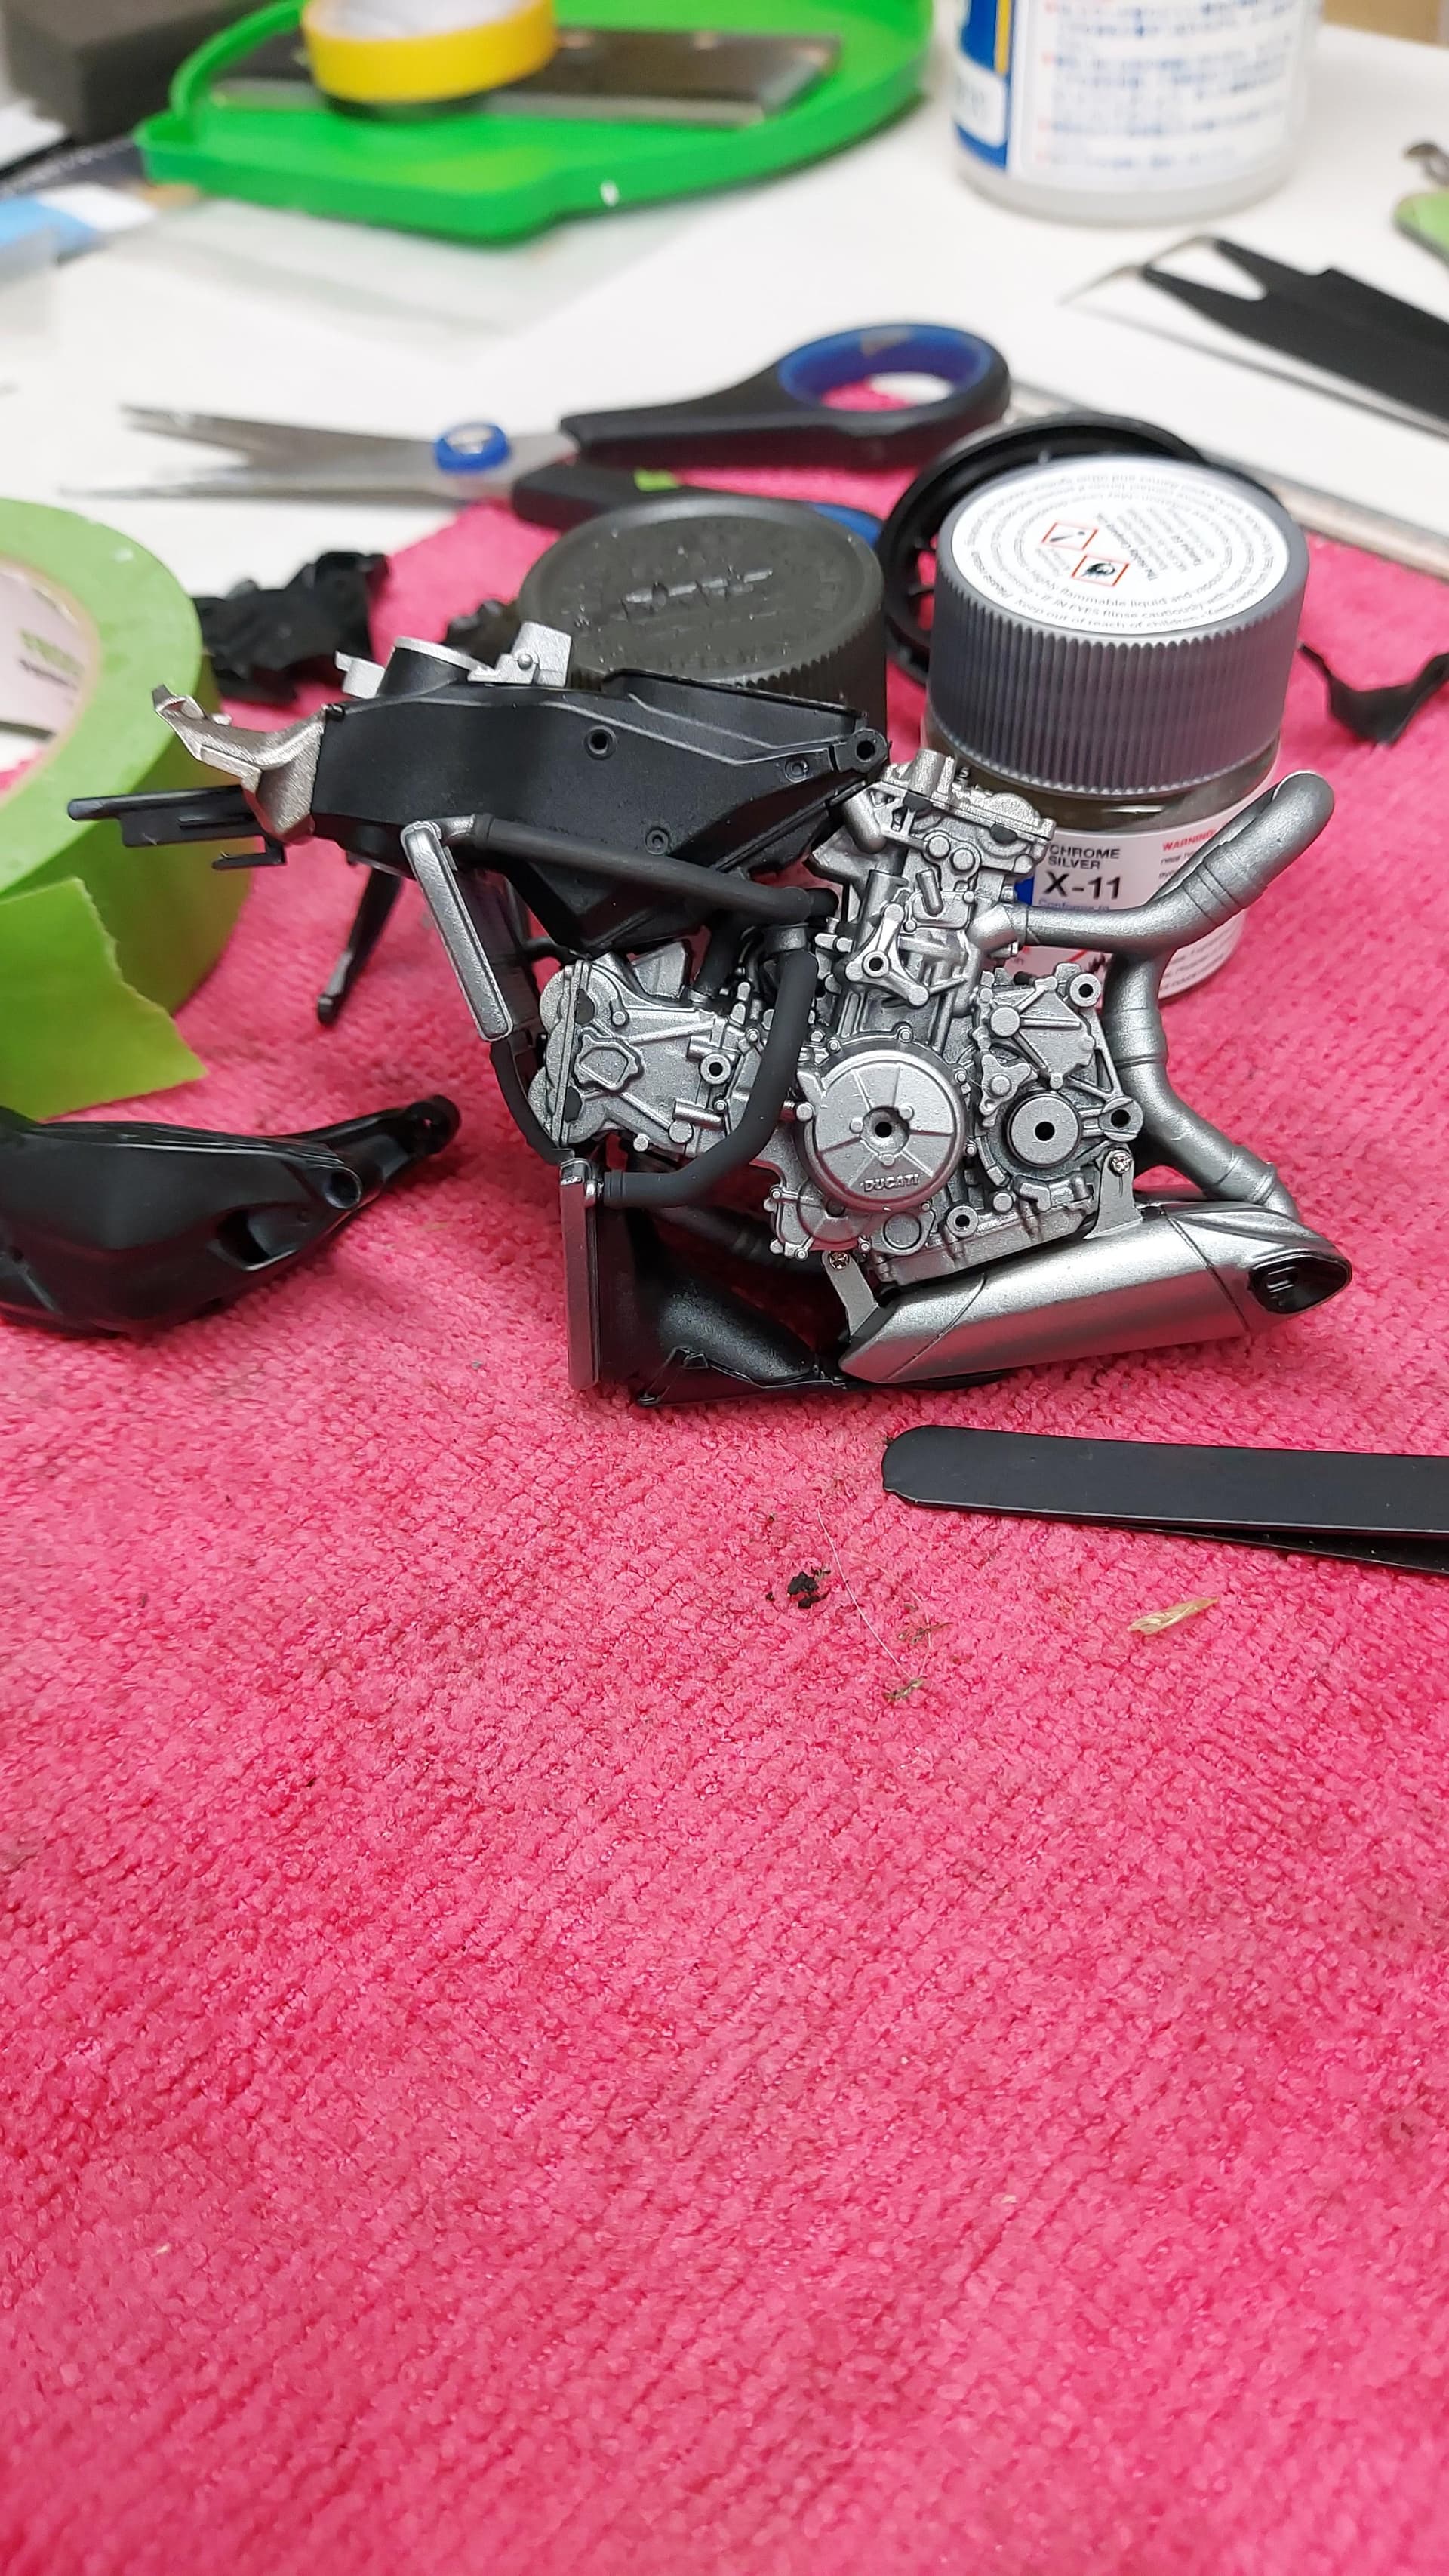
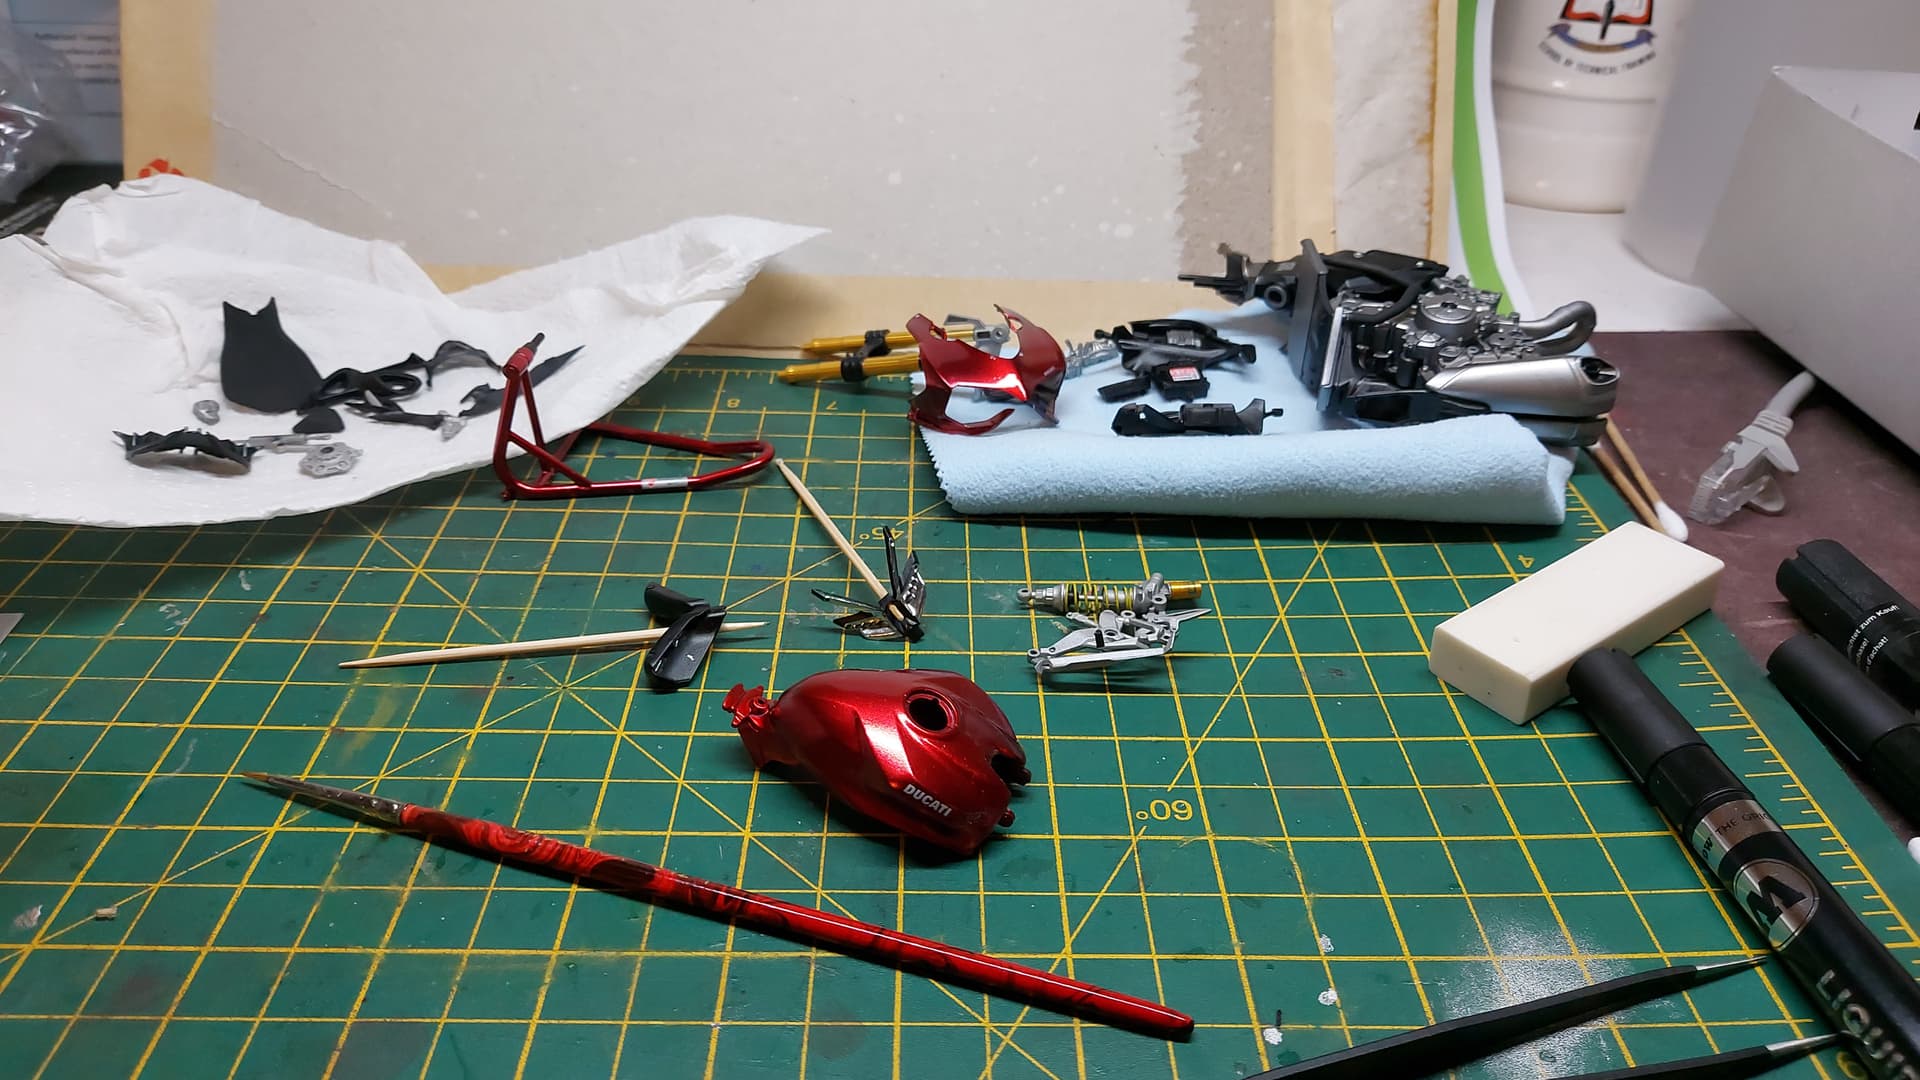
Well, I have laboriously dragged along with the painting and have cooked up something I like to call, “Ducati in a bowl” with a bit of an Asian twist. 
Couldn’t decide if I was using chop sticks or fork, so I decide to just start assembling it.
Here are some imaged of the engine + chassis + radiator assy.
Anyway, as you can see I have been having some fun with the Ducati build!
Thanks for looking, till the next update! 
2 Likes
The Ducati won’t make the Hailsham model show this weekend, most unfortunately. Feeling drained having started a new job this week.
Still in pieces…
2 Likes
Just saw this thread come up and I am not sure how I missed it. I love the look of Ducati bikes and I hope to have, at least one build up for my cabinet someday.
Yeah, your not kidding about the AM for these bike and for that fact for racing vehicles. You can spend a boat load of coins on just the detail sets. I use to think AM in armor and aviation can be a lot but it’s crazy in racing side of modeling.
Well, keep up the good work as you have another ride along! 
1 Like
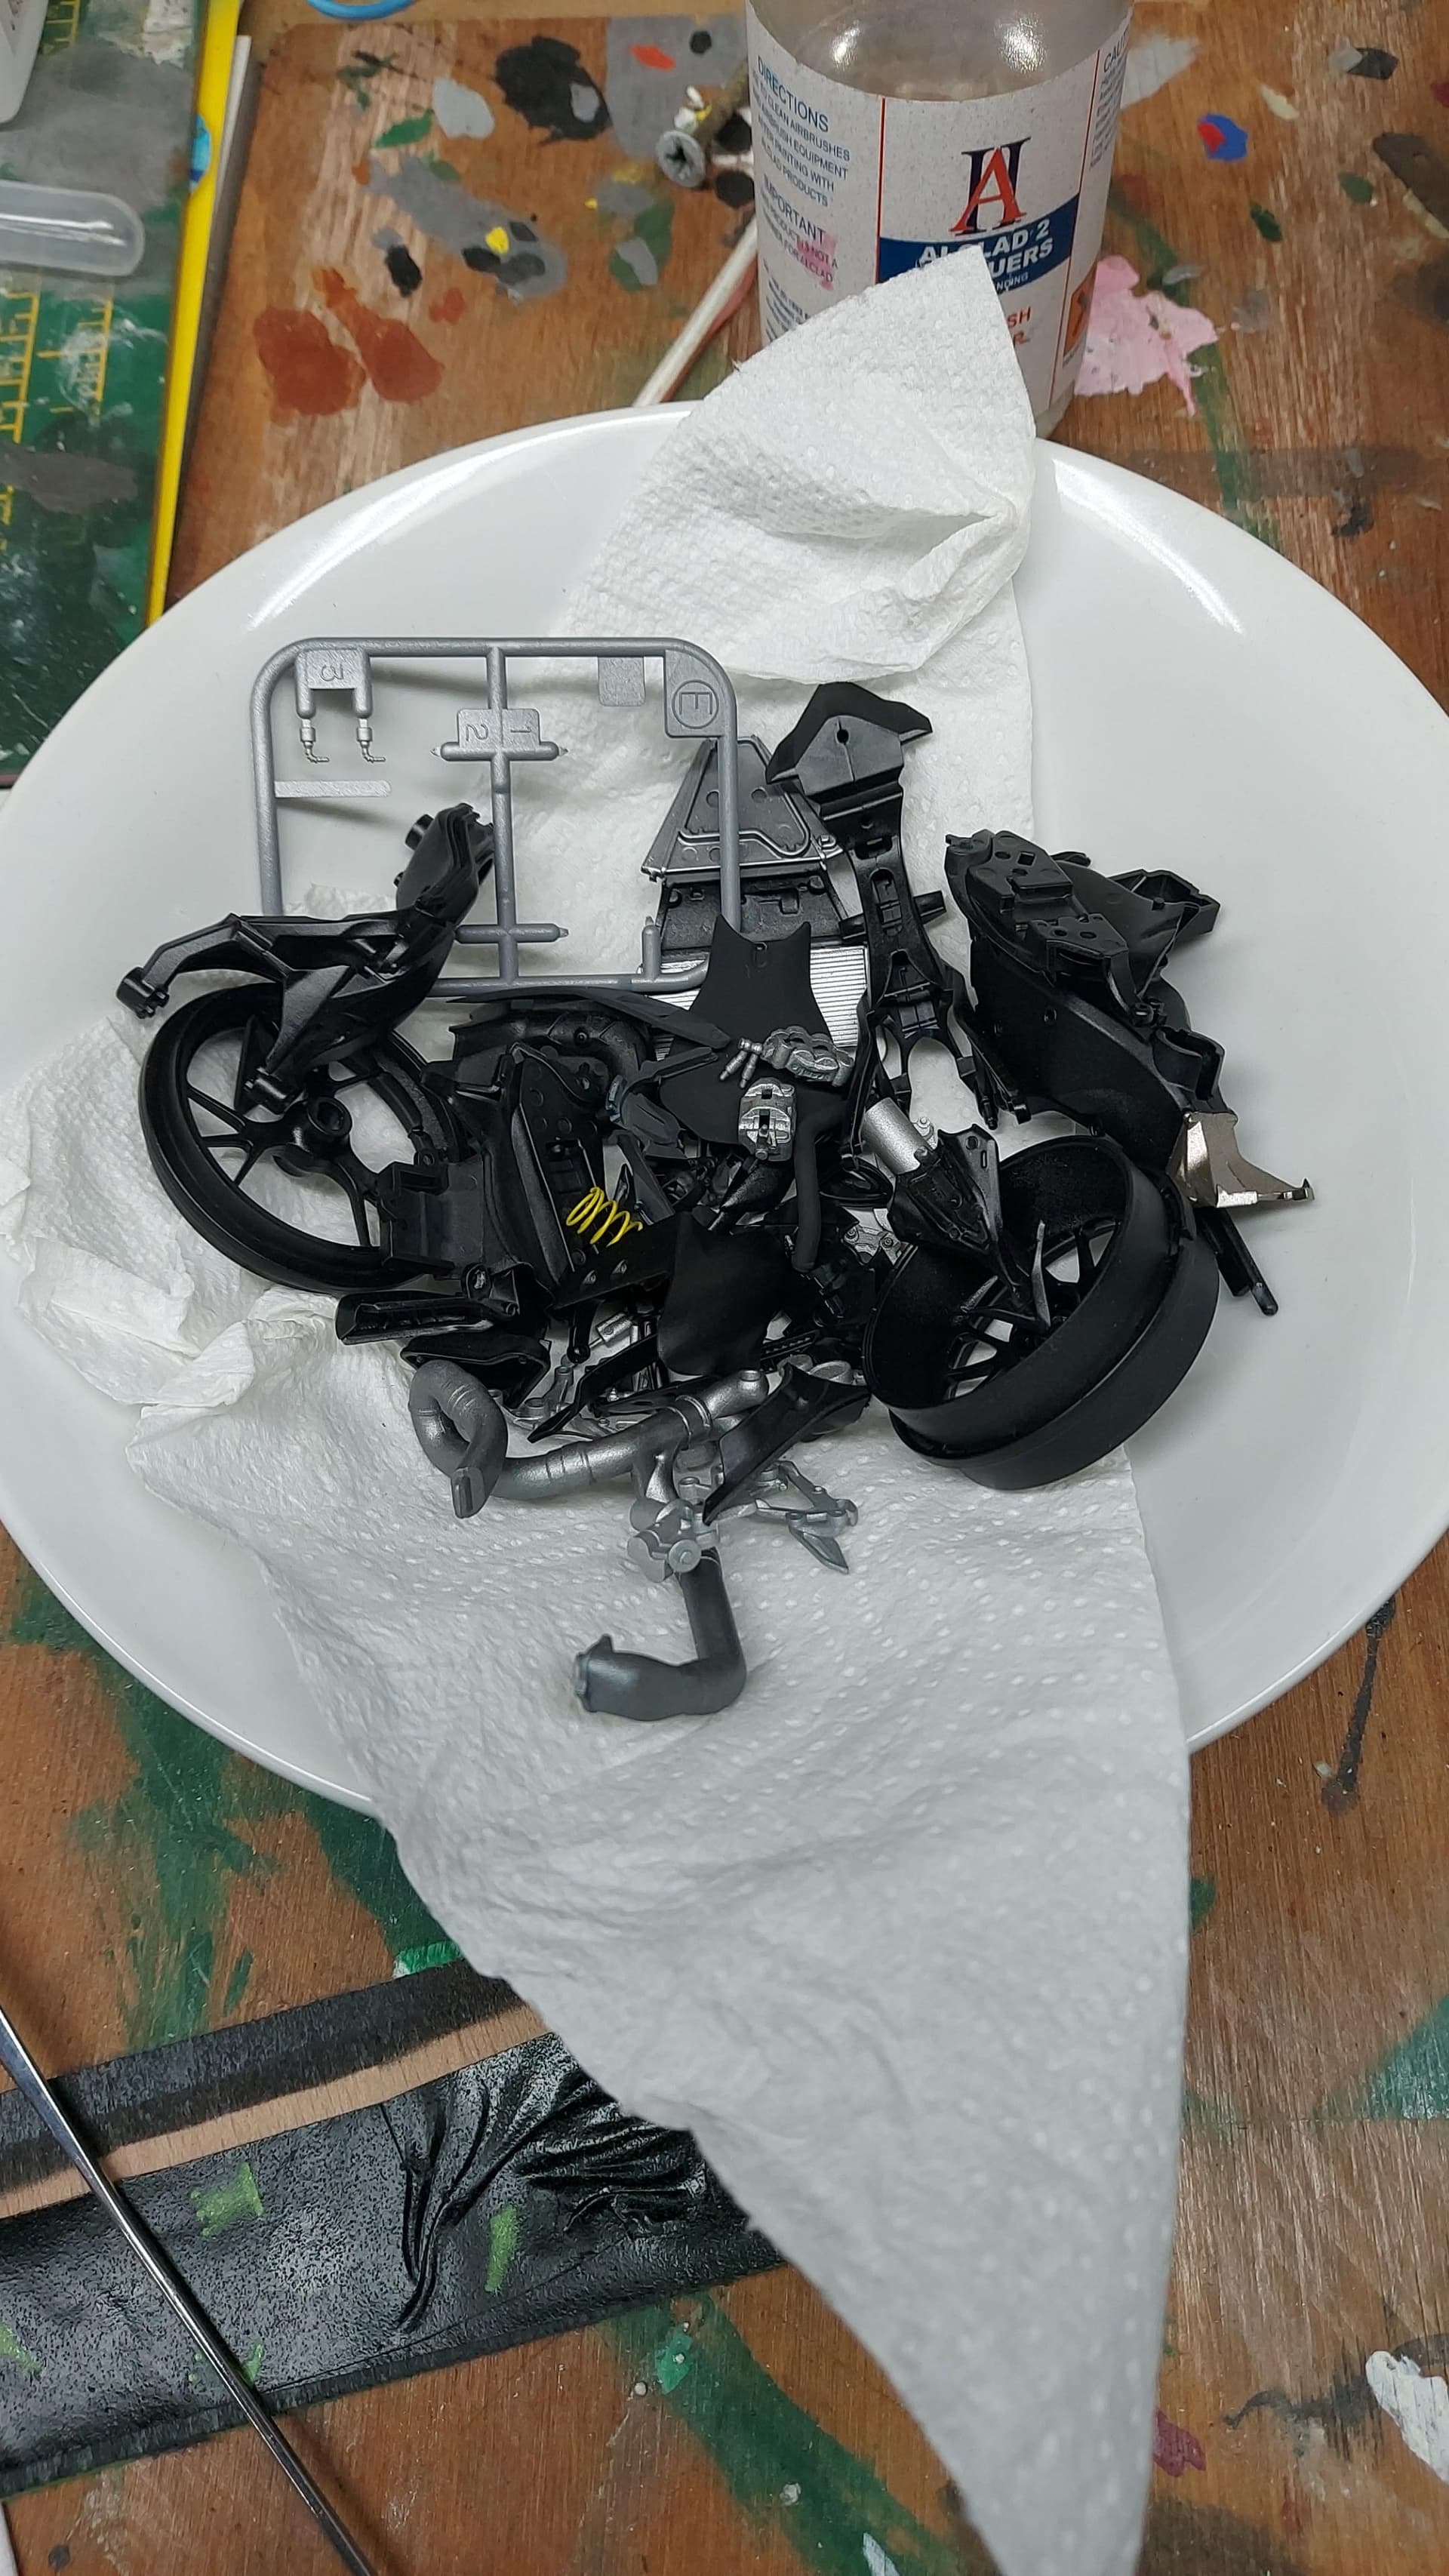
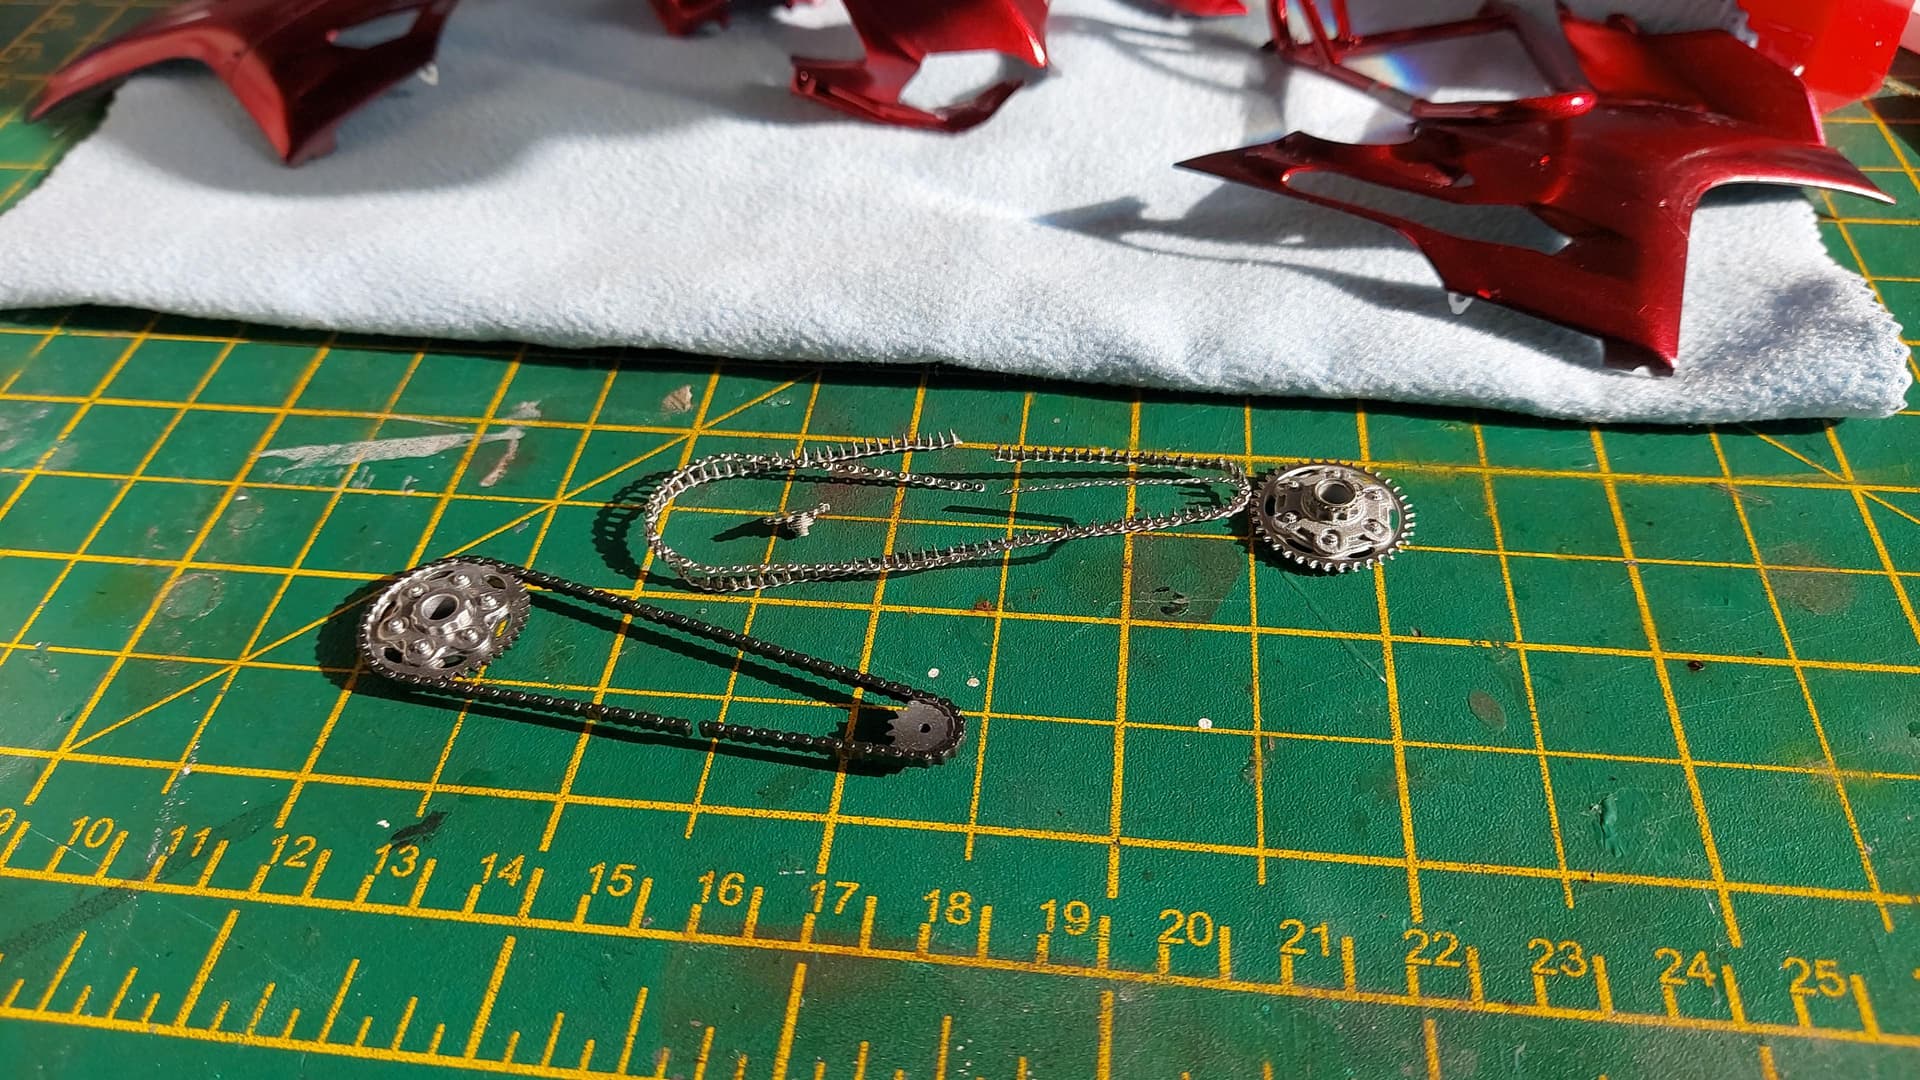
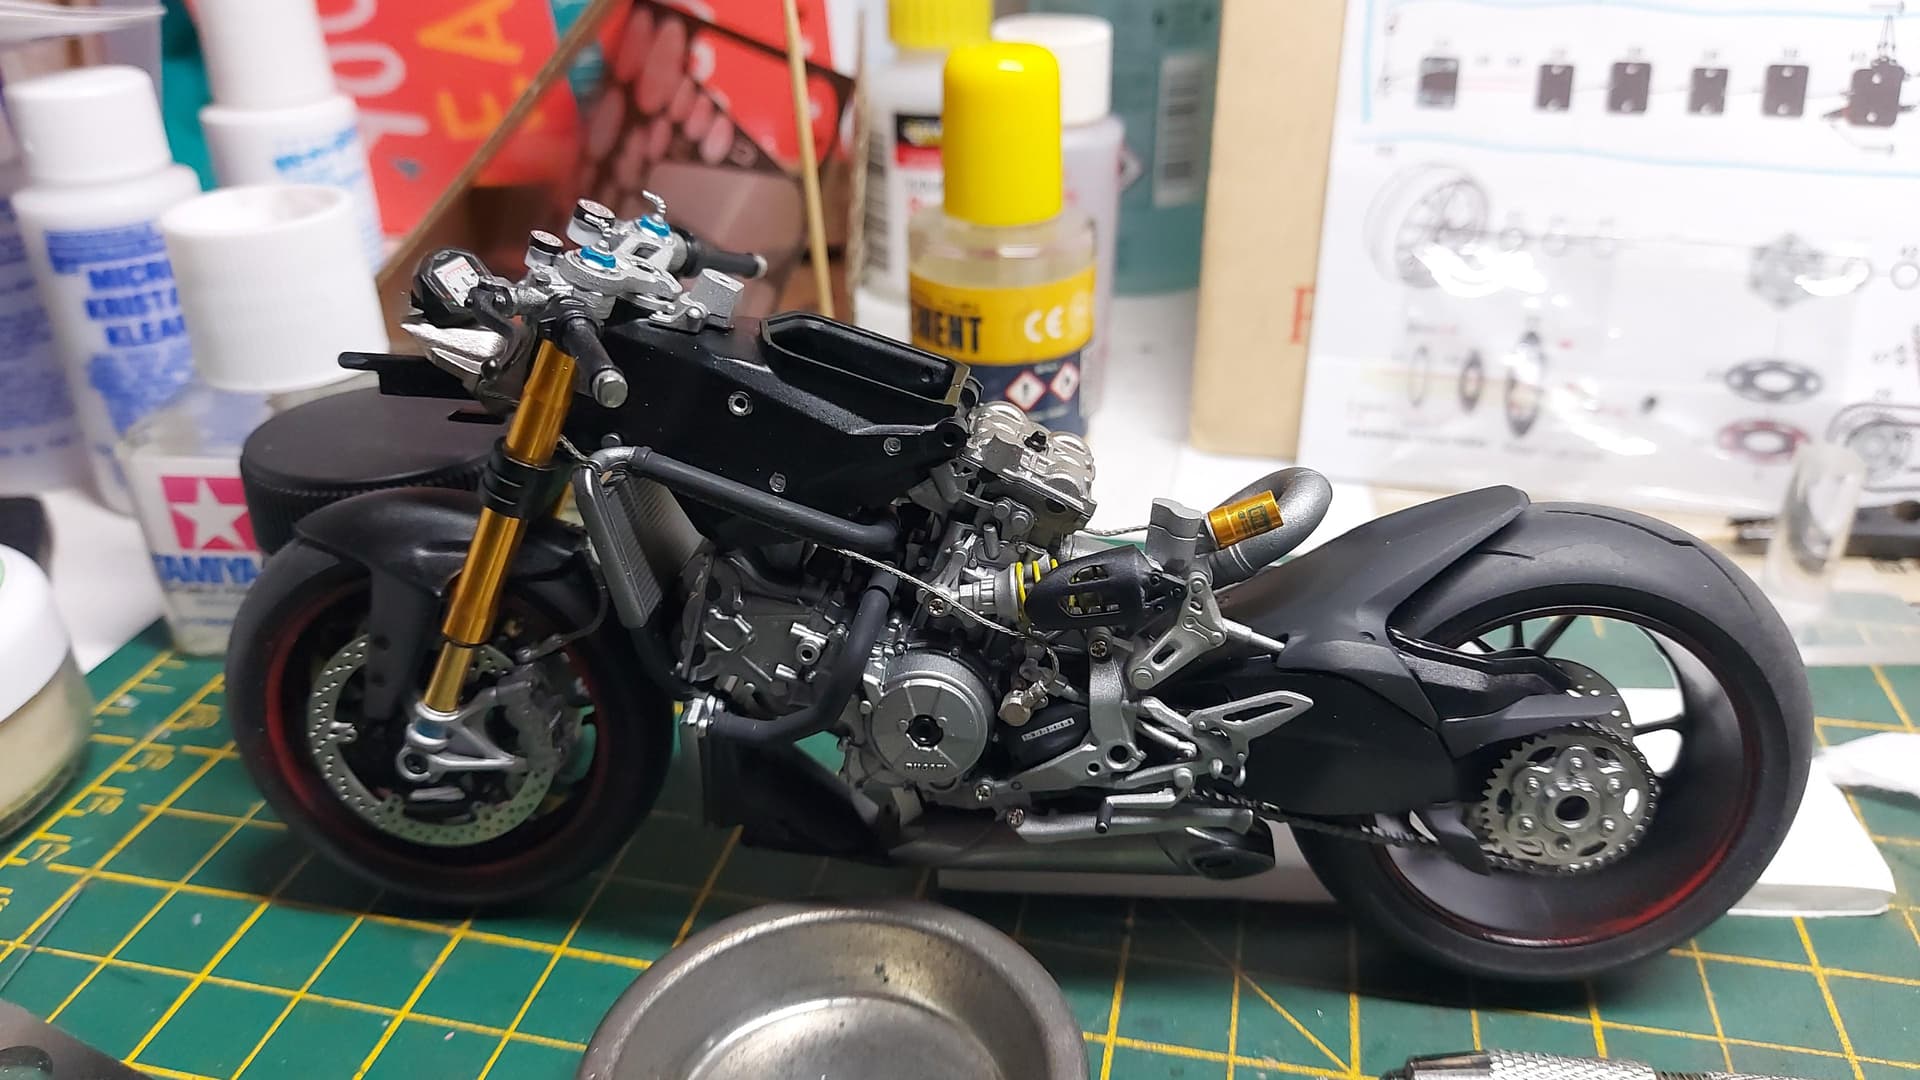
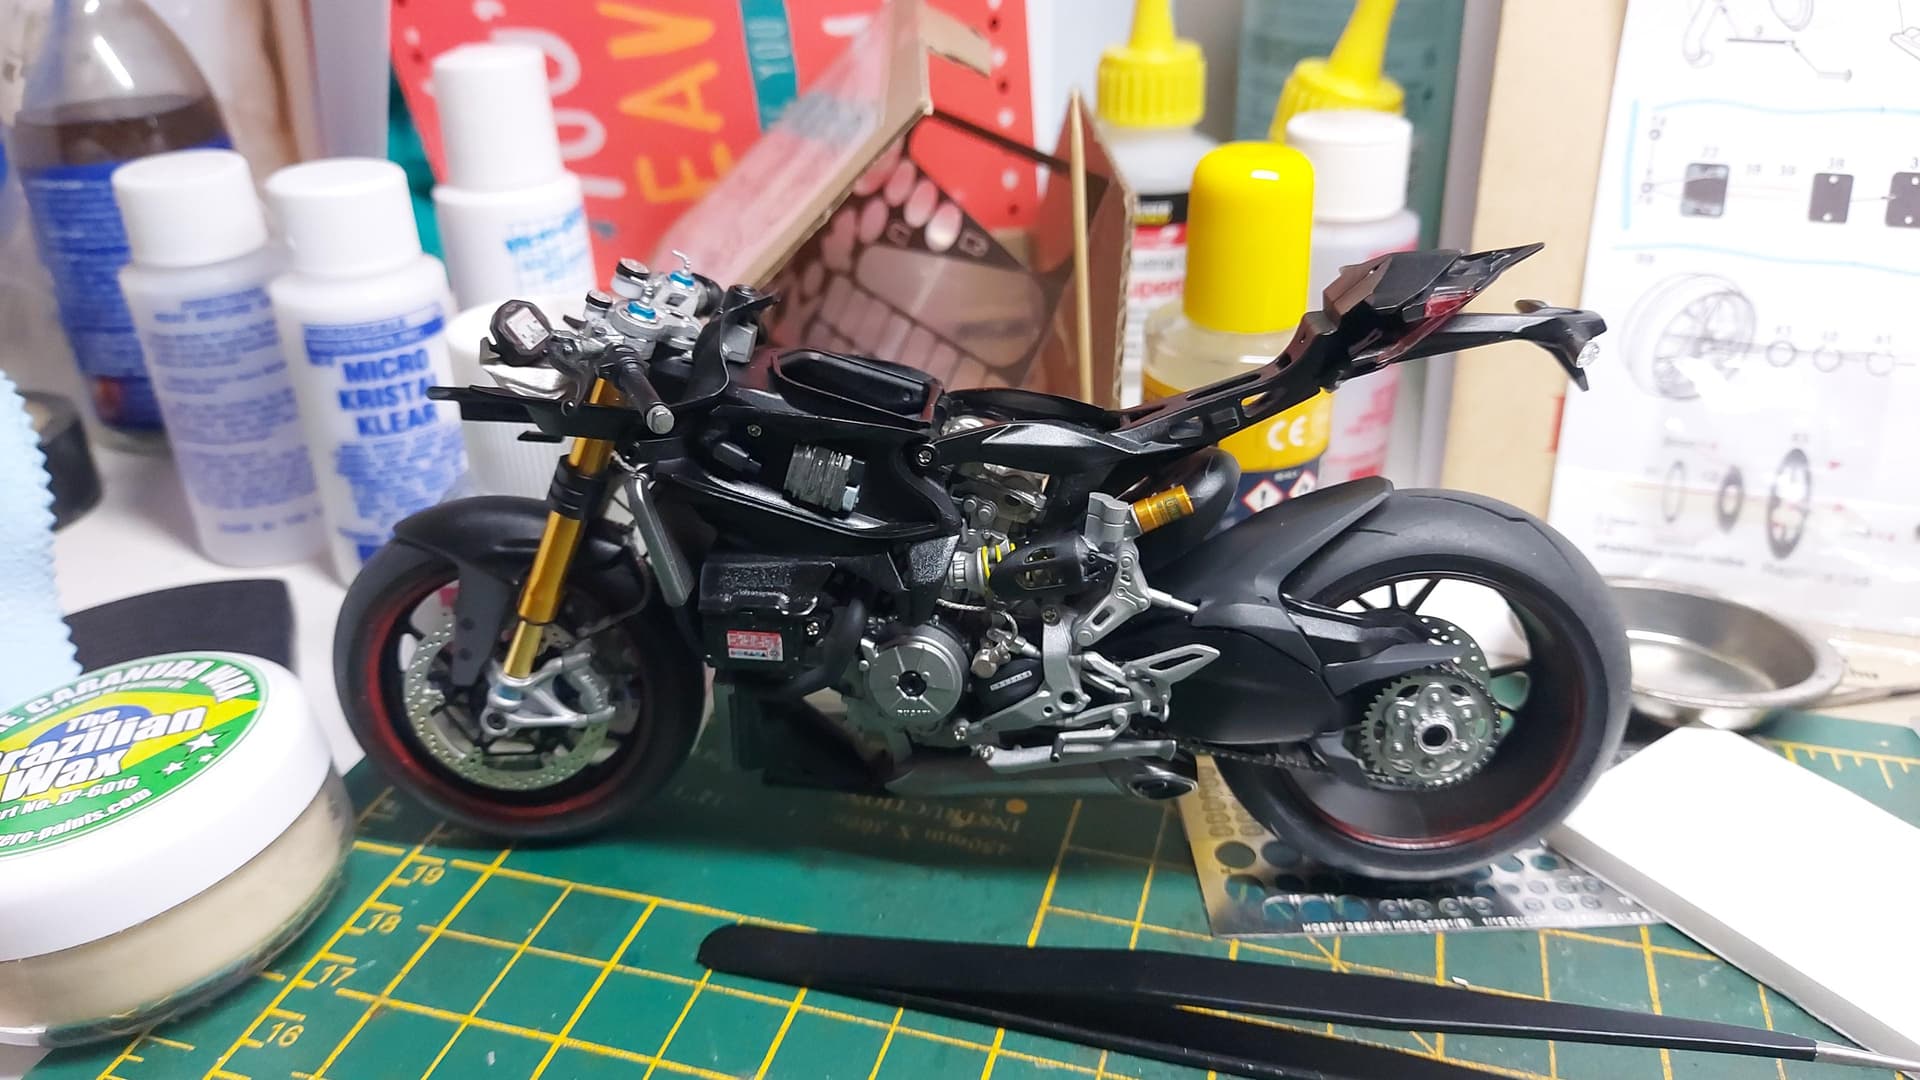
Onwards at last with my build, after much procrastinating, sweating and swearing, I had to call it quits on attempting the PE chain that was in the after market kit. 
I did not want to spend about £40 on the chain set with the jig, so in the end I used the the original plastic part using Alclad steel & polished aluminium. Much better! 
The chain was stopping the build and now I could move on!
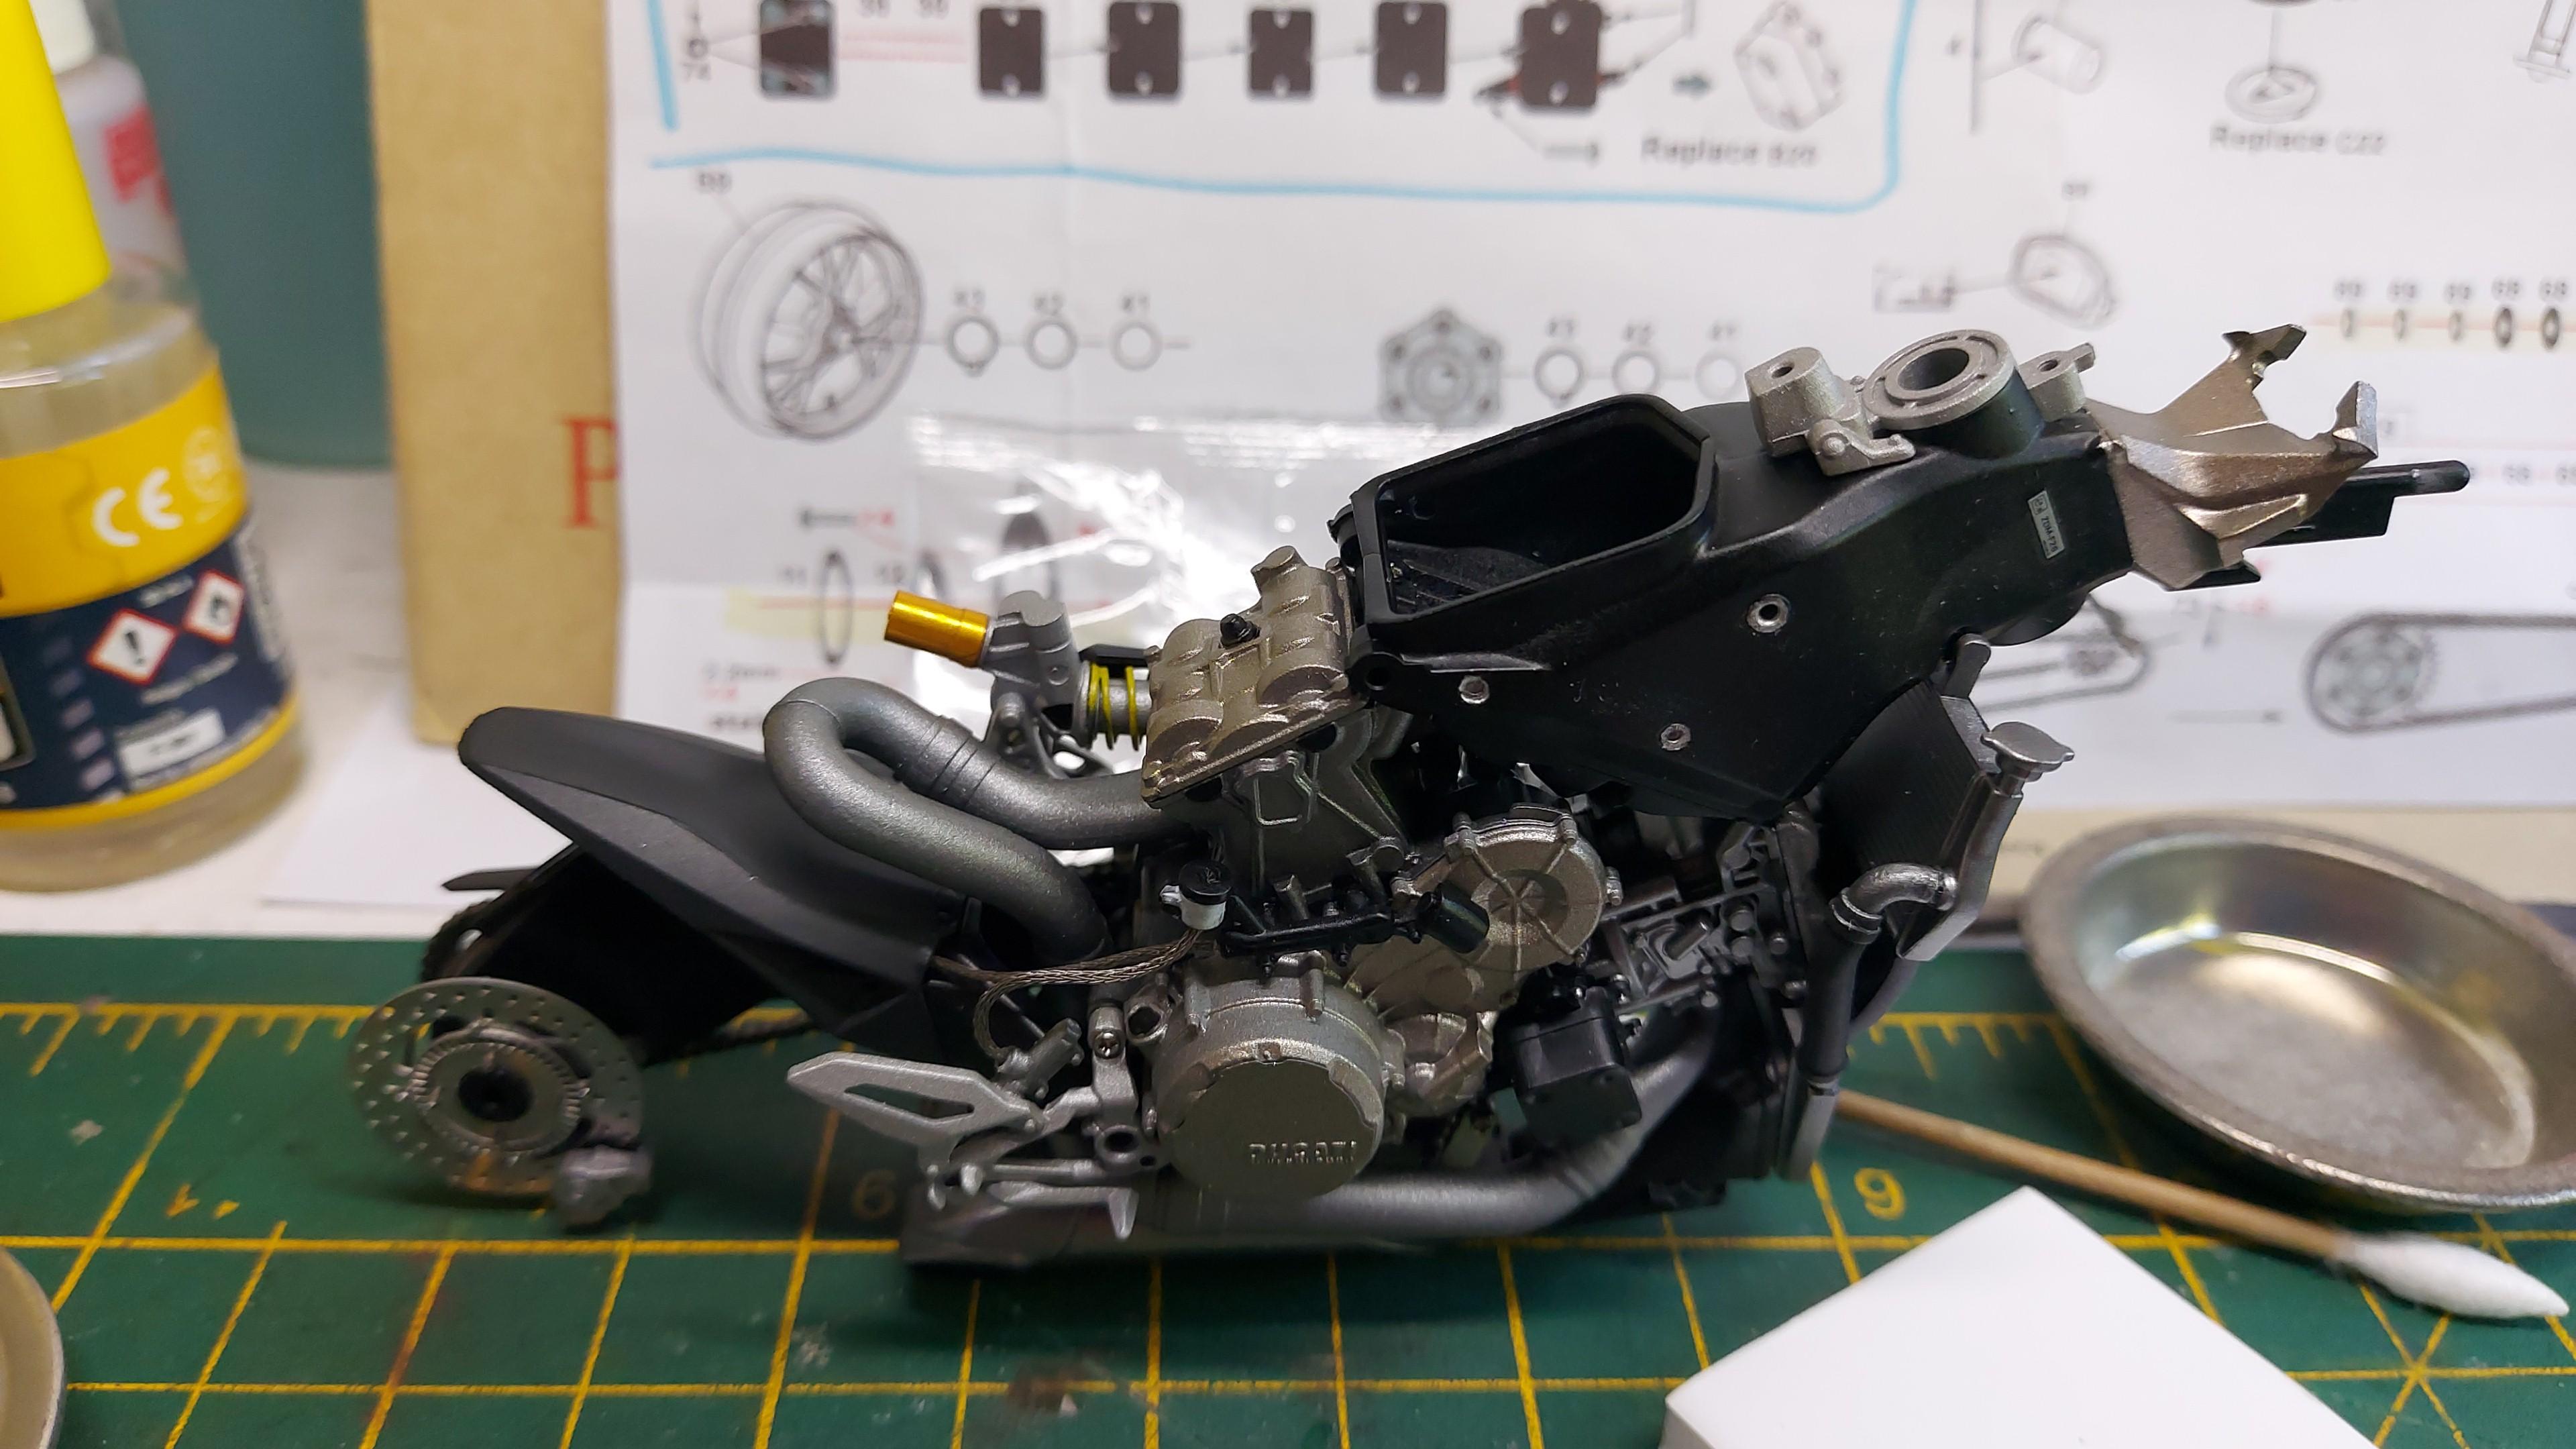
Wow, what a fiddly build with all the screw on pieces and sub assemblies.
Anyway, I made steady progress substituting the nasty rubber tubing for braided hose, look much nicer in my opinion.
The after market forks are business, really happy with the look.
Well that is all for now, than for watching!
5 Likes
Nice Gavin ! I feel your chain pain - facing that again soon enough myself.
1 Like
Hi Richard.
The one with a jig looks more manageable, but that comes at a price. Good luck.
I did manage to build a similar chain for the NCR racer, but no joy this time around.
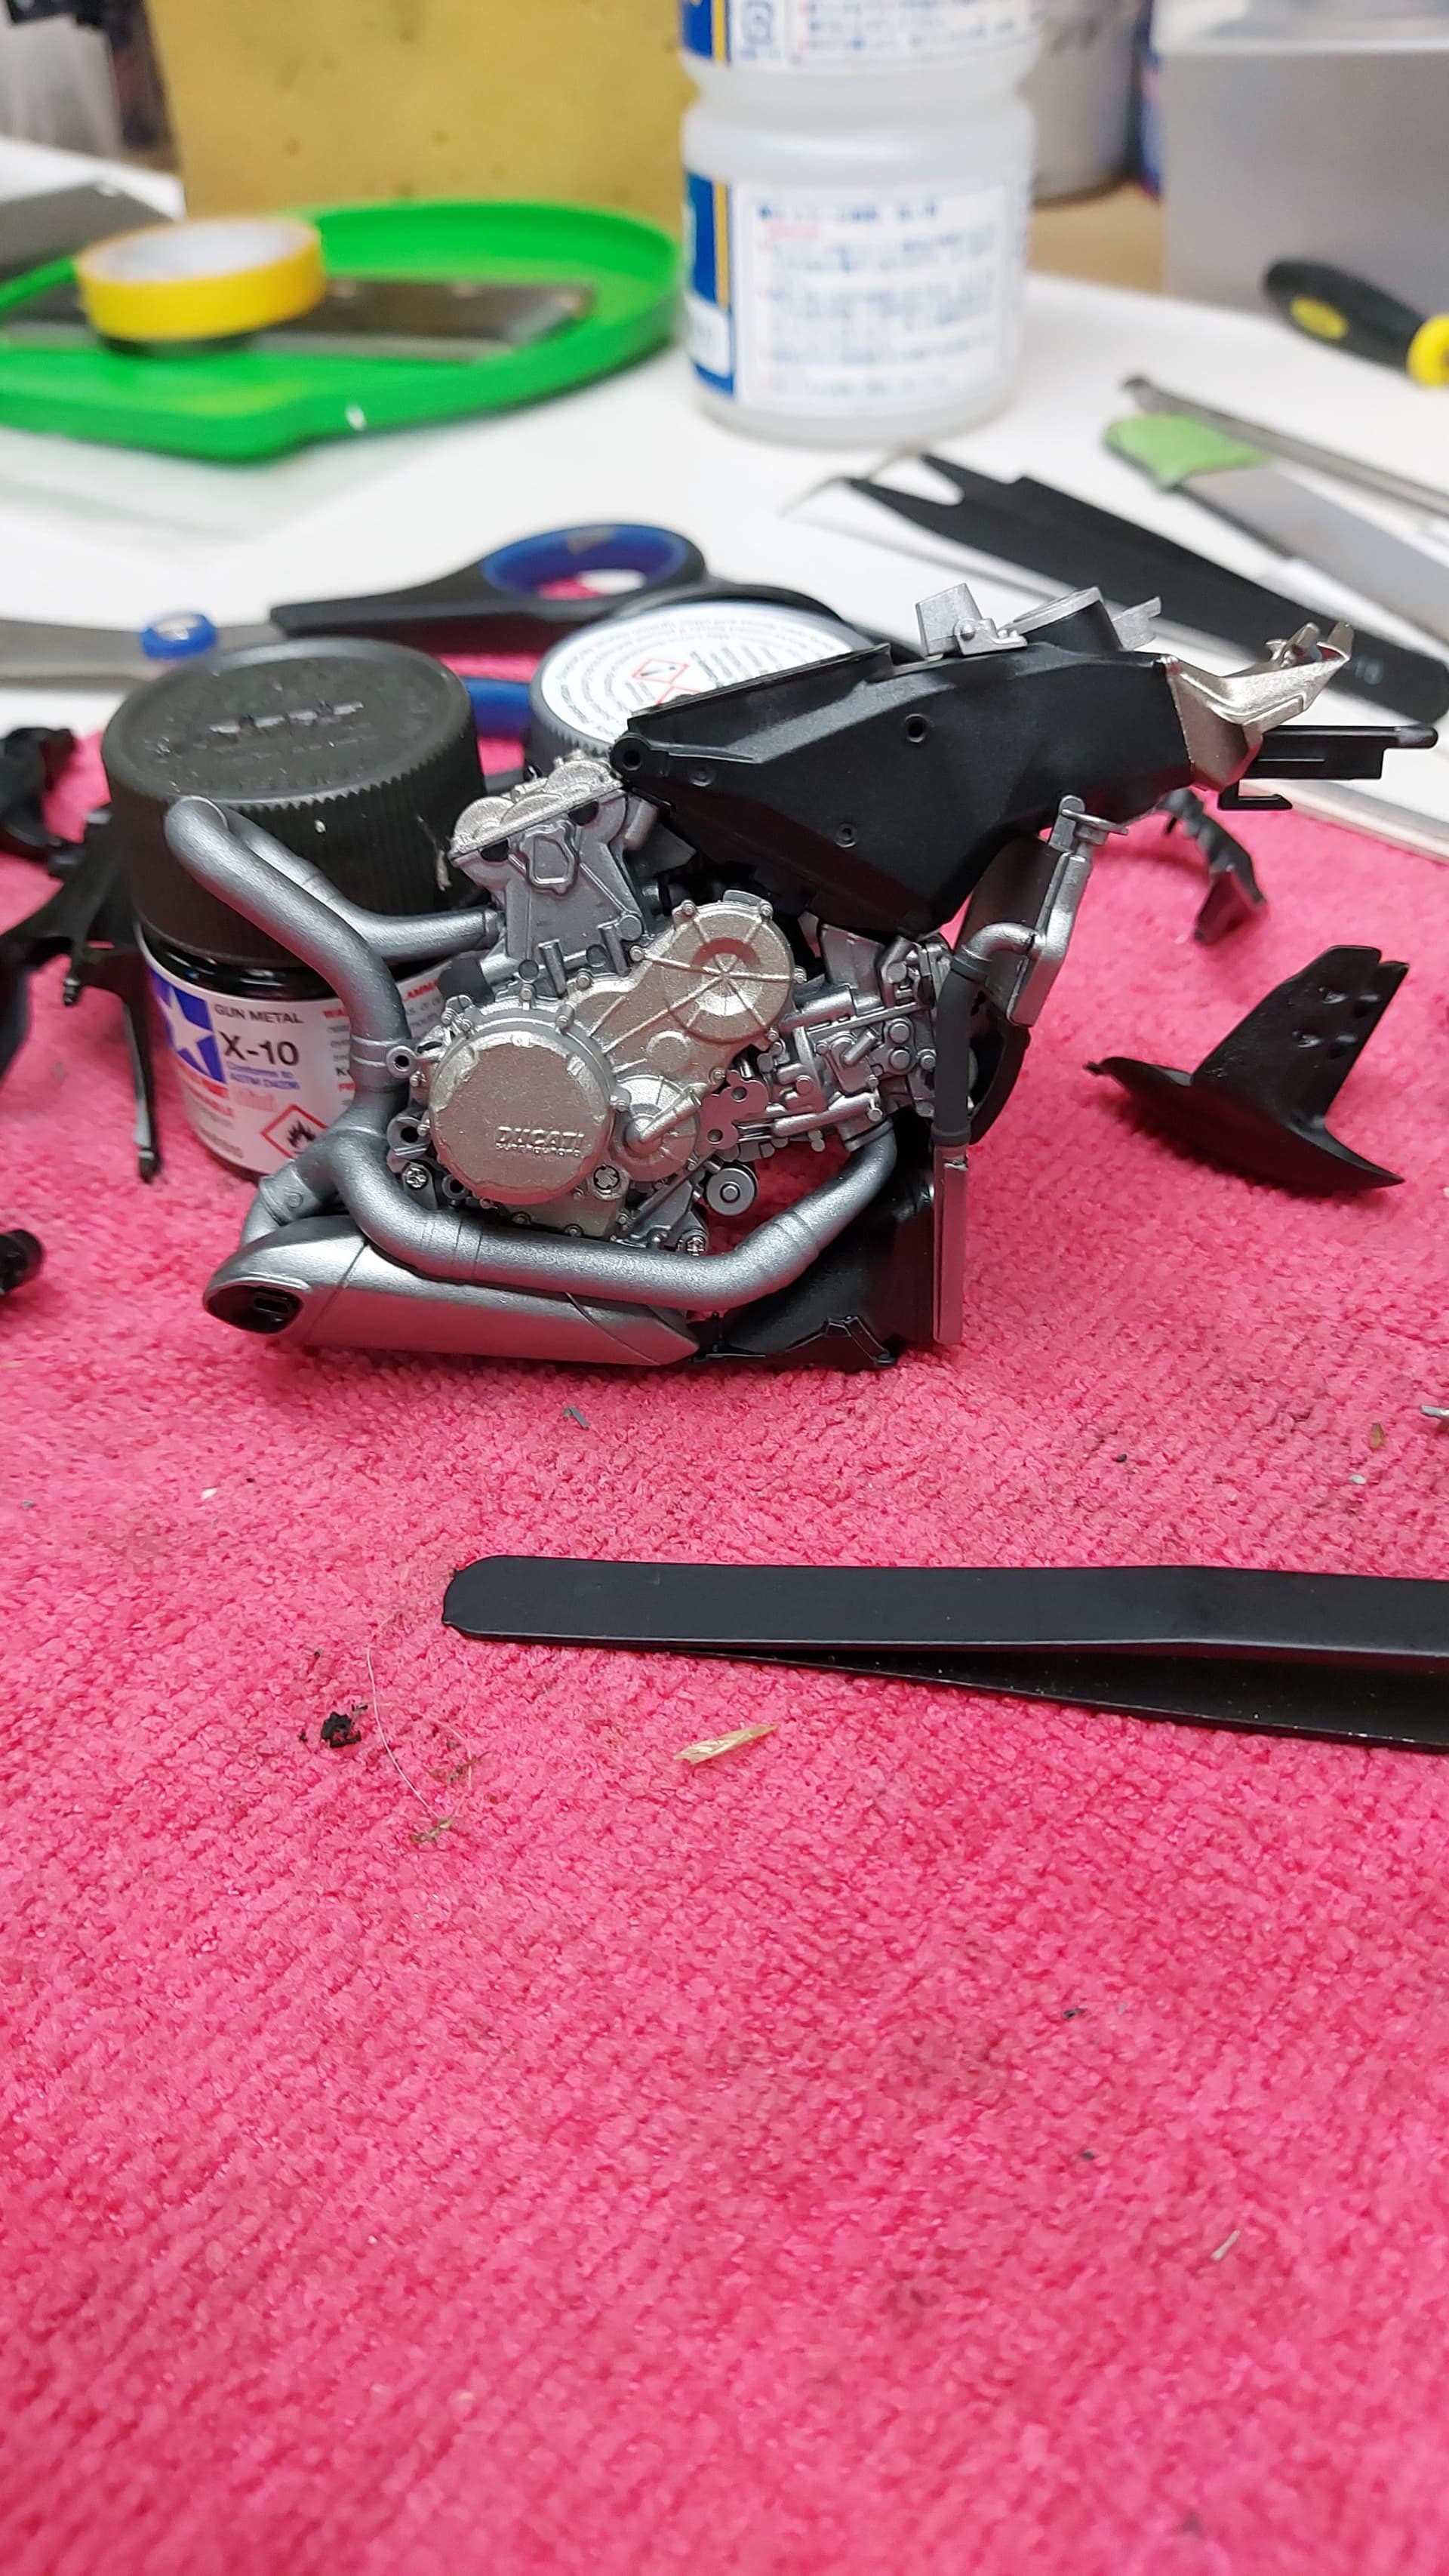
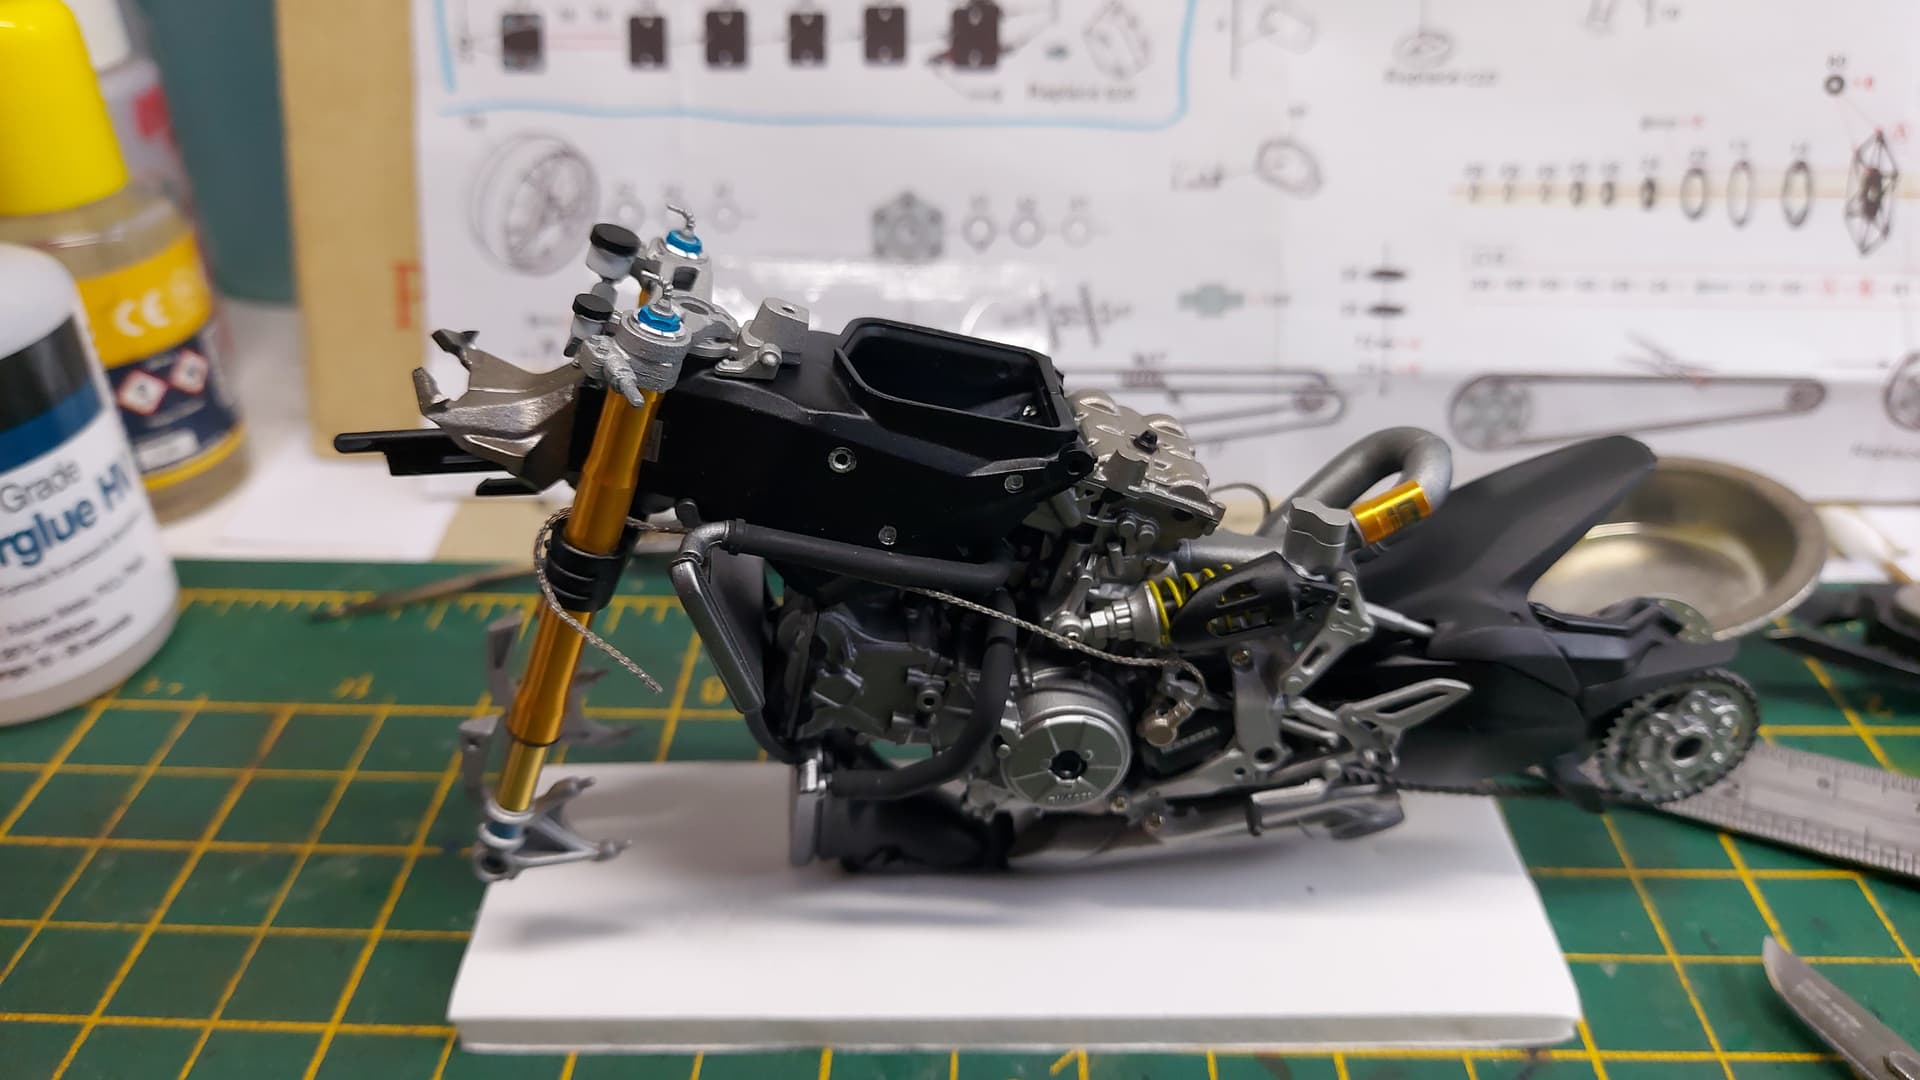
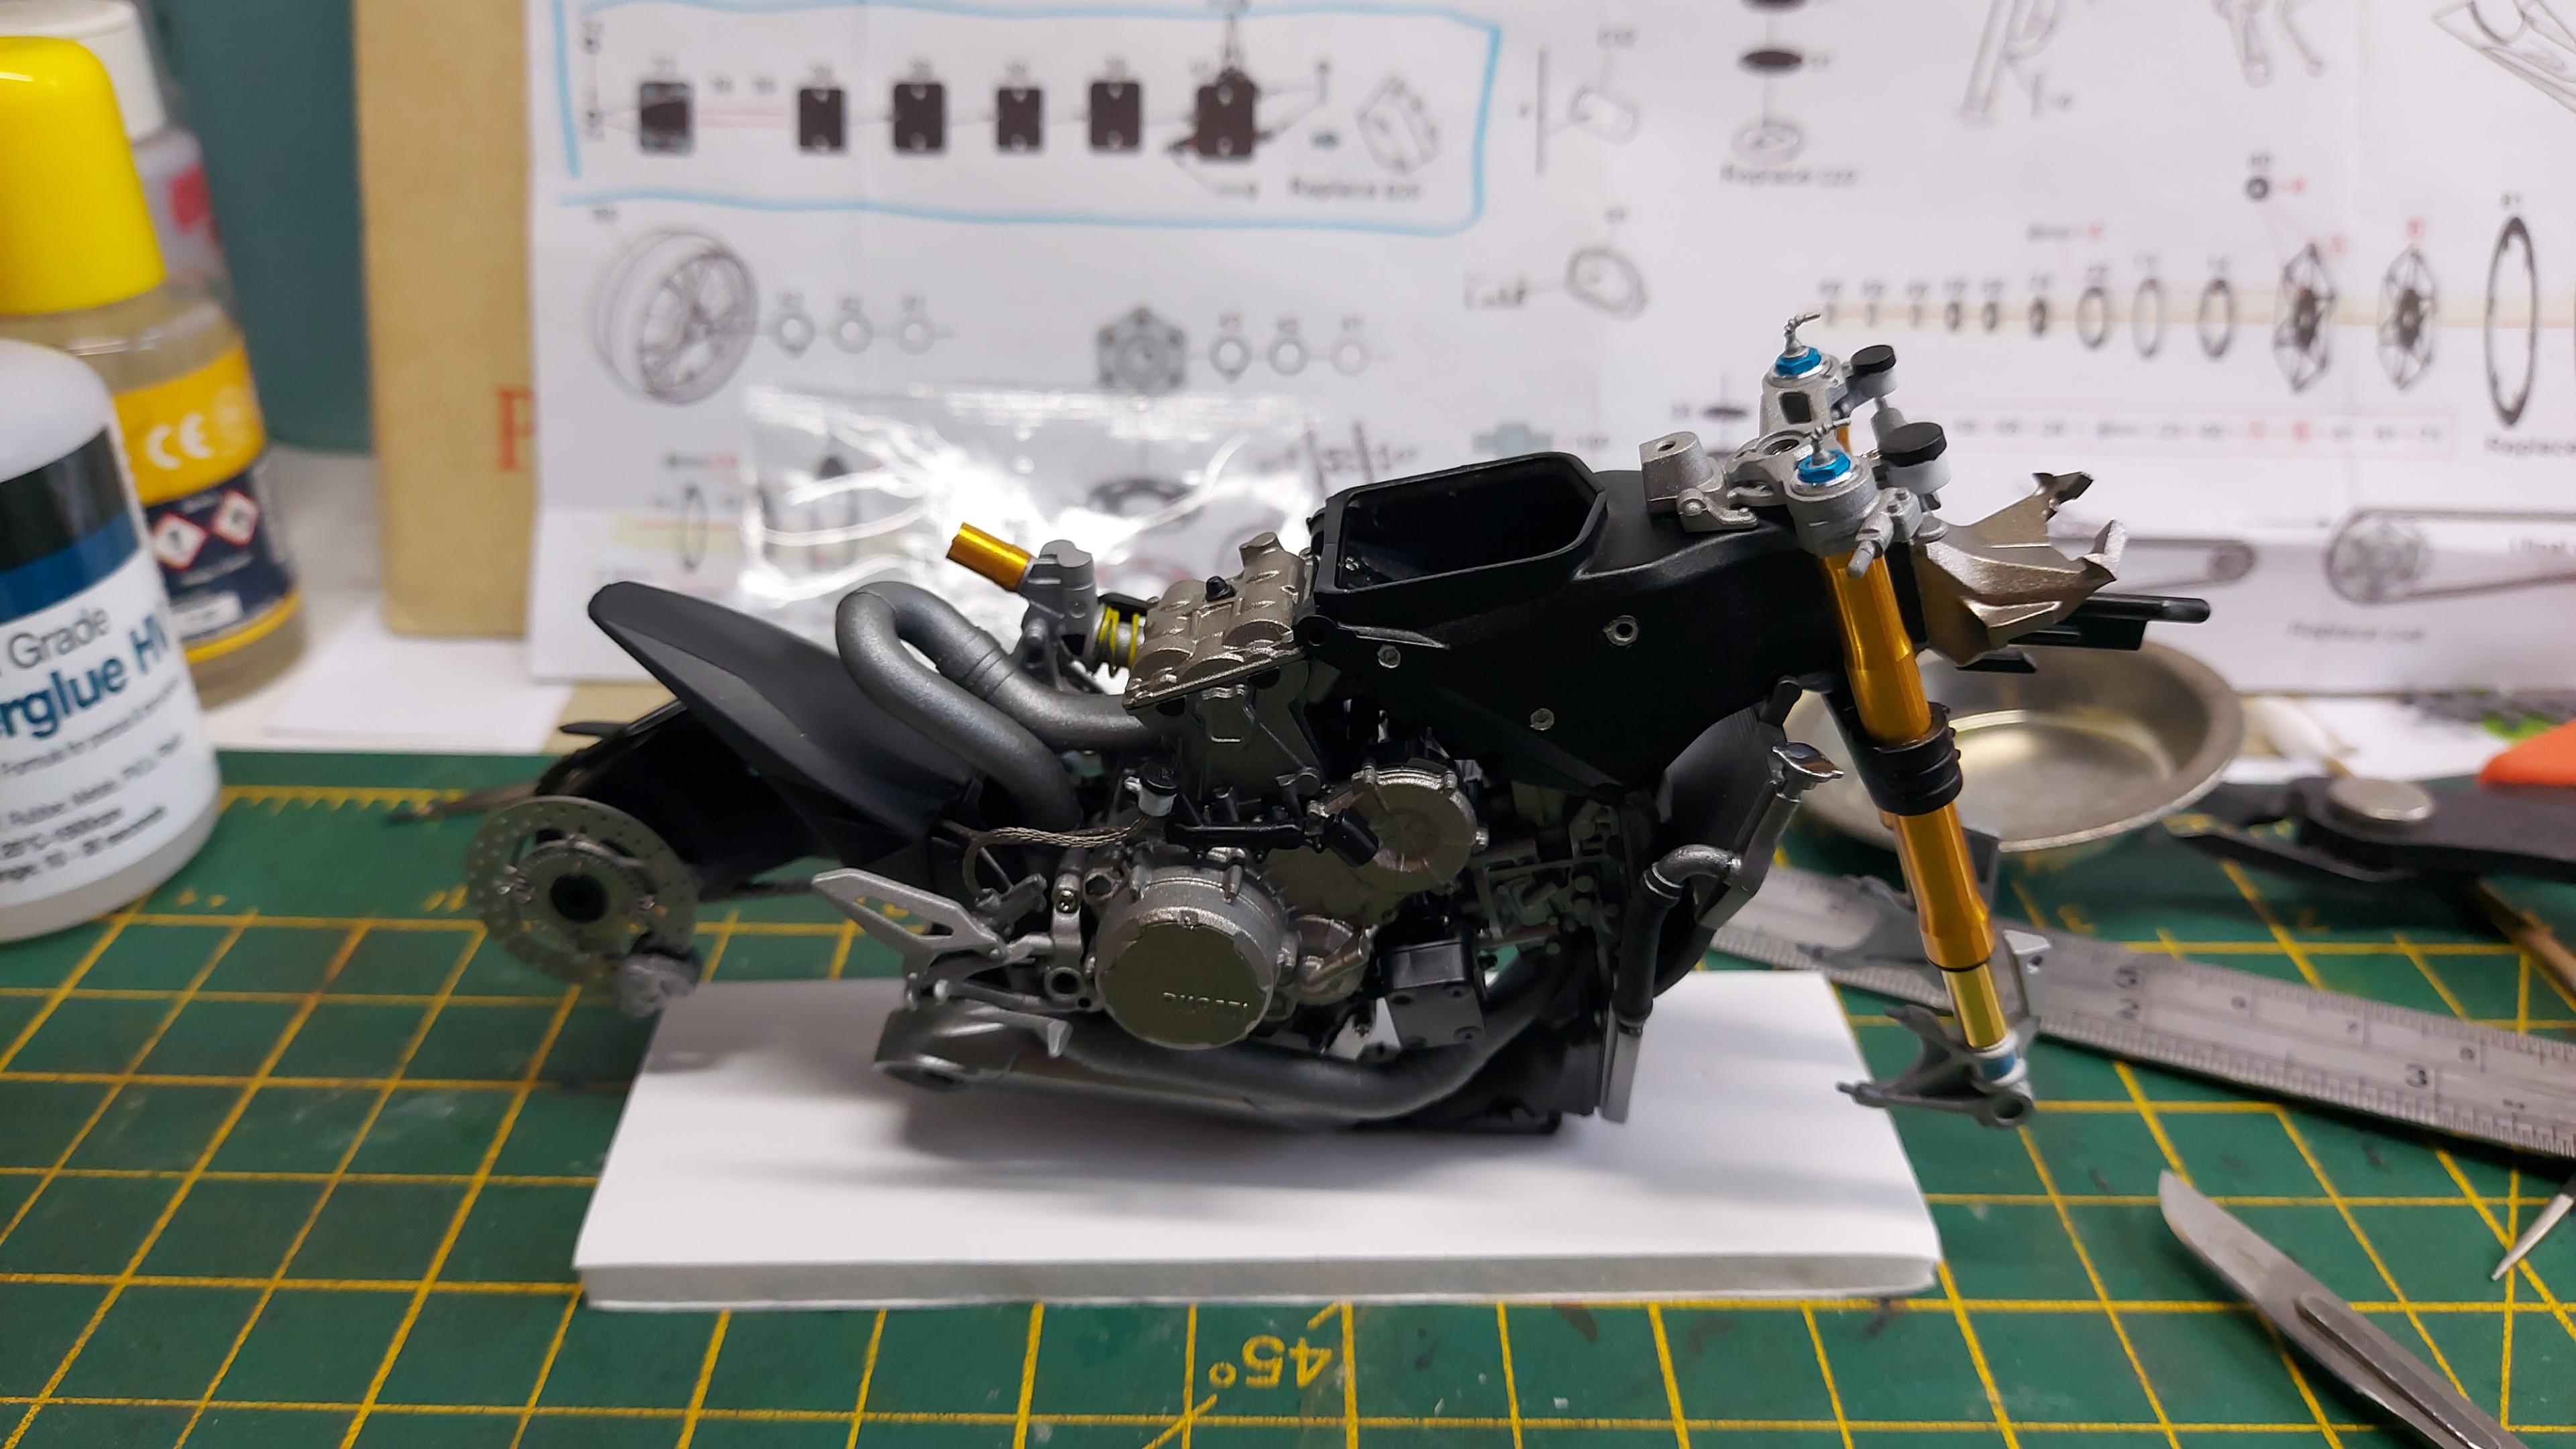
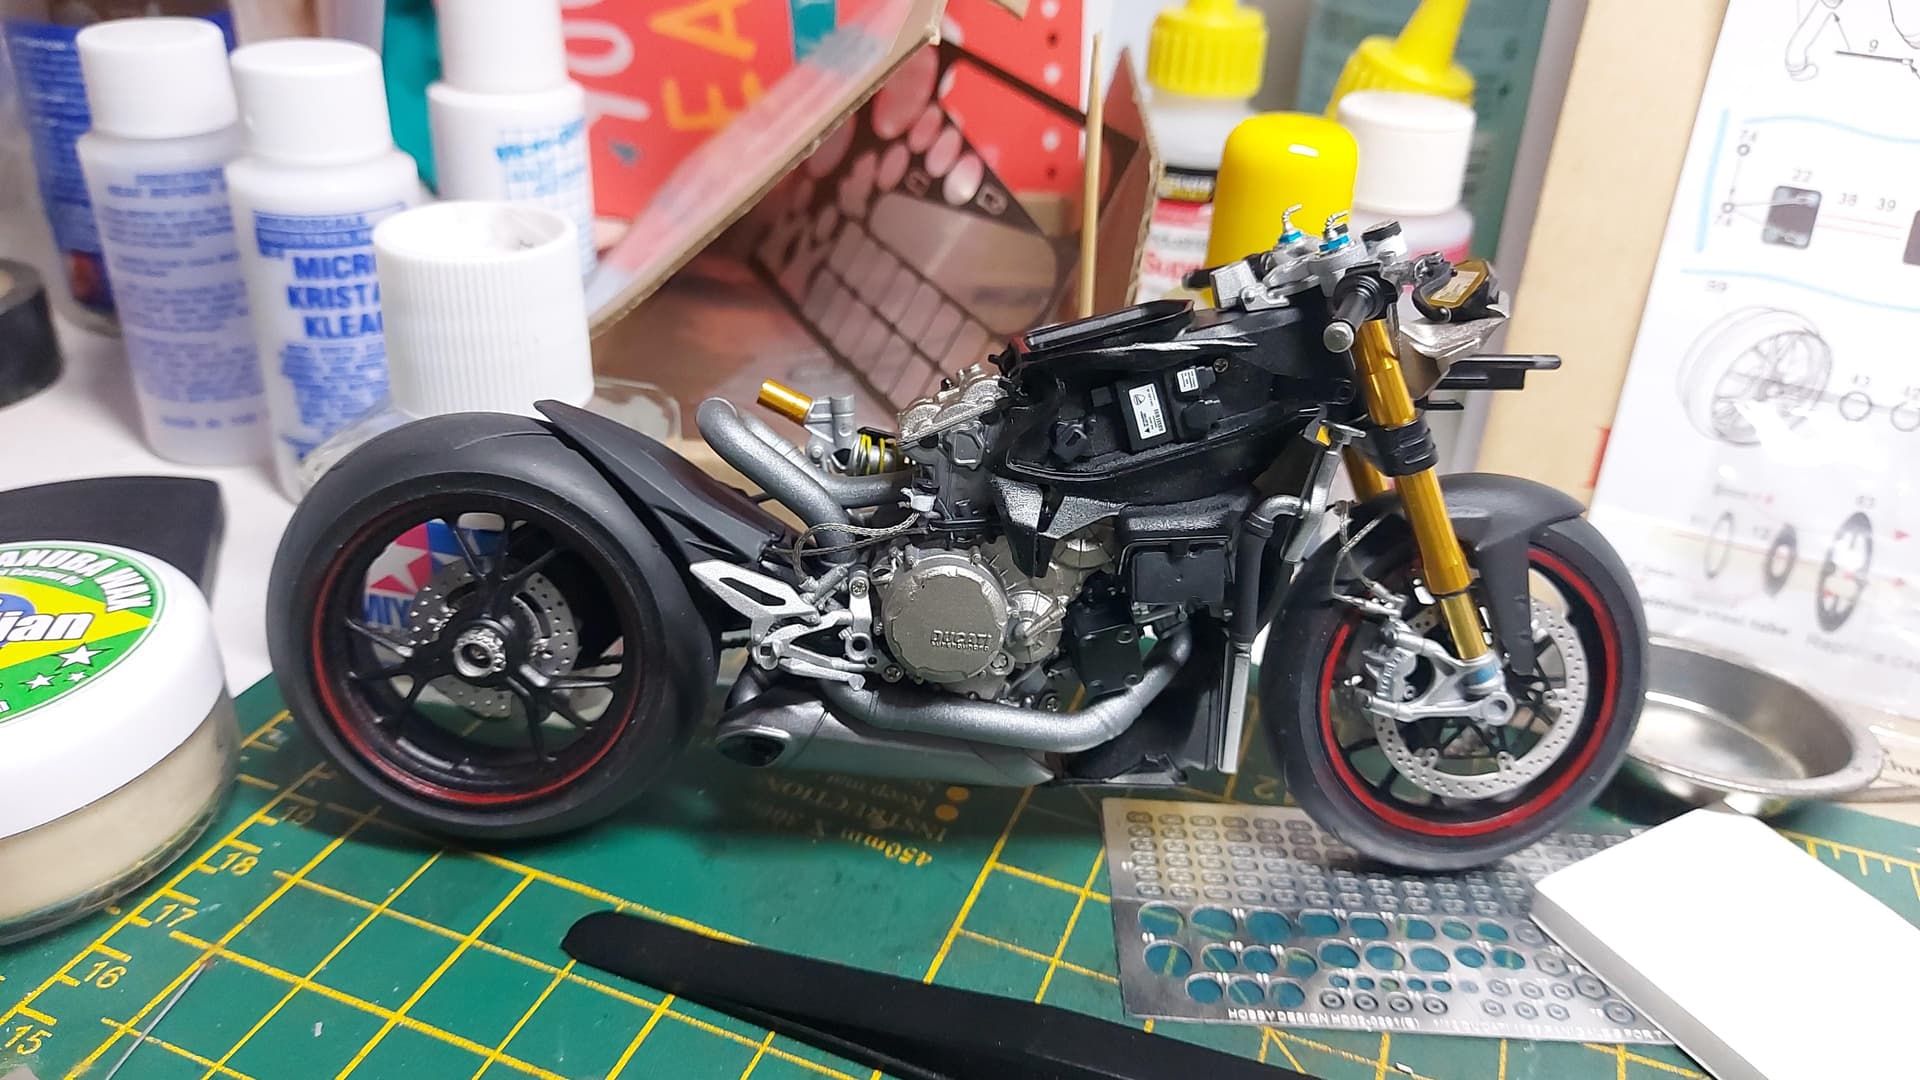
Well, the build is moving along, actually it’s quite a complex for build for a motorcycle, but it is starting to look good. 
Here you get to see the layers going on.
So much is hidden it beggars the question, why hide it, but again compared to the old 900SS and company, this is a whole different beast.
This has been quite a ride thus far.
Thanks for watching, till next time!! 
4 Likes
Looking very nice indeed Gavin .
1 Like
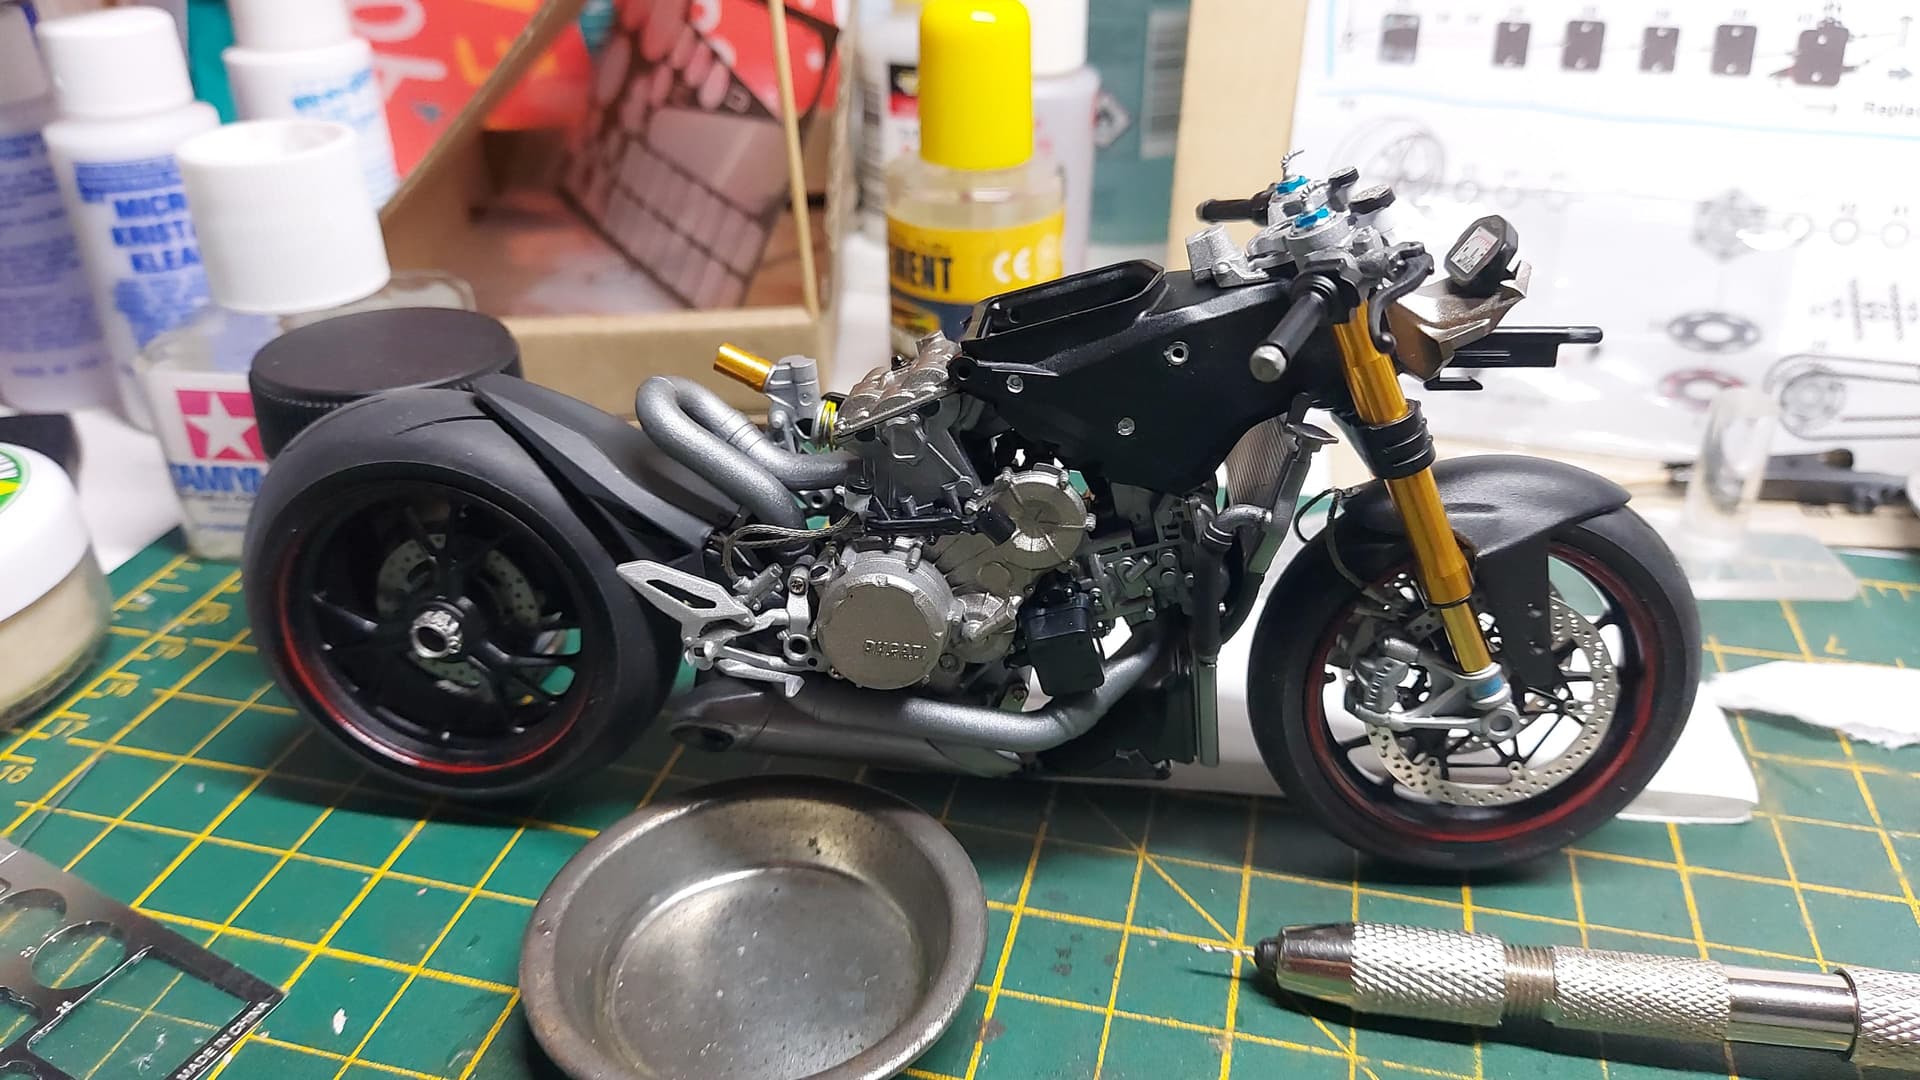
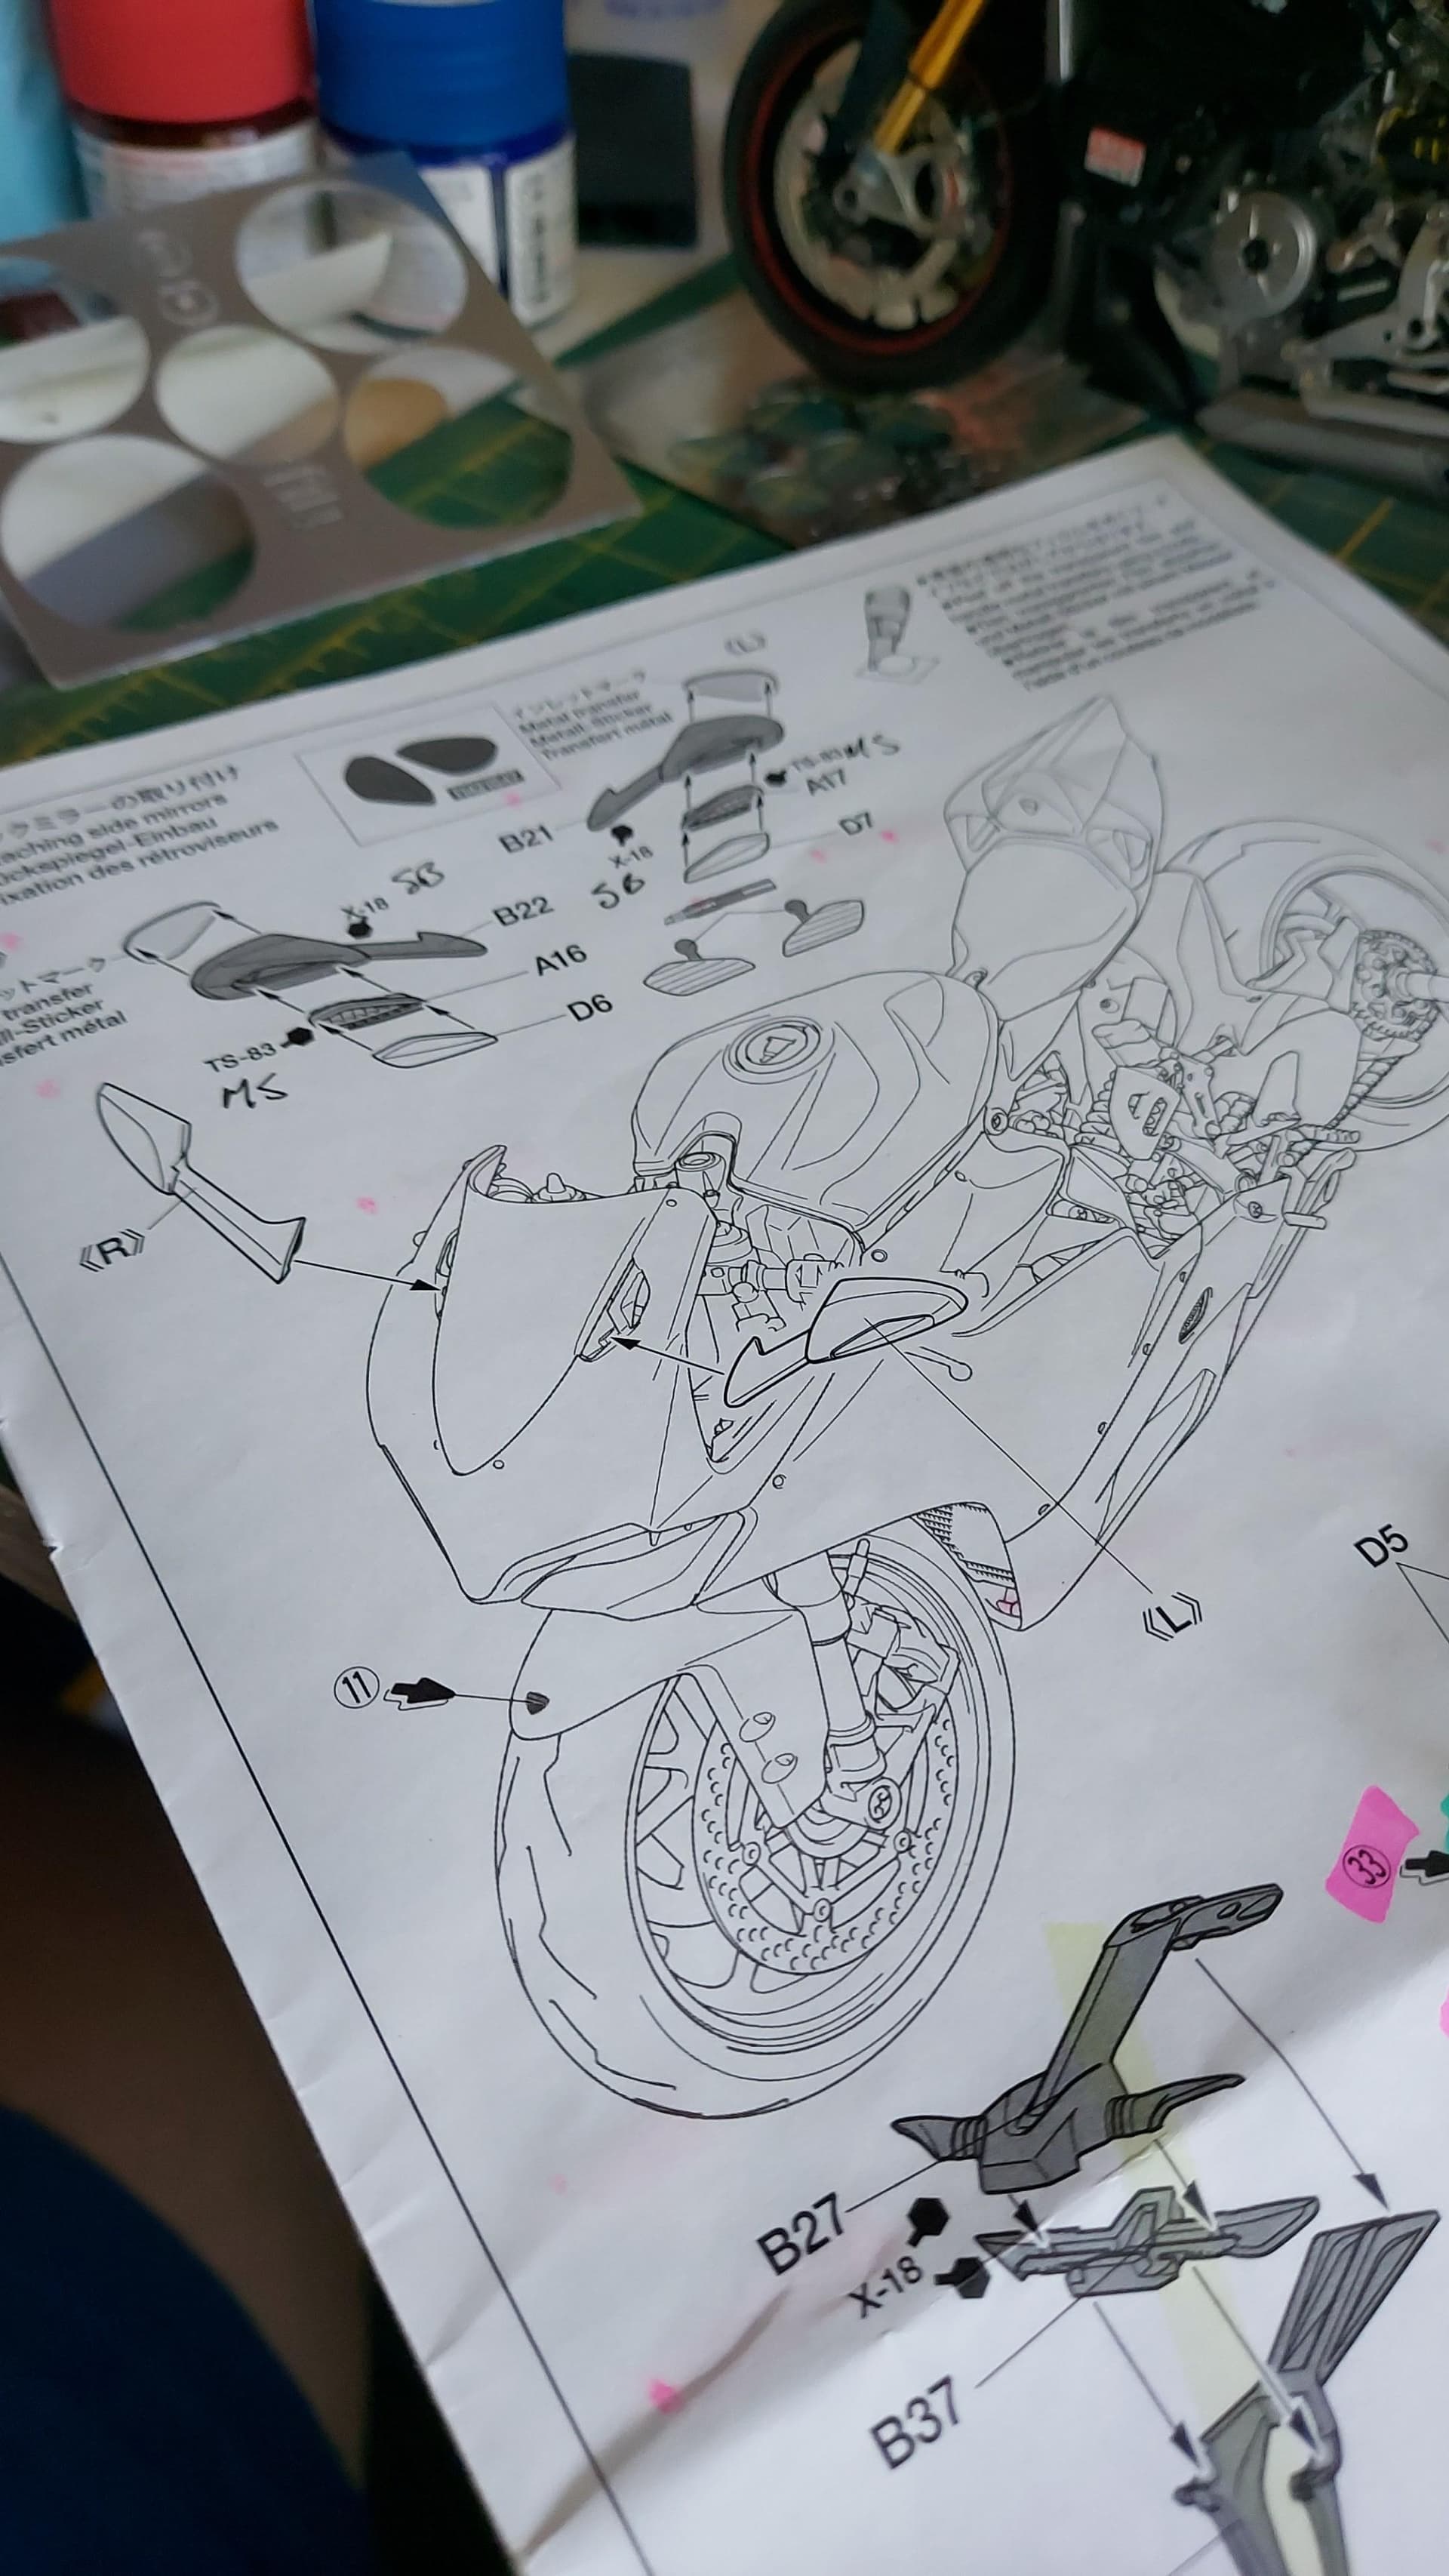
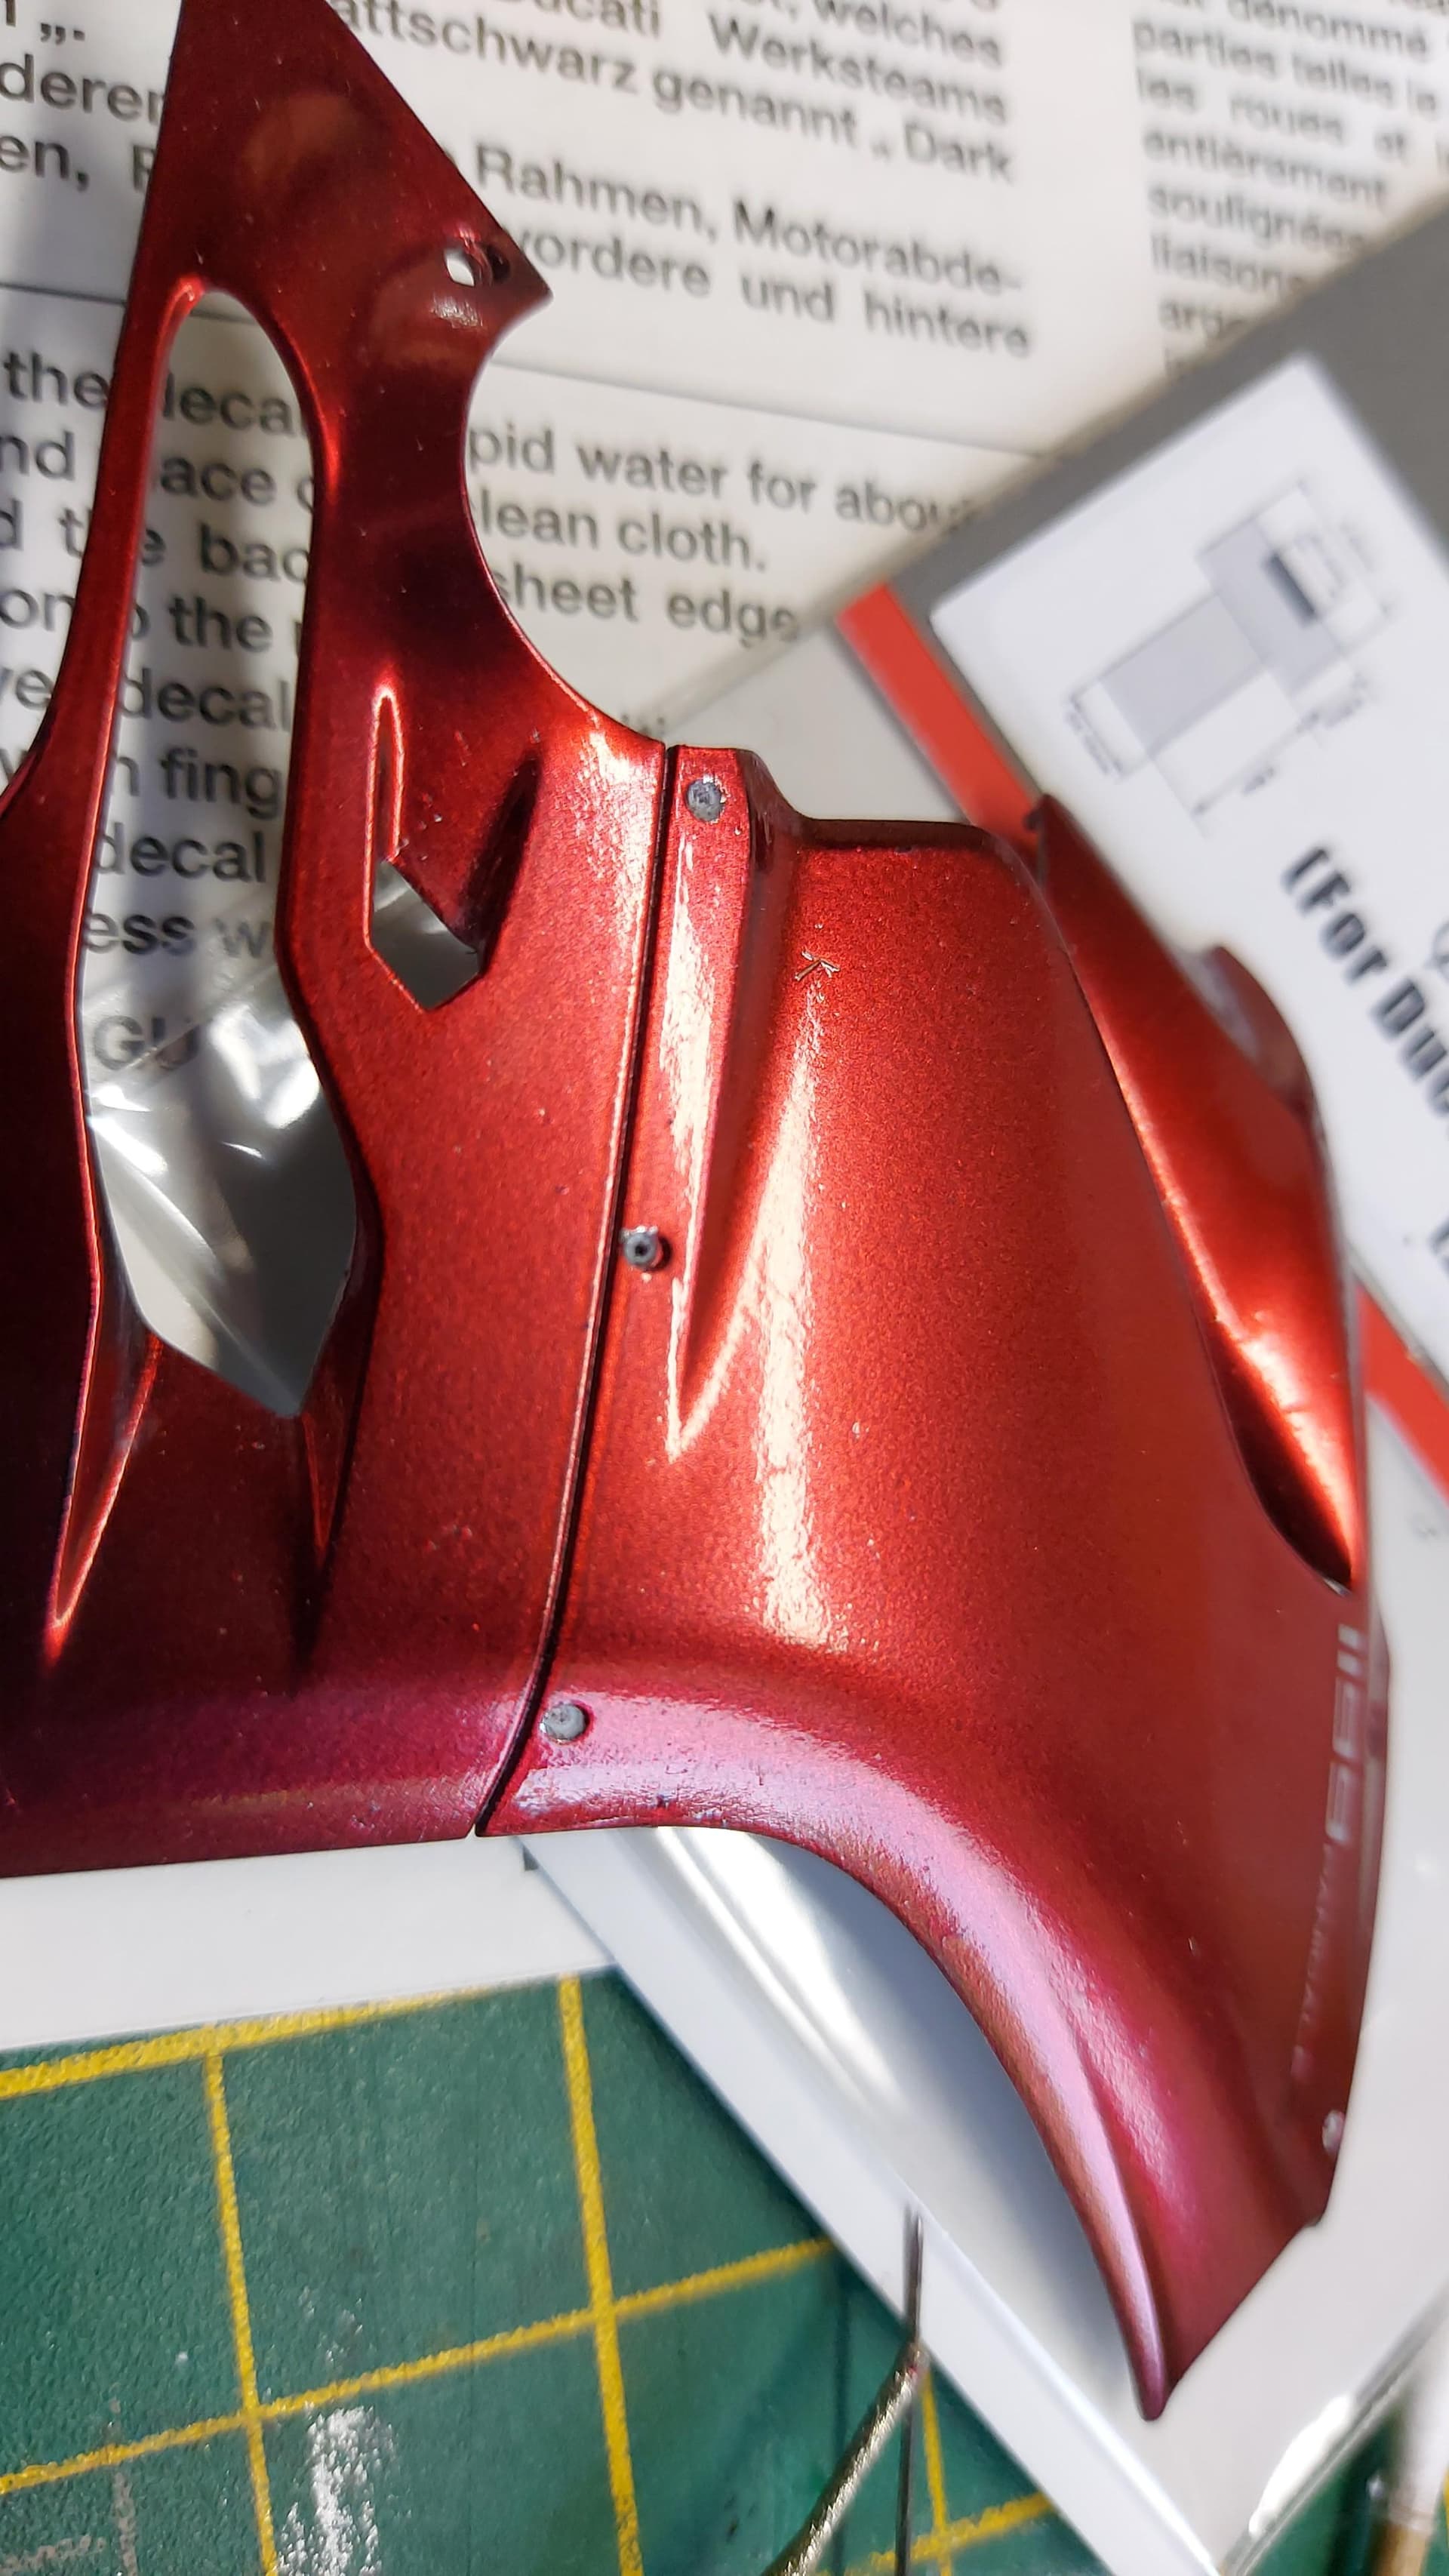
I managed to do some more today. This is one fiddly kit! 
Got the rear portion, seat, tank and top part of the fairing completed. The instructions for the fairing assembly is wrong. You effectively have to glue that valance then the mirrors in place before inserting the clear screen.
Each mirror comprises of 4 parts.
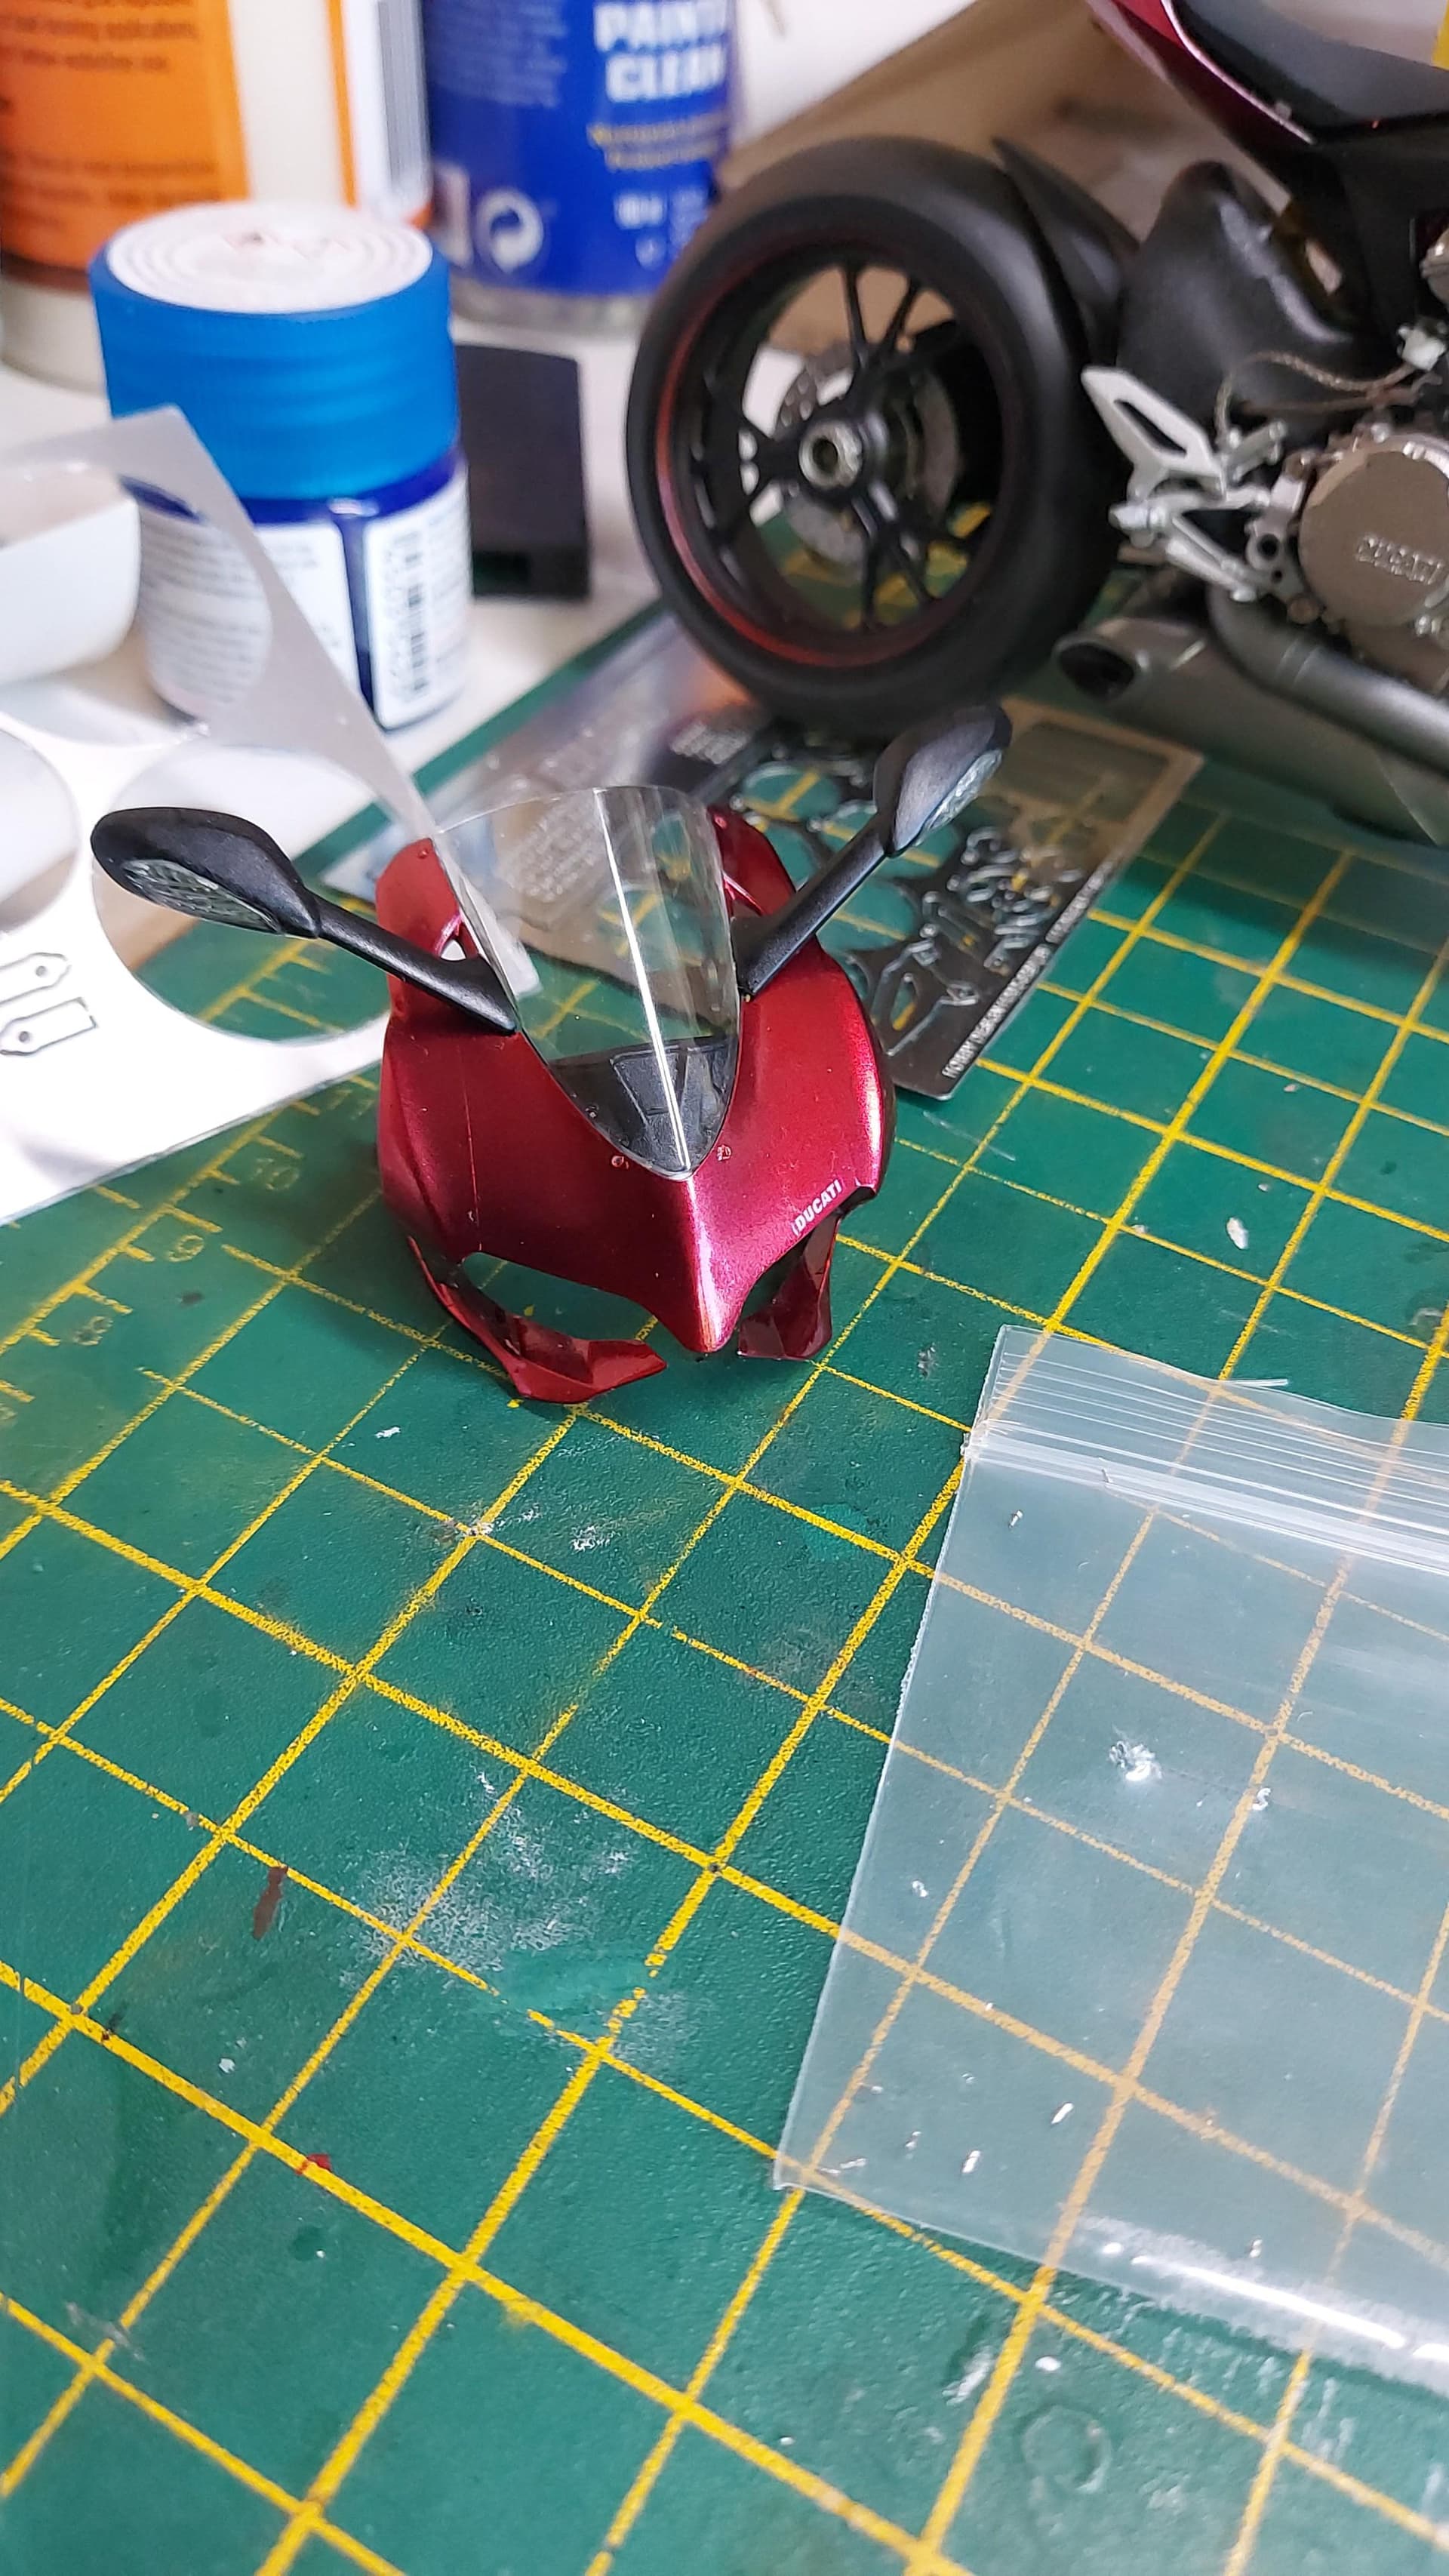
Had to re-prep the drill holes as they formed rims which caused the fairing rivets to stand too proud, Fortunately clear red can fix all the chips, as I discovered my surface prep was inadequate for the Alclad 2 gloss black. Not enough adhesion.
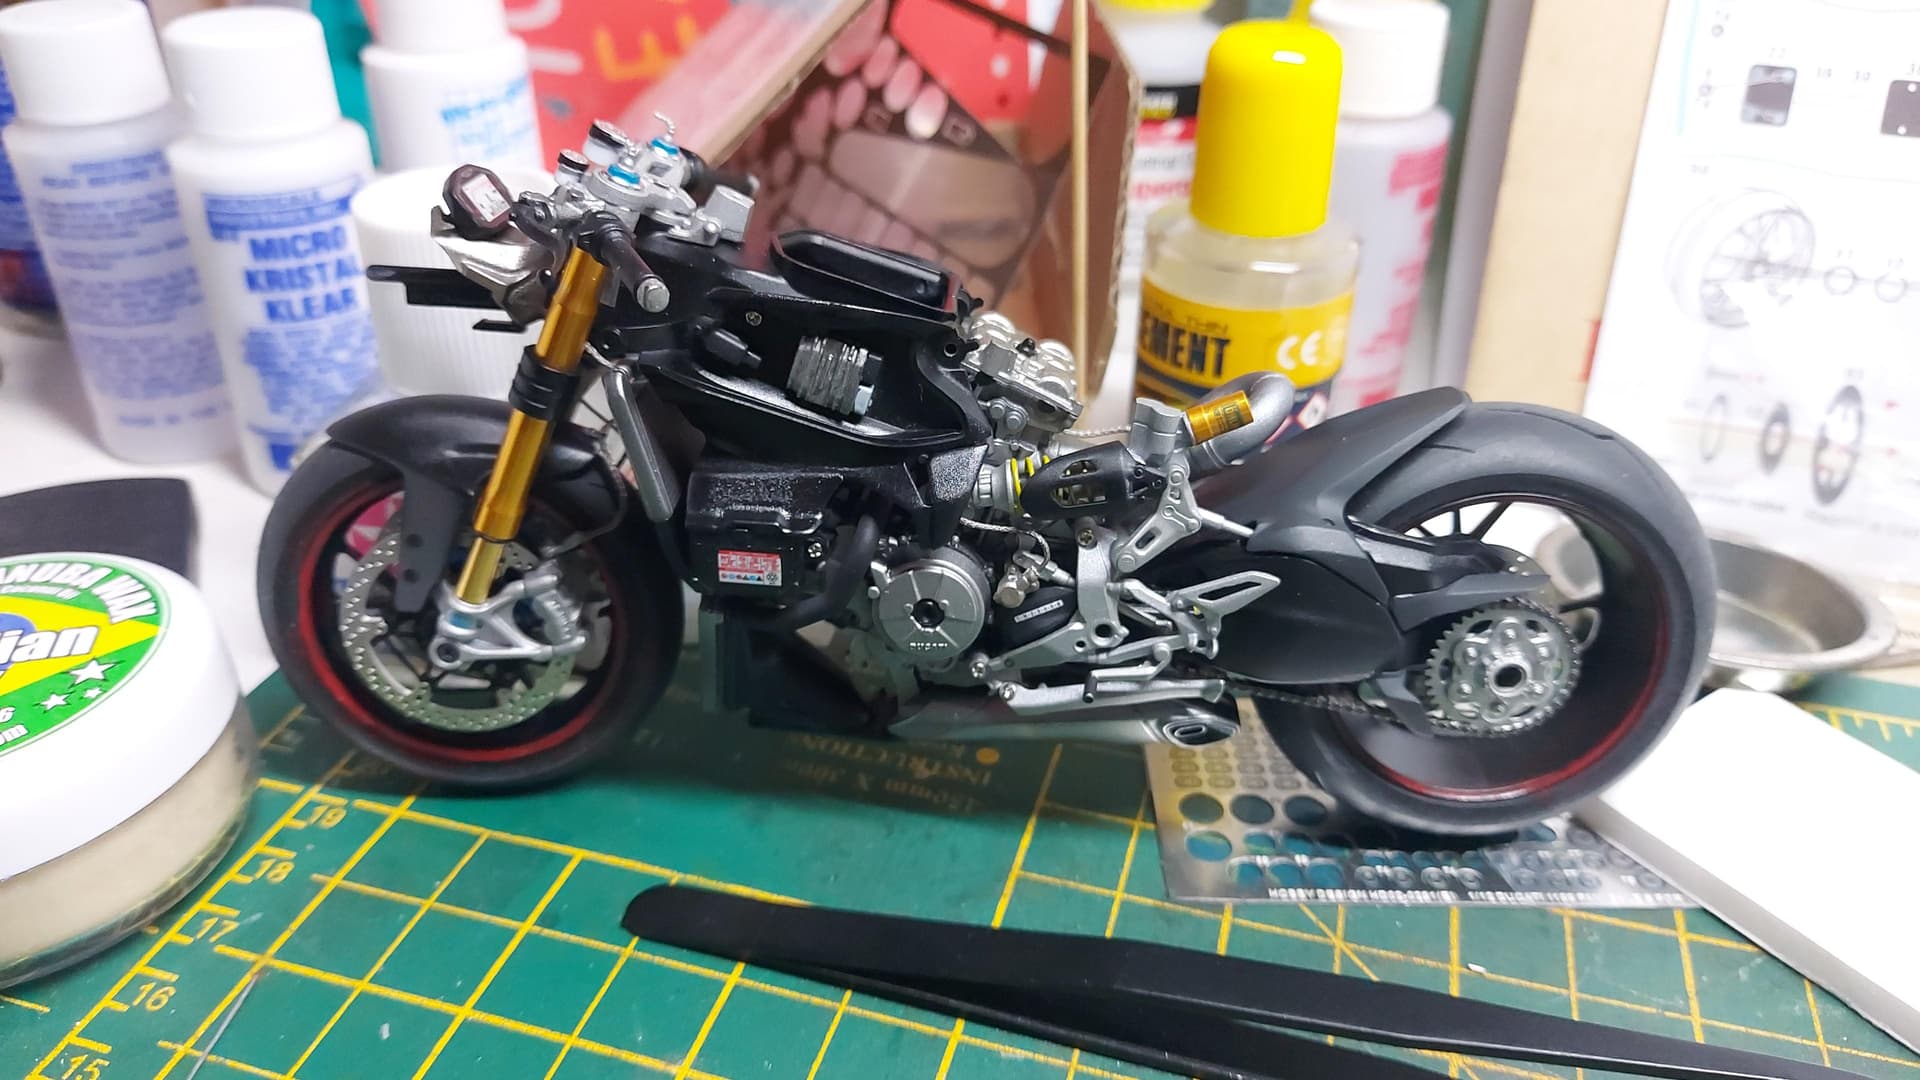
The end is in sight! Hold on tight!
Thanks for watching.
3 Likes