Agree with that, I now get exactly the same type and quality from unbranded multi sets from Mr Bezos… fraction of the cost.
Tamiya are generally expensive, it doesn’t matter what it is. Their tools are also very expensive. Generally the quality of their tools is very good though.
That said, i’ve just paid £54 (inc VAT + P&P) for some Meng advanced side cutters as the Tamiya ones i had have seized up in fairly short order. Which is disappointing. Will keep the Tamiya cutters as spares.
I have tried other brands of masking tape but havent found anything yet as good as the Tamiya product. My perception is that the tape has just the right amount of adhesion.
1 Like
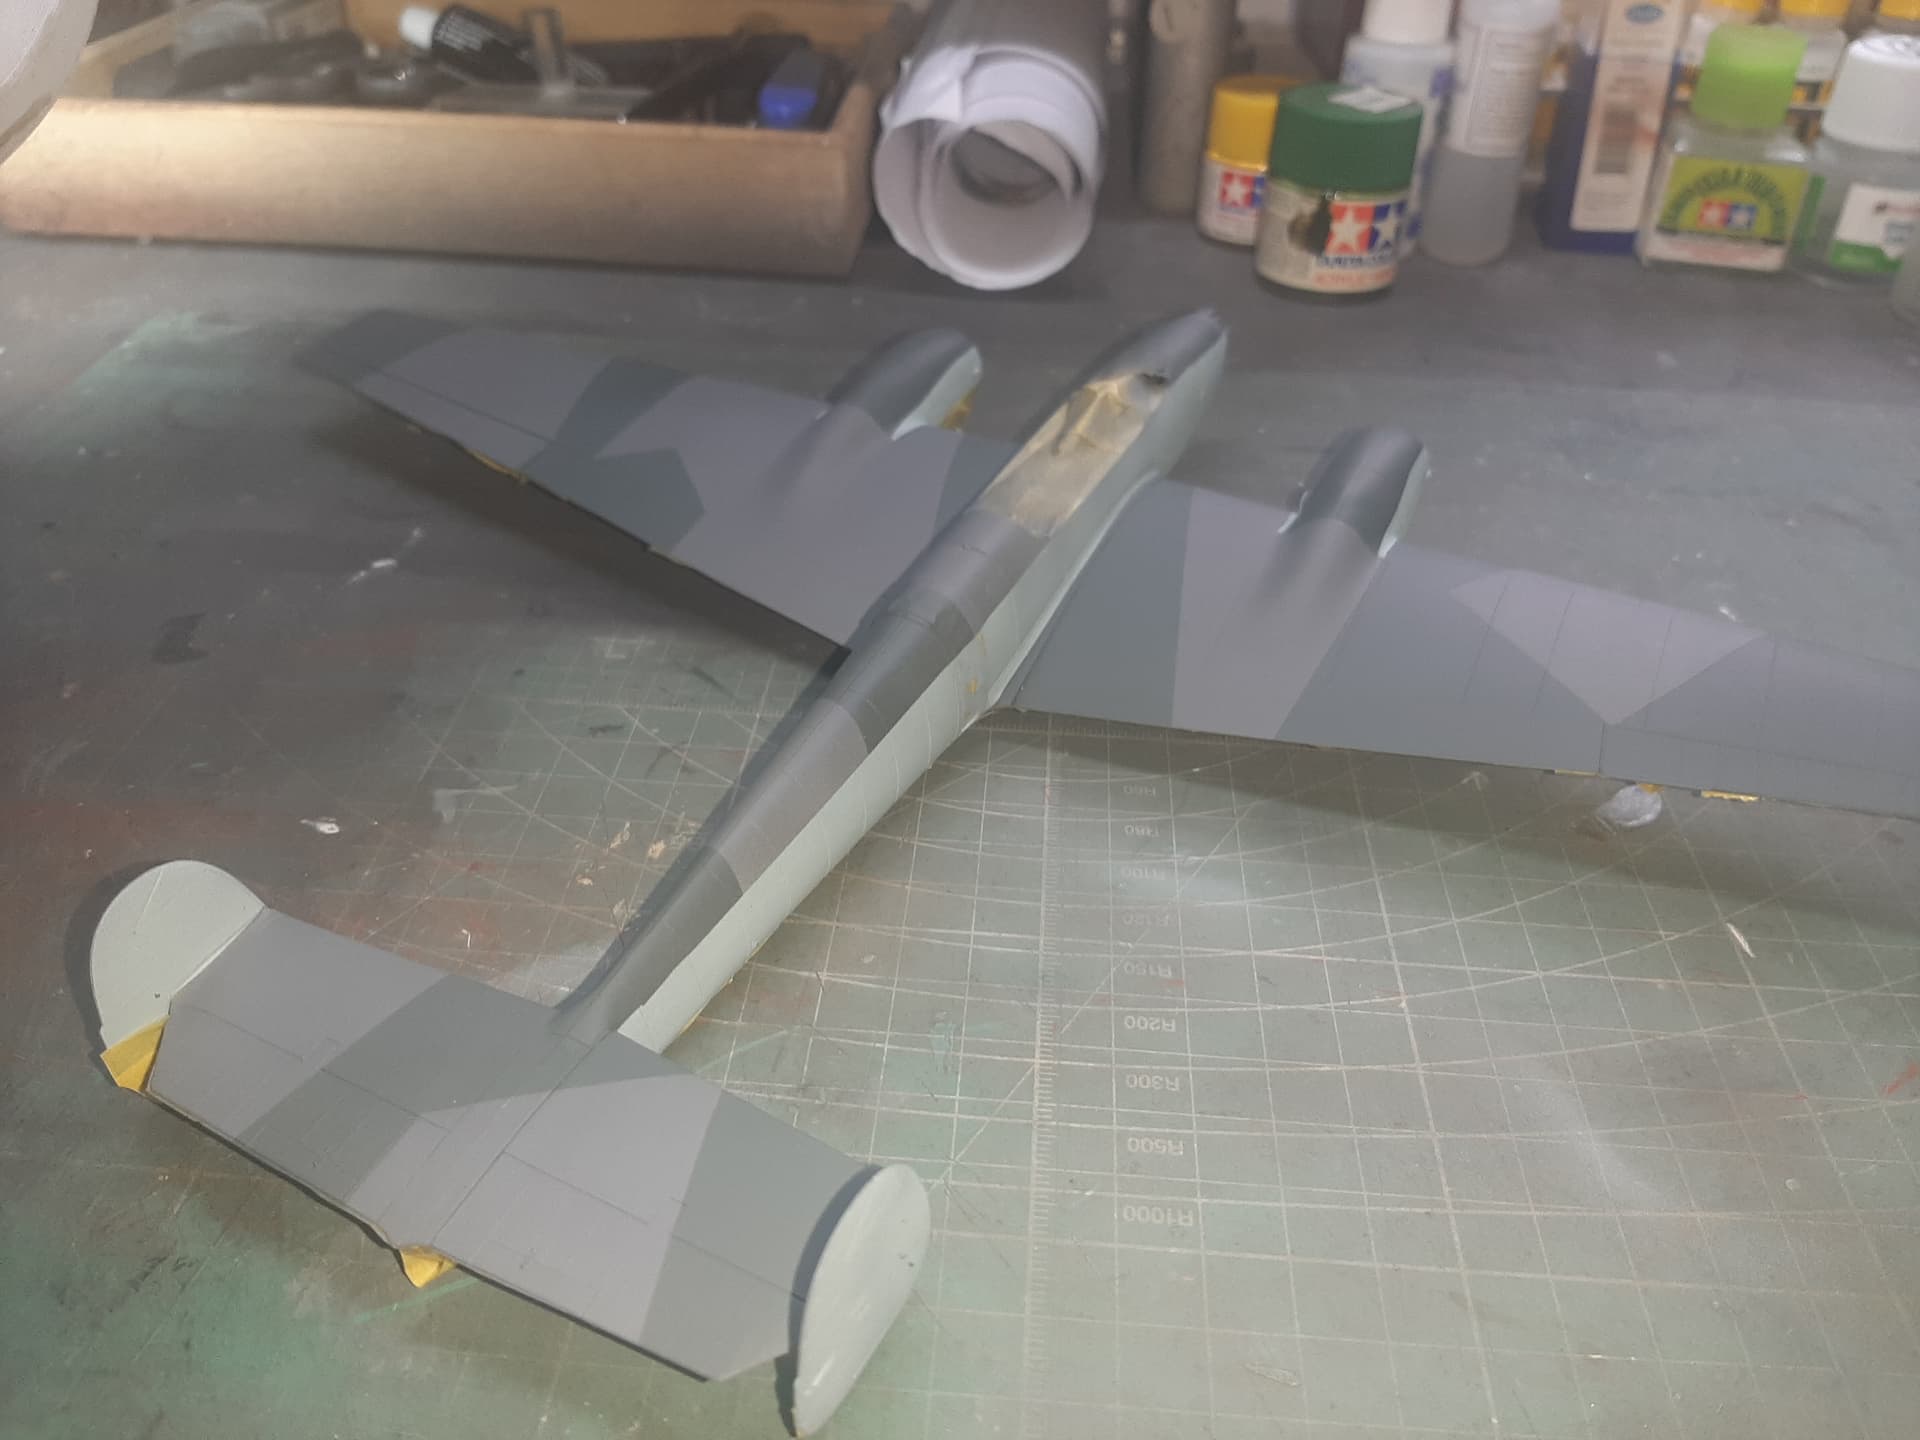
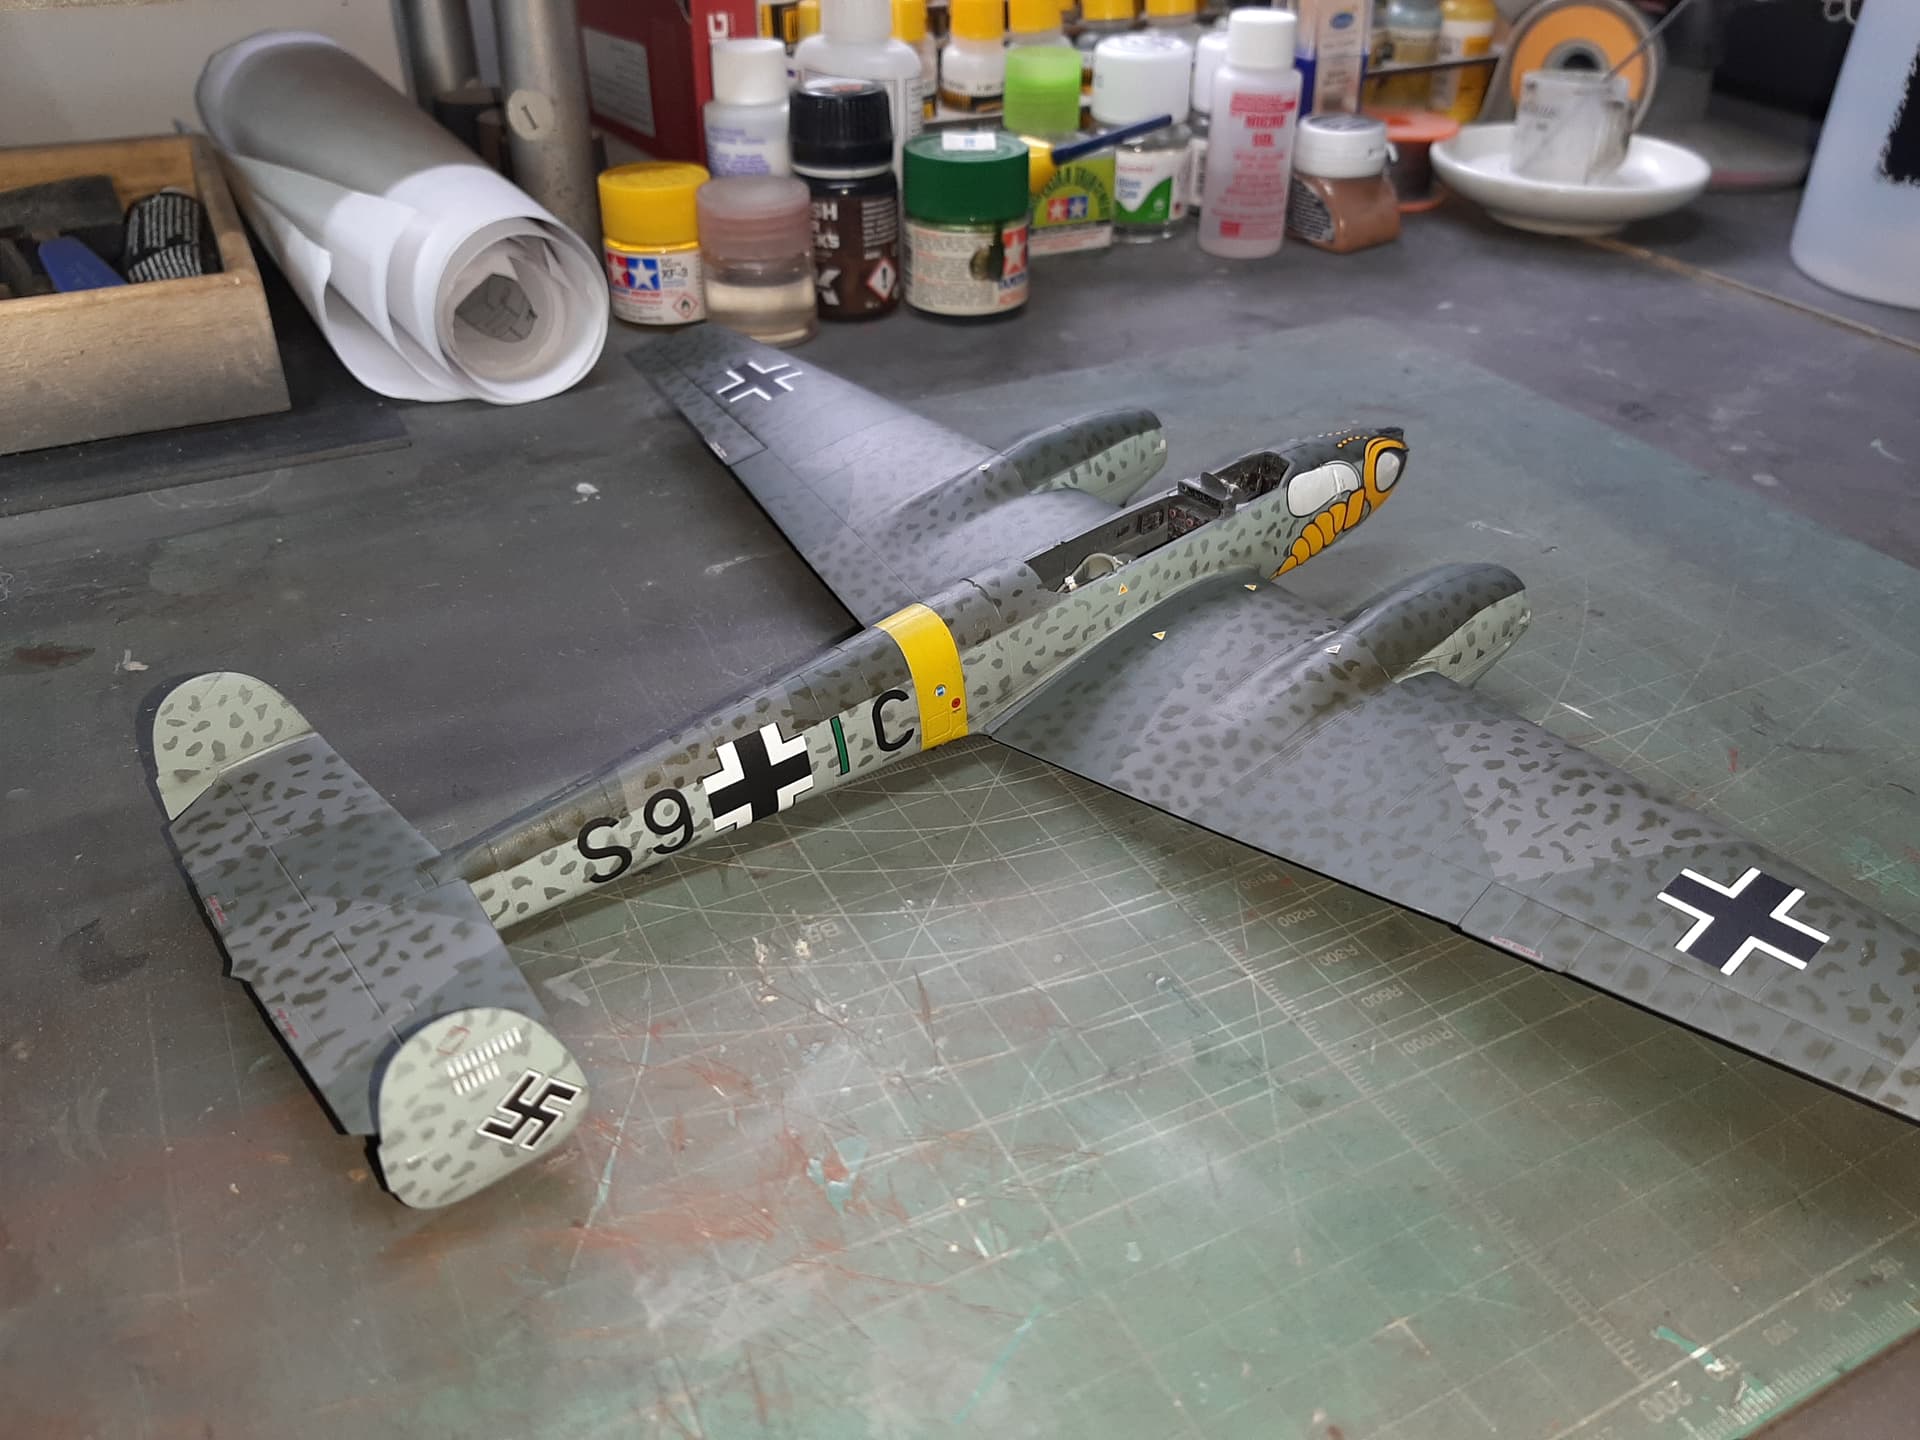
RLM 74 & 75 applied and (upper surfaces) masking removed.
I do quite like doing splinter patterns because it is very ‘definate’, it is easy to mask off, rather than fighting with Blu-Tack sausages or even God forbid, freehand demarkation.
Now ready for the mottling overspray of RLM 70.

2 Likes
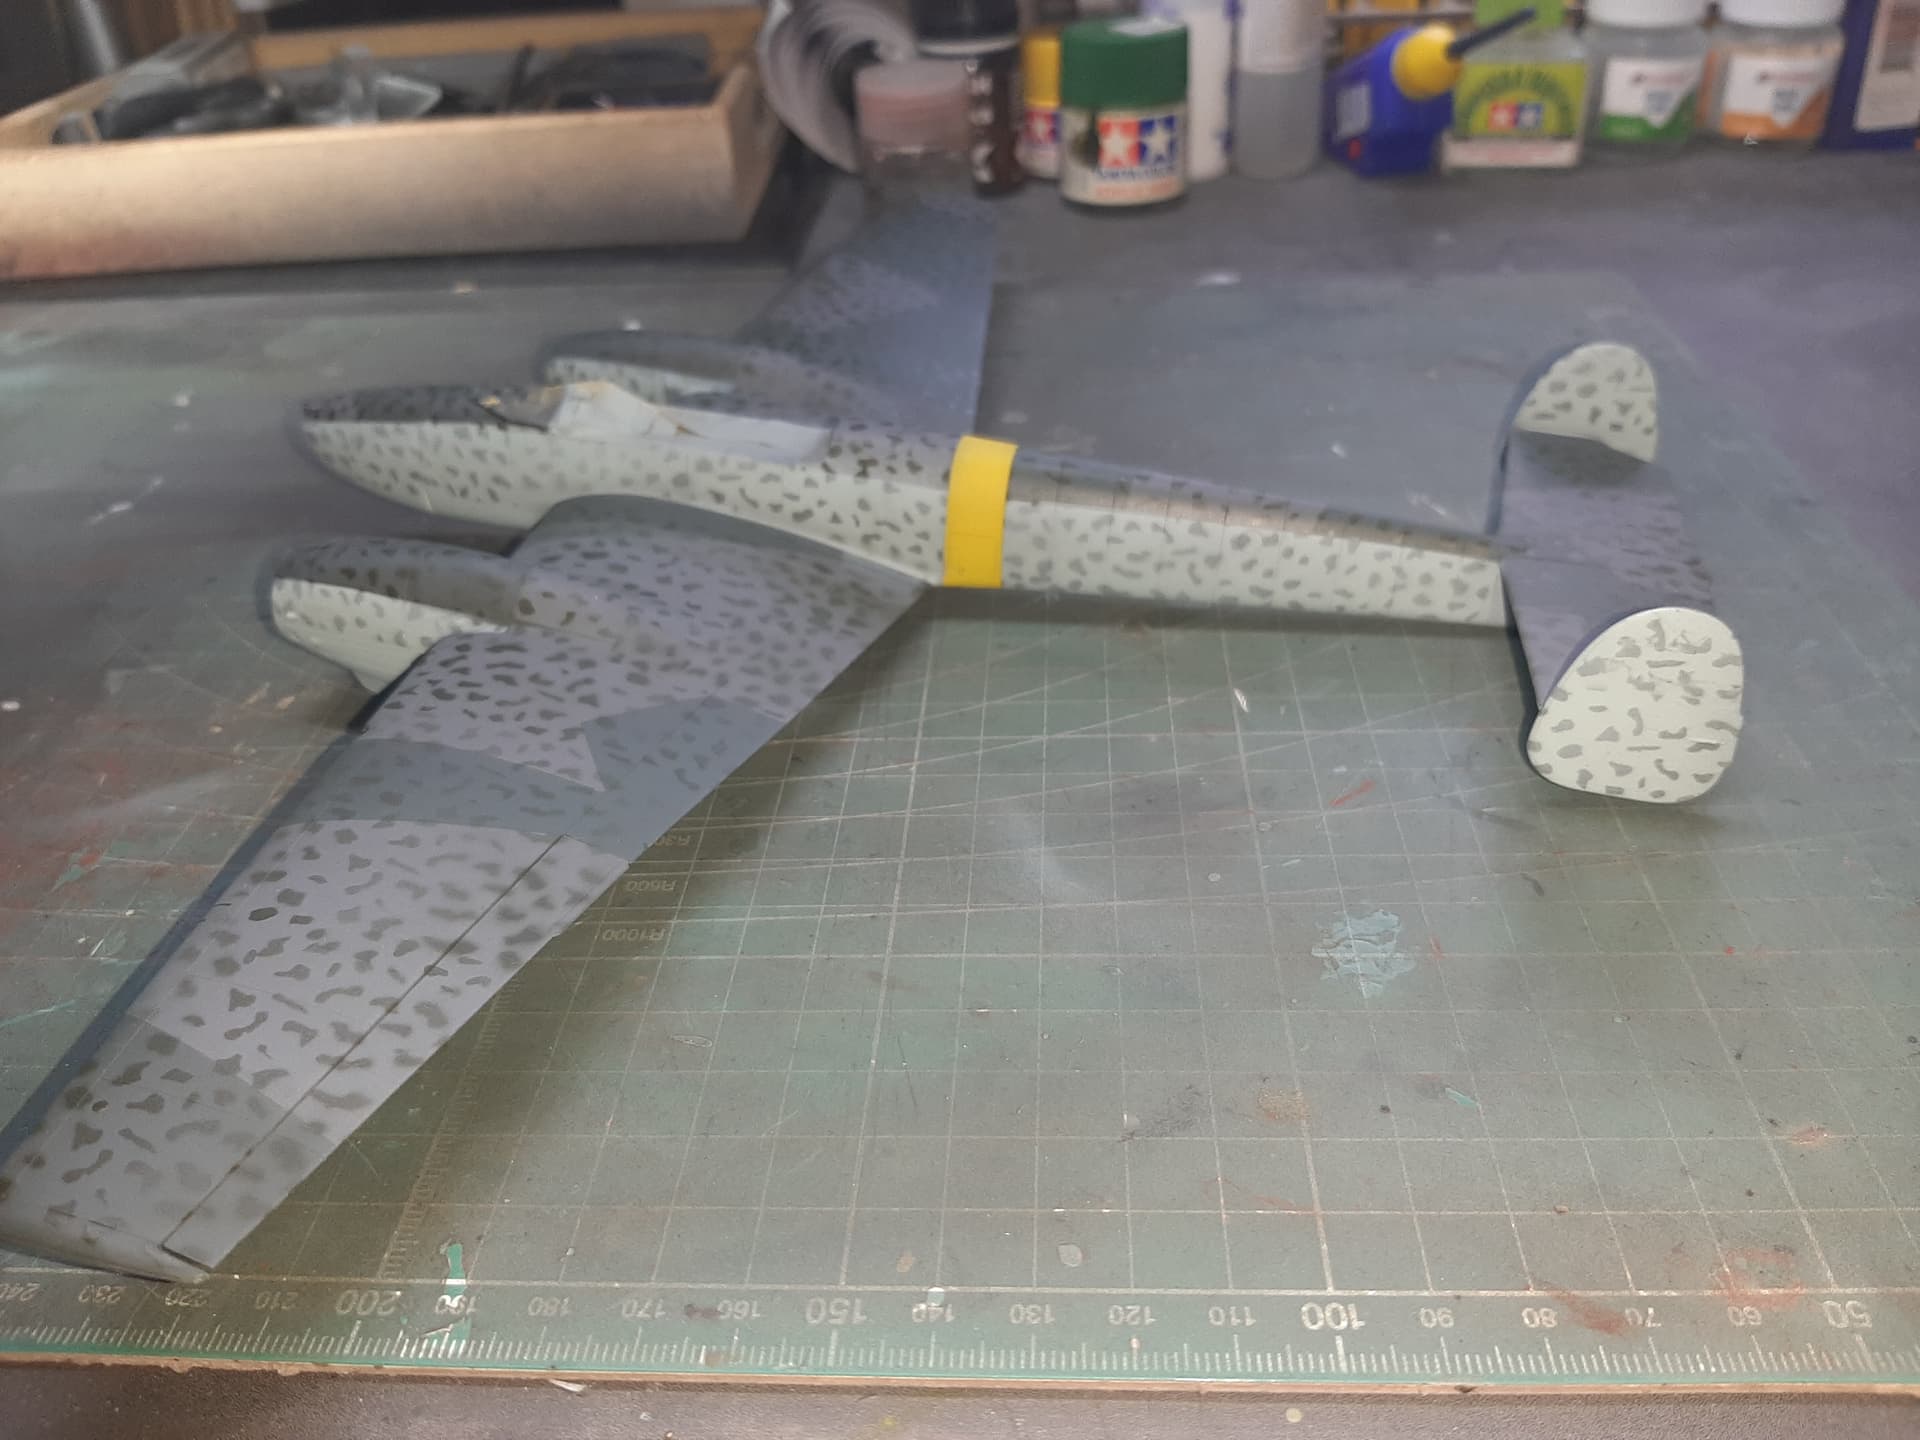
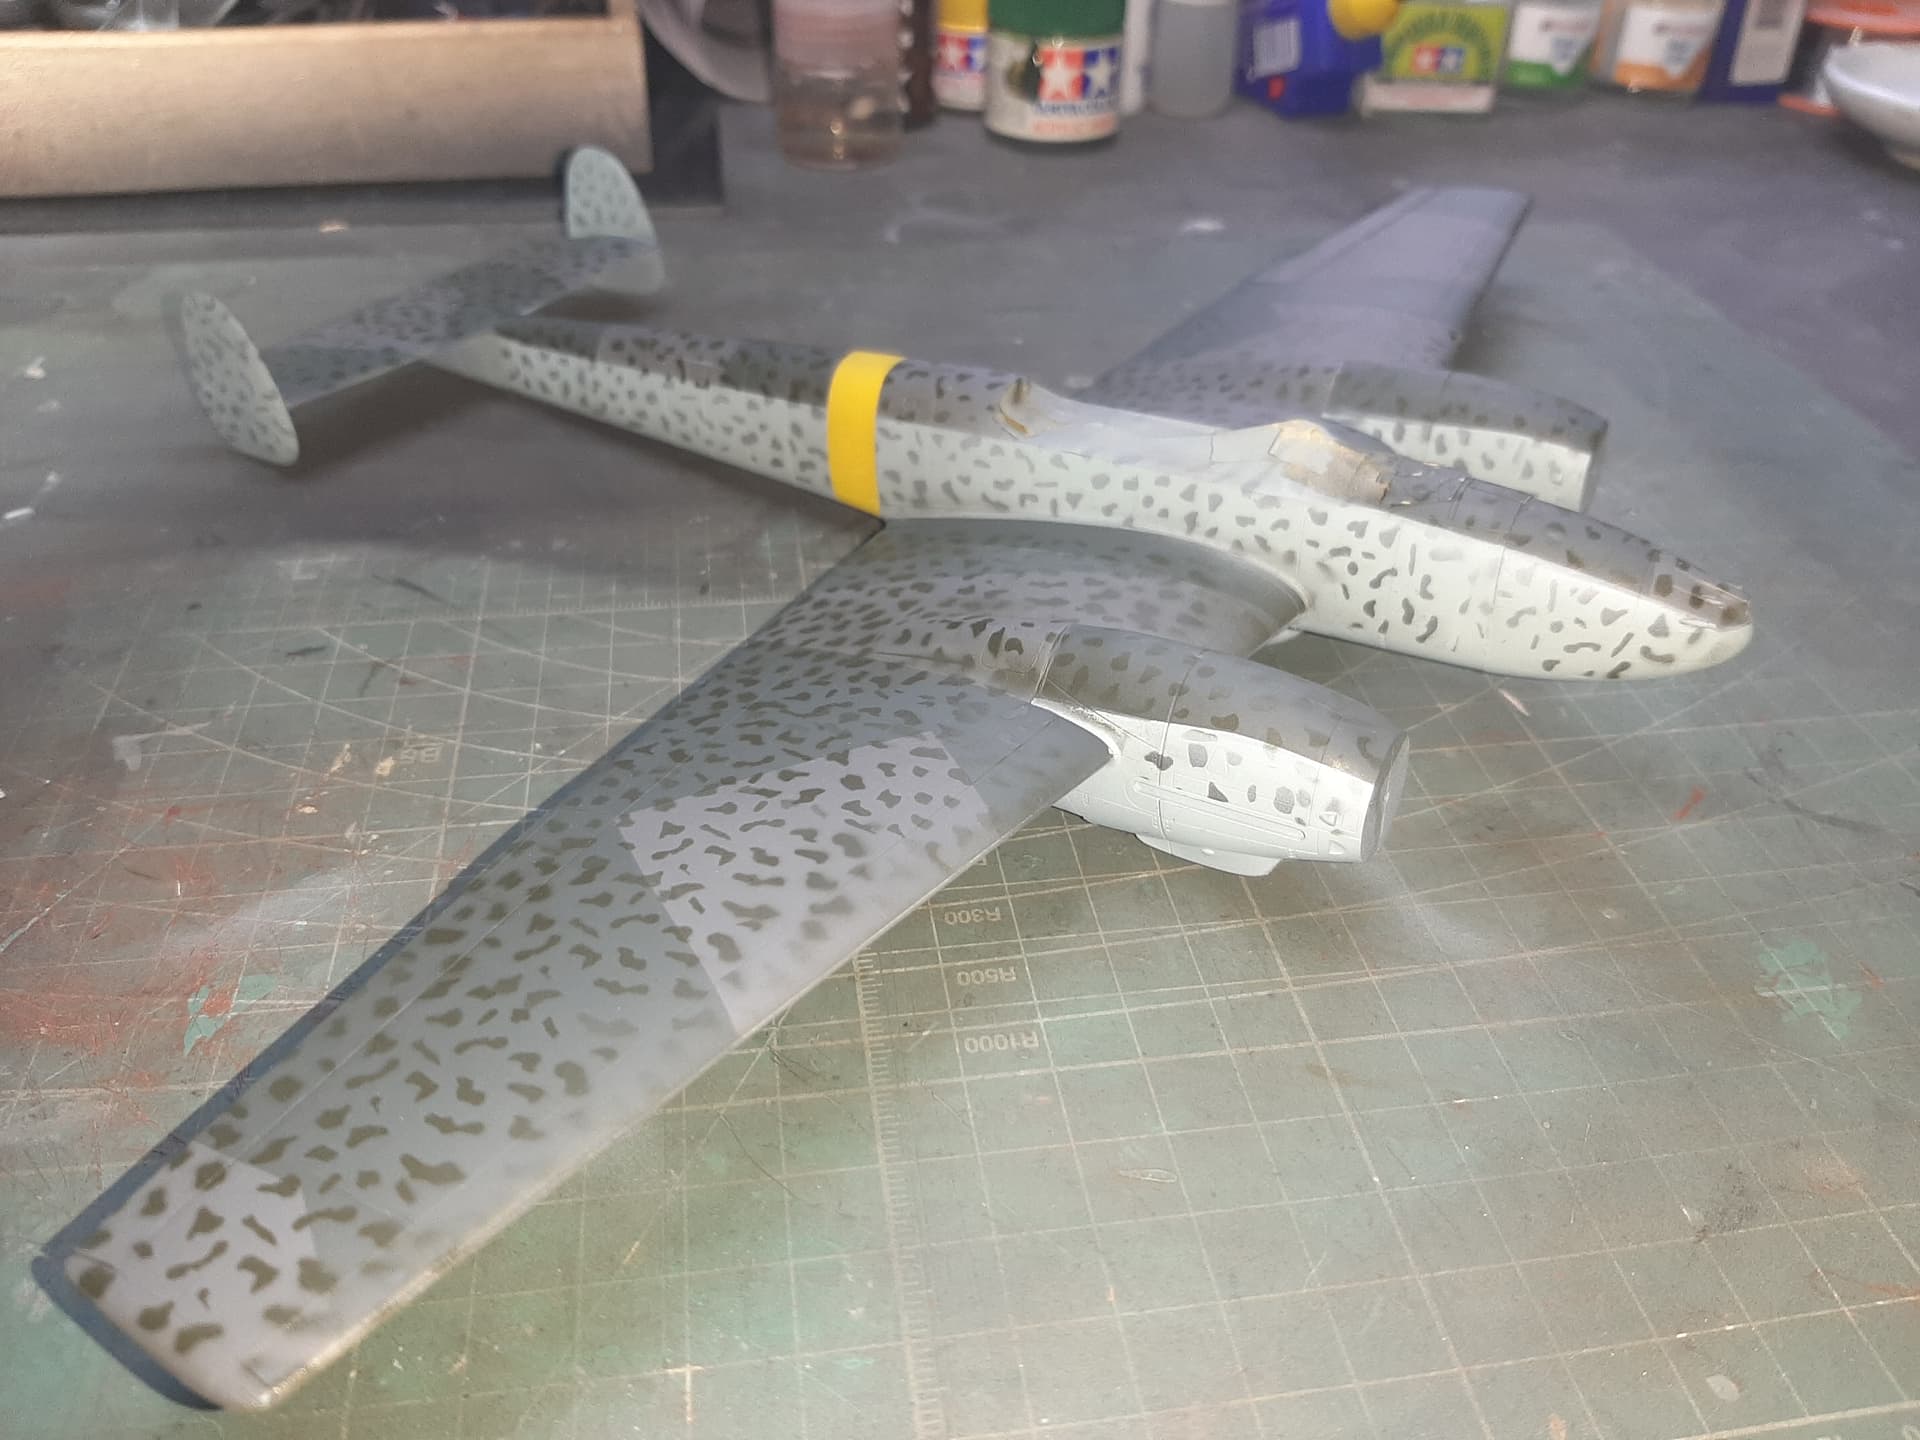
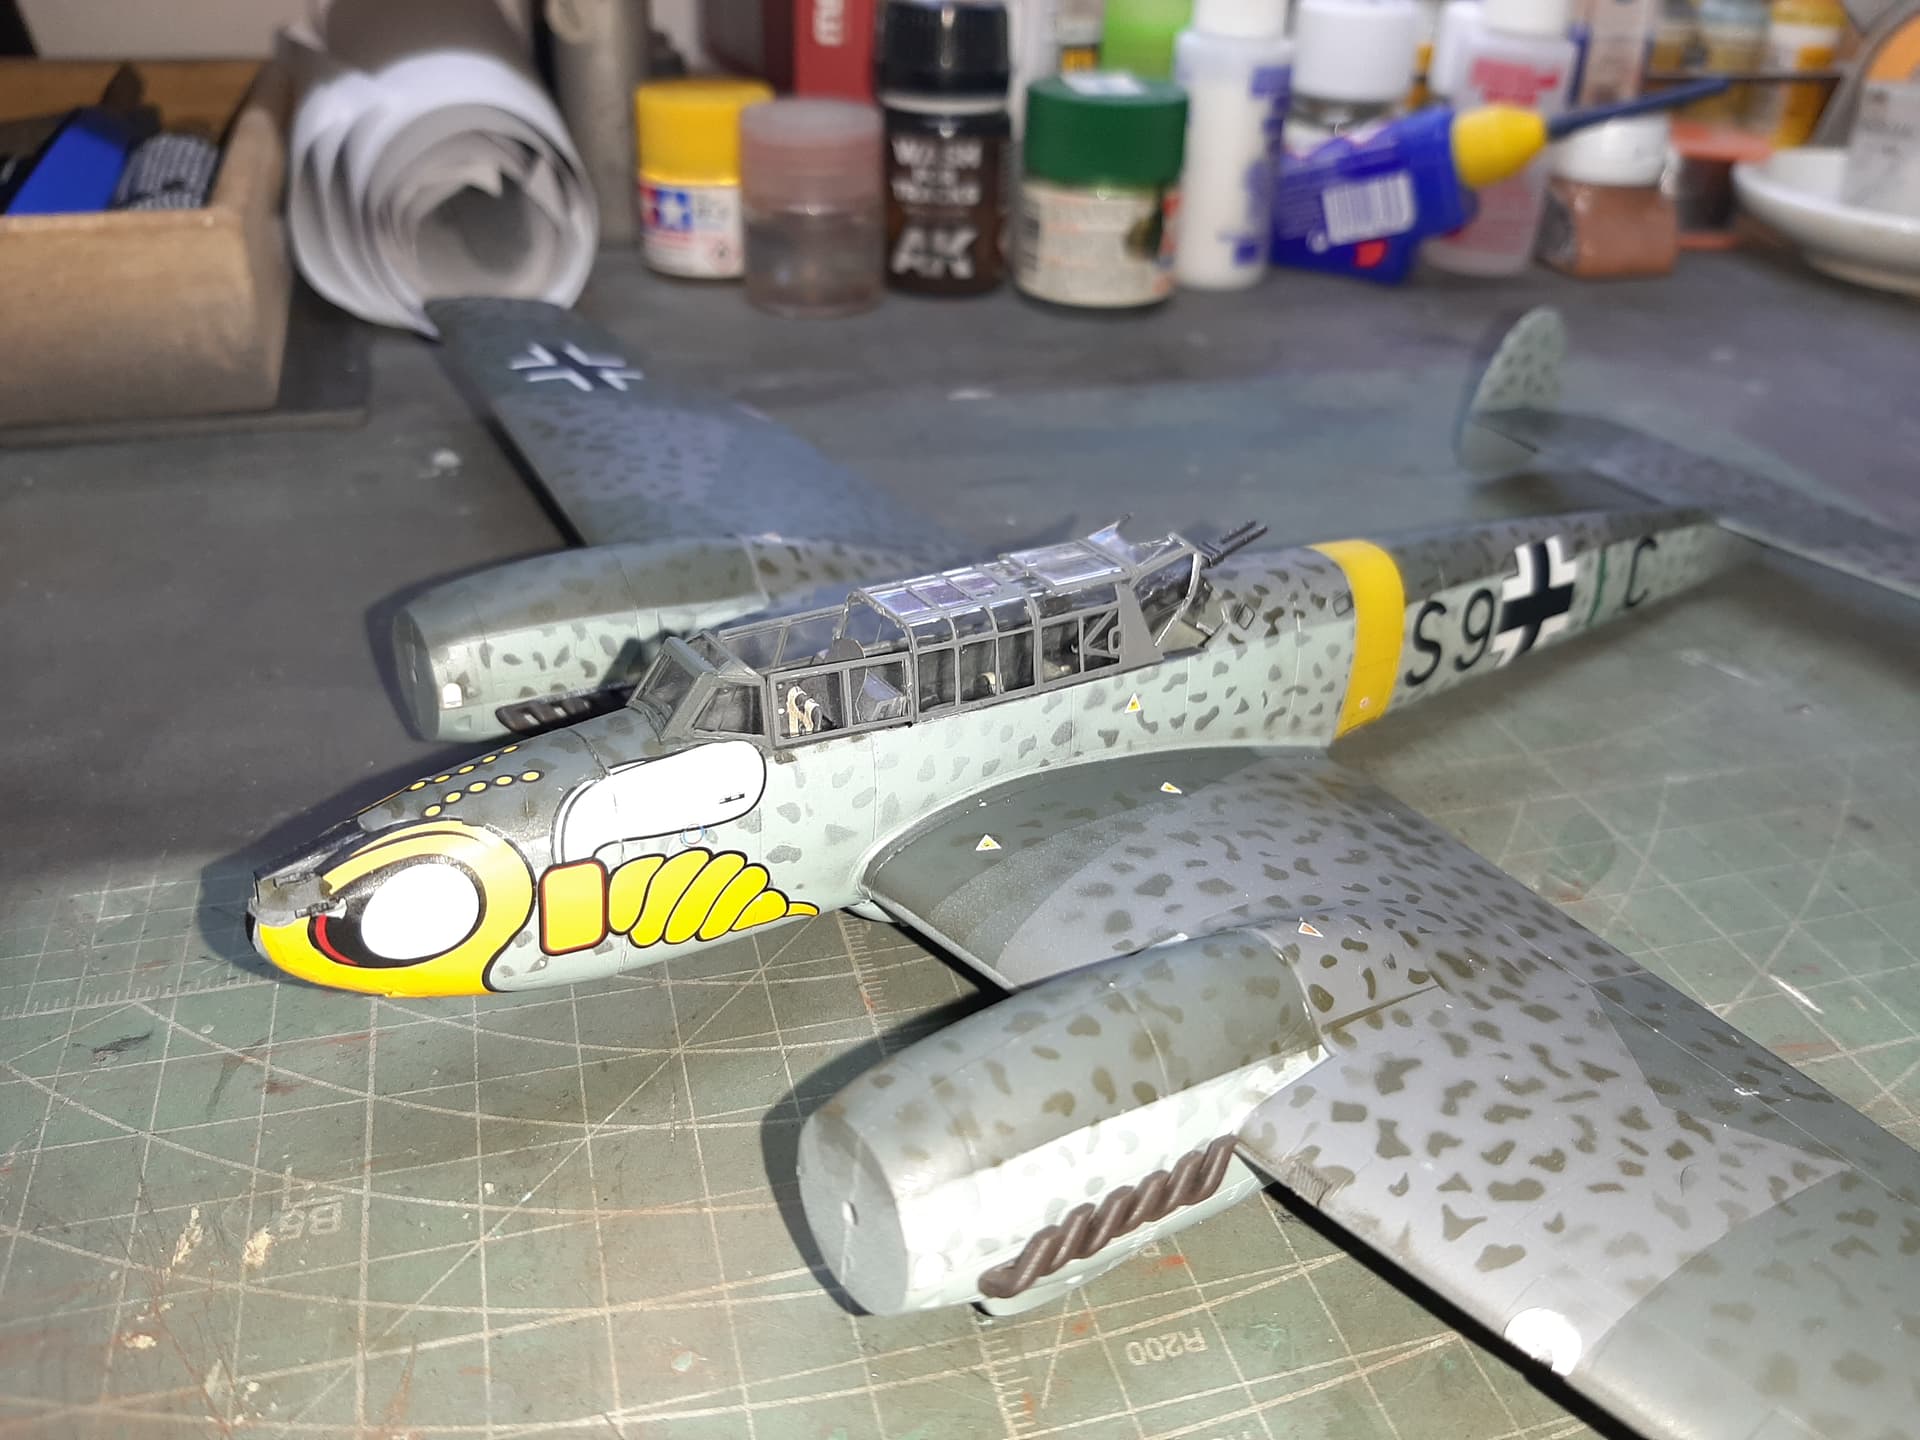
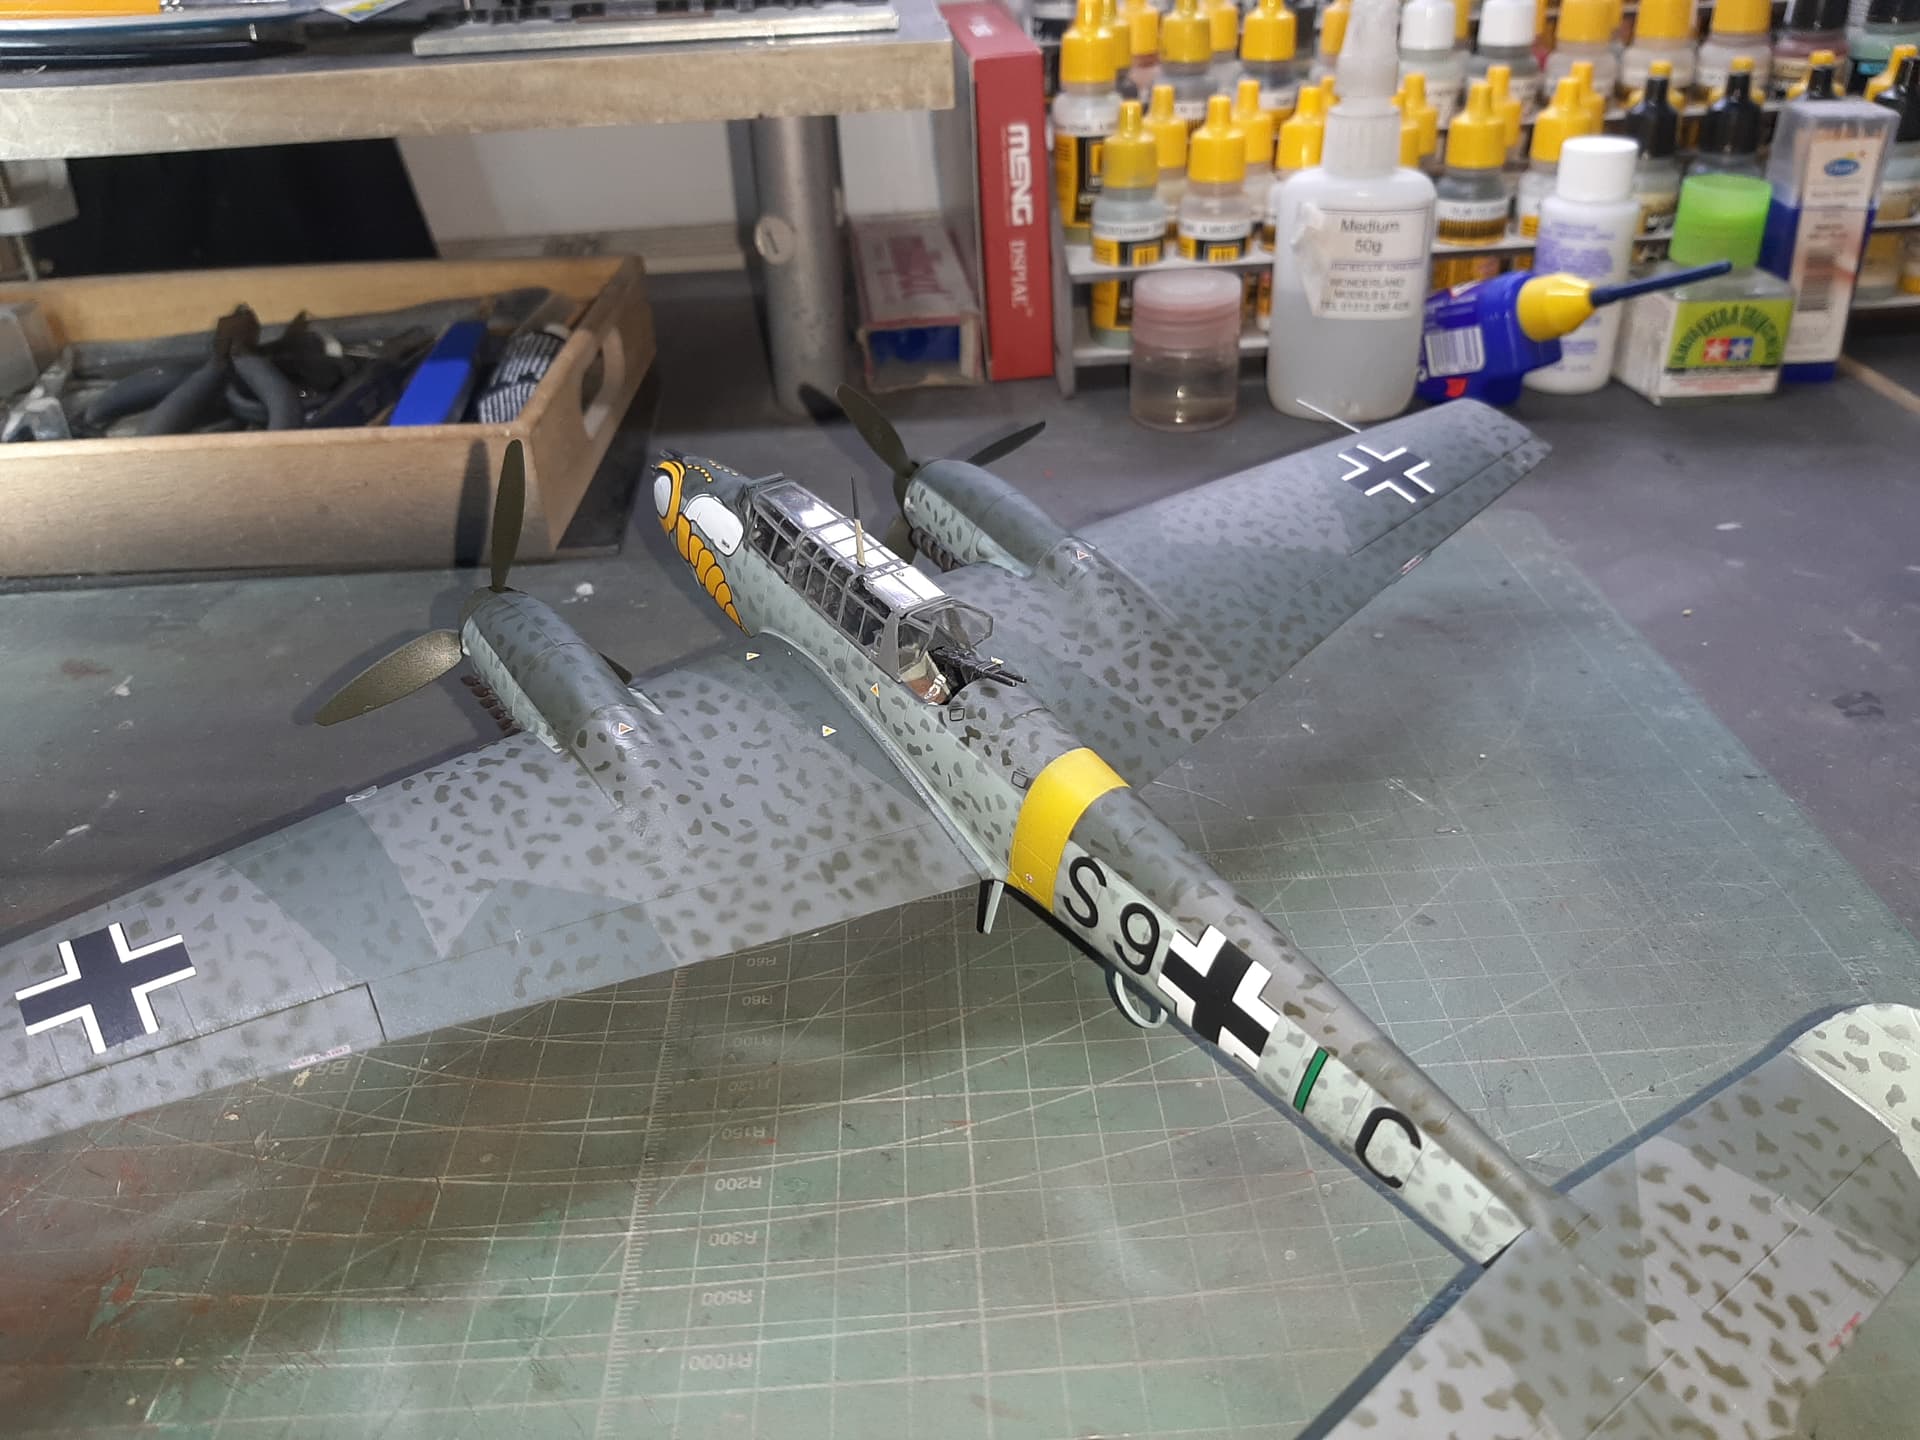
I have now applied the RLM70 mottling that my chosen aircraft required.
To say this was tedious is an understatement, even though I used masks to achieve the effect, it was still labourious and time consuming. I’m looking at the Uhu in my stash and thinking that my next build will be a nice Merkava or something that doesn’t require the patience of Job to paint.
Anyway, it was my first ever attempt at this kind of camouflage - and for a beginner, i’ll take the results.
The Theatre Recognition markings were done in Tamiya acrylic, and went down really well, unlike every other brand of yellow i’ve tried. Next up, the exhausts & manifolds.
3 Likes
Looking very nice. The mottle effect looks really good.
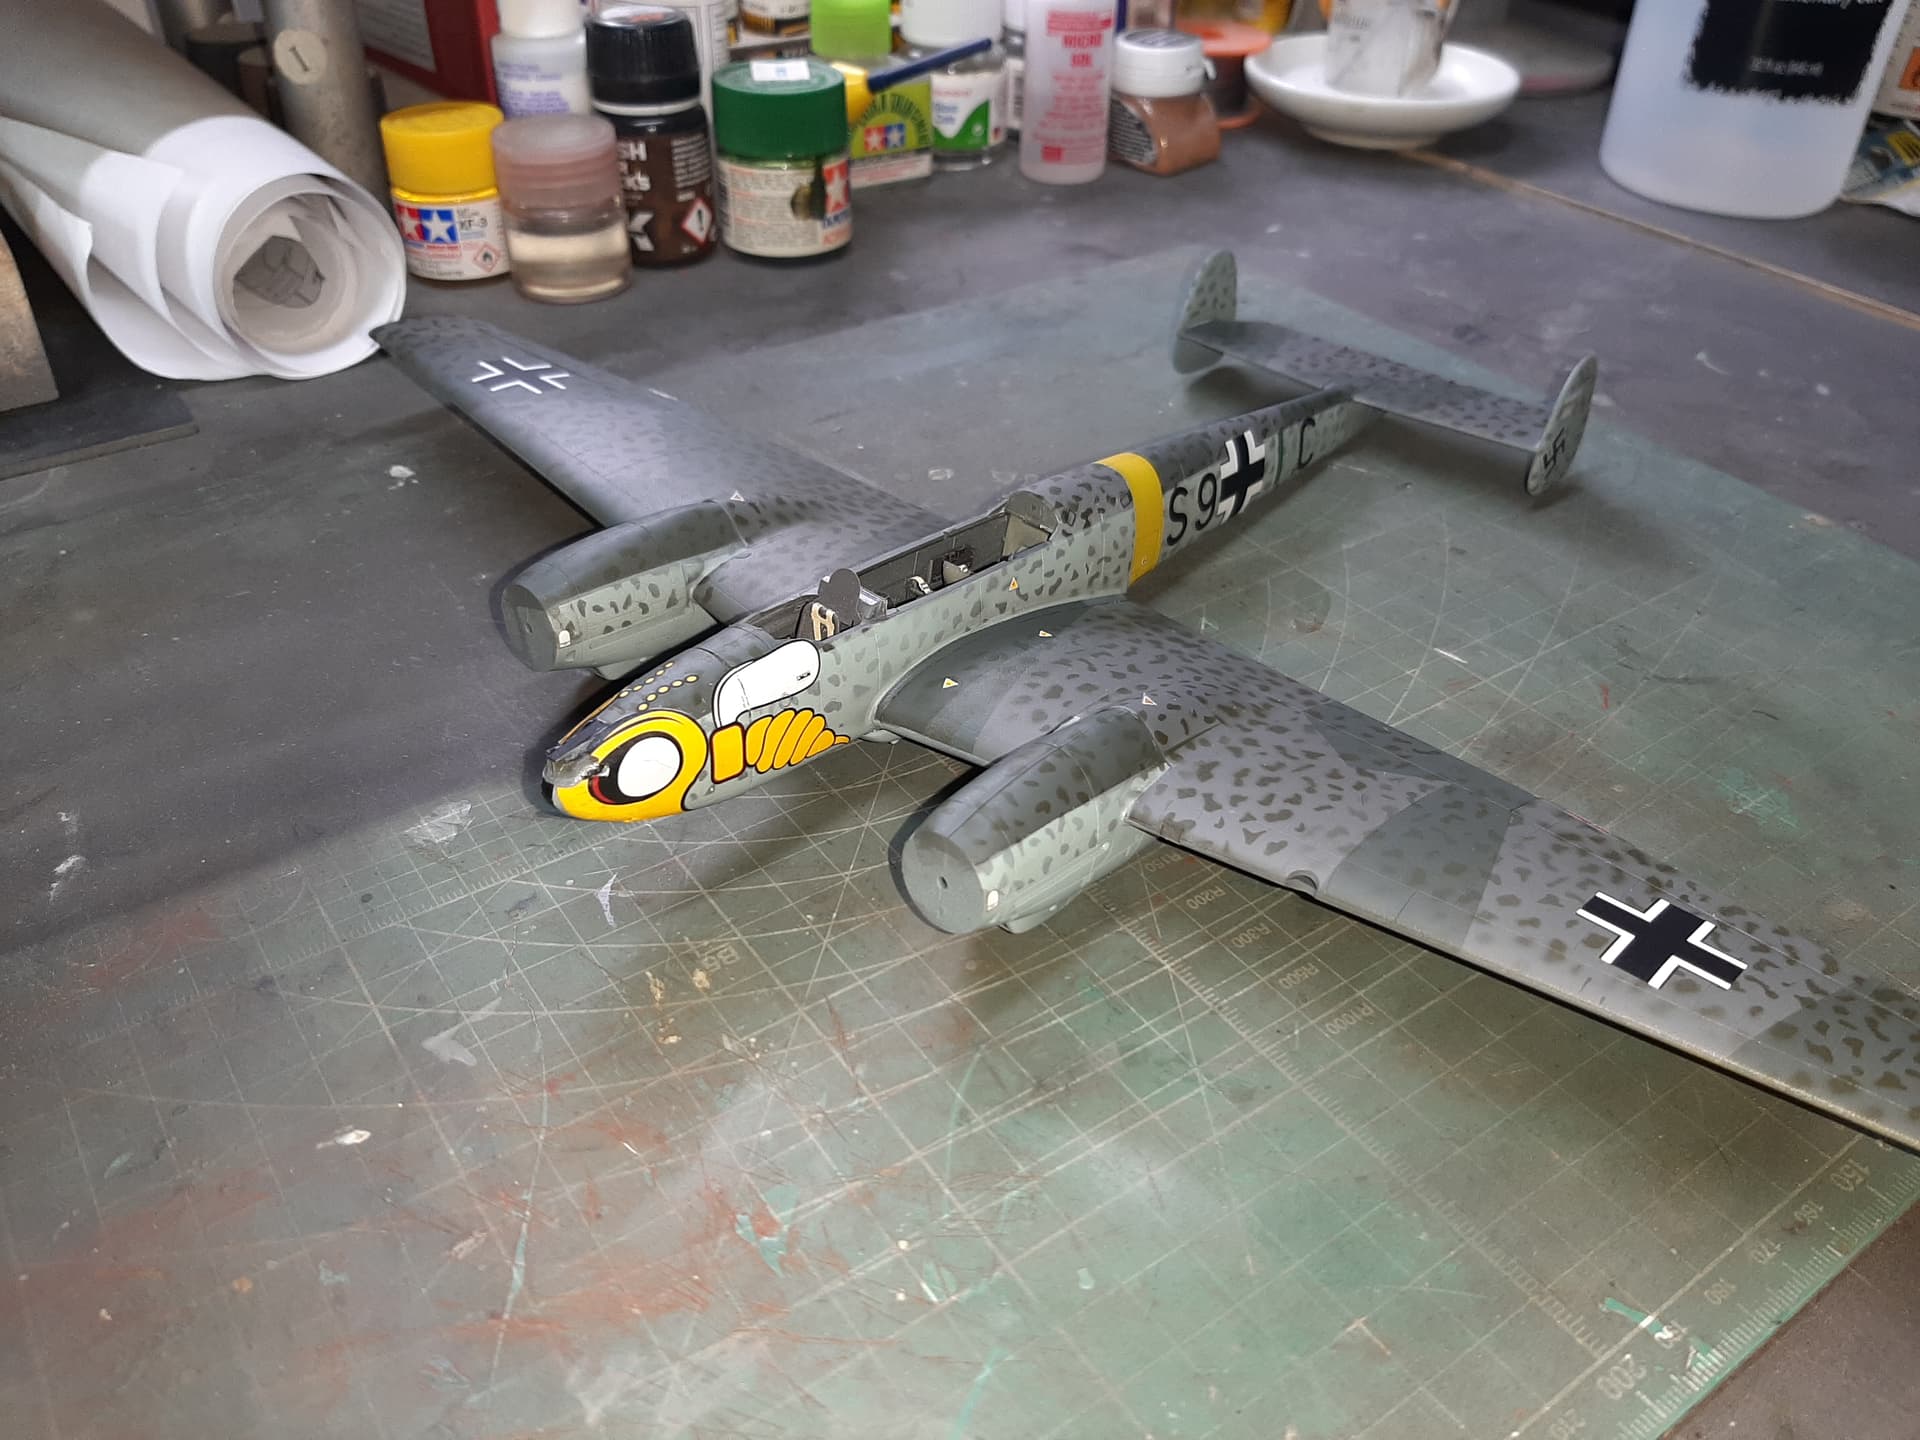
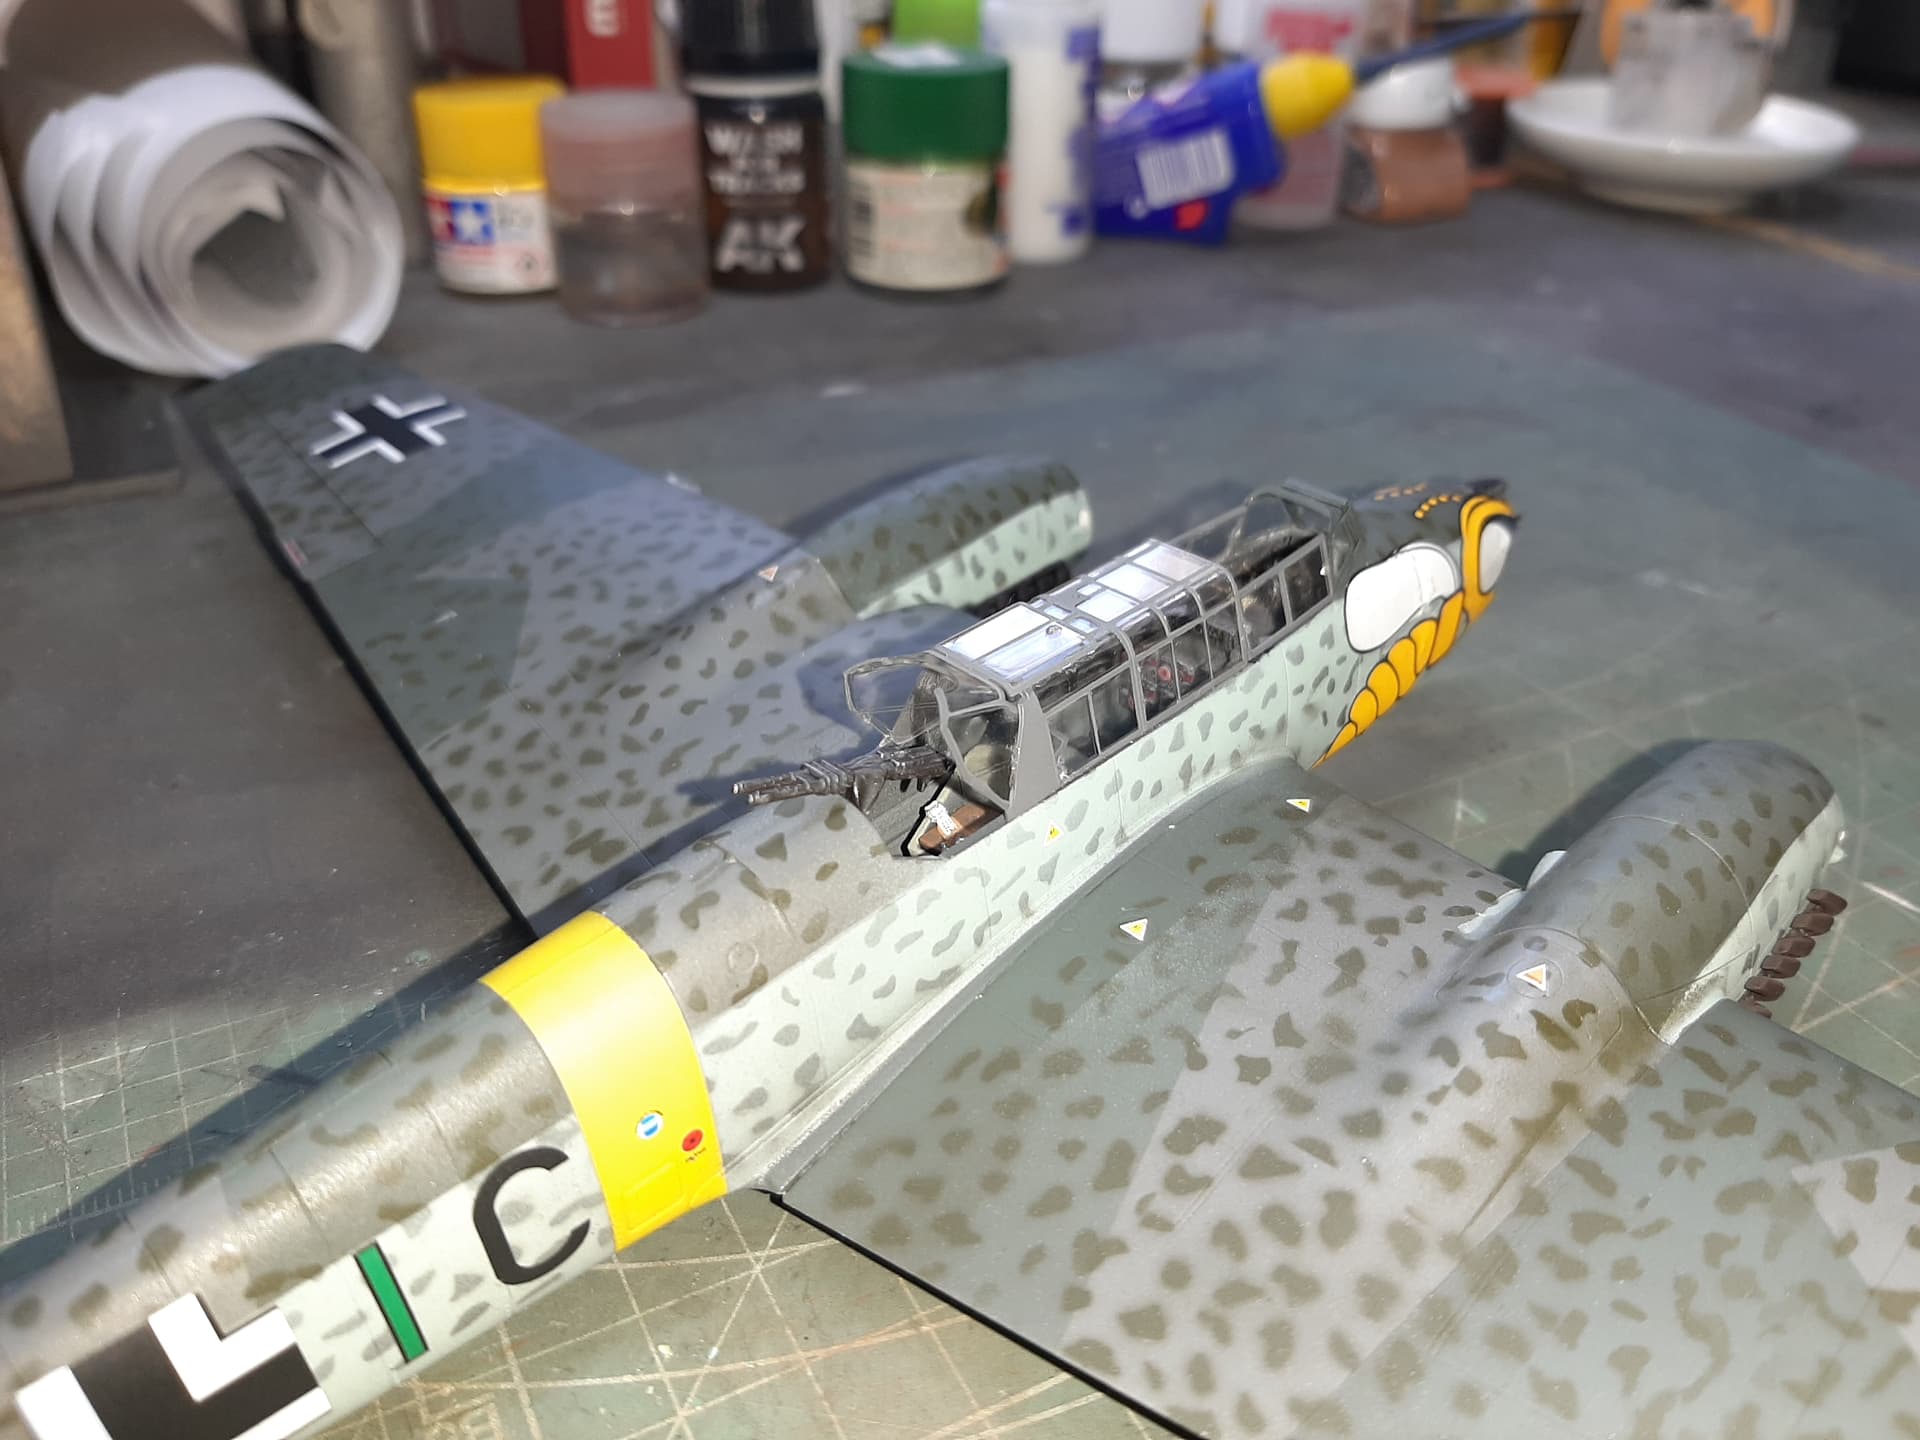
I gloss coted and then applied the decals.
The decals in this kit are quite simply, the worst i’ve ever had the displeasure of trying to work with.
The register was good, the vibrancy of the markings was also good. But, the decals are way too thick. They took ages to soak long enough to allow them to move from the carrier and were almost rubber like in texture. Not a single decal wanted to conform to the surface, no matter how much water and decal softening solution I used.
I had to resort to literally ‘gluing down’ some of them with gloss Cote.
This is most obvious on the complicated nose art decal, it doesn’t look too bad from a distance, but really, its a mess. The two halves wouldn’t go where they were supposed to and in the end, I damaged them getting them into place.
The side Balkenkreuez went on okay, but wouldn’t stick down on the bottom edges - again, I had to glue them down. You can see that the tiny decal on the starboard engine nacelle is trying to peel itself off! Grrrr. more gluing required.
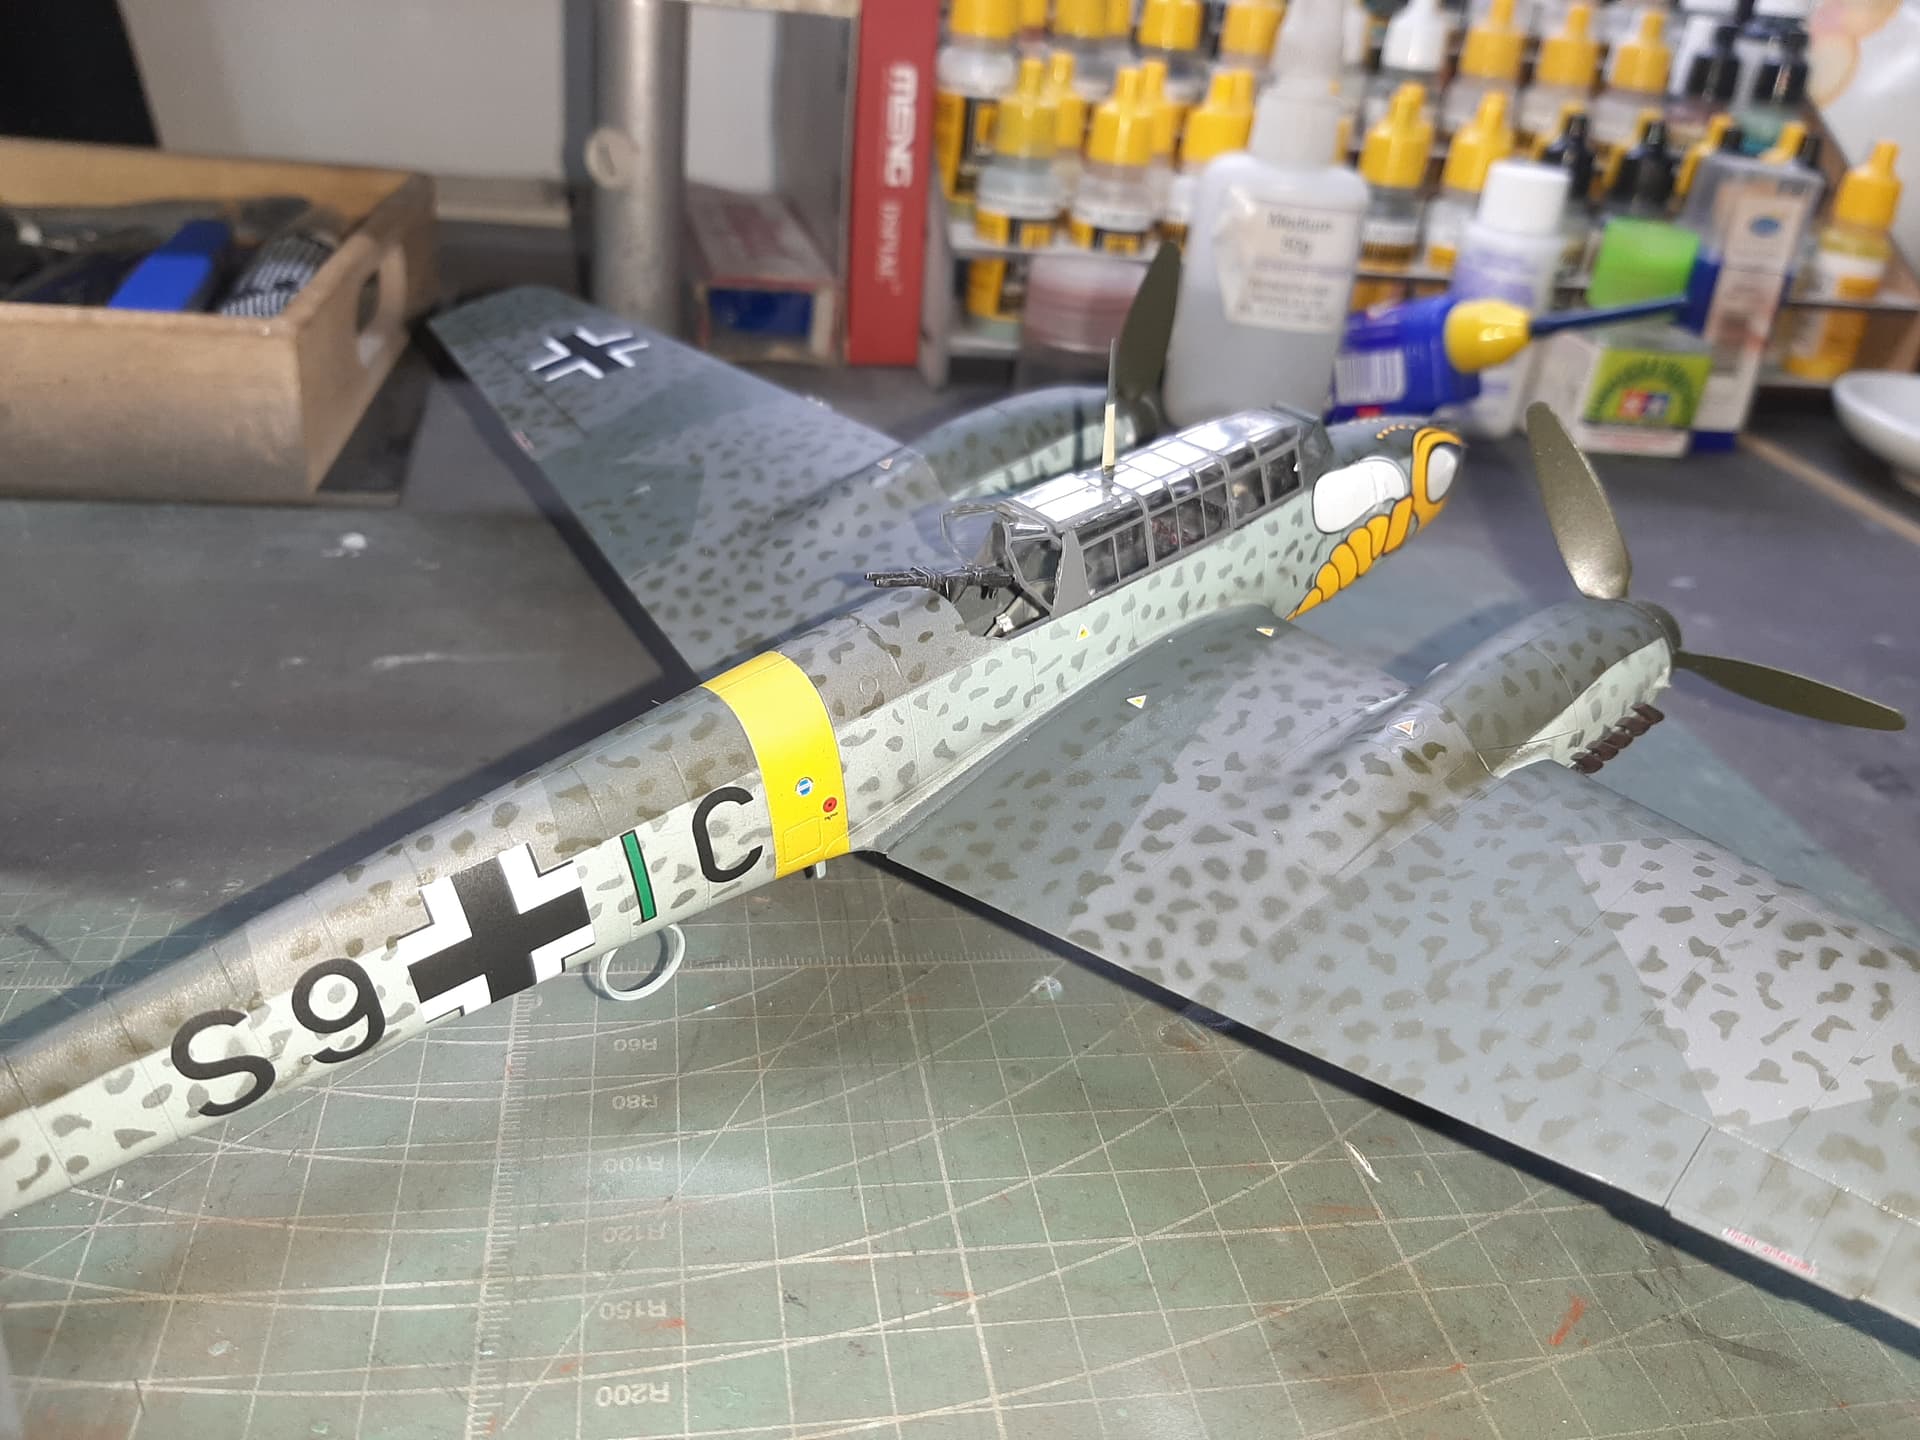
Then I matt coted. Even after that, the corner of one fuselage Balkenkreuez has flaked off.
Really disappointed with the decals. My advice would be to get yourself a set of AM from a good maker instead of using the kit supplied ones. These are quite simply, too thick.
It doesn’t look ‘too’ bad, but i’ll leave it up to you to pass opinion.

6 Likes
cam scheme and the vivid yellow really makes in jump out … looking very nice indeed … lovely work ![]()
Don’t be too hard on you, Roly! The camo came out really nice and you should be proud of your work. I also always struggle with the mottling on german WW2 aircraft. Best result so far was on my Tamiya He 219 some time ago.
The Eduard decals are not that easy, I know. In earlier times they had them made by Cartograph, now Eduard makes them on their own. Though the prints are always perfect (try to read the stencils!), I find them always too “sticky”. I leave each decal for 20-30 seconds in warm water until it “moves” on the carrier paper. I always use a softener (Revell Decal Soft) under and on the decal. After some time it lays perfect into the panel lines. Though you’re right, it sometimes needs buckets of water to make the decal move to the correct position on the surface. The wasp emblem looks good from this side of the monitor. But I hear you, we model builders are always the hardest critics on our own models. Same here …
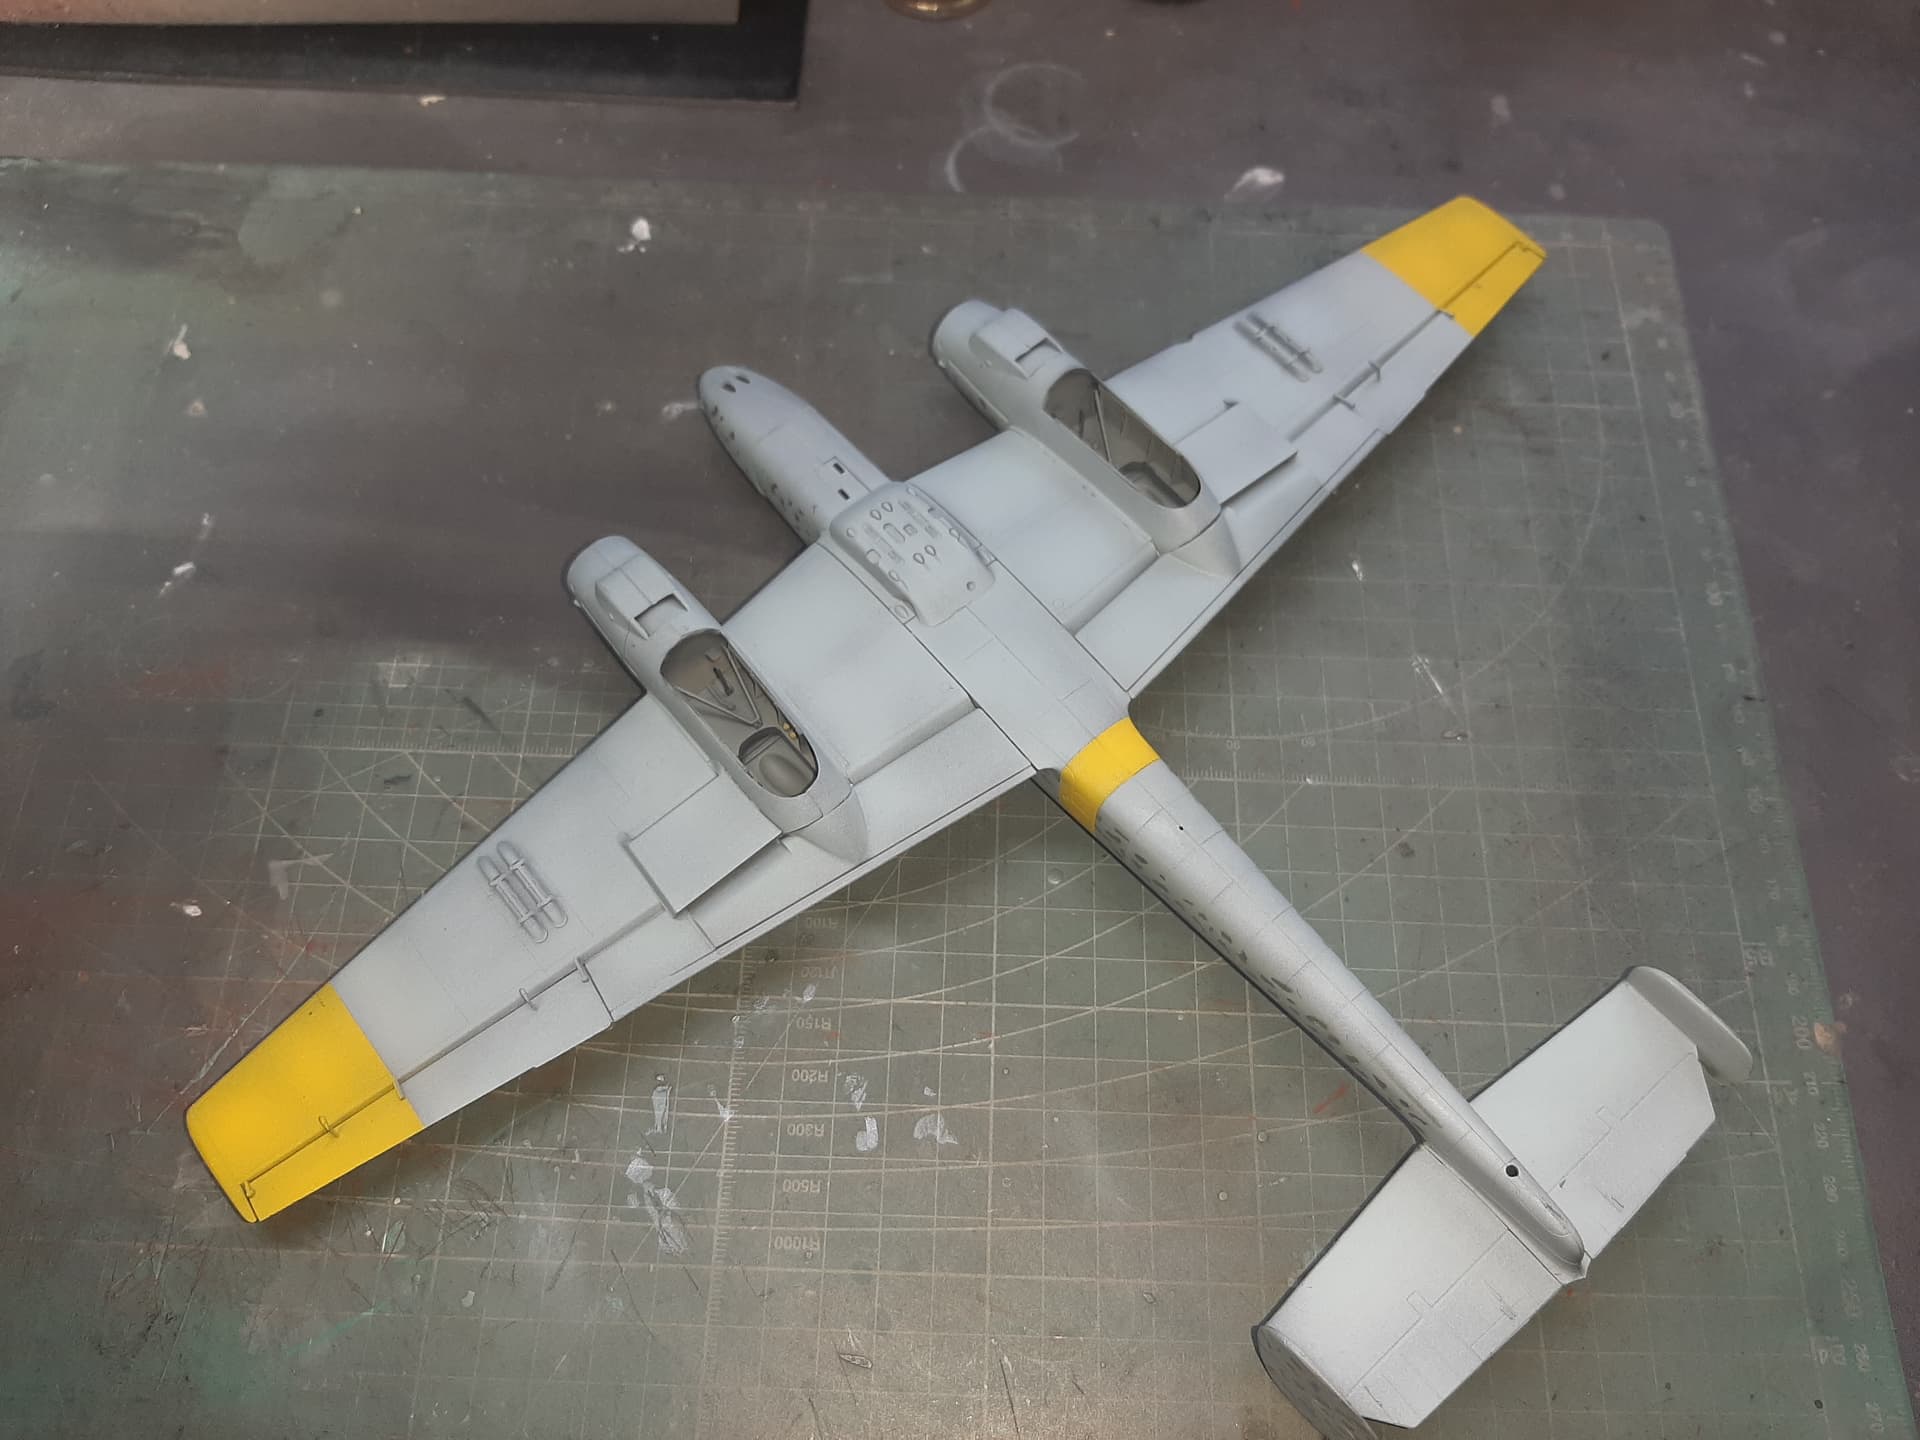
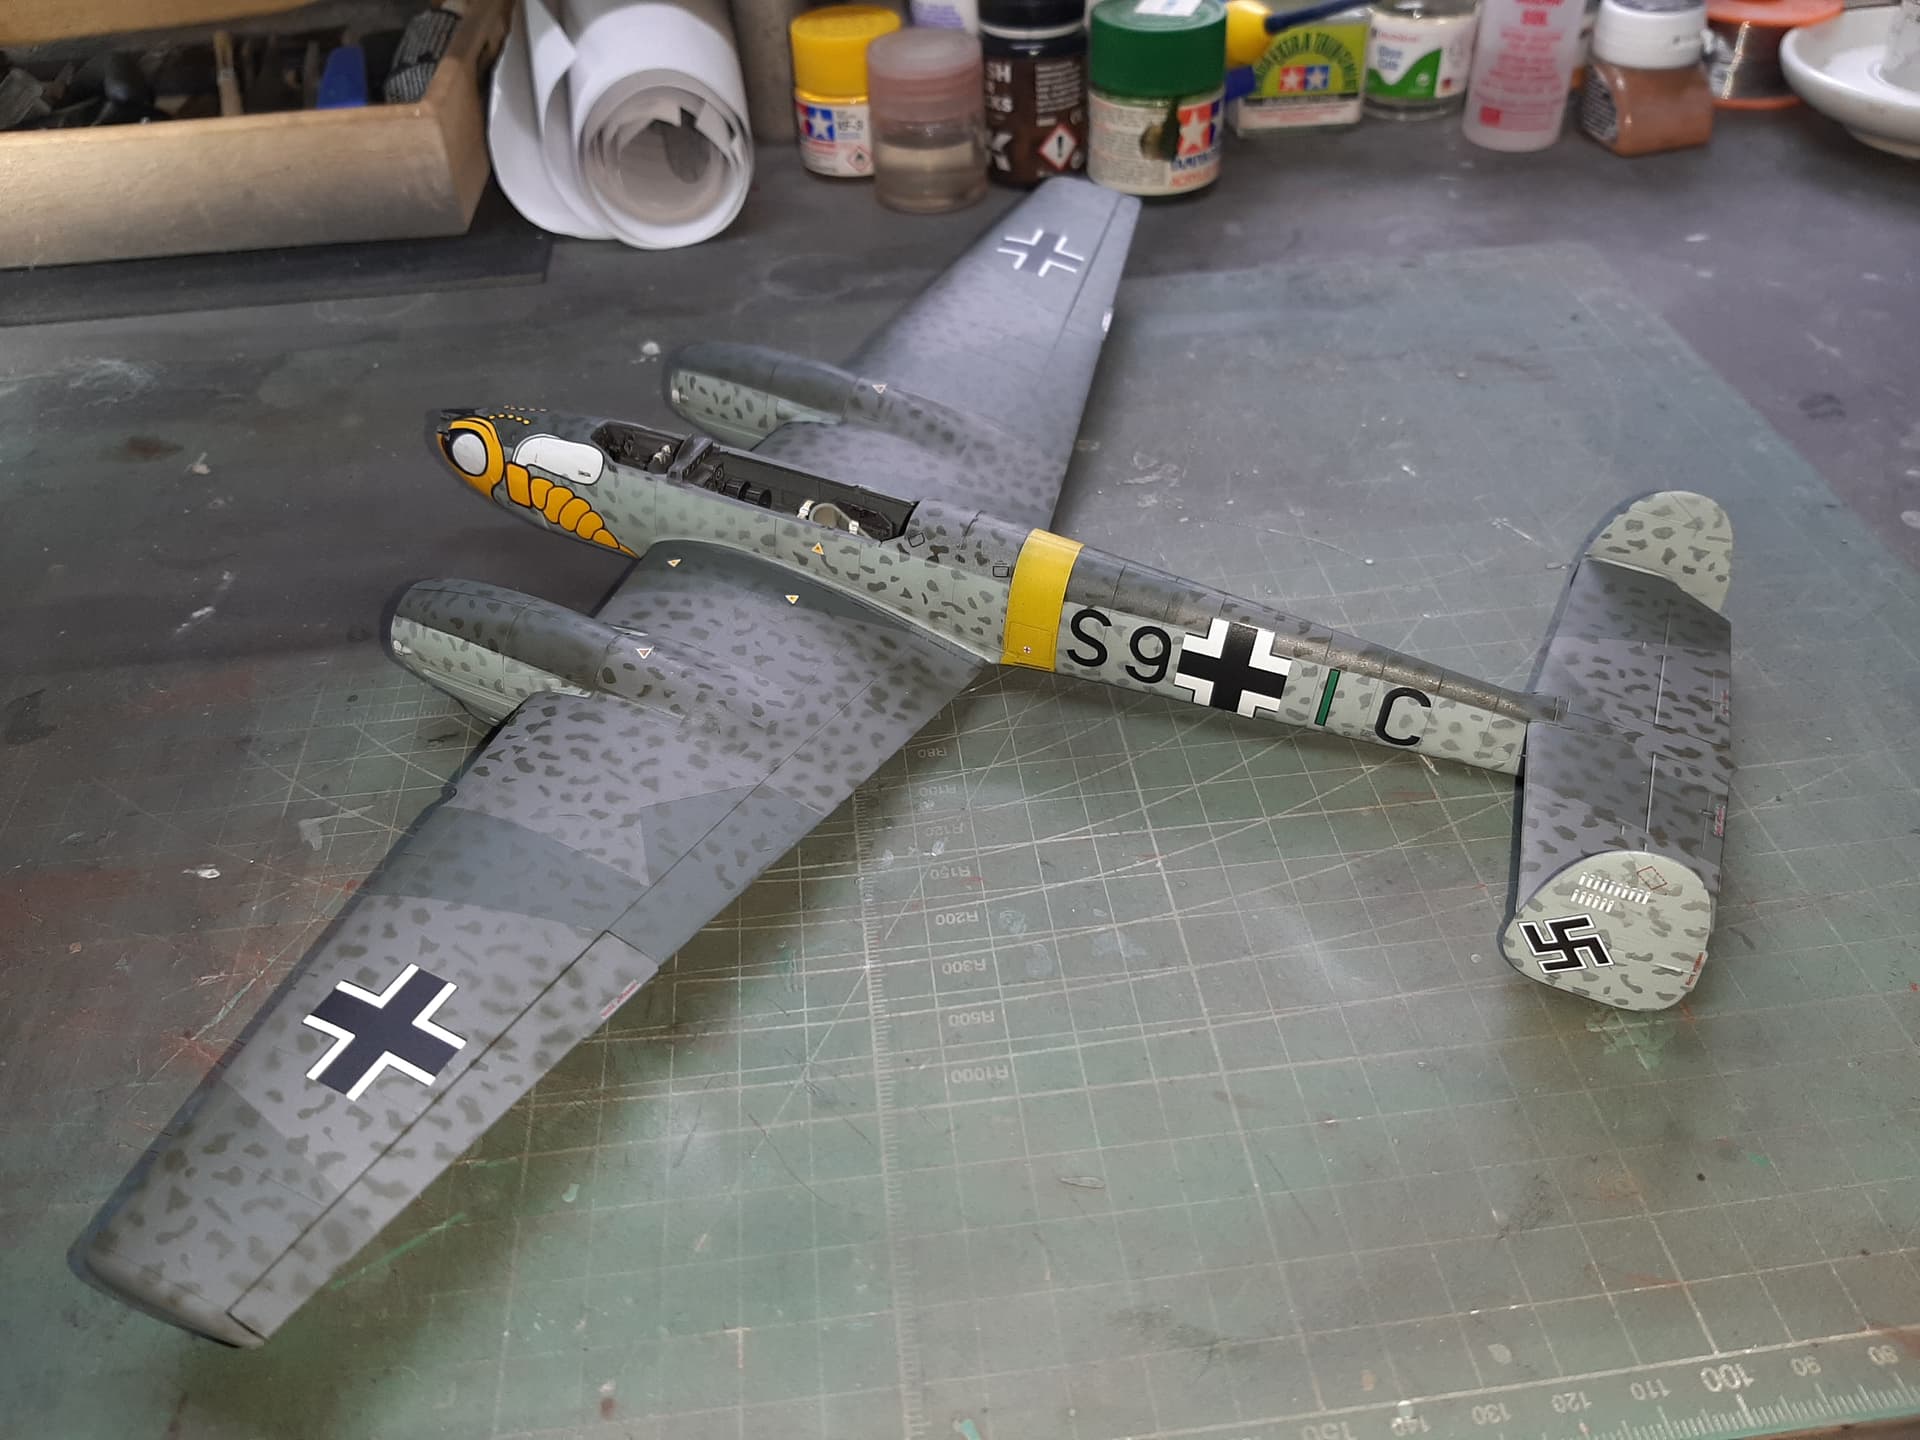
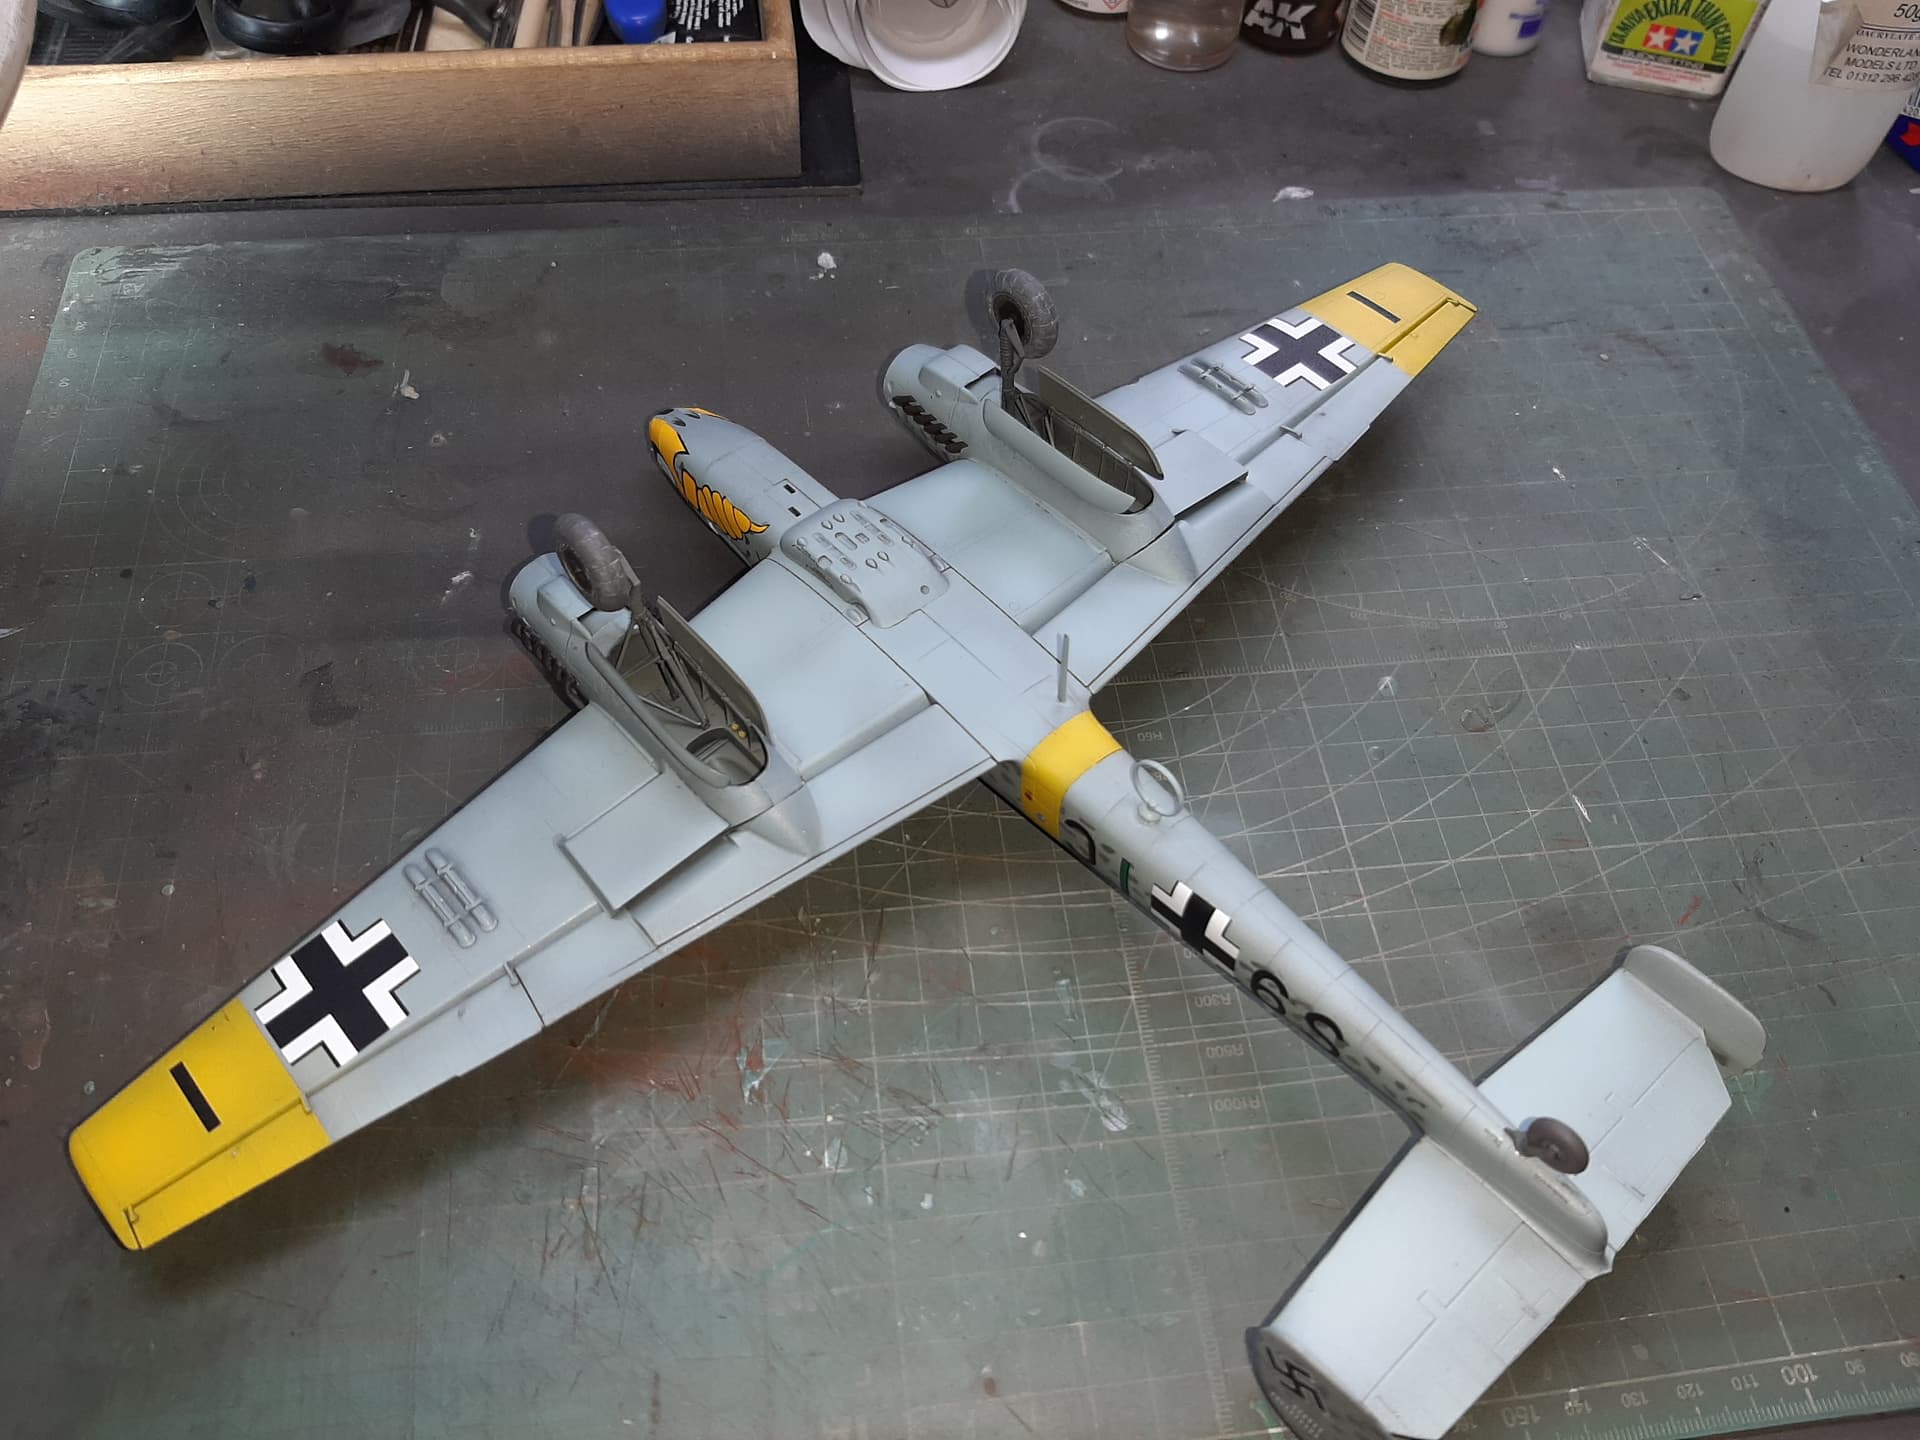
The canopy and exhaust manifolds are fixed. The canopy went on fine but the exhaust manifolds didn’t fit the appertures allocated to them.
By now, i’m getting bored of this, so fixed the manifolds as best I could.
2 Likes
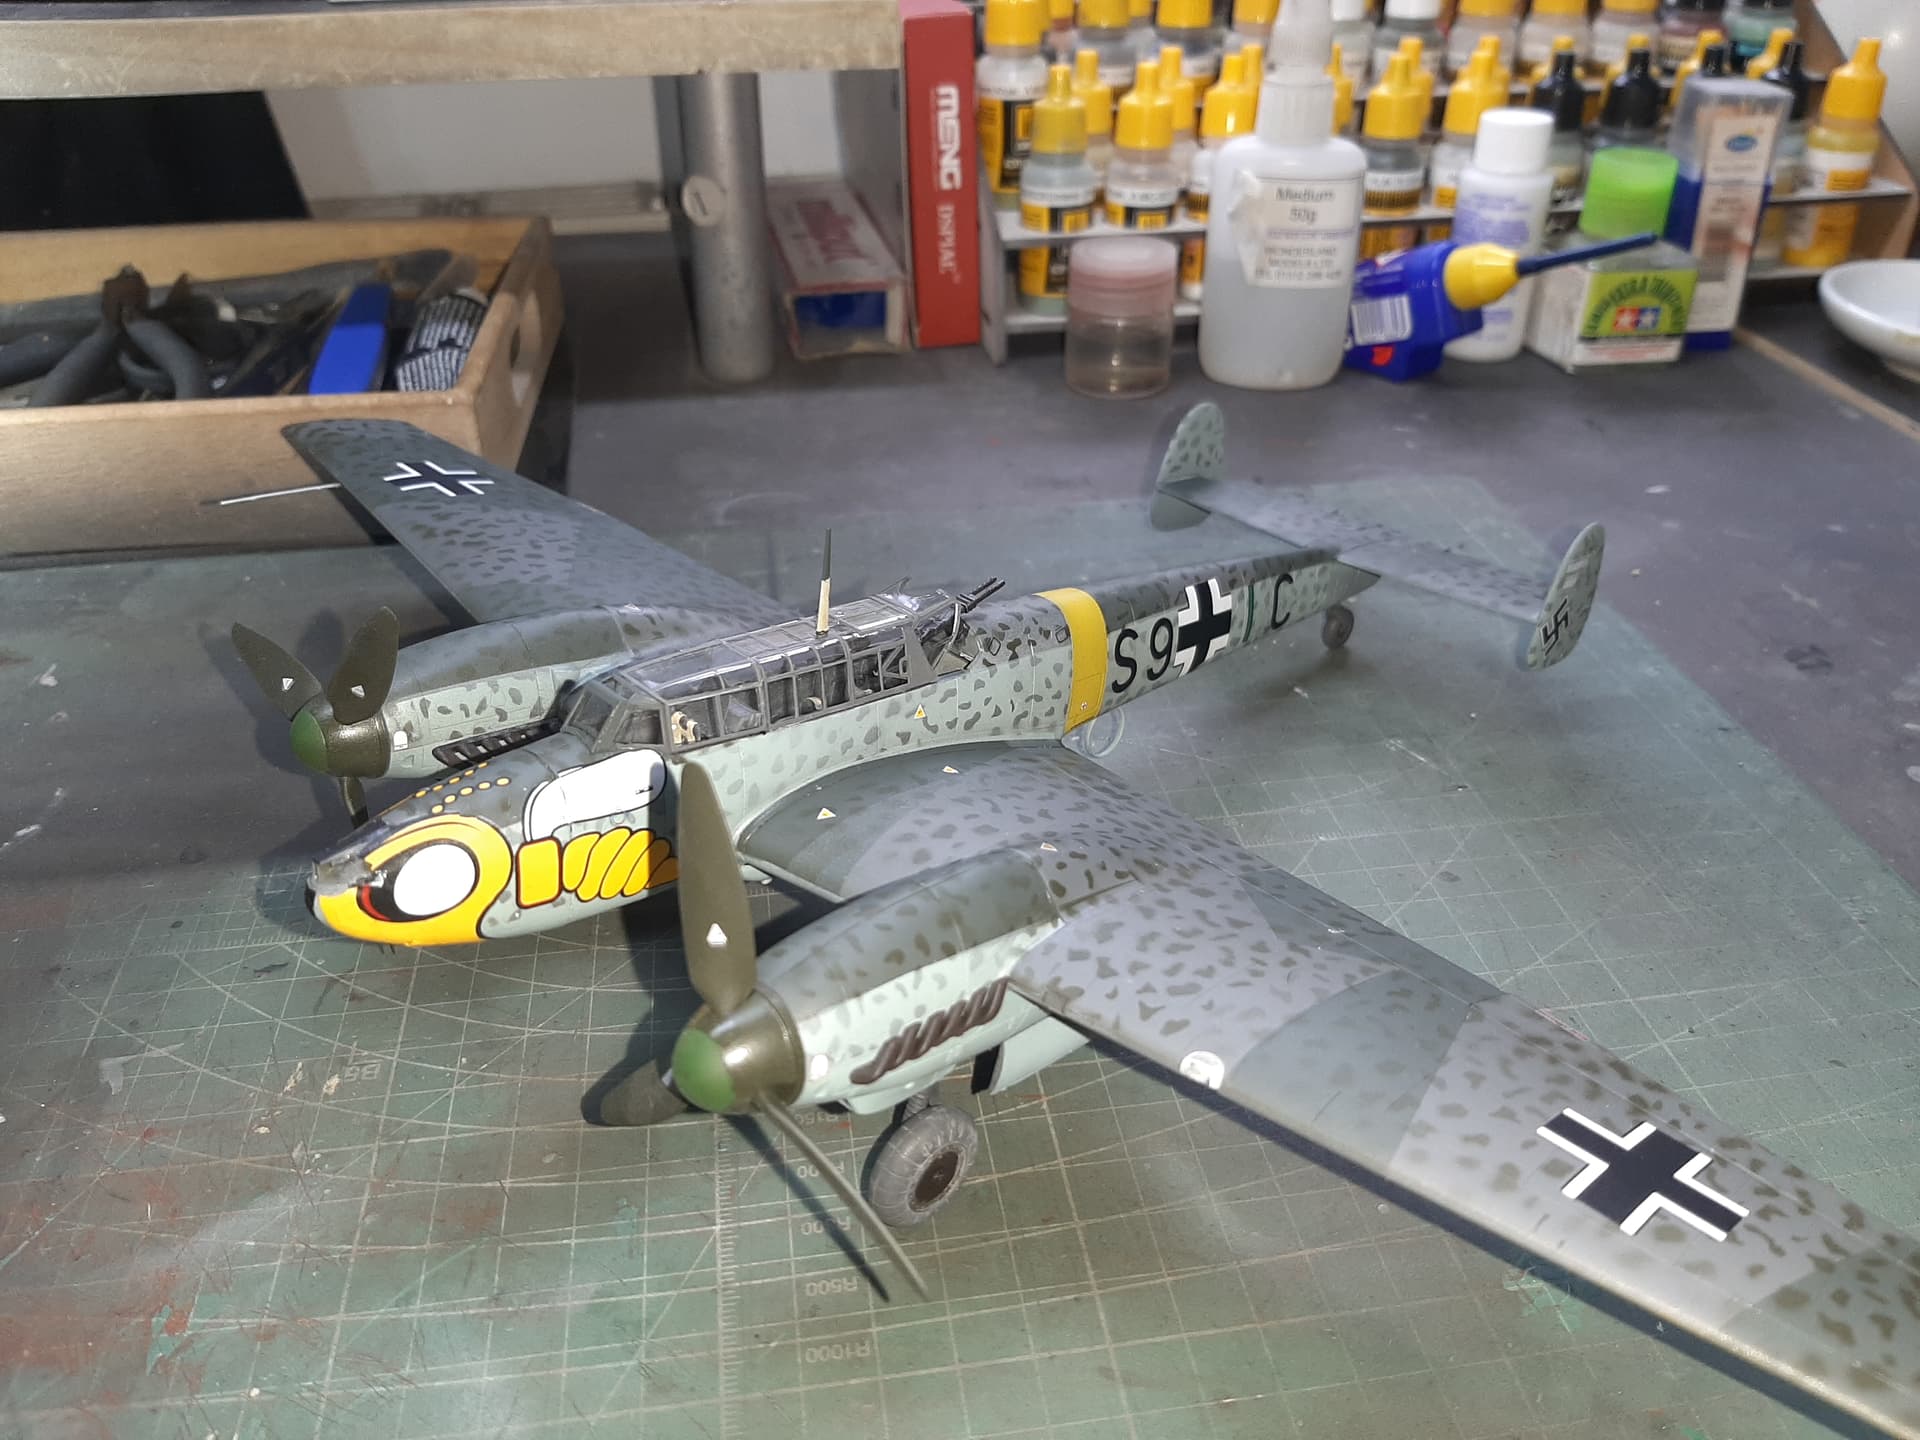
Now all the final detail is added and i’m going to call it done.
I am not going to weather it because firstly, I think it looks alright anyway and second, I simply can’t be bothered - i’m burnt out on aircraft for now and this became tedious at the end. Its not supposed to be like this, so i’m changing tack, back to AFV for my next project.
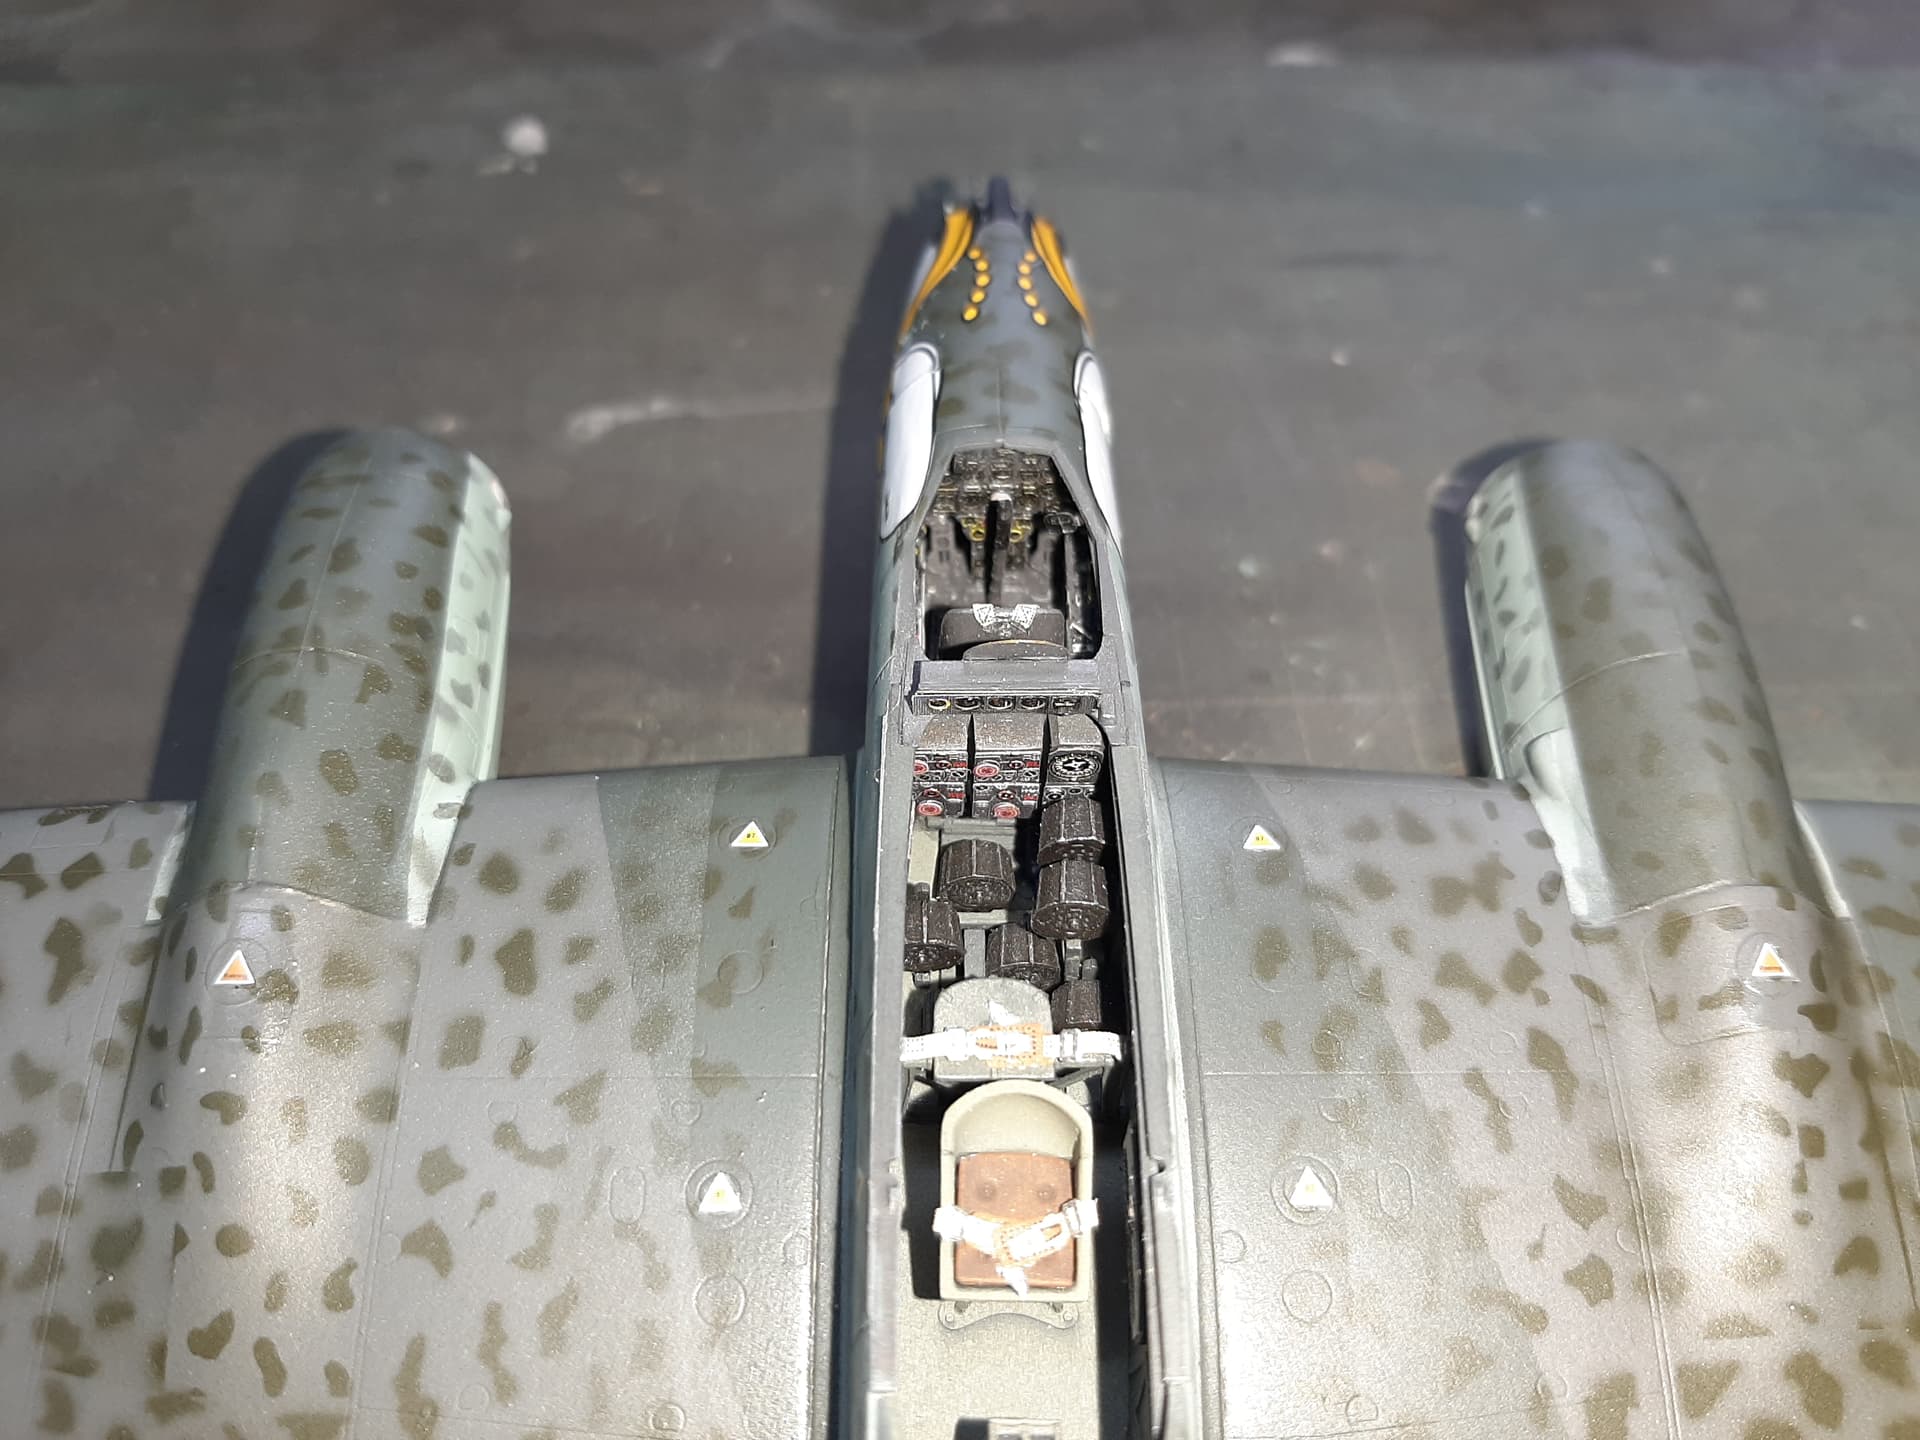
Overall, this kit promised much, and there’s lots to like about it - good level of detail, PE and cockpit masks included - but the negatives were:
Far too much waste on the sprues and a recycling headache for me.
Tiny, tiny parts attached to the sprue tree by way too thick attachment points, sometimes larger than the part you’re trying to remove. I lost some parts because it simply isn’t possible to remove those parts, no matter how careful you are, without breaking or bending them. Its almost impossible to sand, file or trim those parts afterwards, because the plastic is too soft, they simply bend or snap.
Spent a considerable amount of time on this build head scratching. And i’ve been modelling on and off since 1980. The instructions are a bit vague in places, over-simplified might be a better description - or as was the case with the landing gear attachment, viewed from entirely the wrong direction (one simply had to use trial and error here to determine the correct attachment points).
The decals were awful, simply awful - especially when you consider that AM decals do it so well.
5.5/10 - onwards and upwards.

4 Likes
Really nice job. Dont beat yourself up over it. What you have shown here is lovely built up kit, with nice extras , really nice detailing and a super cam scheme and some great salvaging with the headache decals. I think it looks great and would be more than happy with itt … well done … Now get into that armour !!!
1 Like
You’re too kind John, but thanks are very welcome.
Next up is Meng’s Merkava Mk IV M… will start at the weekend I think.
Too bad it fought you Roly but In the end I think you won - it looks great to me .
1 Like