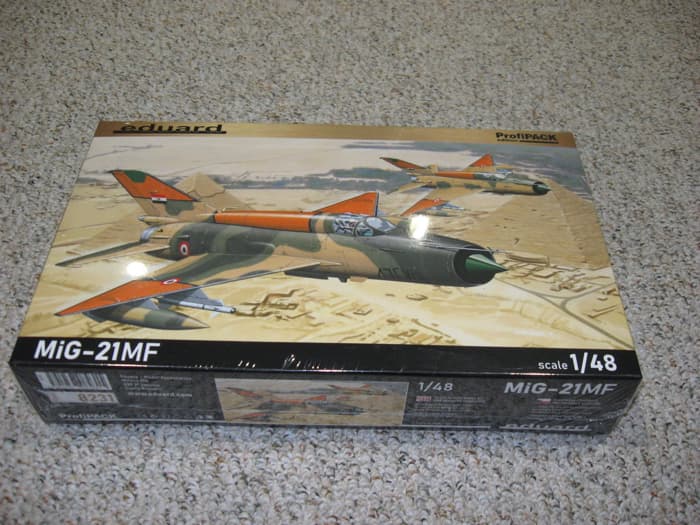
OK, let’s try that again…
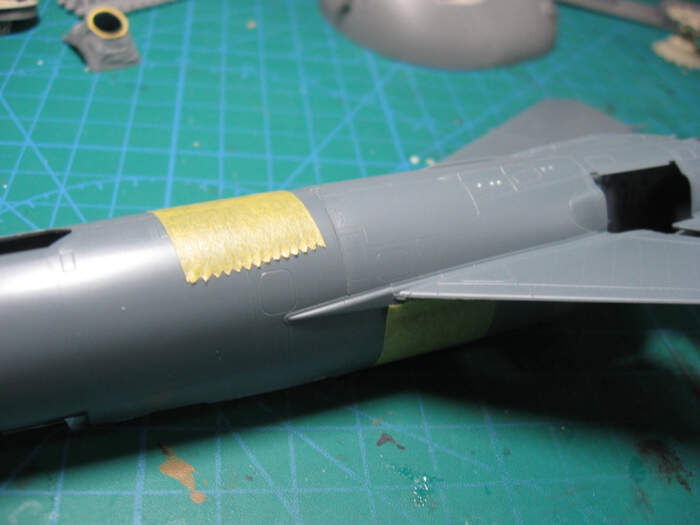
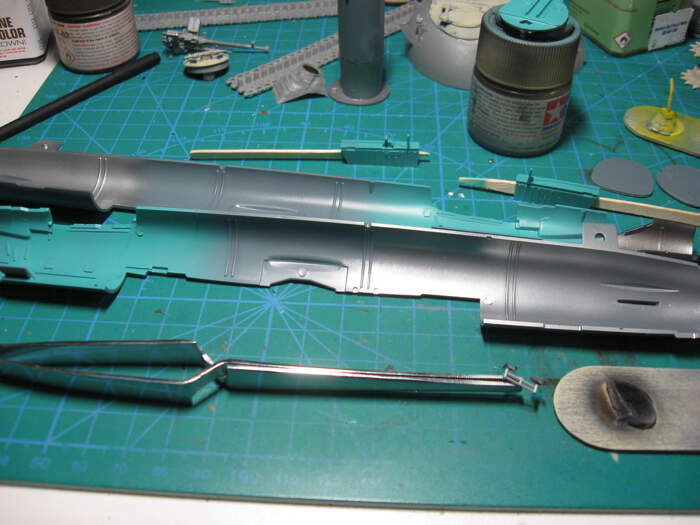
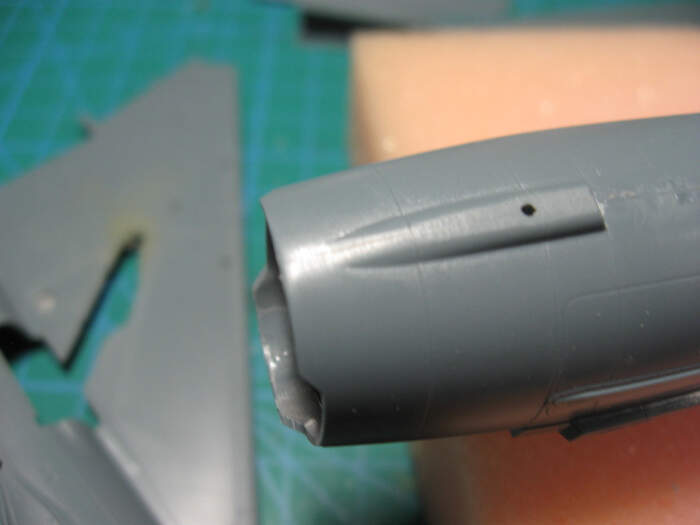
The problem I had with the 1/72 kit was the join in this picture. So this morning I opened the box, snipped the three crucial pieces, cleaned them up, and tried them out with tape only. The join is fine although it will, I think take a little careful glueing from one side to the other to get the lower wing part just right. I imagine the main thing is making sure the parts inside the fuselage don’t disrupt their connection, which I’ll be careful to do this time.
2 Likes
Great, Phil. Watching and making mental notes for my build 
I have to say the Egyptian markings are very tempting, but I kind of have my heart set on an Iraqi plane from the Iran Iraq war era. Just need to find some decals for it…
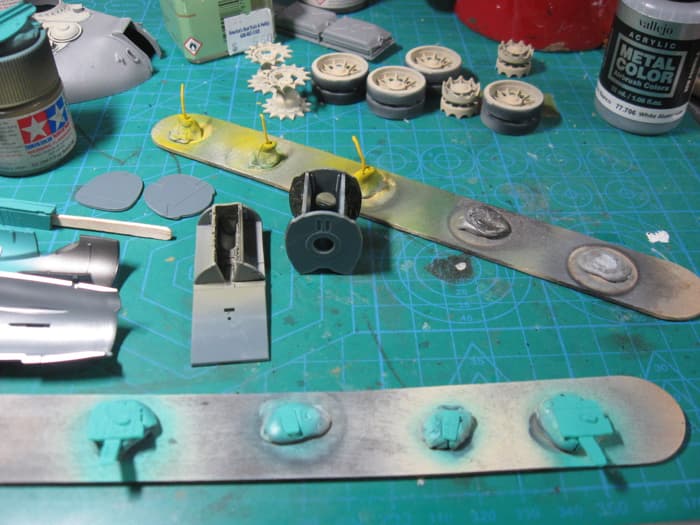
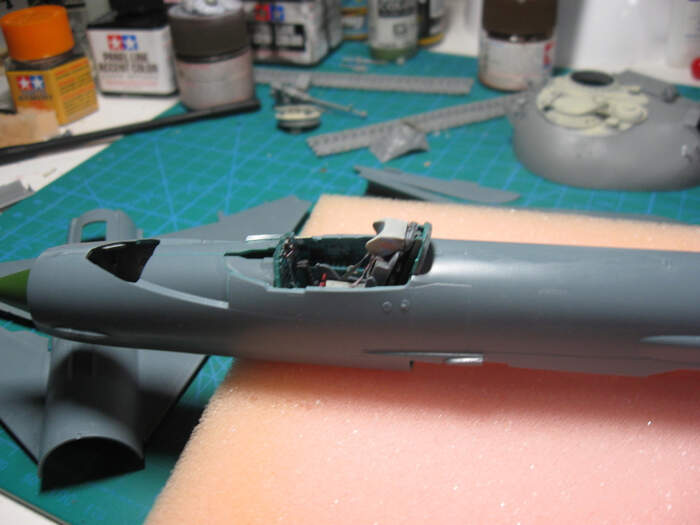
I have the painting done on just about everything that goes inside the fuselage.
Two questions about the nose:
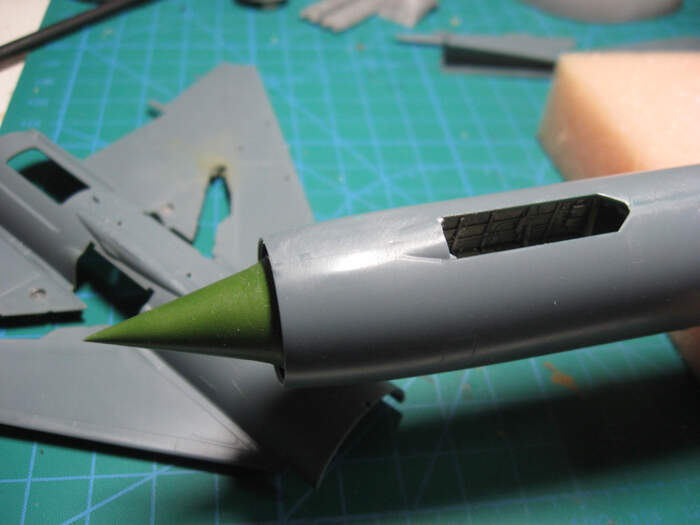
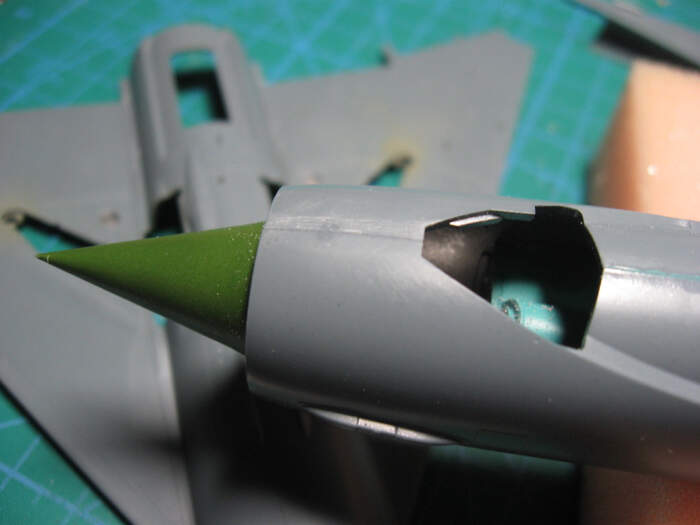
- that MIG-21 green that is on the nose cone and the few spots on the tail and fuselage. I’ve found a thread that says AKAN makes the right color. I’d really like something believable from Tamiya or AK real colors or MRP if anyone knows something, or a mix. The kit instructions recommend GSI bright green. I used that for the inside of the engine and it’s fine there I guess, but looks pretty garish for something on the outside of the plane.
- what is the preferred substance for adding weight to the nose? The instructions say to do so but don’t really say how.
The engine assembly is nice, but it’s almost all invisible. I guess if someone shines a flashlight up the tailpipe you’ll see some of it…
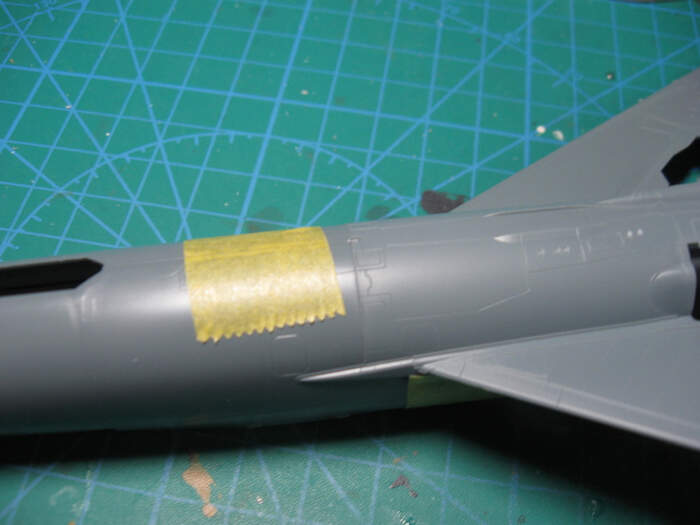
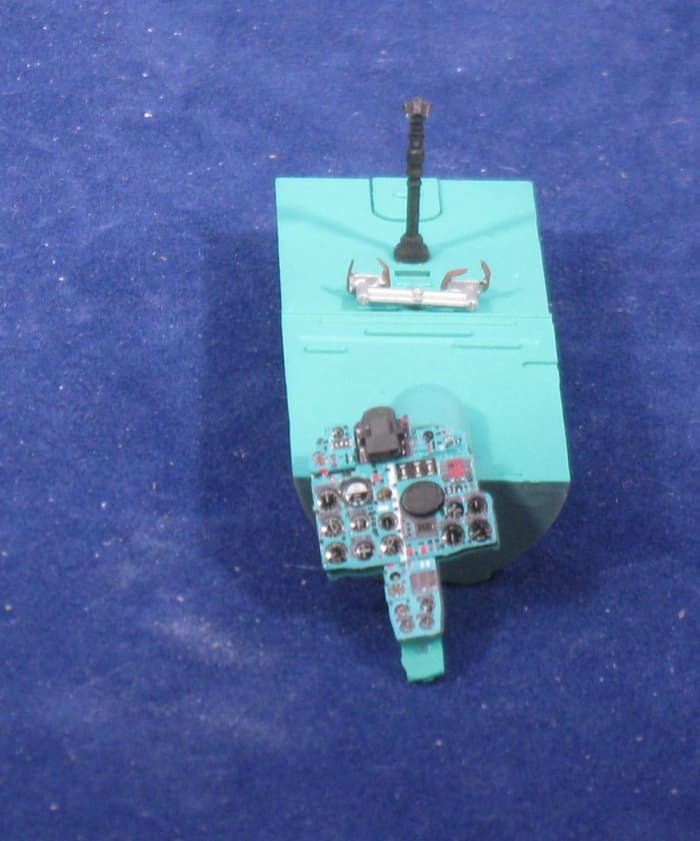
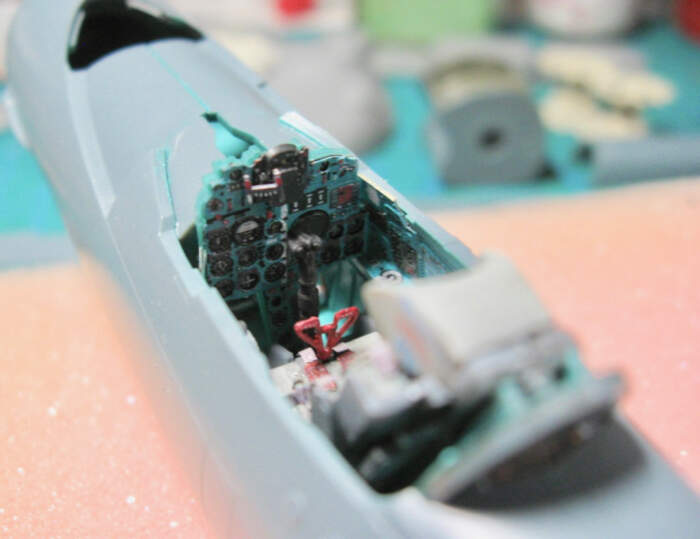
I have dry-fitted all the parts that are held together by the two sides of the fuselage and in each case it looks like the fuselage will go together the same as if there is nothing in it. Hopefully that will be the case when it’s time to apply glue. All the cockpit parts are painted and ready for their photo-etch. Eduard’s photo-etch is bluer than the MRP Russian cockpit turquoise. I wonder whether a blue oil wash will unify it all…
Still need to add the yellow tubes in the rear landing gear bay assembly, but it’s otherwise ready.
So, here’s all the bits on my table (with some forgotten wars T-54 parts also in progress). Hopefully the fuselage will be together by the weekend.
1 Like
I glued a .36 ball cartridge in the nose. I wish I knew if that would be enough weight as there isn’t room for a second one naturally. I guess I could run to the outdoors store and get some small lead fishing weights to bulk it up…
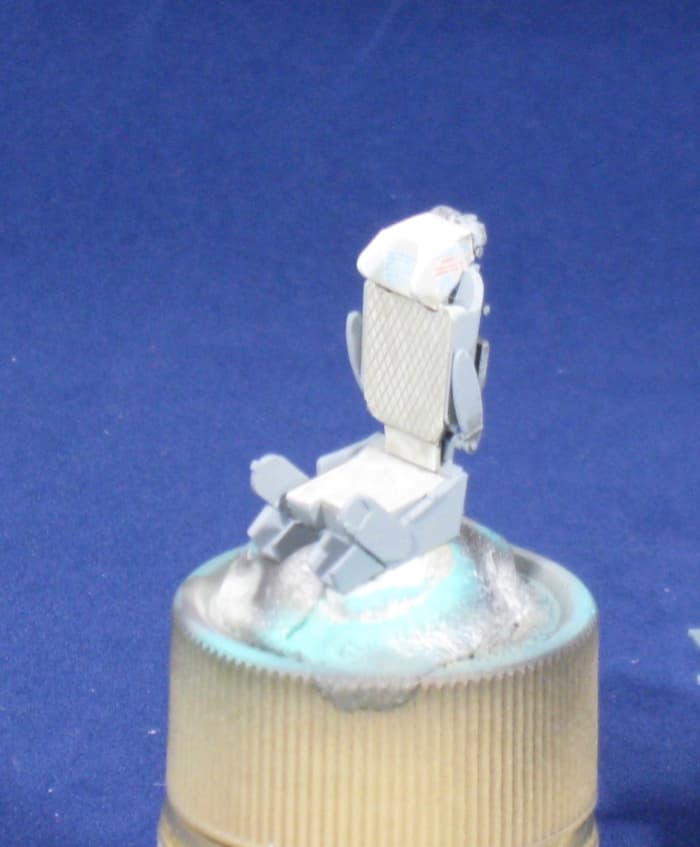
Just about ready to close her up. All the inside parts are painted. I need to add the photo-etch seatbelts because I’m going to glue the seat to the floorboard before I close it all. The instructions call for doing that later, but I don’t think it’s going to be easy to get it positioned where it needs to be once its enclosed. The stencils on the seat are barely visible without my magnifiers on, and I guess that’s probably about the right effect.
I’m loving this kit so far.
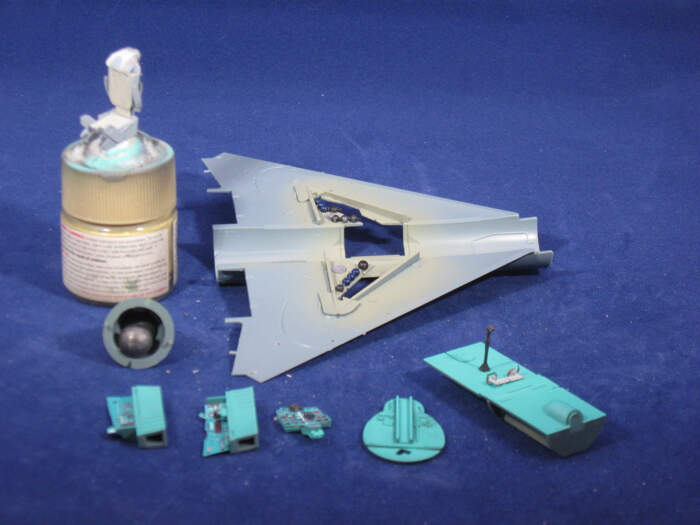
I had thought I might put a blue filter over the cockpit green in an attempt to unify the colors. They are a lot closer than I thought now that they are together. You can see the difference in this pic, I think. Given how it will be all closed up, I’m not sure the large areas of a different shade of turquoise will be all that visible.
2 Likes
Phil, looks super nice. Judging from the picture the colors are almost spot on.
Looking forward to see more 
While I’m waiting for the glue on the photoetch on the seat to completely dry, I’ll bring up my next feat (ha!).
Before I do though, I’m not entirely convinced by the prepainted photoetch seat belts. The seat and belt assembly has been an interesting model in itself, but I’m not sure about it. It caused me to look at a quickboost seat for the kit and I’m wondering if anyone has tried putting a quickboost seat in it. That looks way more convincing, but I wonder if there would be a good fit, or a lot of work to make a good fit. Anyone?
Anyway, the spine has a single part that goes on back that means I won’t have to deal with a long seam all the way down the spine. But the tail comes in two parts, and the ends of it meet up with that long piece, so hopefully that will be smooth. But I’ll have to remove the seam on it, and probably rescribe the oval hatch that goes over it. I imagine I should use superglue across it to make sure I don’t get a ghost seam later. I’ve closed up that gap between the two halves of the main part of the tail that is visible here.
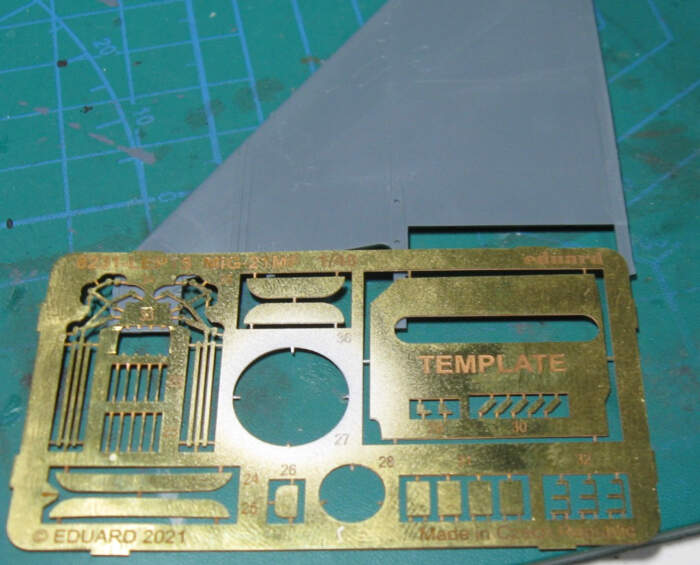
The top of the wing on the MF has an oval panel in it. That isn’t sculpted in. Eduard includes an oval in the photo-etch set for the kit. I ordered a scriber that is supposed to work inside such and will practice on a few spare sheets of styrene etch before I try it out on the kit parts. I think this is kind of lame actually. Seems like it would be easier to cast it in and have the planes that don’t need it get filled in, which is, for me at least, a much easier task.
1 Like
I wonder if something like this would work instead for you?
http://www.archertransfers.com/AR88003.html
I think I have the hinge set but not a MF kit, I think I have the PF.
You can print off page 3 did see if it would work.
HTH
Thanks. Archer is one of my heroes. But I’m going to try to scribe this, practicing on things that don’t matter first!
1 Like
All the things inside the fuselage are painted, and the halves are joined. And … no issues!
I dry-fitted multiple parts multiple times but still feared whether all the cockpit parts would come together. There was some slight wiggling with the floor board but it clicked and was perfect!
The instrument panel is fine but I’m not too keen on the seat. I see that Eduard makes a resin cockpit interior that looks pretty sweet. It still has the PE seatbelts but I imagine I could find another technology for those.

Now there are long seam lines on the top and the bottom of the fuselage, but the beautiful thing is that almost all of it is covered. There is a fin underneath that leaves just a short segment visible and I think I’ve fixed that. (I’ll get some primer on all of these seams tomorrow and make sure)
The front above and below have small sections that I think I’ve fixed too.
There is a bottom section behind the front landing gear well that is going to need some work though. There is a significant dip where the two halves join, and then there is a round and an oval panel that runs across them. This will require more time.

But overall I am quite pleased with this! I dry-fitted the lower wing section and it all lines up beautifully. So, after I’ve fixed that dip in the bottom of the fuselage I think many of the parts will go together quickly and it will start to look like a plane!
3 Likes
Looking good, Phil. In a couple of weeks I will start my 1/72 version.
I made some progress until I got sick on the weekend.
It should go quickly now as I completed removing the seams on the fuselage and rescribed the two panels on the bottom that were wiped out by that, I scribed the panels on the top of the wing. There is one fit issue - a panel on the bottom that can be either (I think) airbrakes open or airbrakes closed. I went with the closed version and there was a lot of sanding to get it to sit flush. It’s on now. So there are a few more things that stick up off the fuselage and stick up off the wings and it will be done. There is a small gap between the wing and the fuselage on the rear of each wing which should be fillable by plastic putty, and one gap where the top of the fuselage attaches, also small enough that plastic putty should do the job.
I’m loving this kit.
Here’s the one photo I managed:

2 Likes
I’m supposed to do wha???
I’m zipping along. It’s almost ready for paint. I decided to get the Tface mask for the canopy so I’ll have to wait for that.
But moving right along in the build I thought I’d go ahead and start working on the landing gear when I came across this in the instructions:
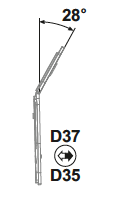
D37 and D35 are the landing gear covers. The kit parts are straight. I’m supposed to do what with this? Cut the part and glue it back together at the specified angle? I can’t imagine getting that right. But is that what I’m supposed to do? Anyone done anything similar on a kit and have recommendations so I don’t botch it up?
1 Like
I have not build the kit before, but seems like you have to bend the plastic part without breaking it?
Yeah. After I posted and thinking about it I was thinking that scoring the part then bending it at the line might be the way to go, perhaps with a thin line of epoxy applied once it’s at the correct angle? Certainly open to other ideas.
You can bend, probably preferably then cutting but you have parts D44/45 and PE 46/47 to help set the angle.
Well, guys, you are correct - bending is the way to go. There are two other parts on the sprue not used in this kit so I used one to experiment. The parts are already slightly scored and a bend bends it along that score. Et voila!
1 Like
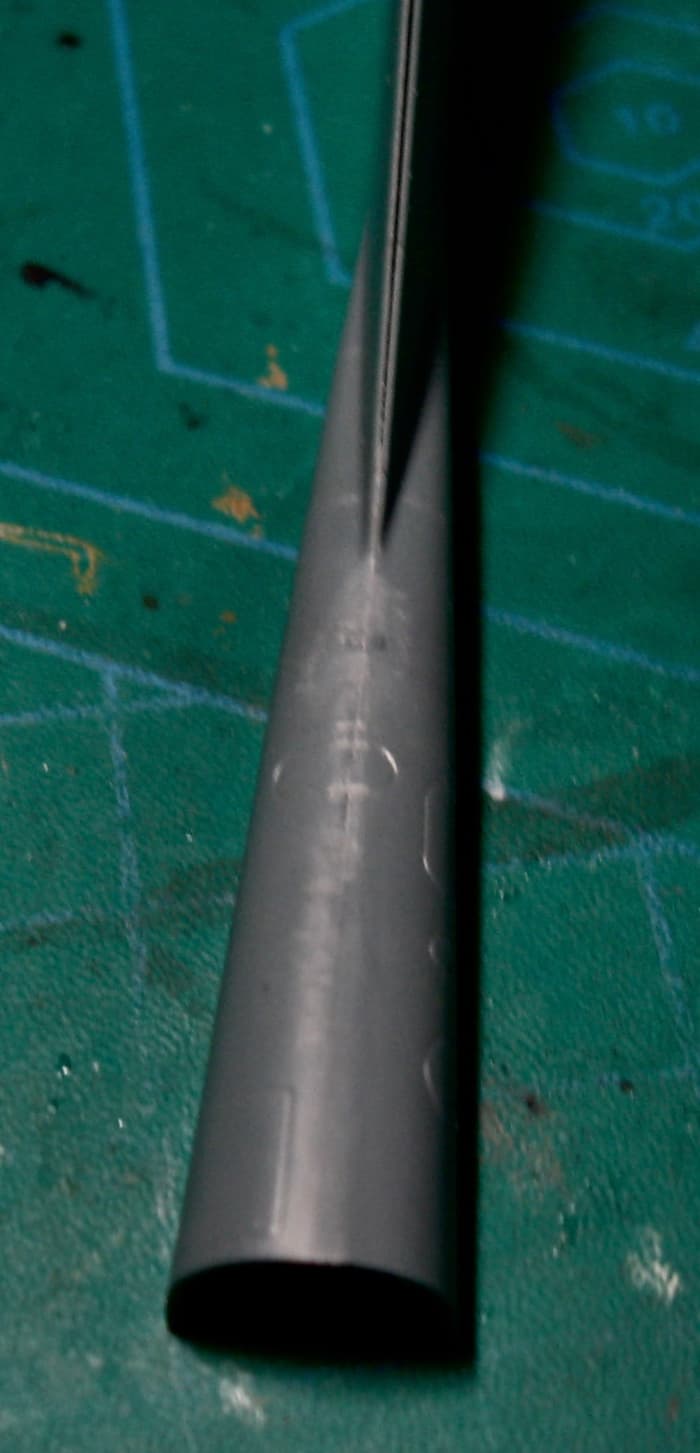
speaking of bent plastic…
That long thing sticking out the nose - what is it? does anyone make a metal replacement for it? Mine is a little crooked…
Never mind. I see that it is a pitot tube and Master Models makes one:
1 Like