Hi All,
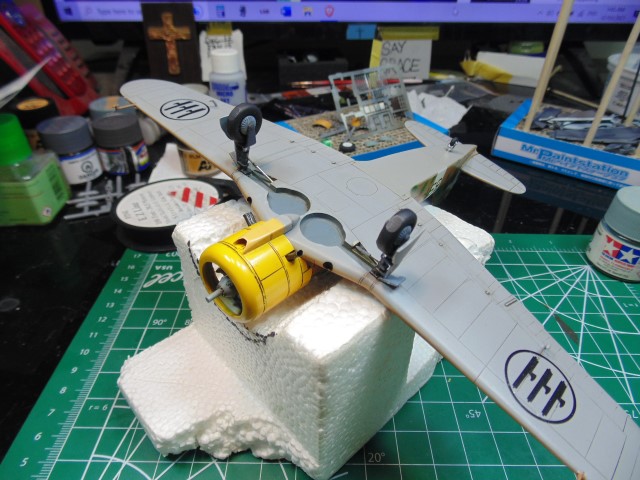
Sure am glad these bits are done. 
Several brass tubes and some KandS rod.
AK metal color for the throws and attached with BSI Flex+
I know it’s a small thing, but I feel it’s needed because the wheel bays are too scant.
It took me a day to pull this off, yet I can help you do it in a couple of hours have done the grunt work.
9 Likes
Hi Friends,
It’s tough to make extra detail on such a simple kit. However, oils, paint, brass and sanders help.
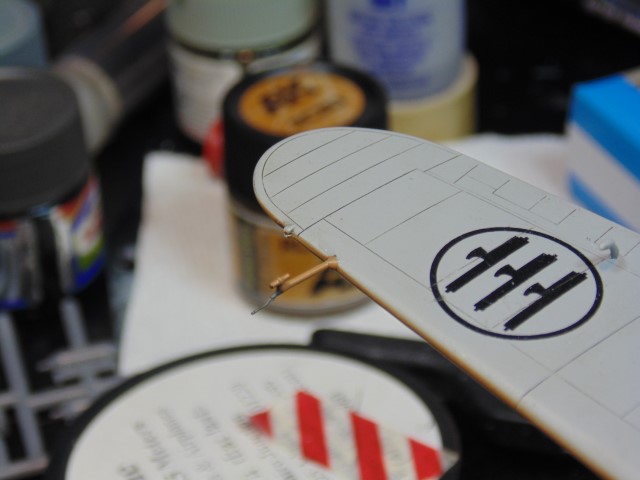
The owner wants the bas color for the pitot tubes, but tips are burnt iron with a drop of red/brown.
This scoop was a knucklehead and not perfect, yet nor are on the ones of the actual aircraft.
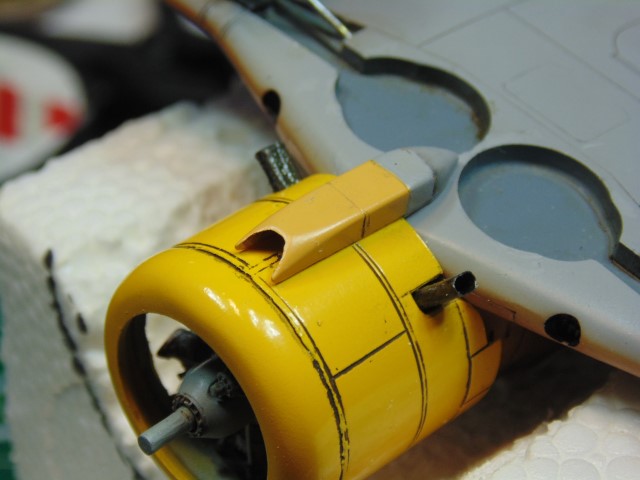
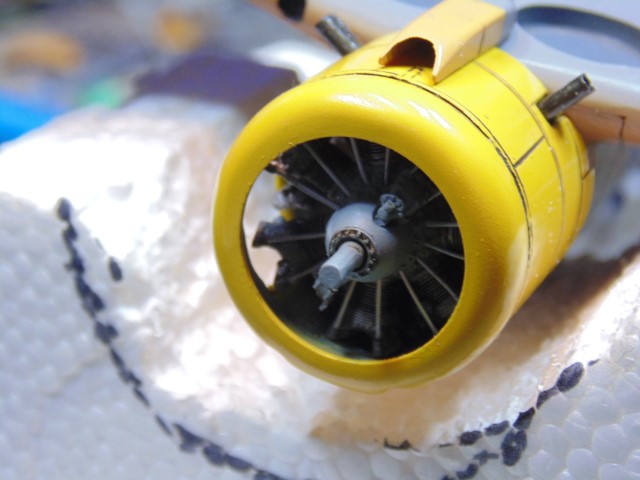
Beginning the dark wash of the engine.
Here you can see the windscreen masking and the tiny details of the cockpit side doors.

There’s much more detail going on this. I hope it’s worth the days invested.
8 Likes
Its moving along great HG. The owner should be very very pleased with it 
2 Likes
Most definitely worth it HG, lovely work!
Cheers, D
2 Likes
Thank you @AussieReg @Johnnych01 @BlackWidow @RDT1953 @Stikpusher AND EVERYONE whos dropped by to have a look.
The support seriously helps. More progress to come.
10 Likes
Hey guys, it’s time for some updates.
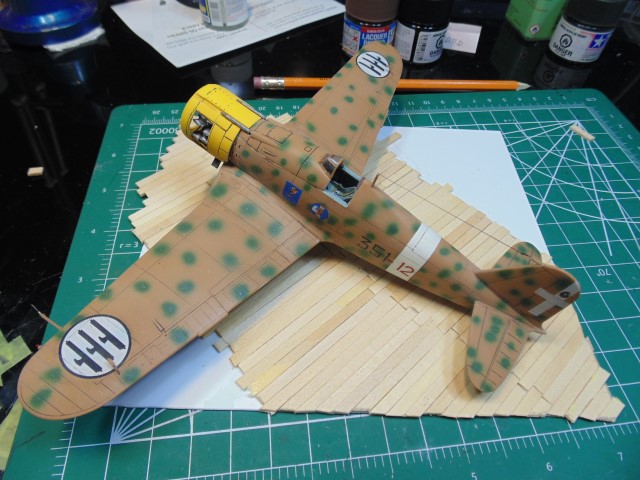
With all the components of the aircraft finished I needed to get a grasp on the base. Rodger didn’t ask for this but I felt it would look cool.
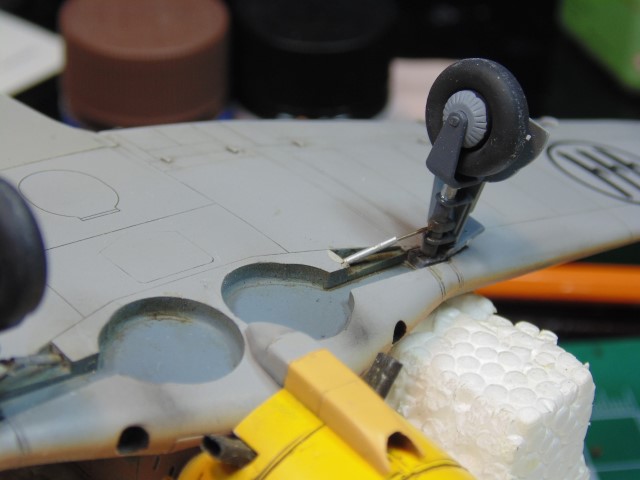
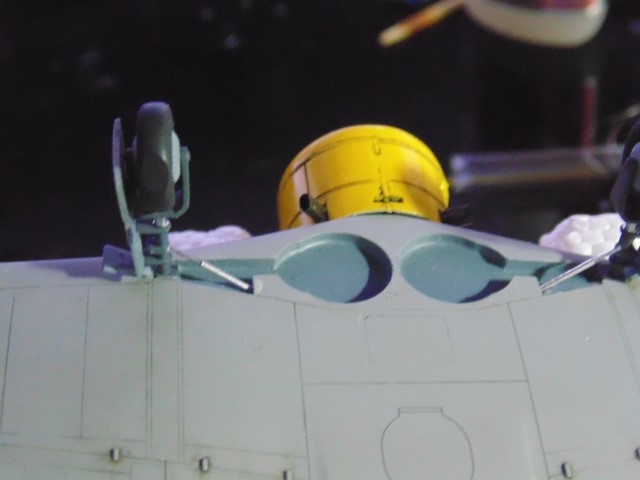
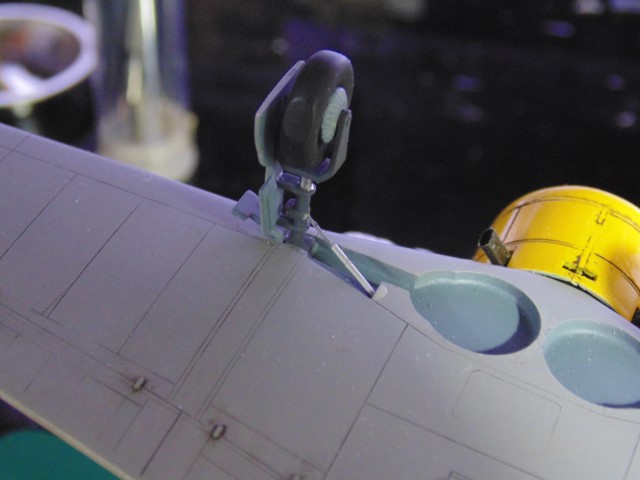
Some minor oil staining in the wheel bays and the added retraction metal parts.

Hasagawa do not include these parts, so I did.
A tricky little bit of business since there’s no point of reference to drill holes. Also I put on some slight exhaust filth.
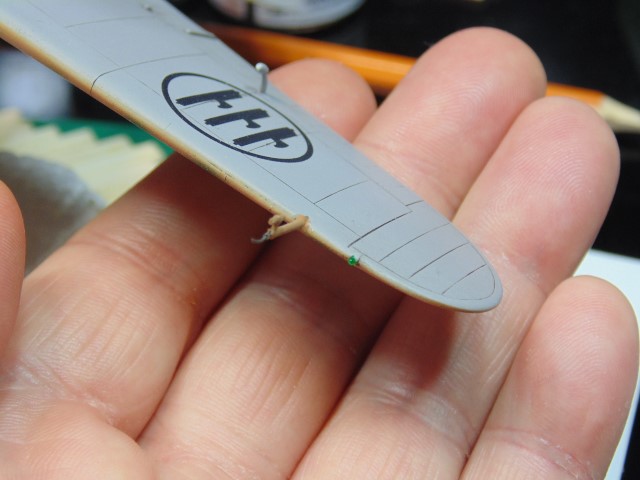
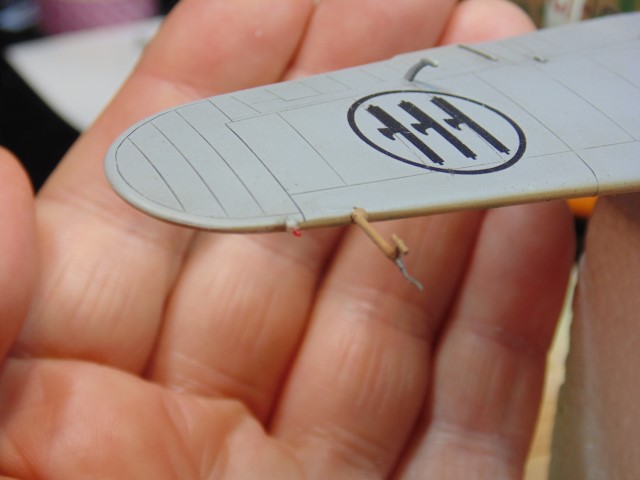
I shaved off the tips of the NAV lights then drilled a 1.5mm hole to fit 1mm clear stretched styrene then painted them with Tamiya clear colors.
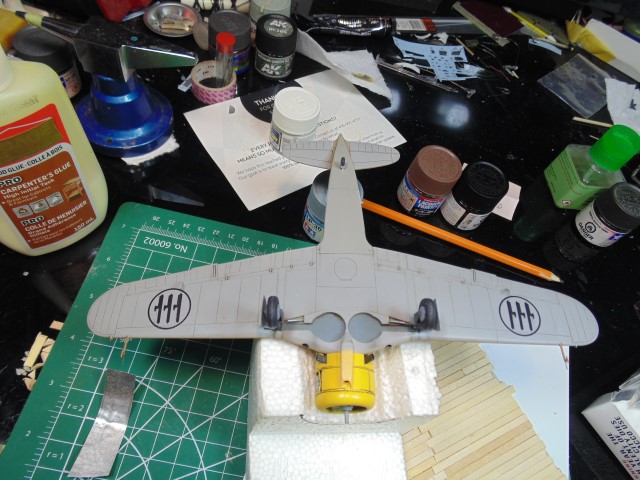
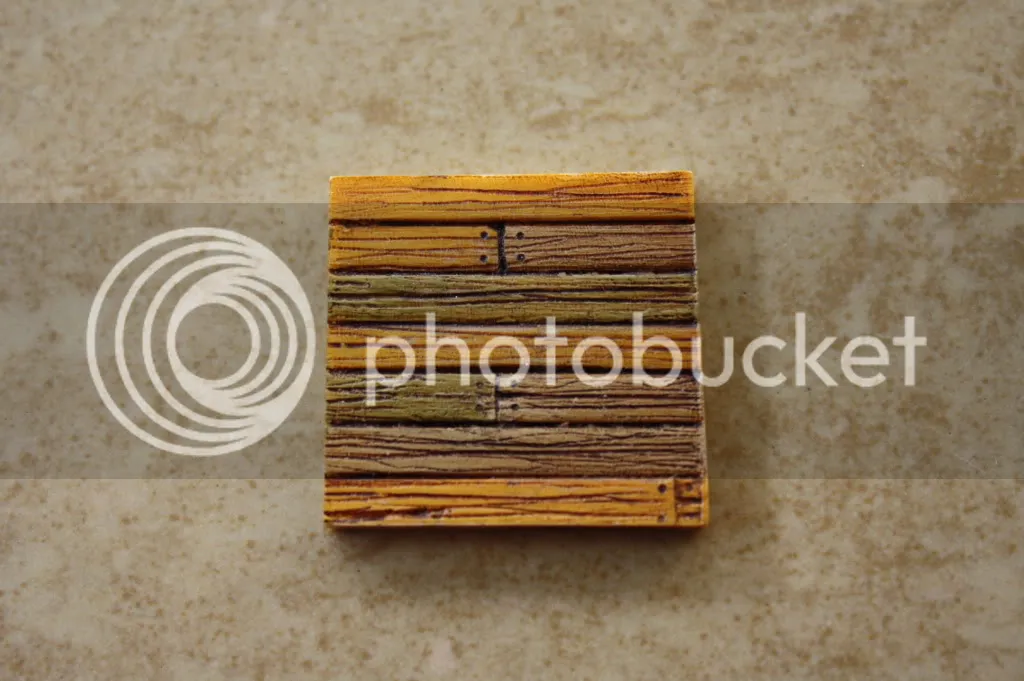
With this completed it was now time to get at the base. The metal strip will be transformed into a bucket to hold leaking oil.
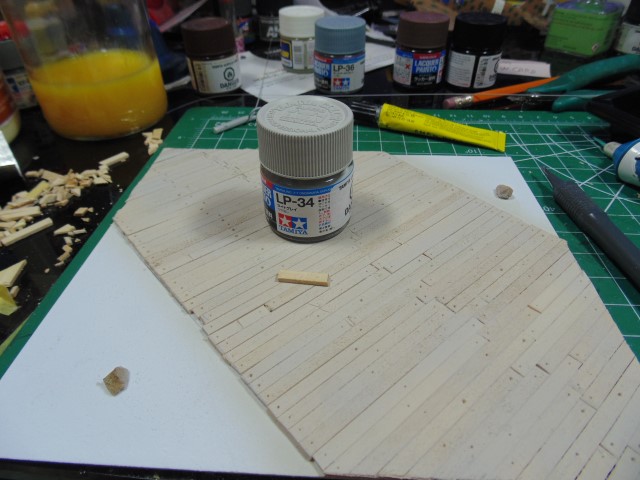
I didn’t want fresh wood for the base, yet needed the wood look to have some presence. I knocked it down with light grey as you can see. Each one of those holes will have a dark iron spike leveled at every point. The rocks are common garden stones.
Huge thanks to UMM-USA and Sunward Hobbies for getting my supplies to me. quickly. It was worth every dollar spent.
7 Likes
Great update and great to see you back at it HG. Hope all is well with you and yours. The Fiat is looking superb … love the mottled cam and the livery markings really make it stand out. Looks terrific … the base idea is a great idea and it will be the perfect finish for it … great work
3 Likes
Just keeps getting better and better.
For the wood decking, I like where it’s going.
Ken Abrams had this technique I have used and might get you the presence you’re looking for.
You can watch the whole thing if you choose. The wood demo starts at 5:19 and resumes at 11:10.
I tried it the other day (over a decade ago now 5/11/2011) on a figure base ship deck base. I really liked the results and it’s super easy. I used Vallejo Ochre, MM Skin tone tint base - light and MM Wood mix and then MM wood with Burnt Umber
4 Likes
Thank you @Johnnych01 and @Tank_1812
Yes I’m over another spell of the monthly neological bought I go through. Better to suffer a bit than to be on zombie drugs, then you’d never see my limited skills.
4 Likes
 under sell of the decade. You sir are an artist. I draw stick figures and you paint the Mona Lisa in this hobby my friend. Keep at it as long as you can when you can, we understand and will continue to enjoy your work.
5 Likes
I cannot echo enough of what my bootie mate Ryan said HG …yours is artistry at it’s best …
And Ryan, that decking looks brilliant… Fantastic tones on the planks
4 Likes
Hey Guys,
Another quick update before moving to other projects. This one still needs some work, but there are only so many hours in the day.
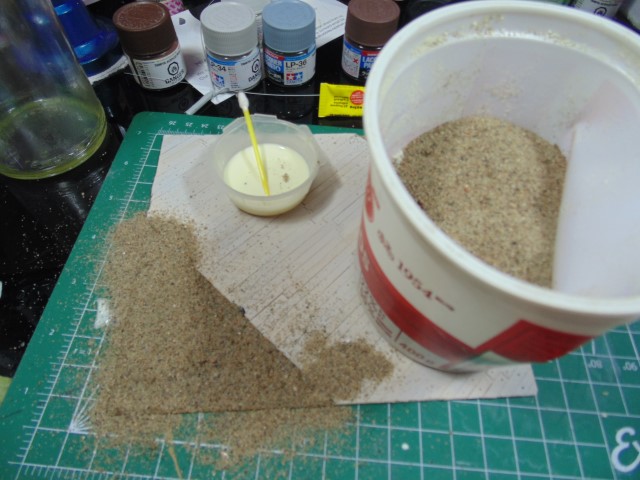
I was about to add green flocking with colored flowers and the like, but the decal sheet saved me from that effort. Rodger selected this camo and decal selection. The terrain has to match. Some common sand has the idea look.
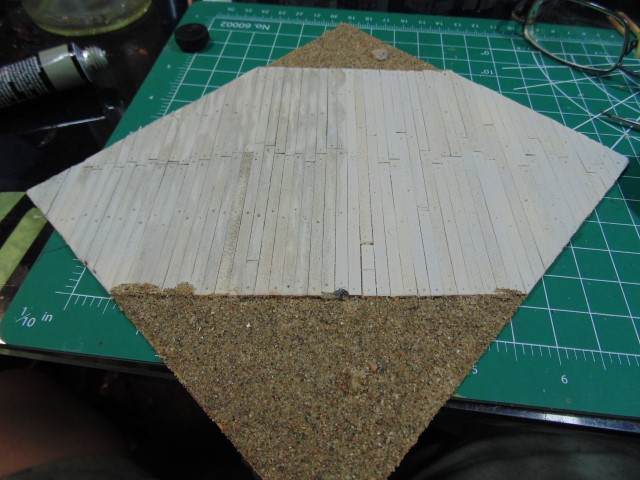
A few stones here and there look interesting. A 50/50 mix of 502 Abteilung neutral grey and engine grease cut 60% with thinner was used for the wood wash. Here, you can see the difference.

It’s one of those sutle things, in my opinion, which add more depth.
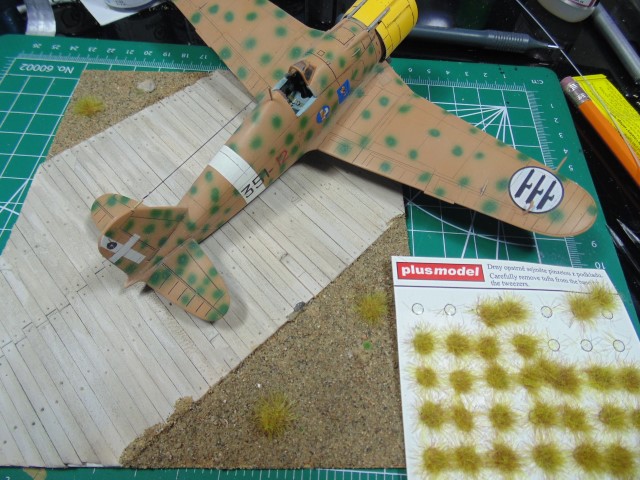
To define the area even more I used Plusmodel tuffs of desiccated and new grass.

I built a work bench out of strips of real wood. The “X” legs denote that it’s foldable. The small step-stool is 100% scratch built from stretched sprue and 0.3mm sheet I bought from Sunward Hobbies. The dripping engine oil bucket was formed from a plastic one that came with another kit.
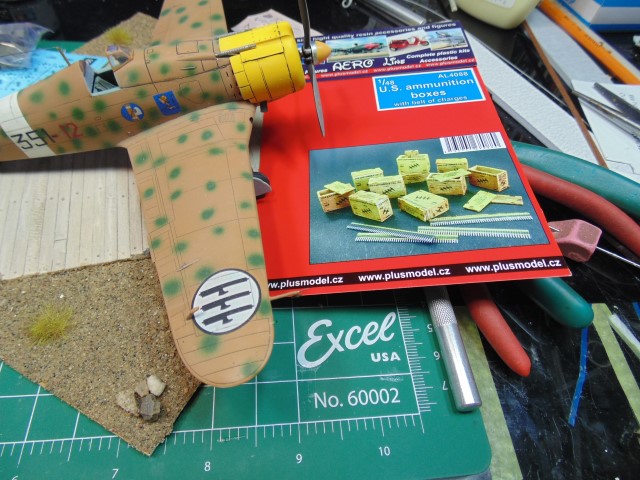
I don’t have any Italian ammo boxes, so these will have to suffice. They are 1/48 and look super cool. Plenty of tiny details to come.
Huge thanks to https://plusmodel.cz/ for sending the items and Sunward Hobbies https://www.sunwardhobbies.ca/ for shipping my purchases quickly. Thanks Everyone.
9 Likes
That is looking brilliant HG … Base really brings it all to life . Great work buddy.
2 Likes
Thank you @Johnnych01
The replica is going to a retired FAA higher-up who is a super nice man.
4 Likes
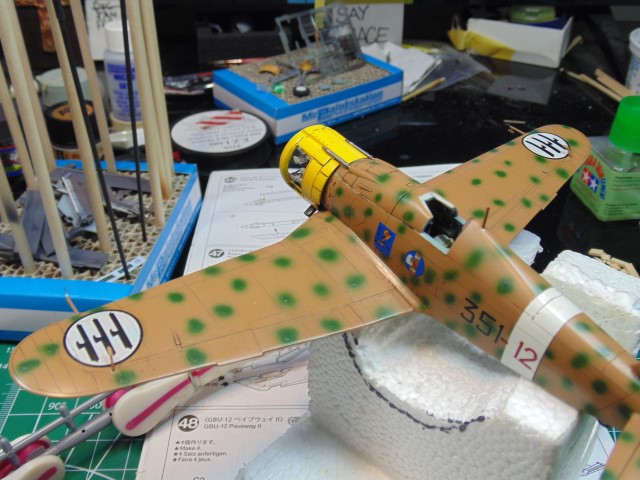
Now the fun begins.
I’ll wait for Rodger’s go ahead to deepen or lighten the feathering. What do you guys think?
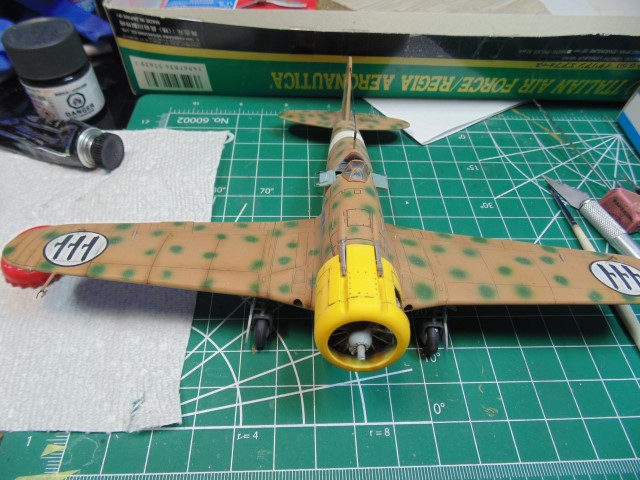
Note the slight difference on the panel lines from left to right.
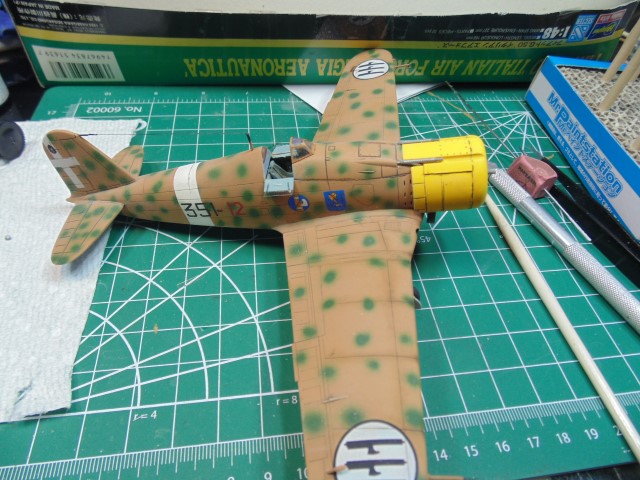
Every thought is welcome.
7 Likes
To be honest (and not being an expert) I really like the look as is. There may be some very subtle things you could do, but to me, its looking super nice.
2 Likes
I seriously appreciate your view, so let’s have it please. Tell me your views.
2 Likes