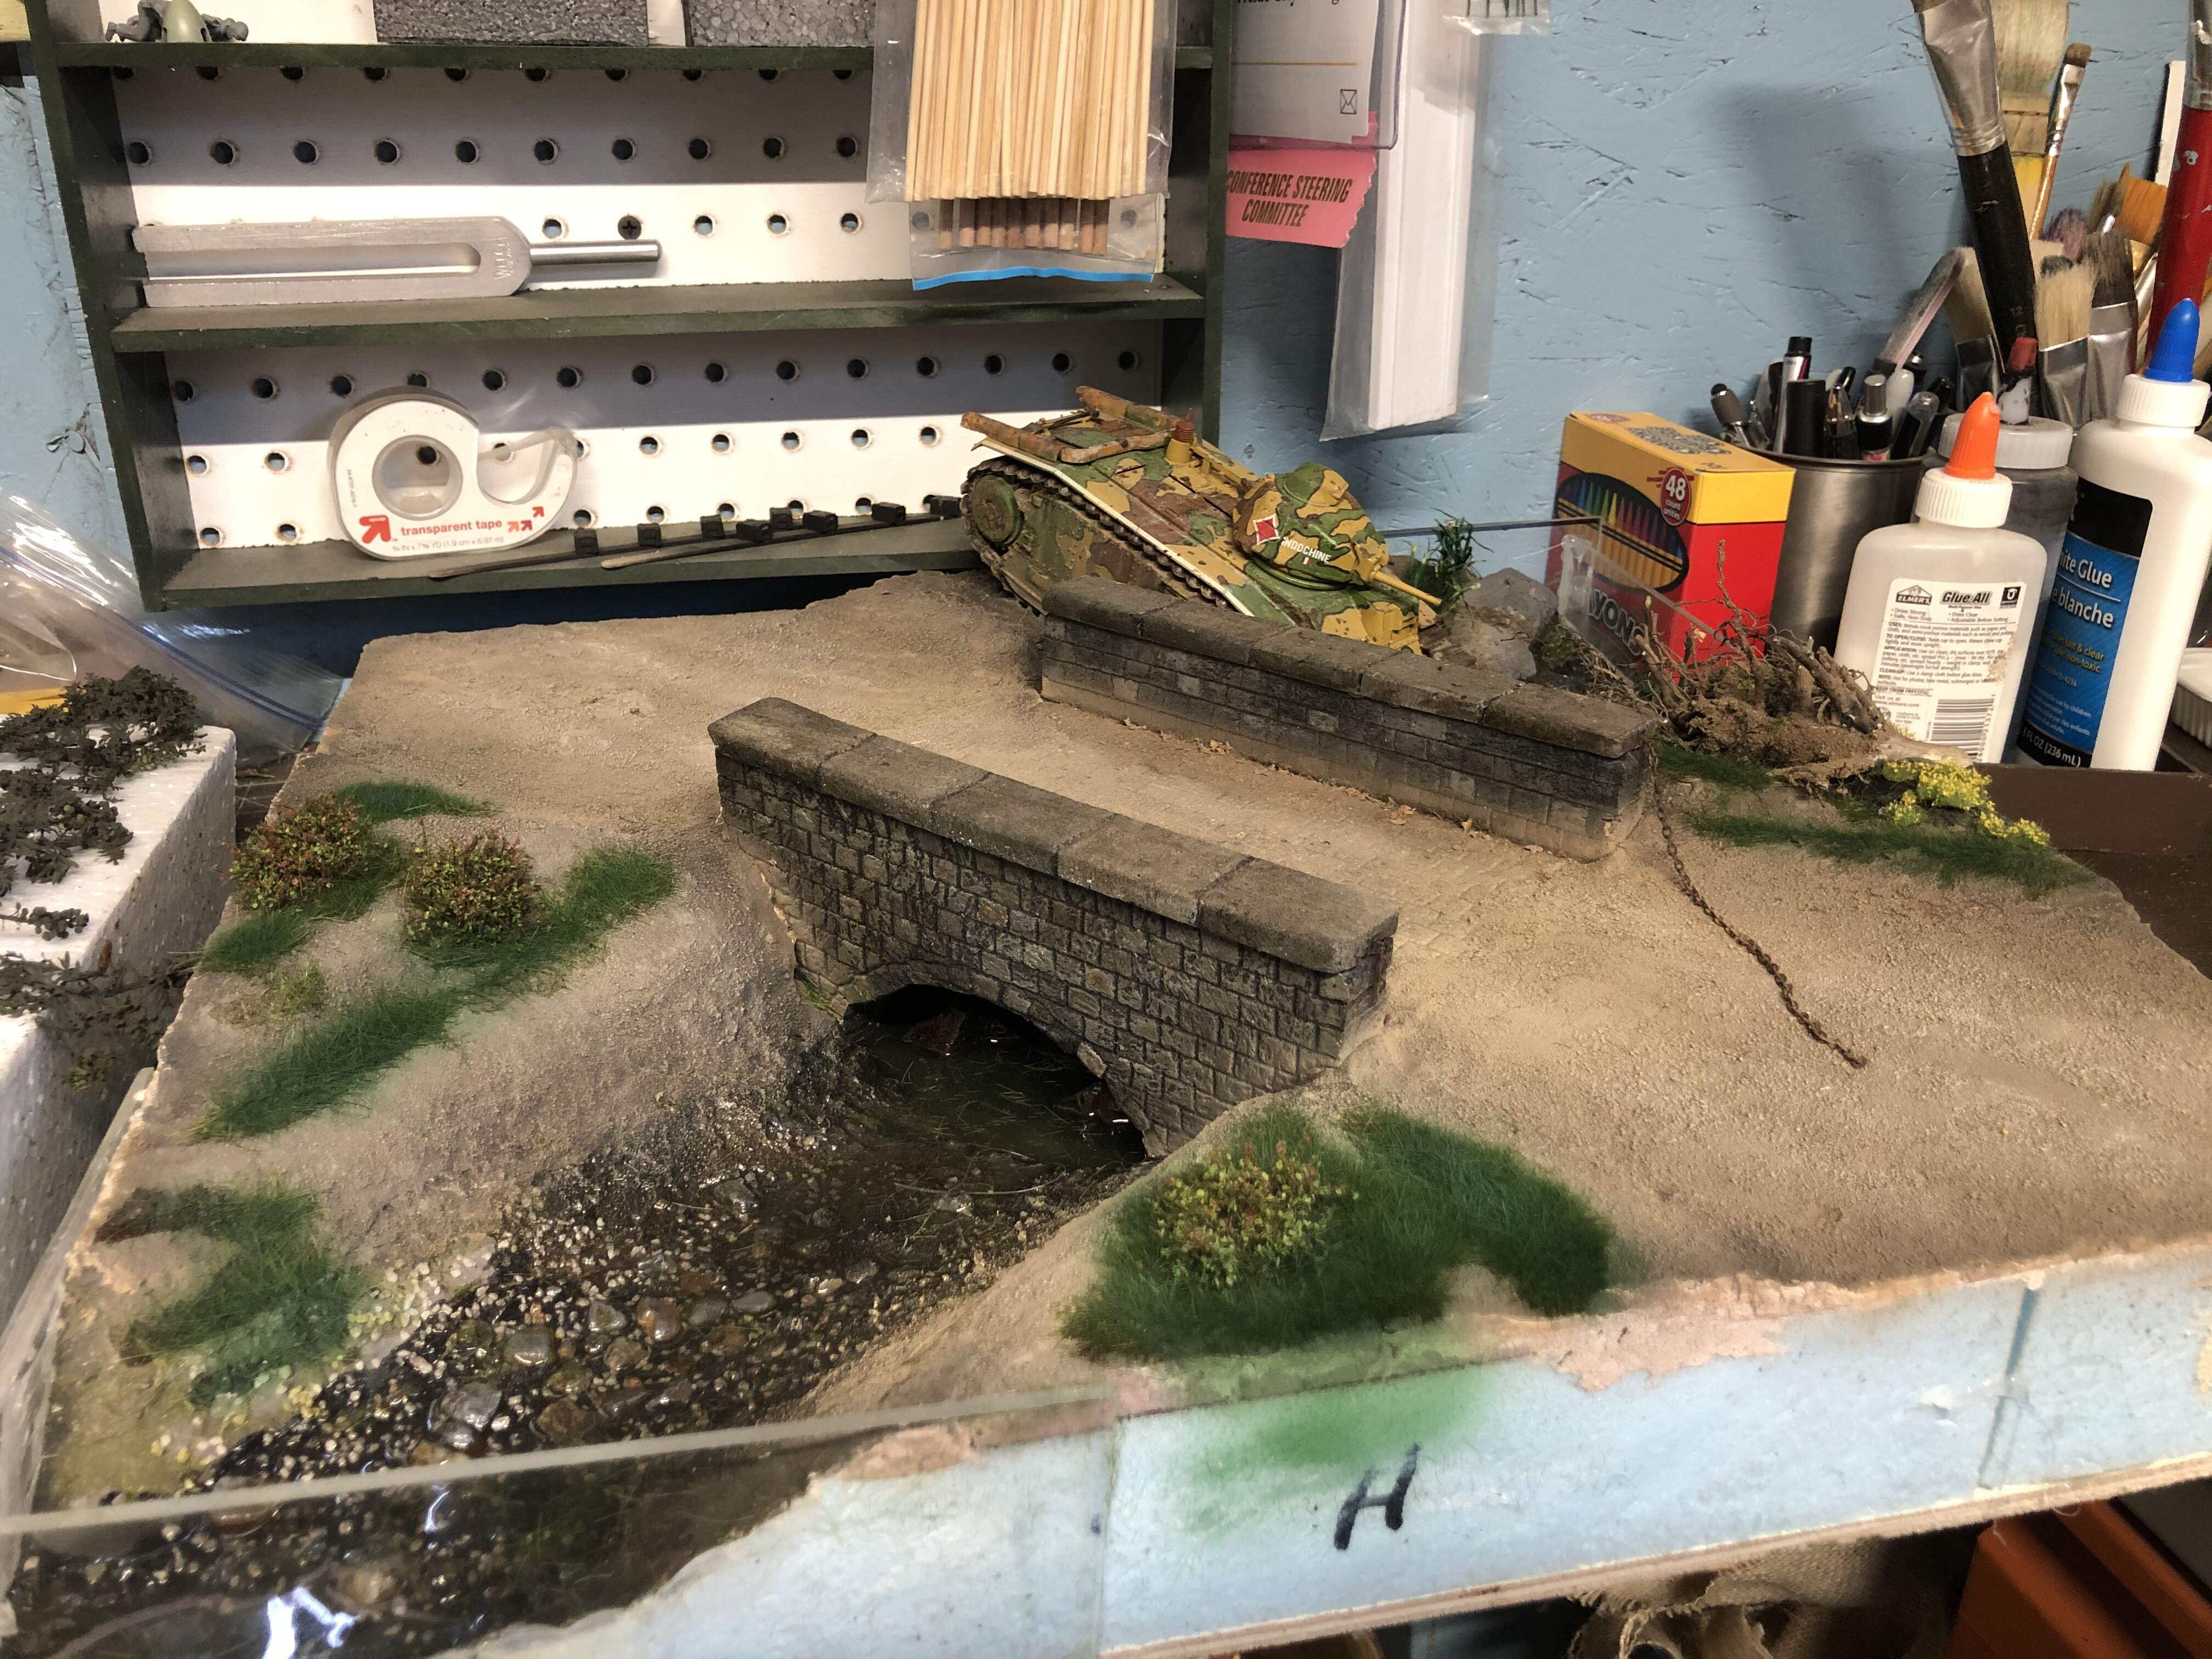
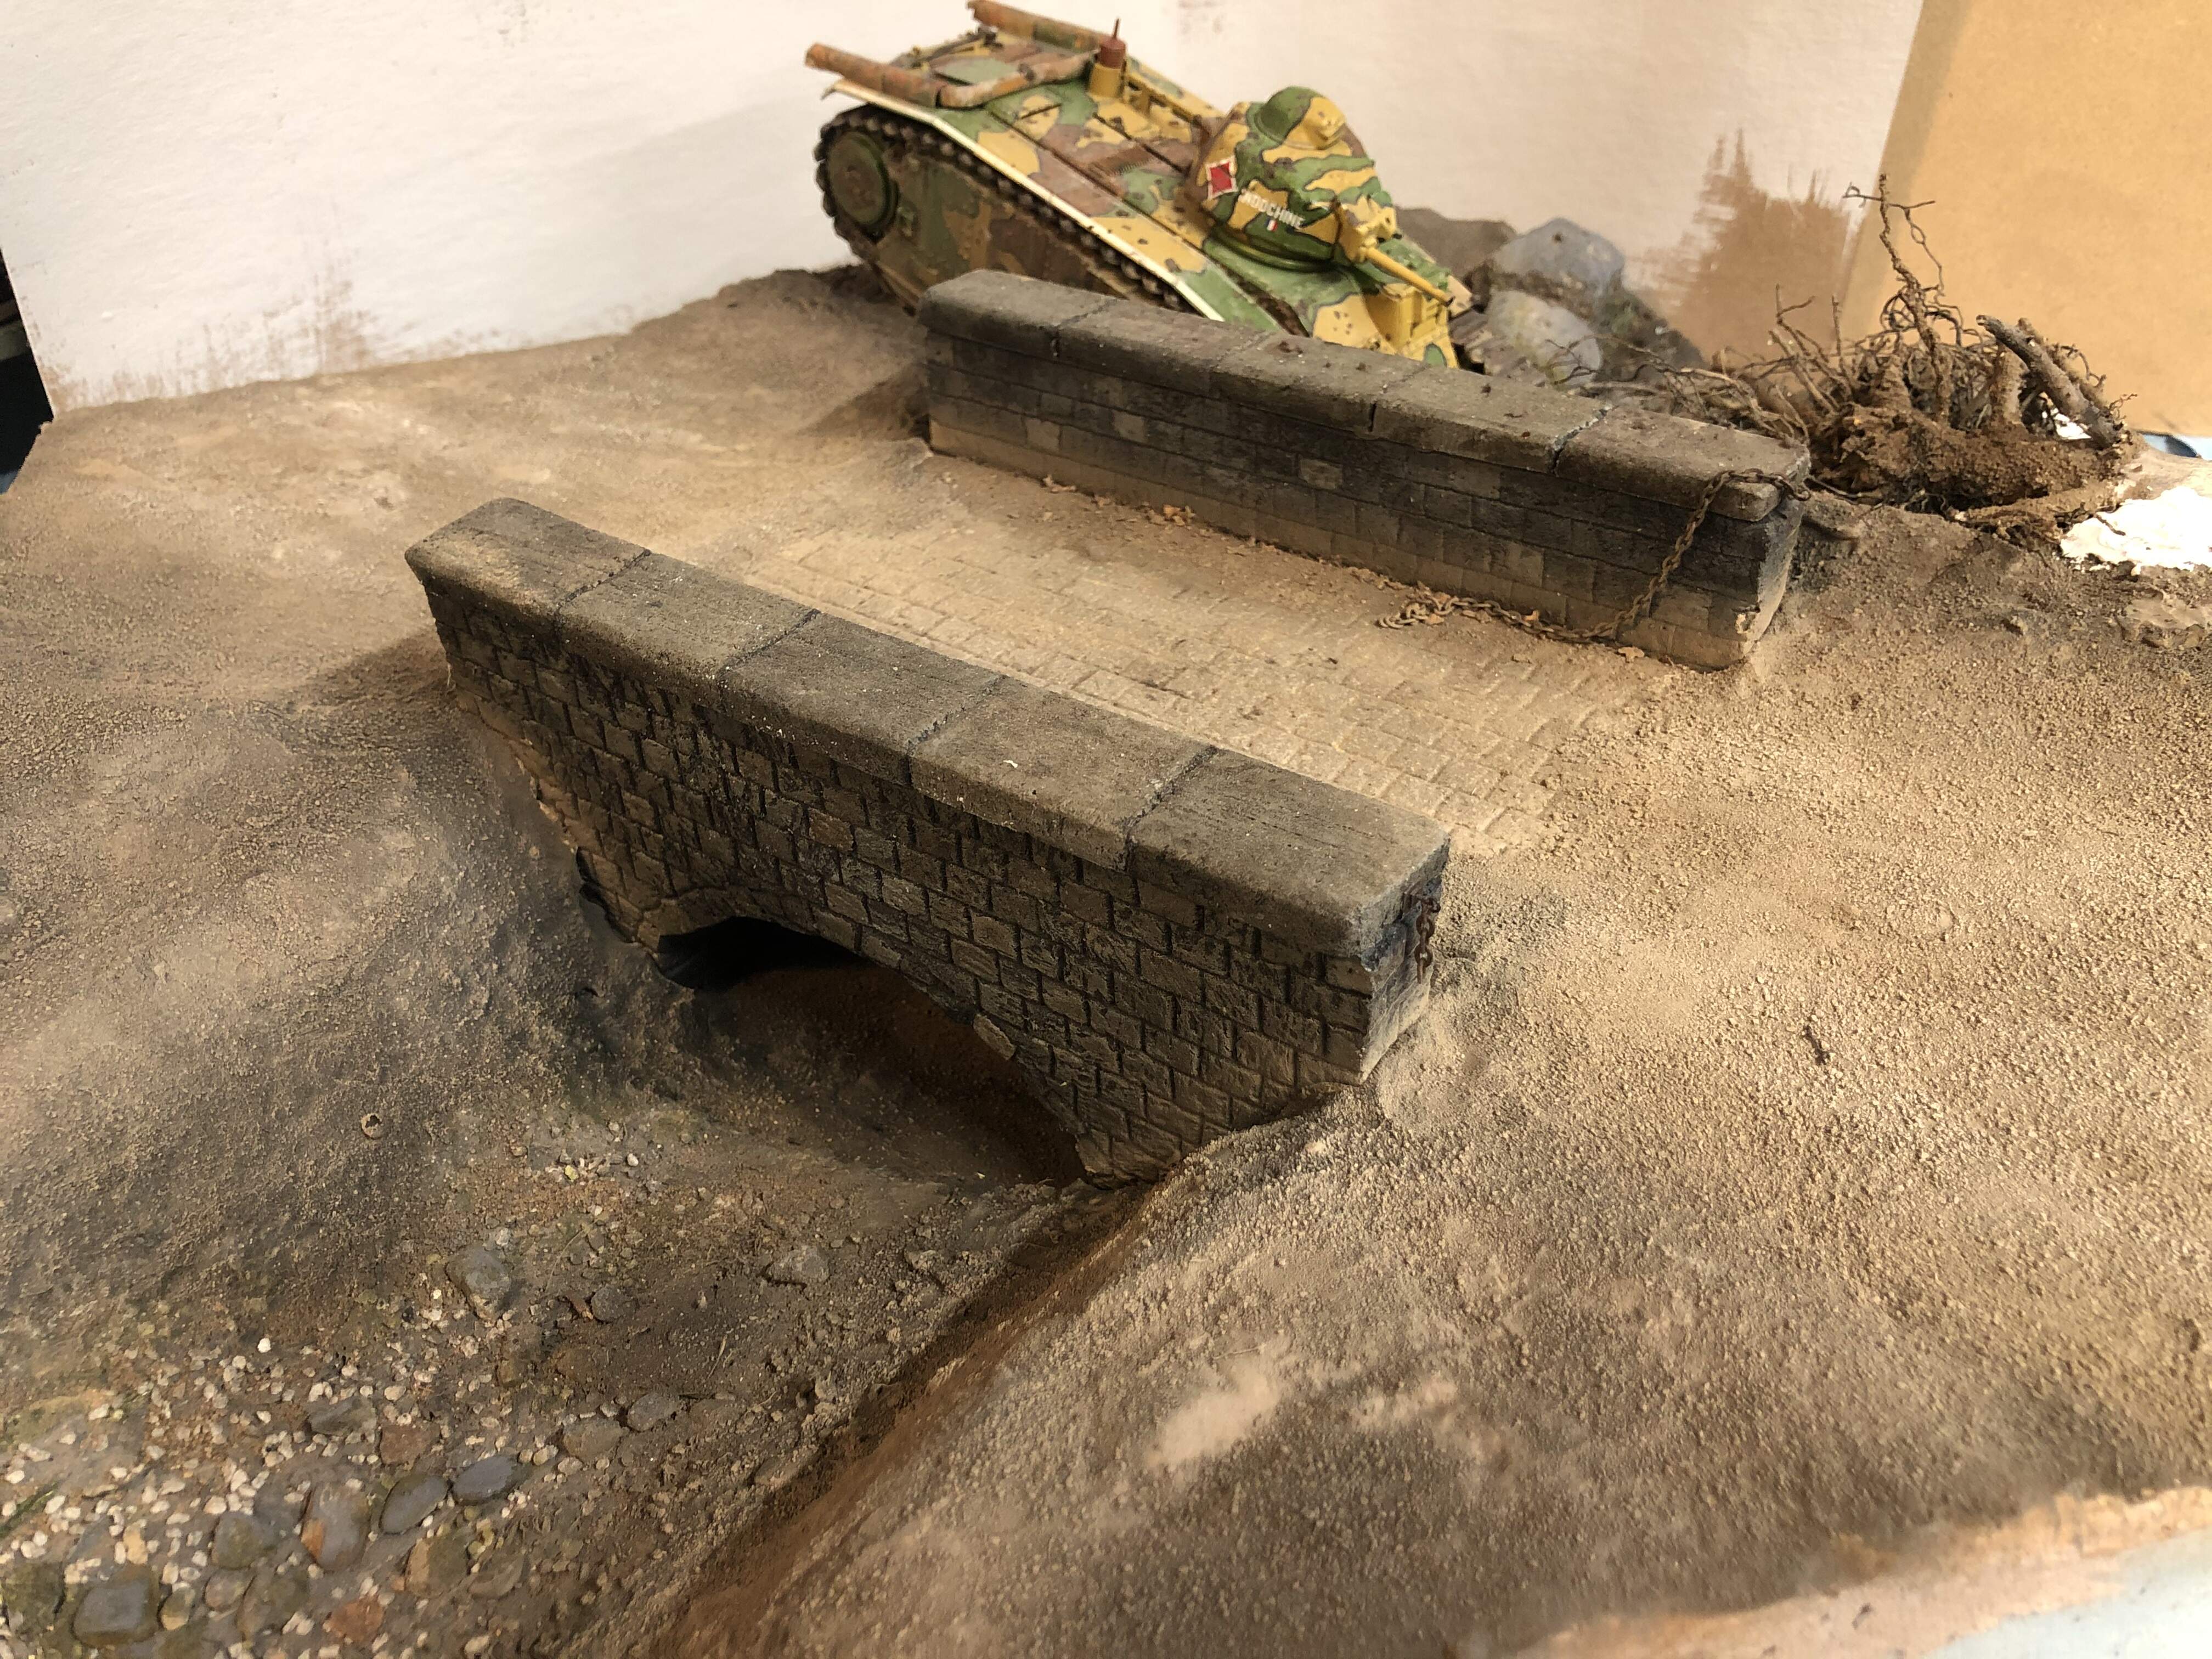
I’ve been working on this one for a while now and had originally posted a few photos in the old forums. Thought I would try the new photo features here on the new forums.
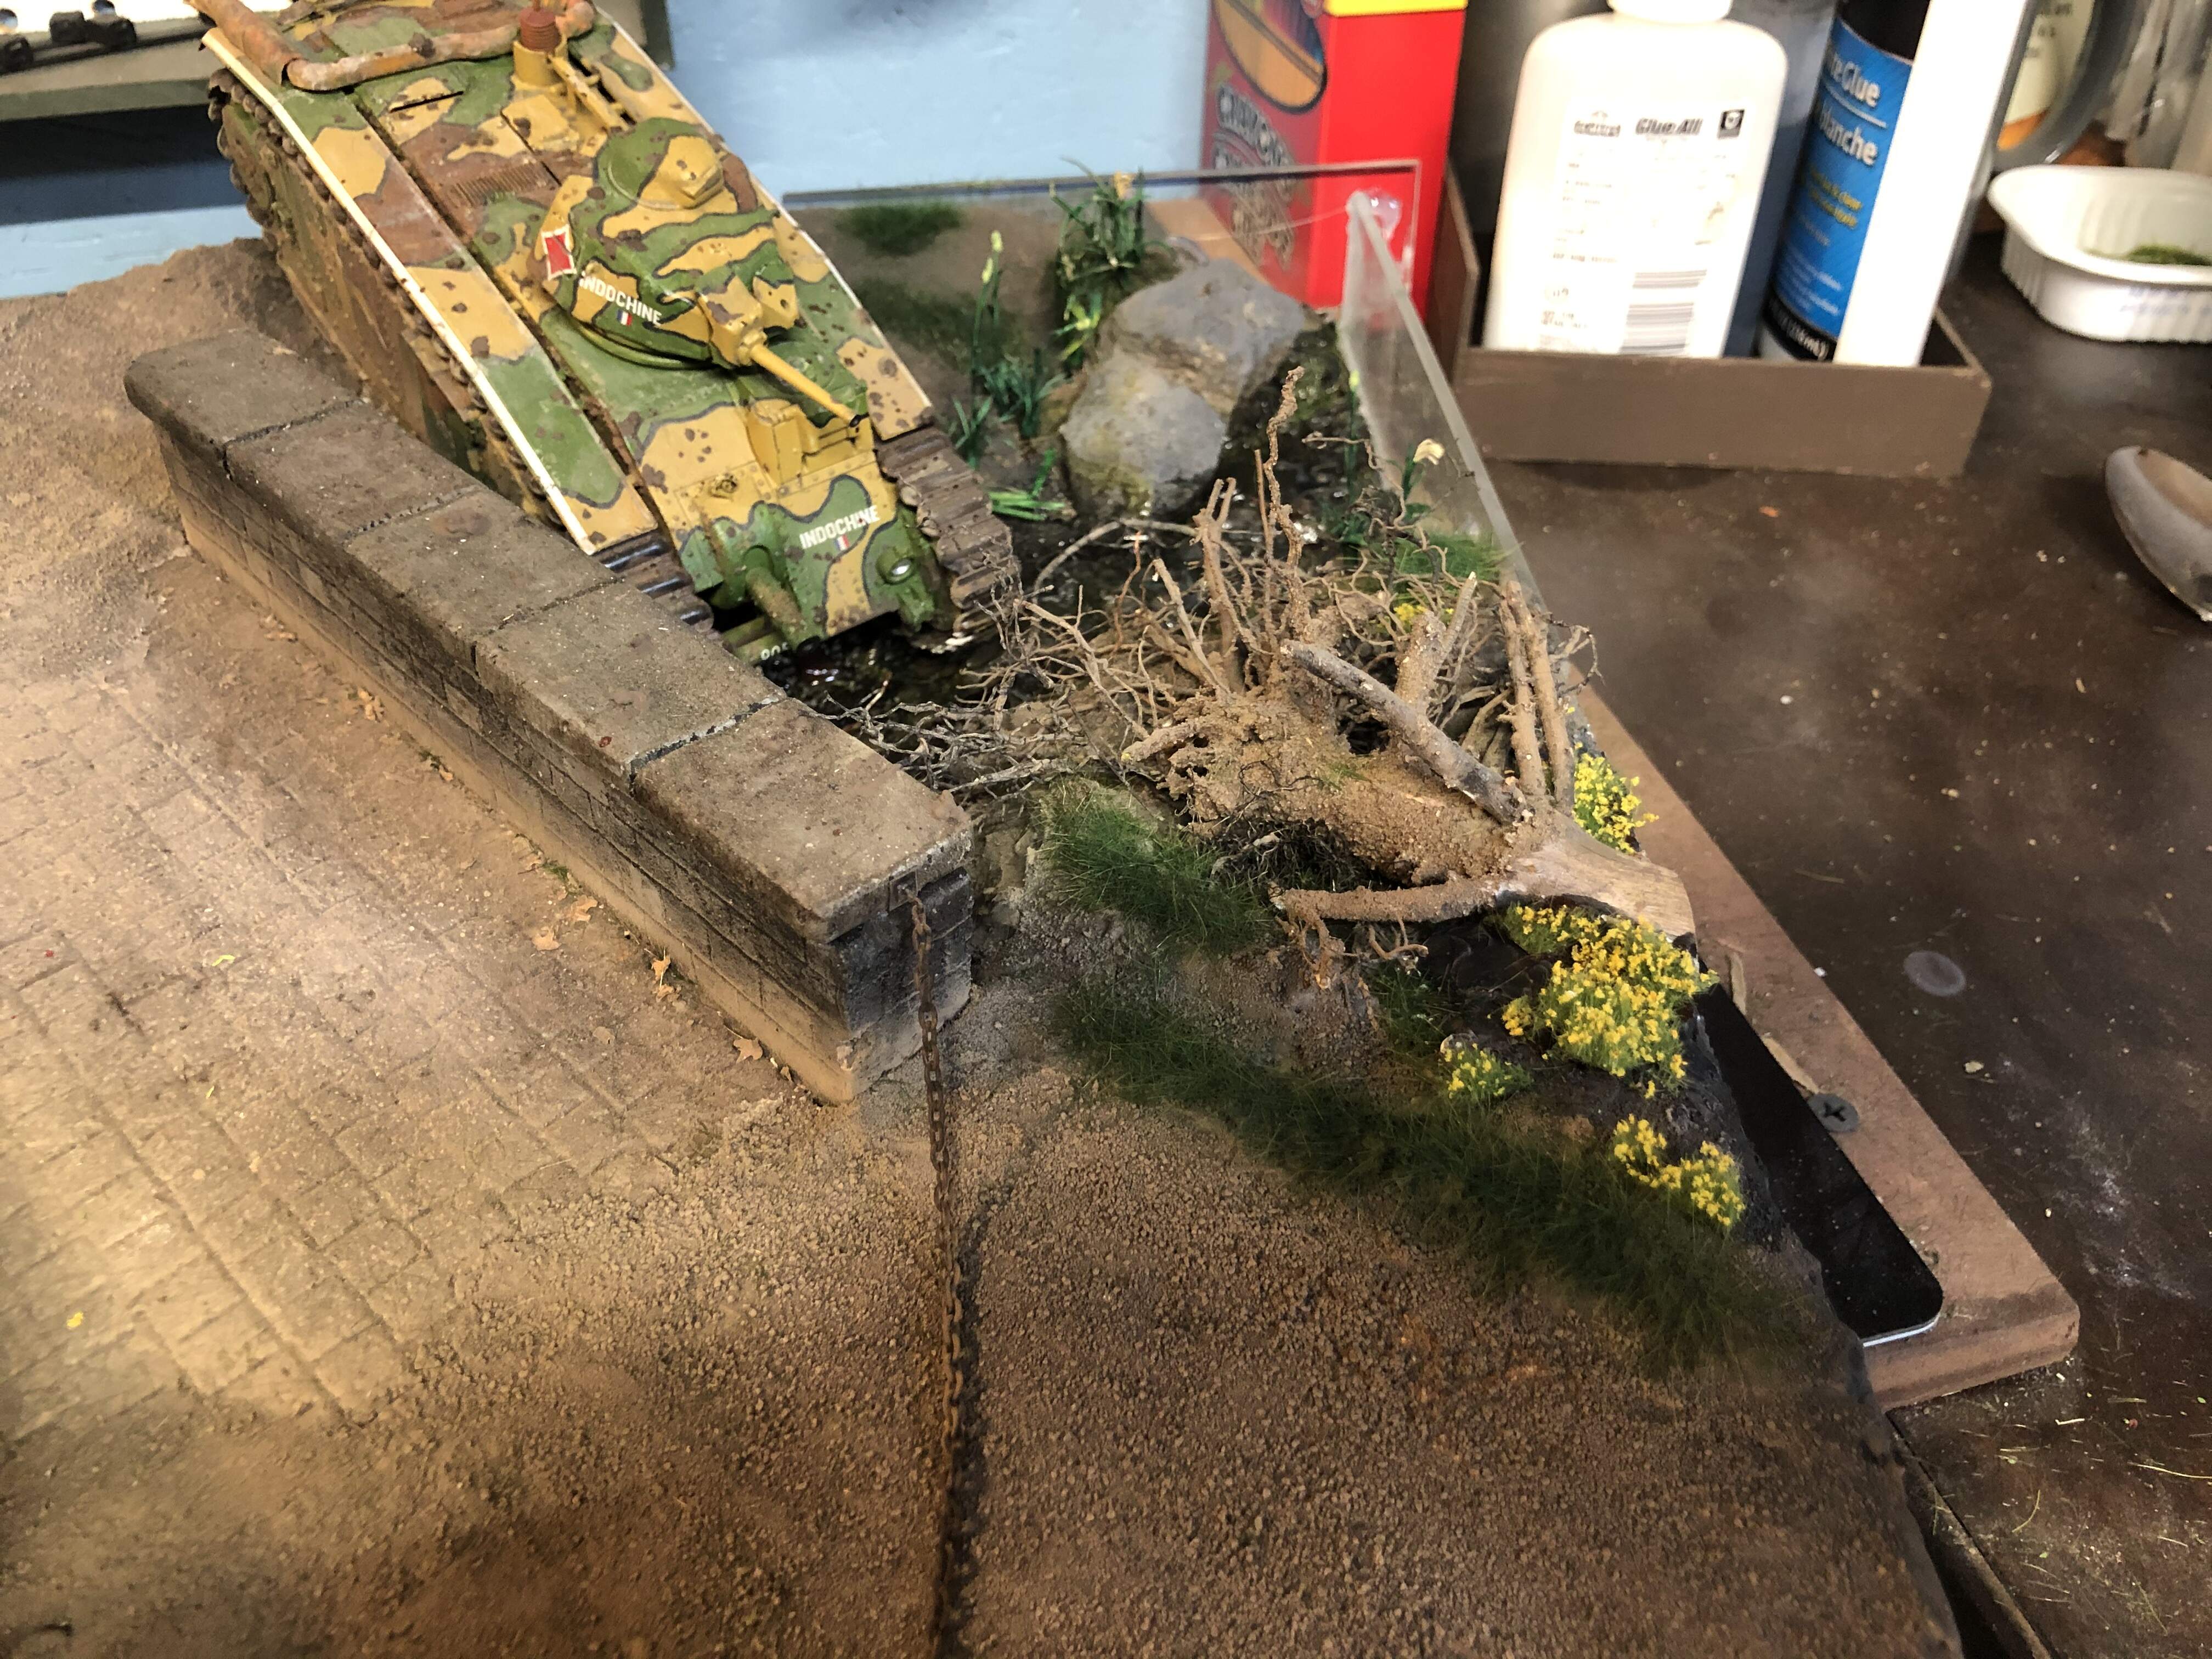
I have a Faun L900 with trailer hauling both a Panzer I and II with several crewman either helping or kibitzing the driver try to safely maneuver over the bridge. Hoping it warms up enough in the studio today to pour some resin for the water in the stream.
Any criticism welcome; constructive preferred but, hey, it’s your dime!
Cheers,
Rick
.
14 Likes
Looks great. What materials did you use to make the bridge?
What can be seen looks good so far. I’d like to see an overall shot and one from the side with the overgrowth along the bank.
Cheers,
C.
P.S. Welcome to the new forum
Tank,
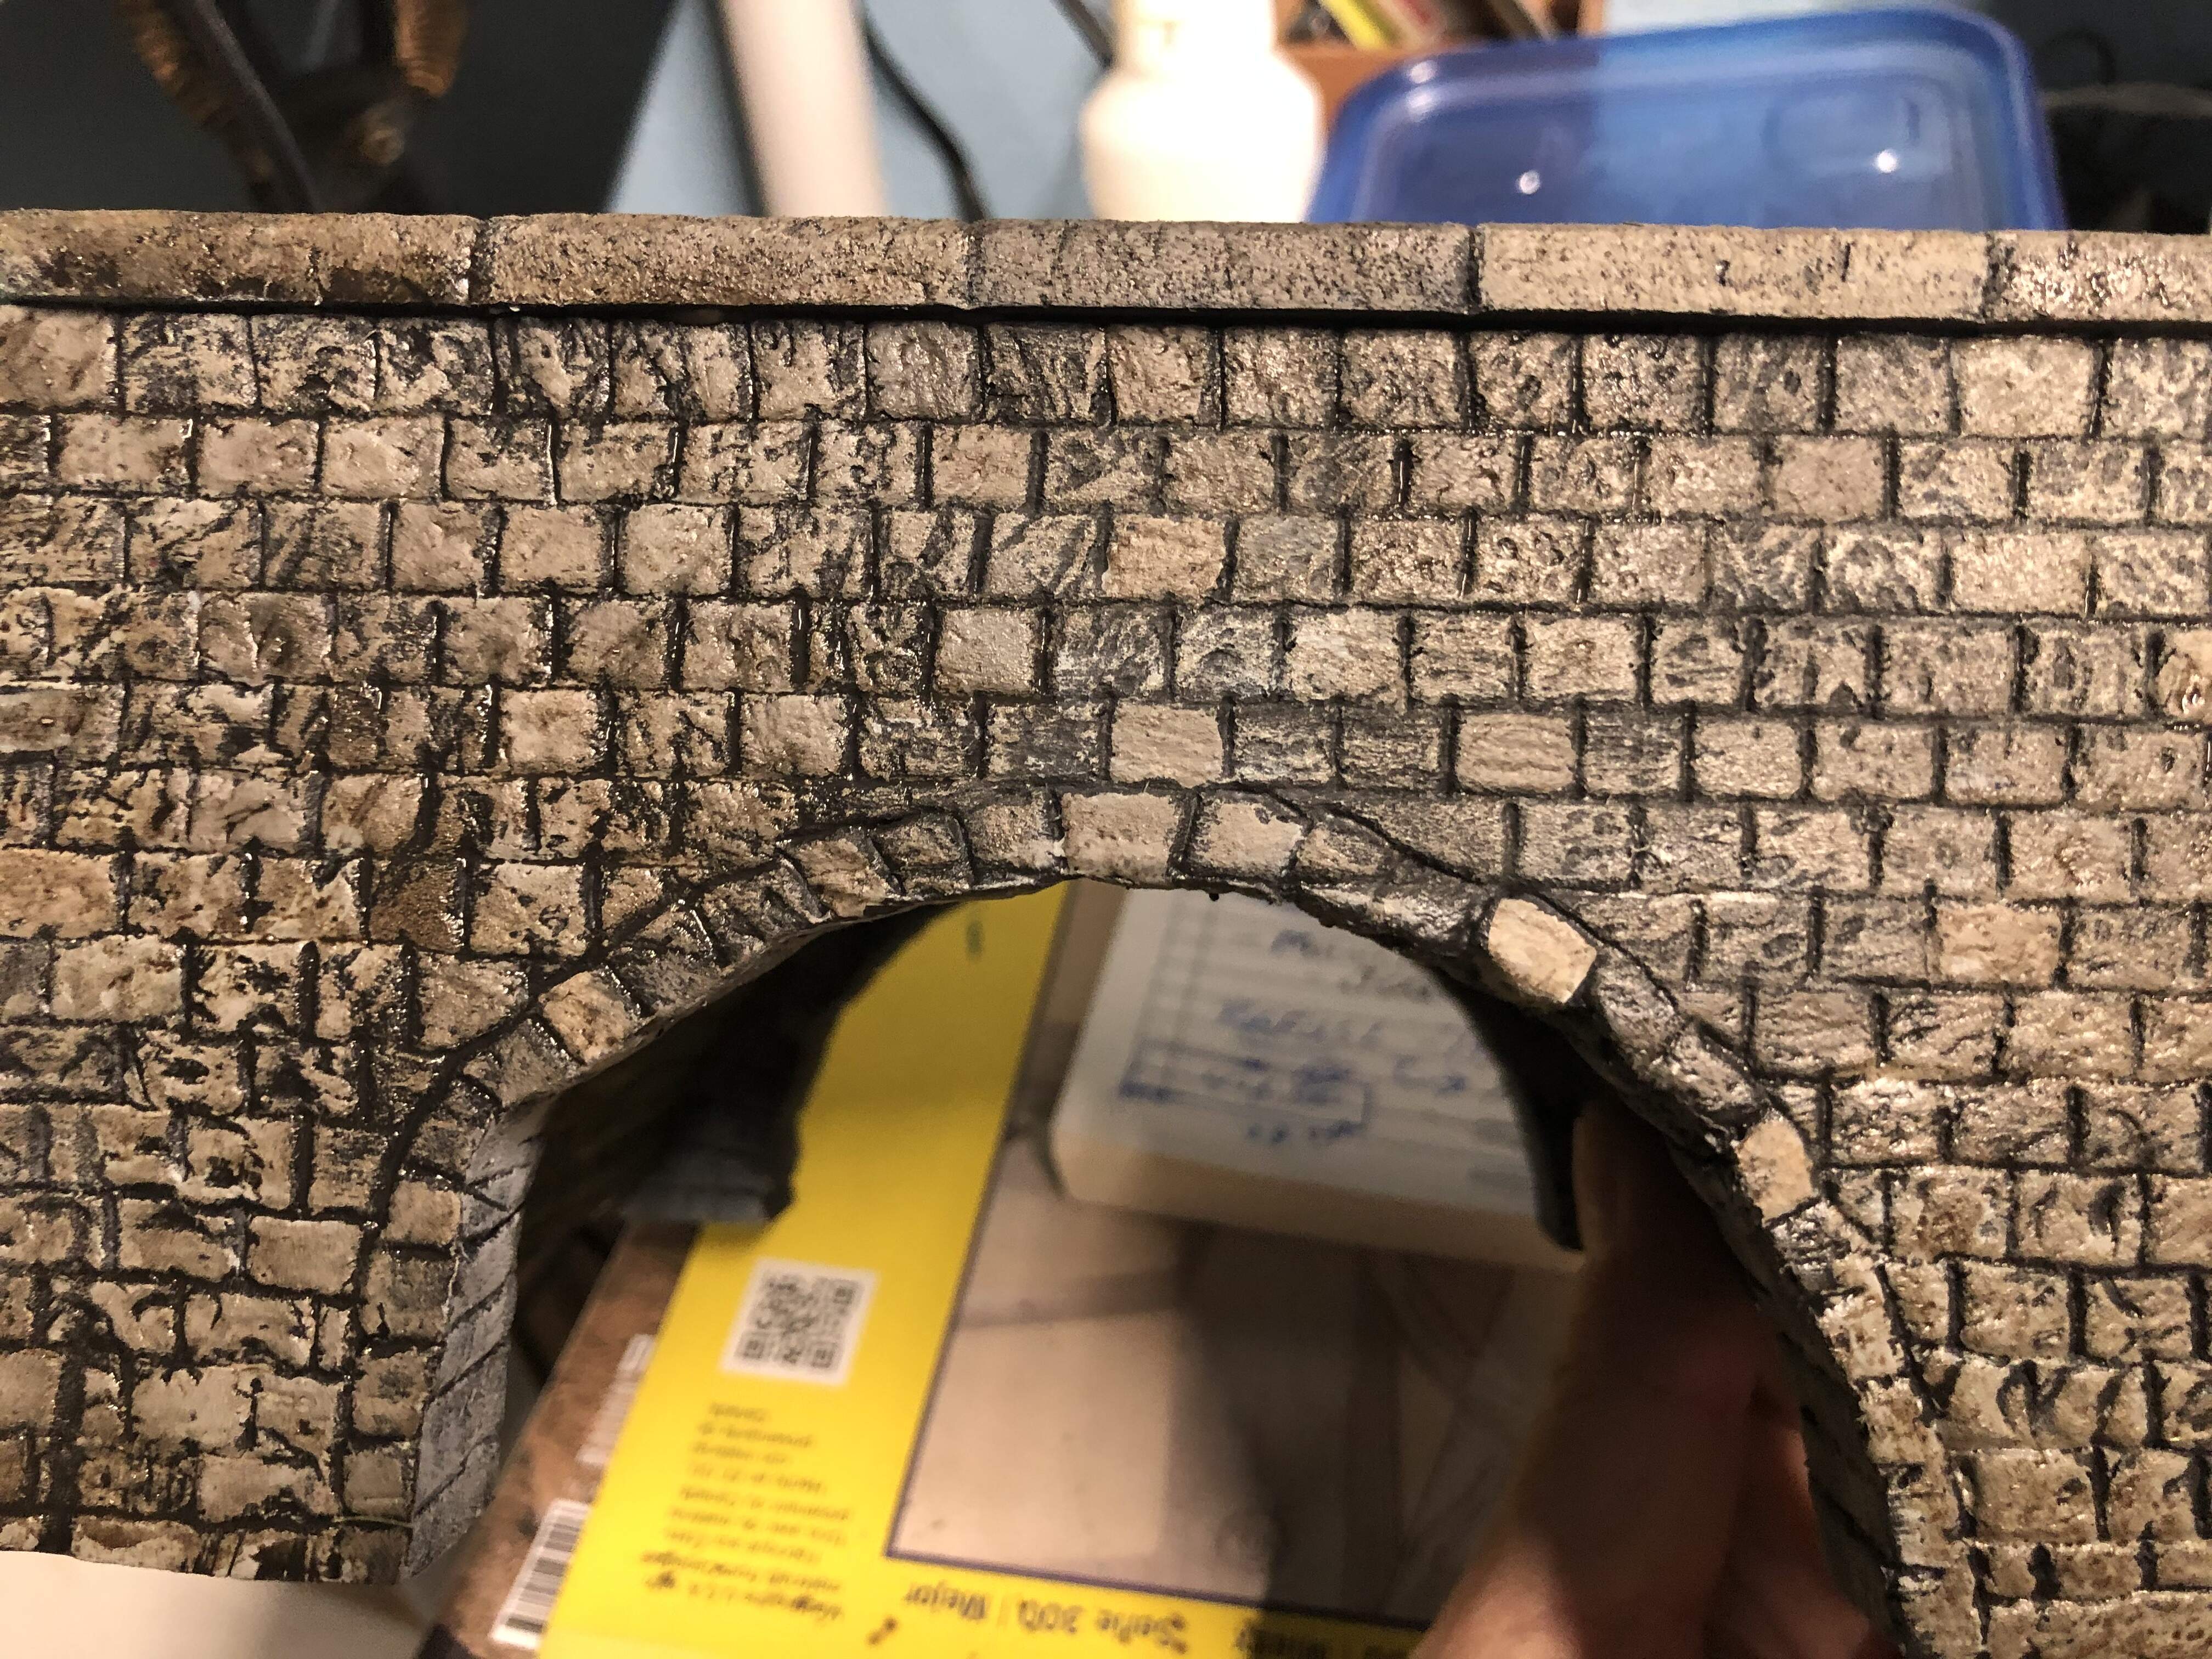
The bridge is made from the blue foam. I’ve been using it for a couple of years now, couldn’t live without it. Super easy to work with. I carve it with a few dental probes and such but you could use a pencil as well. After that I use those test bottles from the hardware store of house paint that I thin down to seal it all. After that dries you can paint and weather away to your heart’s content.
](upload://sqjZoIMfpjuCLIy9I4tJQDekXWy.jpeg)
4 Likes
Charles,
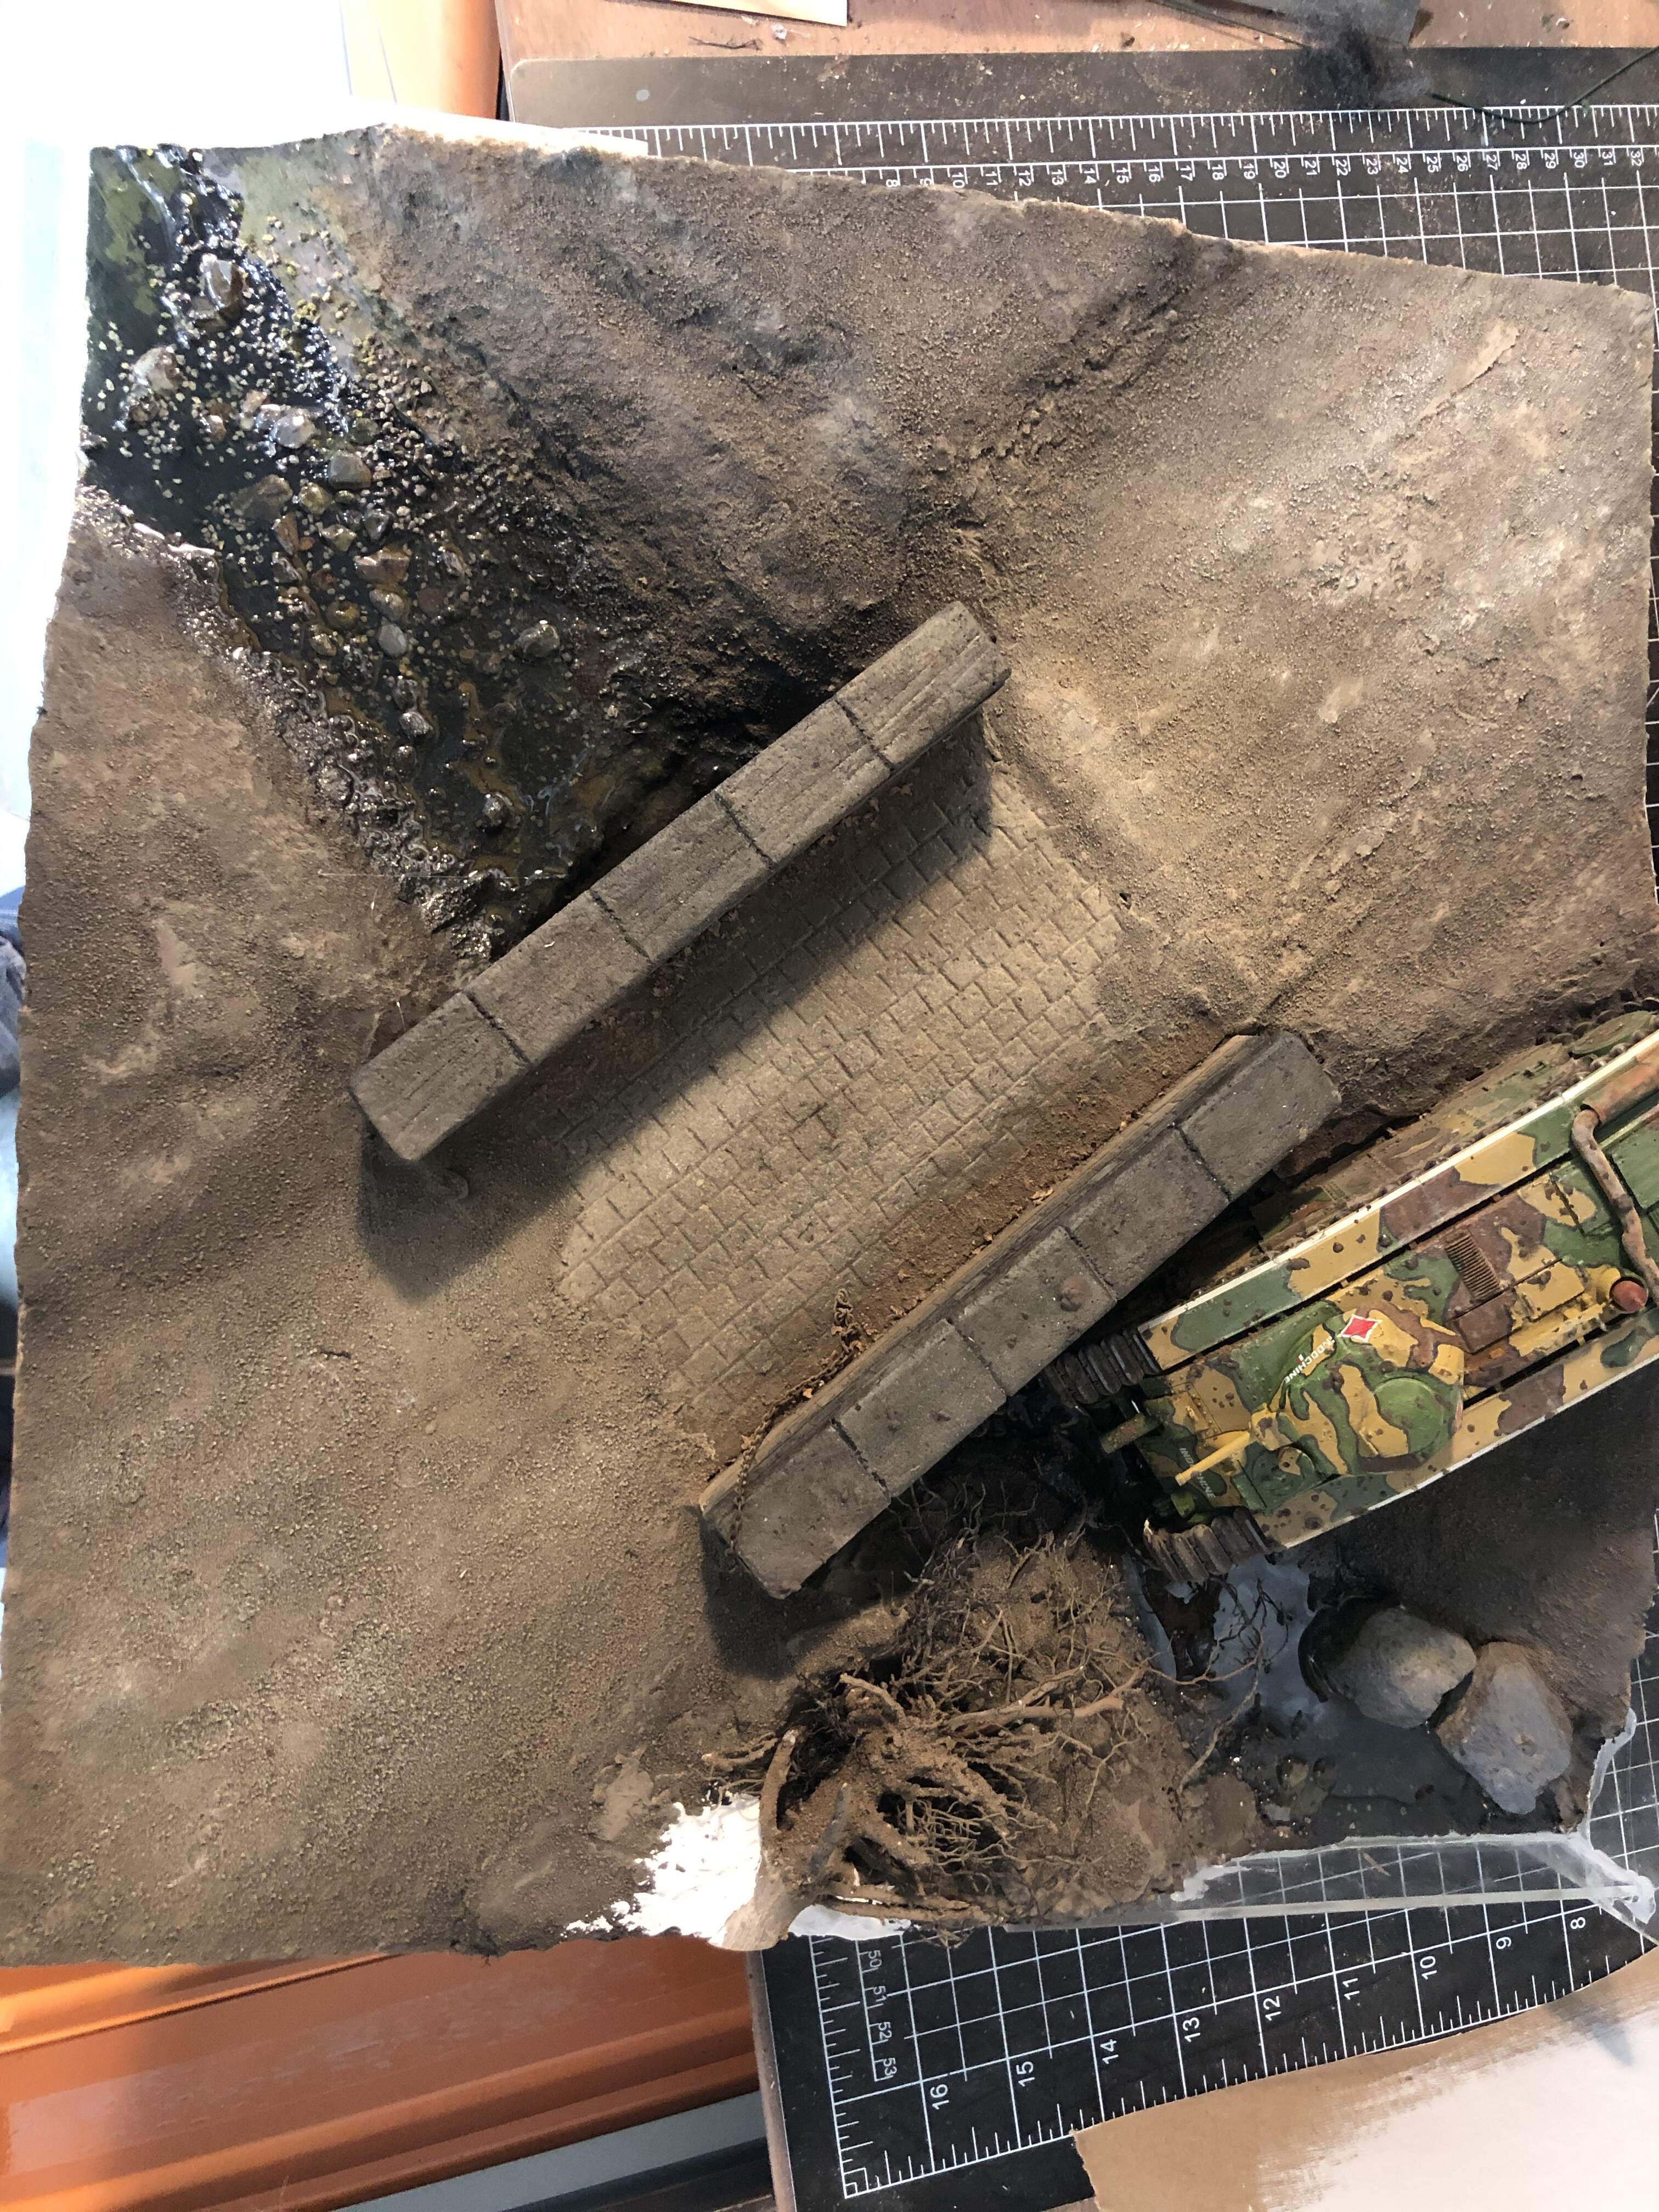
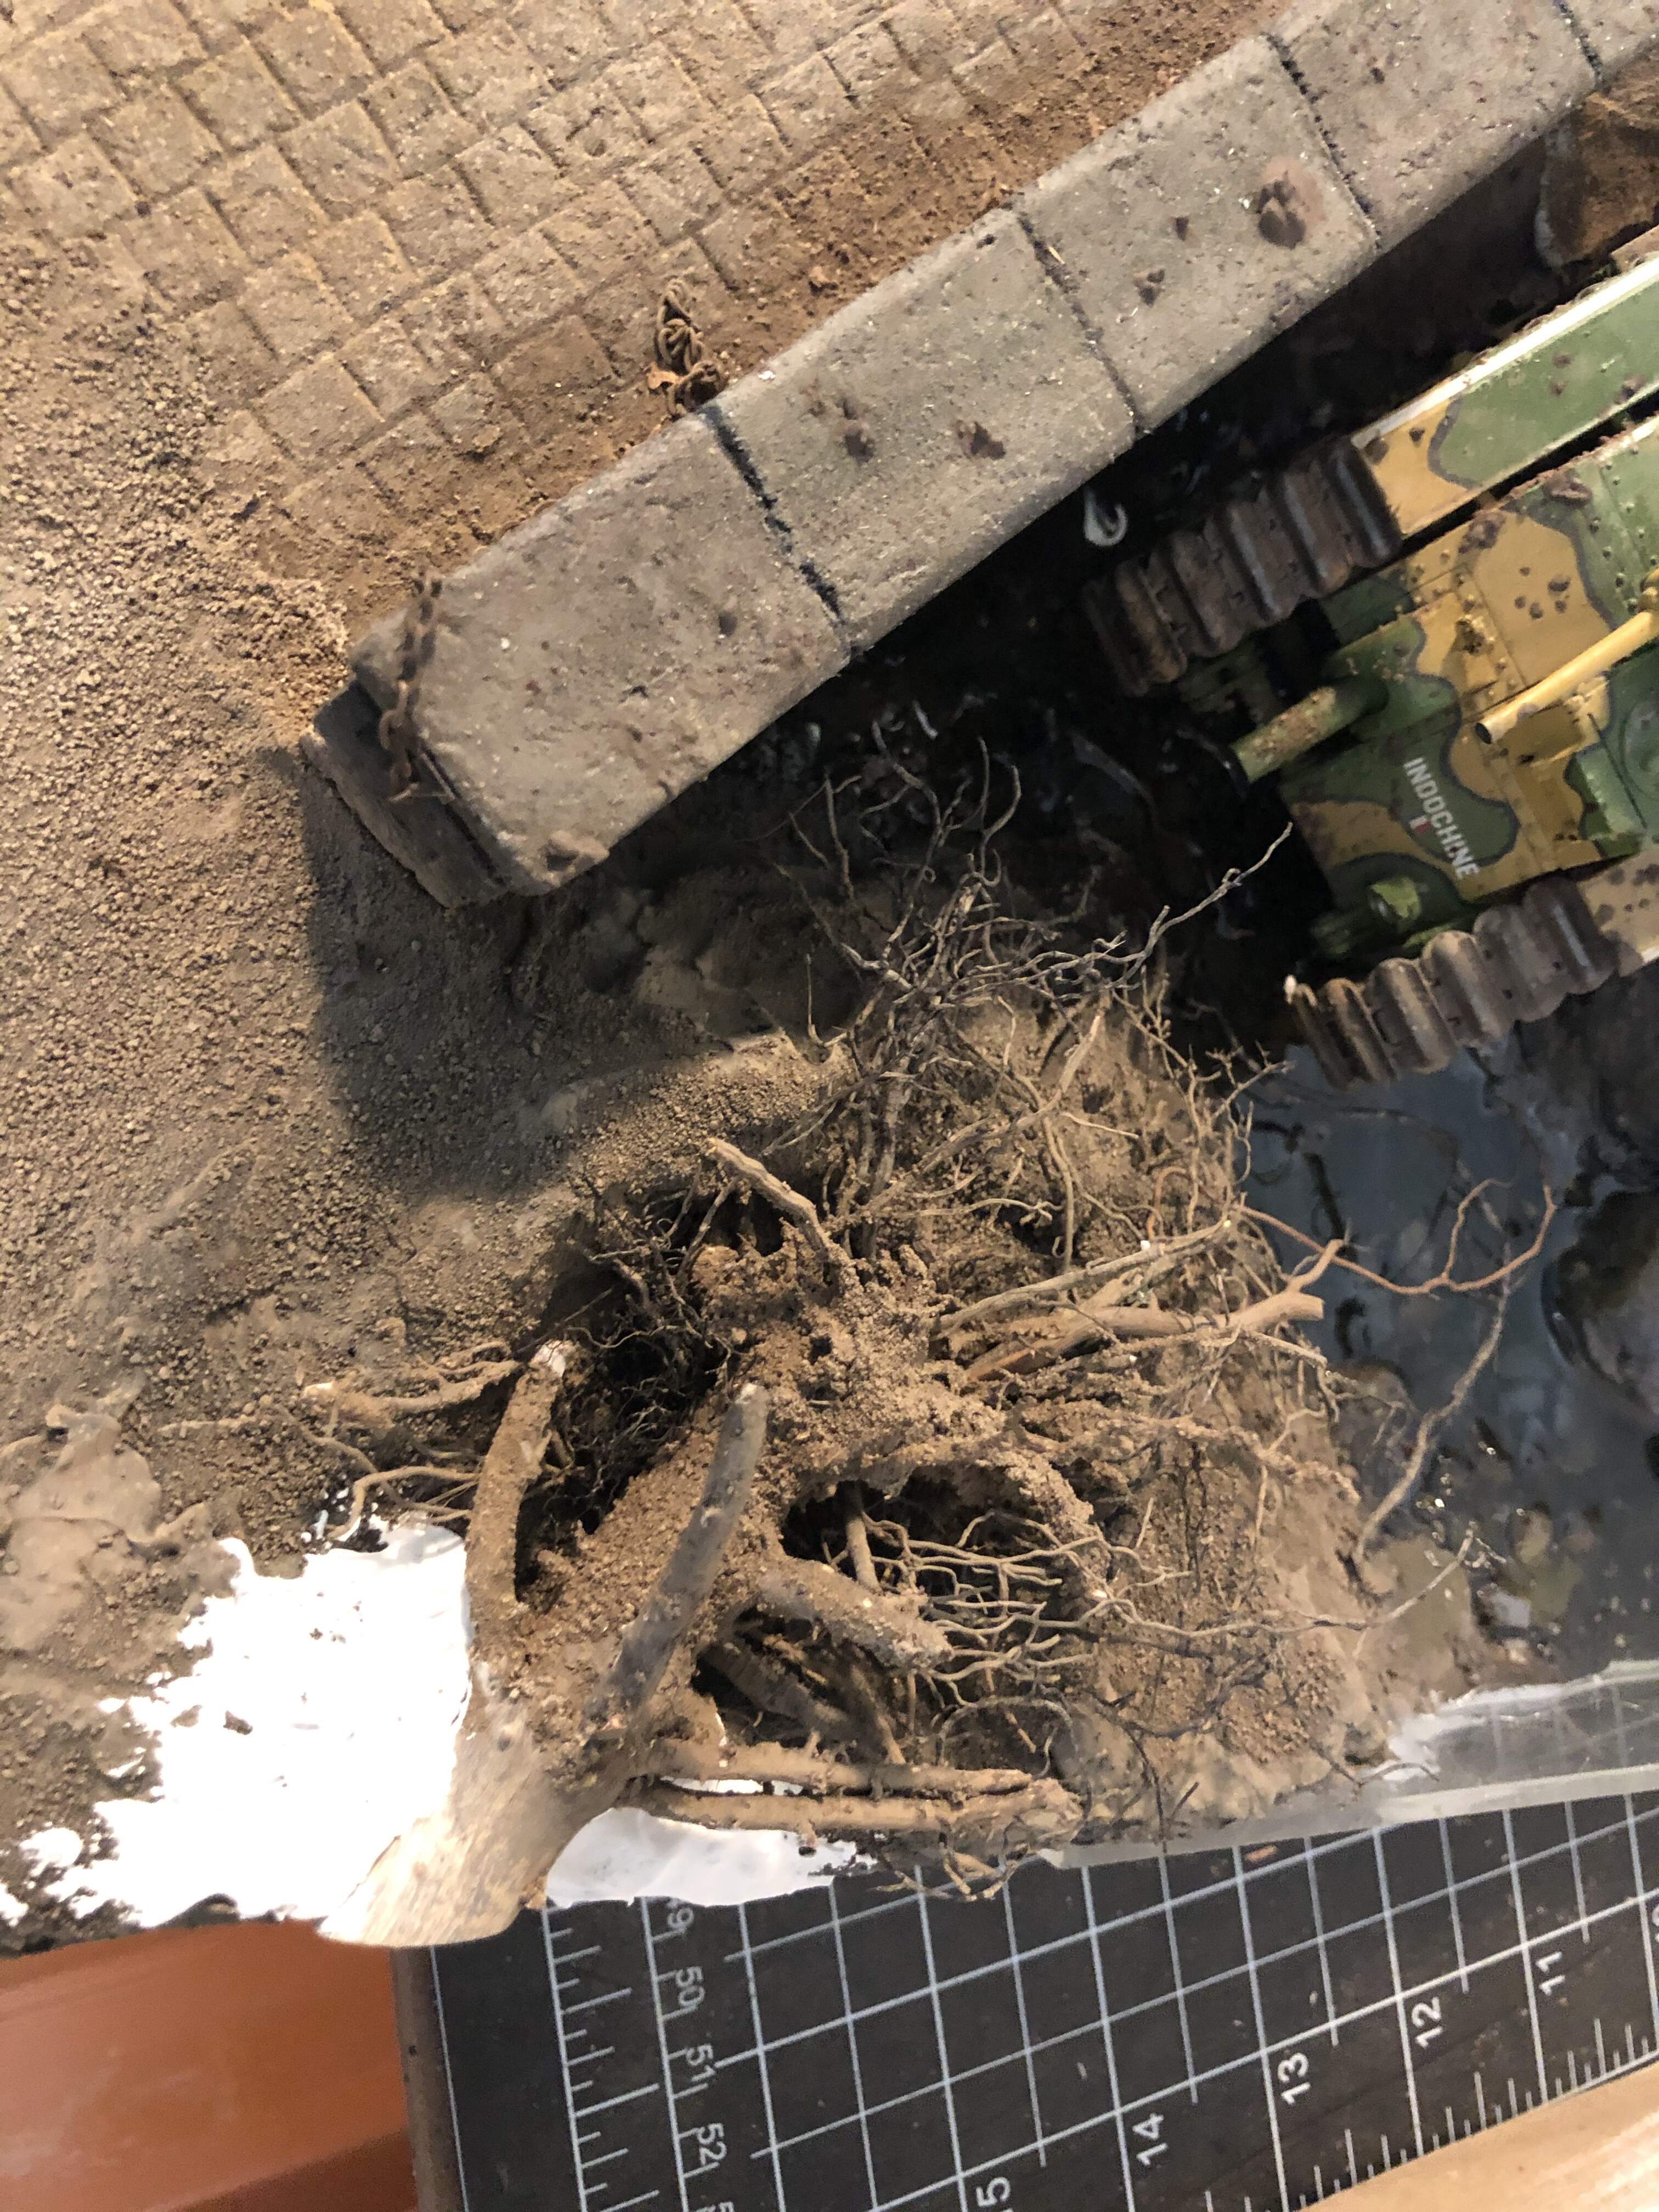
Here are a few pics I took that might give you a better perspective. Thanks!
Cheers,
Rick
5 Likes
Thanks for posting these Rick. It looks really good. Can’t wait to see it with your vehicles and figures on it.
Cheers,
C.
Nice start man , looking good !!
Looks great, thanks for the information.
I seconded @Johnnych01 comments about a SBS. He has a 1/72 Diorama campaign starting very soon so it will be handy.
John,
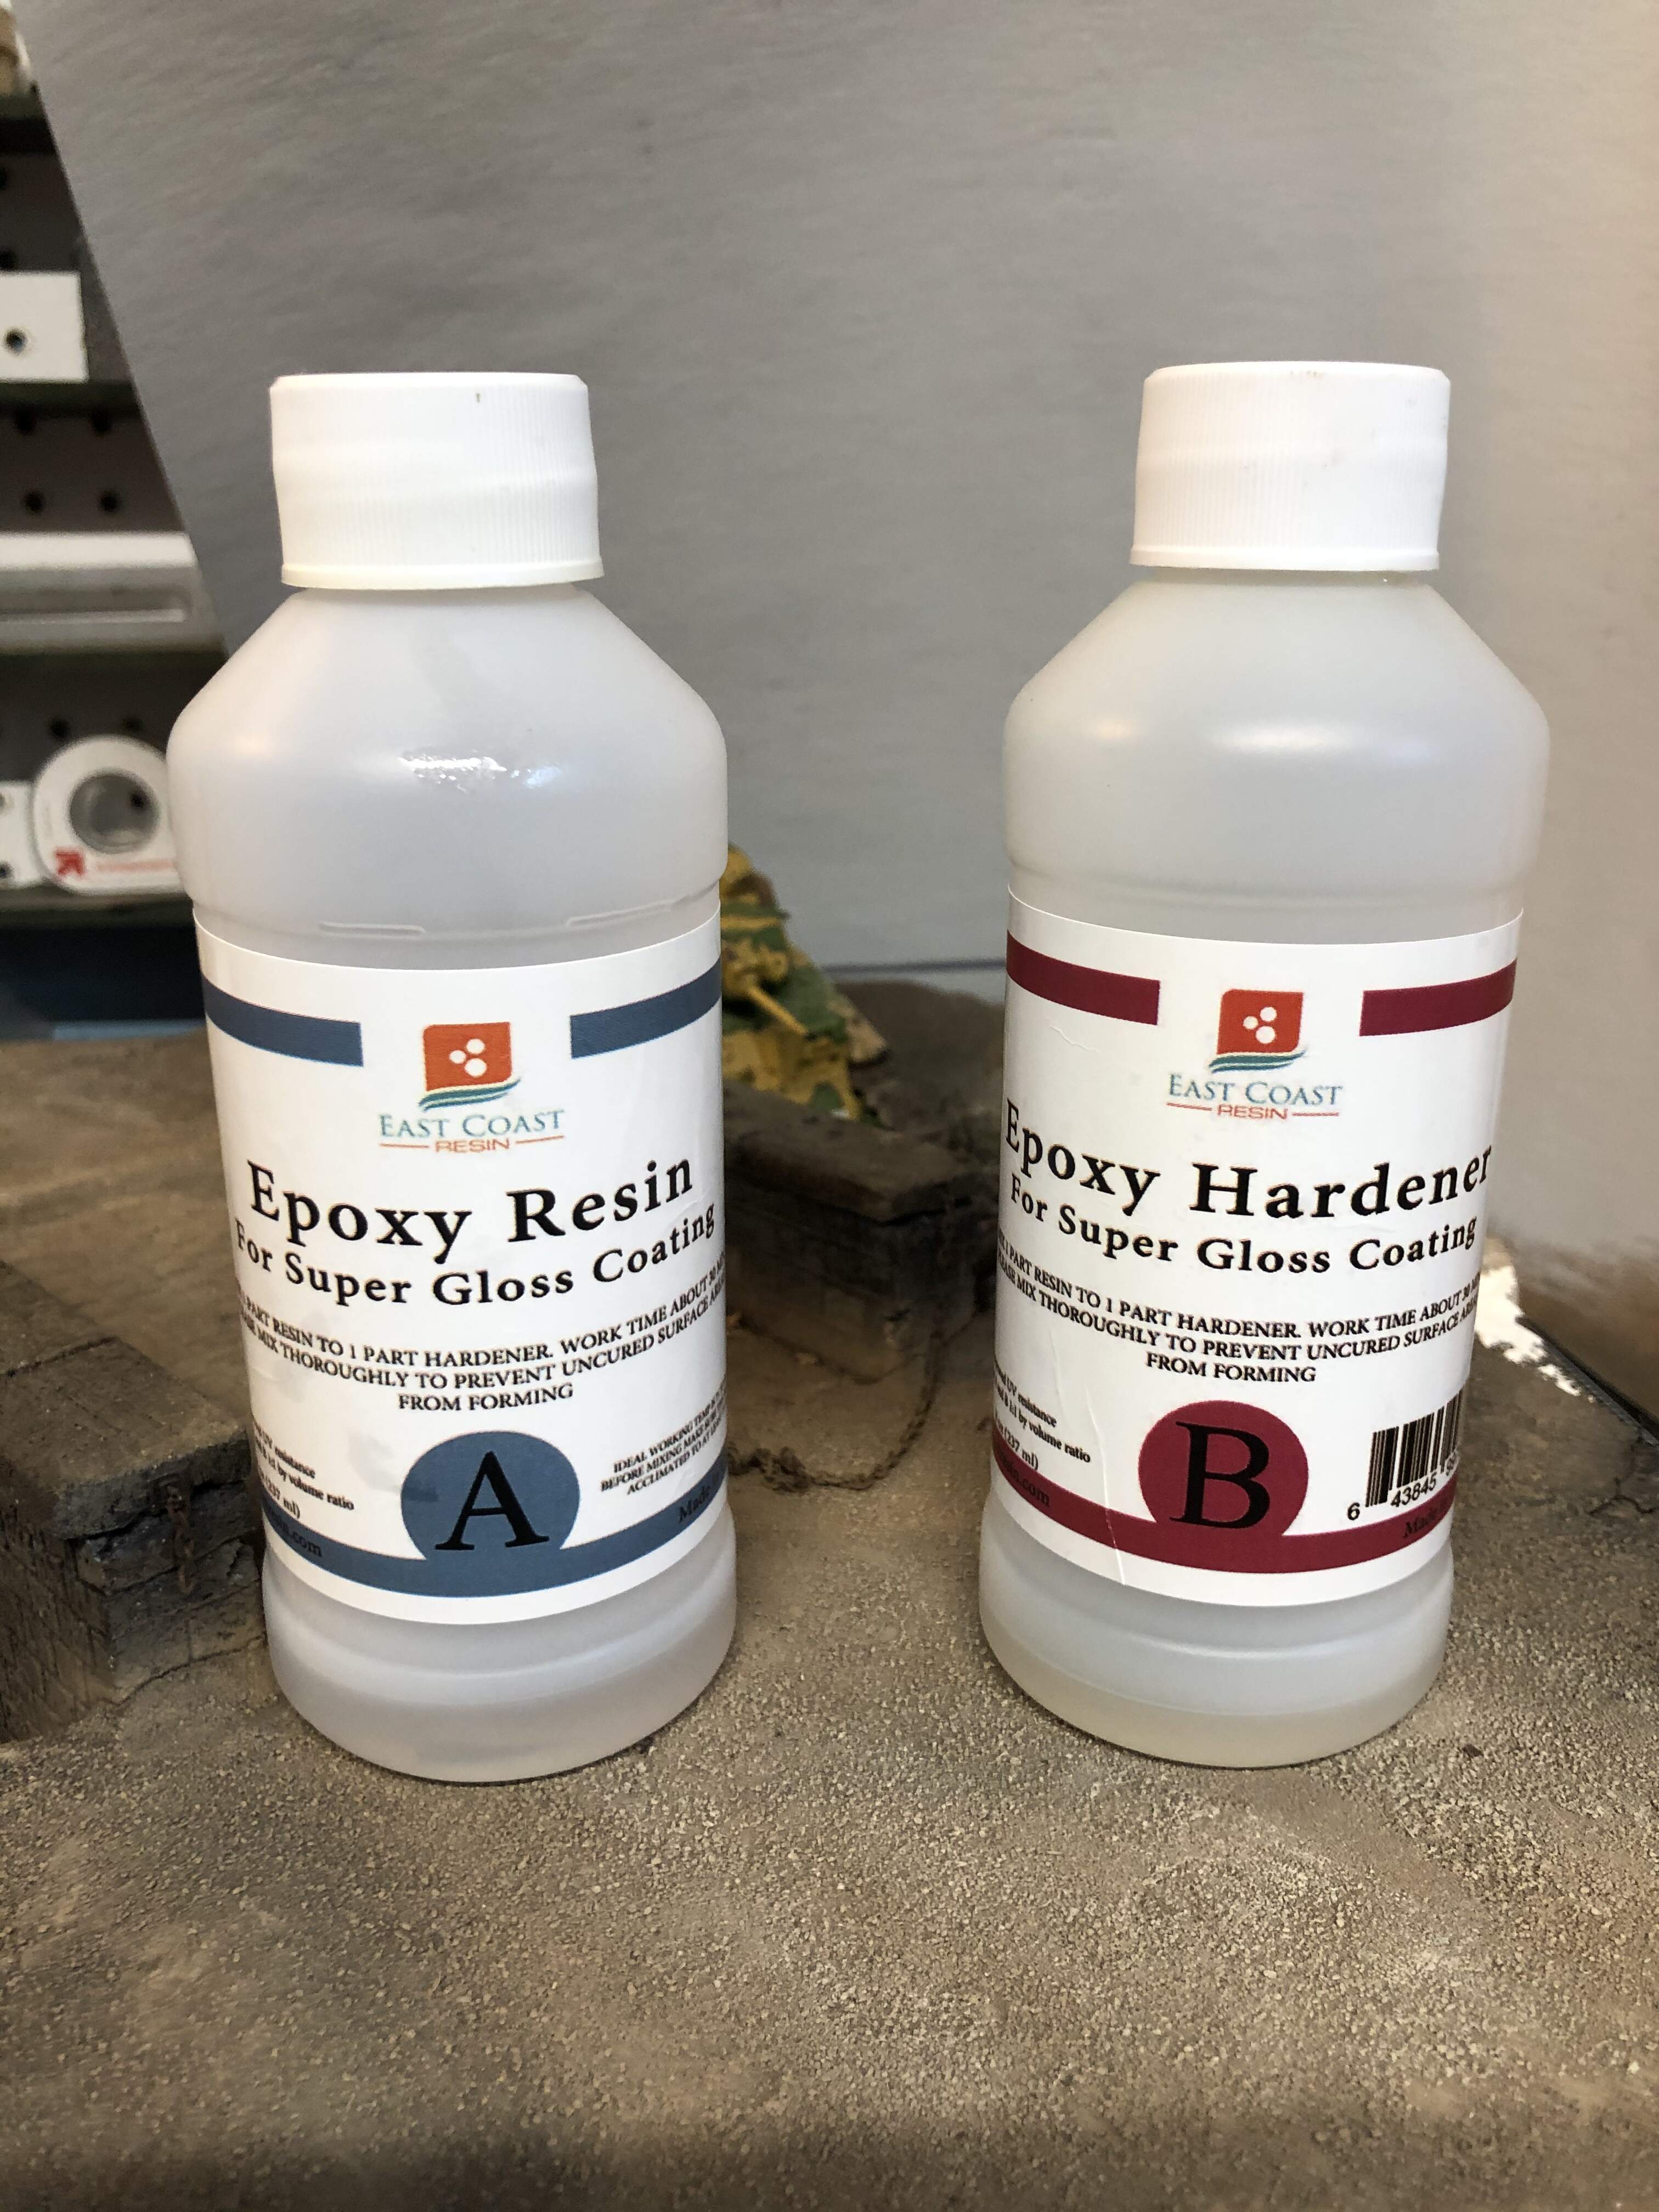
Thanks for your comments. pouring the resin almost couldn’t be easier. For years I was really intimidated by the idea thinking I needed some kind of chemist grade scale to carefully measure out exact amounts otherwise the whole thing would end up in the trash. I couldn’t have been farther from reality in my thinking. Earlier this year I finally took the plunge. I poked around a bit and these guys https://eastcoastresin.com/ at East Coast Resin seemed to have the best prices and simplest procedures for an excellent result. Pour X amount from bottle A and X amount from bottle B
into a plastic or glass container and mix thoroughly. I use a couple of paper cups to pour equal amounts of the A and B into and then mix them together in a larger plastic tub (I use a high tech cleaned out plastic soup container from the grocery store).
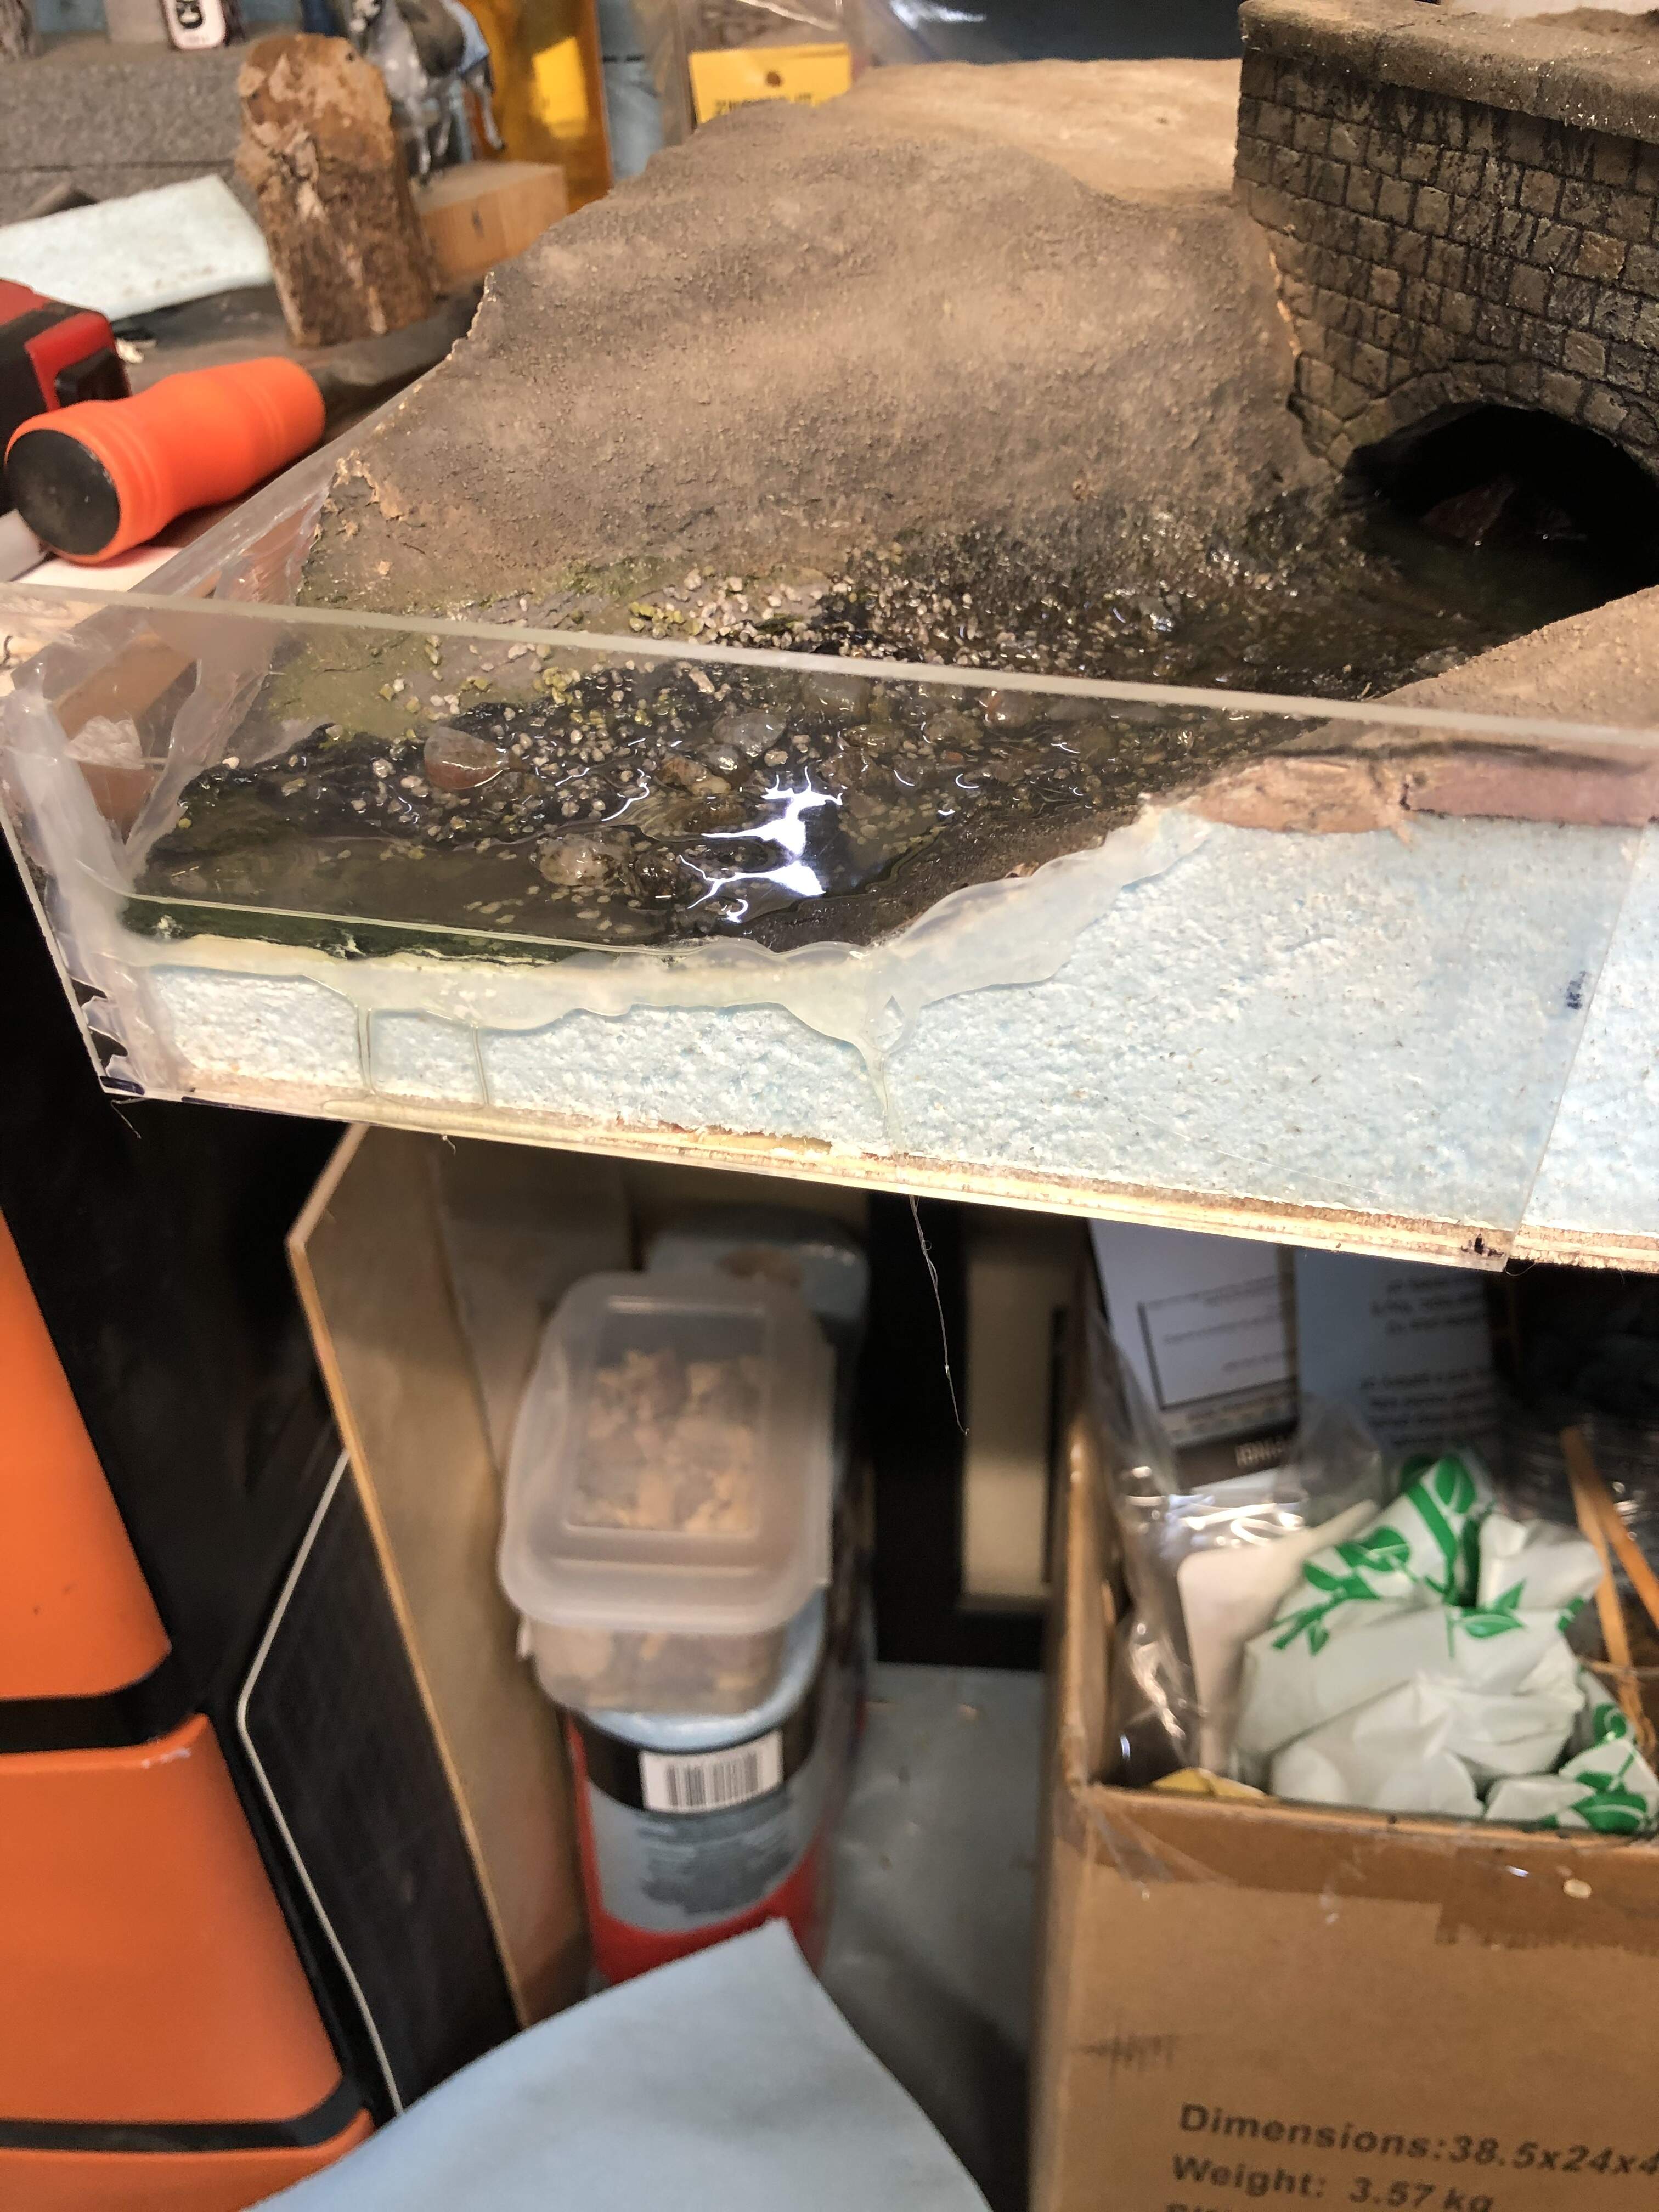
I have tinted the water with a couple of drops of brown ink (you can use a drop or two of acrylic paint as well I believe) and it is ready to pour. Because I don’t have a contained area for the water I needed to cap off the ends. This was another area that had filled me with dread but my worry was much worse than the reality. I had some scrap plexiglass that I scored and snapped and then hot-glued onto the base to hold the resin while it cured. The globby looking stuff on the edges of the creek bed is the hardened hot glue which makes a great seal.
If you don’t have any plexiglass you should be able to find a small piece in your nearest DIY store for 10 dollars/quid or so. The nice thing about the plexi is I have been able to reuse so a 12" x 12" square should last for years.
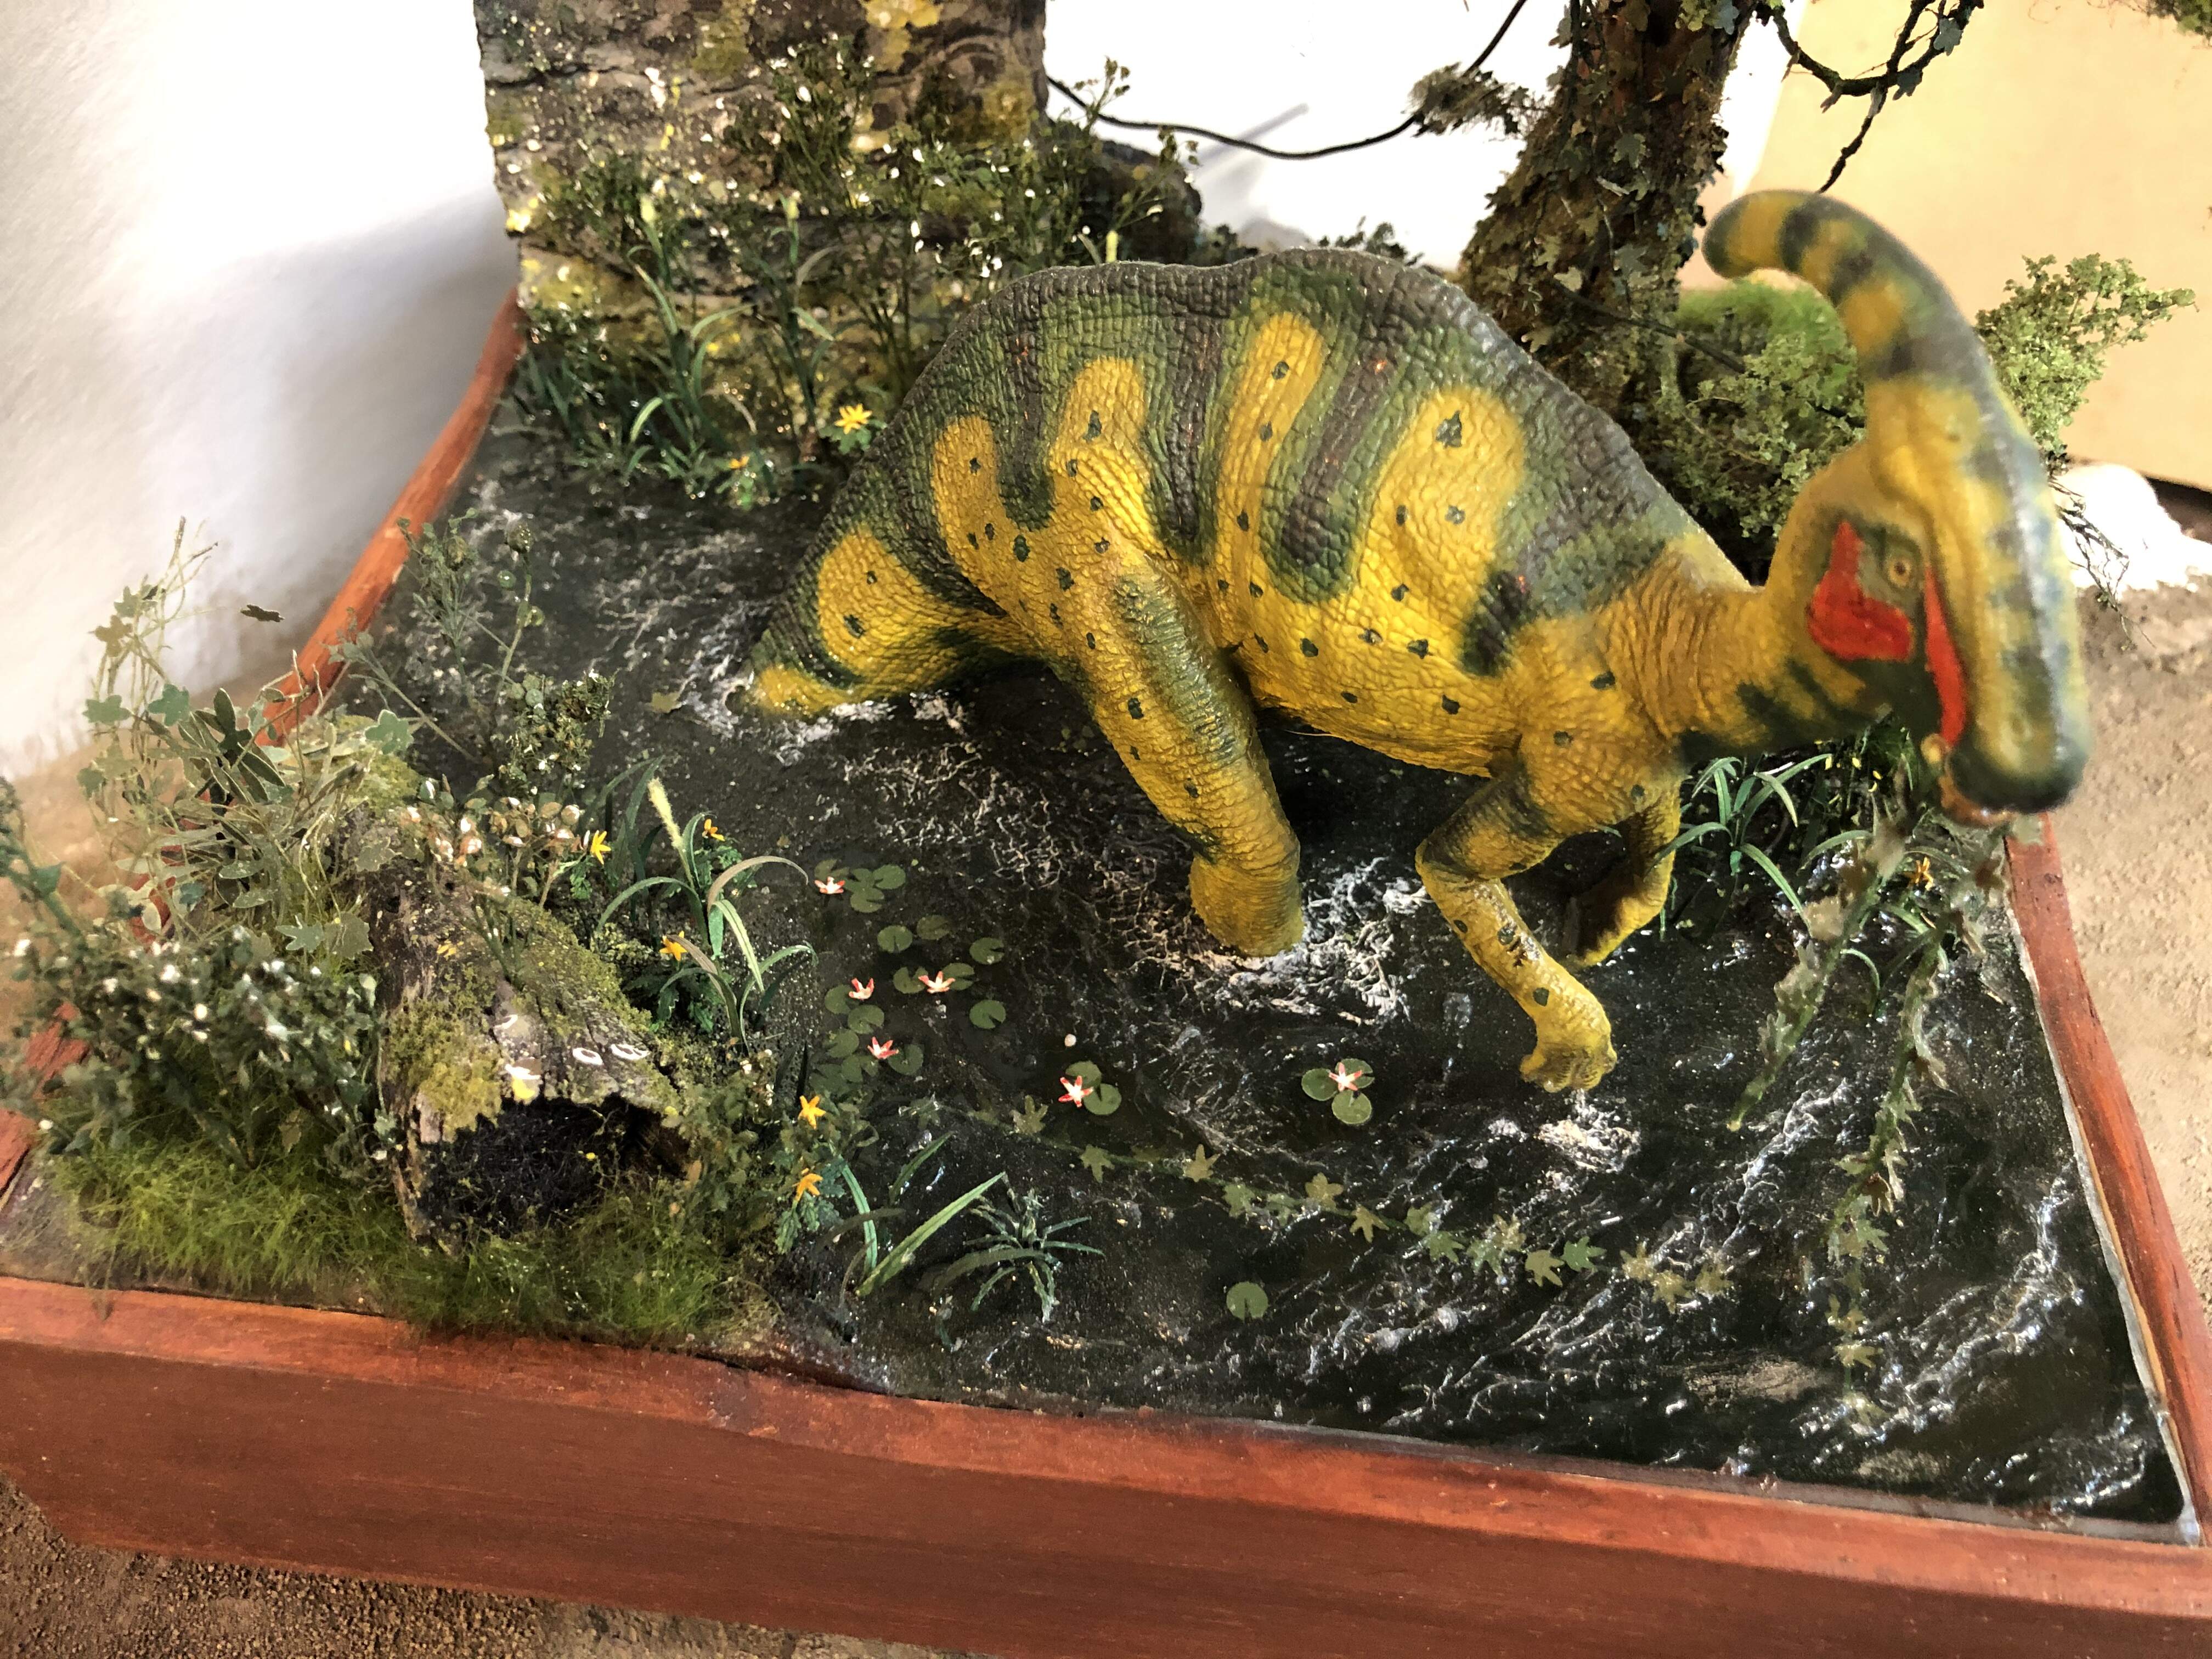
I ran out of the resin and had to order some more yesterday as this my second go at resin water having checked off a modeling bucket list item of mine with a dinosaur in a swamp dio earlier this year.
I realize now that I made the parasaurolophus swamp much deeper than it needed to be, but live and learn. It was probably still easier than cutting off his hind legs and tail , so there is that.
I hope this helps! I’ll reiterate in case it wasn’t entirely clear; mixing and pouring two part resin for water effects was one of the easiest modeling tasks I have ever done. I’m kicking myself a bit for never having taken the plunge earlier.
Hope you have a Merry Christmas and happy New Years Day.
Cheers,
Rick
3 Likes
Thanks Glen! I have always been inspired by your work. If I can end up with something even 1/2 as well executed as your modeling I would be thrilled.
Merry Christmas!
Cheers,
Rick
Thanks for that very nice and easy guide Rick…I remember the parasaurolophus Dio from the other site and thought it looked very well done.
You have convinced me to give it a shot in the new year.
Have a great Christmas and New year… John
Wow Rick nice of you to join us, this looks like a fantastic dio, really excellent ground-work & I didn’t think I could ever get so excited about tree roots. Pour away 
1 Like
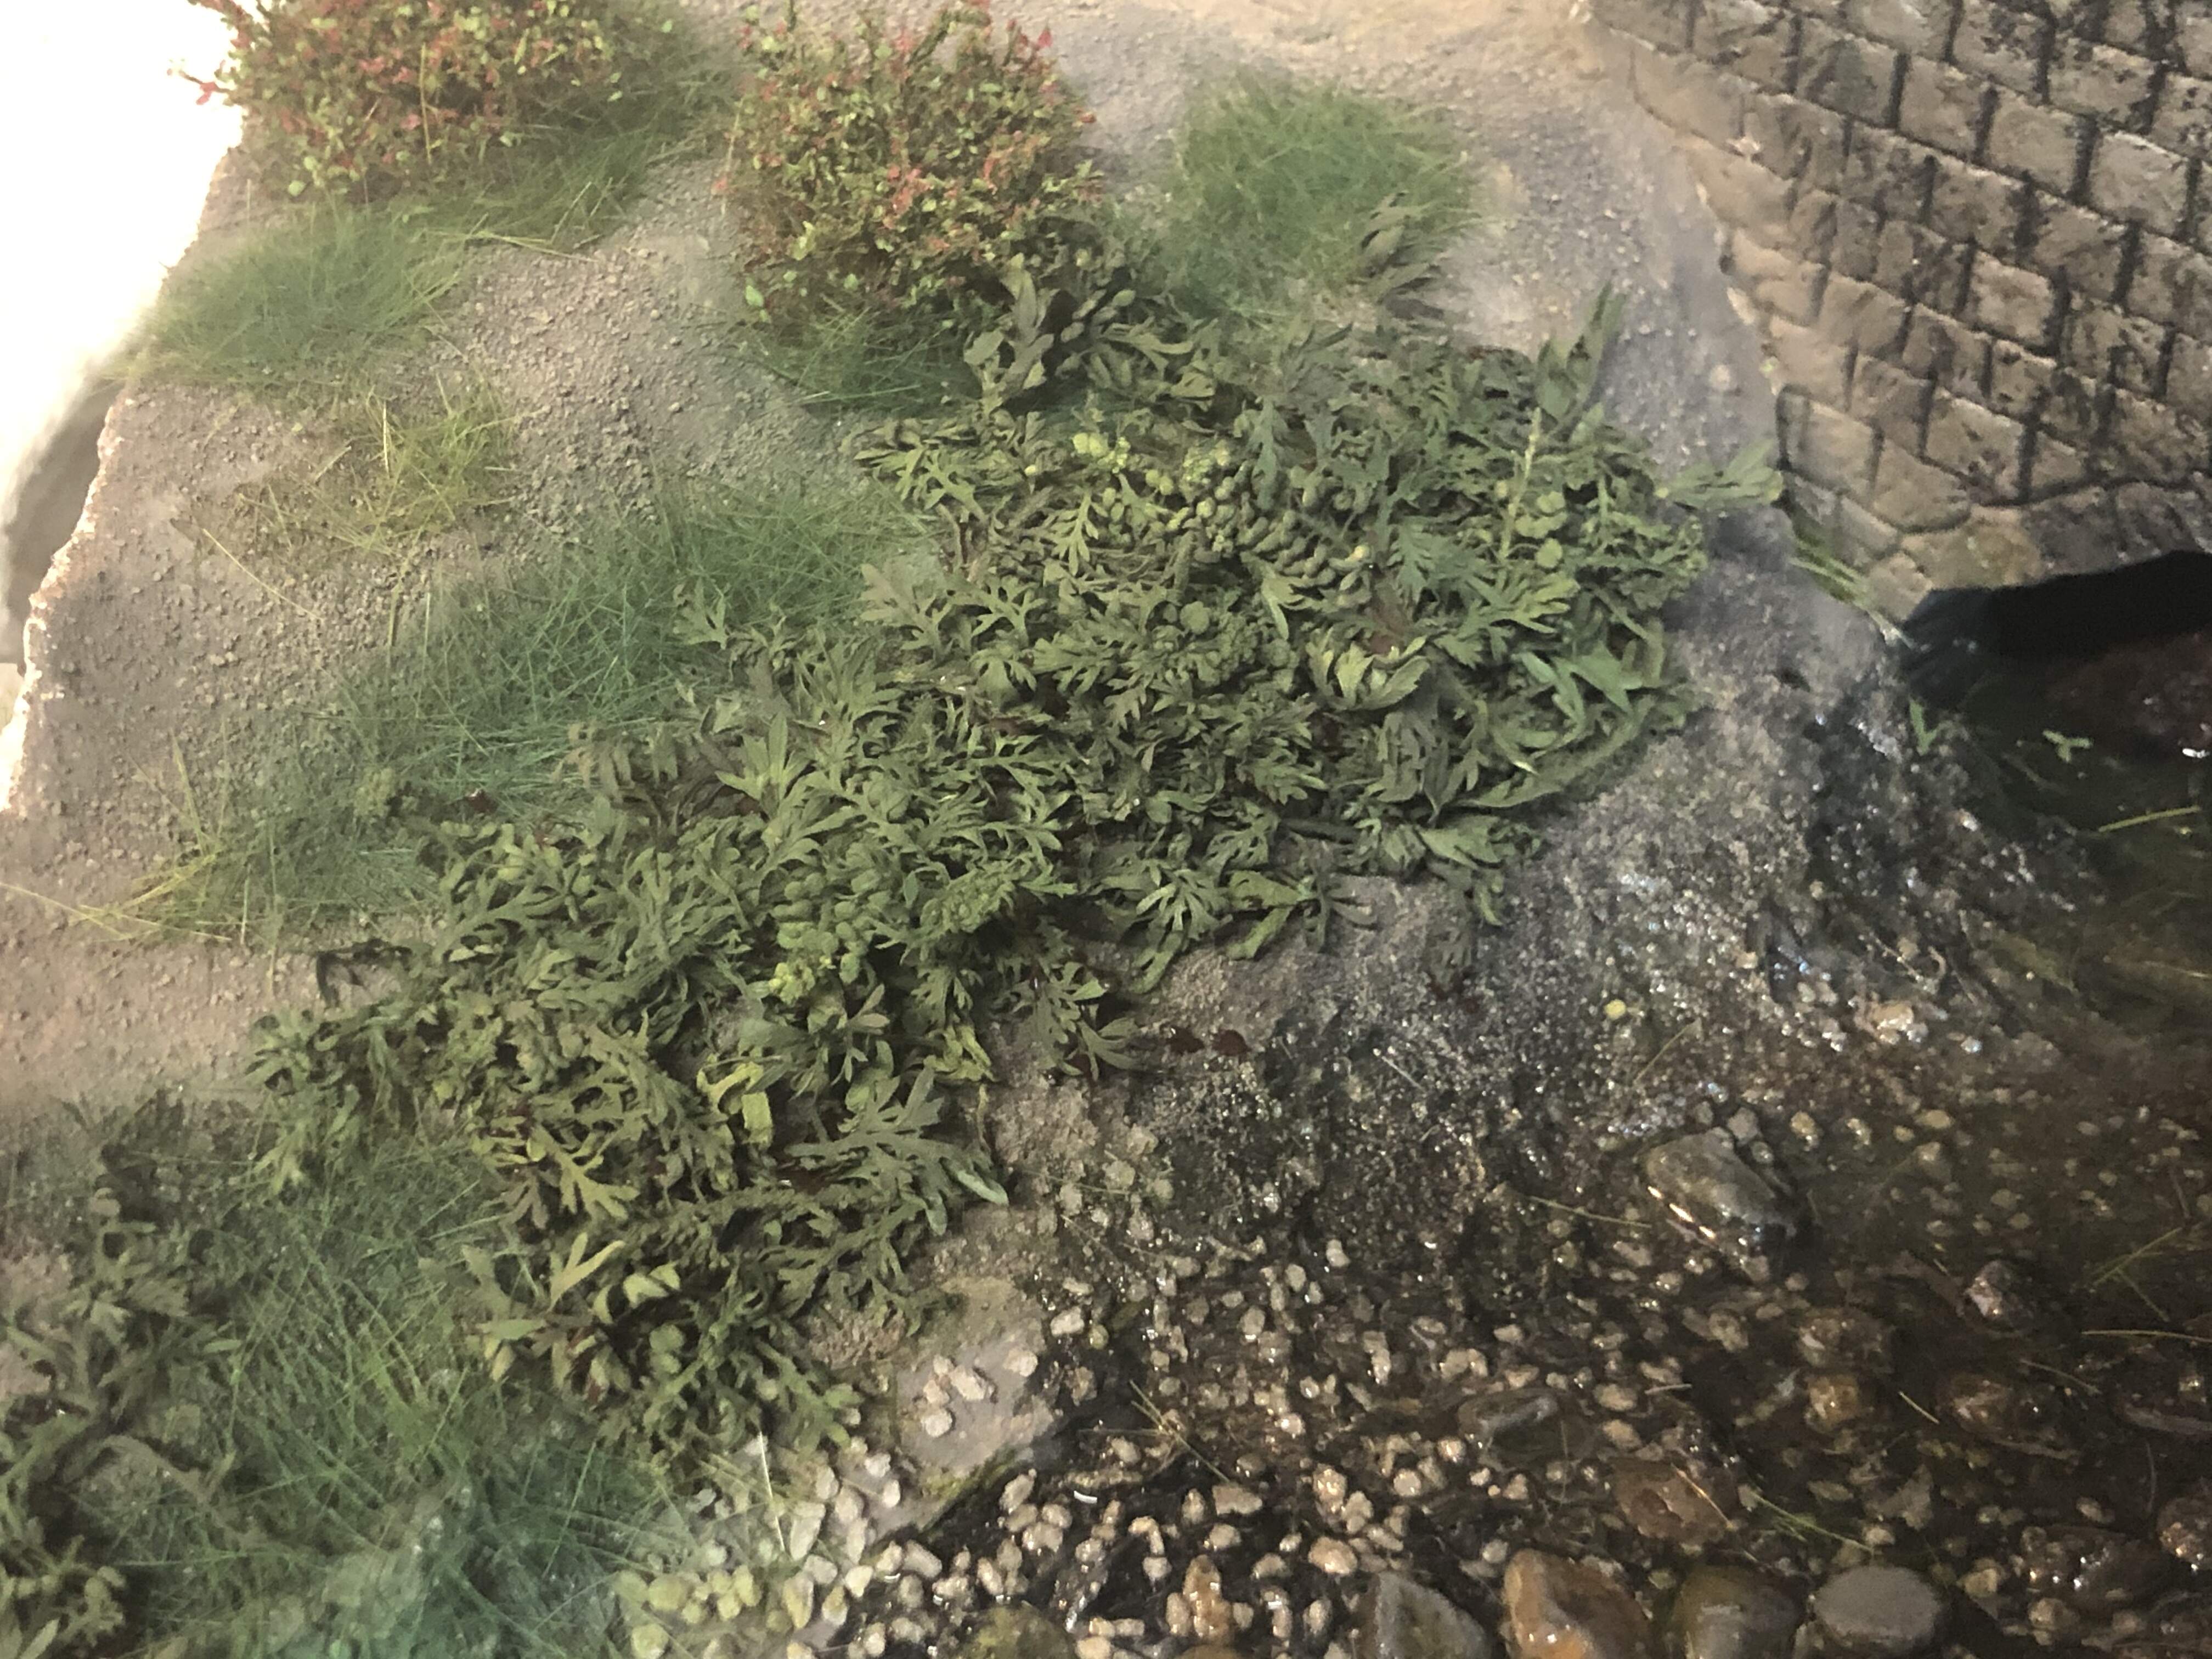
Have spent a little time creating some edge of the water plants but got a bit bored with the process and decided to start on some of the general vegetation. Here we are with the grass added along with a trifecta of small bushes.
Have to finish up some of the bull rushes, goldenrod, and other vegetation to help fill out the scene before we start adding the other vehicles and figures.
Cheers,
Rick
3 Likes
Happy New Year to everyone; hoping for something a wee bit better this year compared to last!!
Here is where I am today. The grass has been given its first shot of paint, right now it is quite a bit deeper in tone than what the finished product should be. I’ll be toning it down with some yellows and pale greens with subsequent layers of vegetation.
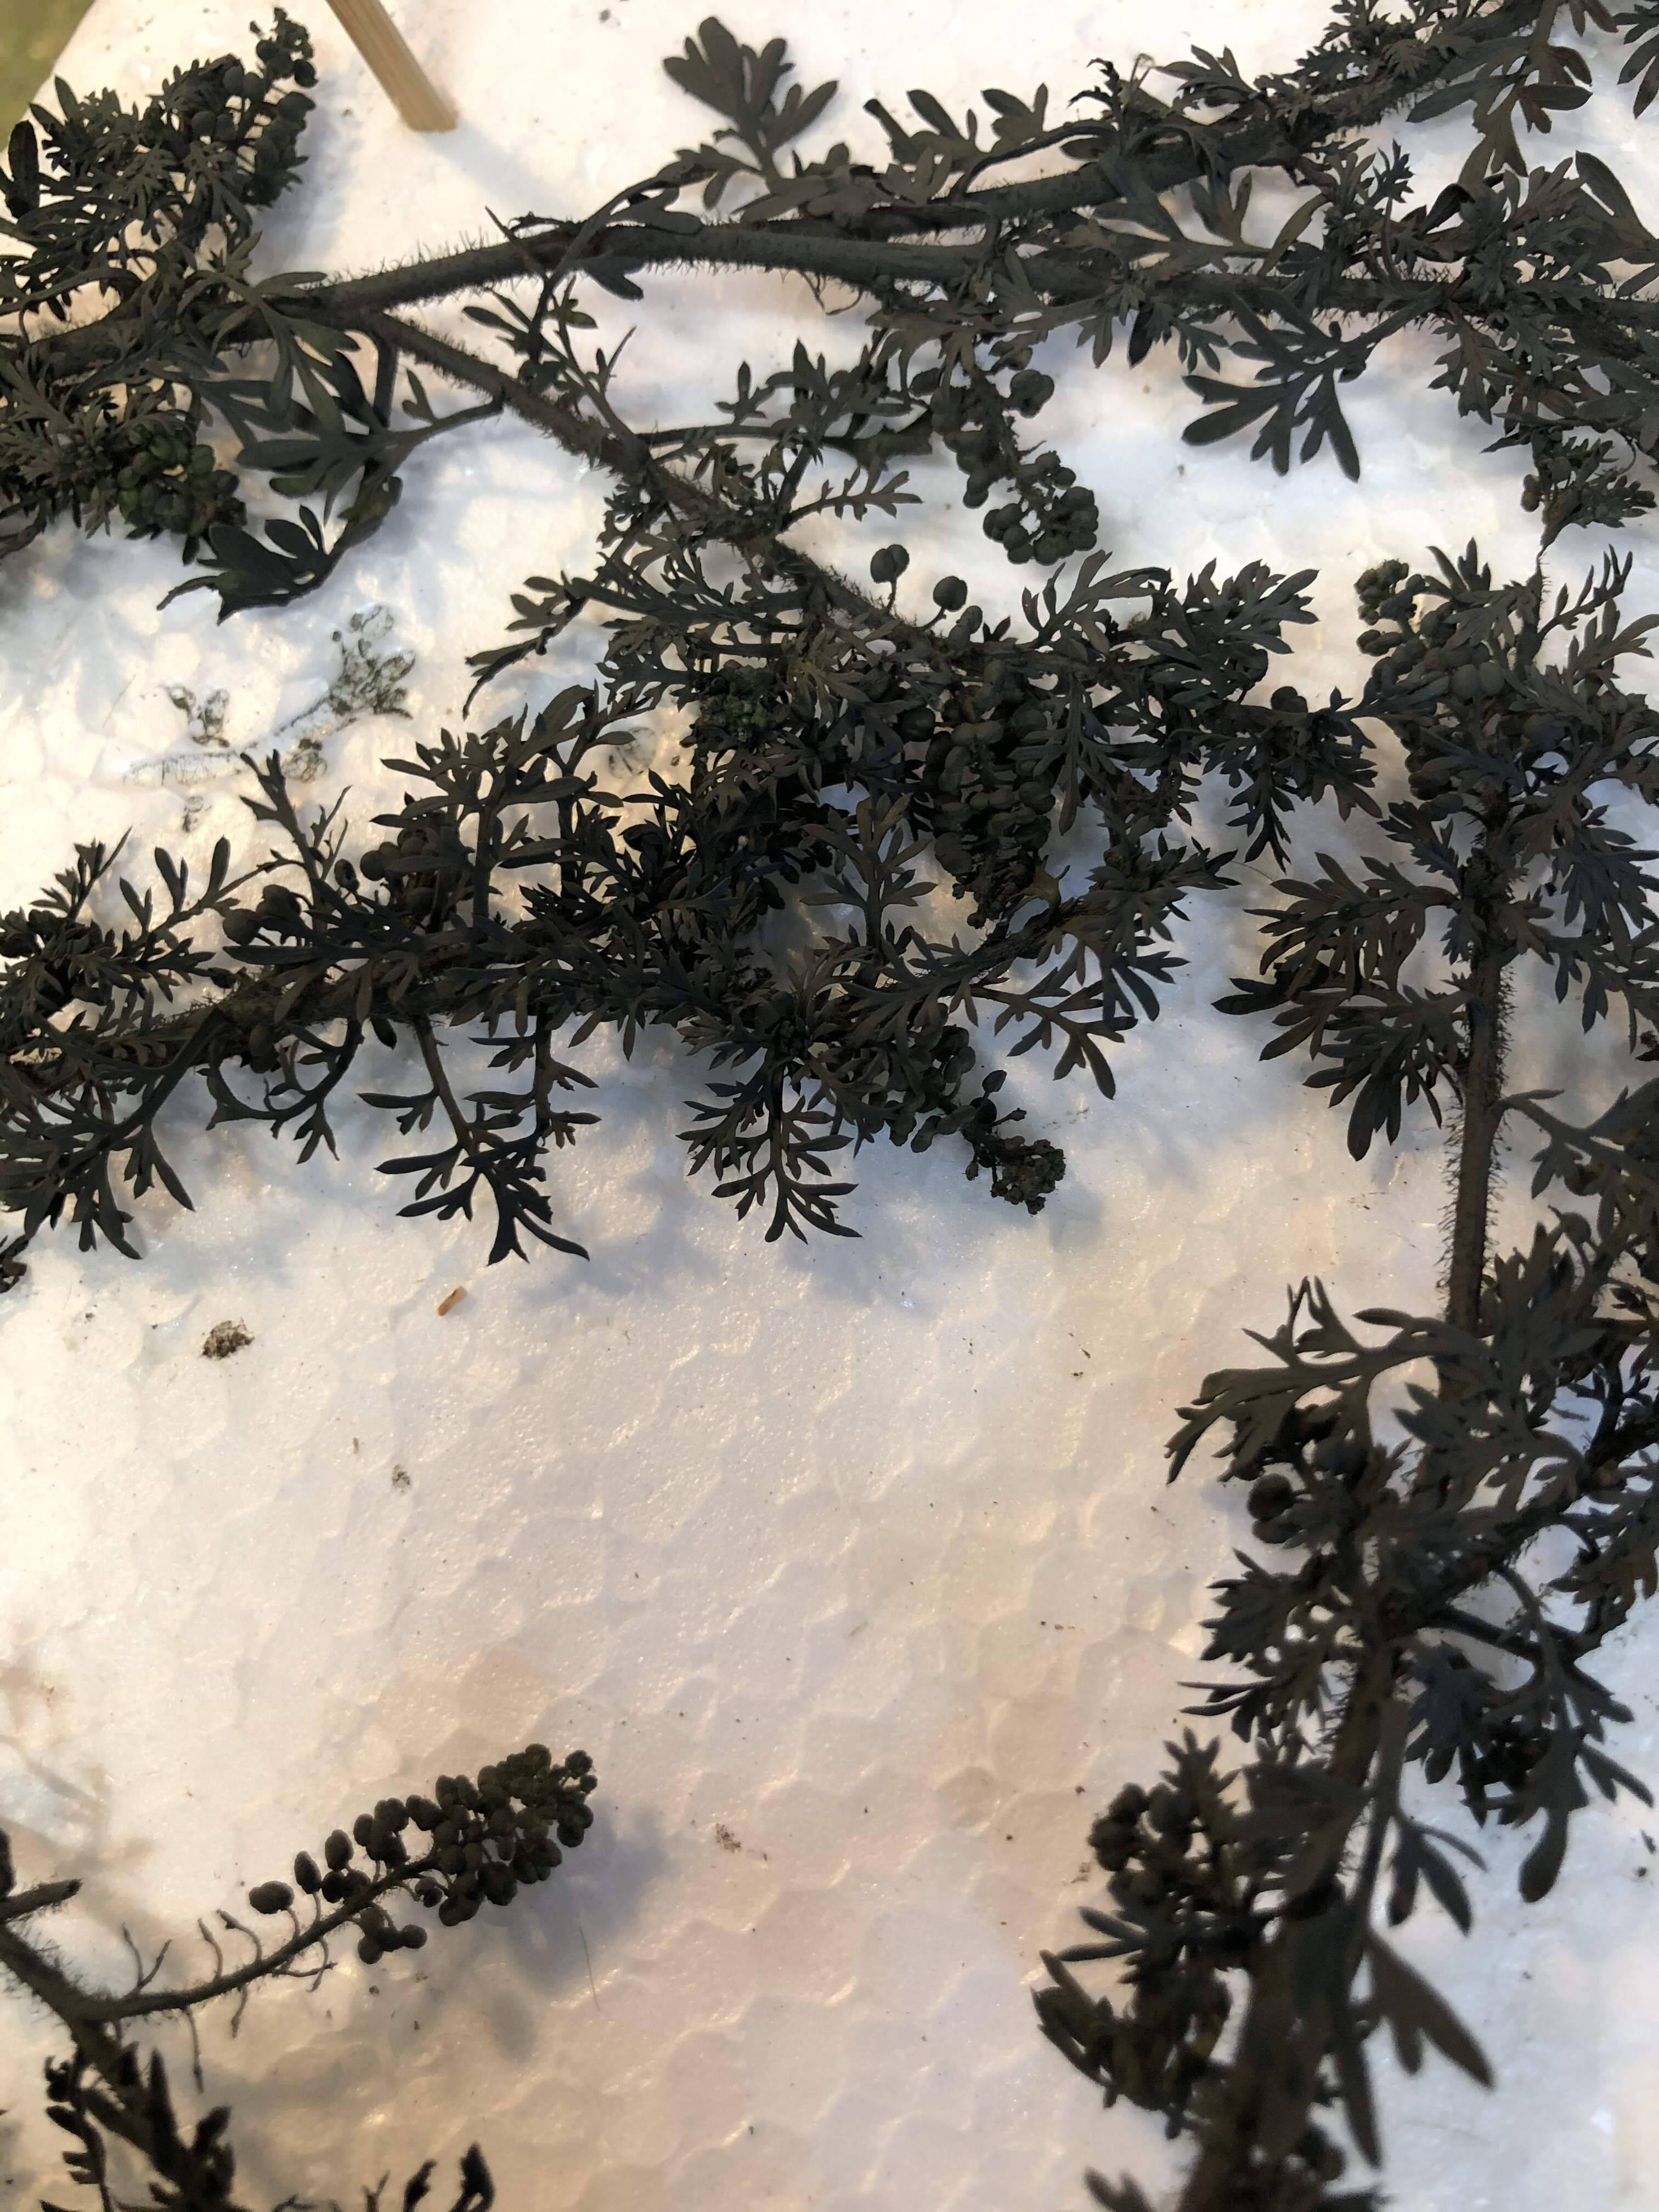
I followed Eric’s (Diowork) suggestion and found a few things in the backyard that I have painted and will be adding. One of them is a weed with some very delicate leaf structure that I am going to use for the low ground cover. Looks like I’ll be following that up with some more paper aquatic rushes to add some volume around the stream banks.
At least that’s the plan in my head!
Cheers,
Rick
And here is my new favorite backyard weed.
3 Likes
It’s starting to really come to life now. I like the tree root … I always look at any fallen trees when out walking for that decent bit of root that looks like a miniature tree… Always ultra realistic. Great work 
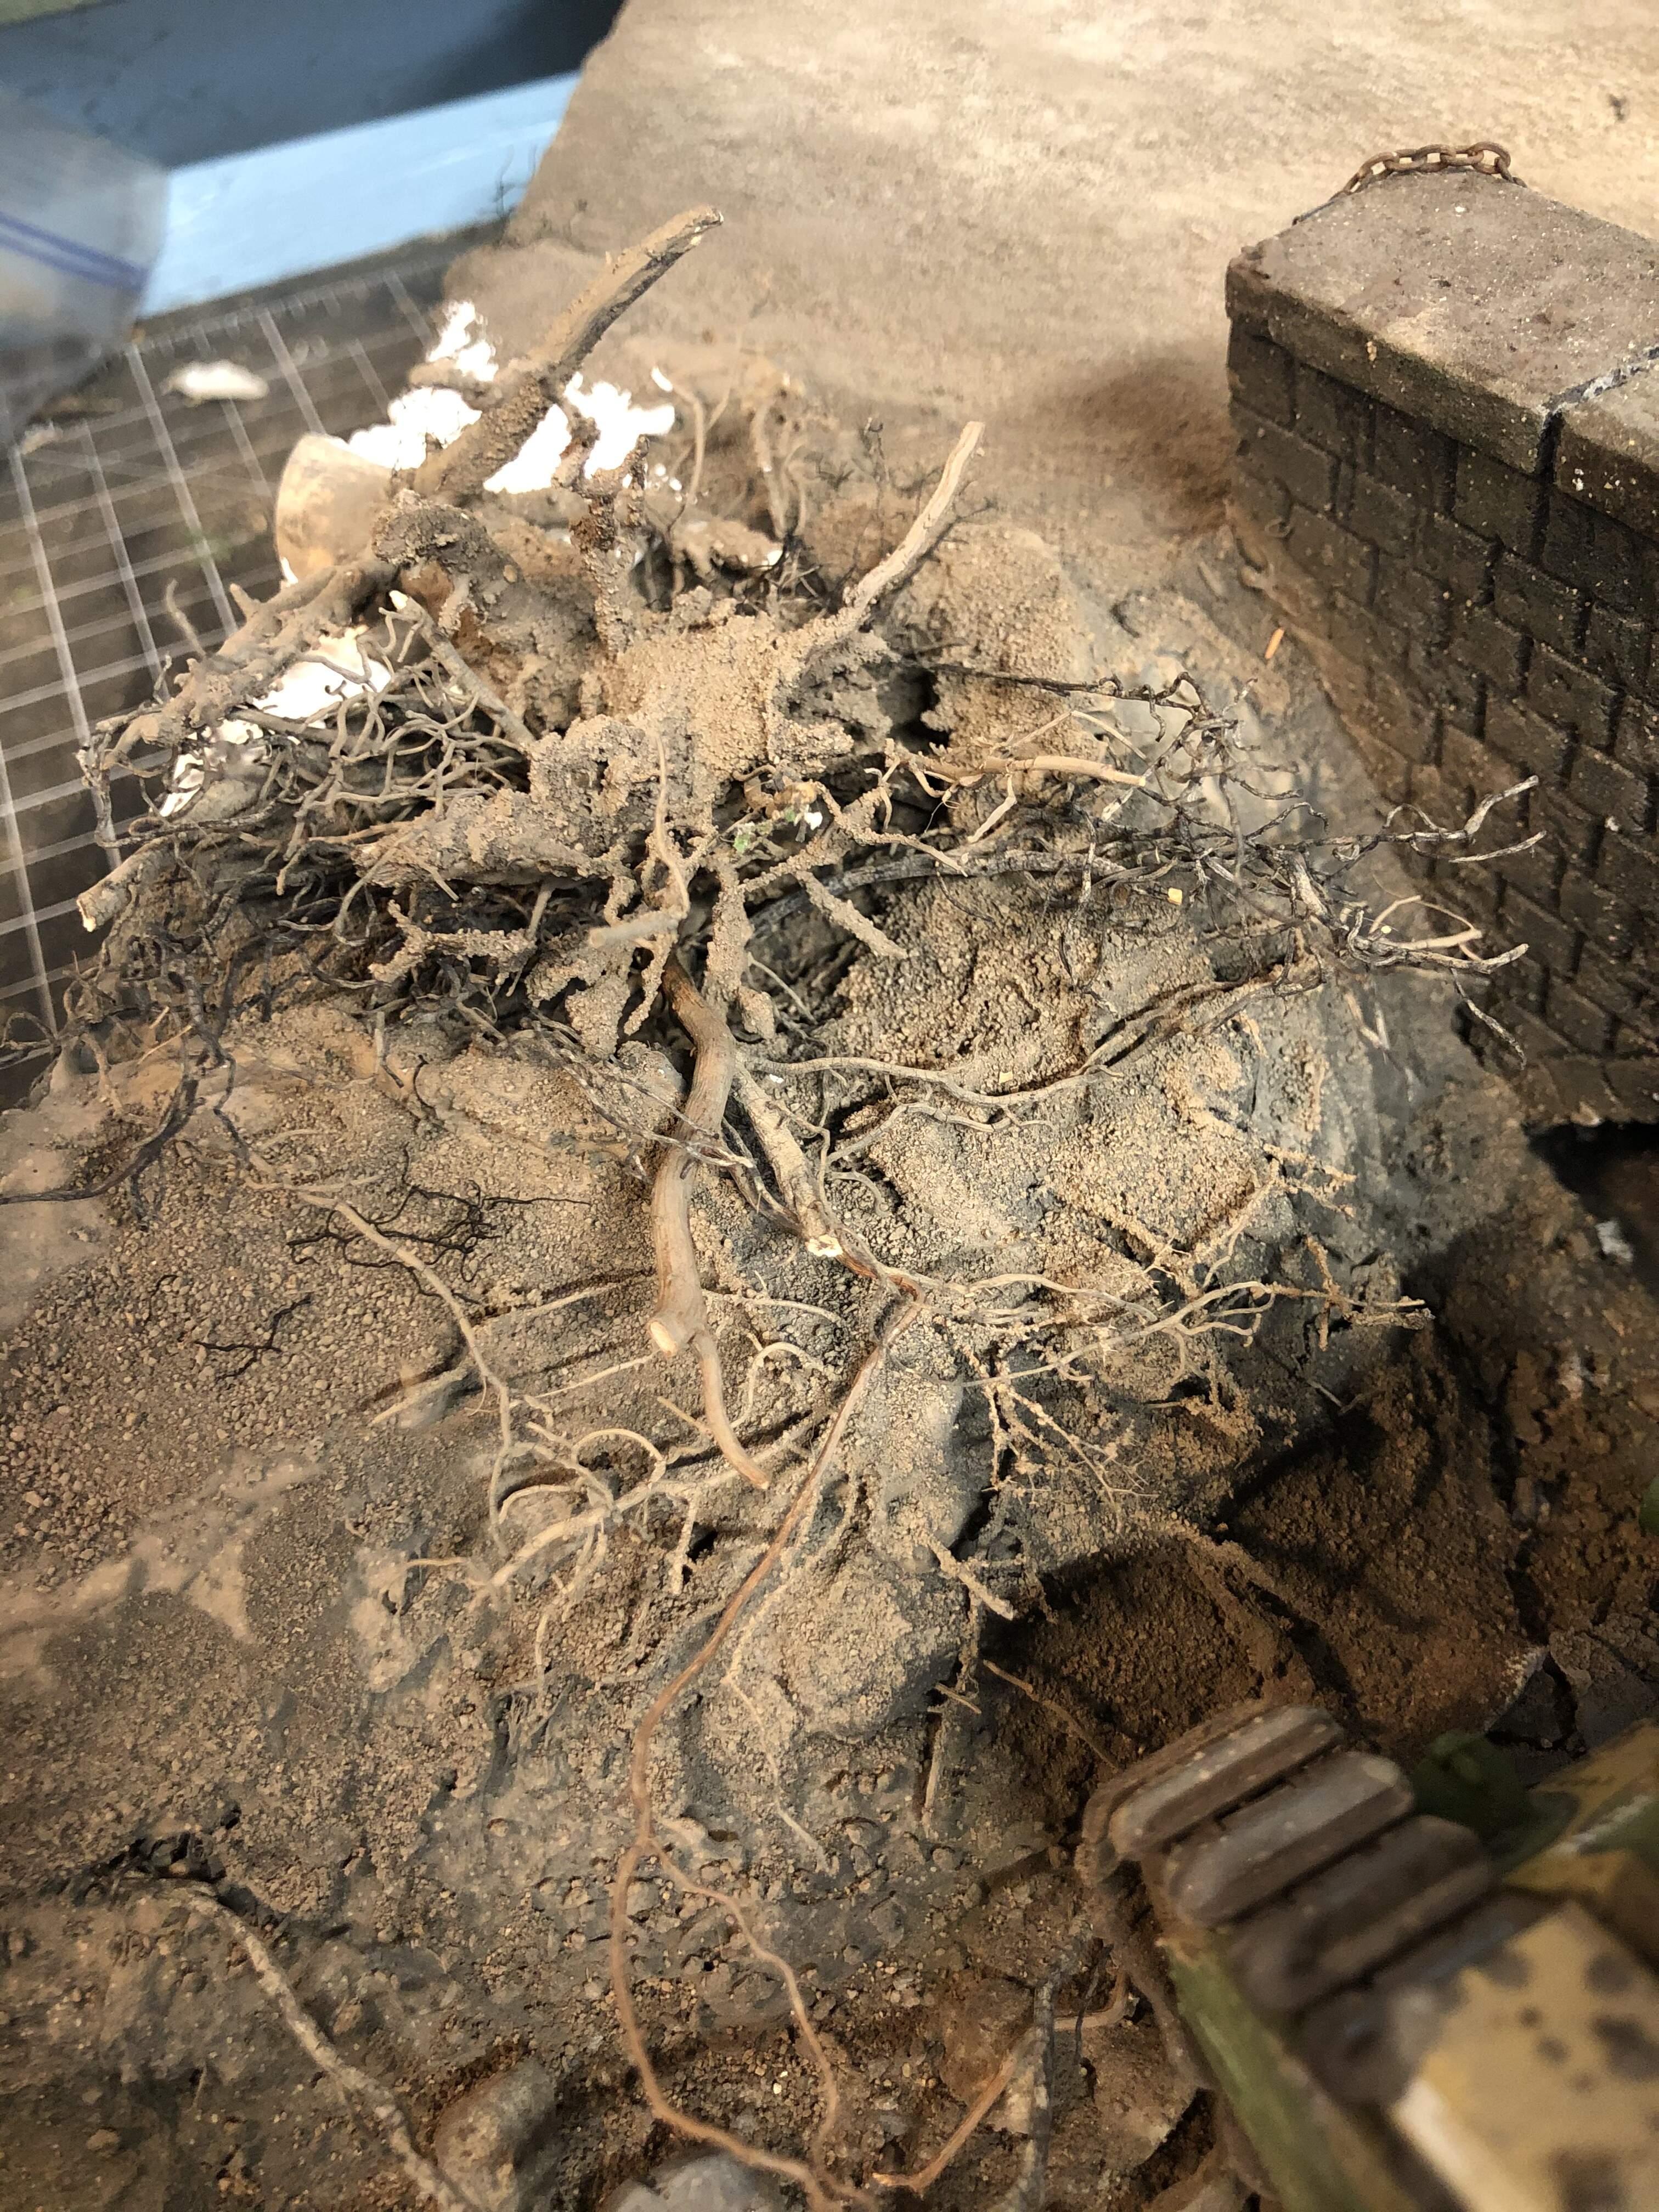
Here is my take on some bramble like tangled undergrowth along the stream bed.
If it looks okay I’ll run it up to the corner of the bridge. Any criticism, constructive or otherwise, gladly accepted!
Cheers,
Rick
4 Likes
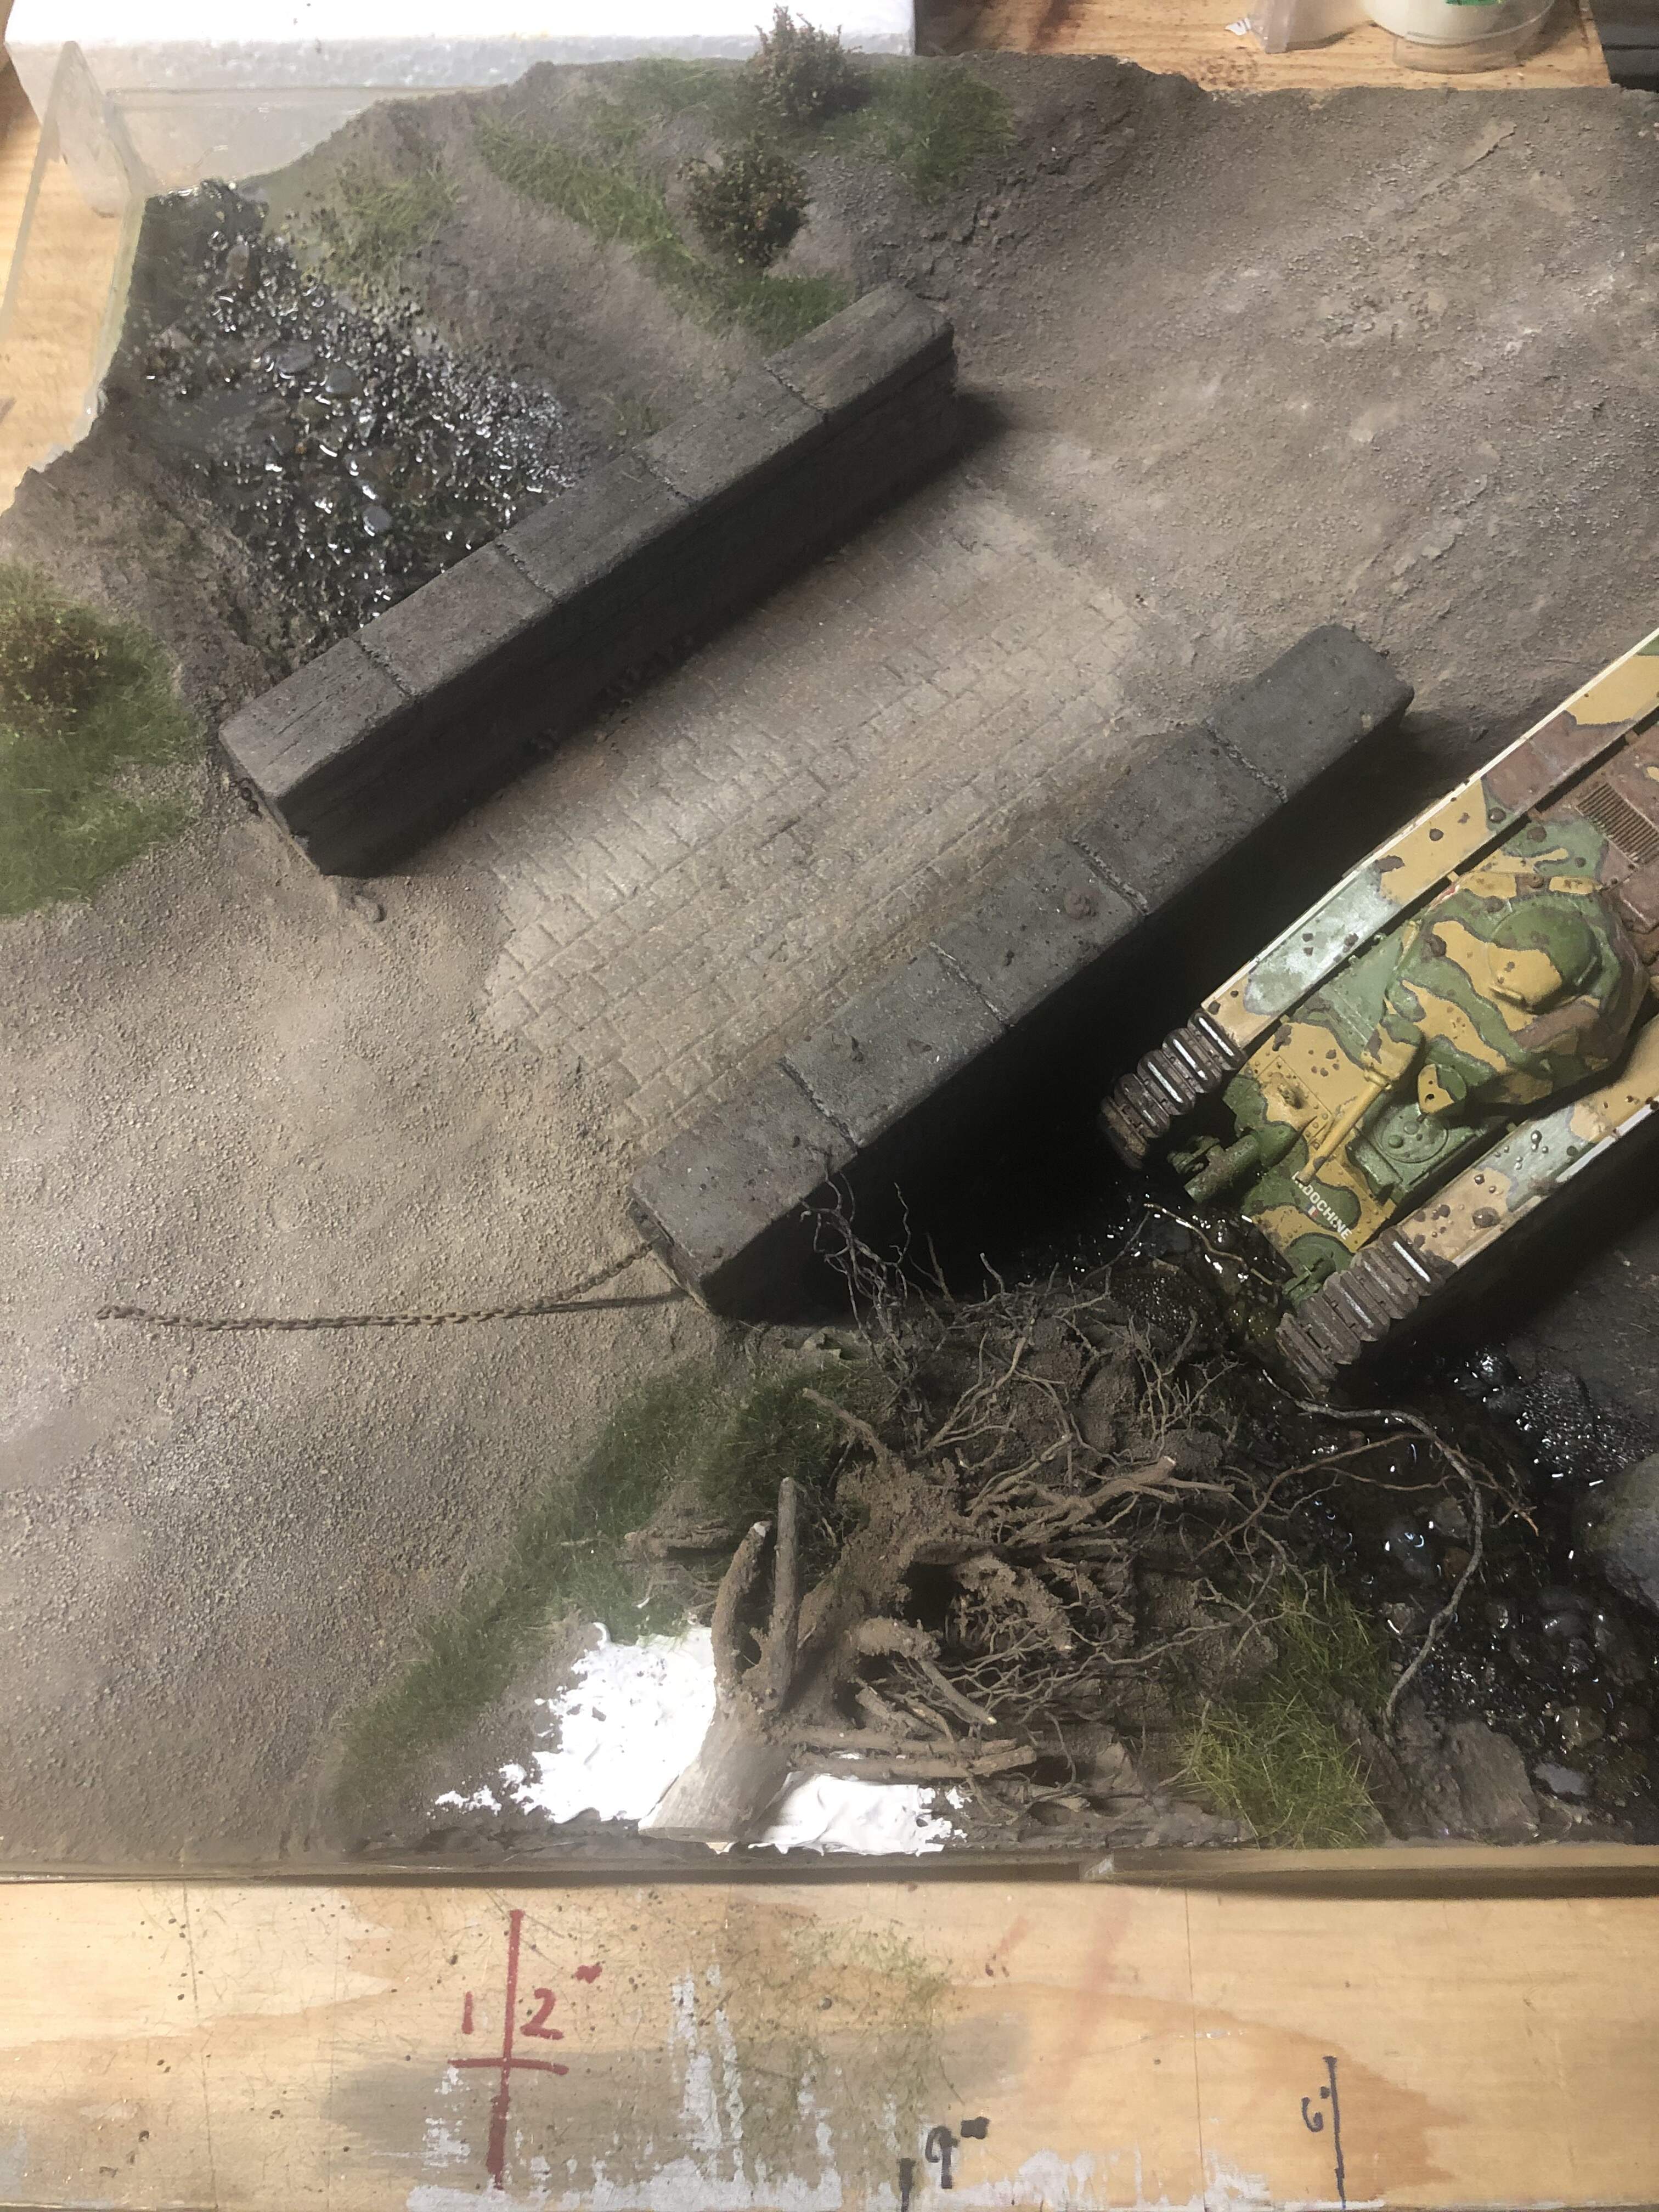
I really like how you’ve placed this layout on the base, it looks really good. Maybe this isn’t yet the time but I hope you’ll blend out the rather clean lines with stuff like moss/weeds at the base of the bridge walls. The tank looks somewhat factory-fresh too (and all hatches down?) but again maybe I’m jumping the gun
 ) as the exact steps you take when you lay the resin for the stream - Its something I want to try in the new year.