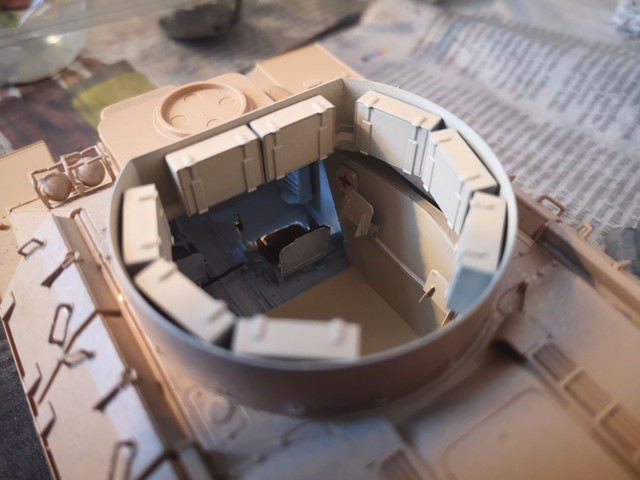
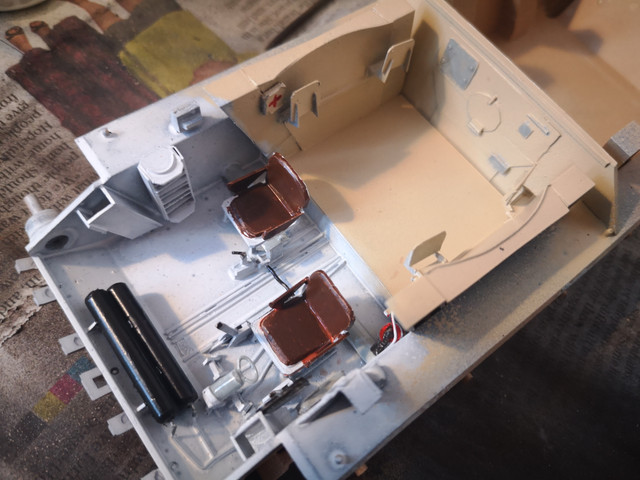
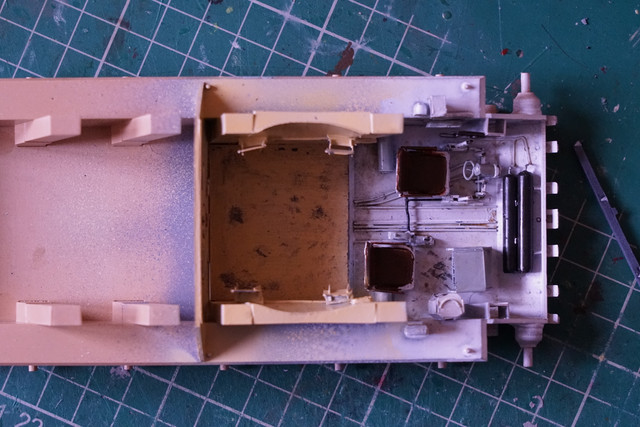
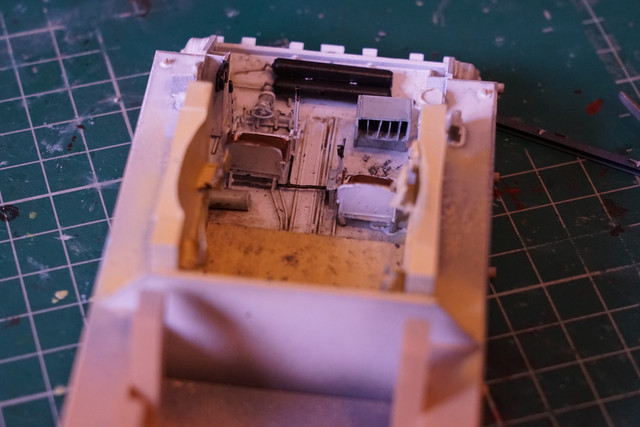
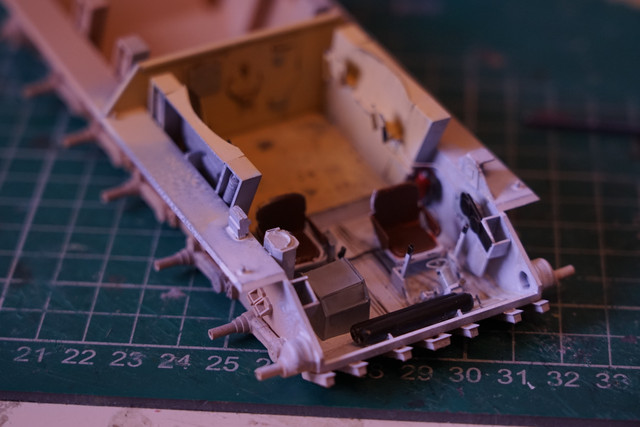
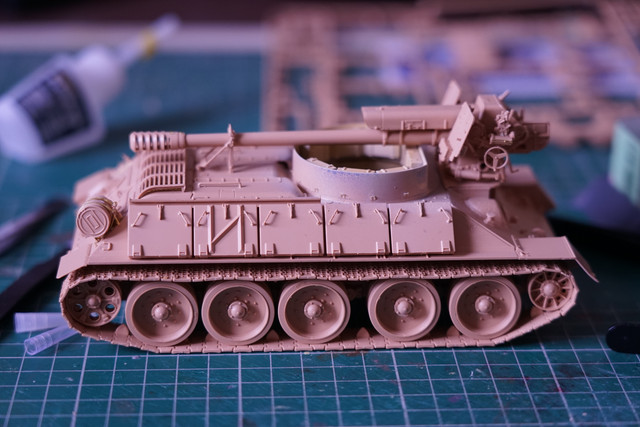
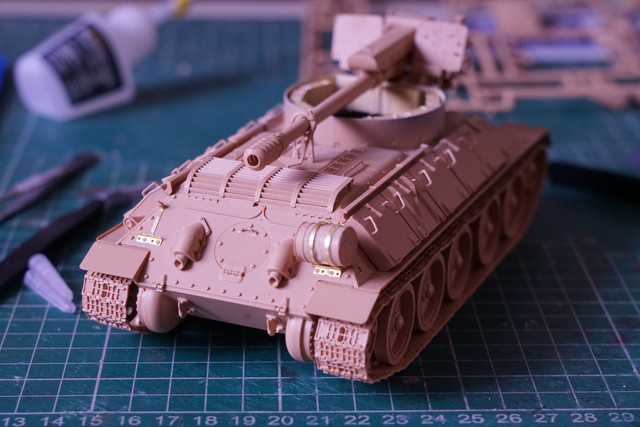
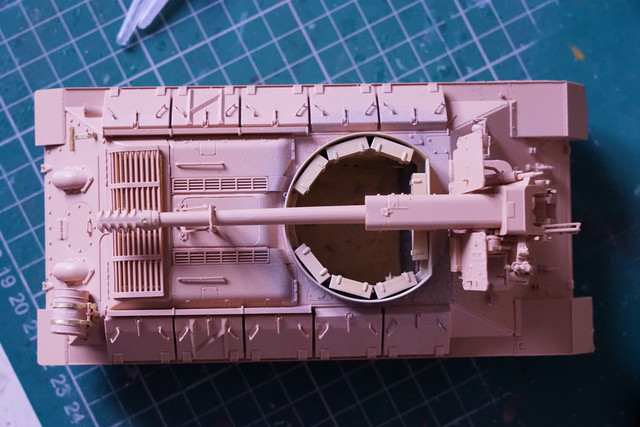
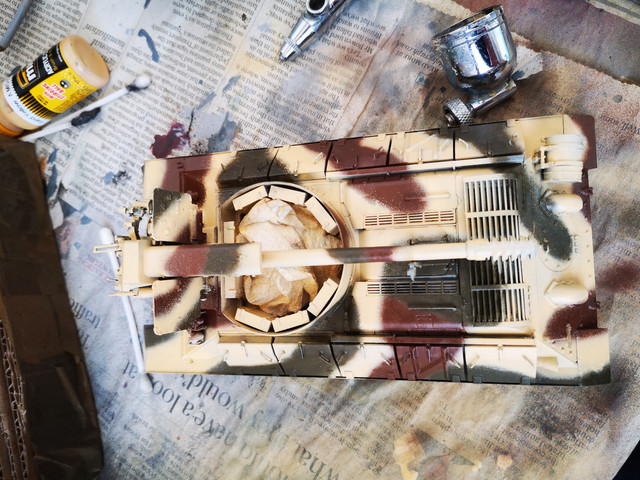
more progress on the t34/d30 - some interior detail painting… need to scuff it all up a touch then can join top & bottom… not 100% with the sand colour, need to check I have the right one when it comes to the exterior - could be with pale grey to desaturate that it looks ok - just looks too “orange” at the moment…
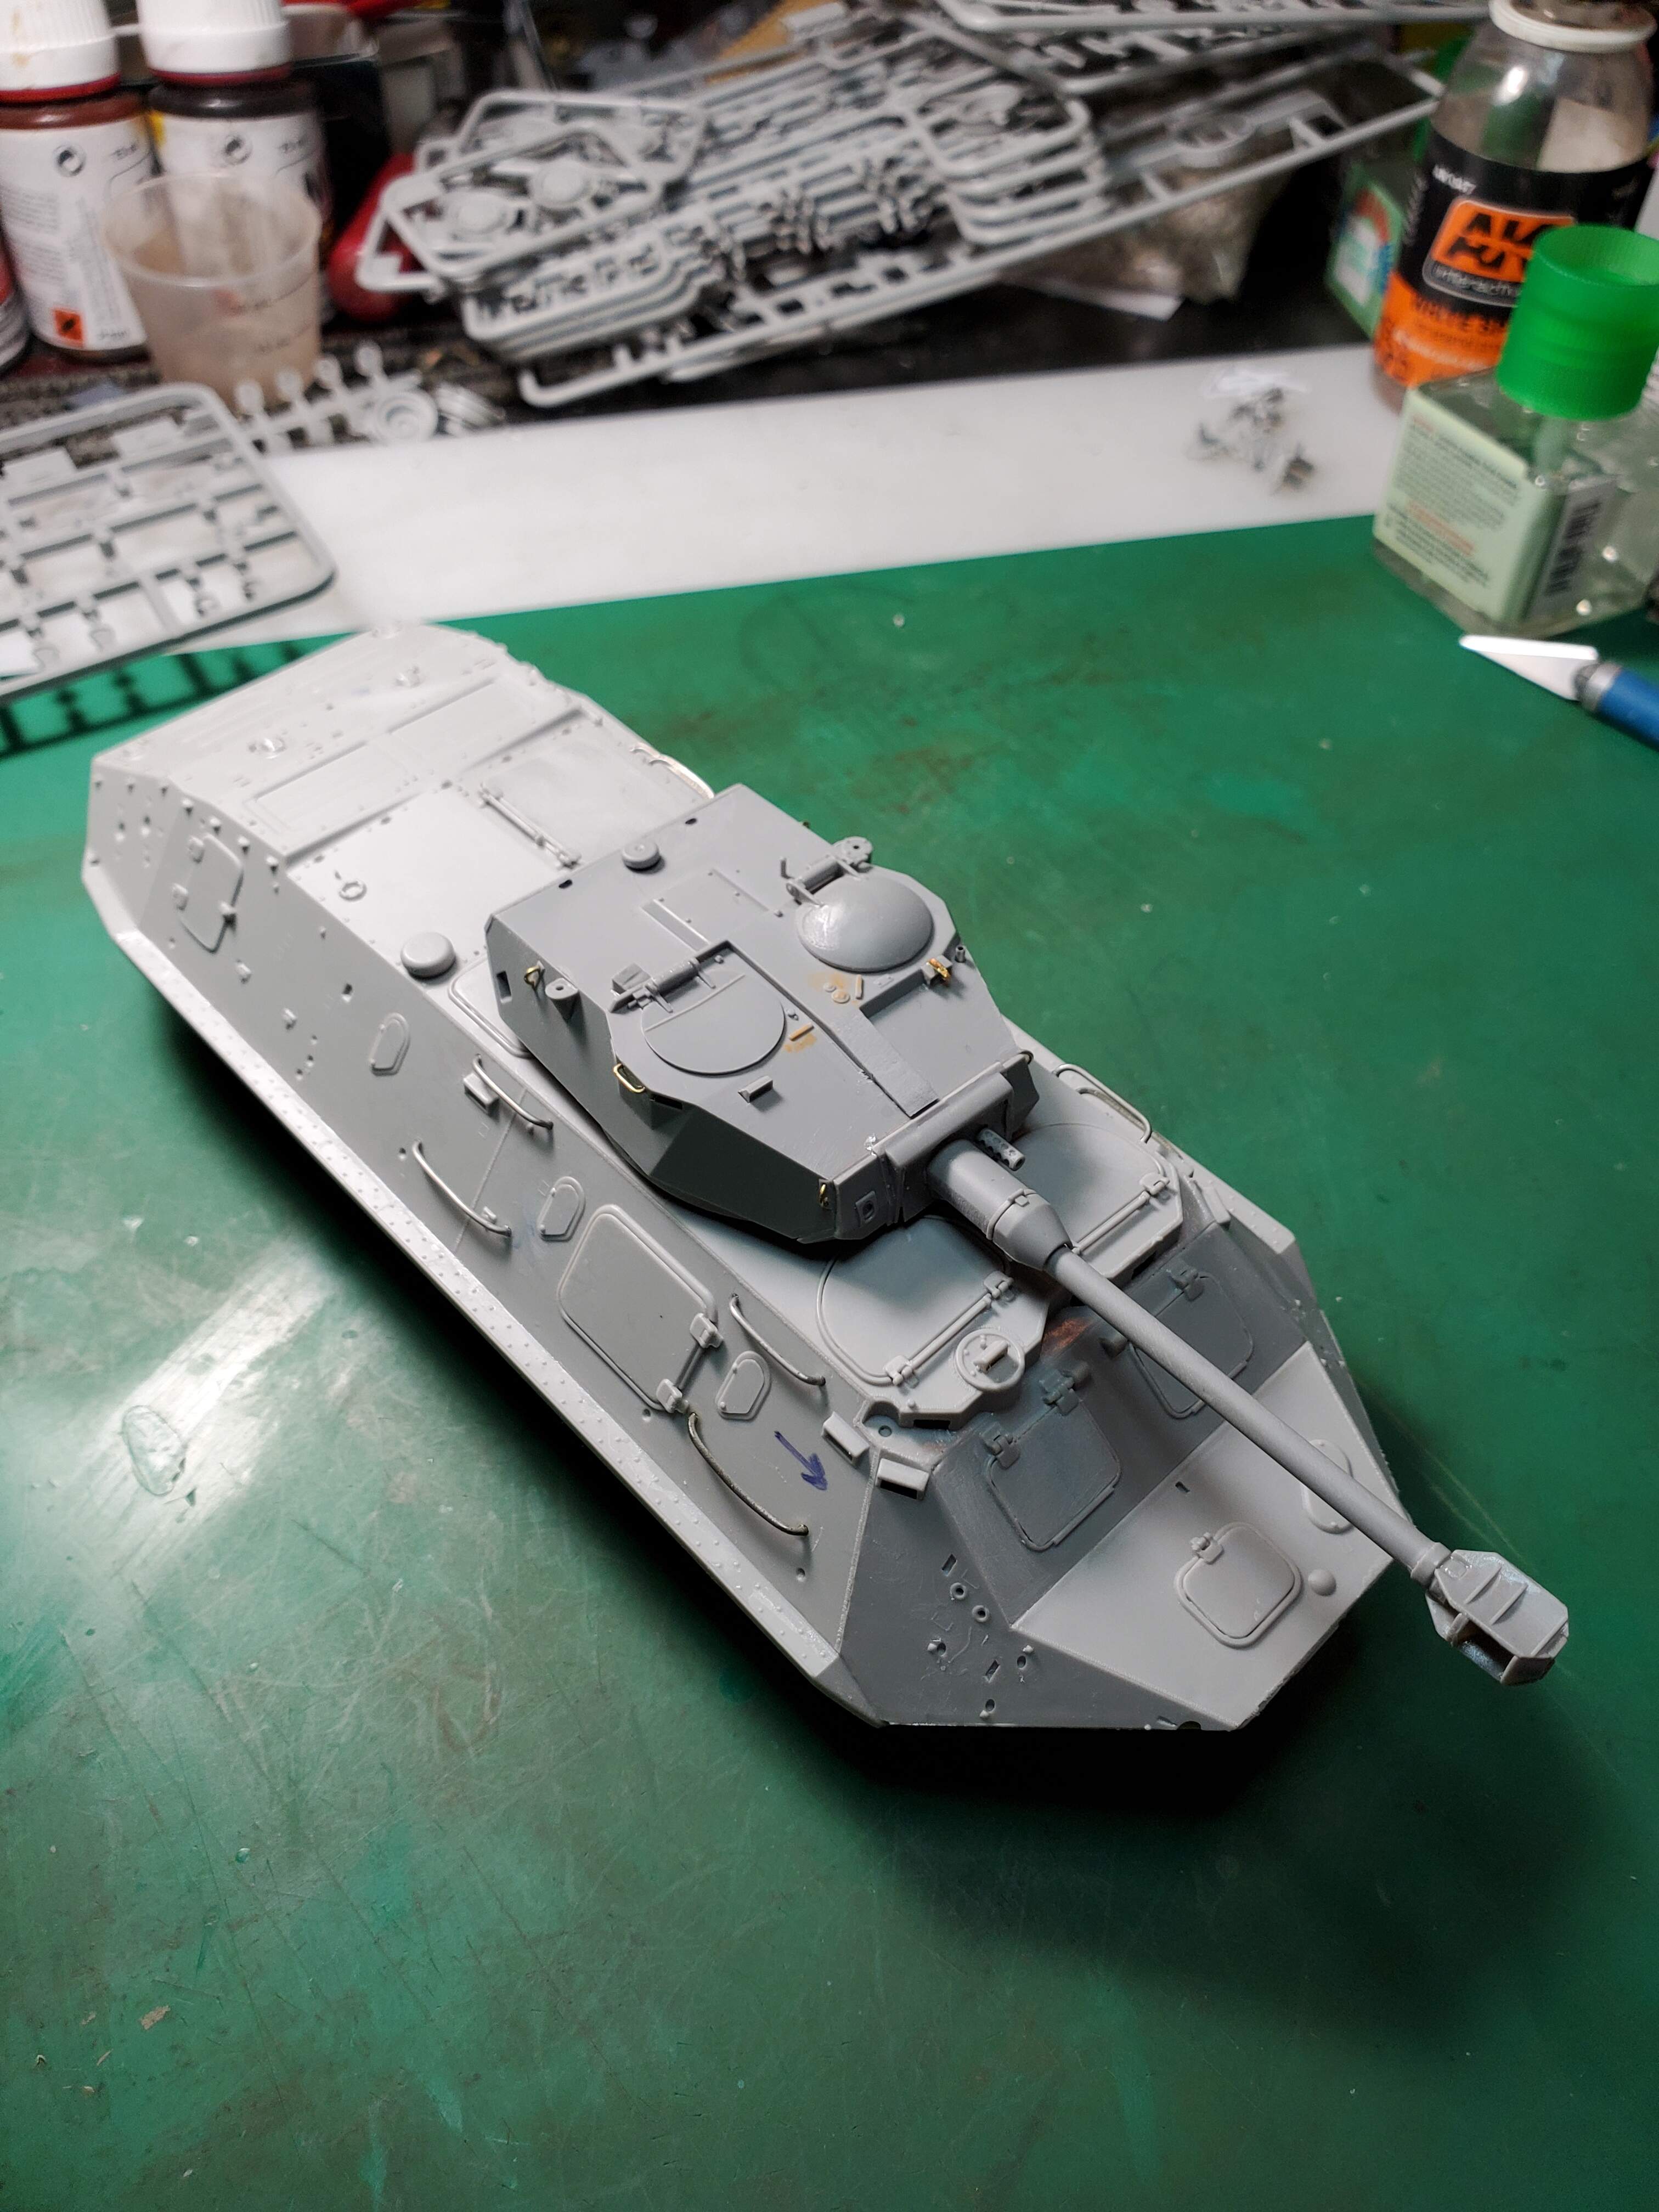
I have made some progress with the Type 59. I decided not to use any photoetch; although I did use an aluminum barrel. There are still some pieces I need to add to the hull and turret before I move to the tracks and fenders. After that, I will be adding/correcting some welds, filling holes, and adding texture to the turret. I lost a piece to the rug monster , so I will have to scratchbuild that little piece.
Phil2015 and robw_uk thanks for sharing your work! It motivates me to move faster with my build.
The beginning test fit/modification of the Takom AML 90 to the Trumpeter, BTR 60, from Djibouti (Africa). Photo of the real vehicle is found in this thread at ref line 80. Surprisingly, the mod to fit the turret to the upper hull will be easy.
Update 30 April 2021: Djibouti BTR 60 w/AML 90 turret.
Major suspension components complete. But man, what a pain the a _ _ ! Talk about fiddly! Seams are everywhere on the suspension. Shaved/sanded a little bit here and there, but I pretty much gave up trying to sand all those small, POS parts, after breaking a few pieces here and there. I came to the conclusion that when the build is finished, the suspension will be dabbed up with a bit of thick sand, grease, oils, and/or mud to cover up those seams. Having build this Trumpeter BTR to this point, I’ve also come to another conclusion that this will most likely be the first, and last, build I do of anything BTR related.
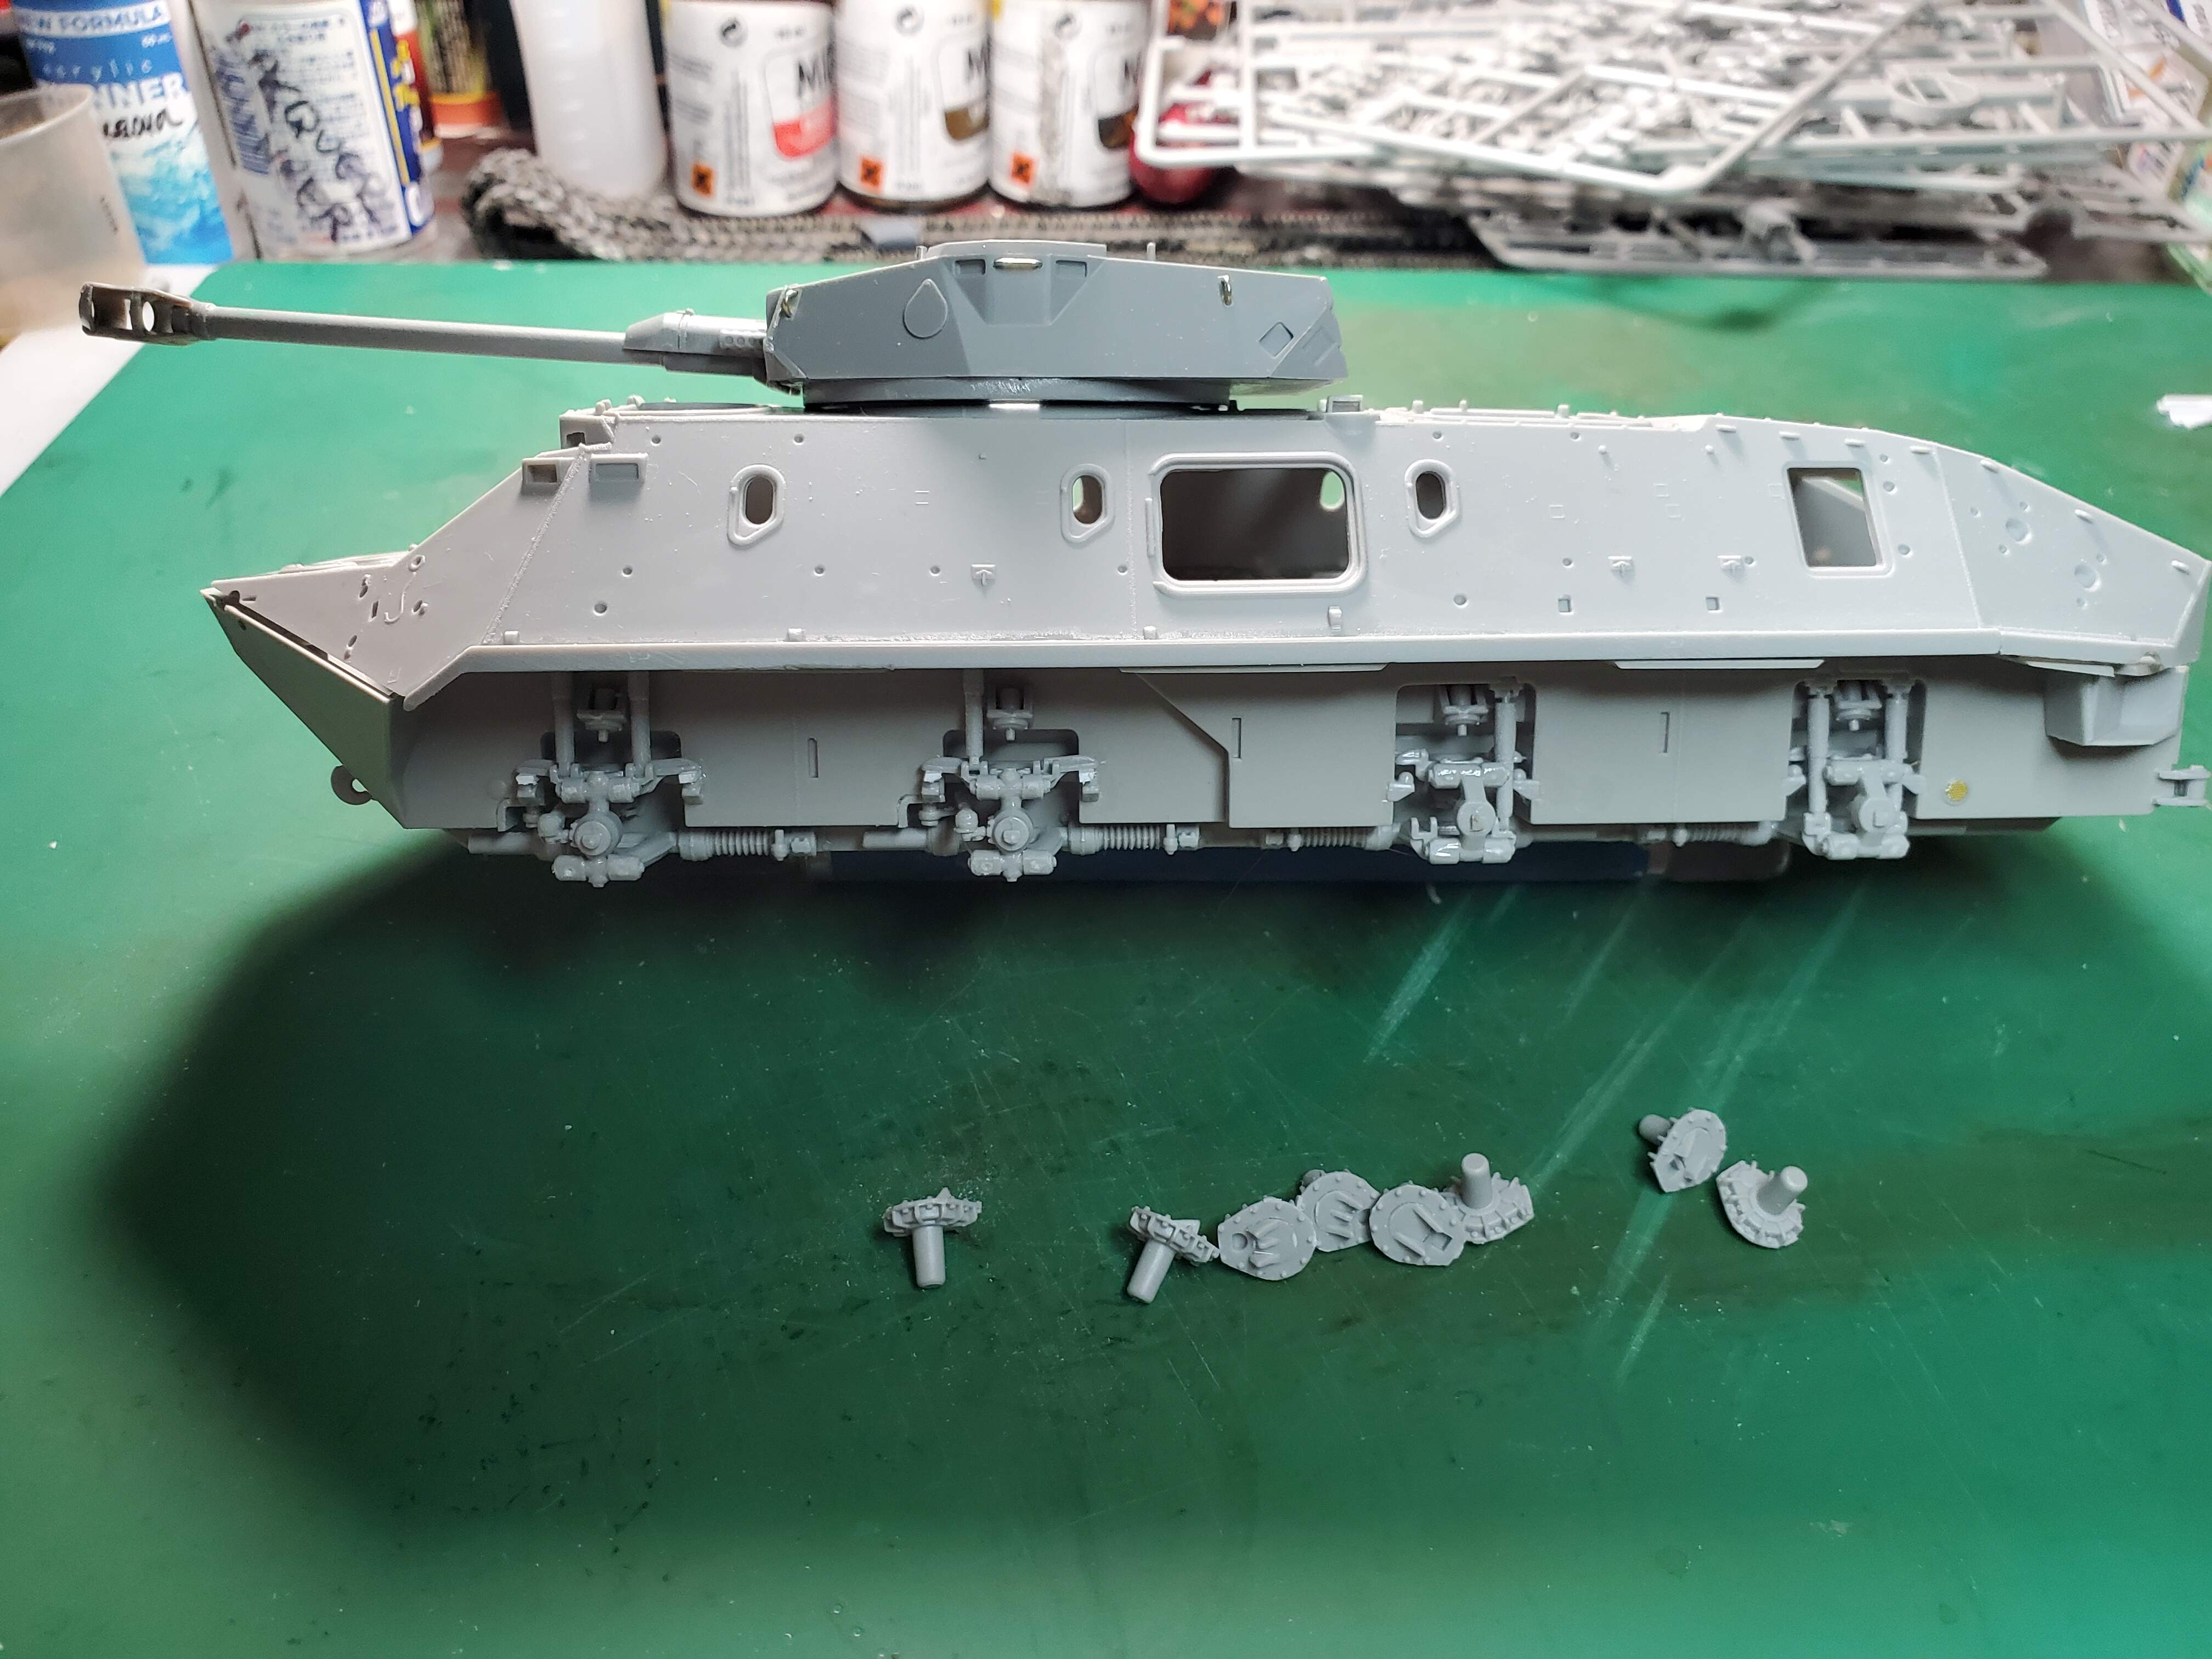
Moved up, and now working on, upper body. Will be adding PE where I feel some extra detail might be an advantage, from the PE sheet that came with the kit, and the PE sheet from ET Models. Wheels/tires will be Panzer Art. No progress on the AML 90 turret (although I’ve previously added some brass rod detail for the lift rings/grab handles). Eventually the turret will enjoy some PE upgrades from the Voyager set.
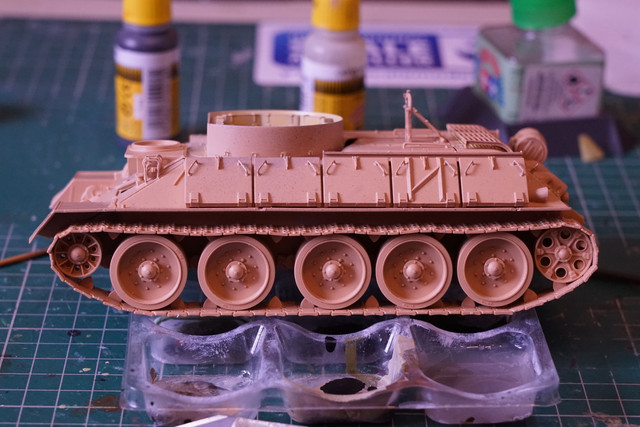
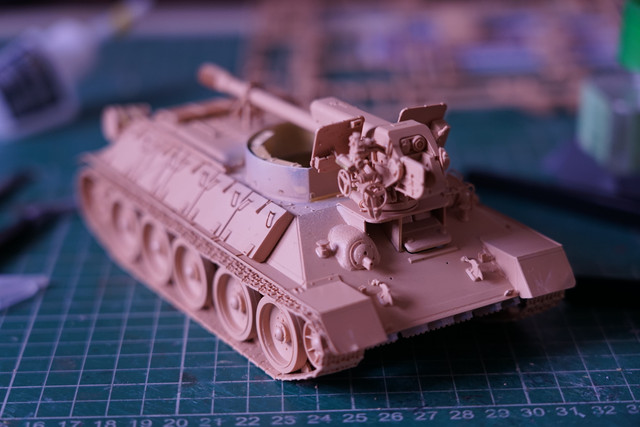
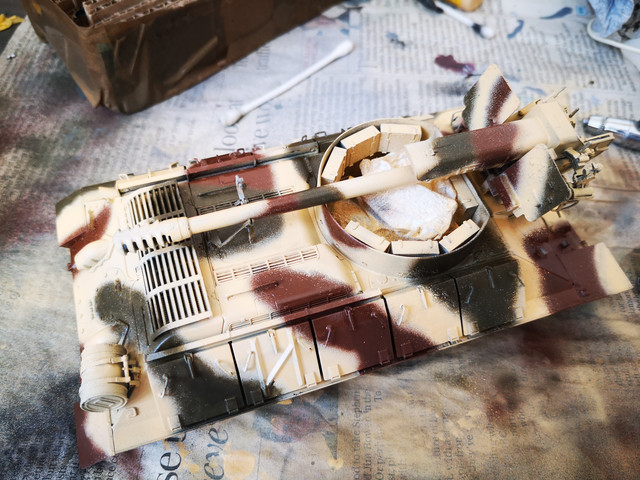
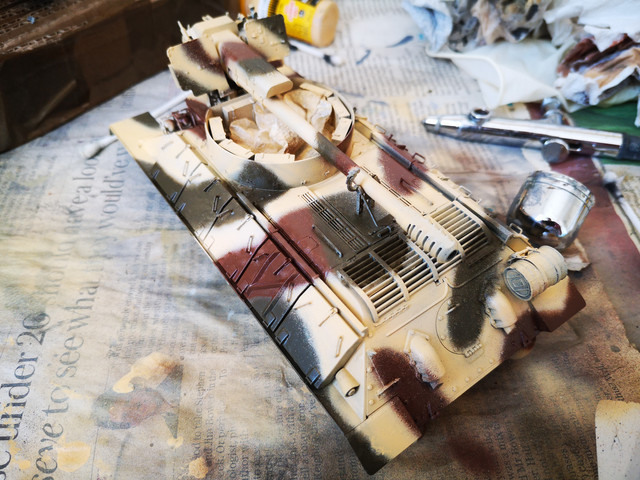
Syrian T34/D30 - I did the free-hand camo,and then redid it… actually not too bad I must say. Ammo paints as called out in the kit (not 100% on the sand yellow but with some weathering should tone down) thinned with Ammo transparator. Some overspray but, again with weathering, should tone down…
Like the colors and yes weathering will help to “erase” some of the overspray.
To cut down on the overspray you can thin the paint more and spray at a lower pressure. You will also have to work closer to the surface and spray at an angle away for the area you are trying to avoid overspray. I free hand all my multi color camo and find this works pretty well.
Little bit of an update. But first, NEVER let me build another Trumpy BTR 60 kit, EVER! What a POS PITA kit. I sneezed once and broke over a dozen parts, that is how sensitive some parts are! Talk about over engineered and fiddly parts! Spent over 15 hours over the last 2 days, and the 2 pics is all that I can show for that time! Talk about taking the wind out of your sails and causing burn out! Pretty much closed up most of the Takom turret, adding a bit more PE, but there is quite a bit of fit issues, along with final detail additions. The steps and gaps, when combining the upper with the lower hull, are atrocious. Still have areas of fill to complete along the joint line, especially the front where the top meets bottom affecting part number L13. Added .032 steel safety wire for grab handles along the upper hull line. Seems when I finish one aspect of this build, another error shows up that needs correcting before I can move on. Extremely disappointing build. You’ve already read my description of the #$%^&* suspension. Between the Trumpy instructions and the Takom instruction, I think I’m about 60% complete. But…I slog along…
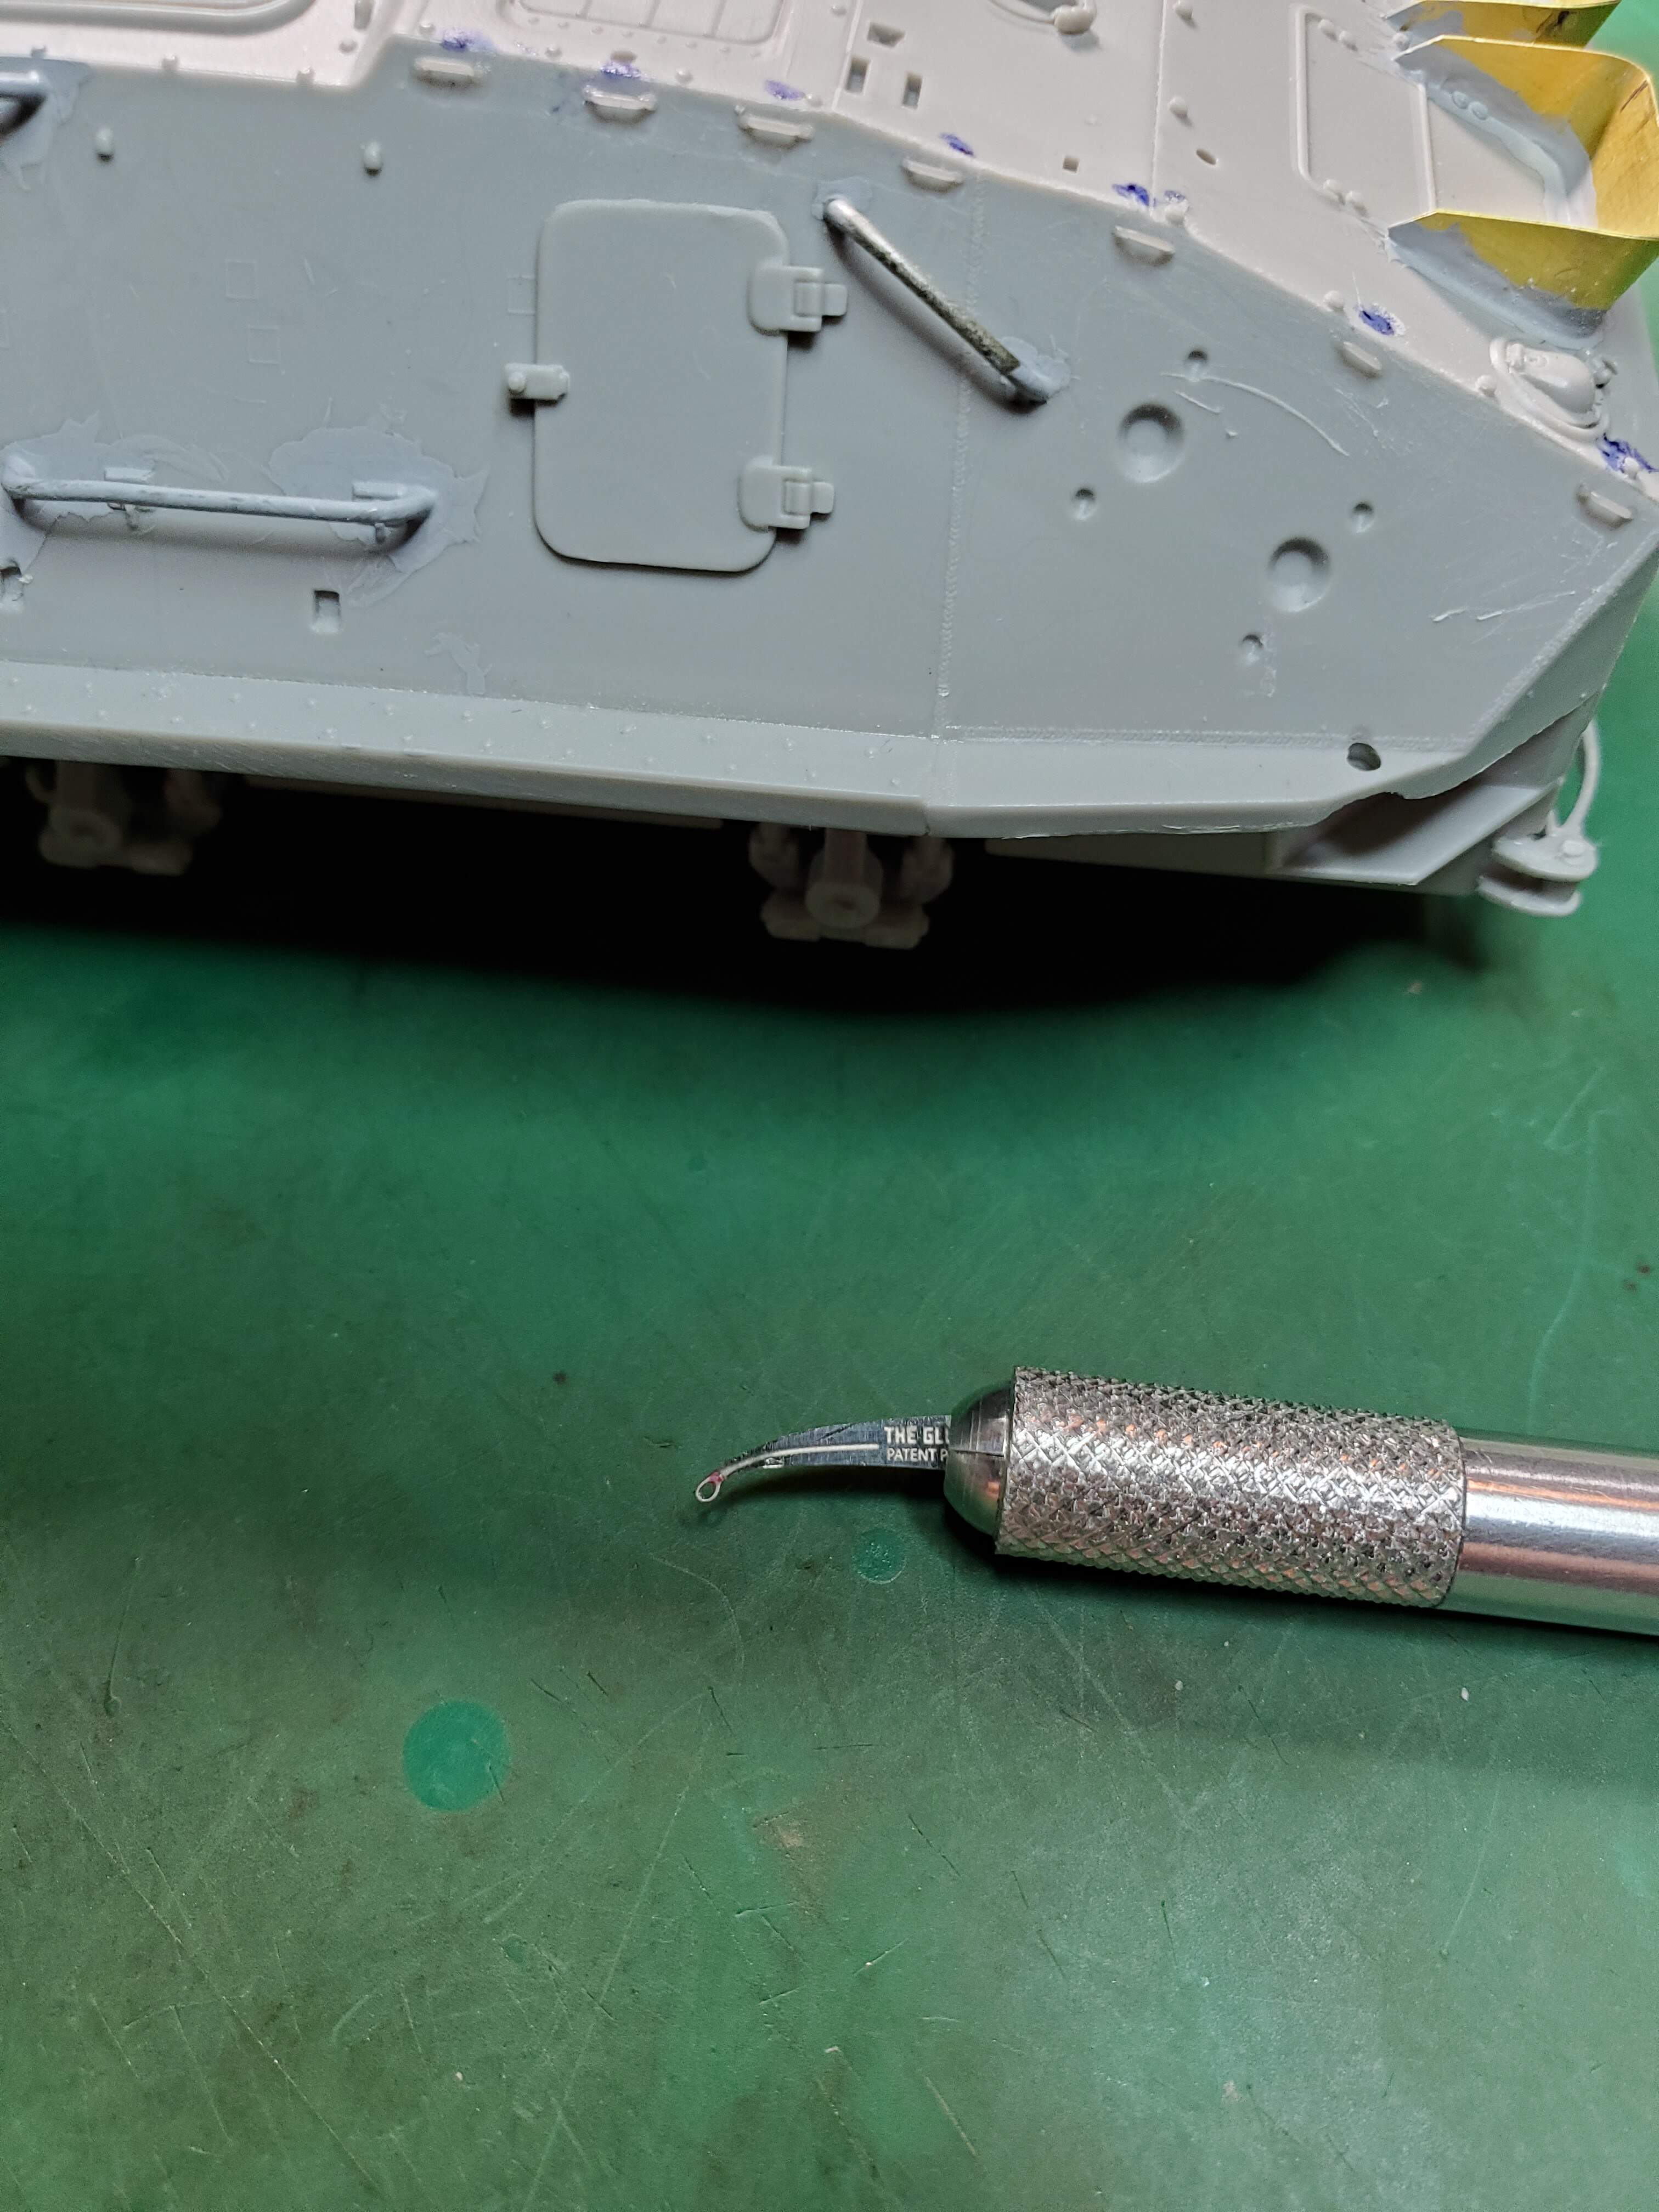
A little more PITA application/work to the BTR, and the AML 90 turret. Since the rear tie-downs are molded with atrocious detail, on both the BTR and AML, all of them had to be cut off and replaced with aftermarket. These little tie-downs look great, but they are fiddly…and prone to static electricity when trying to move them around the vehicle. Apply them with an applicator meant for super glue in the tiniest of amounts, and with the longest drying time (5 to 15 seconds). You’ll need it to maneuver these little guys to a correct position. I’m giving the cure time 24 hours…then I’ll apply a good stiffening coat of Tamiya Extra Thin.
Sorry to say, but no Mark… it finishes 30 Nov 2021!!! Yes an extra month is a blessing.
A per the first post - hidden away is '9 mos -
Which is 9 months to you and me…
Welcome back.
My mother in law is ill at the moment, but I have been doing a little parts clean up on my build whilst I have been visiting her. Hopefully can start putting a dab of glue here and there soon, so I will be joining you.
Hmmmm. Peter is correct in that 9 months after March 1 is Nov 30, or Dec 1, depending on how you count. But, that is a bit of a miscalculation on my part (Phil can’t subtract) as I had in mind it ending at the end of the year. So, let’s stick with Nov 30 for now, but realize I’m extremely sympathetic to builders who need until the end of the year to complete.
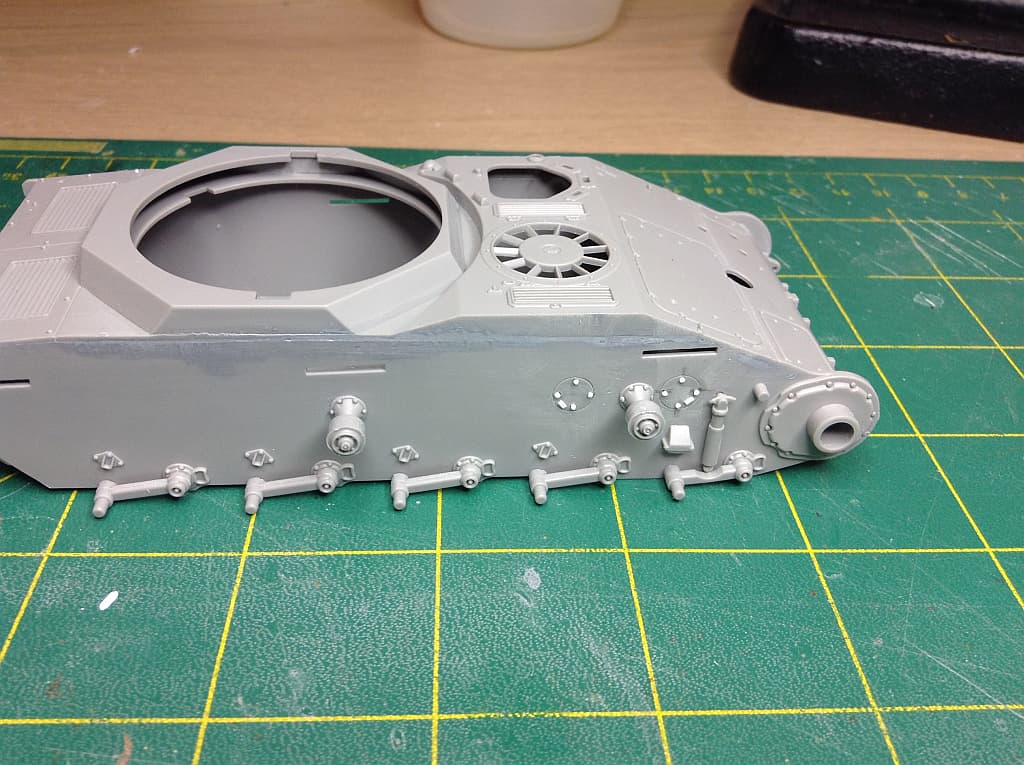
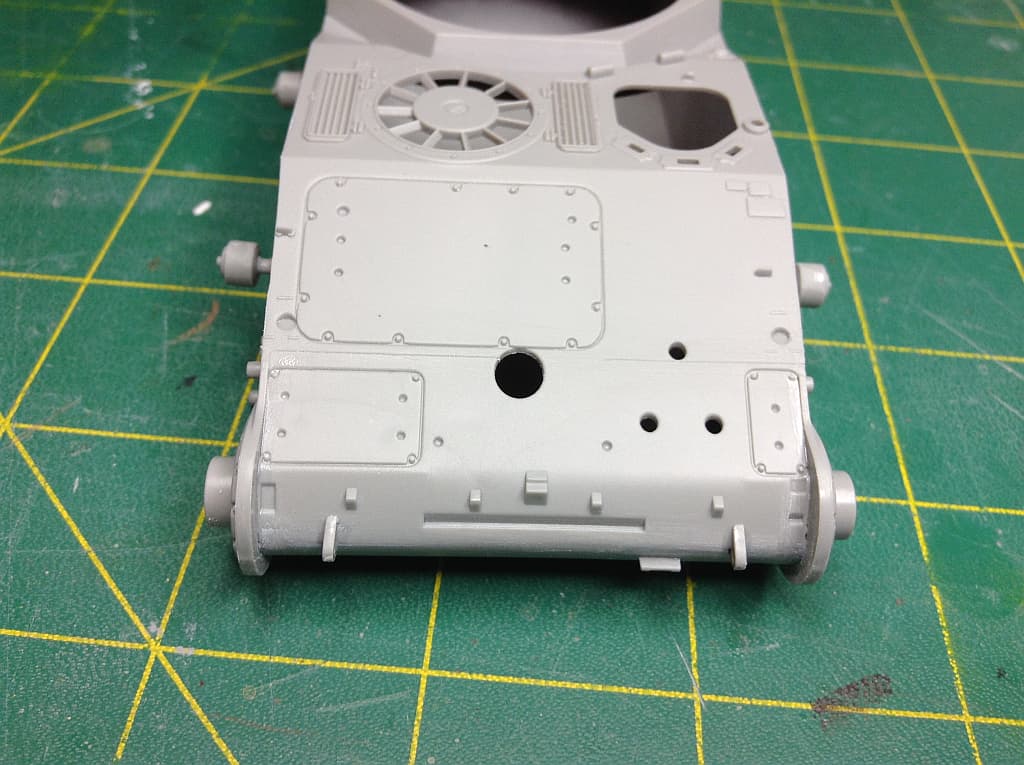
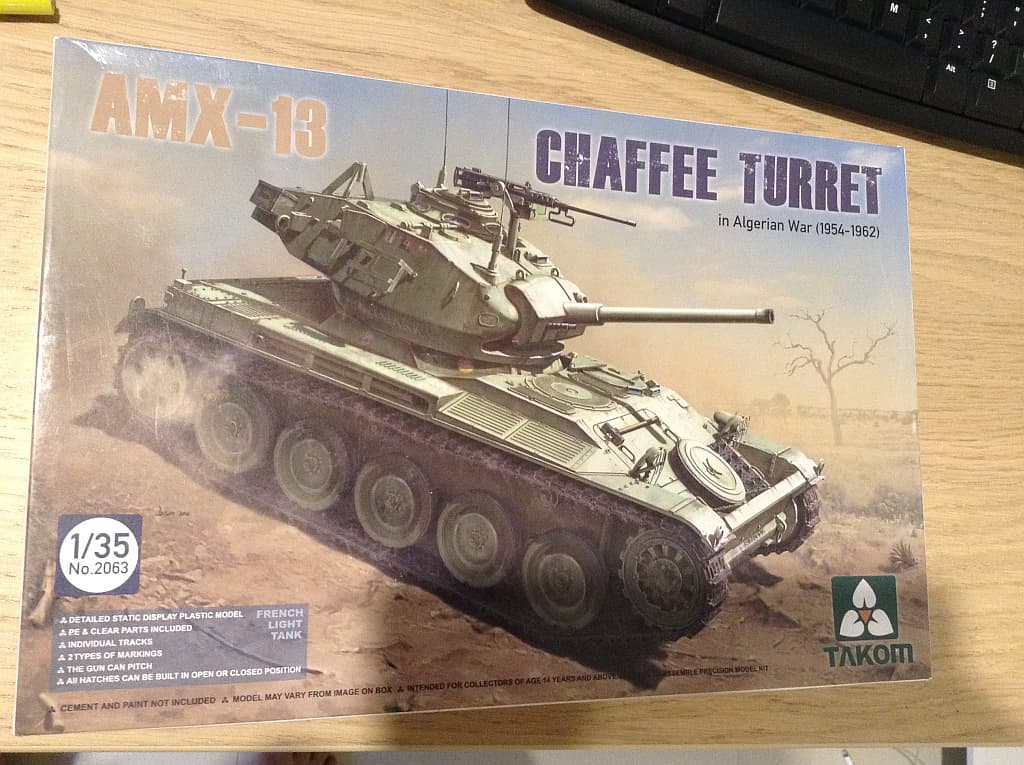
My kids went and spent the evening with their Nan, so I had some time to myself last night. Got to throw some glue about. This morning I sanded down some putty (probably didn’t need to do that if the side stowage boxes cover it - better safe than sorry). So here is a start on the French AMX Chaffee used in the Algerian War circa 1961.
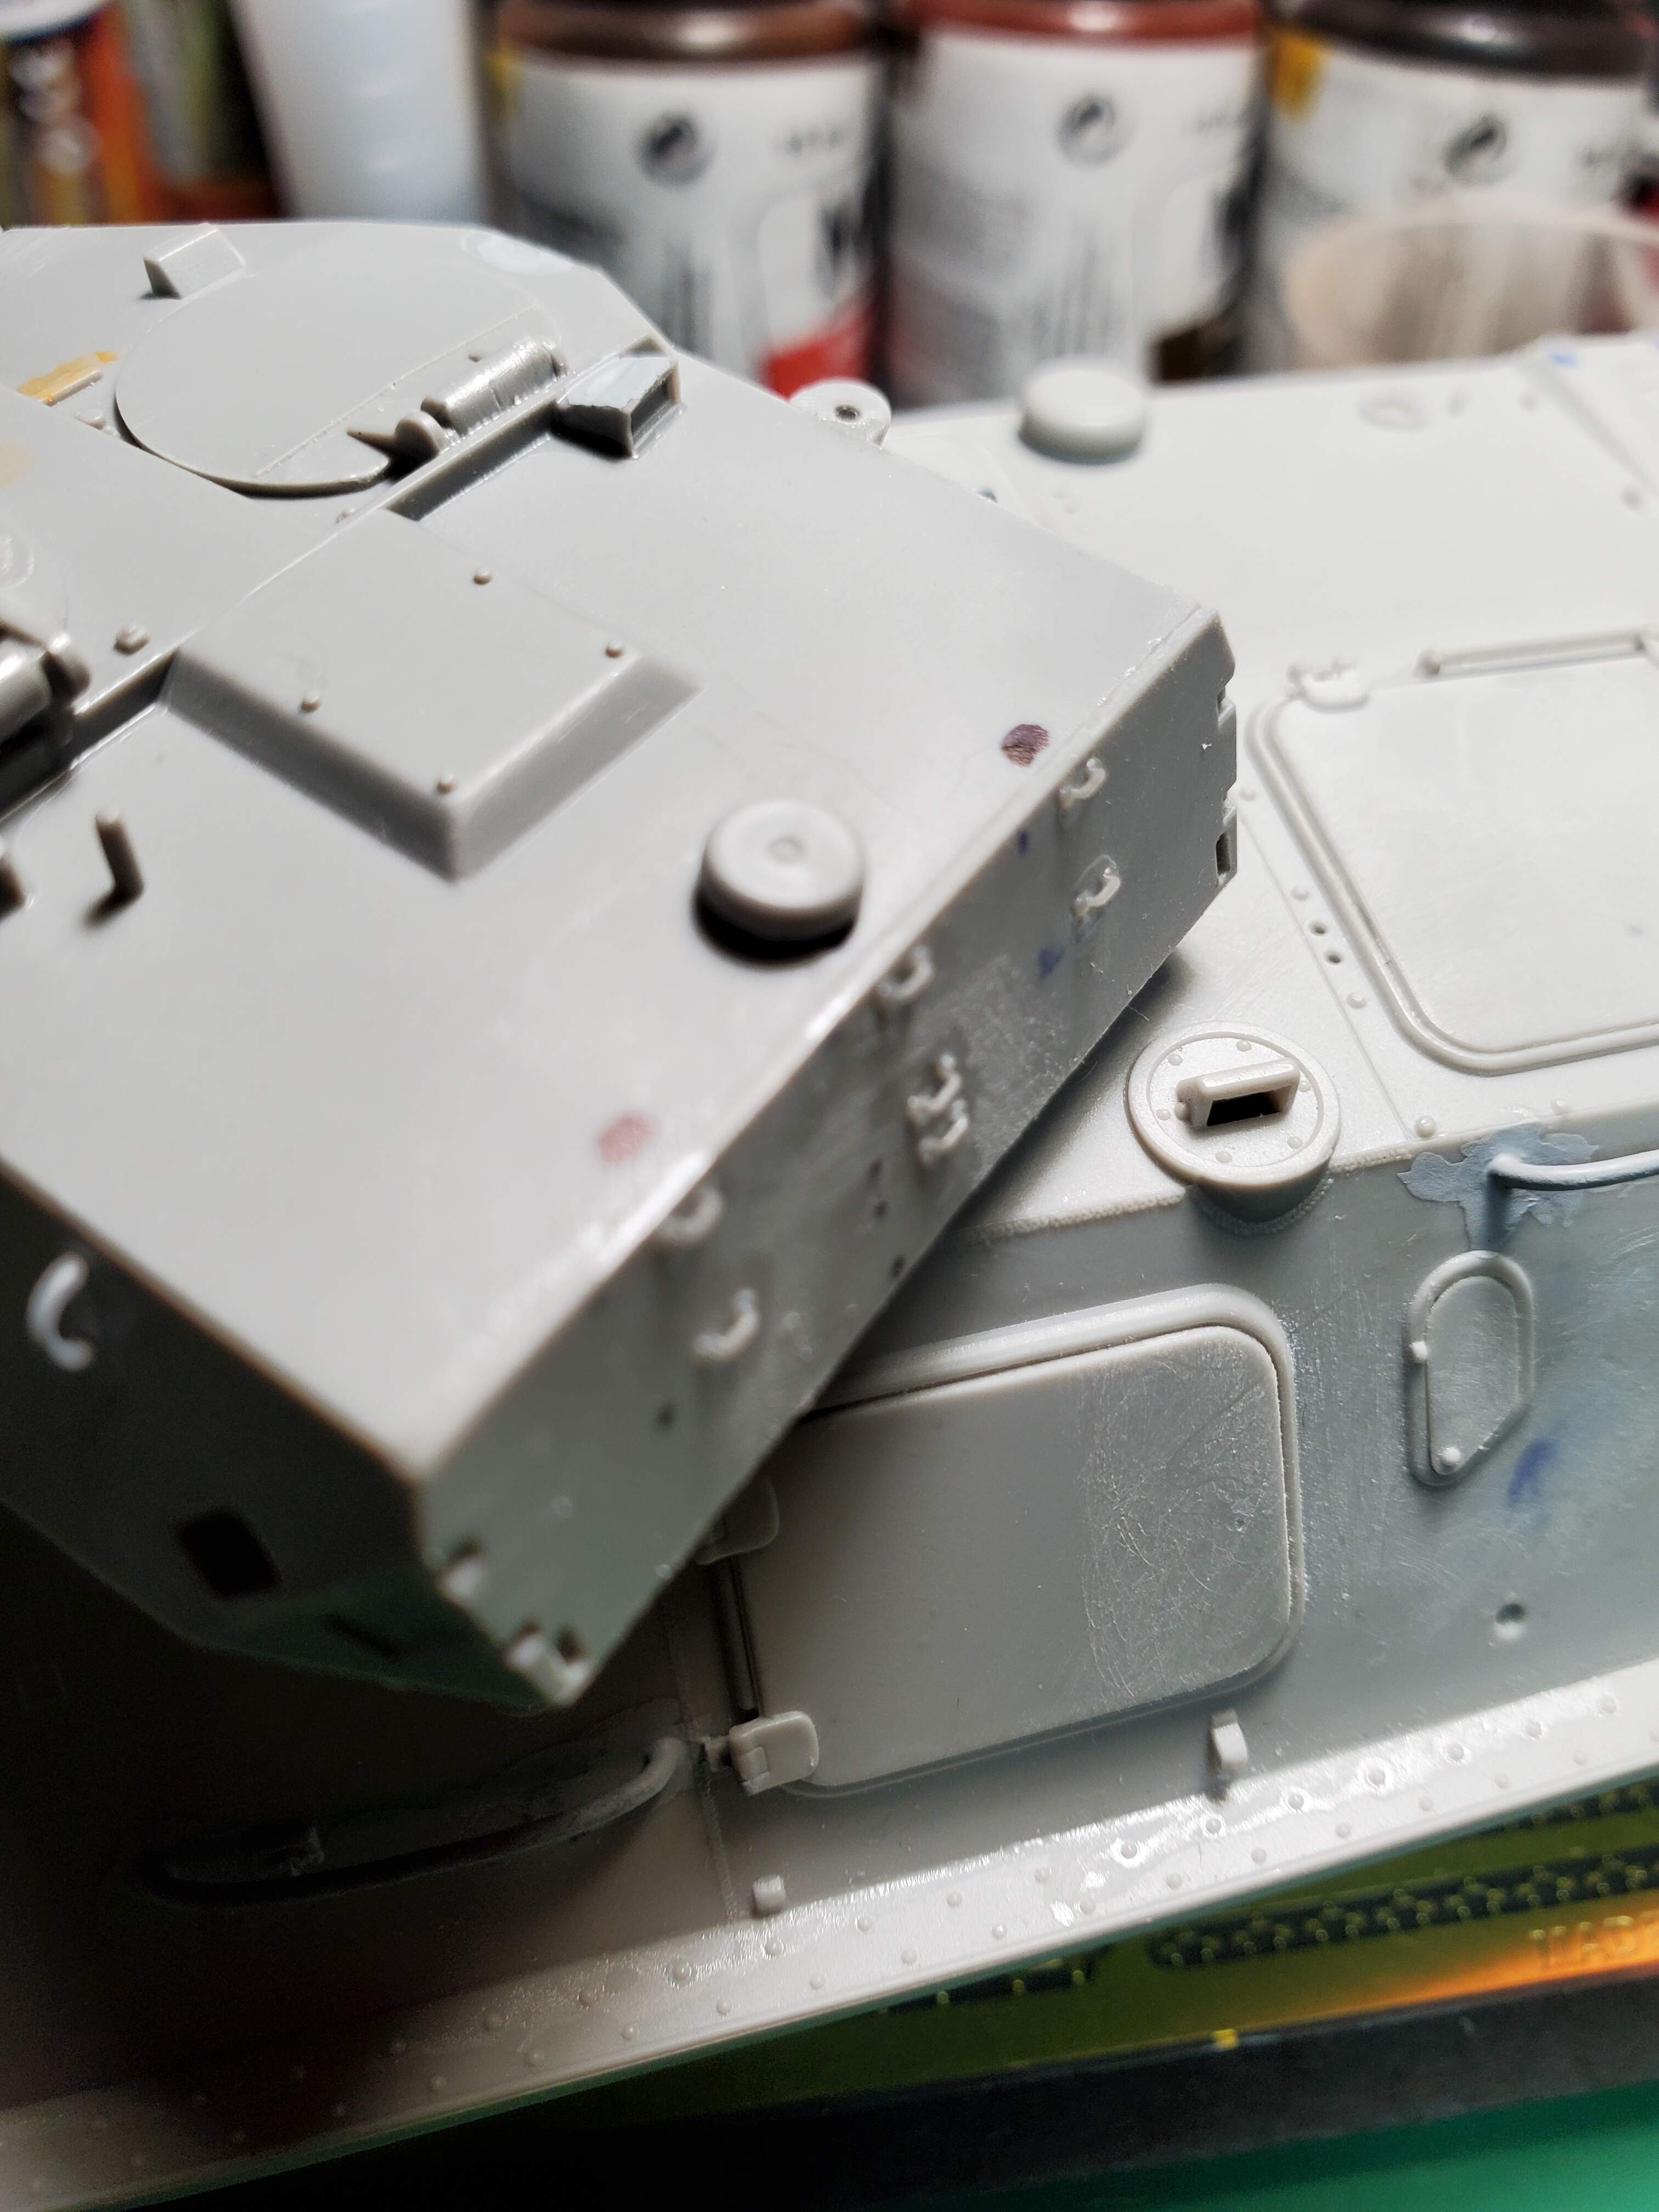
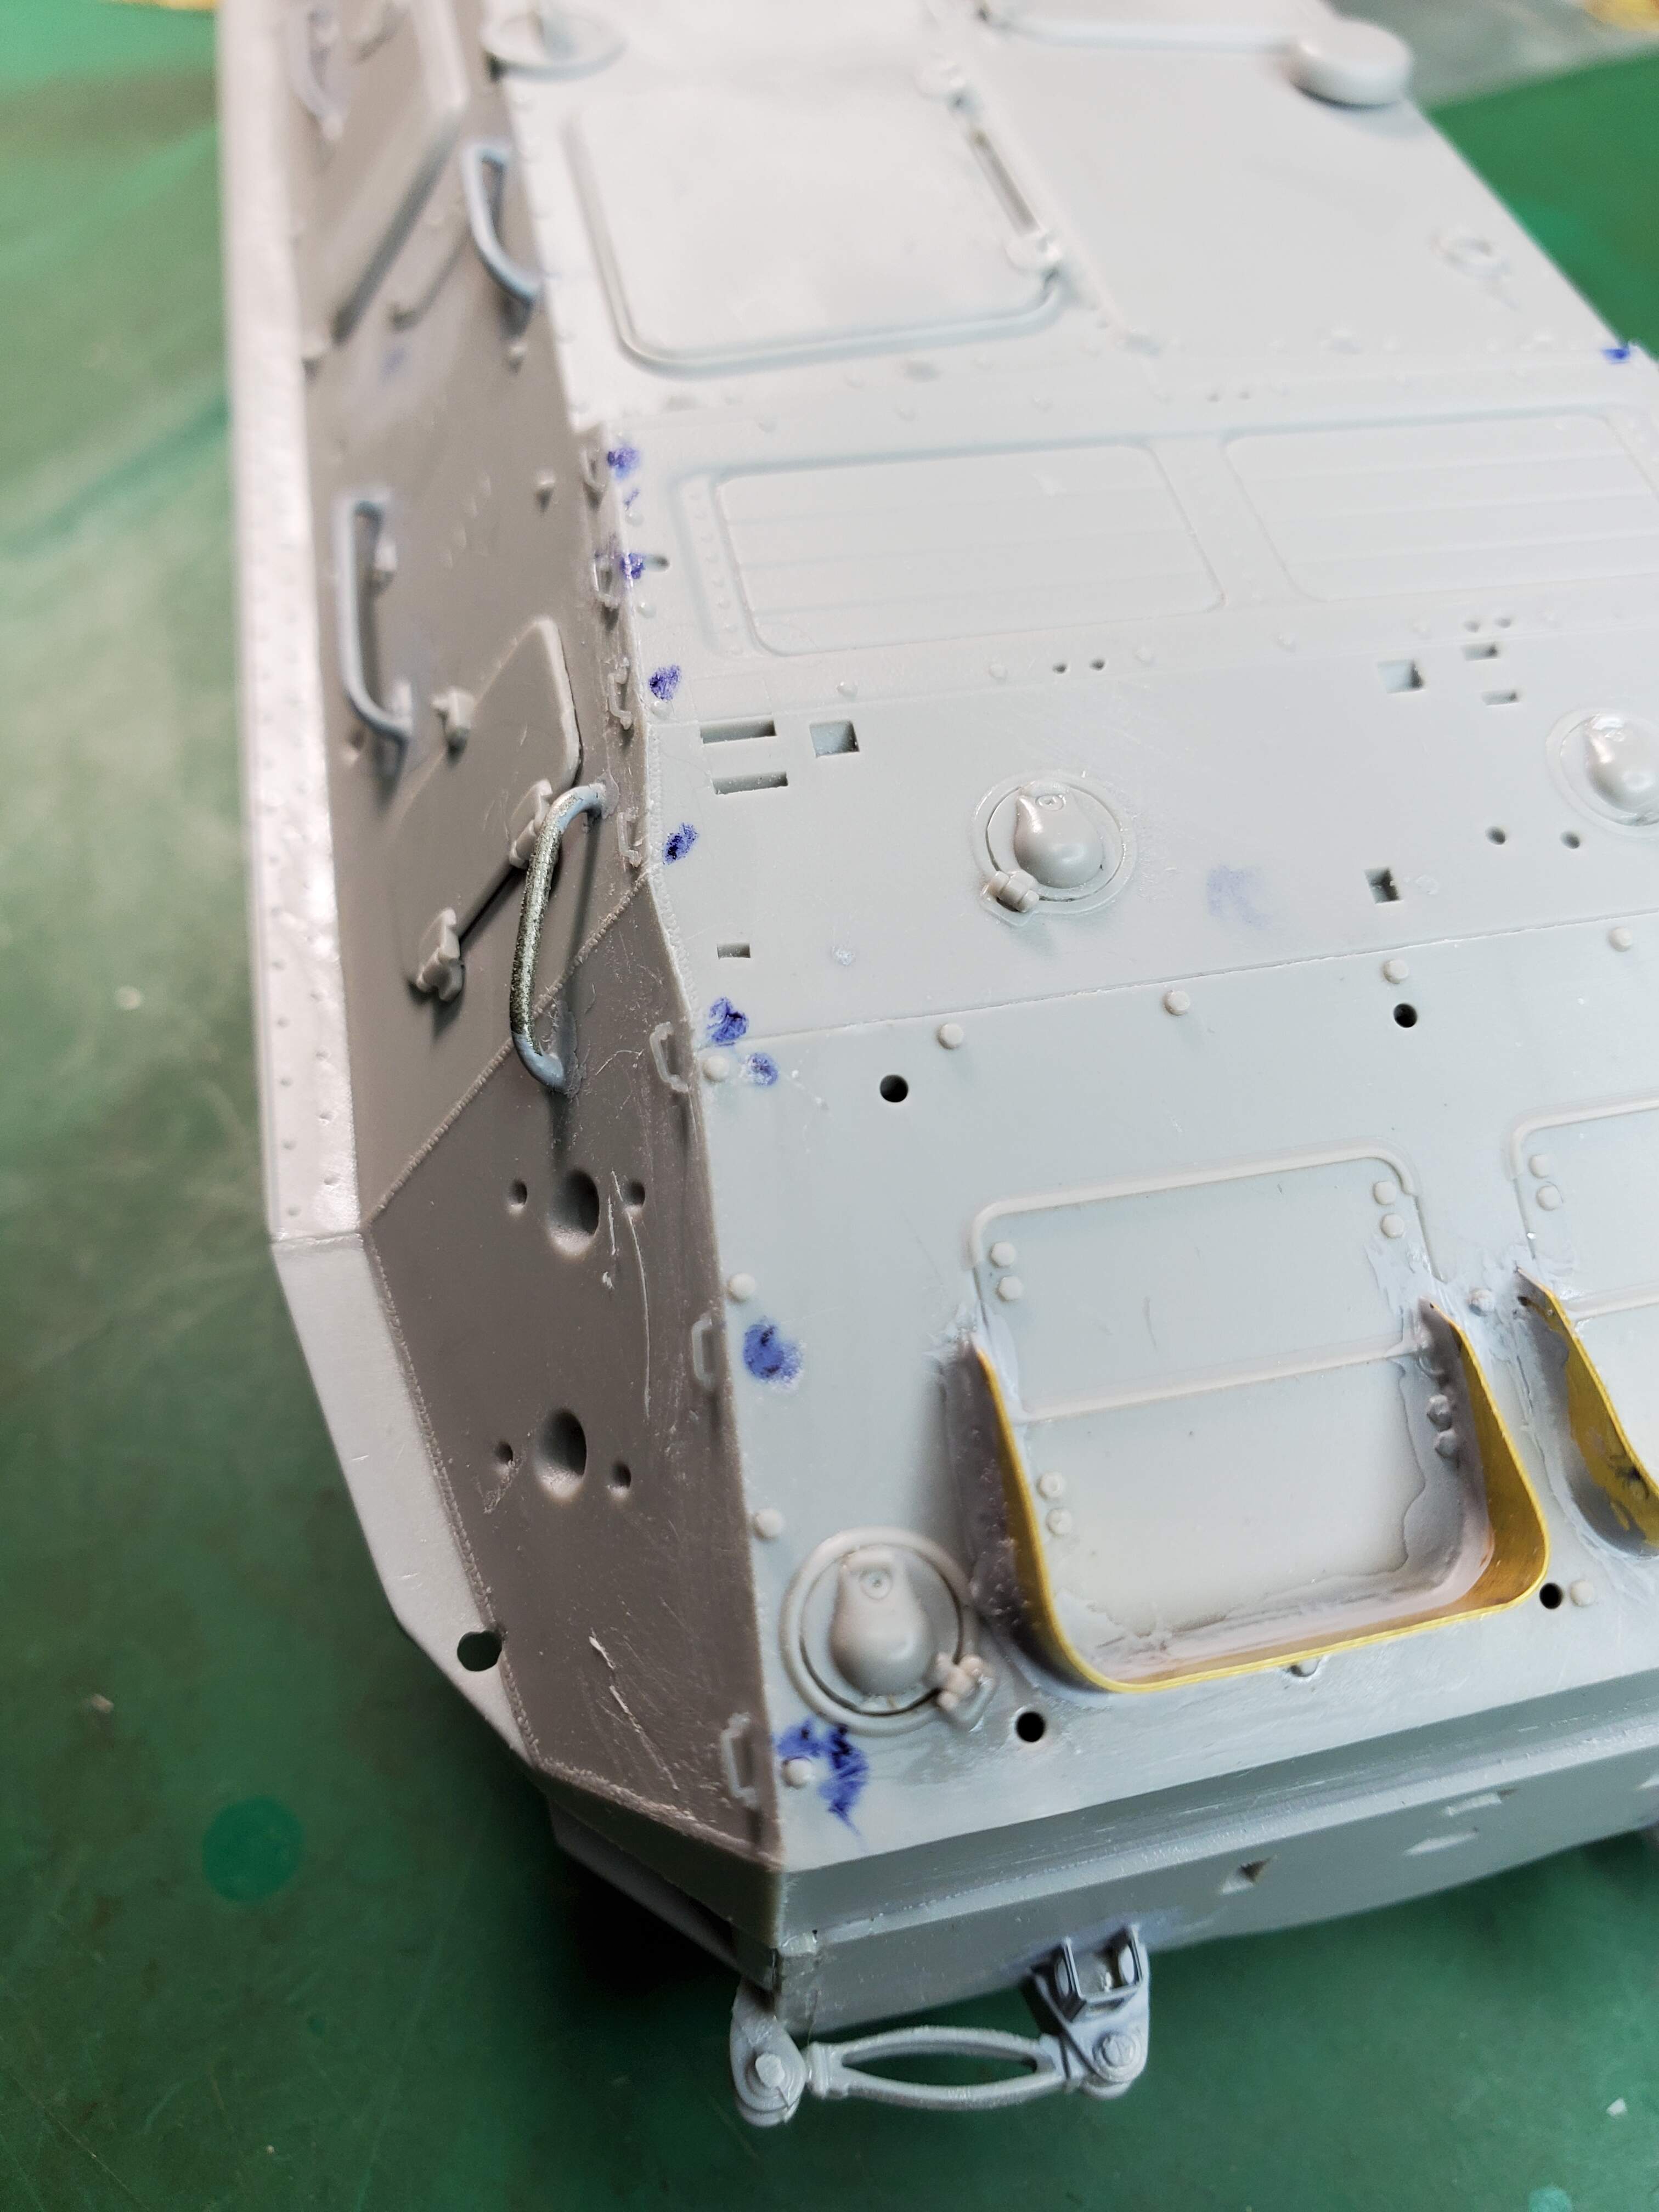
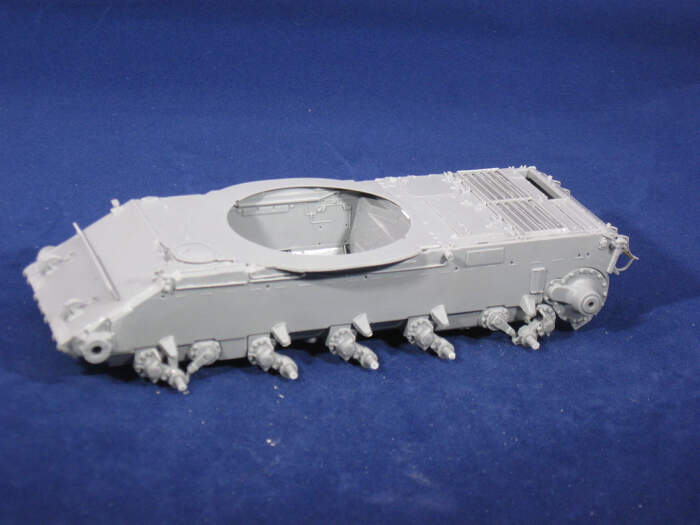
First, the Takom kit has the circular access panels in the hull side proud of the hull, when they should be flush. This meant sanding off the kit port and scribing new ports and adding bolts:
Fairly simple Phil. I use a set of drawing dividers and a small brass disk with a hole in it from an old PE fret. Superglue the brass disk in the centre of where I want the port, place the leg of the divider in the hole in it, and then twirl it so the other leg scribes the circle. Remove the disk, a quick sand down and then use a toothpick to remove the excess from the circle. A quick whisk over with Tamiya super thin, fixes the slight fuzz you sometimes get.
My BTR build is running a bit late than I expected. Life’s issues and a model contest coming up October has me trying to prepare the finish to 4 other completed build vehicles that are actually ahead of this BTR build, that need paint/weathering. So, completing the BTR for this campaign might be in jeopardy.
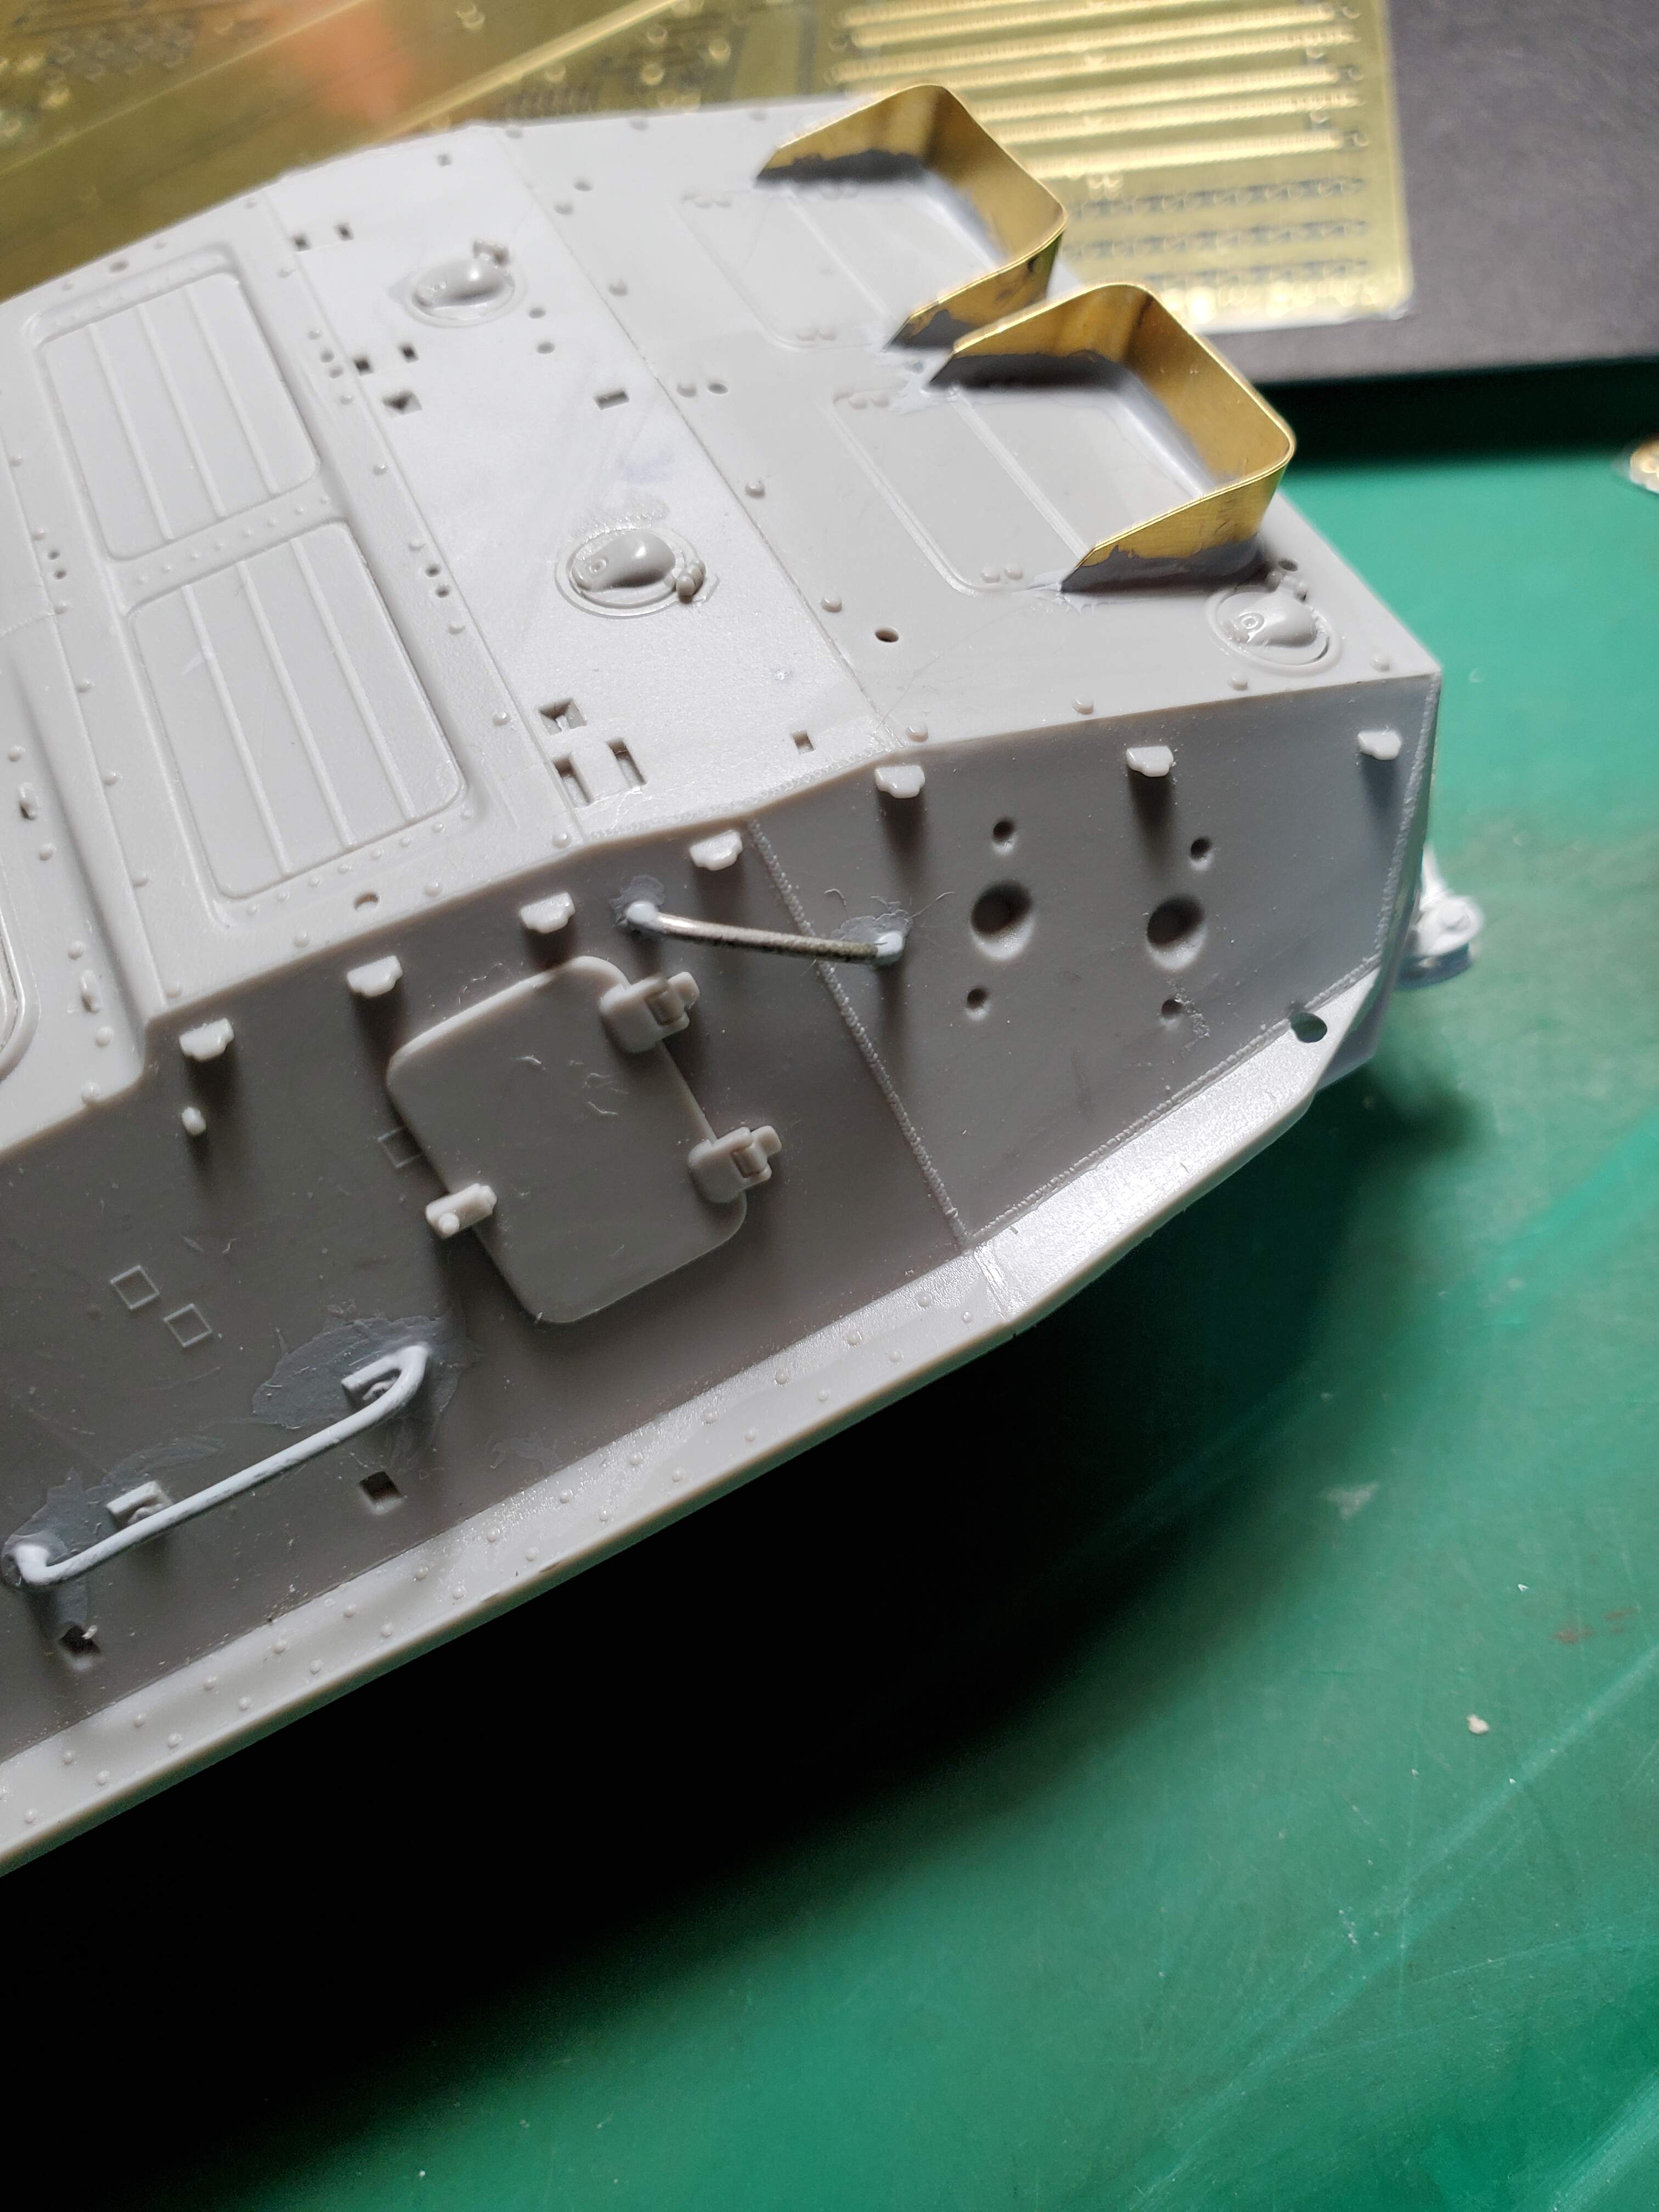
Having finished up a couple of other things I now have some space on the table to get back to this. I did quite a lot this weekend, but this is what is mostly showable - the plastic parts of the hull are mostly done now - I need to add some PE before I can do more plastic so need to set aside some time for that.