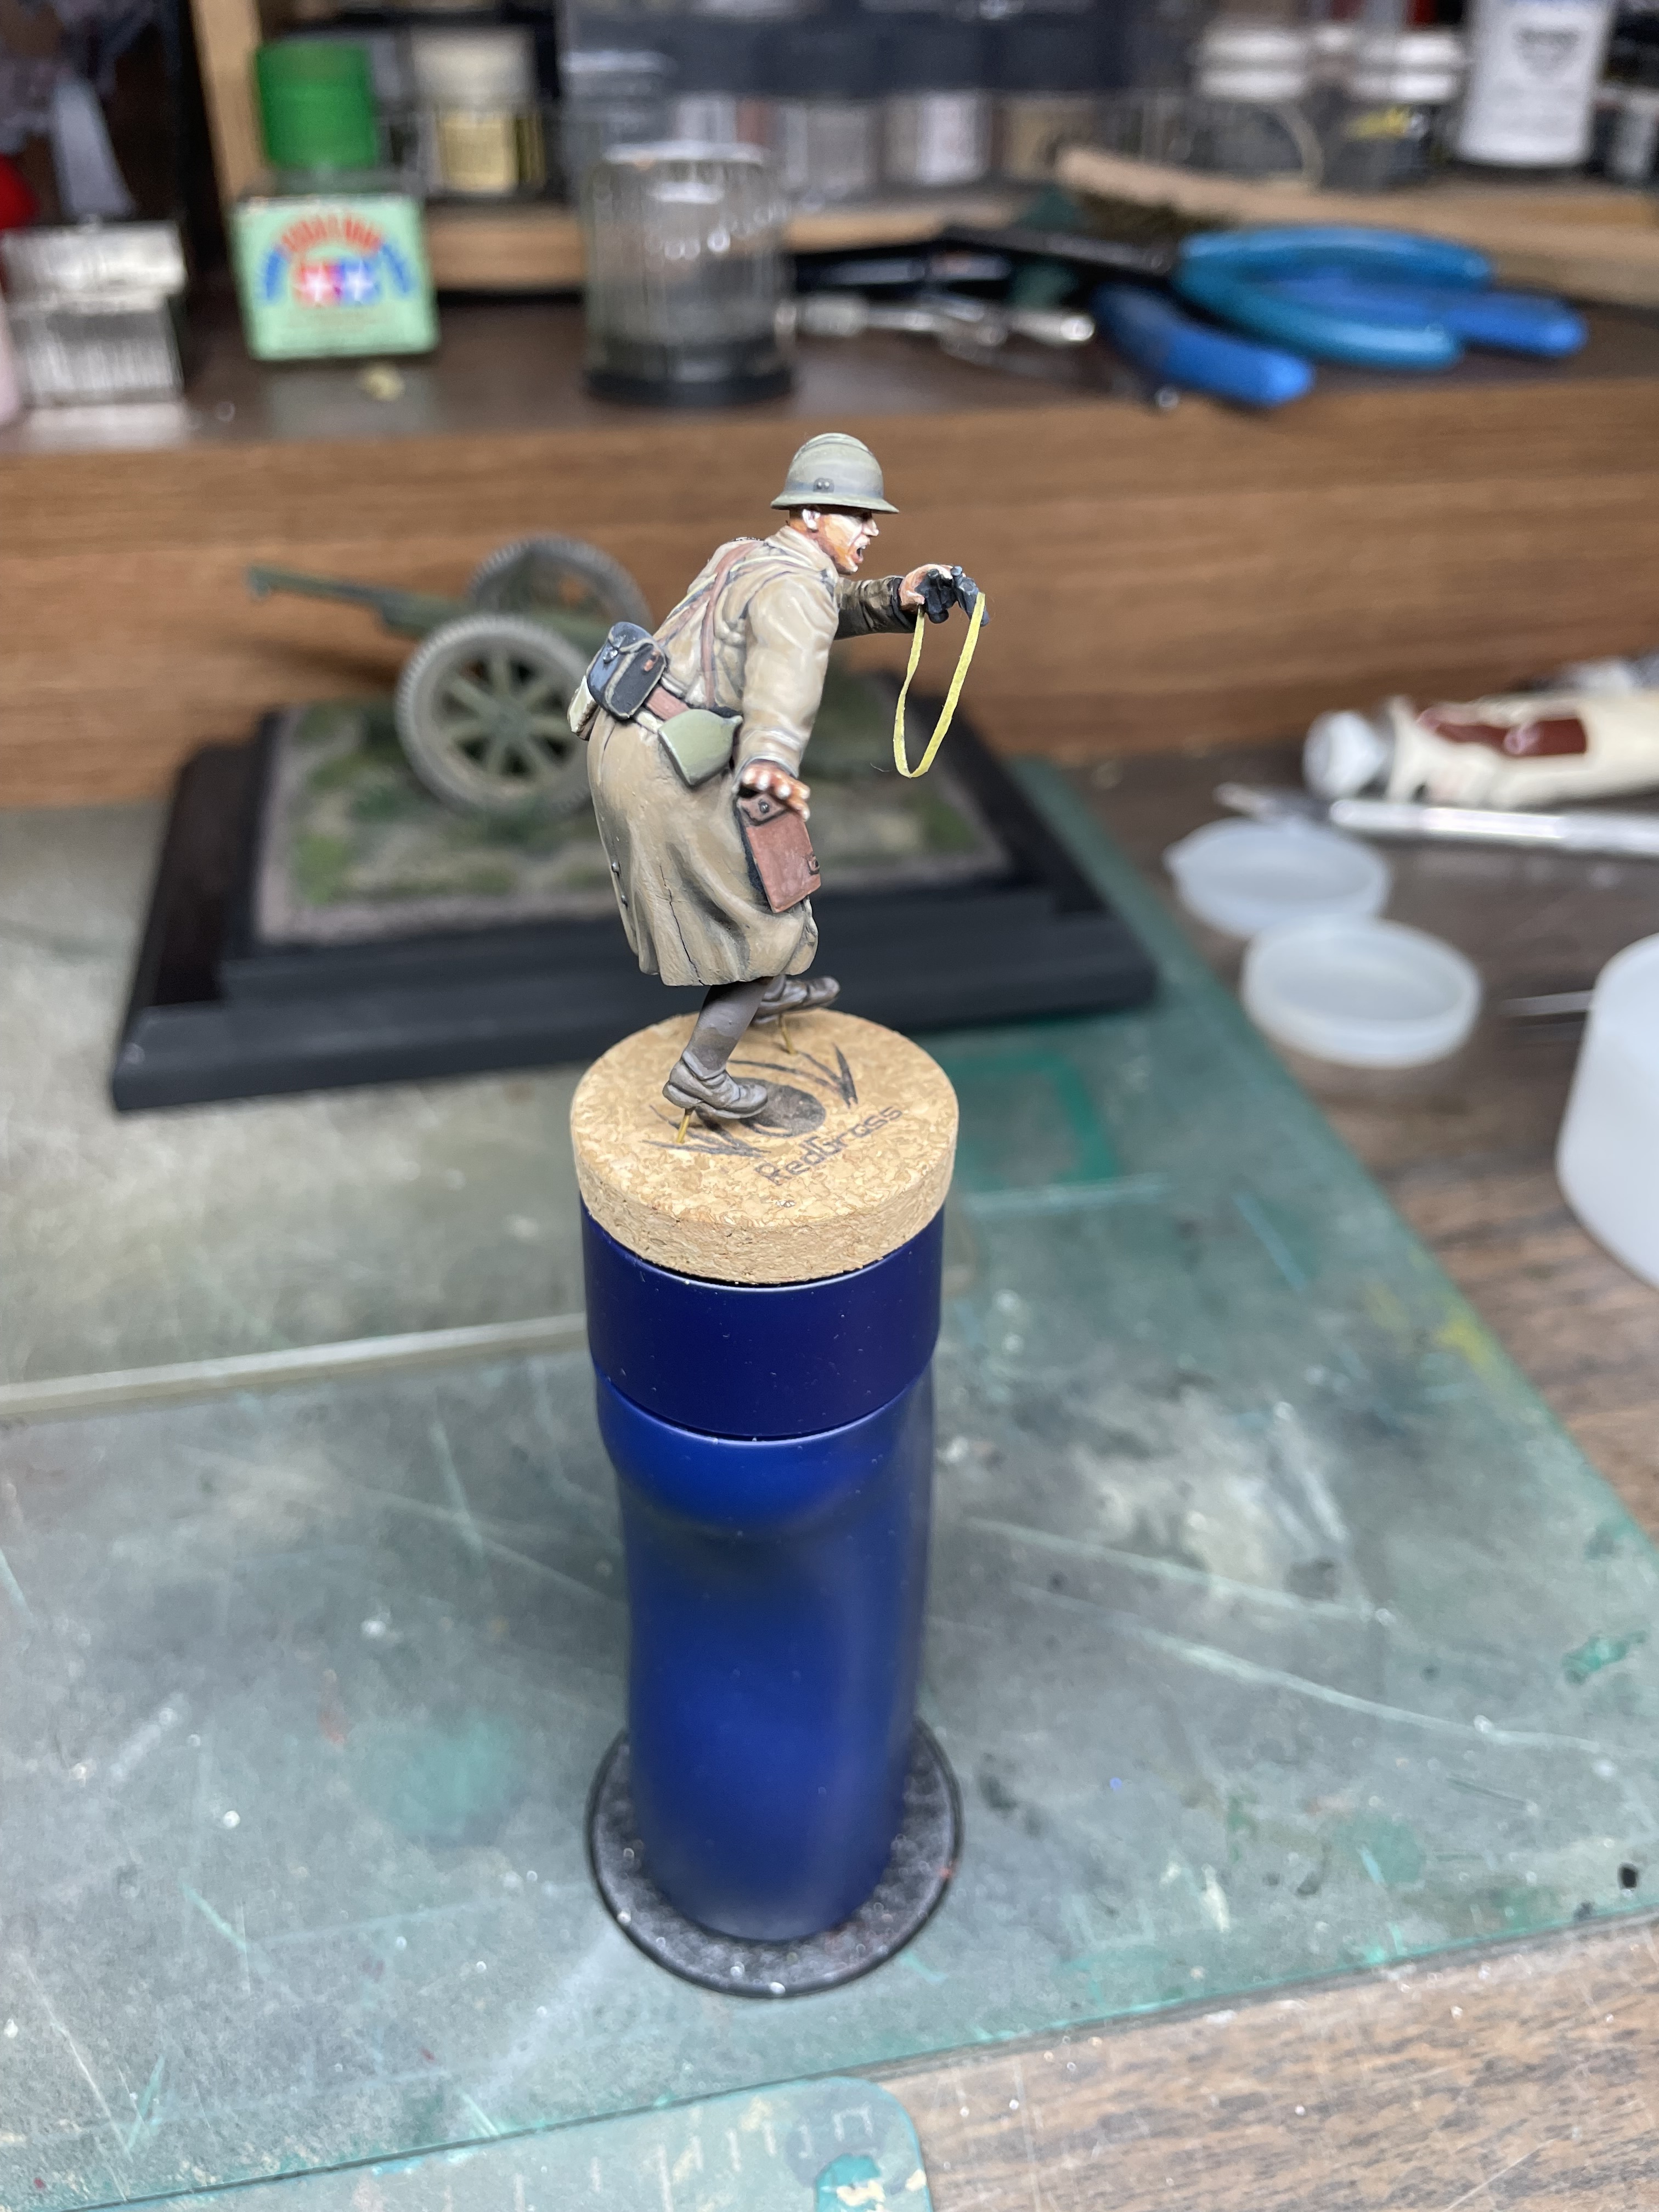
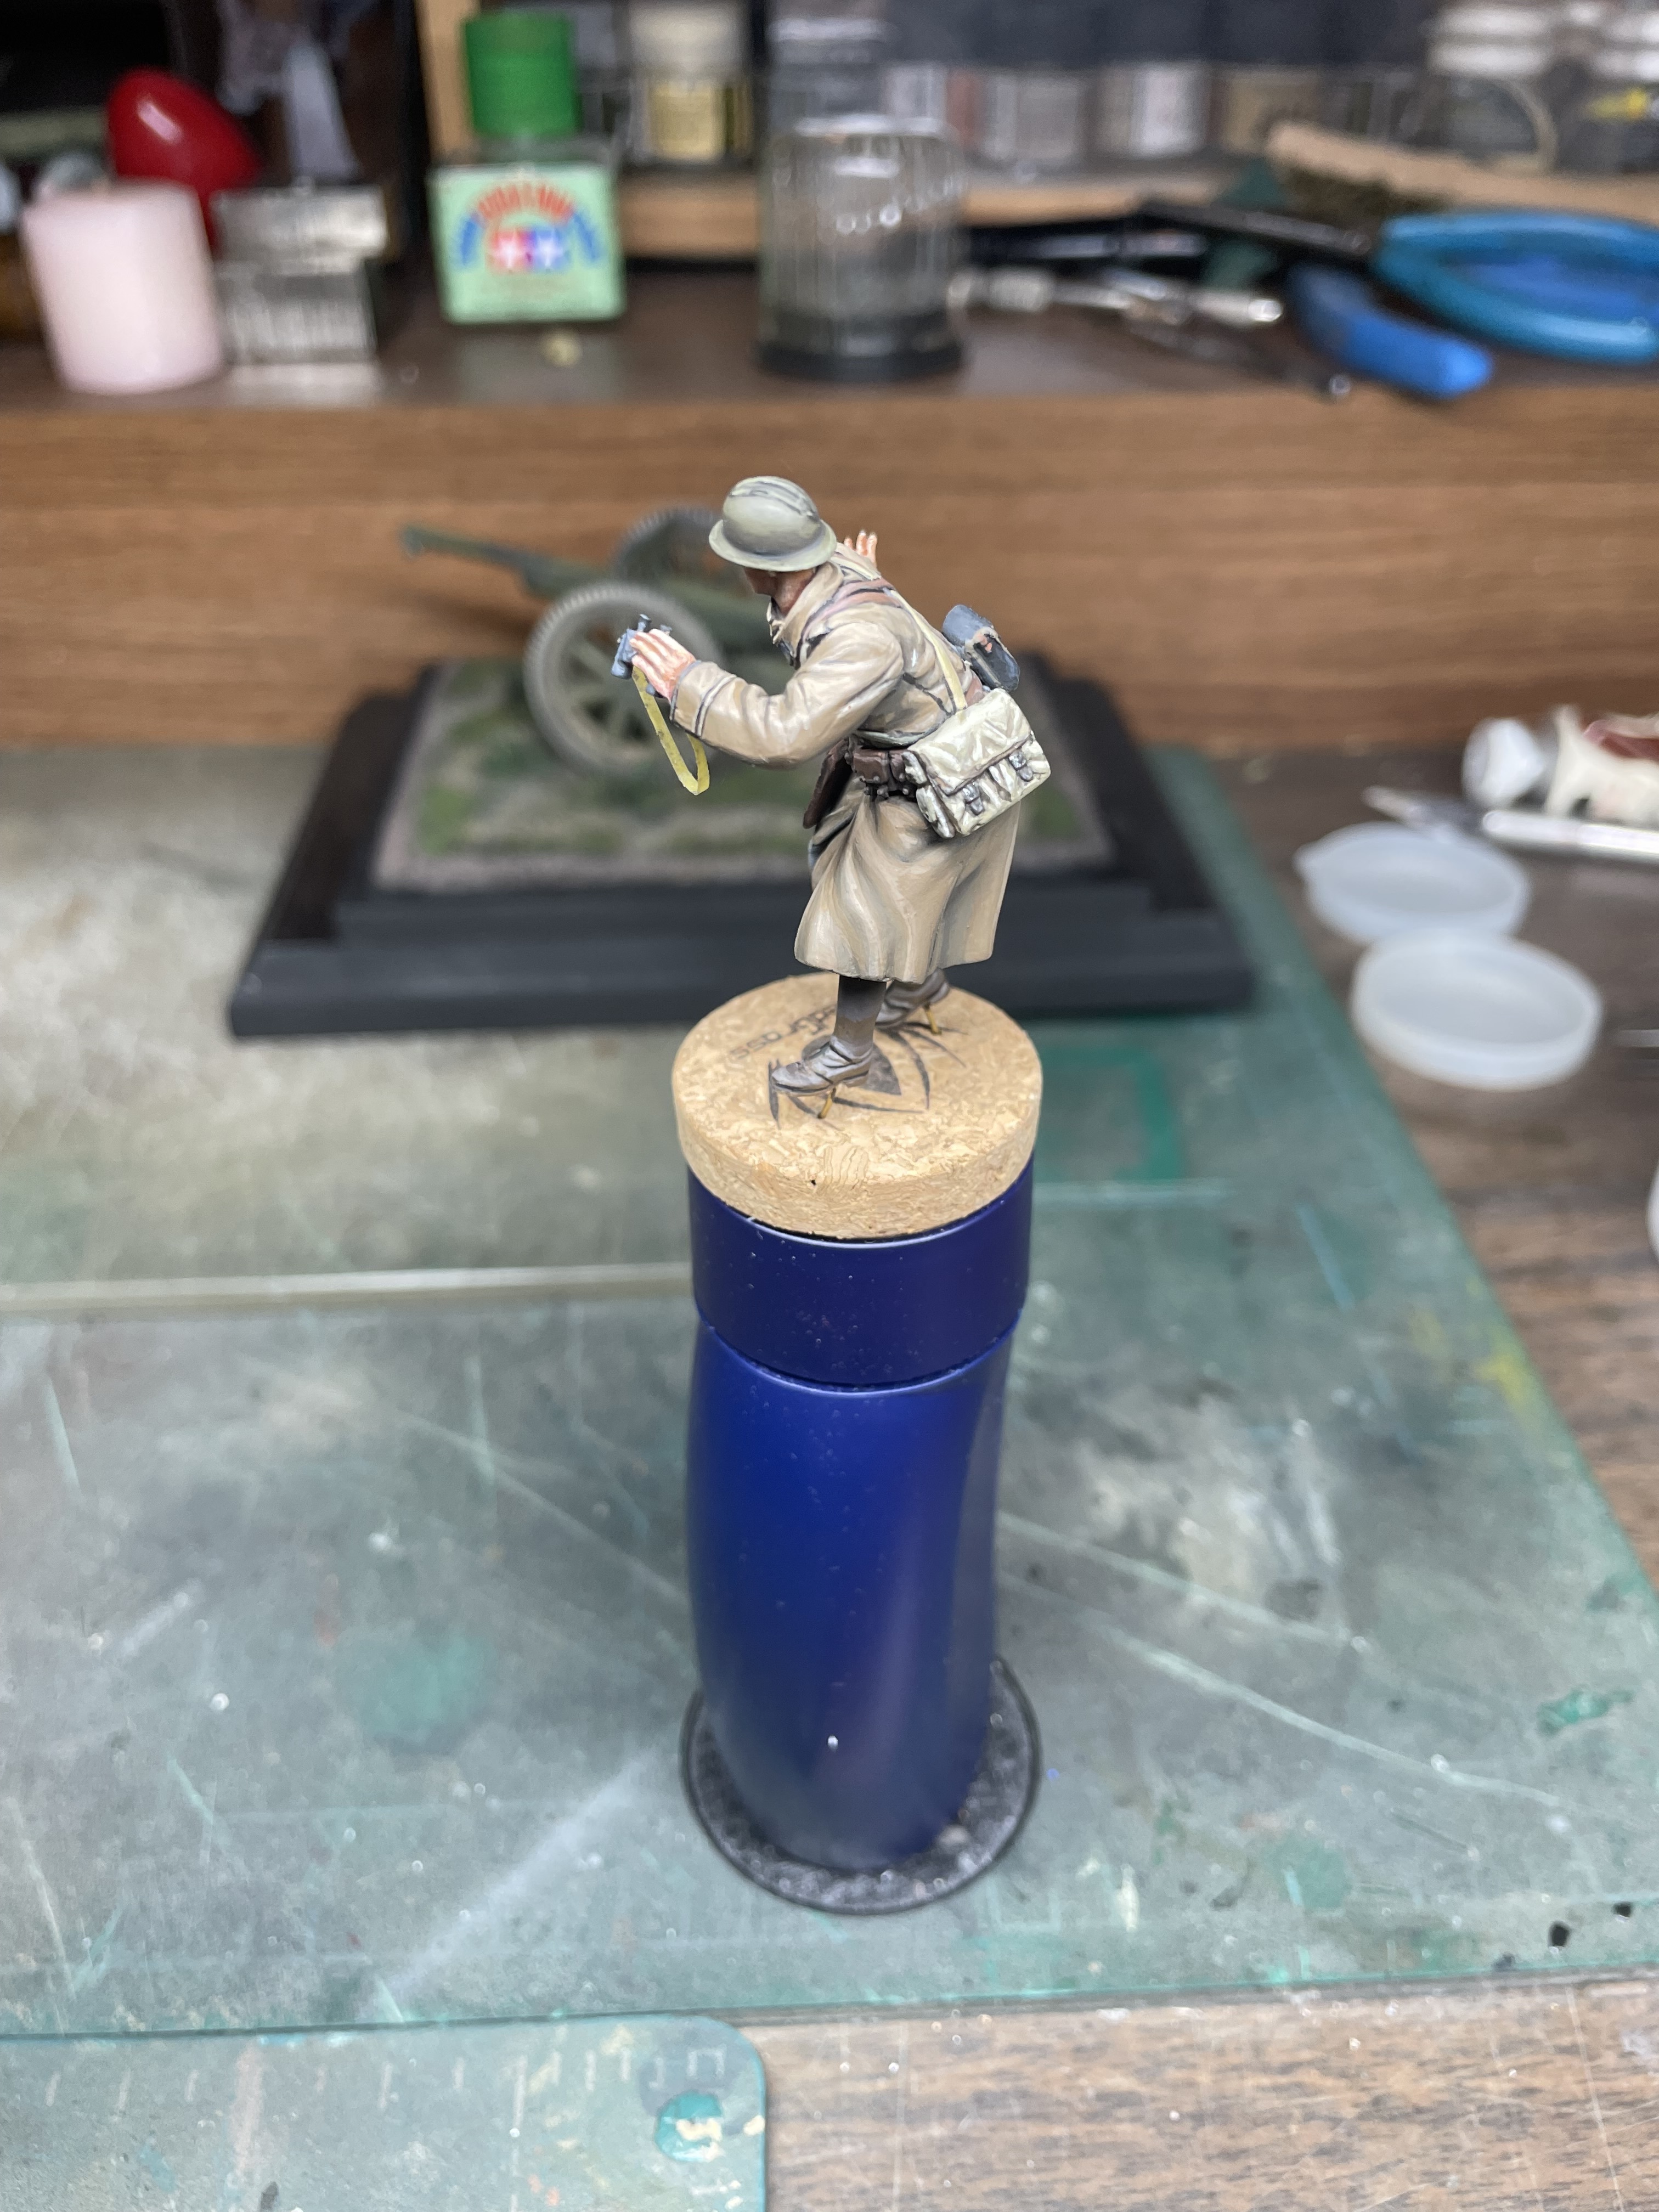
I originally intended to paint this figure as an artillery man and put him with my recently completed 75mm gun from IBG, but changed my mind. He’s from the Dragon set of French Infantry at Sedan.
I will now make him a standalone figure but as an infantryman. I just had to repaint his collar tabs from red back to kaki drab.
He has a Hornet head btw. Yes it looks too small for his body but those Capote ( overcoats?) were bulky….
I want to make a stack of ammo crates and sandbags for him to lean on - like the art work on the box of the Dragon set. My question:
Is that pic taken from an actual photo? I seem to remember a picture like that but can not find it anywhere it seems. Thank you and comments welcome!
16 Likes
Nicely painted, but why are the skirts of the overcoat “Bleu Horizon”? The 1935 uniform copied the cut of the old WW1 but was in the new khaki colour so the overcoat skirts should match the top half. It’s possible that some of the reservist units in the French army in 1940 might still have had the old colour, but not first line units. The only major unit to avoid overall khaki were the light infantry, who retained their blue clothing except in action where they wore a khaki overcoat.
2 Likes
Well I can’t speak to the photo query but damn that is some fine figure work Richard. The shading on the overcoat is particularly nice- adding real interest to a rather drab color. I like the dark shading around the various details to help them stand- his kit looks used and worn too- not just fresh issued. Plus you picked a nicely animated head for the pose- suits it perfectly.
3 Likes
lol no I’m not done painting the rest of the overcoat guys- sorry I did not mention that in my original post!
I have several pics of the overcoat, replicas as well as real ones and they vary between a tannish brown to a more green/ brown shade. I wanted a more green version but started out with Vallejo US field drab and stuck with it.
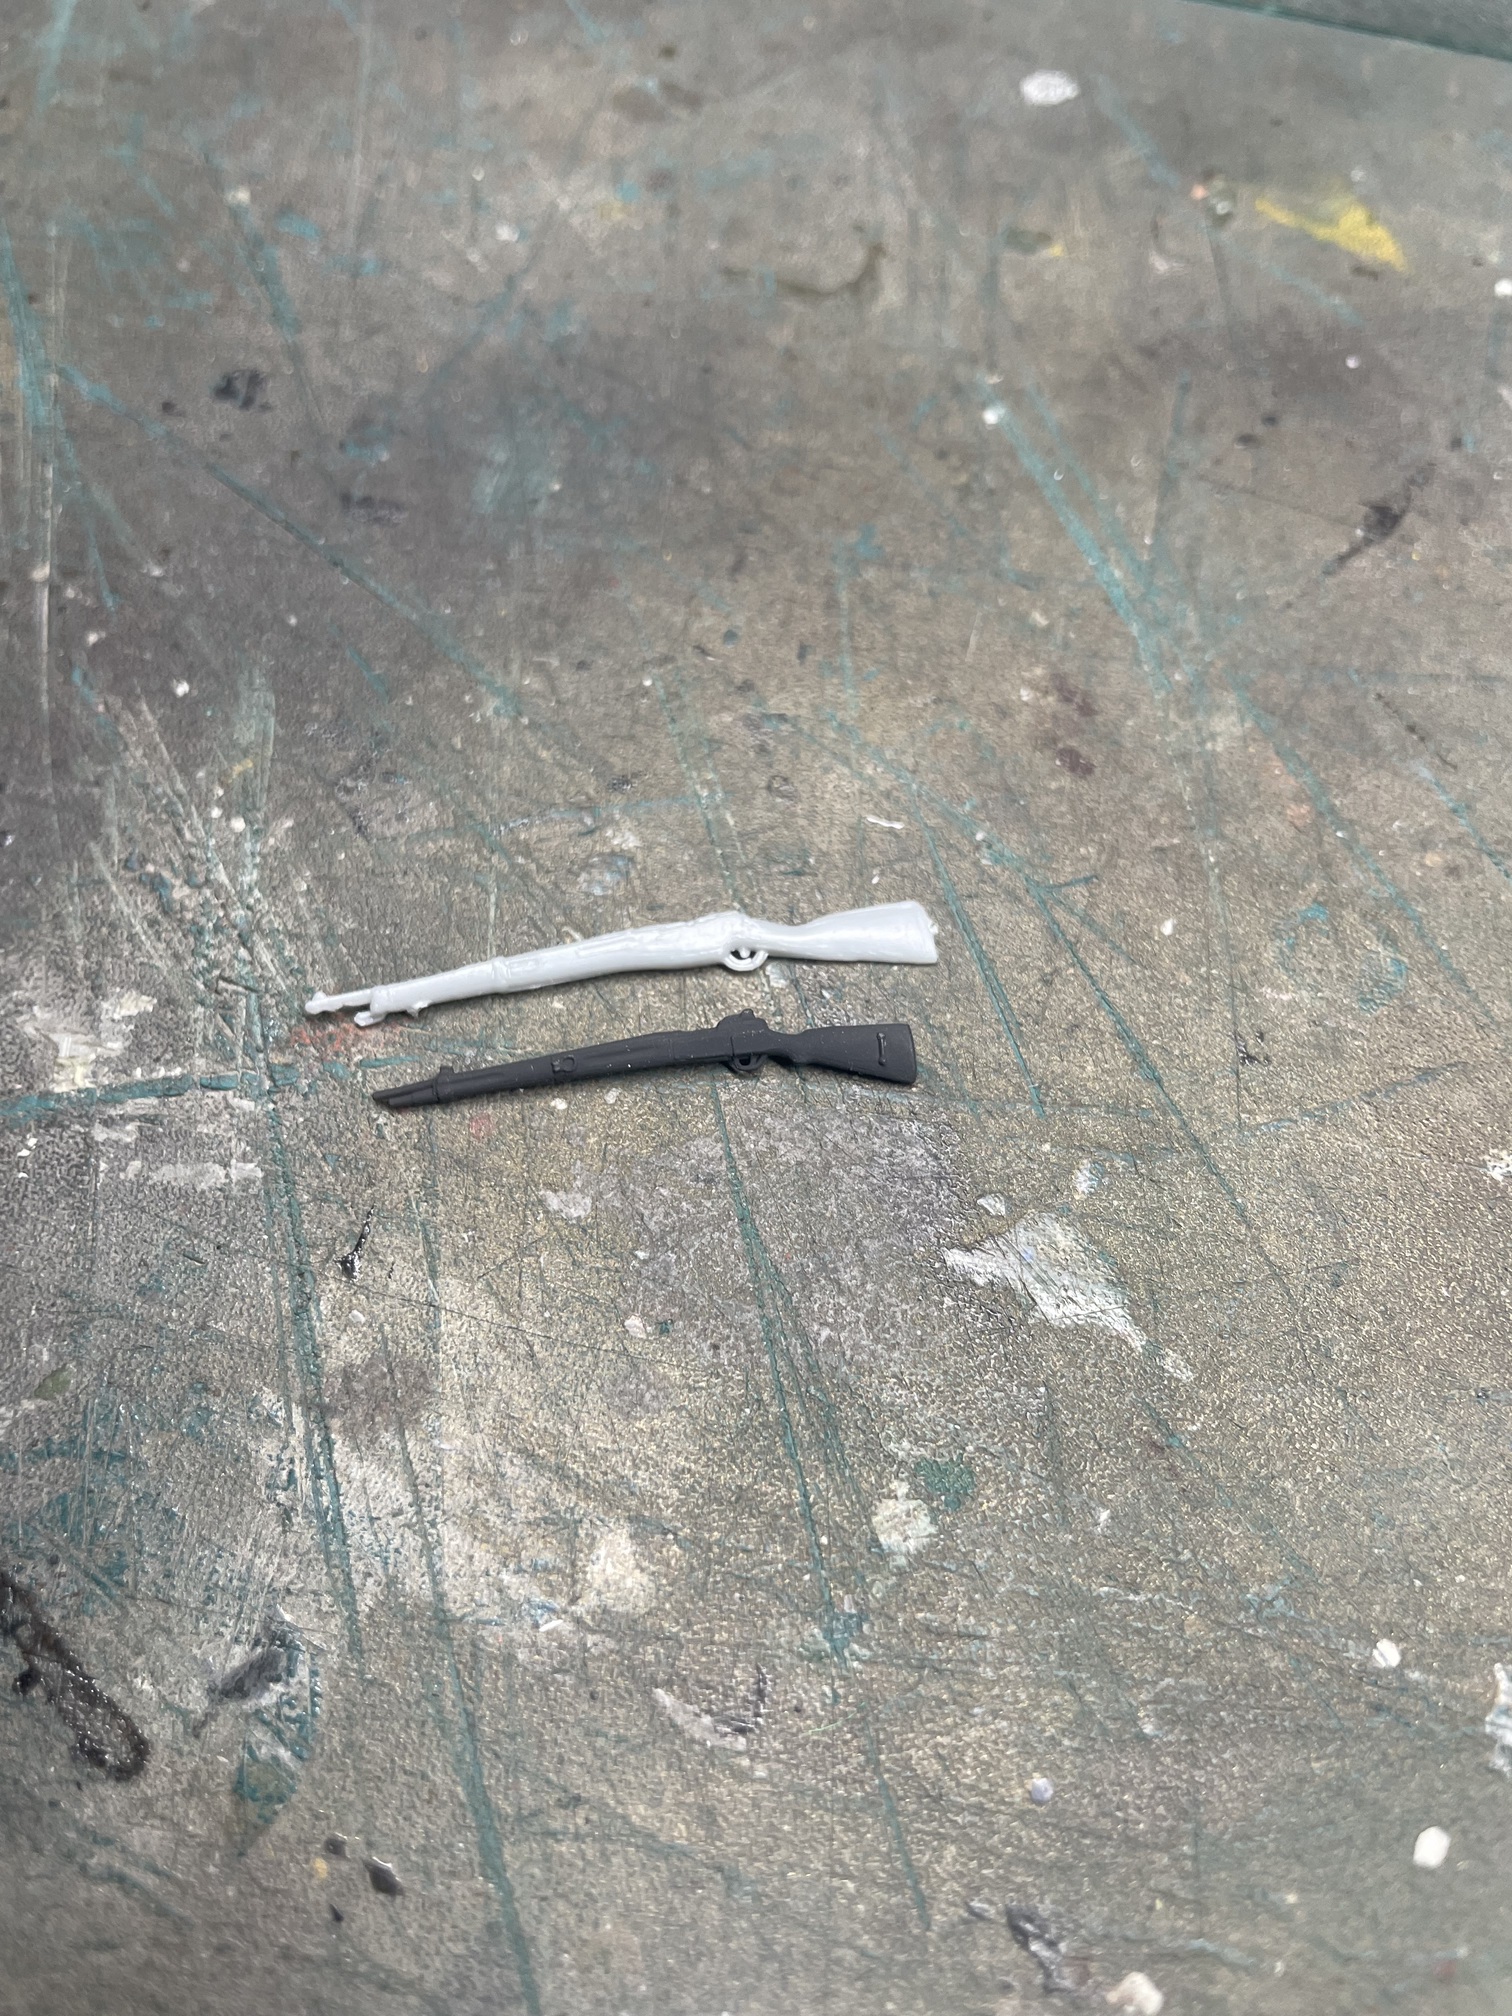
It’s not in the pic , but I changed the left hand for a better fitting resin version holding the binoculars. Also, the kit supplied rifle was horrible so I changed it for one from an old Dragon Allied small arms set. It’s a little smaller but way more detailed. The Dragon one was a smooth , long blob of plastic. Not sure what happened there.
3 Likes
That’s some super-excellent paint work for 1/35 DML figures!
1 Like
Here’s a comparison between the two rifles; the black one is from Dragons Allied weapons set, the gray is from the kit.
4 Likes
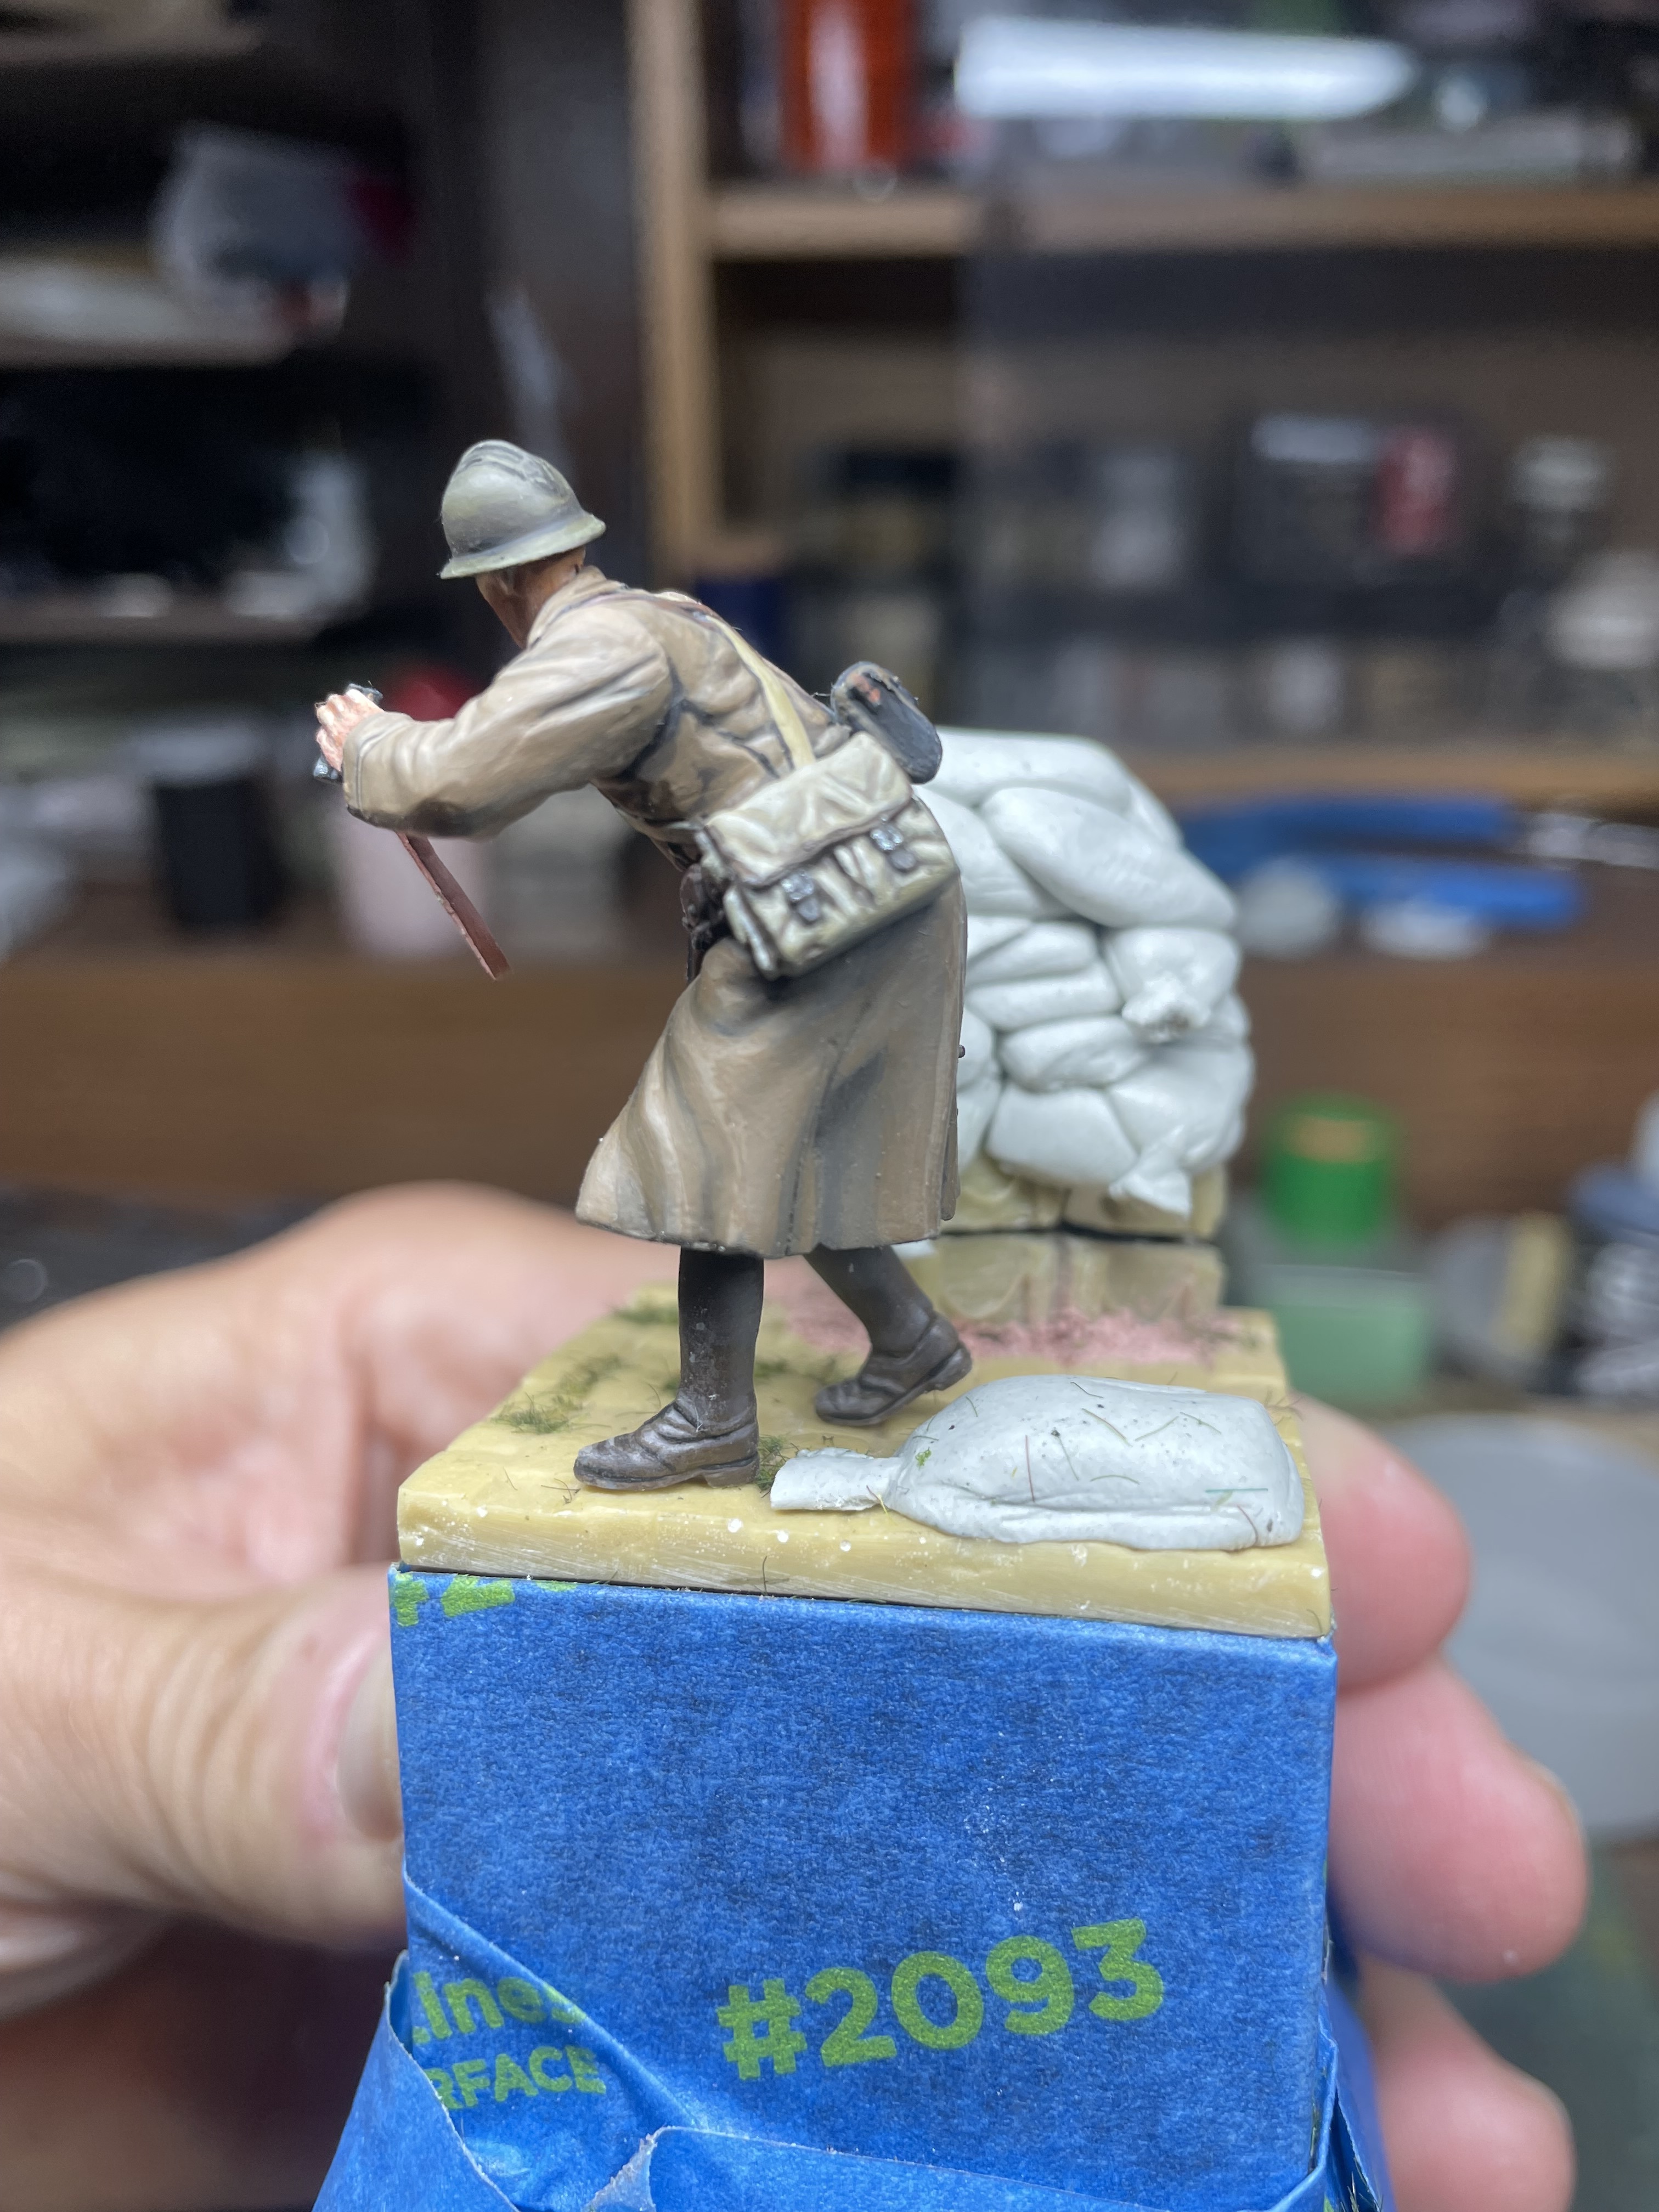
Almost there. Still have to paint the rifle and add a sling, the binocular strap and touch up. Then a suitable base.
12 Likes
Super looking Richard. I know I mentioned the coat before but I will mention it again coz now it is finished I like it even more! Your highlighting and shading is precise- it brings real impact to the largest area of paint. You have imparted bags of character and animation into this fig.
3 Likes
Thanks for the kind words Karl, it was a pleasure to paint.
2 Likes
I’m glad someone else agrees that Hornet heads are very small.
2 Likes
Yes they are, these Dragon figures do seem a little bigger maybe because of the overcoats because I’ve used Hornet heads on Dragon figures before and they looked more in scale with each other.
3 Likes
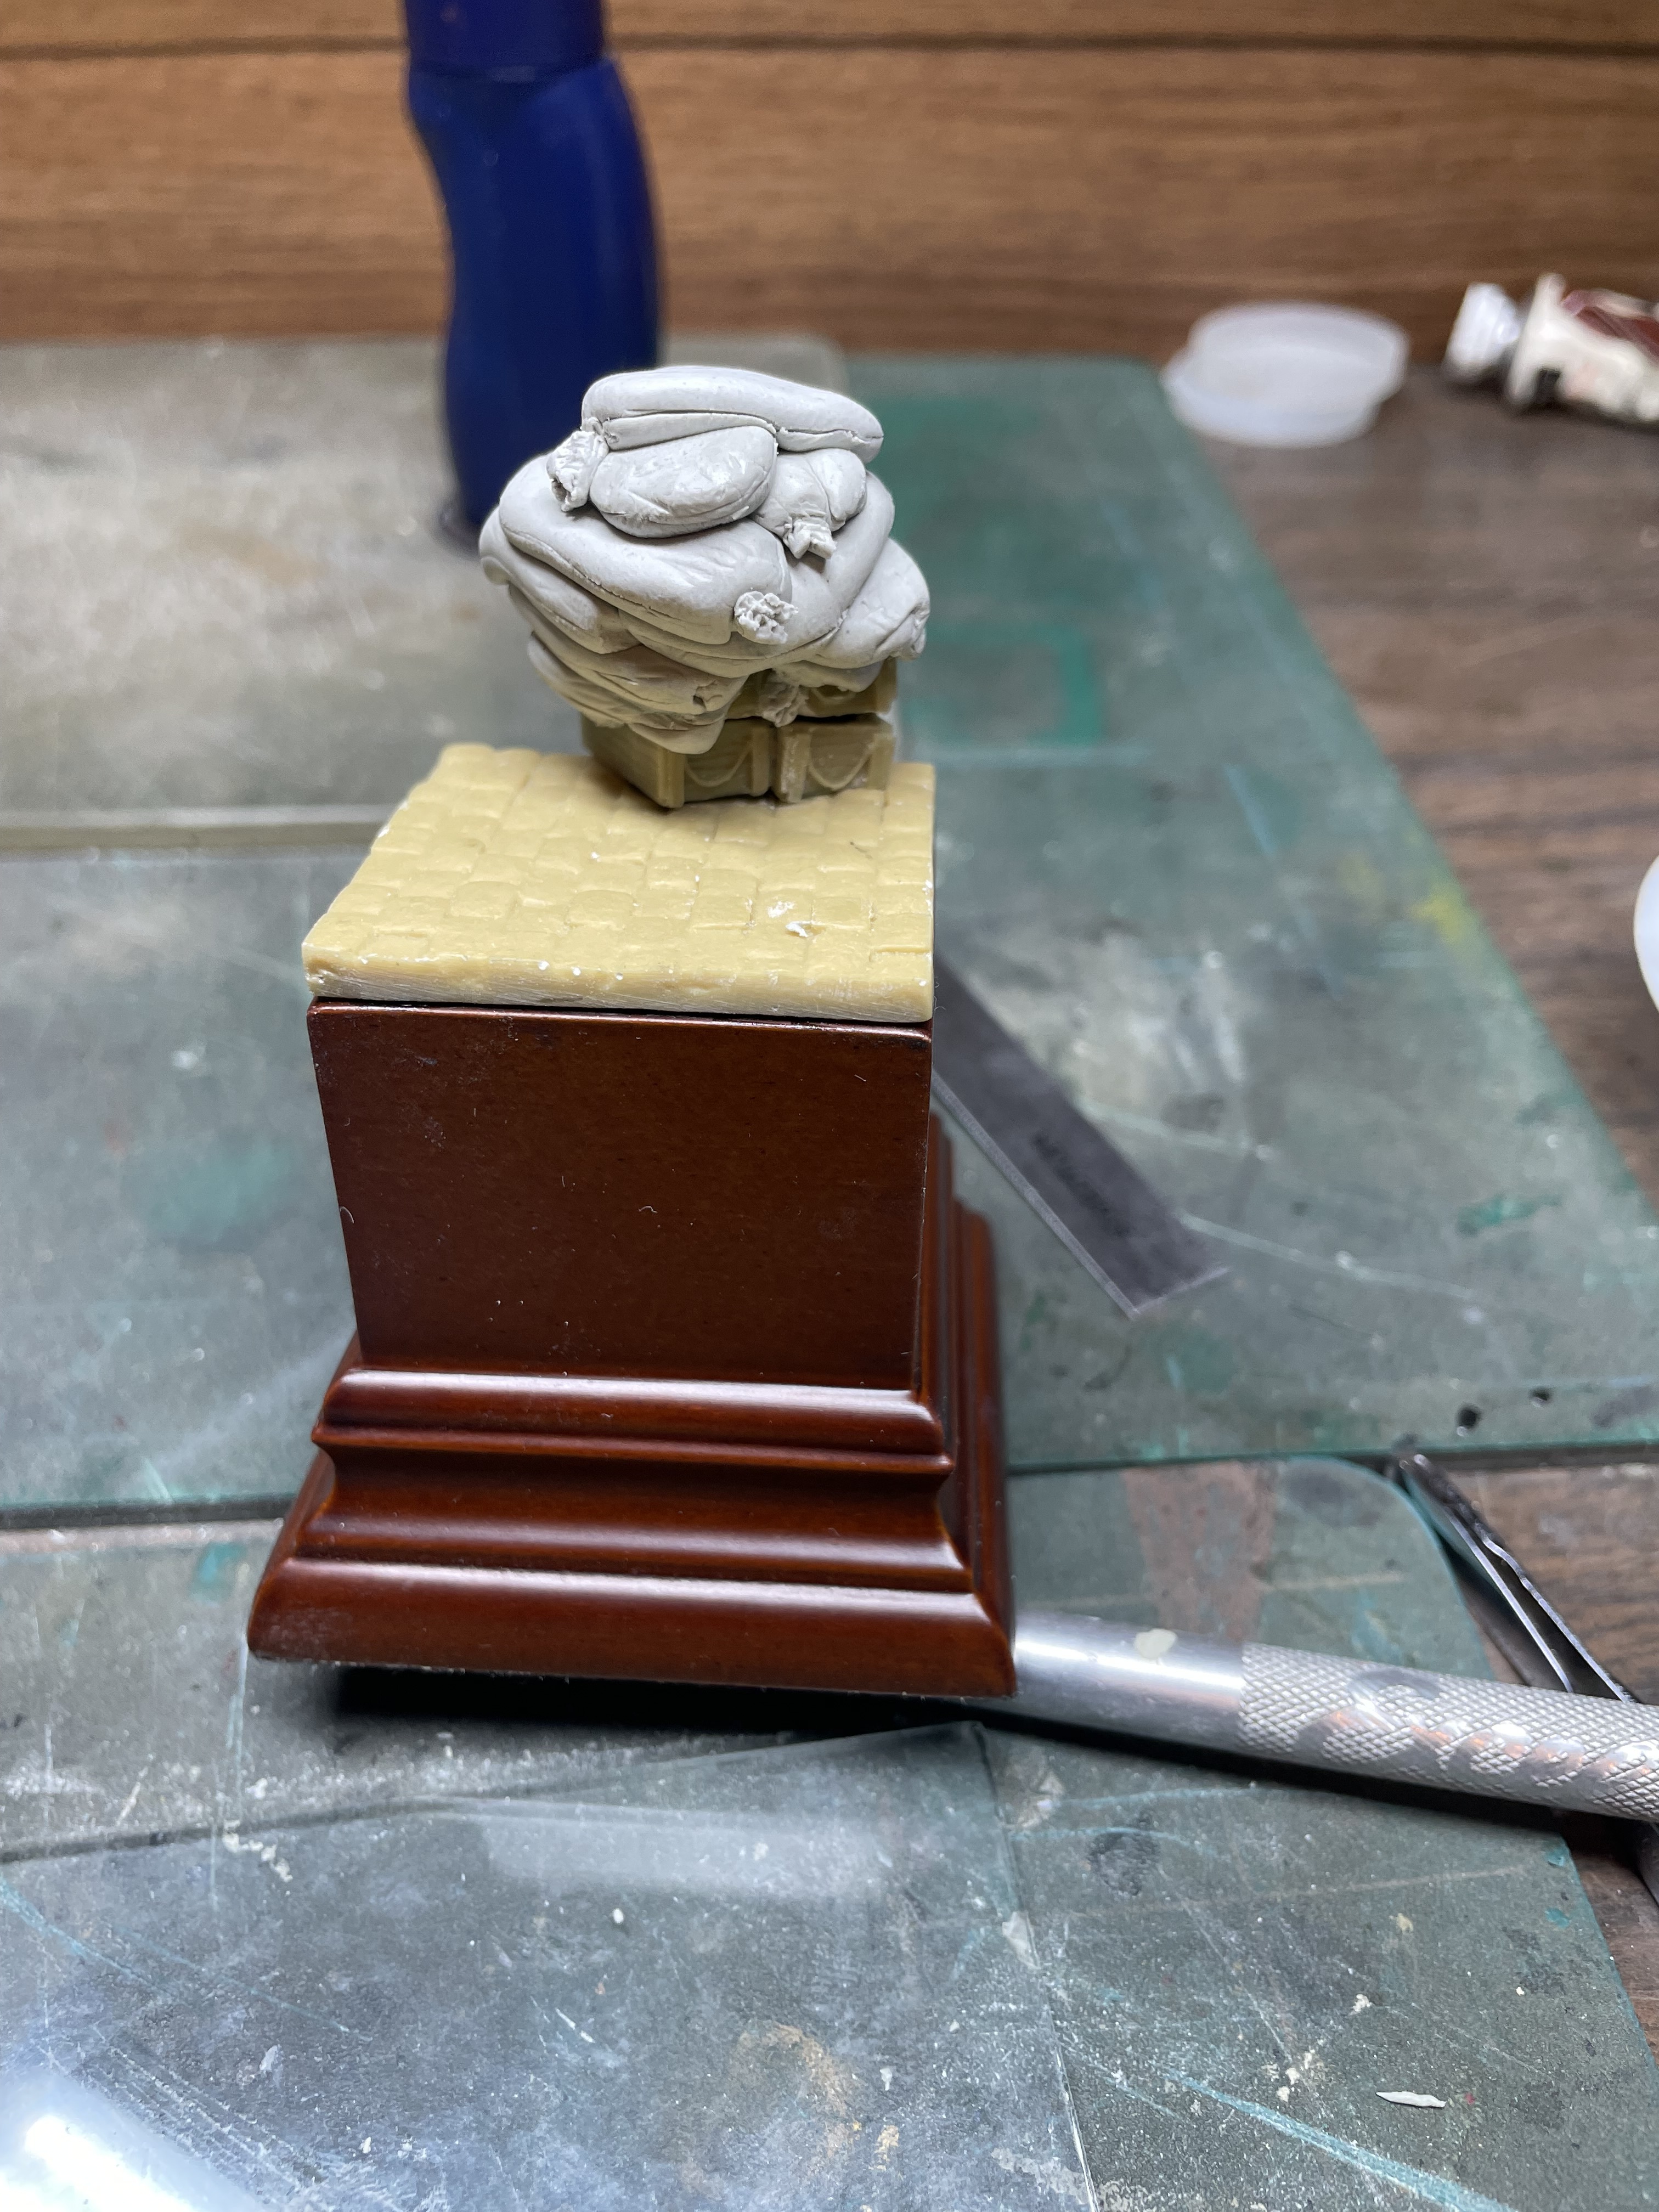
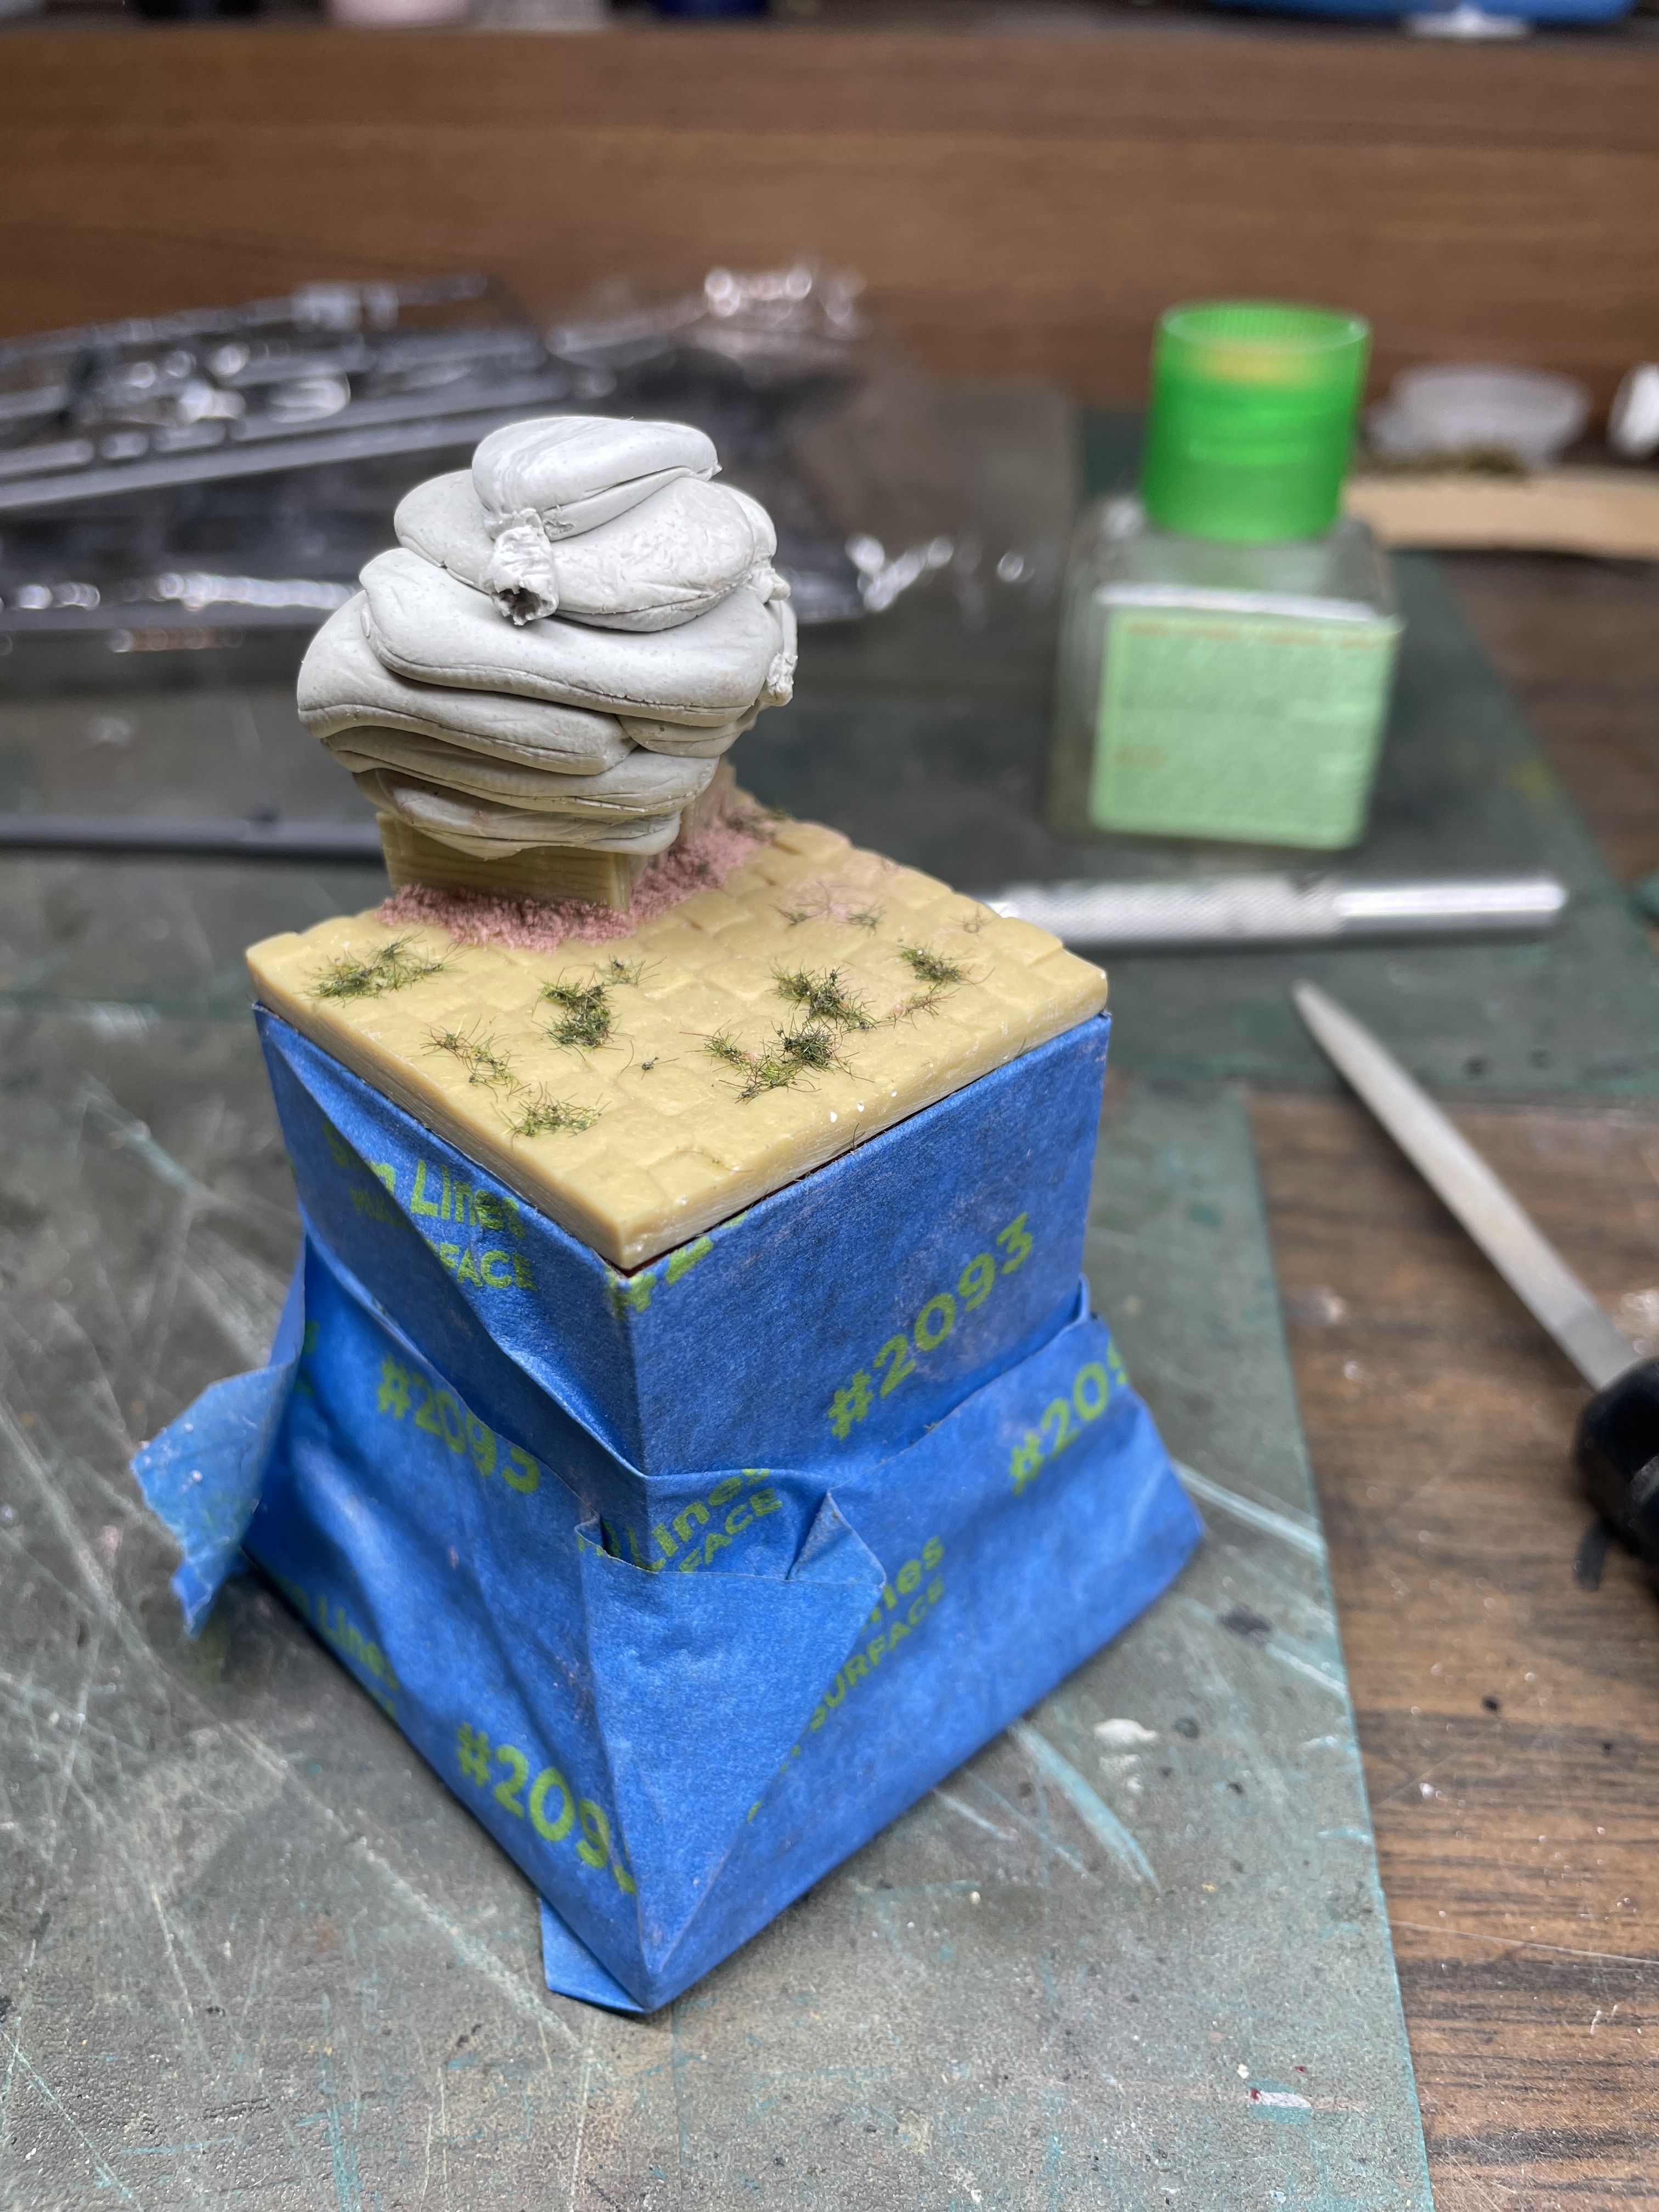
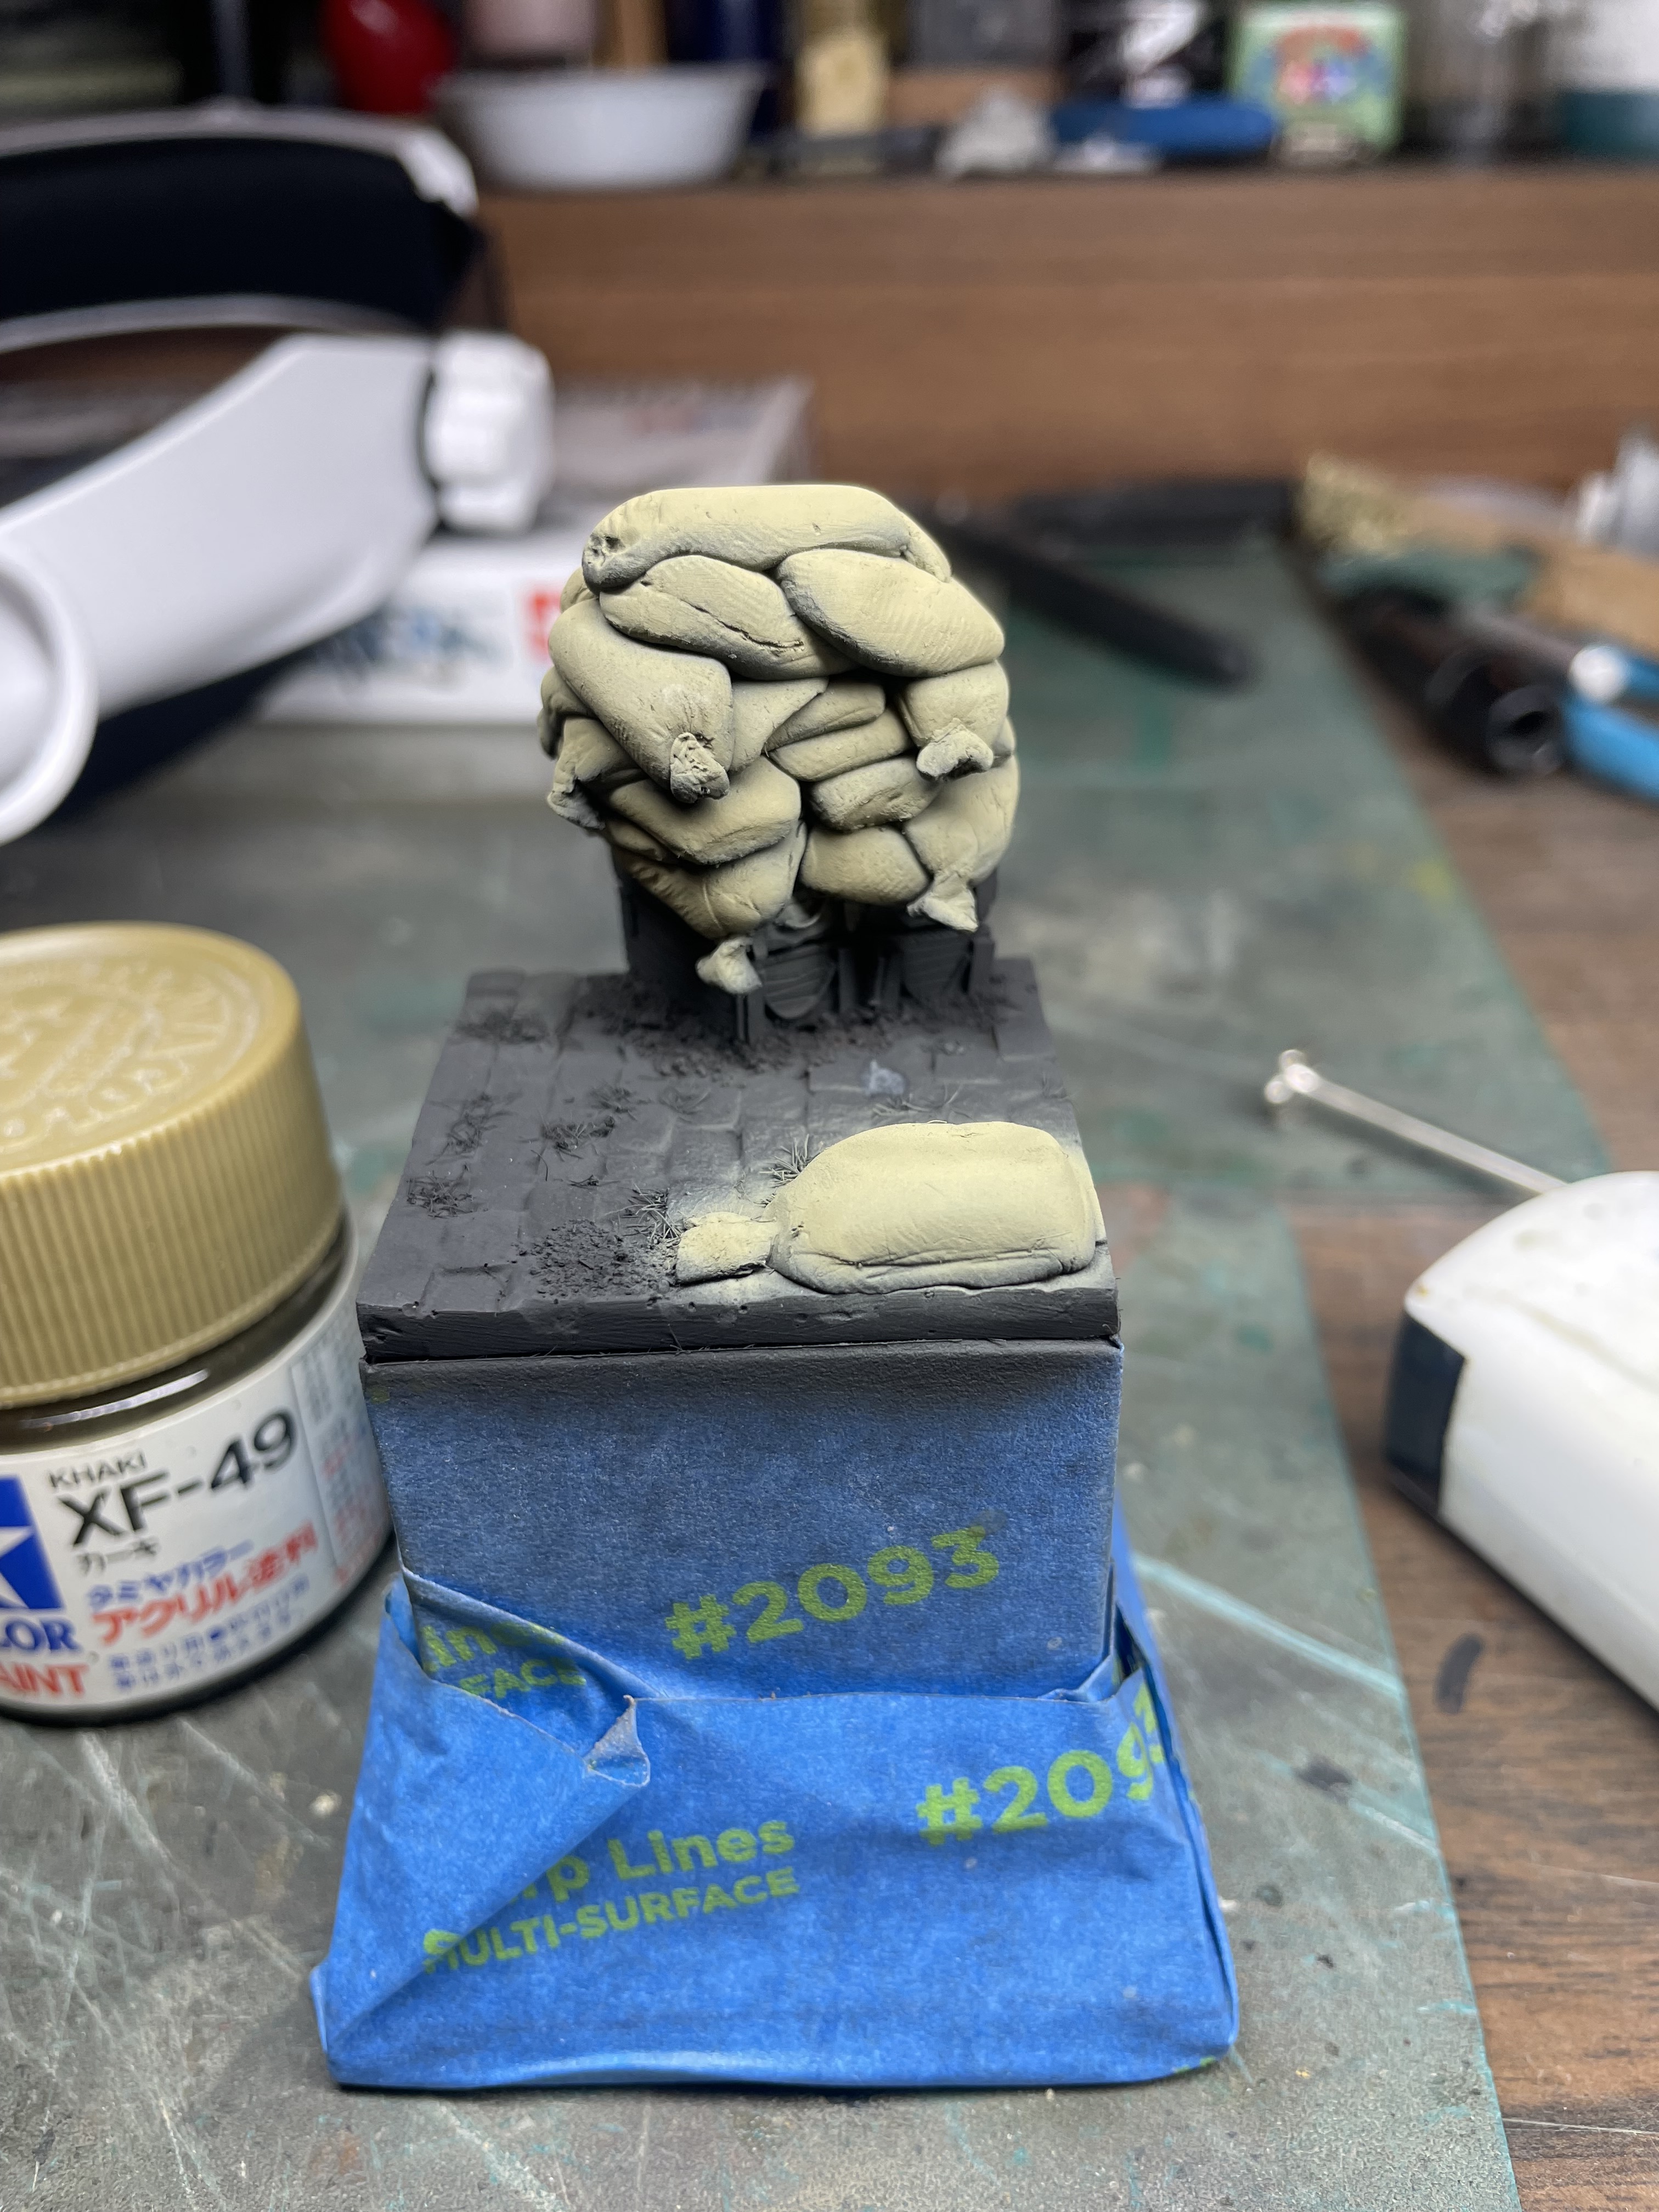
I started the base for this guy. It’s a section of resin cobblestone from Verlinden, as well as the ammo boxes.
Apparently they would have been filled with dirt along with anything else they had on hand to build barricades to defend against German attacks.
The sandbags were sculpted from apoxy sculpt. I also added some sand at the base of the ammo boxes and done grass between the cobblestones.
4 Likes
Outstanding work Richard! The figure looks phenomenal and that base is excellent.
1 Like
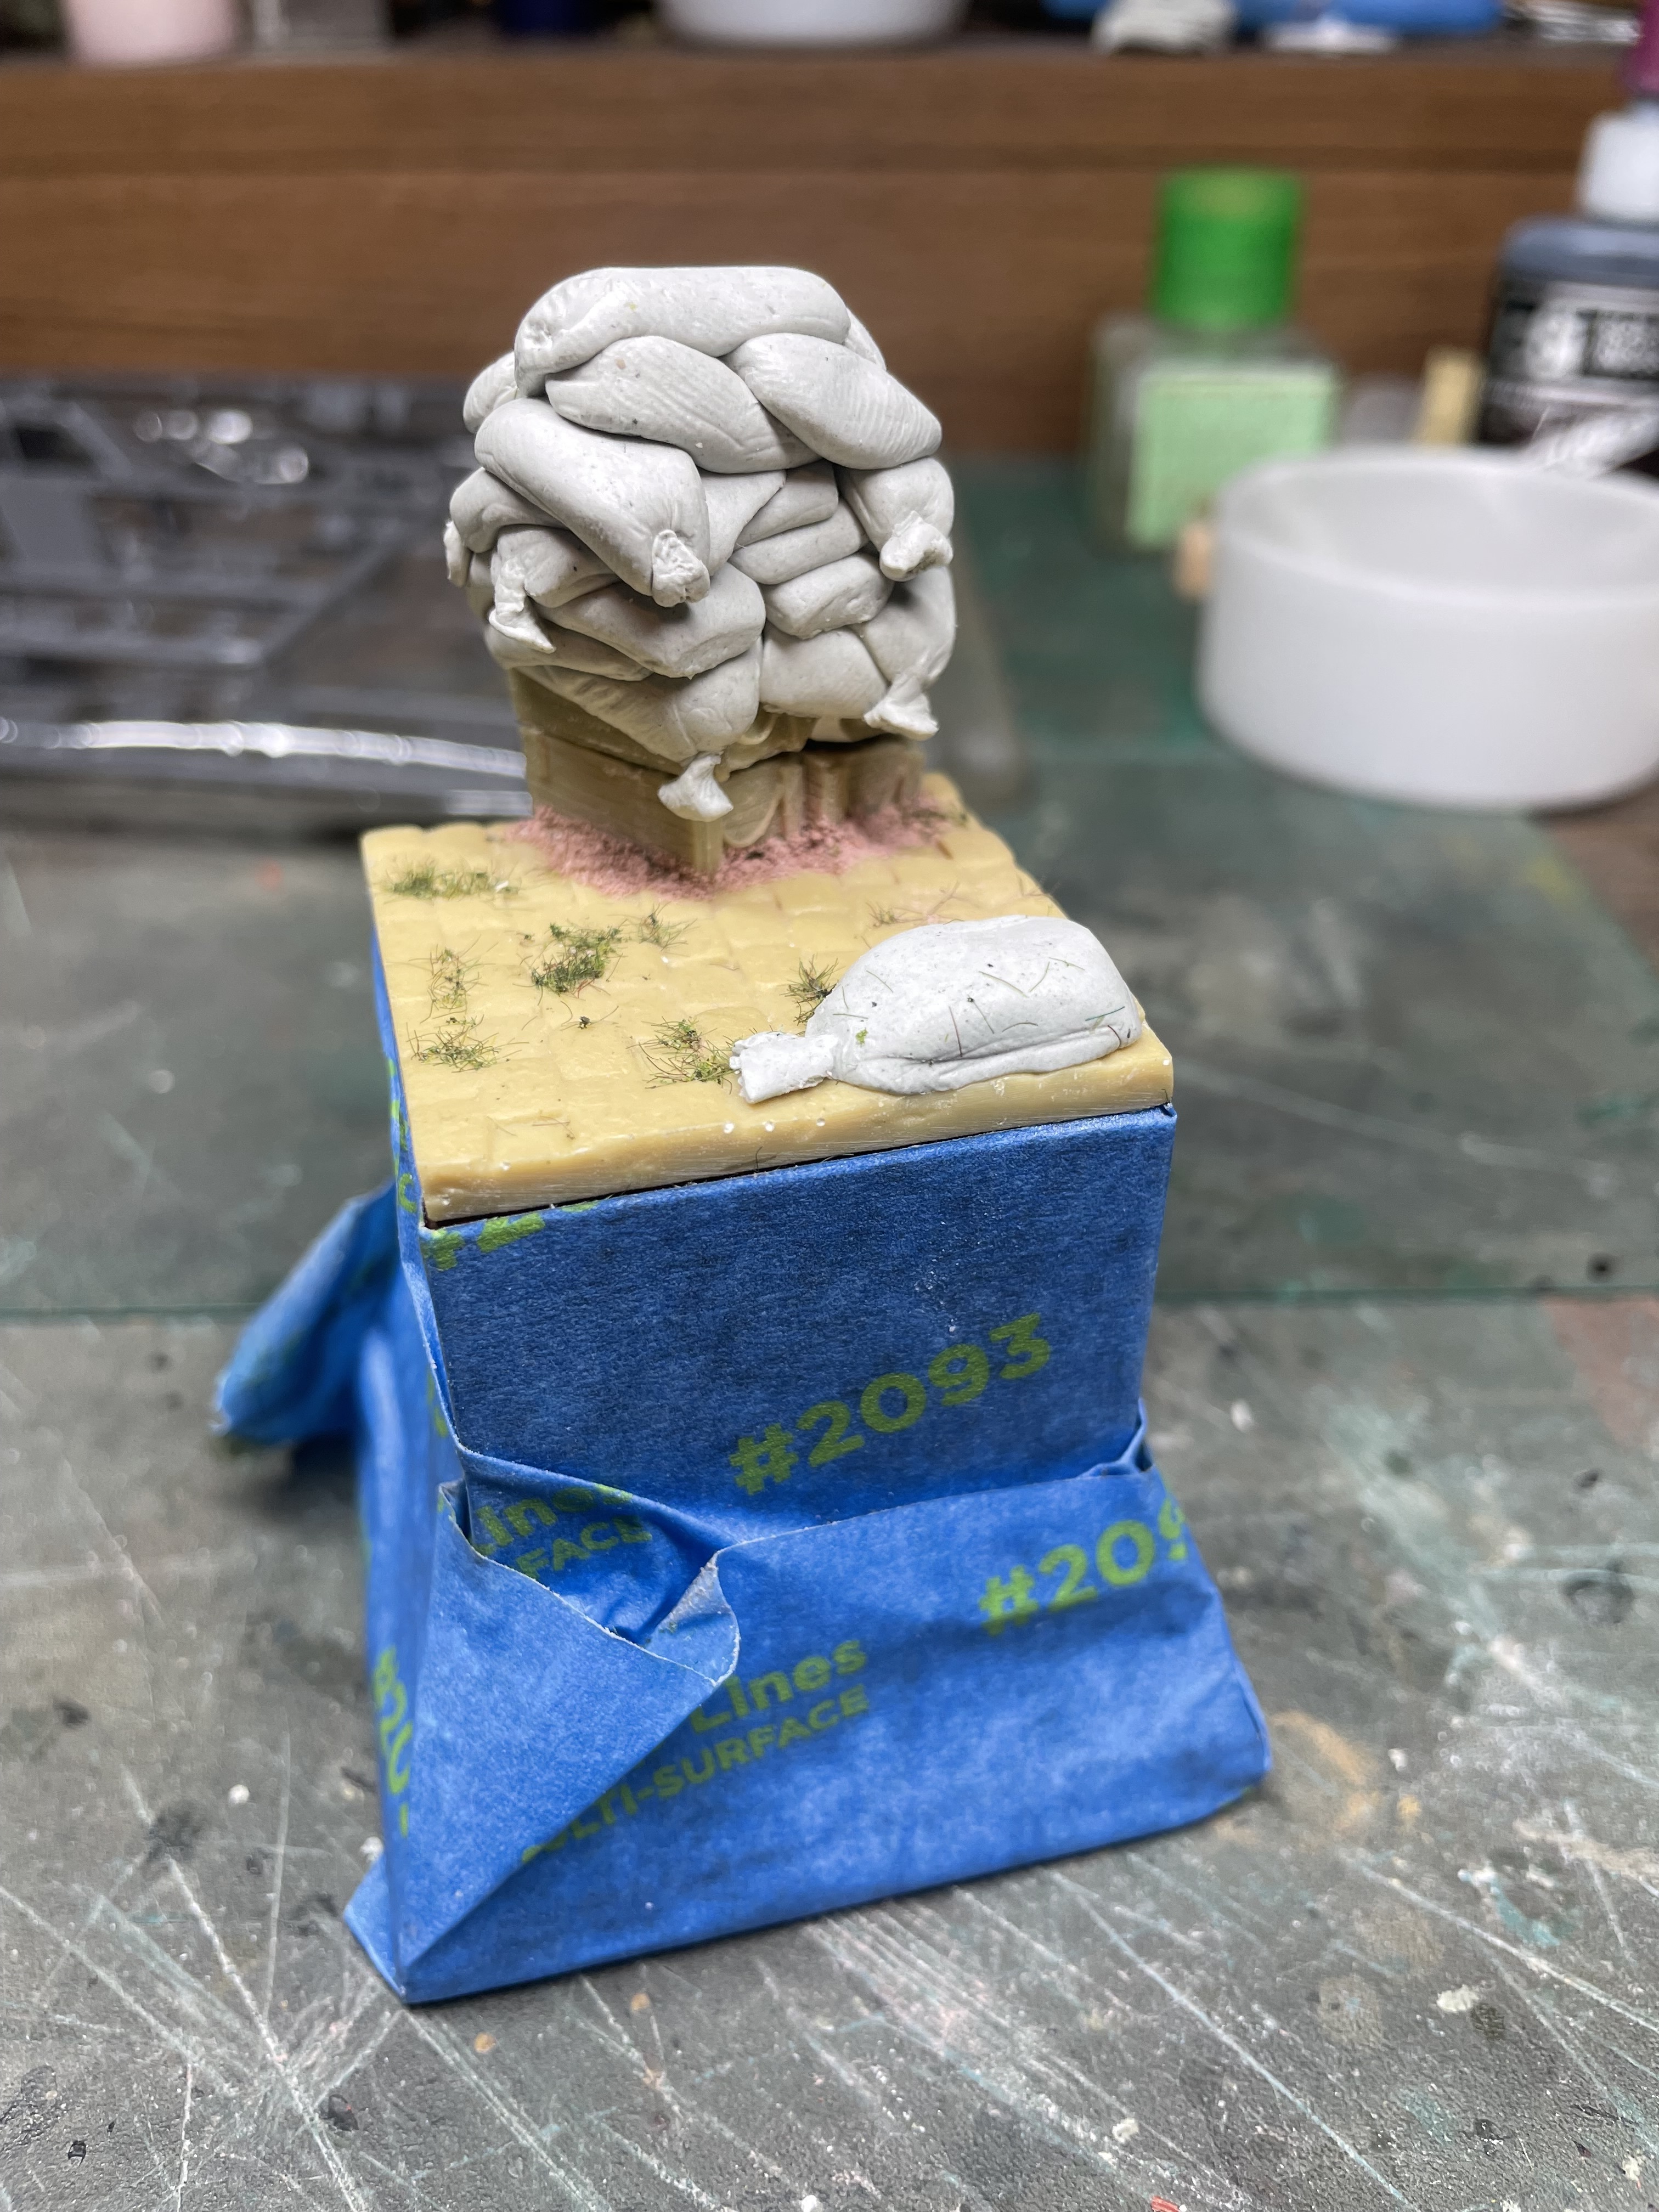
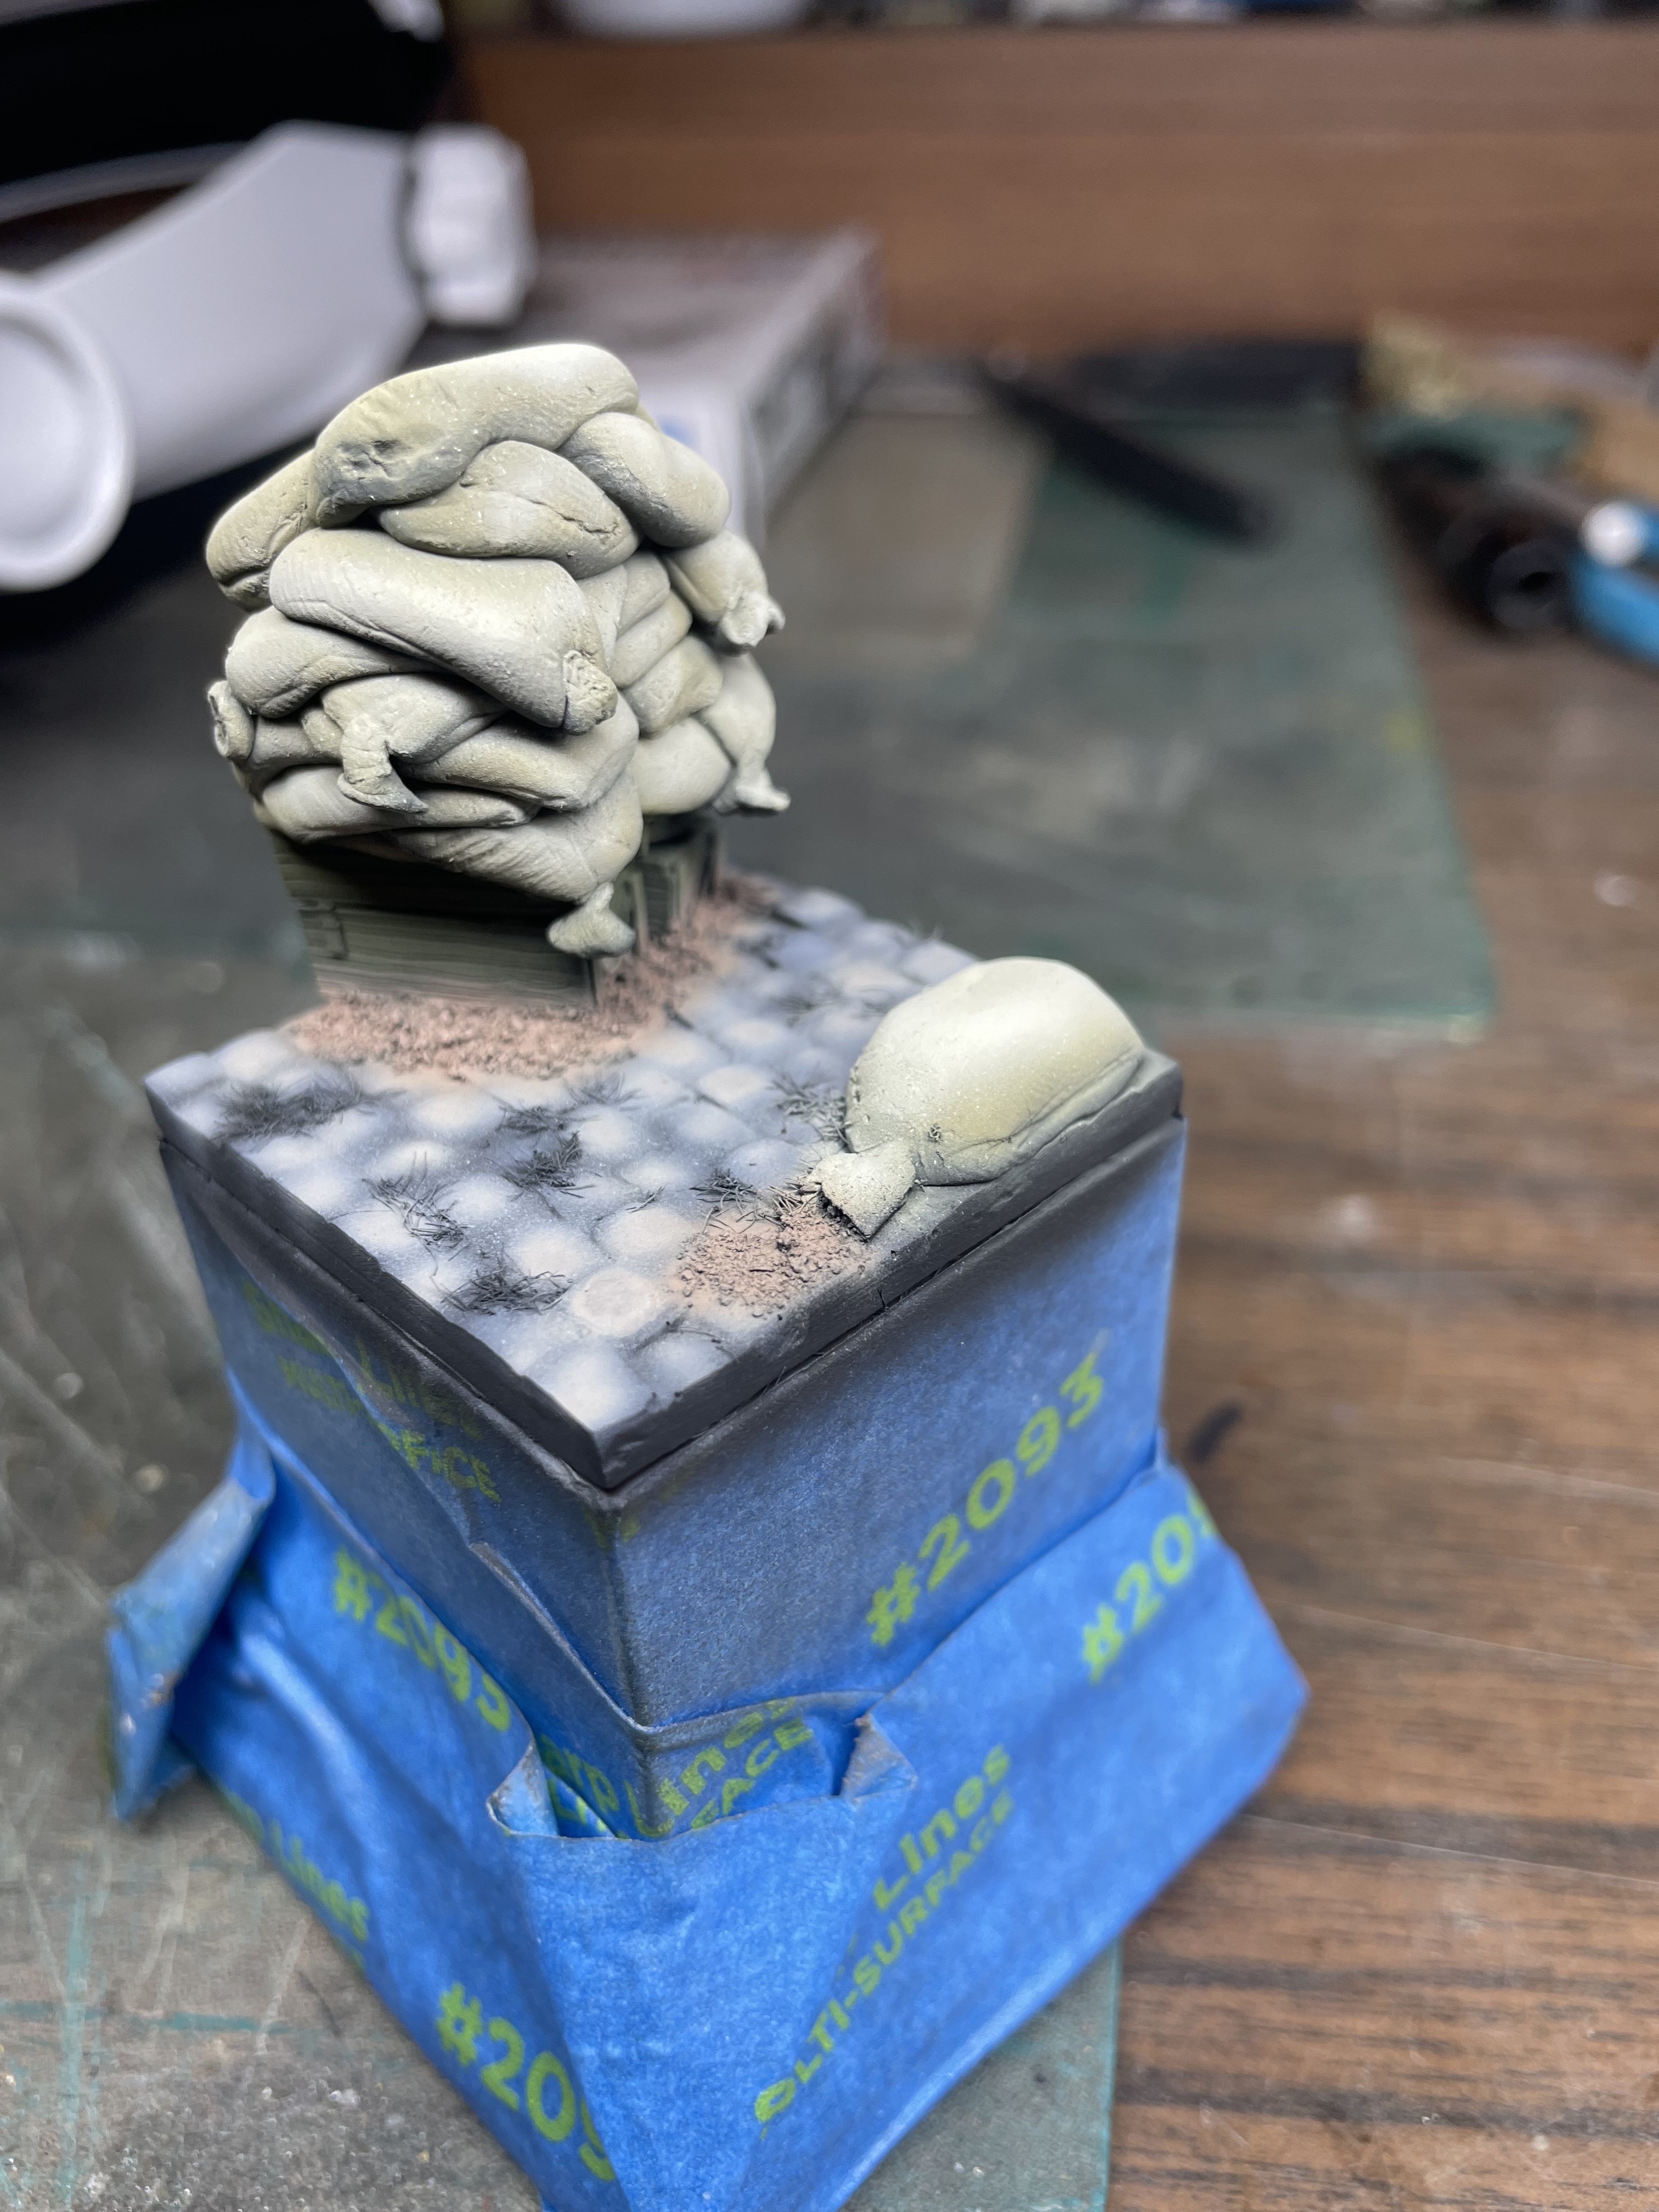
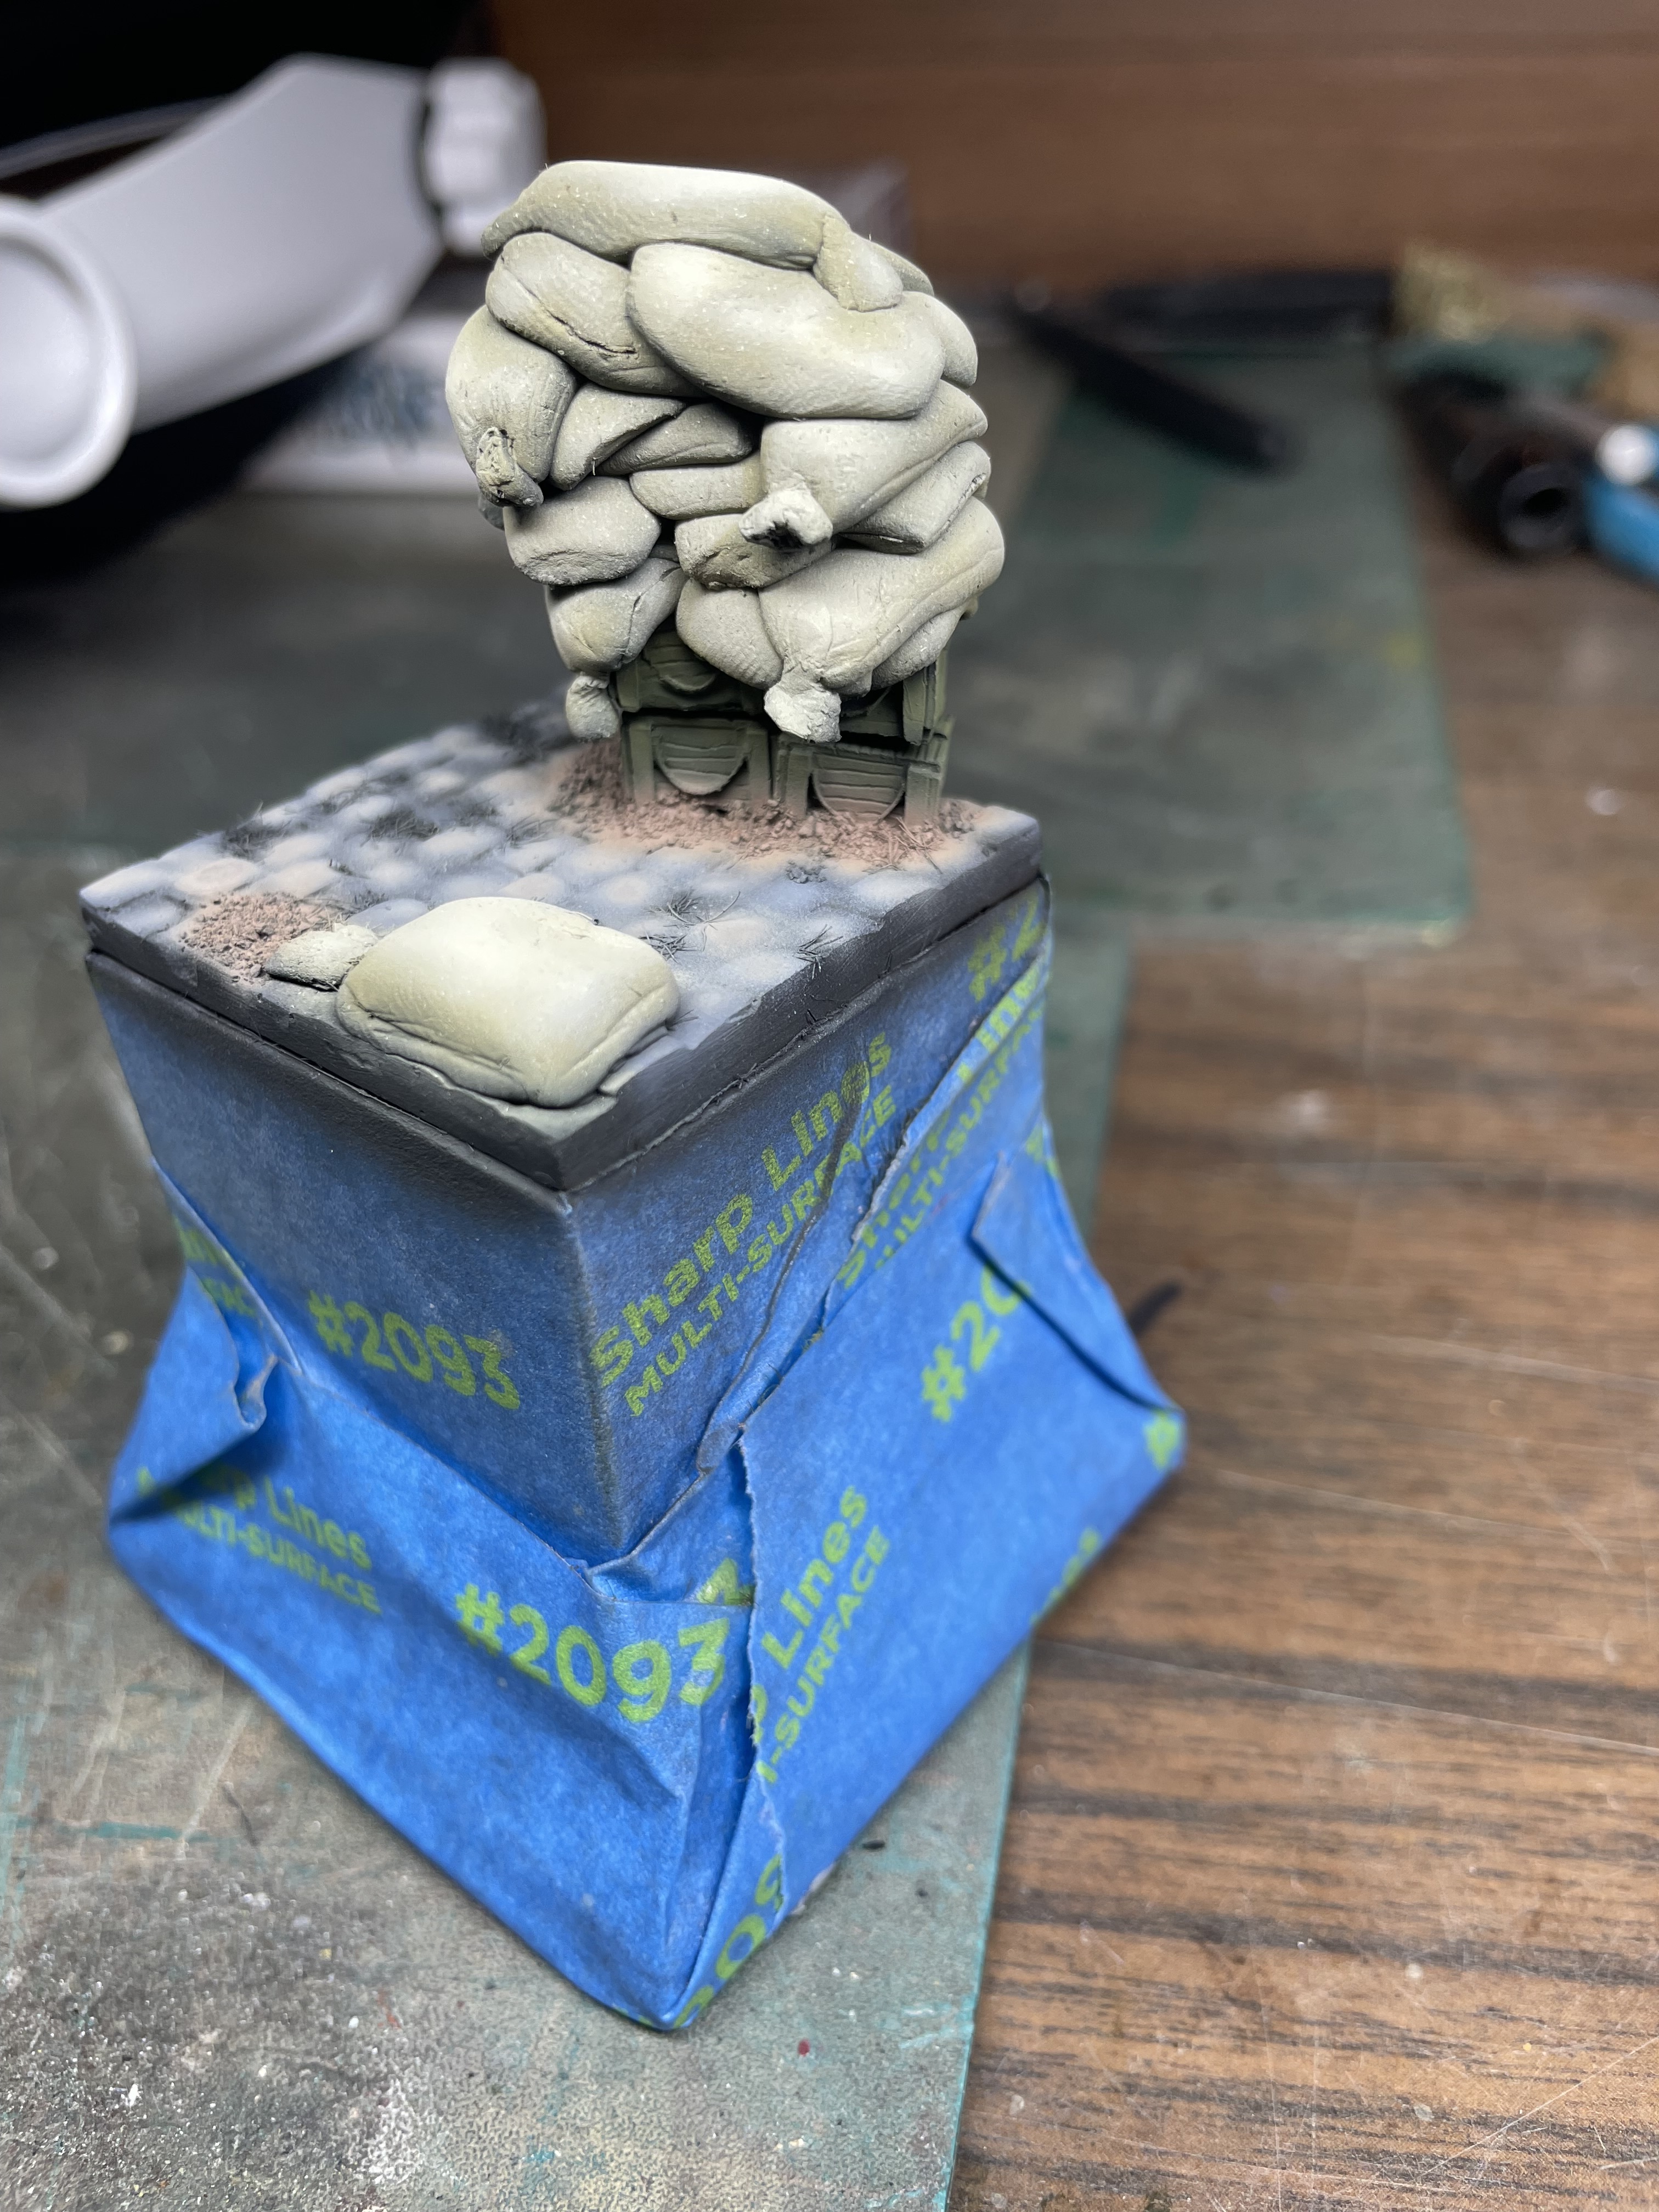
Thanks for the kind words Matt, but I was not happy with the sandbags. I started out fine with the ones on the bottom but as I continued I just made them way too big. Plus they leaned a bit too much I thought. I posed the figure on the base next to them and they just didn’t look right.
So, I ripped it apart and sculpted new ones that are more in scale. Here’s the redo:
5 Likes
Both sets look good but the last set looks better. 
2 Likes
i don’t know how I missed this one but I think you’ve done a fantastic job on that figure.
2 Likes
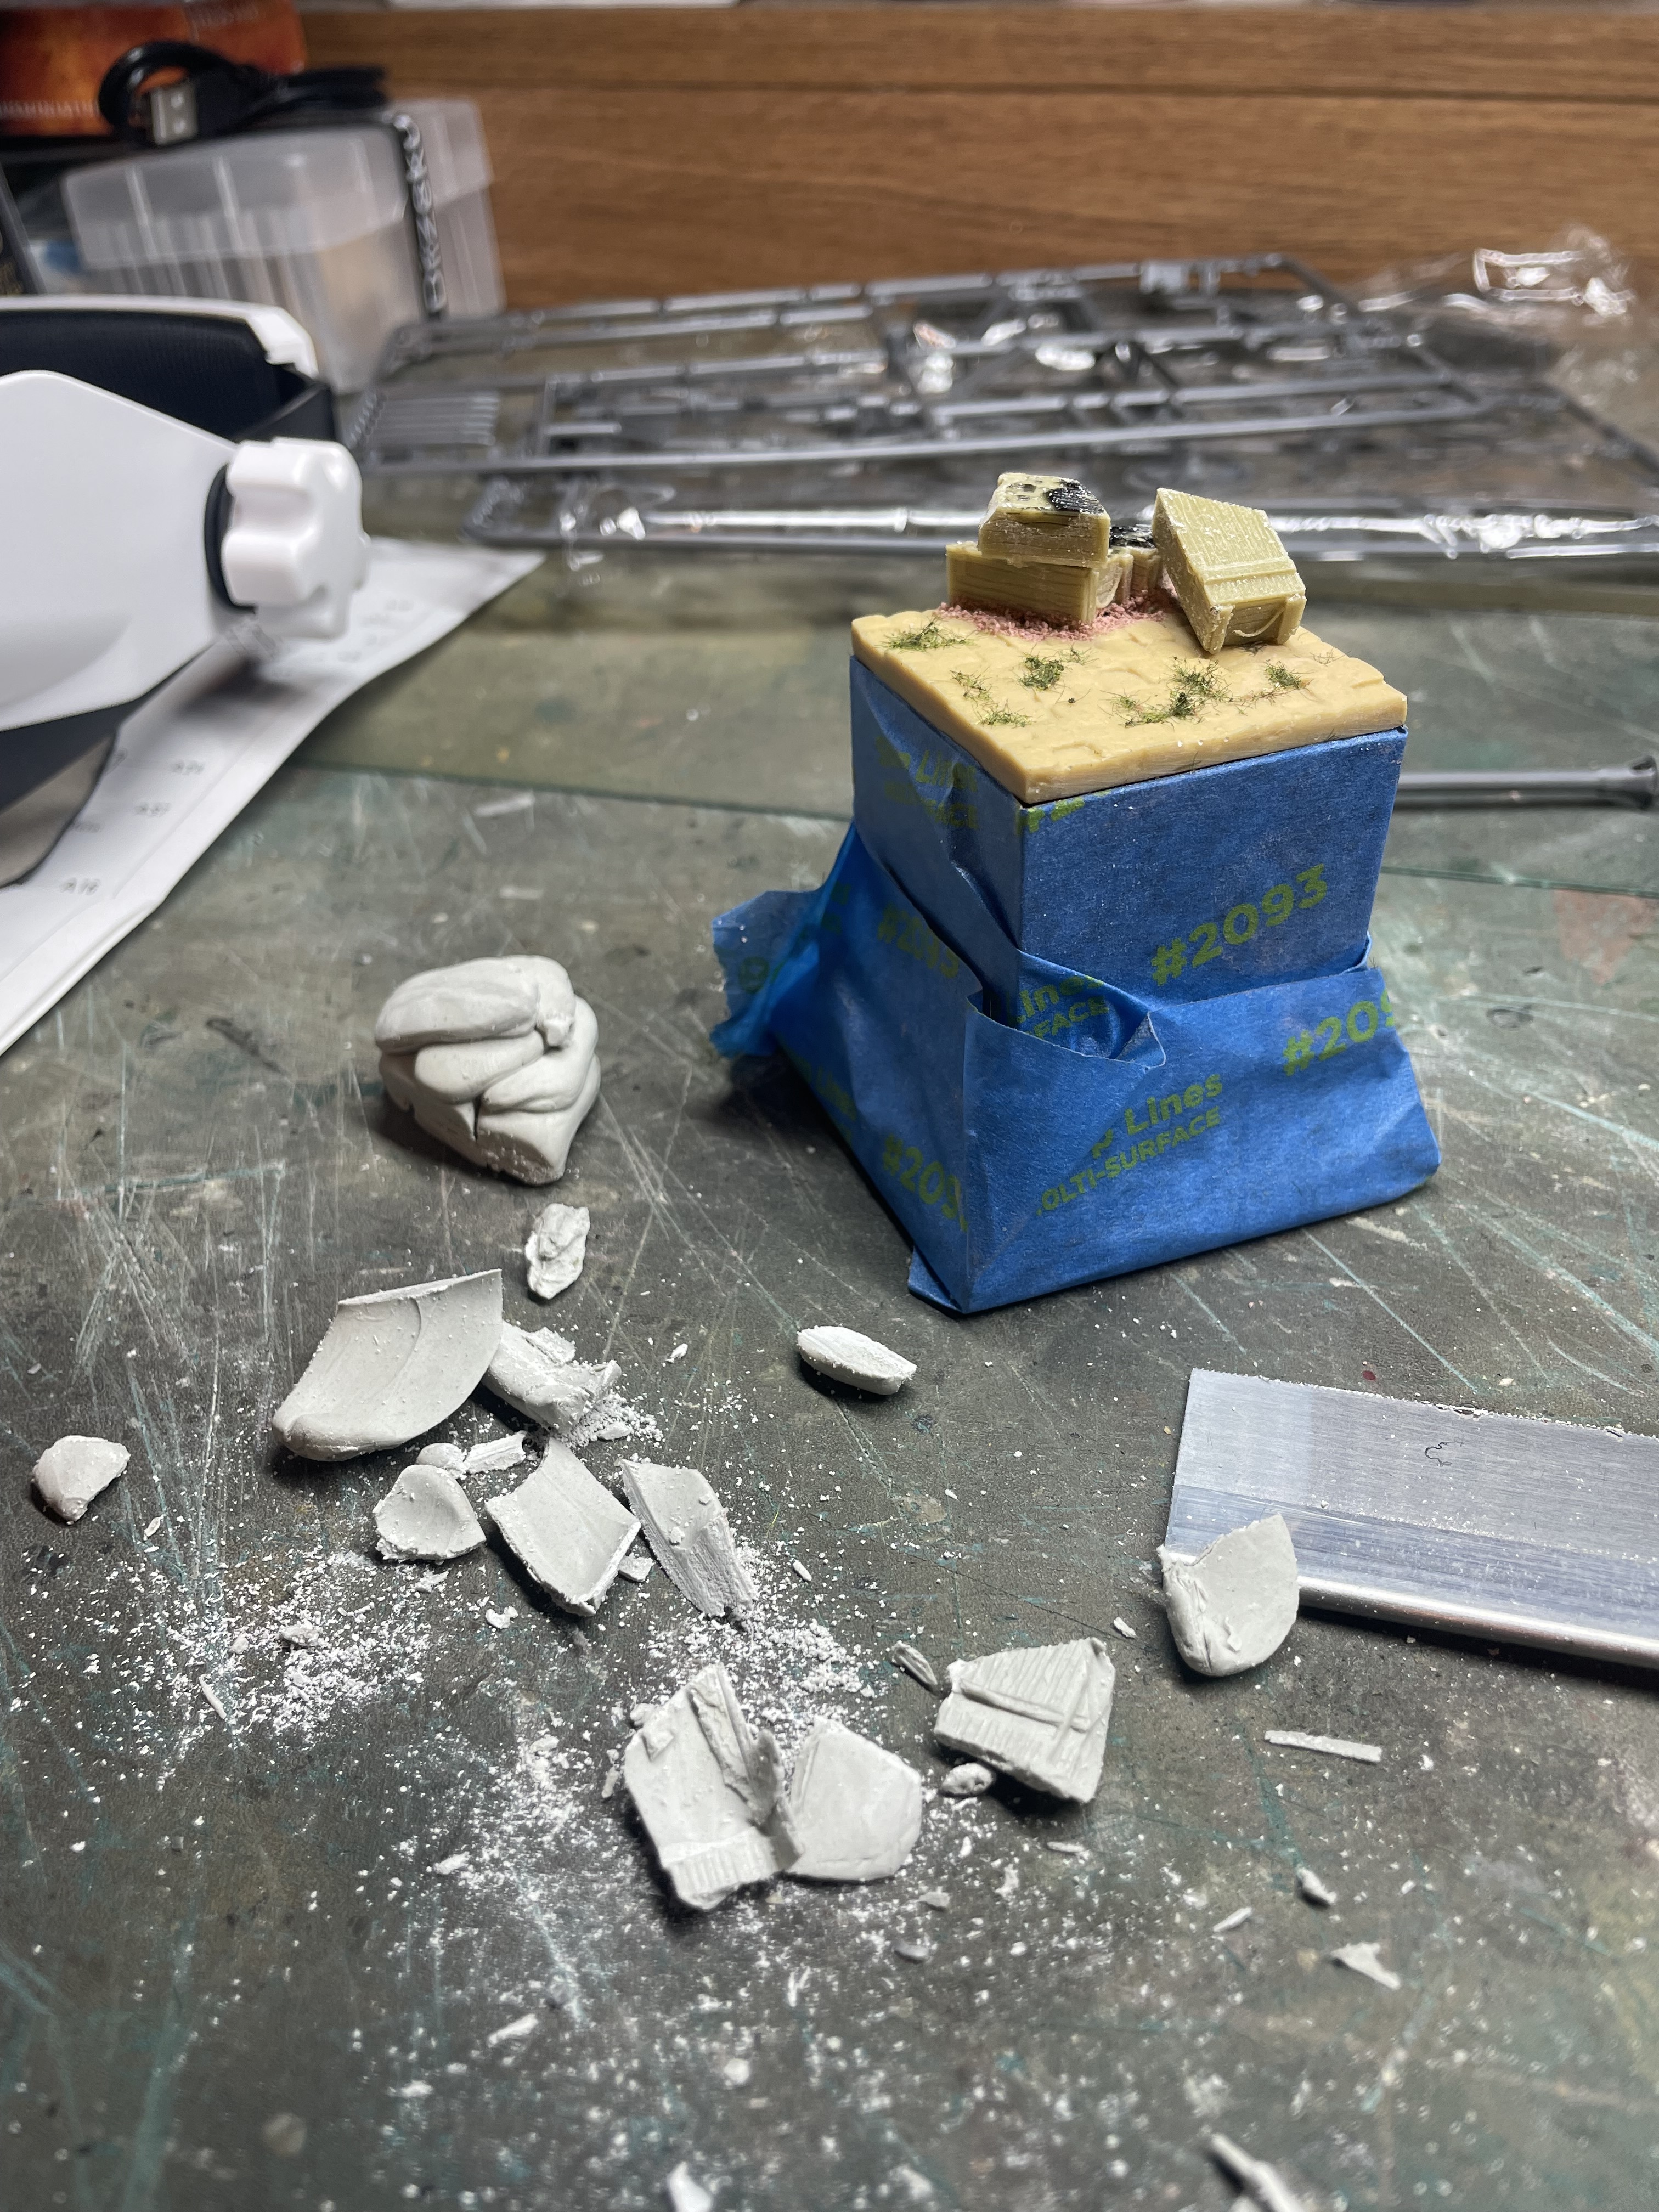
Got some paint on the base. I started with the sandbags in Tamiya Khaki, then dessert yellow, then finally deck tan as a highlight. The ammo crates were sprayed olive green, cobblestones were given a coat of dark gray, then medium gray then light gray. I felt the gray was too strong so I added some flat earth to the gray to add some tonal difference. I still have to do some washes and dry brushing and finally pigments.
The dirt around the base of the ammo crates was sprayed in flat earth as well as the sand coming out of the line sand bag.
5 Likes