'FUEL DUMP' diorama

Hello fellow modelers.

Thought I’d share another (2nd) small WWII diorama/vignette that I completed recently for the ‘Wow, you’ve got a great figure’ Campaign. Once again, I got side-tracked and dove head-long into base construction in order to satisfy my building jones. … Here ya’ go!

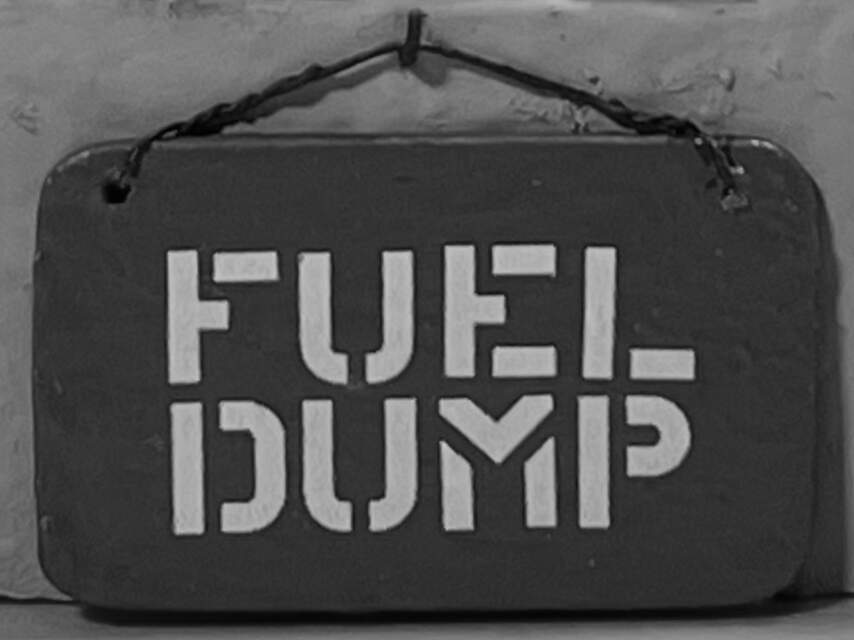
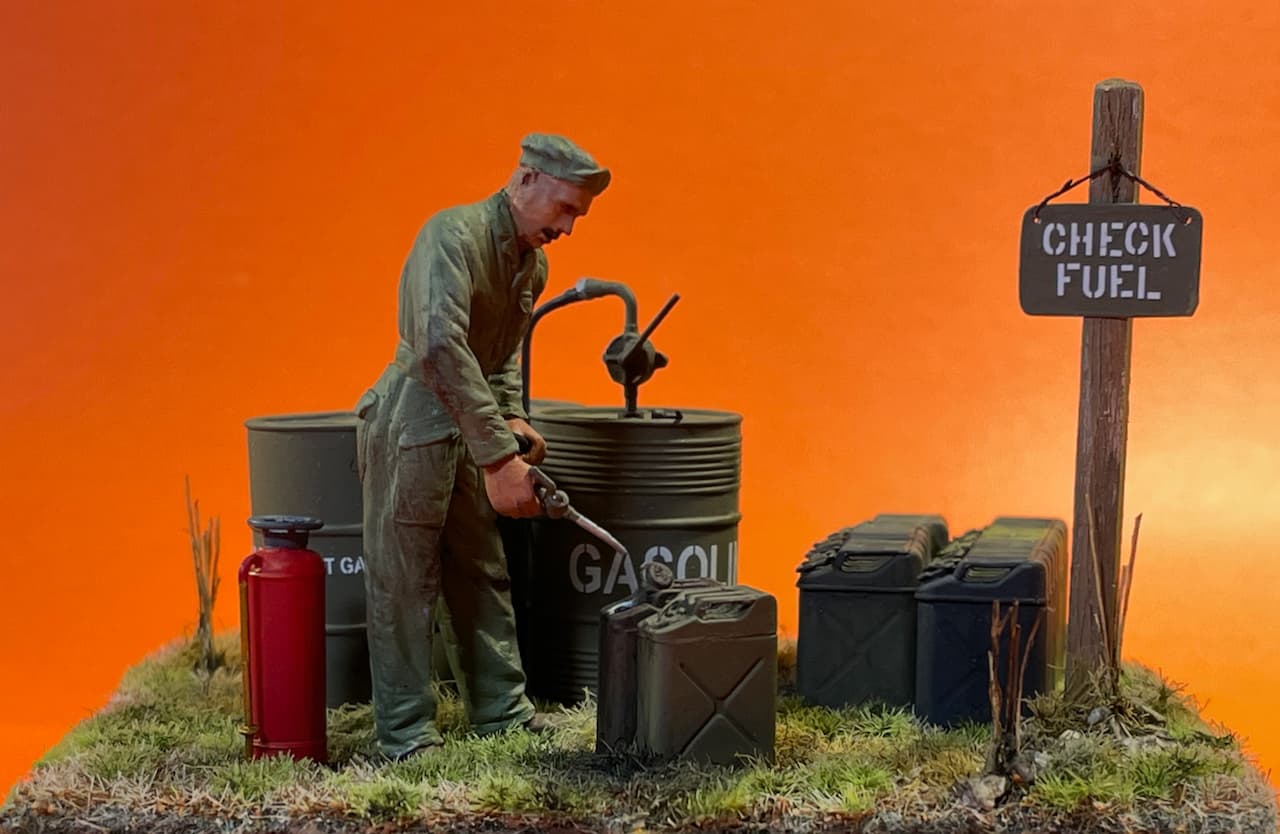
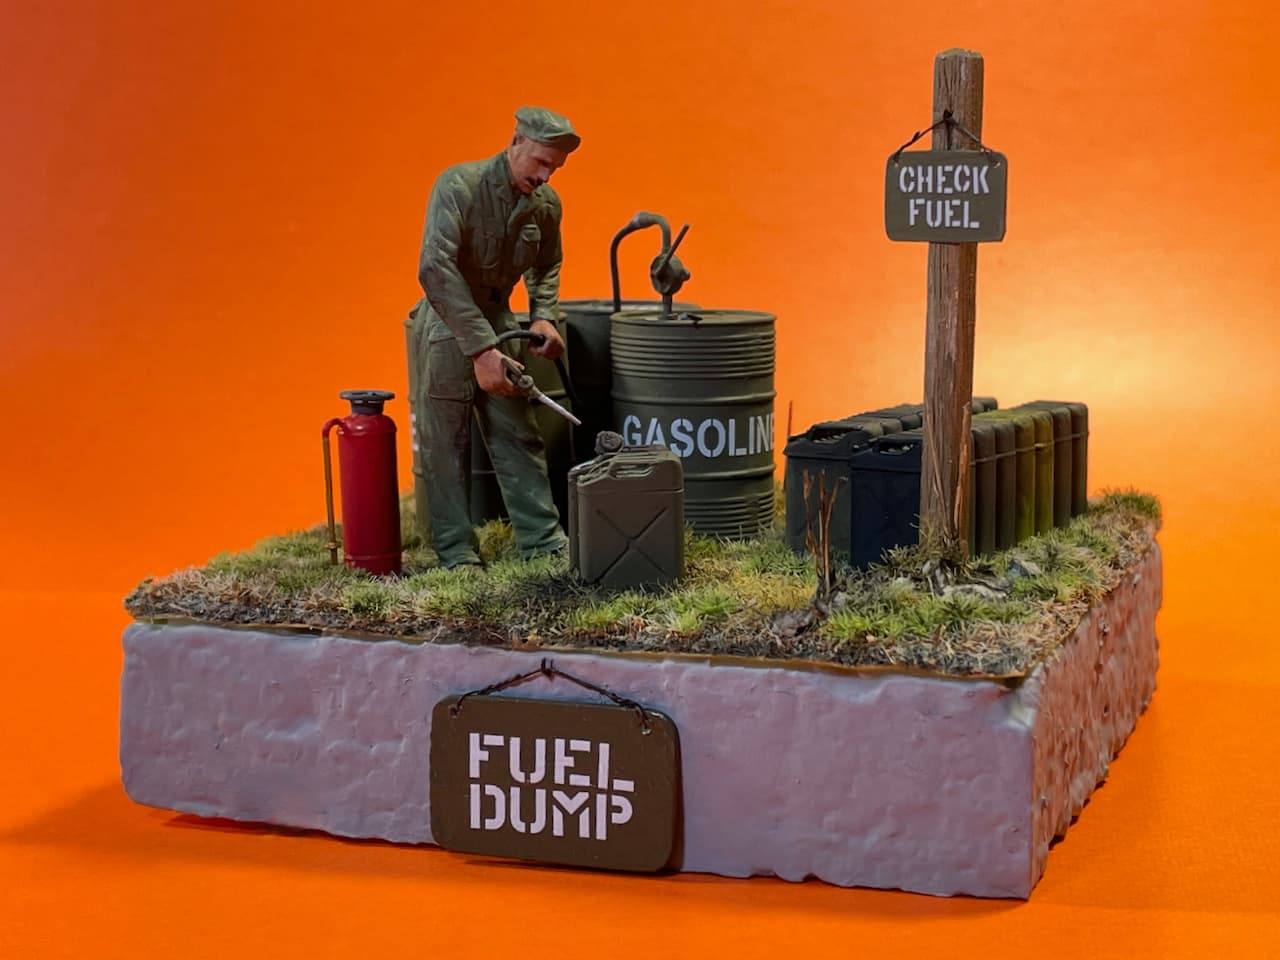
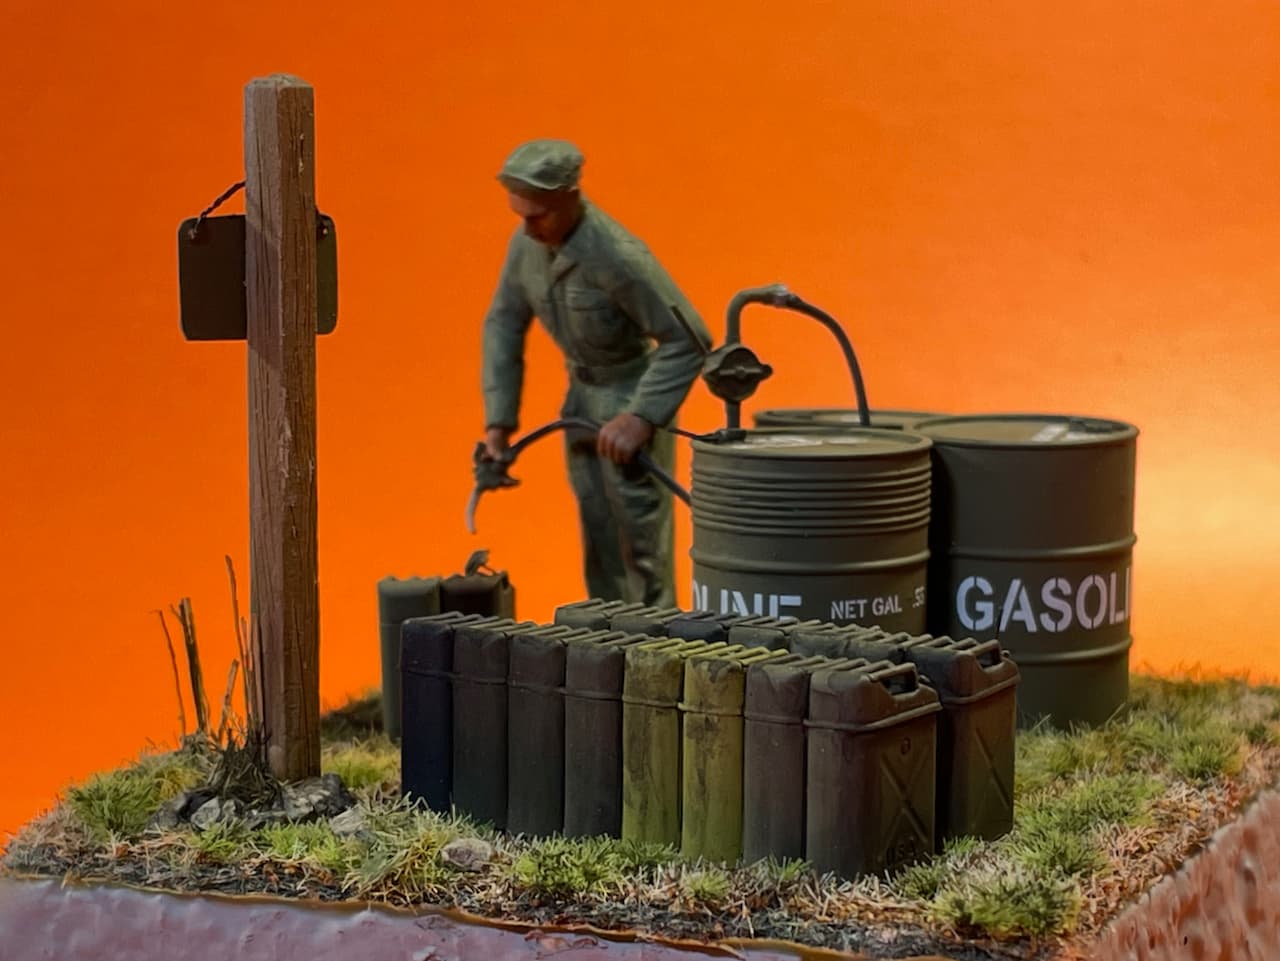
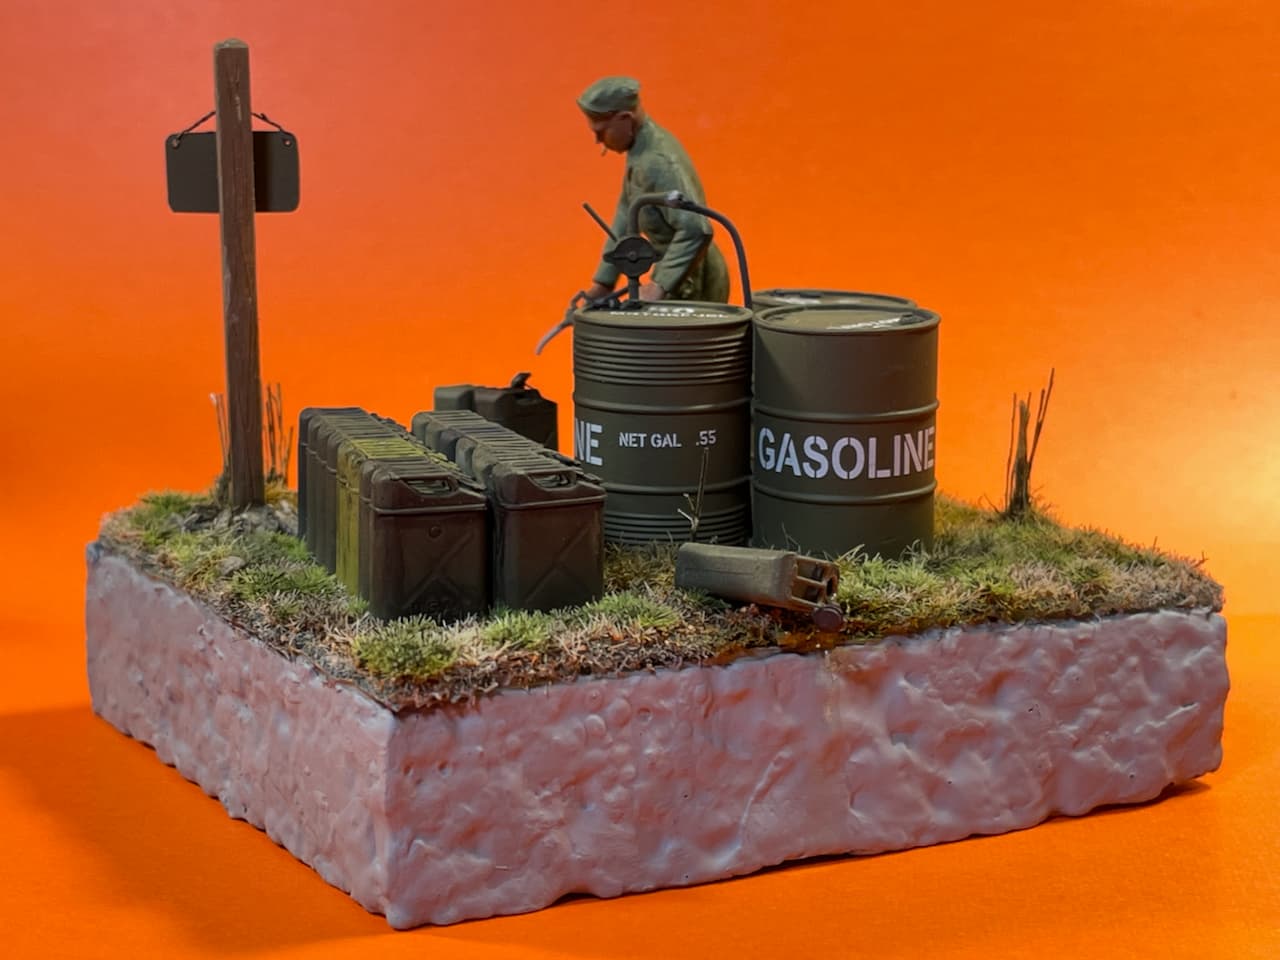
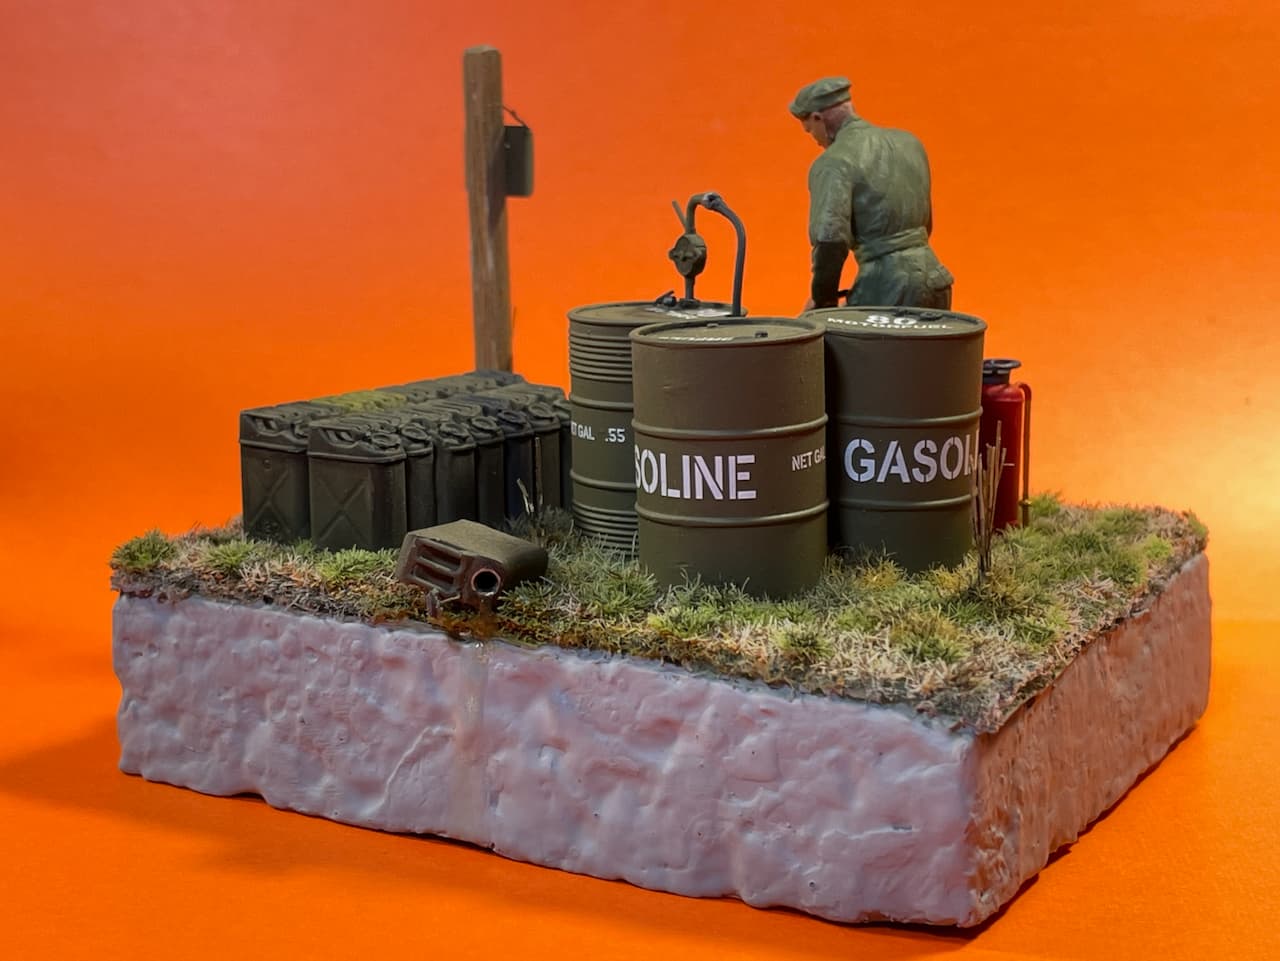
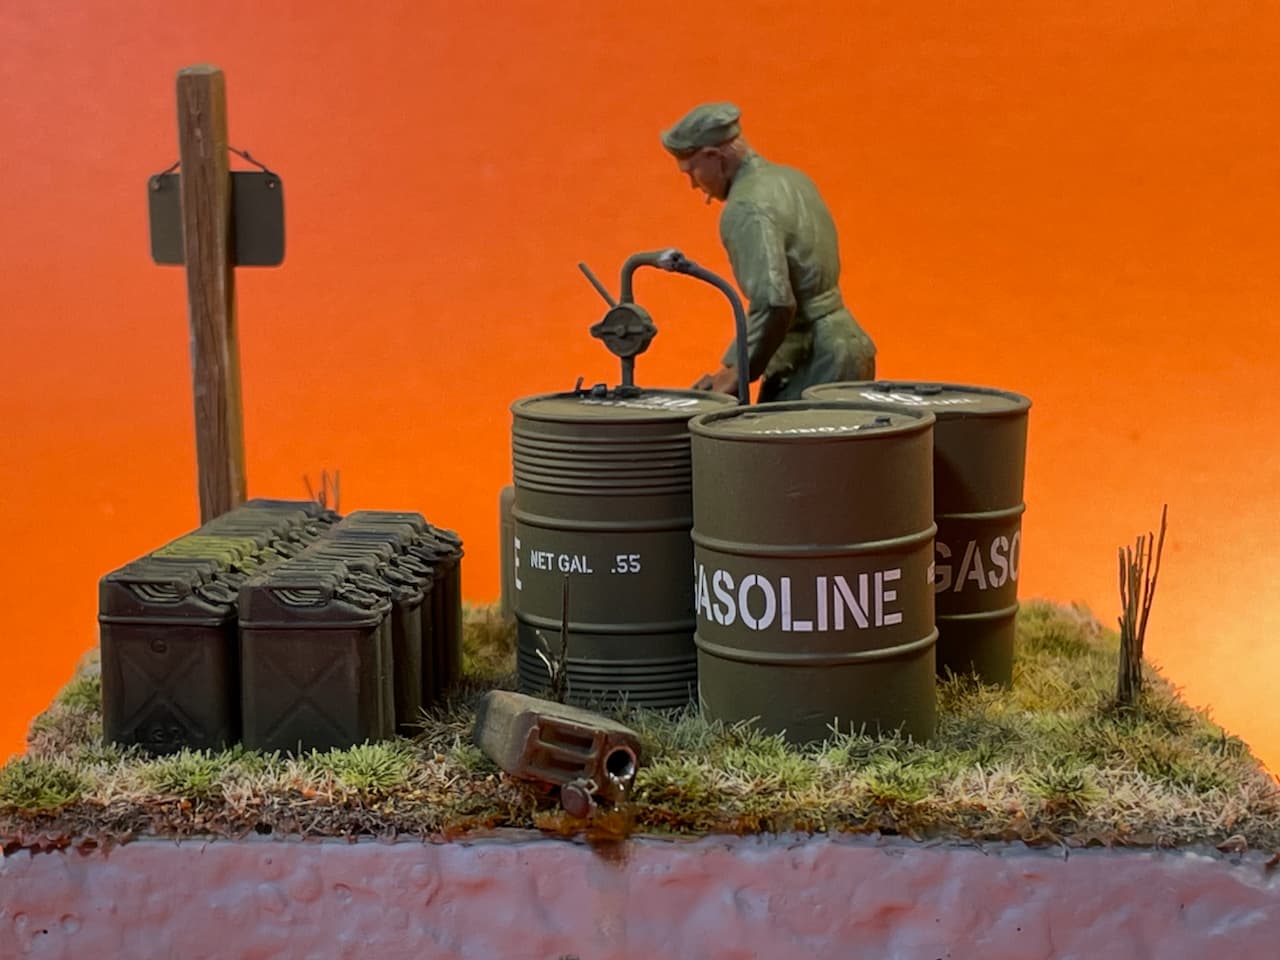
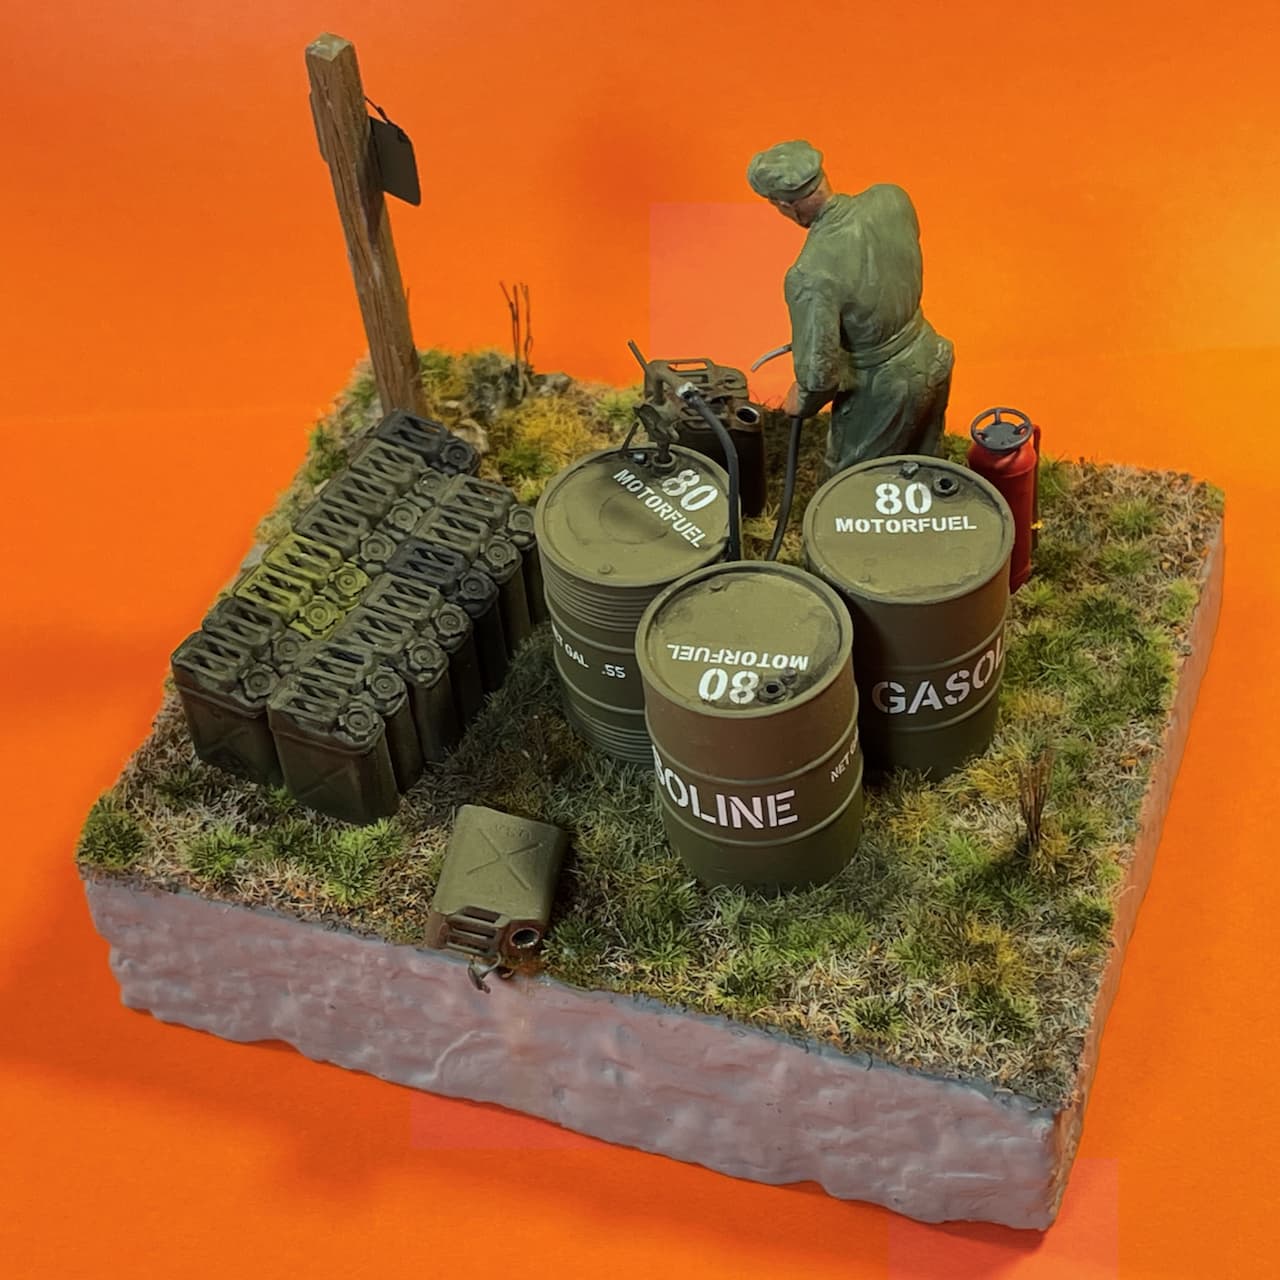
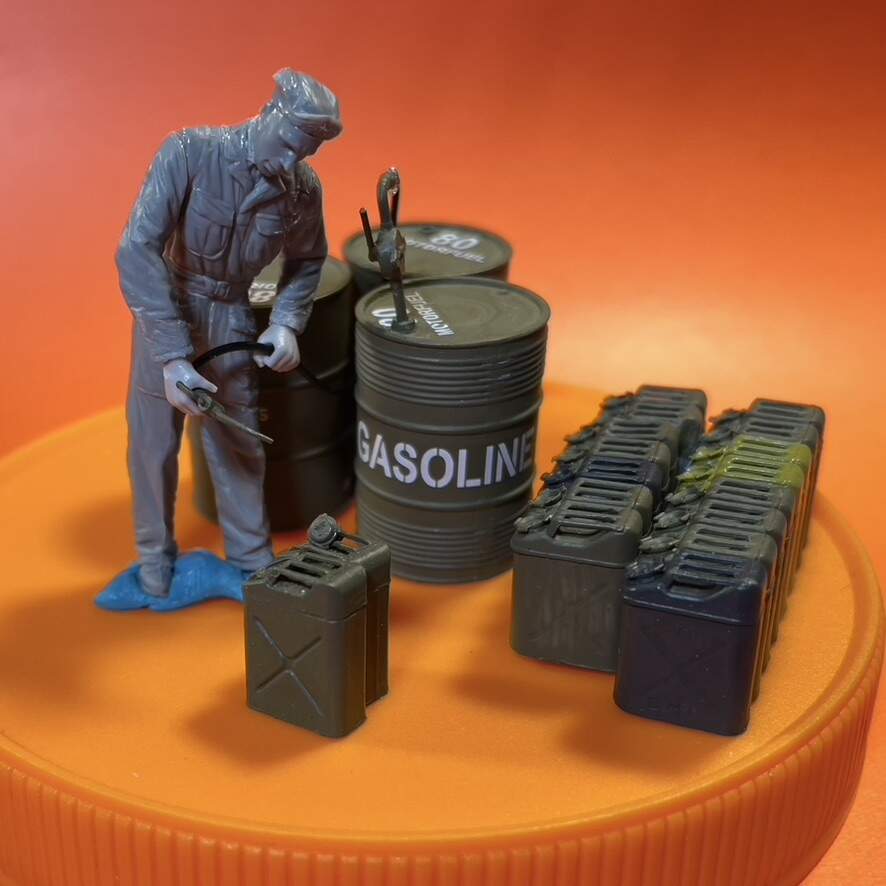
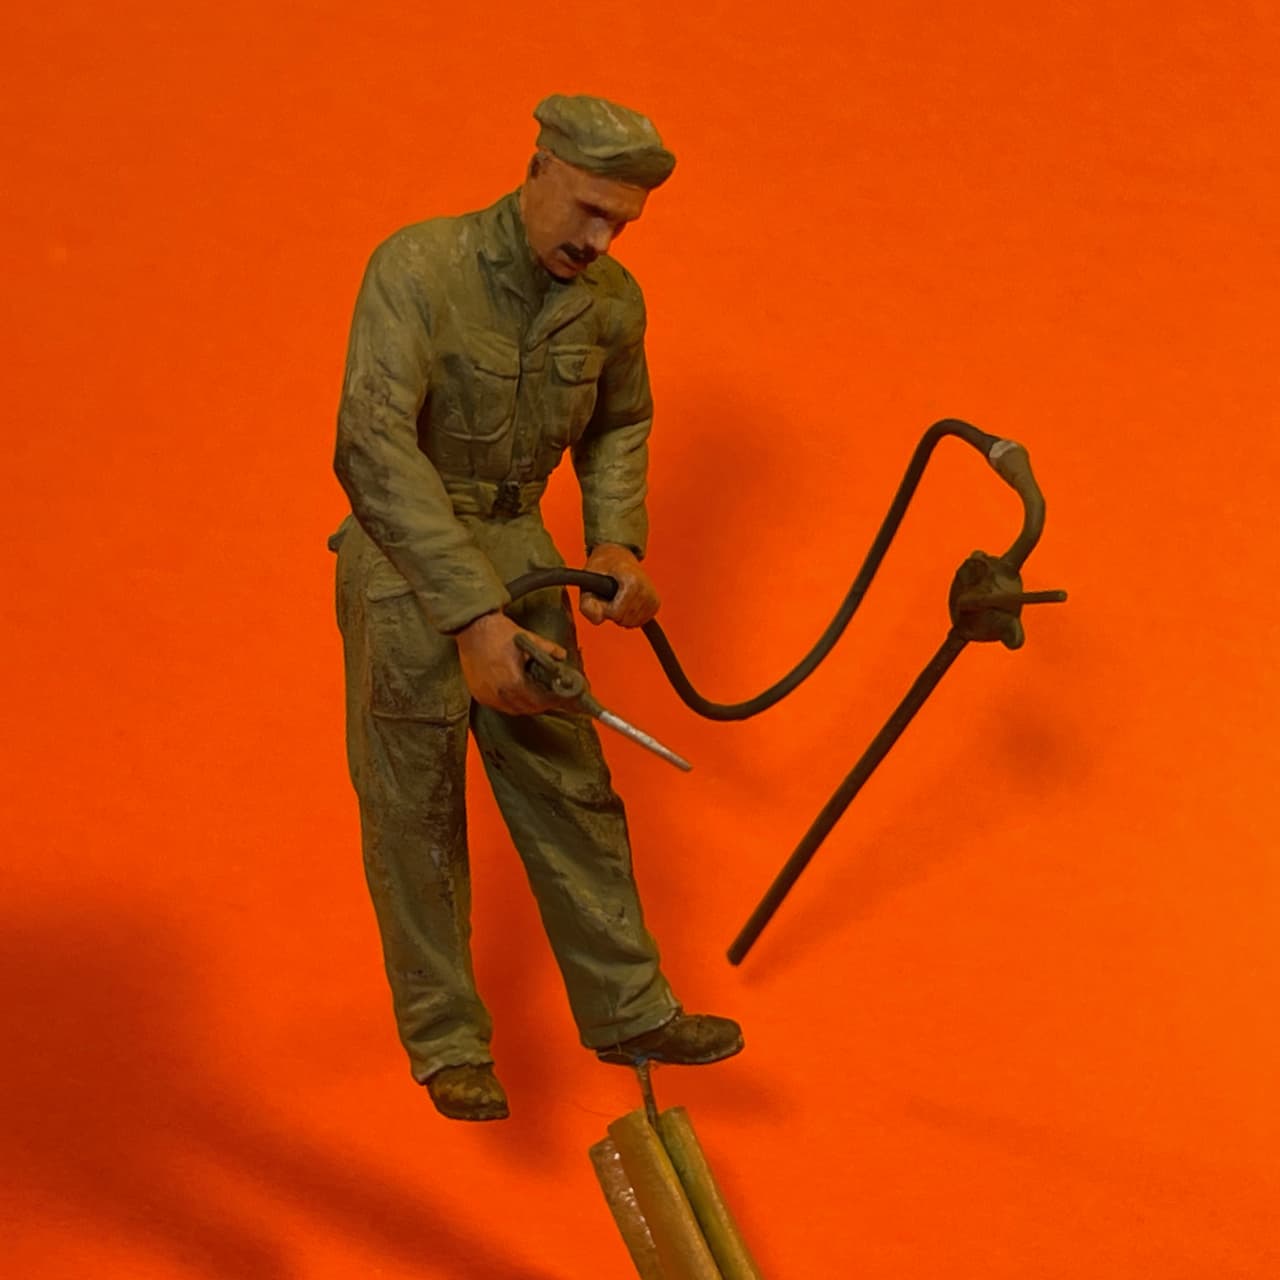
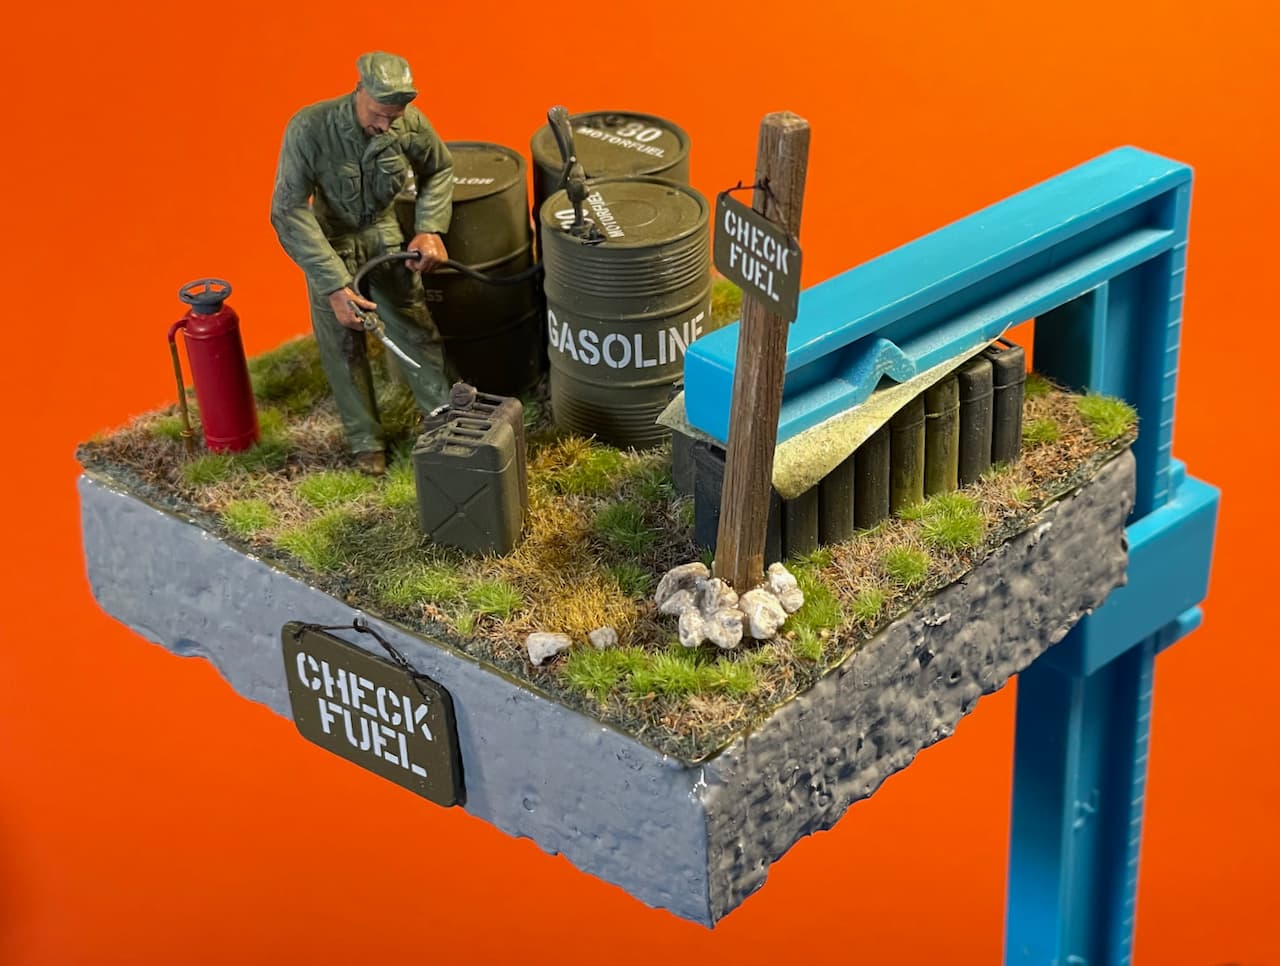
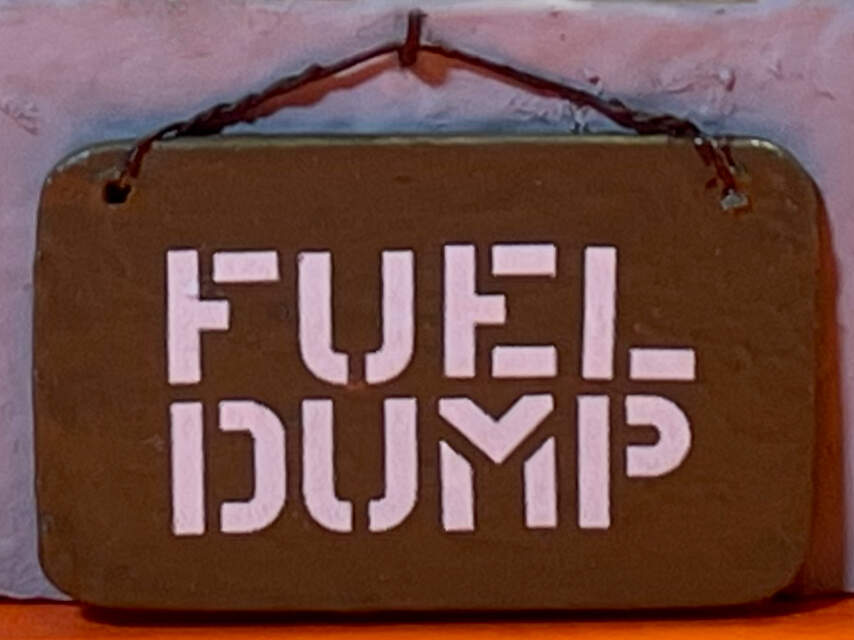
PVT Phillups topping-off gerry cans at the ‘Fuel Dump’ — one of the regular maintenance stops along the ‘Red Ball Express’ loop. :red_circle:

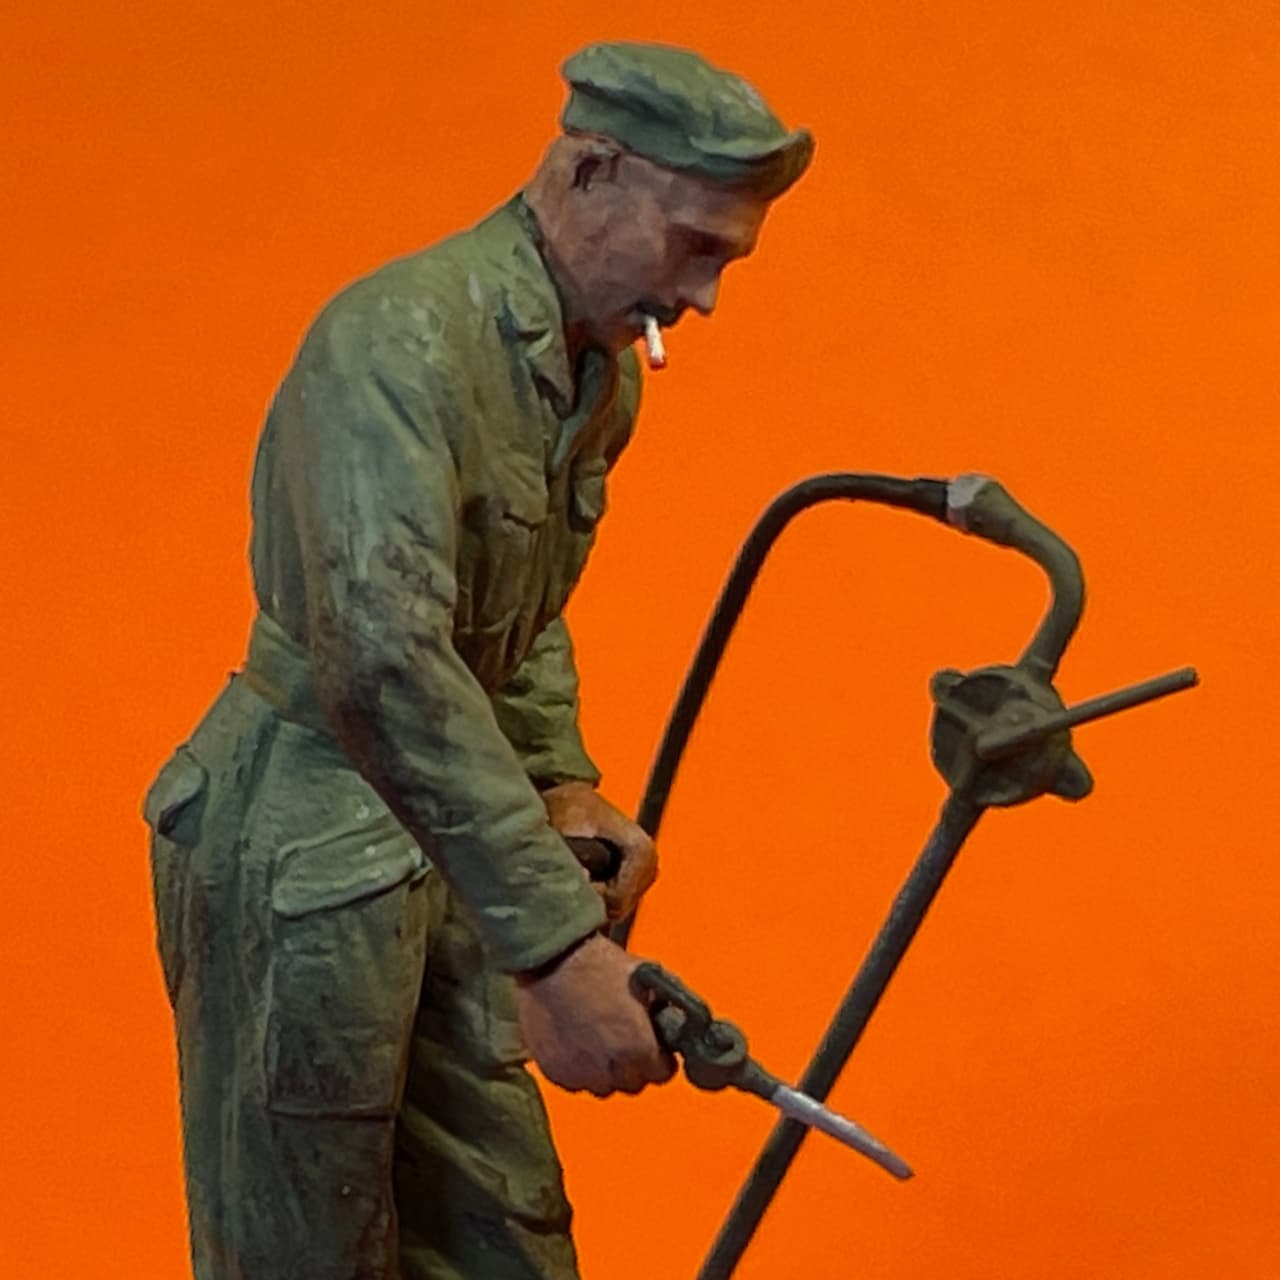
The cigarette was an afterthought. … “Hey GI, can I bum one of those?”

.

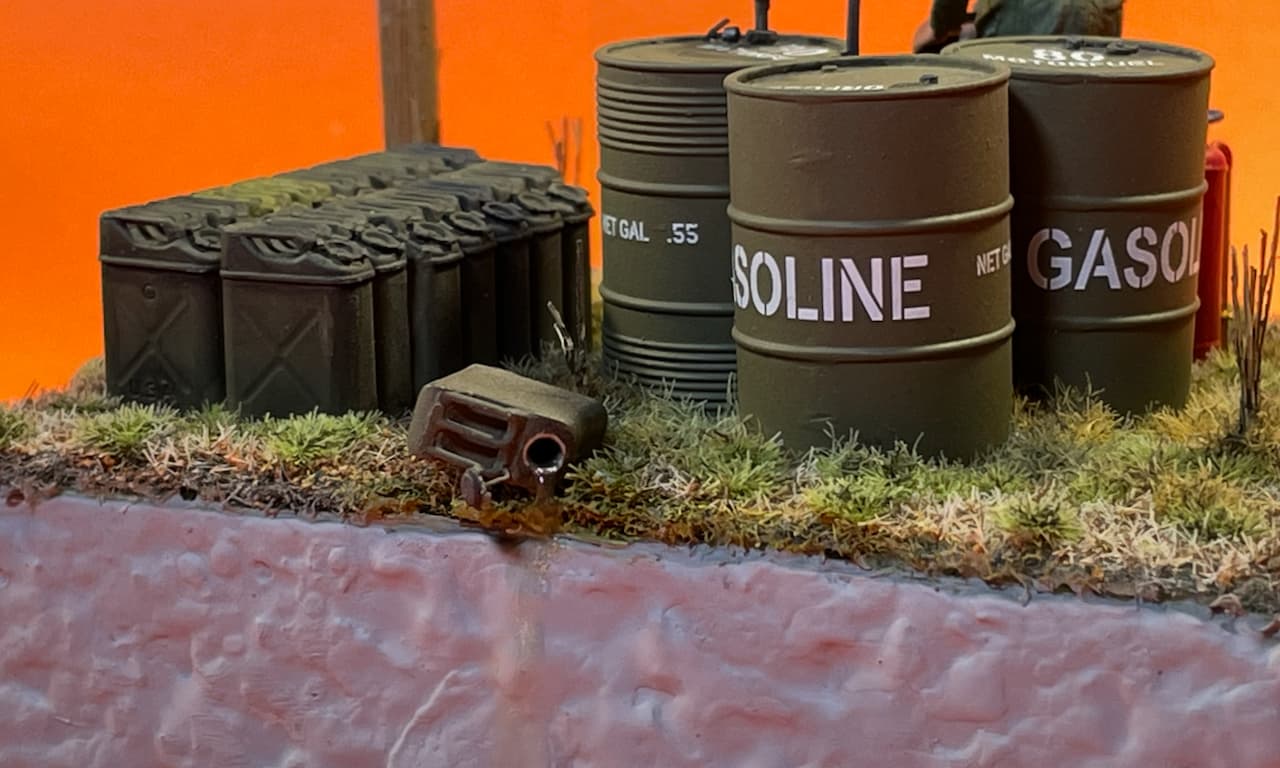
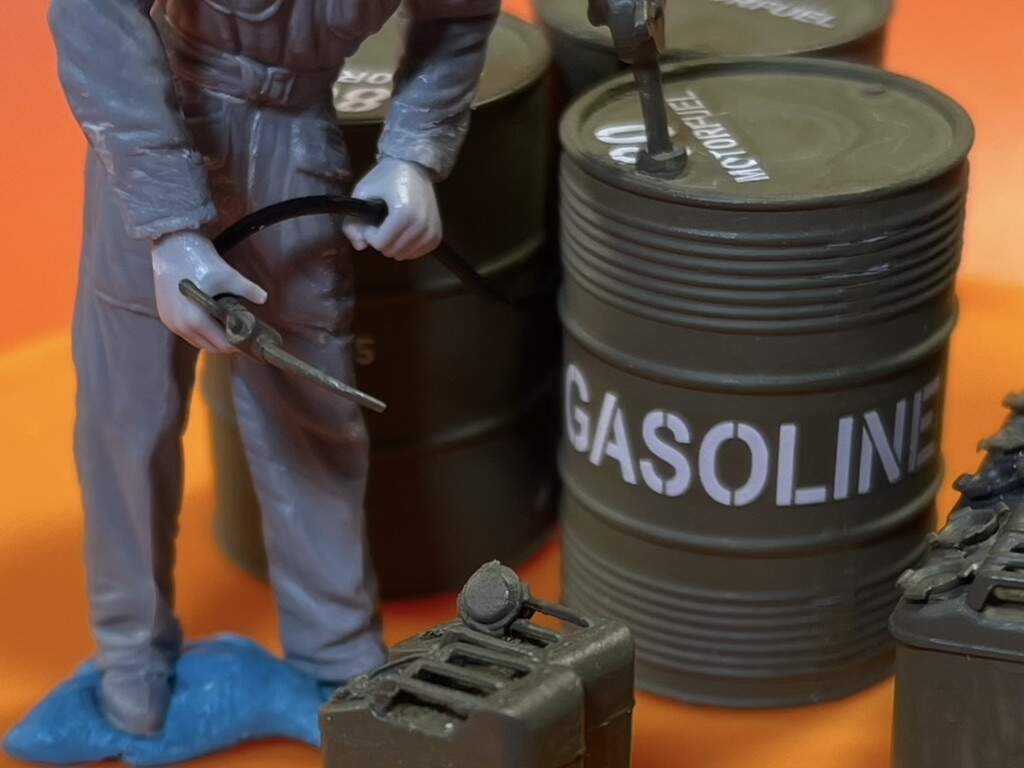
A last-minute addition was the gerry can fuel spill at the rear of the base. Tee-hee! :smile:

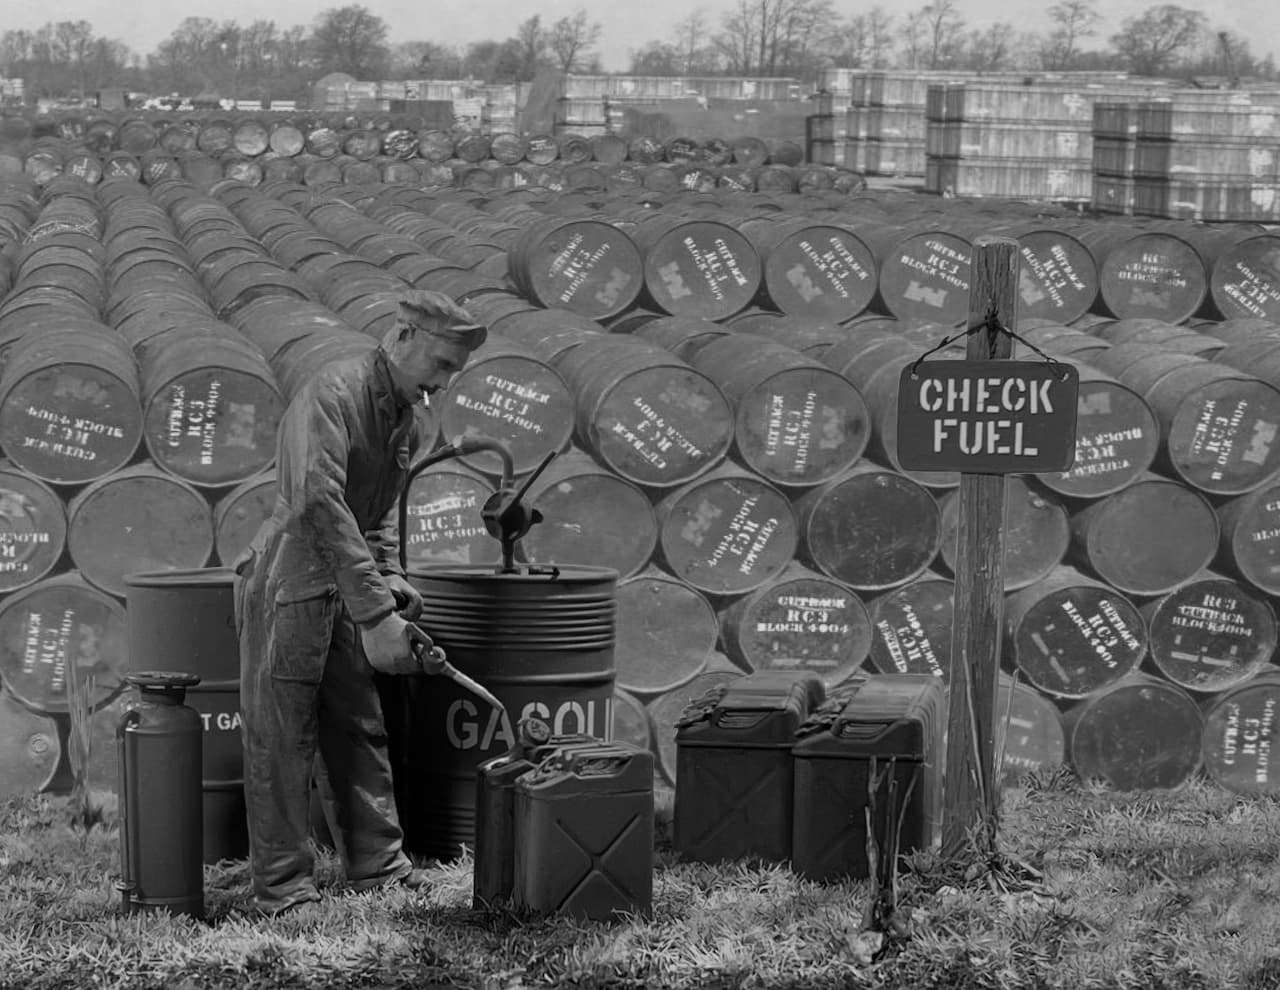
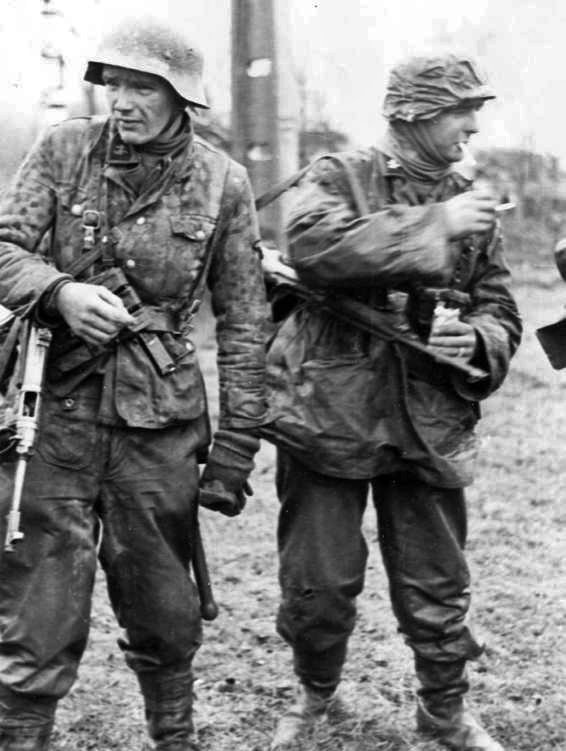
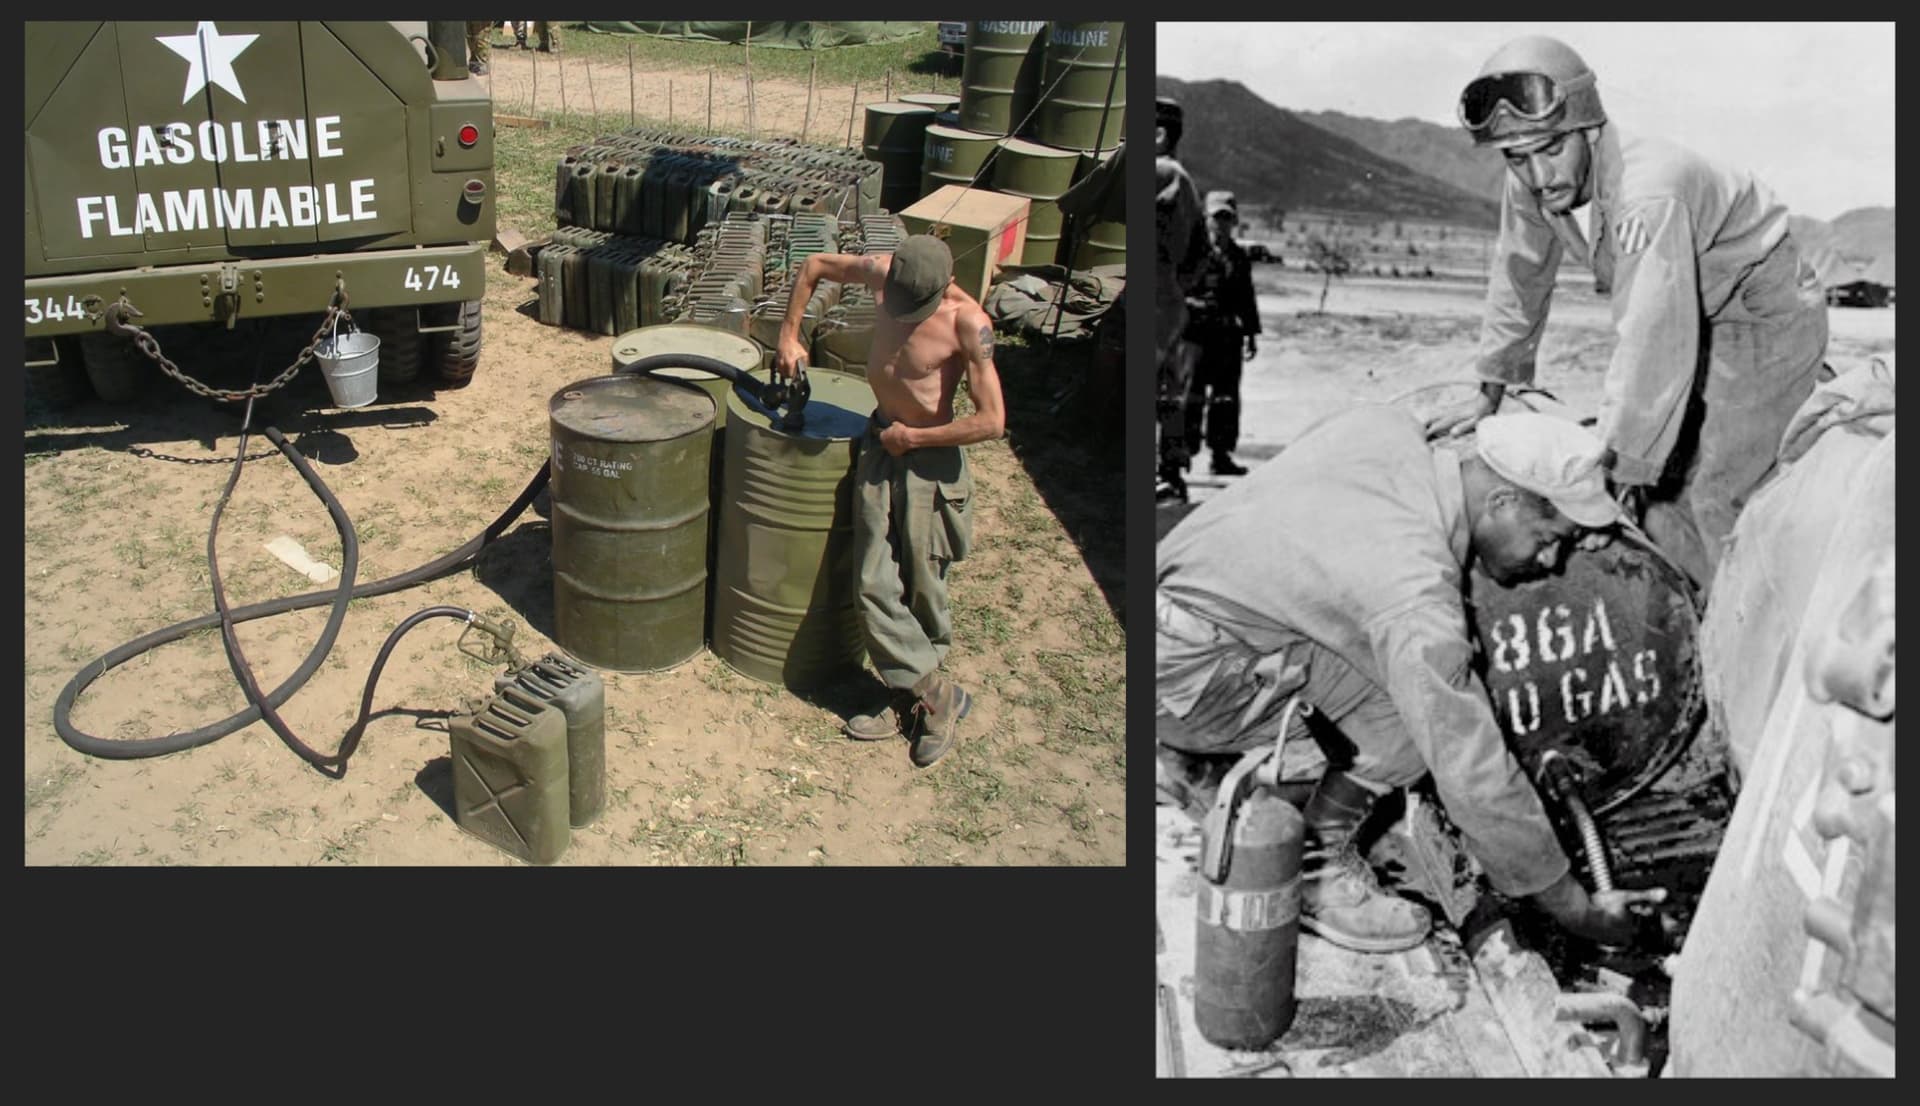
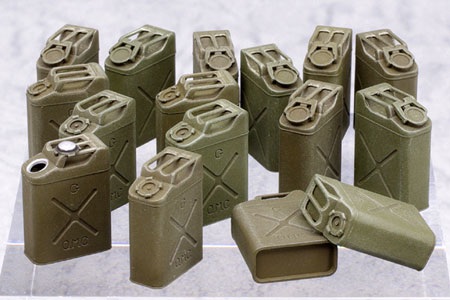
A few reference images.

74540286-5C83-4B5B-996B-CC445A95383B_4_5005_c

––––––––––––––––––––––––––––––––––––––––––––––––––––––––––––––––––––––––––––––––––

Following is a background story and a YouTube video pulled from the web.

“Keep ‘em Rolling”: 82 Days on the Red Ball Express

African American truck drivers of the Red Ball Express kept American units supplied in the race across France during the summer and fall of 1944.

‘France ’44 The Red Ball Express’

Note: Signage reference can be found at approximate time-stamp: 35:10.

––––––––––––––––––––––––––––––––––––––––––––––––––––––––––––––––––––––––––––––––––

Here are some WIP photos along with product call-outs.

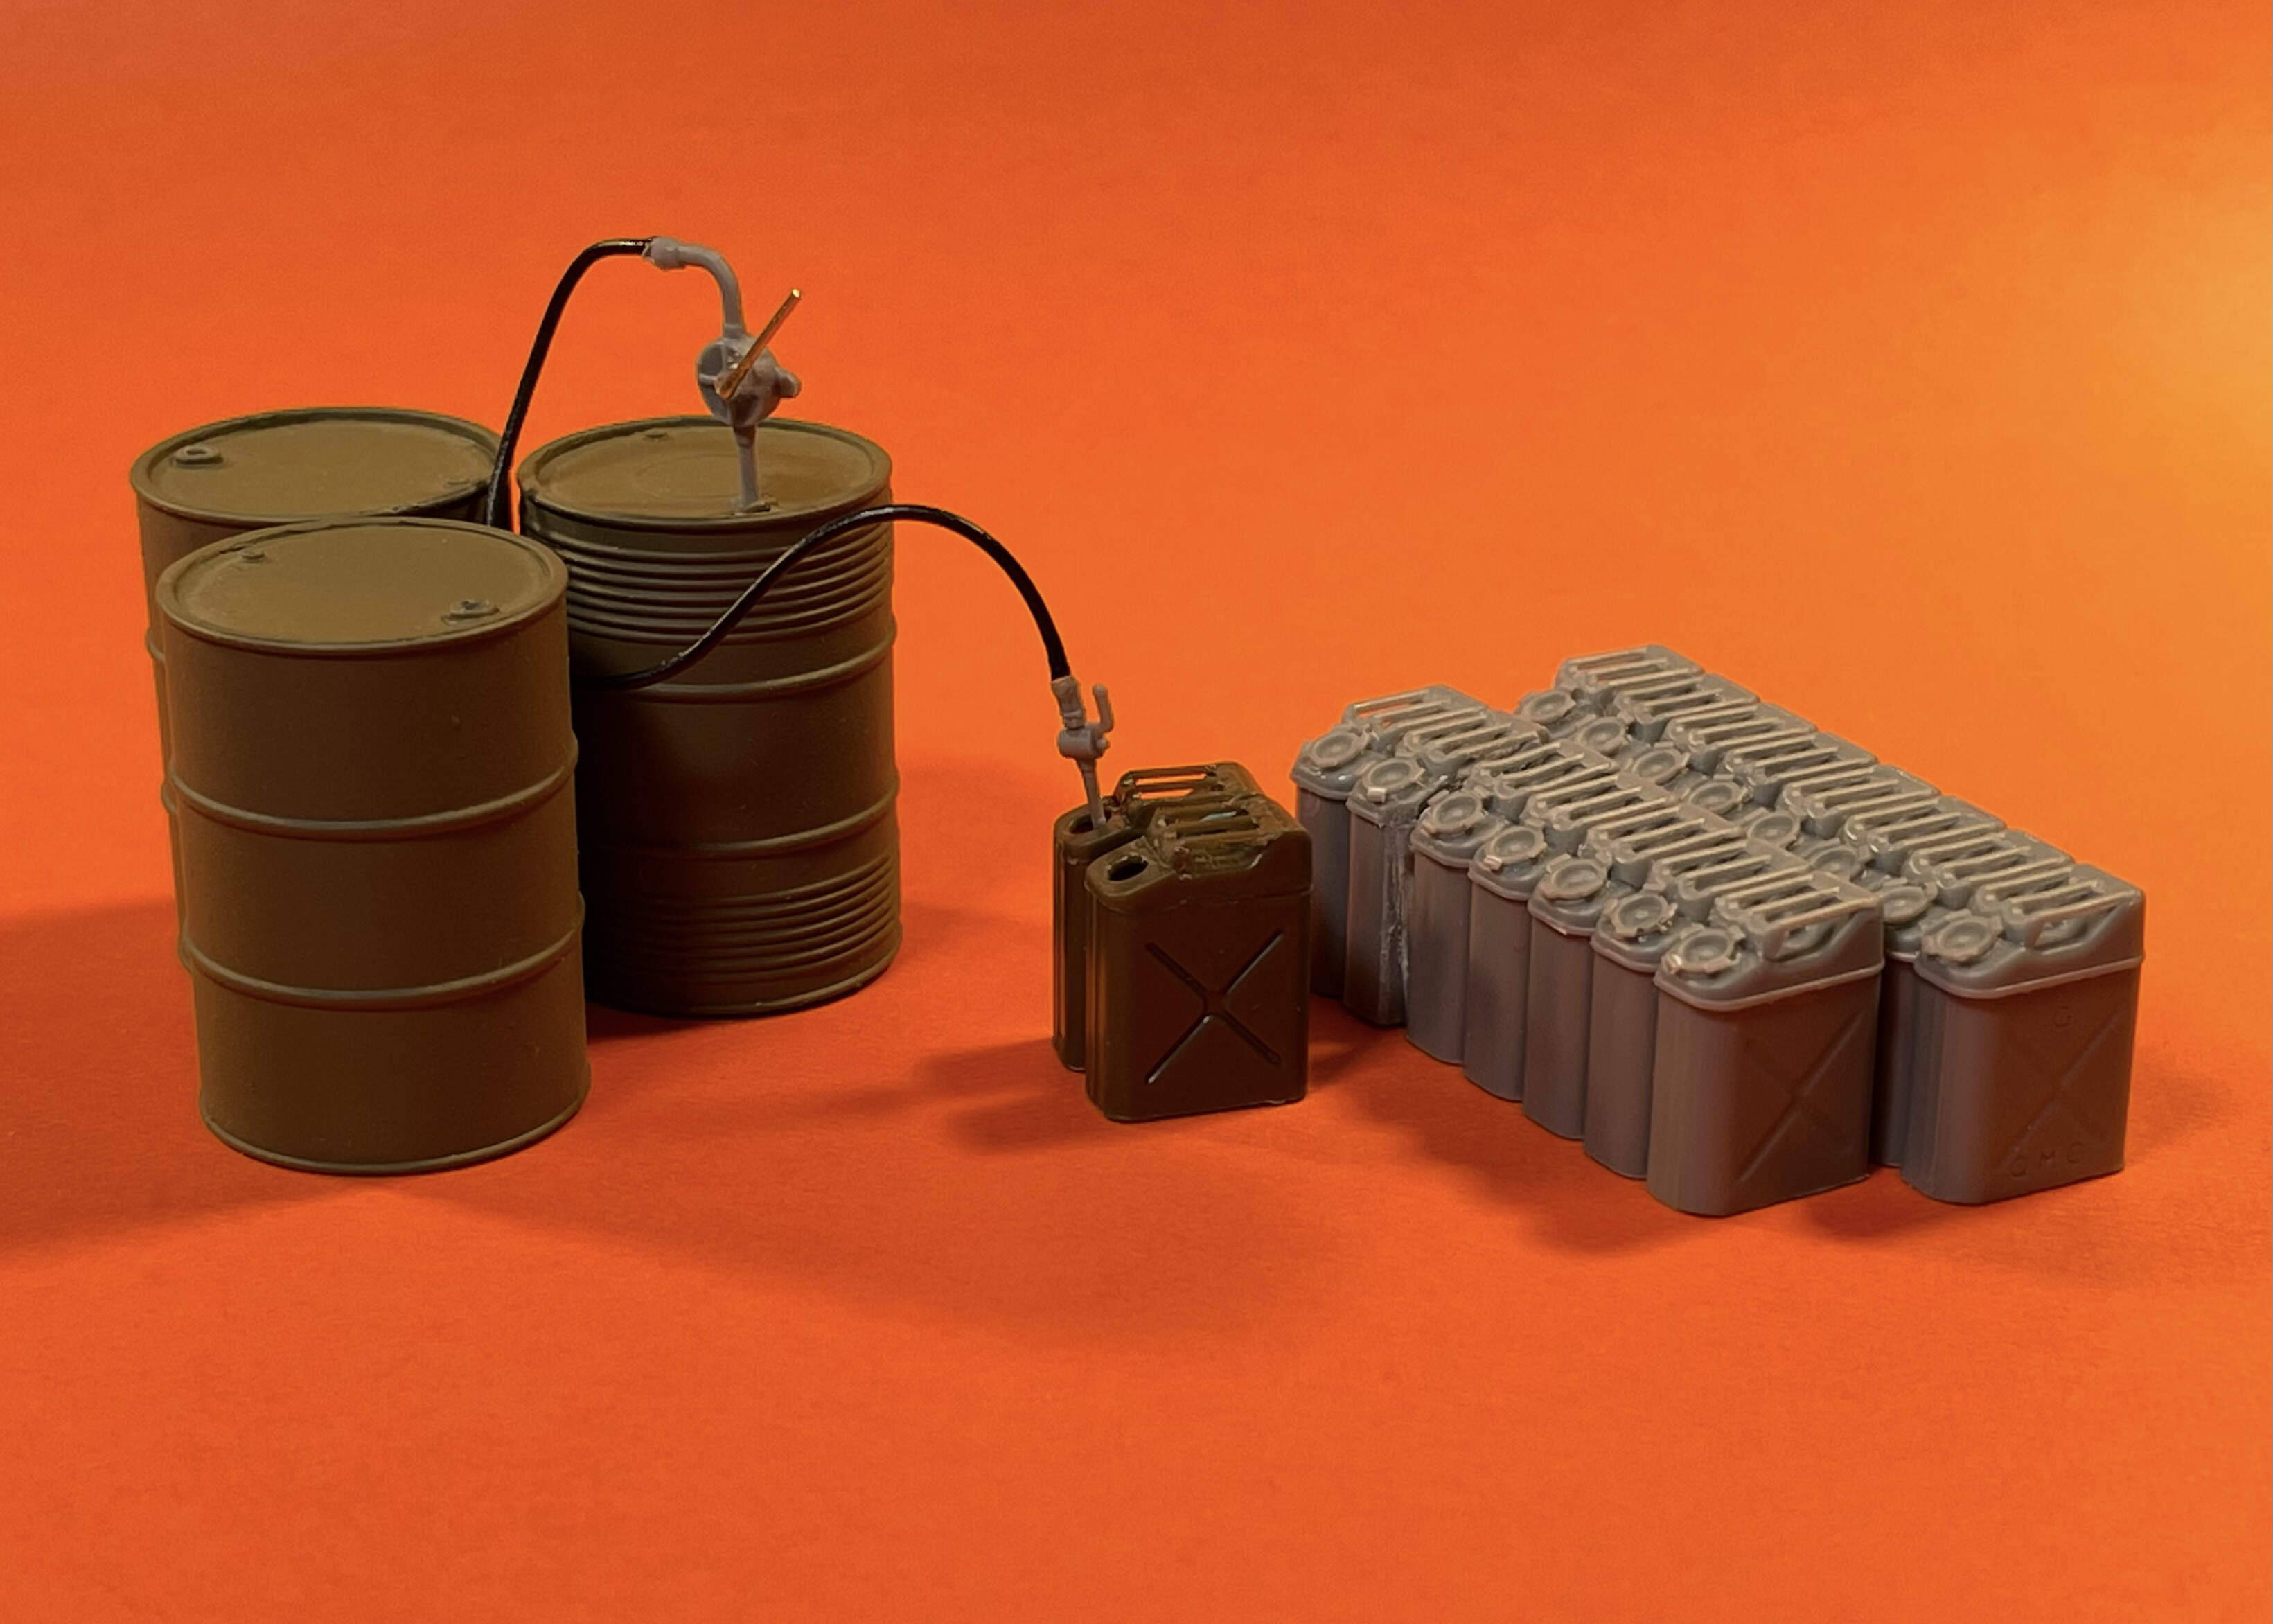
My bright idea to bog myself down with more work began with a leftover figure — nicely moulded from MiniArt (far left) and some arm swap-outs from the center figure.:bulb:

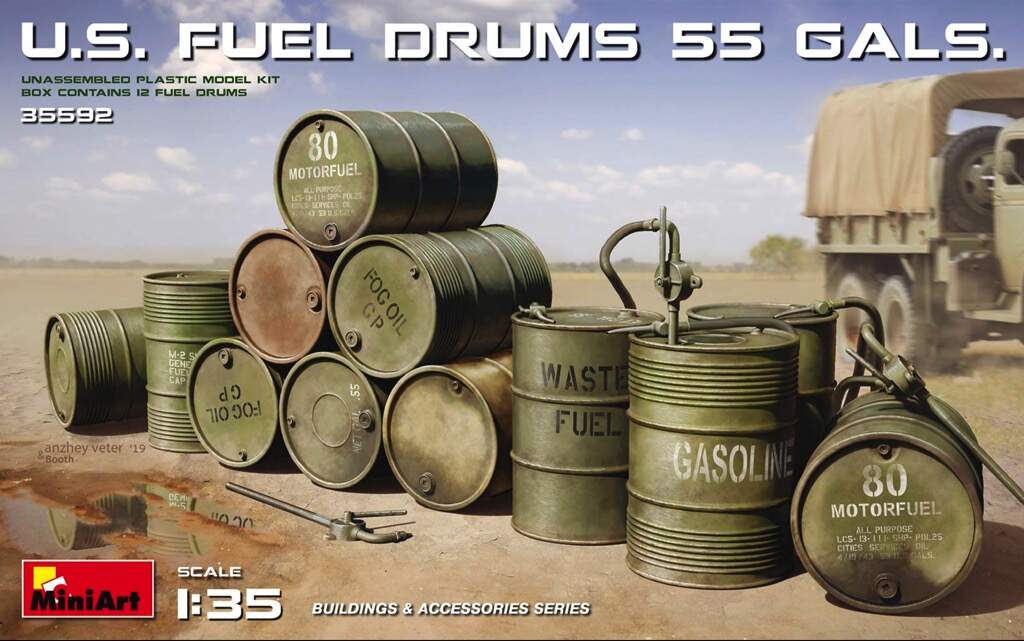
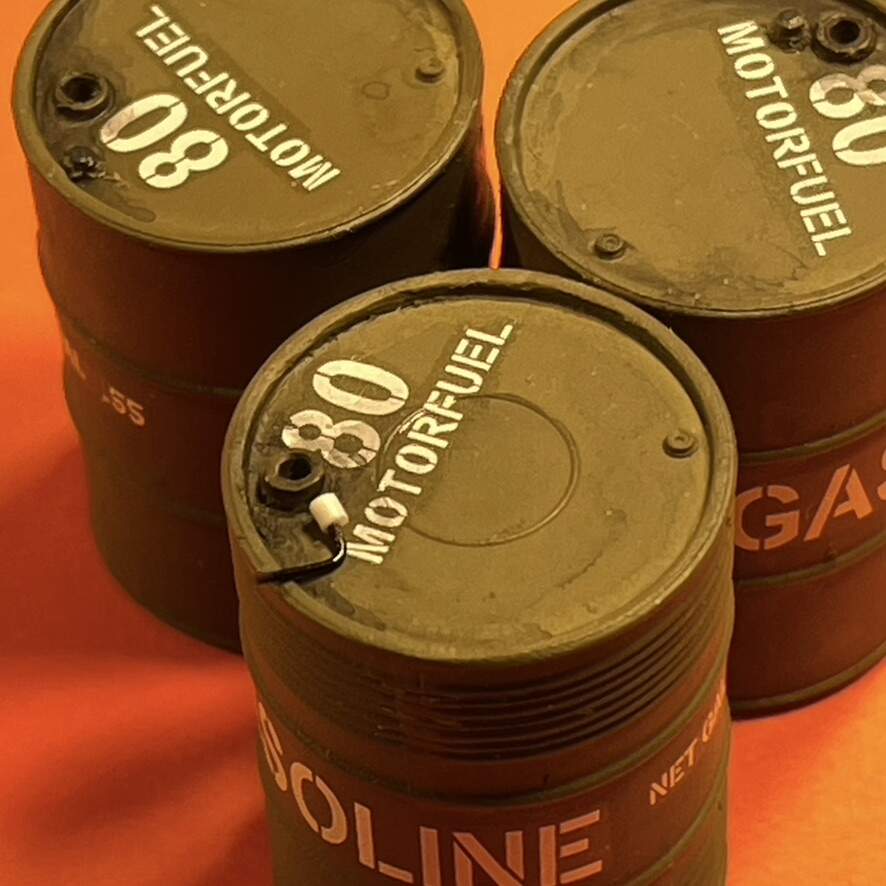
I already had the entire MiniArt US Fuel Drums assembled, so all that was needed was to glue three together and add the very nice decals.

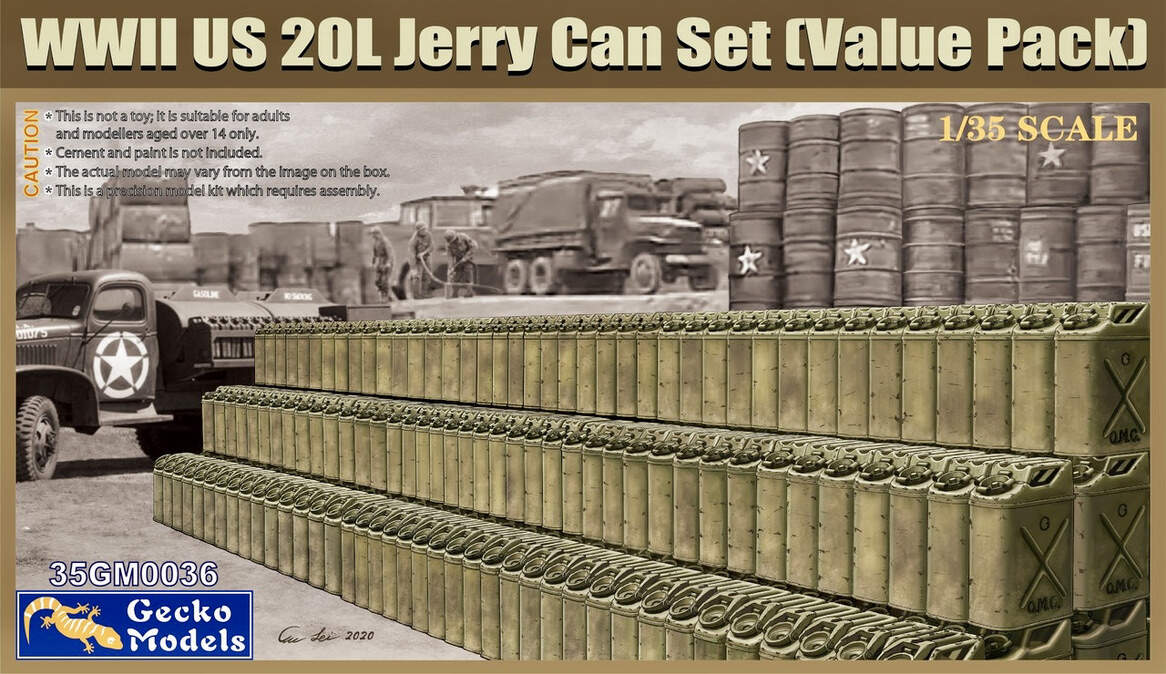
I did some minor modifications to the nice Jerry Can stacks from both Gecko Models and Tasca/Asuka.

E48C217F-8188-477D-A5DC-13438BE9EC9D_1_105_c

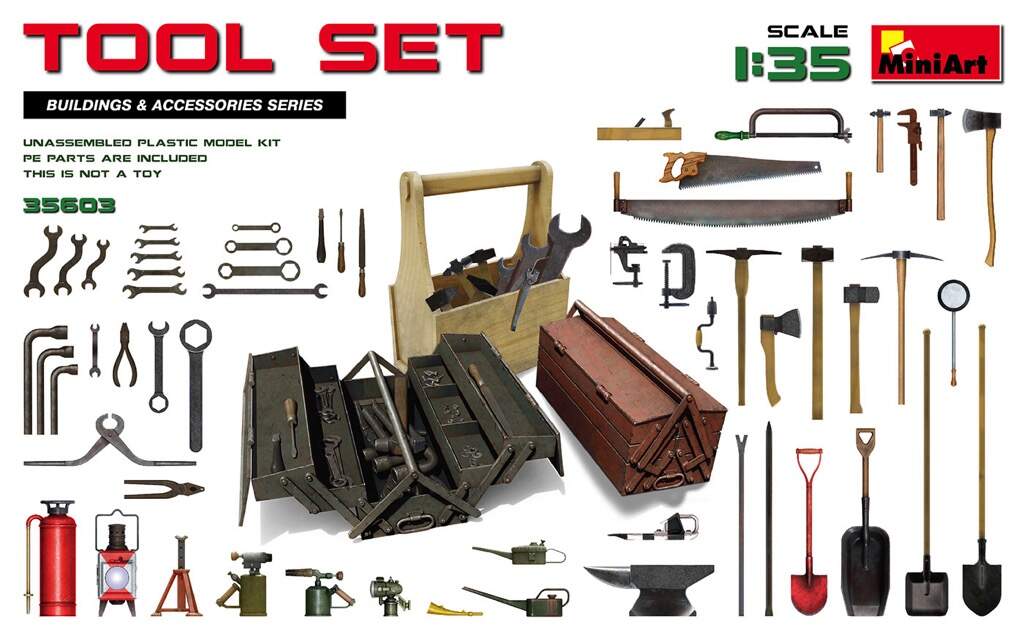
Hard to resist that fire extinguisher from the MiniArt Tool Set. I think it added a nice color splash to the over-all scene.:fire_extinguisher:

––––––––––––––––––––––––––––––––––––––––––––––––––––––––––––––––––––––––––––––––––

Initial concept and dry-fit. :thinking:

Keeping the delicate figure/pump assembly removable proved to be a smart move on my part for ease of modification and painting later on. :smile:

.

Hornet Hand try-outs… I made things more difficult for myself by choosing left hand No. 2. Whenever there was a need to work on the figure, I had to clip the hose at the pump connection in order to thread it through. But I think it does look much better.

.

A Styrofoam block was cut for the base. After sealing it with White PVA Glue, Mr. Surfacer 1000 was applied to simulate concrete. Here, a clamp is used to mush-down the fuel can stack after PVA glueing to the mat.

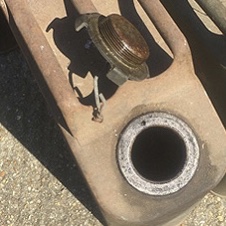
A little super-detailing… Fuel Plug with Allen Key attached. :hammer_and_wrench:

.

Some signage examples in different sizes.

I made a mid-construction title change for the base placard. Here it is flipped-over with the decal redone.

––––––––––––––––––––––––––––––––––––––––––––––––––––––––––––––––––––––––––––––––––

Kits Used:
• Figure: MiniArt (35180) US Army Drivers (1 of 5 figure set) + replacement Hornet Hands.
• Fire Extinguisher: MiniArt (35603) WWII Tool Set.
• Fuel Drums: MiniArt (35592) US Fuel Drums 55 Gals.
• Pump Hose: Scrap Electronics Wire.
• Stacked Fuel Cans: Gecko (35GM0036) WWII US 20L Jerry Can set.
• Foreground Fuel Cans: Tasca/Asuka (35-L14) US Jerry Cans.
• Signpost: Basswood (1.875” x 0.125” x 0.125”).
• Placards: Evergreen Sheet Styrene No. 9009, .005” (0.13mm).
• Large Placard Decals: Archer (AFT35501W) Generic Stencil Style Lettering (White).
• Small Placard Decals: Dragon M21 Mortar Motor Carriage (from spares box).
• Ground Mat: Ammo by Mig (8353) Spring Steppe (5"x9" mat).

Paints, gasoline spills, etc.
• Vallejo Acrylics, Varnishes, and Washes.
• AK Interactive (8028) Puddles Effects Liquid.
• Tamiya Flat Clear (TS-80).
––––––––––––––––––––––––––––––––––––––––––––––––––––––––––––––––––––––––––––––––––

So that’s it for this one. Now it’s onto the next — one of my many incomplete projects. :hammer_and_wrench: :art::paintbrush:

Hope you get a kick outa’ the build. And remember… NO SMOKING NEAR FLAMMABLES! :fire:

'FLAMMABLE GAS'

Cheers!:beer:
—mike

20 Likes

Living large with a lit cigarette there!

1 Like

I think this highlights one shortcoming to the software the forums use. This is the perfect time to have some music playing when someone clicks on a thread. Perhaps, “Come on baby light my fire?”

I fear Pte “Phillups” may not be long for this earth…I can see a hot fiery end on his horizon lol

1 Like

Yea, perhaps not the smartest thing to be having a smoke while filling gas cans!
Ken

1 Like

Michael- you’ve depicted one of those essential logistics operations that don’t get a huge outing in the 1/35 figure world. I think it’s all the better for it because it shows that with a bit of skill and determination you can knock out a cracking wee scene with some decent plastic kits and odds and ends.

Nice of you to add the WIP too so we can see how it was put together- you have a good eye for composition. You also show that a lot of items (including the GI’s uniform) that are OD don’t have to be uniform in tone and can be made to look interesting with careful and thoughtful painting- plus having something like the red extinguisher is great to draw the eye. The figure pose and paint look very natural too and the cigarette is a great addition that will definitely get the viewers attention!

2 Likes

i love the lack of “Health & Safety” …smoking a cigarette whilst working with highly imflamable products.

:grinning::yum::sunglasses:

1 Like

Great vignette & presentation Mike. The fire extinguisher’s a hoot too, about as useful as a flame-thrower. :boom:

1 Like

Ground work looks great! Super realistic

1 Like

Nicely done Mike !!!

1 Like

Late to this party Mike - Very nice work and an unusual subject . Well done and thanks for sharing.

1 Like

Nicely done on all counts Mike! A great scene. Hilarious and terrifying at the same time.

1 Like

I’ve seen it happen all too often; I recall our Series II/III Land Rovers at a Div HQ in the mid-70s. The fuel tanks were underneath the front seats. A thin piece of sheet metal had to be slid out once the seat was raised, then the fuel cap unscrewed, tilt jerrican and empty into said tanks, and of course, light up a cigarette whilst so doing! Unbelievable.

How the clerical component of the HQ wasn’t drastically reduced I’ll never know.

1 Like

I forgot to say, cracking little model.

1 Like

Greetings fellow pyromaniacs! :fire::laughing:
Thank you for all the kind replies. I really appreciate your taking the time to drop by and comment. Happy that I could highlight a fascinating little piece of WWII history. Also glad that I could give you guys a little chuckle while doing so! :grin: This was a challenging and fun little build which kept me highly motivated as it evolved. It was also a much needed practice run at the many projects looming over my workbench. :hammer_and_wrench: :art::paintbrush:

Okay… now field-dress those cigarette butts before you light the fires in your flammable lacquer infused modeling environments! :no_smoking:

Happy and safe modeling!
—mike

2 Likes

Hi Mike ,

i’m glad to see you still around . Nice diorama for sure and you must have put a lot of effort in creating the scene. Well done !
Kurt.

1 Like

Hi Kurt!
Good to hear from you… it’s been quite a while. I hope you’re doing well.
Glad that you like the diorama.

—mike

1 Like

Yes indeed Mike , way to long but everything is fine . Thanks for asking.

Kurt

1 Like

This diorama reminded me of the shortest story writed by O`Henry.
“The driver lit a cigarette and bent over the gas tank to see if there was much gasoline left. The dead man was twenty-three years old.”

1 Like

Nice little scene with some humour added :slight_smile:
I think I would dirty the white lettering on the tops of the drums a little with some black pastel dust as it seems to stand out a lot. But you already did that a bit with the fuel around the caps.
I like the spilled can at the back :slight_smile:
This fuel man is one careless worker I would say.
Thanks for sharing the sources.