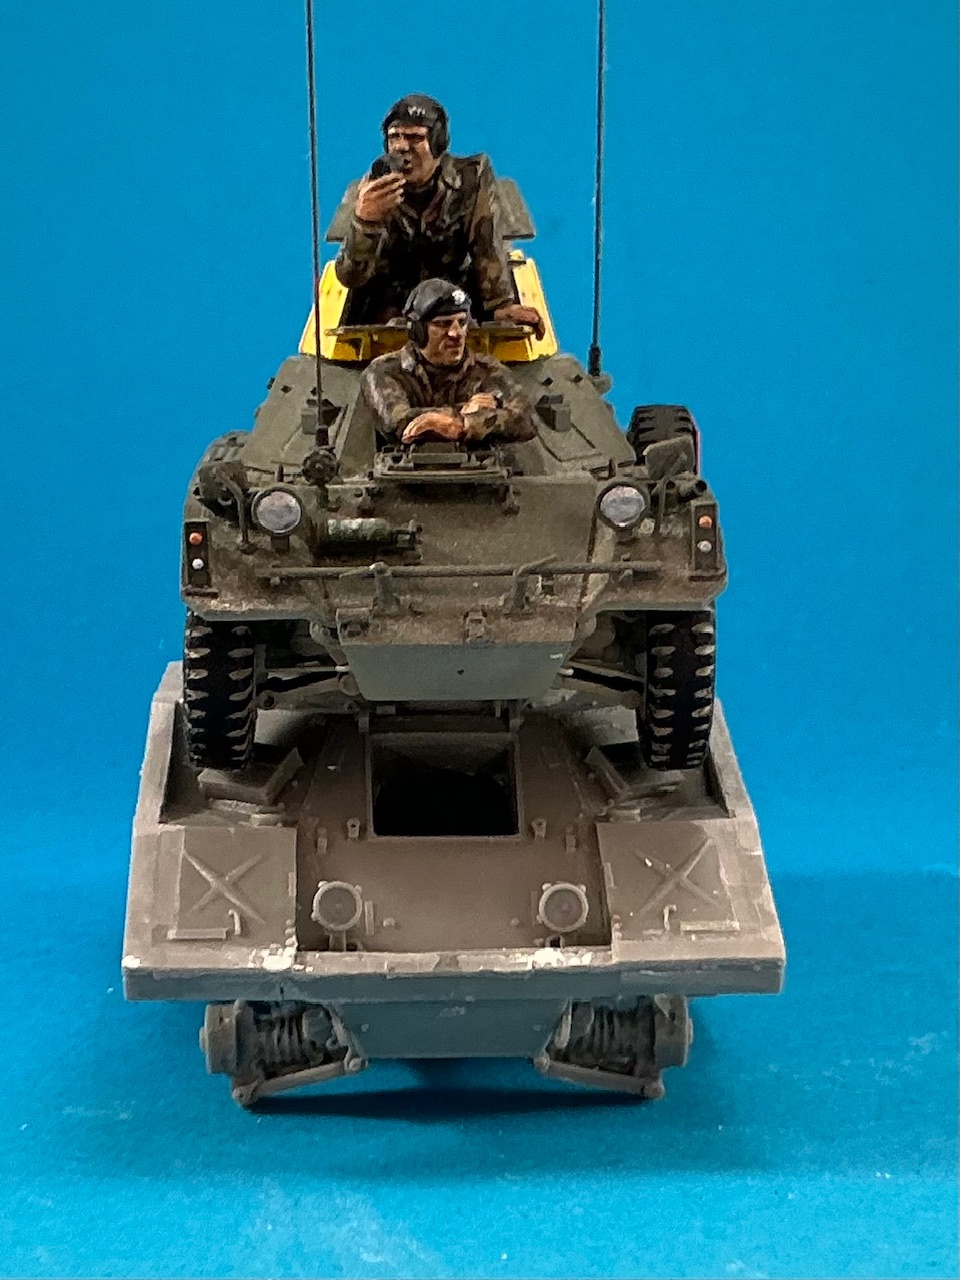
FV 722 CVR(W)L Vixen in the Gulf War

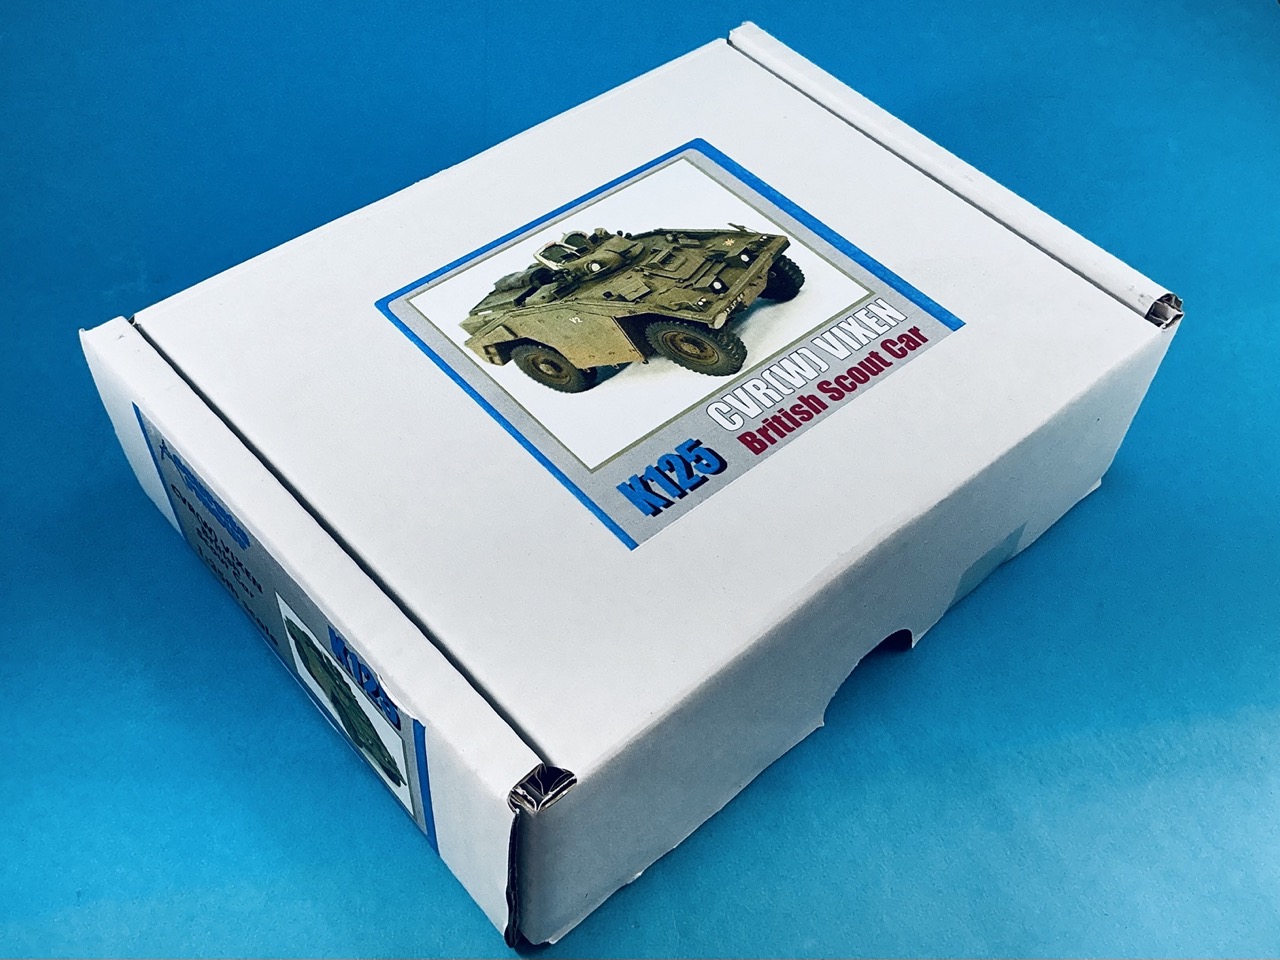
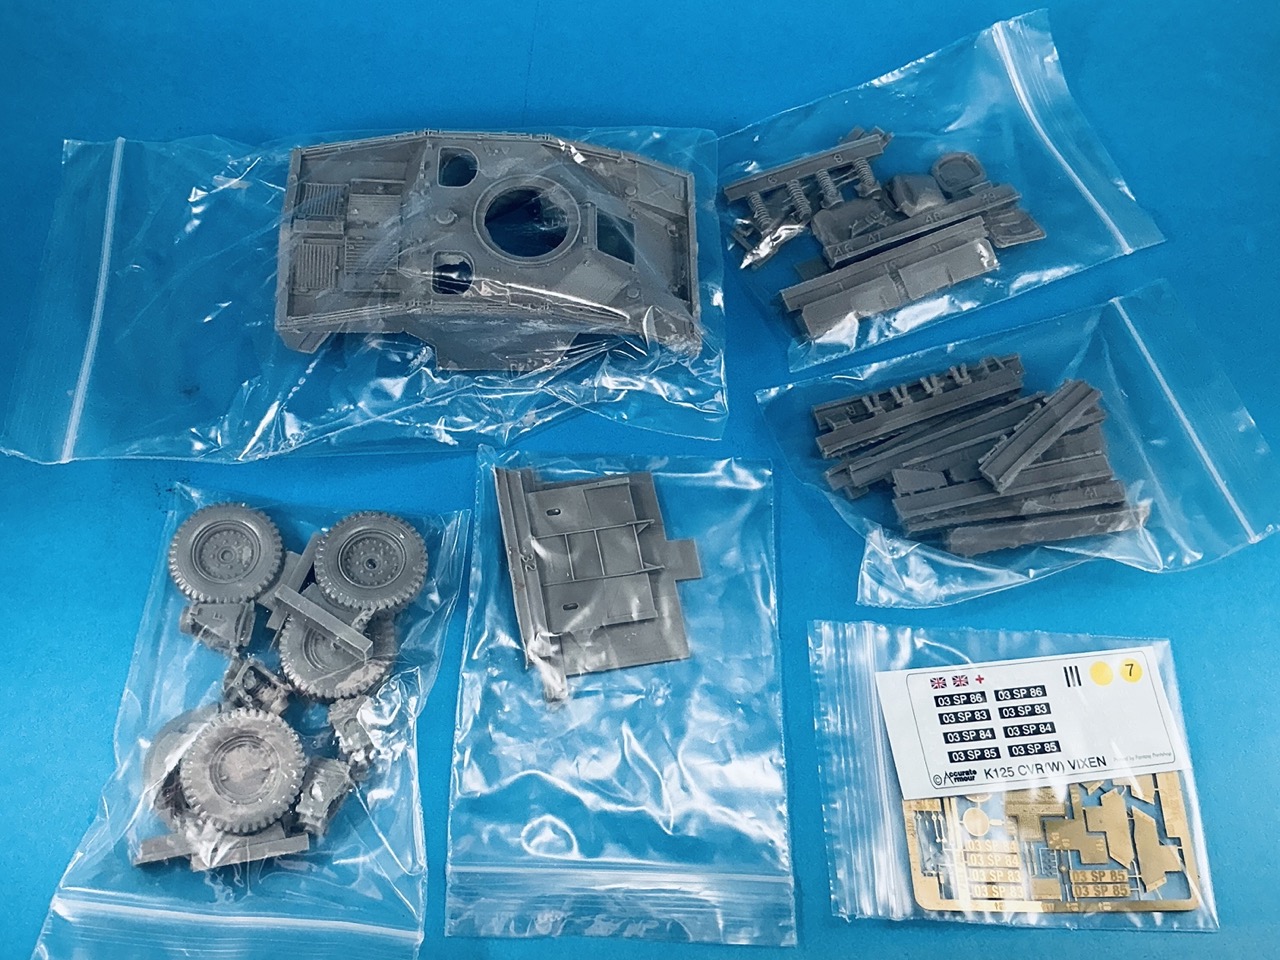
For some months now, I’ve hardly built anything for a number of reasons. So what do you do to get back into the swing of things? Exactly: you take a full resin kit out of your stash :wink:


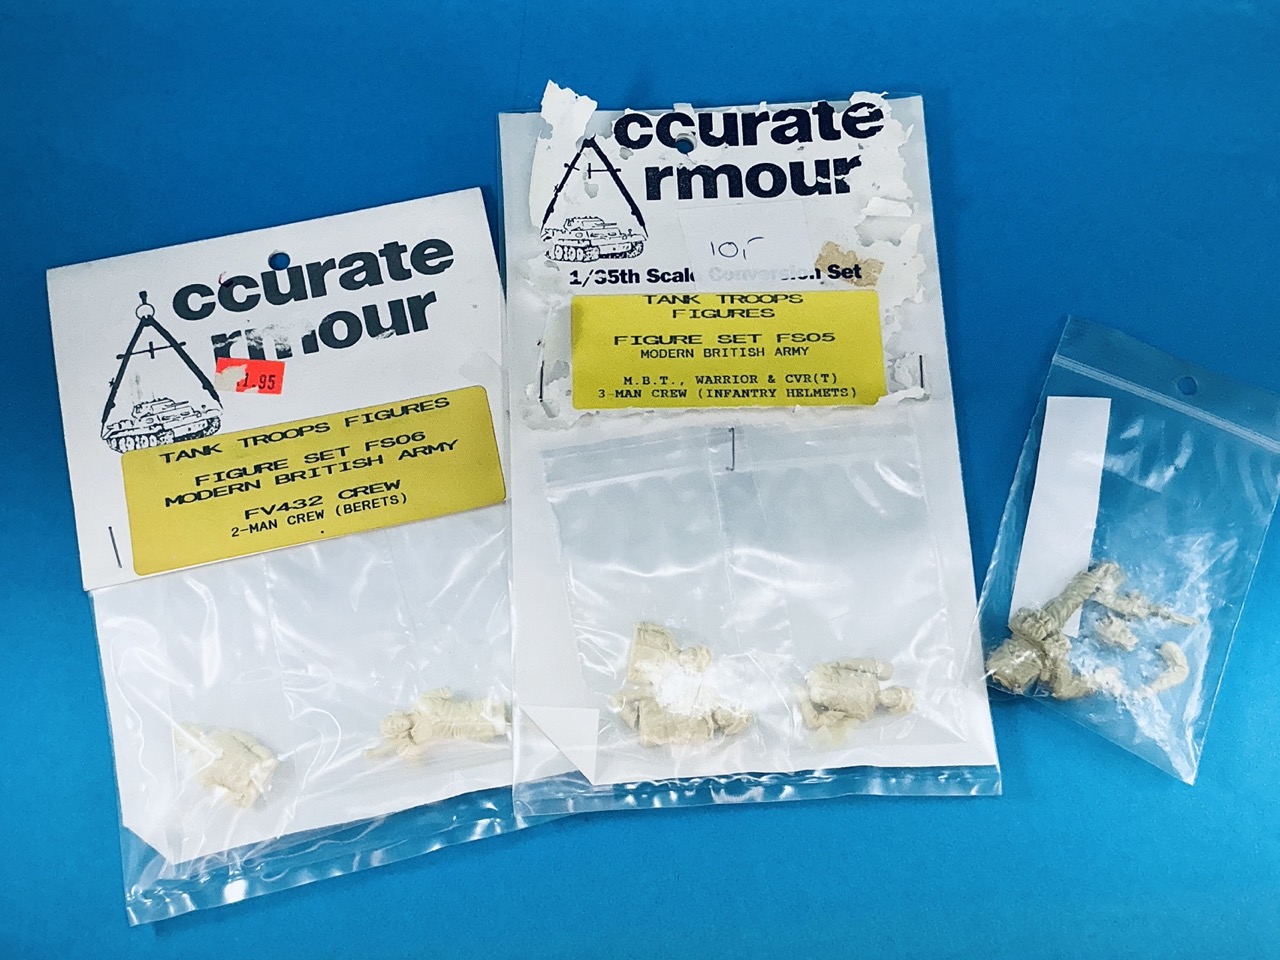
Plus some figures, of which I’m not quite sure yet which ones will become part of this model:

I bought the Vixen two years ago, when Accurate Armour announced they were going to close, mainly because I’ve always wanted one ever since I saw a couple of photos of it in an Arms & Armour book about CVR series (Scorpion, Spartan, Scimitar, Fox etc.). The two unopened (but a little moth-eaten) sets of figures, I bought second-hand from someone else last year, the figure on the right is an infantryman that I’ve had for a long time, and is AA as well.


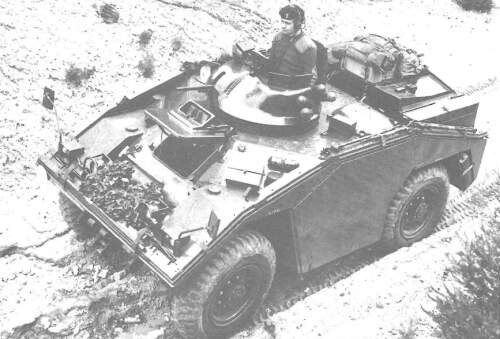
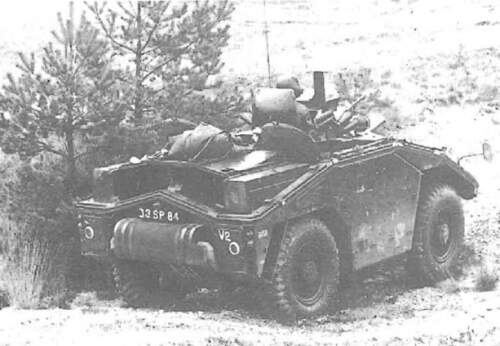
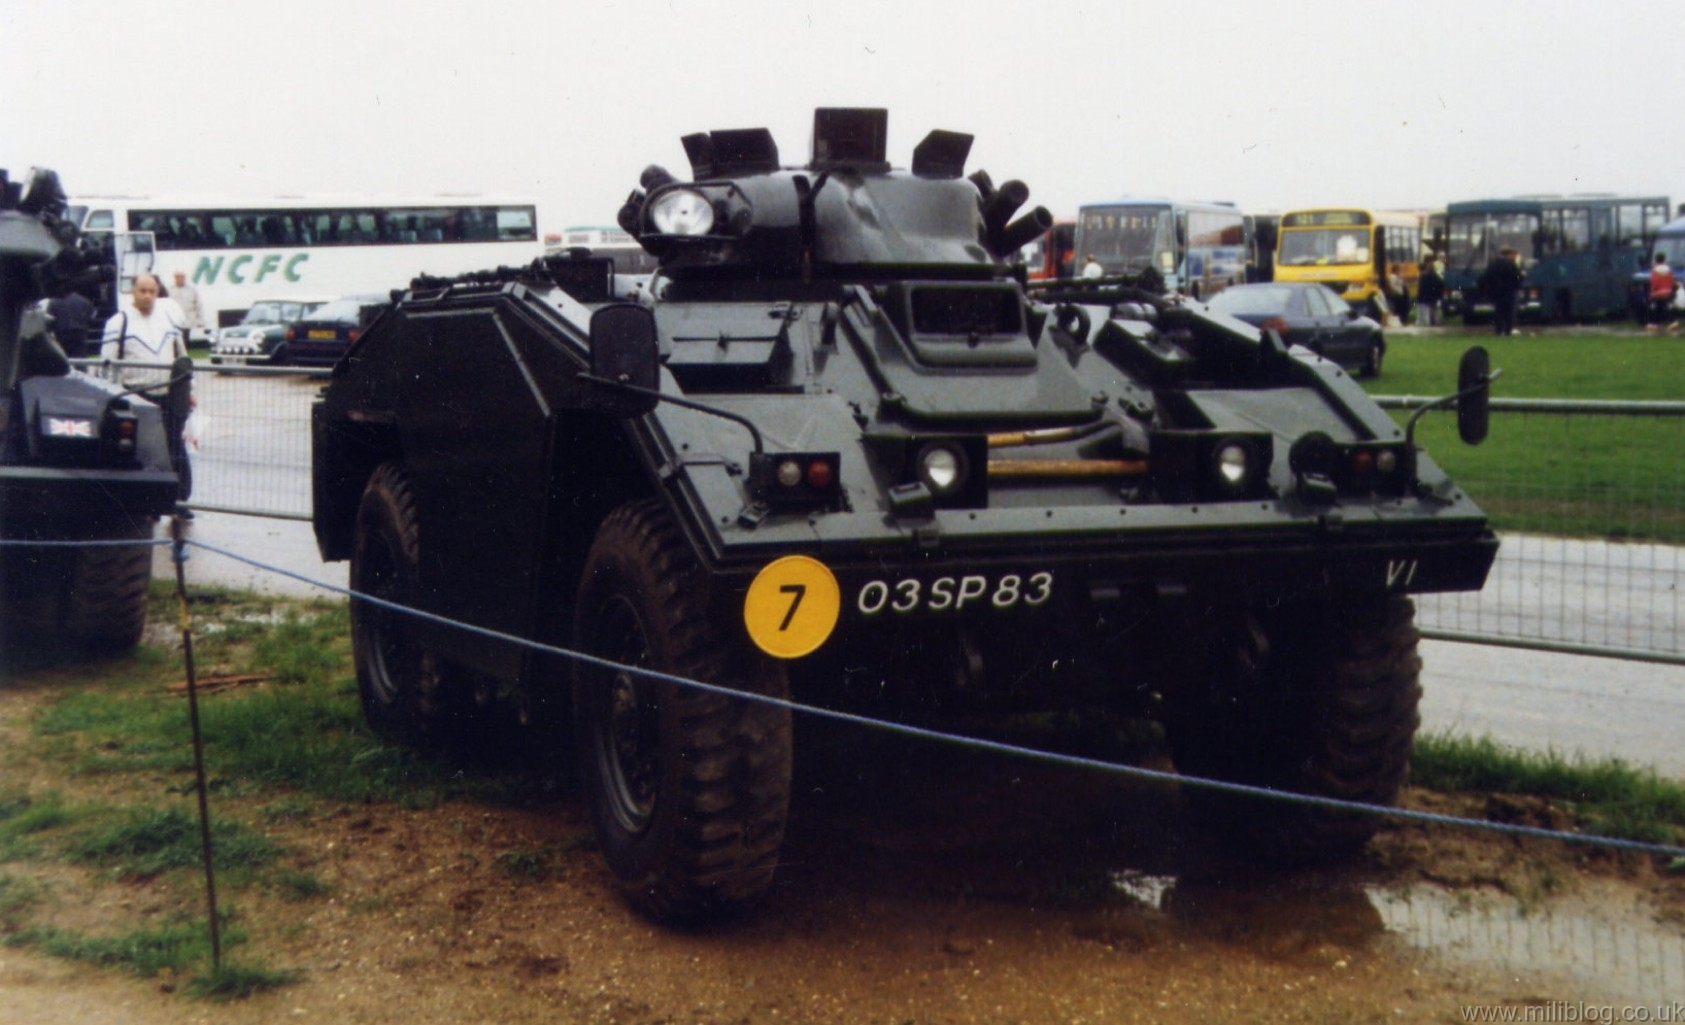
The FV 722 Vixen was developed in the 1960s/’70s from the FV 721 Fox, and was intended as a follow-up to the Ferret armoured car, for all kinds of light reconnaissance and liaison tasks that Fox wasn’t suited for. In essence it’s a Fox undercarriage with a new top on it, and room for for men: driver, commander and two passengers. It was armed with an L7A2 (=FN MAG to much of the rest of the world, or M240 for the Americans) machine gun in a small turret, plus eight smoke grenade launchers.

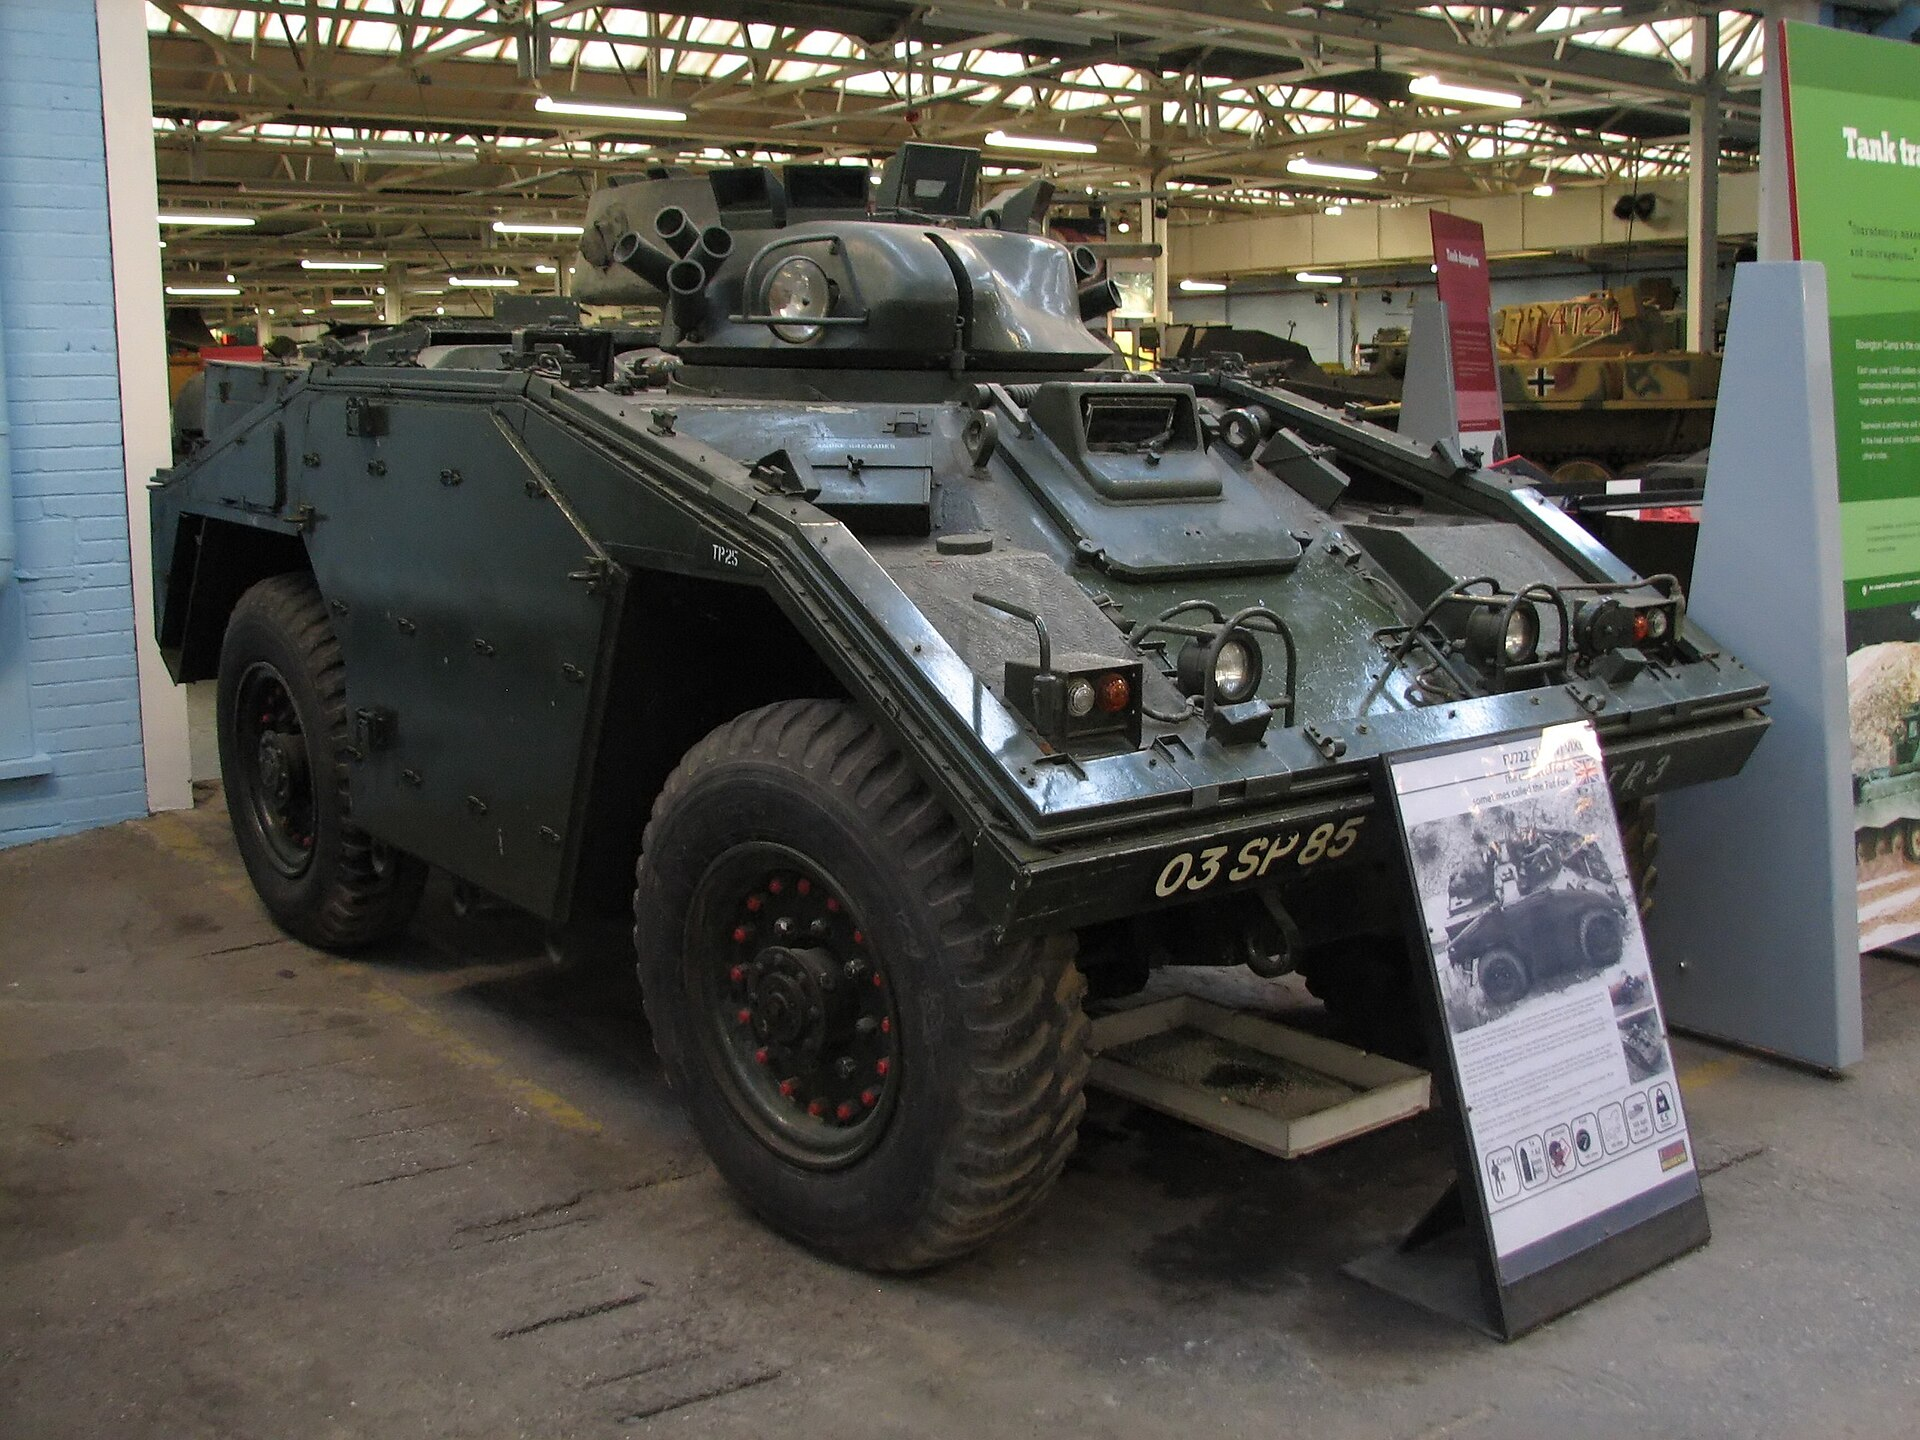
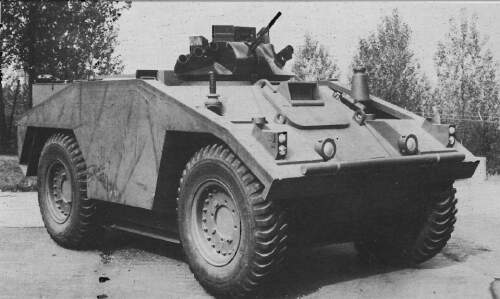
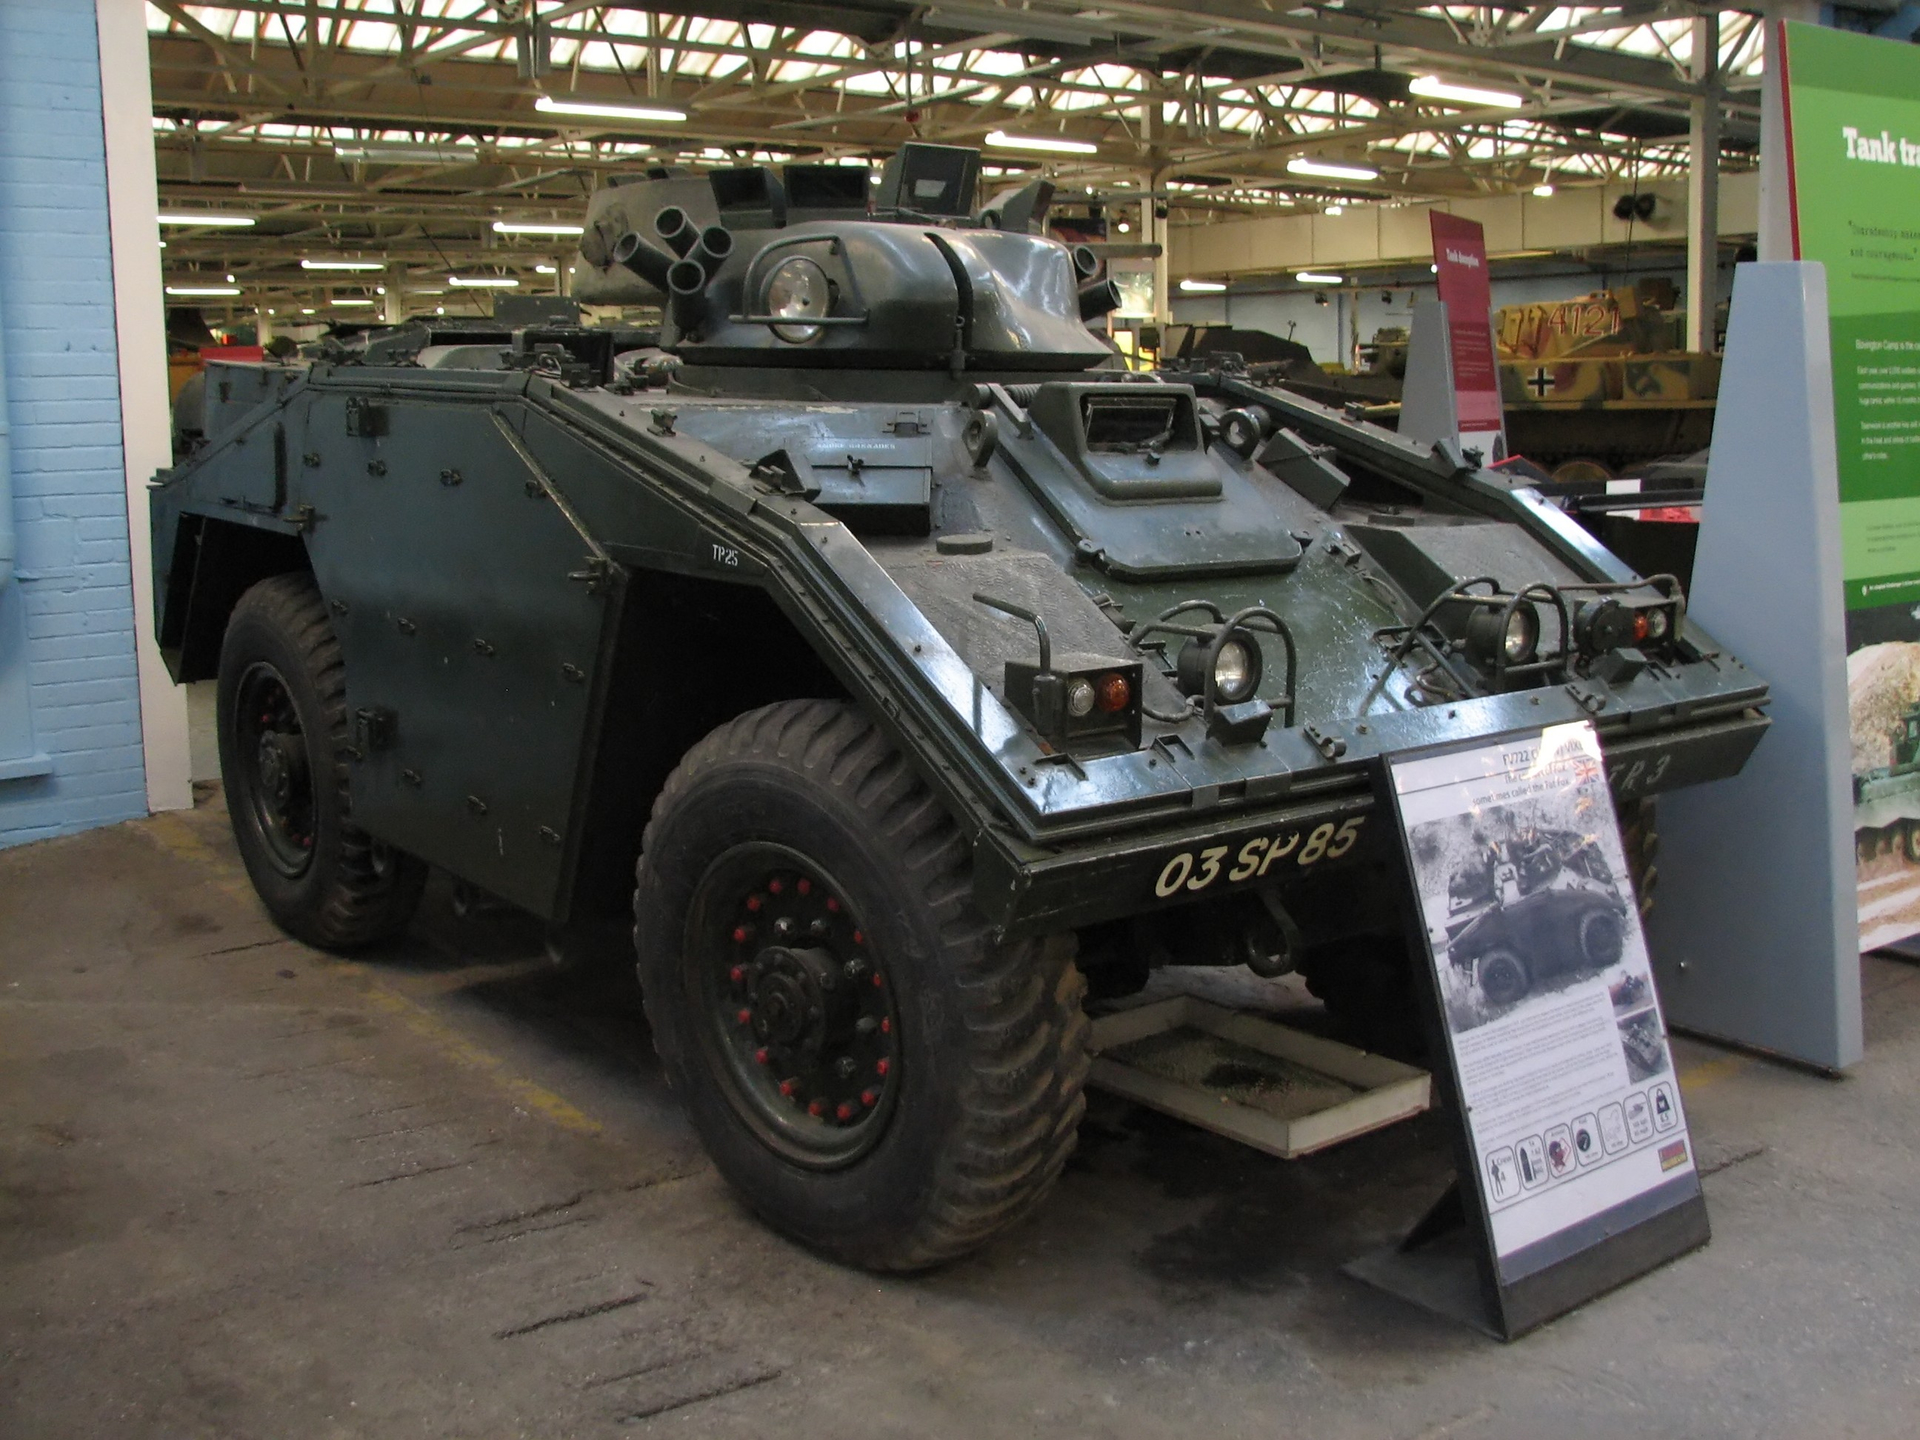
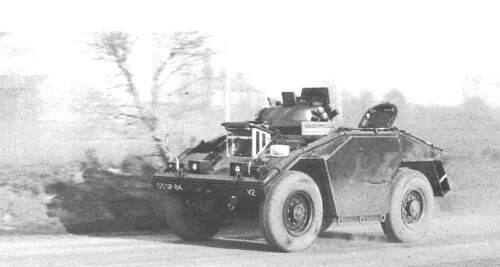
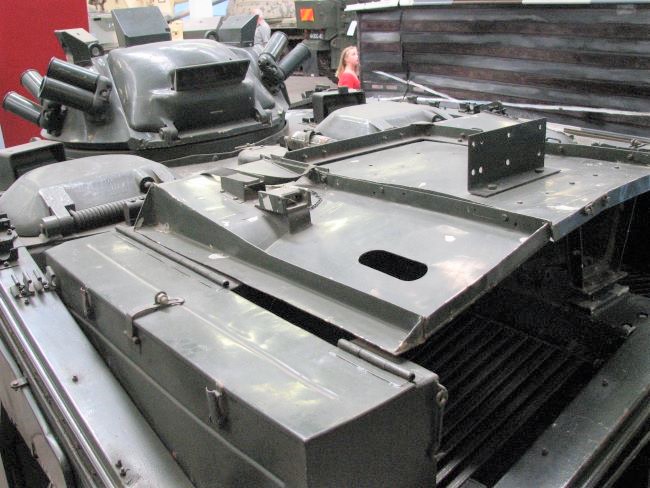
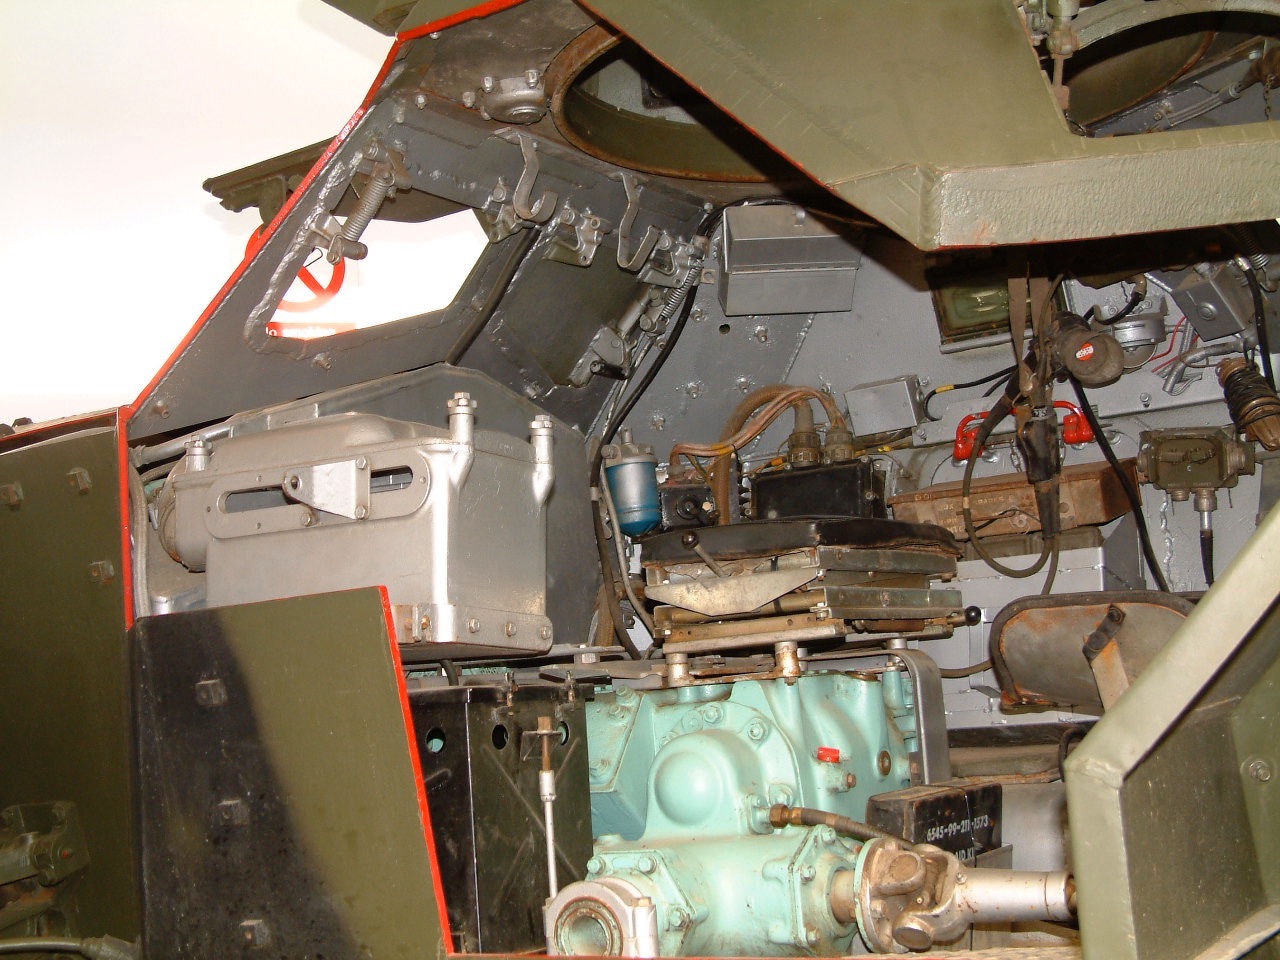
However, it ever got beyond four (I think) prototypes. At least one survives, in Bovington:


(source)

The designation is, in typical British manner, somewhat complicated: FV 722 is the Fighting Vehicle type number, CVR(W)L is Combat Vehicle, Reconnaissance (Wheeled) Liaison and Vixen was almost certainly picked because the 721 is Fox. (The Scorpion etc, were CVR(T), with a T for Tracked instead of a W.)


But what you can do with a Vixen? Build one of the prototypes, of course, but I don’t usually find those very interesting. After some thought, I arrived at the 1991 Gulf War: What if the vehicle had gone into production and been deployed to Saudi Arabia and Iraq instead of the aging Ferrets that served there in the real world? A small problem with this line of thought is that the Fox was bad enough that it wasn’t even sent to that war, and was removed from service entirely in 1994, buy I think Vixen may have lasted longer. The main problem Fox had was that it was top-heavy, rolling over far too easily if the driver took sharp turns. The only solution proved to be better driver training — in other words, it was not a problem that could be solved by improving the vehicle. But the Vixen was lower, without that relatively big and heavy turret on top, so I suppose it would have had better handling and less danger of rolling.

So that’s what it will be: a Vixen as it might have appeared in the desert :slight_smile:

6 Likes

I am looking so forward to following this! I have two in my stash and have a hankering to depict one in service in BAOR. I’ve seen one in the flesh back when I was at a Div HQ in the mid-70s. It was based at Tidworth, the neighbouring Garrison and I’d been sent to deliver a document at one of our Brigades based there and Lo! And behold! I saw one which must have been undergoing trials with one of the cavalry regiments or infantry battalions based there.

I thought it looked the business, but understand the ergonomics were fraught, but a great “What-If” that’s for sure.

It was cancelled in a fever of a socialist government’s defence cuts and to my mind Britain has never satisfactorily filled the gap it left (it was due to replace Ferret which had soldiered on for far too long in any case). Since then the Army has had nothing worthy of the name of Scout Car and the liaison and recce roles must have taken a hammering. All we could get near to was the Panther, delivered in 2008 and resembled not much more than an armoured bread van to my mind. It just looks, well, so insipid.

So Jakko, full steam ahead; as I say, I am looking very forward to this one.

2 Likes

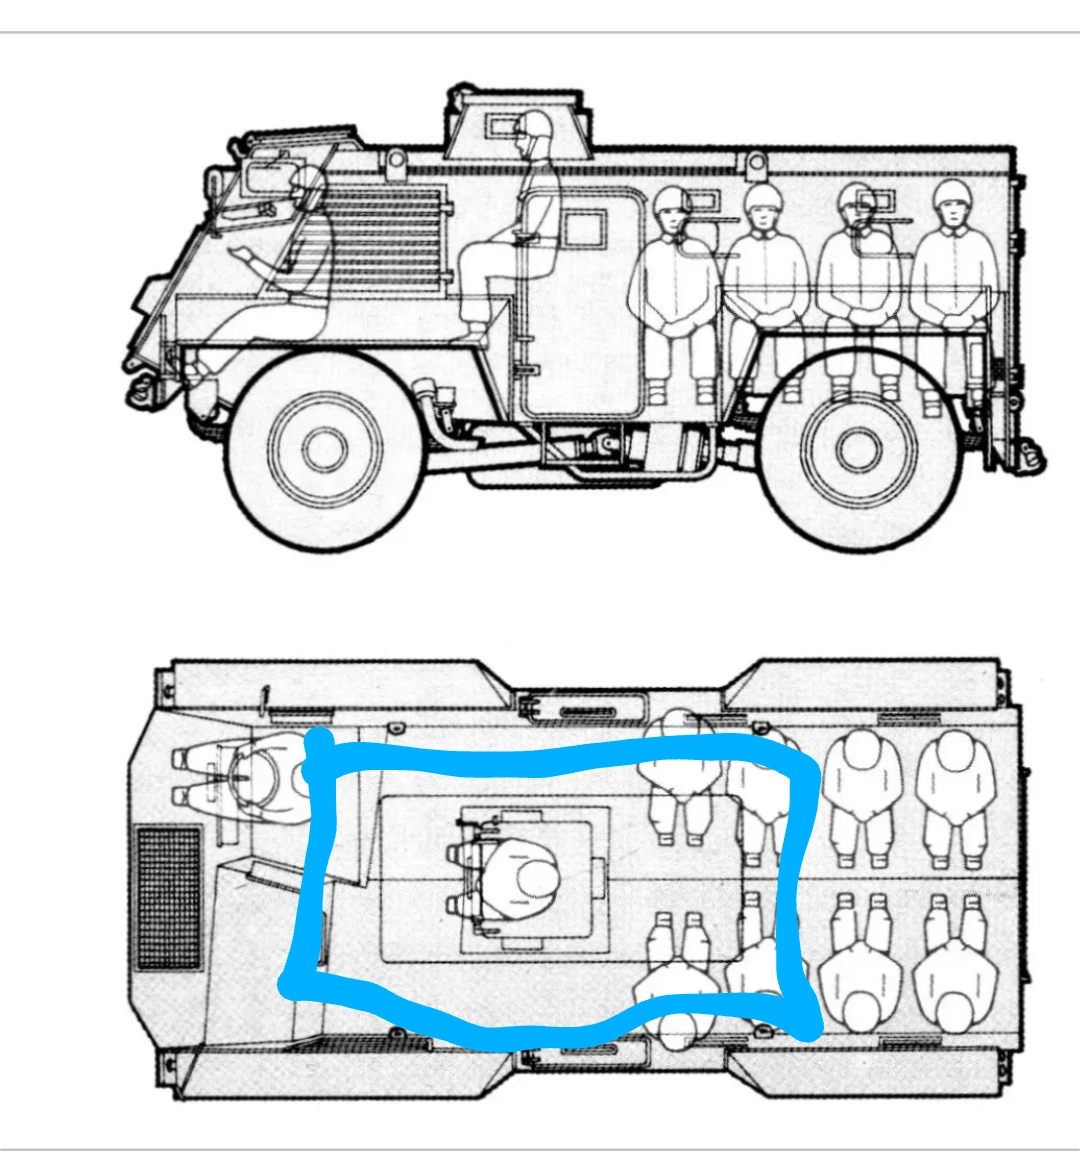
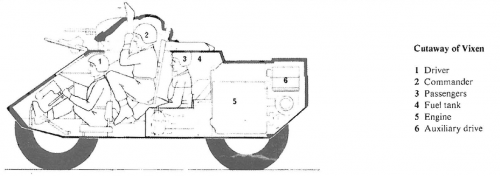
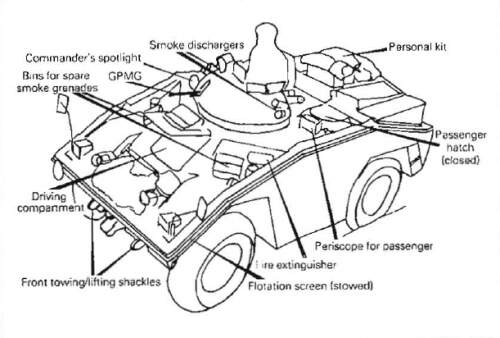
All I know of the interior is a drawing in George Forty’s Modern Combat Vehicles 5: The Scorpion Family[1] but it’s clearly not to scale — the crew look far too big. But I wouldn’t be surprised if it did have poor ergonomics. A lot of vehicles like this seem to have had that, especially the ones designed in the 1960s.


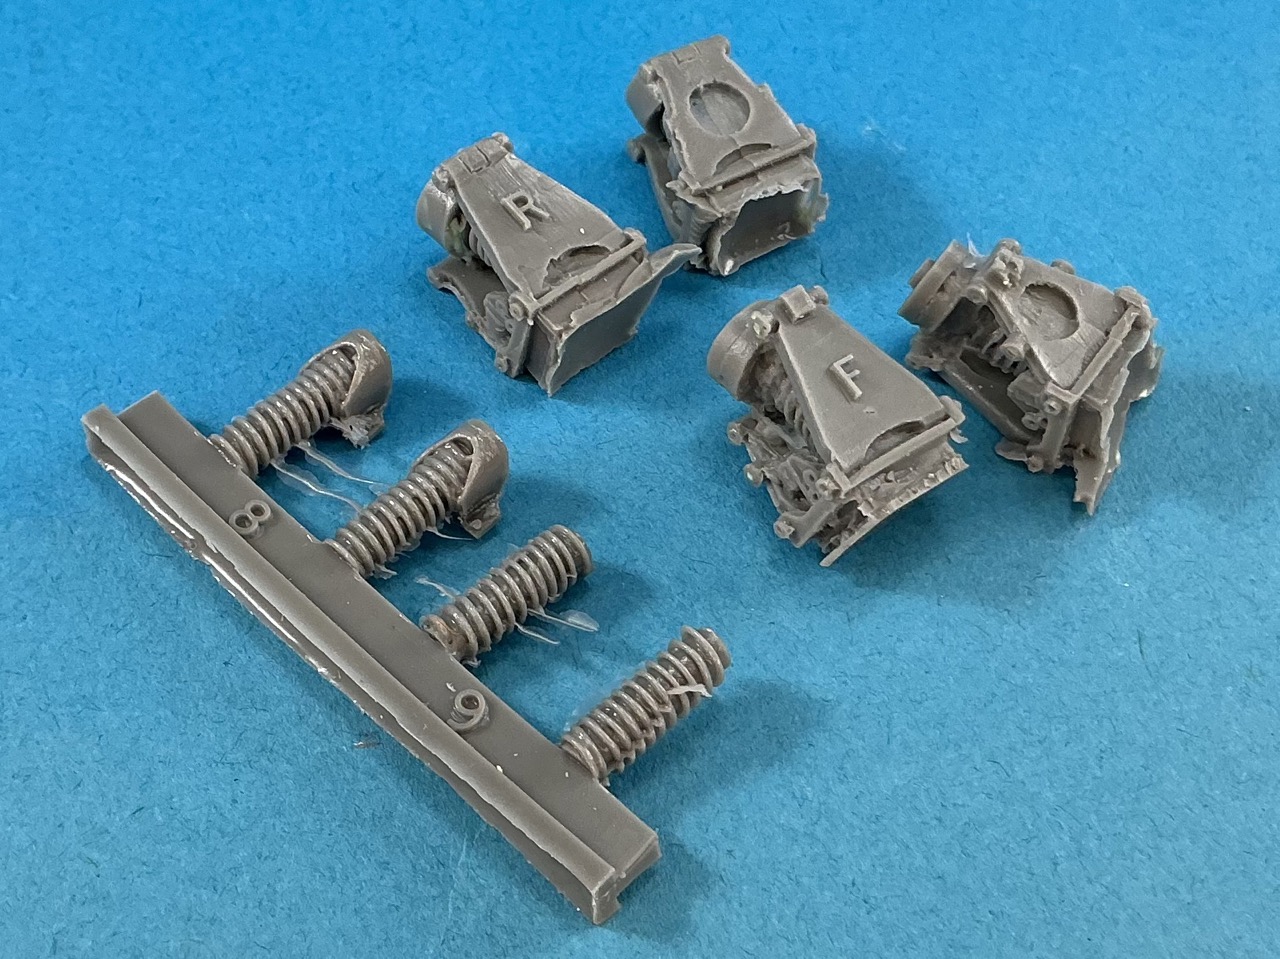
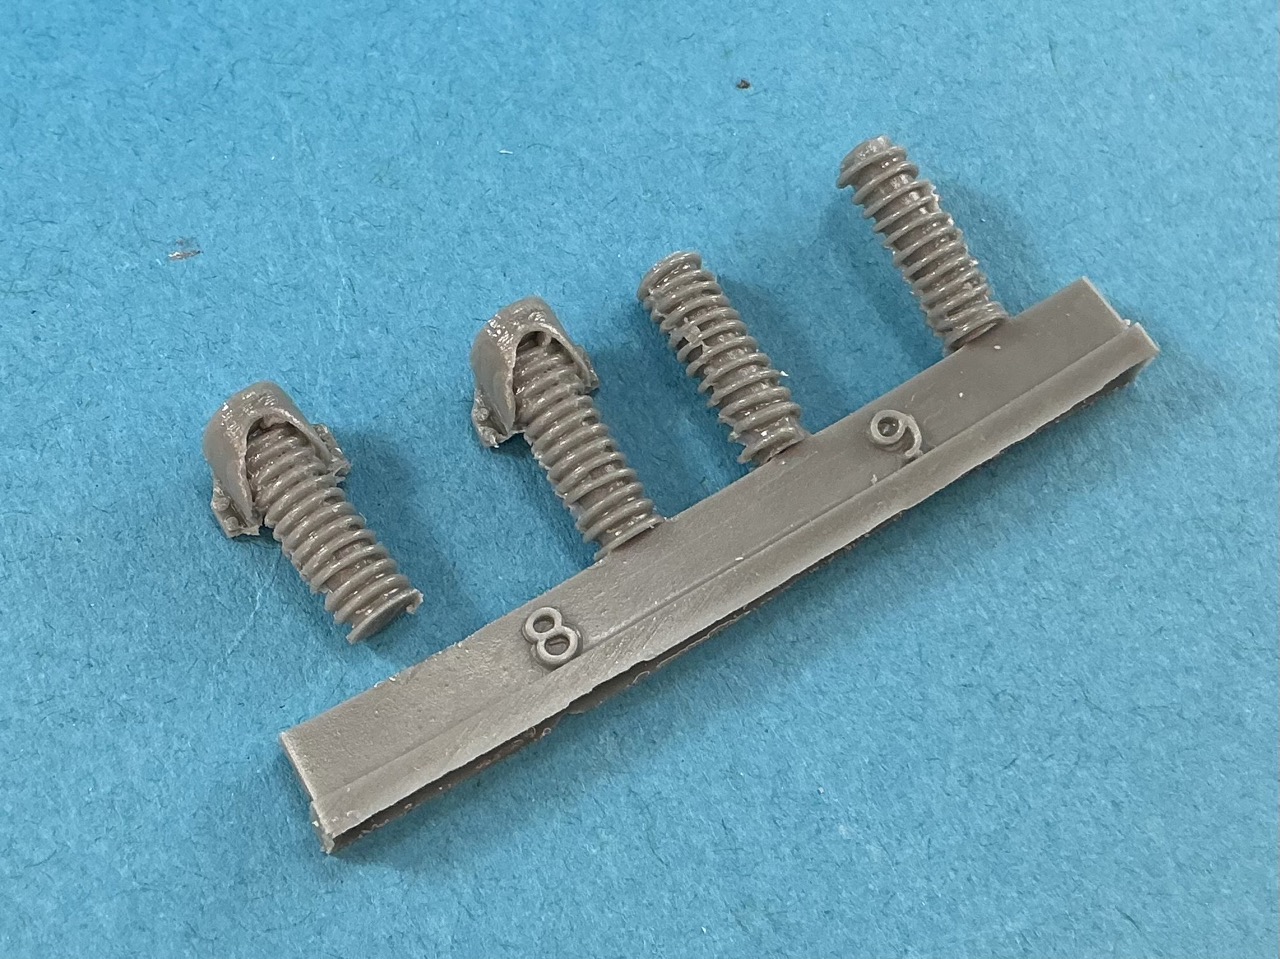
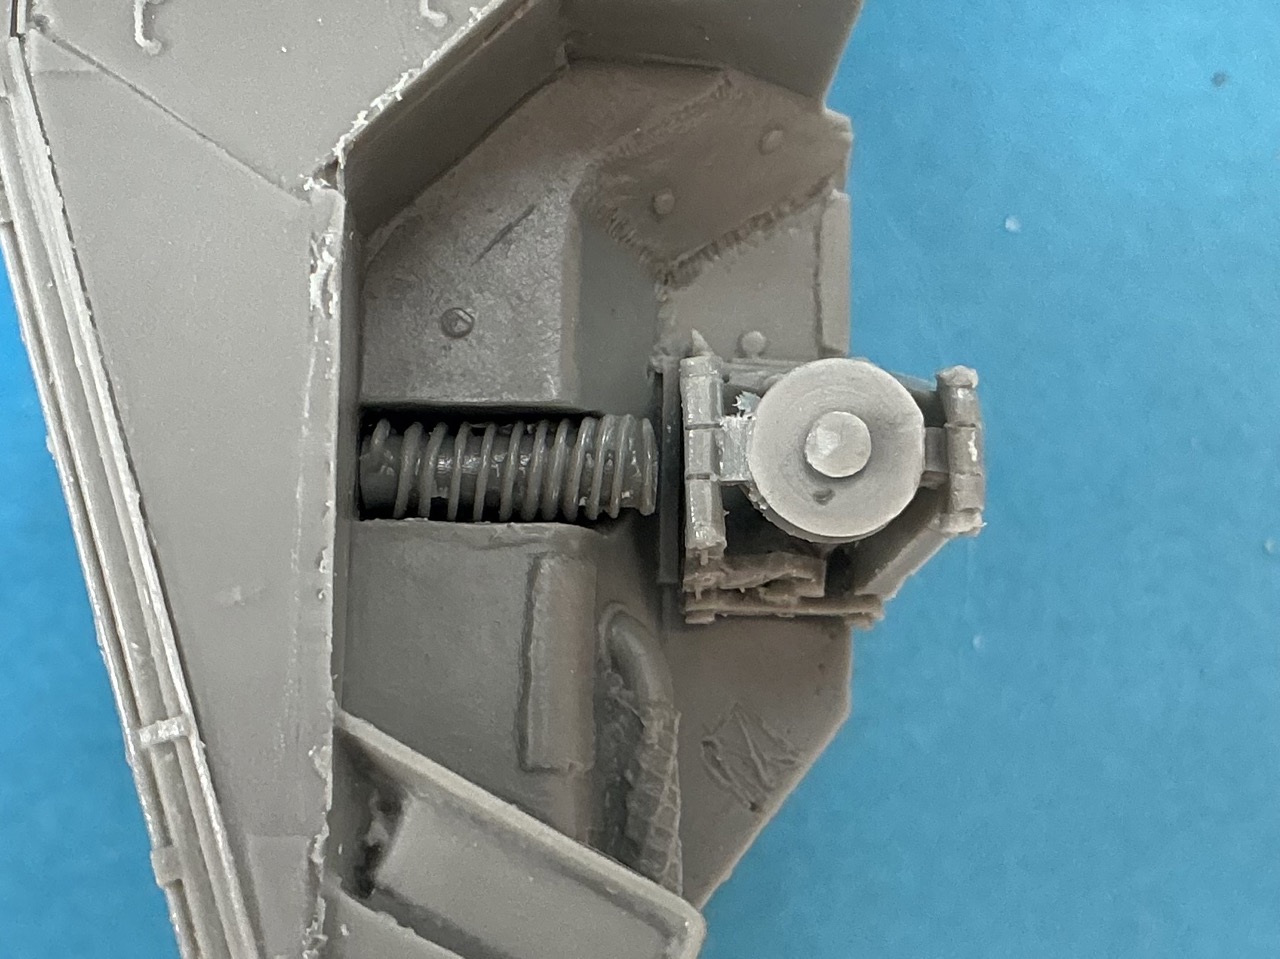
Yesterday evening, I began building according to the instructions, with the suspension. Not counting the wheels, this consists of only eight parts: four axles with suspension arms cast on, and four springs. The springs were not cast overly well, with seams running through them and misaligned coils in some places.

Since of late I’ve been seeing a good deal of messages on different forums of people who seem to not know how to deal with traditional resin parts, rather than 3D-printed ones, let’s do this step by step :slight_smile: The parts are typically cast either on blocks or strips, like the springs here, or have a pour plug attached, like the suspension arms.

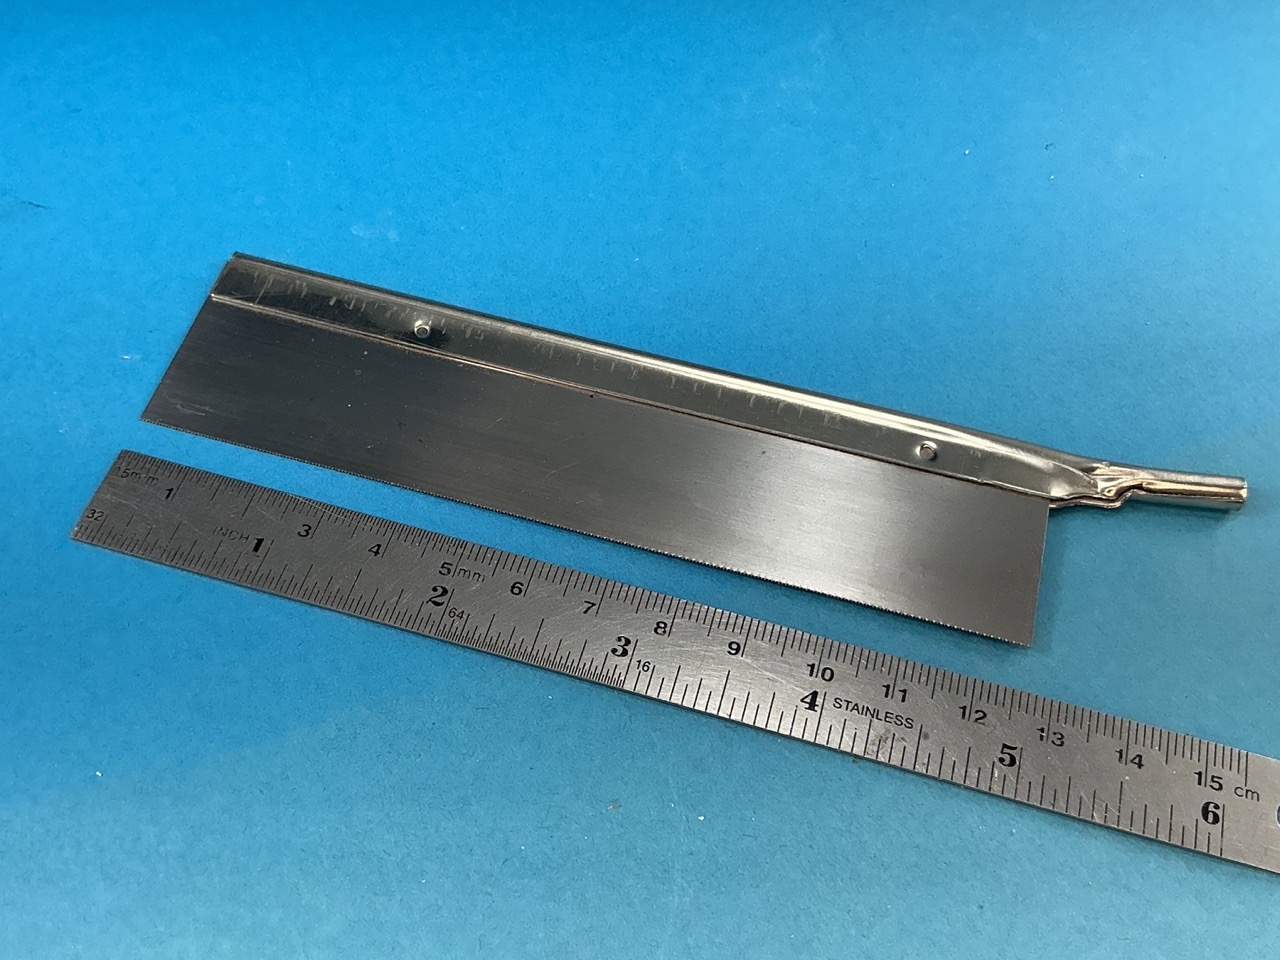
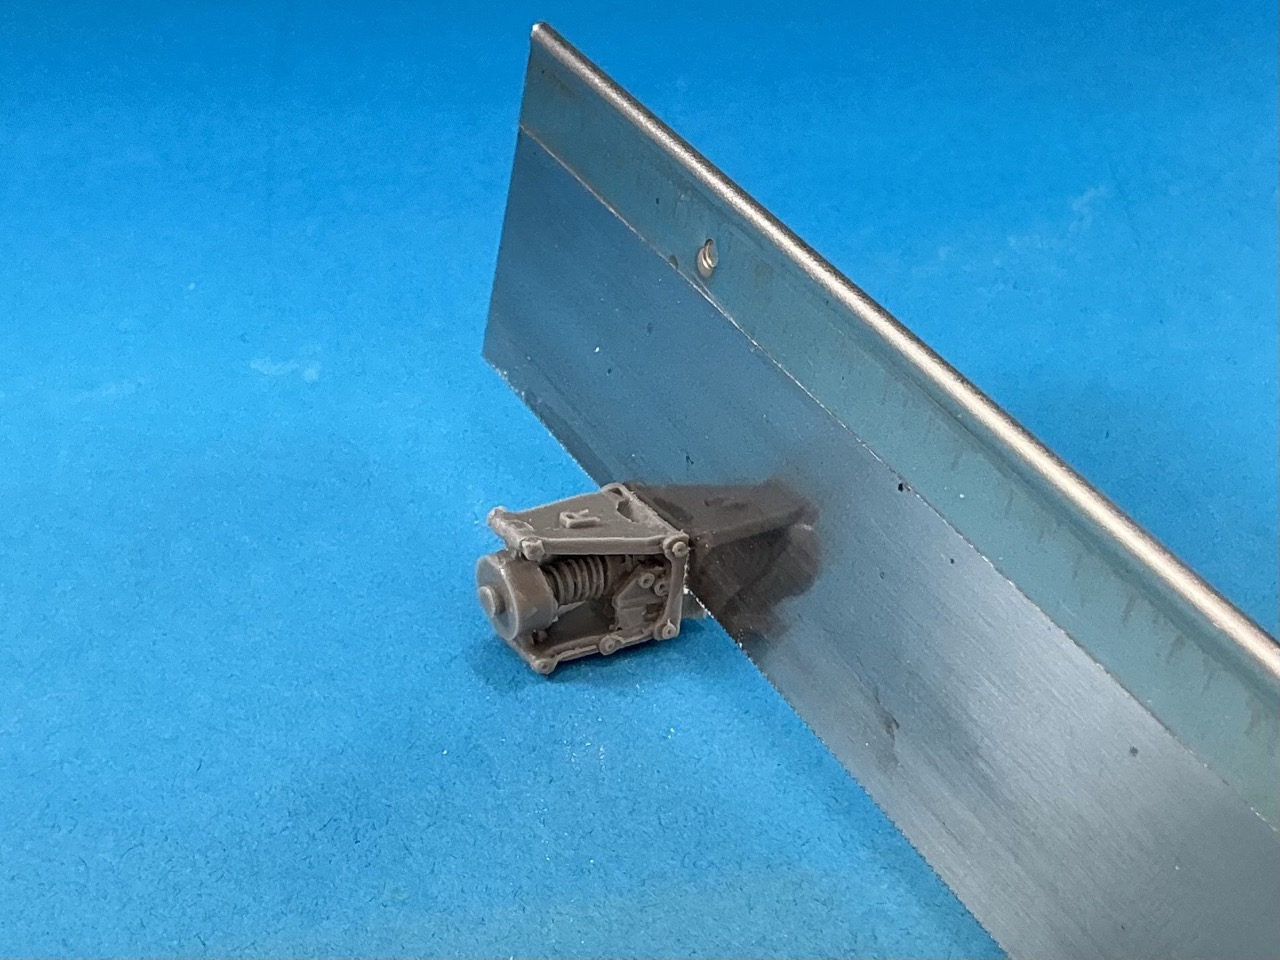
Removing a part from a block isn’t too hard: take a fine-toothed razor saw like this:

You can put a handle on (the type used for heavy-duty hobby knives) but for light work like this, that’s not necessary. Then just saw along the block to separate the part:

Polyurethane resin is a very easy material to saw. It feels a bit like soft wood without a grain, and usually saws more easily than polystyrene plastic. But that also means you will need to take a little care that you don’t accidentally saw where you don’t want to go.

If you need a part that’s in the middle of a block, you can saw vertically through the block on both sides of the part to separate it from any others cast on the same block.

Do note that sawing resin produces fine dust, and though that’s turned out to be not as dangerous as it was once thought to be, it’s still fine dust. It’s not great to breathe, so take care that you only saw (or file or sand) it as little as you have to, and don’t leave it lying around longer than necessary.

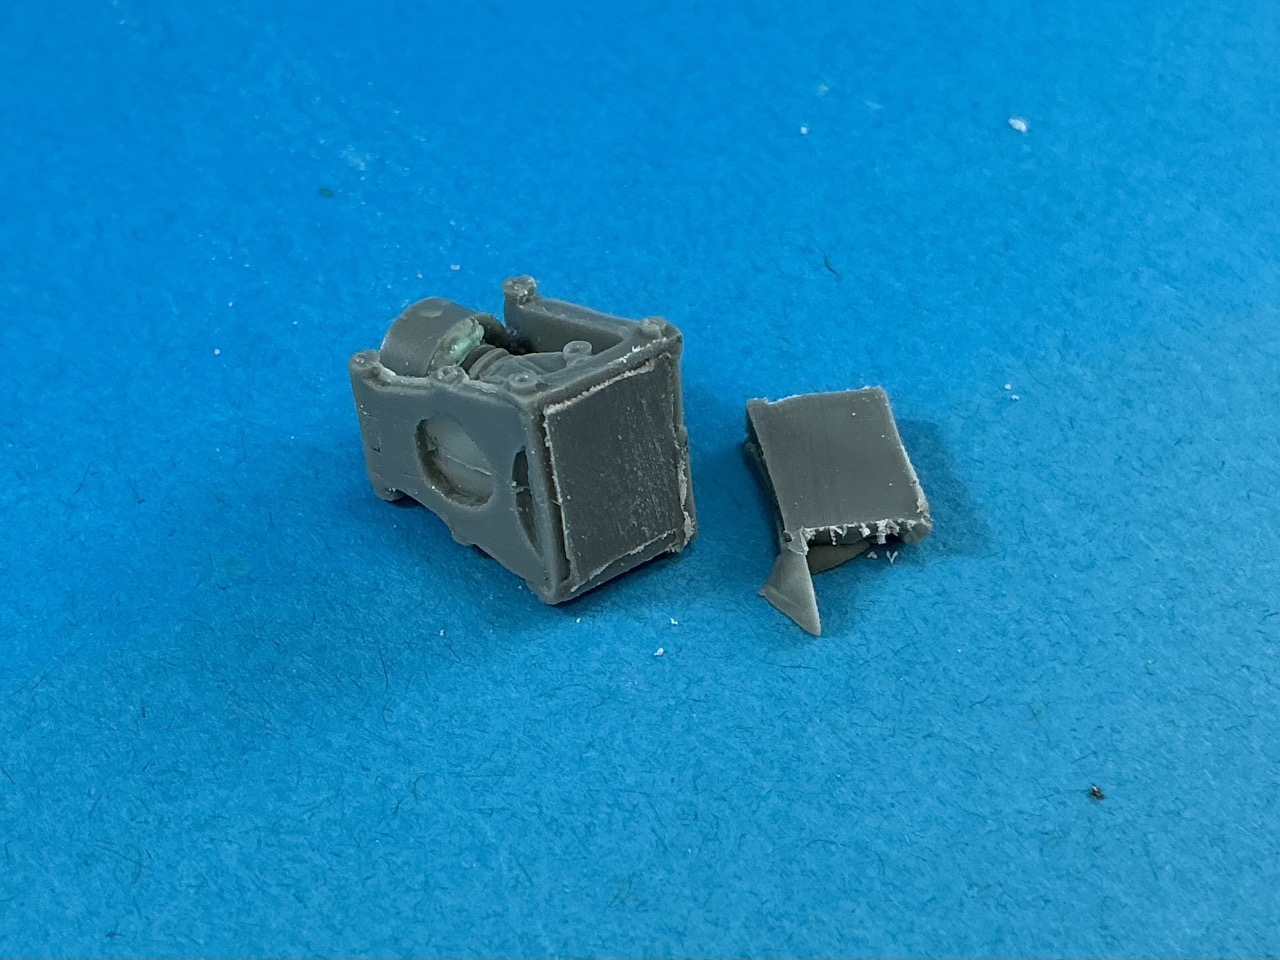
For pouring plugs like on the suspension arms, you do much the same: saw through the plug alongside the part:

Again, be careful of where you saw and which direction you end up going in. If you’re not careful, you might veer into the part and saw off bits you actually need to keep! It’s better to err on the side of caution:

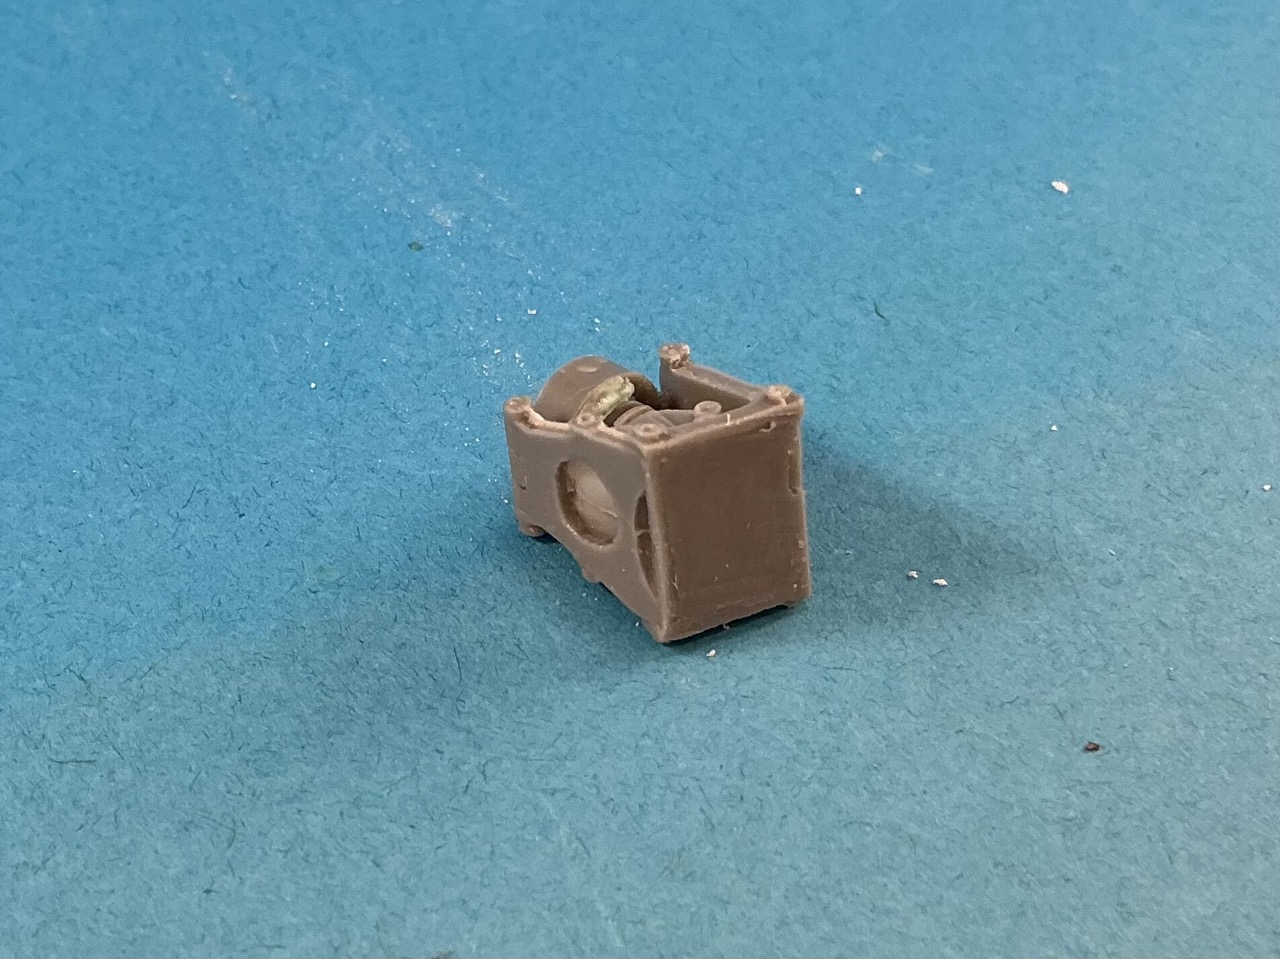
As you can see, there’s still a small amount of plug left on the part. You can remove this in a number of ways, including filing, sanding or scraping. Filing and sanding produces dust, but if you use wet-and-dry sandpaper with water, that’s not a problem. I myself prefer scraping with a hobby knife (one with a straight edge, not curved!) for all but large parts. Here’s what it looks like after maybe twenty seconds of scraping down the remains of the plug:

That’s flat enough to glue. You can tell you’ve gone far enough if the outline of the plug has disappeared from the part. Be careful with scraping, though, in that it’s easy to create a hollow in the part. Scrape a bit in one direction, then turn the part through 90 degrees and scrape a bit more, turn 90° again, etc. Also, don’t scrape areas that are larger than the length of your knife blade, for much the same reason.

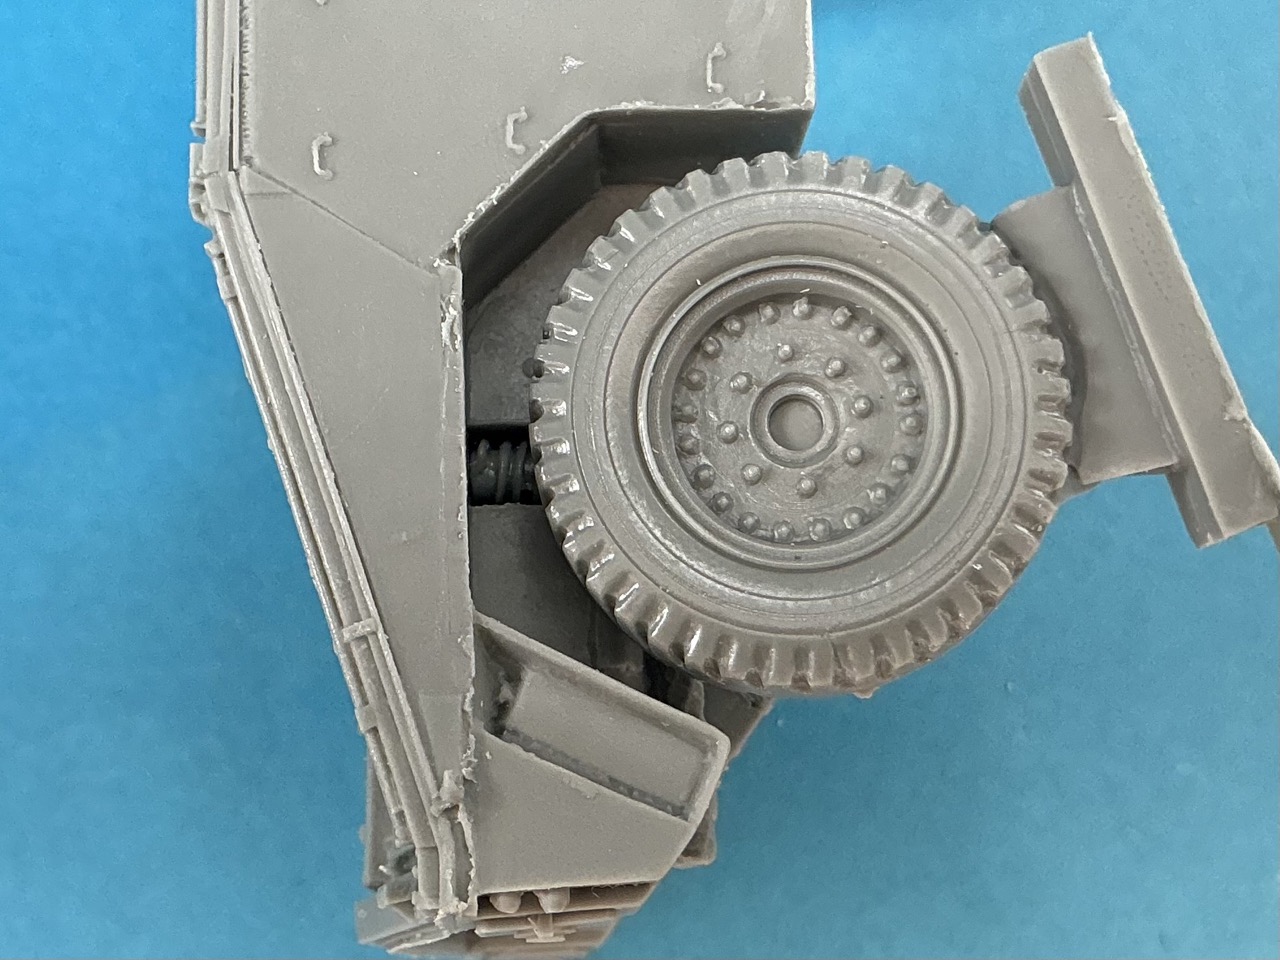
When this is done for all four suspension units and springs, it’s a simple enough matter to glue them to the hull. Always test-fit first, though, because resin parts are not generally as tightly produced as plastic ones. In this case, they all proved to fit well enough, so I fixed them in place with superglue.

One small problem is that the rear springs are clearly too short:

By a good millimetre or two, I reckon. For this reason, I glued them at the top of the wheel arches instead of touching the suspension arms, because once the wheel is also on, you can’t see the gap at all:

Today, though, I discovered that it would have been better if I had left the suspension off a bit longer. I started reading up a little on the Fox, which told me that the flotation screens (a canvas curtain all around that allows the vehicle to swim when it’s raised) was removed from Foxes fairly soon after they entered service. Pictures of CVR(T)s in the Gulf War also showed all of them without their flotation screens (remember that no CVR(W)s were deployed there, making the CVR(T) a logical alternative reference for a what-if model). That’ll be fun:

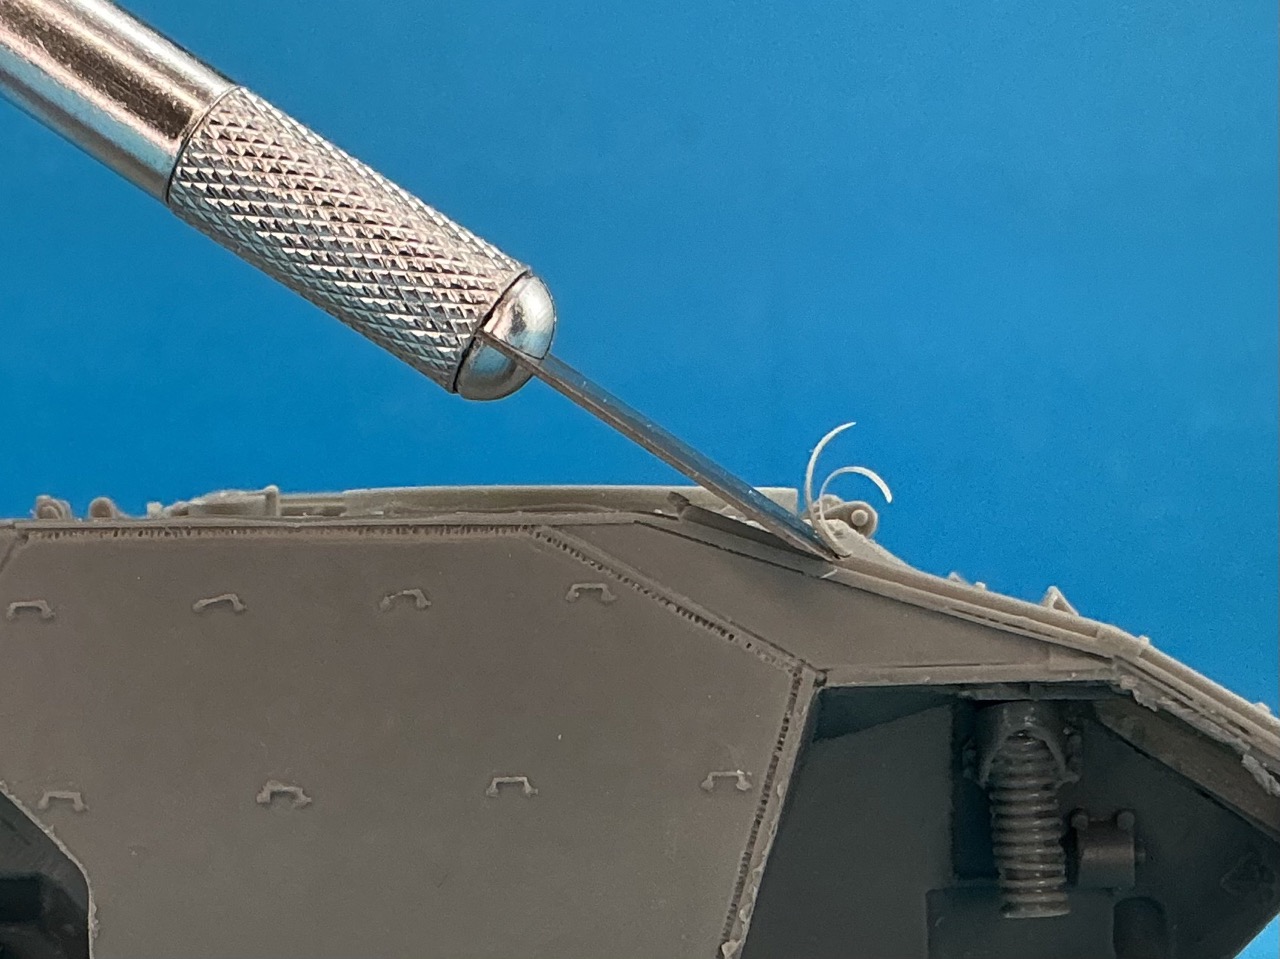
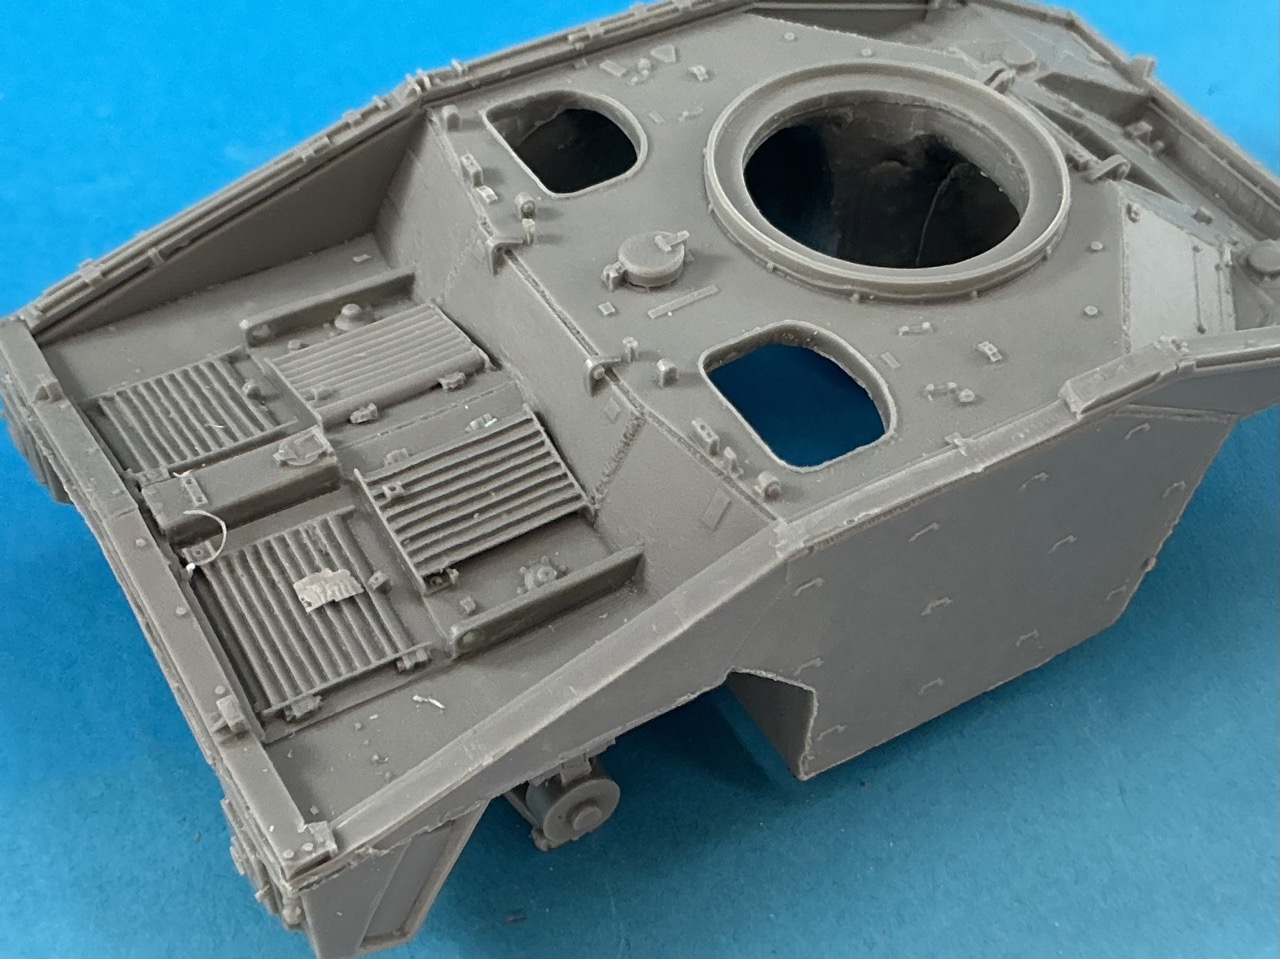
The raised border around the whole upper hull is the stowed flotation screen … That needs to go, but how? I began by cutting it with a No. 11 (straight) blade, but that didn’t go all that well. A chisel-shaped blade (No. 18) made it much easier, by chiselling away layers to reach the height of the “bare” hull.

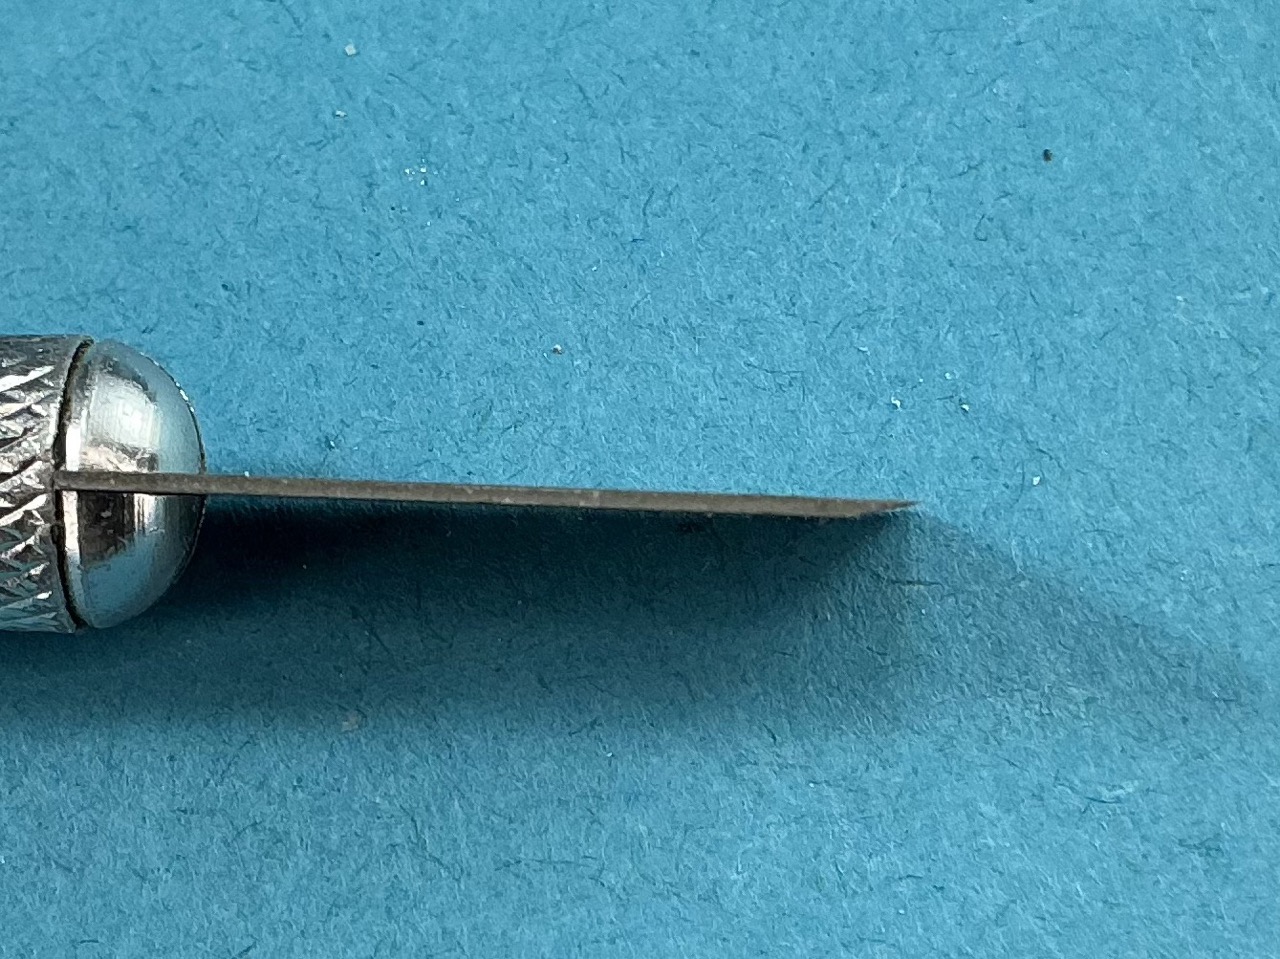
It’s important to do this kind of work with a blade that has been ground on one side only:

Notice that the upper side is entirely flat, while it’s been sharpened from what’s the underside here. By having that side down, you can chisel flat without the blade trying to cut deeper into the material, but you have to find the right angle to do this at. If you’re too steep or too shallow, you won’t remove much material, but you’ll know when you have the angle right because you’ll slice through. Also, don’t try to go to the full depth all in one go but take layers off until you’re where you want to be.

Also, very important: never do this towards your fingers or other body parts! The blade will slip at some point, and even if your fingers are some way away, you might stab yourself!

A few minutes later, there was definitely no way back:

On the inside, you can see a groove that shows how much to take off. On the outside it’s less clear, but there’s a thin raised line there as well, at the same height as the groove.

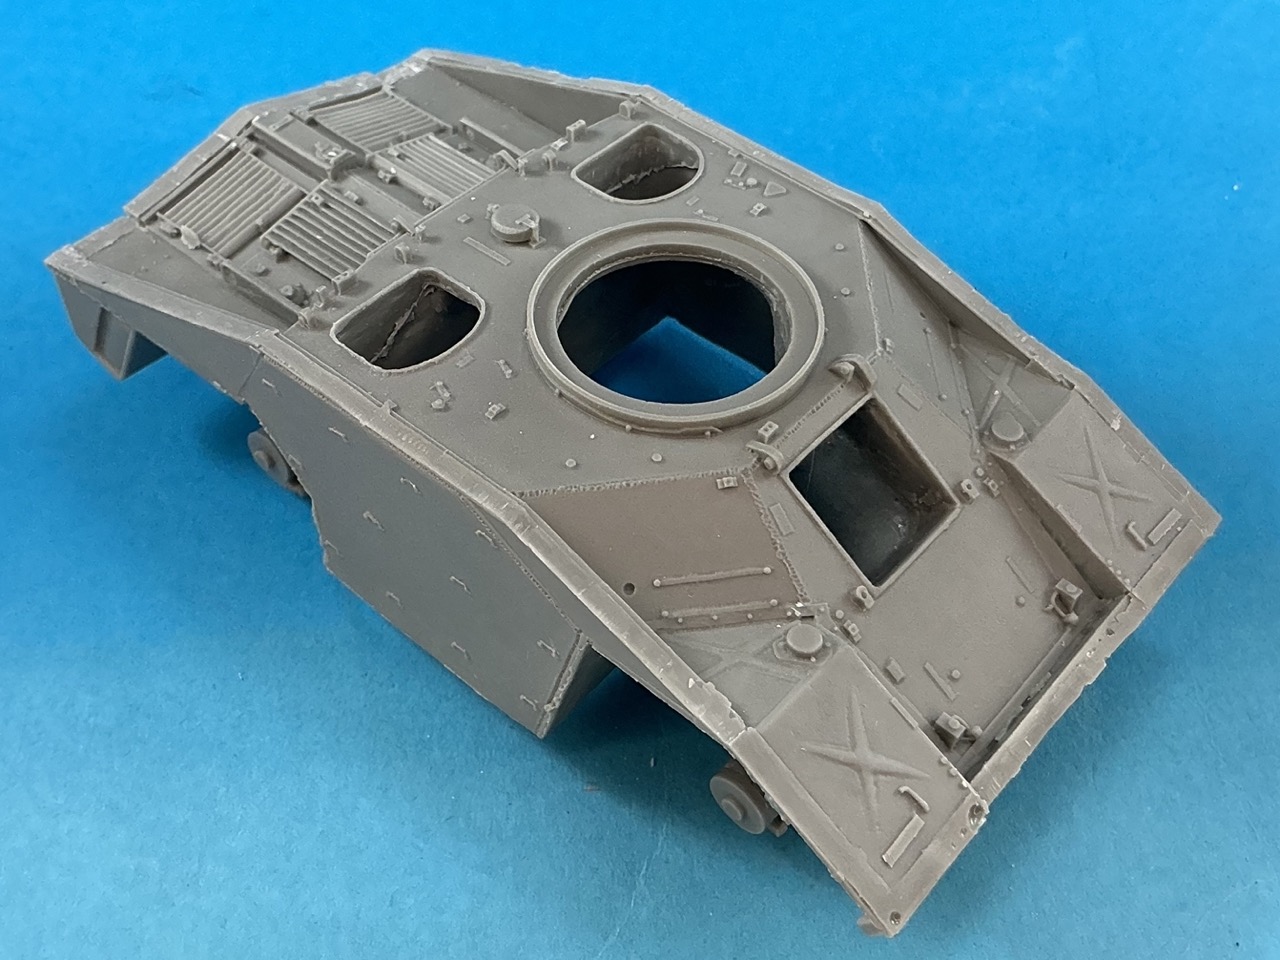
On with the rest, and within half an hour or so, all of it was gone:

Though this is, of course, only the coarse work. It still needs to be finished off to remove all traces of the screen.

But like I said, I should have done this before adding the suspension, because two units broke off as I was doing this. Luckily it was the glue that broke and not the resin, so I could just stick them back on once I was done chiselling.

  1. Shepperton: Ian Allan, 1983; ISBN 0 7110 1175 3 ↩︎

7 Likes

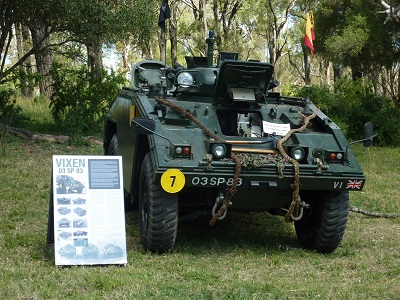
Nice. I think there is a runner in Australia too. Turret - I think that’s a Peak Engineering turret, same as fitted to the FV432. Considering it’s a similar size to Ferret - 2 man crew - having a 4 man crew would be rather taxing.
Mal

1 Like

There is a runner in Australia, and very impressive it is too. There’s some footage on You Tube.

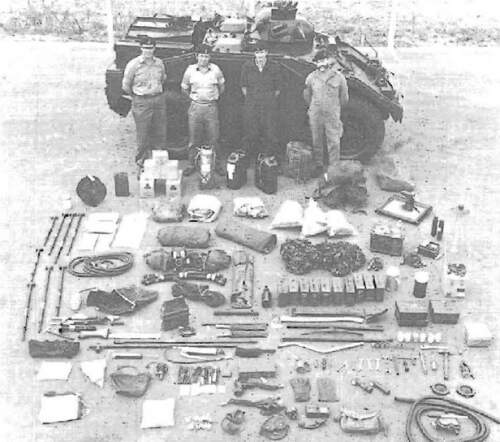
As I understand it the crew was 2; the remaining positions were filled as necessary by whatever role the vehicle was assigned to. For instance, it could be an NBC team, liaison officers hitching a ride, or, the crew required to man and operate the ZB 298 radar, which in pictures of the time, was often depicted fitted to the vehicle. It’s a bit more substantial in size than the Ferret.

I believe the turrets were fitted to the FV 432 Platoon Commander’s vehicle after Vixen was cancelled. I am not sure when they were fitted to Saxon.

3 Likes

The Vixen is a good deal bigger than a Ferret, and it looks like it had a reasonable amount of room in the sides. But like I said above, I’ve never actually seen the interior :slight_smile: I’ll try and remember to take a photo of the Vixen with the Sovereign Ferret I built some years ago.


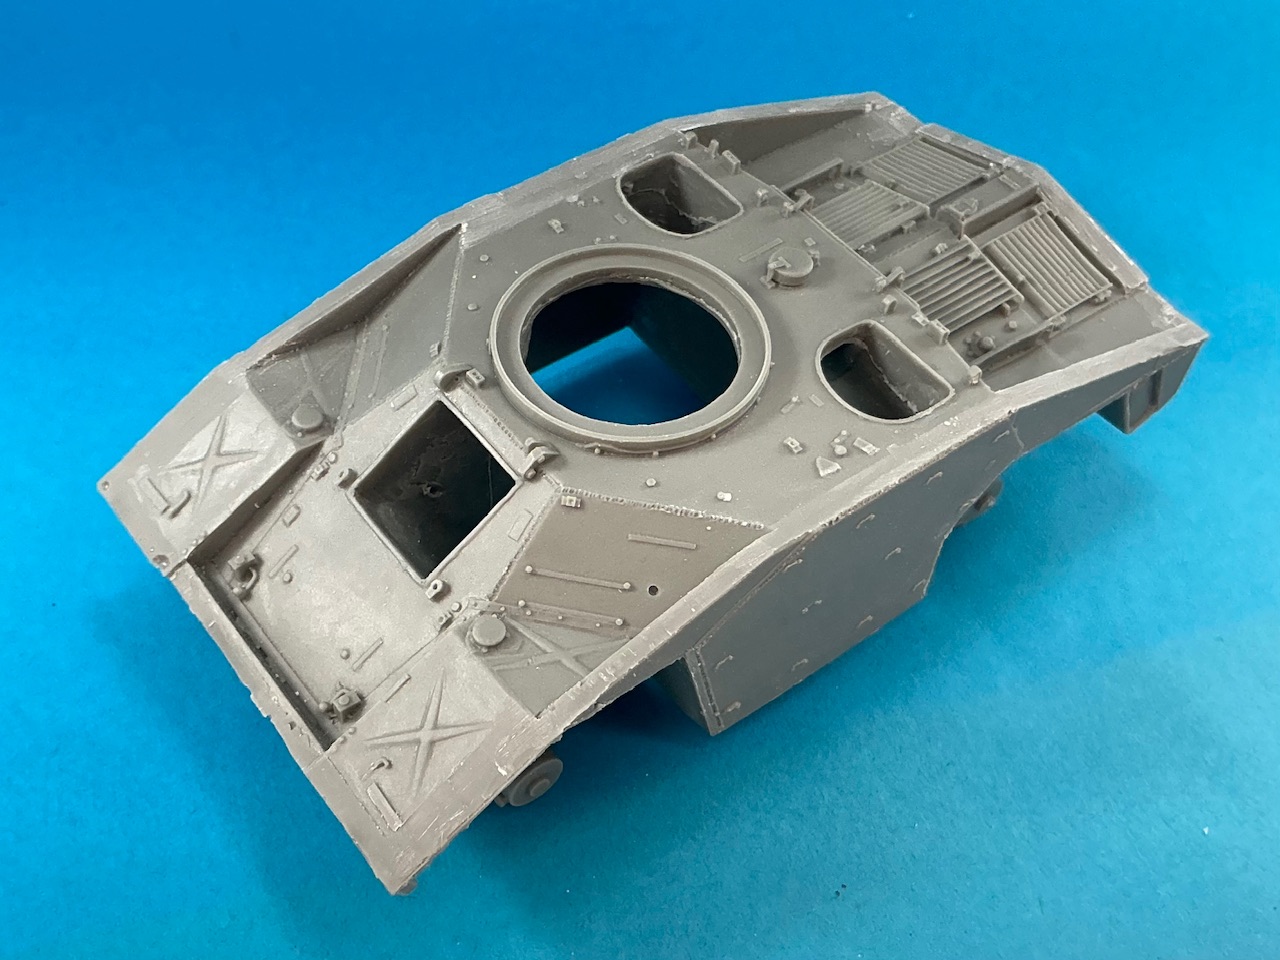
Tidying up the hull was about as much work as chiselling away the screen in the first place:

I mainly used a file for that, as well as more chiselling and scraping with knives. The file was because you can make things straight with one, while with knives you’re very likely to get an uneven surface.

4 Likes

On the Saxon,
The access hatch for engine/ gearbox changes, is also the commander position, just a matter of changing to the plate built with a turret fitting.

2 Likes

H.P.

2 Likes

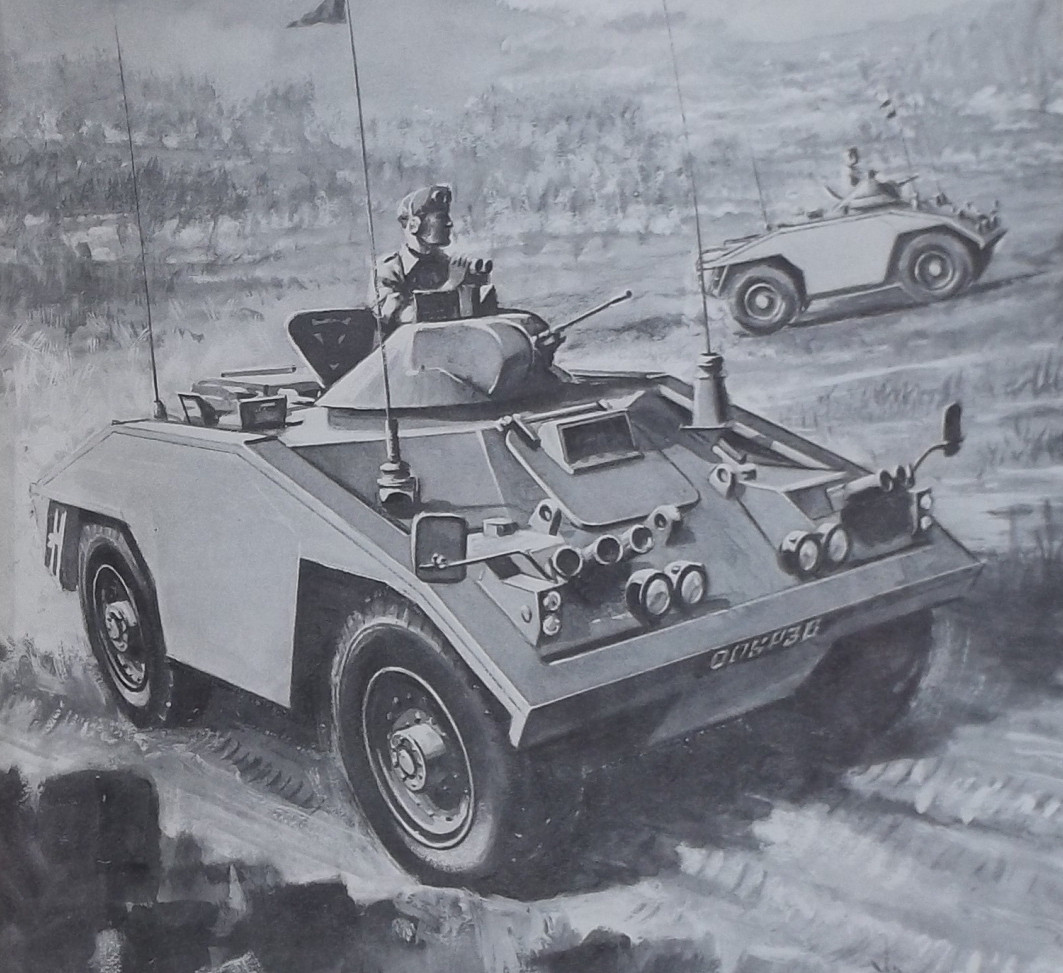
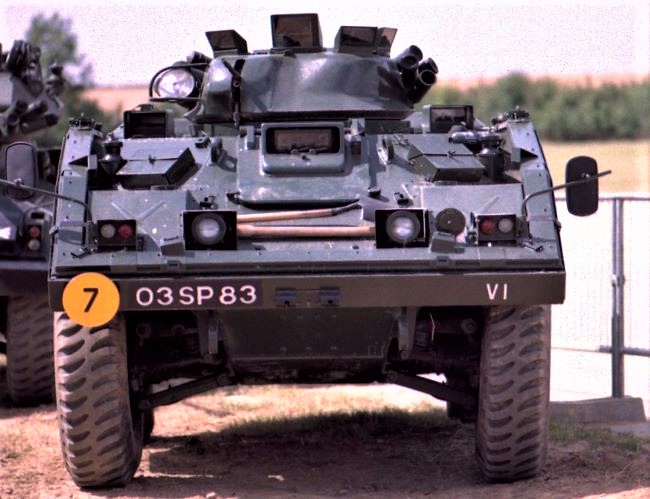
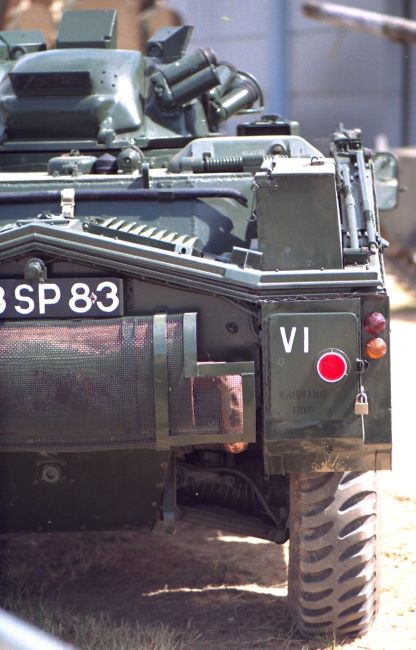
I’m sure Jakko has probably amassed the same pics as I have over the years, but I’ll throw these in just to aid the discussion if not the build. Vixen is actually quite a chunky beast, and I’m sorry that it never came into service. Partly because Ferret was just about sha*ged out and really did need replacing. Jakko has chosen a good idea in placing a version in the Gulf War I feel, considering that Ferrets were still soldiering on there in one guise or another.
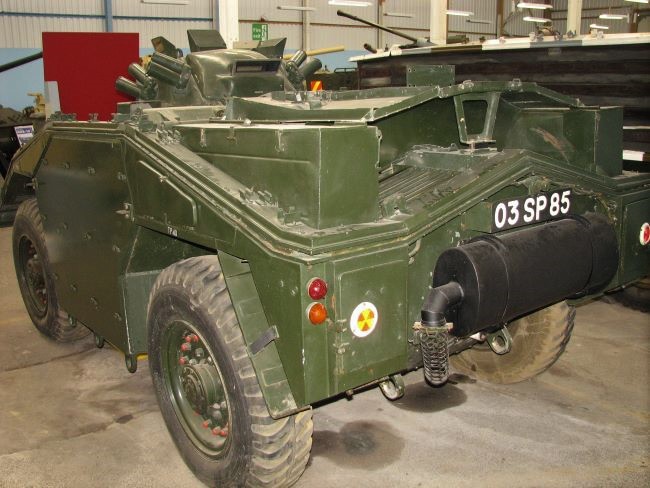
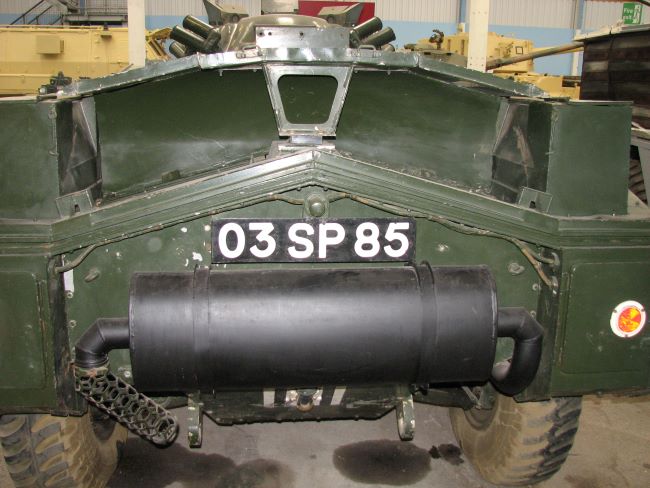
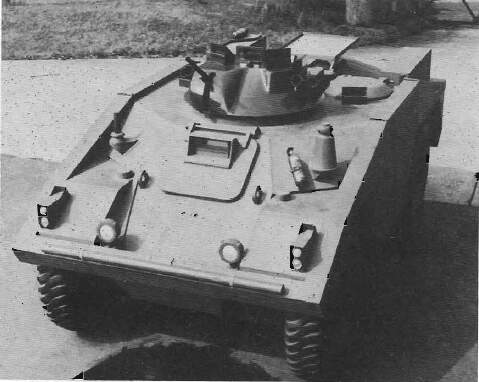
Anyway, for what they’re worth - including drawings, artists’ impressions and mock-ups:

2 Likes

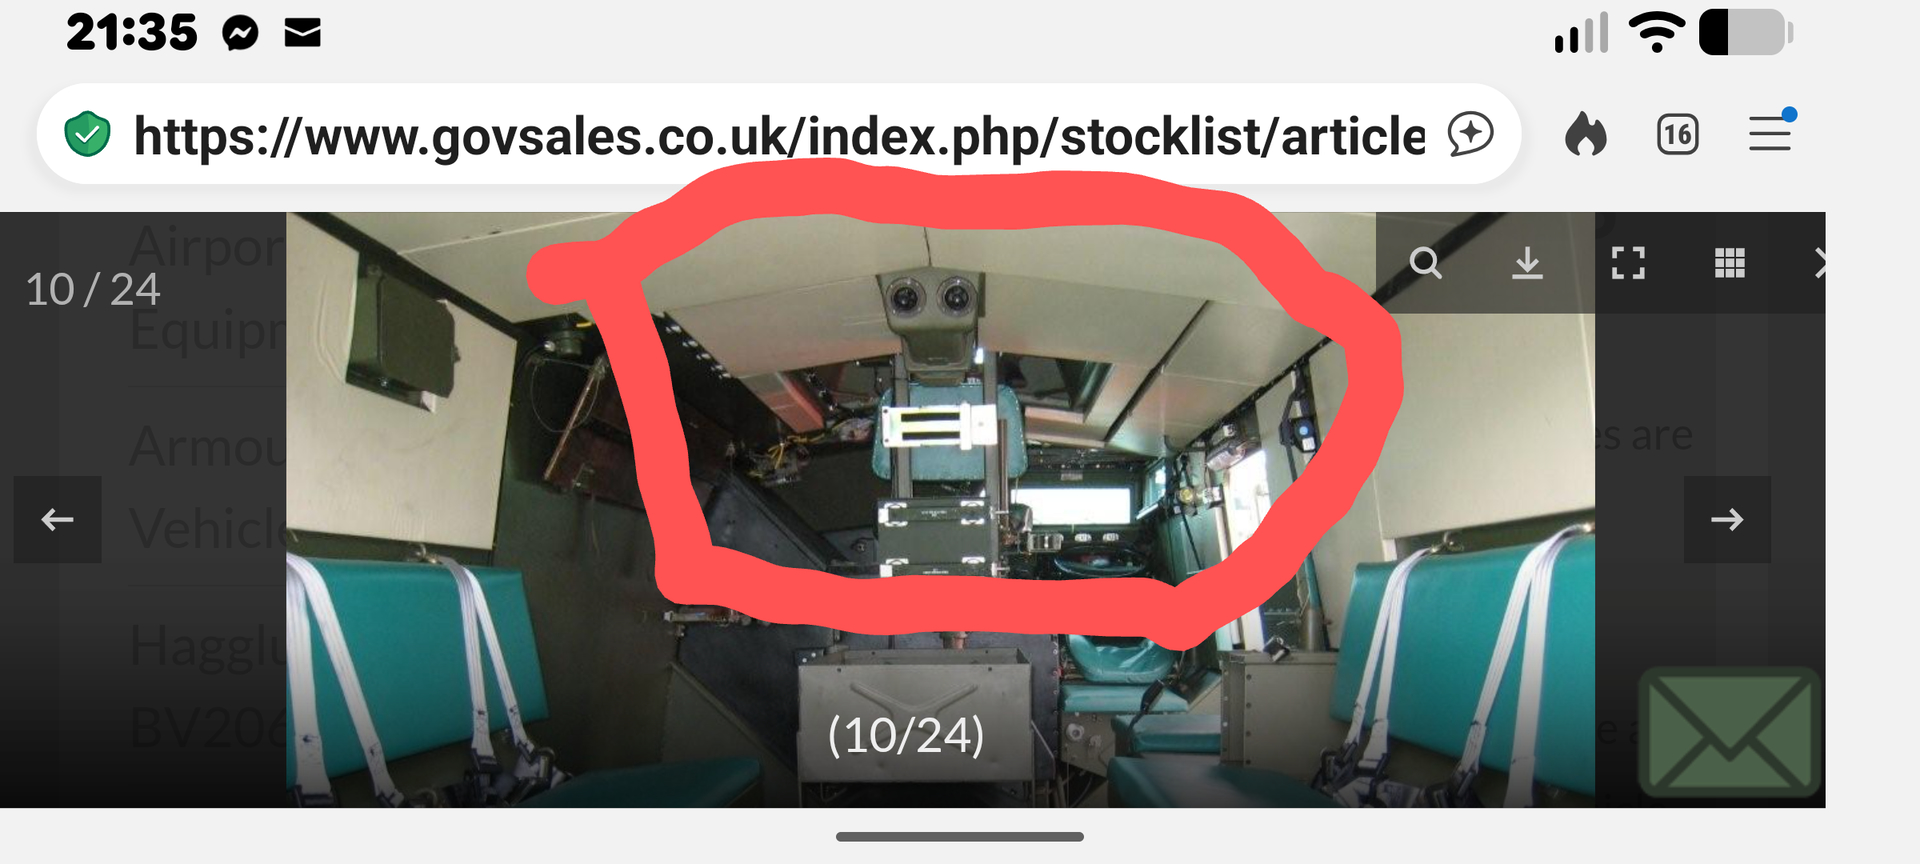
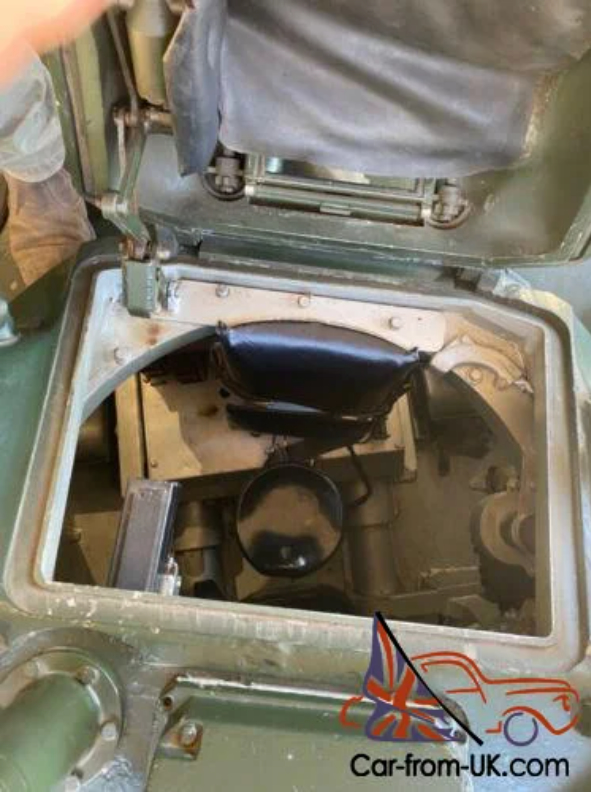
This can’t be a Vixen. It looks like some kind of soft-top vehicle with lots of space inside and a big rear door. The other photo you posted is a top-down shot through the open hatch of the cupola, but is this an FV 722 or some other vehicle it was also mounted on? I can’t tell from what’s visible of the hull, though.

The only references I have for FV 722 are the two photos in Simon Dunstan’s Scorpion: The CVR(T) Range (London: Arms & Armour, 1986; ISBN 0-85368-747-1) and the other Scorpion book I already mentioned above, George Forty’s Modern Combat Vehicles 5: The Scorpion Family. The former only has a right front and a right rear overall photo of 03SP84, prototype V2, the latter has some of the photos and drawings you just posted as well, but not all of those. It also has a couple you didn’t post :slight_smile: Oh, and a picture of the cupola on some kind of Fox hull by means of an adapter ring (the vehicle in that photo has a side-swinging hatch rather than an upward-hinged one and hull sides that don’t go all the way outboard, so it’d not a Vixen).

1 Like

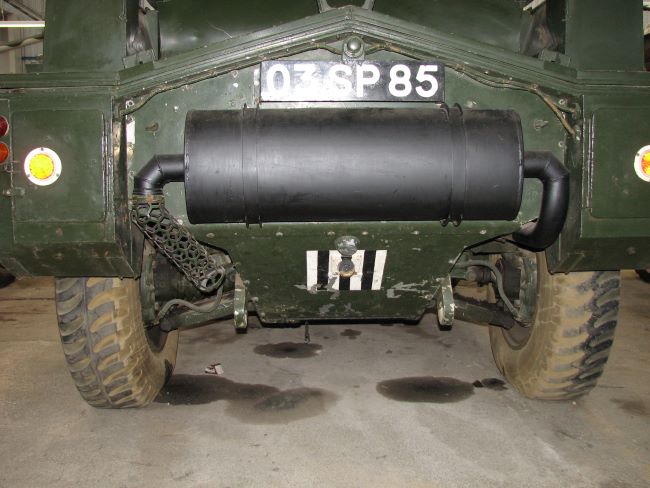
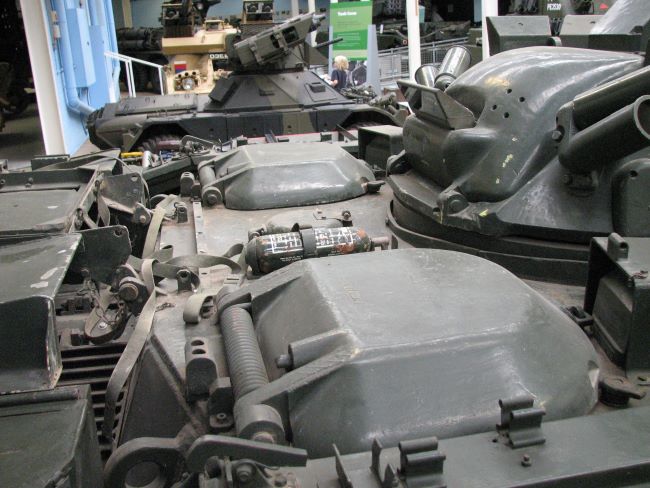
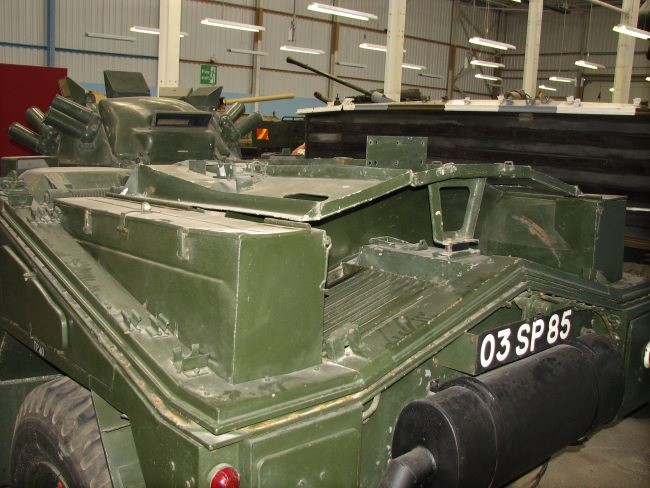
You’re right. Here’s the source anyway

https://car-from-uk.com/sale.php?id=649927

H.P.

2 Likes

Thanks, that’s more detail photos than I’ve ever seen of a Vixen :slight_smile:

Now, where did I put that AU$120,000 I had stashed away in case I needed it …?

2 Likes

There are a few hi-res overall views on Flickr

https://www.flickr.com/photos/tags/fv722

H.P.

2 Likes

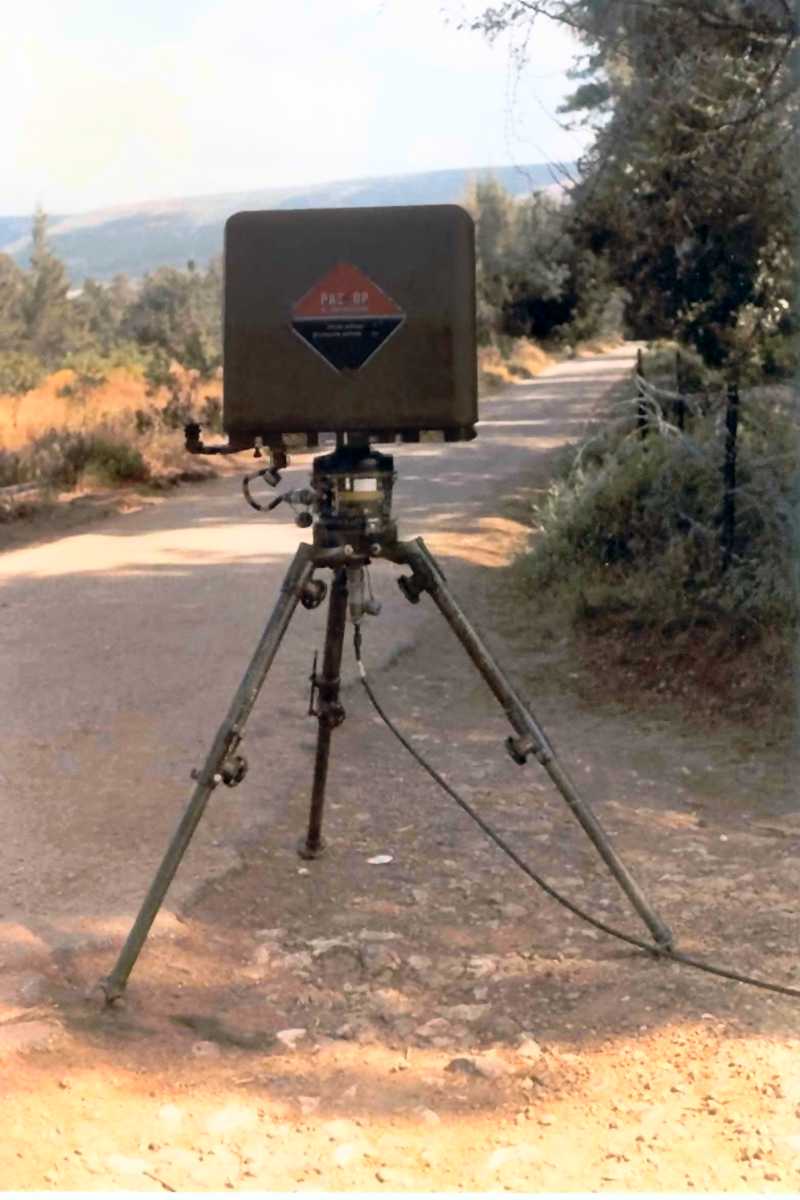
Well, the more the merrier I suppose:

The last picture being that of the ZB 298 radar, (Radar GS No 14 in British Army service) often shown mounted on the Vixen in pics of the time, and Fox come to that.

3 Likes

I looked up the vehicle dimensions in Terry Ganders 1980 Edition Encyclopedia of the Modern British Army, the Fox hull was only 200mm odd longer than Ferret Mk 4, which was a bit longer than the previous 3 Mk’s, width was about the same. Assuming Fox & Vixen hull were equal? Don’t have the book with me presently or I’d quote it - probably tonite.

Funny thing I thought Ferret was purely 2 man, but the book said 2/3, depending on Mk. Also the Fox hull with Peak GPMG turret, had a rumoured name - Stoat.

Mal

1 Like

Ferret Mk 1/1, FV701(J) - Length - 3.835m, width - 1.905m, height - 1.448m - crew 2 or 3 - open top

Ferret Mk 1/2, FV704 - same Length & width, height - 1.651m - crew 3 - with small flat top turret with external MG pintle

Ferret Mk 2/3, FV701(H) - same length & width, height - 1,879m - crew 2 - with small turret with Bren/ 30 cal Browning

Ferret Mk 4, FV711 - Length - 3.962m, width - 2.133m, height - 2.336m - crew 2 or 3 - turreted Ferret with large wheels, wading screens & strengthened suspension

Fox - FV721 - Length - (Gun Fwd) - 5.359m, Hull length - 4.166m, width - 2.134m, height - 2.2 m - crew 3

So difference in hull length 0.204m - about 8 inches vs the Mk 4, 0.331m - about 12 inches vs the Mk 2

Mal

2 Likes

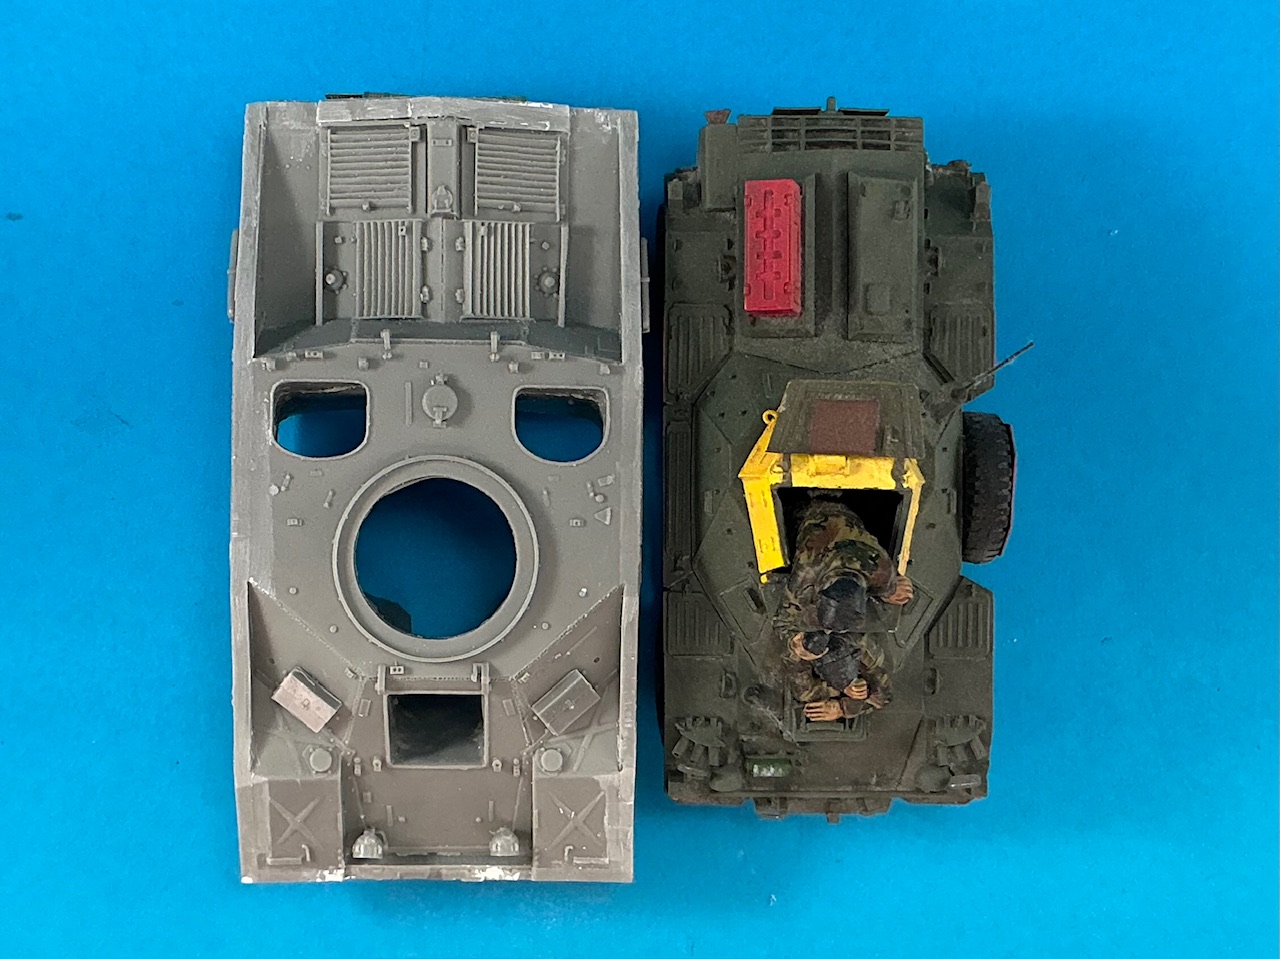
The main difference in hull size between Ferret and Vixen is not the outside dimensions but the actual hull width. Here’s my Sovereign Ferret Mk. 2[1] compared to my Vixen hull as I have it right now:


Assuming both are reasonably to scale, you can see the Vixen is a bit longer than the Ferret (I placed them so the rear wall of the crew compartment is approximately level, to give a better comparison of the room available inside). More importantly, Vixen is also a good deal wider, because the width of the Ferret is deceiving: it actually has a stowage bin on one side and a spare wheel on the other, so the real width of the lower hull is about that of the superstructure, whereas the Vixen’s interior is full-width.

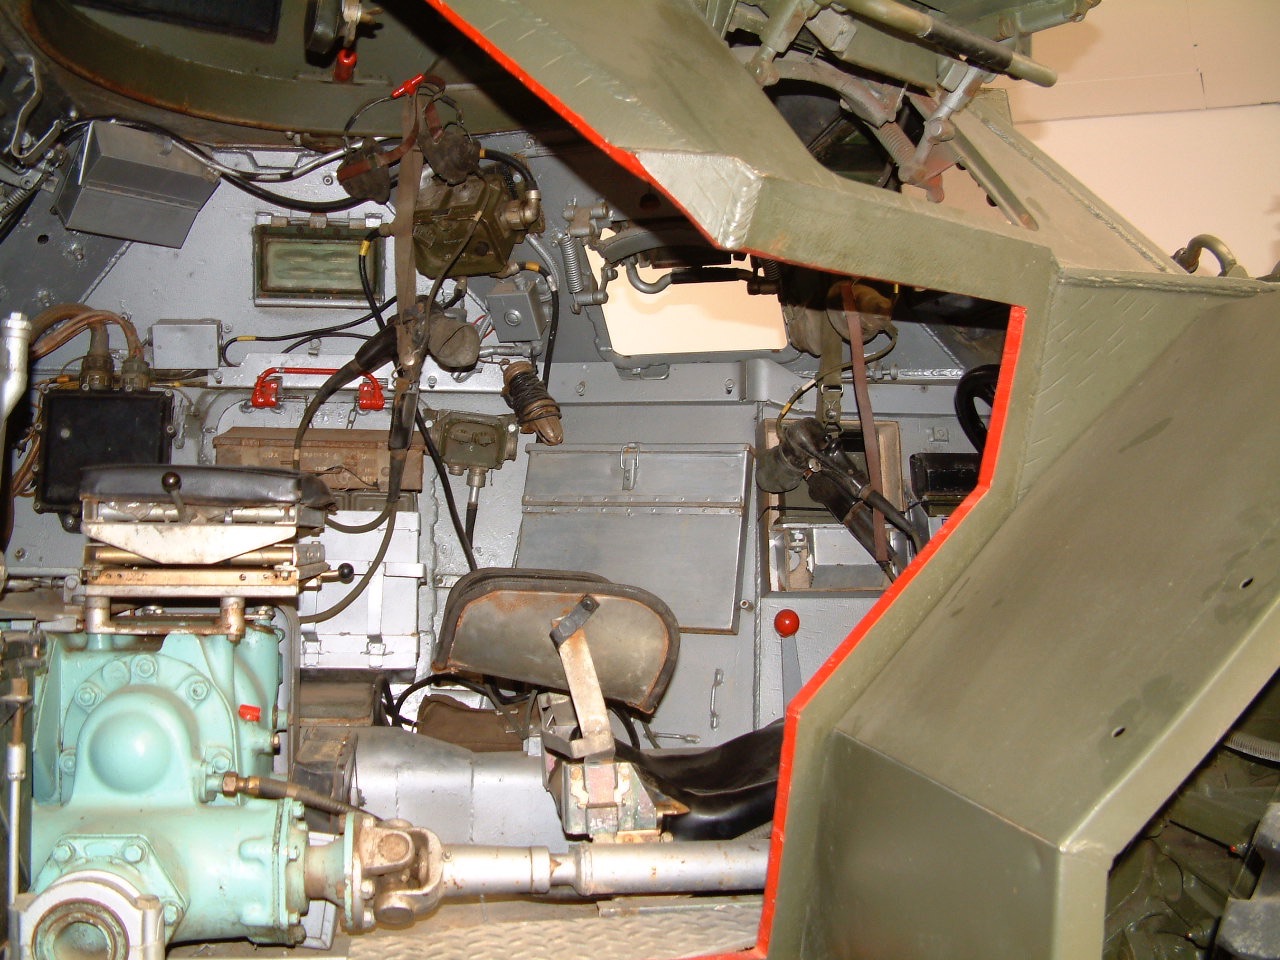
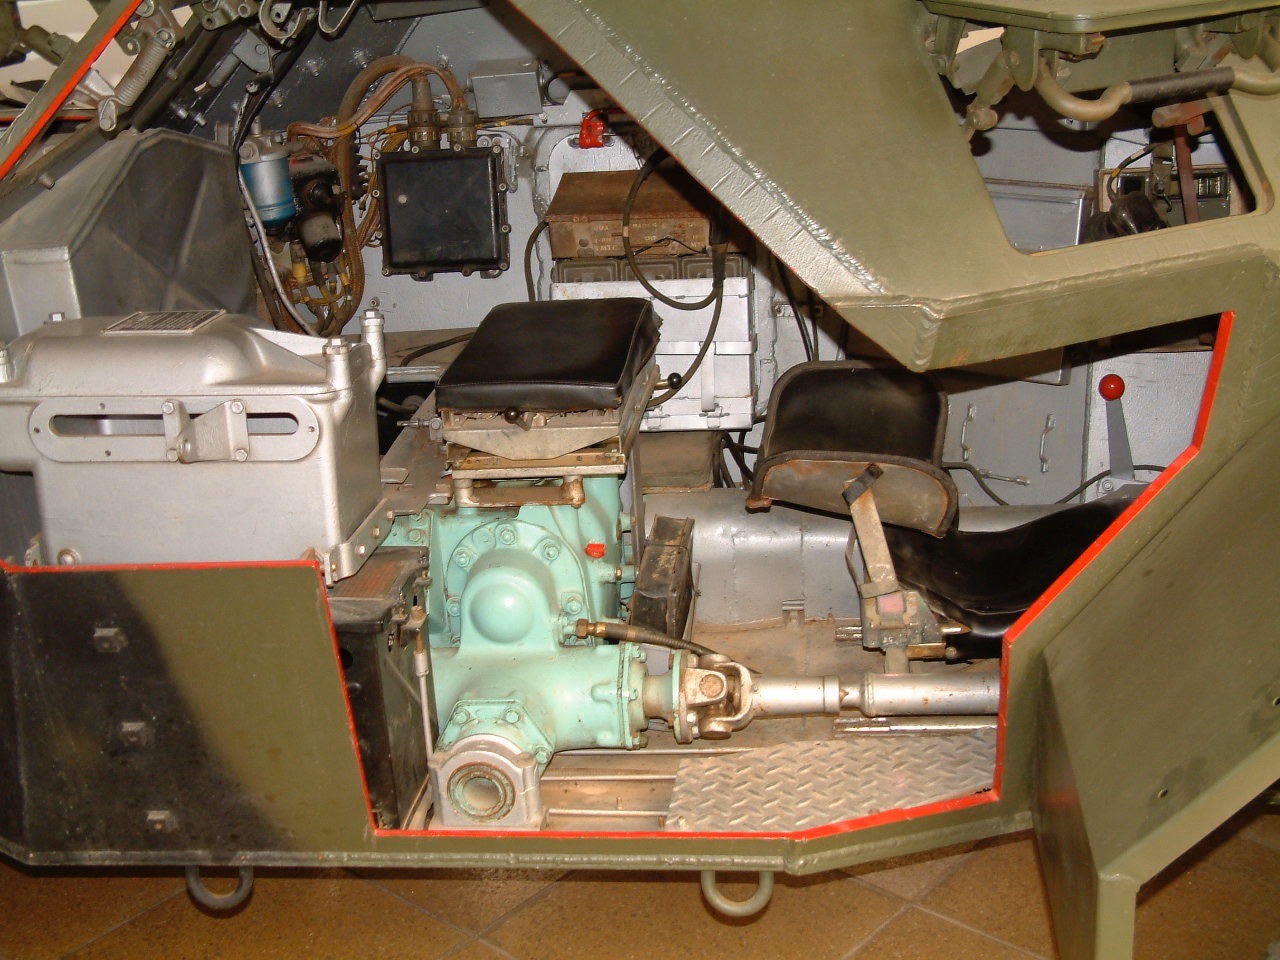
Here’s the inside of a Ferret Mk. 2, that I came across at IWM Duxford about 25 years ago:


The photos show well how much extra width there is outside the hull, if you look at the front mudguard. The Ferret’s lower hull also angles inward slightly, while Vixen’s is vertical, which would also provide a lot more room on the inside for those passengers in the rear corners.

As for the crew, turretless Ferrets were intended as three-man vehicles, but the turret required enough room that it was reduced to two.


  1. The photo of the box top and parts there are this model :slight_smile: ↩︎

1 Like

That comparison really shows the difference, they wrung out optimum use of the space available.

Mal

1 Like

H.P.

3 Likes

The floor was still missing:

I hadn’t installed it yet because I hadn’t worked out yet if I will need to add a support for one of the figures I intend to add. That doesn’t appear to be necessary, so I could glue the floor on. It fit reasonably well but didn’t want to sit flush on the sides until I added the clamps :slight_smile:

The driver’s hatch appears to have come from a distorted mould:

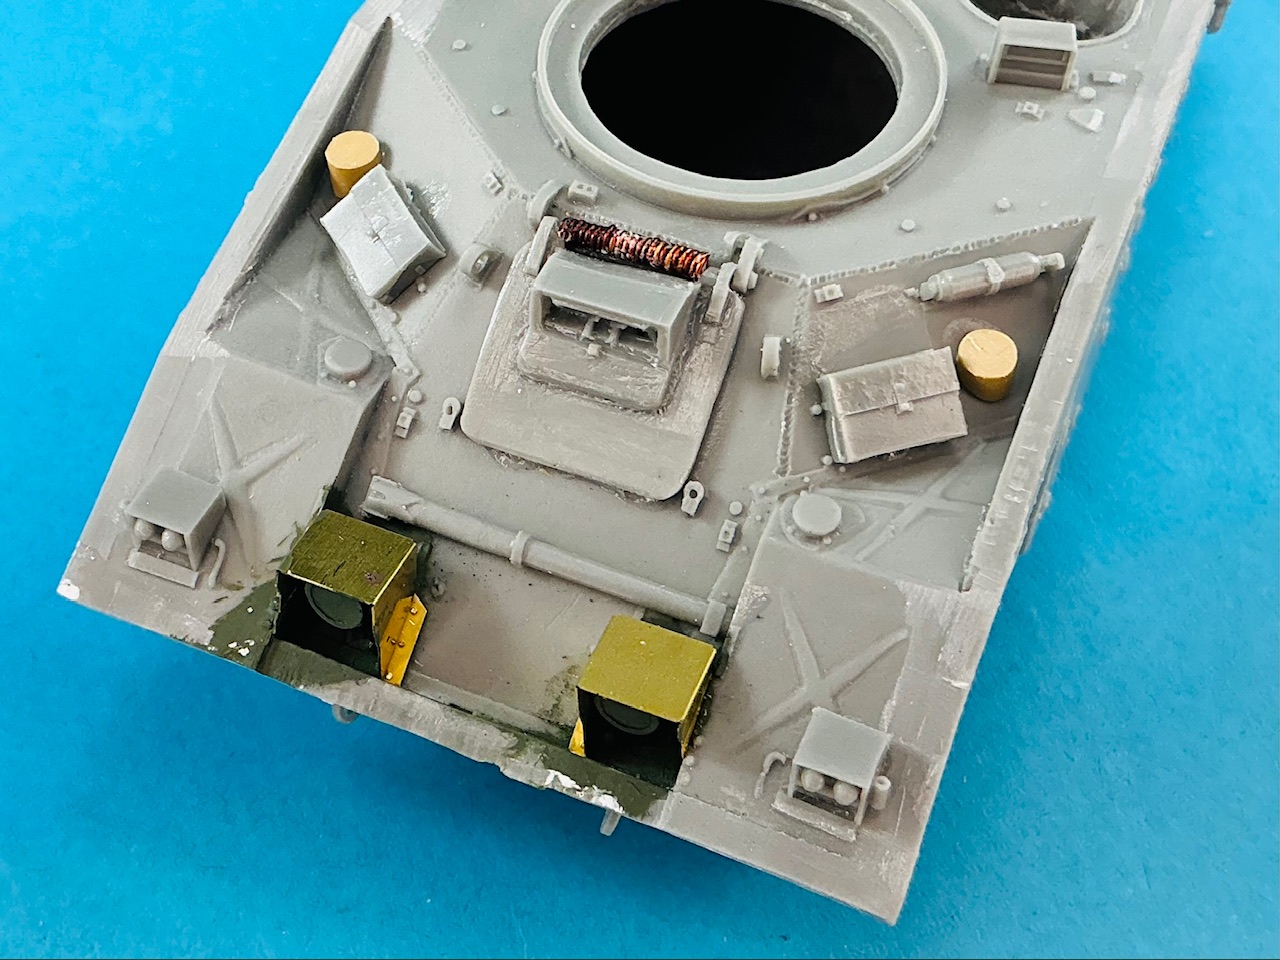
This photo was taken vertically down (the camera in your phone or tablet has two + signs on-screen for this: if those overlap exactly, the device is level) so there is no perspective in this photo that distorts the corners of the hatch. The black rectangle shows that the sides are not at a 90° angle to the top and bottom. The spring at the top is also distorted. I filed the sides to correct their angles and replaced the spring by a bit of plastic rod with copper wire wound around it.

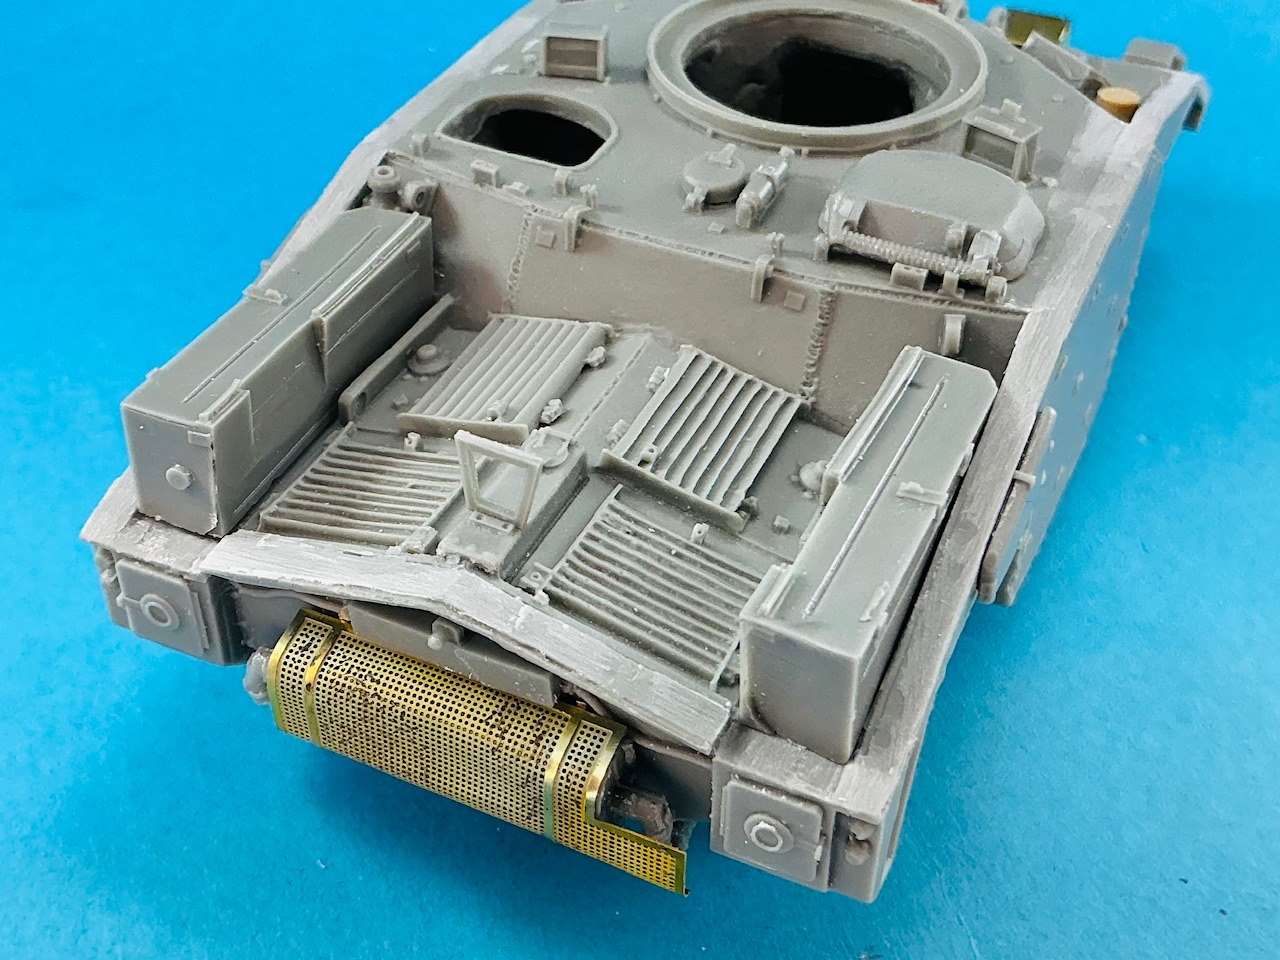
More details now on the front and rear:


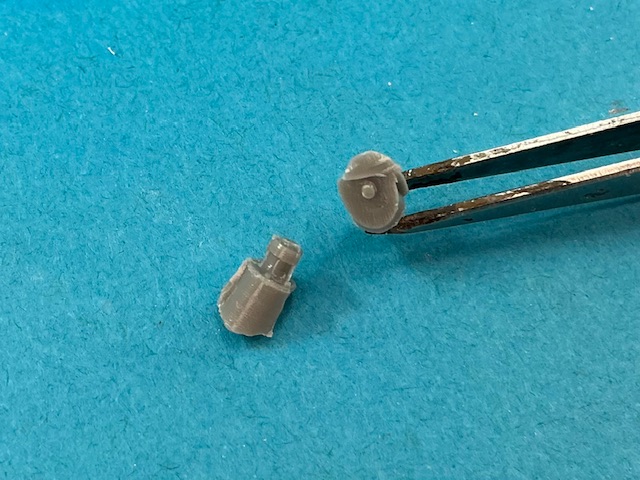
The hoods over the headlights didn’t fit too well, but after some fiddling, sit reasonably OK. I replaced the bases for the antennas by pieces sawed from 4 mm diameter sprue, because the resin parts look like this:

This is a good example of typical problems with Accurate Armour’s castings :frowning:

2 Likes