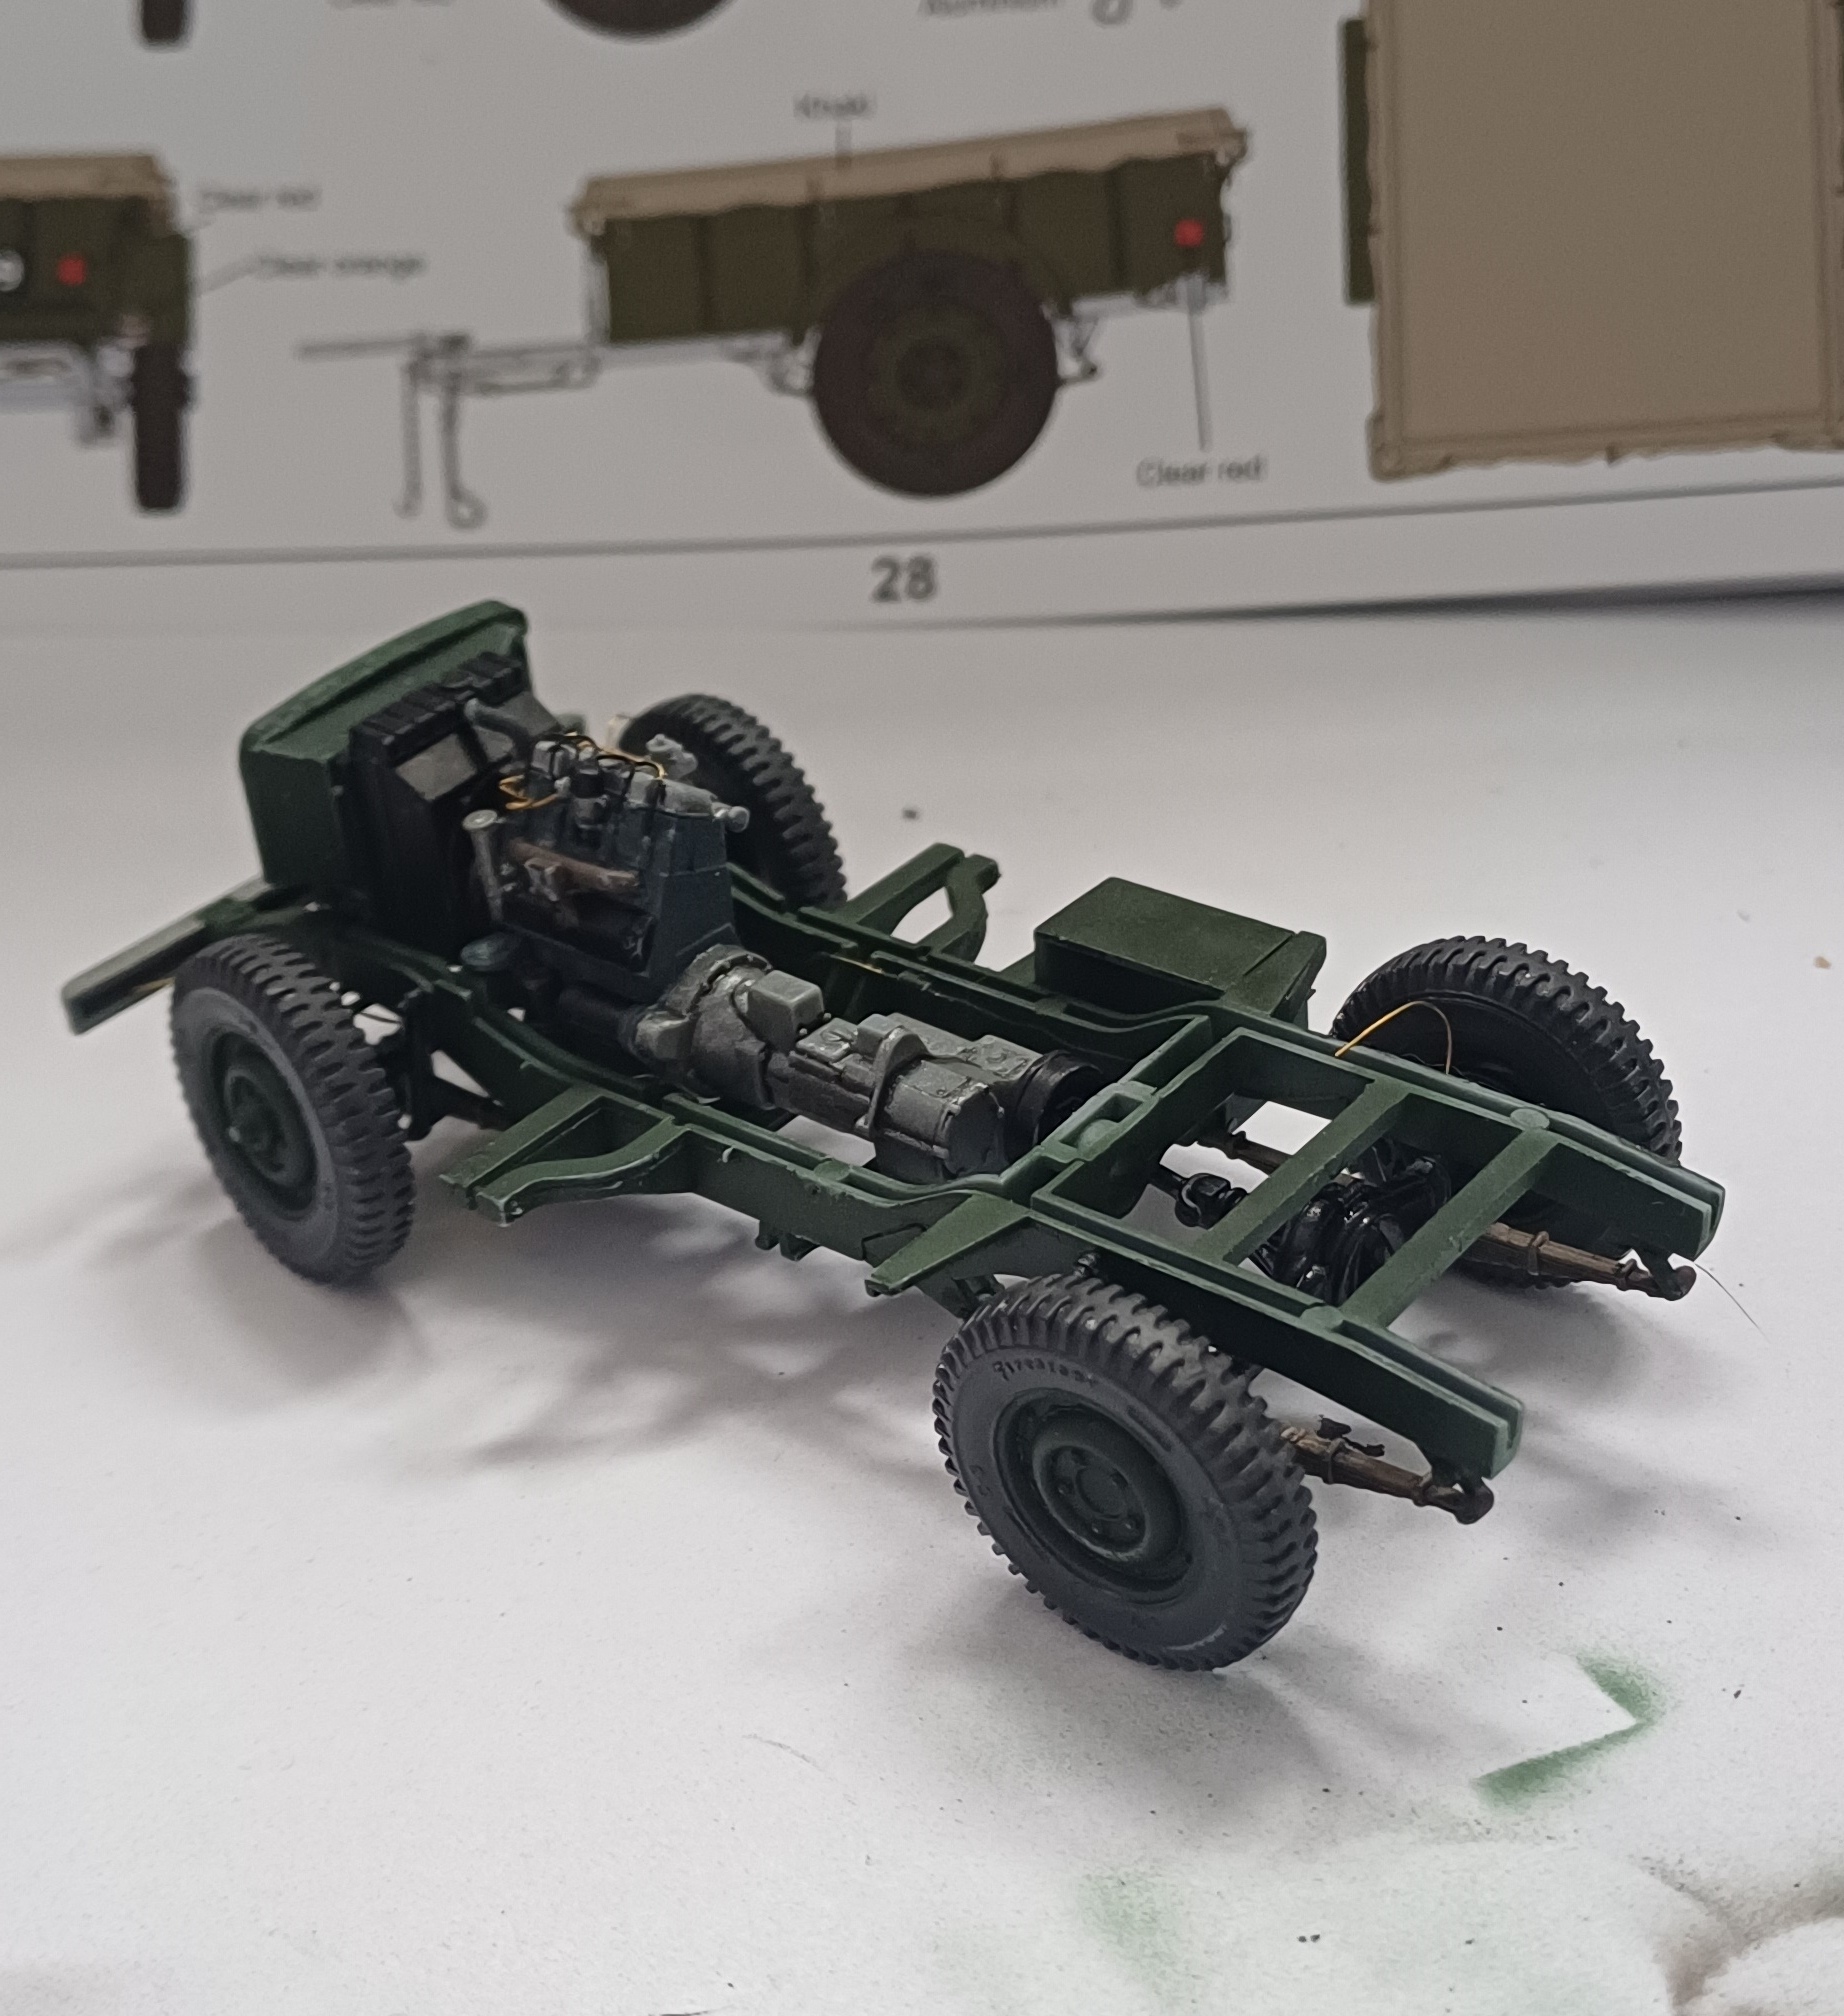
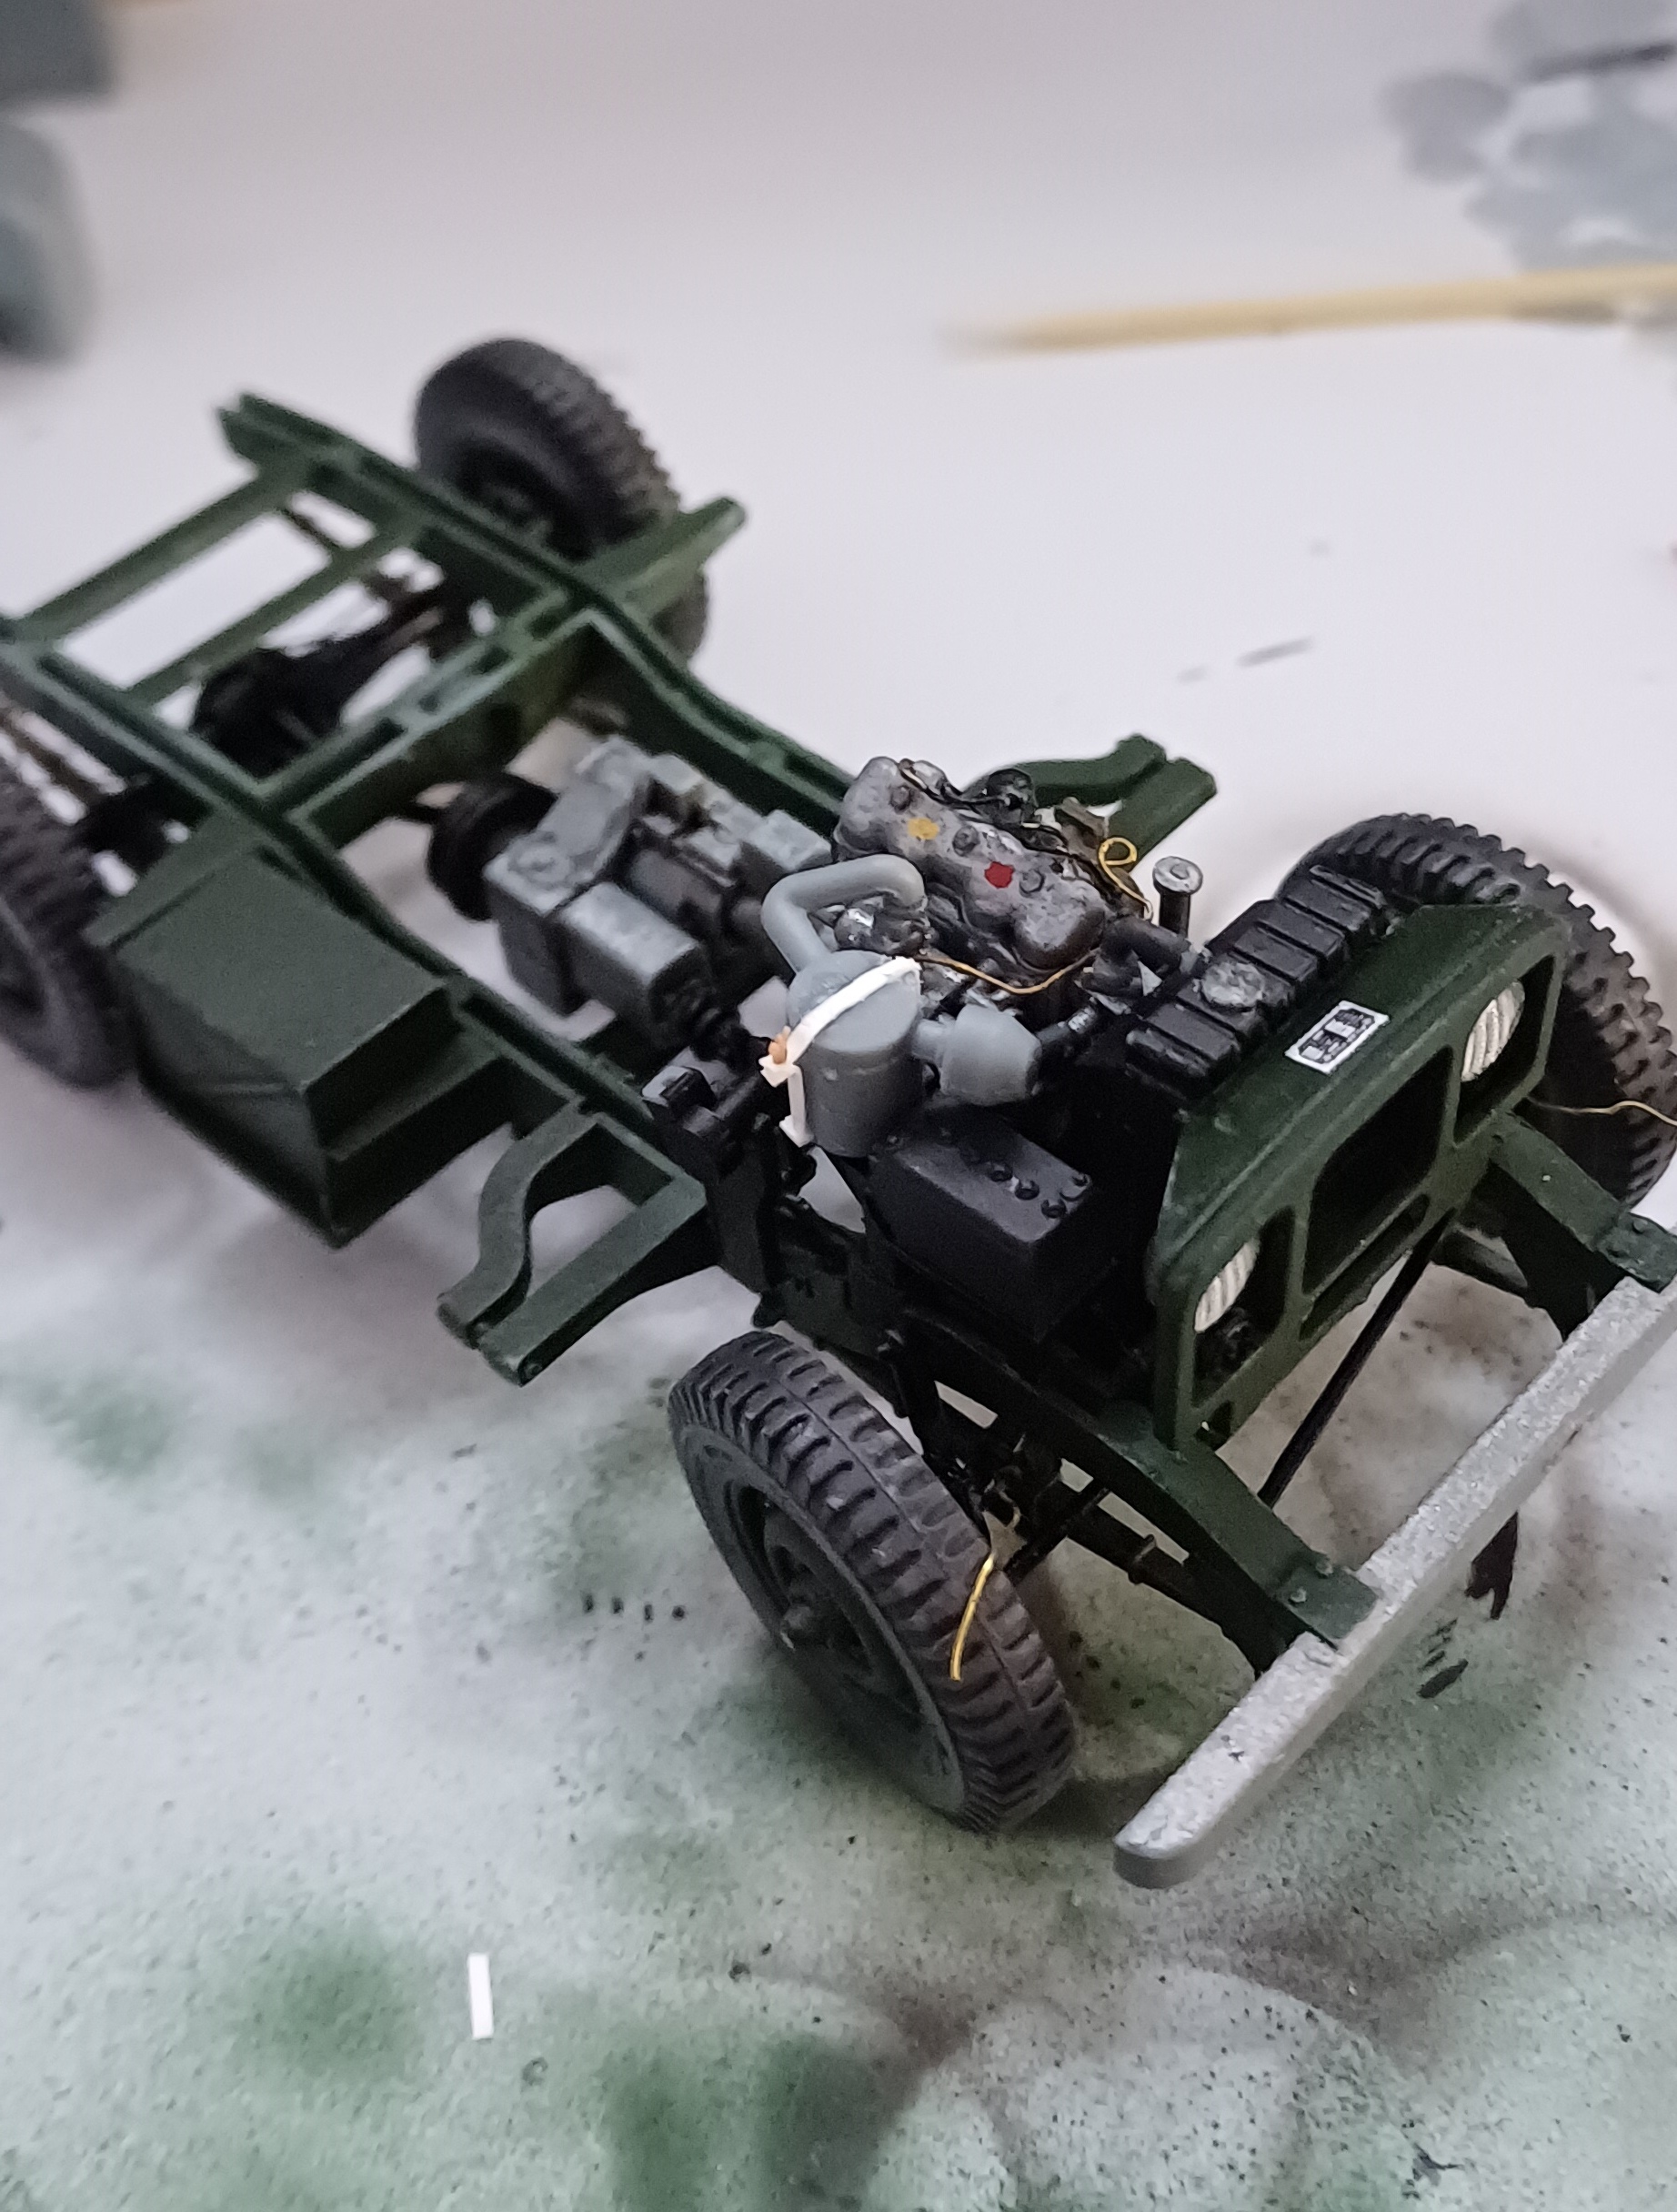
Been on a bit of a go slow recently but got the engine and chassis married up. The wheels are just plonked on there and the copper wires you can see are the brake lines which haven’t been fitted and painted yet. I’ve a few decals to put on and then I’ll turn my attention to the cab and bodywork. As you can see the chassis is bodycolour which is bronze green (Humbrol 75) but I’ve decided to do sub assemblies in different colours. As I don’t have info to the contrary I would imagine axles and drive shafts etc. would be supplied painted and just bolted on as happens with modern military Rovers. It will be getting weathered anyway and very little will be seen once the bodywork is on. Touch ups will be done as I go.

12 Likes
Nothing wrong with slow and steady mate ![]()
1 Like
Looking good mate
1 Like
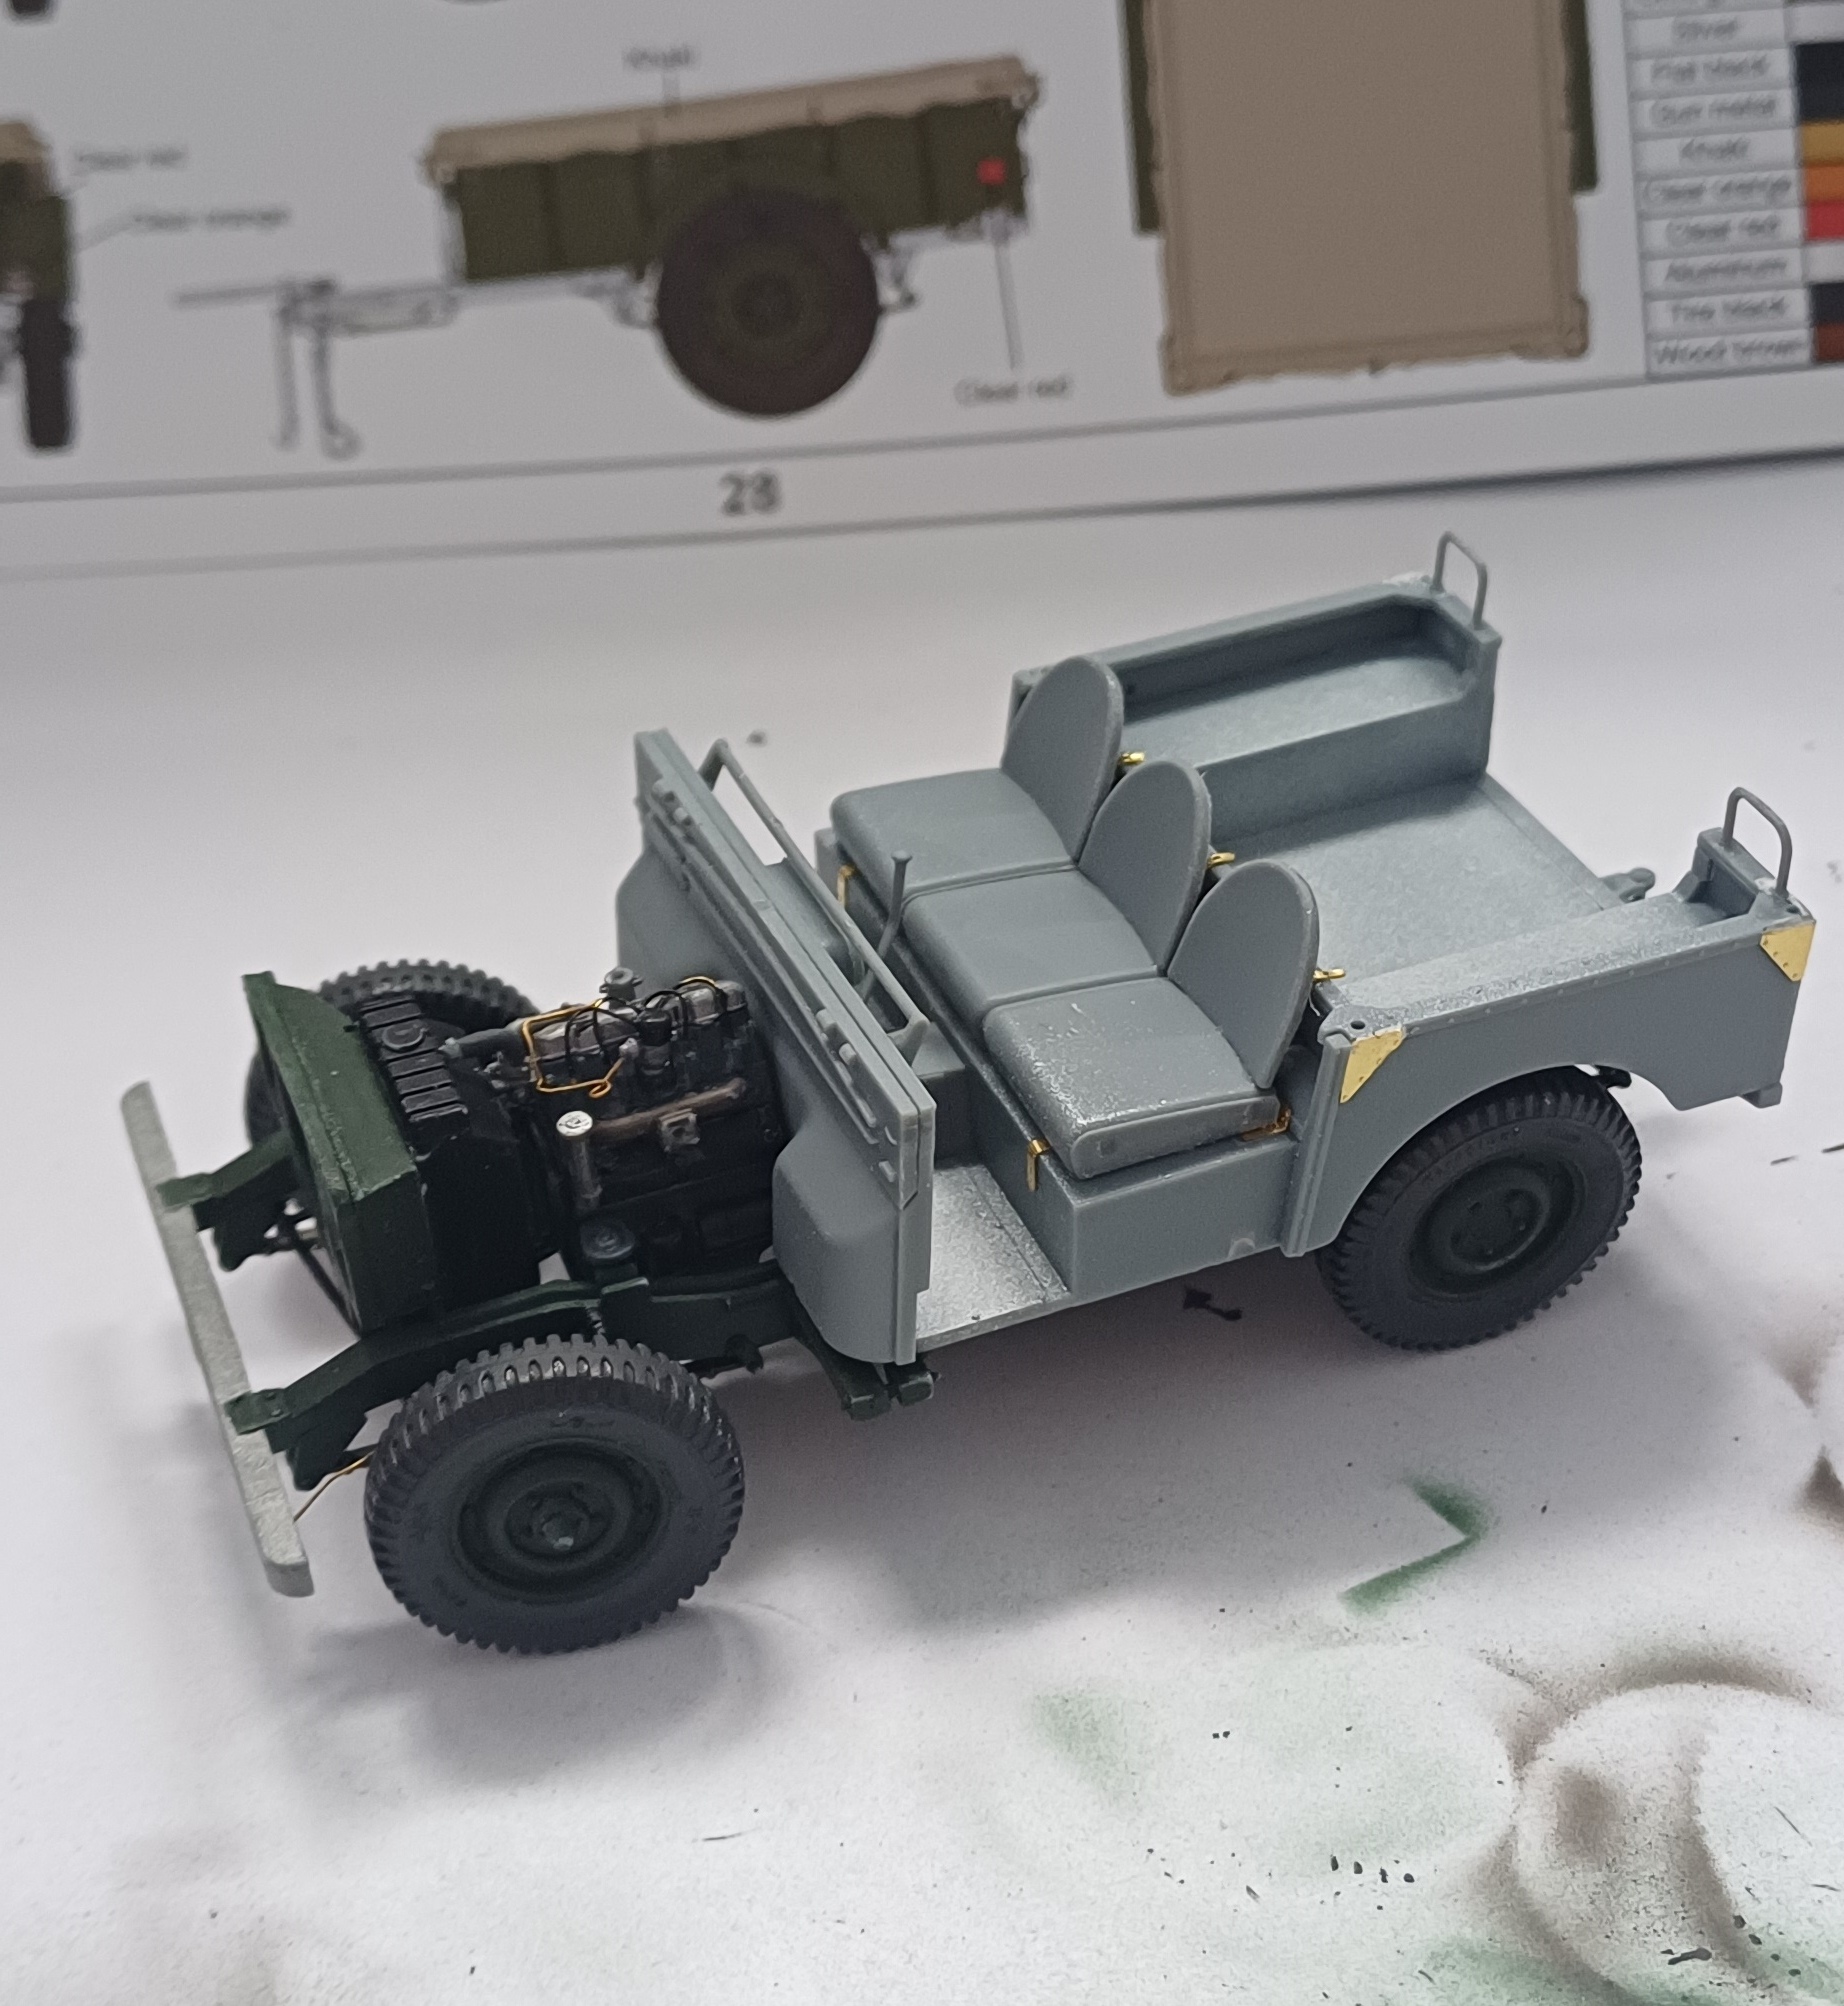
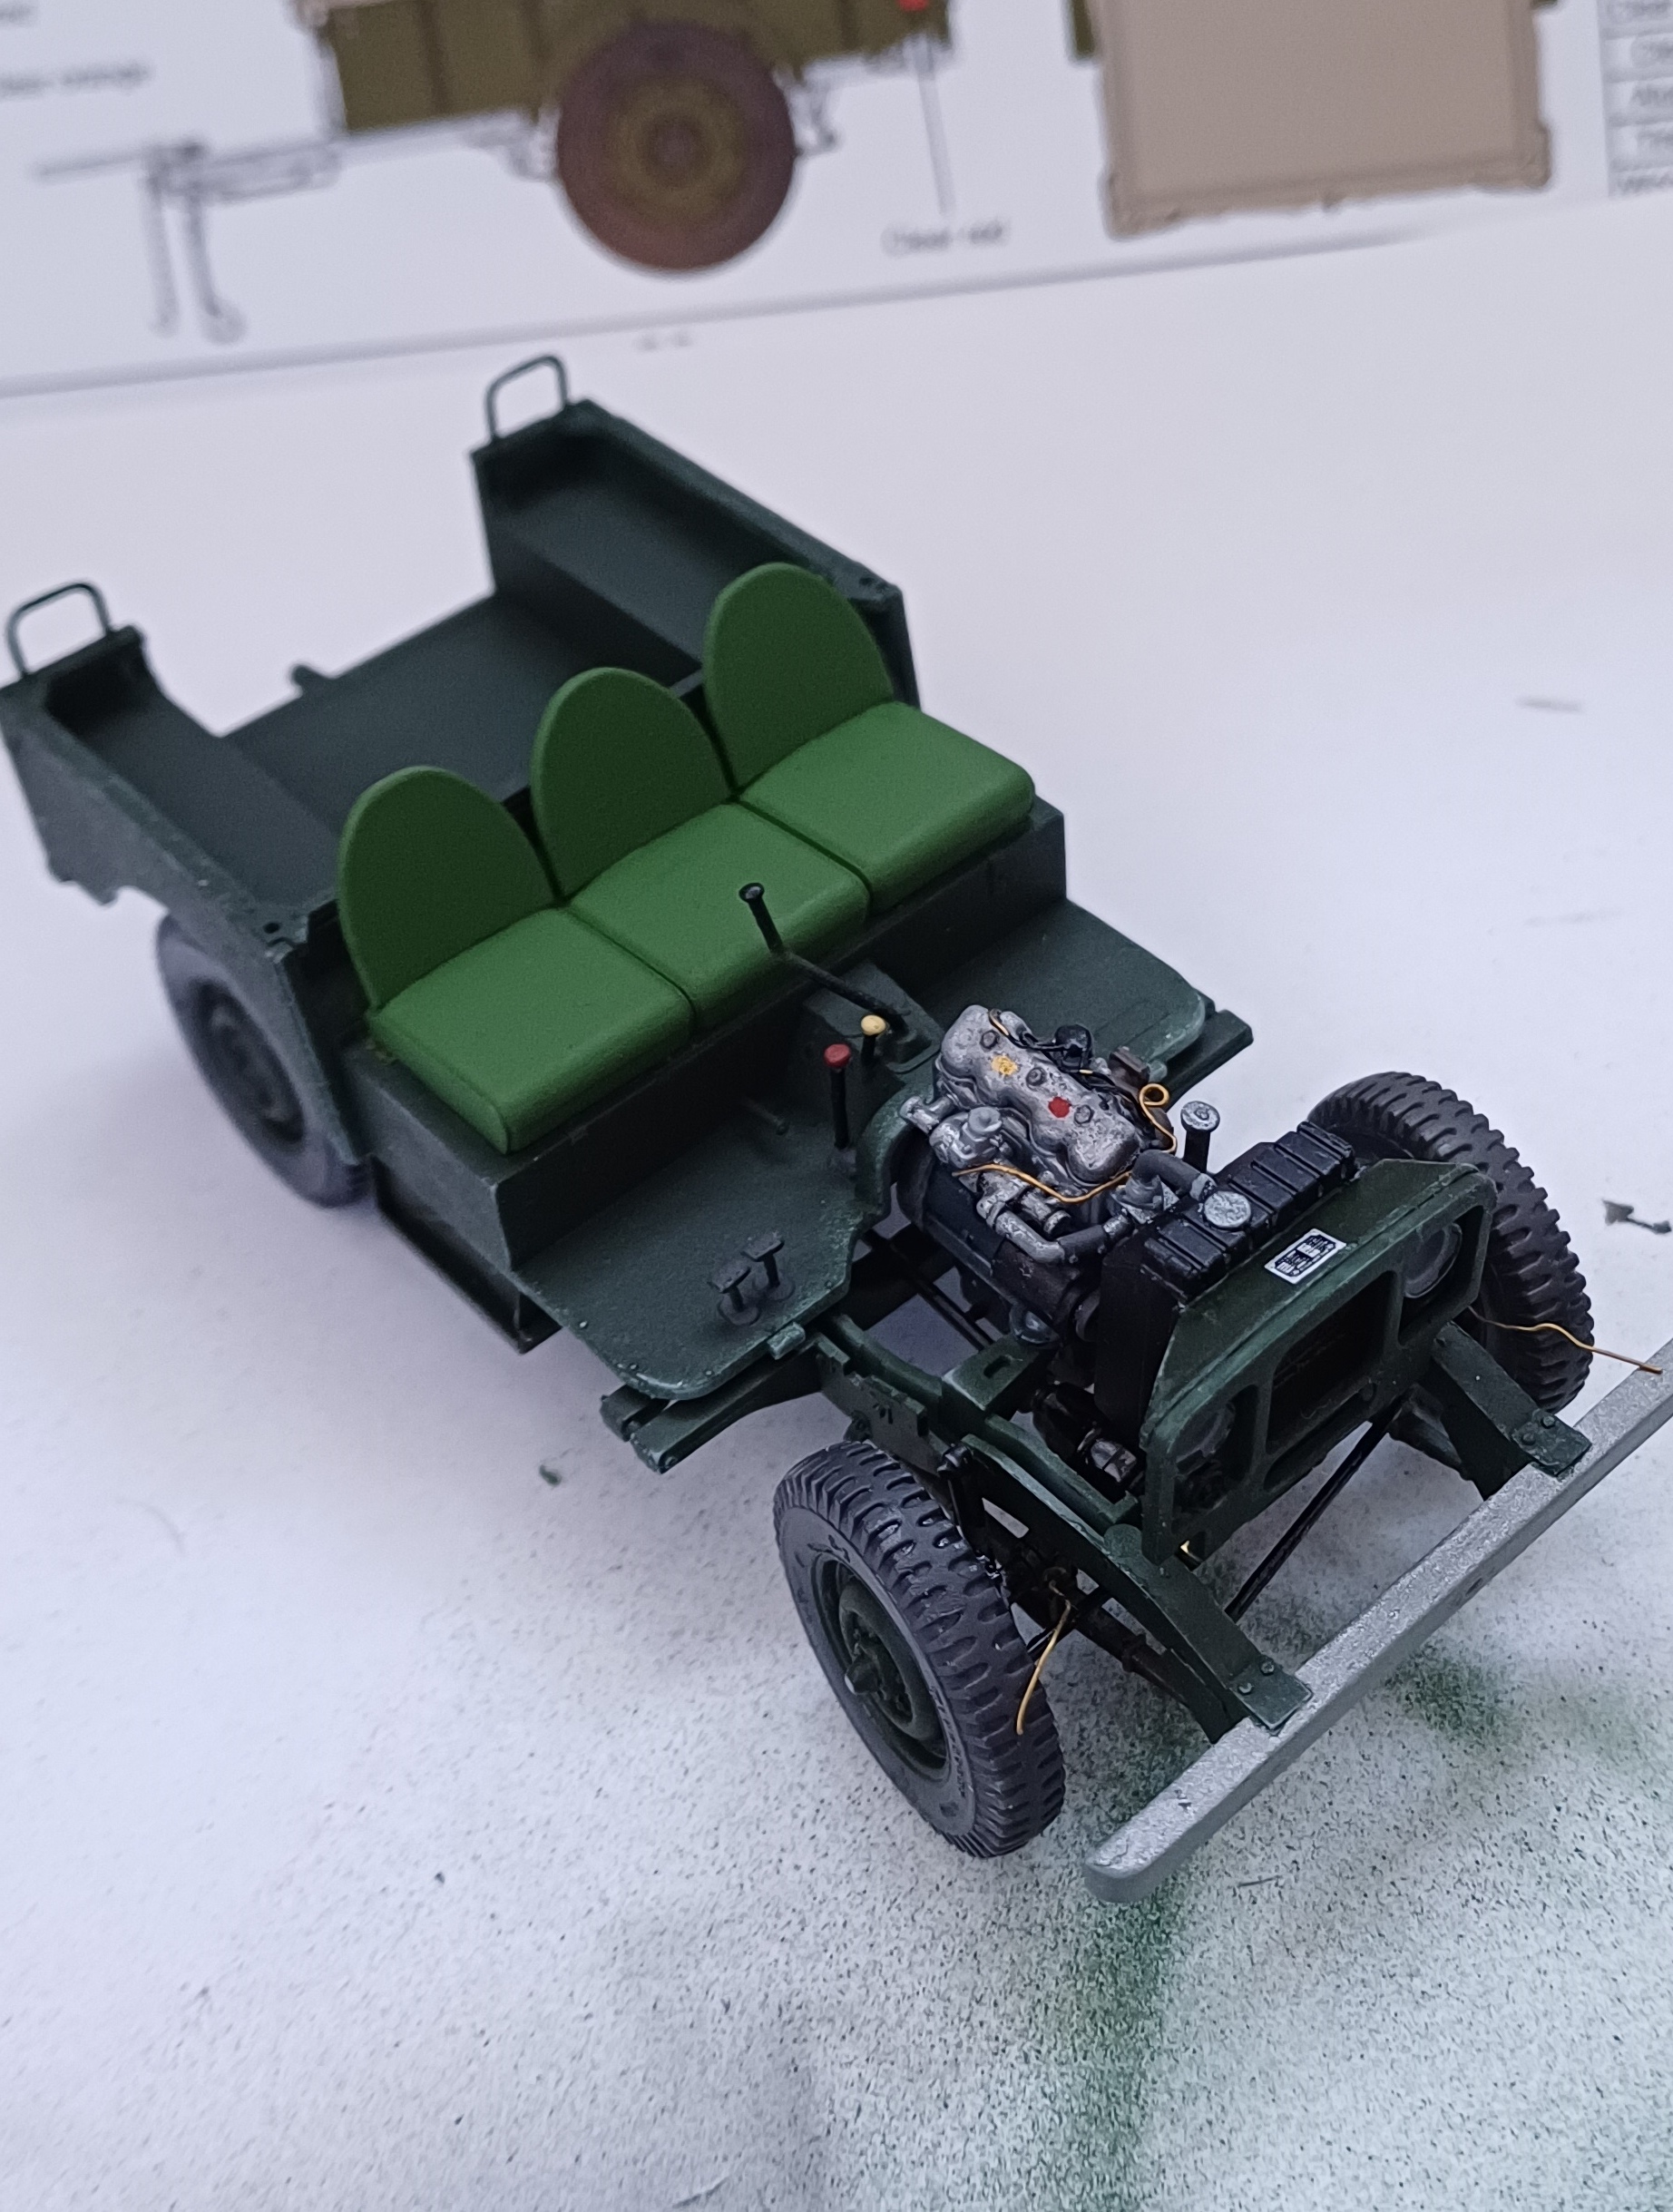
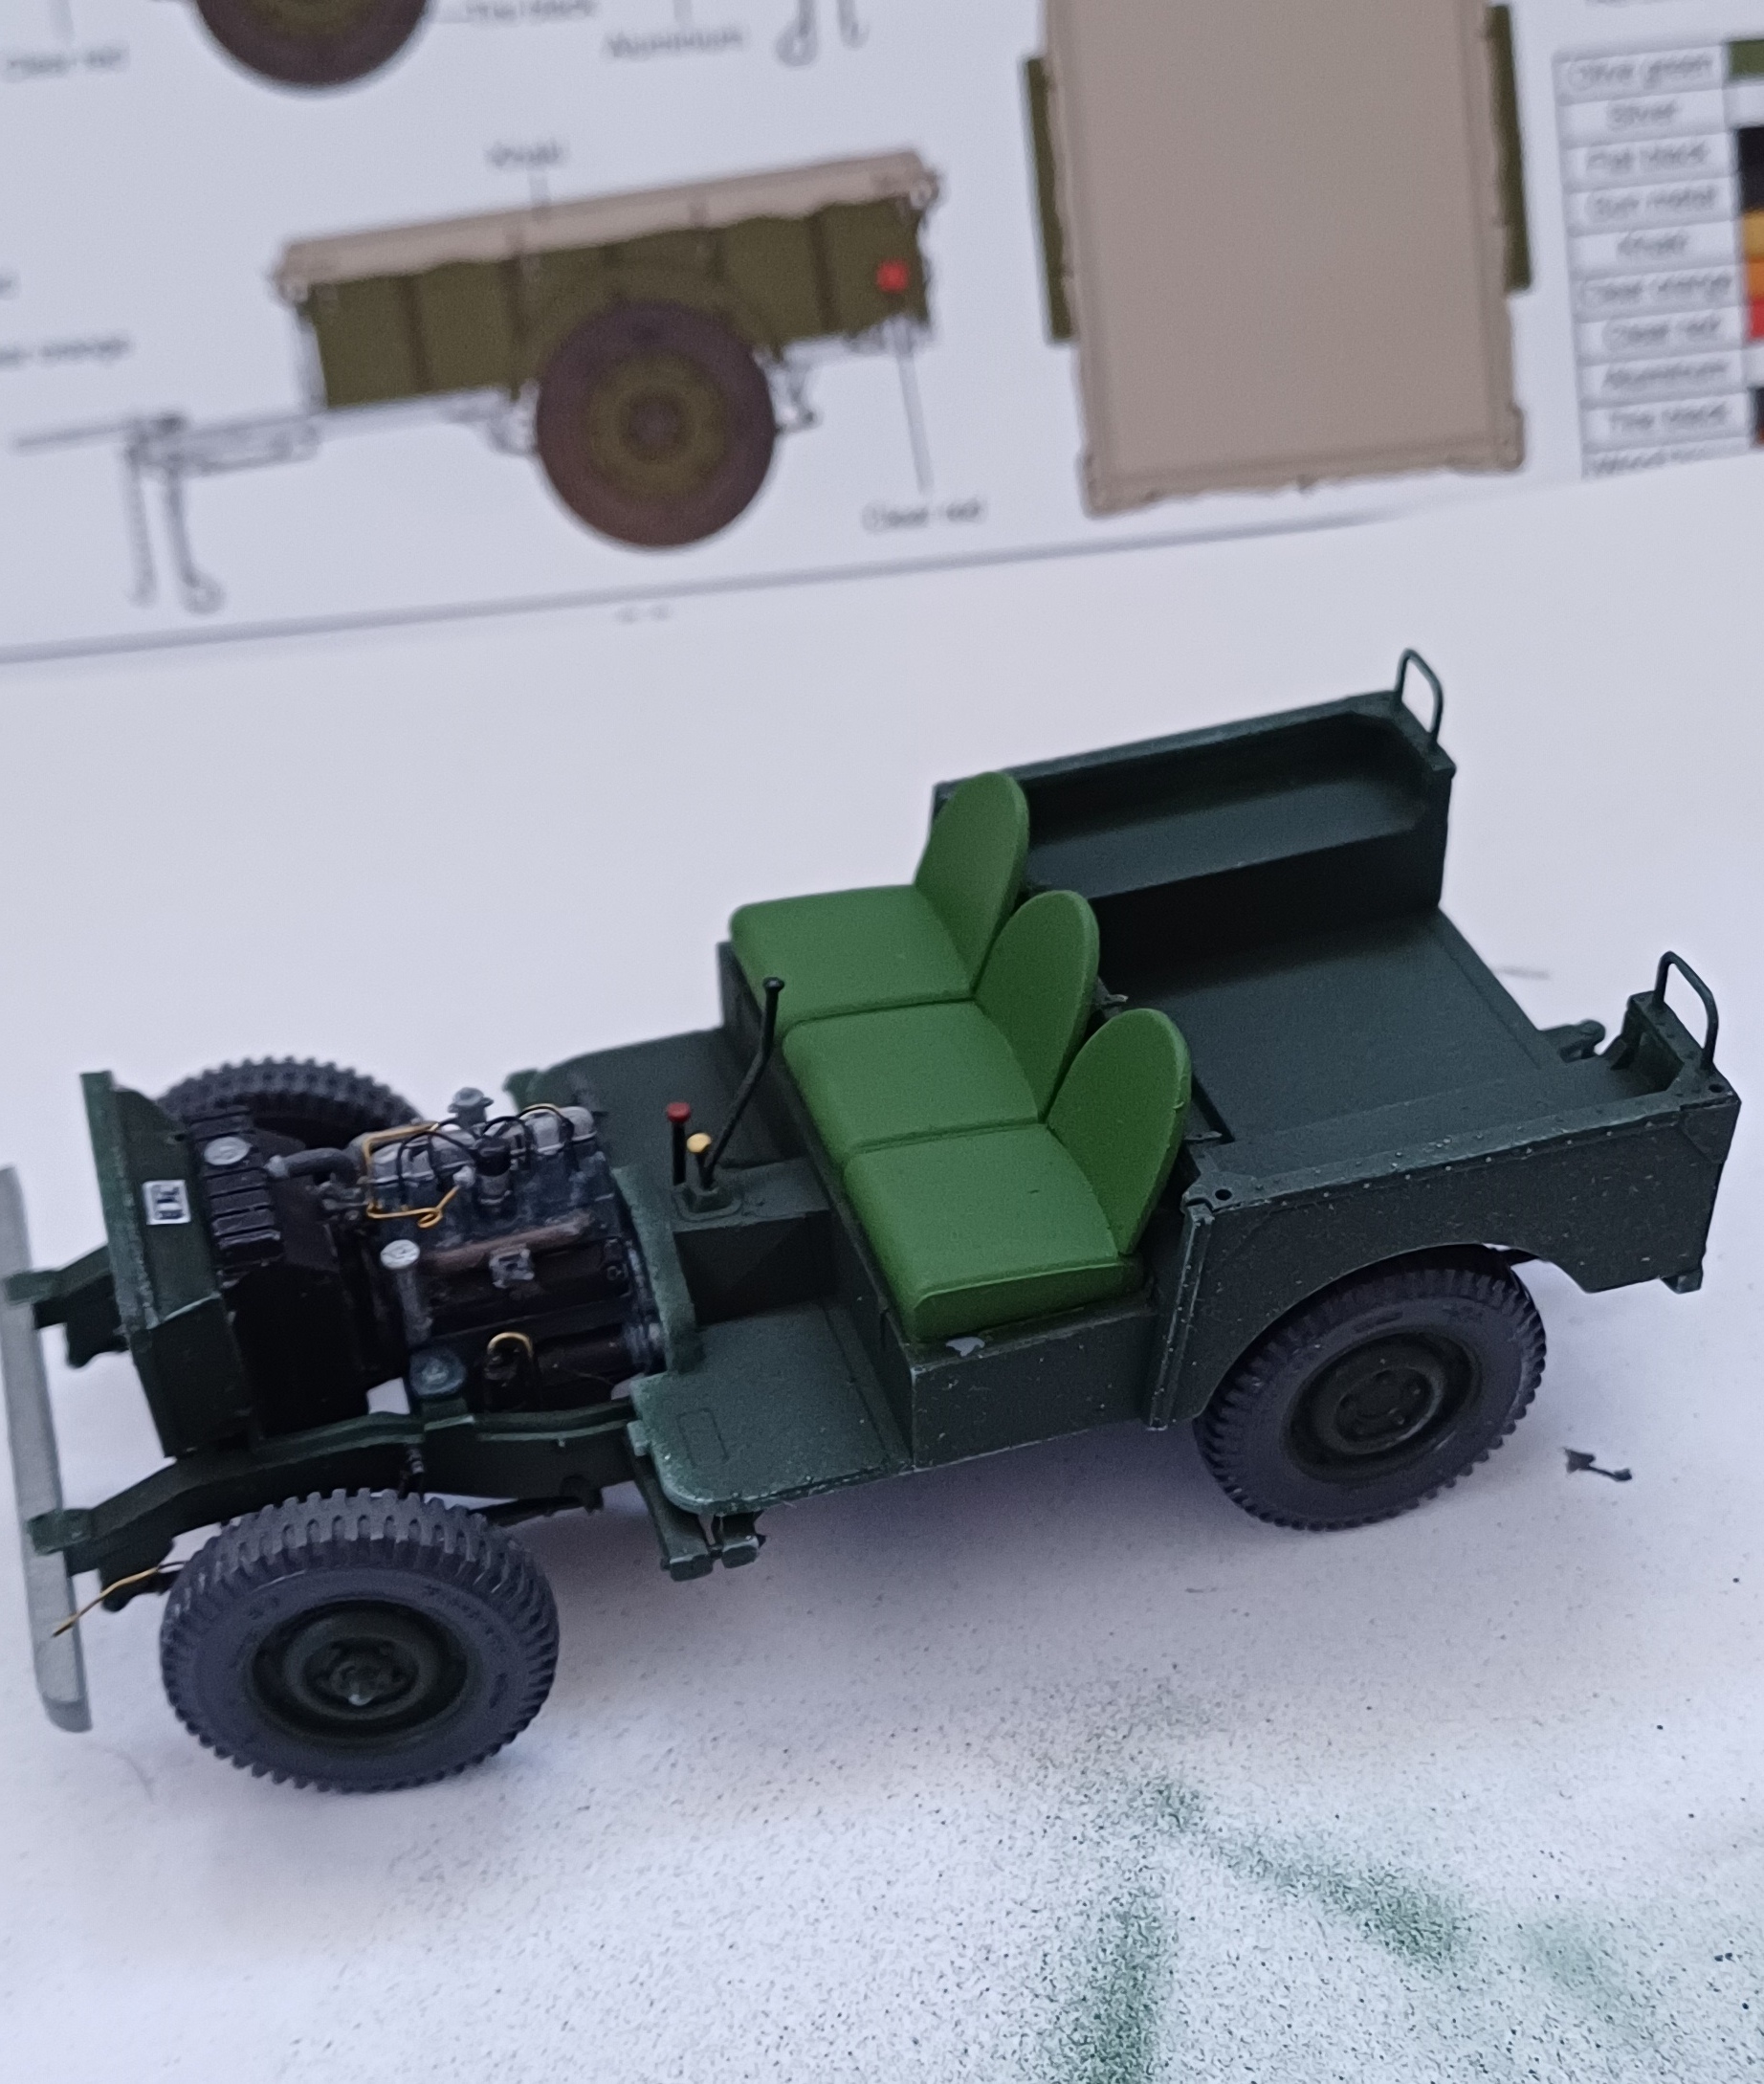
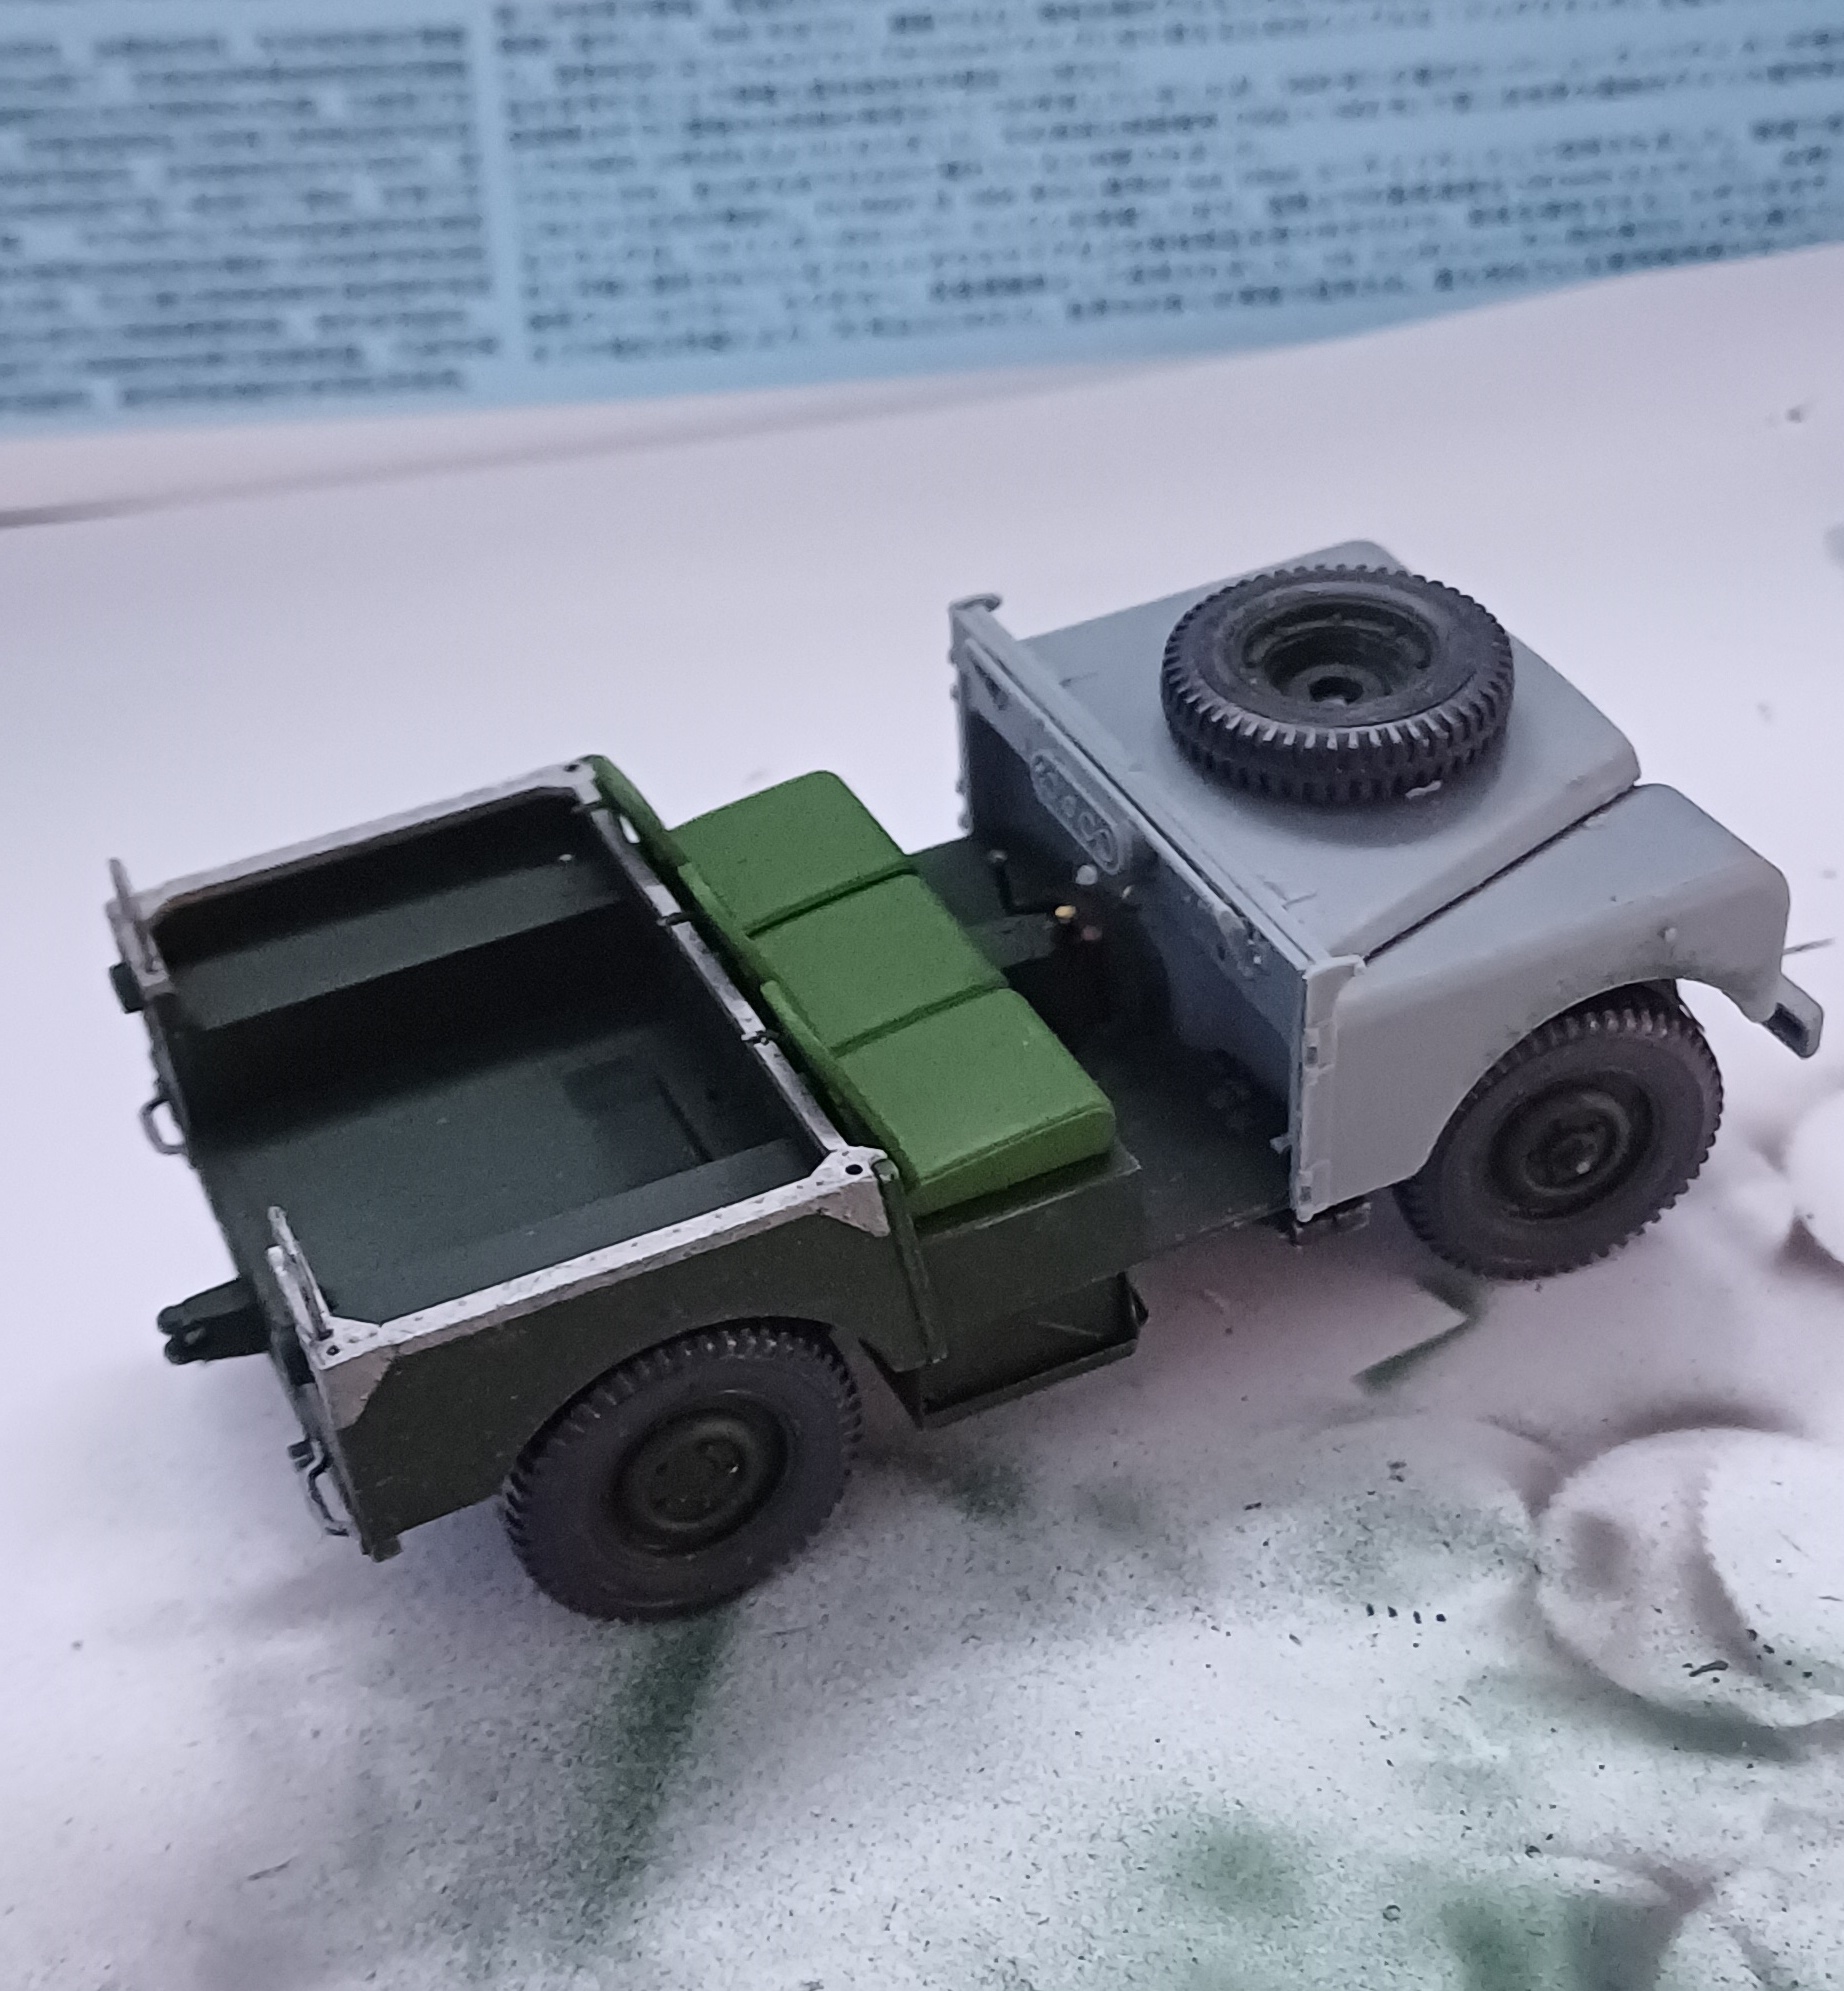
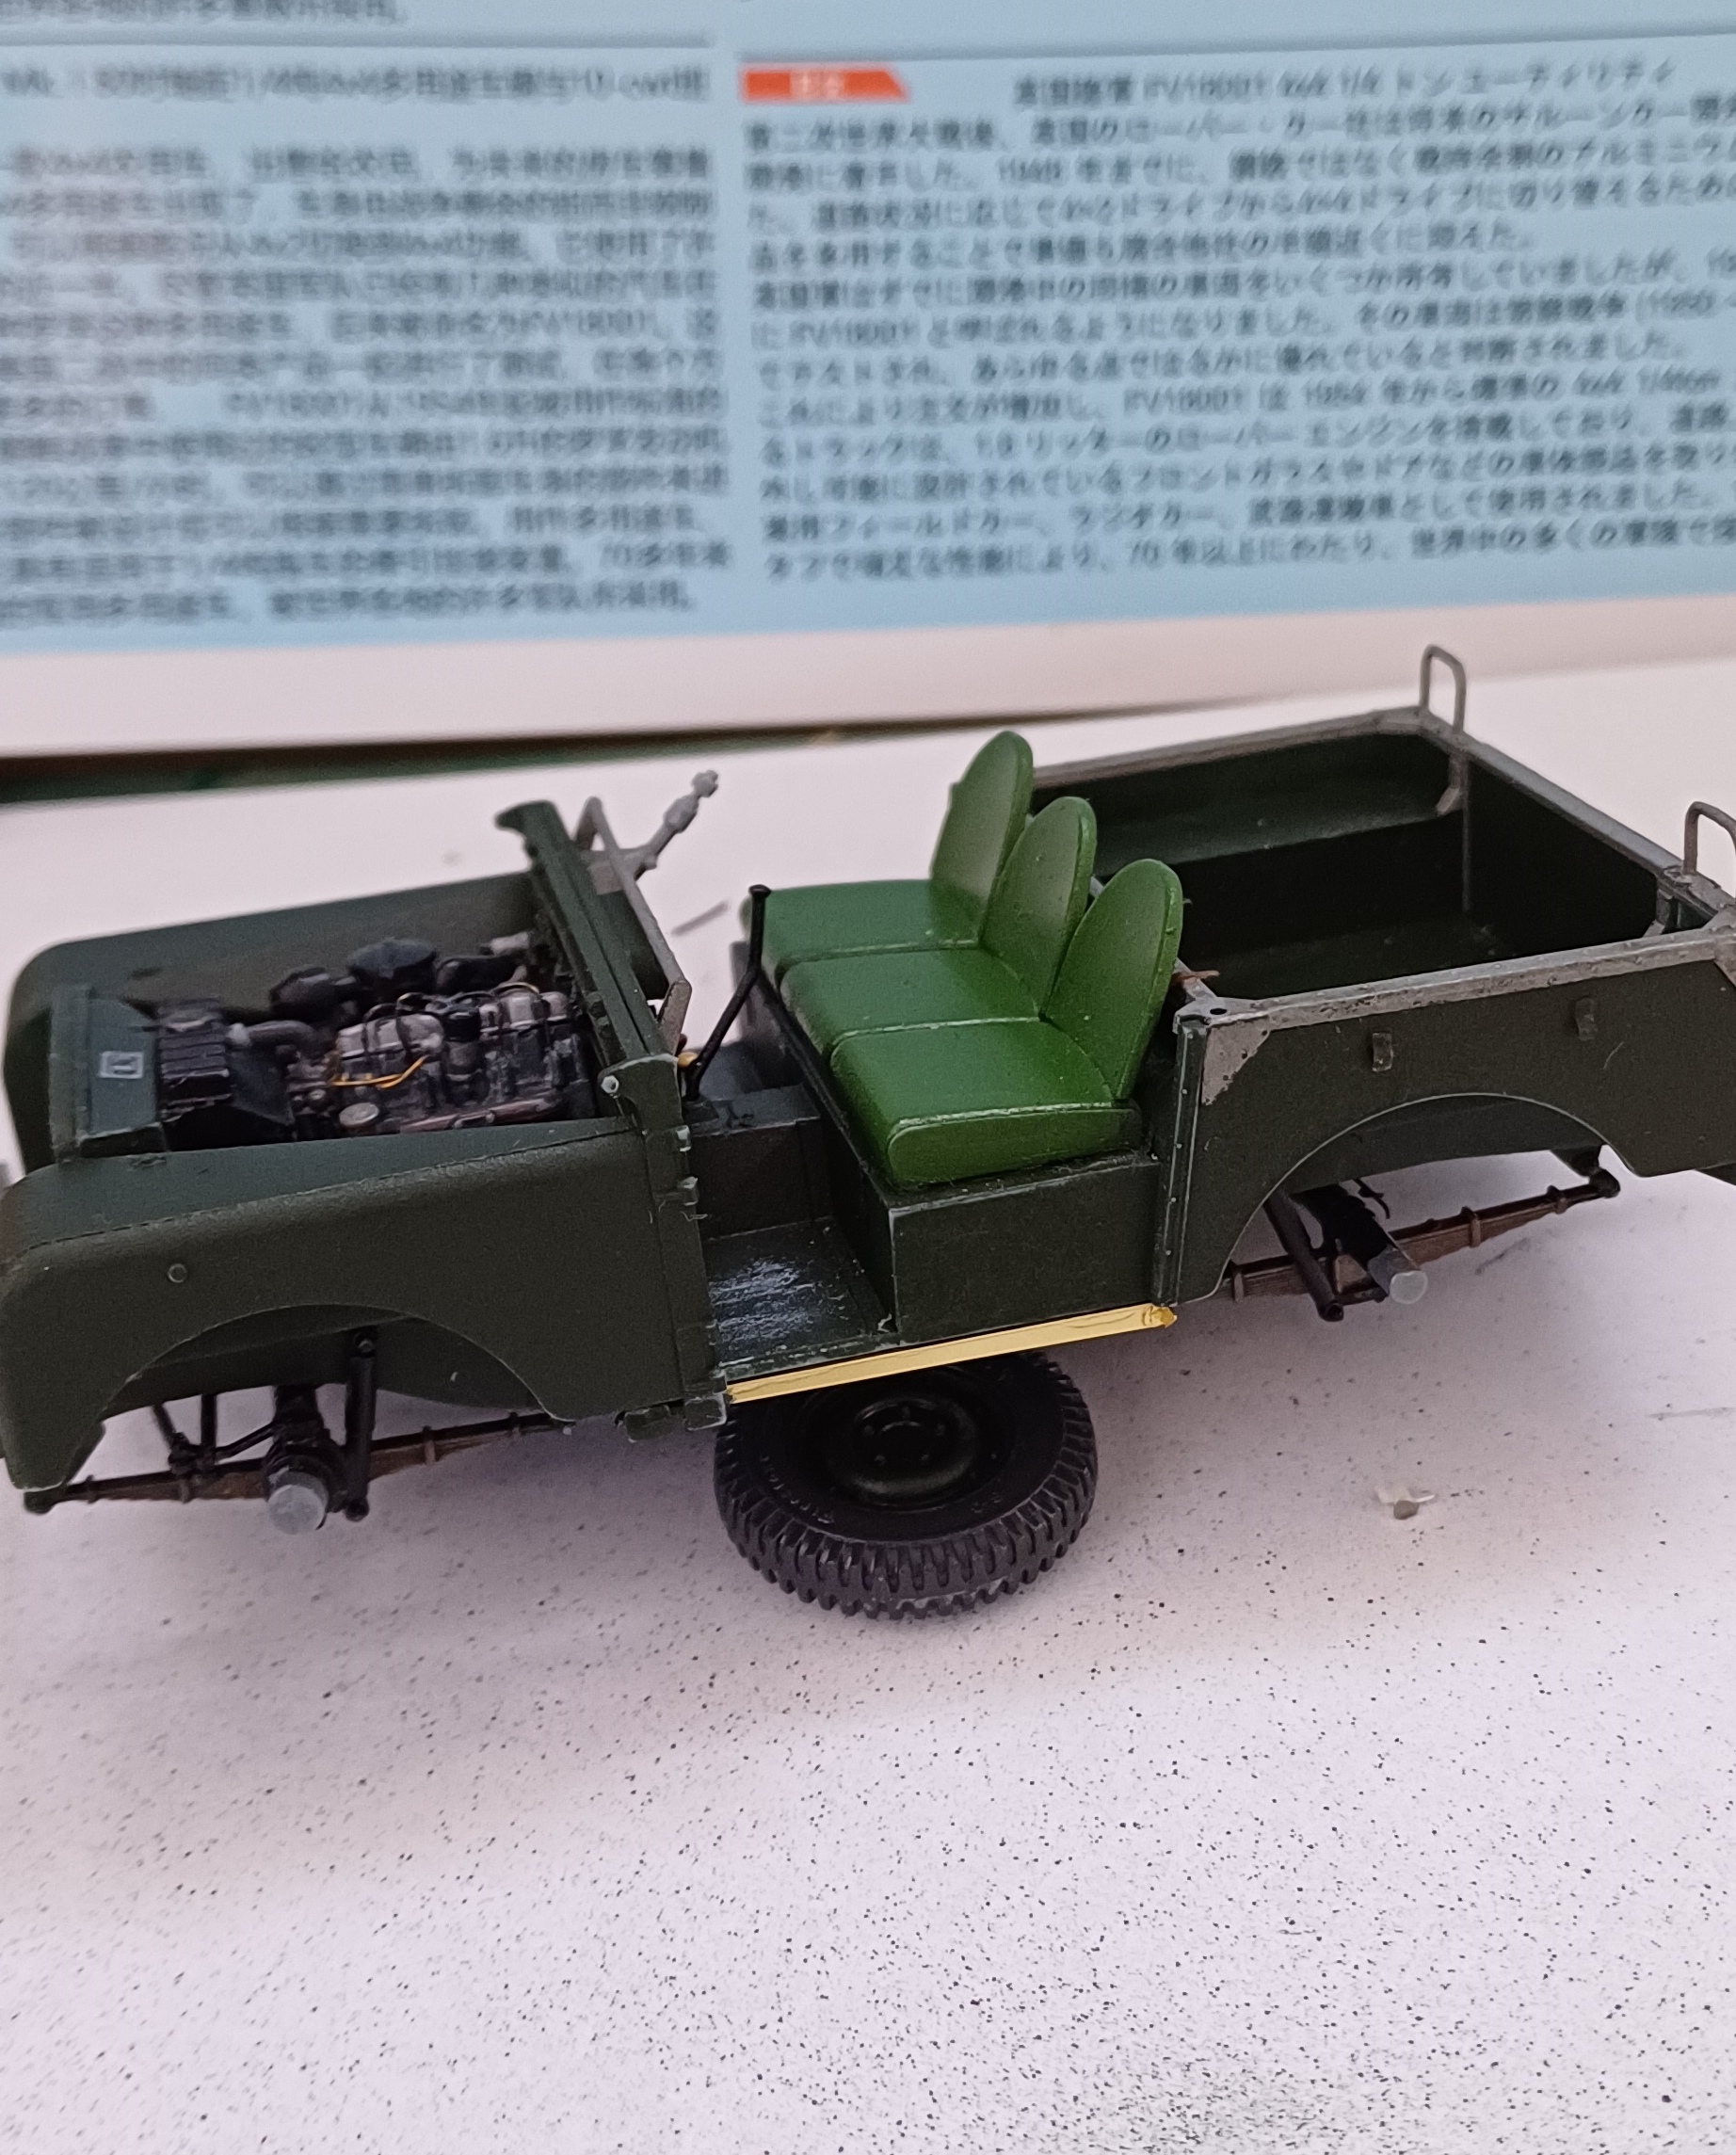
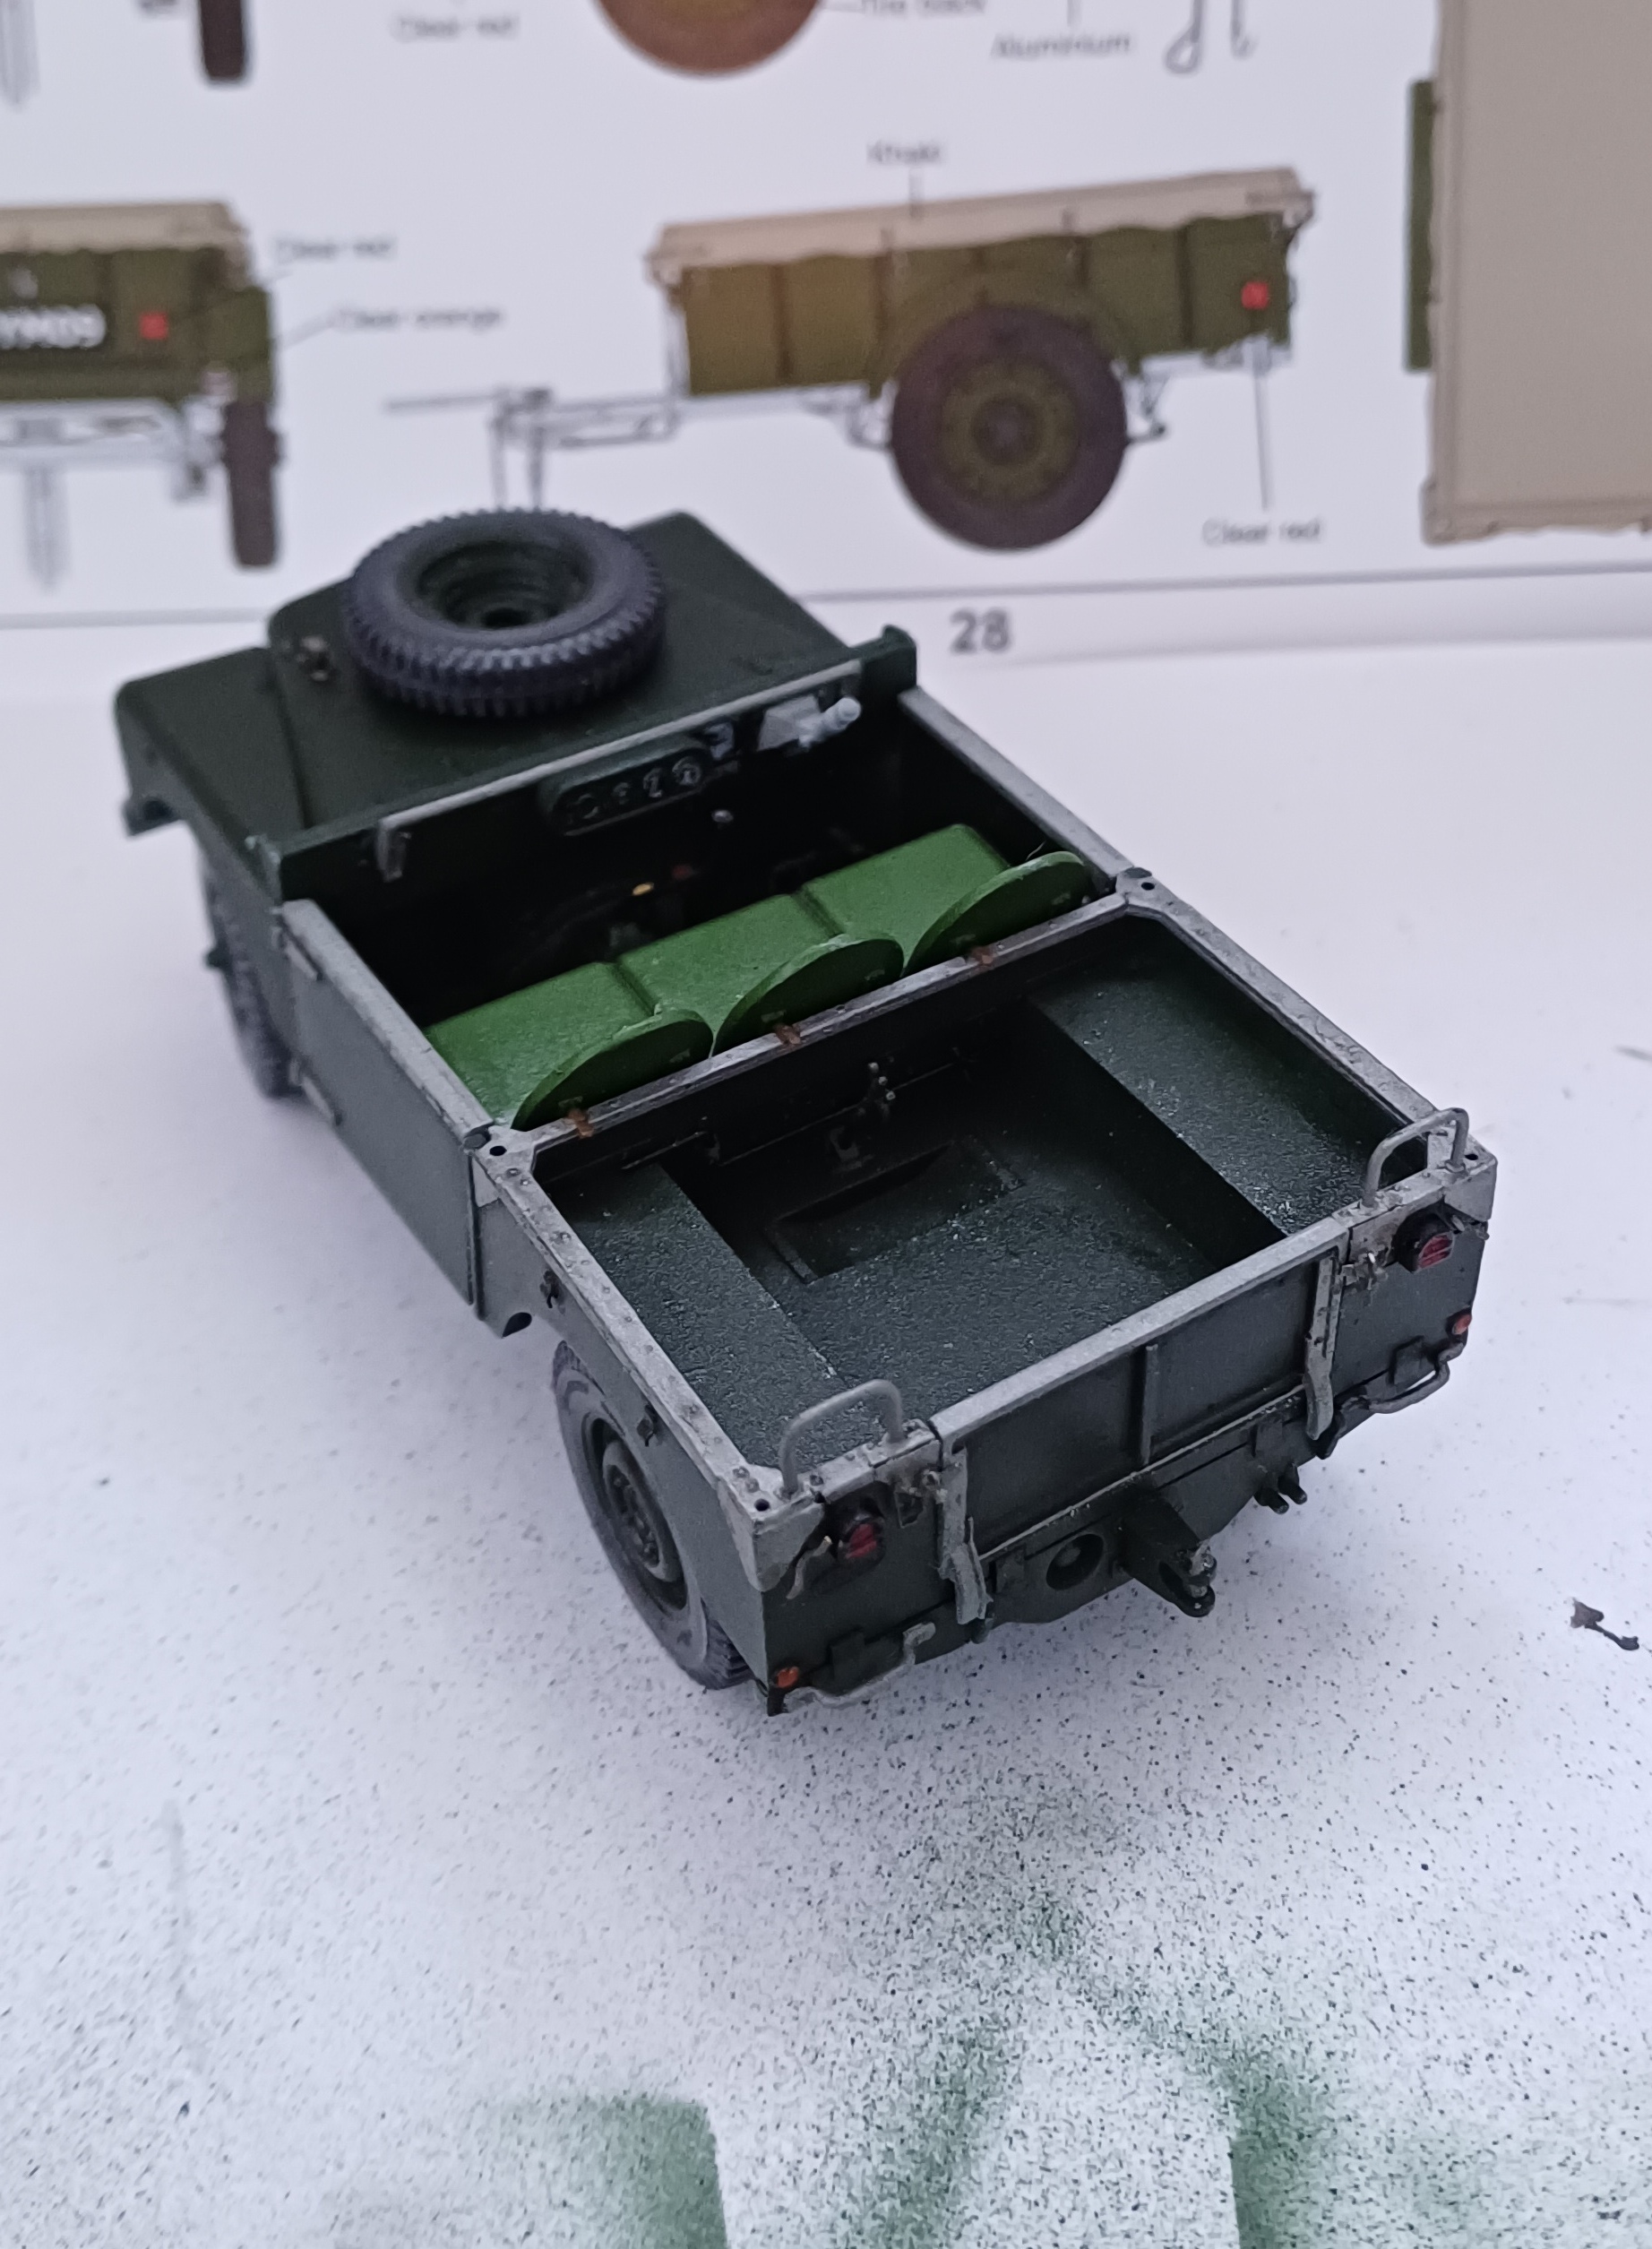
Thanks for the encouragement fellas. I’ve done a few bits on the loadbed, some etch on, handles and rear bumper etc. I’ve then went ahead and painted it, I realise that there are quite a few other parts need fitting but I find that painting assemblies and then adding parts after stops me making a hash of some details. I plan on having the tailgate down and it would be a pain painting it after it has been fitted. The seat colour looks a little lurid but it will tone down with a wash over it, but the real thing is quite a bright colour also and looking at it the paint is quite a good match.
10 Likes
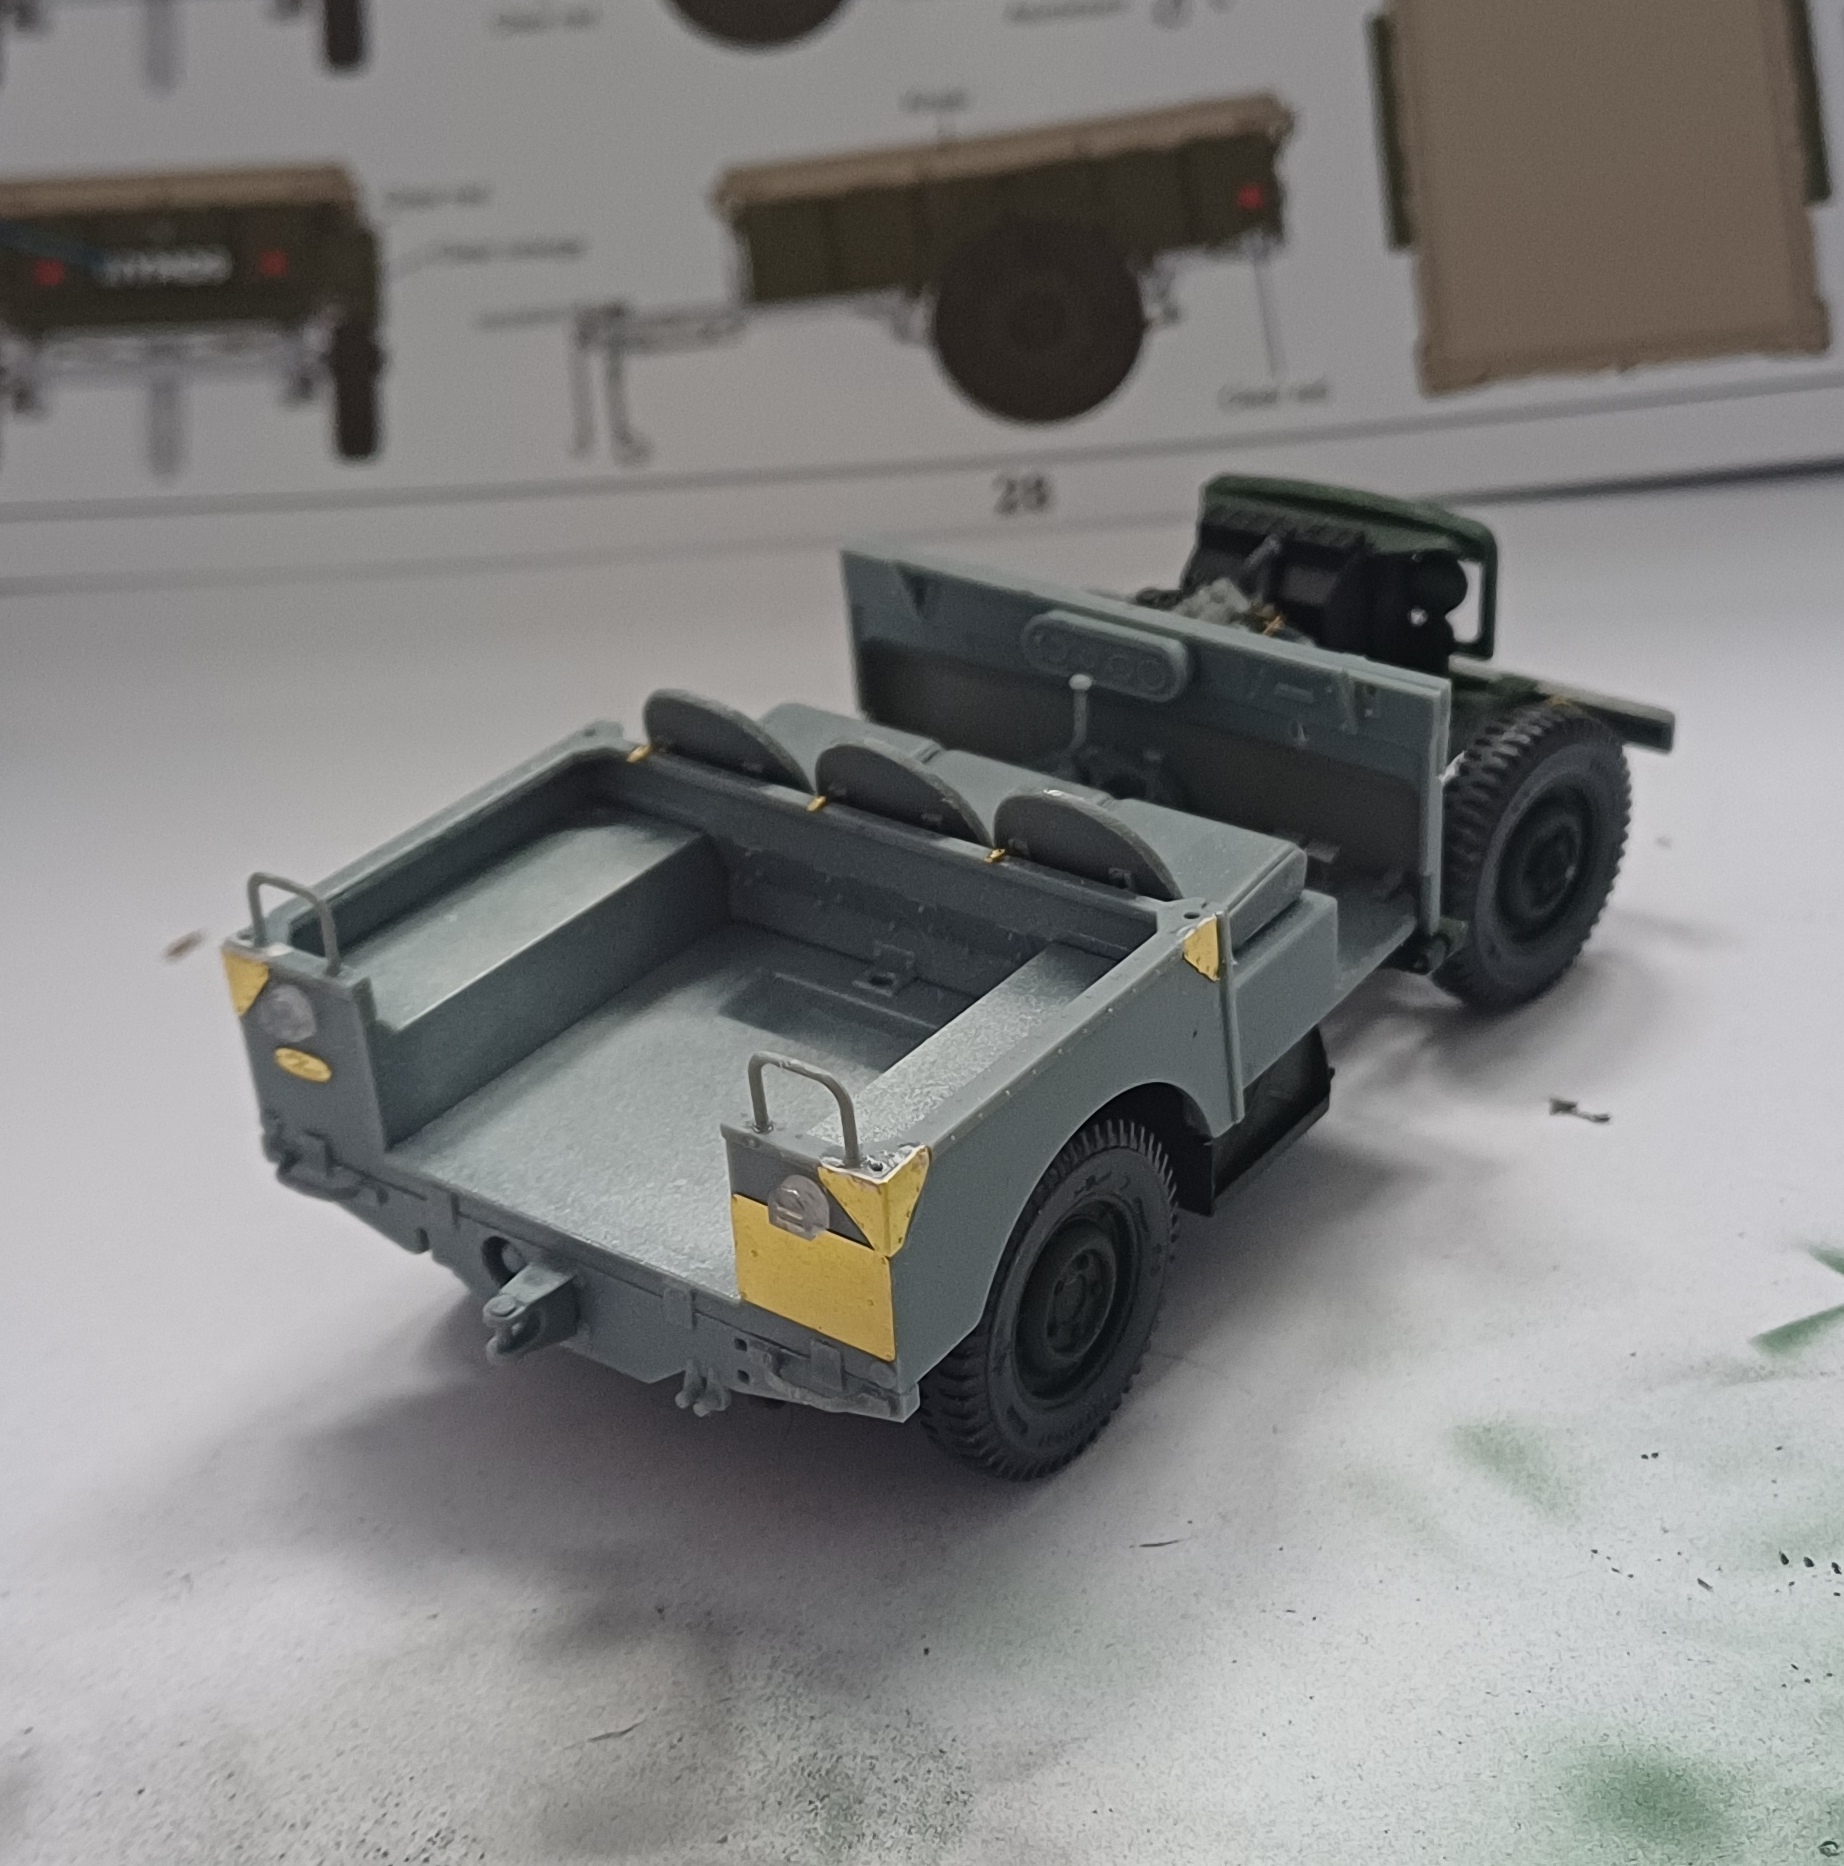
A few bits of detail painting done, mainly the galvanised steel sections on the loadbed. I forgot to mention earlier that when I fitted the corner strengtheners I found it necessary to cut into the steel rail slightly so the etch piece fit flush with the rail, otherwise a gap was present between the etch piece and the styrene rear side panel section. You can see what I mean below.
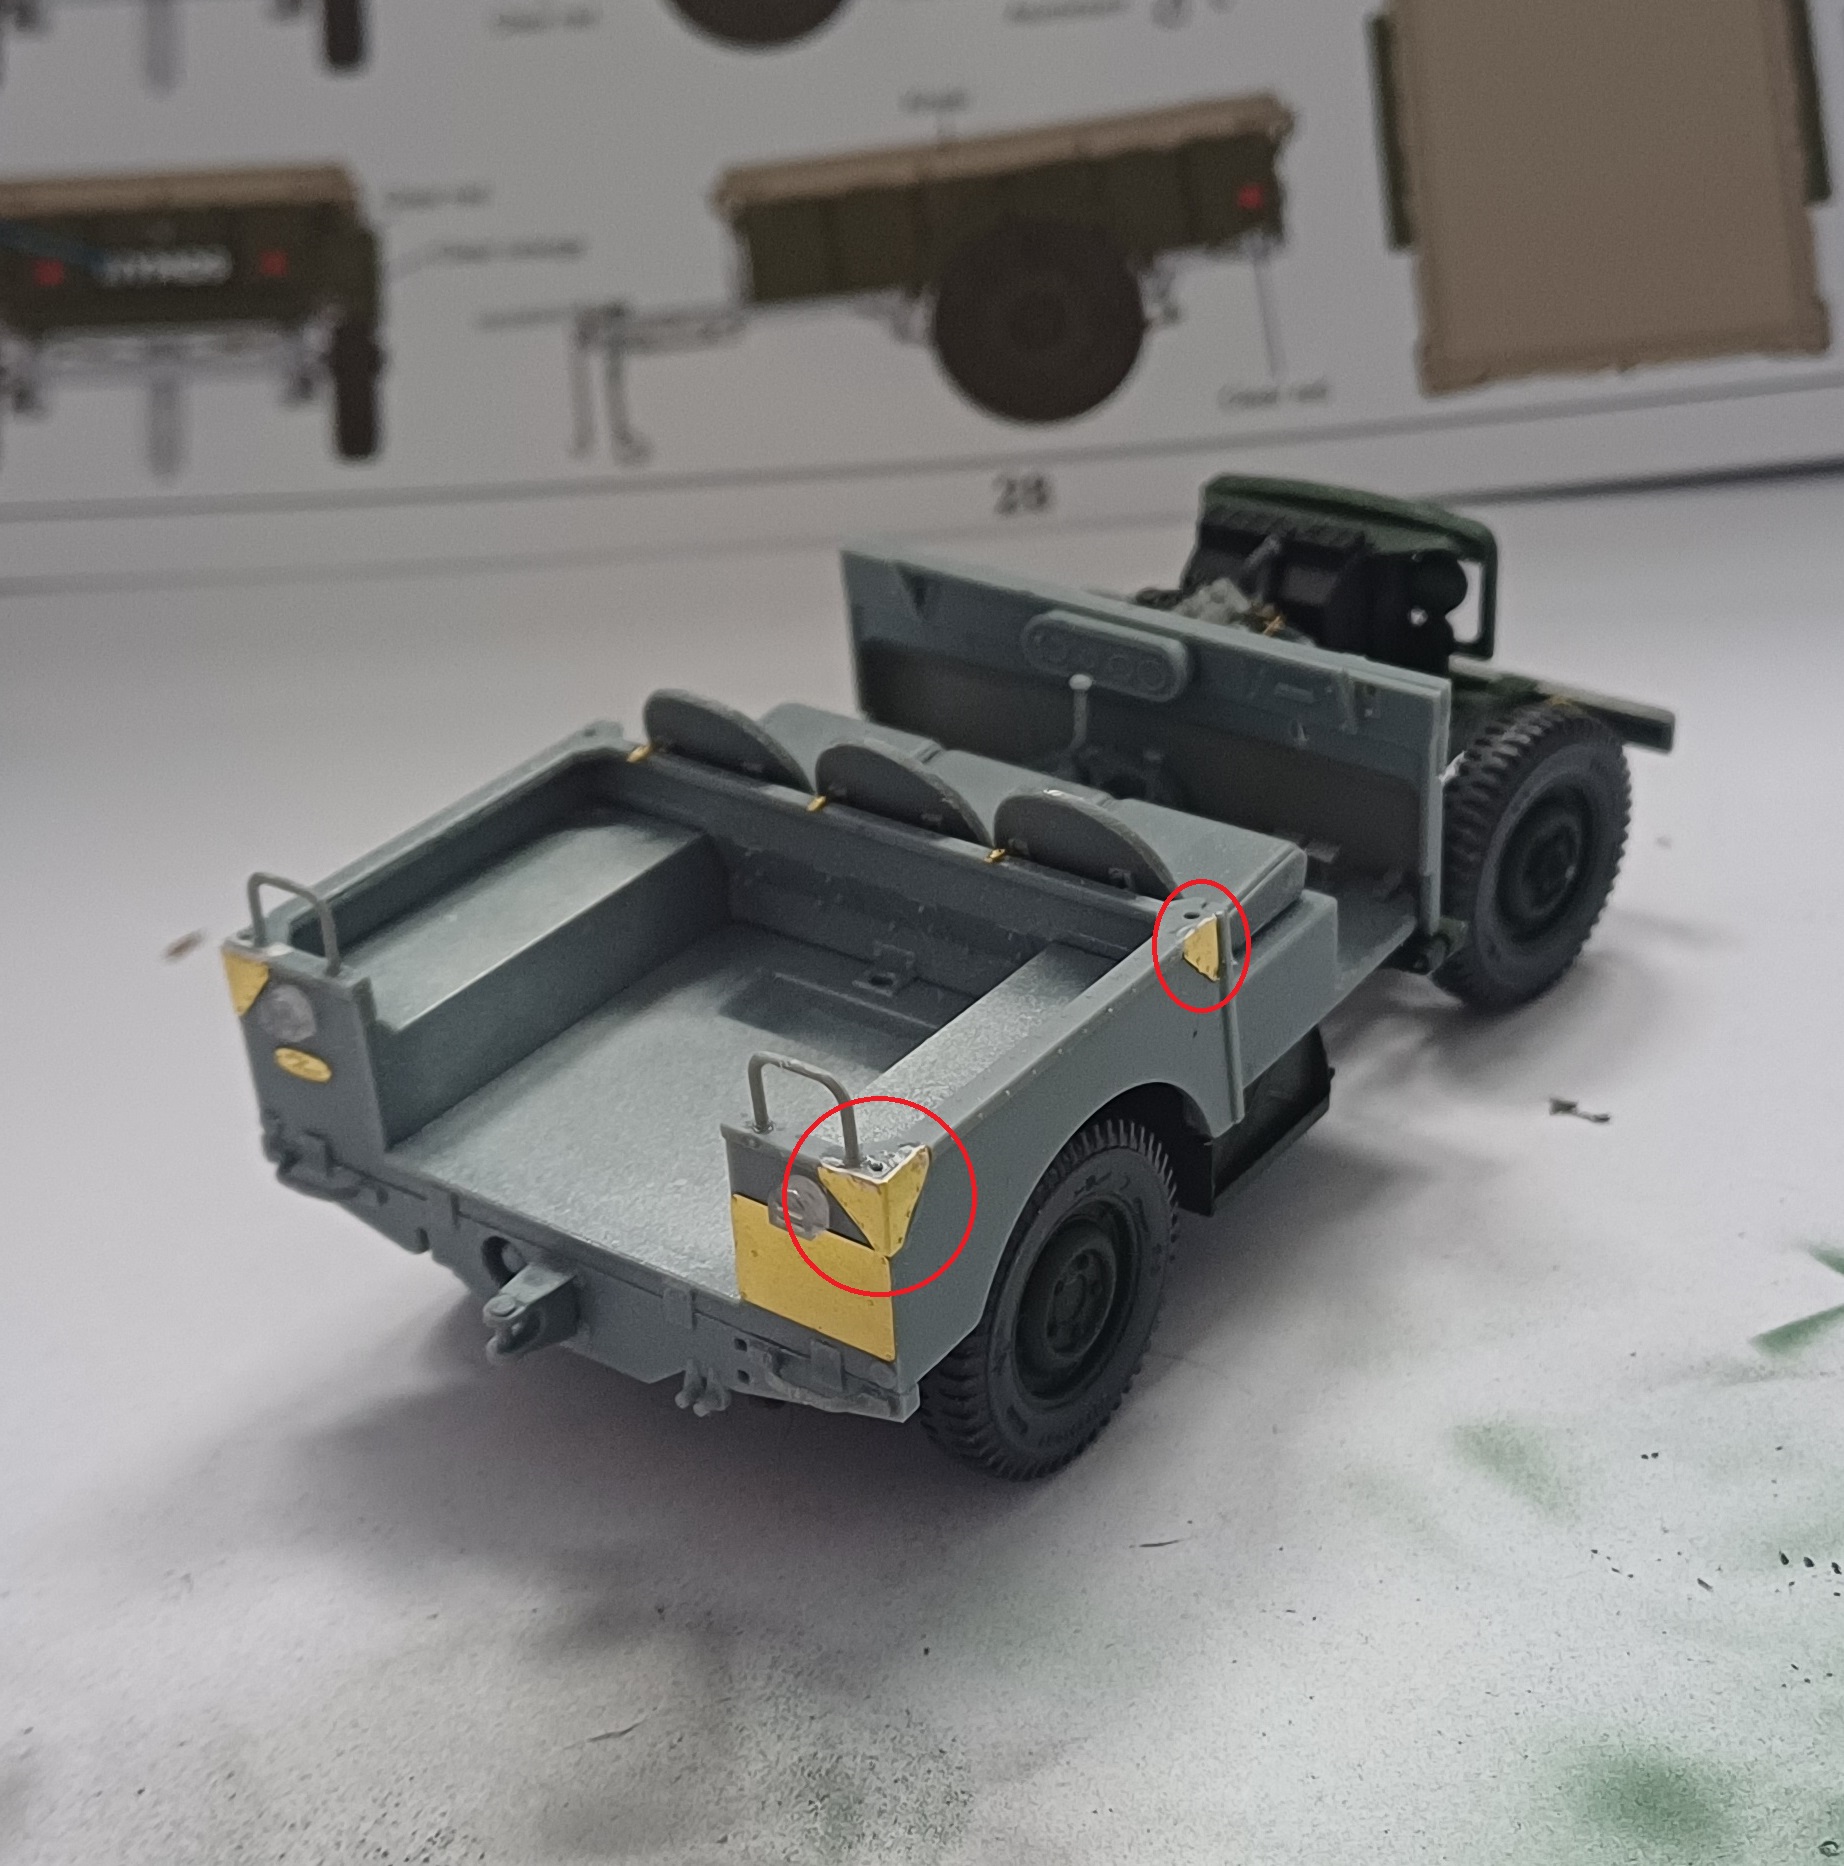
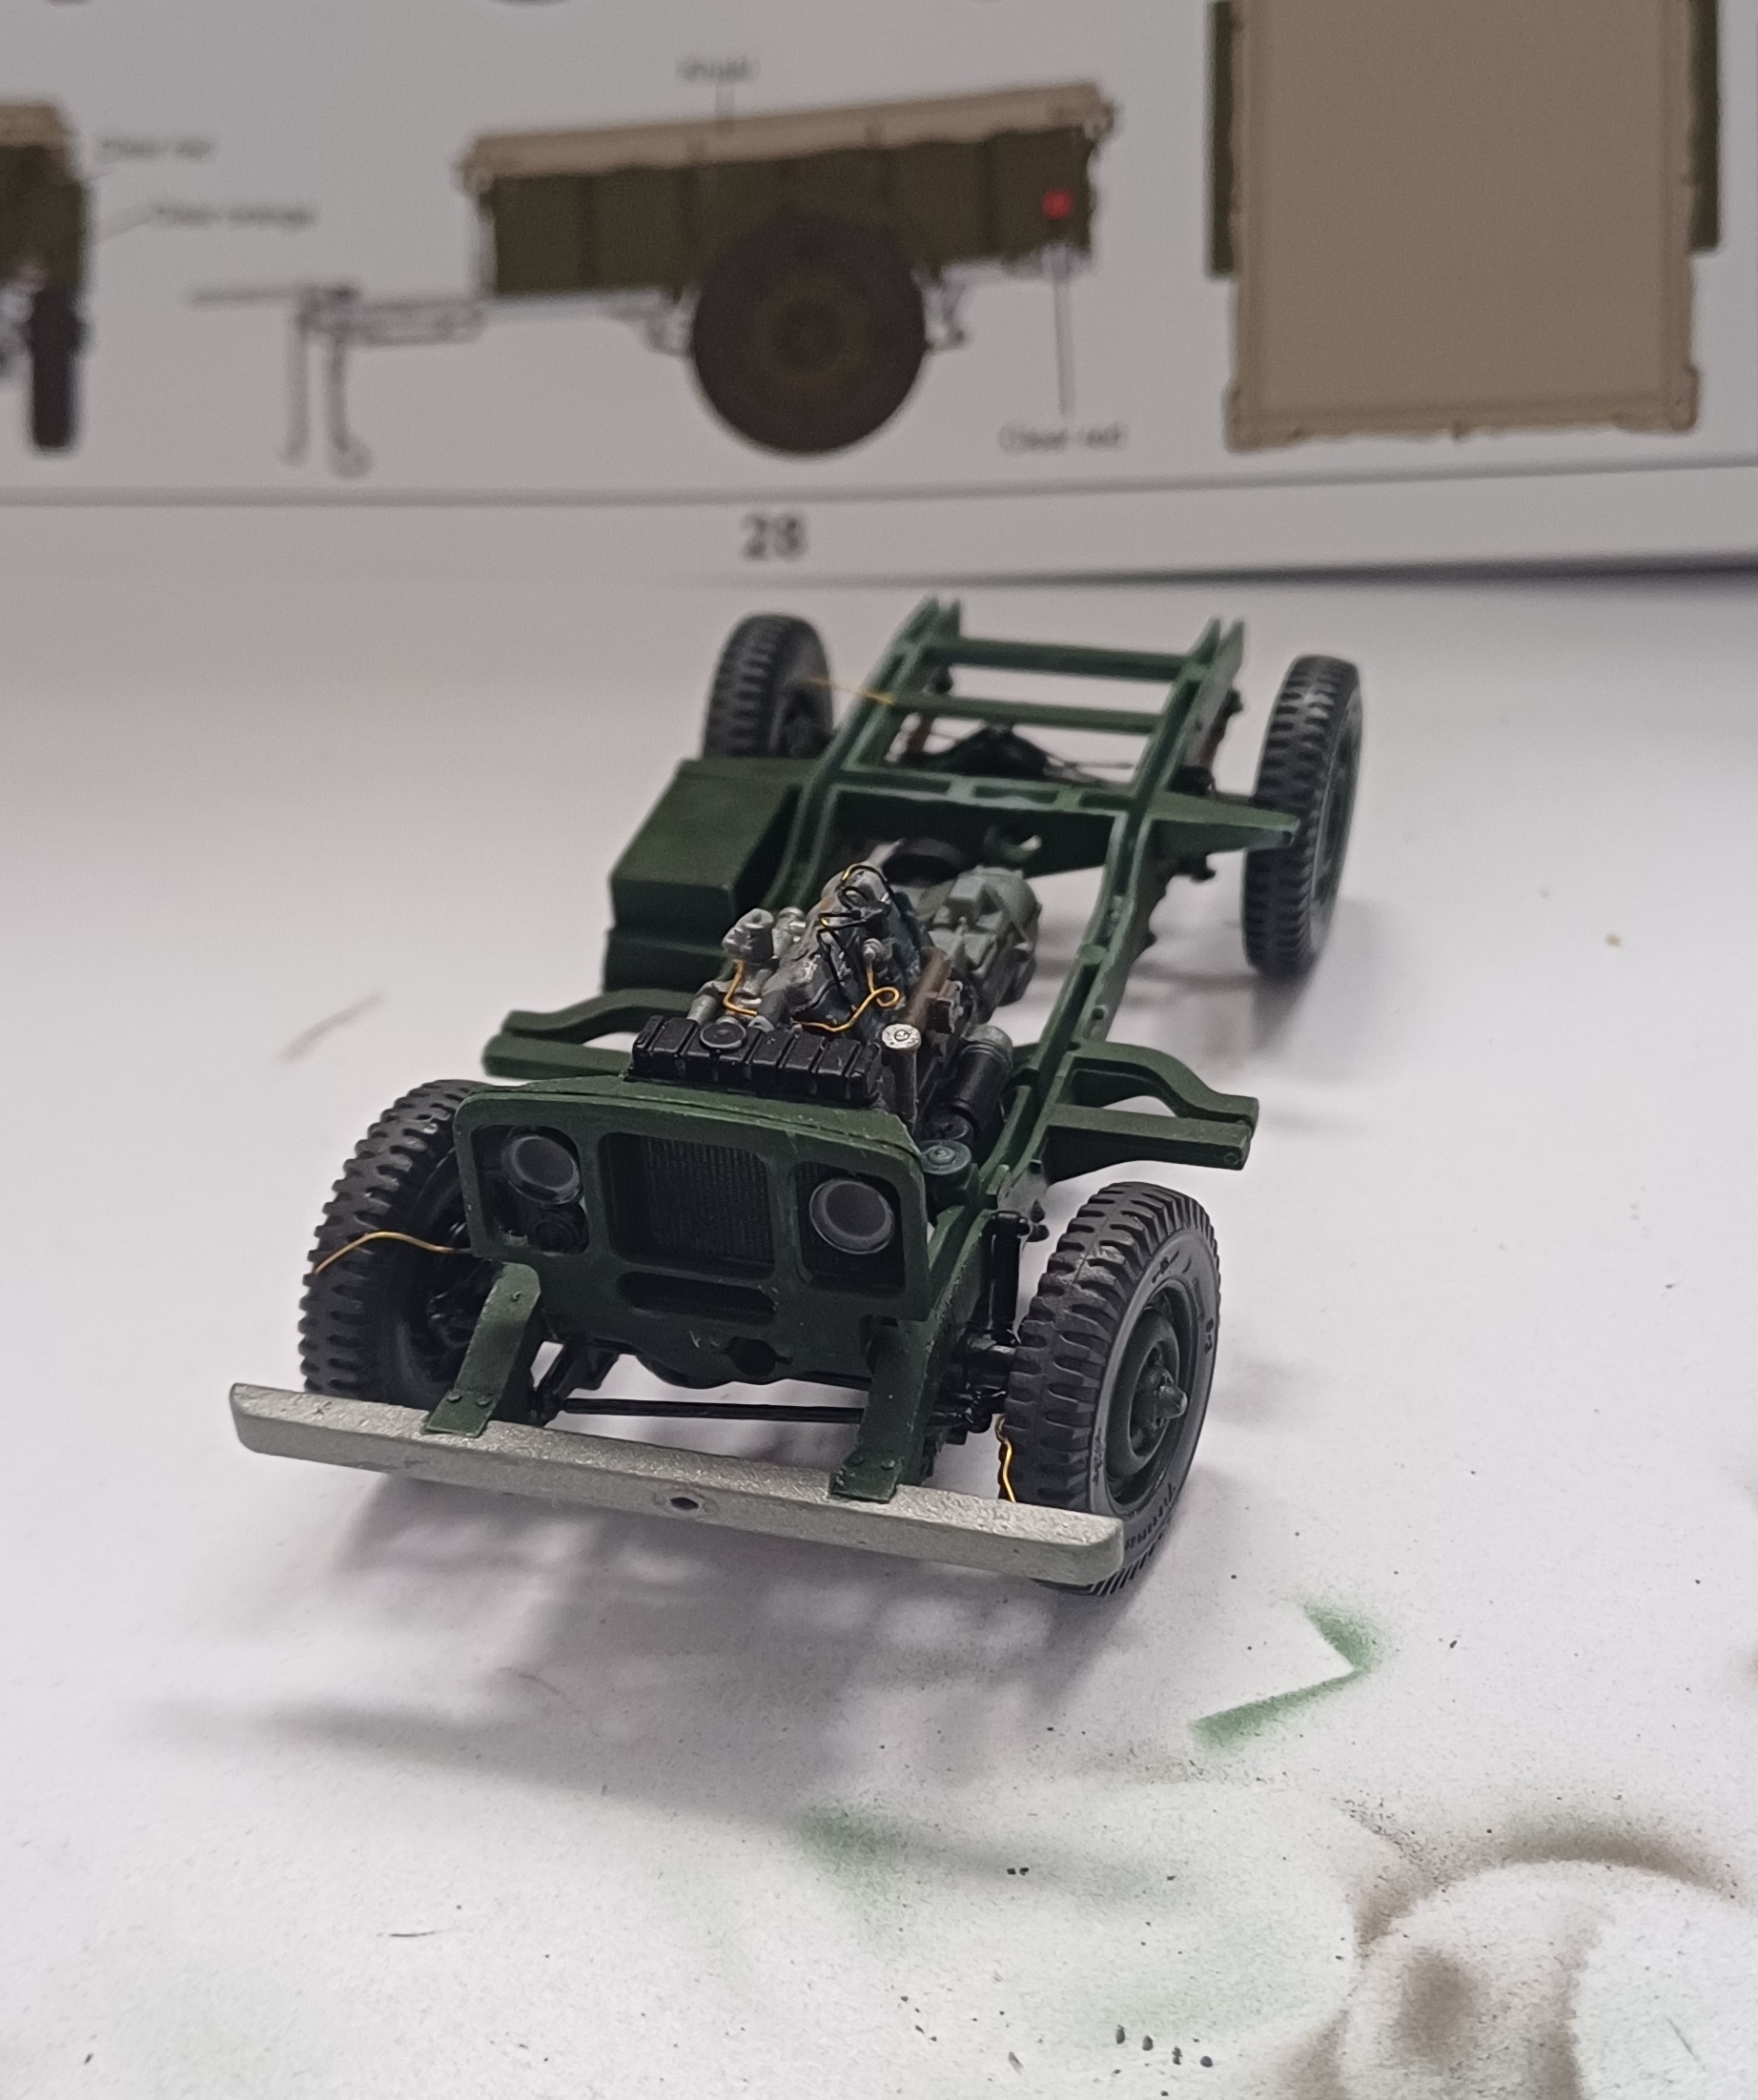
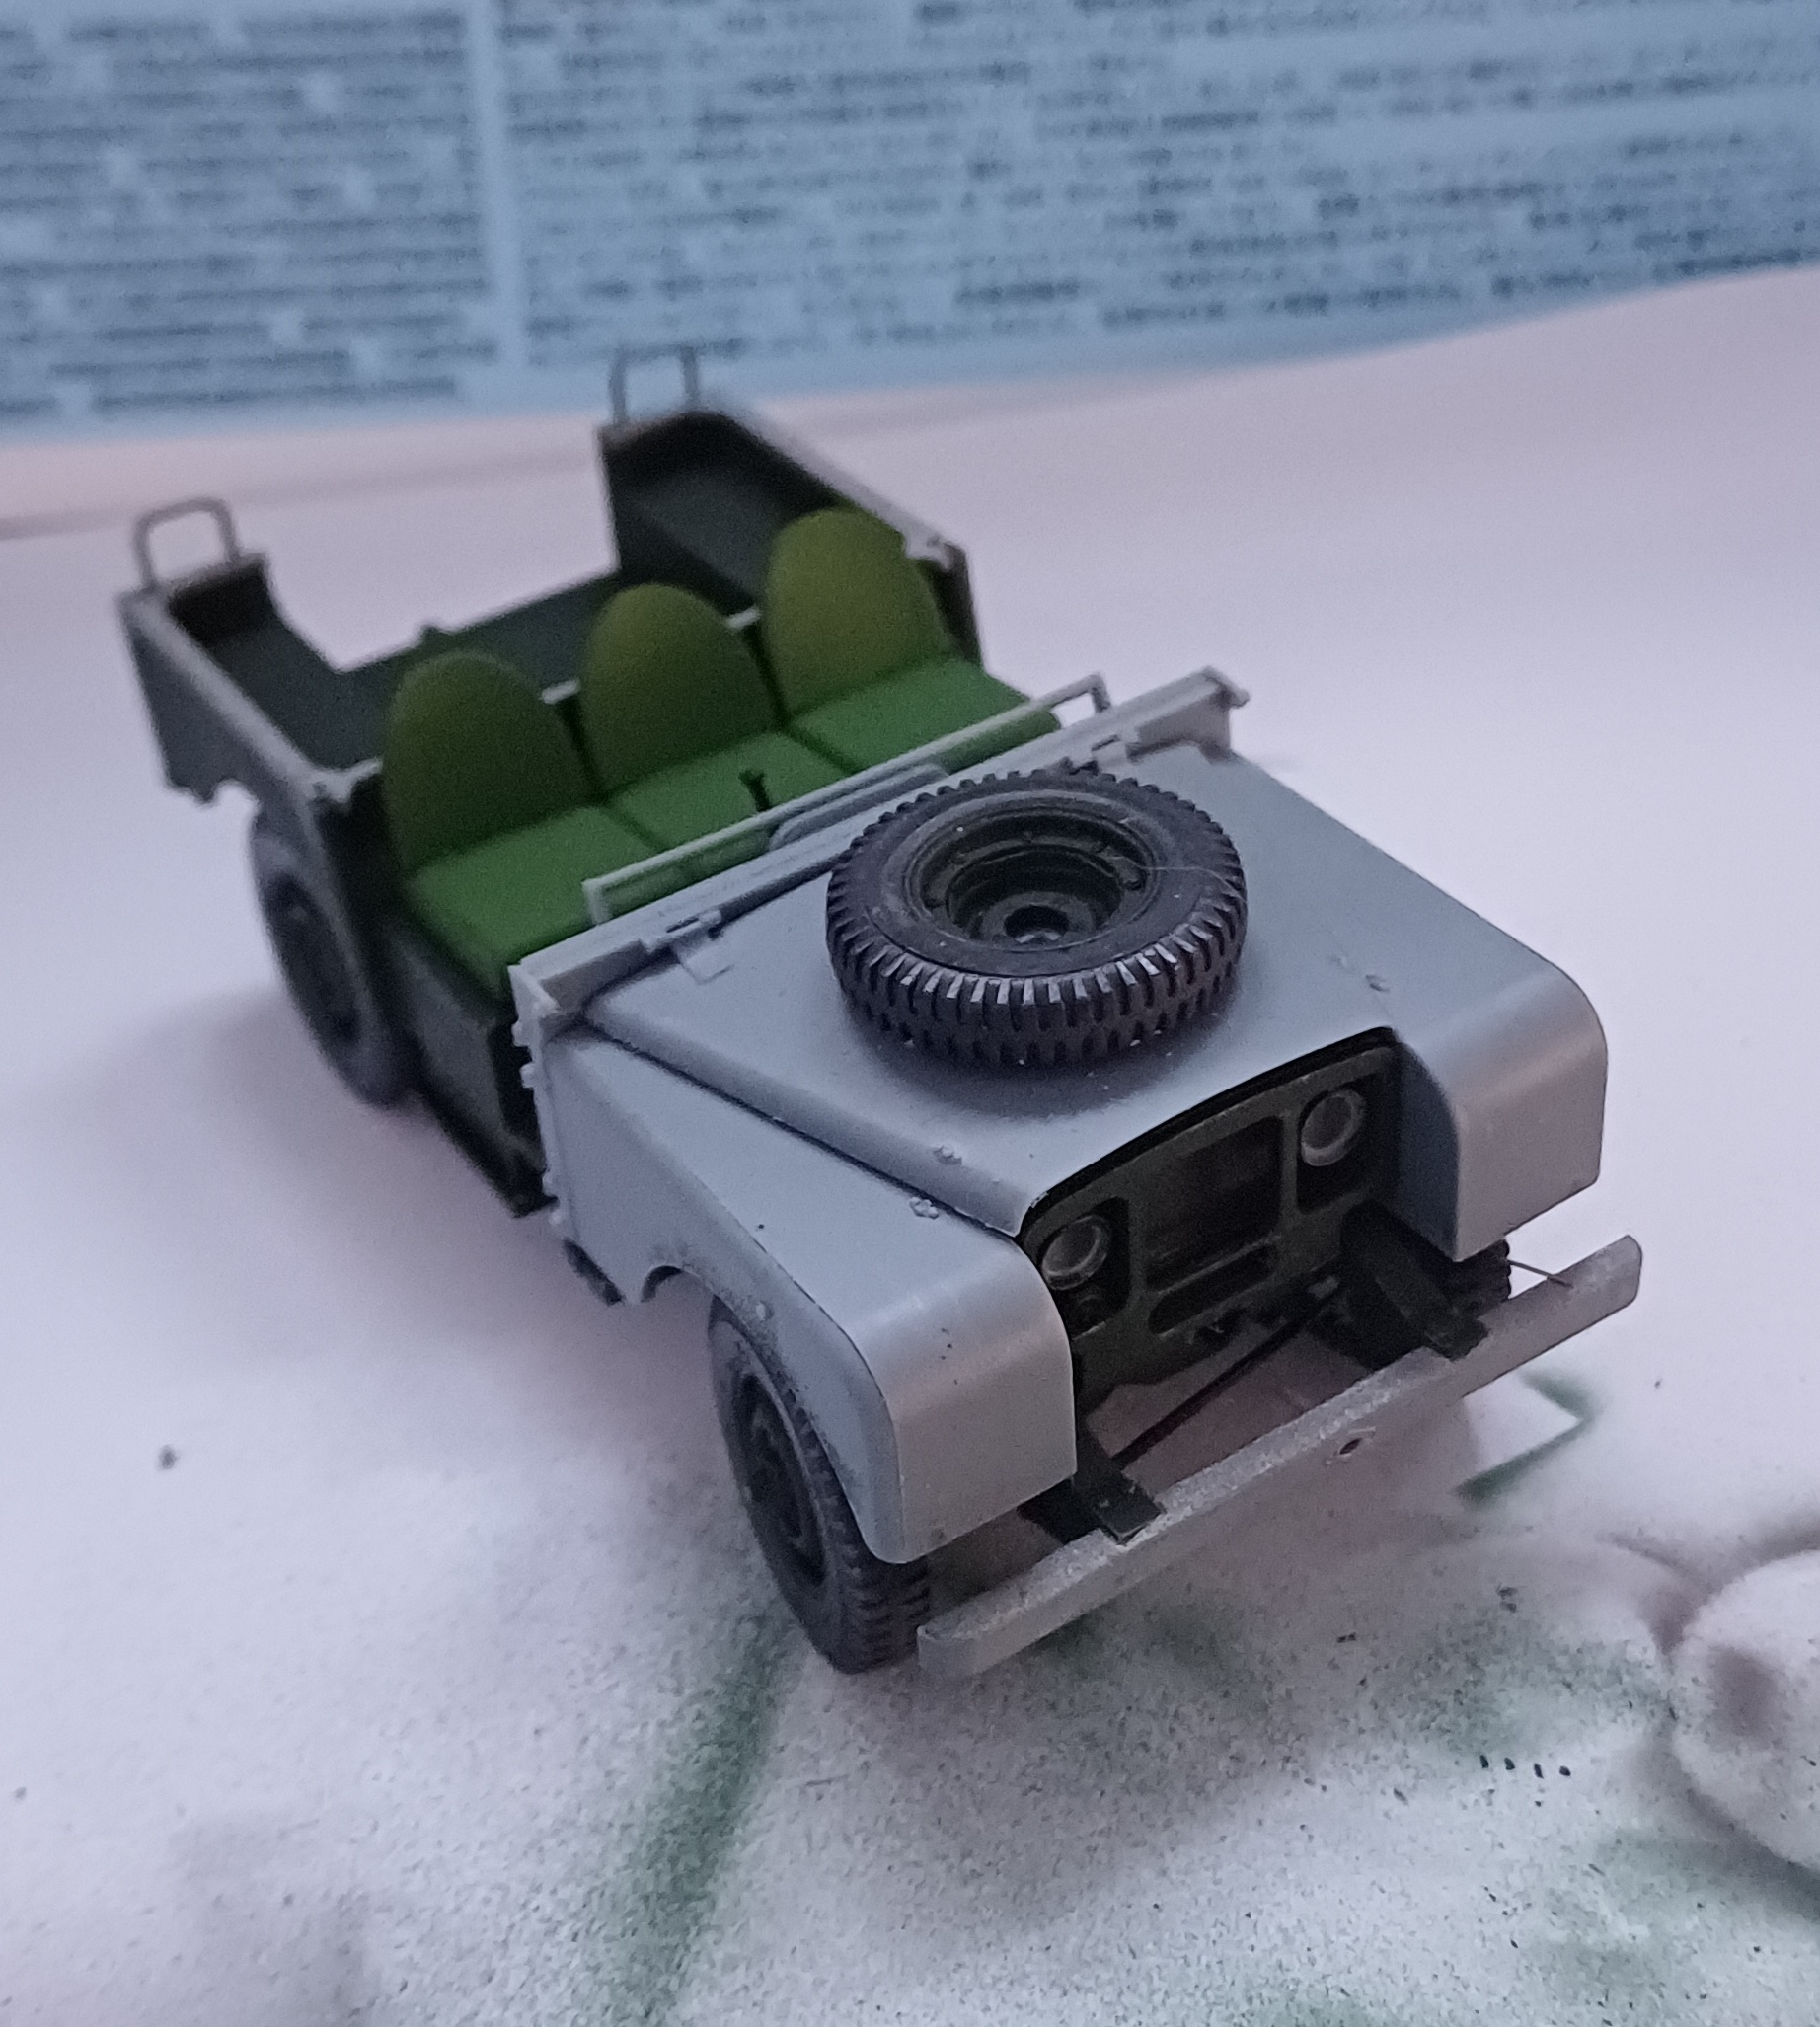
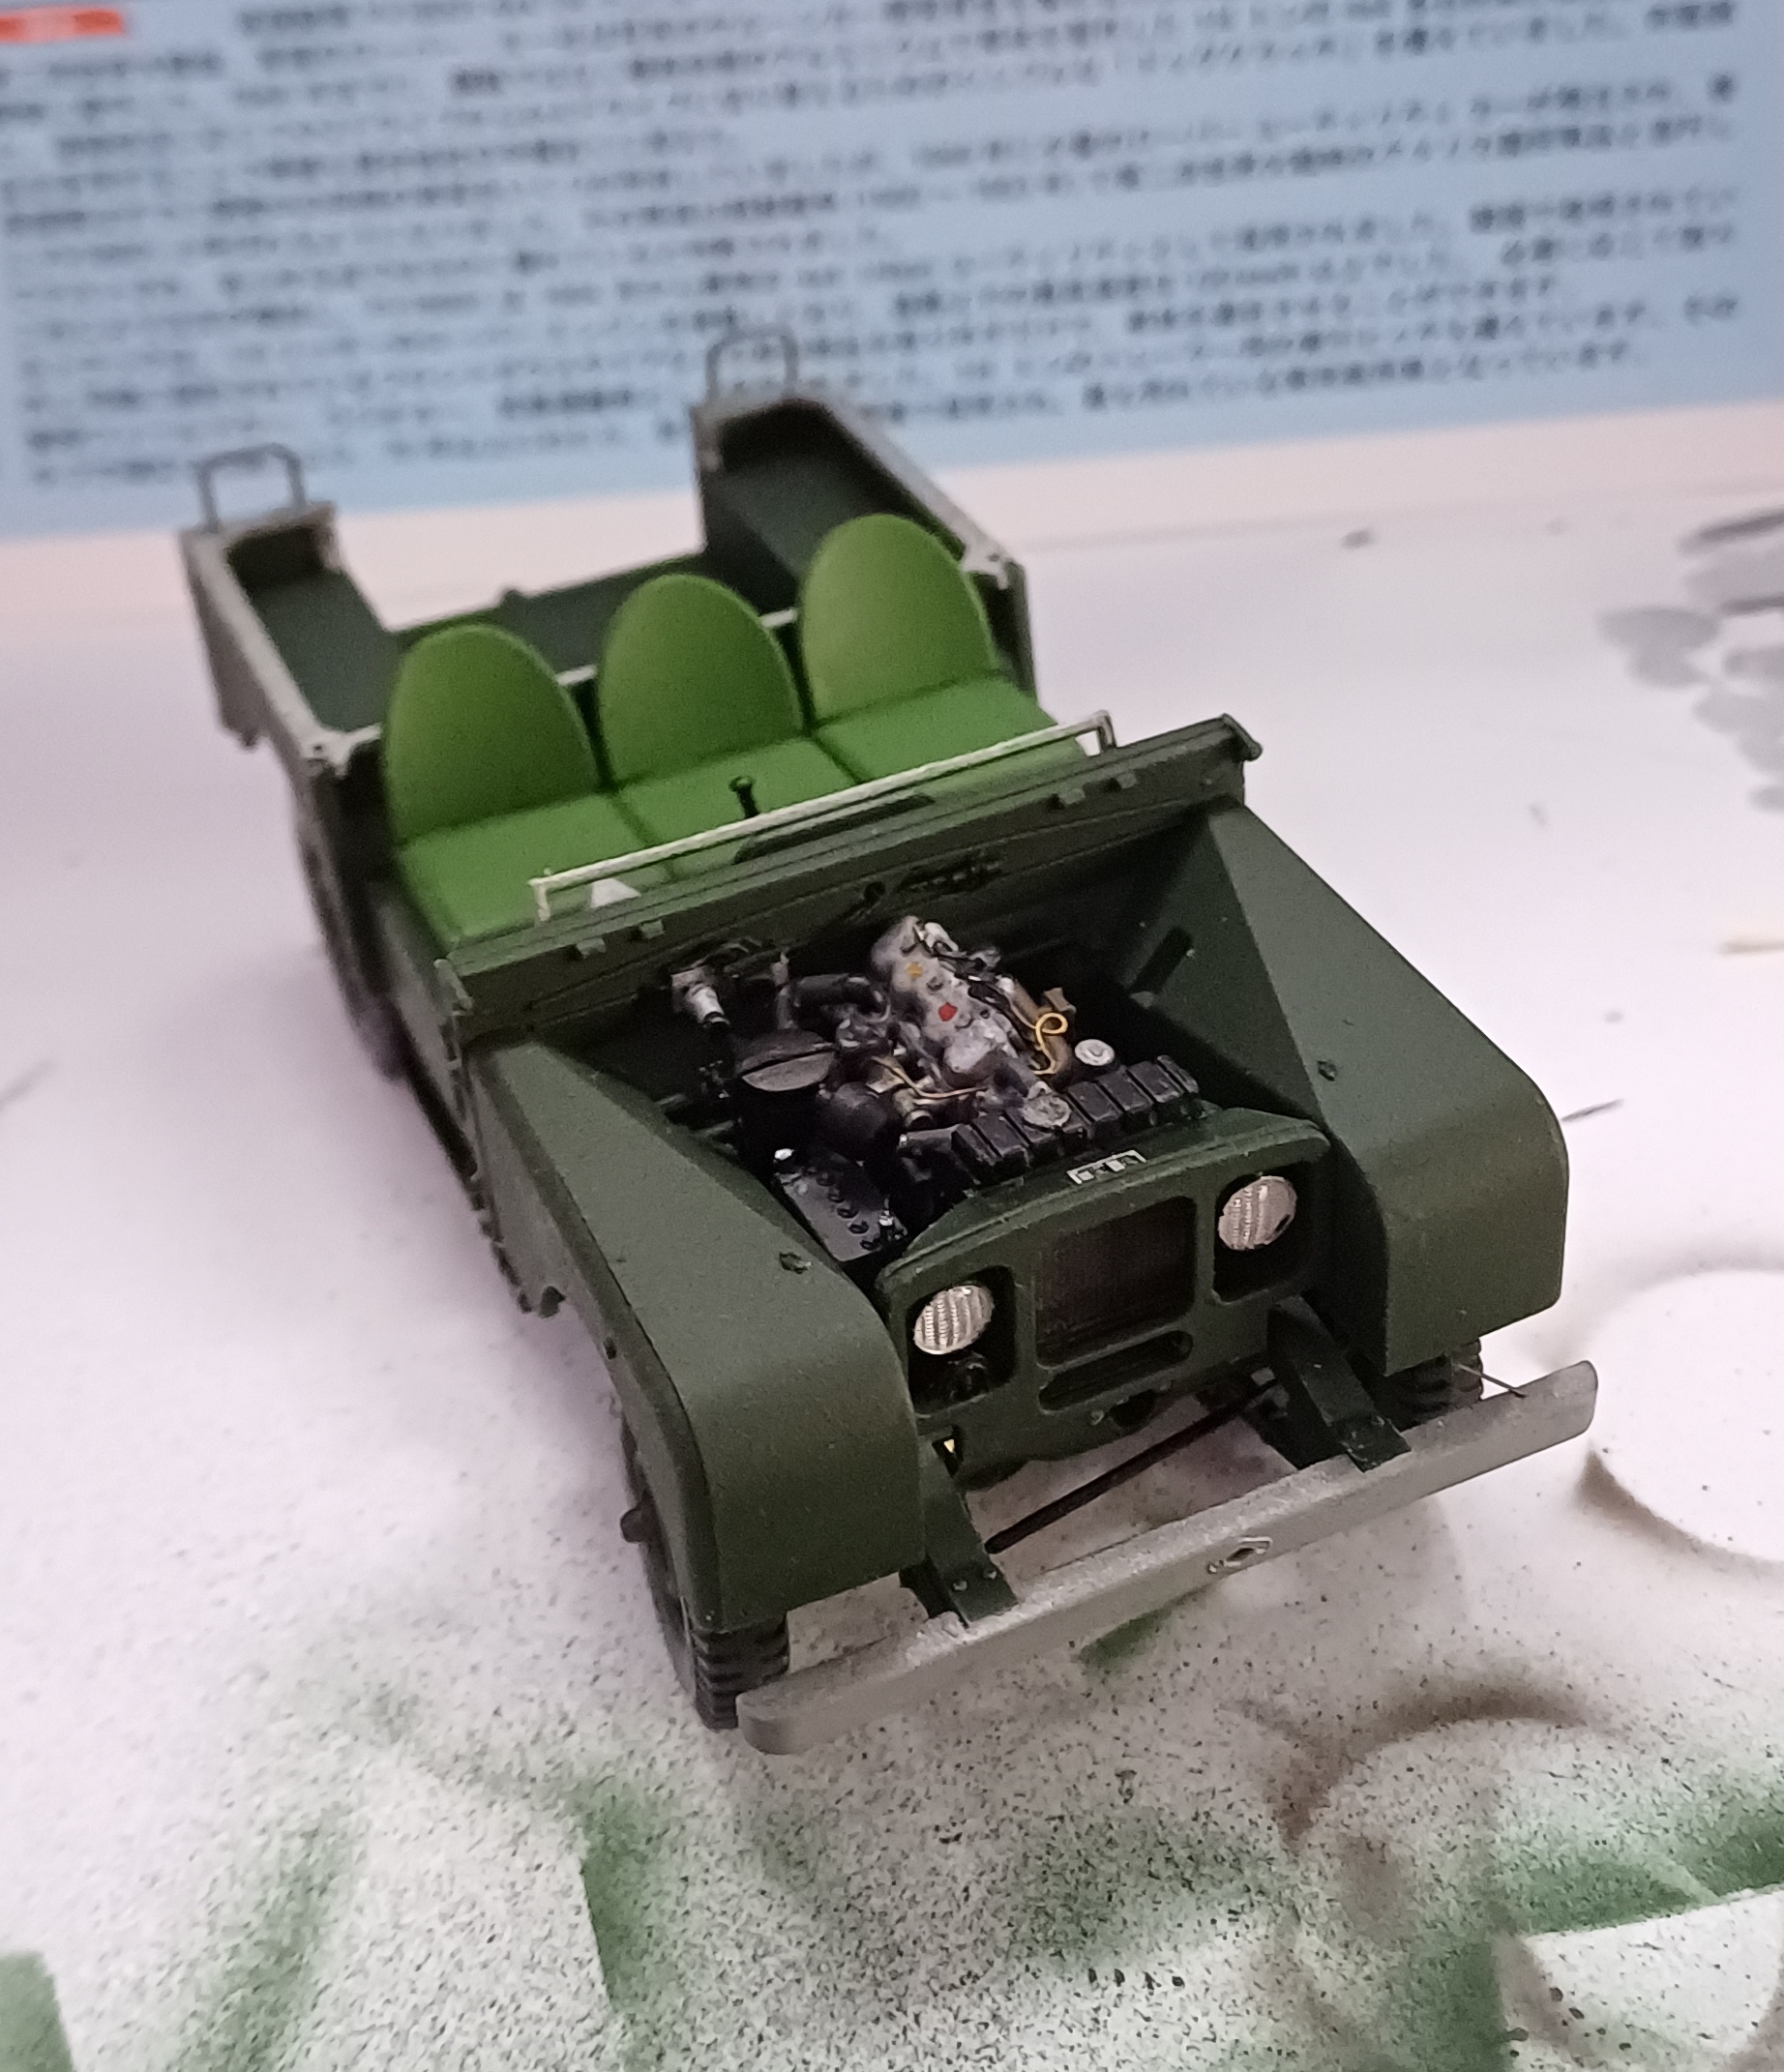
I‘ve also attached the front wings to the bulkhead and have the bonnet and spare wheel plonked on there to see what it looked like. I’ll do some scratch work inside the engine bay, fuel pump, coil etc. before painting it attaching it as another sub assembly. Once it’s on the associated piping and wiring will be done.
12 Likes
Looking good G, and the seats are very nicely colour matched as well … nice ![]()
2 Likes
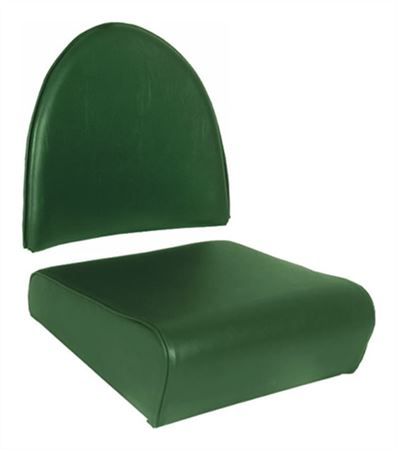
Great job mate the seat shape makes a great difference to the look and period correct which is alway satisfying..well for me anyway
2 Likes
Thanks Johnny it’s getting there slowly but surely. The seat backs were a make or break thing for me Barny, the scope for me producing three backs of differing dimensions was quite large
2 Likes
Three seats in the front of a Lannie? Luxury!
Admittedly the vehicles I used were of a far more modern vintage but I do remember so well, the dip between the two front seats as I laid out my sleeping bag and tried, without much success - to accommodate my form to the space provided. We never, ever had that gap filled with a seat/cushion, and I so wish we had.
And depending on the environment, including weather, one’s feet, or even head, with the doors open, would ensure that any protruding extremities would end up soaked.
How the hell did we survive all that? Answer: we were young!
3 Likes
Heartache to heartache, you stood?
2 Likes
Indeed we did!
PS: Actually a fan of that song(!)
2 Likes
The term “sleep on a budgies lip” comes to mind!
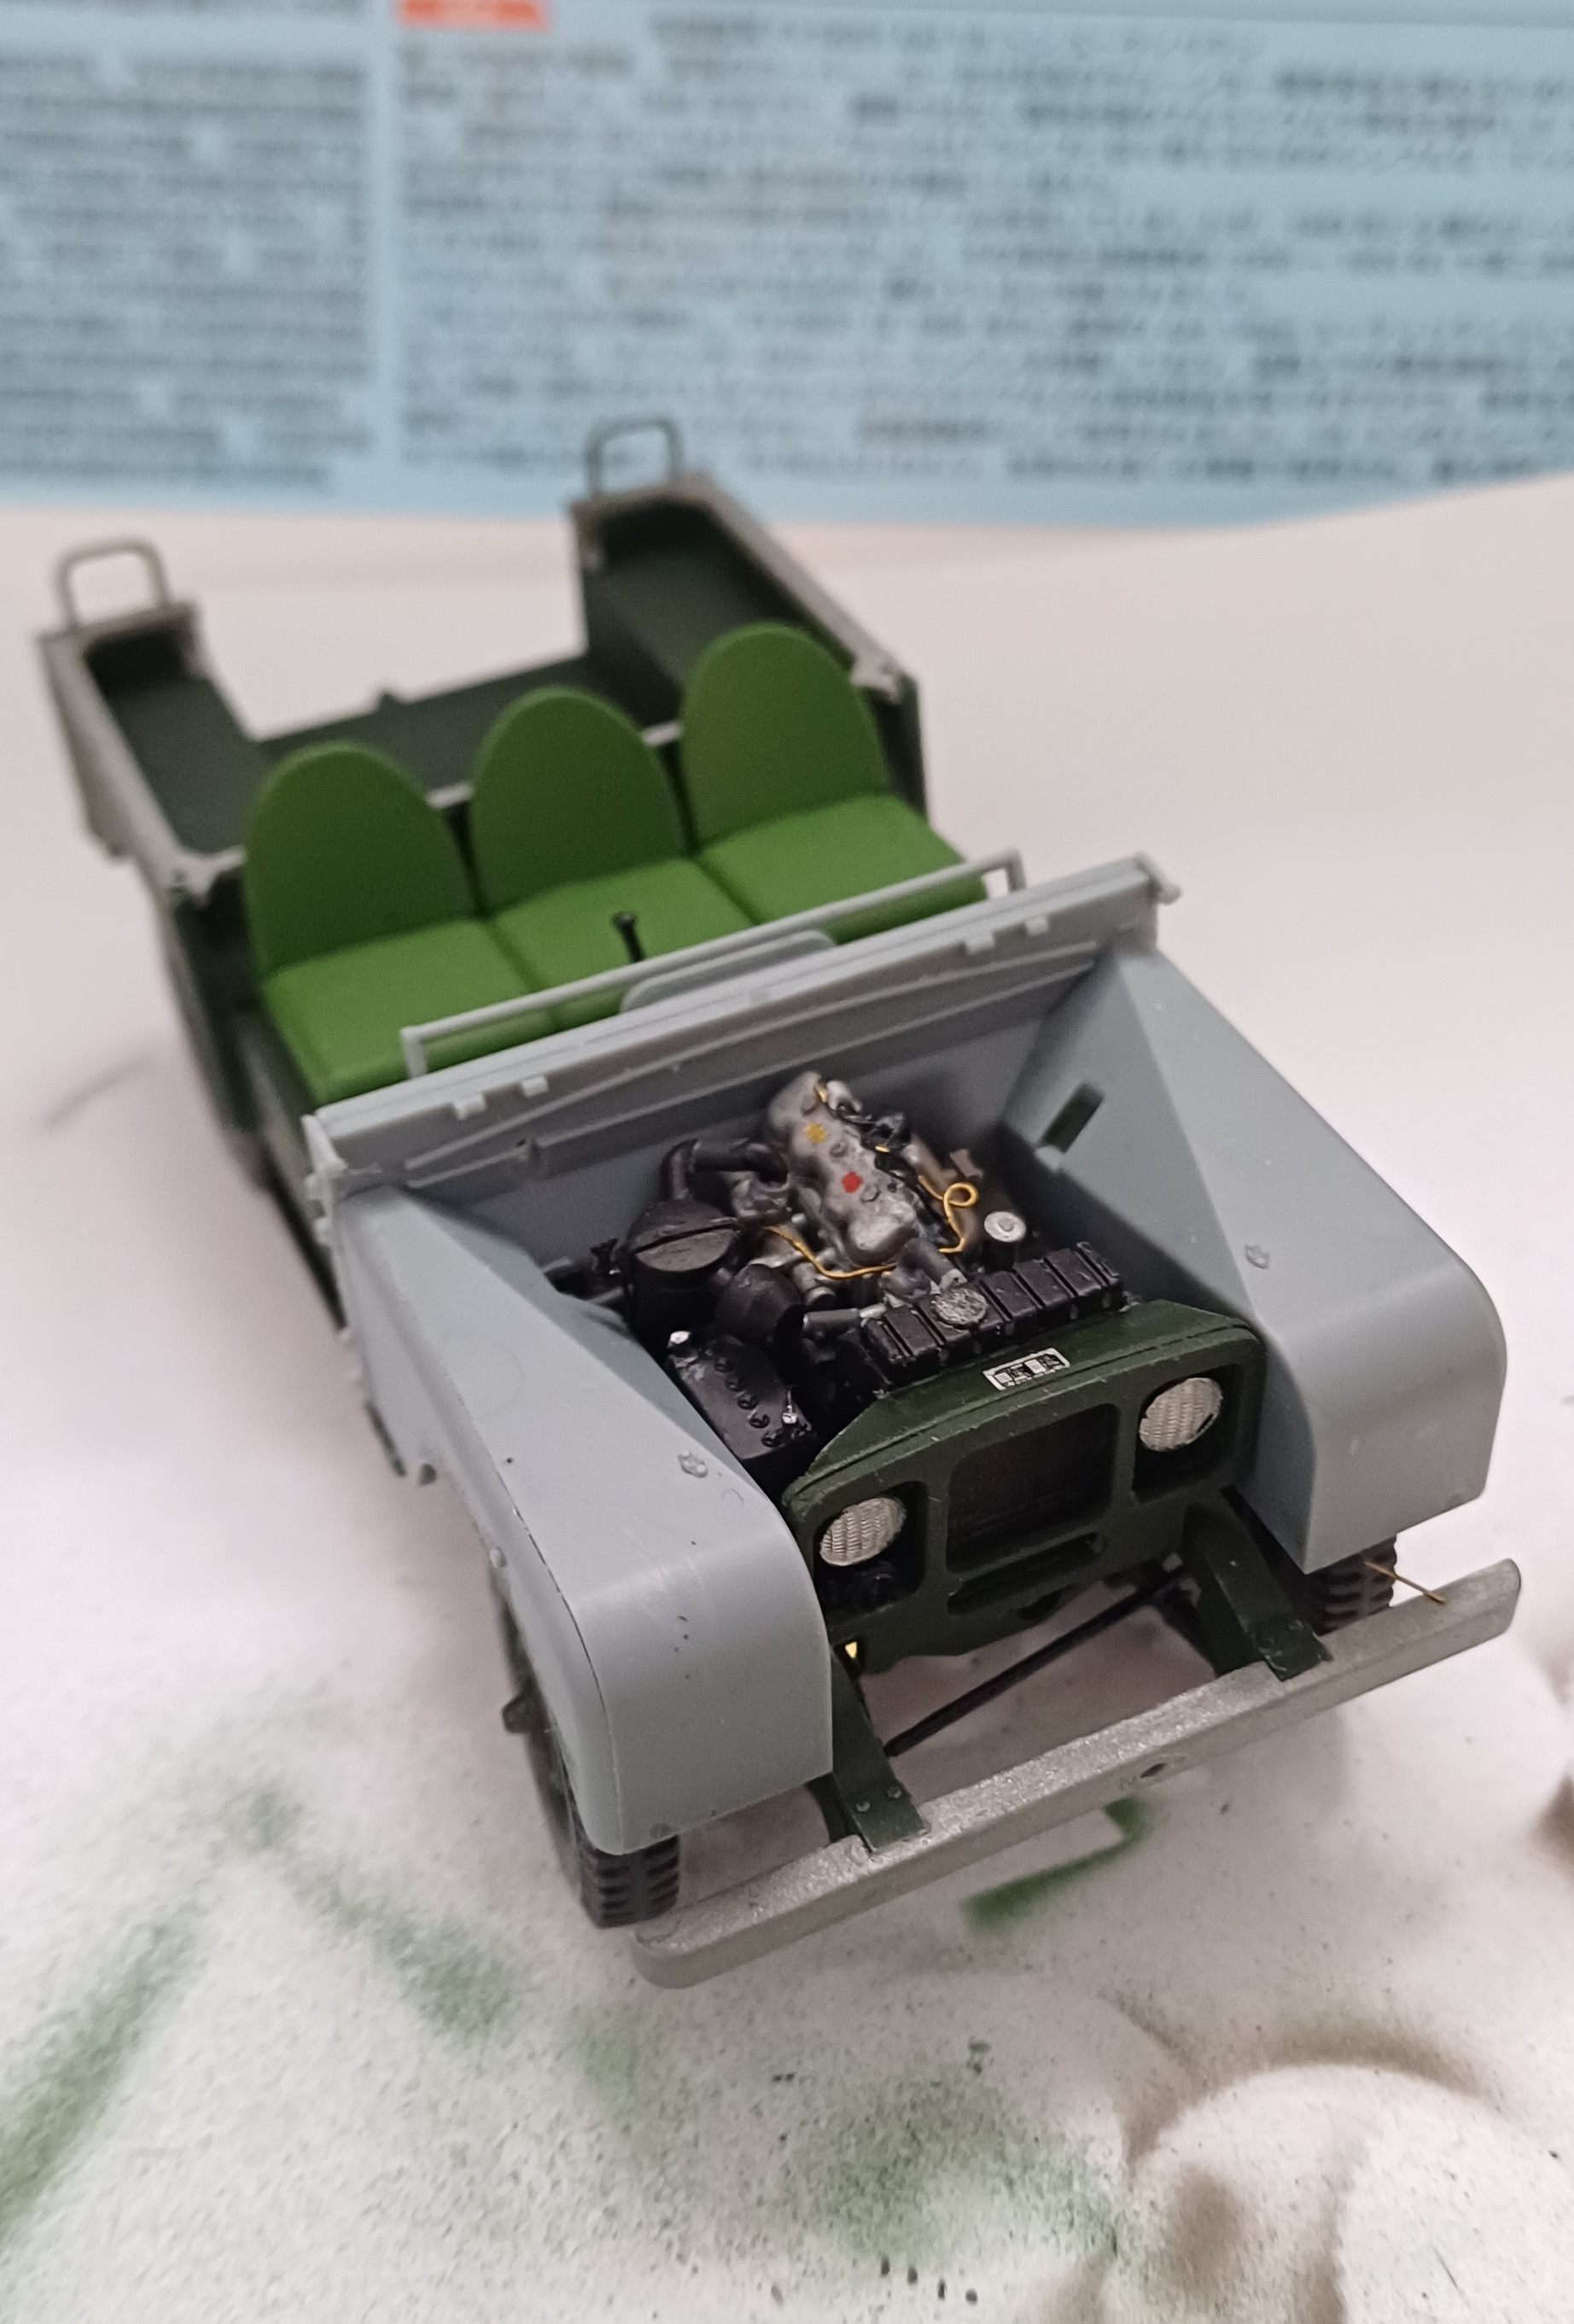
Anyhoo, been plodding on adding detail. Snapped the starter handle so replaced that with brass rod. Did some detailing to the air cleaner and battery and got those fitted and also the steering box and associated linkages plus the headlight lenses. Bulkhead detail will be next then I can paint that and the wings and get them and the loadbed fitted.

9 Likes
I hadn’t heard that before - brilliant!
(as of course is the work displayed!)
2 Likes
A small amount of work done over the weekend. Done a few bits of detail work on the bulkhead and then painted it. The bulkhead and wings are just dryfit at the moment so I can gloss coat and weather the inside of the cab and to also fit the few decals there. Once done I’ll weather the loadbed and then fit it to the chassis, then the bulkhead and do some wiring in the engine bay.

9 Likes
That’s a great tip. Matches photos.
1 Like
I looked at some ref pics of ones for sale here in the UK. They aren’t cheap. For a completely restored example you can pay anywhere between £40K and £60k. But there are some really nice ones out there for £15K to £20K.
Well I got around to fitting the loadbed, front bulkhead and wings onto the chassis. It was here I fit the etch door sills. The instructions would have you fit them way before this point, however I felt I’d likely put them in the wrong place and cause myself issues further down the line.
The doors are just placed on there as is the bonnet. I’ve to finish the fuel lines in the engine bay, weather the cab interior and fit the steering wheel. The tailgate chains need doing also. I decided to do the kit with the tailgate raised because although the box art looks cool with the Vickers MG in there I felt I likely wouldn’t be able to make any tie downs look realistic. I might do it in there but laid on a cam net with the tripod folded.


8 Likes
WHAT on EARTH were you breathing to produce that colour of snot?
Wasn’t there any occupational health and safety?
1 Like
I read the original civvi Series 1’s were painted that colour as it was an RAF colour which they had shed loads of left over from the war, strange enough to be true. It certainly is true that the body work is Birmabright which is an aluminium/magnesium alloy due to huge availability because of cancelled aircraft contracts.
1 Like
Child of the 50s/60s Robin! All that pollution, no antibiotics, rationing still in force until the year I was born; antibodies absent? I have no idea.
Colds I recall were pretty persistent back then; and we had to run the full gamut of childhood diseases, chicken-pox, measles, croup (horrible cough), mumps, tonsilitis, and sometimes rheumatic fever; the latter actually taking quite a toll on those unfortunate kids who had it.
To be honest, living in the country where I did, there was no pollution; loads of fresh air, and our parents never really knew where we were when out playing; we just roamed and found our amusements as we did. We went home when we were hungry, or it was dark.
7 Likes
Well as it does life got in the way of more important pursuits. I got the decals on, went with 29th Independent Infantry Brigade. I’ve added some mud in the form of Citadel Technical Agrellan Earth. It dries very lumpy if painted on thick and even cracks like dried mud if it’s done in larger areas and that has happened in a couple of places where it was thick enough. I’ve done it to reflect mud flicked up off the wheels onto the undersides and panel edges. I’ve then used Vallejo 71.284 UK Light Mud sprayed along the edges to show dried spray and splashes. Only done the one side so far to see what it looked like. As it is I’m happy with it as the Citadel stuff would be a pain to get off at this stage if I wasn’t happy.


20 Likes