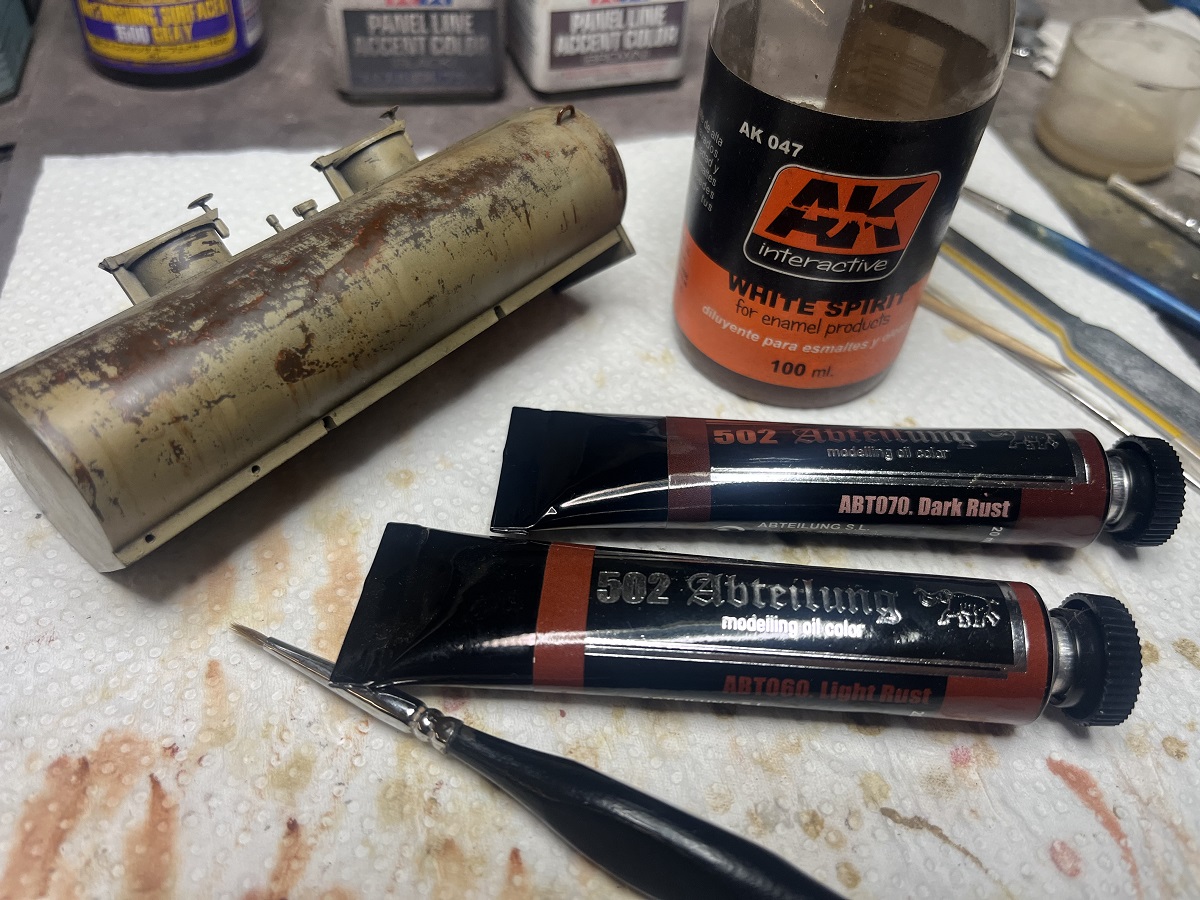
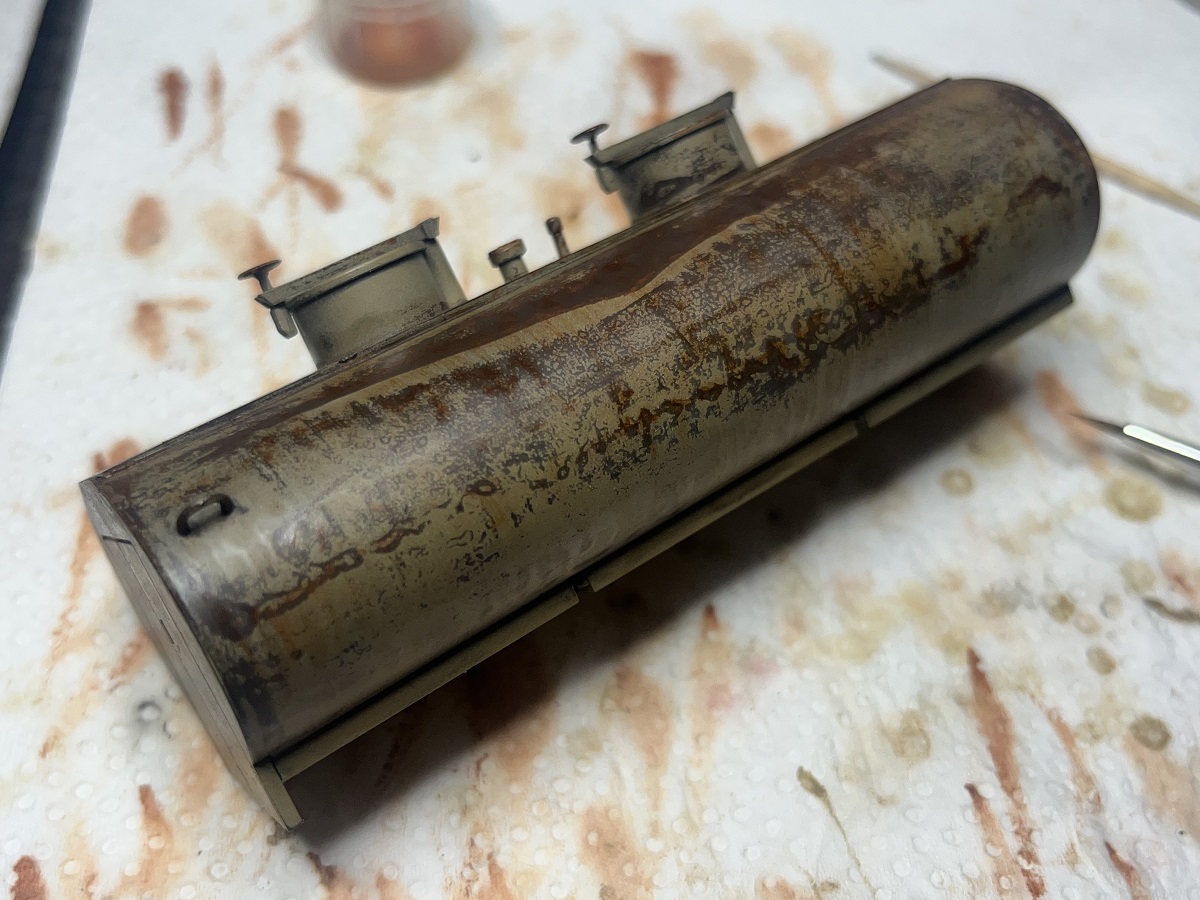
Started delicious rusty oily grimy filth on the water tank ![]()

7 Likes
Looking wickedly nice with all its rust and aging.
Kudos!
1 Like
6 Likes
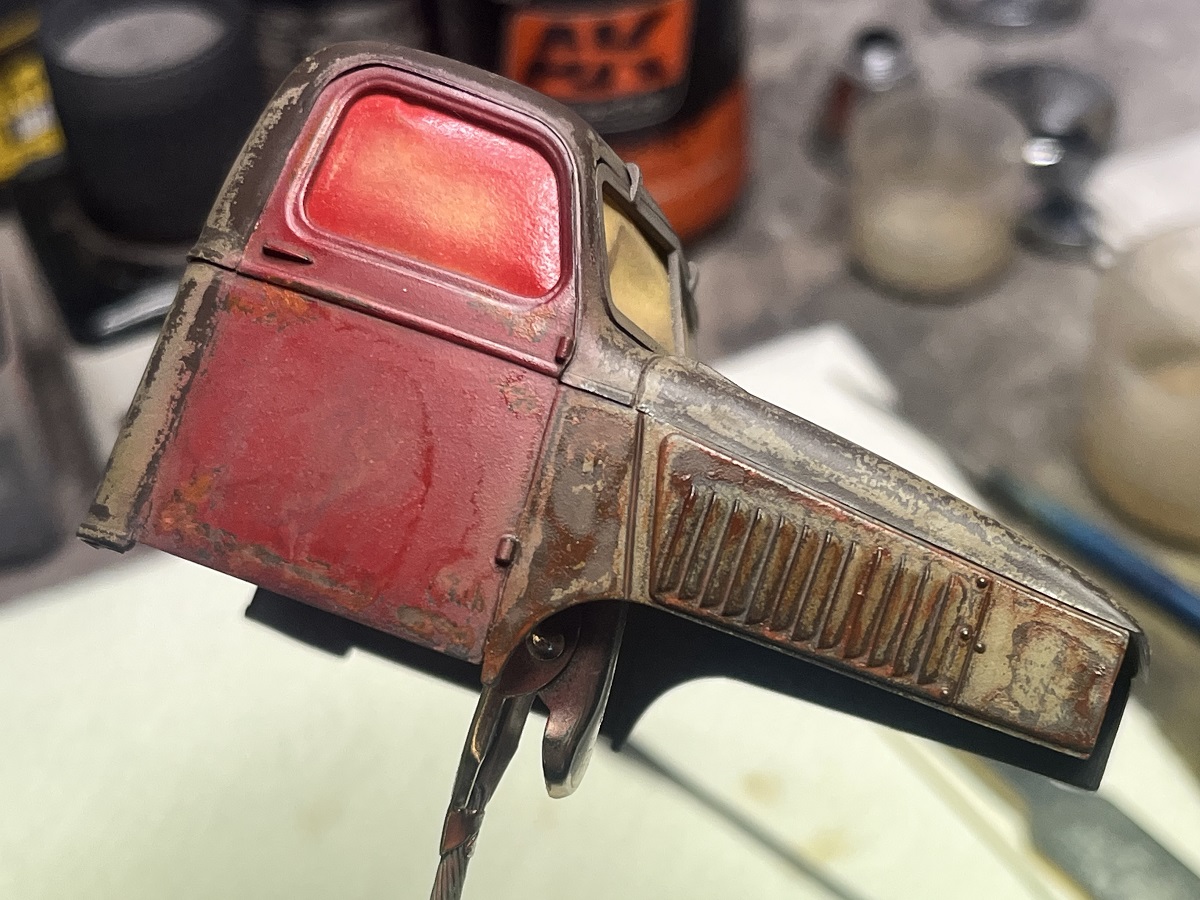
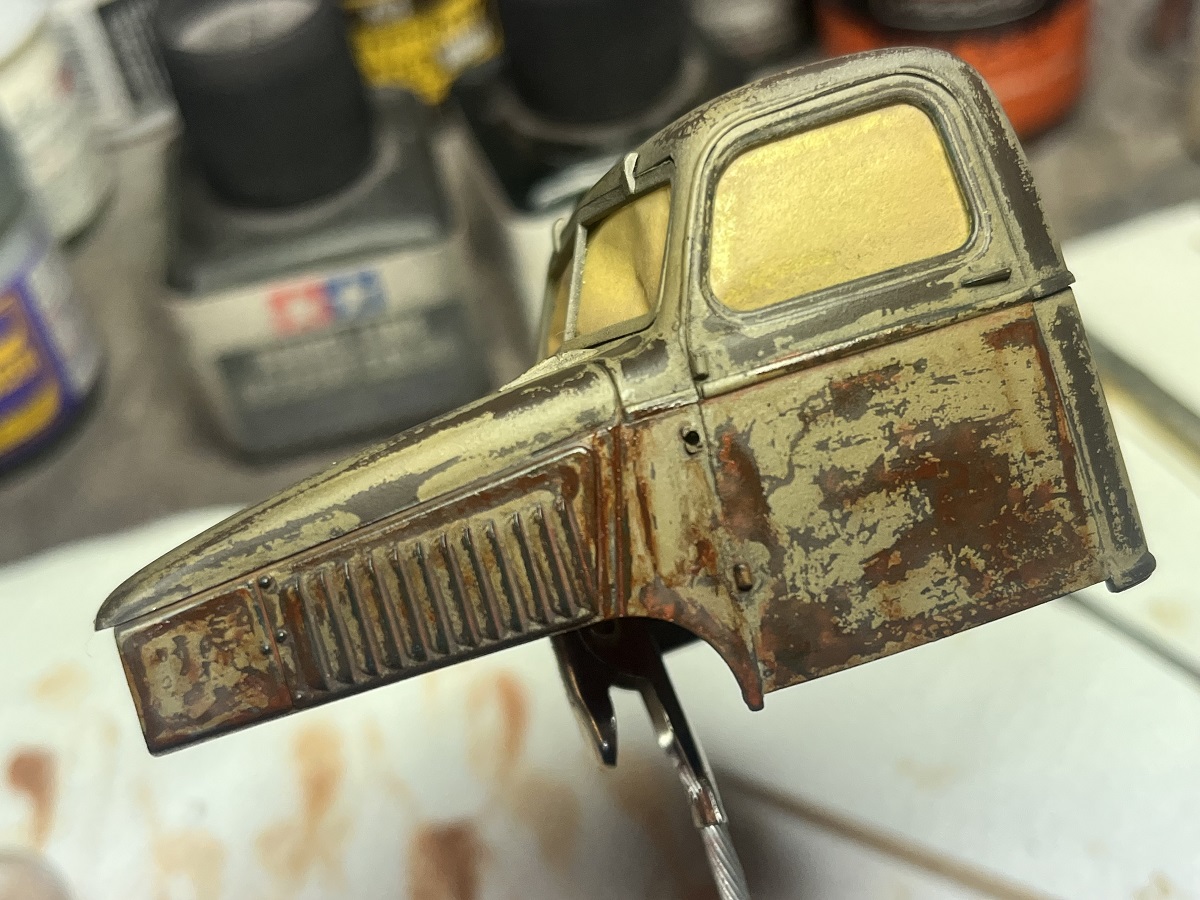
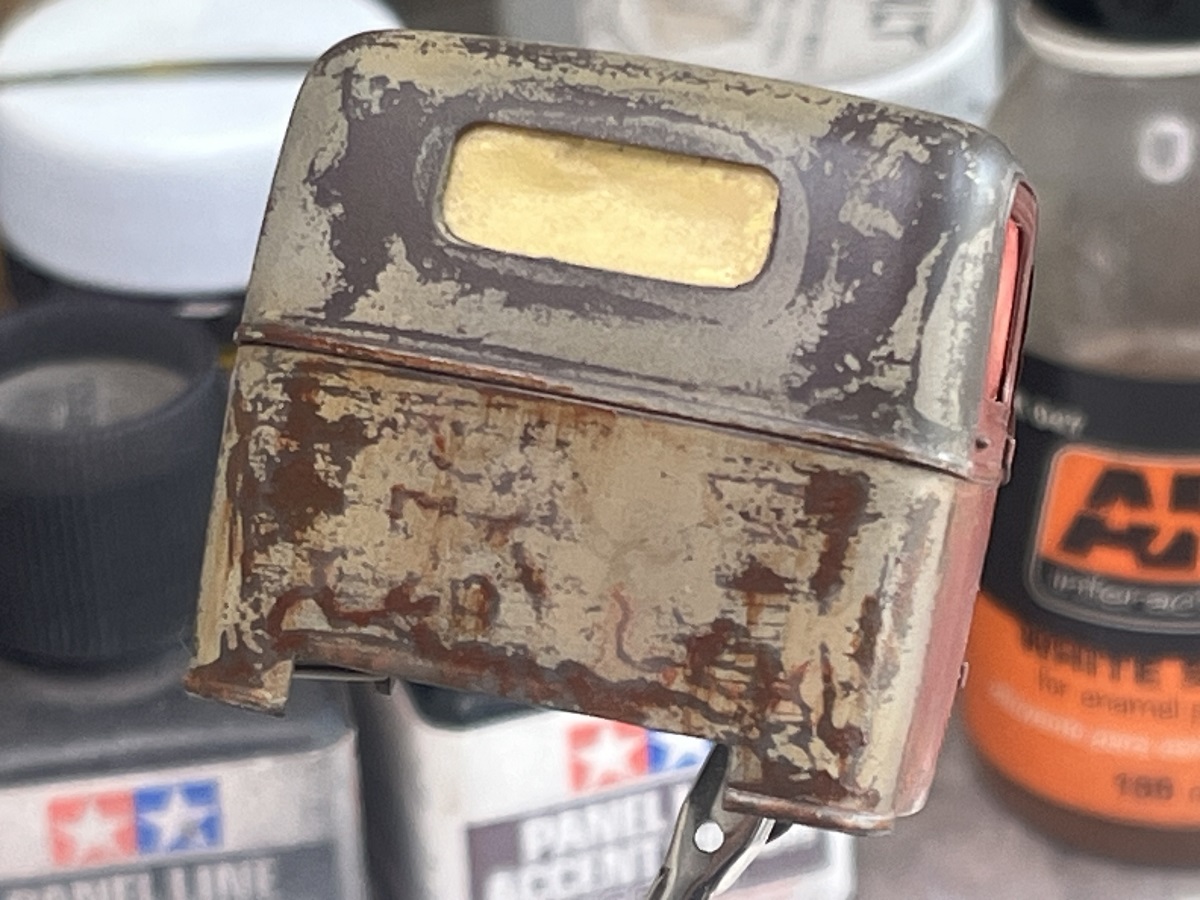
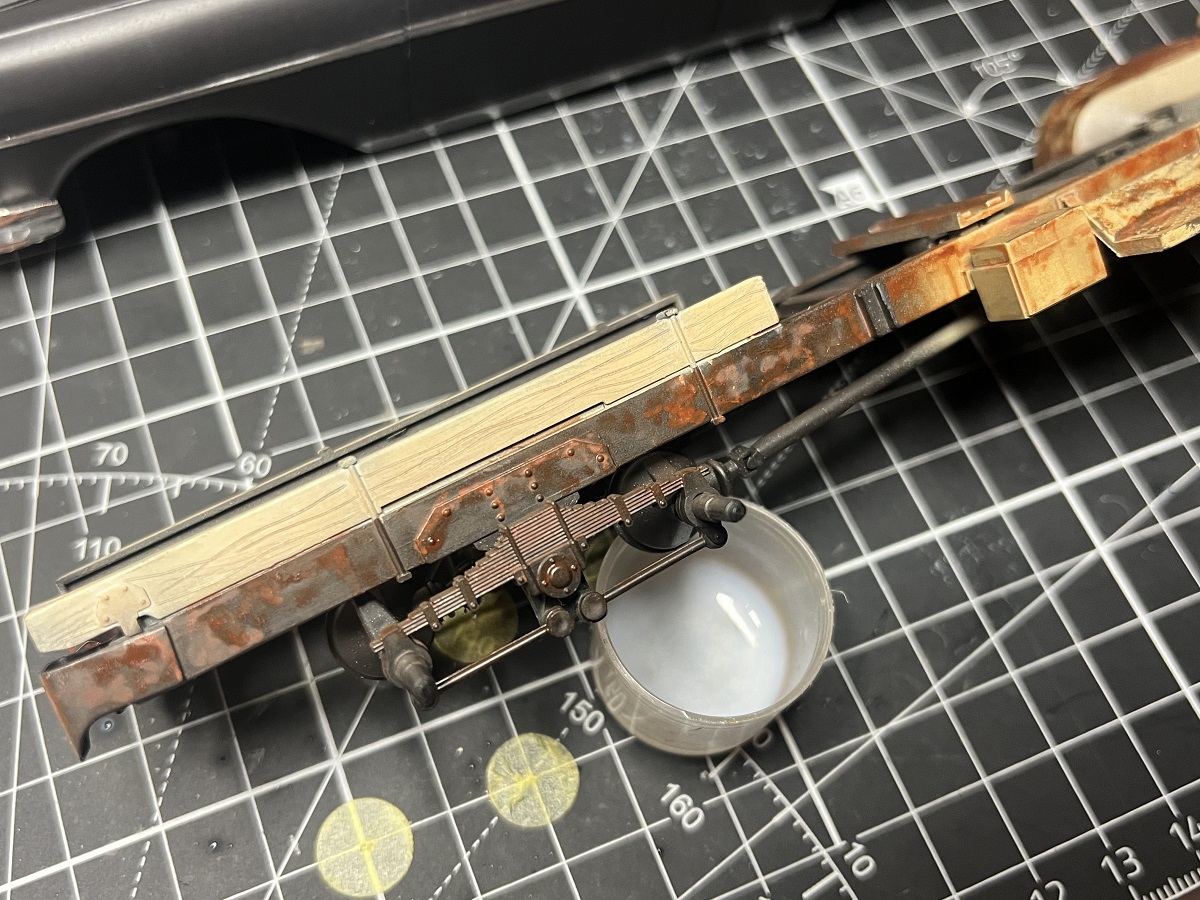
More work on the cab and a quick loose test fit to see how the image is shaping up.
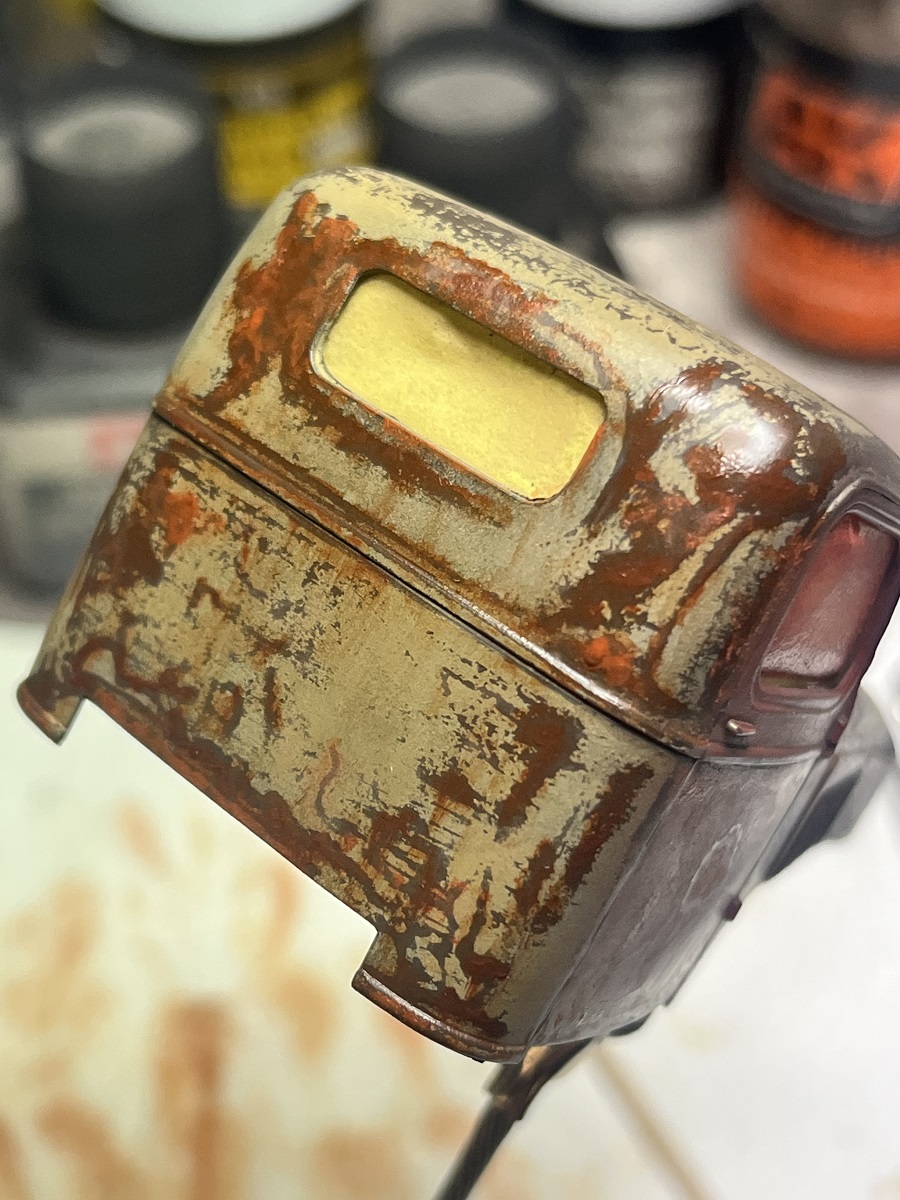
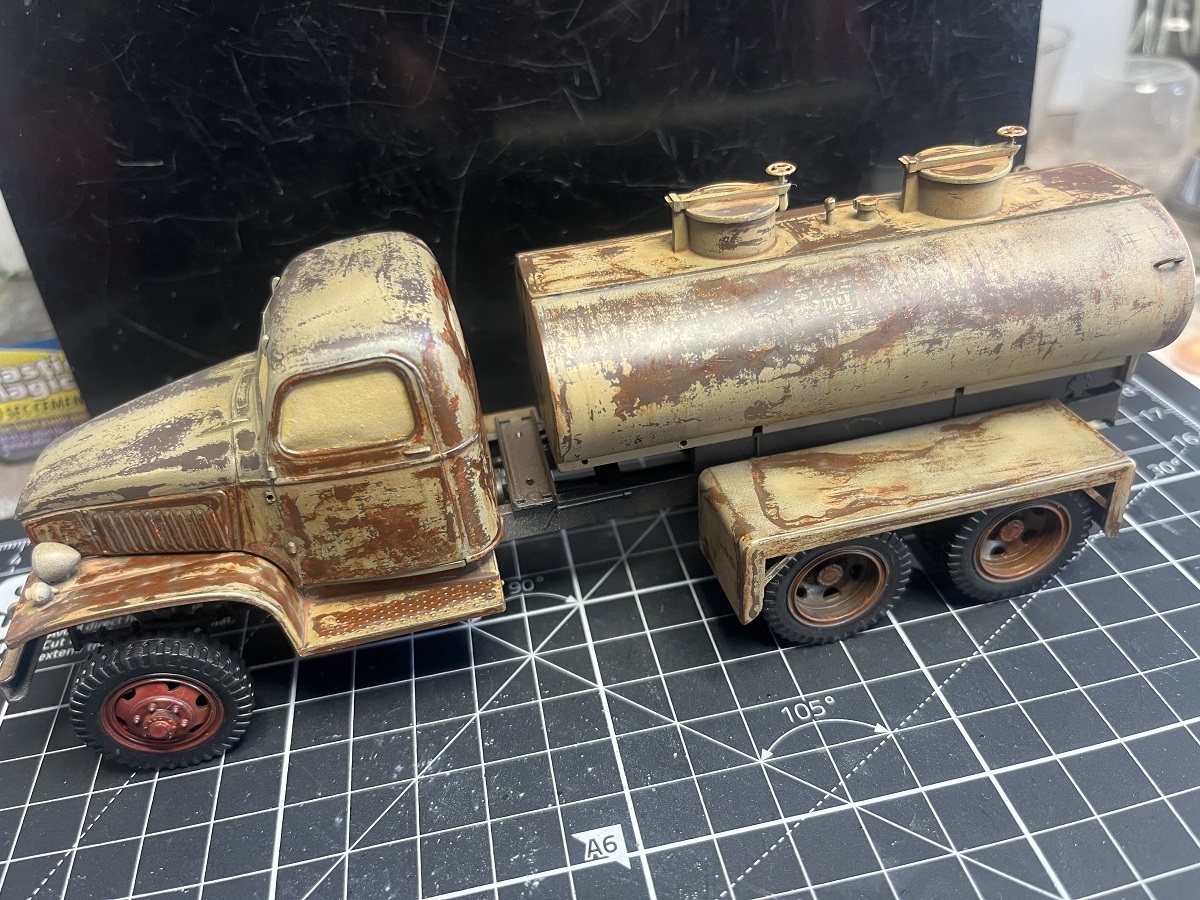
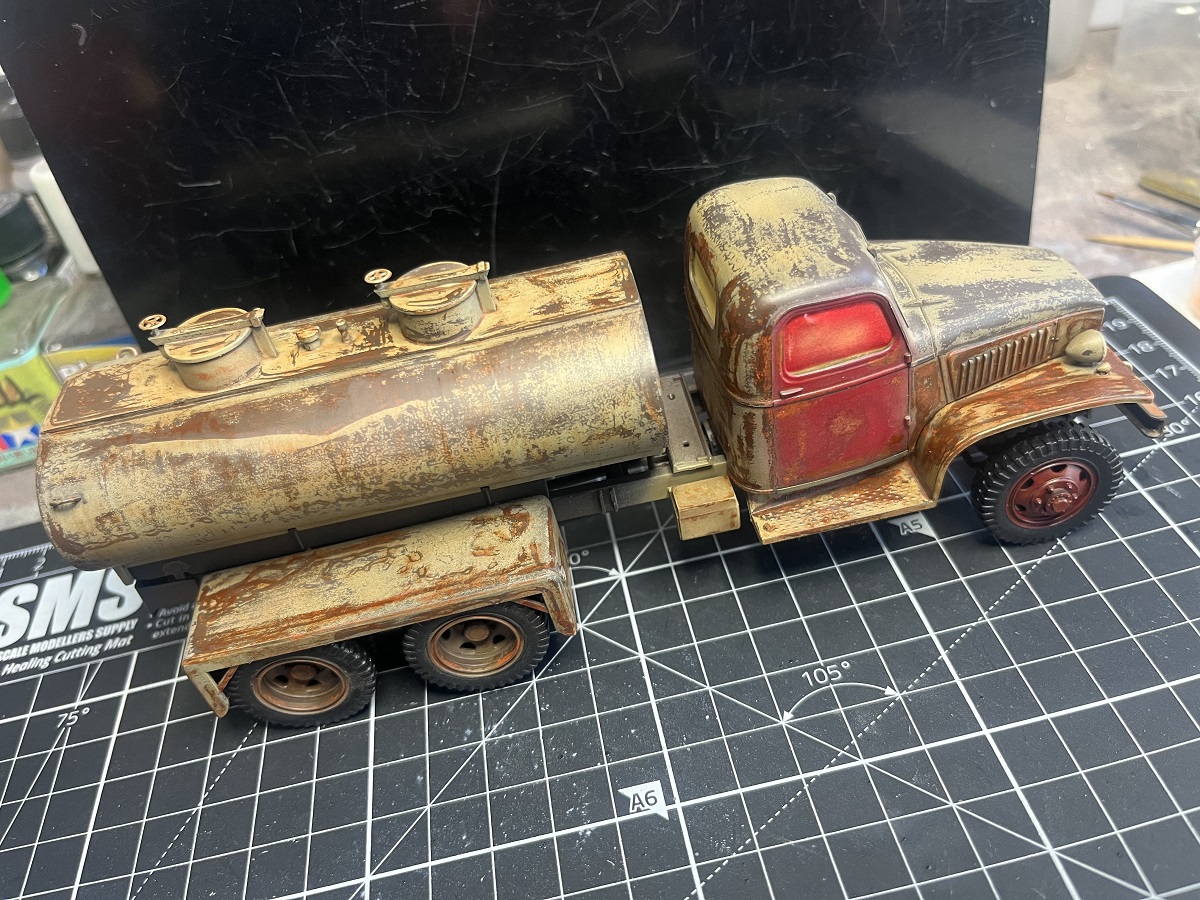
Probably 6 hours into the OPR at this point and still a lot more to go blending and refining the rust tones. Very relaxing and enjoyable process.
Cheers, D
5 Likes
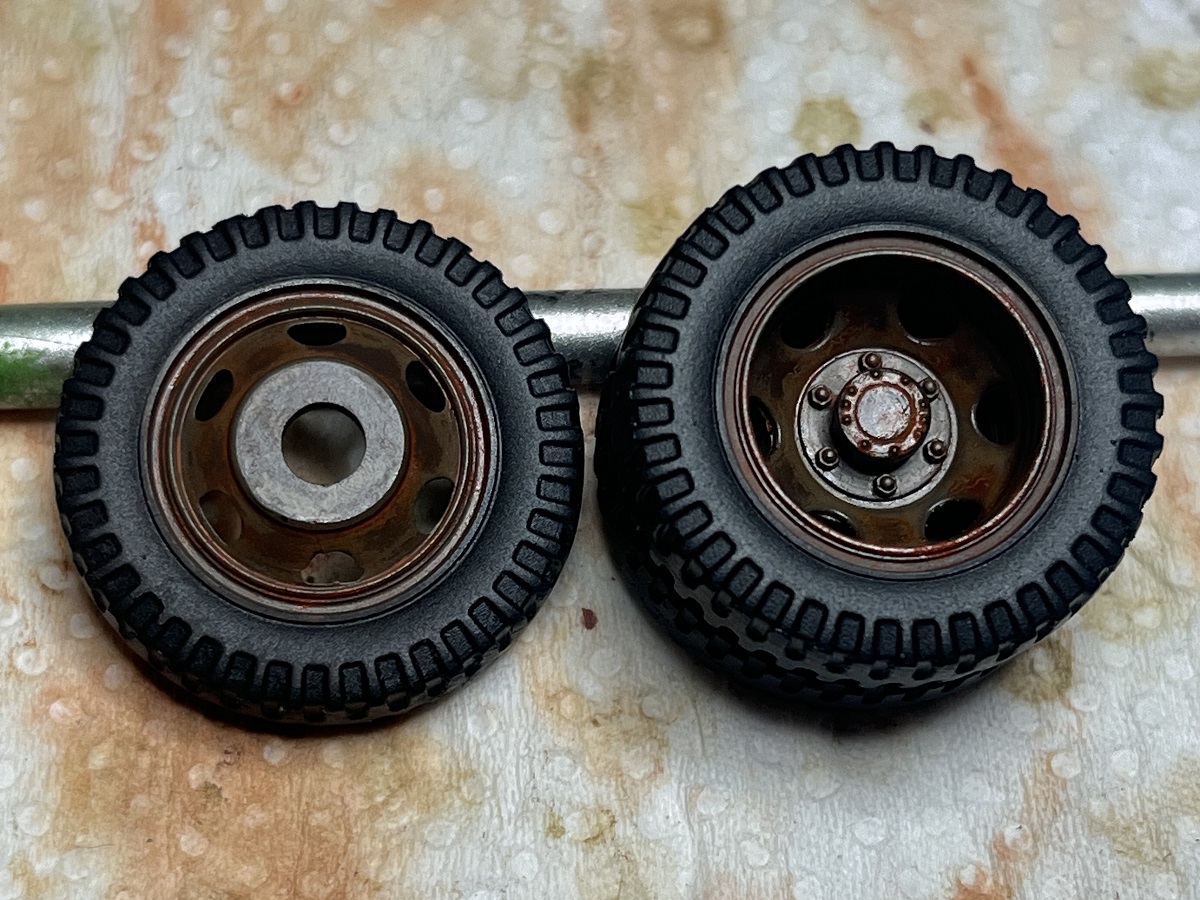
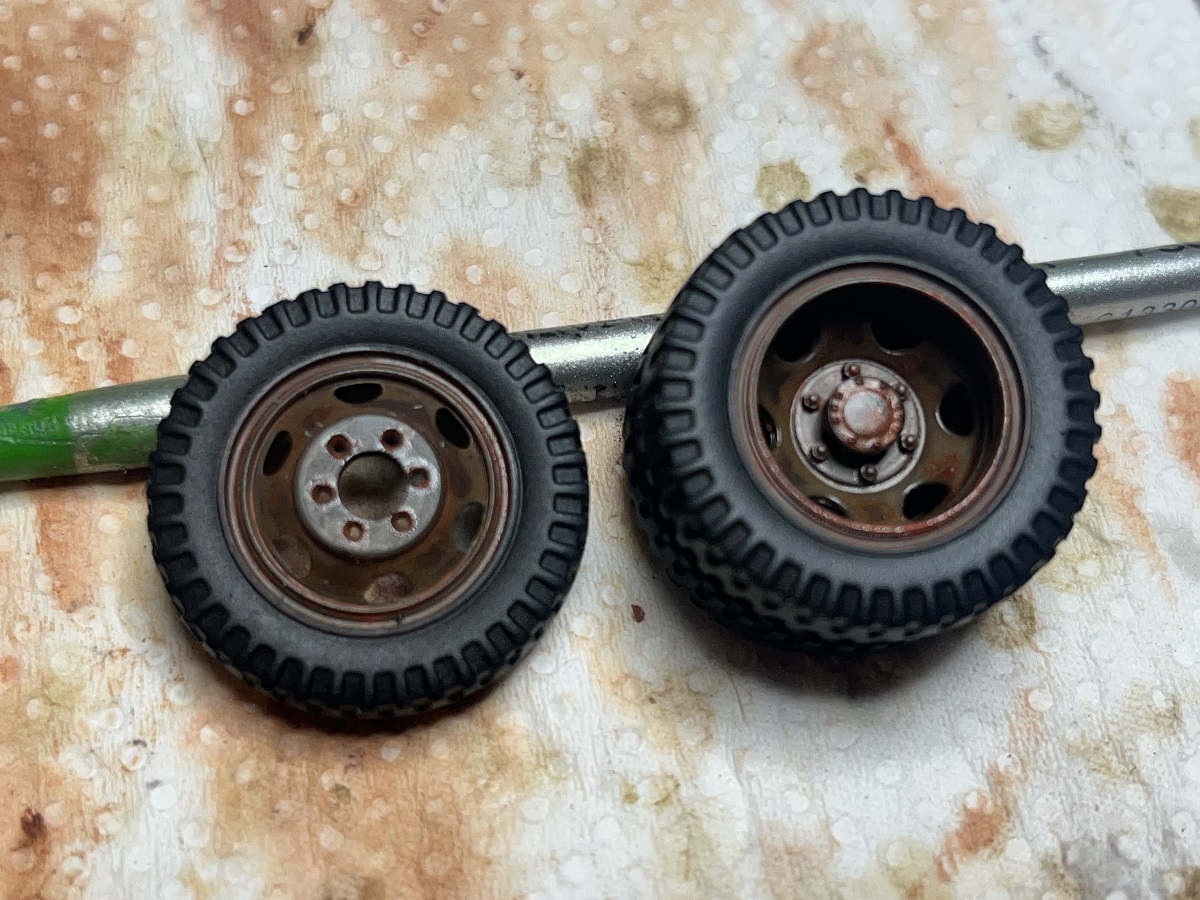
What gets bigger the more you take away from it? A hole of course, and the rim on the spare wheel needed 6 of them because . . . . . accuracy!
Cheers, D
4 Likes
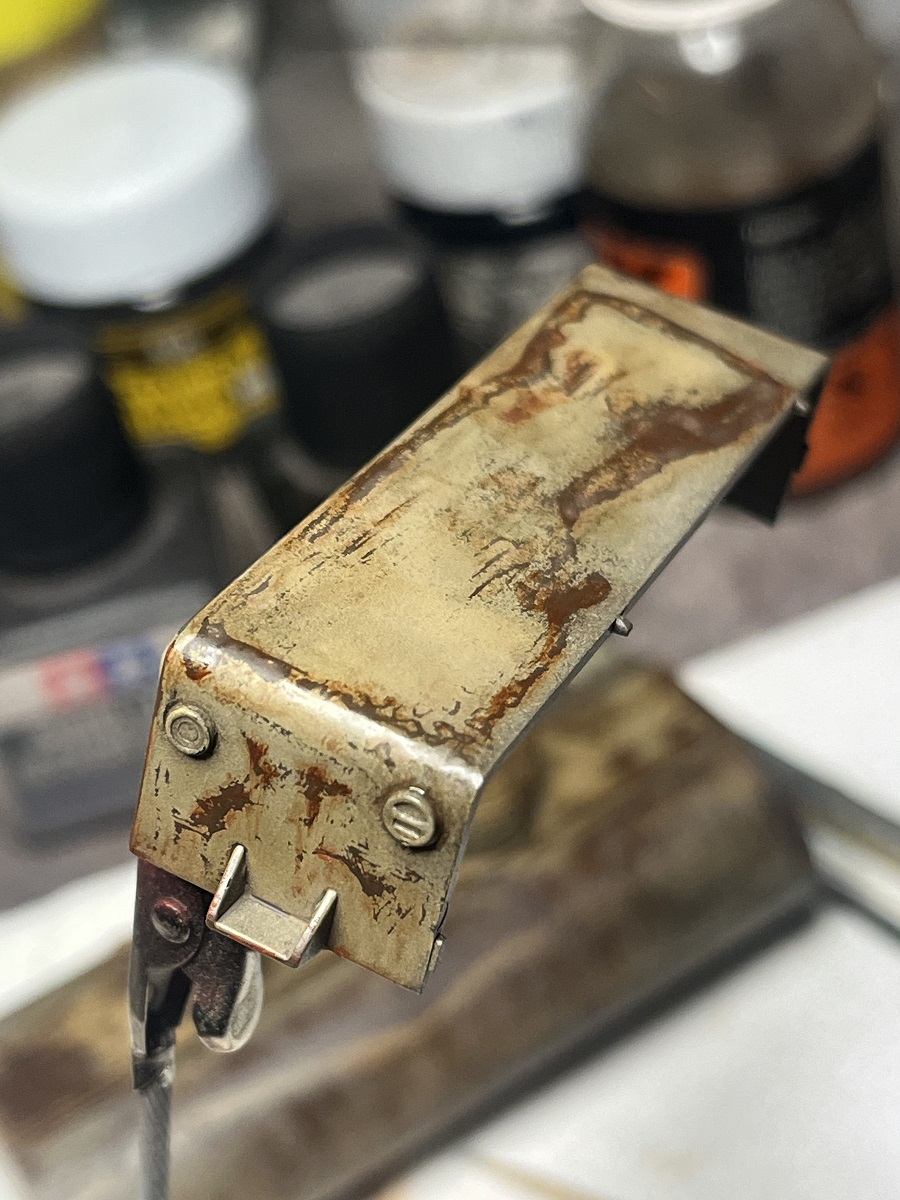
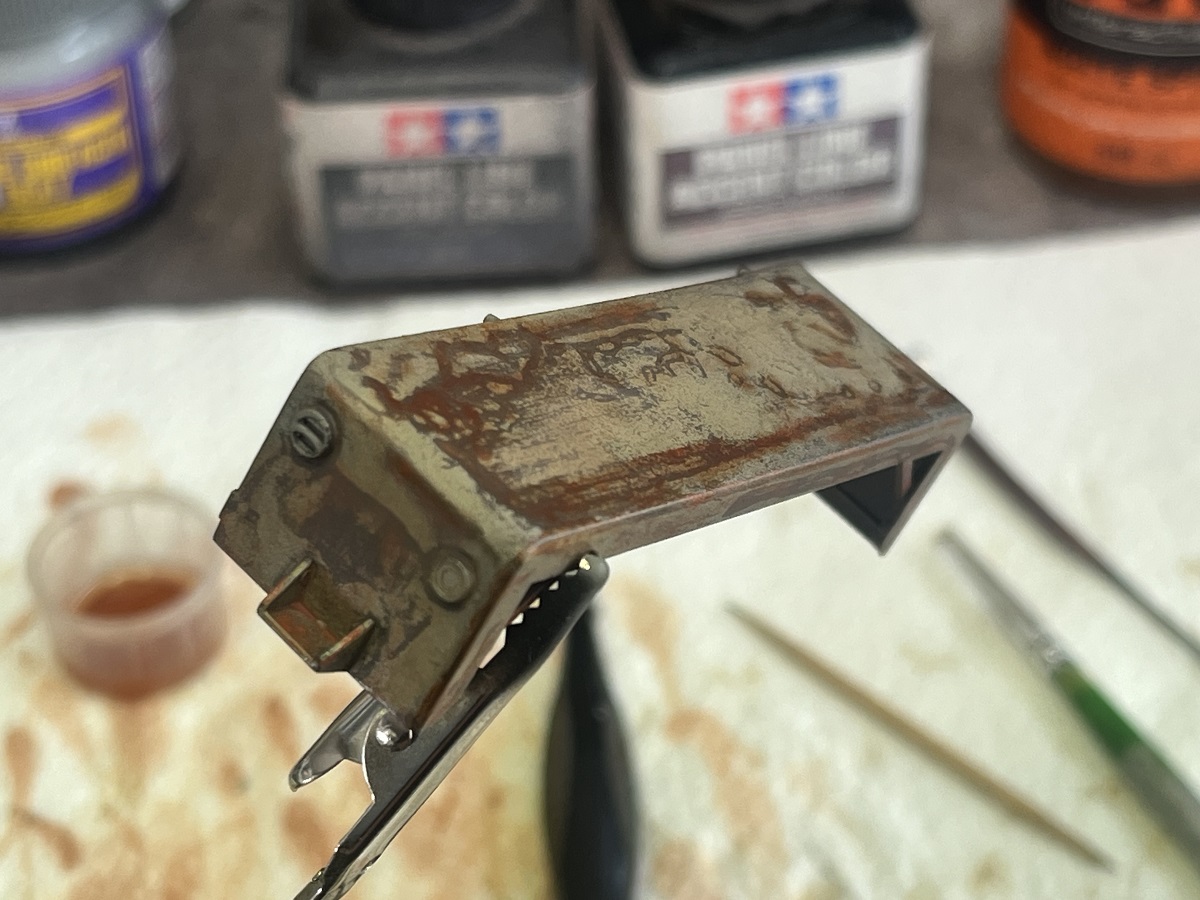
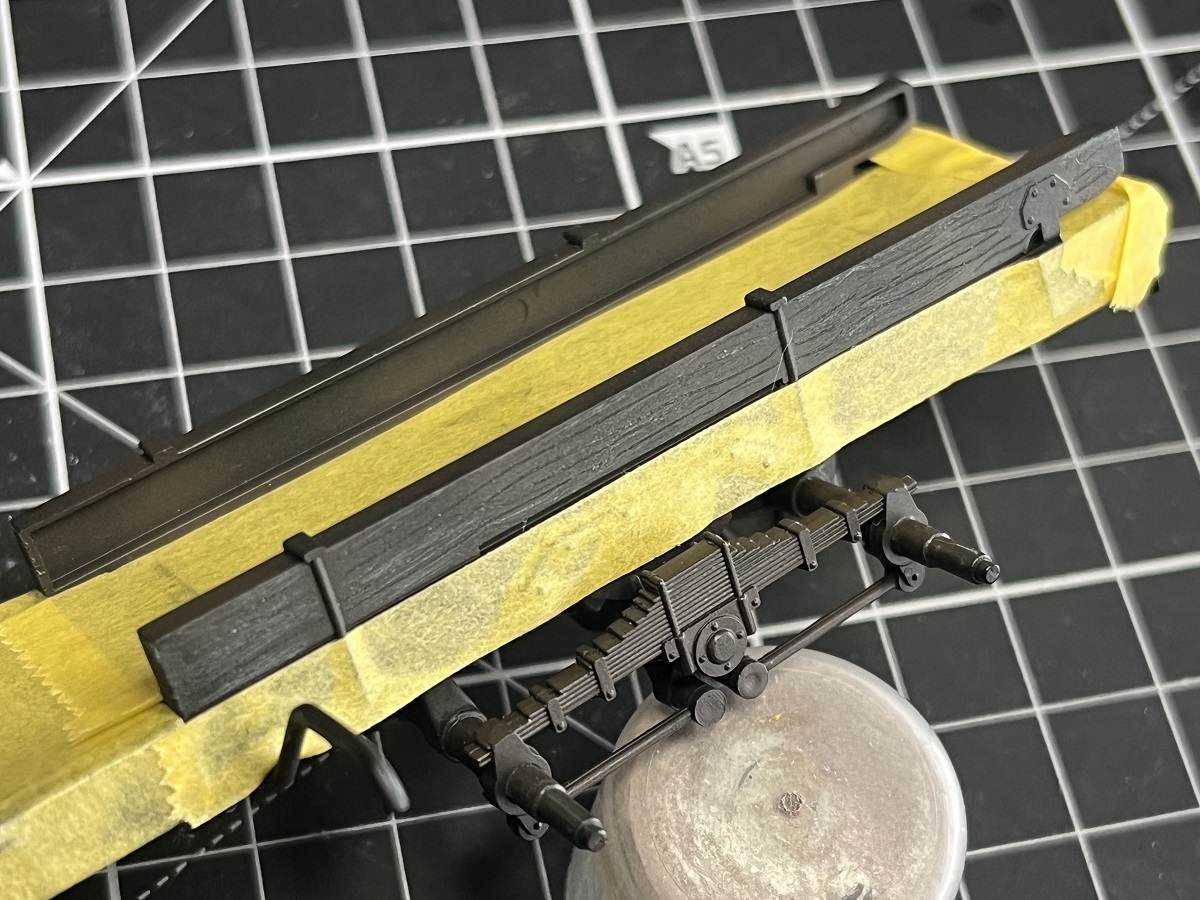
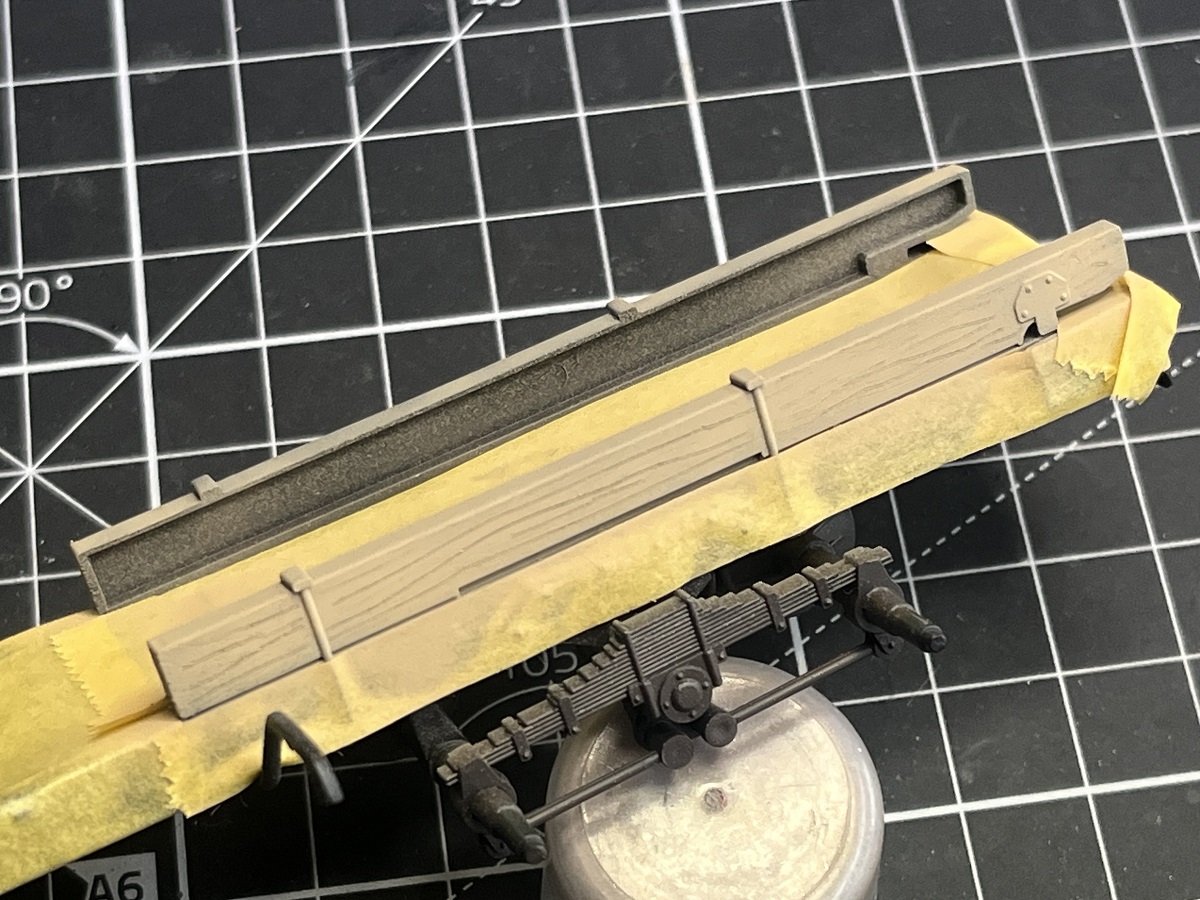
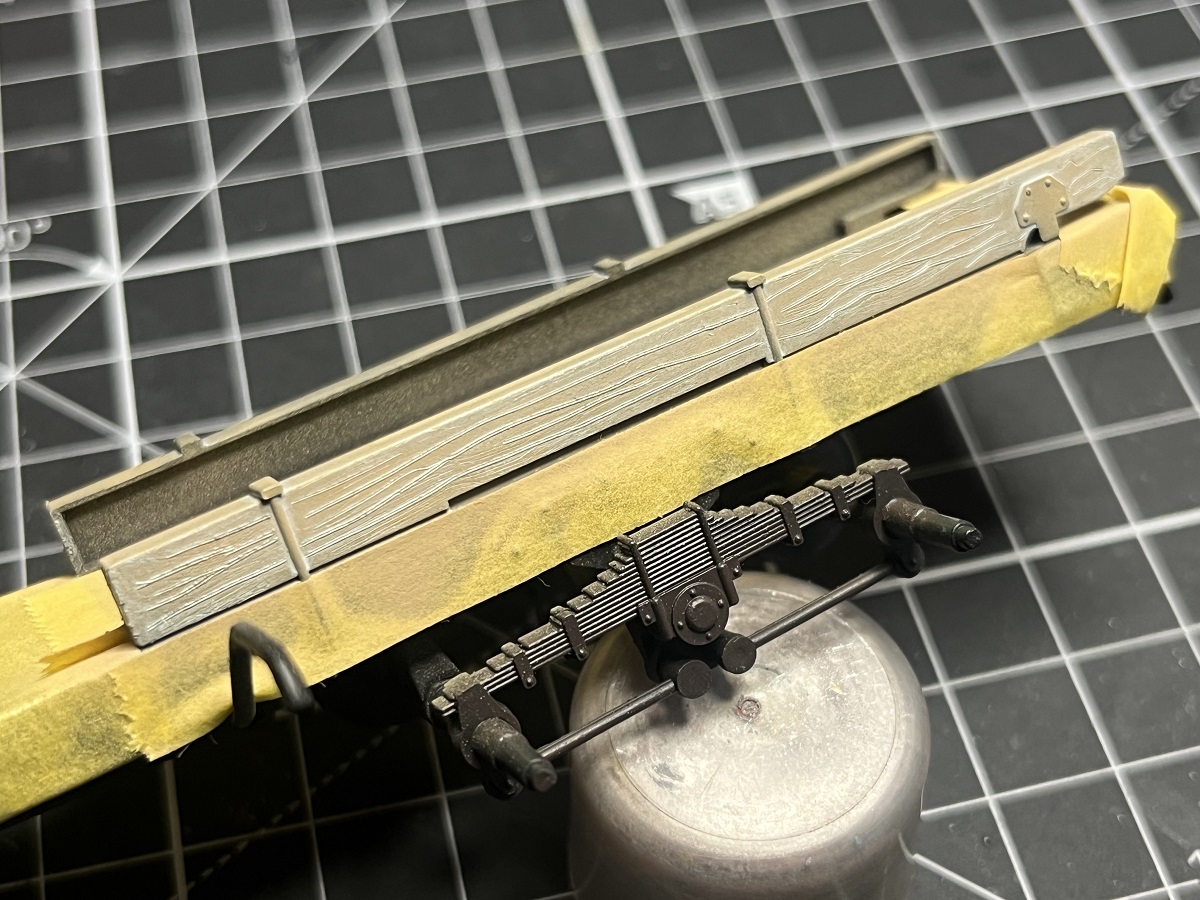
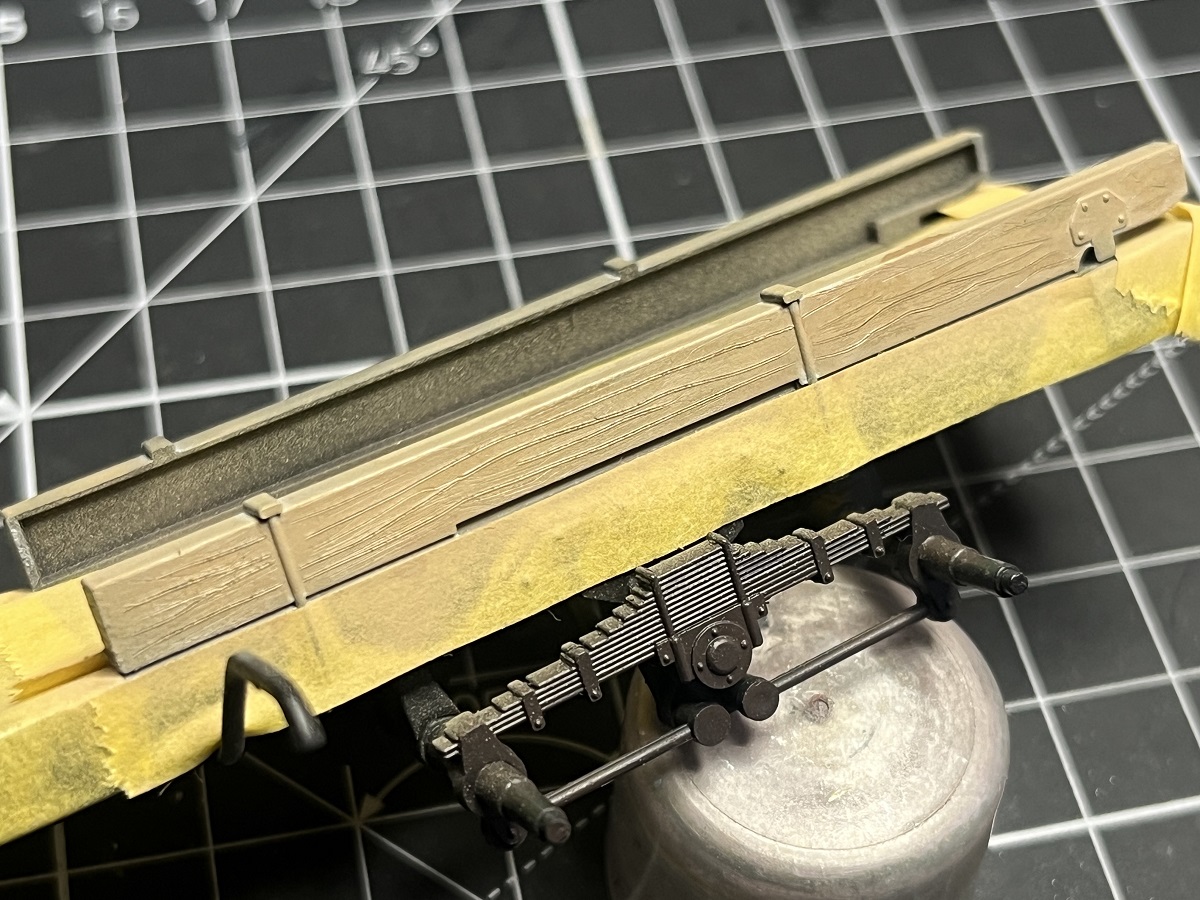
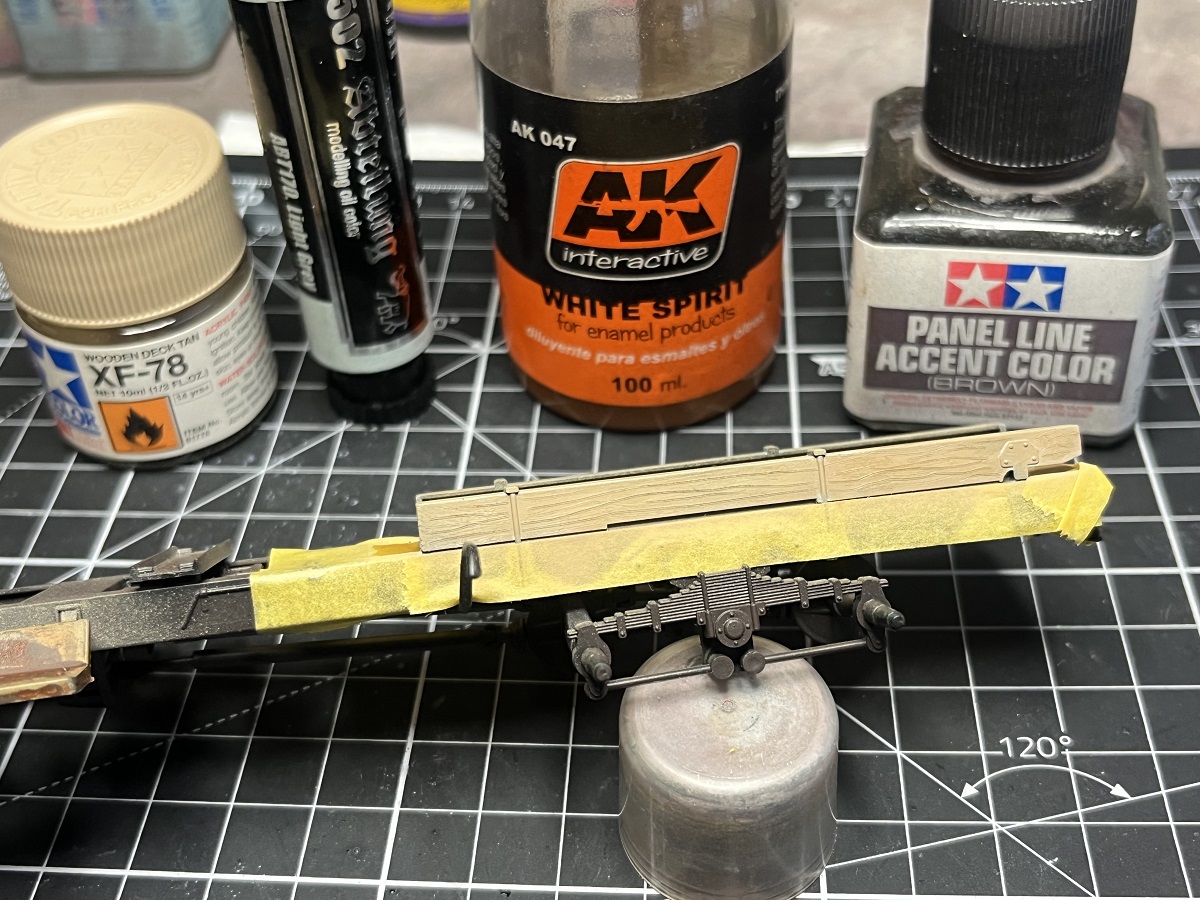
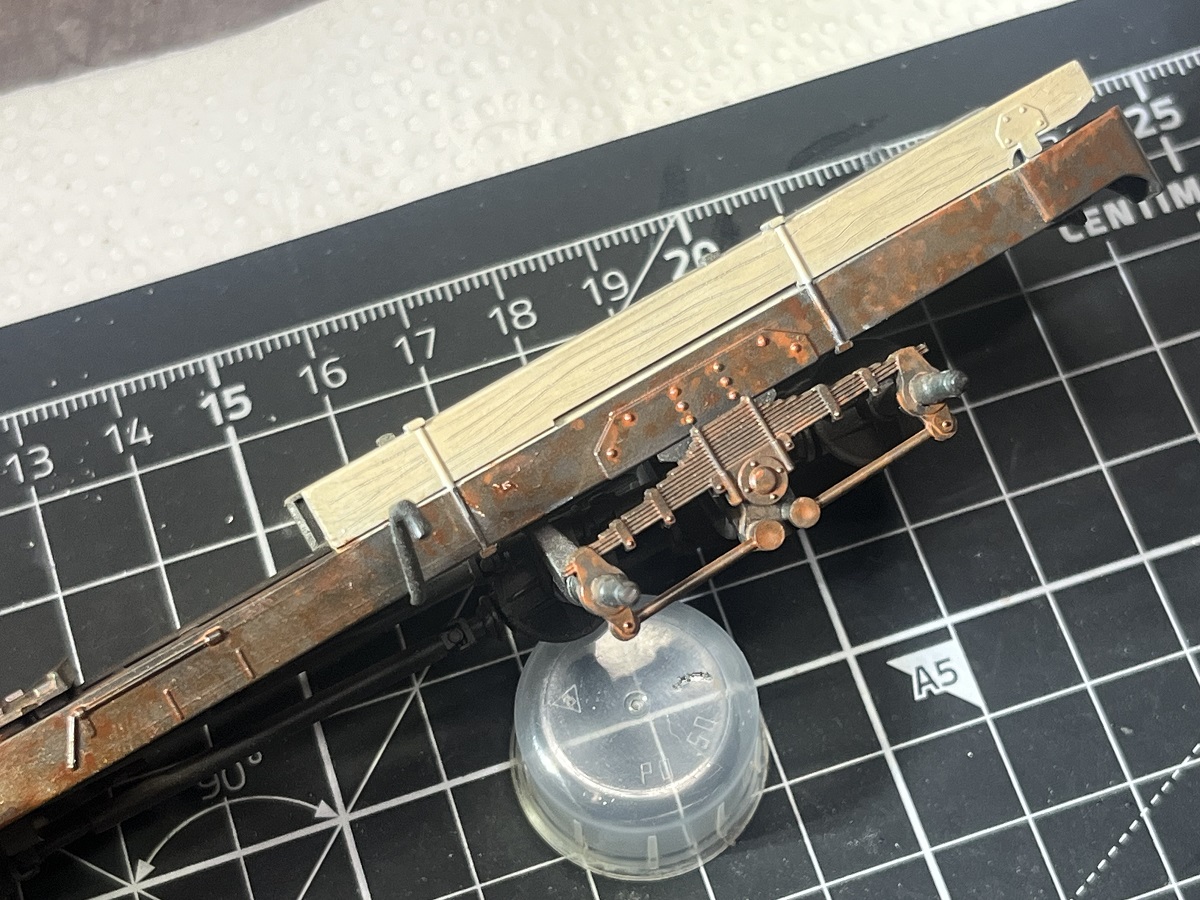
Mike @165thspc this is all your fault! I roughed up the surface with a coarse sanding stick the carved some random grain with a blade, airbrushed XF-78, several washes with thinned ABT502 Light Grey then a touch of Tamiya Brown PLW in the grain. Once it’s all cured I will paint the hold-down bolts and straps. Of course, once I assemble and fit the guards this will be barely visible ![]()
![]()

Cheers, D
5 Likes
Sorry as I do feel your pain here. Make them look really old and weathered in keeping with the rest of your vehicle.
You might consider leaving one or both rear fenders off to better see this added detail.
1 Like
Are them planks hollow?
Asking for a friend …
1 Like
No, but if your friend is small enough to lie down under the truck and look up through the drive train to see the inside, they are welcome to ![]()
I thought about filling them or boxing them in, for about 5 seconds ![]()
Cheers, D
1 Like
I fill the back sides with a quick bit of modeler’s putty. (Sorry no photos of this)
1 Like
Definitely. I think another light wash of the grey oil will do it.
I thought about that as well, but I’m liking the look of the rusted rear guards and it is a functional truck so I will leave them both on.
Thanks for checking in again guys!
Cheers, D
1 Like
How about sort of tearing up the front of the right rear fender? (Bent up with part missing) As though the driver turned too sharply and hit something.
This would add more decrepitude to the vehicle and perhaps show the wood grain detail a bit more.
1 Like
Hi D,
Yes, as it’s been noted, the bed/frame rail spacer (sil) in the kit is likely wood. As also noted, it’s wood so that when the truck is unloaded the box won’t be a rigid structure bouncing around, potentially leading to cracking frame rails or rattling around. These were usually hardwood, but for some applications soft woods were used - in fact, wood is still used, as are some polymers - no idea why choose one over the other.
The spacers are needed to elevate the bed high enough to clear the vertical movement of the rear tires/wheels.
All of that said, it appears that Italeri (and I would bet others too) provides the kit with a relatively generic version of the cross section ( and, I don’t blame them for this). This is the cross section as noted in the manual for a tanker:
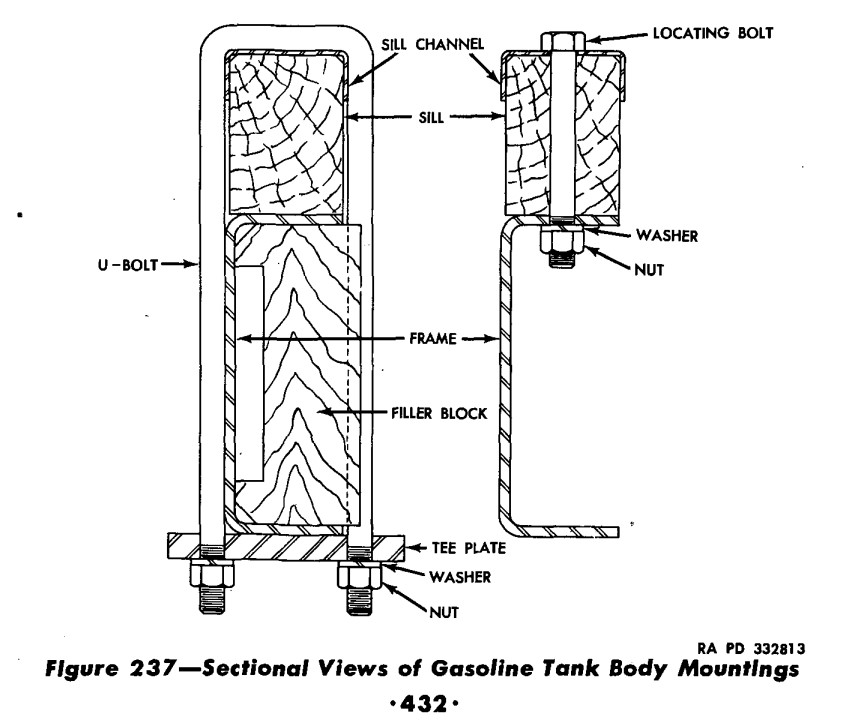
The spacer (sil) is a bit shallow (this section is the same for the water truck), compared to the type for a bed truck:
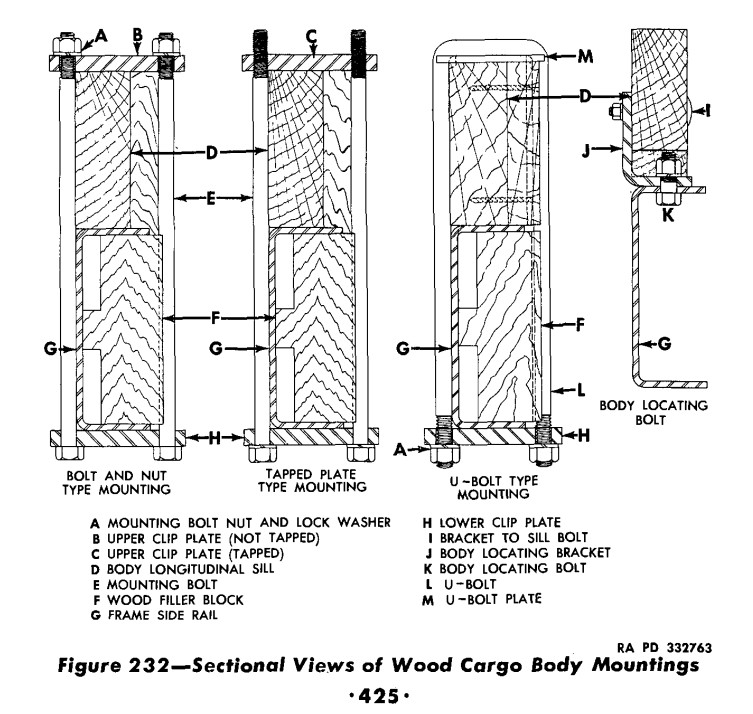
As for the view, they’re not really all that easy to see anyway (with or without the backing):
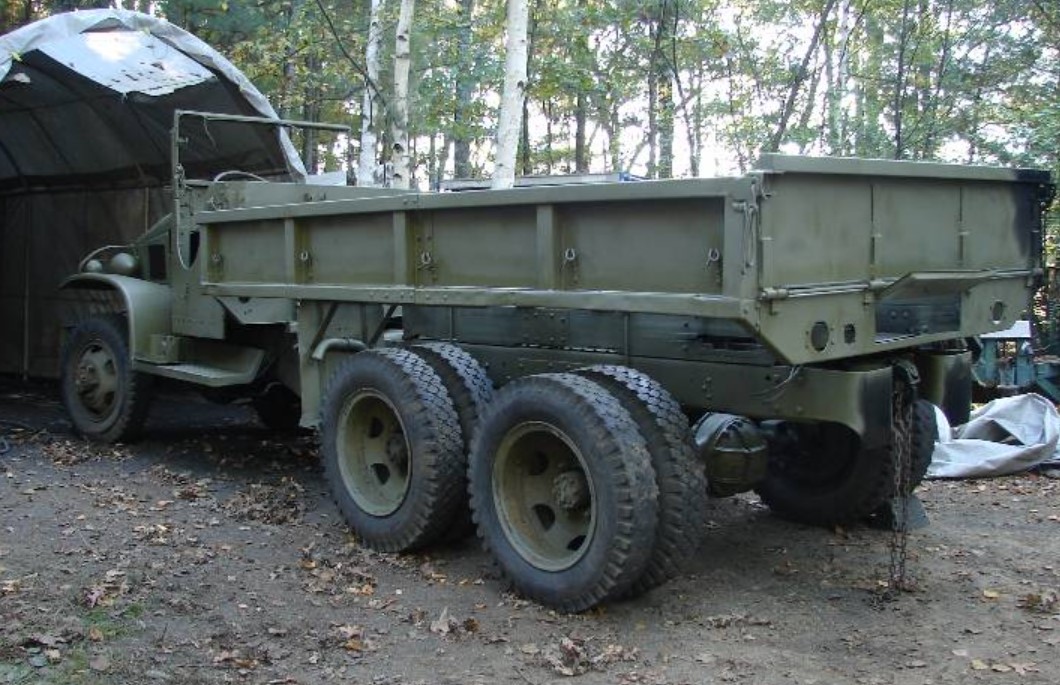
You can see the sil here primarily because the actual bed of this rig is out - so they are “lit” from the heavens above ![]() And I suspect it would be really hard to see the frame blocking at each U-bolt
And I suspect it would be really hard to see the frame blocking at each U-bolt ![]()
The dump bed includes steel and wood sils, which the tilt bed rests on top of.
But all of this does make a guy wonder about scratching up a bed system that follows the specs - - but how to rationalize leaving enough of the bed off to actually see the work? ![]()
Back to the truck at hand - it looks great! Your weathering suggests well used, and not abandoned!
Cheers
Nick
6 Likes
Since my builds represent trucks earlier in their service life (Wartime) I tend to just scribe the wood grain, fill in the back side with putty and then paint them OD along with the the rest of the frame. I may however give then a wash of transparent black to bring out the grain and differentiate them slightly from the steel frame members.
1 Like
Another little noted and hard to see detail present on almost all US cargo trucks of the time:
(Aussie, not to worry as this does not apply to tanker trucks.)
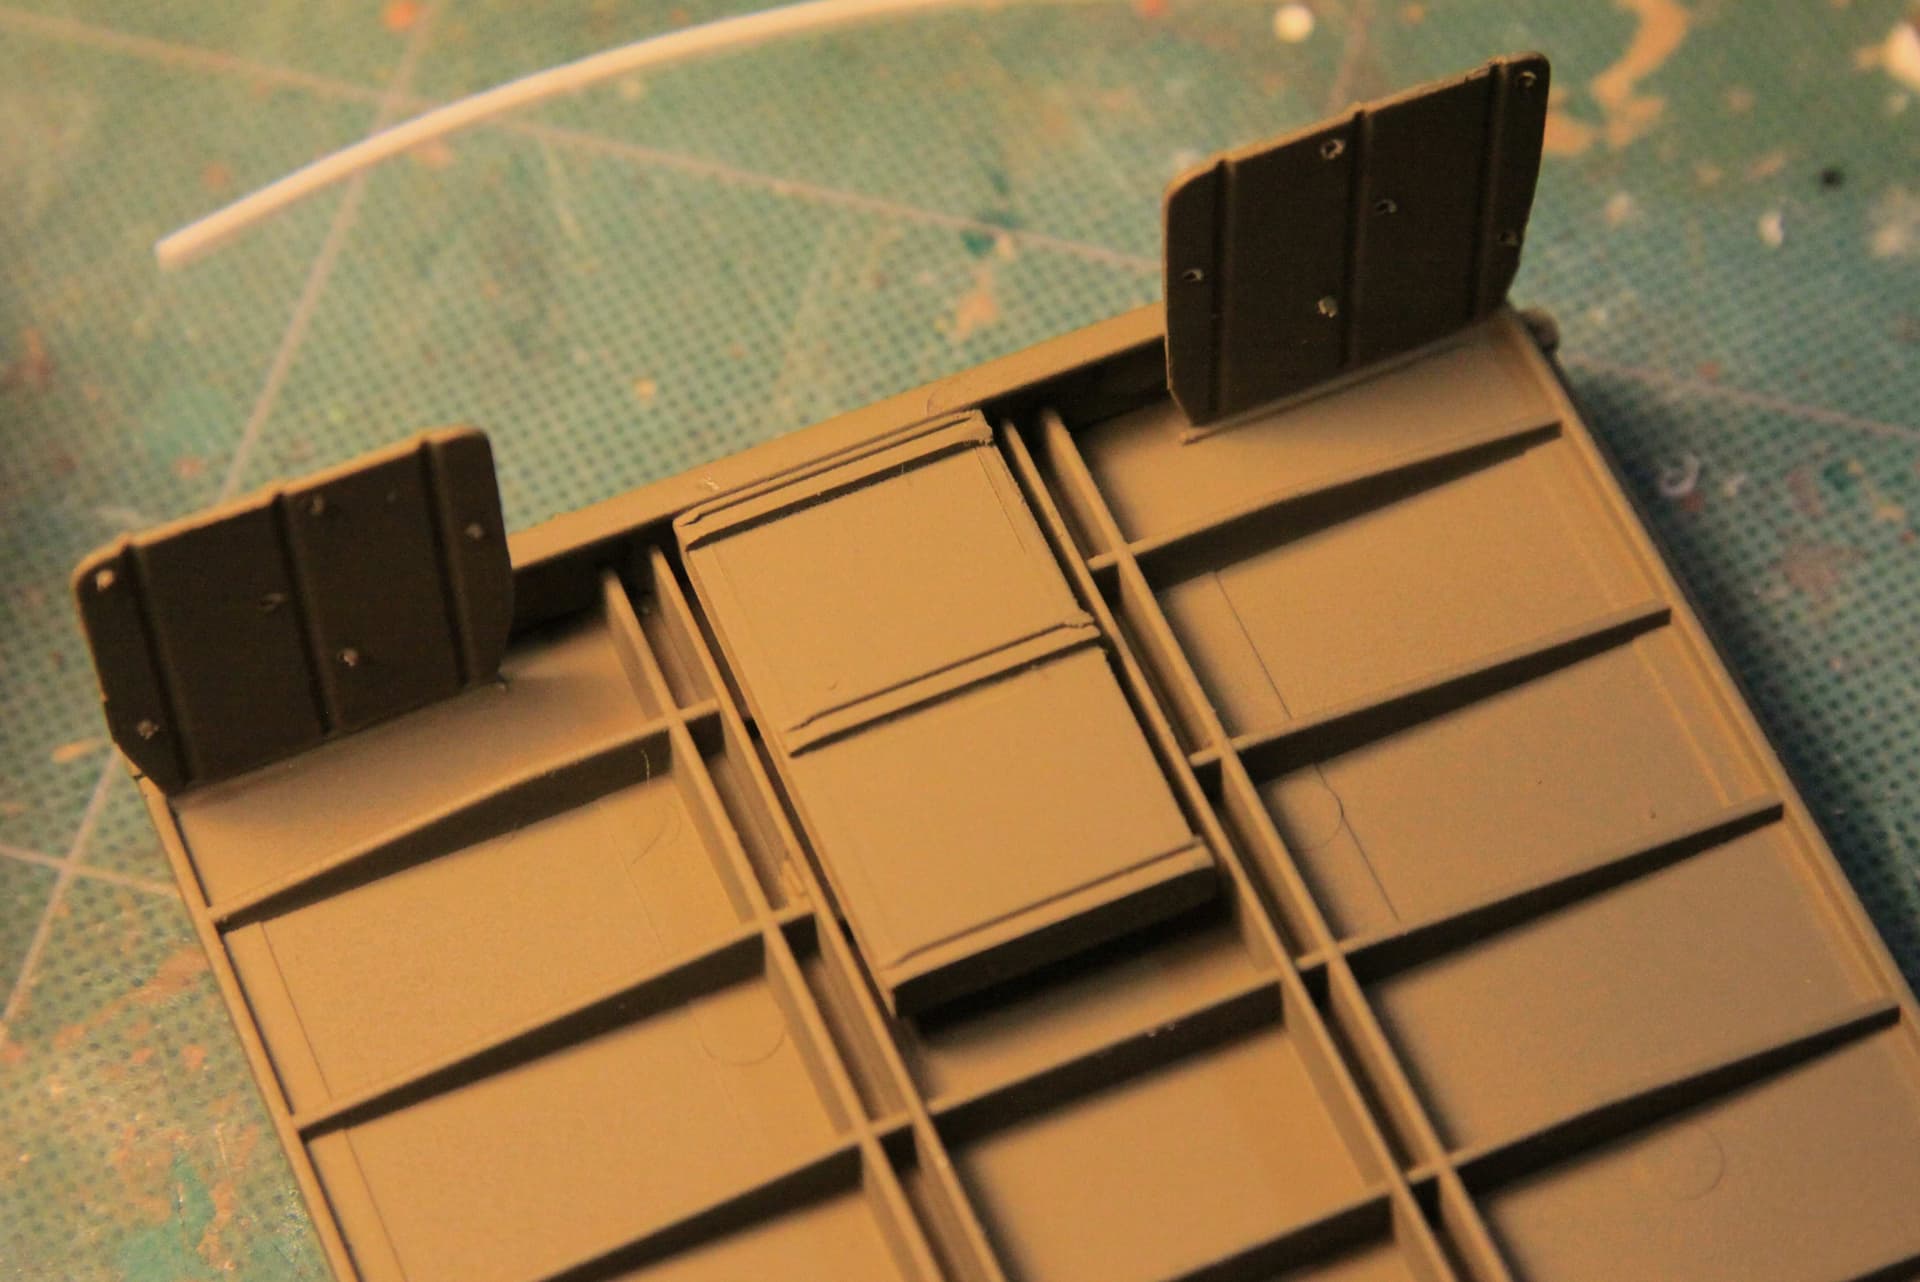
Almost every US cargo vehicle had this tool tray (drawer) tucked between the rear frame rails. (I believe this is where the tire chains were carried.) And almost every scale model since the beginning of time shows this drawer/tray in the end beam but almost no model company has ever seen fit to model the actual drawer enclosure as seen from below.
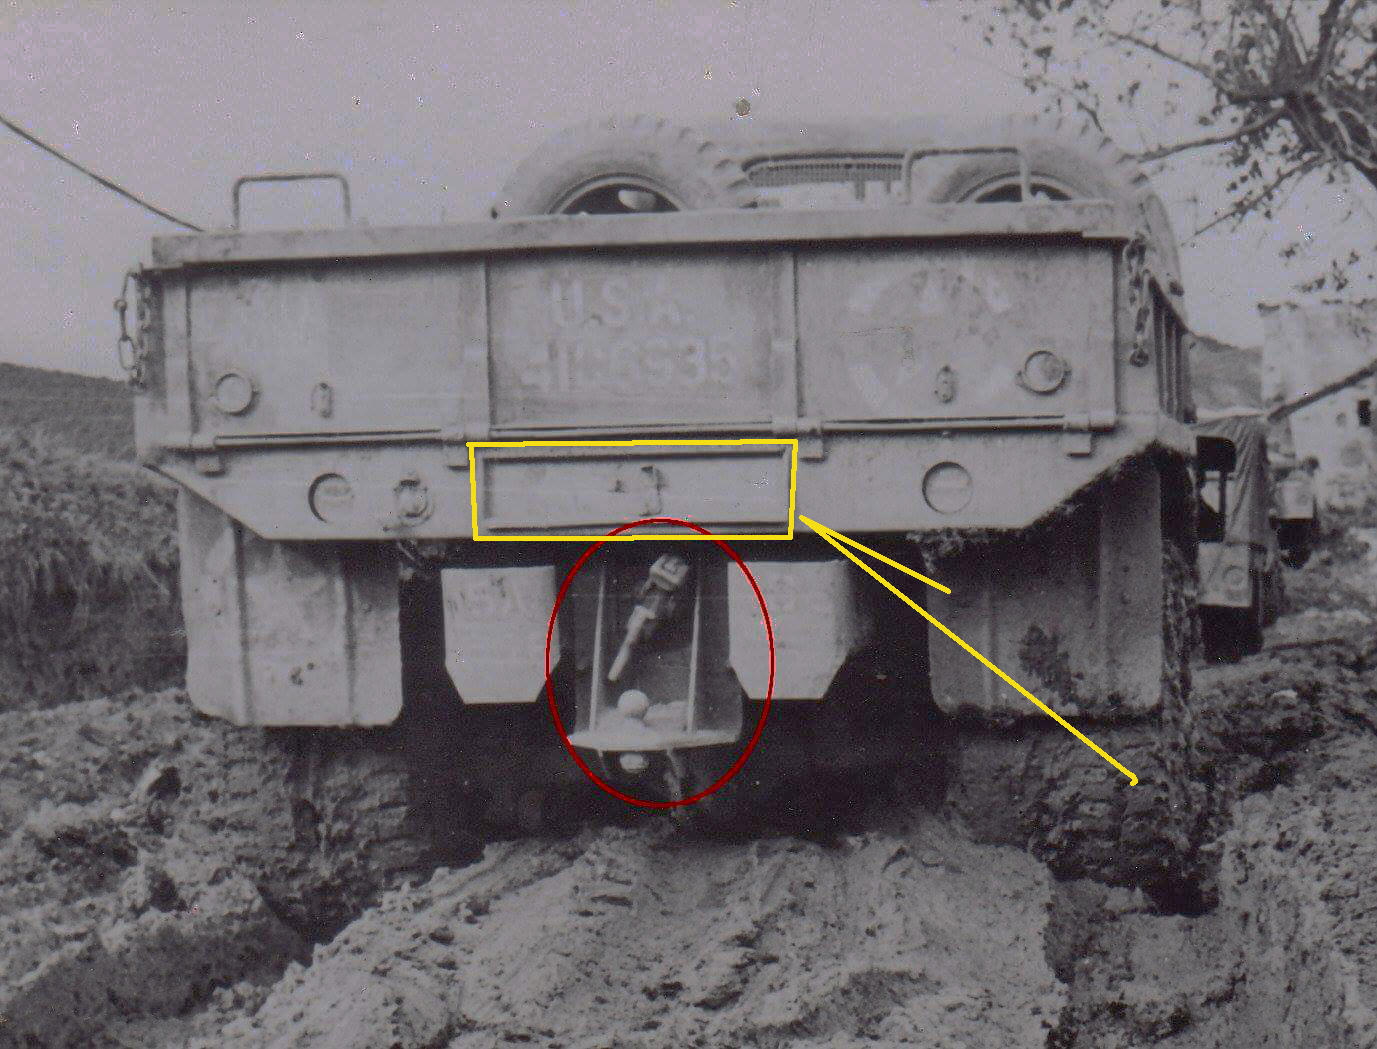
Here it is on my CCKW:

And again on my Mack NO:
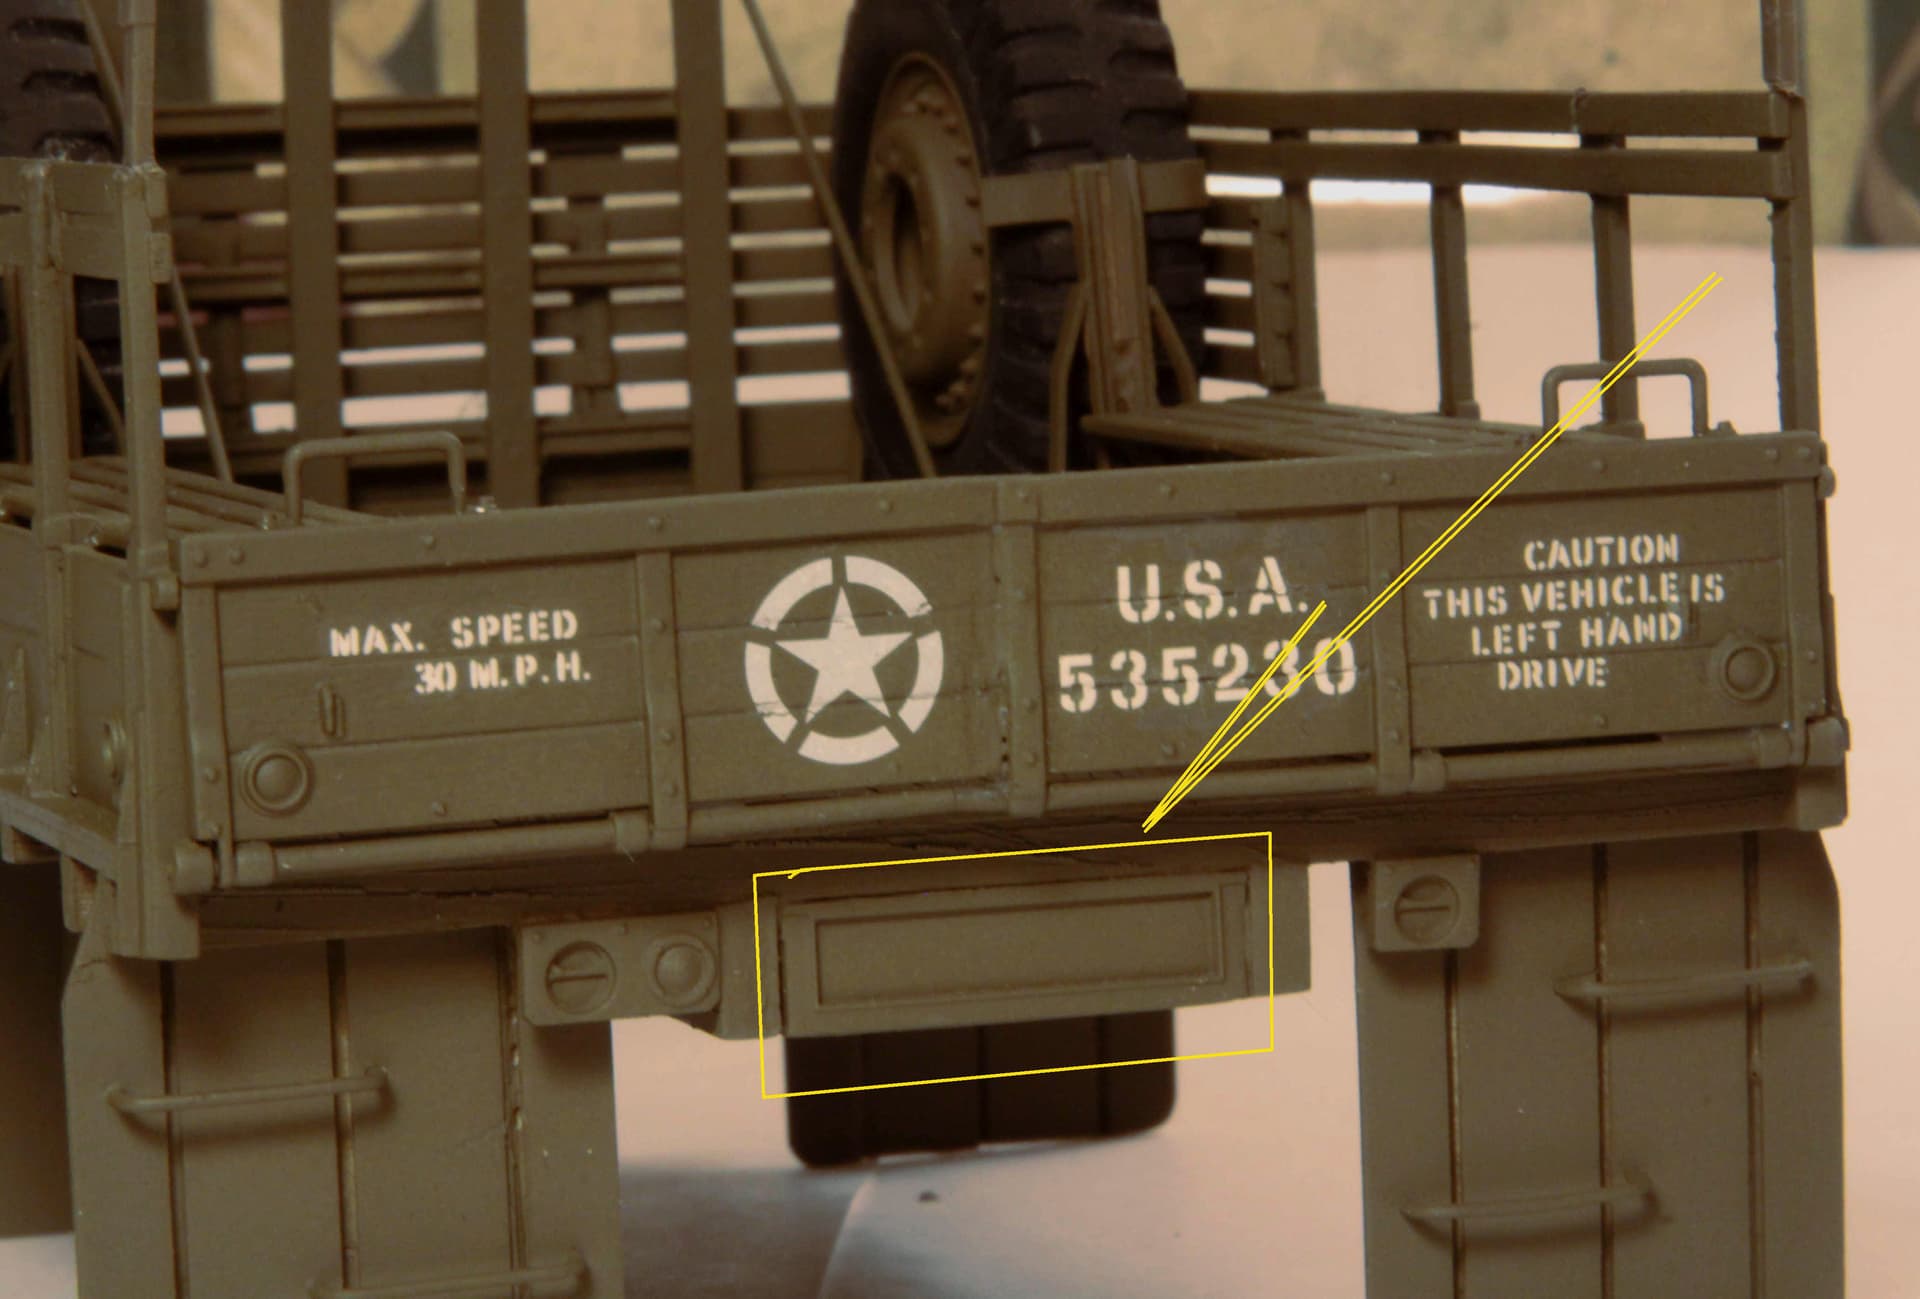
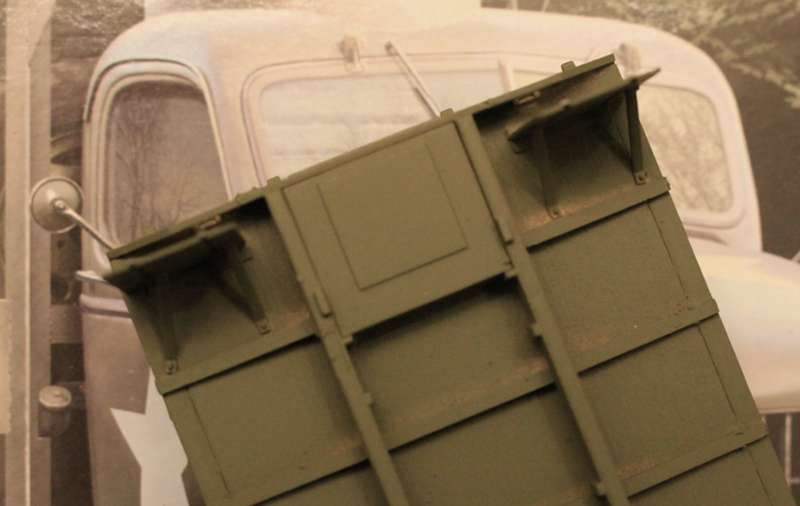
Somewhere along the line it occurred to me that I should model the actual tool tray underneath!
Seen here as scratch built on my Diamond T Wrecker:
And as much as I criticize the HobbyBoss CCKW series offerings for their mis-shapened cab and fenders, they are the first model company (to my knowledge) to actually include the tool tray underneath as seen below.
(FYI - Their CCKW series is a tour-de-force in every other way as regards detailing!)
____________________
You might also note in that first reference photo (red circle) that all military towing pintles rotate to accommodate the lunette on the towed trailer when at extreme off-angles. So the REAL pintle is often seen as not perfectly straight up and down.
I almost always include this small detail in my builds.
(I have also always feared a competition judge would mark me down for this.)
3 Likes
Another overlooked detail in the tray is the small padlock and looped chain that usually secured this tray. Even I have failed to figure out how to model this aspect, though some etch detail sets have included this item.
On the topic of details perhaps unseen I offer the following:
*This material is lifted primarily from my old thread “Waiting of a new Deuce and a Half.”
This all started with the thought that all differentials have both a bottom drain plug and a fill/level check plug about 3/5th of the way up the side of the diff housing. Most modern injection moldings MAY give you one or the other but NOT both. So I started the practice of using small nut/bolt plastic castings (lifted for my Railroad modeling efforts) to add these details.
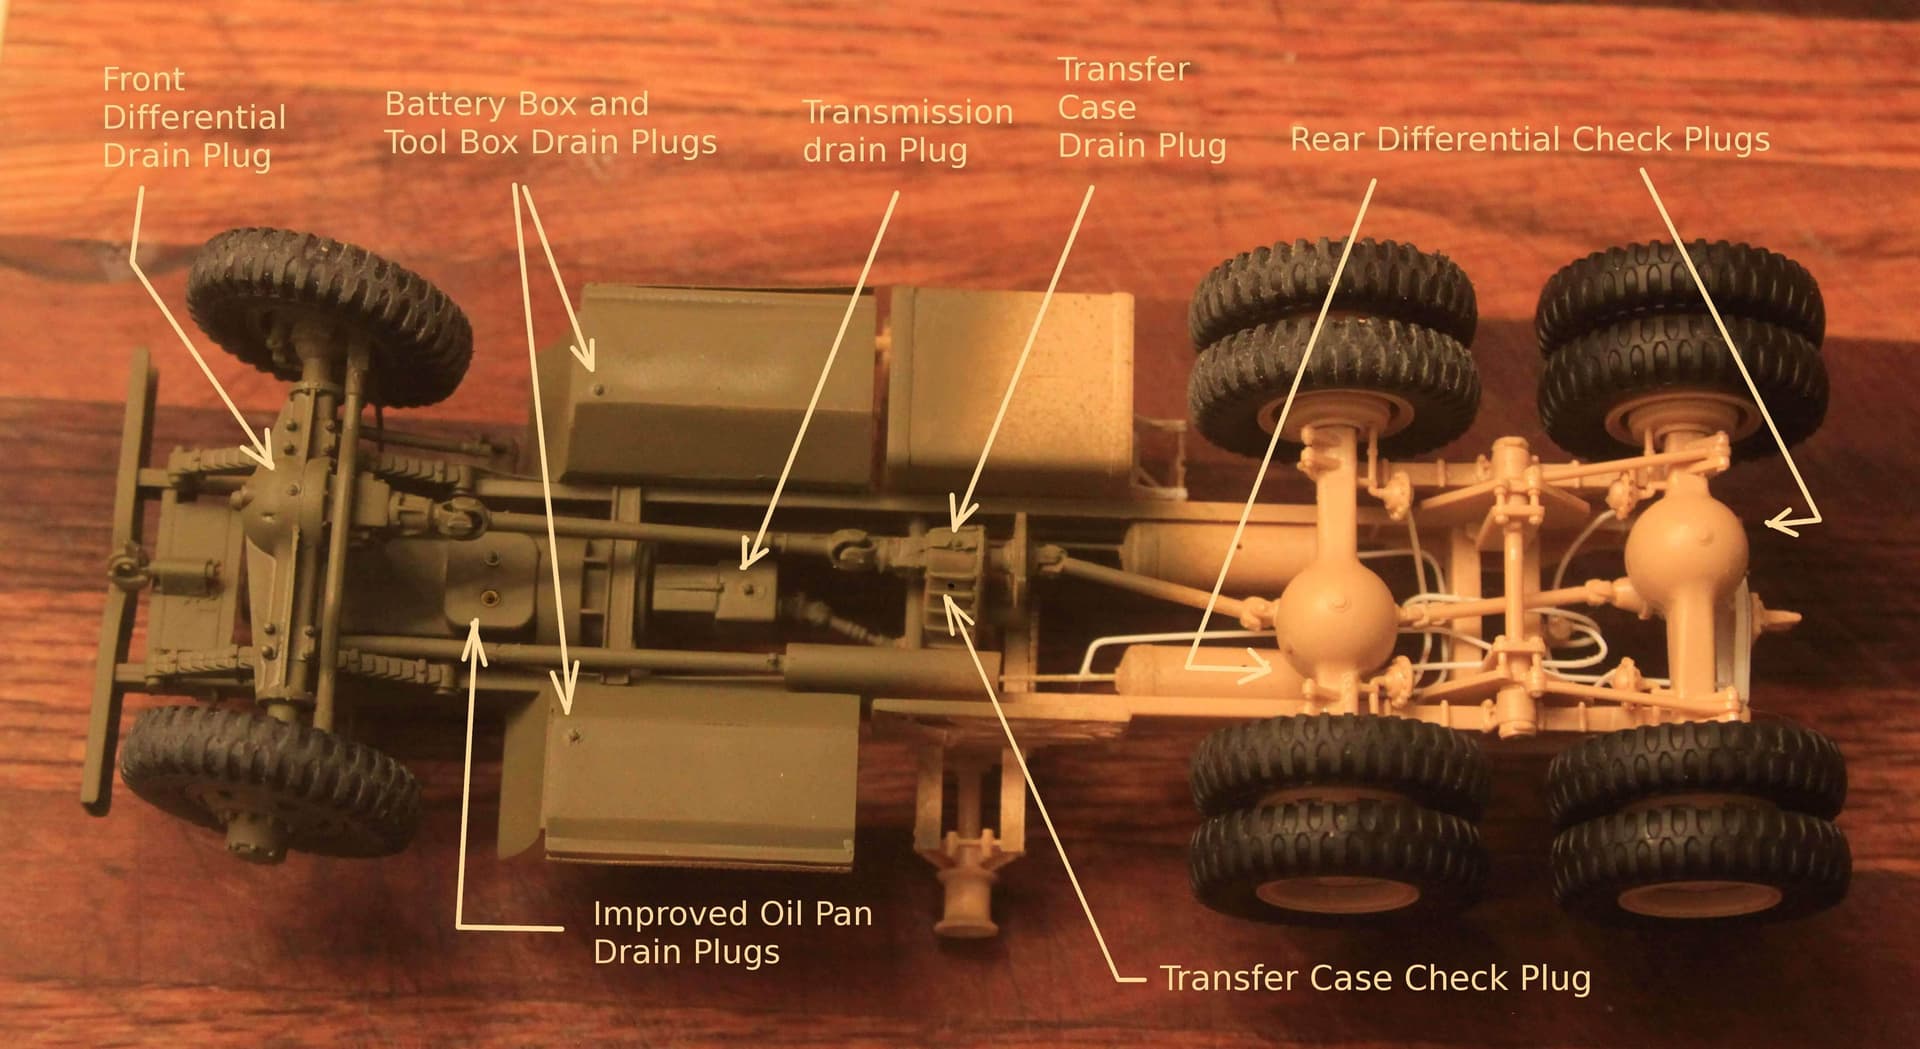
Also almost all air brake reservoirs have drain cocks and the driver is instructed to periodically purge any moisture that has built up in the system. (Same for air compressors and even musical trumpets!)
As seen here on my White 666 cargo truck converted to a semi tractor.
Again I called on my Railroad Modeling supplies to provide small brass drain cocks for this purpose.


1 Like
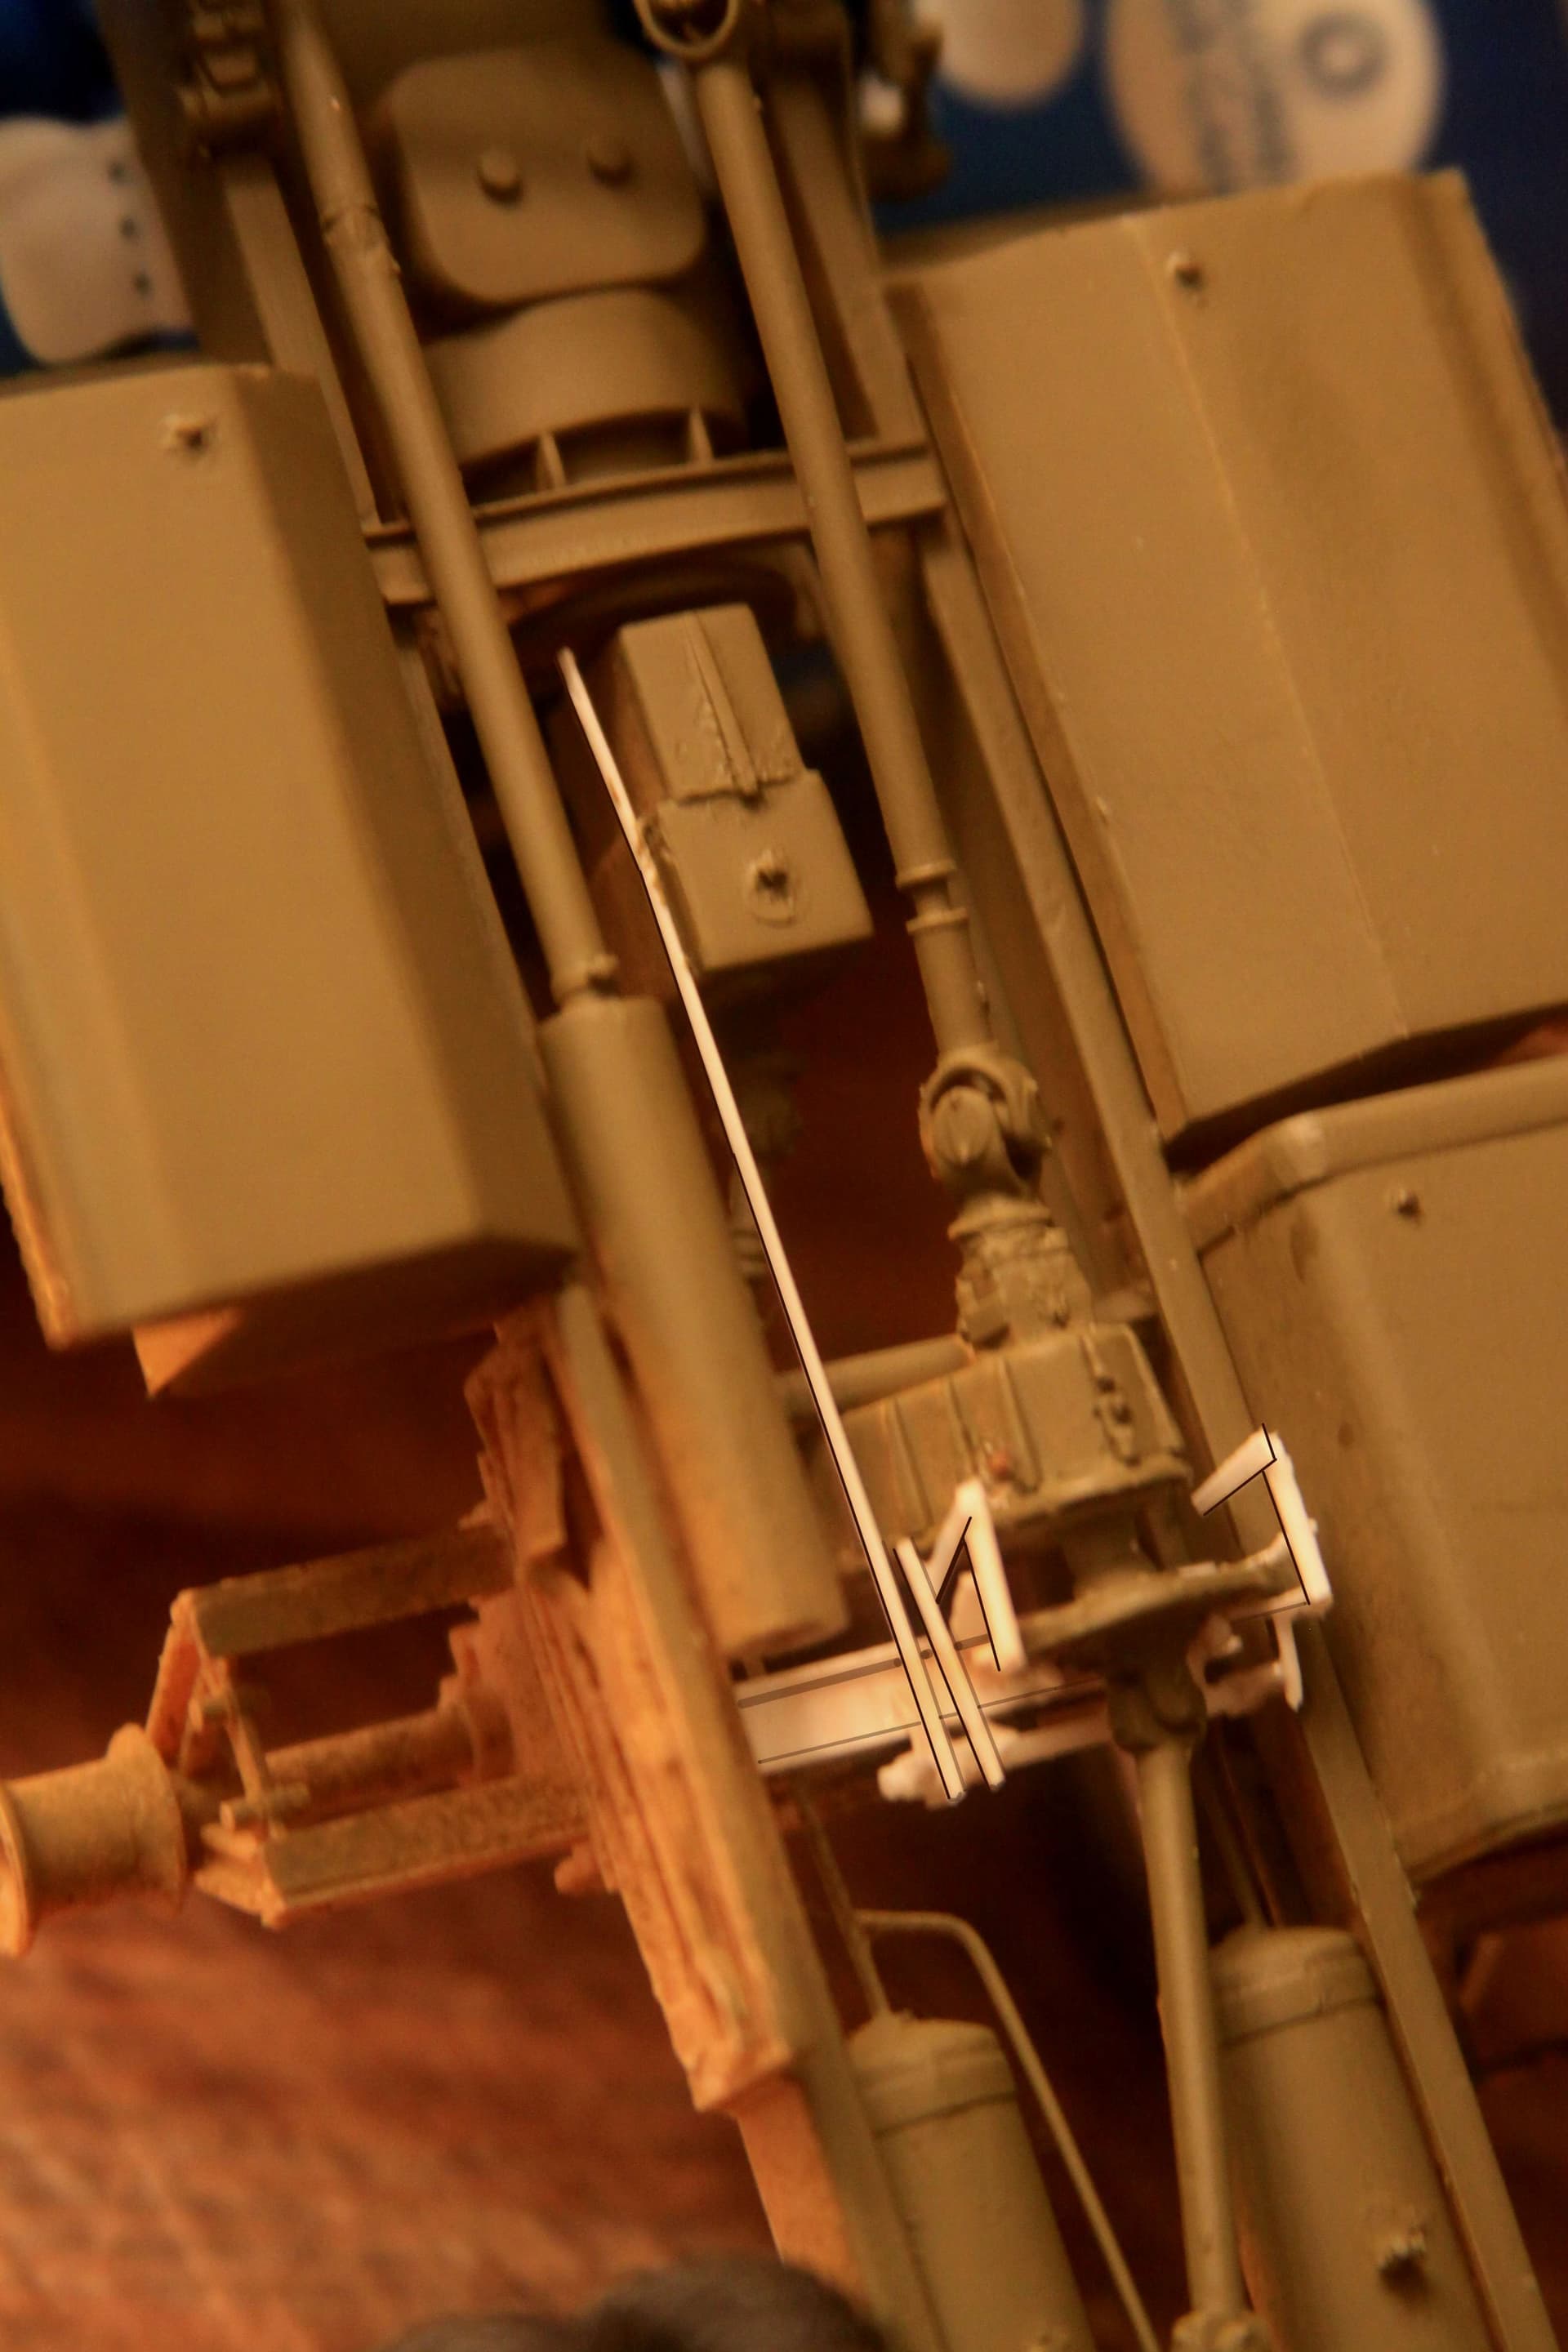
And if I have not as yet bored everyone with a discourse on truck underbody details:
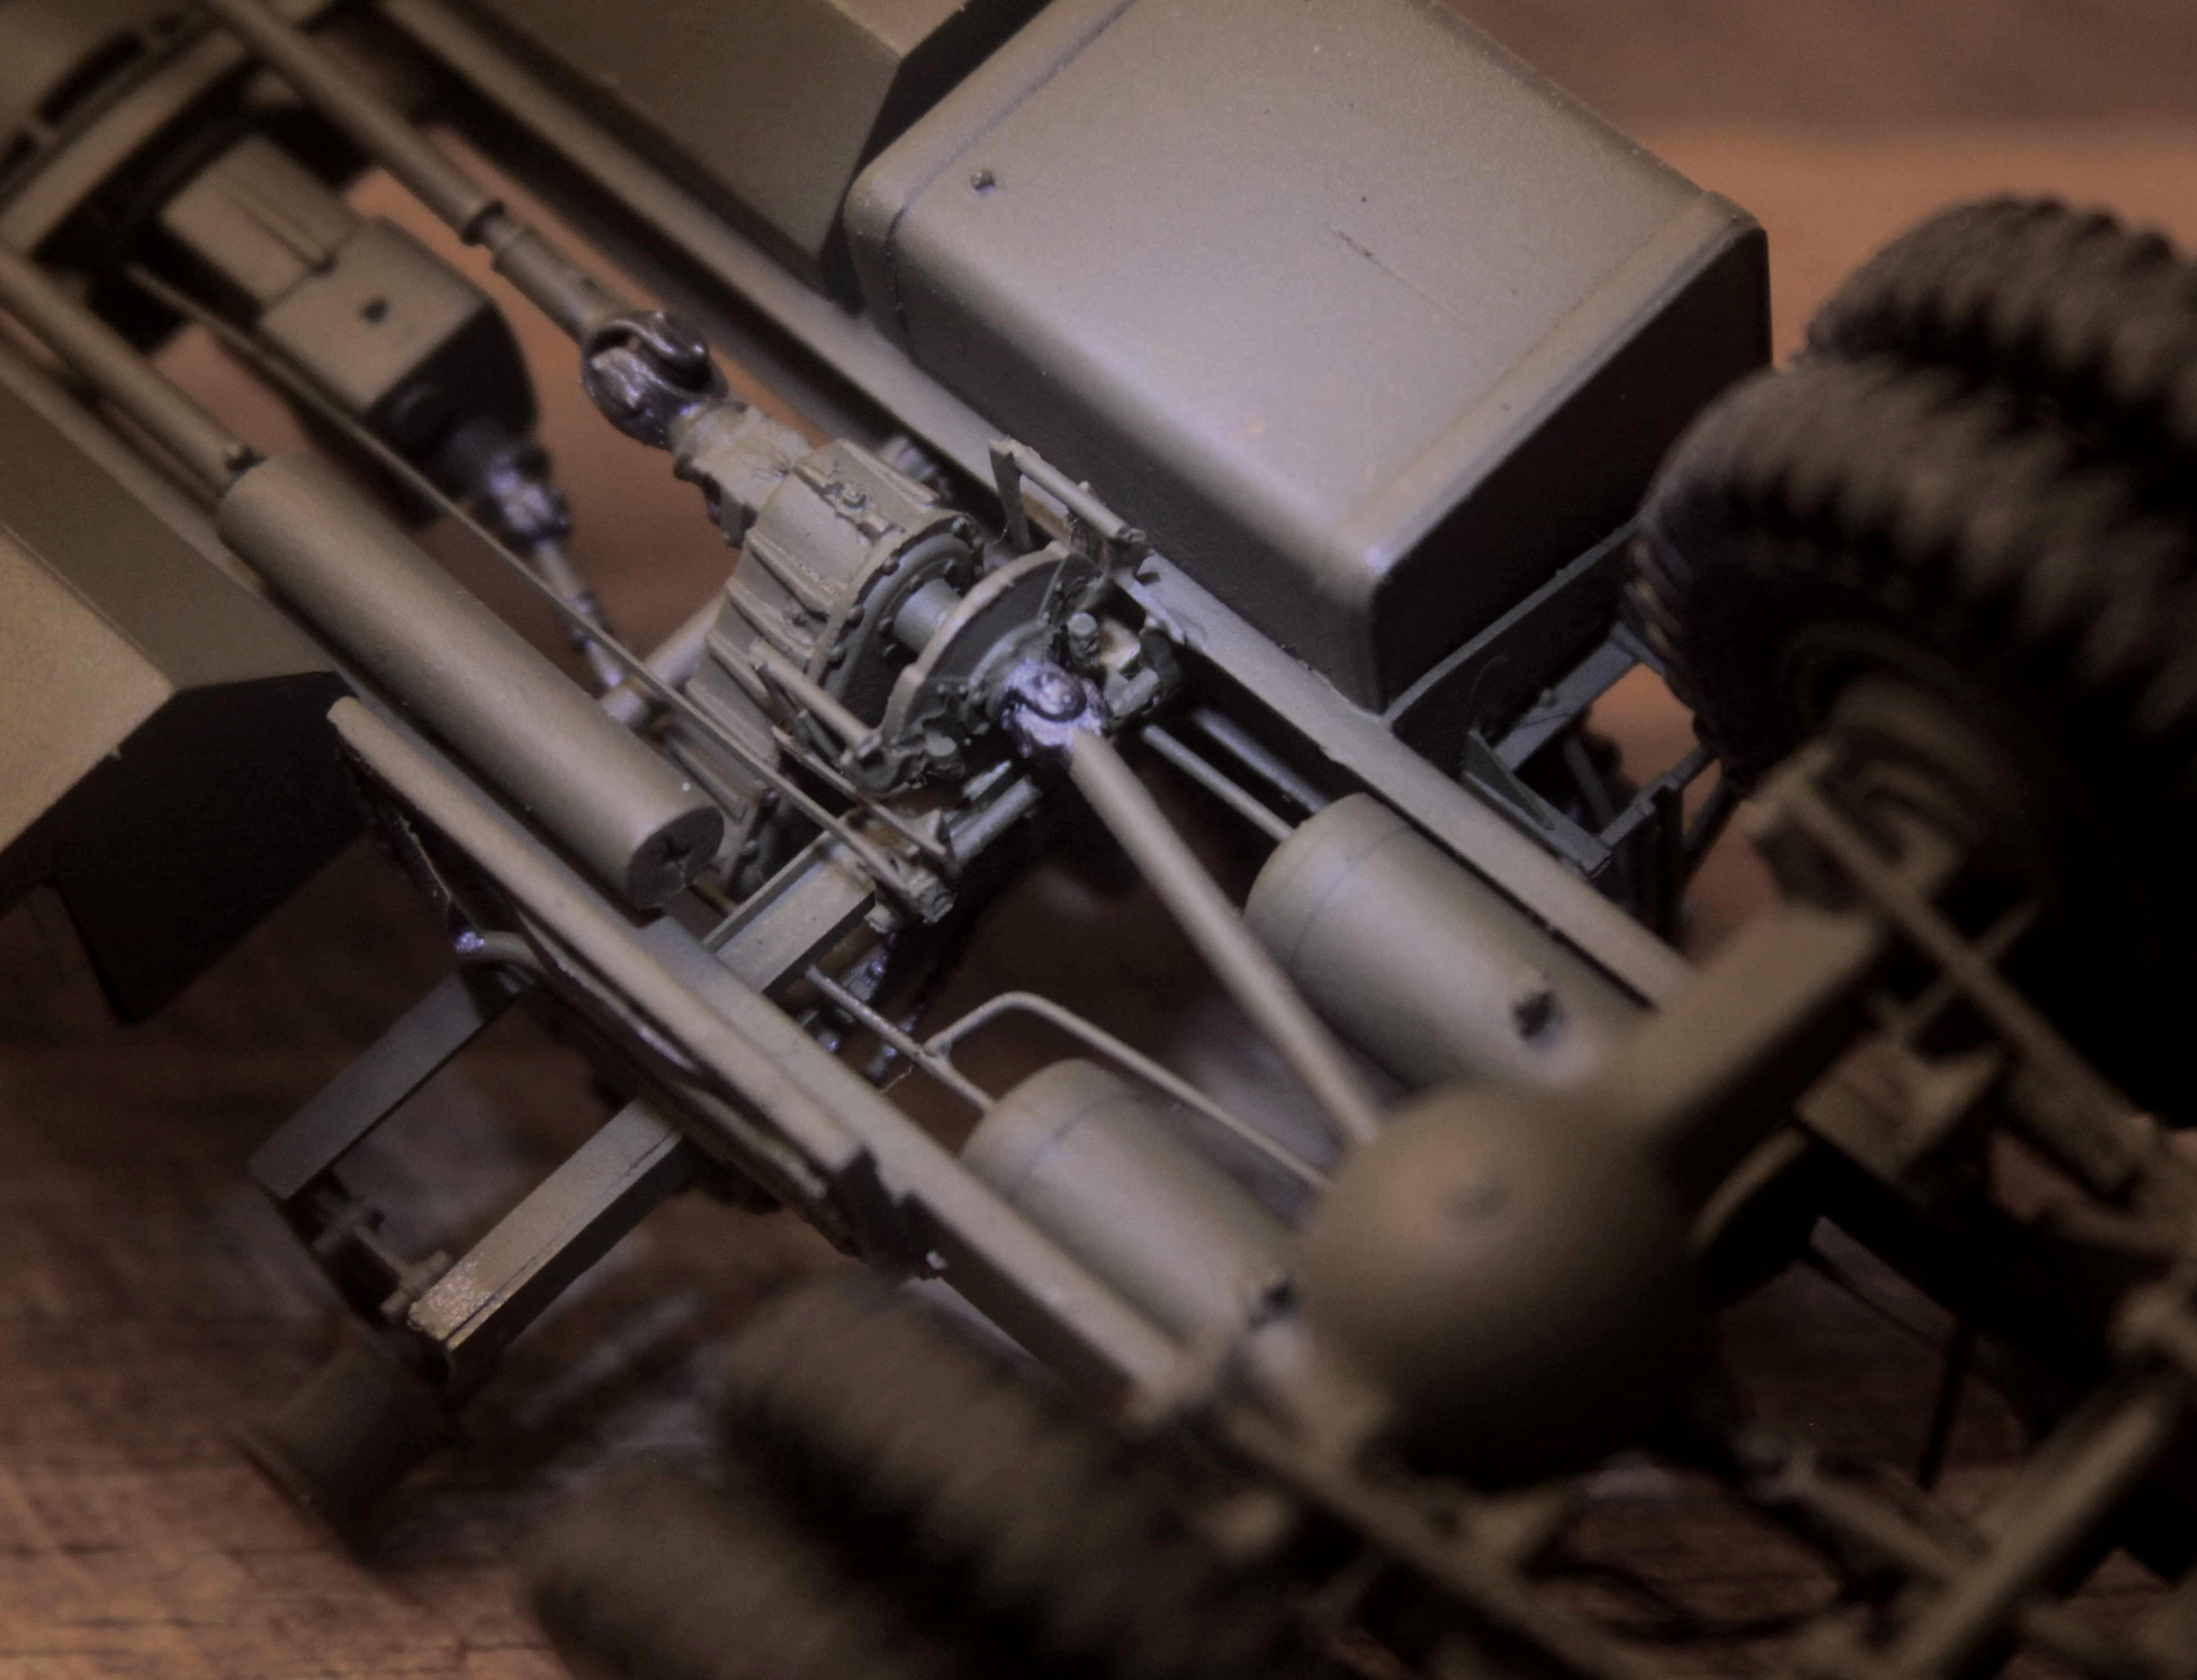
More detail for the parking brake assembly:
From Below: . . . . . . . . . . . . . and Above:

Finished: Since this was to be a semi tractor I figured that hopefully, the more visible and complete detail would be warranted.
_________________
Here is the link to my CCCKW thread in the archives:
https://archive.armorama.com/forums/203281/index.htm
Looks like the majority of the reference and model photography survived the Archiving process!
3 Likes
Many thanks for the extra info guys, always love the learning that comes along with these build threads!
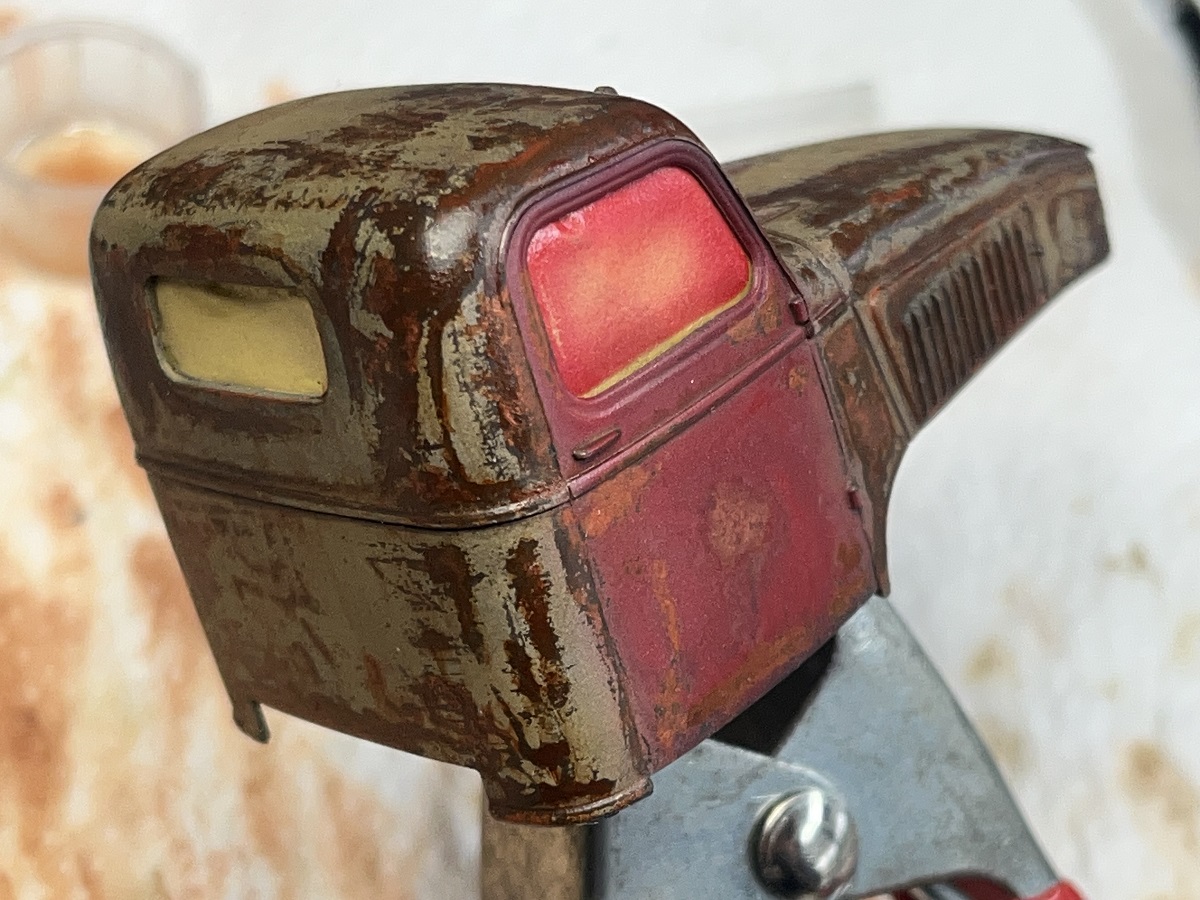
Update on where I’m up to on this one, chassis rails are rusted up, cab is done, a few more days for the oils to cure fully (cold and wet here now) then I will lock the work in with Dullcote and do the major assembly.
Cheers, D
6 Likes