That’s my first post here and I hope the new forum will work fine for me
I am participating Golden Memories Campaign, hosted by Johnnych01, and I’m building the KShtM R-142N Deymos radiotruck I served on 25 years ago, while doing my tour of duty with the 5th Border Detachment(Momchilgrad)/Border Troops/Ministry of Interior/Bulgaria.
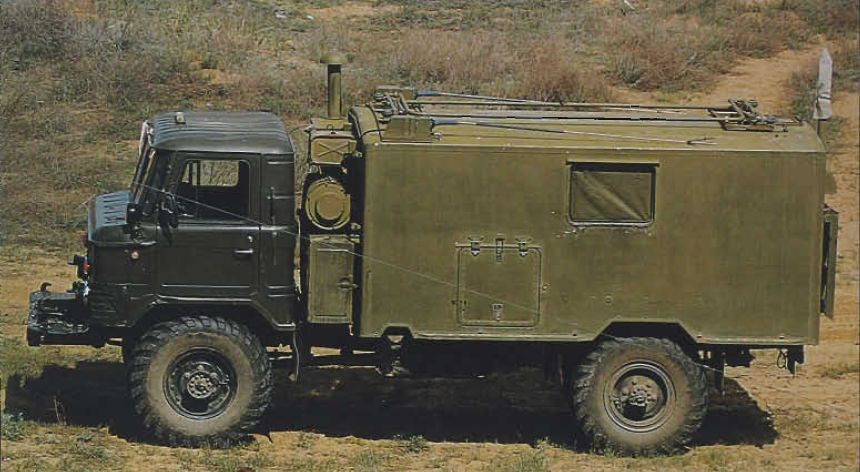
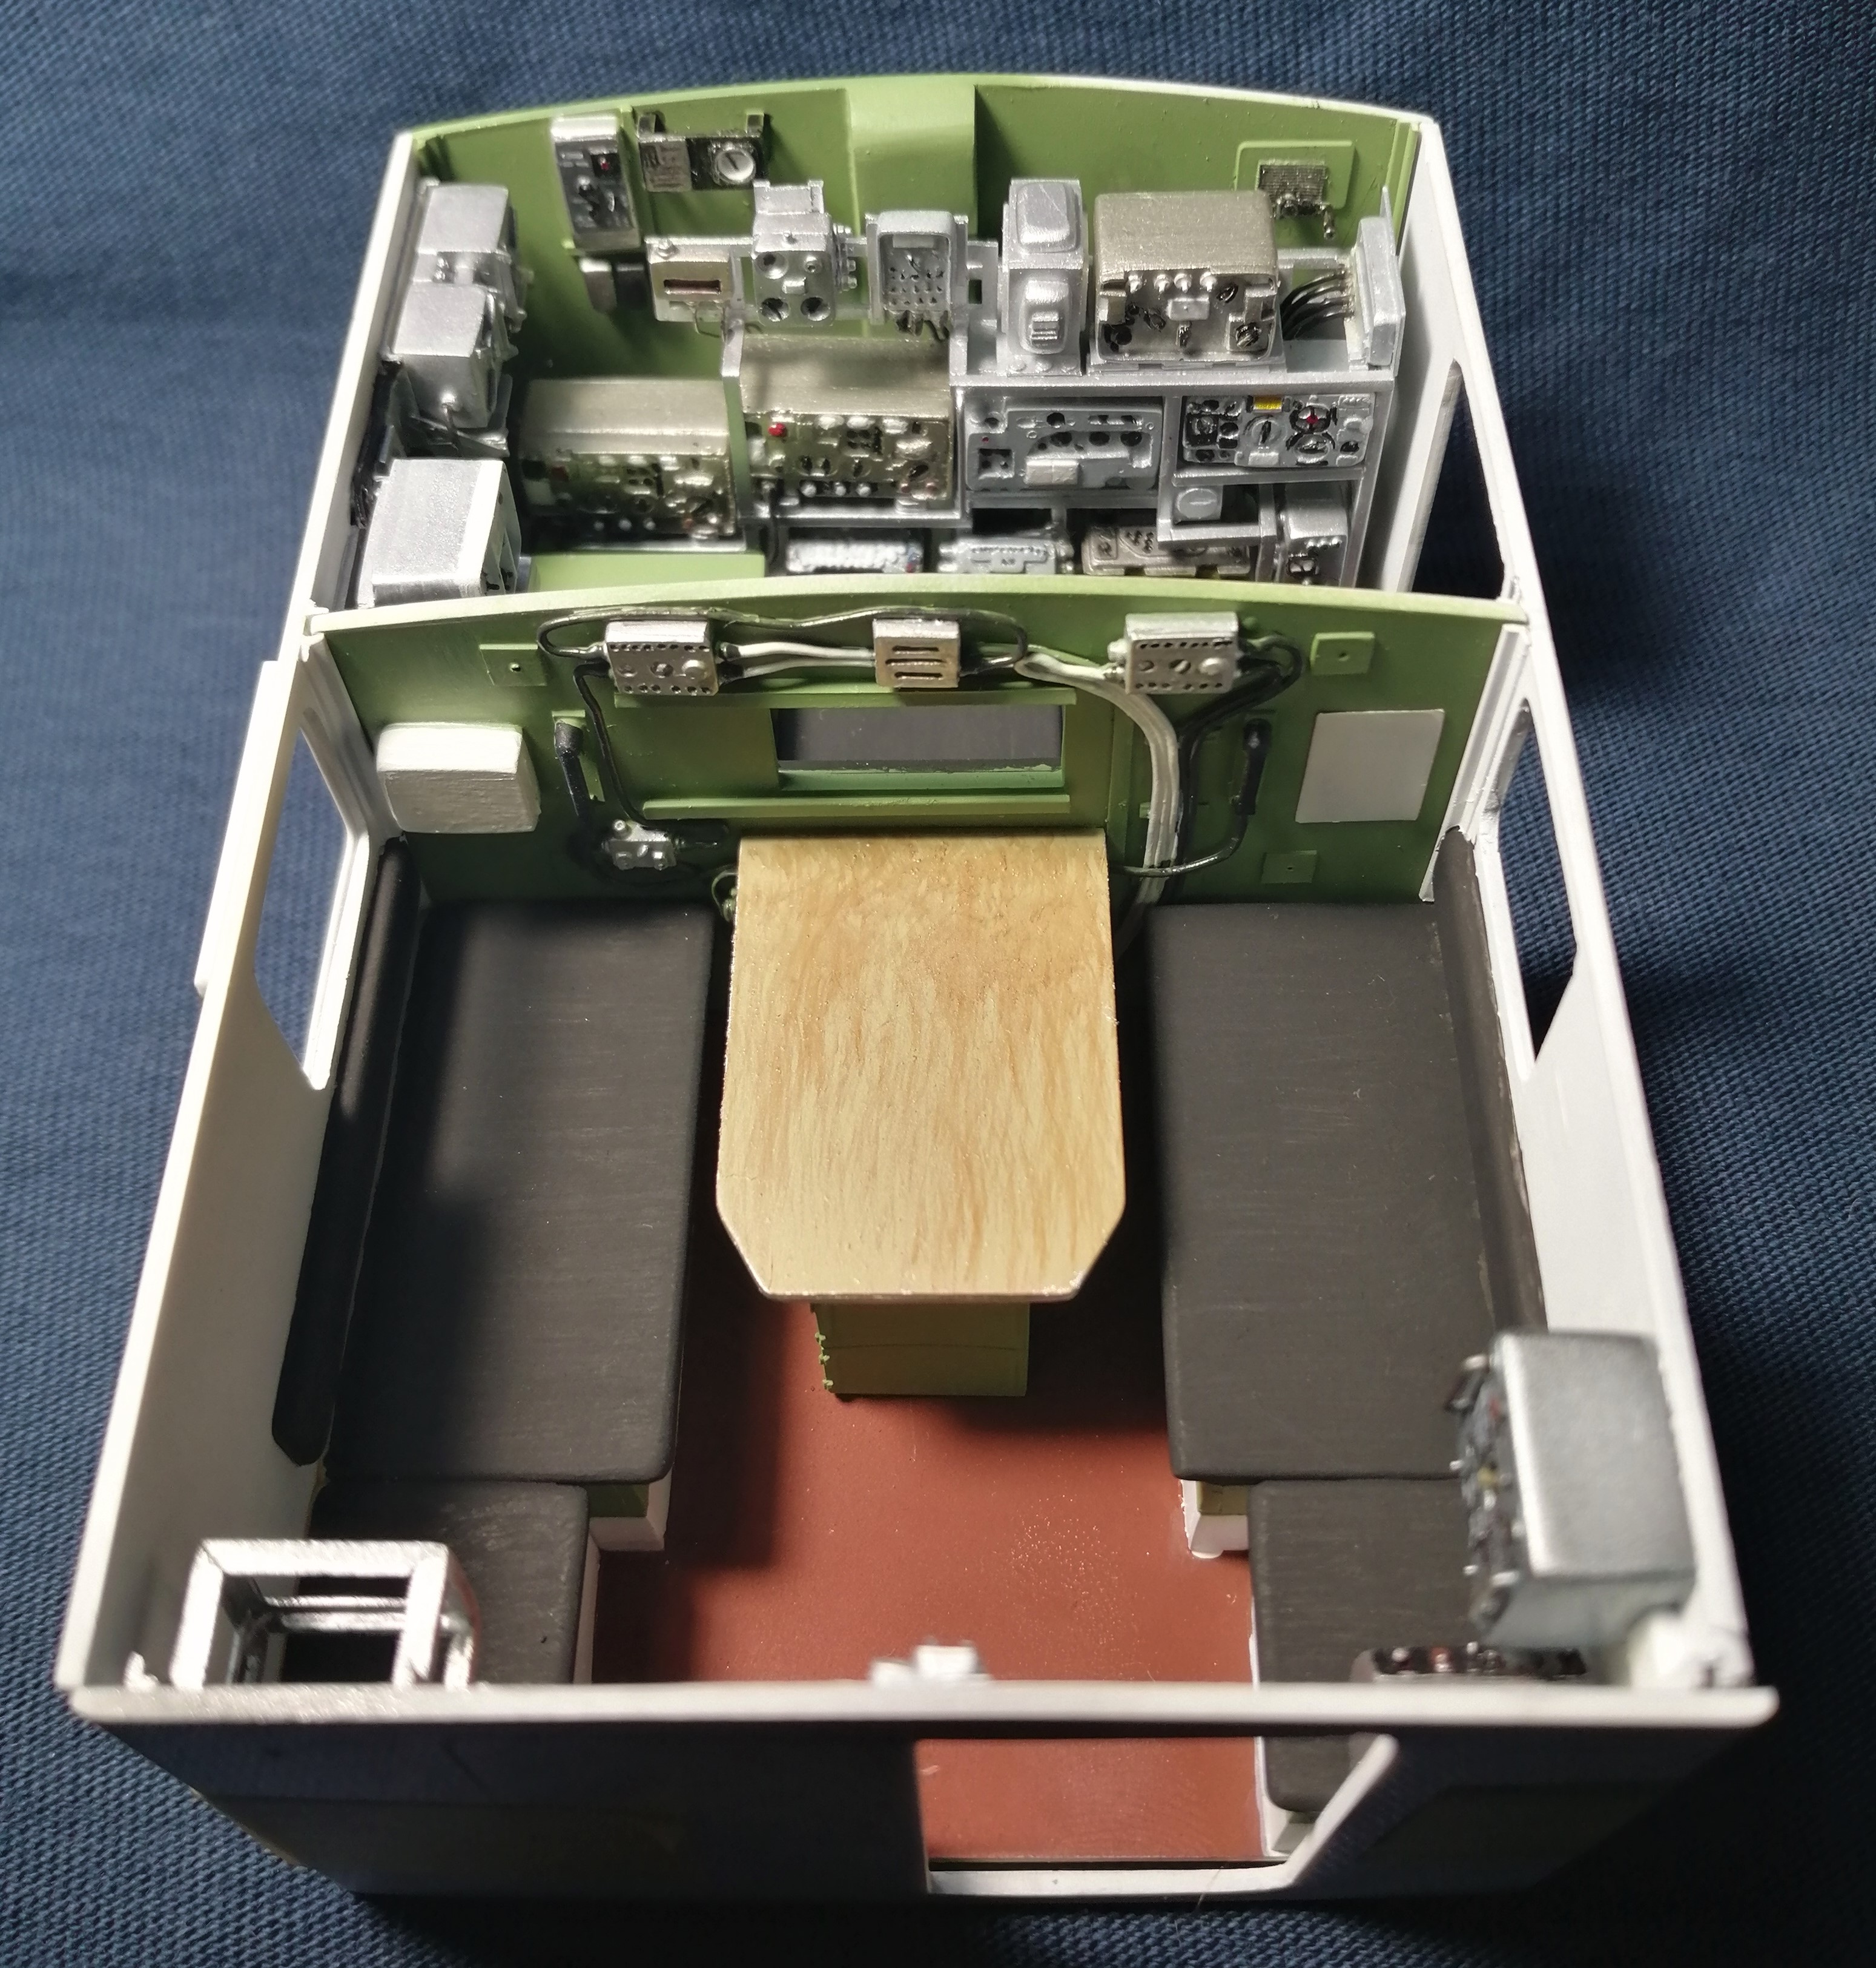
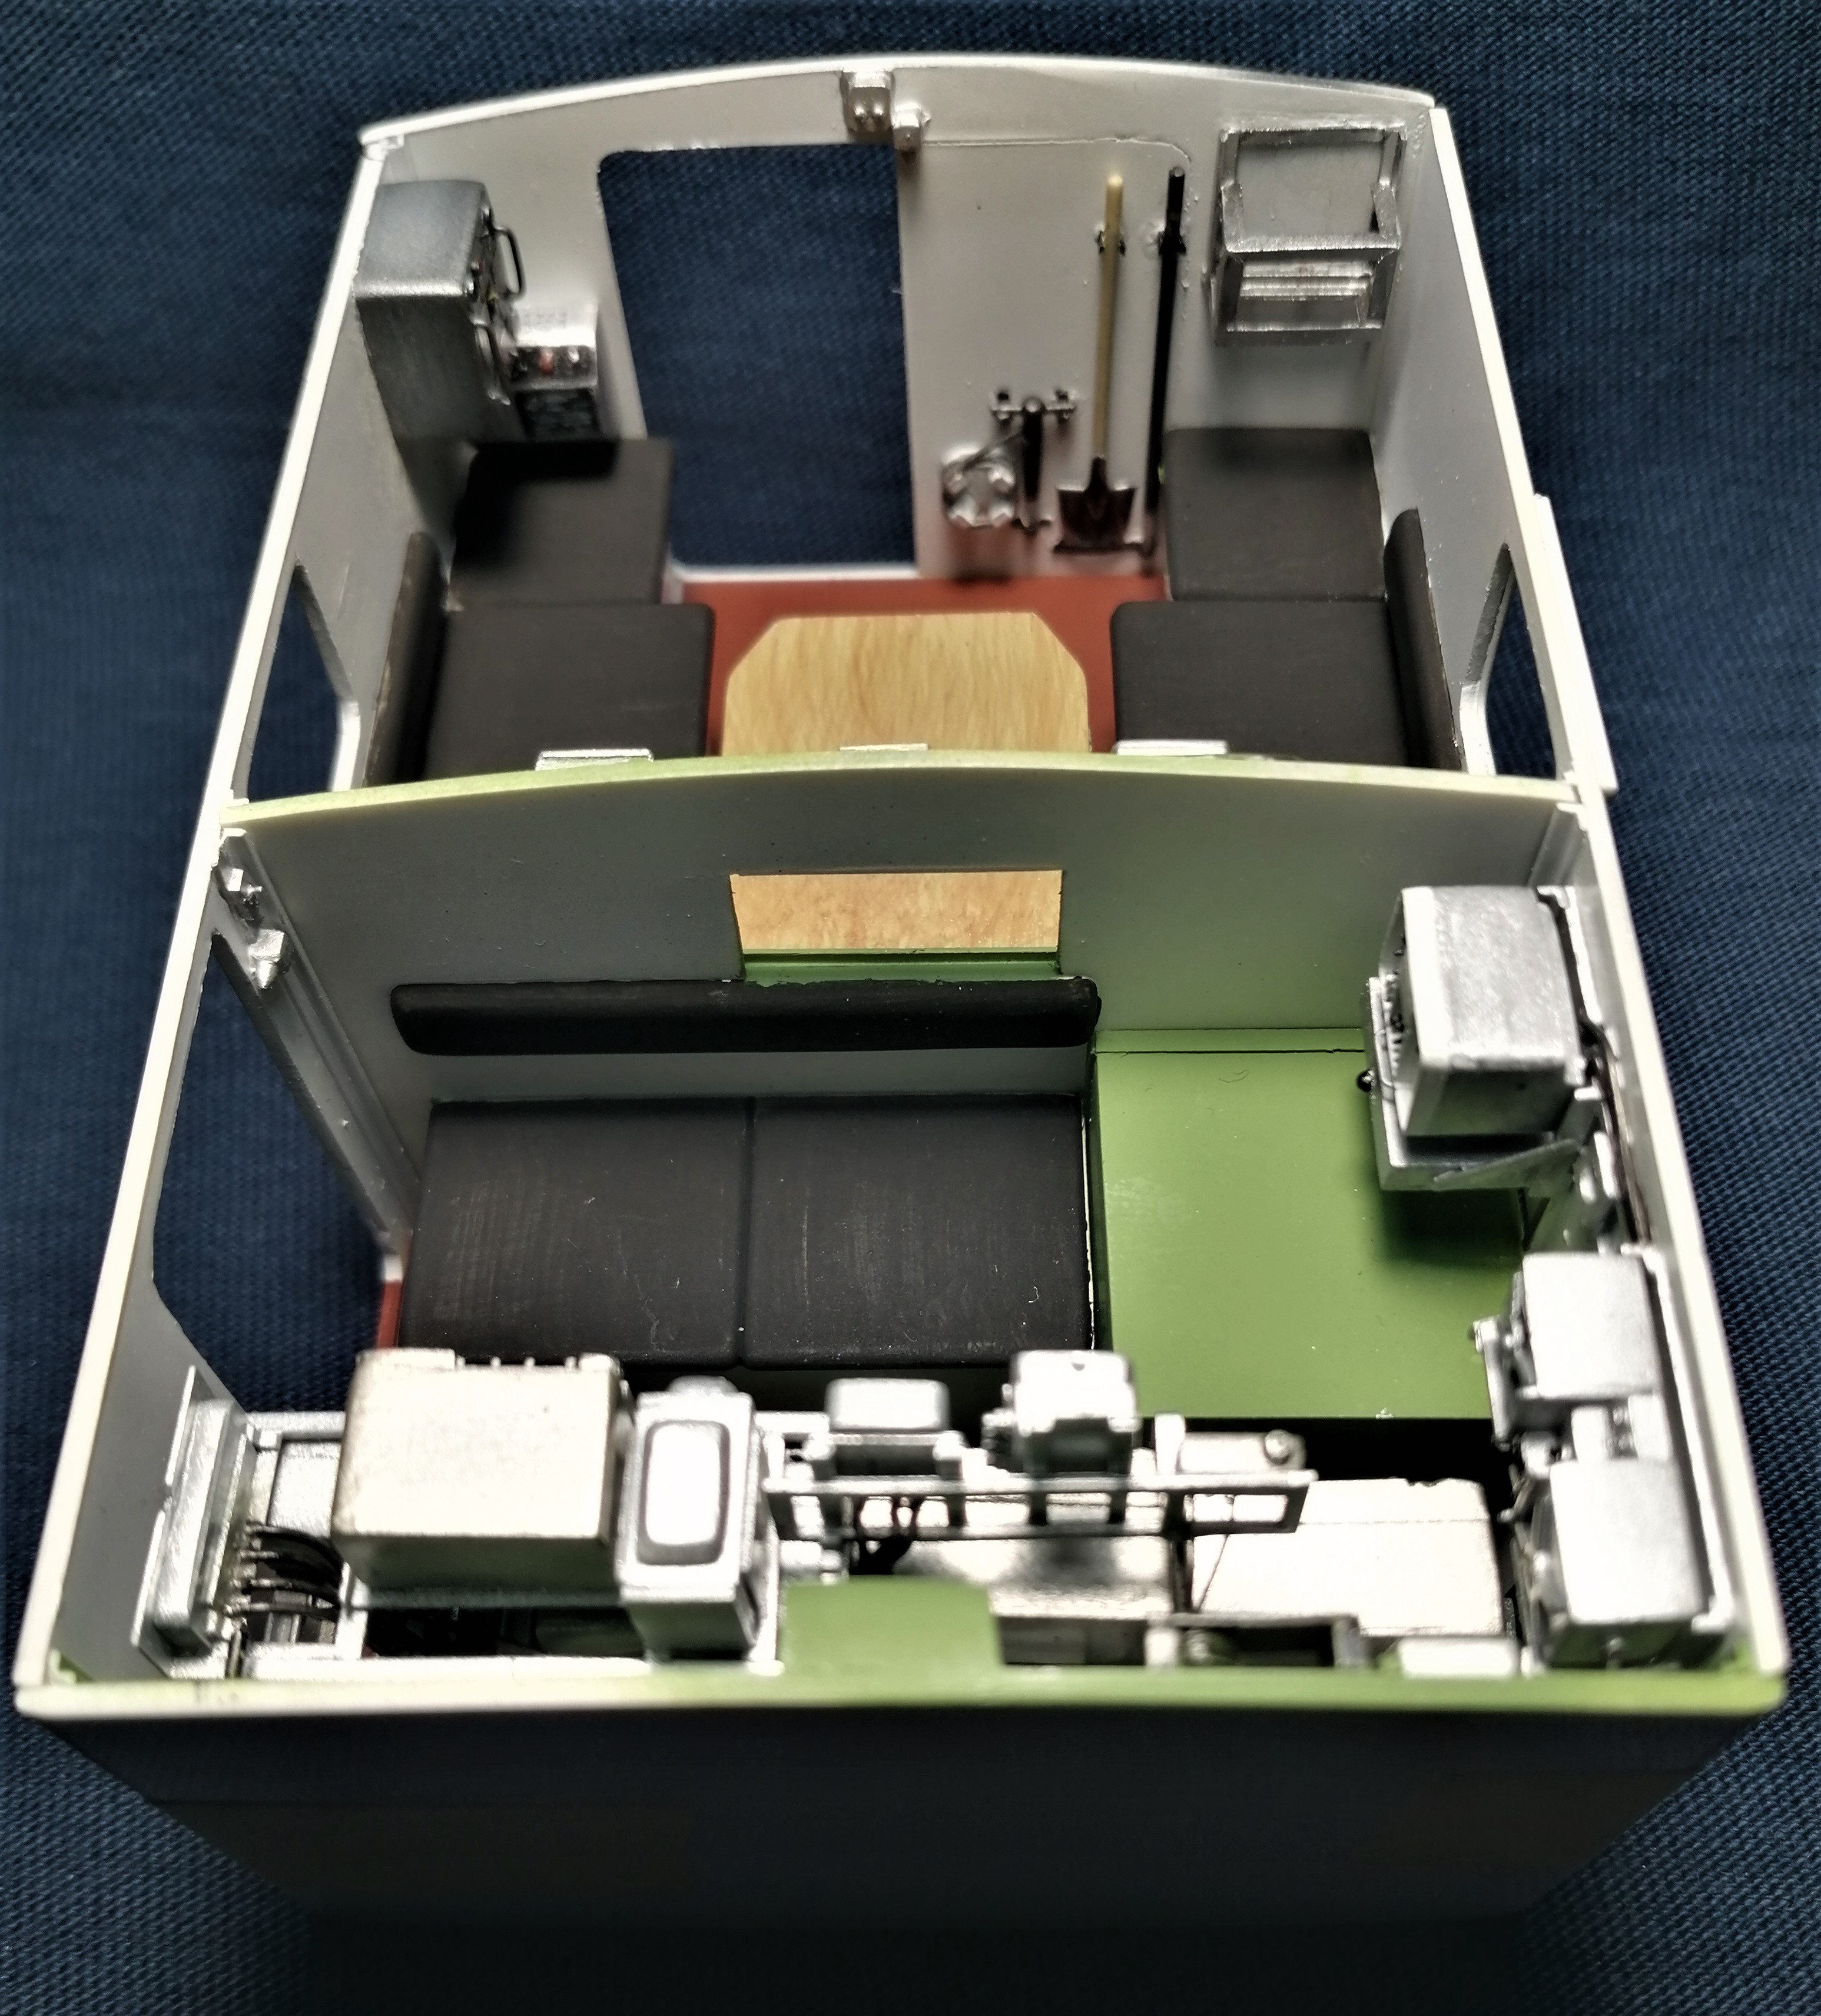
To sum up what I’m doing- I’m using Trumpeter’s GAZ-66 truck kit and I’m scratchbuilding the radiobox with all the equipment(radiosets, power units,antennae feeders e.t.c.) inside.
Thanks for bringing the link across Angel, and good to see you over here.
Now you’ve put some pictures up with the build broken down it looks even more impressive when you see just how much fantastic detail you have put into it.
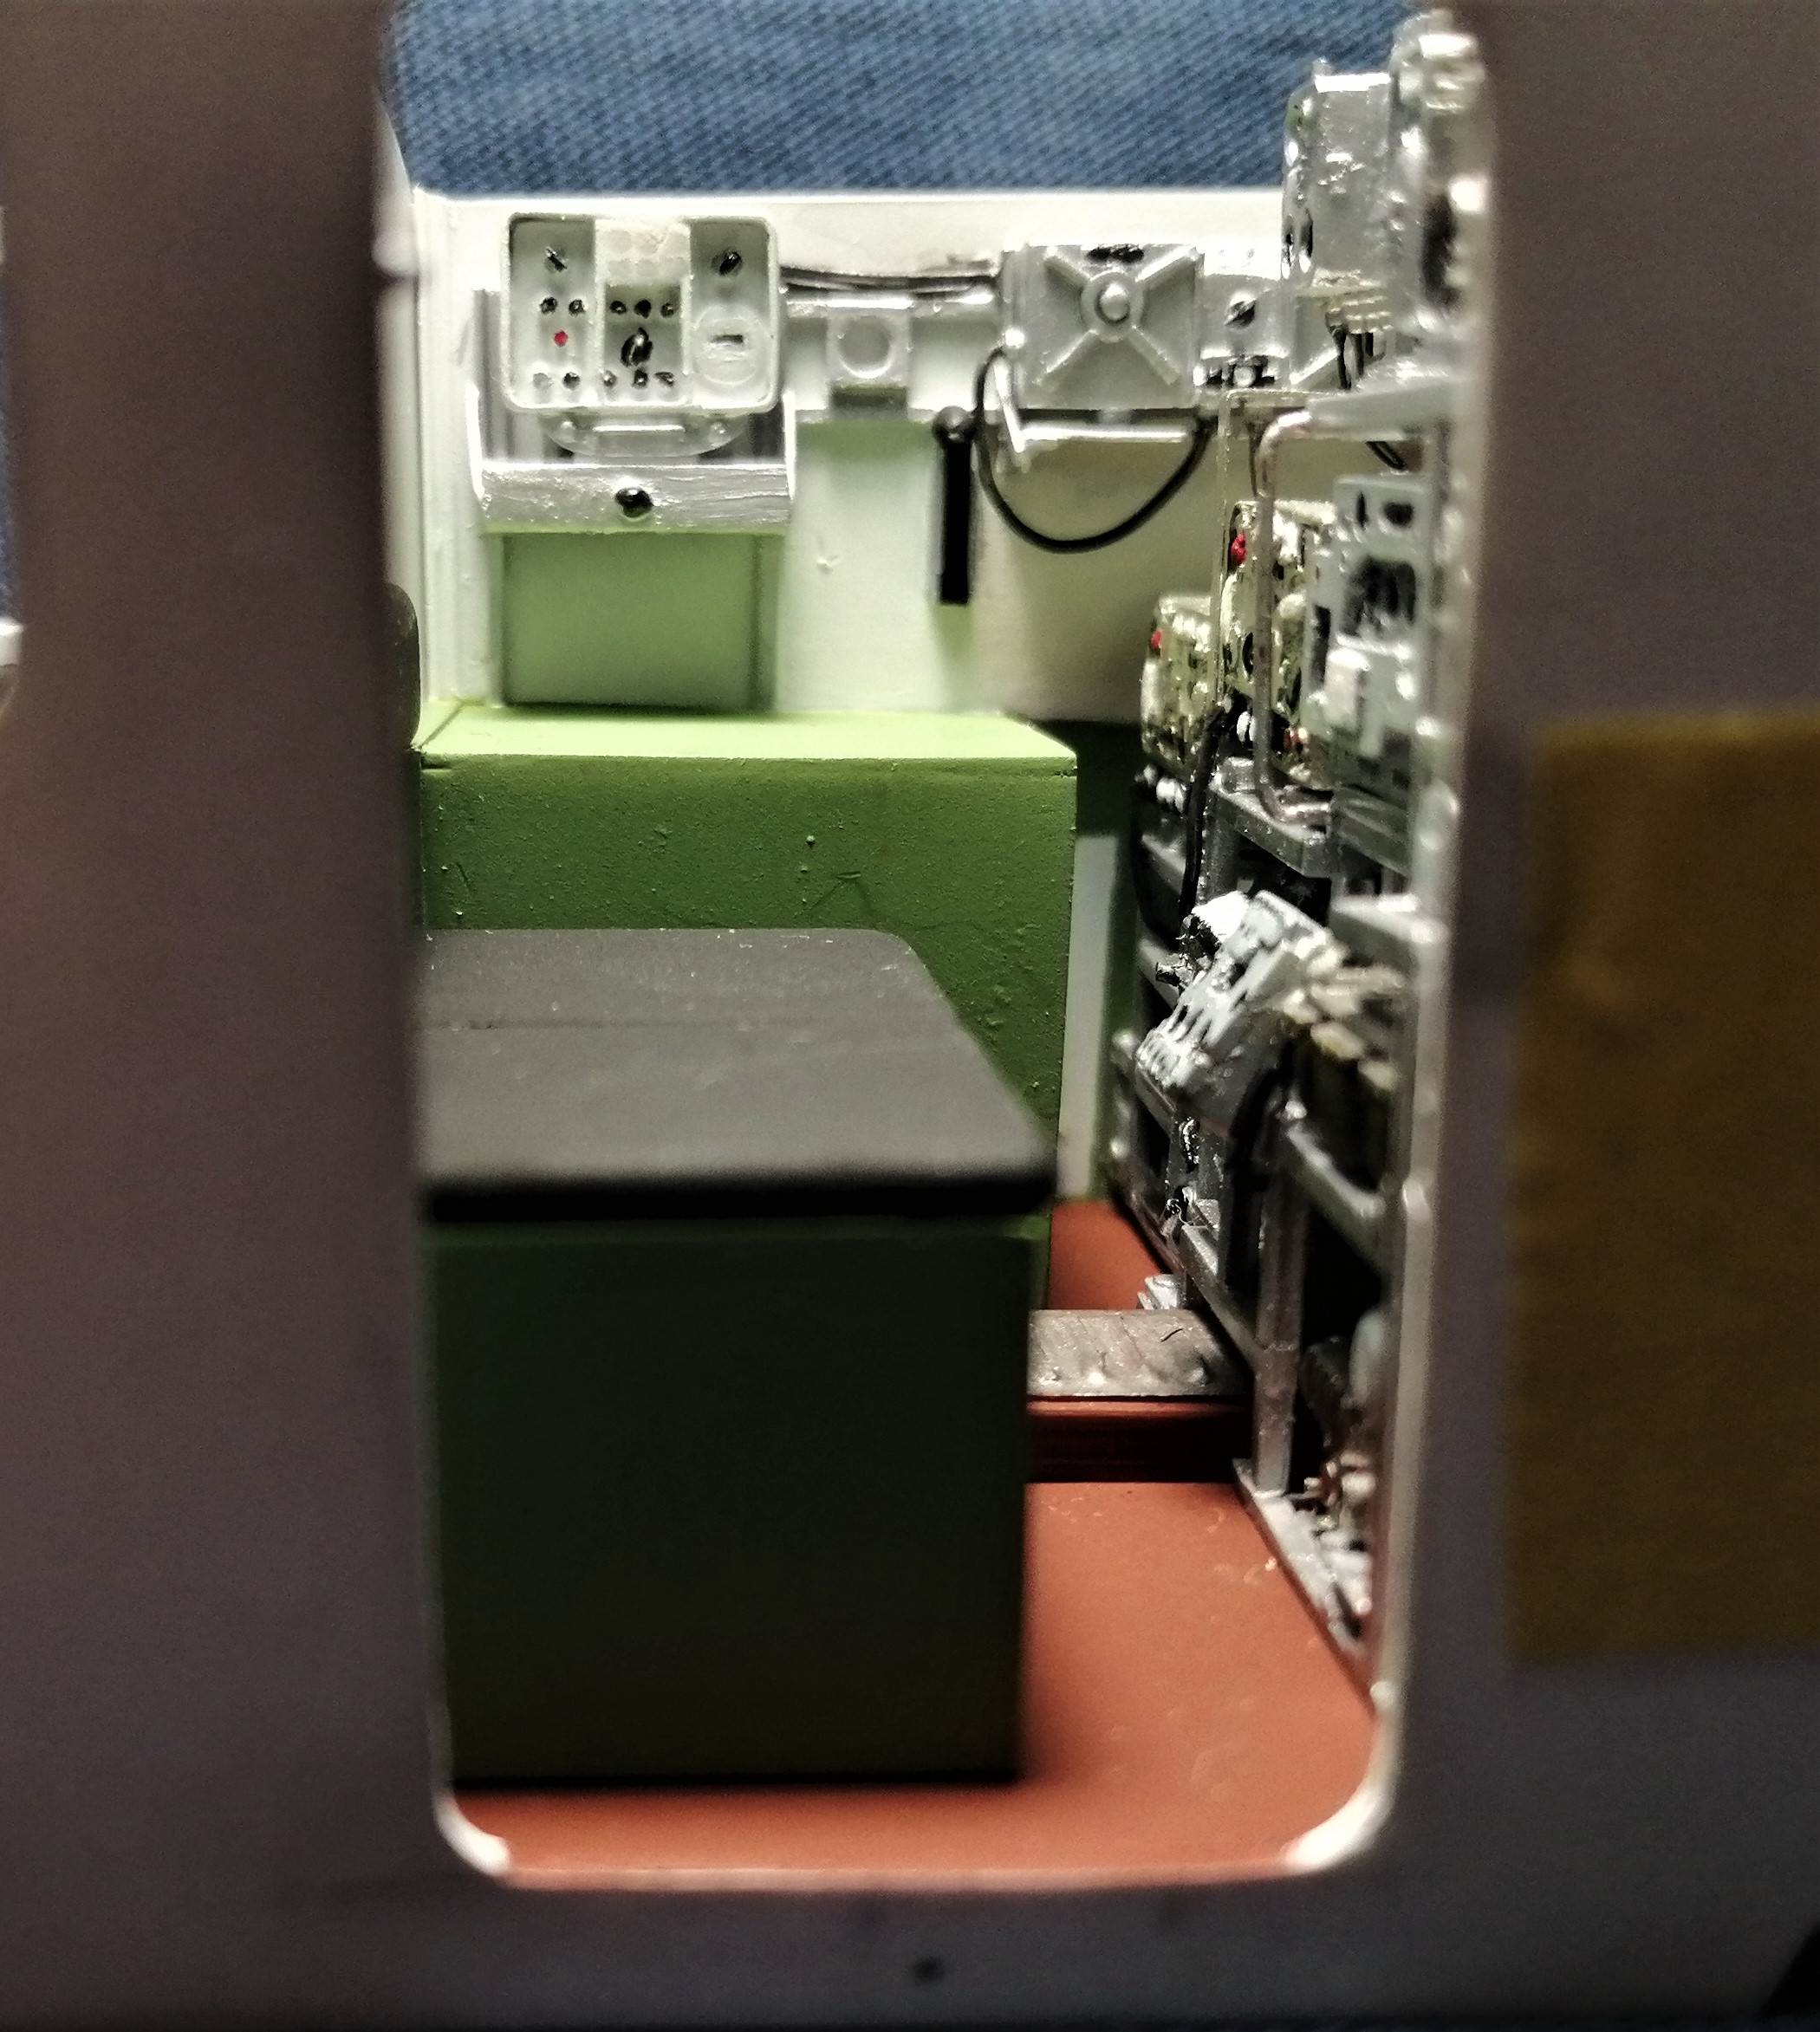
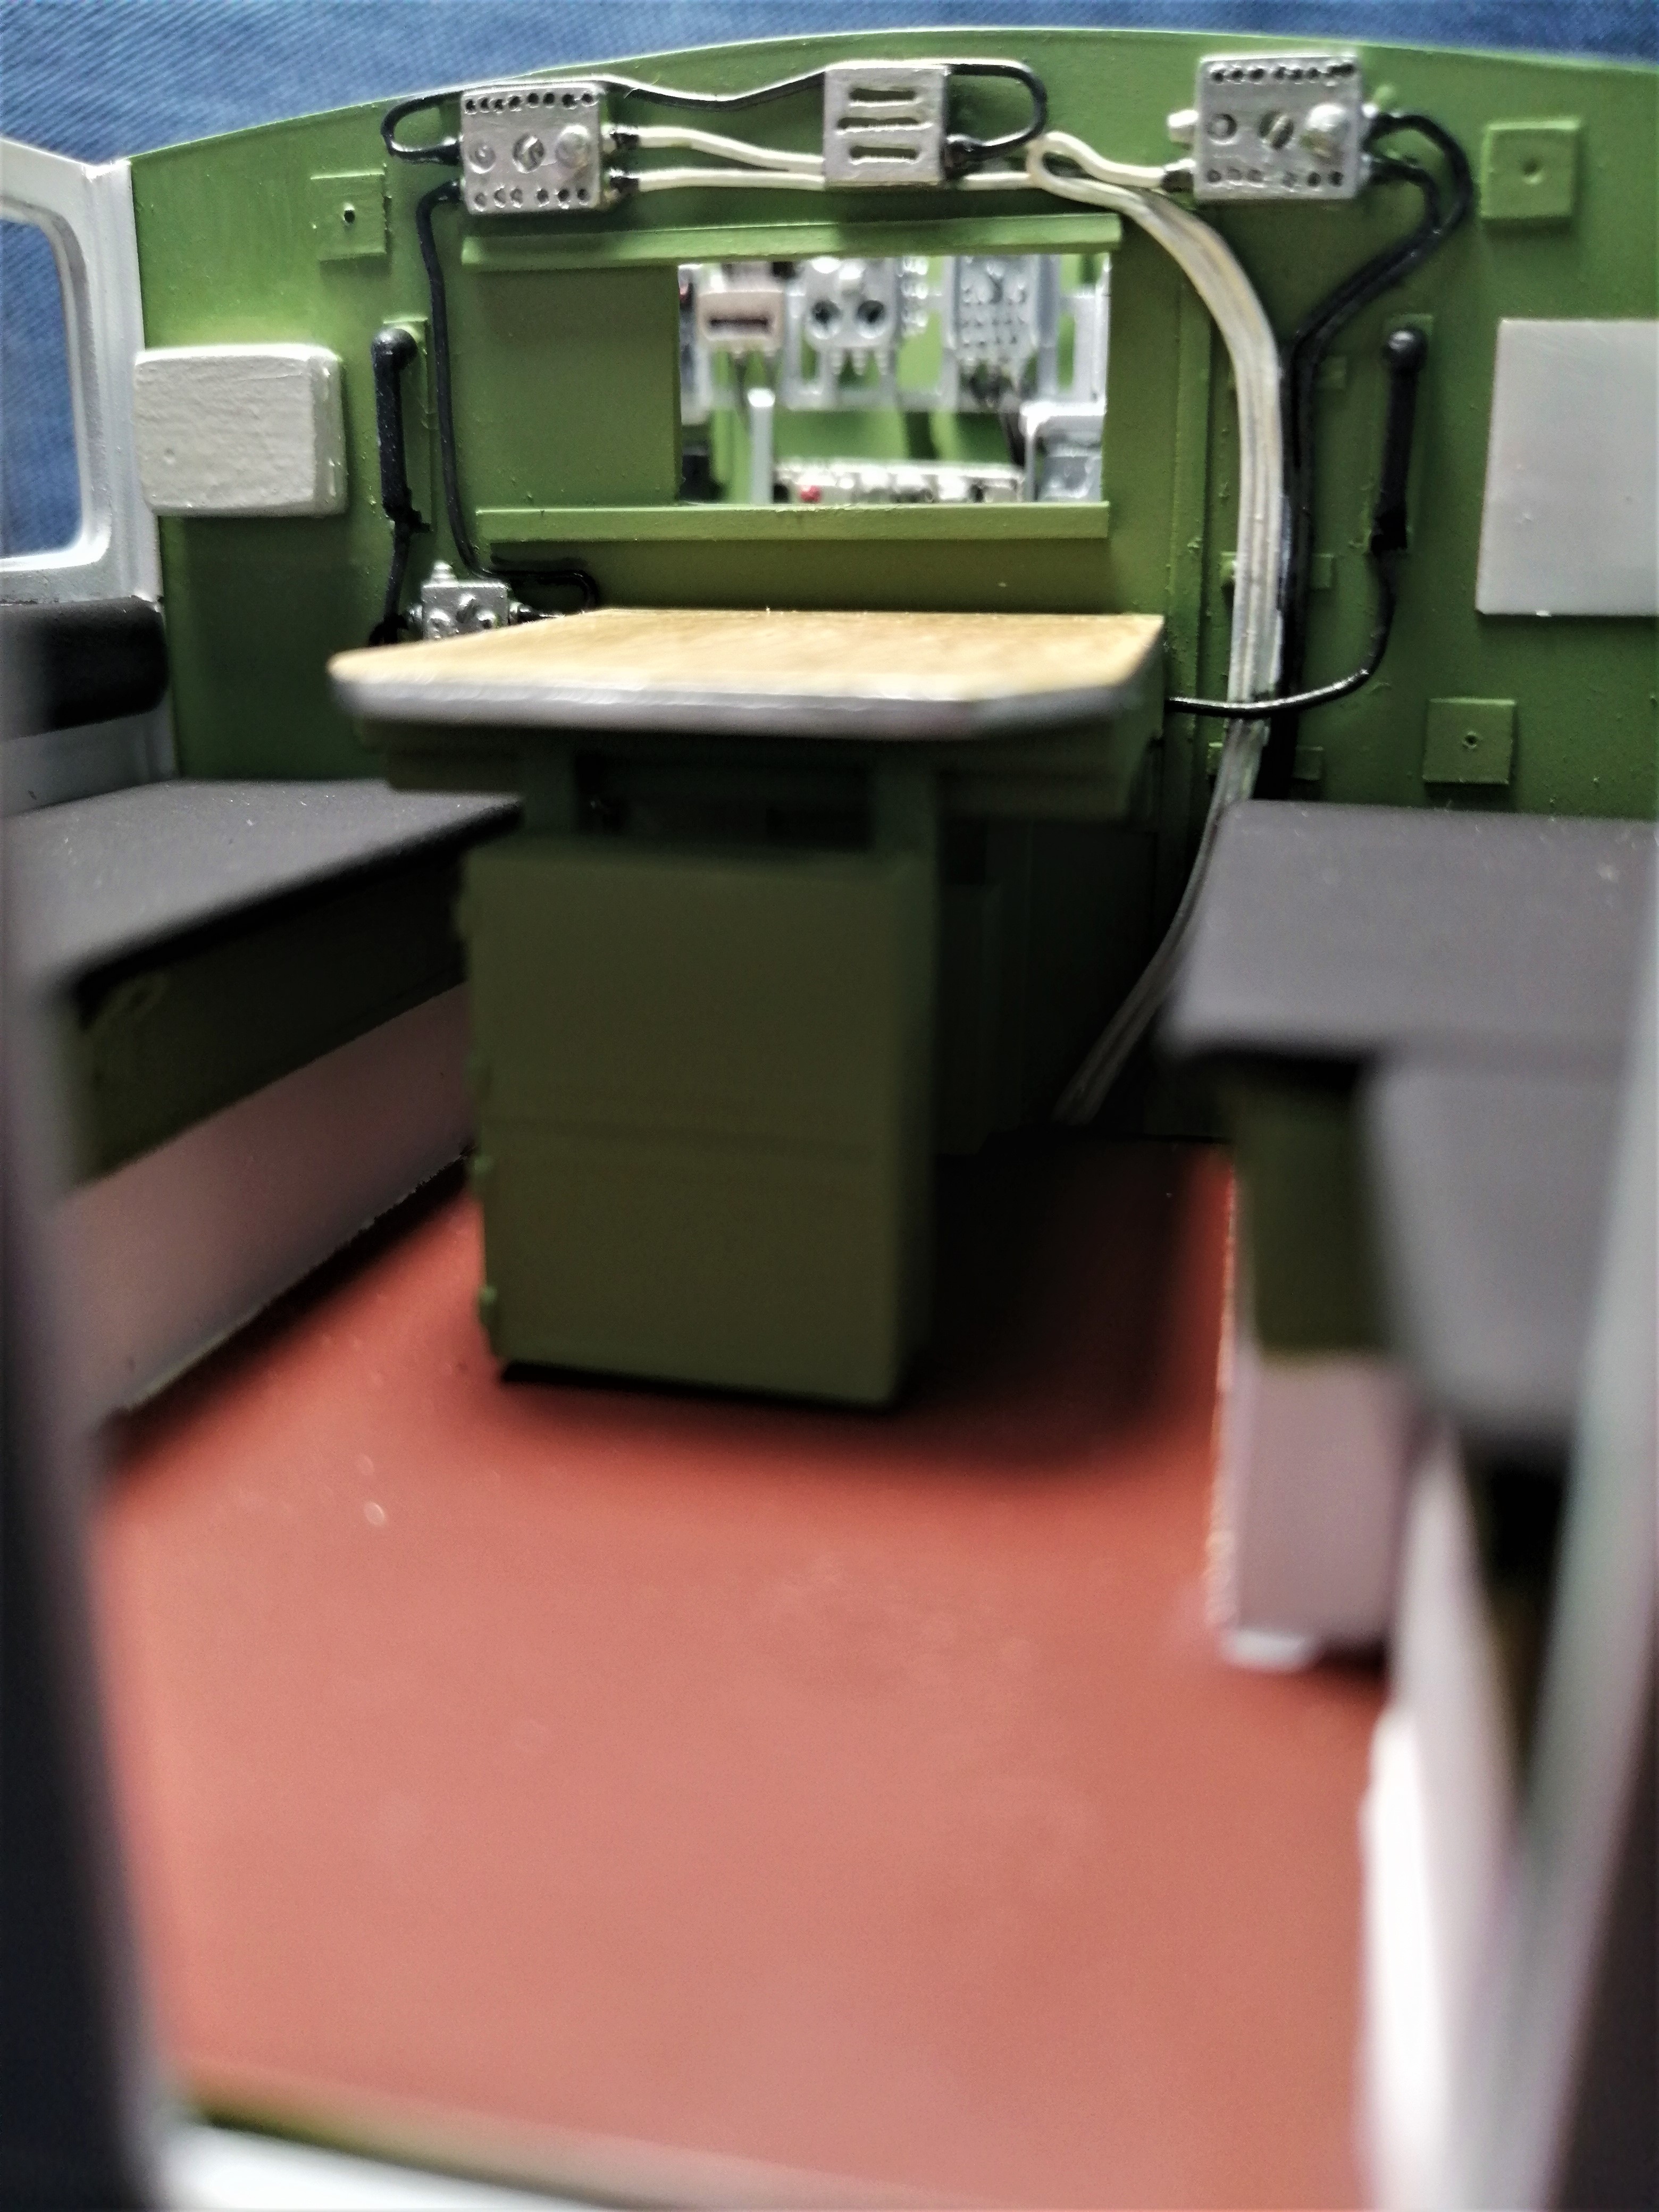
I love that radio and equipment rack… Amazing.
Lol… I just wish I had a miniscule part of his skill to do it at that level. It’s a mini work of art in its own right. Anyway Matt, I’m not talking to you as you have a stupidly insane amount of kits in your stash … And yes, I am jealous of that !!! Lol
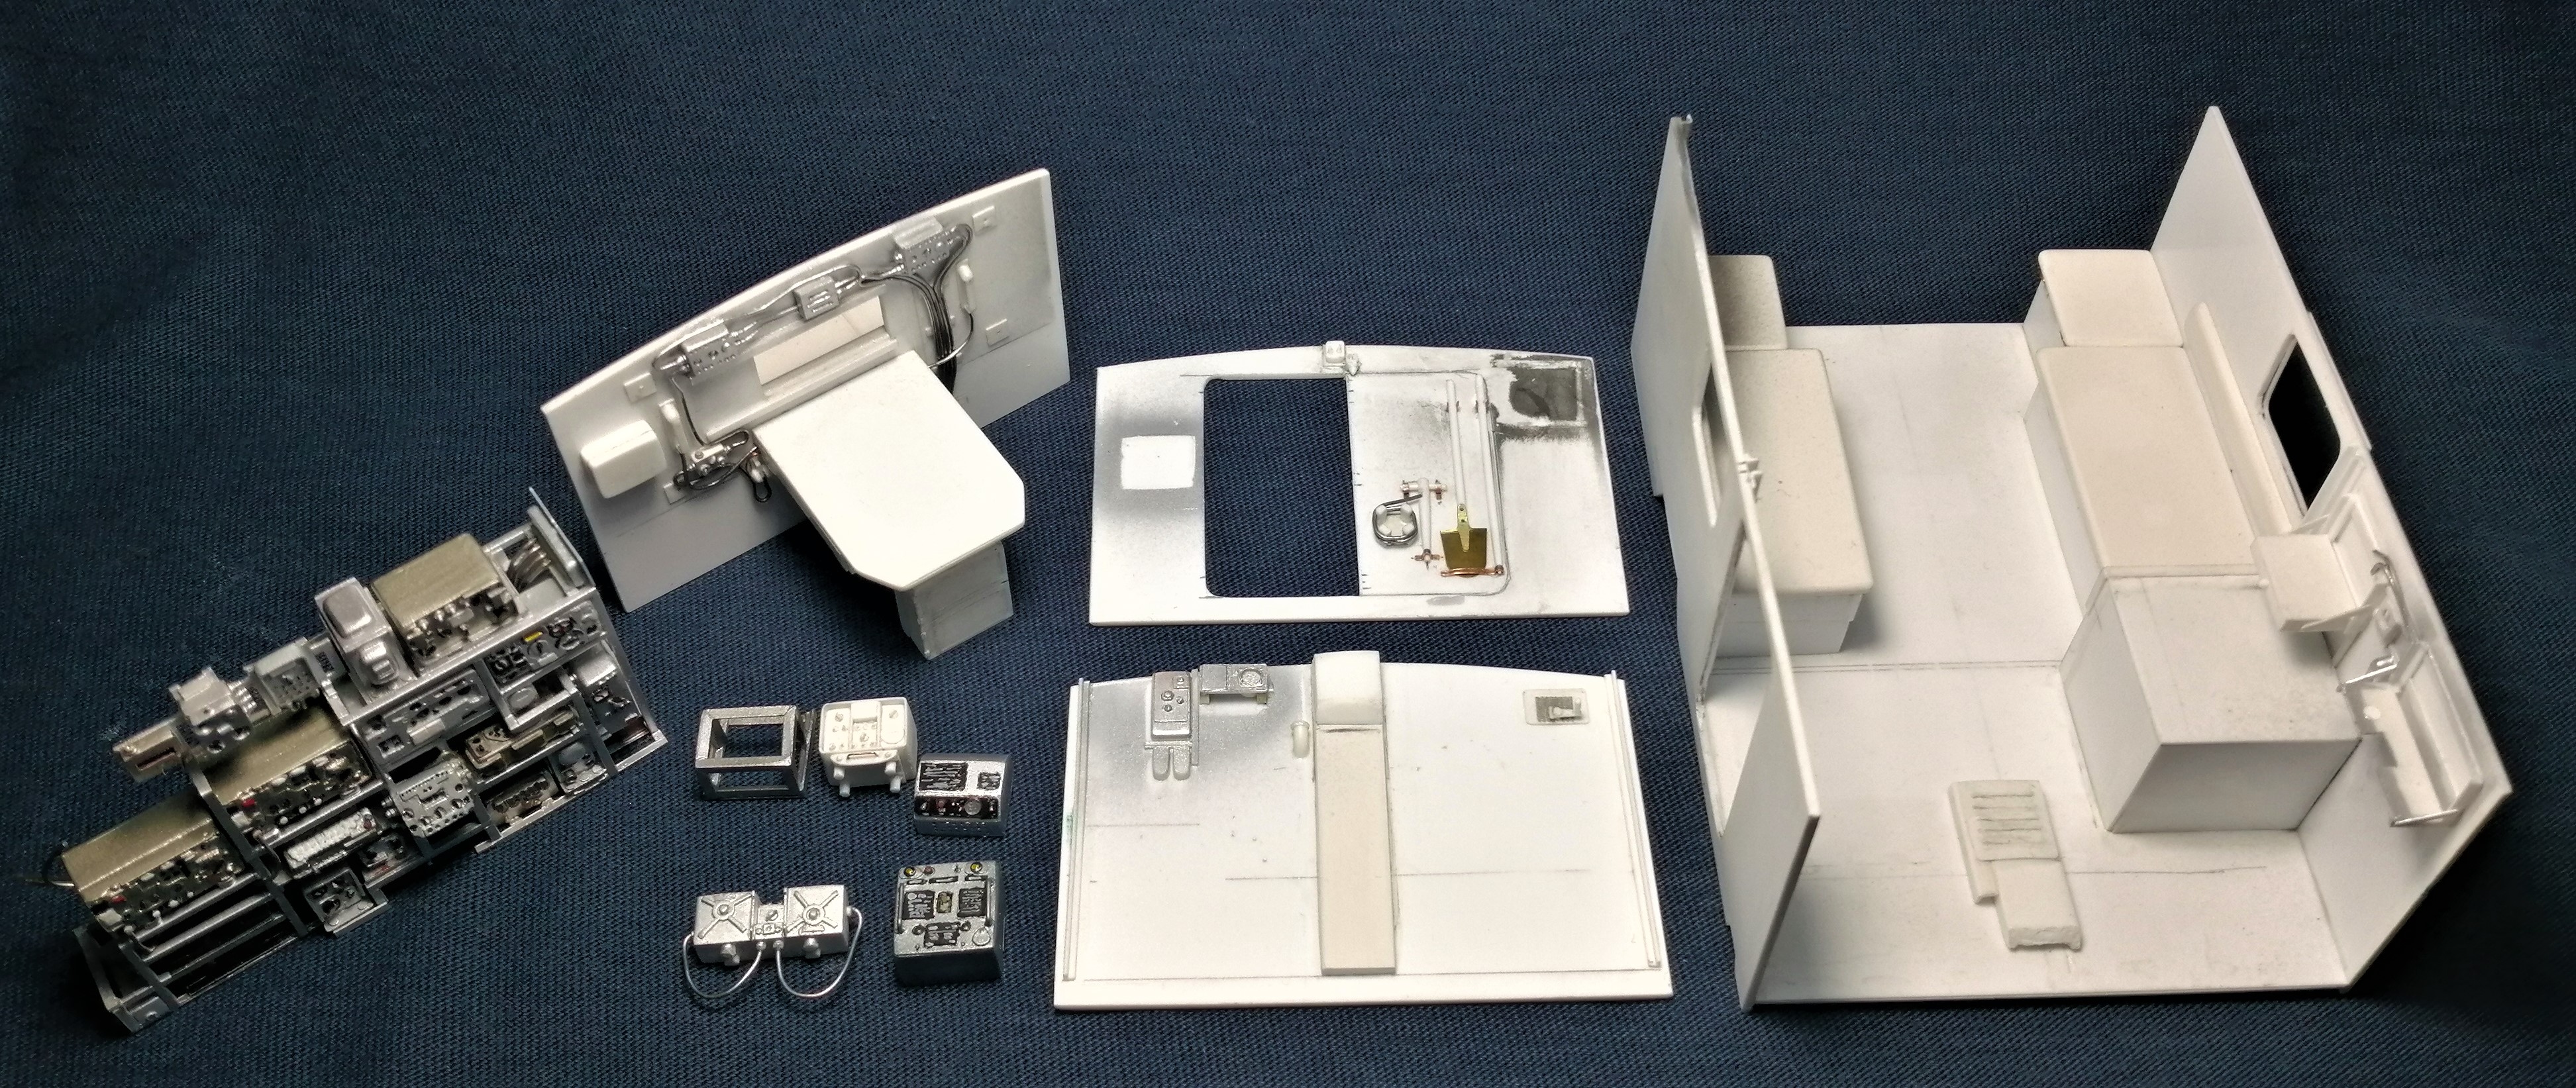
Oh for Pete’s sake! That bank of radio equipment is over the top! 'Bout the time I think I’m half decent at this hobby I come across a scratchbuilt superdetail like this and just sit back in awe. Incredible work here. How do you even see a cycle swtch that tiny!
It is a special build for me and I go after each detail- redoing it if I’m not happy and learning while doing mistakes.
For the tiny cycle switches I use a glue with longer working time(Mr. Cement Orange in my case) and take pictures - looking at them I can adjust the knobs.
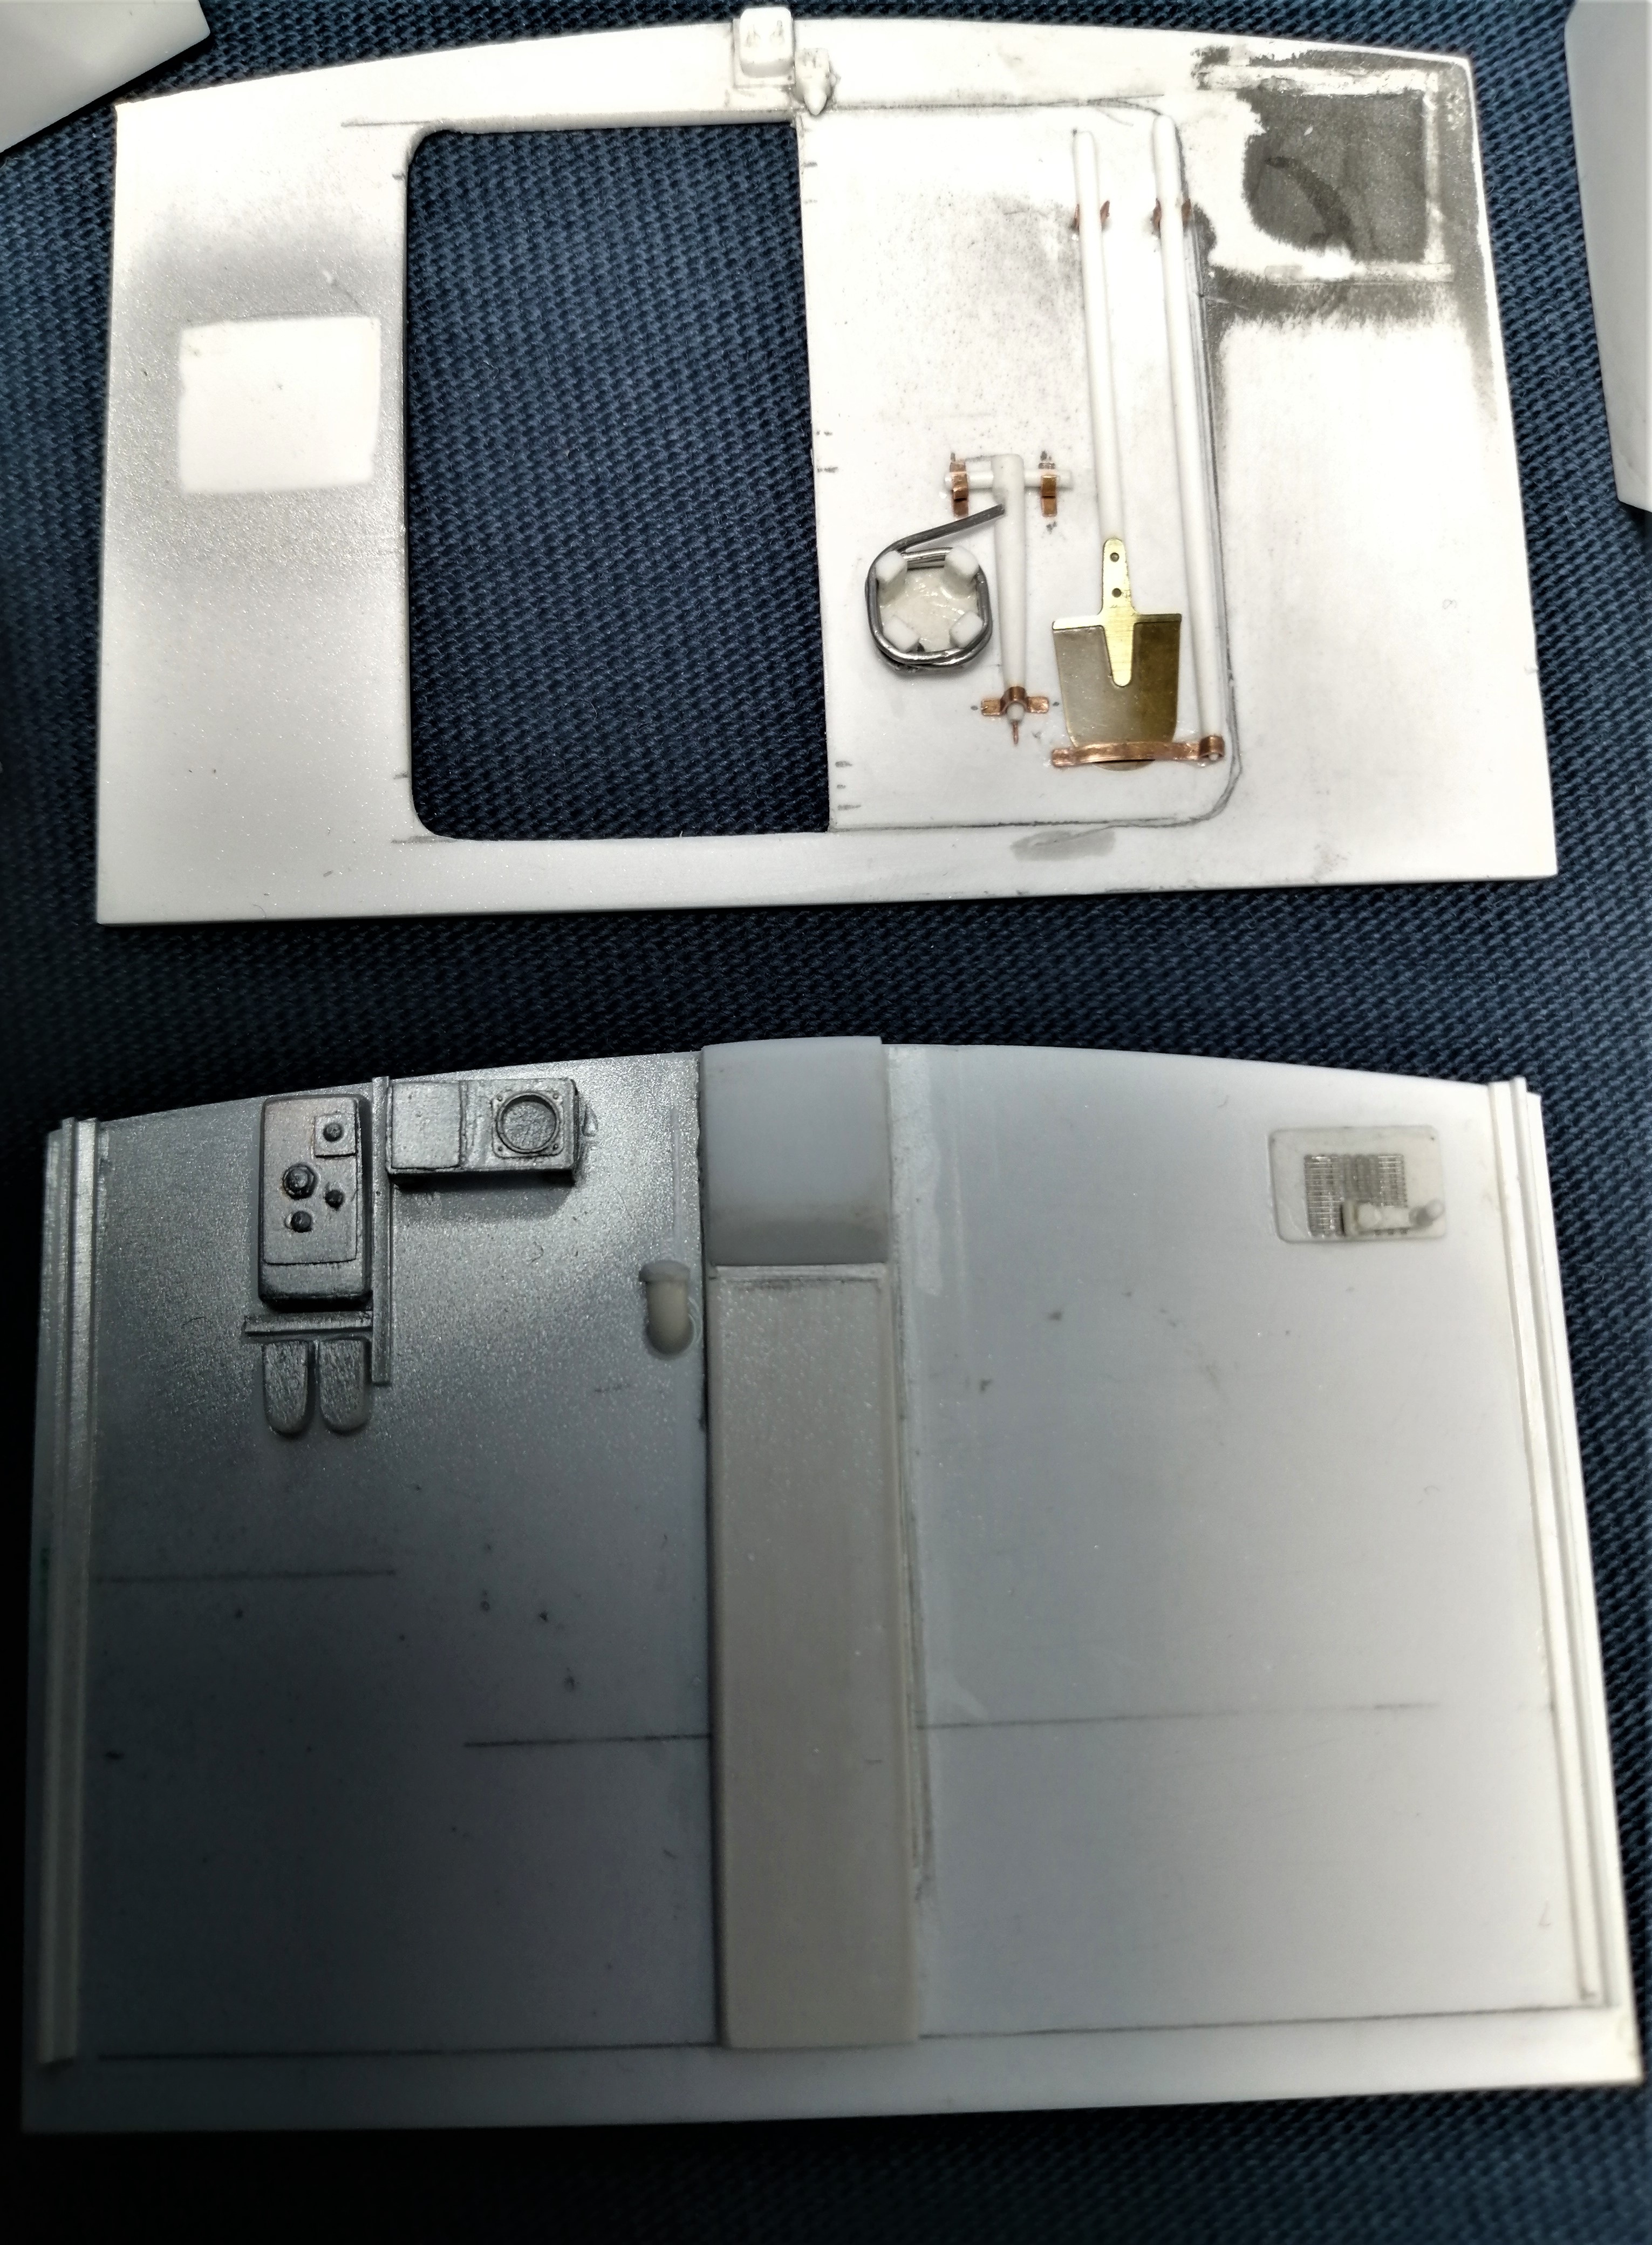
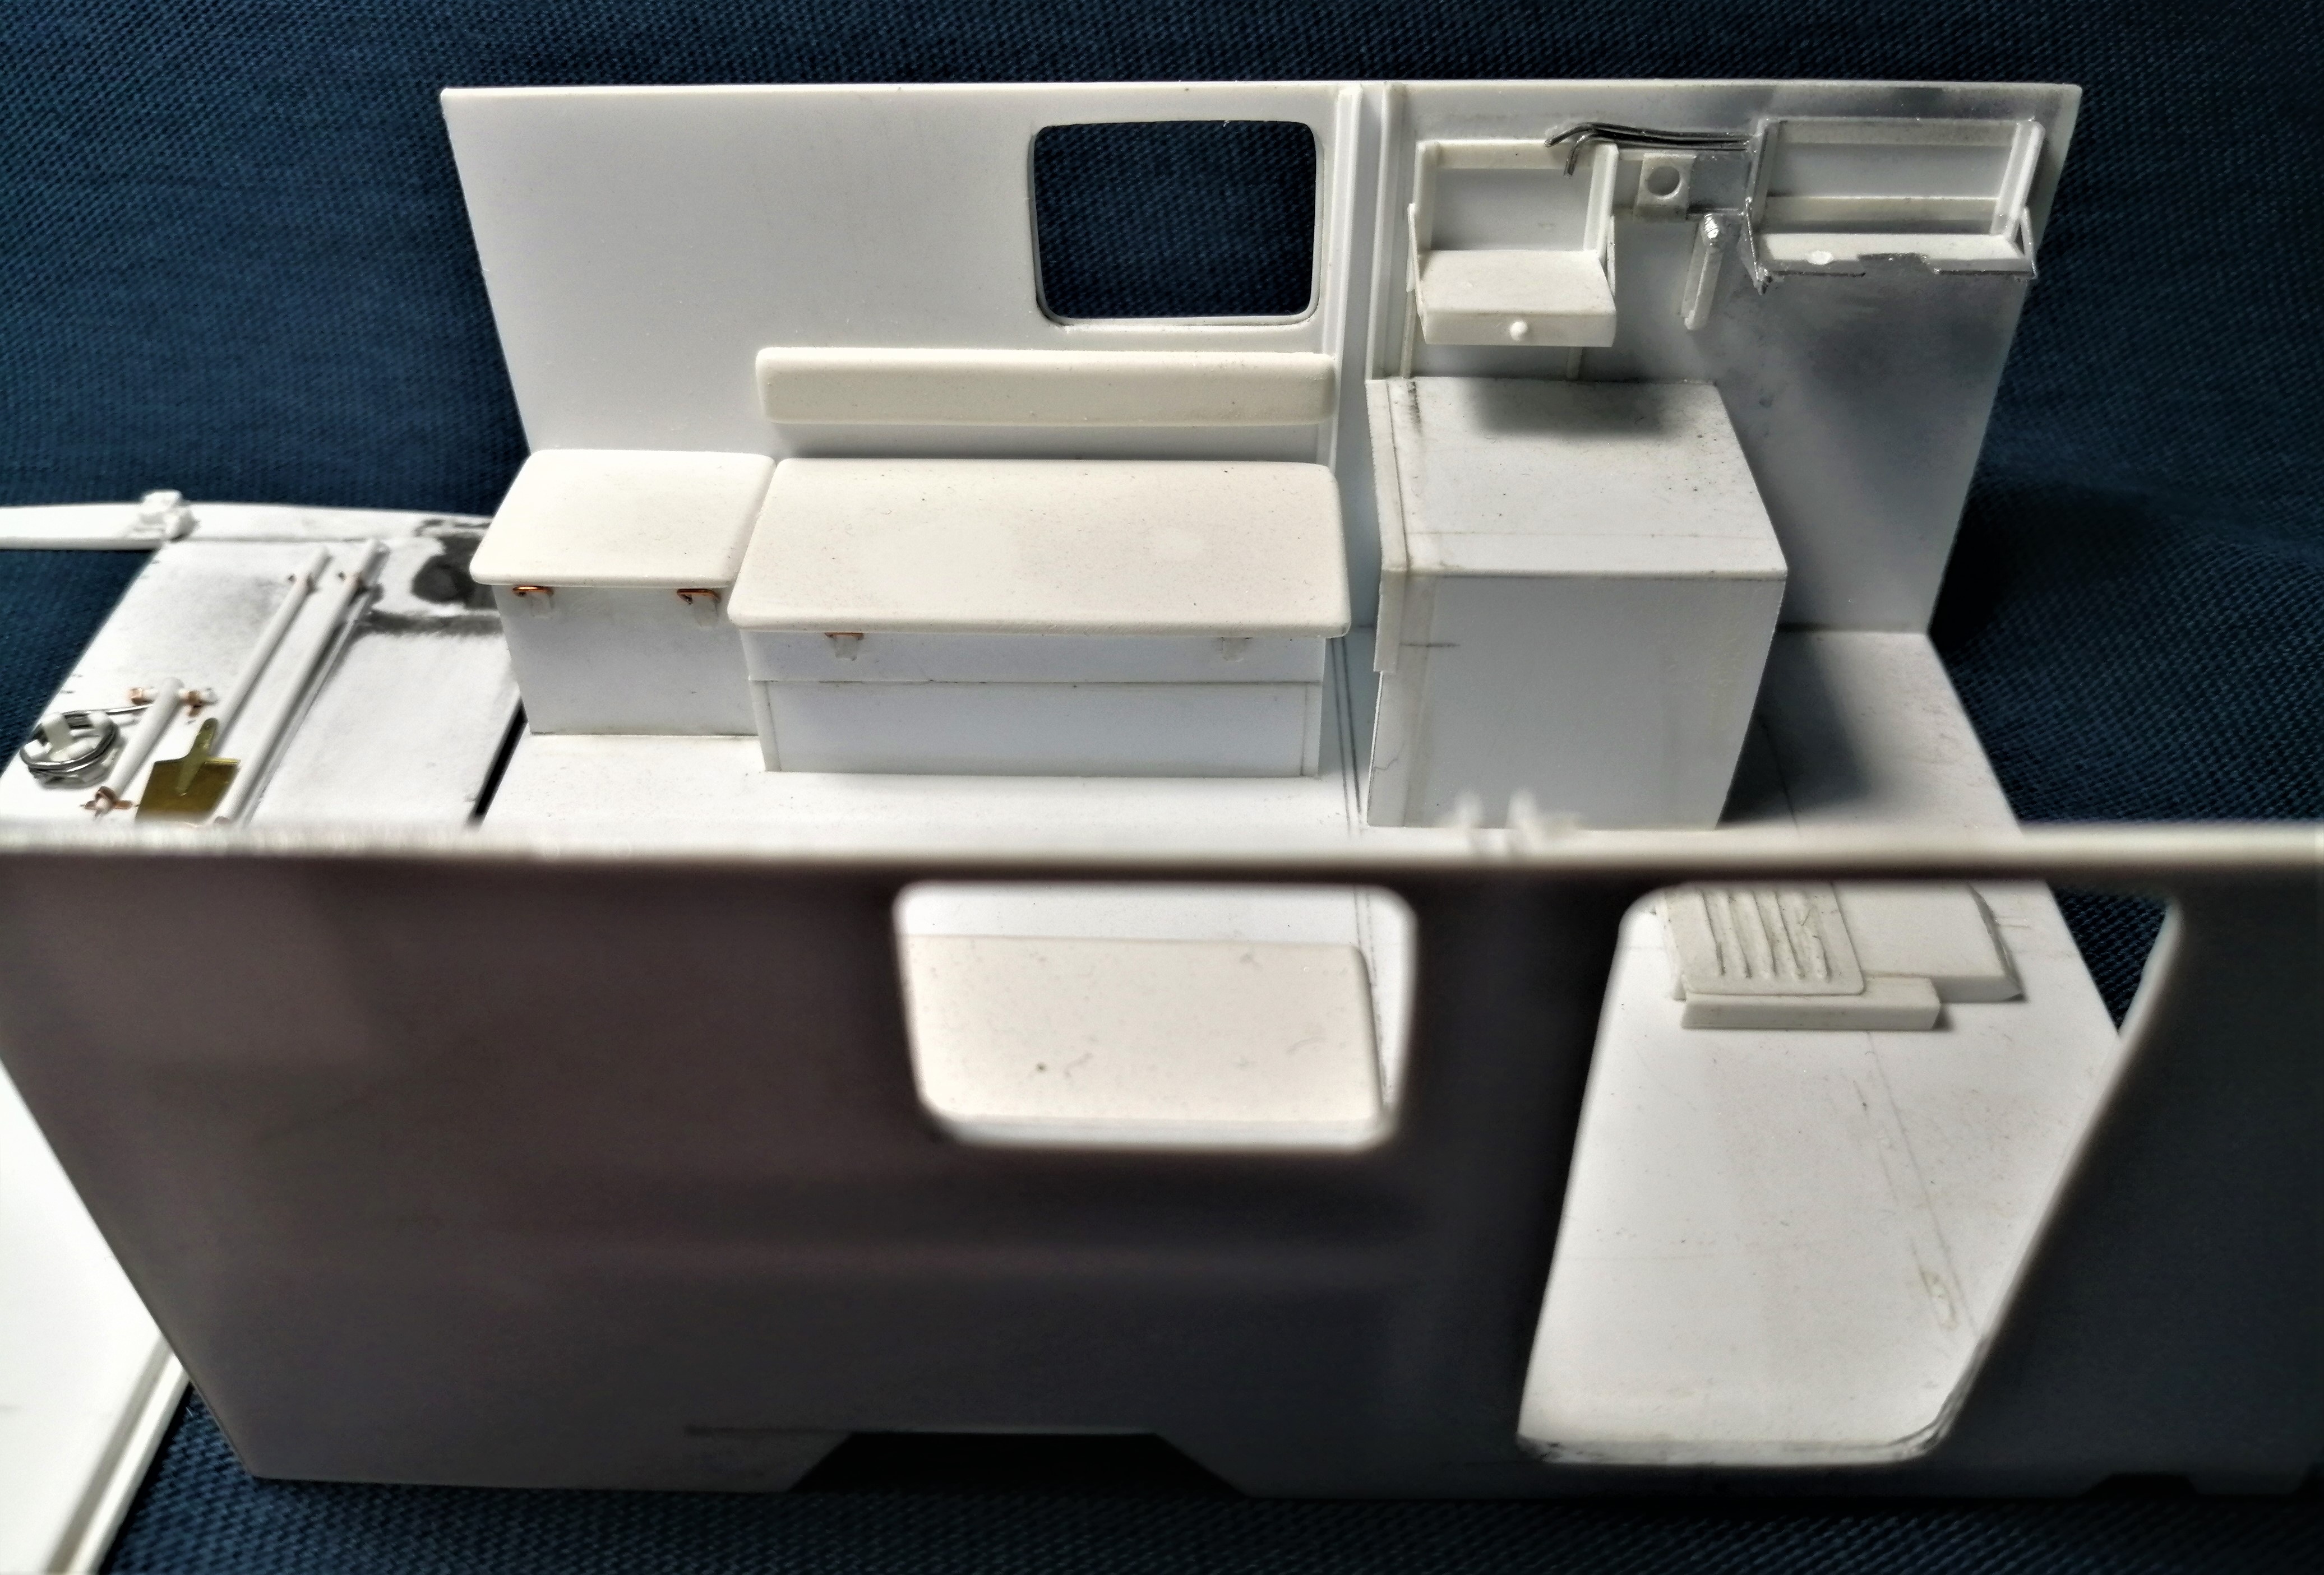
I sprayed and brushed some colours on the interior and will post some pictures soon,
That is looking phenomenal Angel. Now it’s painted you’ve taken it to a whole new level. The pic showing you looking into the plotting compartment and into the radio equipment area is very good, it gives you a sense of what was happening. Amazing
Really nice work on that interior!
You say you are adding led lights, will the roof top be removable?
With all that fantastic detail I hope it is removable.
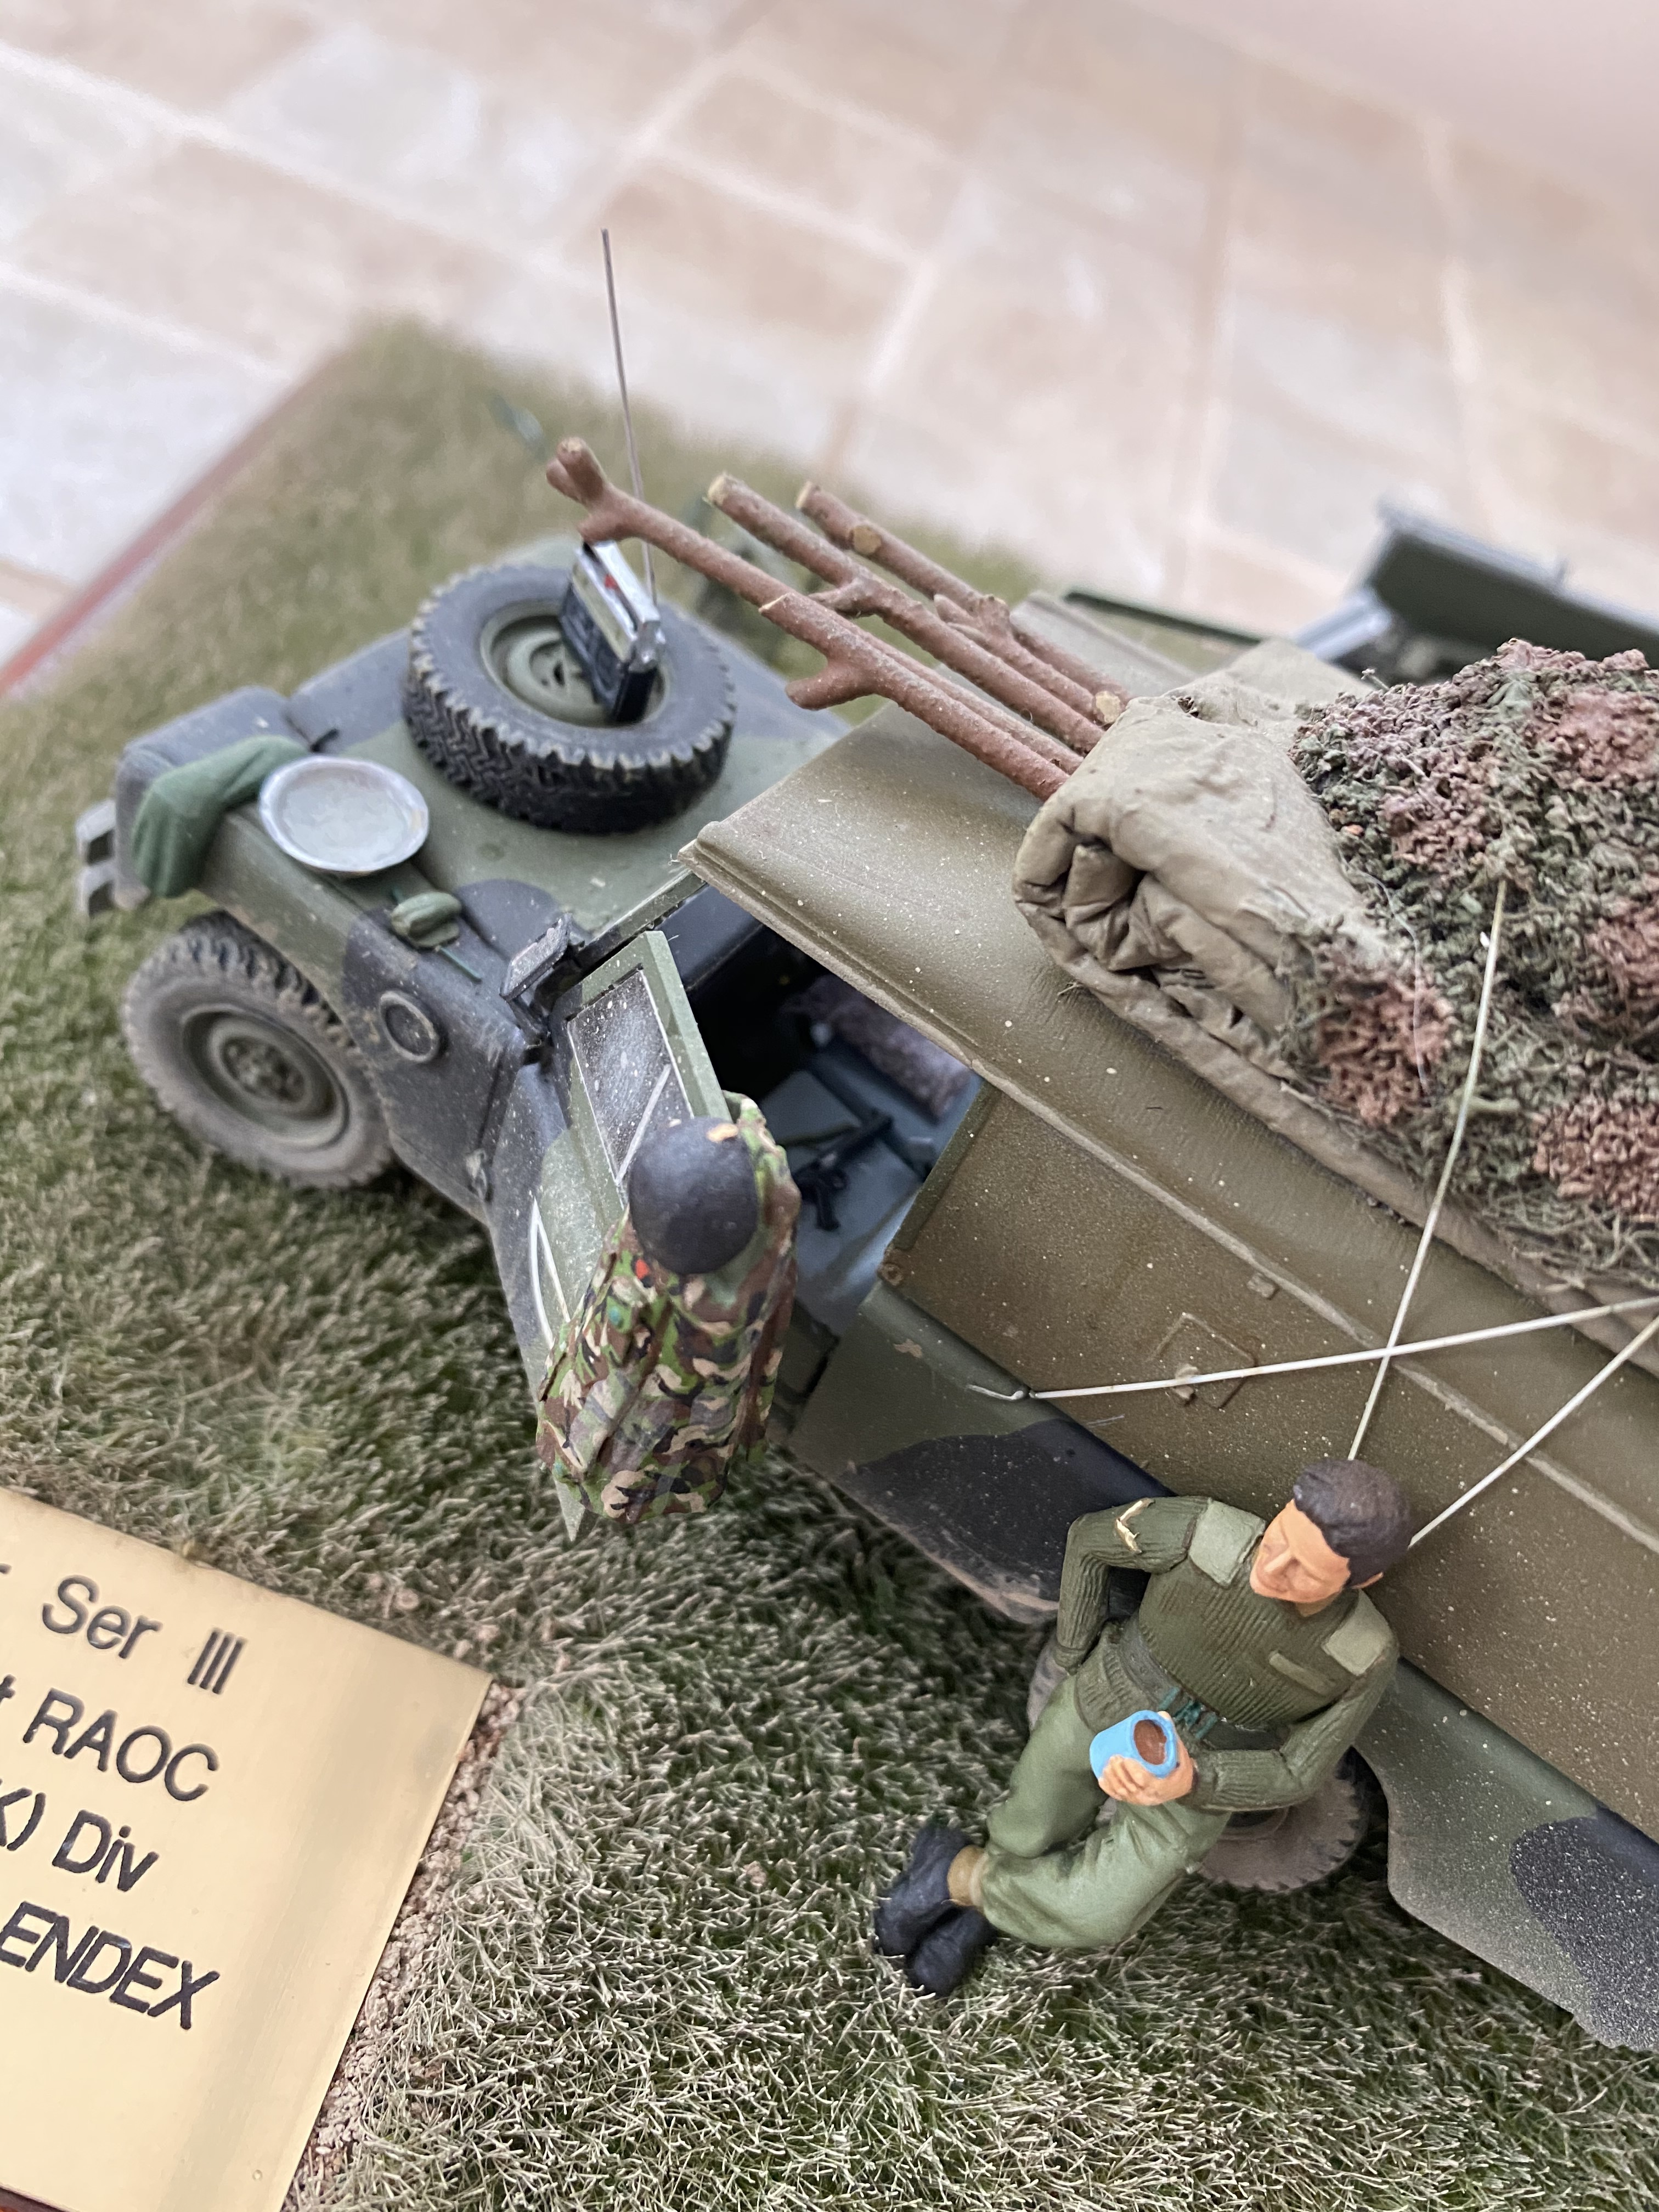
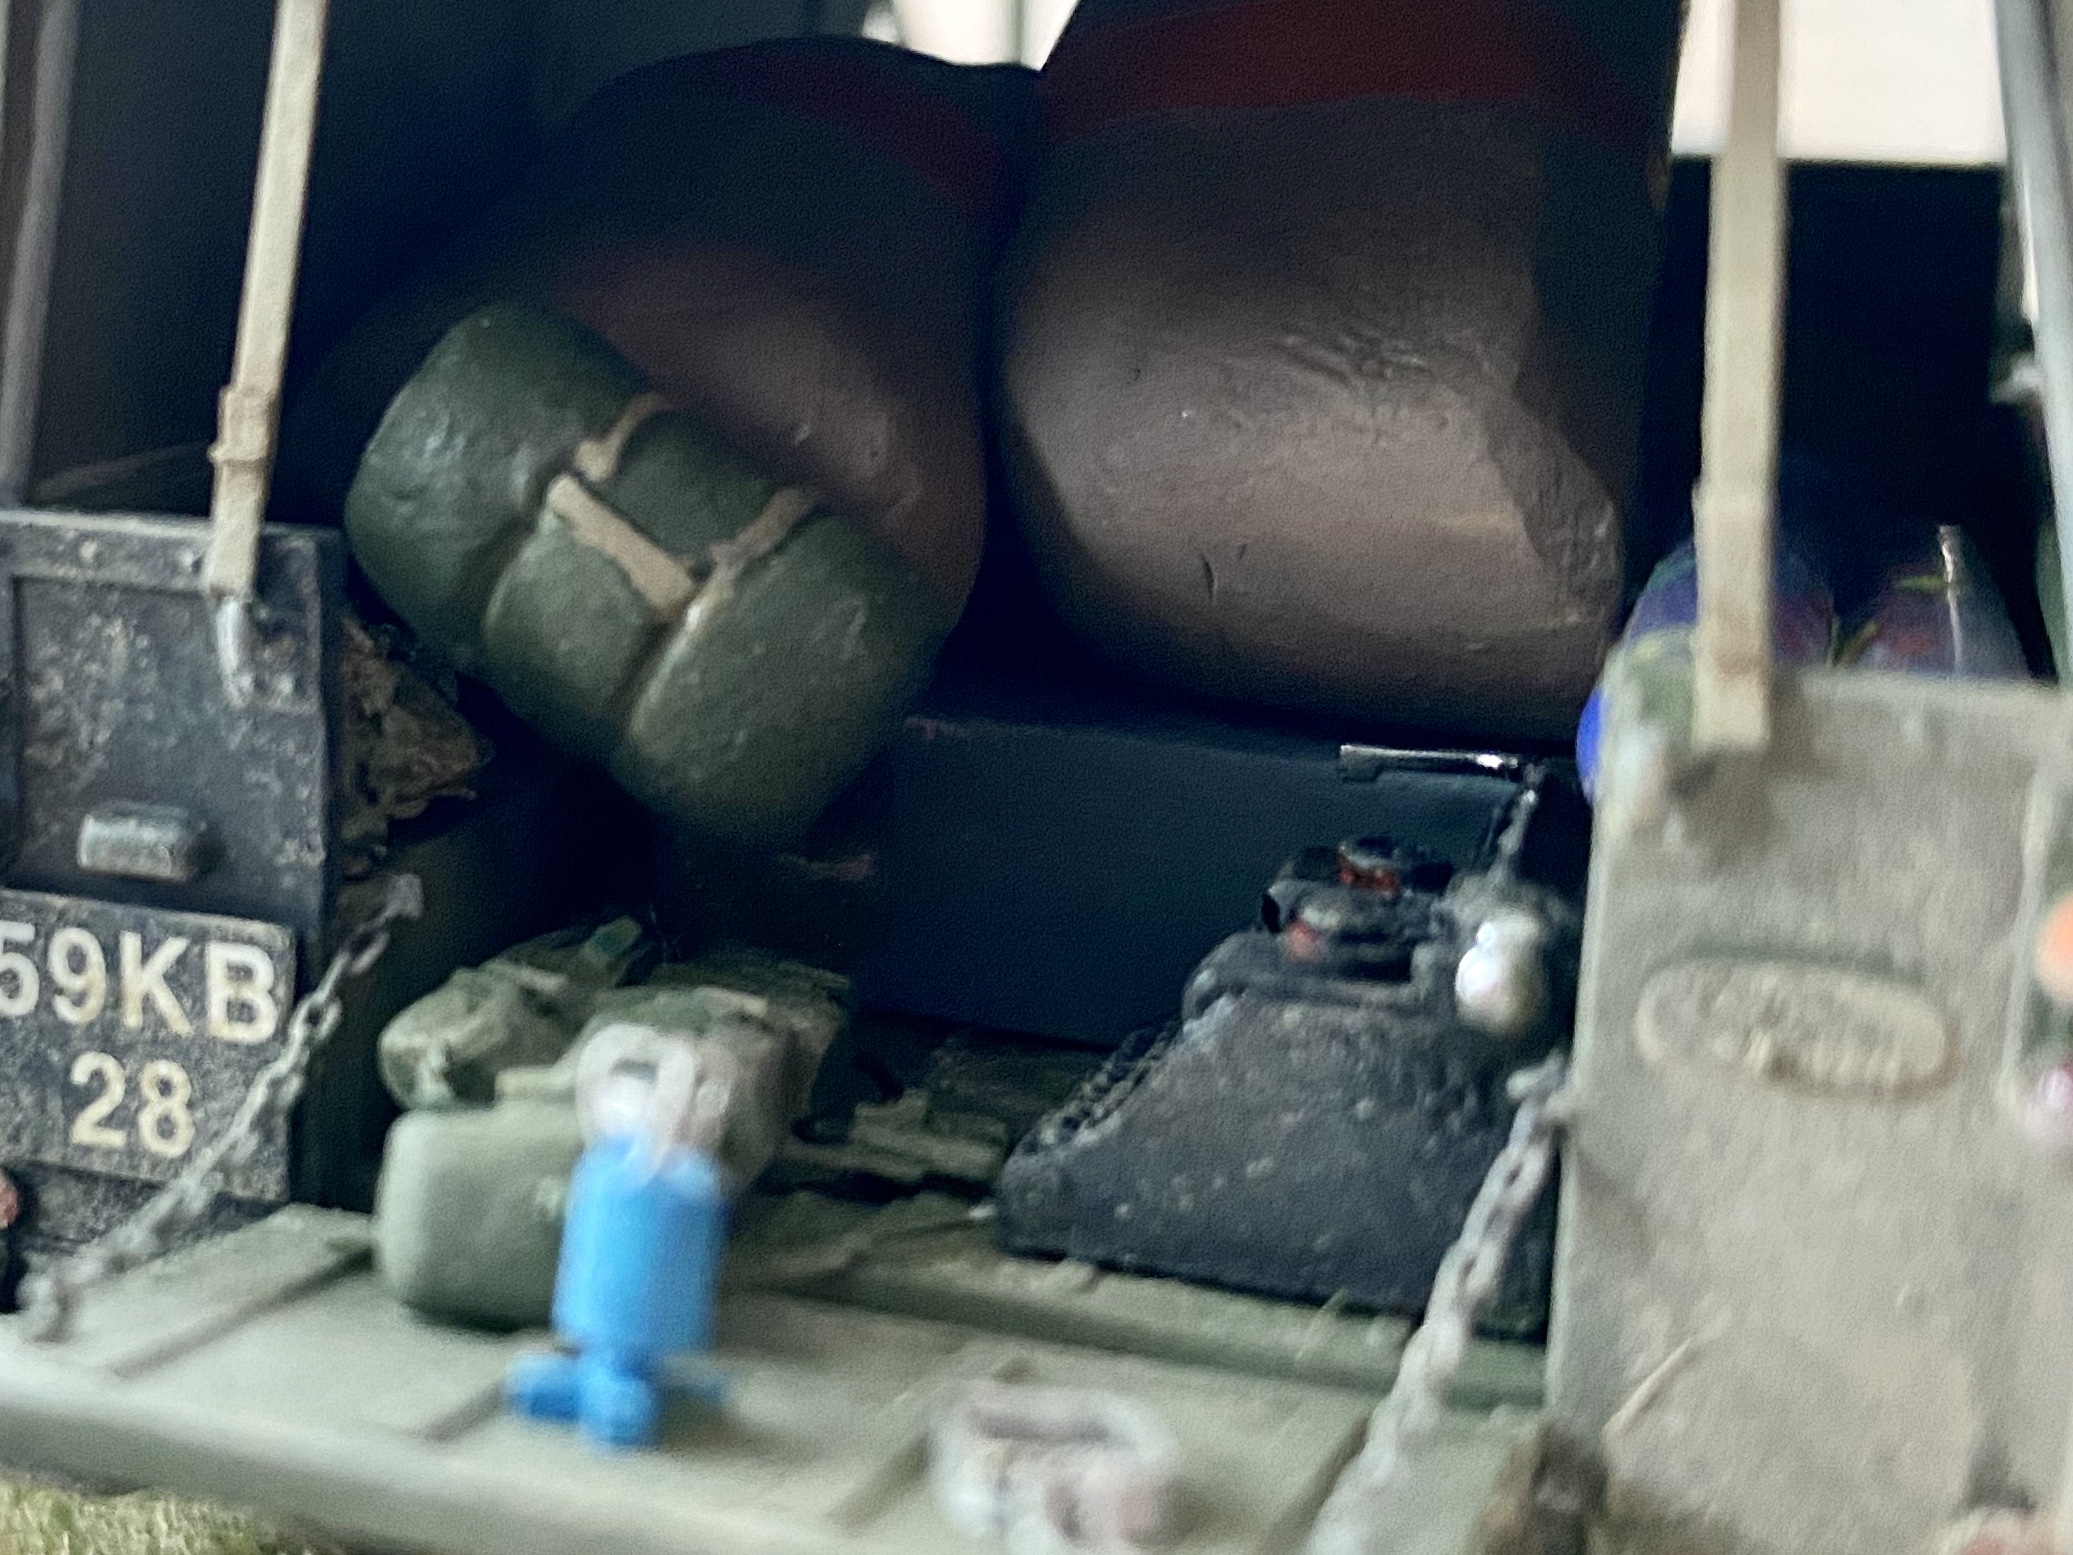
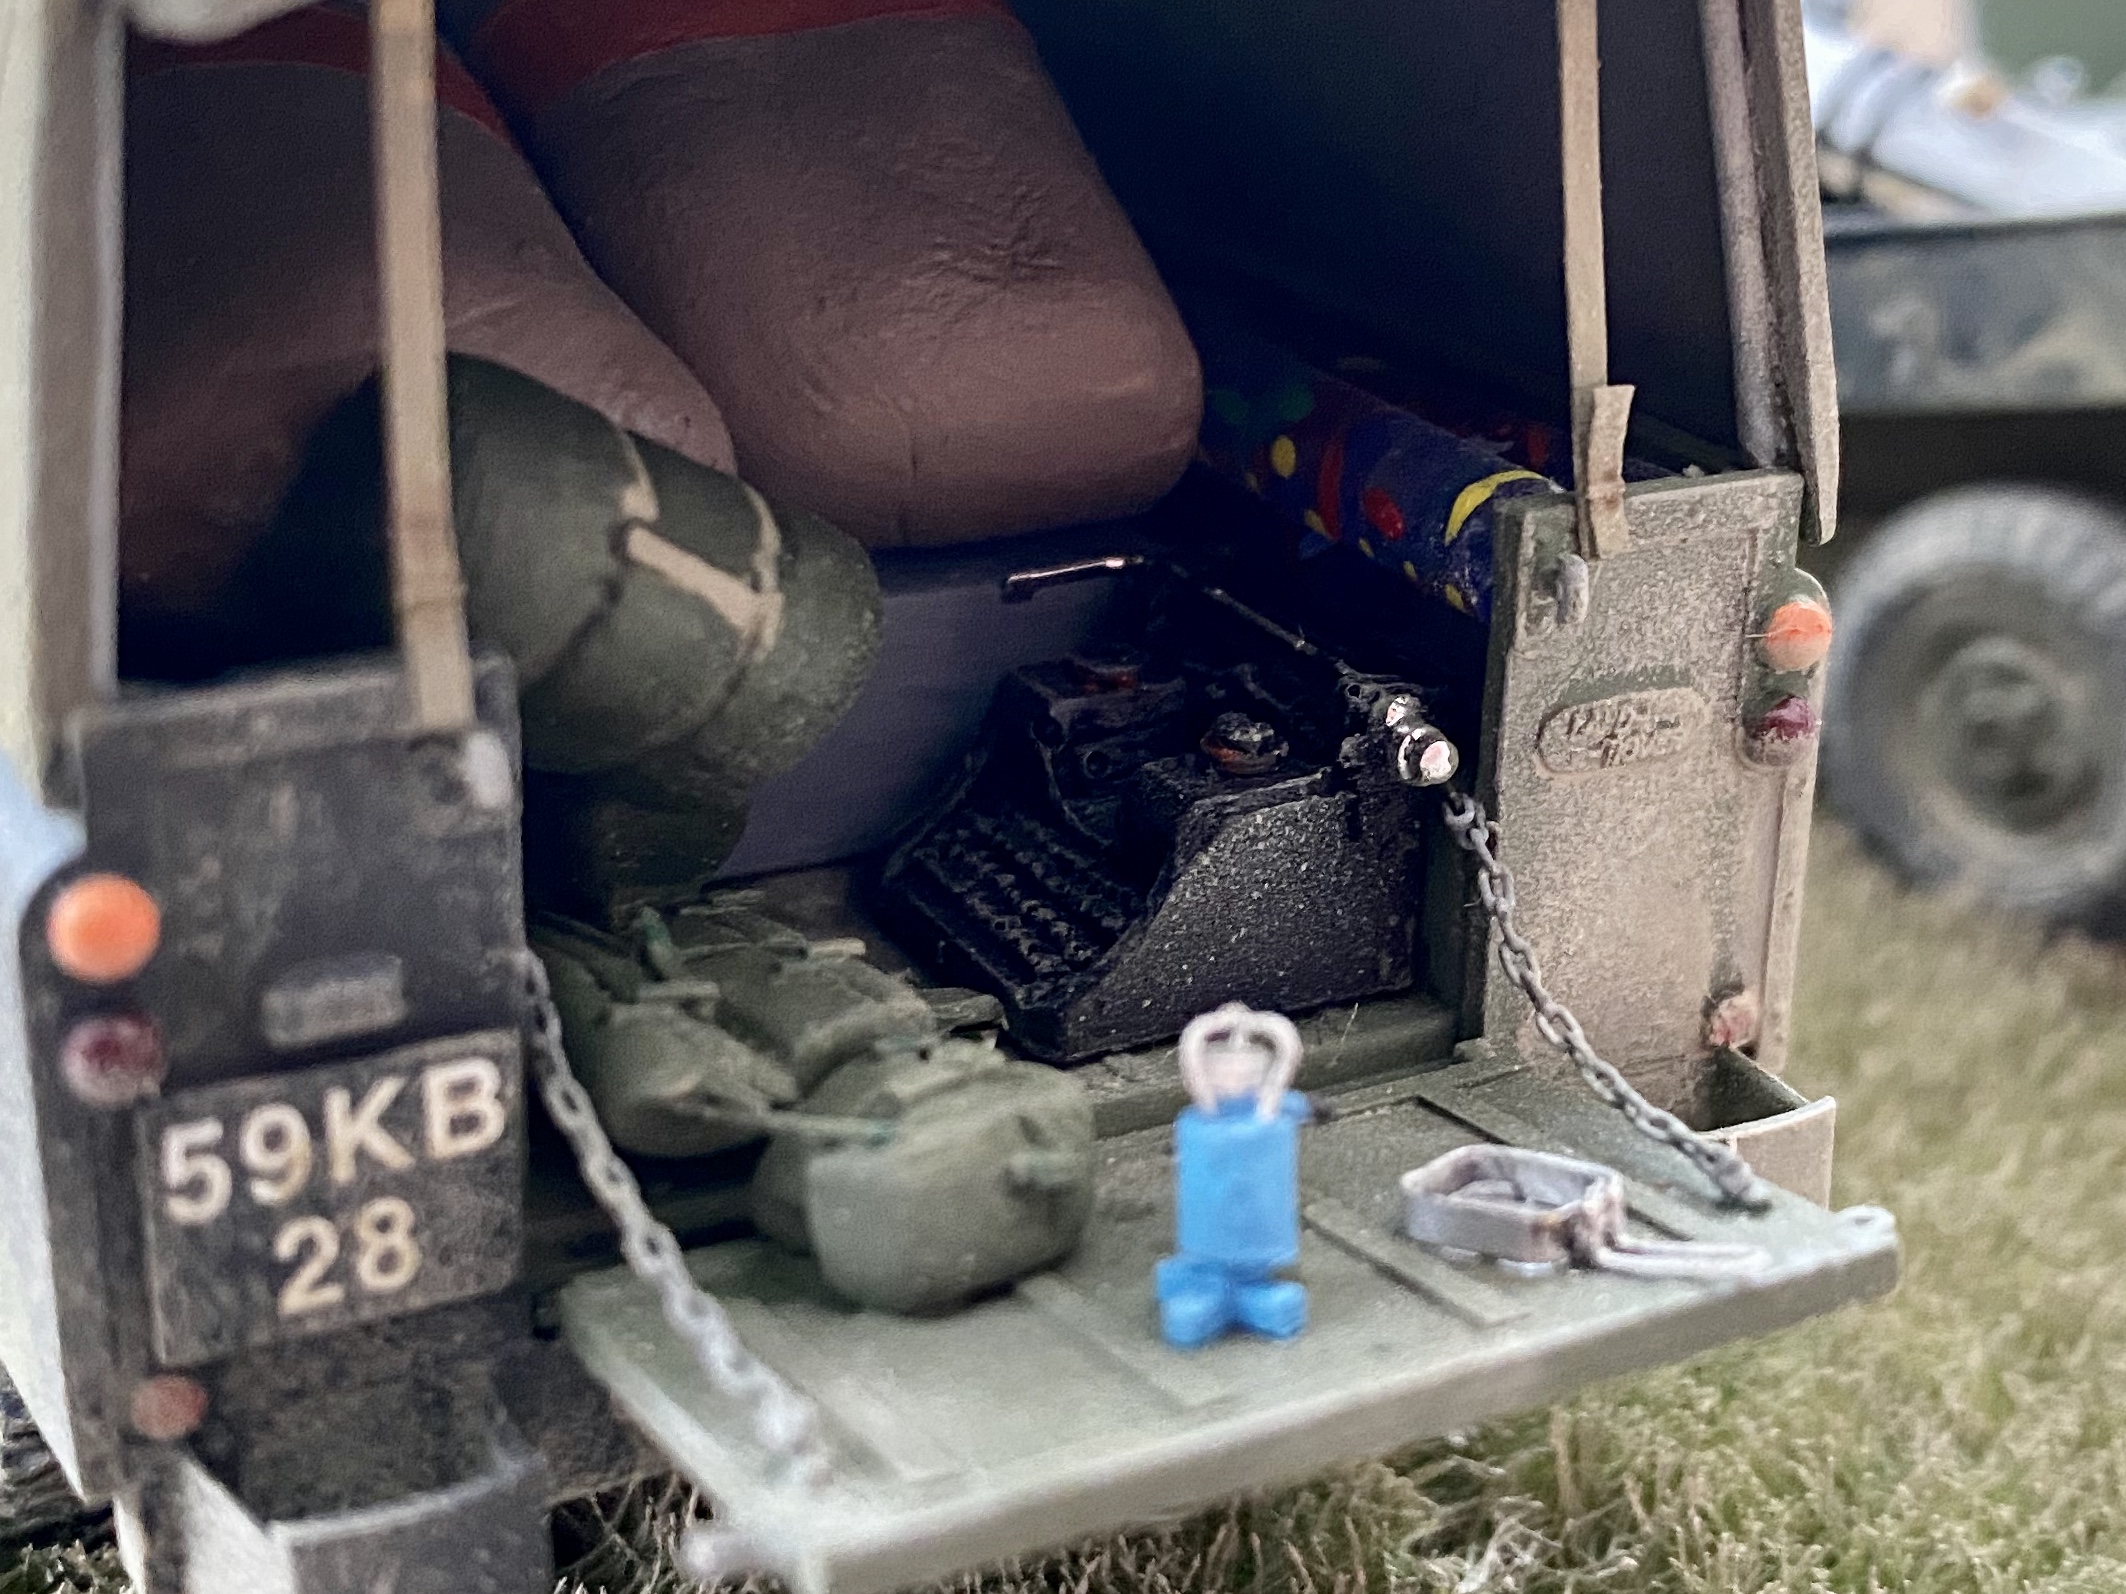
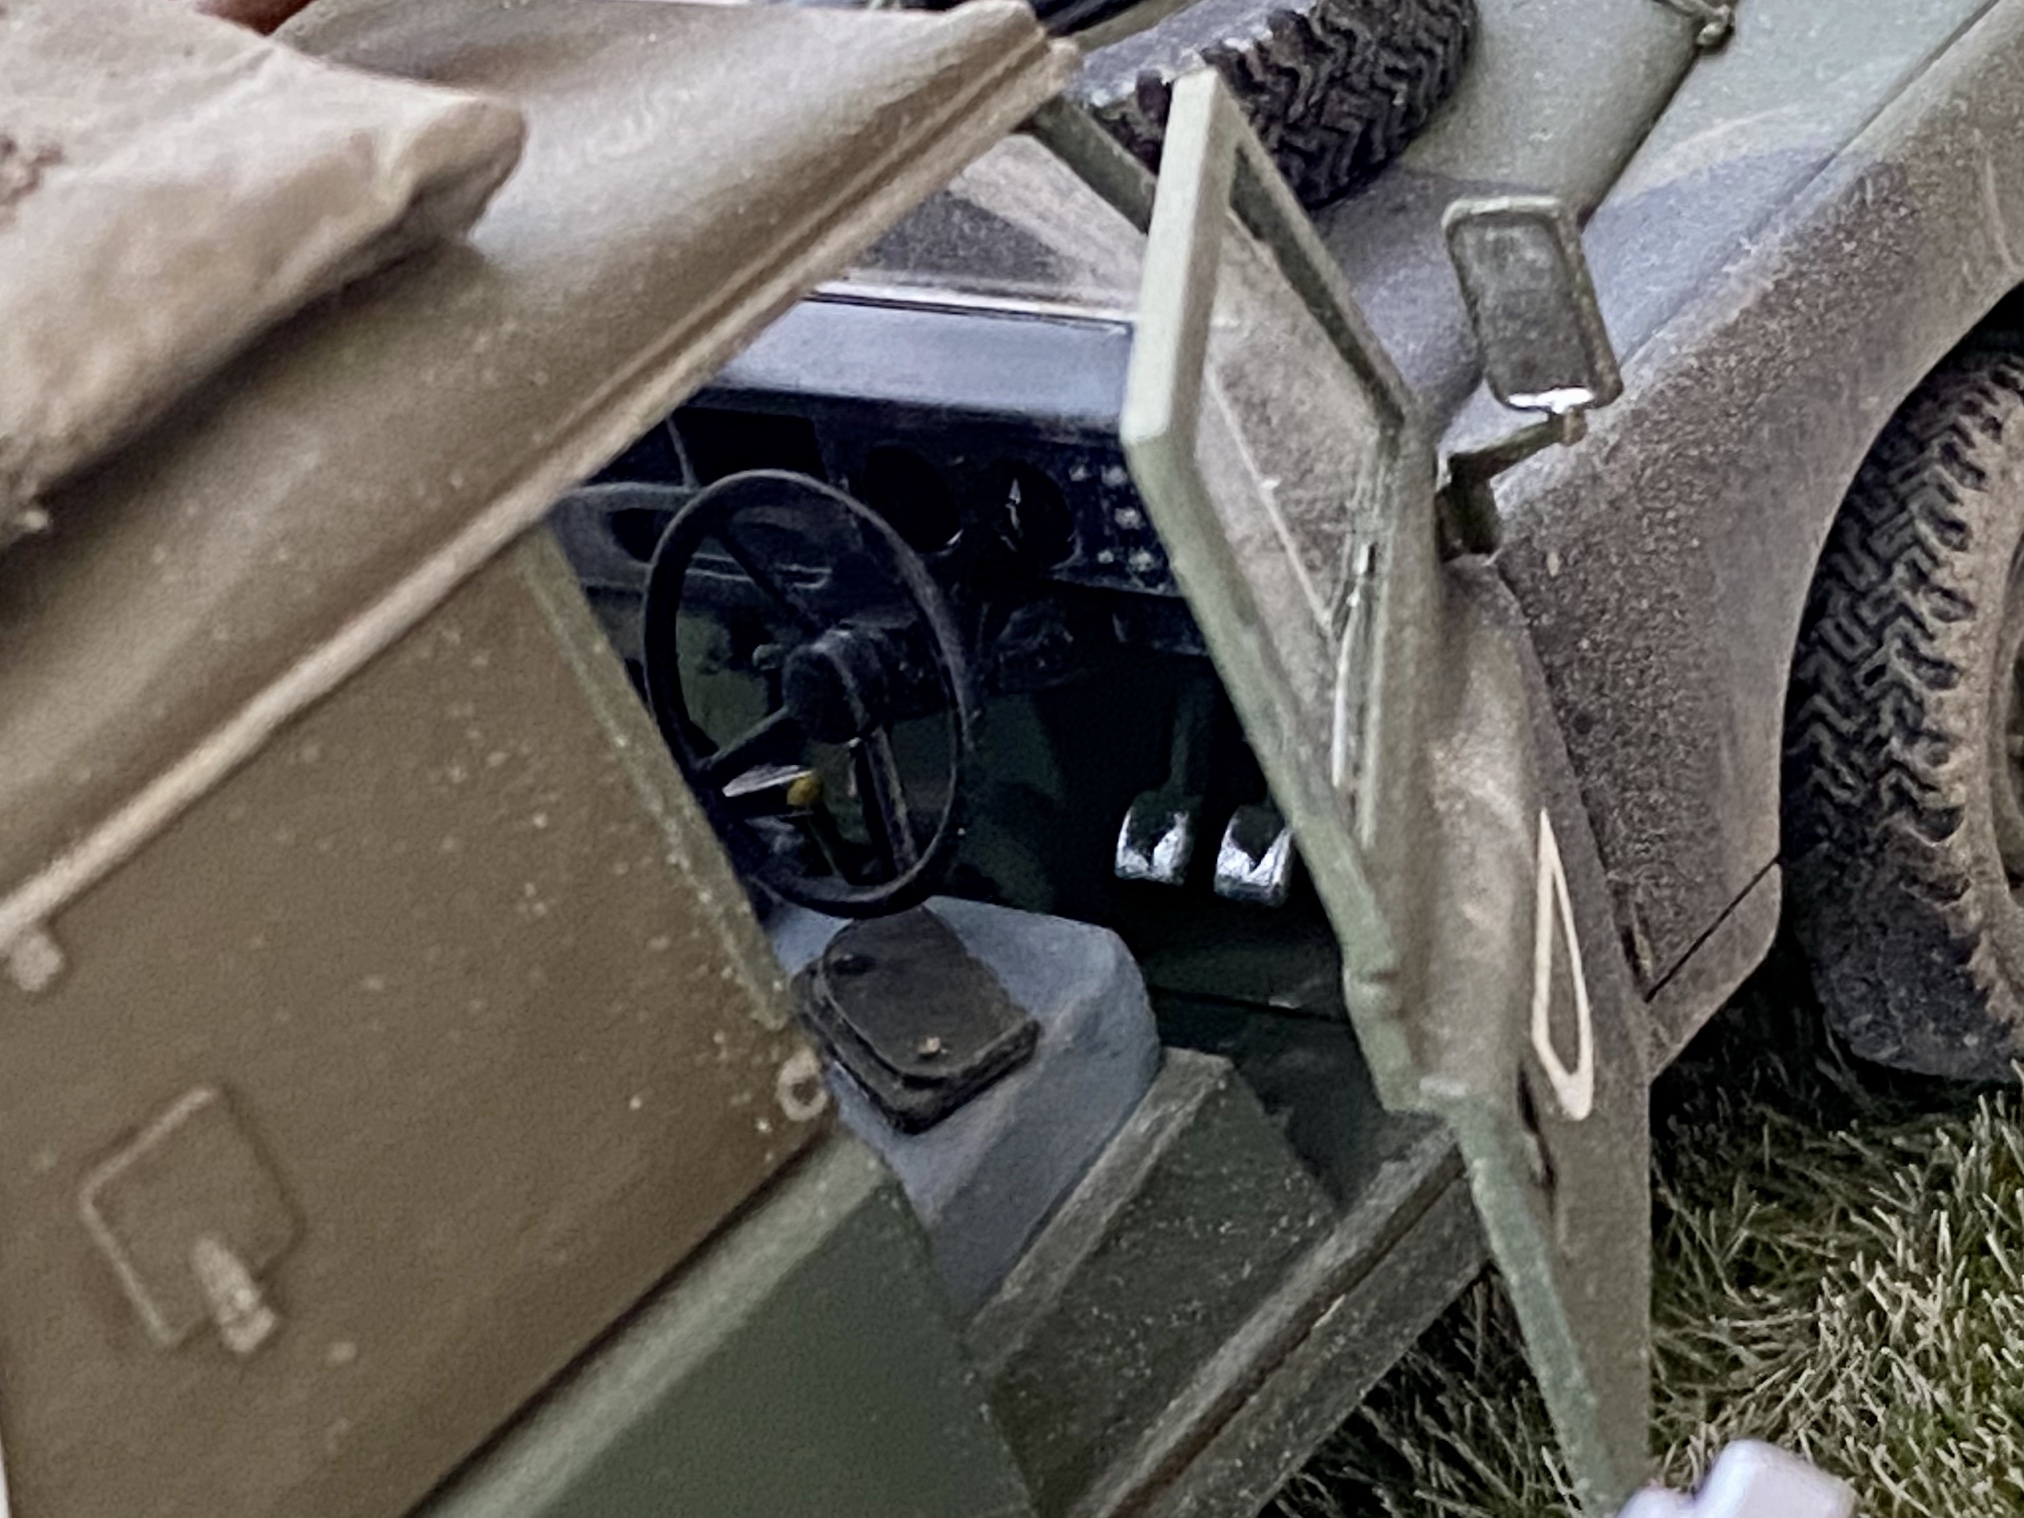
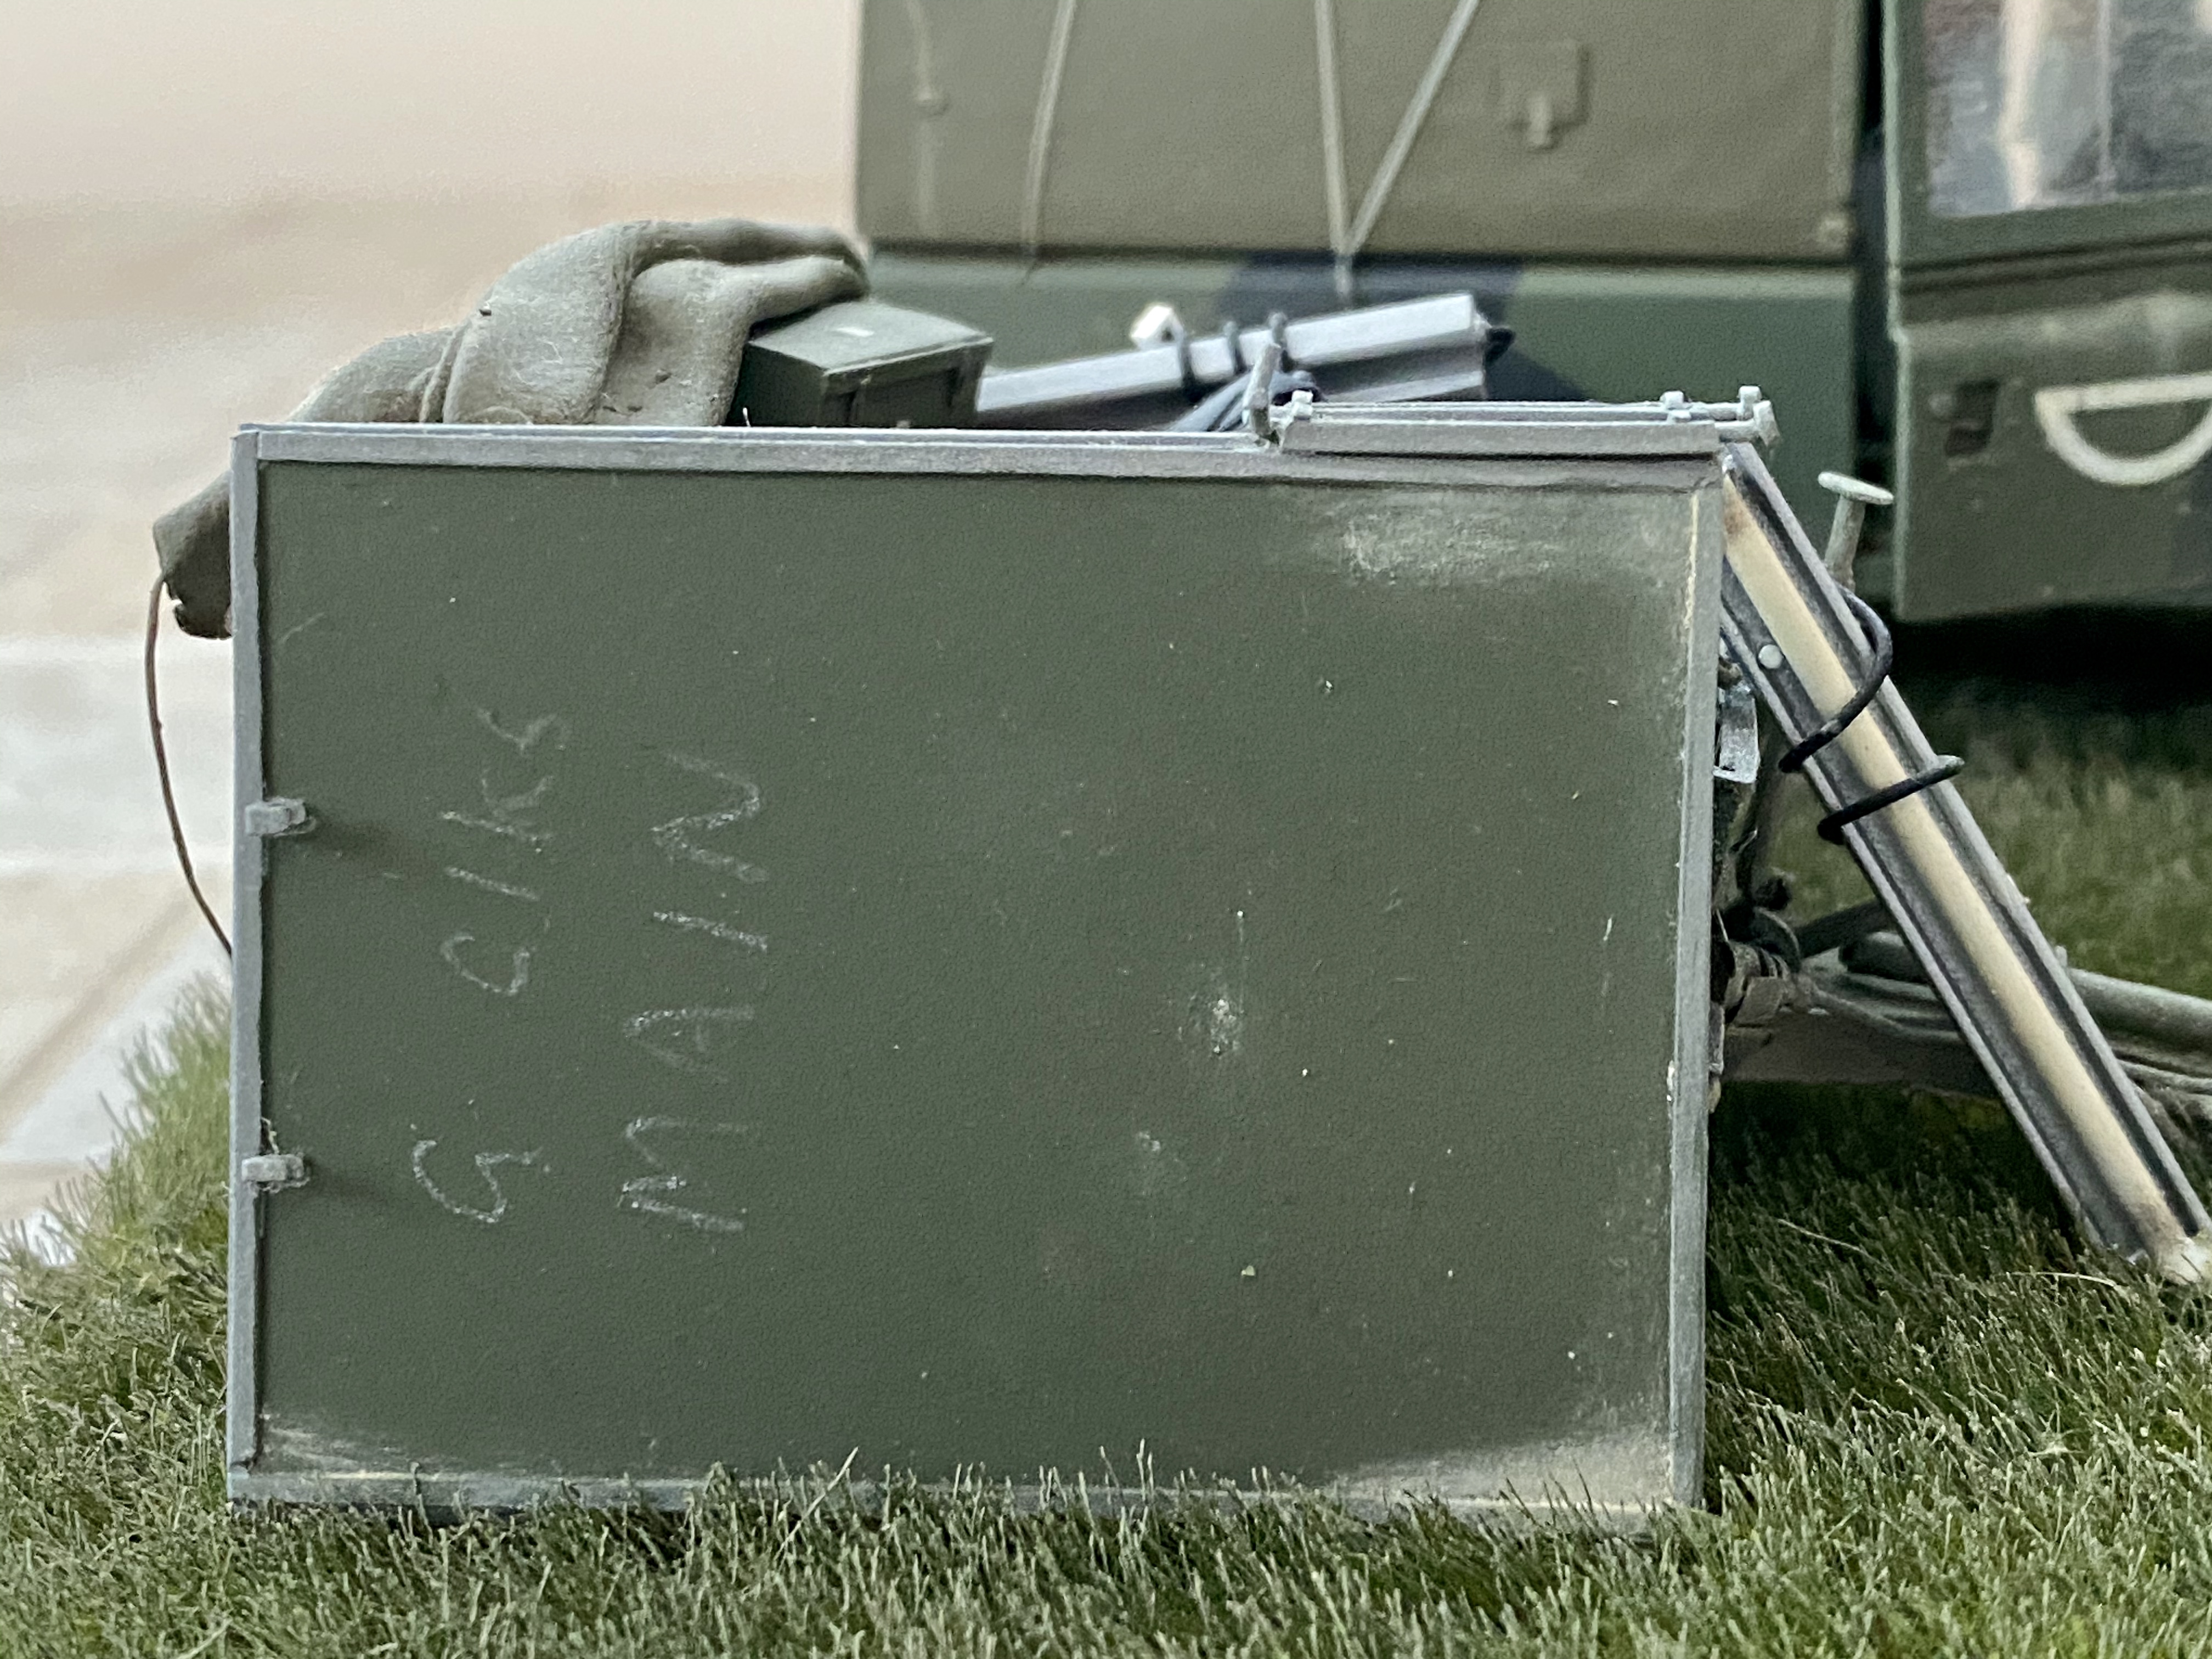
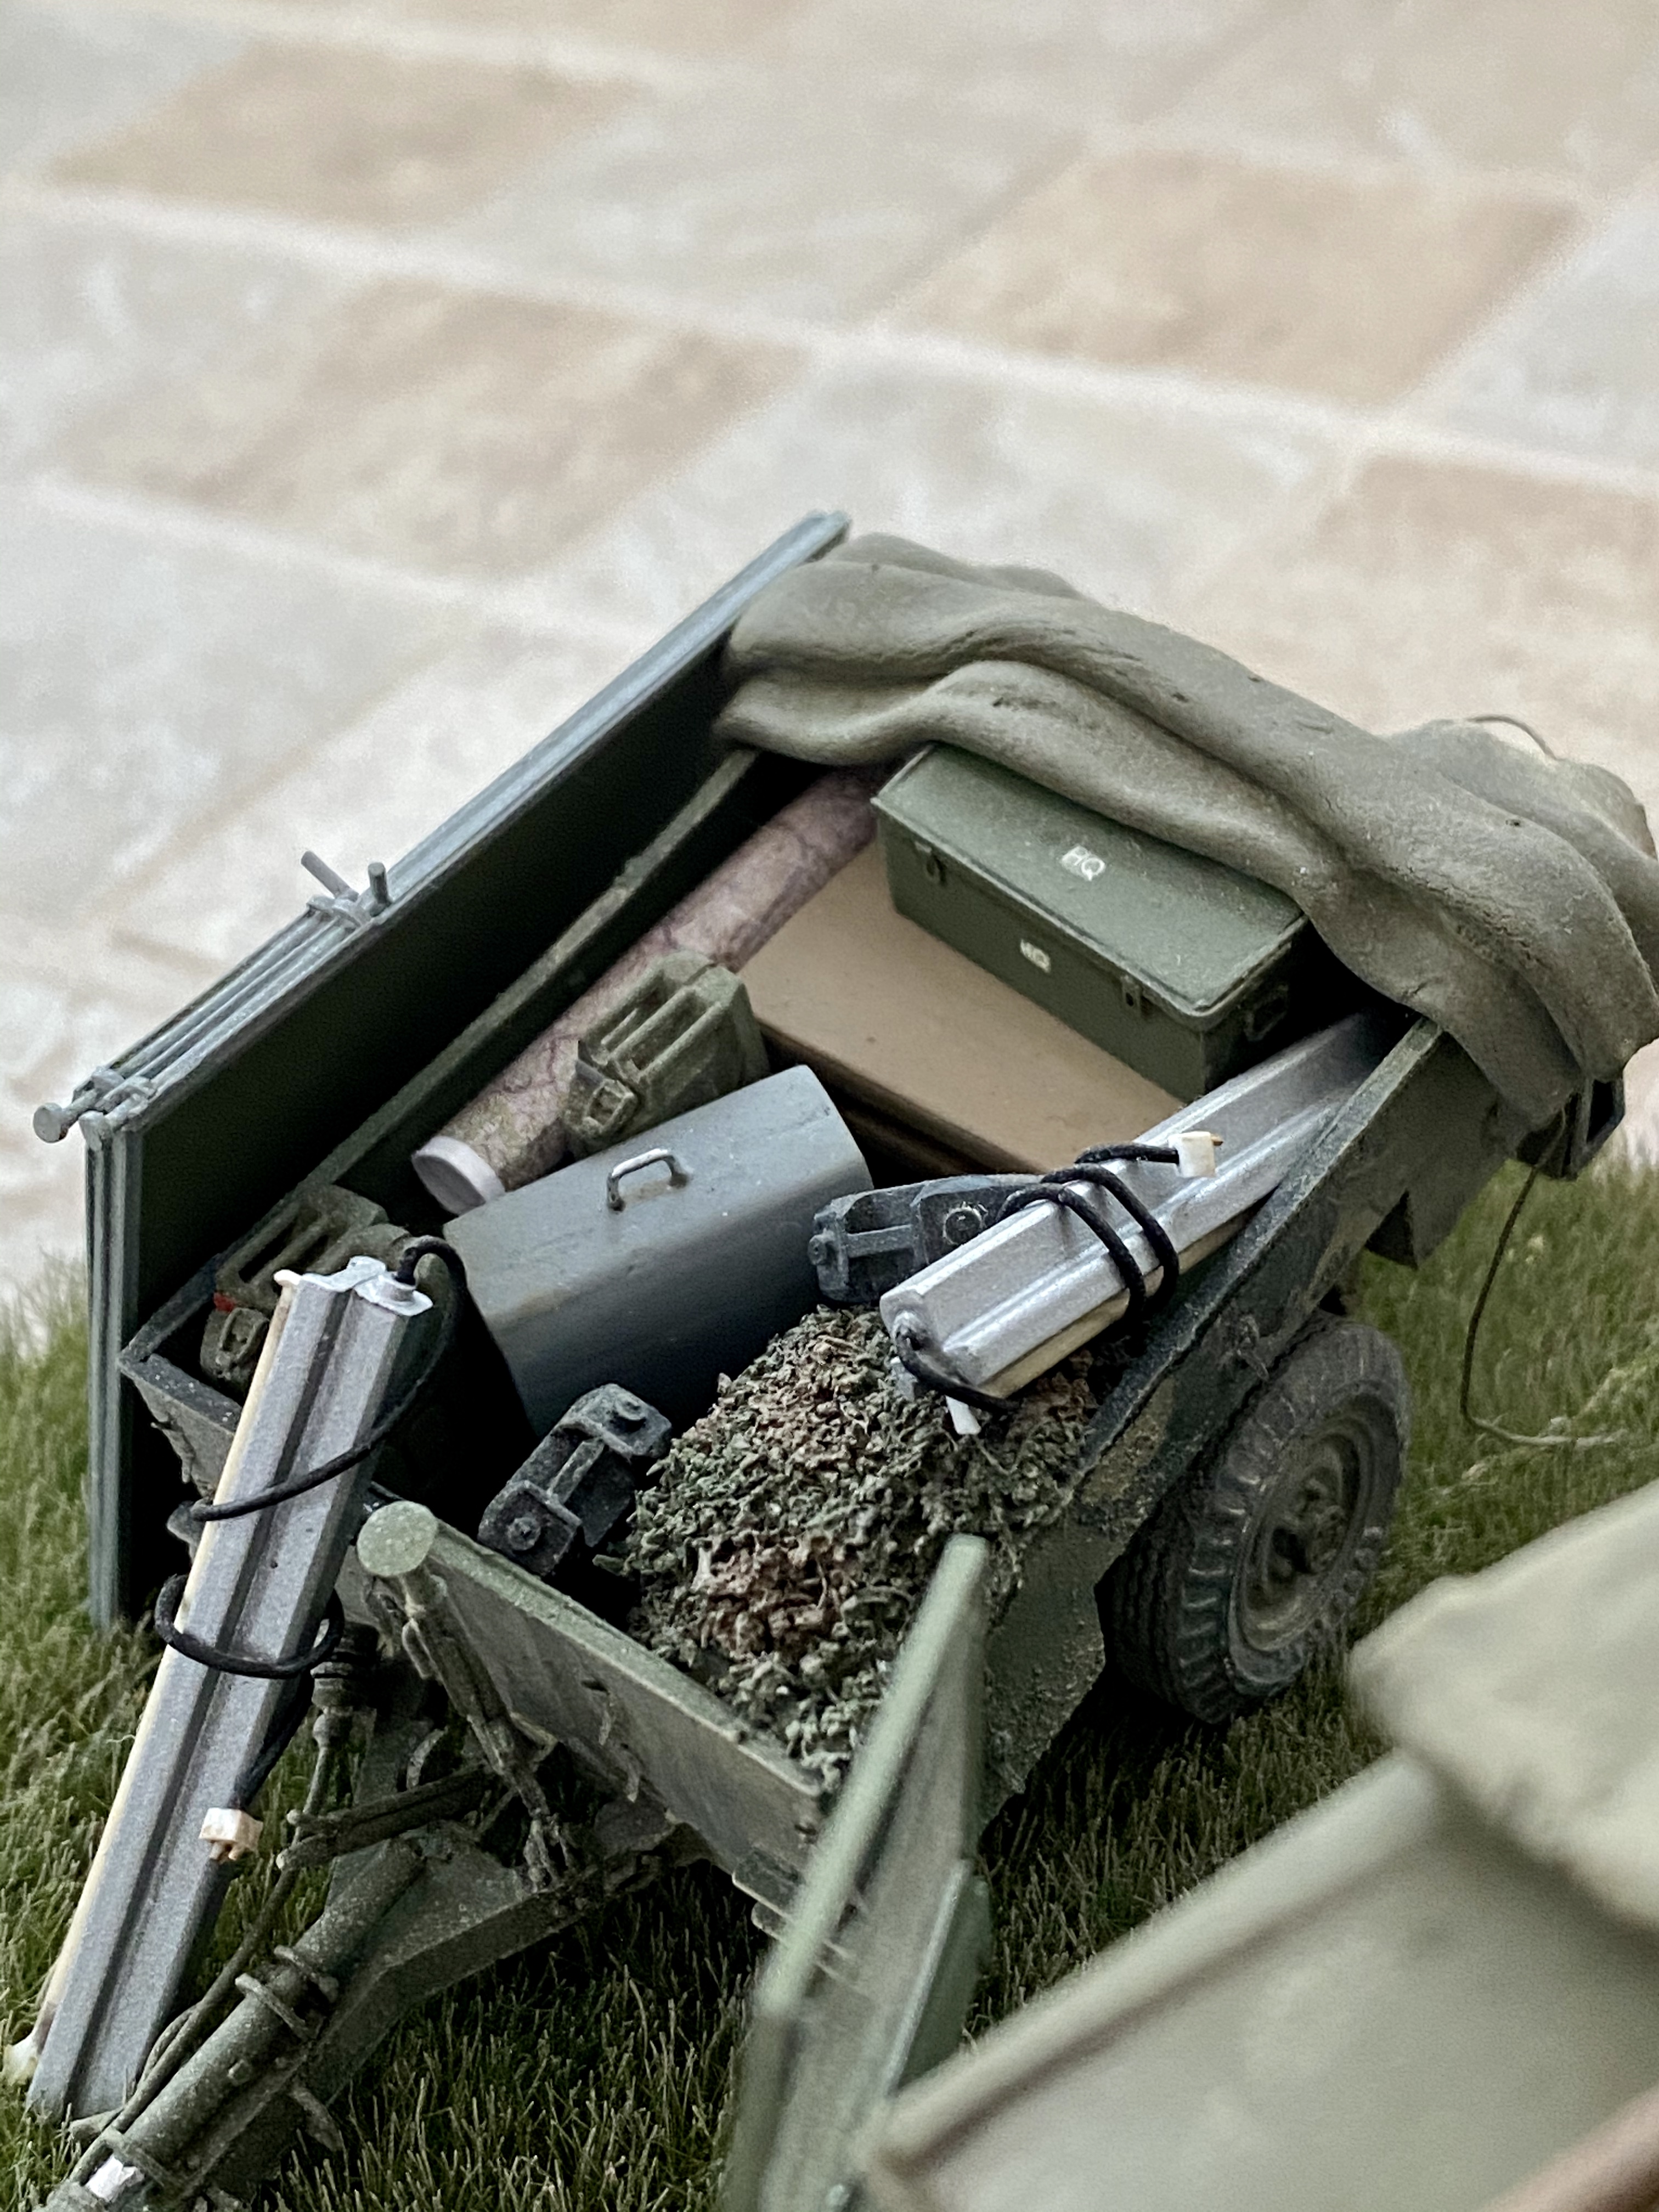
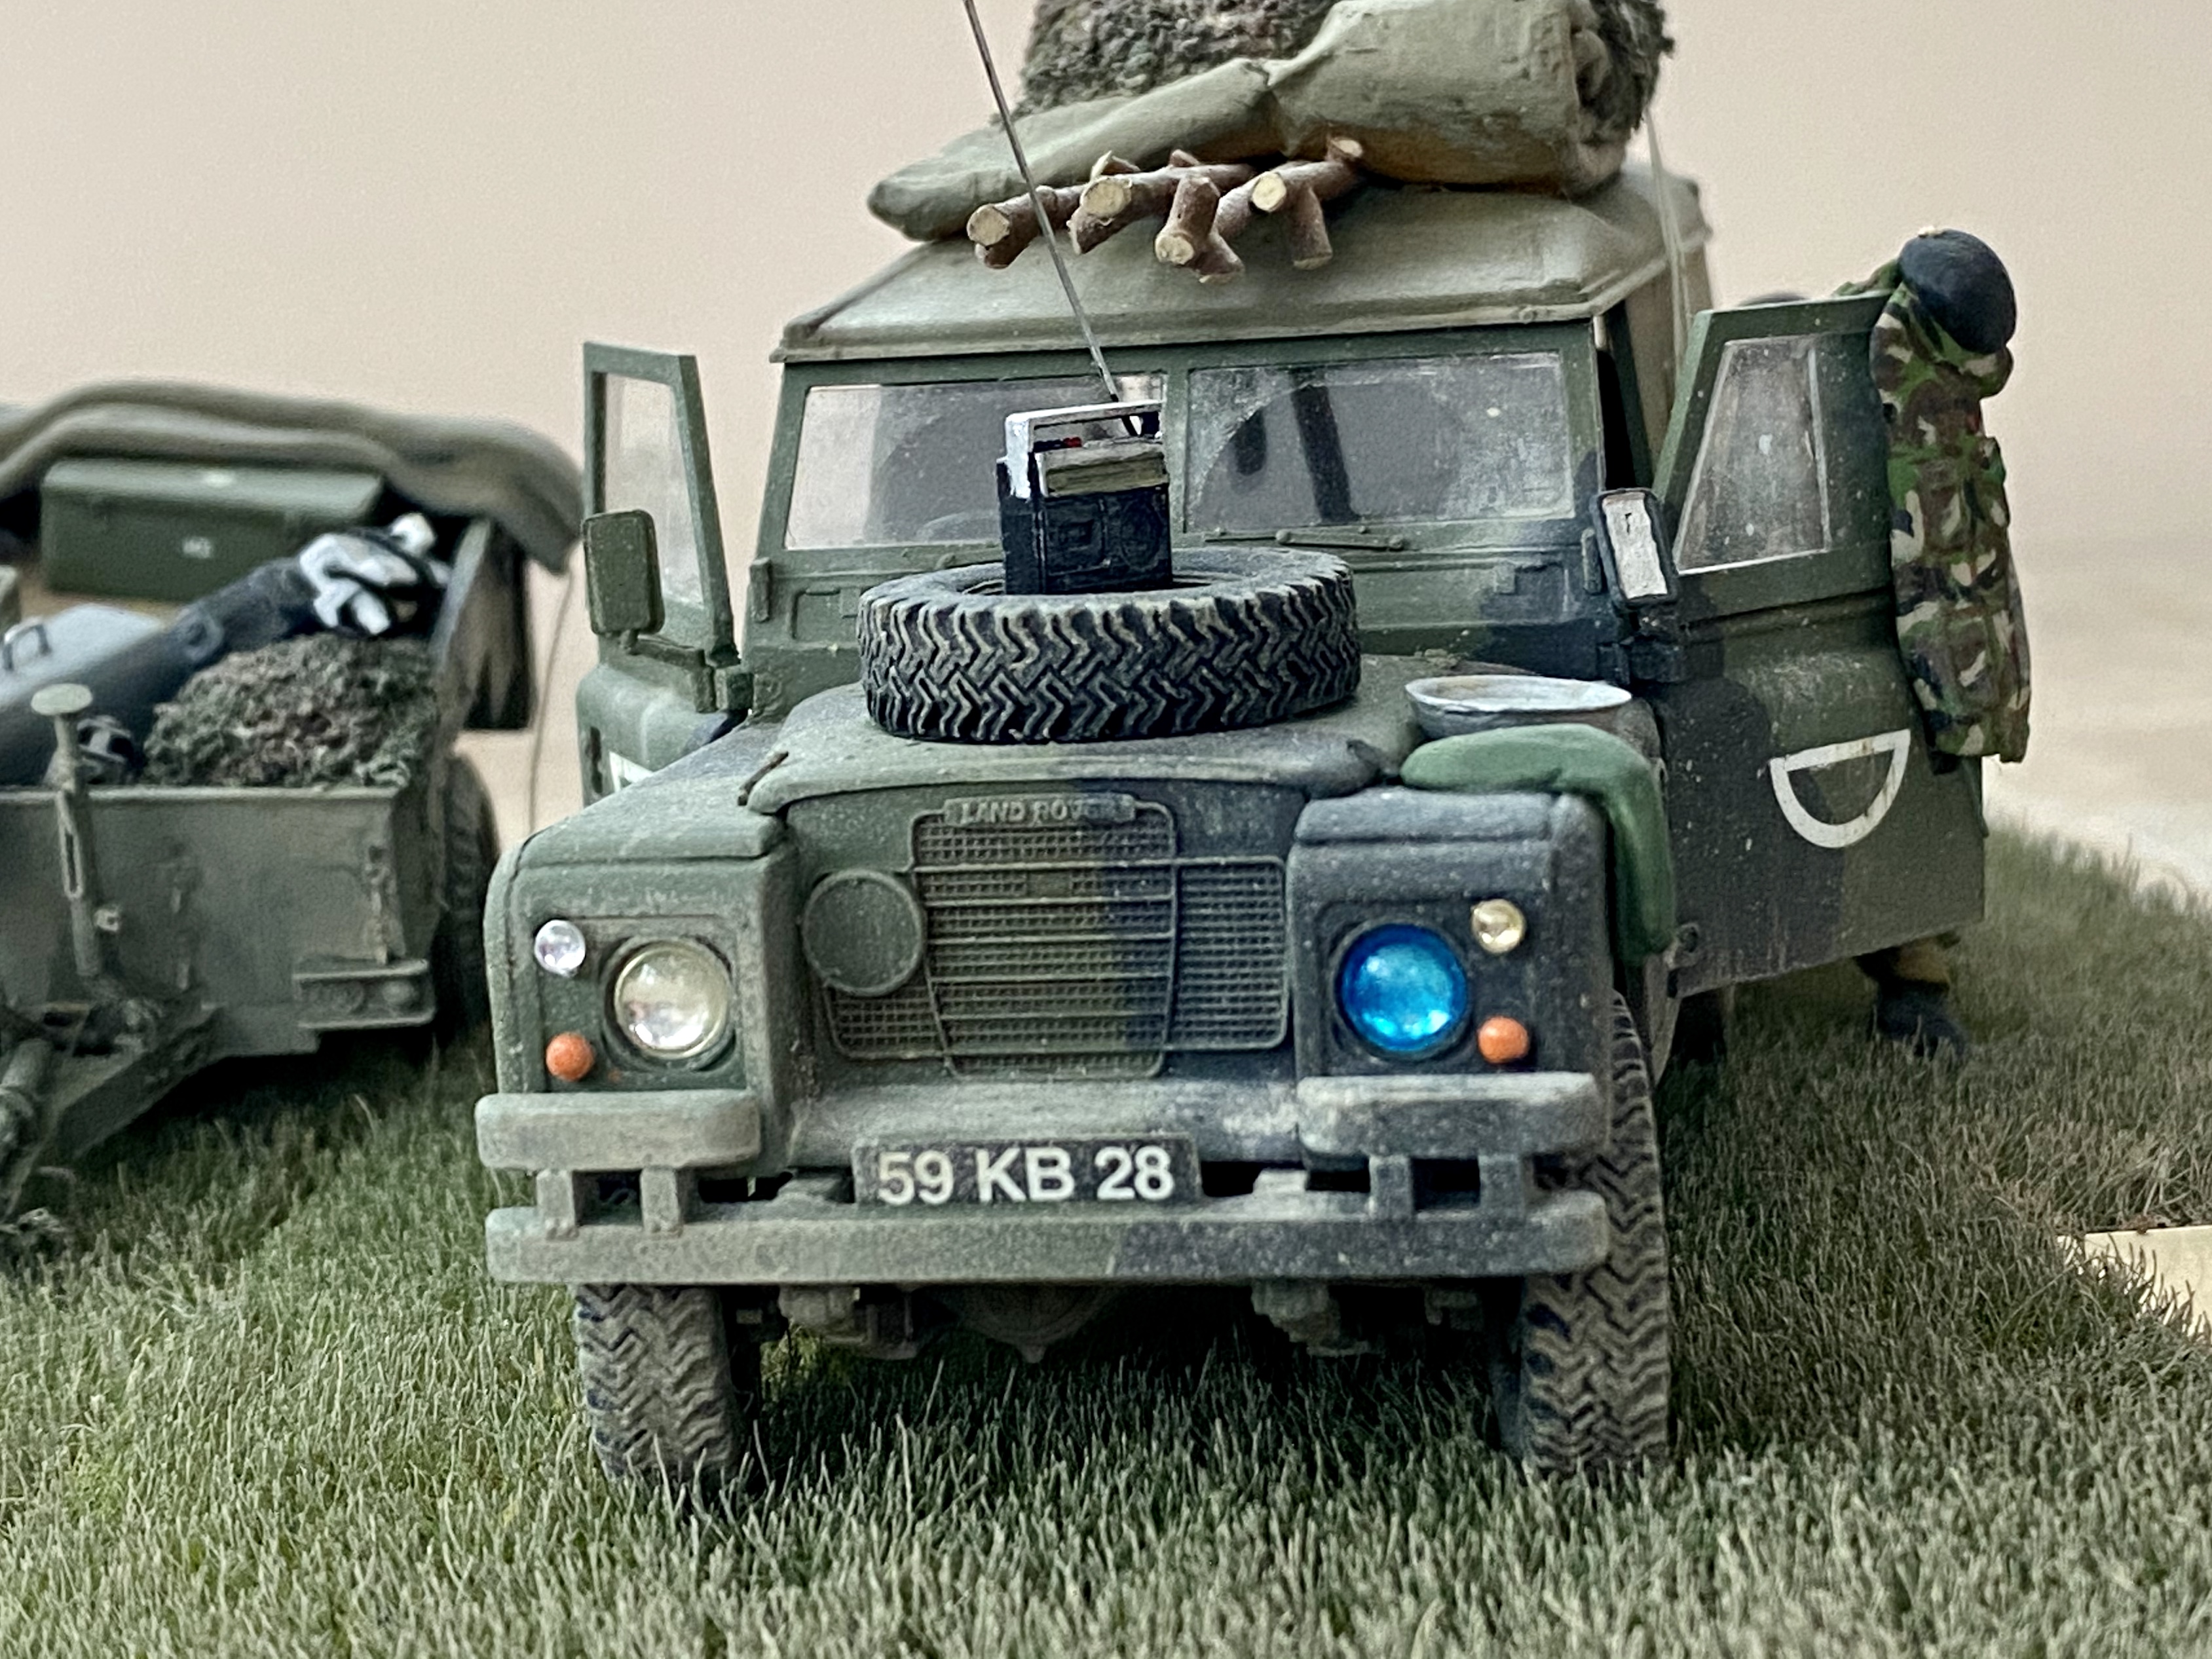
Shots include my personal weapon on the front seat - just visible - 9mm SMG, the rear of the vehicle showing a stove and mess tin on the tailboard (a bit blurry and oversize perhaps), classified waste sacks (brimful with Secret material), my typewriter - in truth this would have been protected by a plastic cover, rolled up map traces, my personal webbing, sleeping bag and so on; my steel helmet is just visible under the sleeping bag. The vehicle work ticket can be seen on the driver’s front seat. Trailer contents include yet more cam net, fuel Jerricans - both Civgas and Kero (with the respective NATO labels), boxes of maps and rolled up maps, water Jerrican, Gestetner duplicator, library box and light fitting. Alongside the trailer are the HQ complex map boards - chalked up "G (general Staff branch) Clks (Clerks) Main (that is Main HQ of the Divisional HQ) and another light fitting.
Other views show a tipped over chair (I chickened out from scratching a British one and utilised a US version) and the inevitable empty wine bottles; I explained in an earlier post about the circumstances - needless to say it was ENDEX - End of Exercise. My cassette radio is shown resting on the bonnet and one of the headlights is blue in accordance with convoy march discipline.
Brian, wow and thanks for posting the pics here. That Sir is outstanding !!
The little tiny bits of attention to detail make it jump out for me and bring back a lot of Landrover memories for me… And loading up those poxy trailers lol.
Love the sleeping bag, nice when new but a pain when old as all the feathers would end up down at your feet… And a nightmare when wet…
Love the wear on the clutch/brake and Accel pedal.
The camping gas cooker and mess tin is a great touch and they look fine for scale.
Another great job on the DPM colour on the jacket, looks perfect and the 3 UK Div patch.
Also I have to mention the petrol tags and kero one on the jerry cans, brilliant.
And that cam net like the other one is a great rendition. I’m definitely going to use that method on any I do from now.
All the other trailer and internal bits in the rover rear are great, exactly what you would find in a HQ set up.
No doubt I will see more little details the more I look but it looks fantastic. You should be very proud of that.
Well, that’s for sure! I think usually on exercise back then I tried to sleep in the front seats; there was no seat cushion in the middle (unlike the model) and I sort of stretched out, bent in the middle, with either my feet or head sticking out into the elements. There was a sort of ad hoc plywood bulkhead set up between the cab and the vehicle rear when the HQ complex was all set up. There were 2 clerks per vehicle and we operated 12 hour shifts which sounds reasonable save that we moved just about every 24 hours (for survivability) so it was all pretty disruptive. Thank God I was young and could deal with it. Eventually we were issued camp beds but the design back then was a model which only raised you around 6 inches off the ground, and we never had dedicated tentage - which would have been really useful.