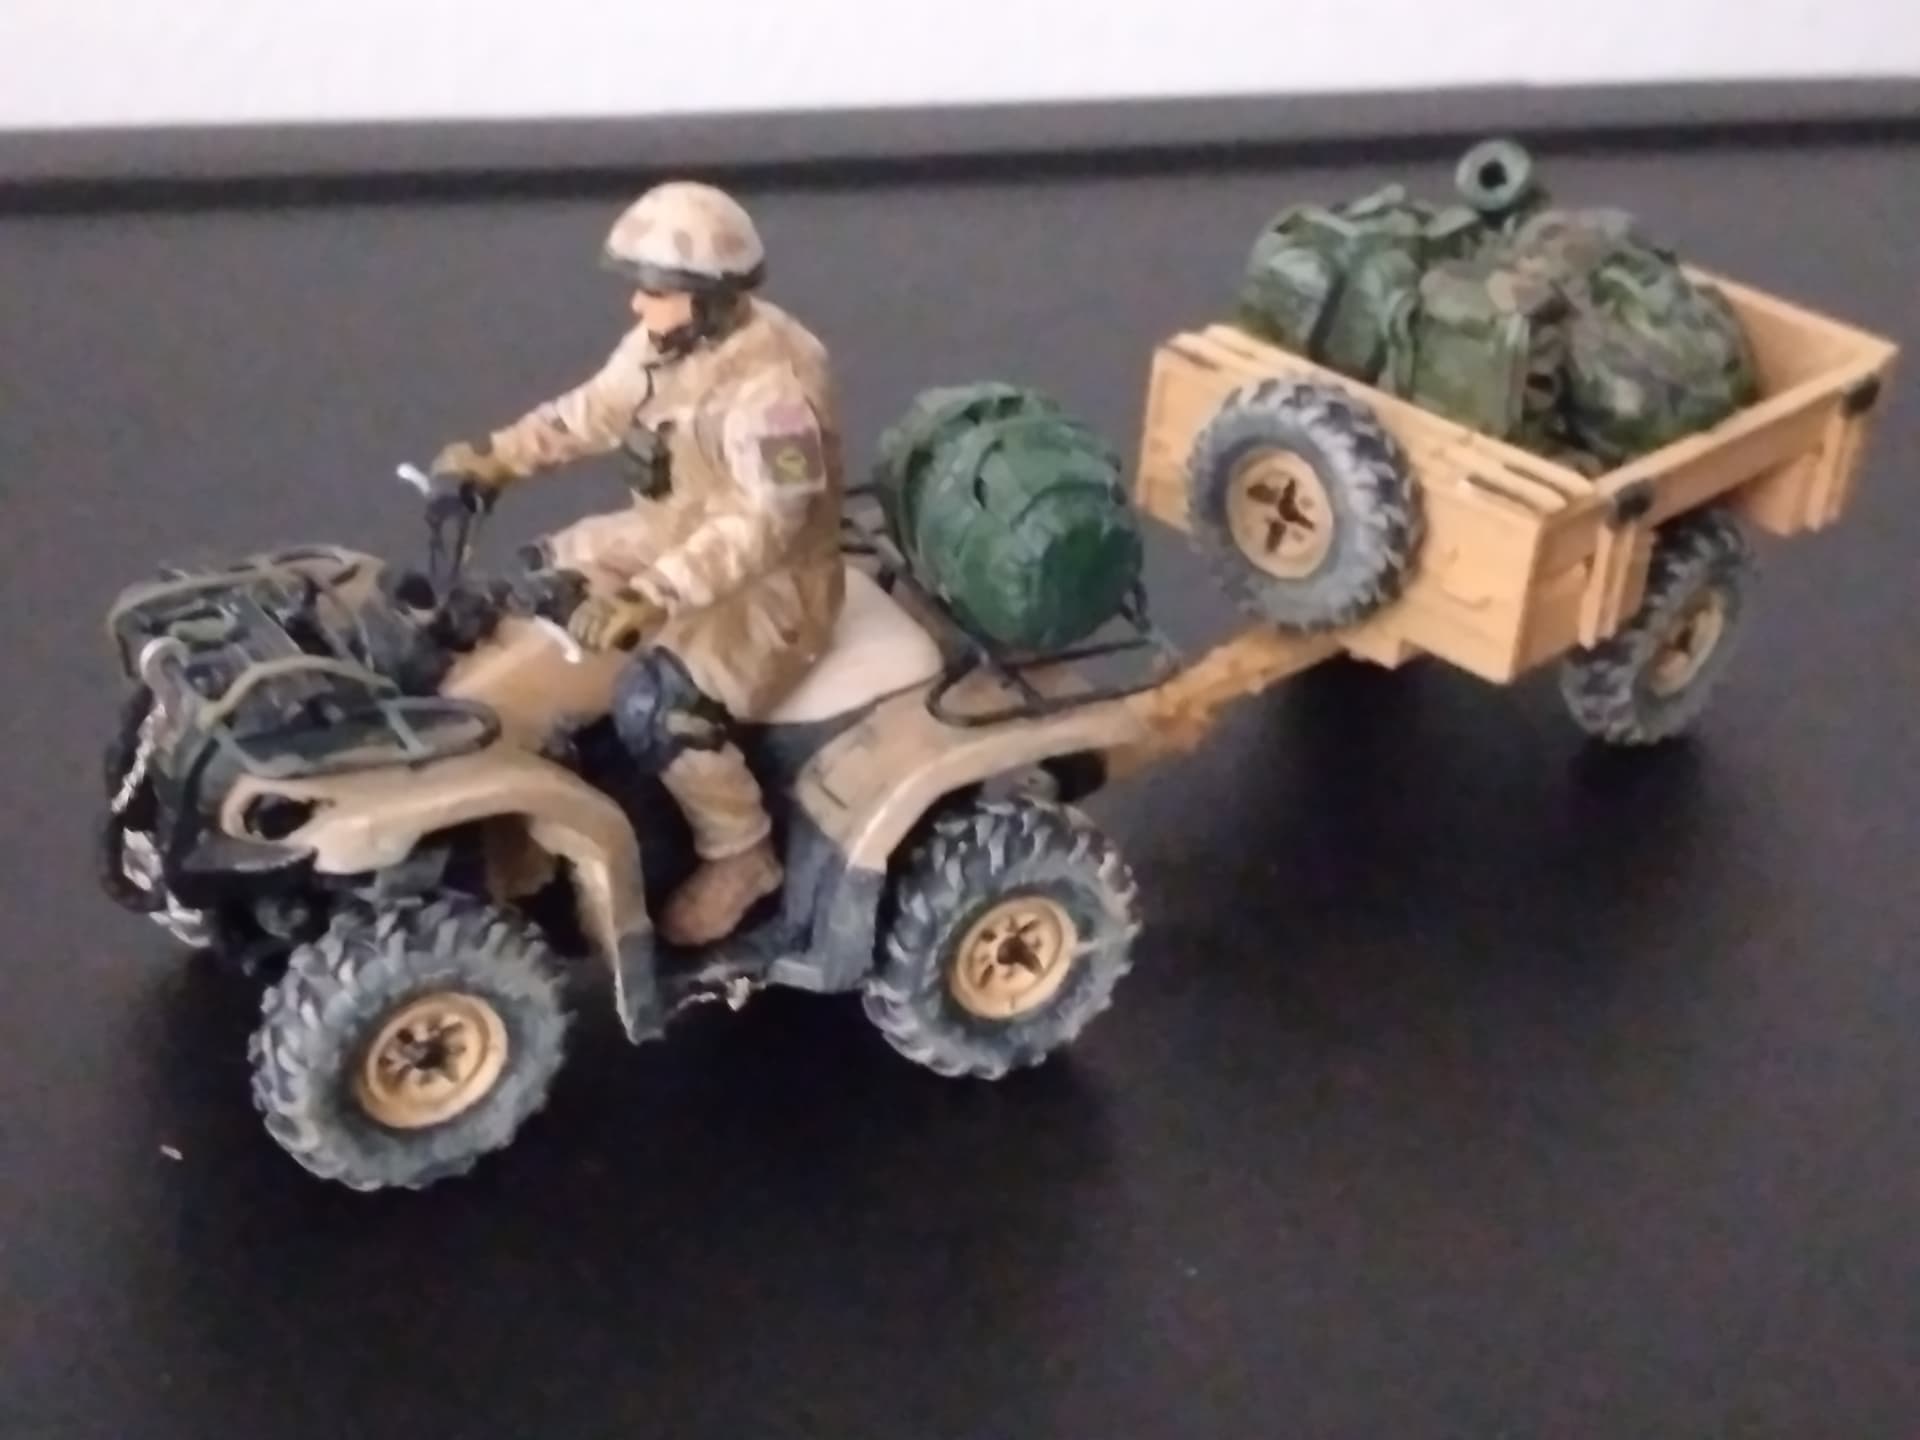
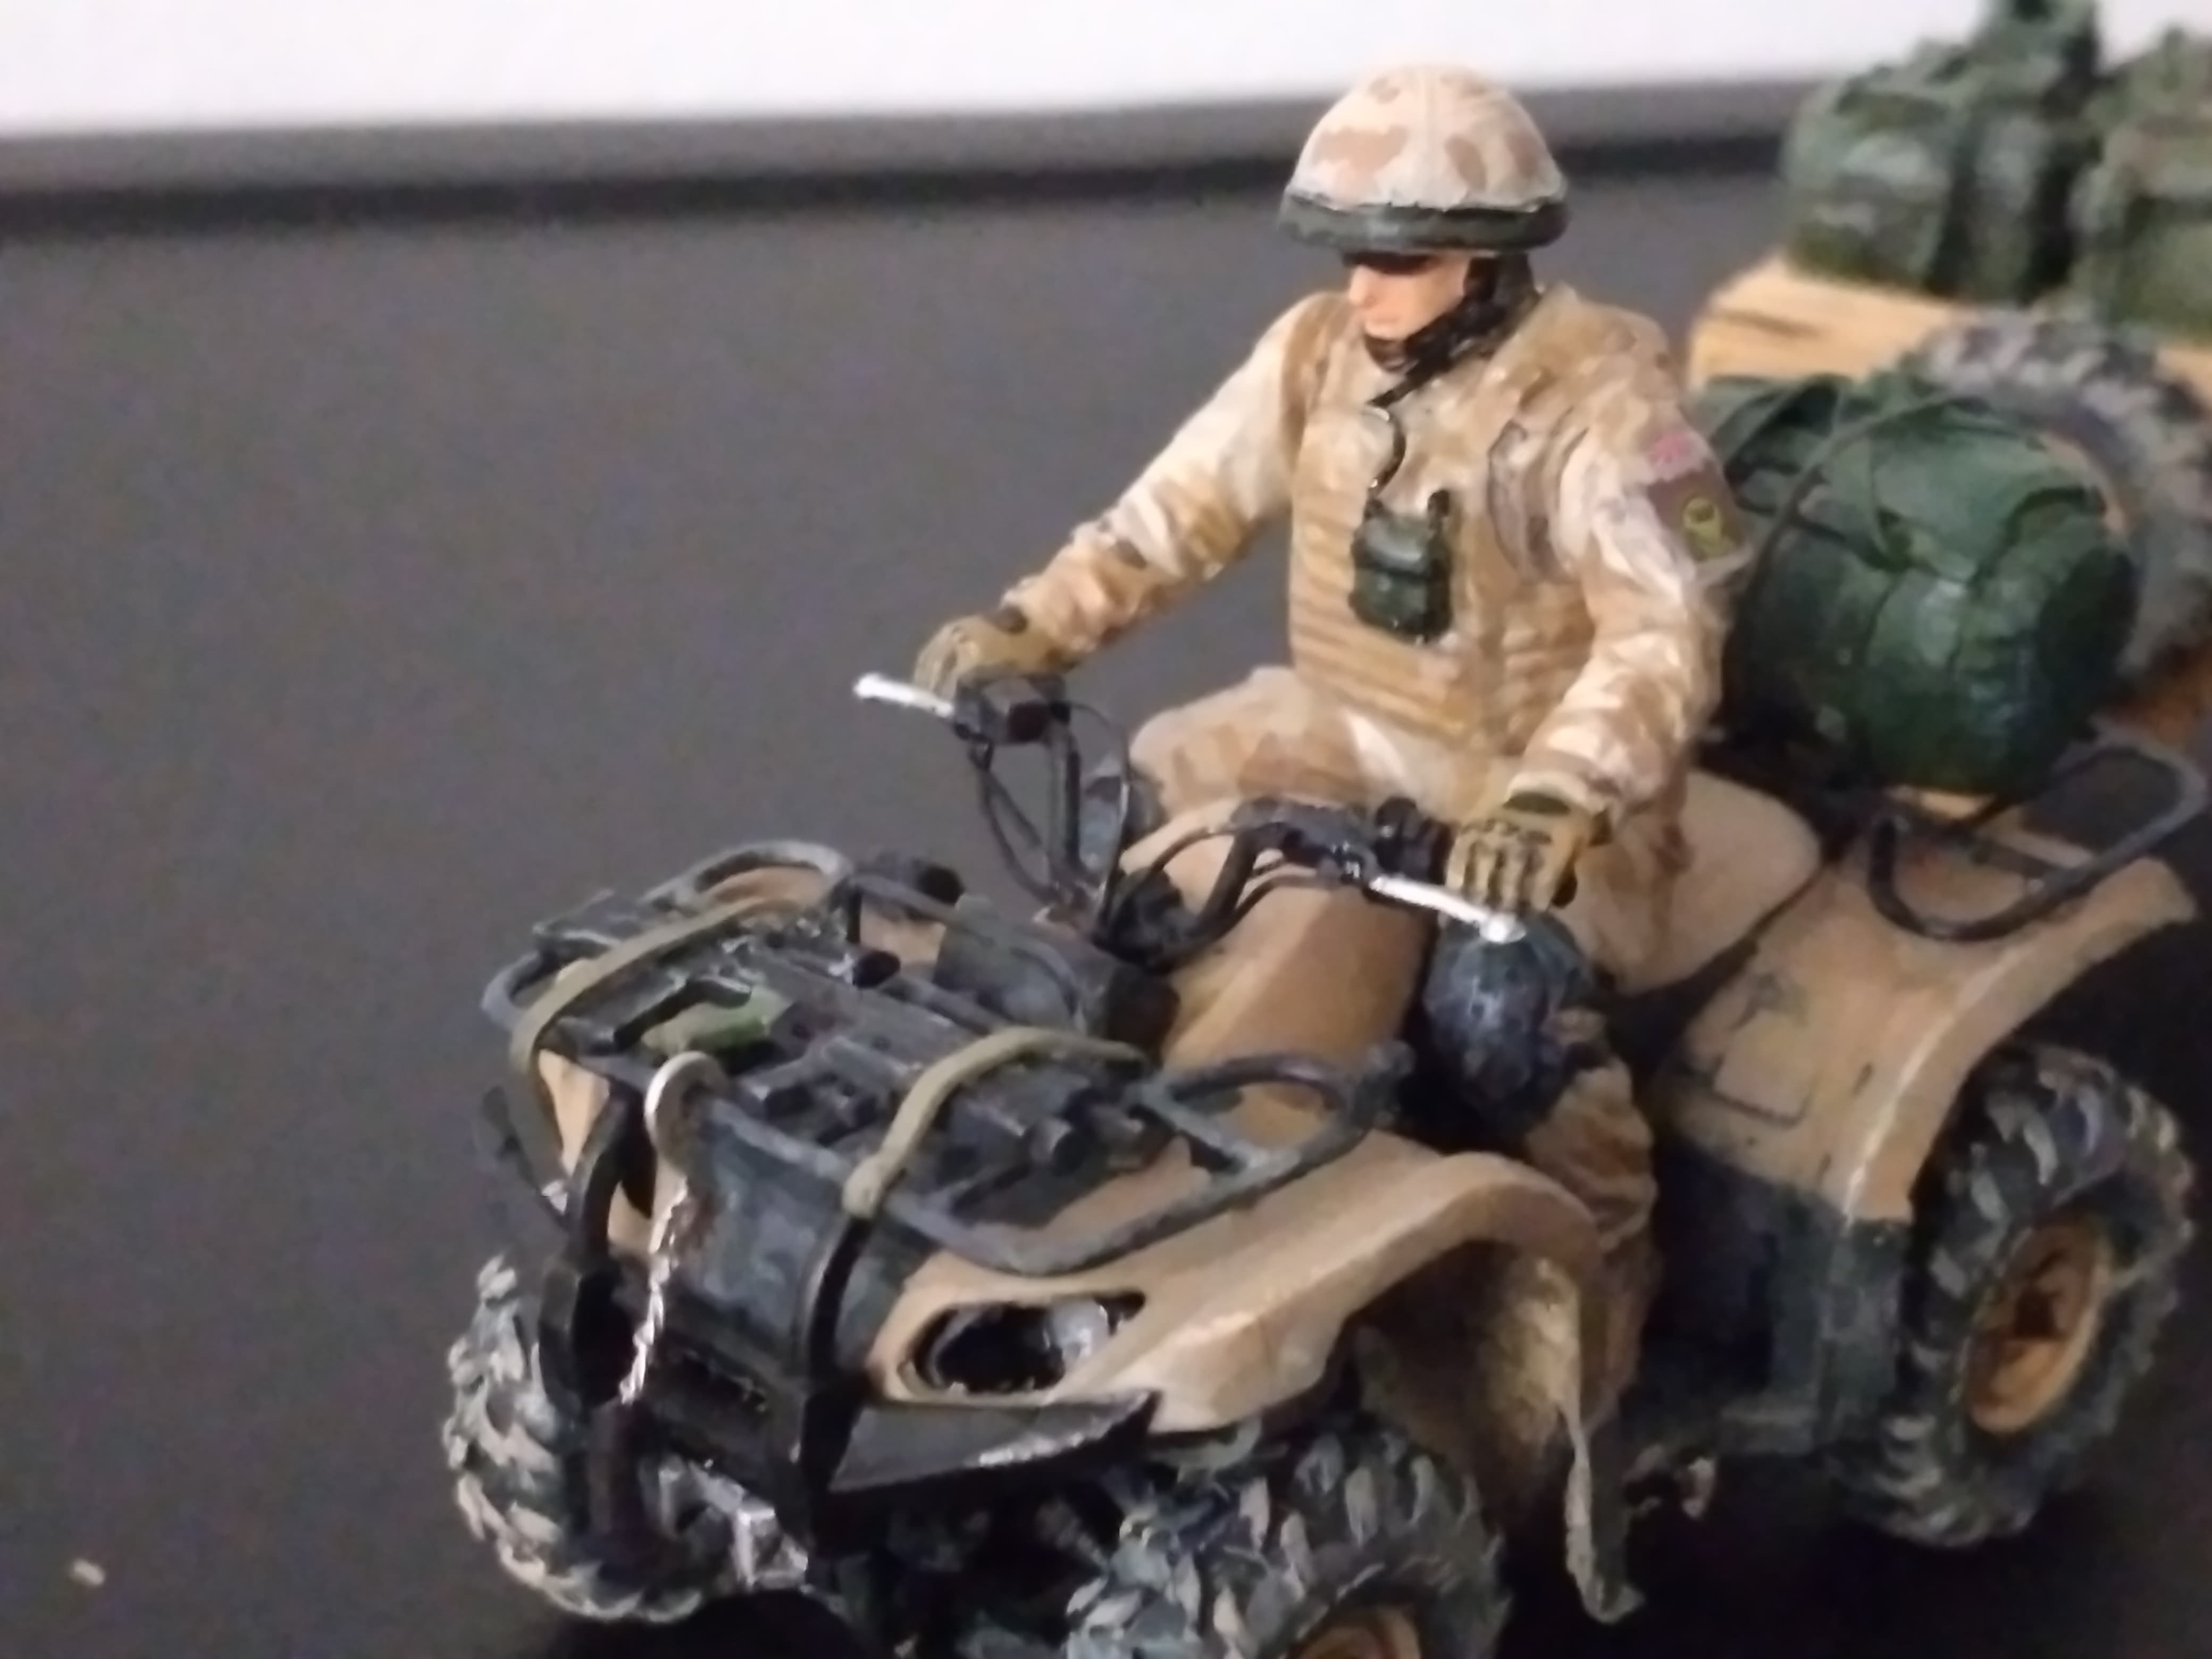
Very nice work on the quad T. It does make for an interesting combination.
2 Likes
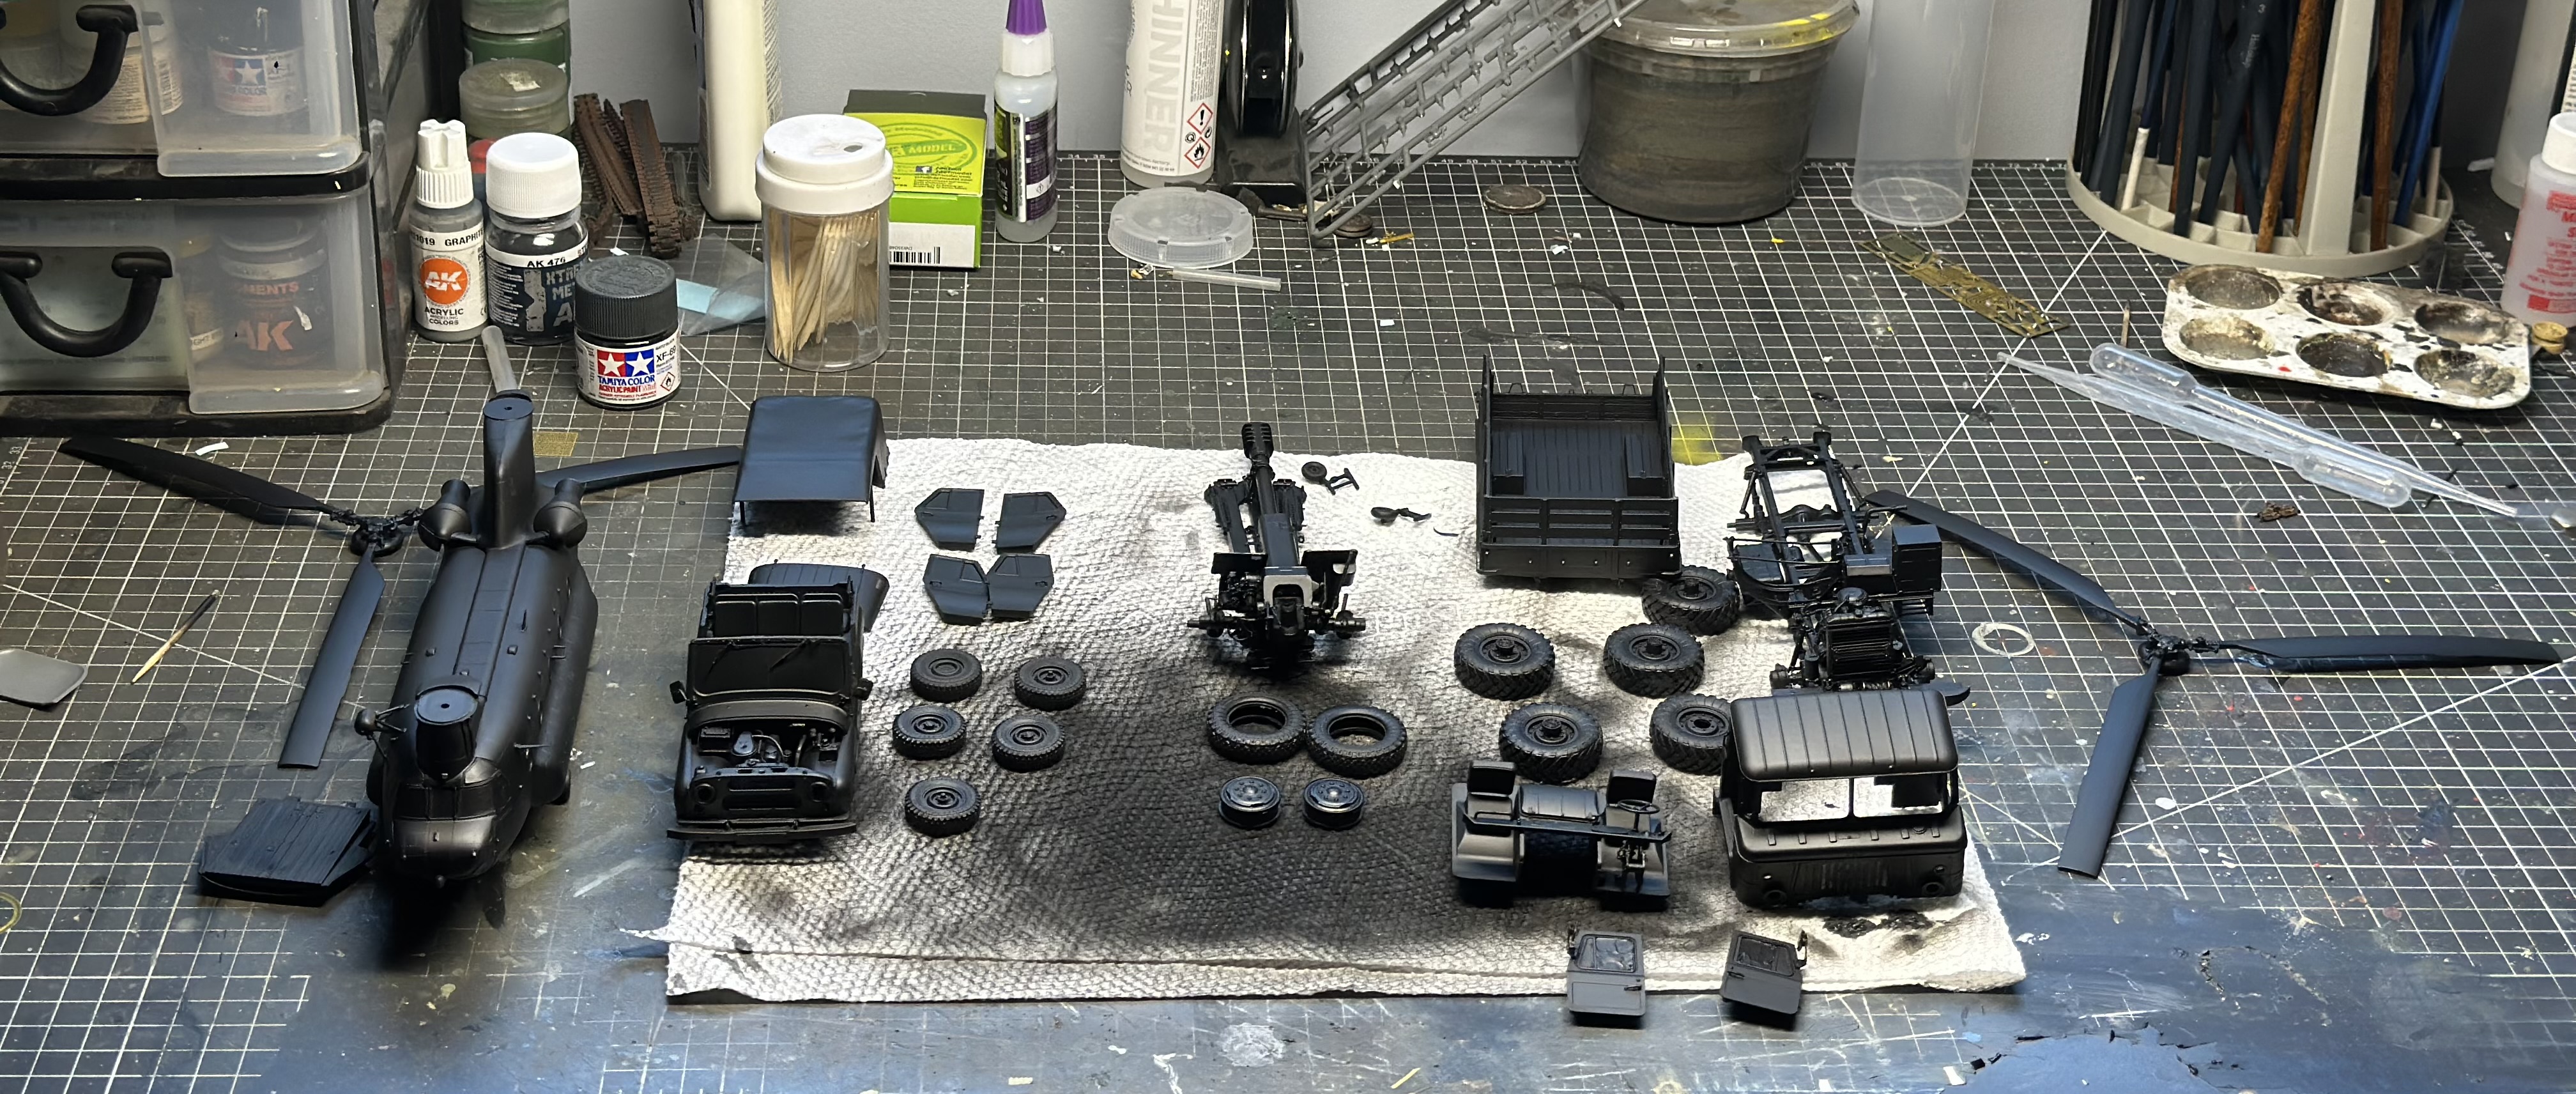
All the details are looking great. ![]()
2 Likes
Cheers buddy. ![]()
1 Like
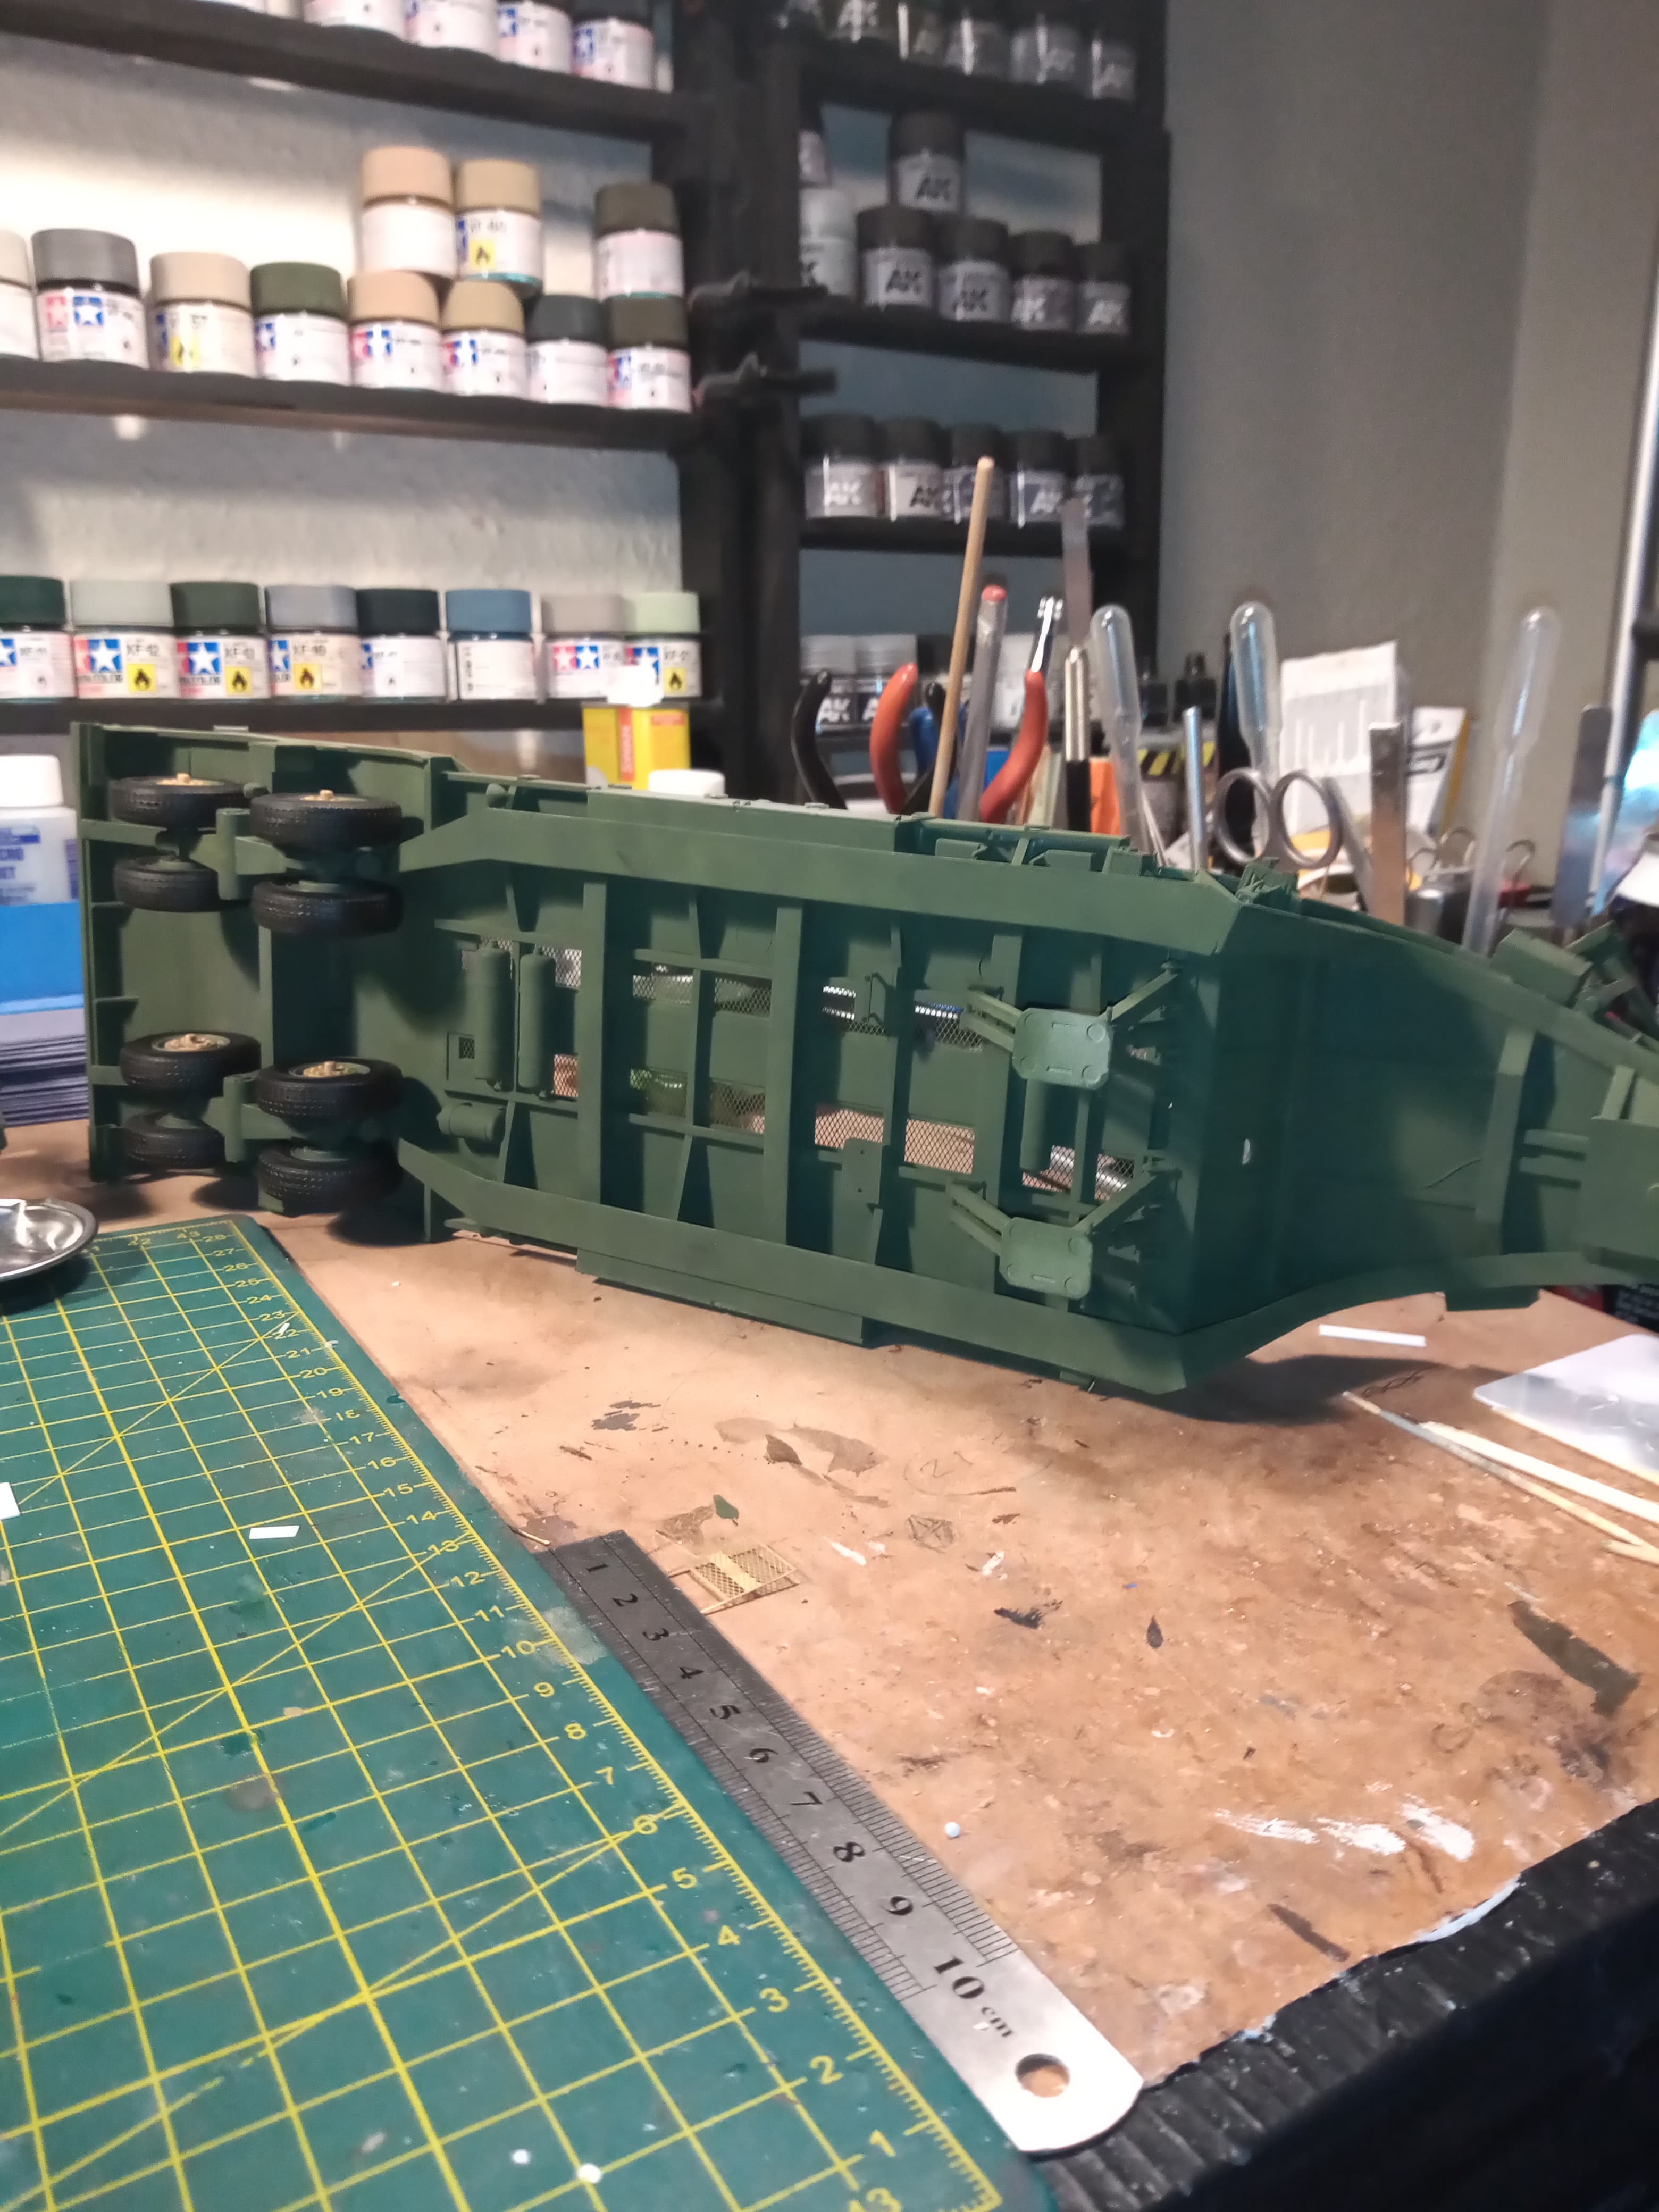
Starting on the mammoth job of painting the trailer… Got a coat over most of the underside but it’s a slow process… Lots of out the way corners, hidden sections under or behind cross beams …
and a bit of the top got a coat …
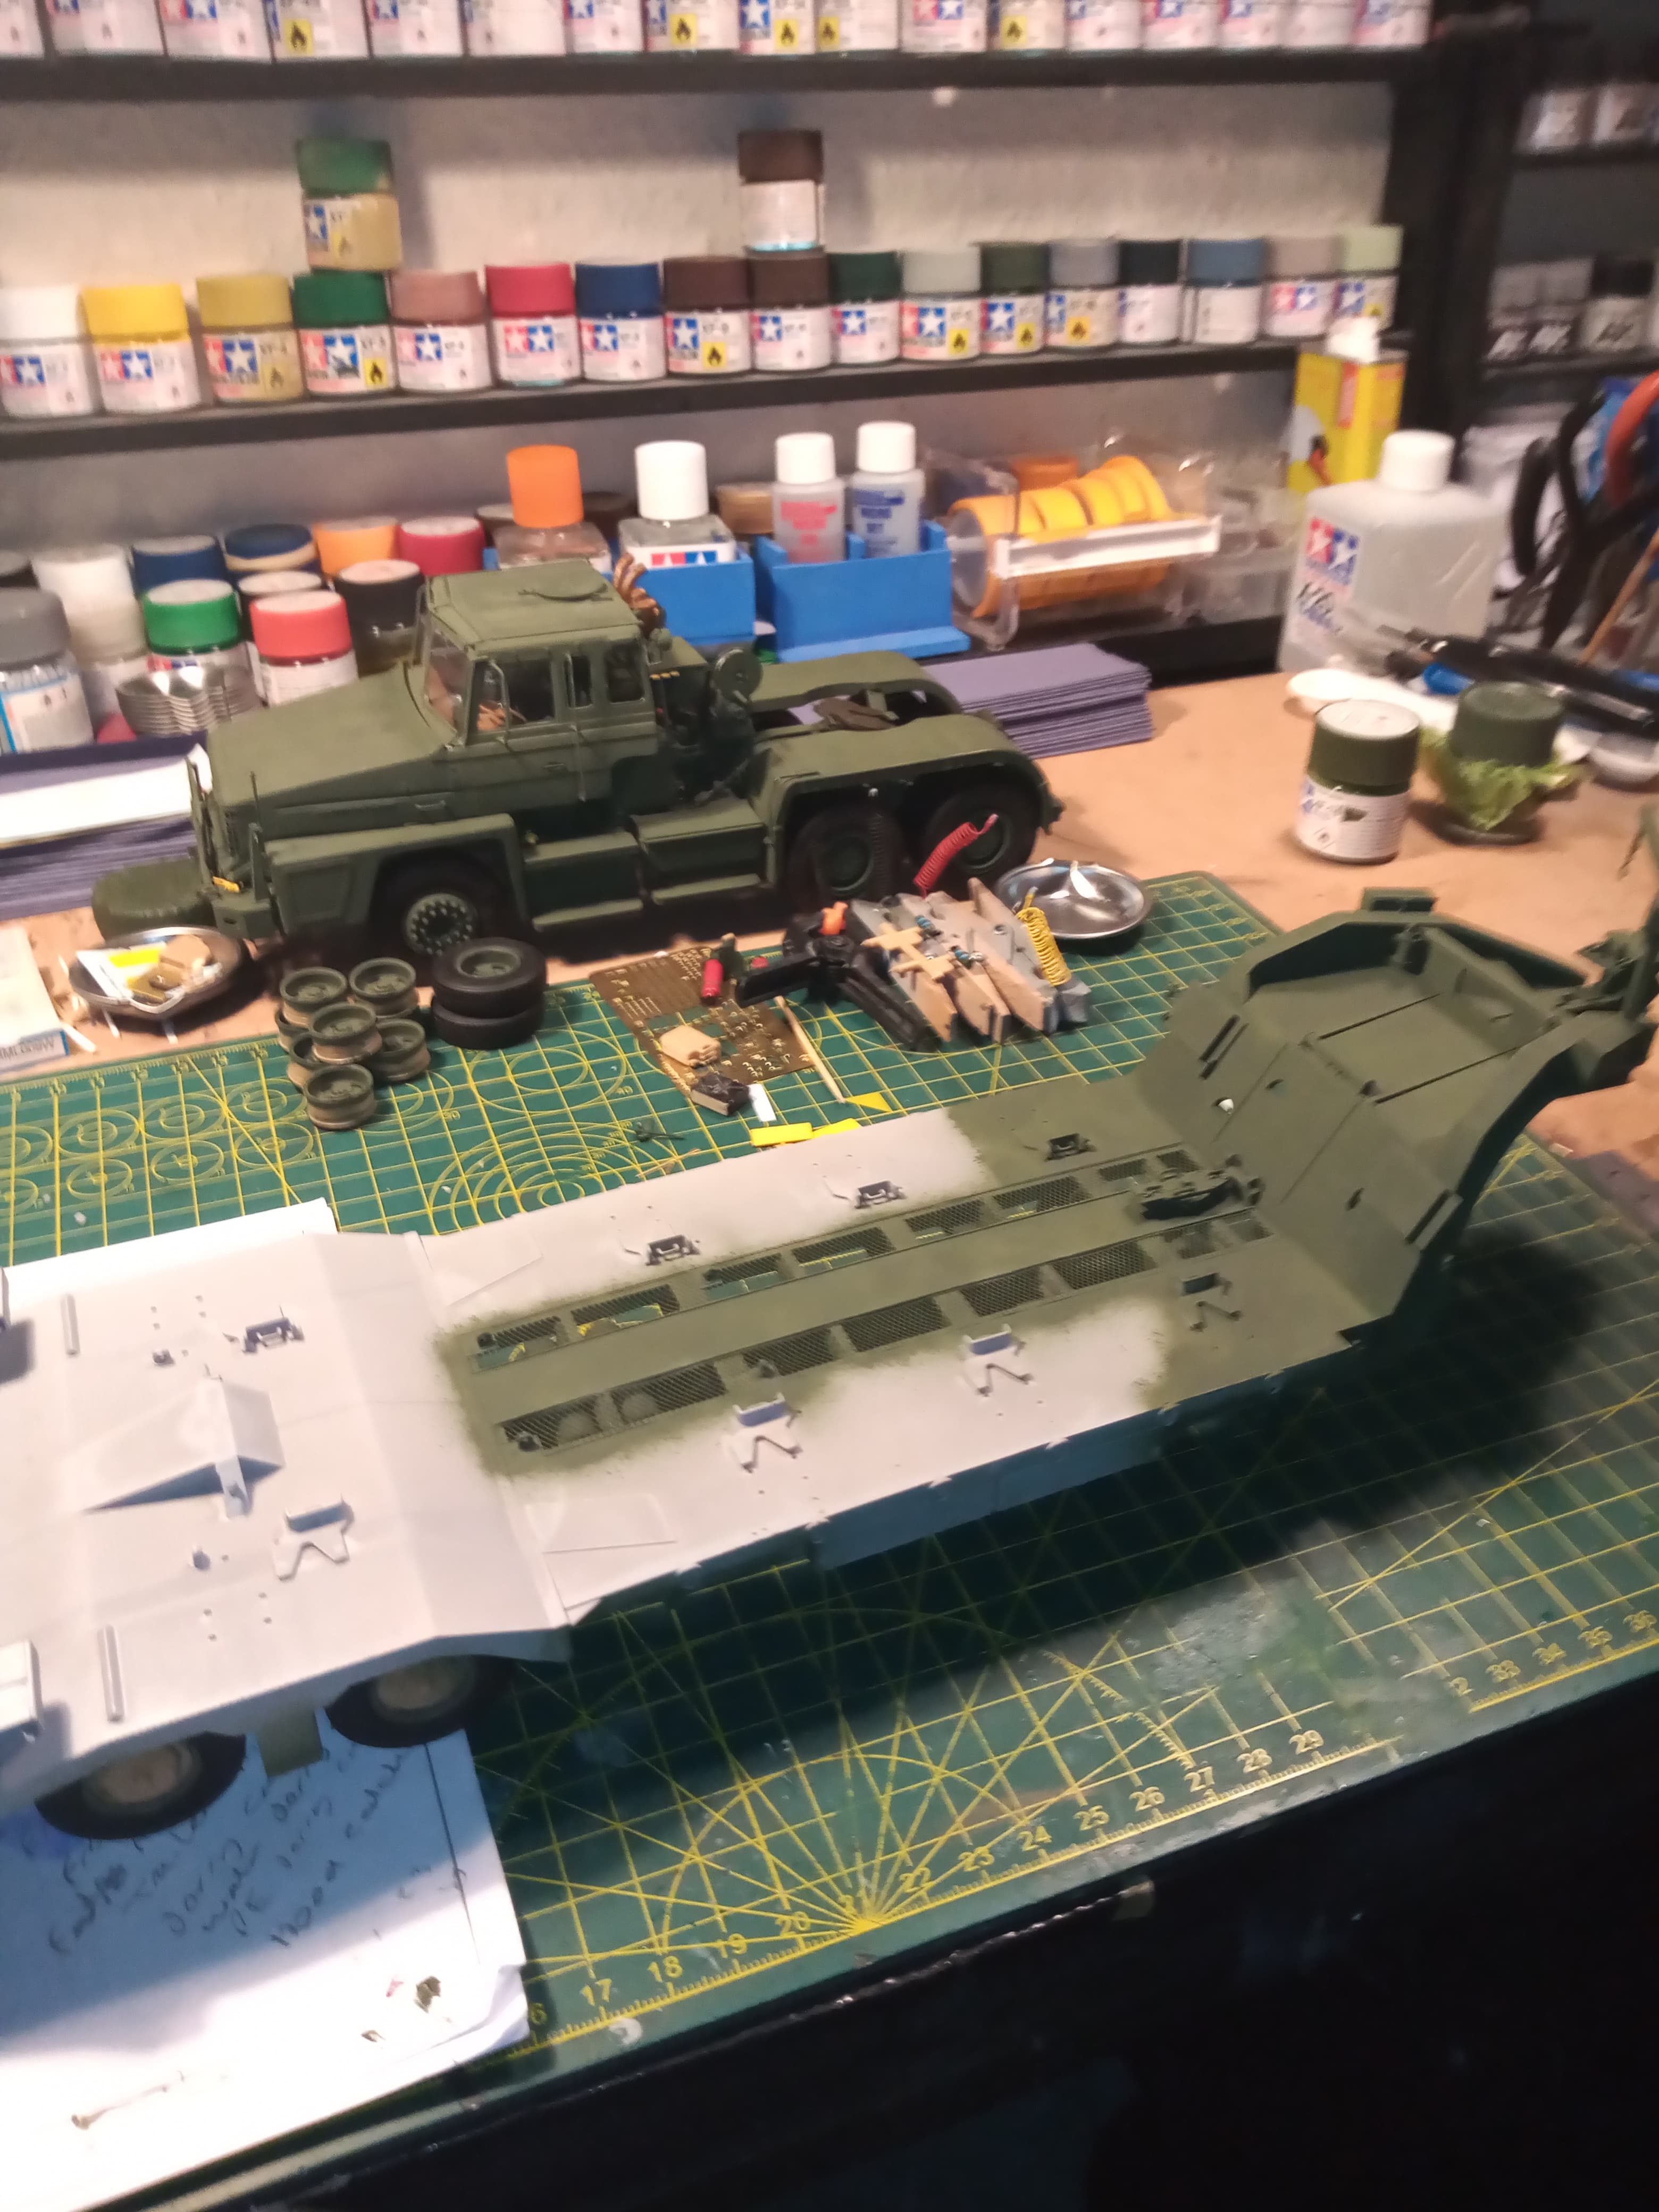
Luckily, I can spray down through the PE mesh to hit some difficult to get to areas on the underside…
So far, it’s taken 1 and 3/4 bottles of Tamiya NATO green … all mixed 50/50…
10 Likes
Got the MERDC camo on. Did my best to copy the layout from the Vallejo MERDC set.
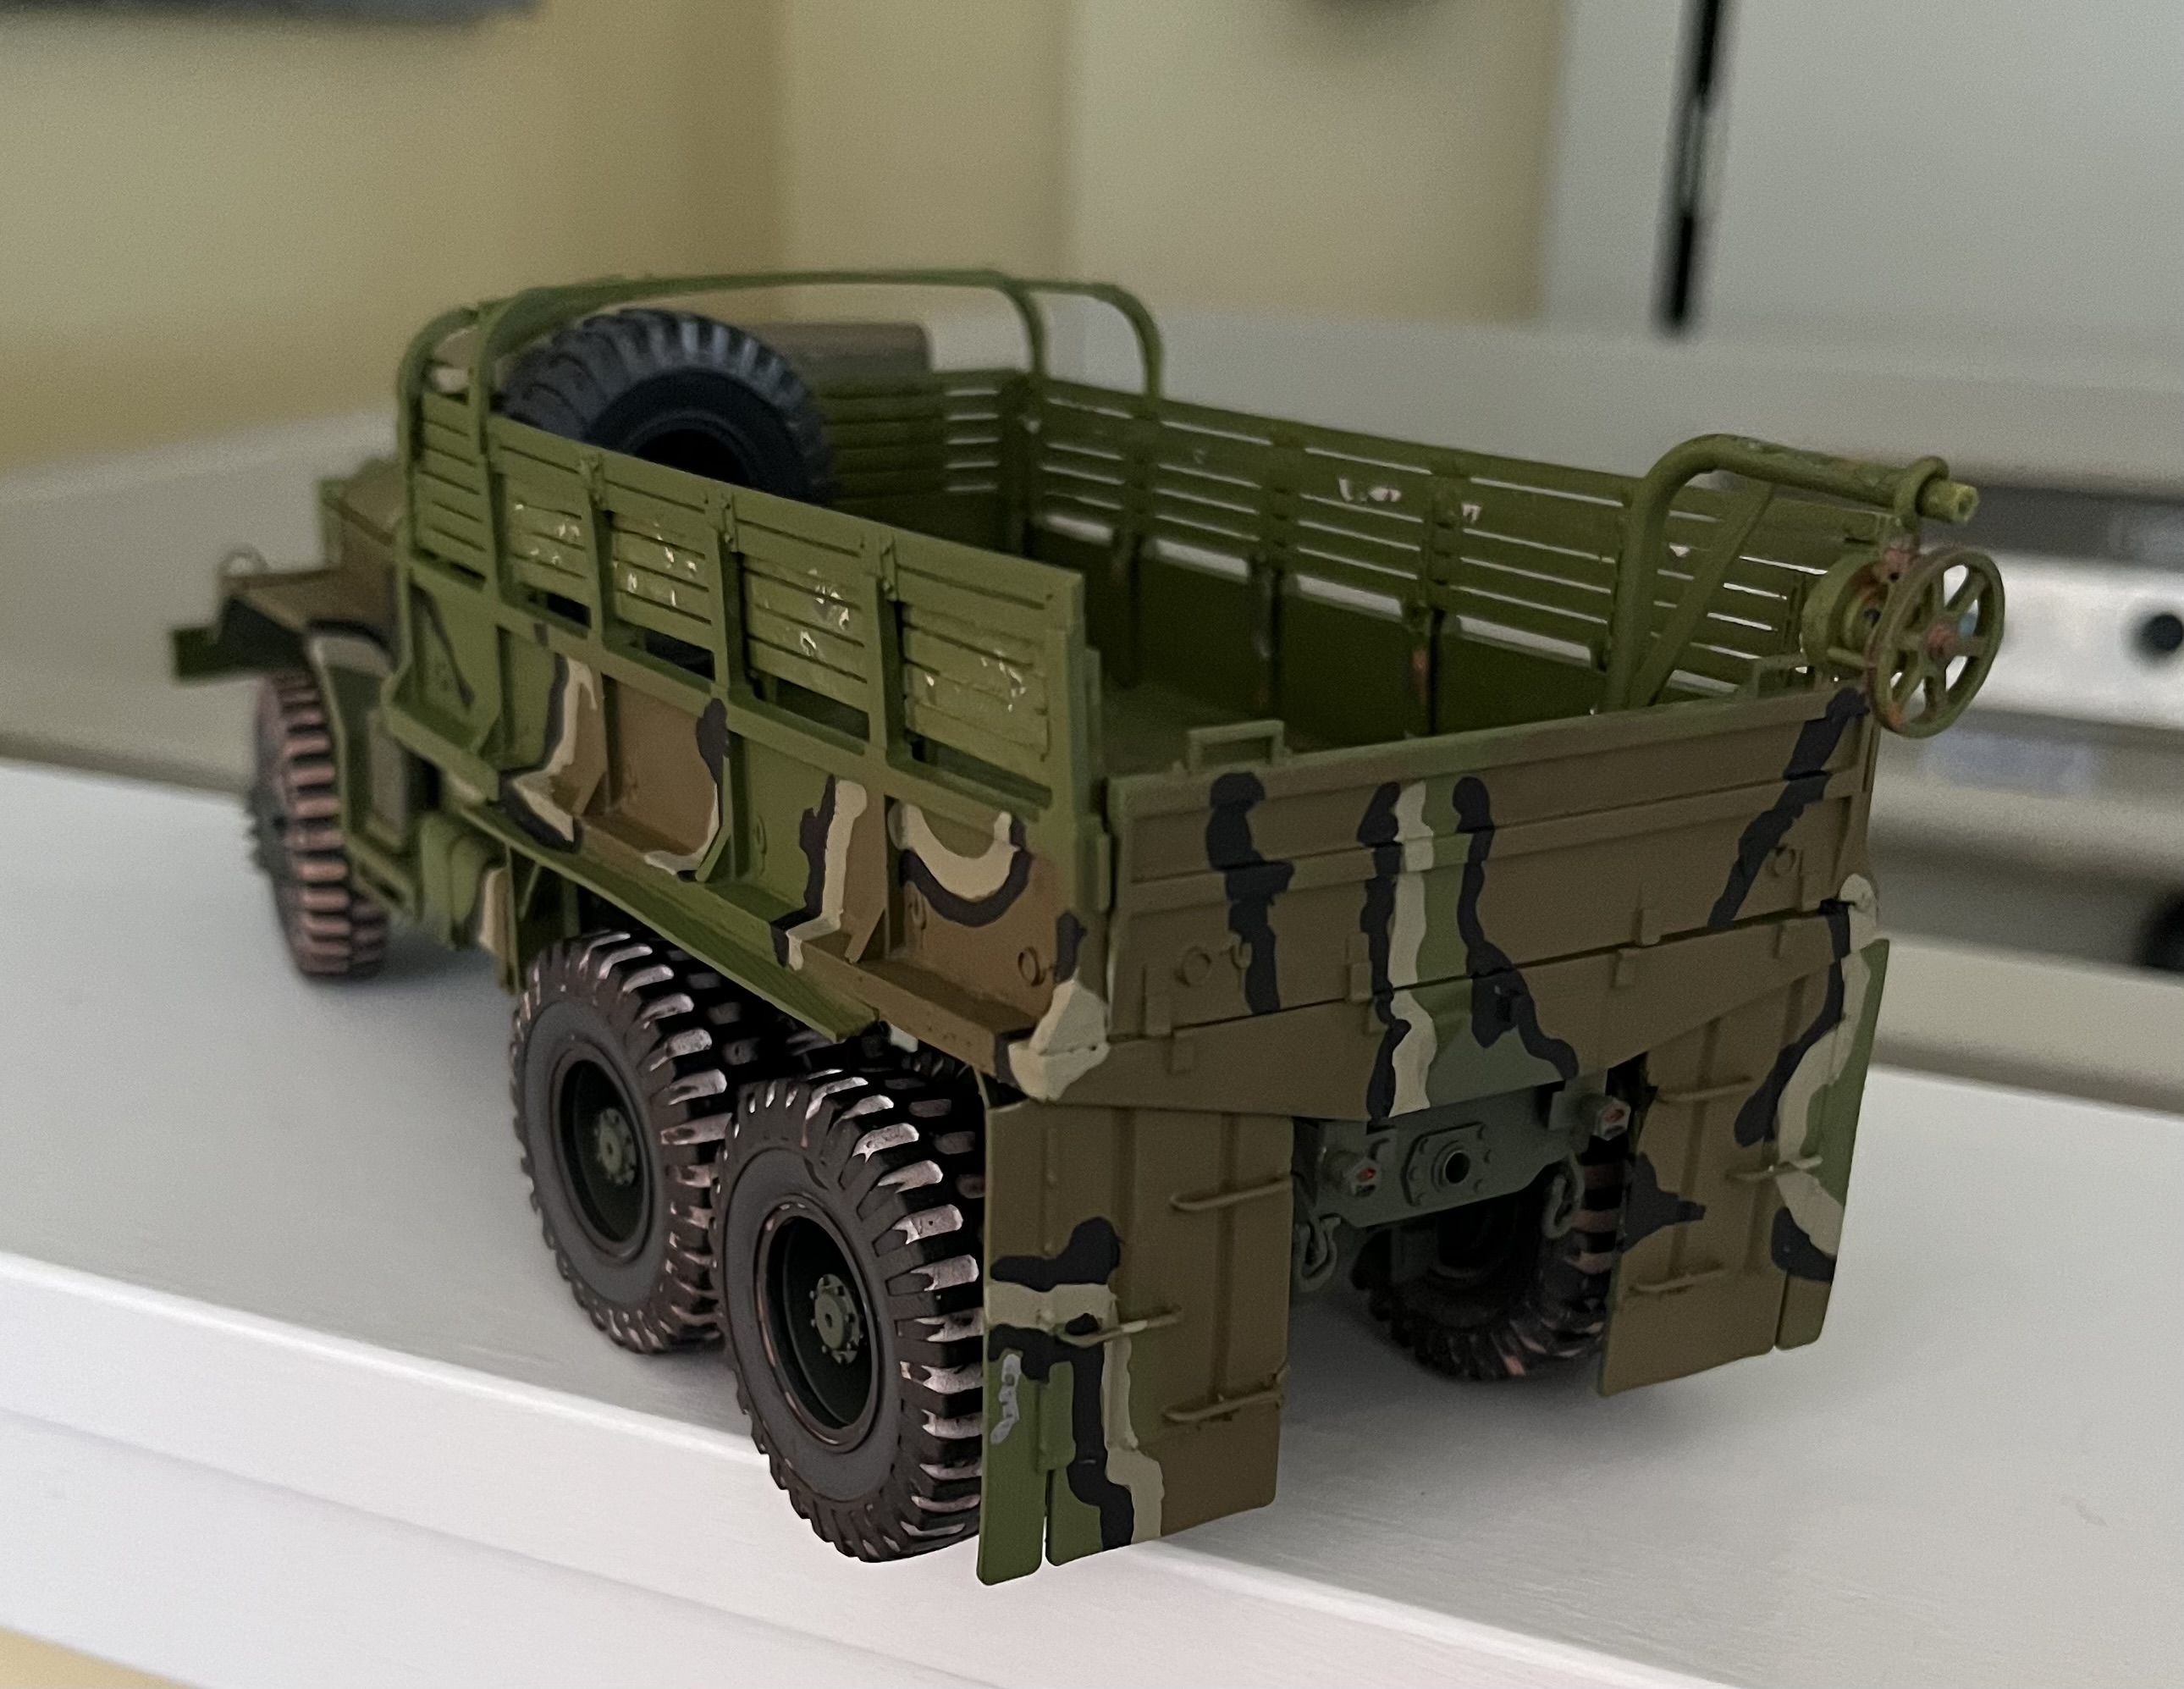
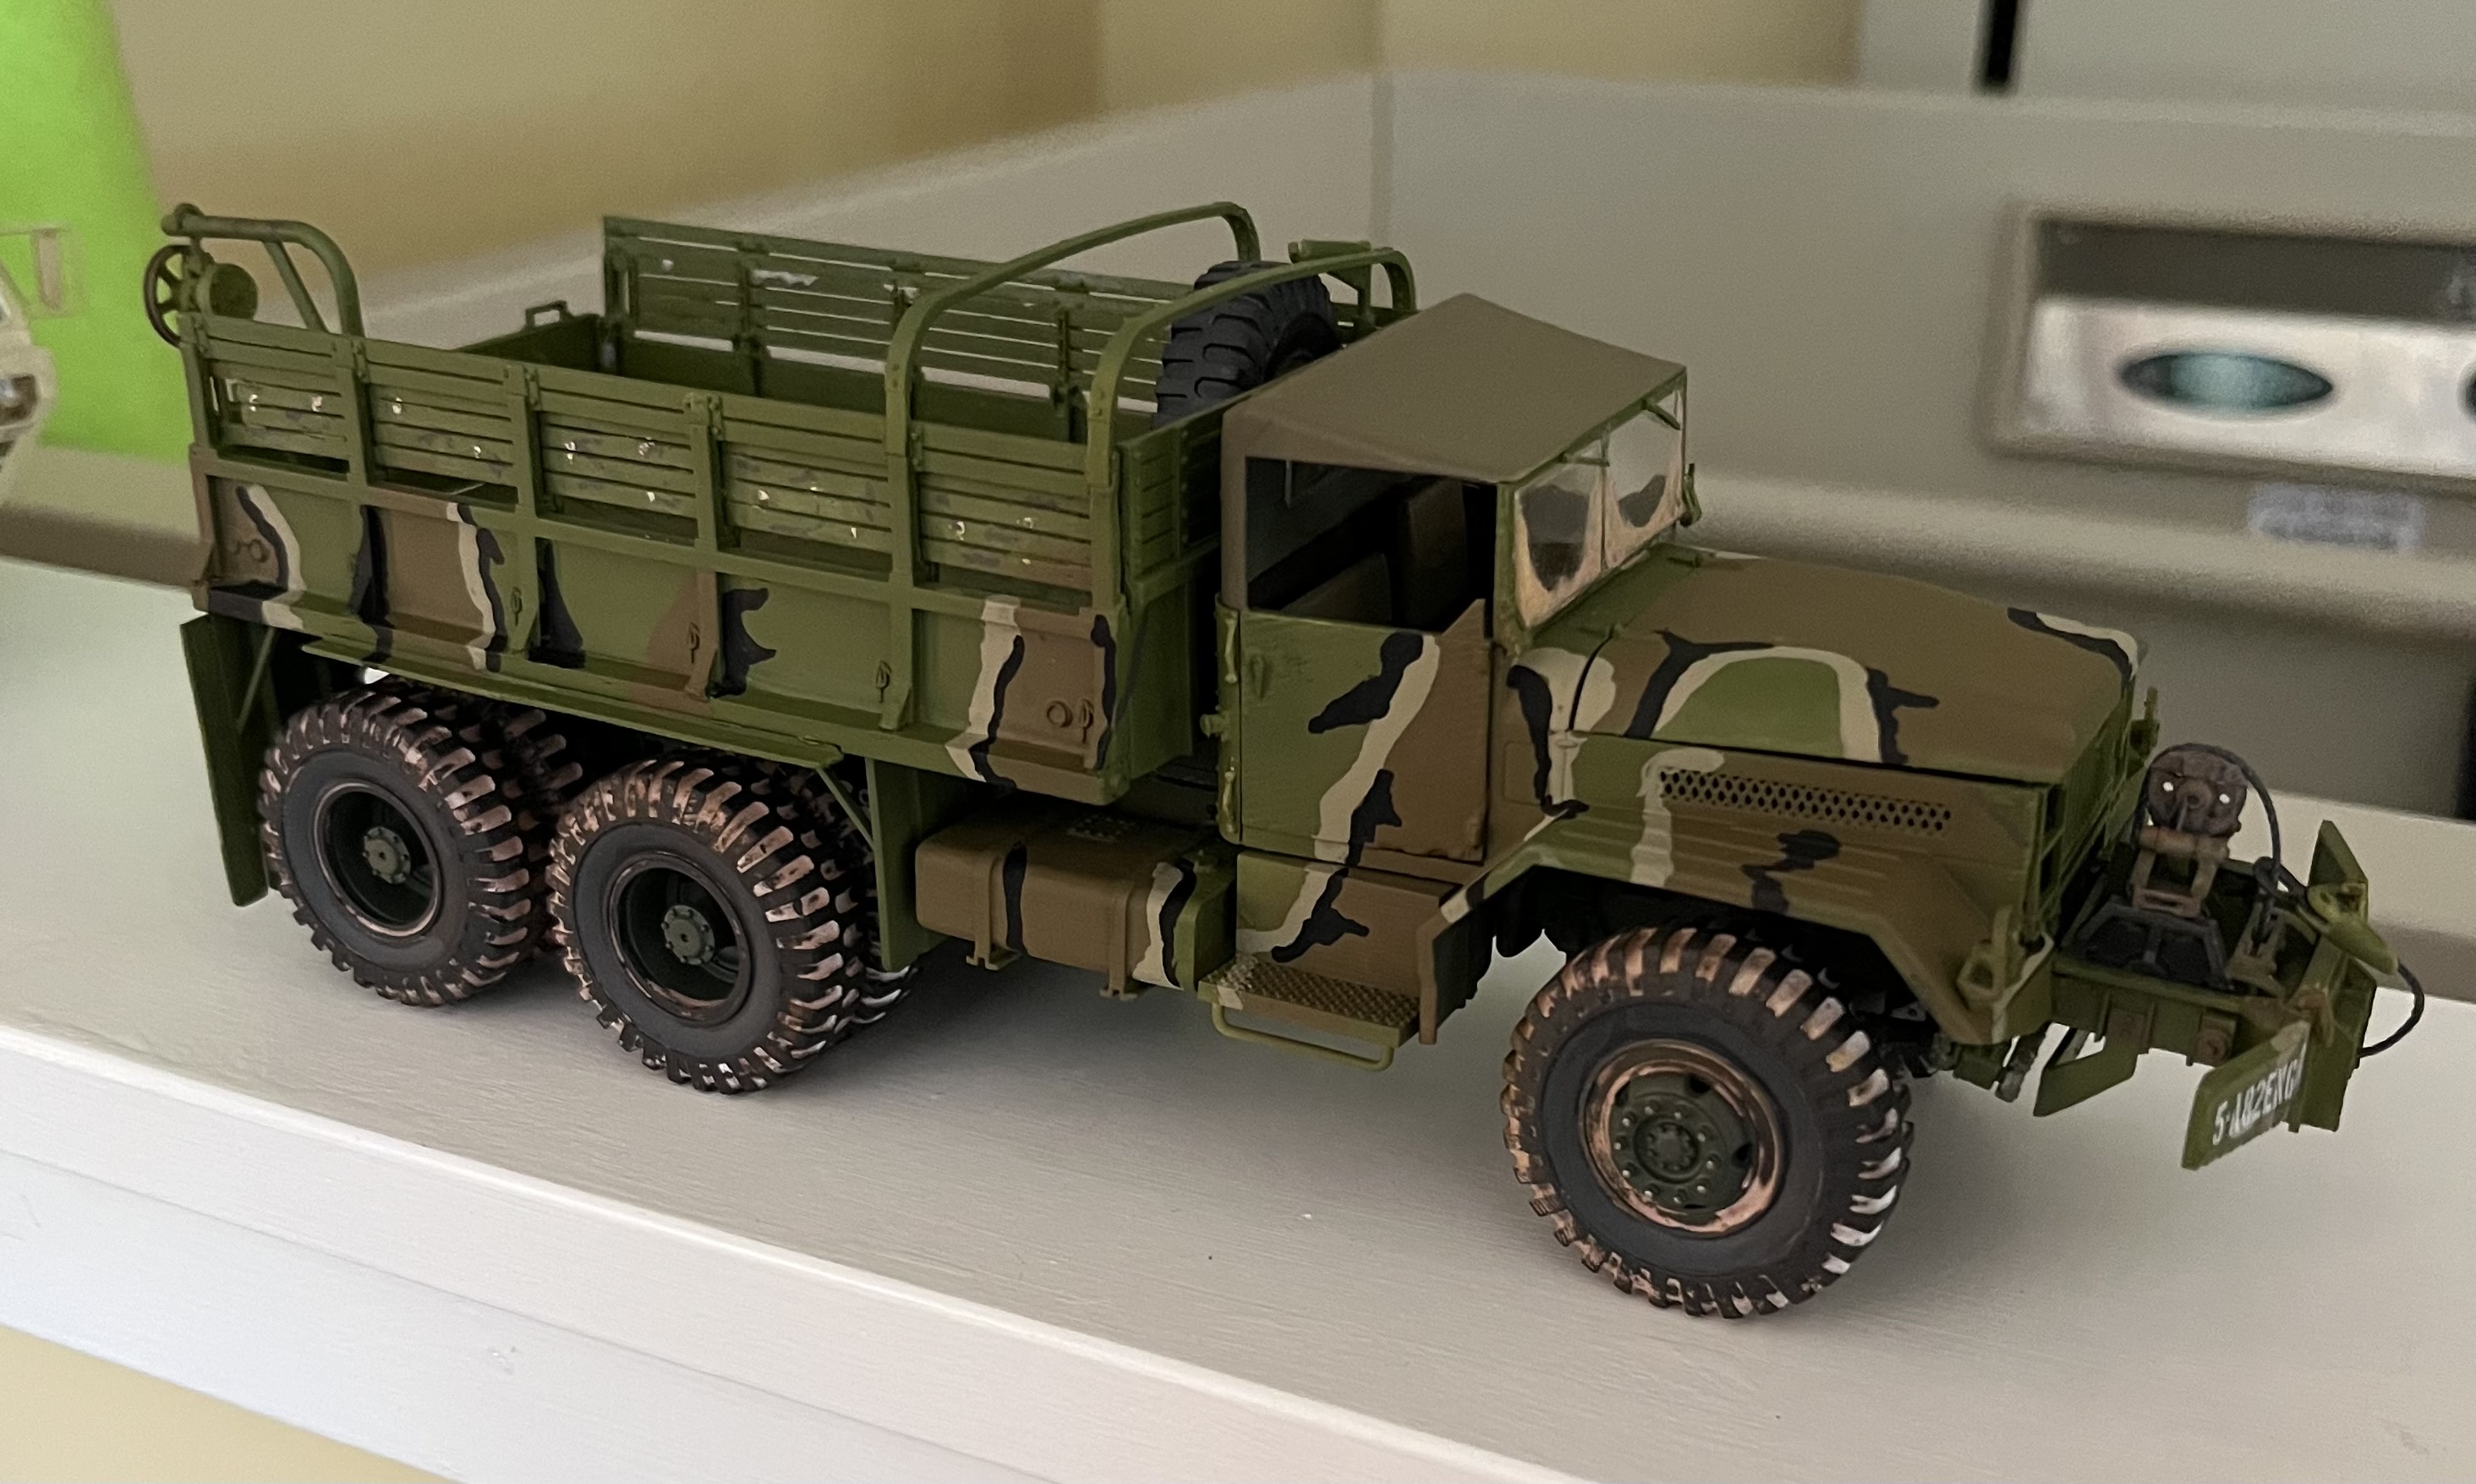
Any comments, suggestions to improve the camo’s appearance (weathering is pending) would be appreciated.
12 Likes
Looks good ![]()
3 Likes
It was bad enough getting a base coat down on my Scammell Pioneer (finally the weather was okay to start painting), with all its nooks and crannies, I can only imagine what it was like for the trailer John.
Denimo and Alex. Great progress there guys.
2 Likes
That does look really good ![]()
![]()
2 Likes
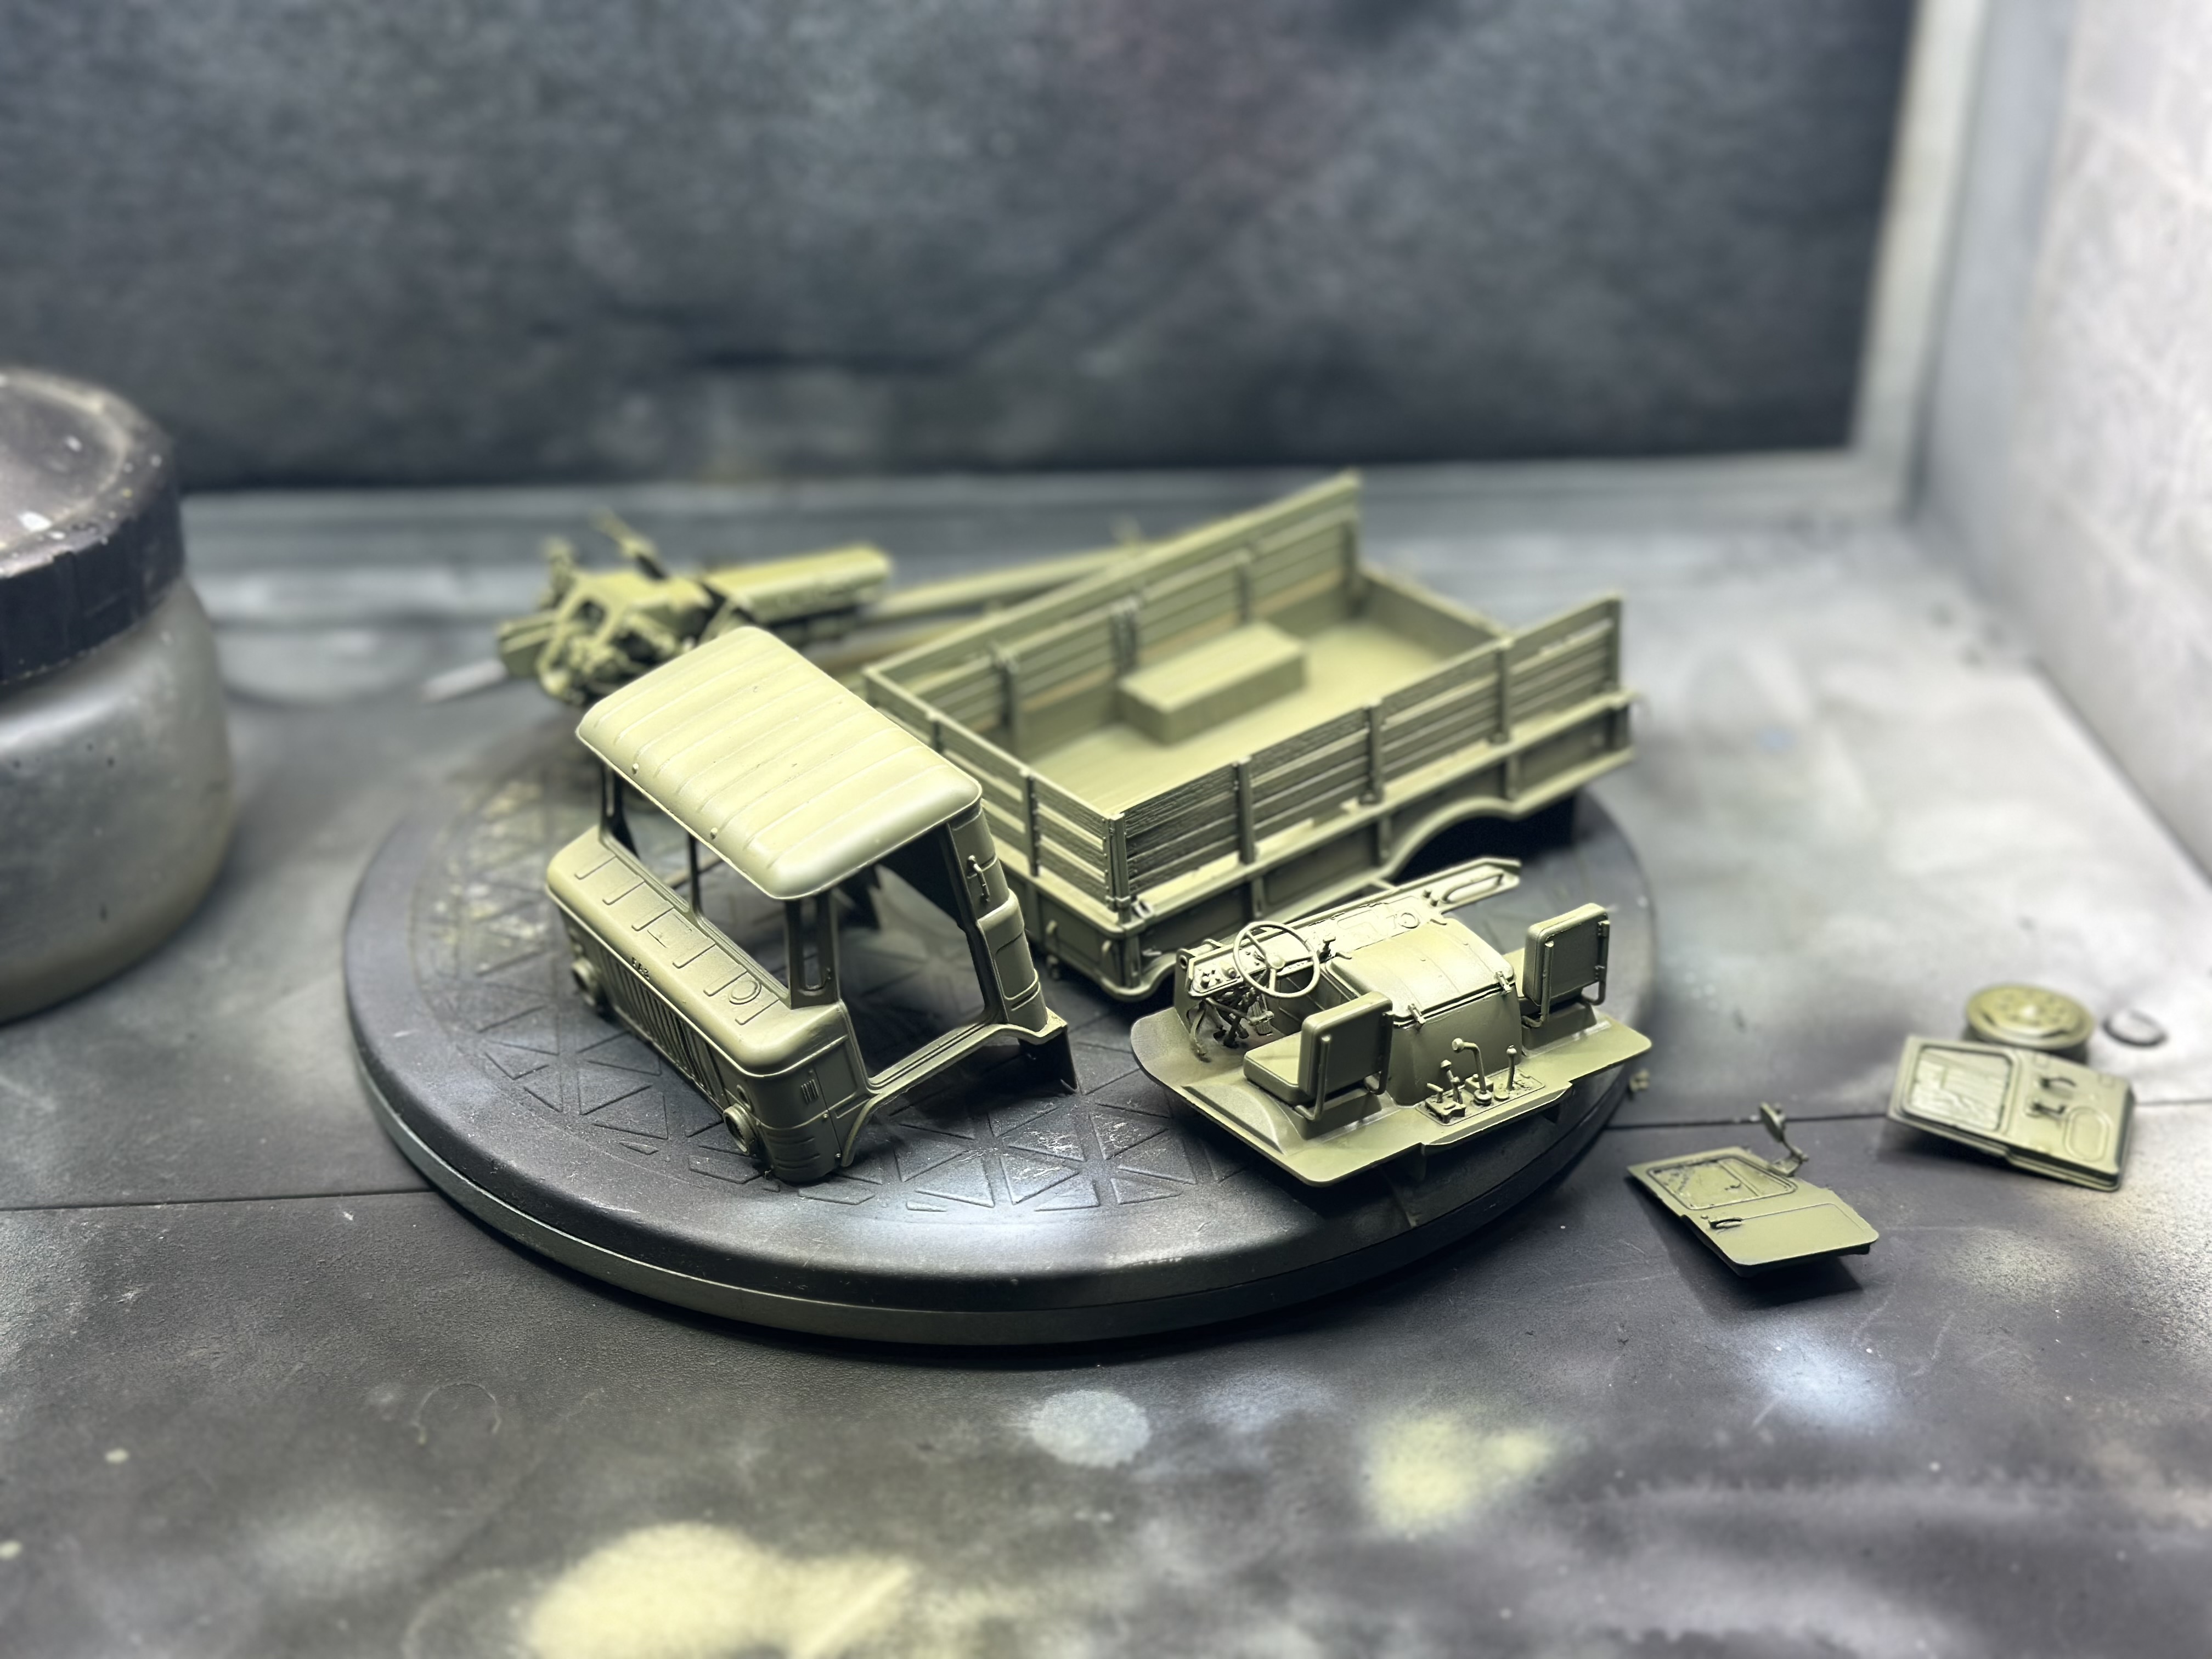
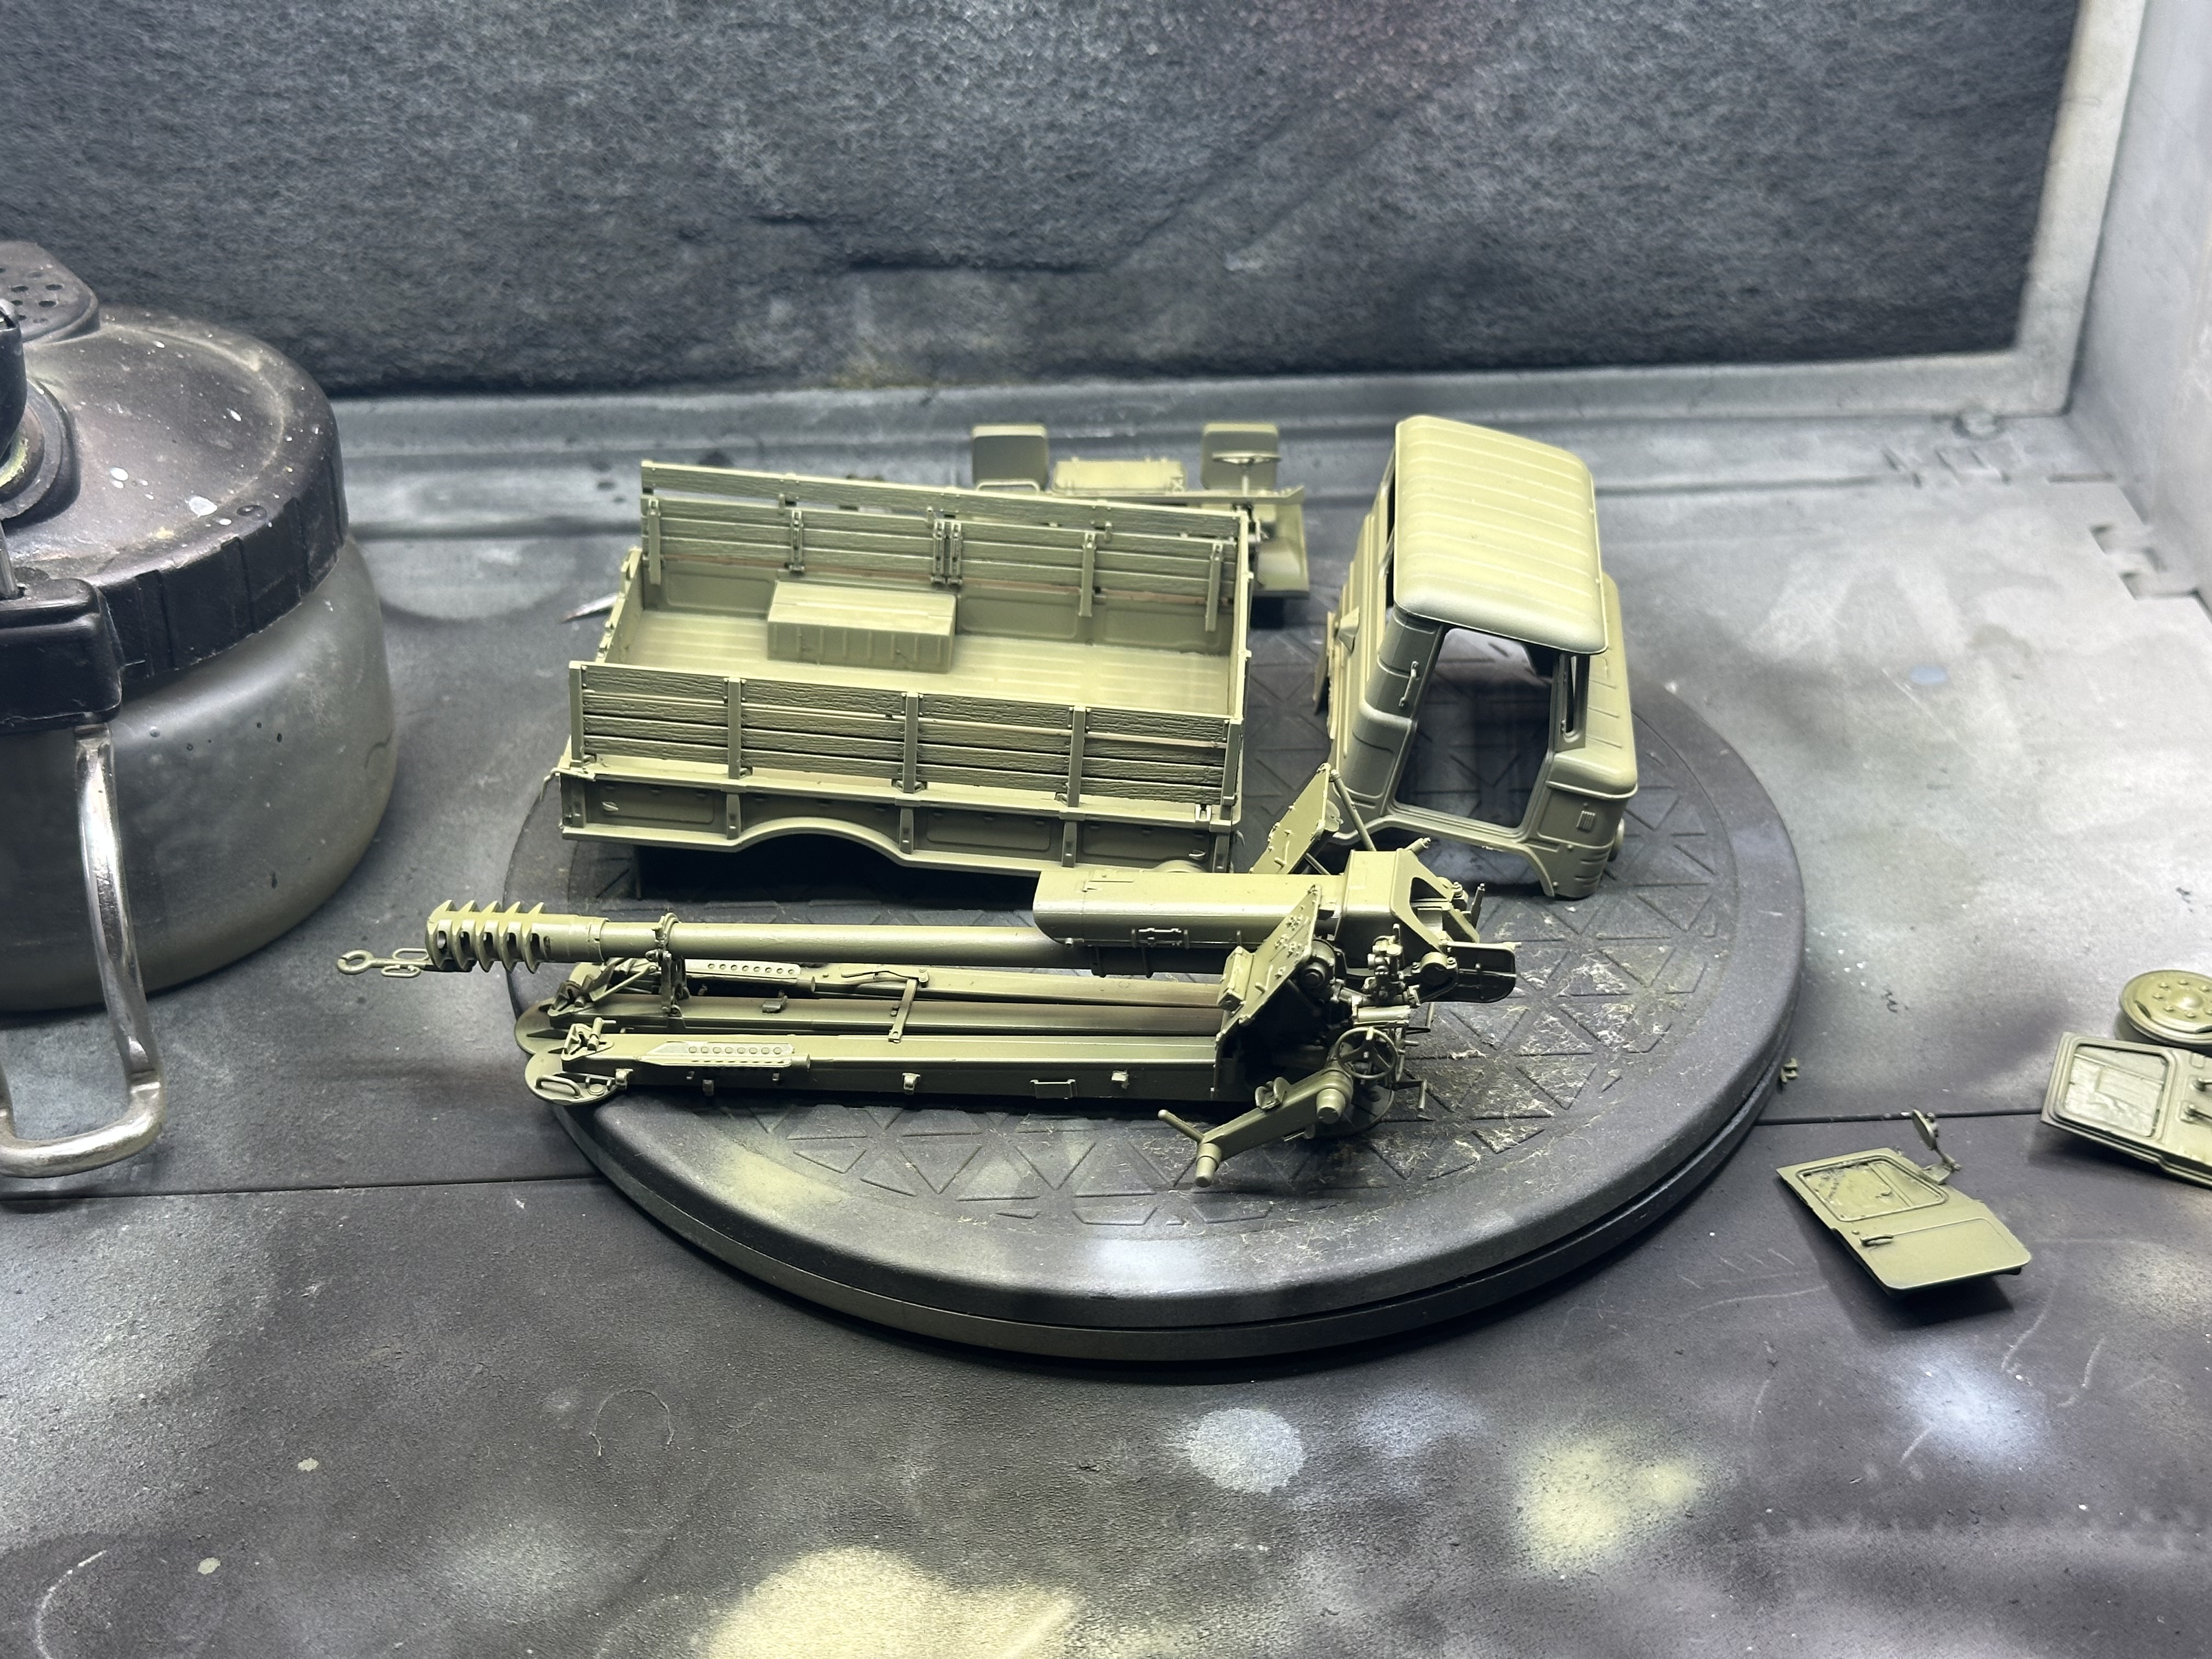
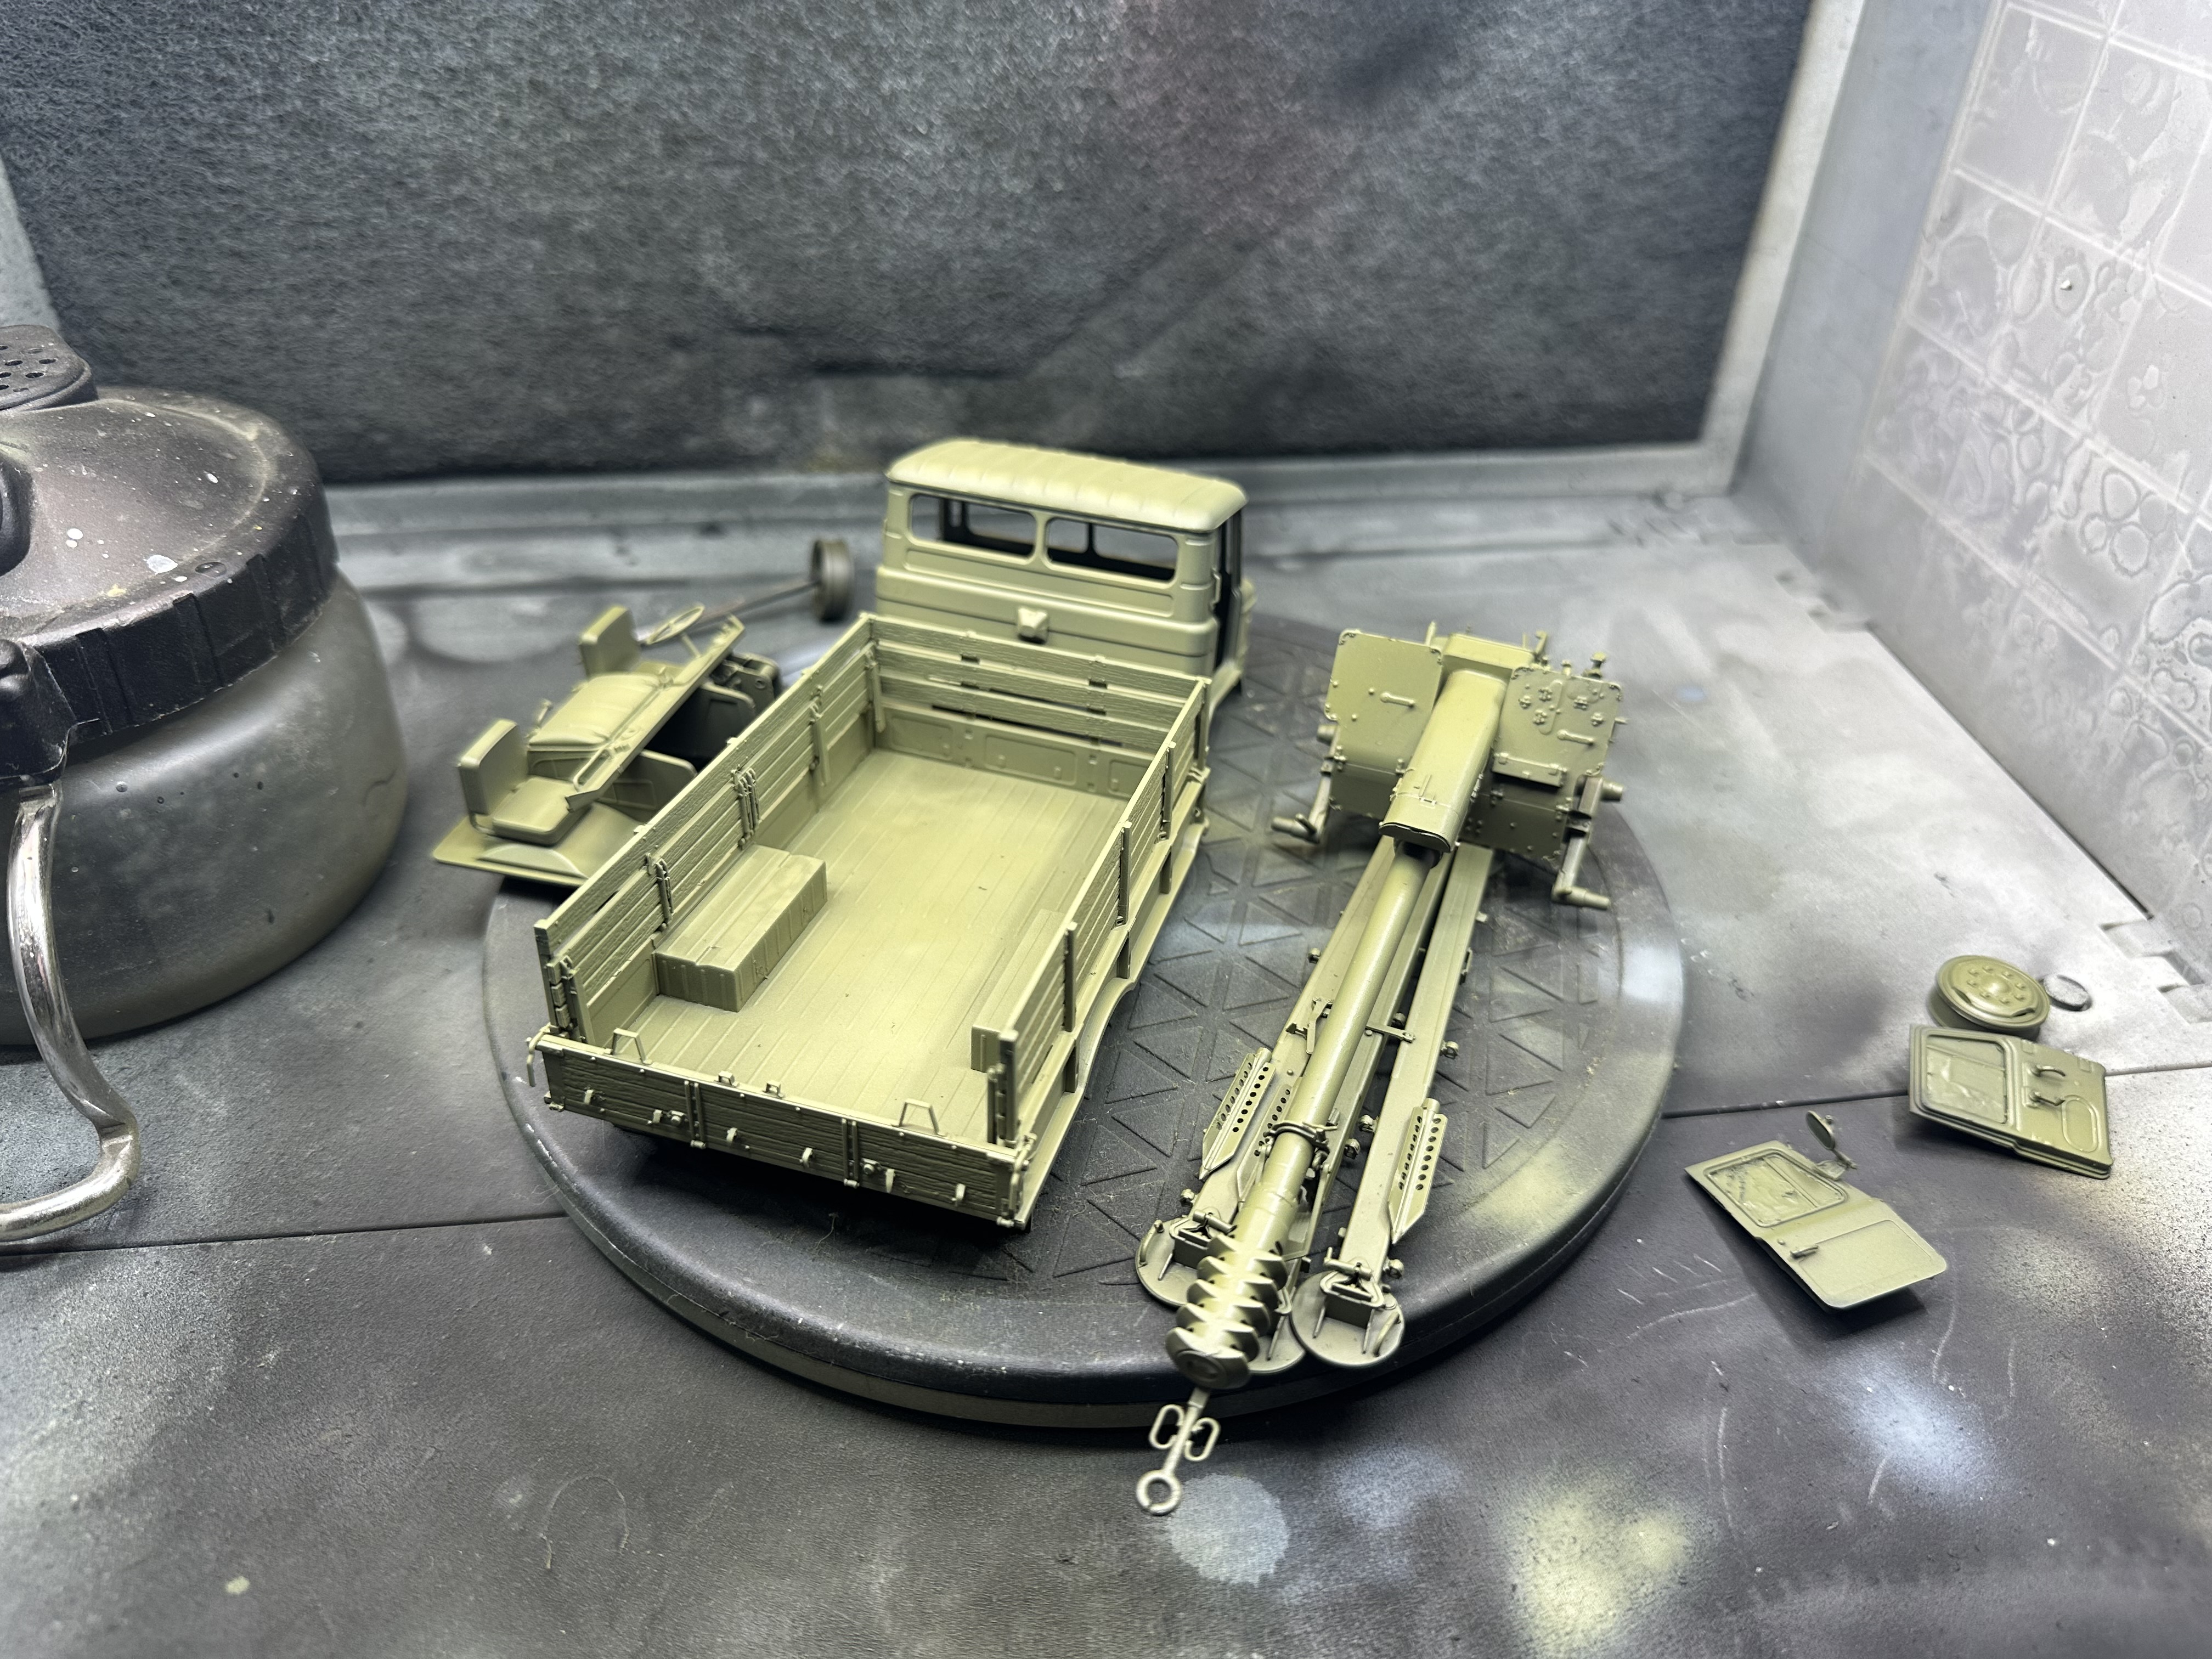
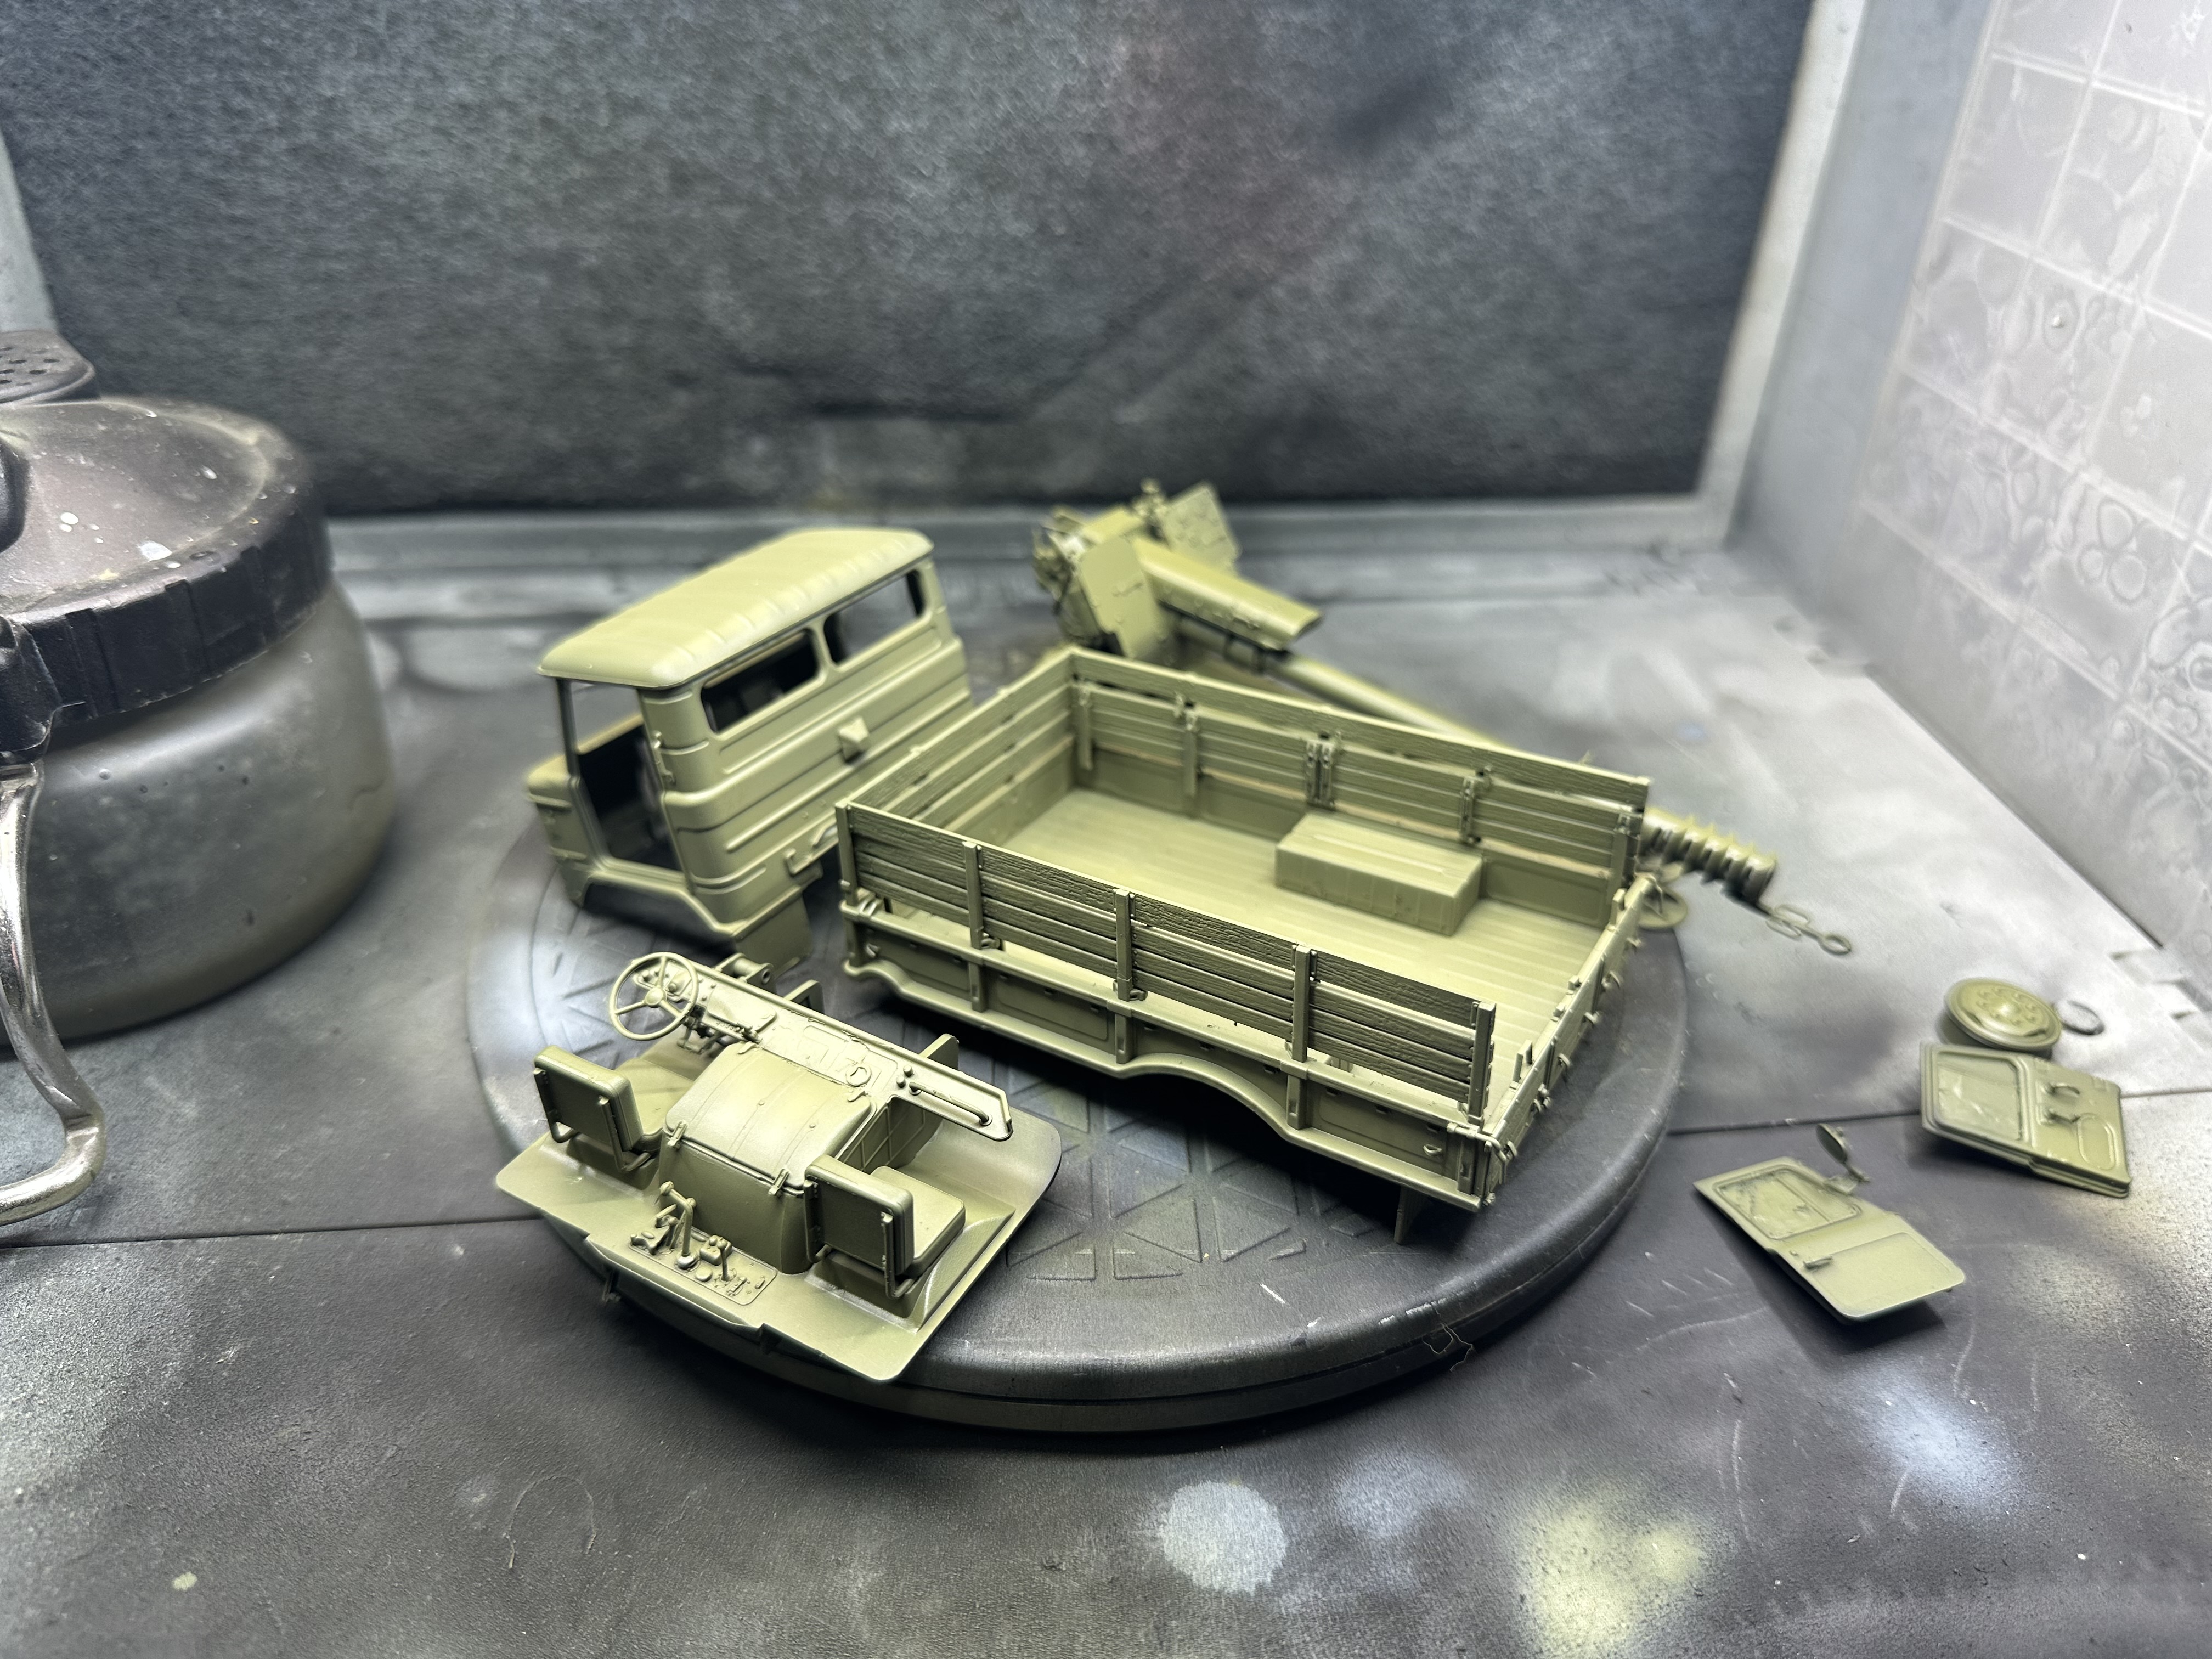
Base paint on the GAZ and D-30. Started with a layer if XF-81 for shadows. Then progressively lightened Mr Hobby 4BO green with Tamiya Buff.
7 Likes
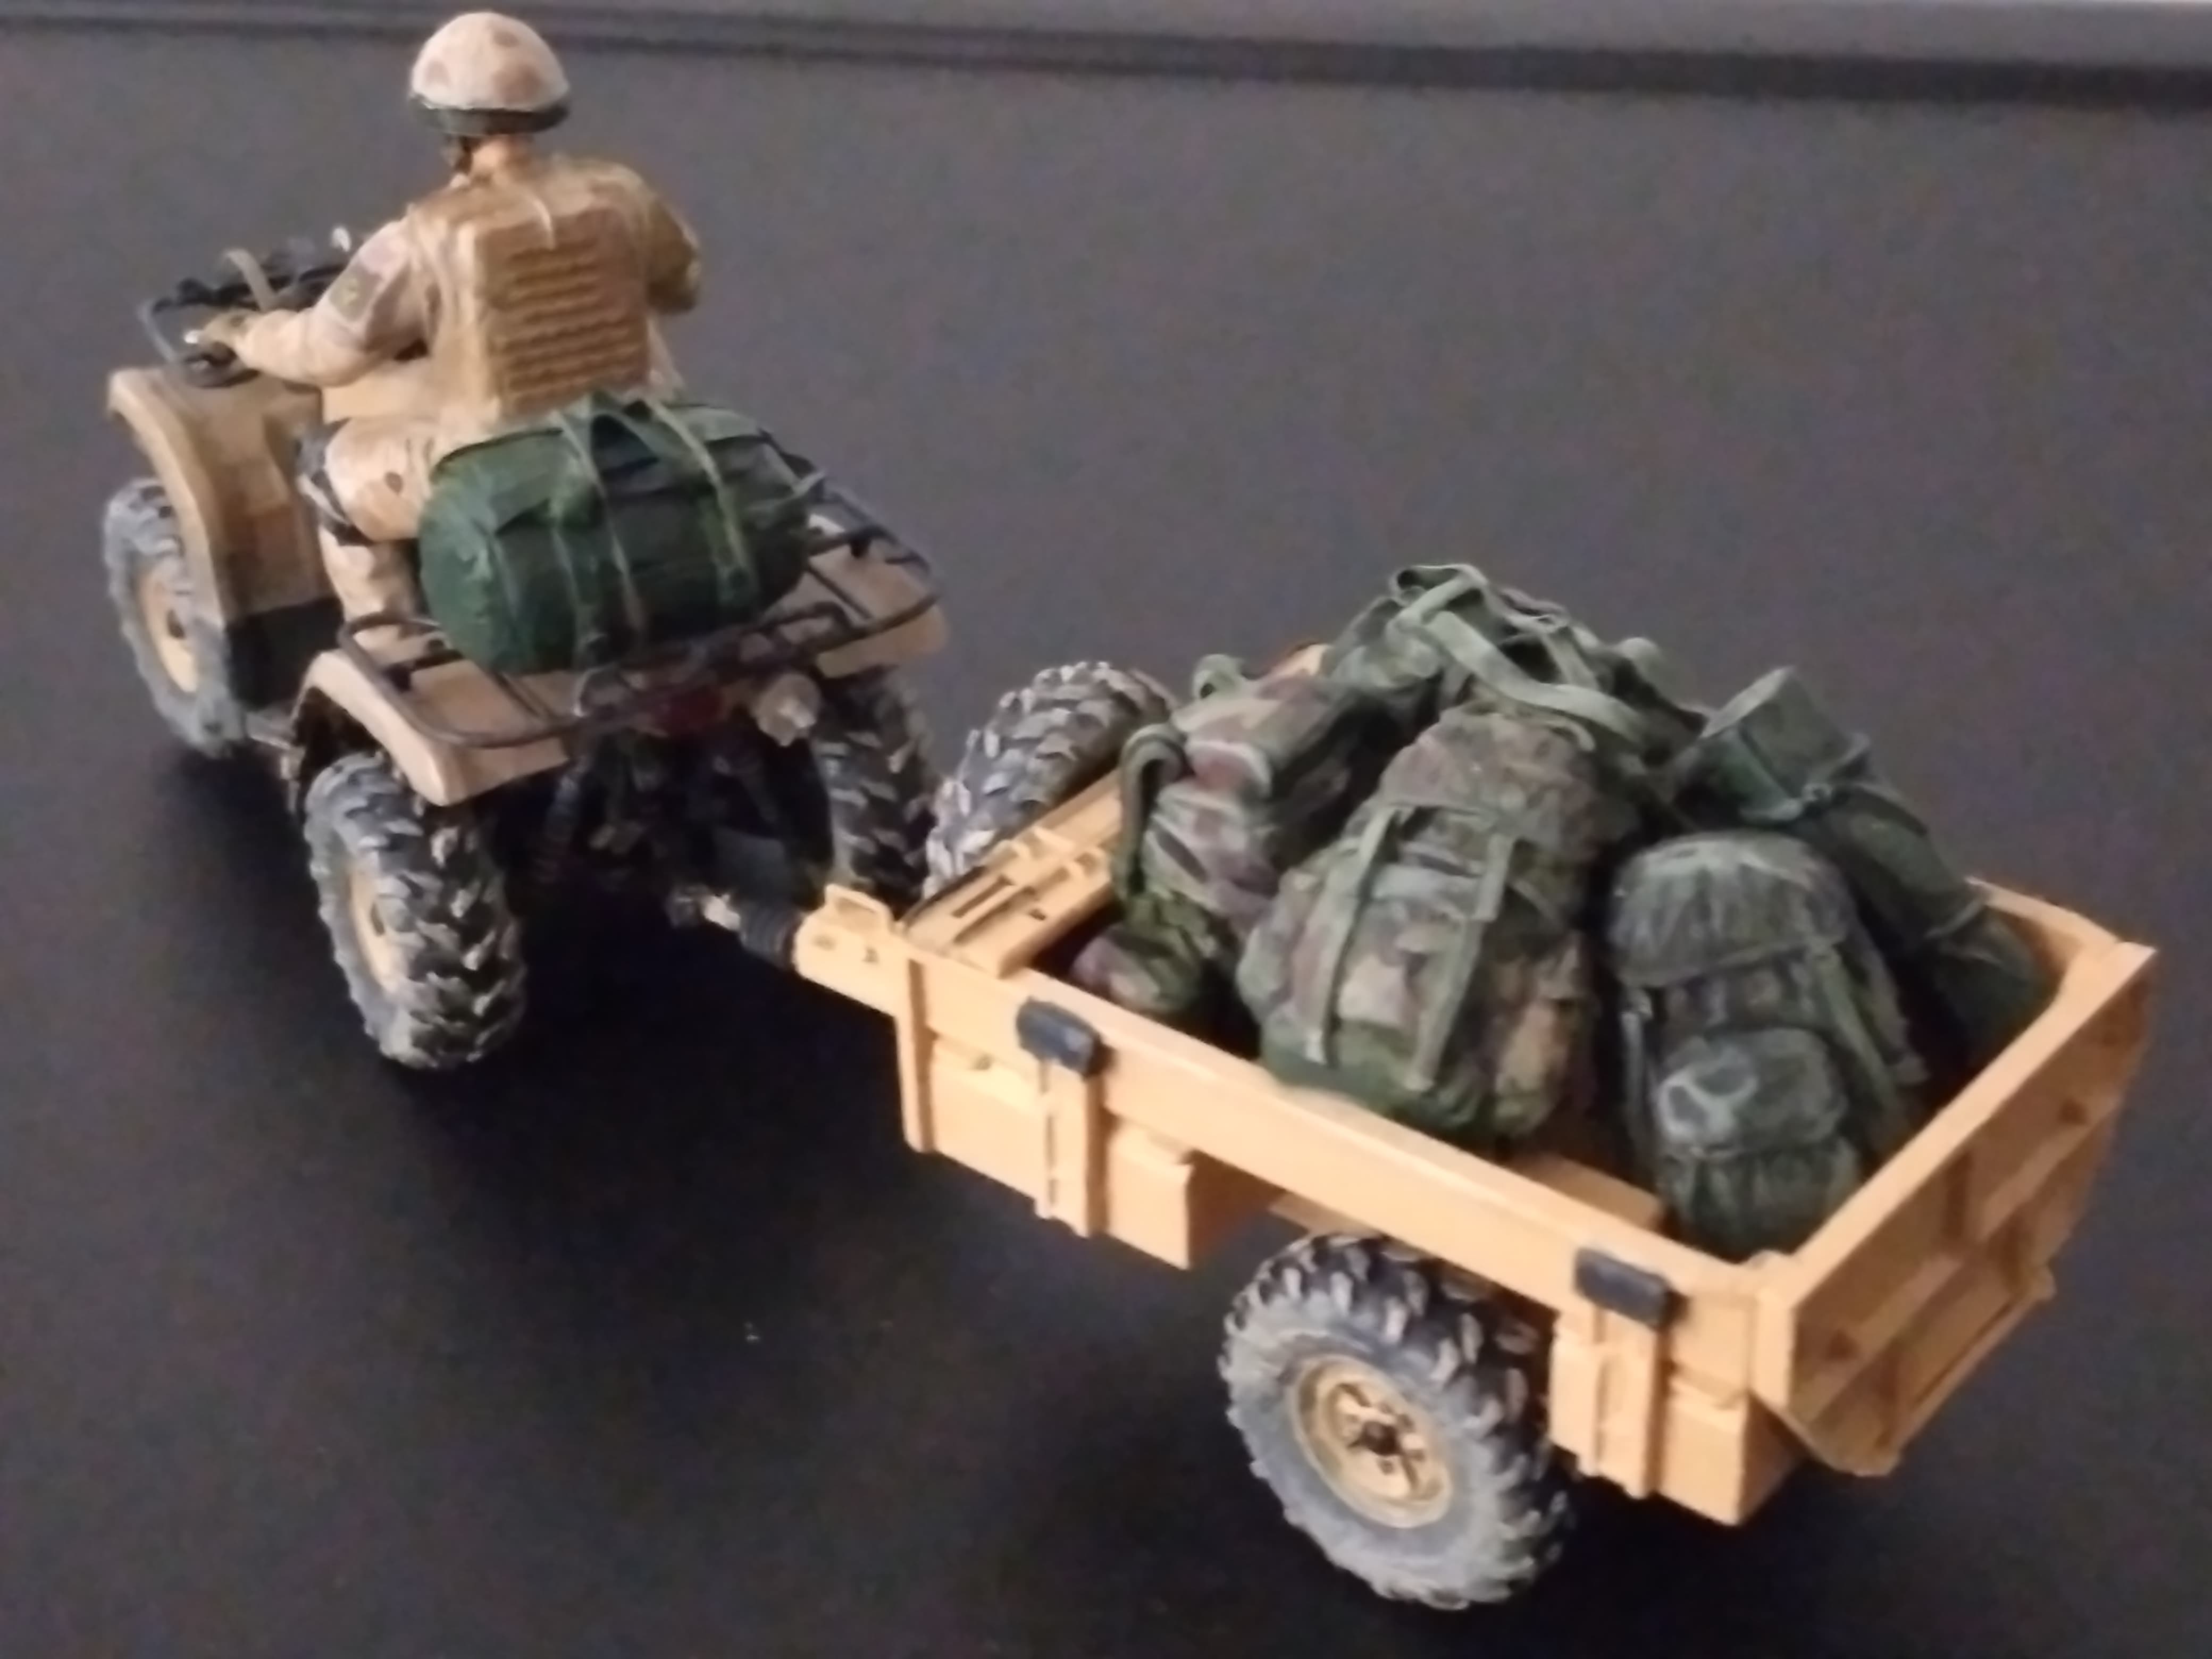
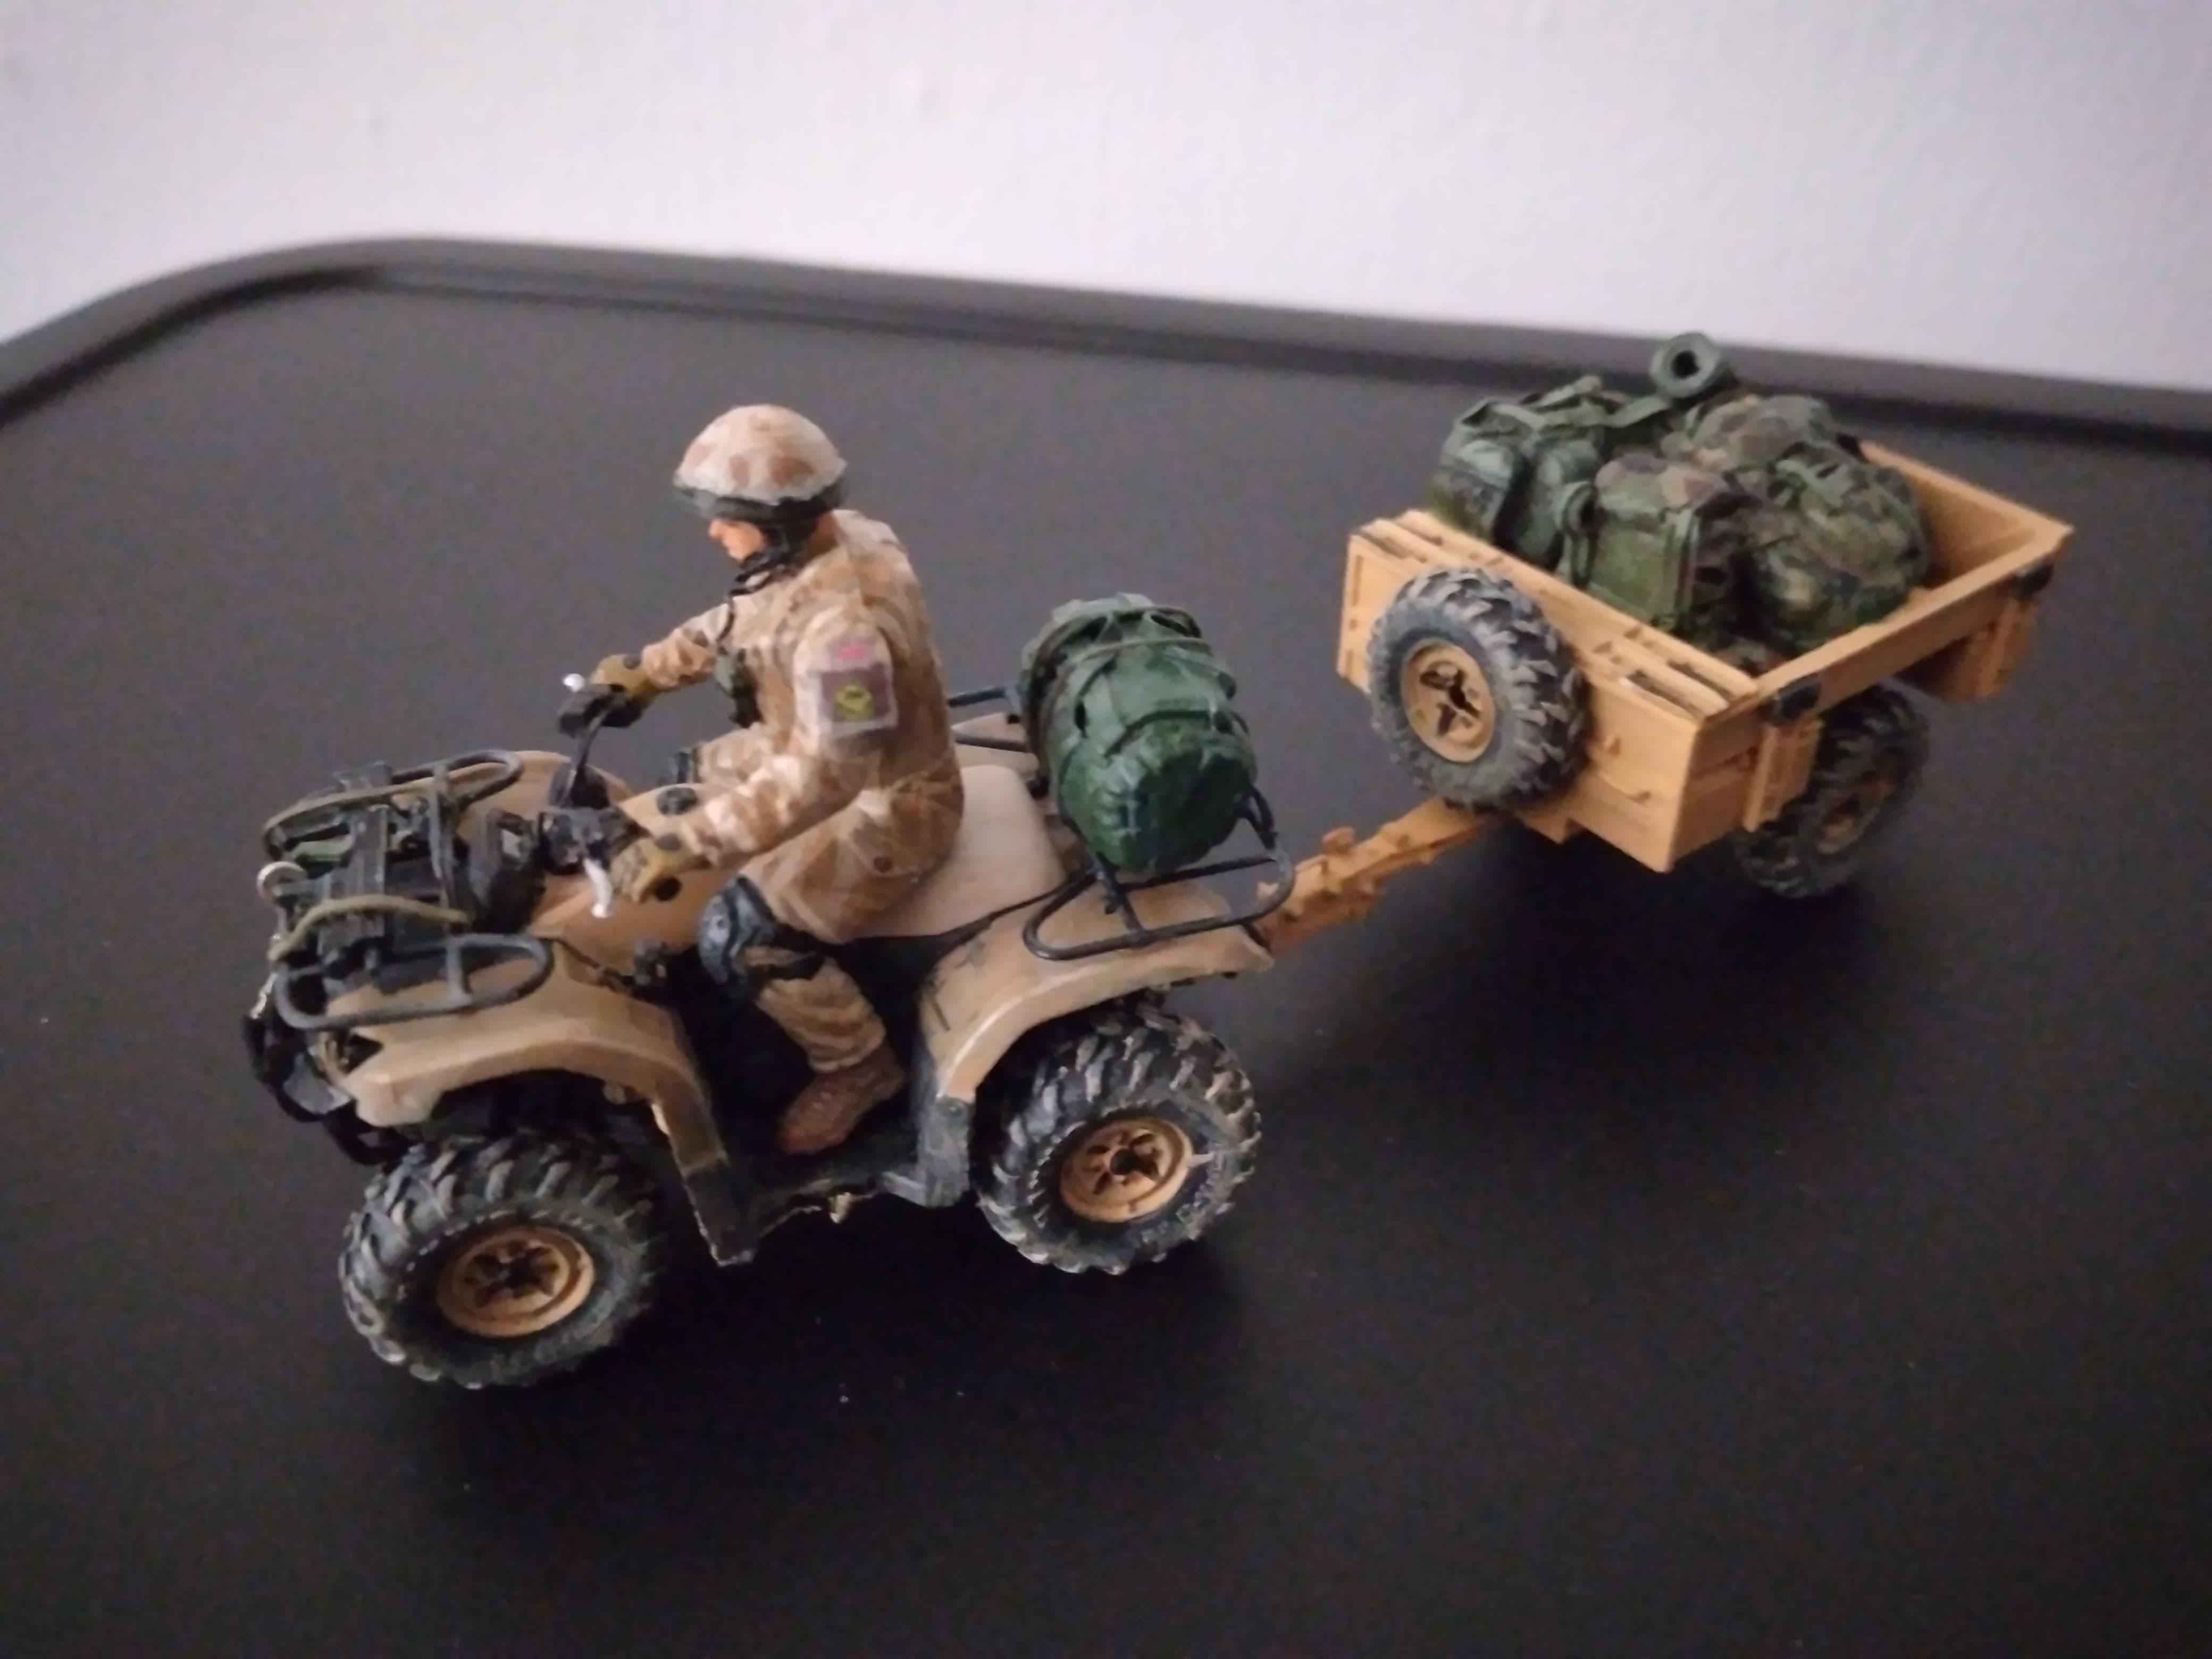
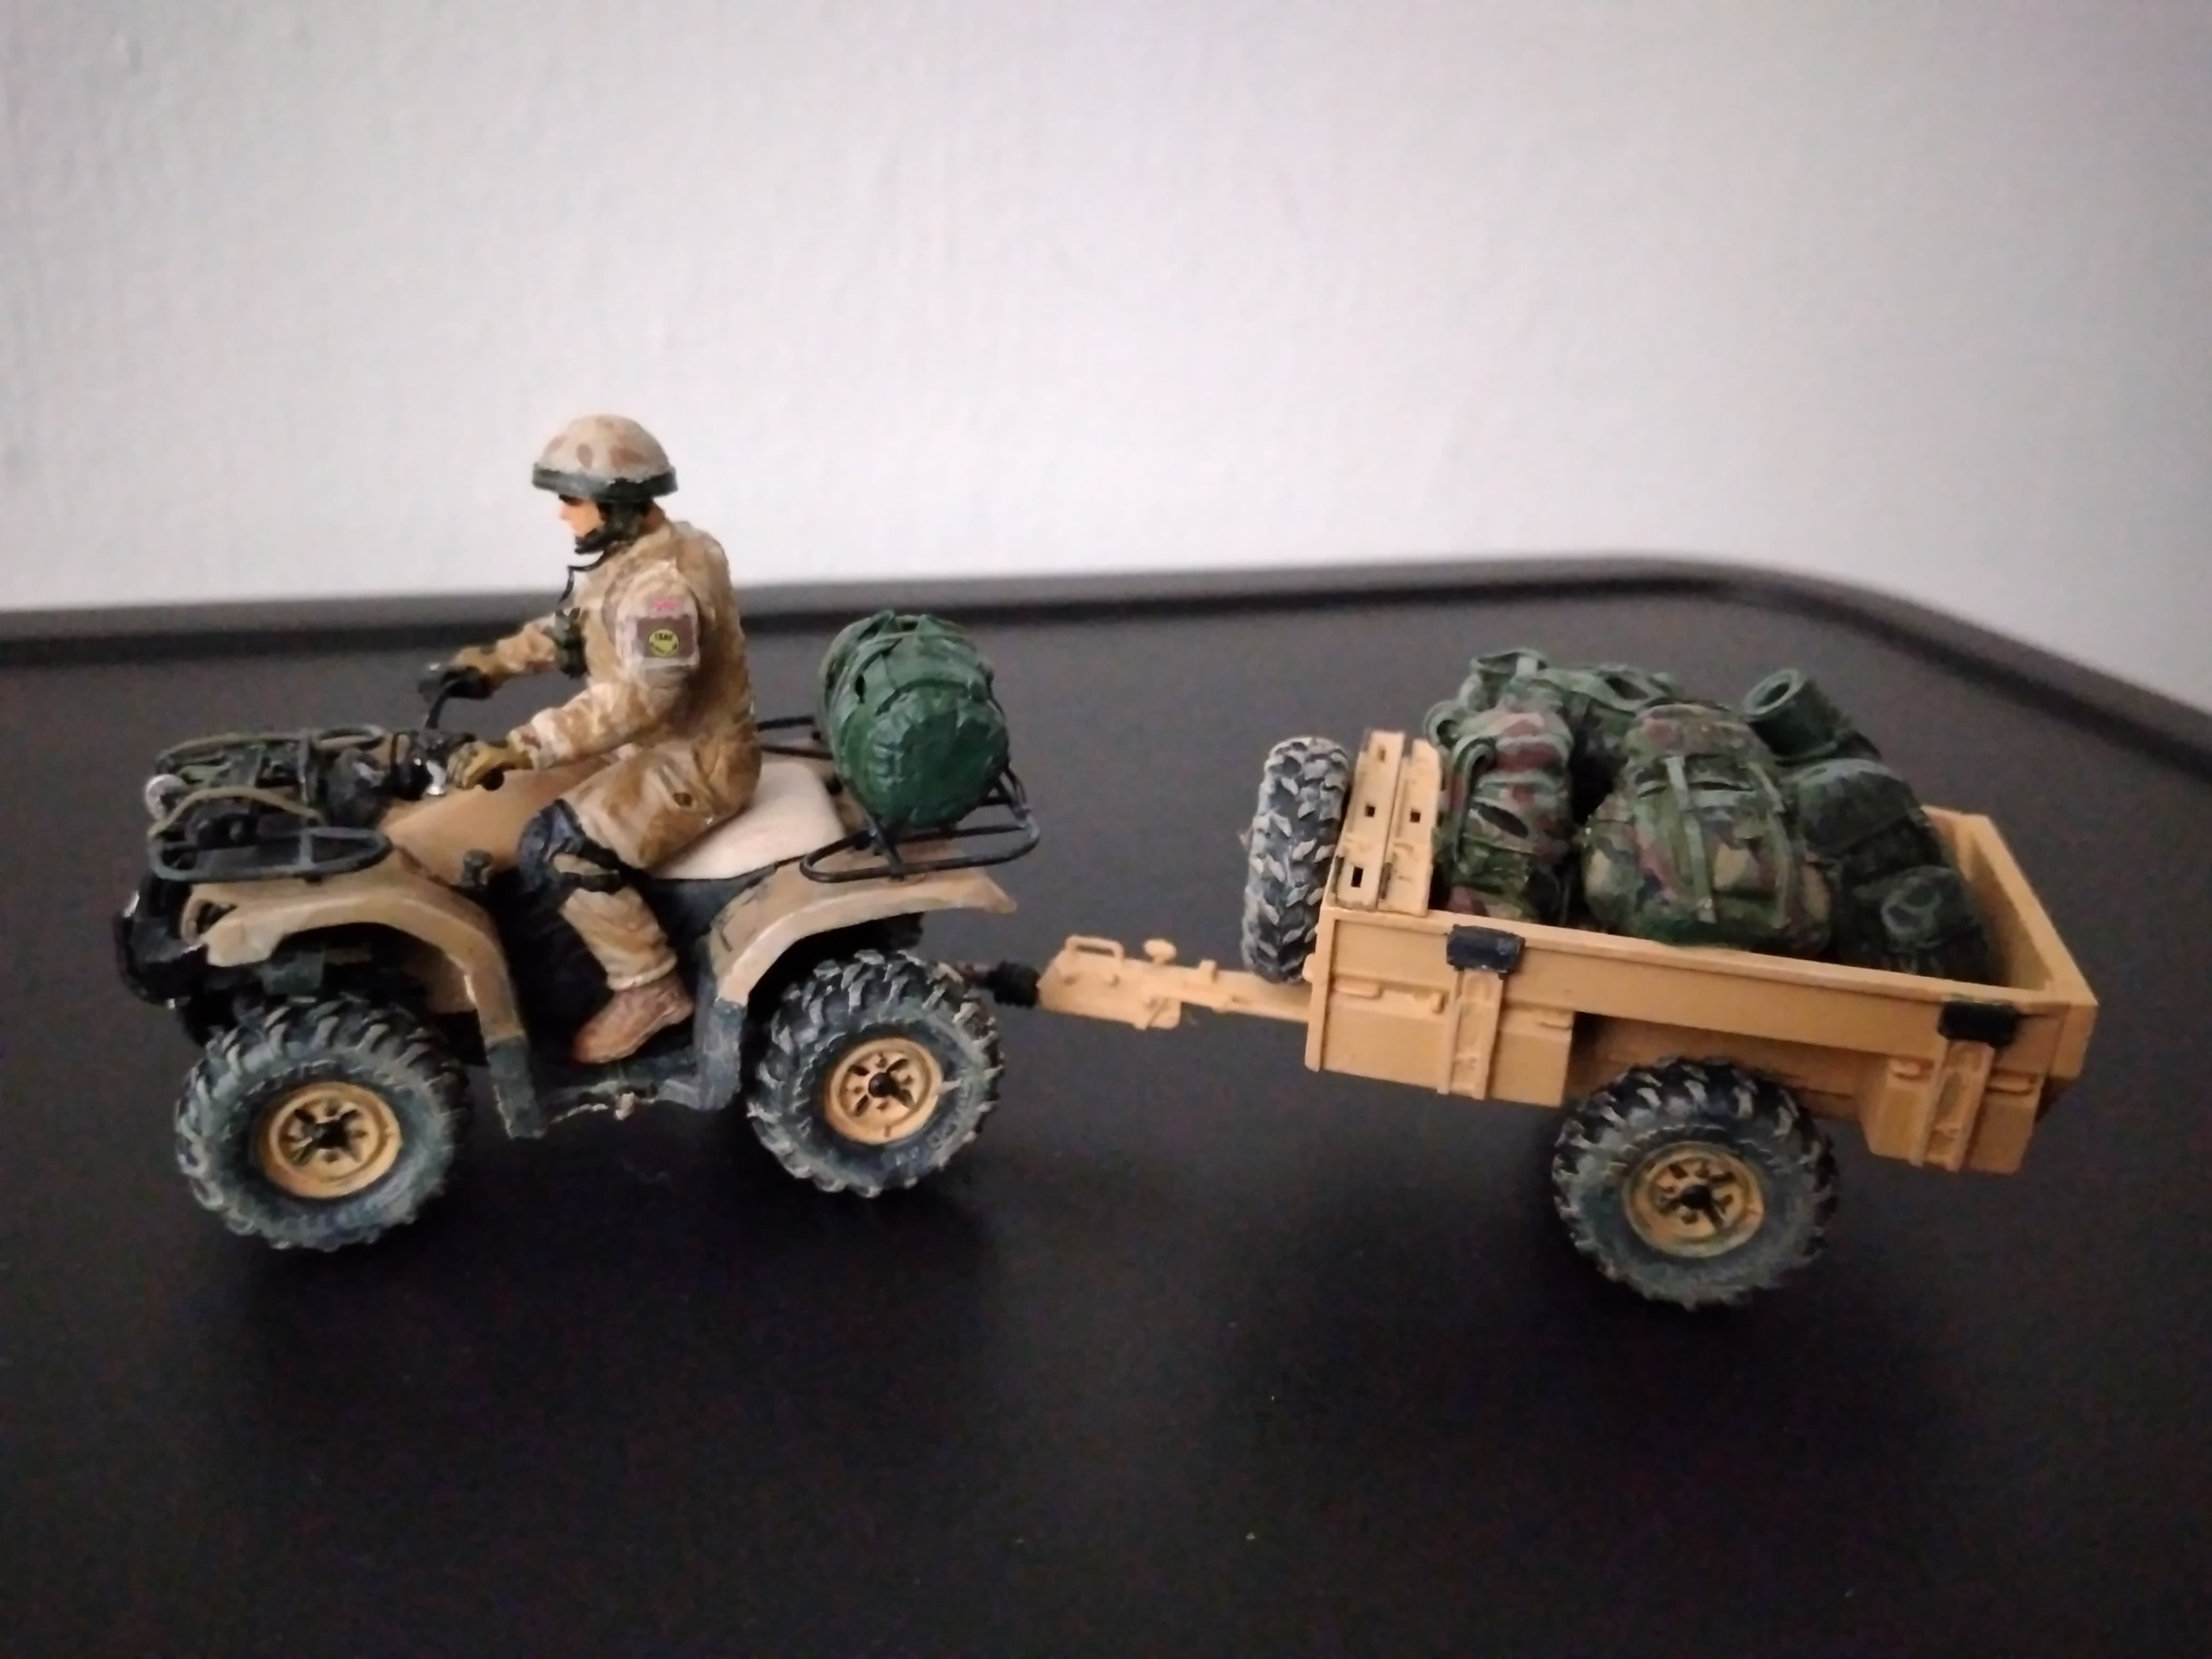
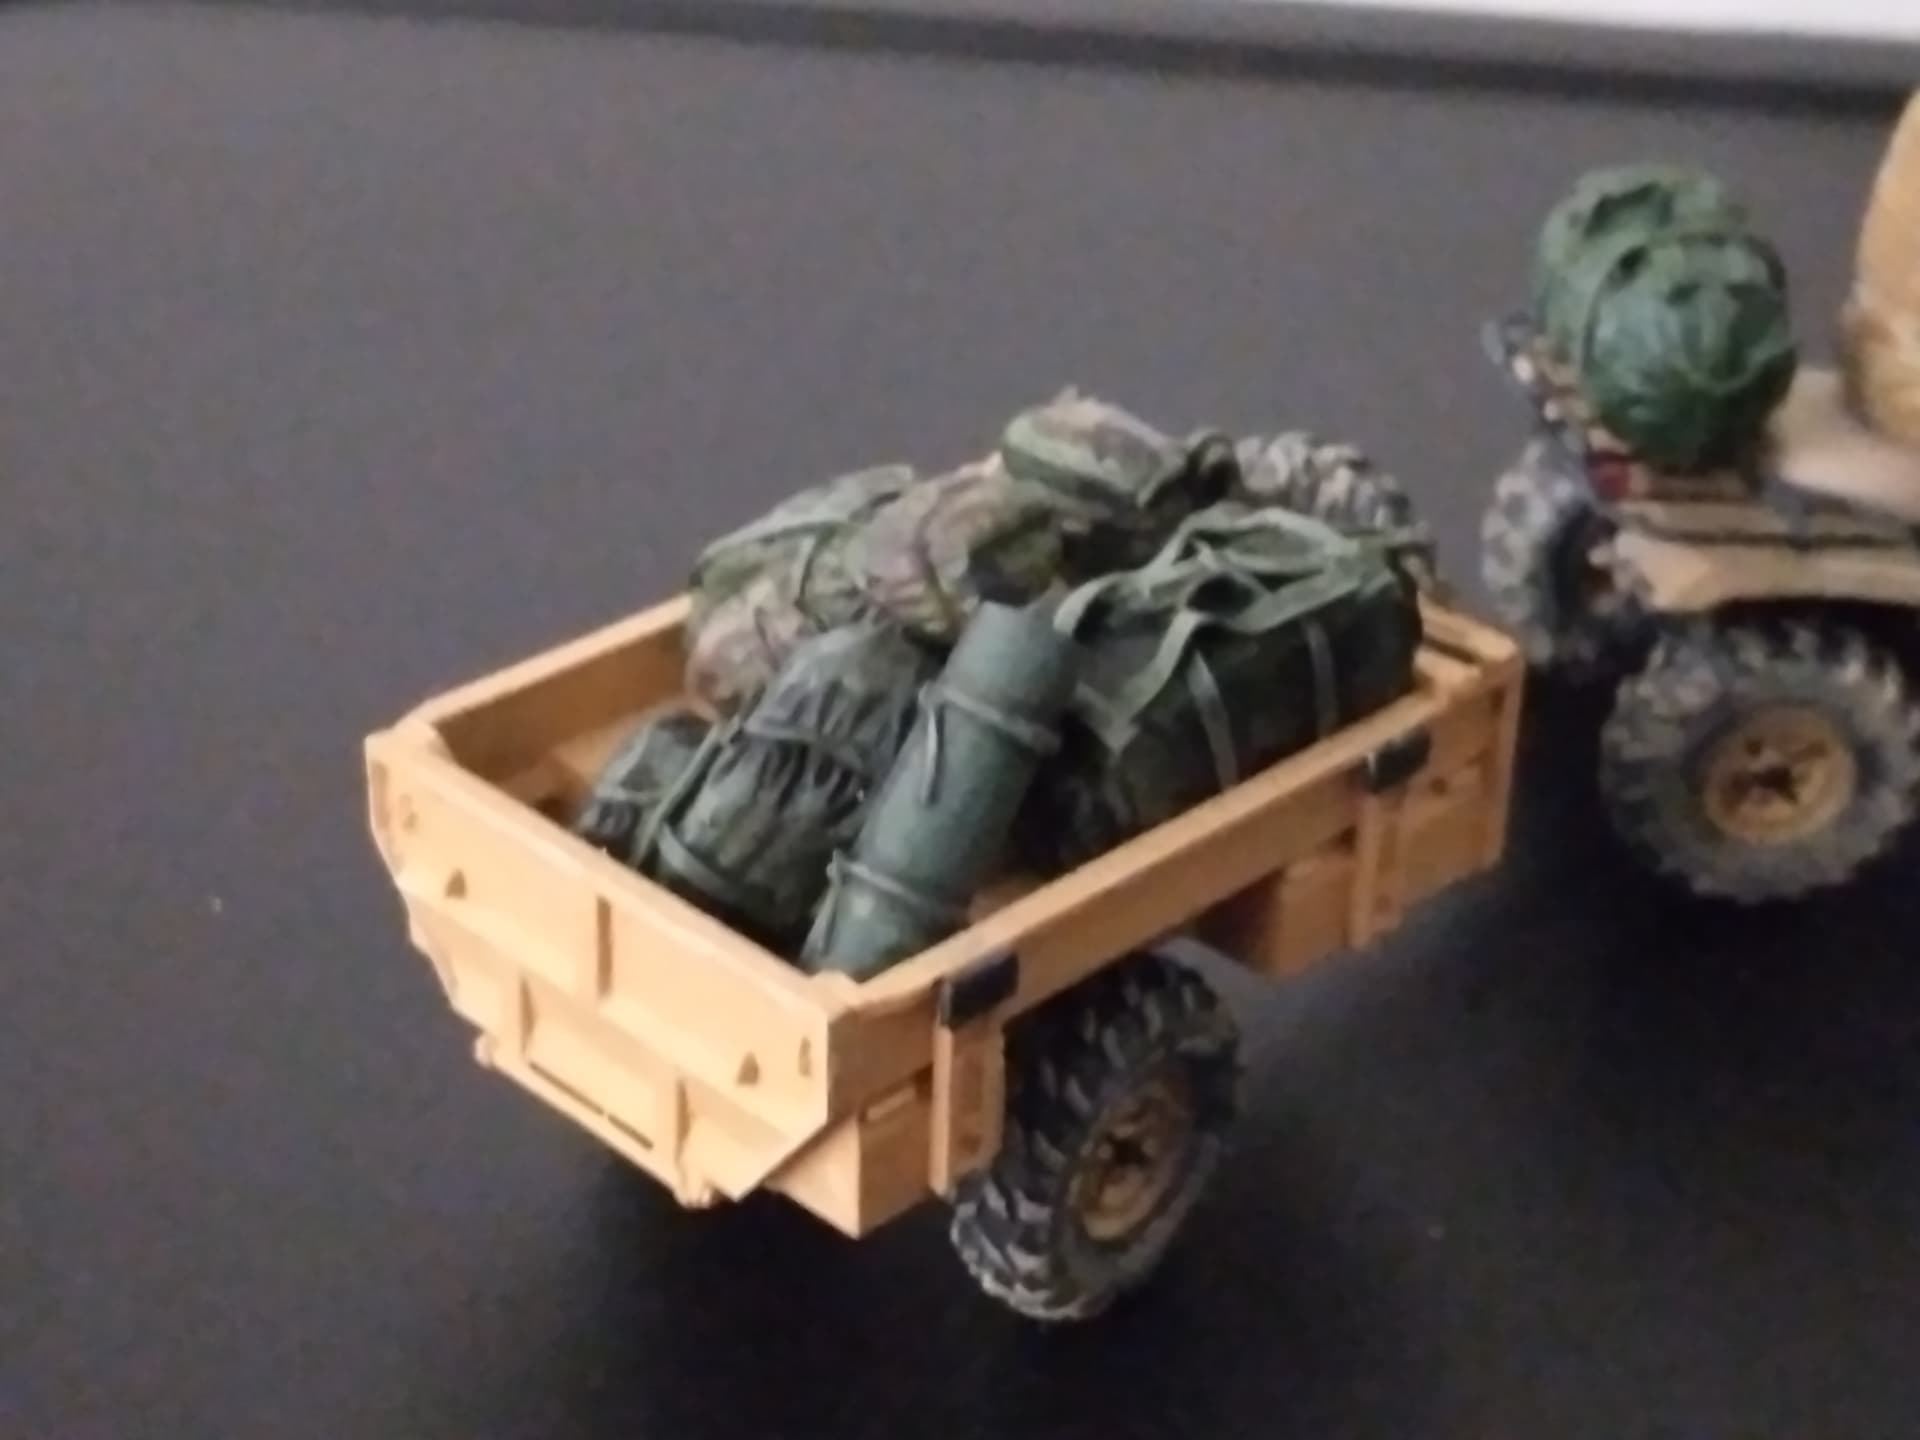
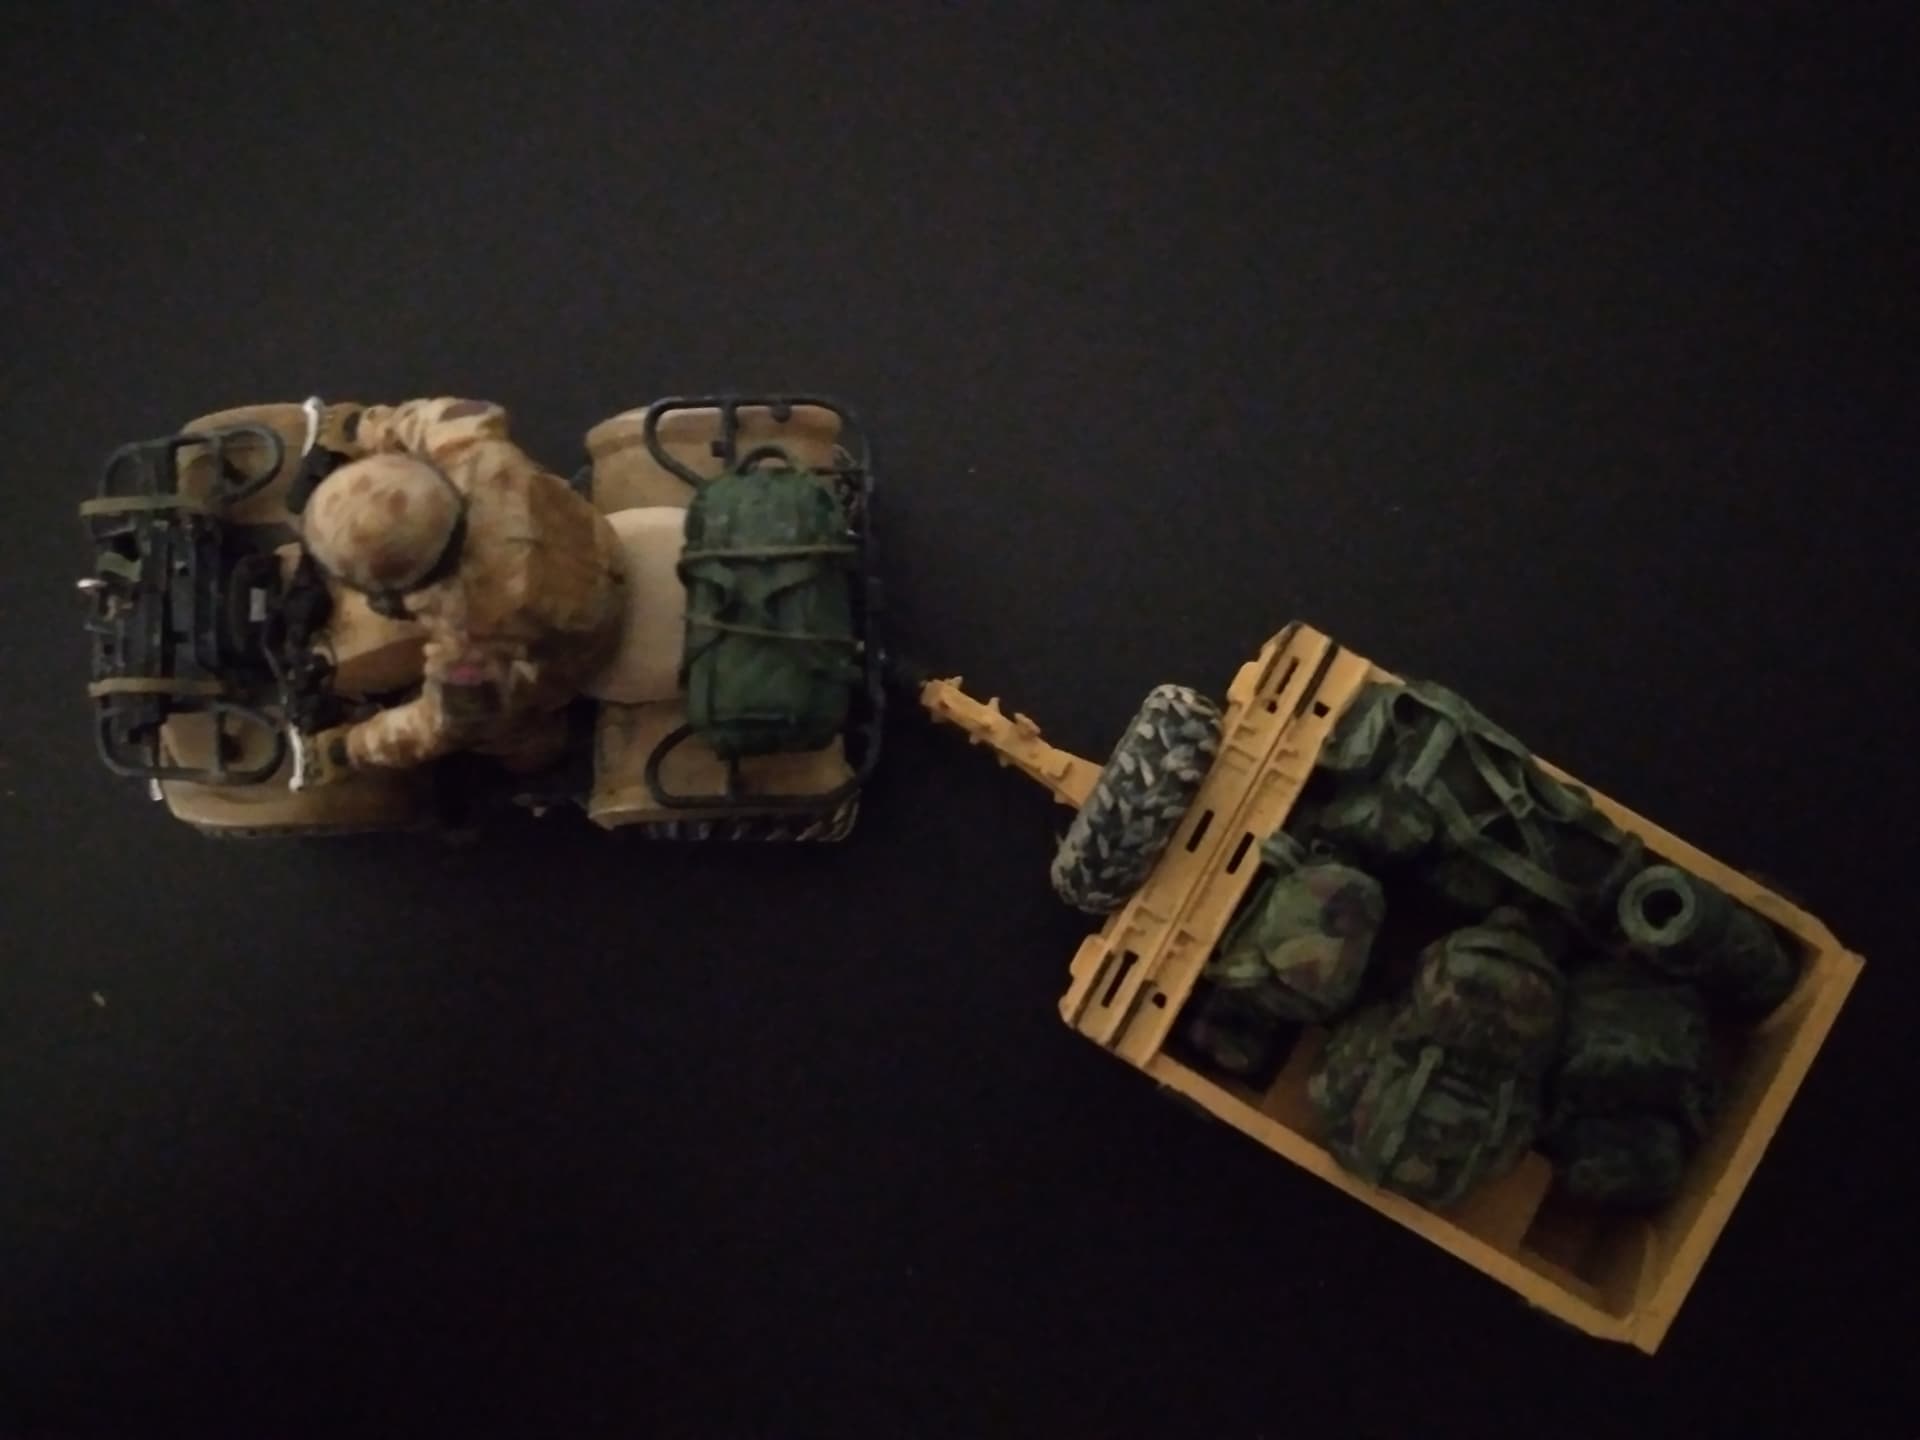
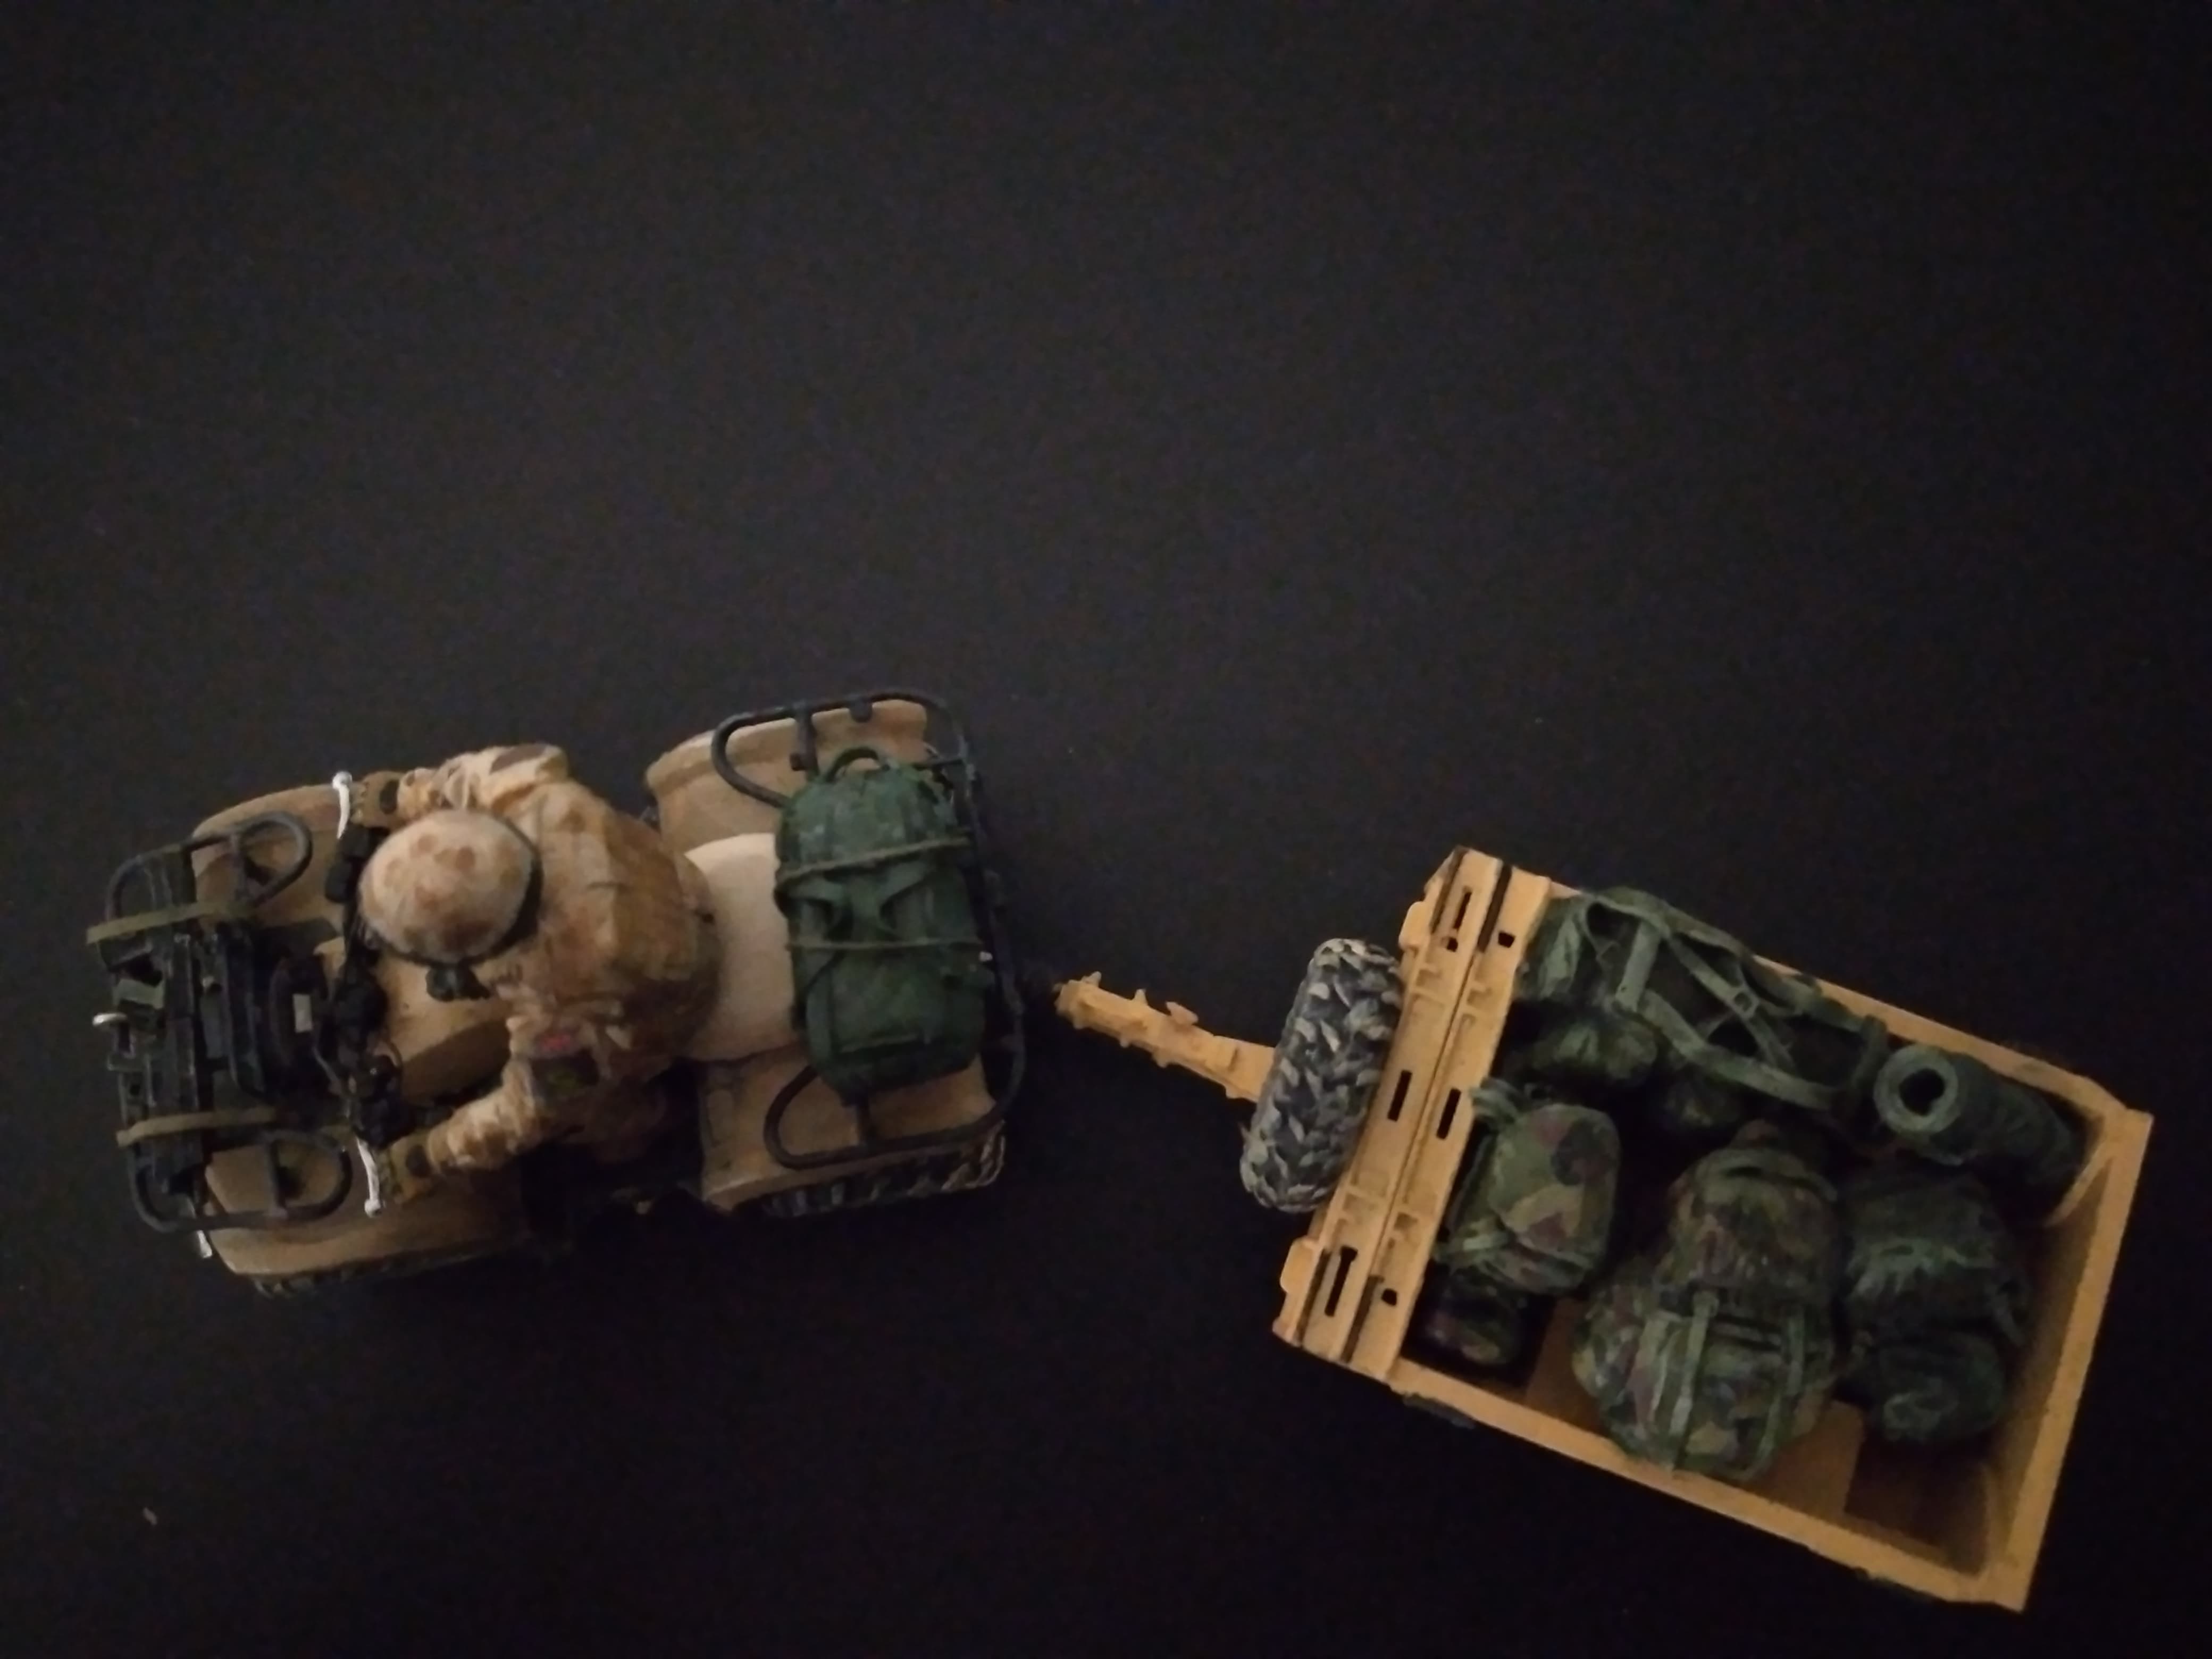
In between painting 1/300 figures and making latrines in the same scale, I’ve been tackling a bit of detail painting on my NORTHAG Land Rover and trailer:

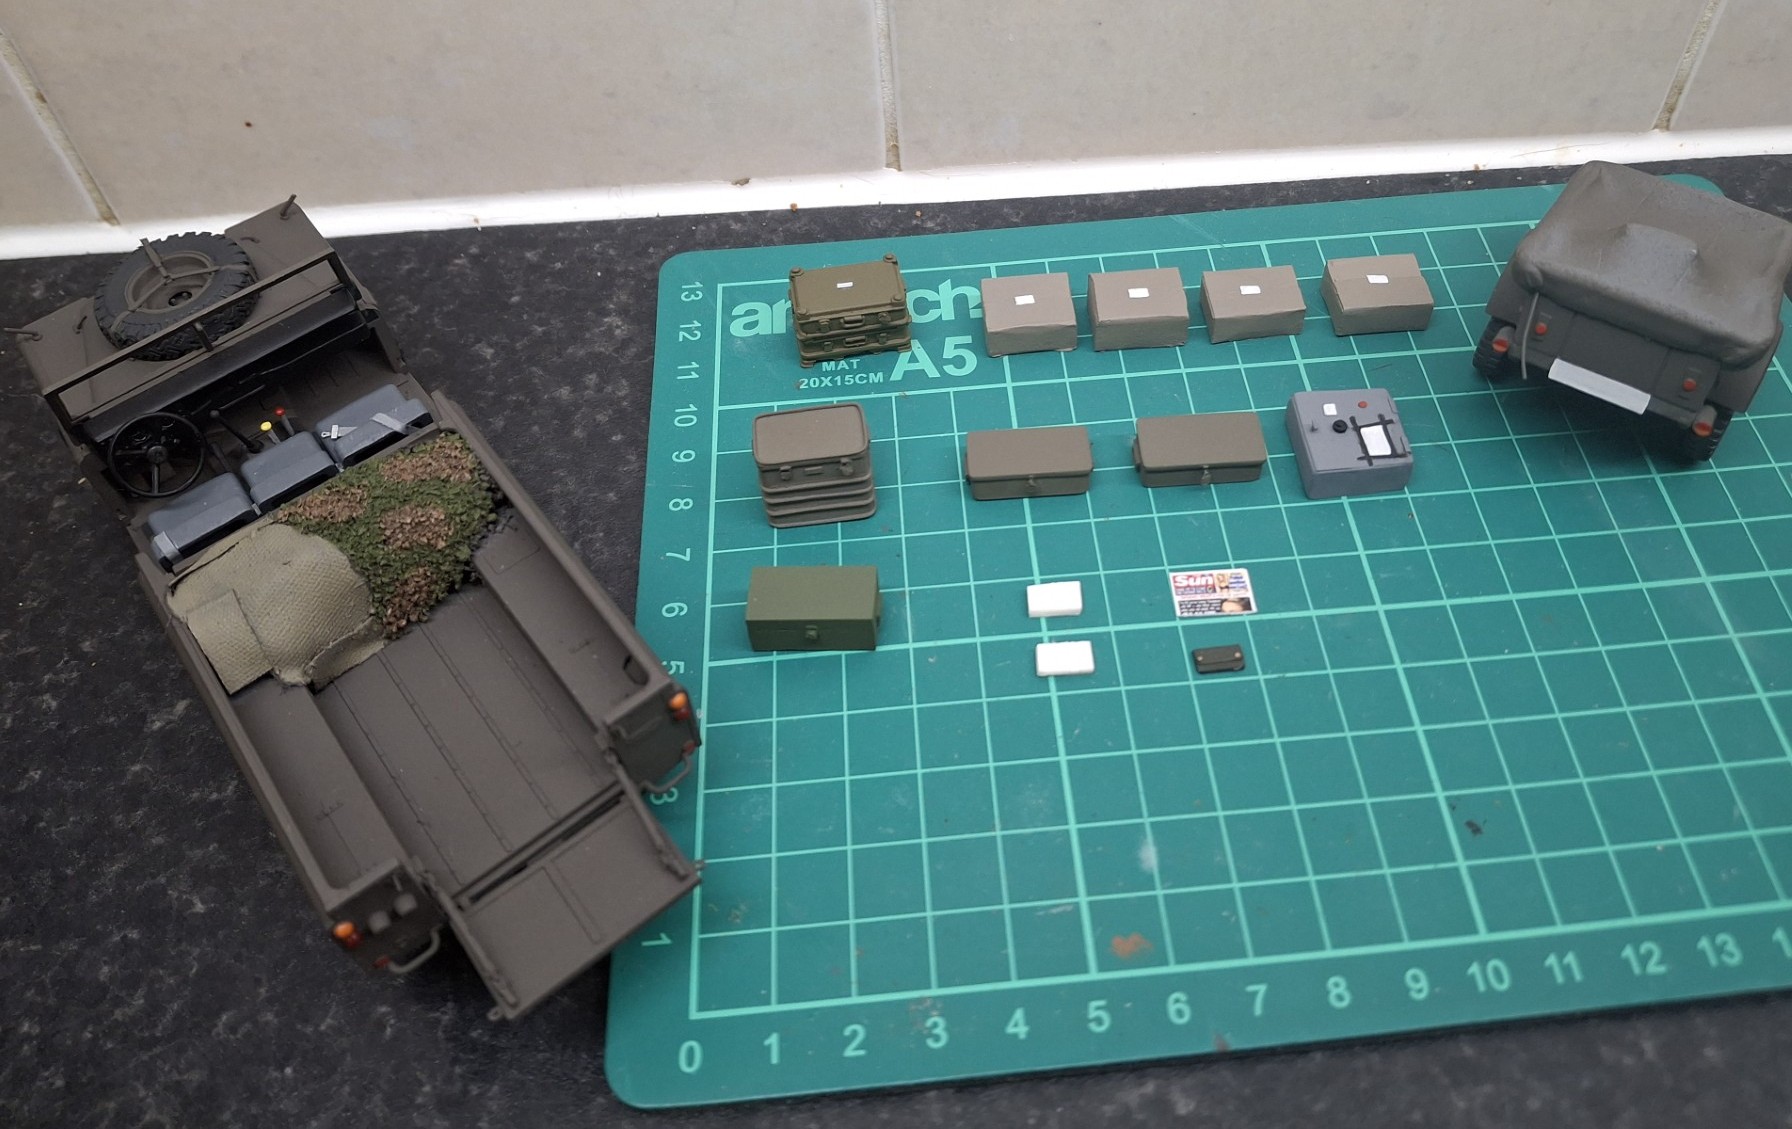
Kit just shown on the vehicle for effect and will not reflect final positioning.
Some of the details will be positioned like this though:

Vehicle work-ticket on the dash shelf; the inevitable newspaper (not my choice but my Belgian compatriot liked it), on top of which are 2 packed lunch rations for the day (white cardboard boxes). Unlike the dreaded Brit Army issue “White box of death”, the NATO-issued ones were quite good: fresh crusty rolls, real meat as a filling, a good chocolate bar (not some faded whitened tosh originally destined for some Arab Army), and some decent fruit. A far cry from what I was used to courtesy of the British Army(!)
Of course, a lot of this will hardly be seen with the canopy on, but I do plan on leaving doors open.
11 Likes
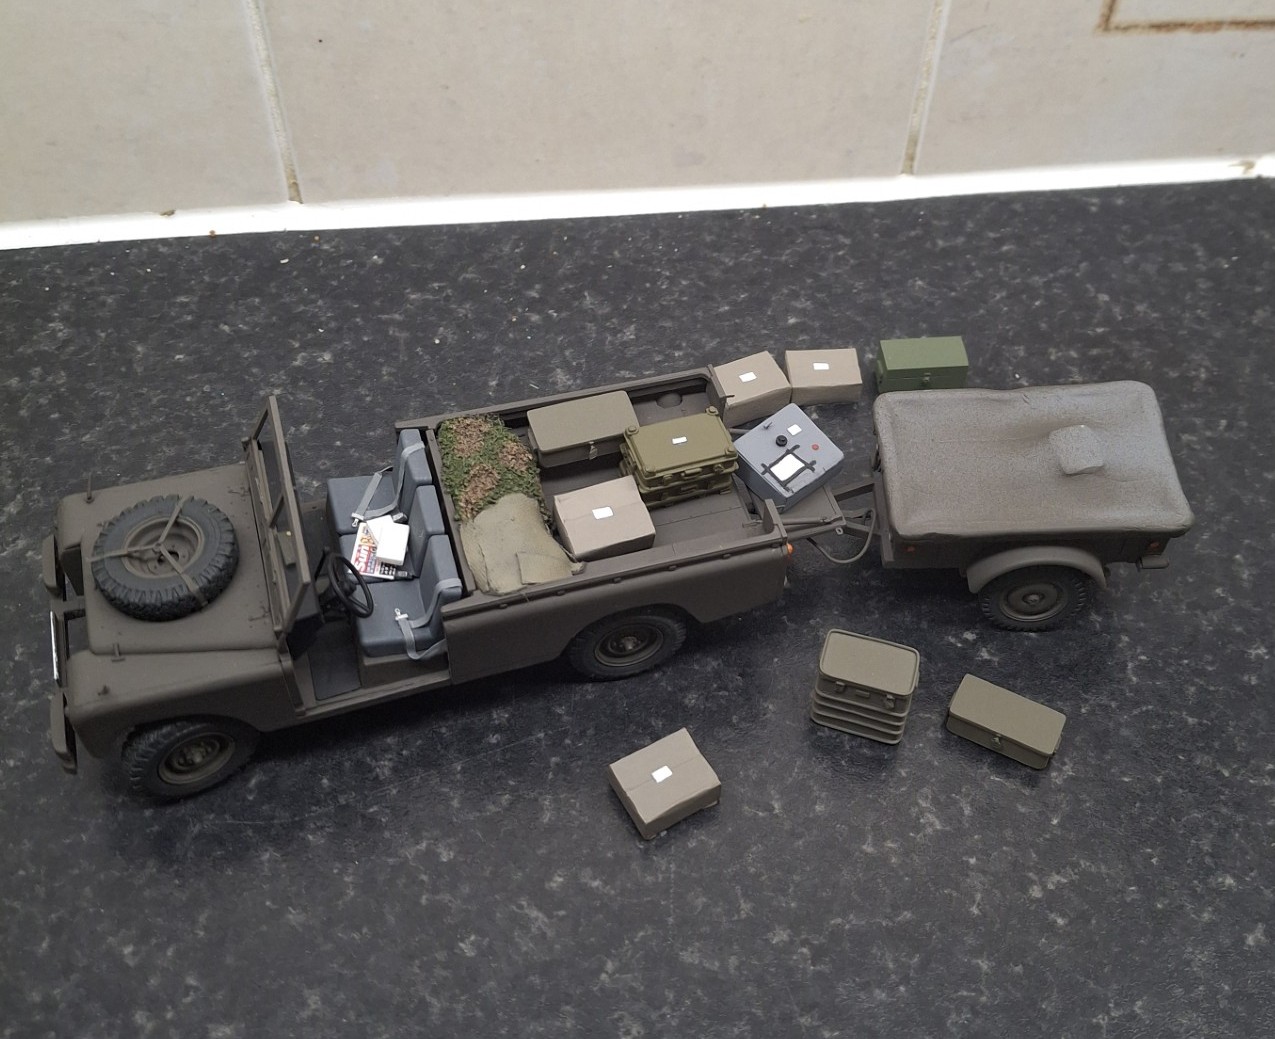
Some cracking details… Reminiscent of the other Rover you did, with mess tin, gas cooker etc … The clever little additions will really make this authentic… That work ticket, the horror bags, seat belts are sweet, and something so silly and throw away… that black nasty taping the sheet of paper to the safe … Brilliant… Bravo !!
I also managed to get the whole trailer painted…that was epic … I also painted something else NATO green but will go into that in its own thread…
The problem with this is it’s size … Really limiting to how I show it as it is …

Really like how it looks though with the green on… And here is the size problem…
Just loosely hooked up to the cab…
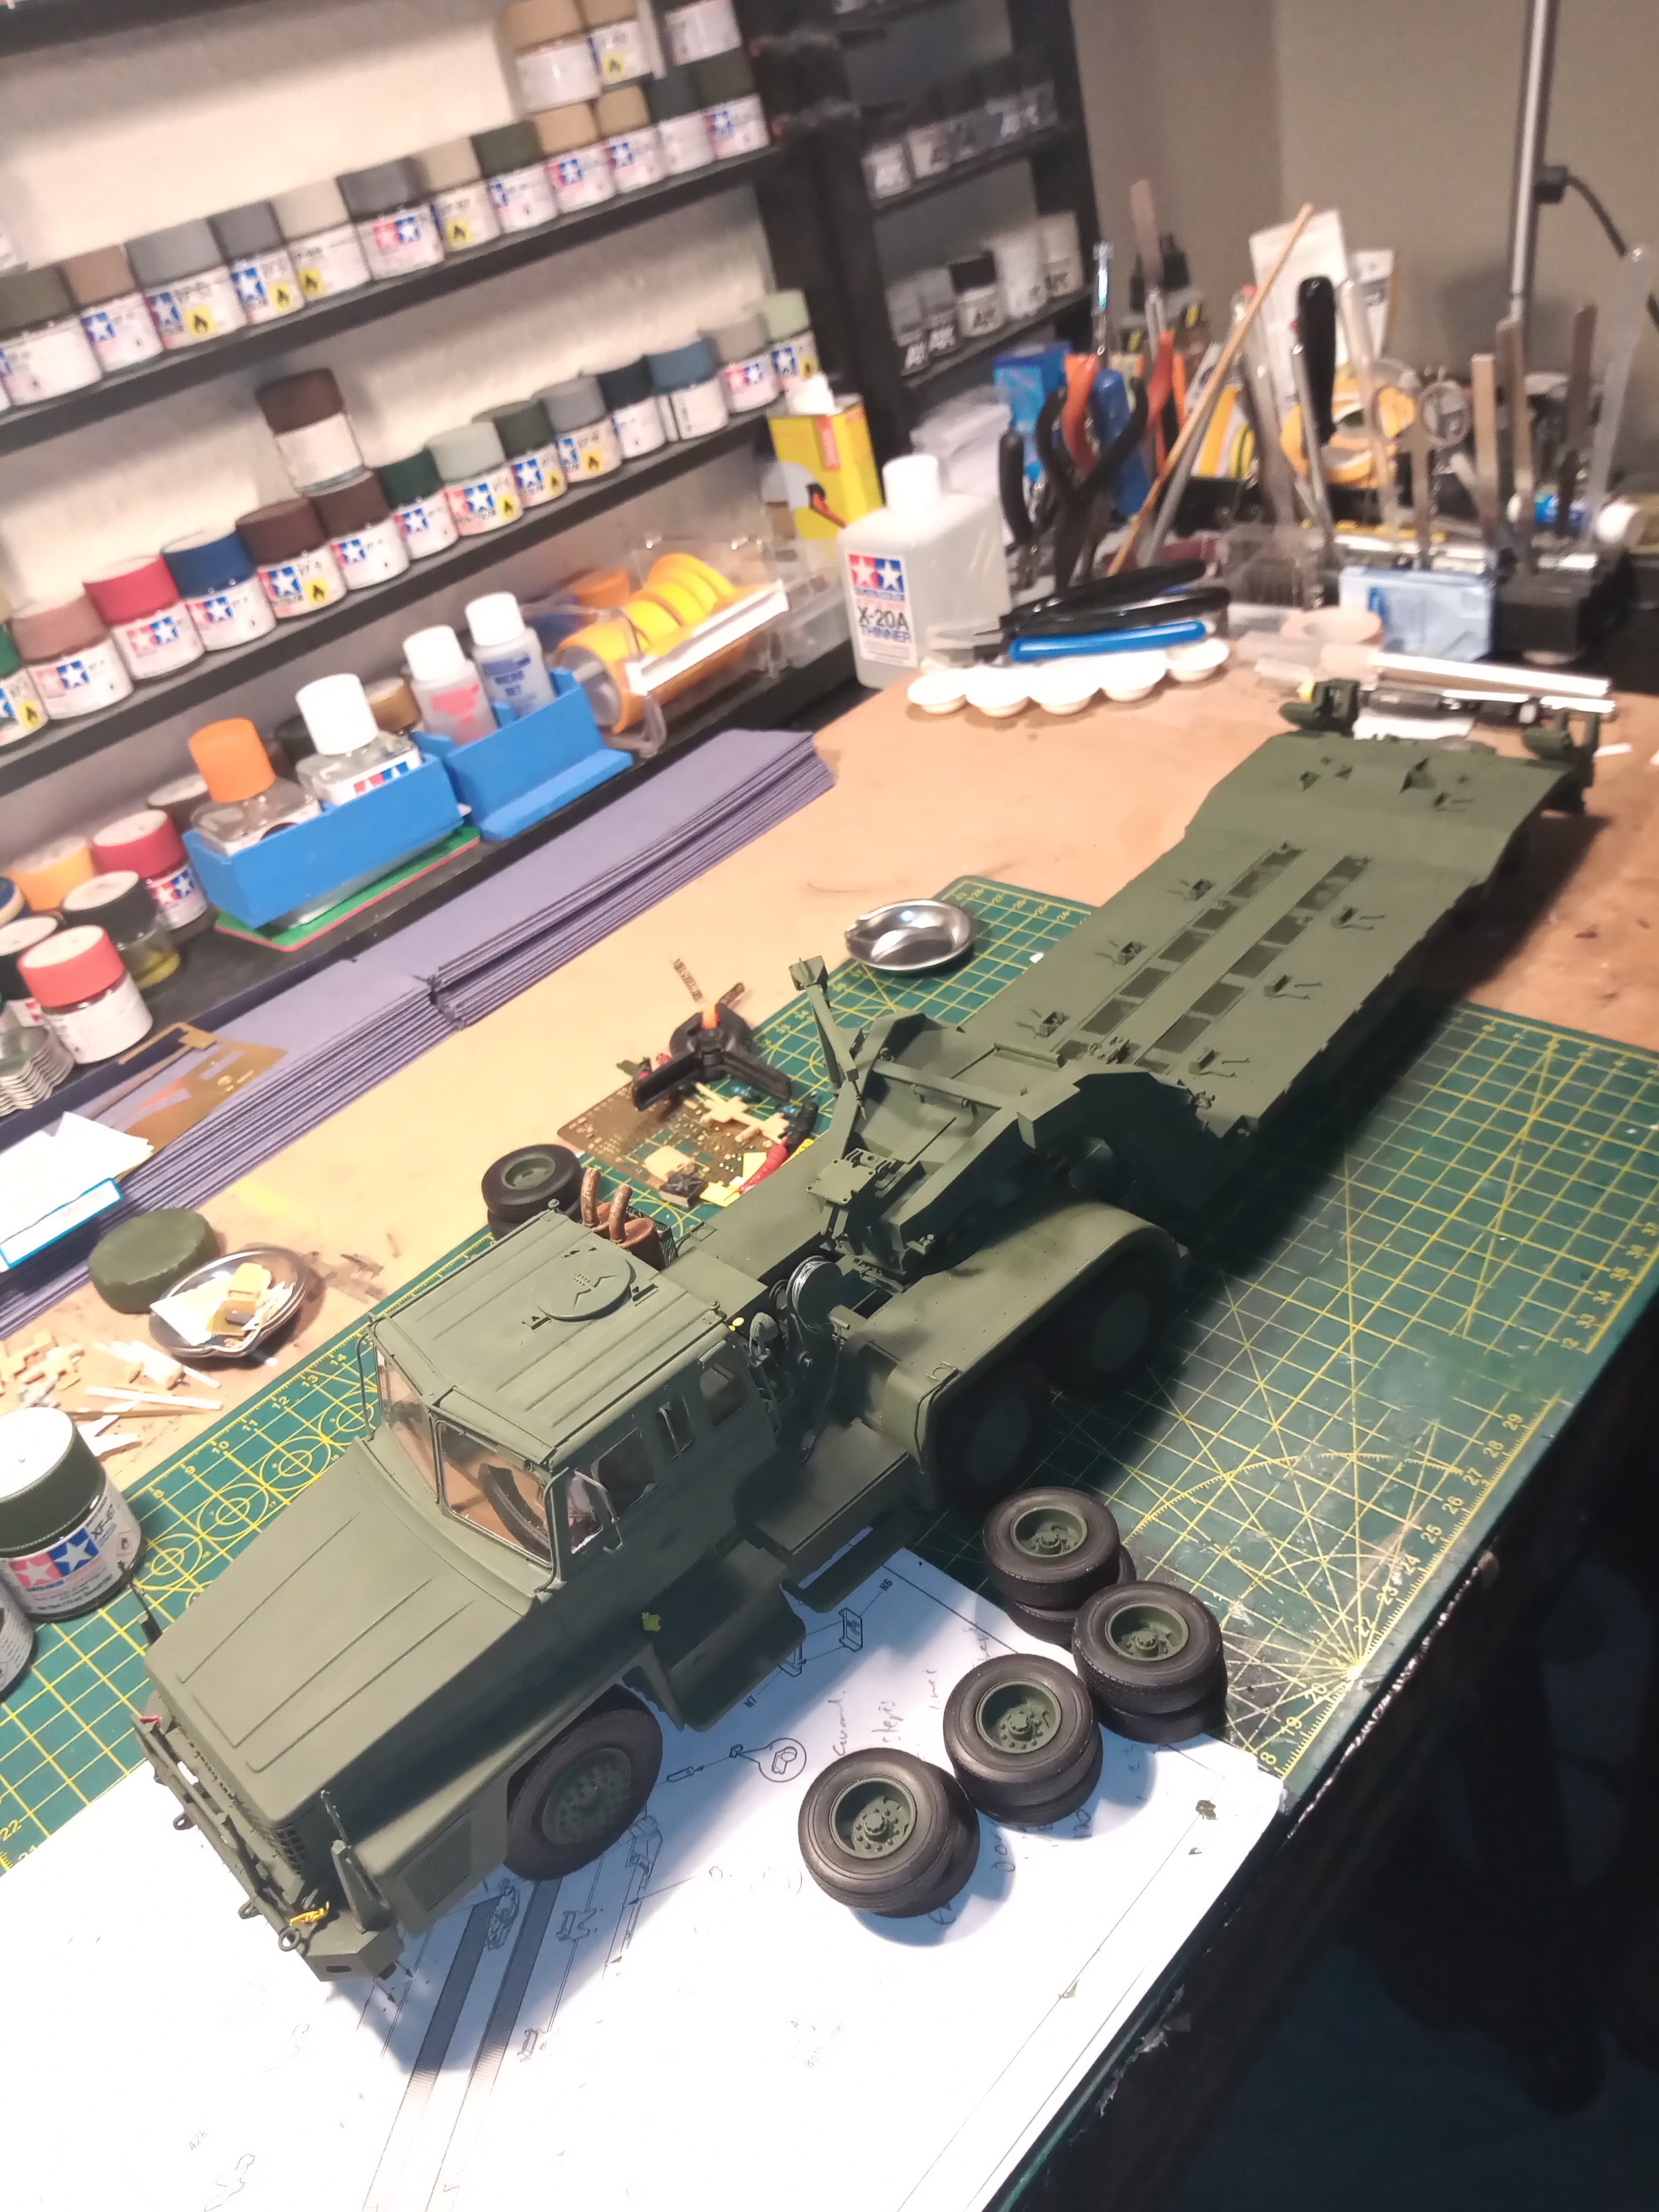
It’s just so big… (Said the actress to the bishop )…
Also, here’s the smaller hand winch with cable now fitted…
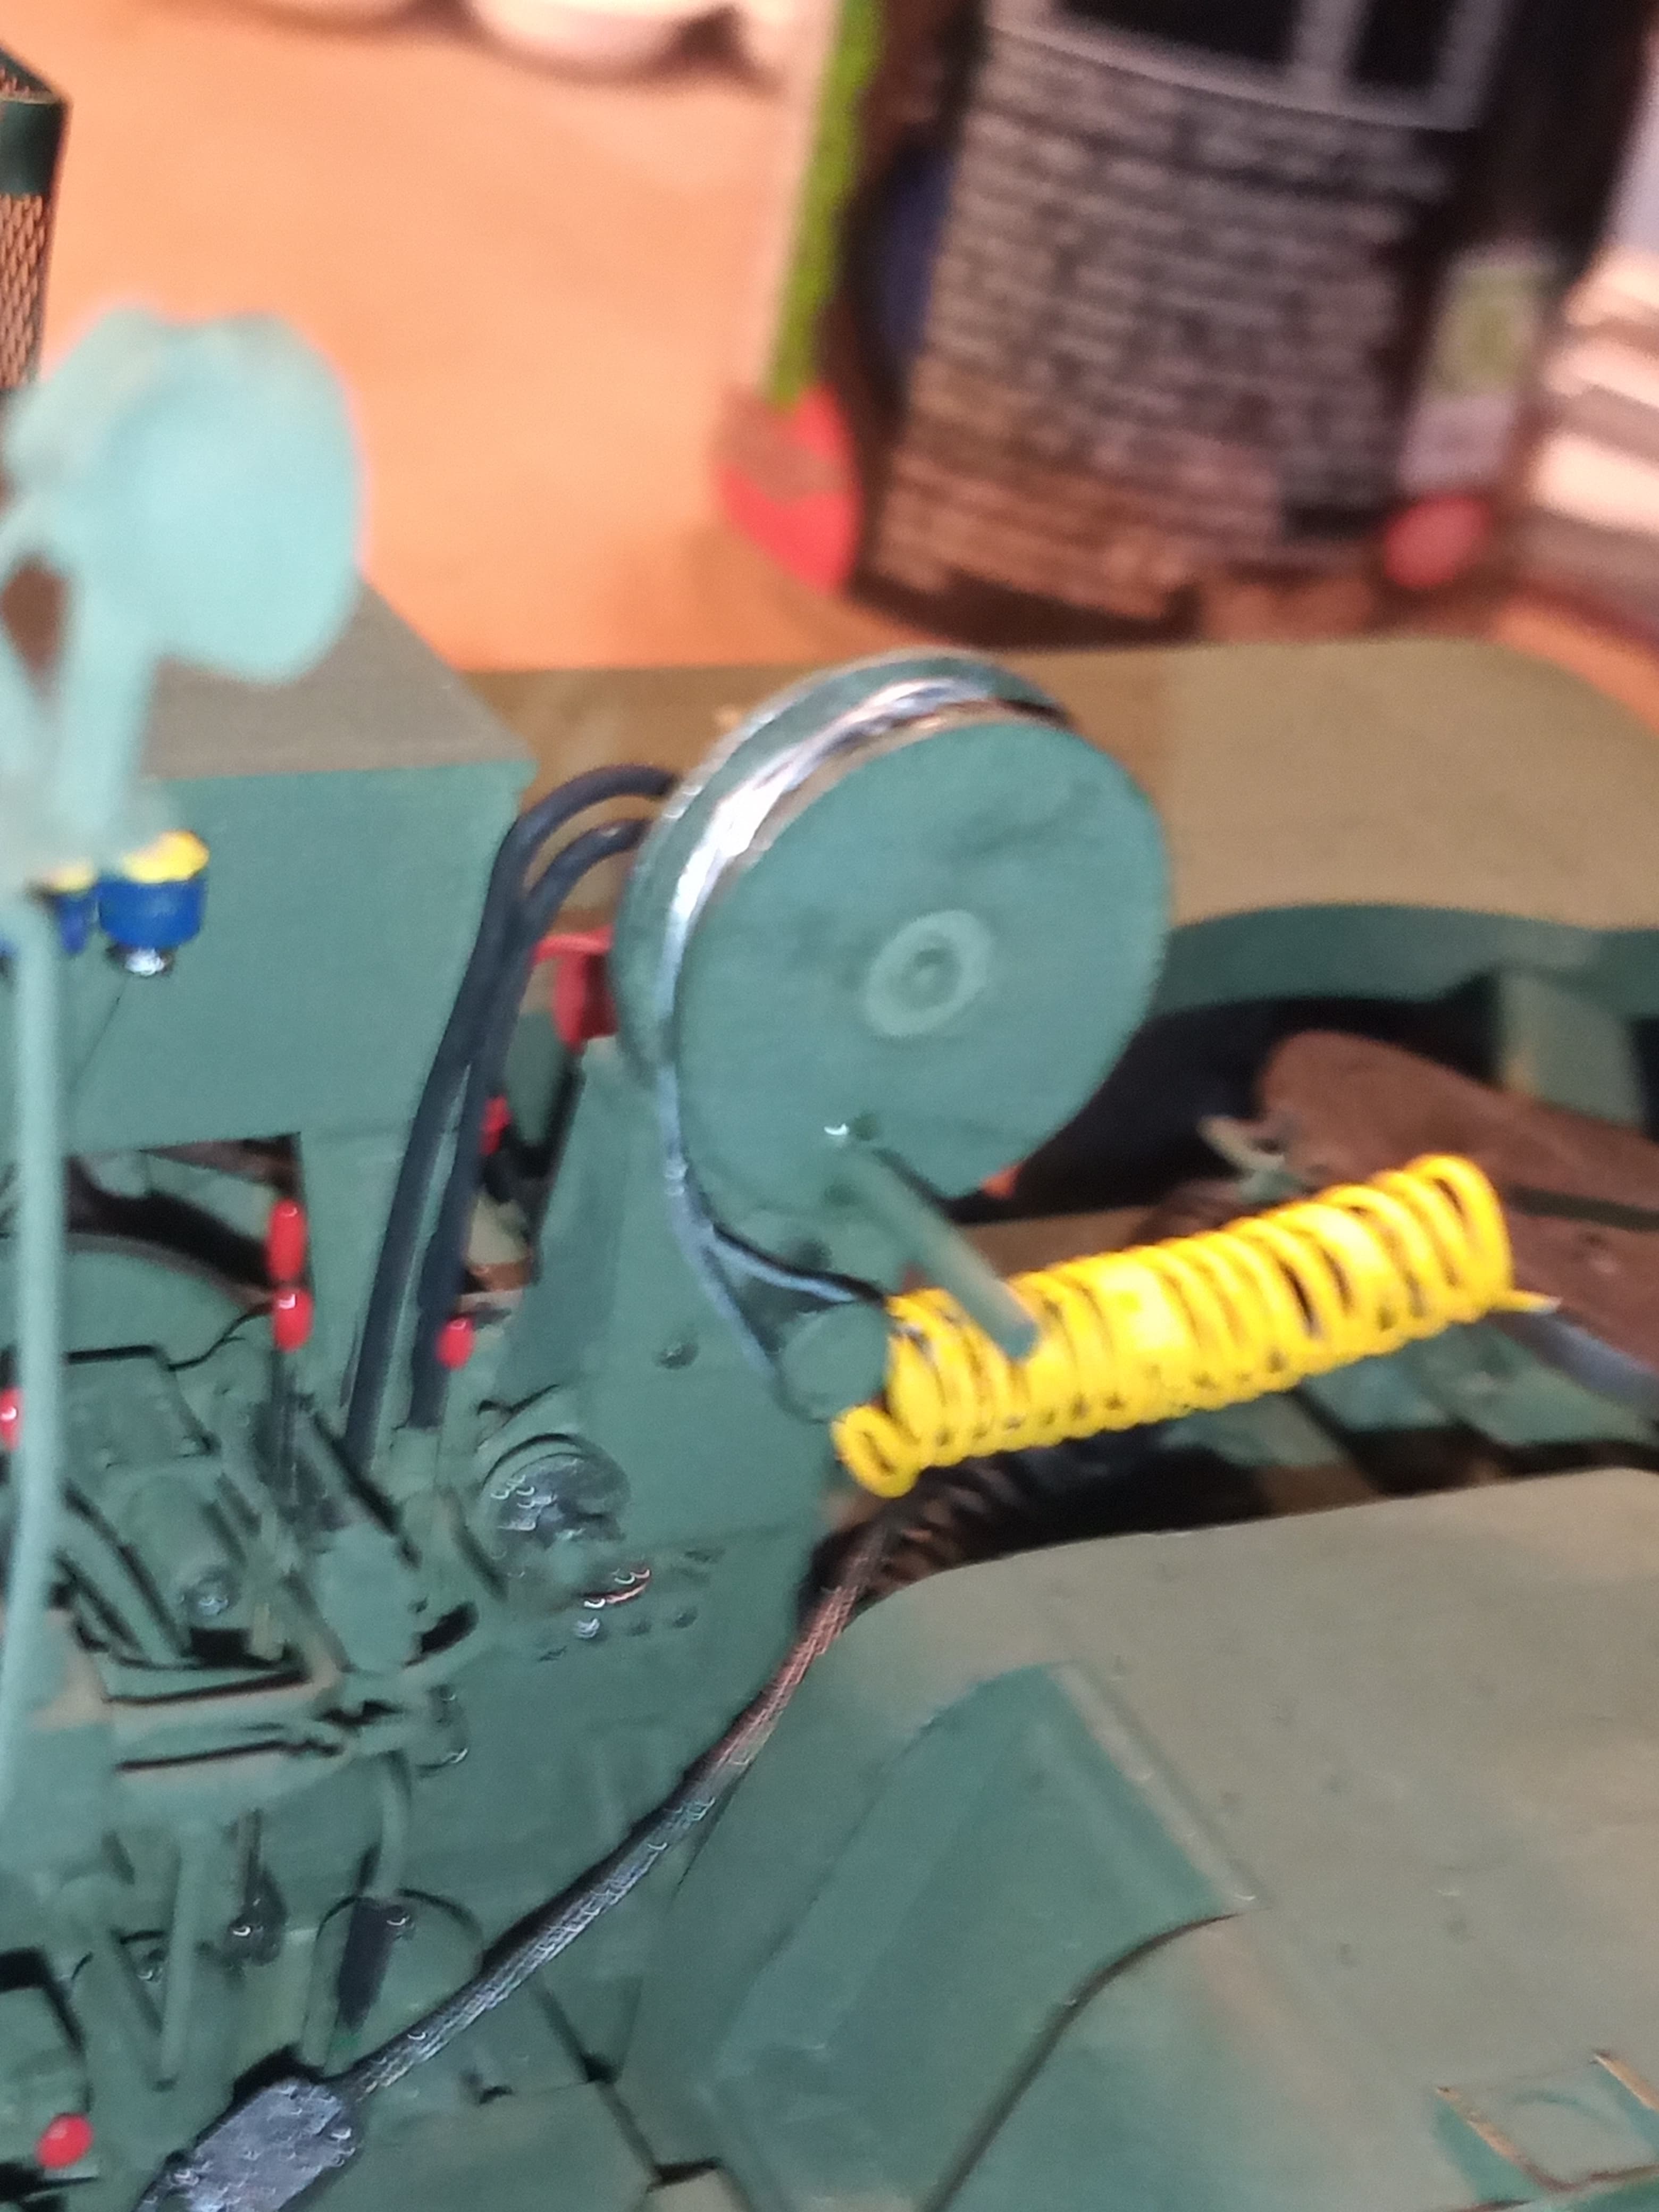
It’s just .3 mm jewellery wire wrapped round and super glued in place.
Dry fit of the air lines …
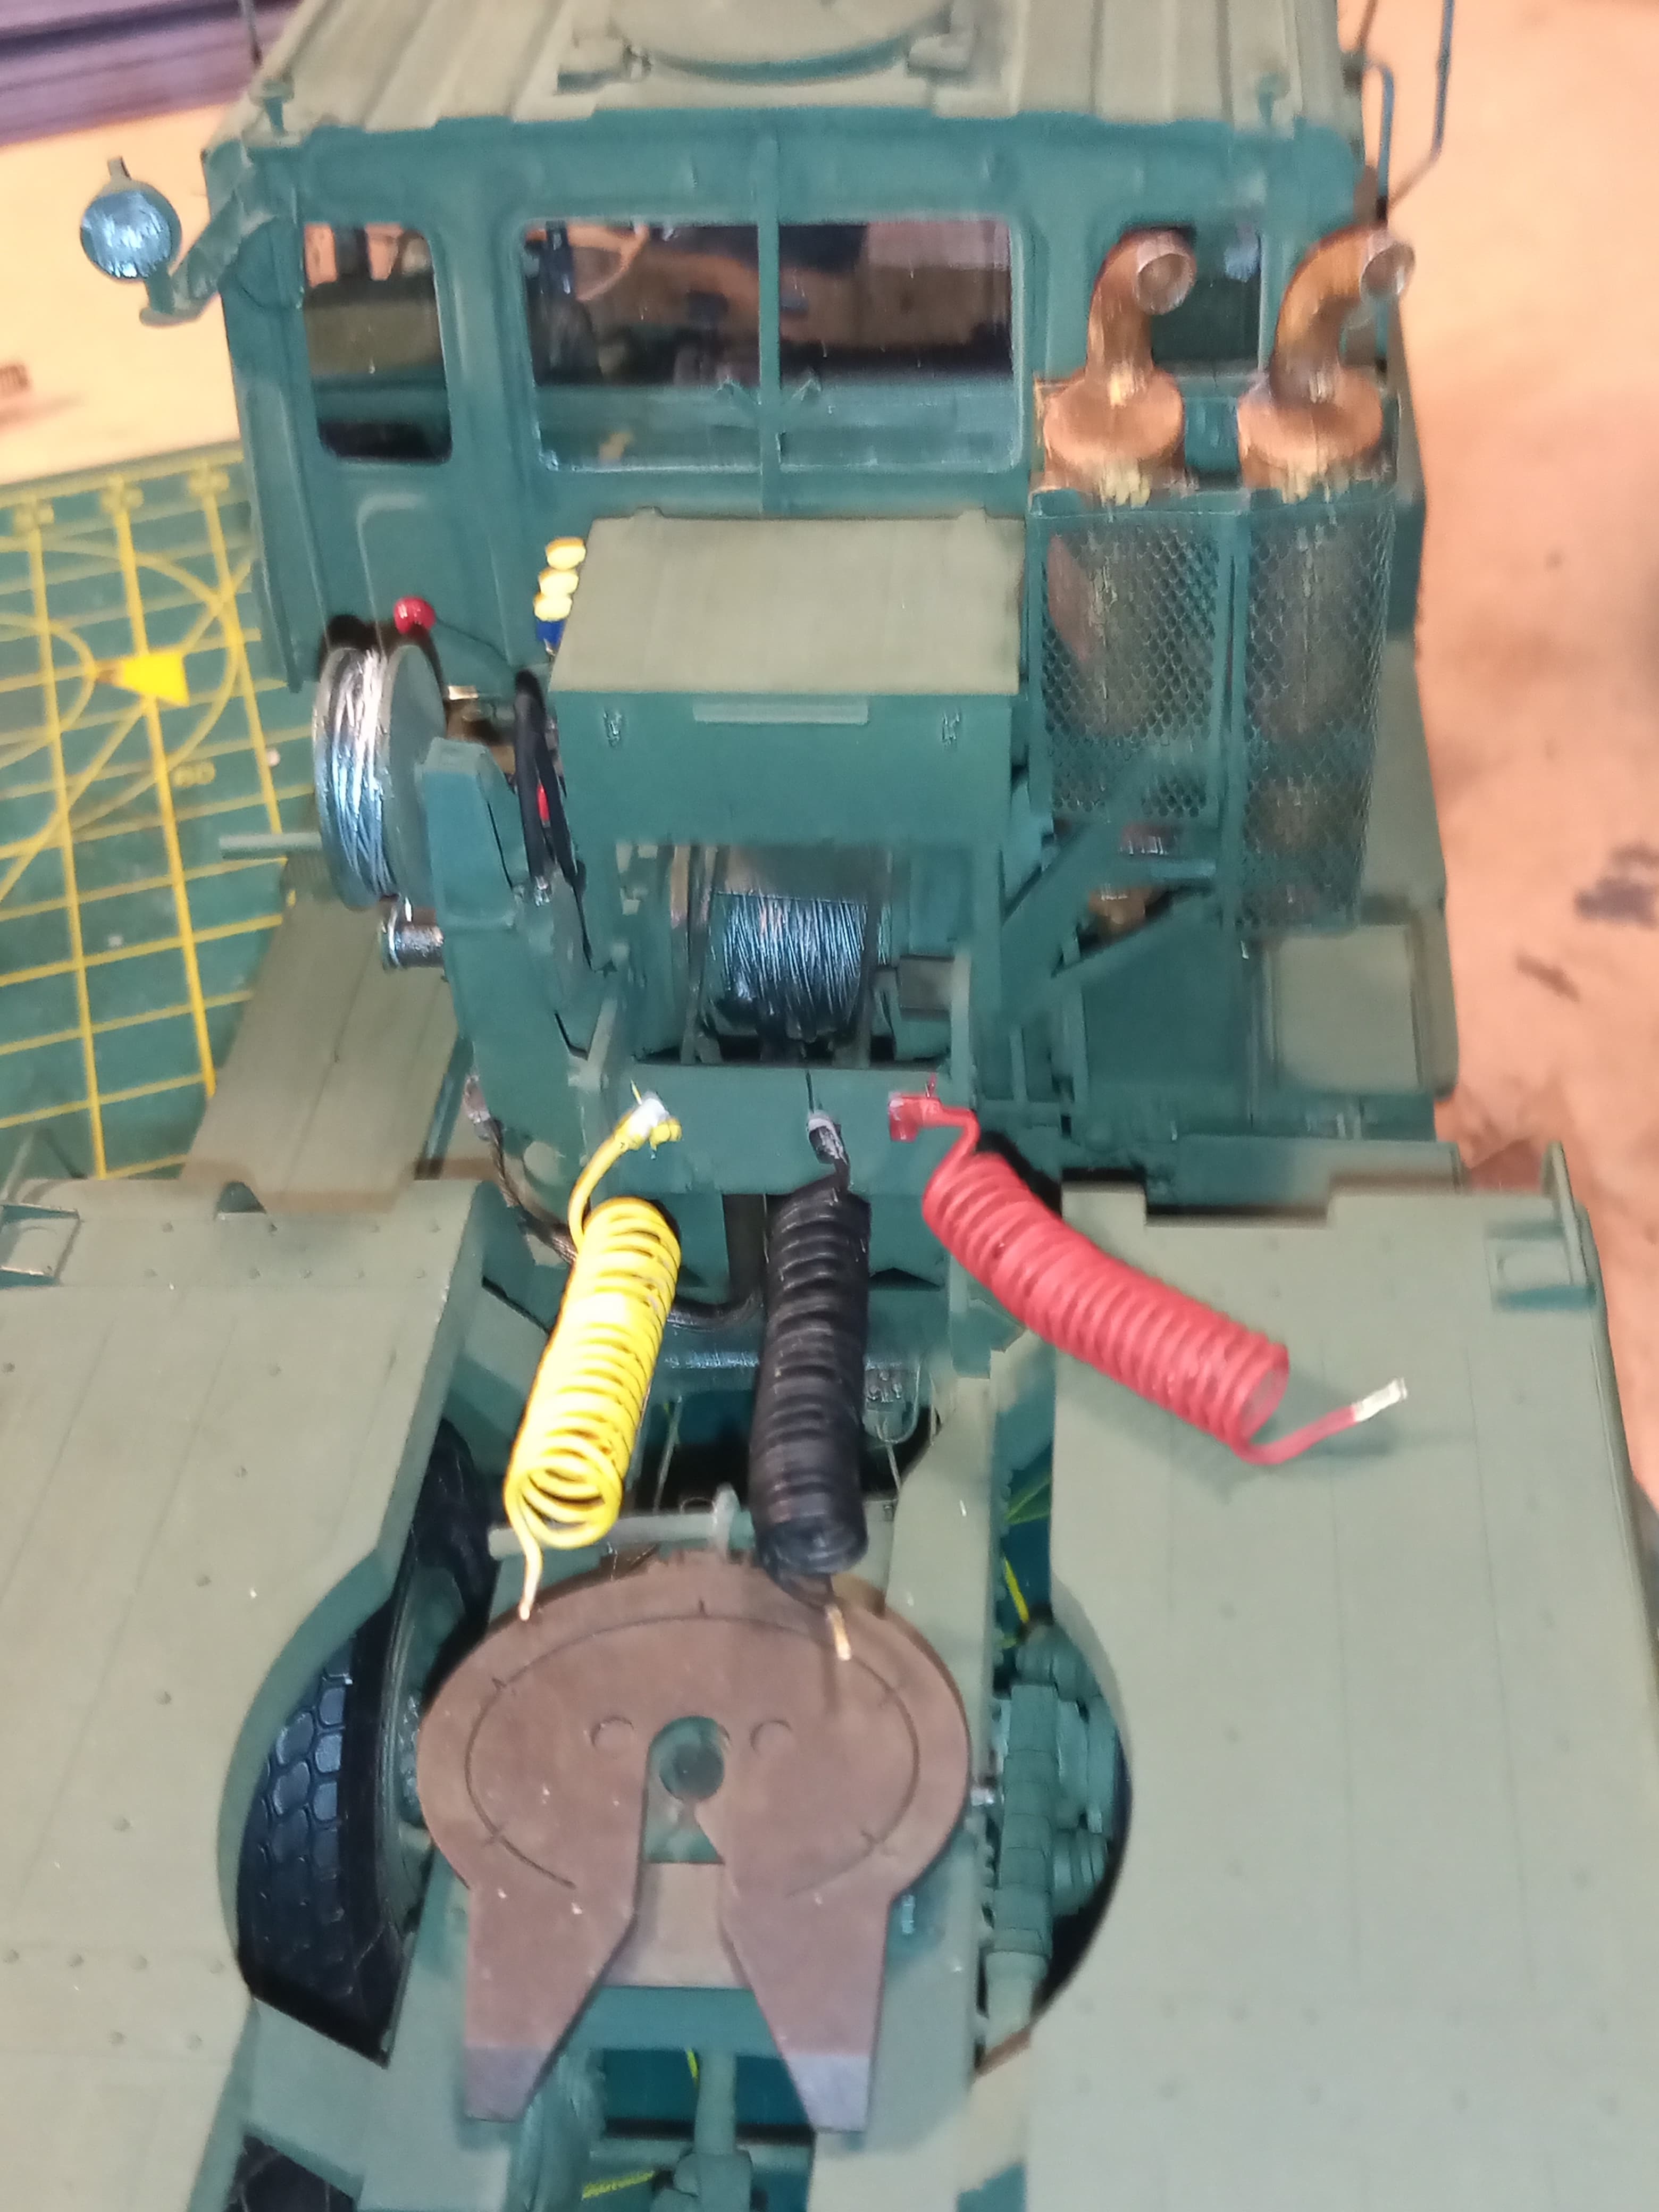
I am going to have to trim these back a bit so they fit onto the swan neck ok…
Next up will be adding the last few delicate pieces, light lenses, running lights, decals, mirrors and jerry can straps and the extinguishers etc…
11 Likes
Thanks John; I’m beginning to quite like doing Rovers!
Well done on the mighty Scammel; I think you could have done with one of these as opposed to small Tamiya jars:

Cracking build Mate, and with a load - whatever you end up choosing - will blow people away!
7 Likes
I tend to ask everybody, and I hope I didn’t miss you taking about it but how did you weather the fifth wheel.
1 Like
No probs Michael. I did an initial coat of Tamiya xf 84 dark iron, then a thin dry brush with metallic grey over a few parts then another thin coat of dark iron. I then sealed that in with a few coats of MIG Track wash - same as the rollers and the yet to do cable guides on the trailer.
5 Likes
Tamiya smoke may give it the grease look.!!!
1 Like
Some more details added or touch painted…
The lights now add a few dashes of colour and reflective surfaces
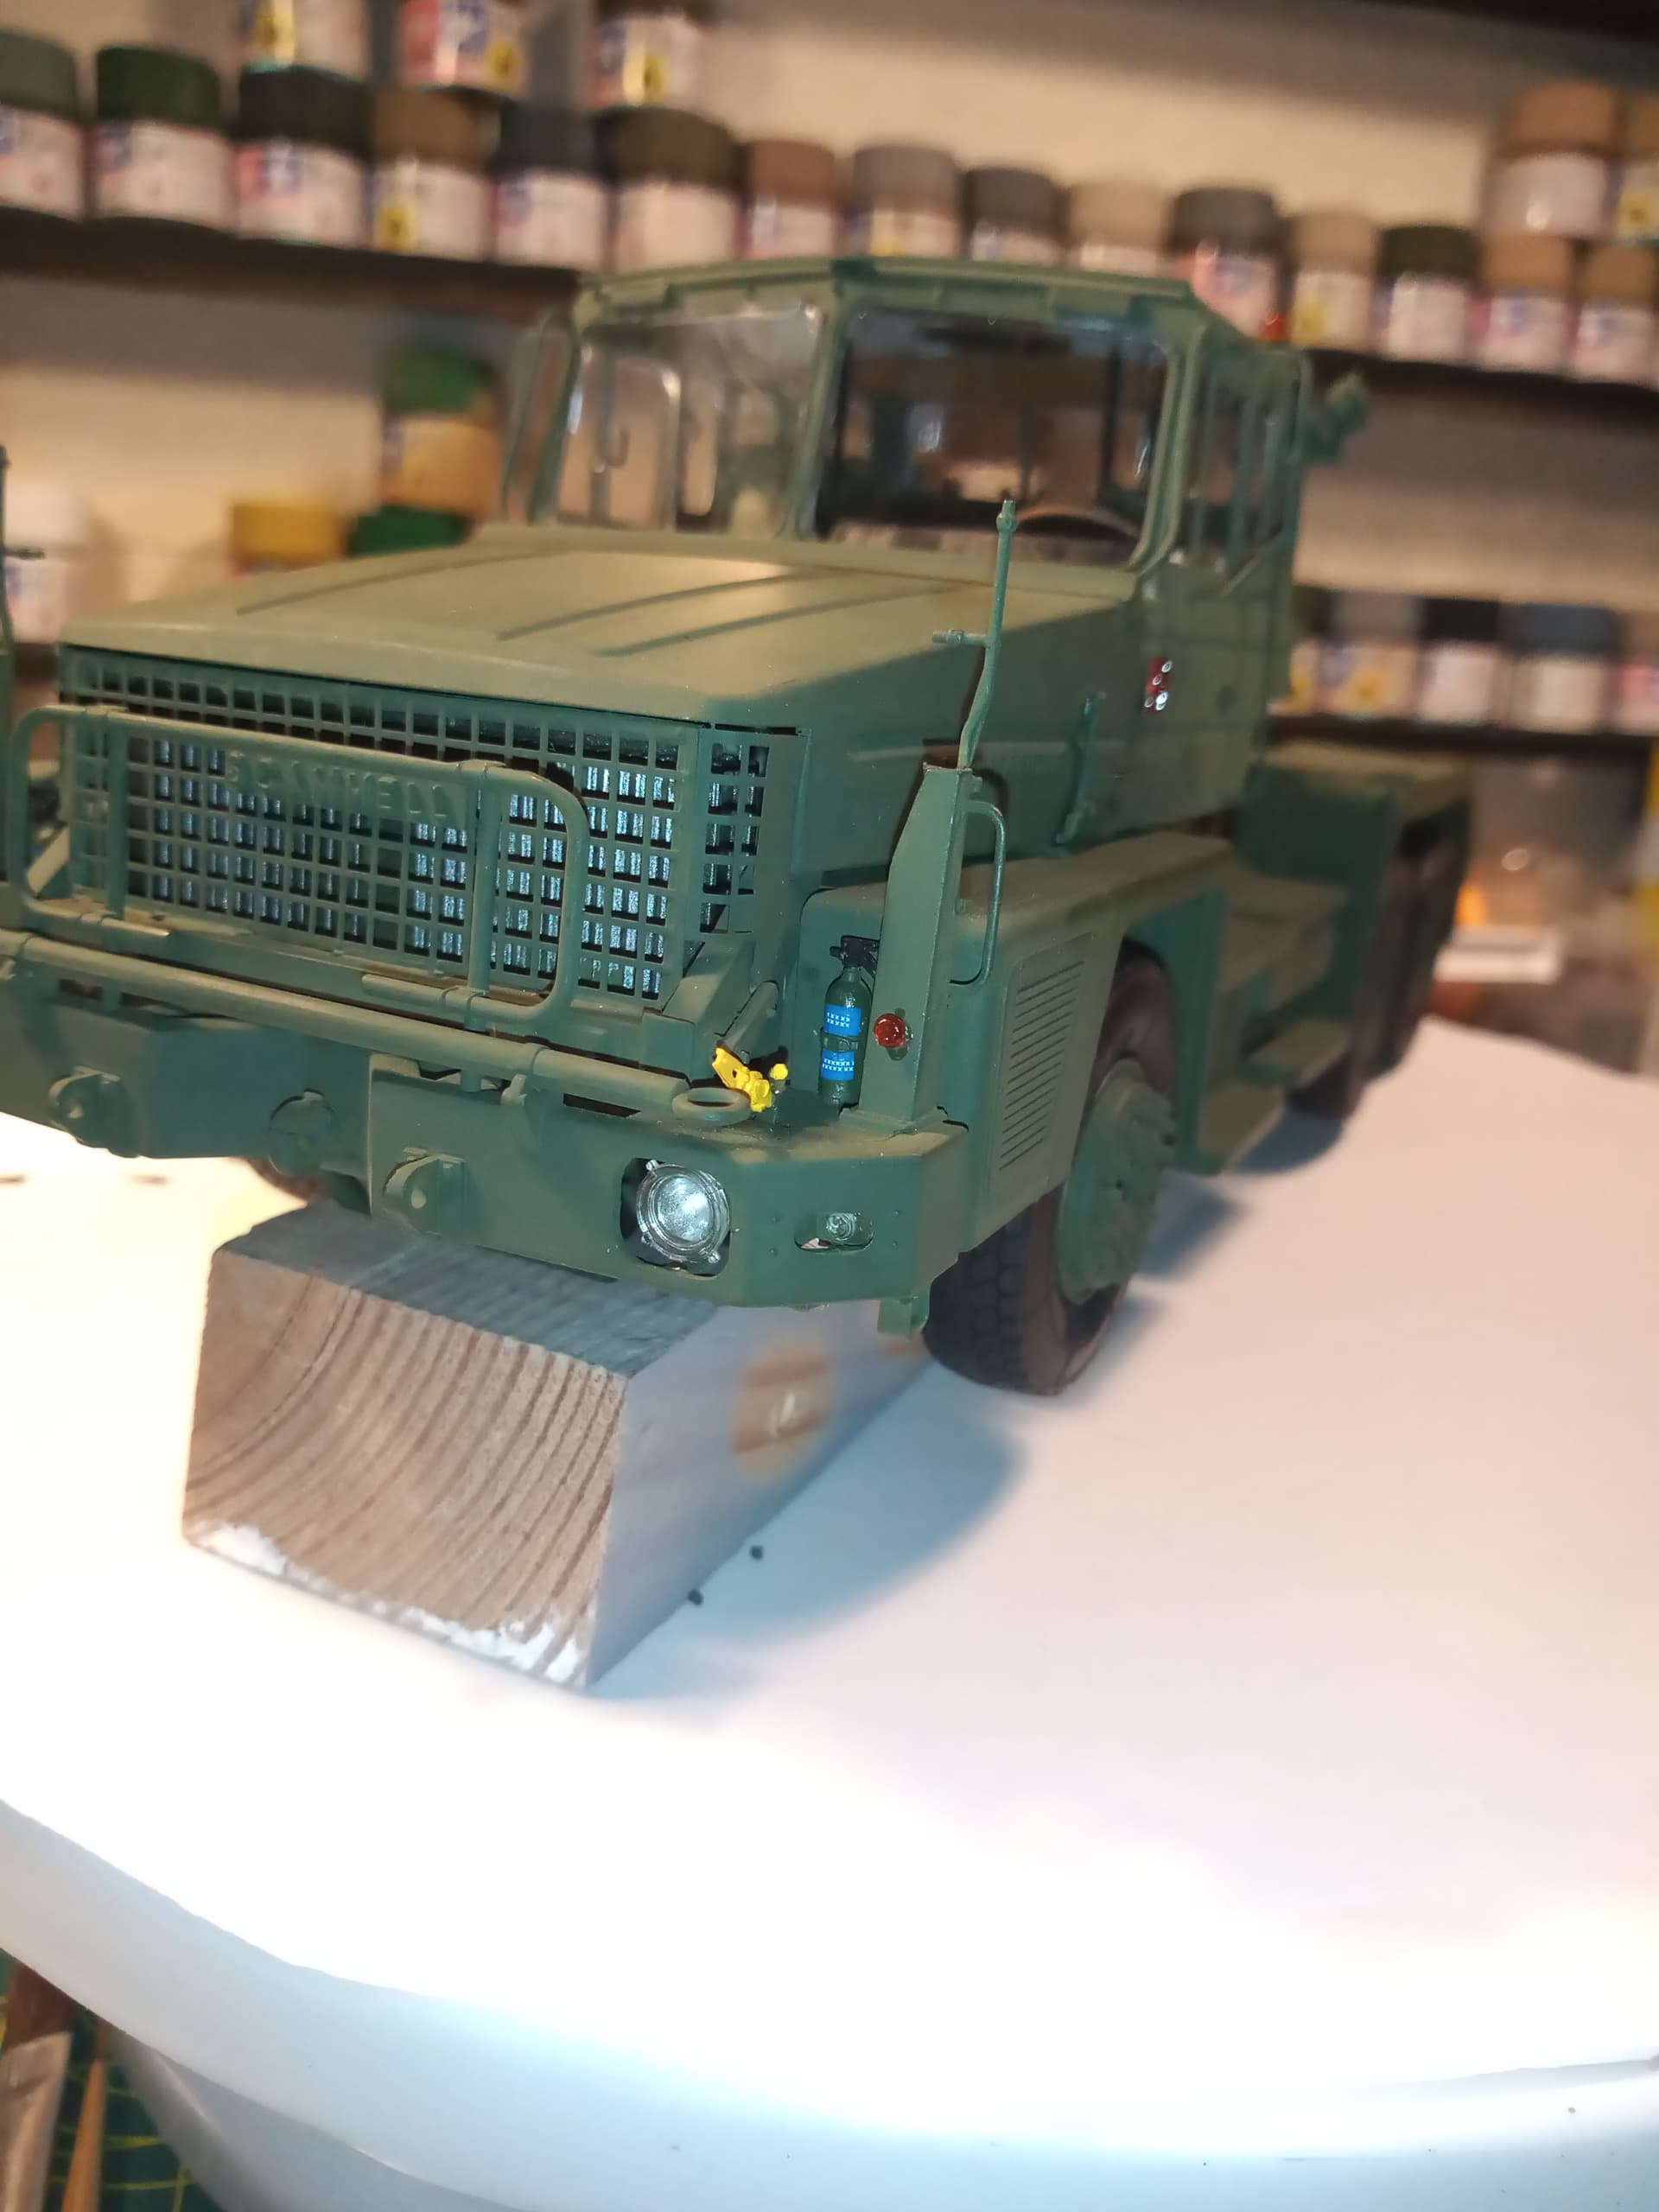
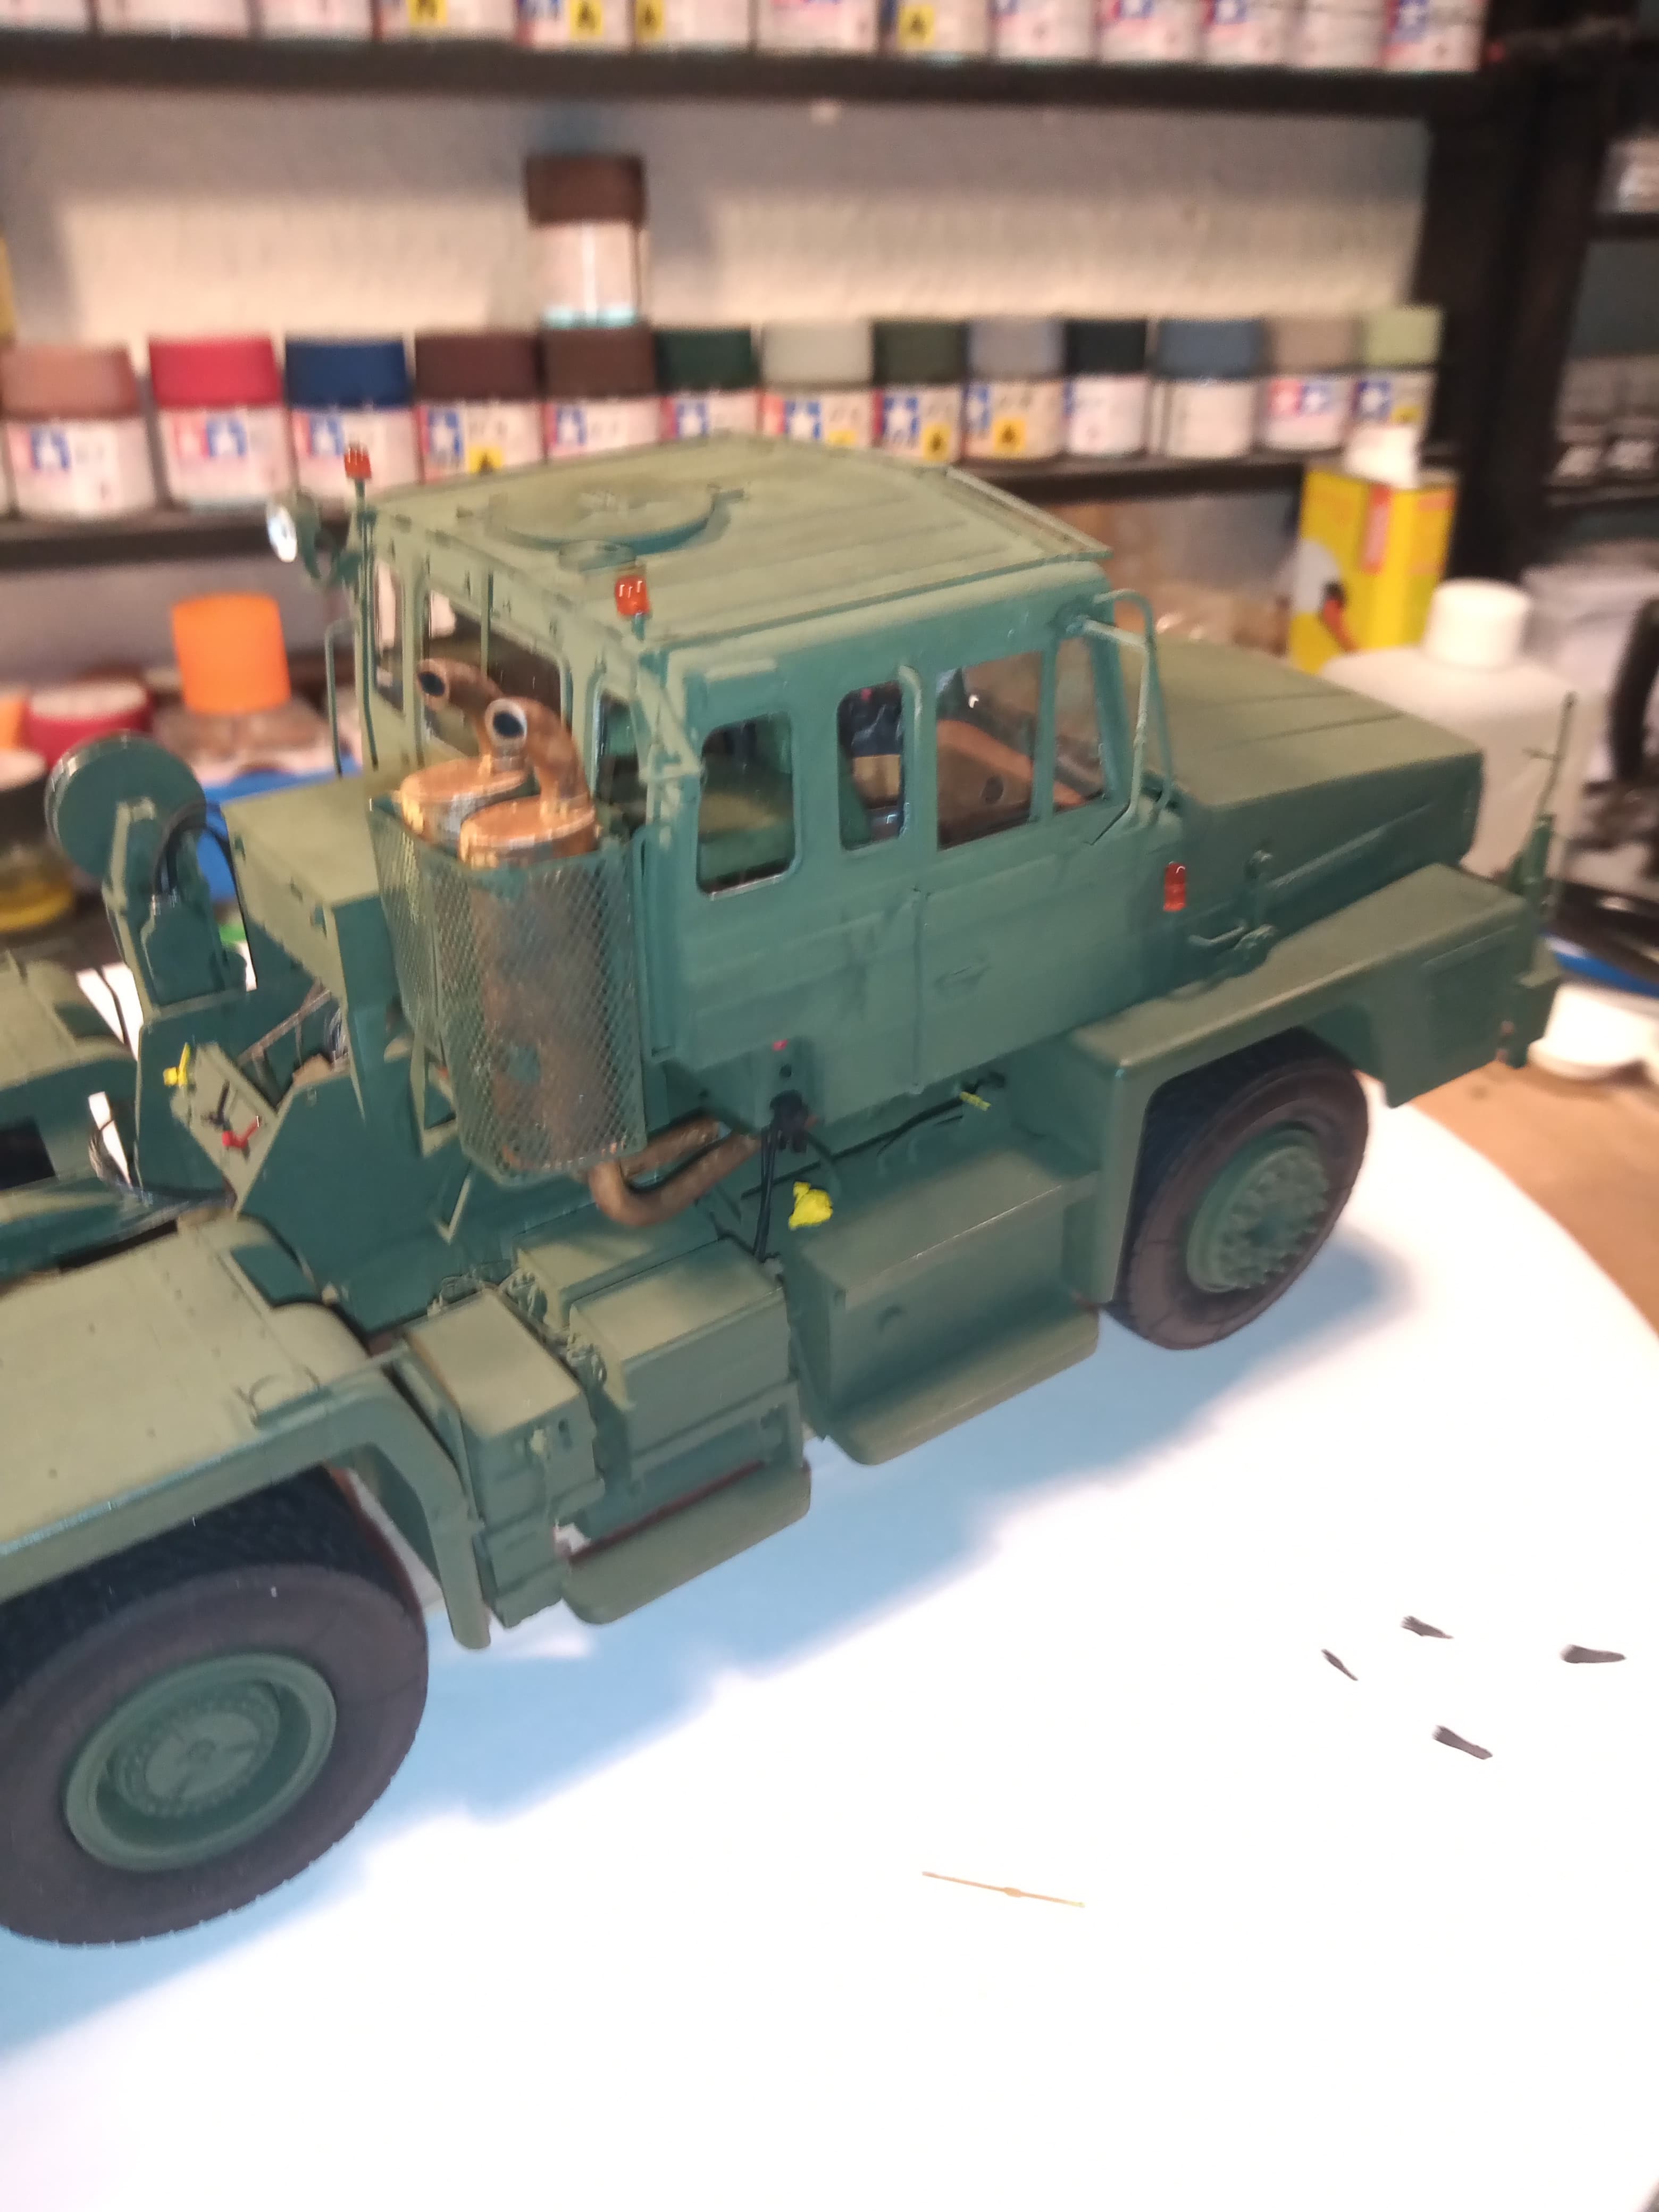
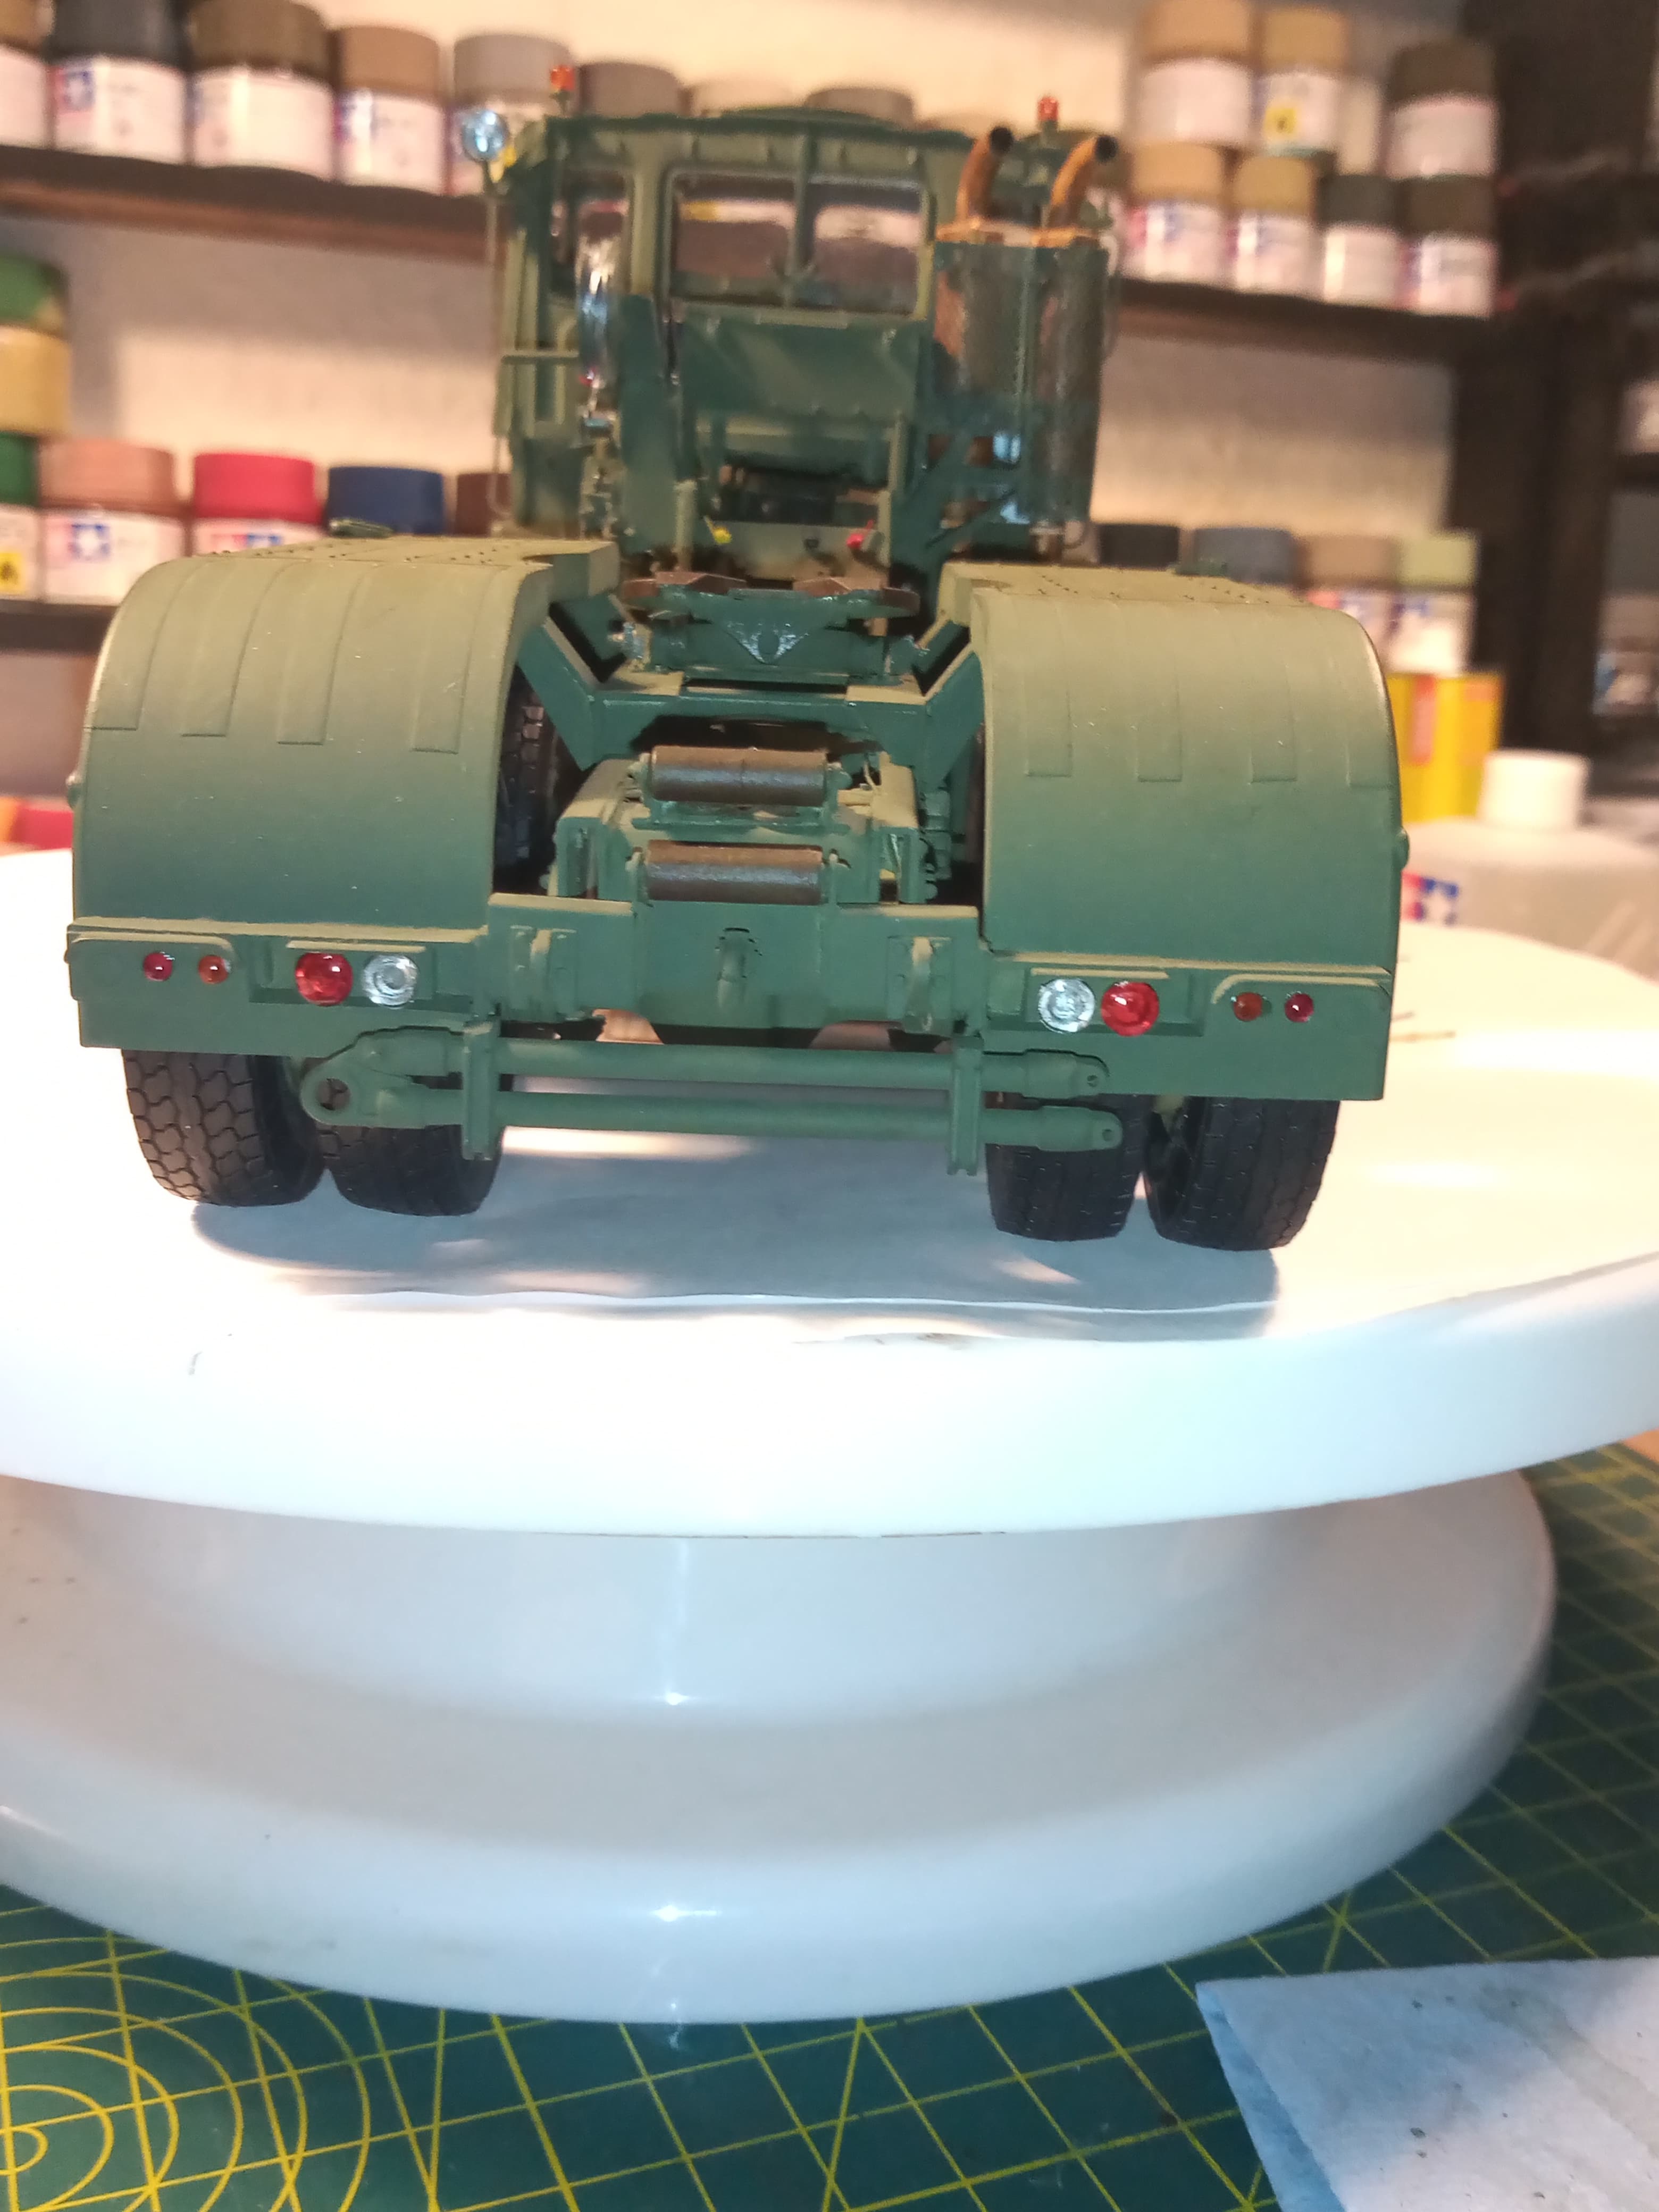
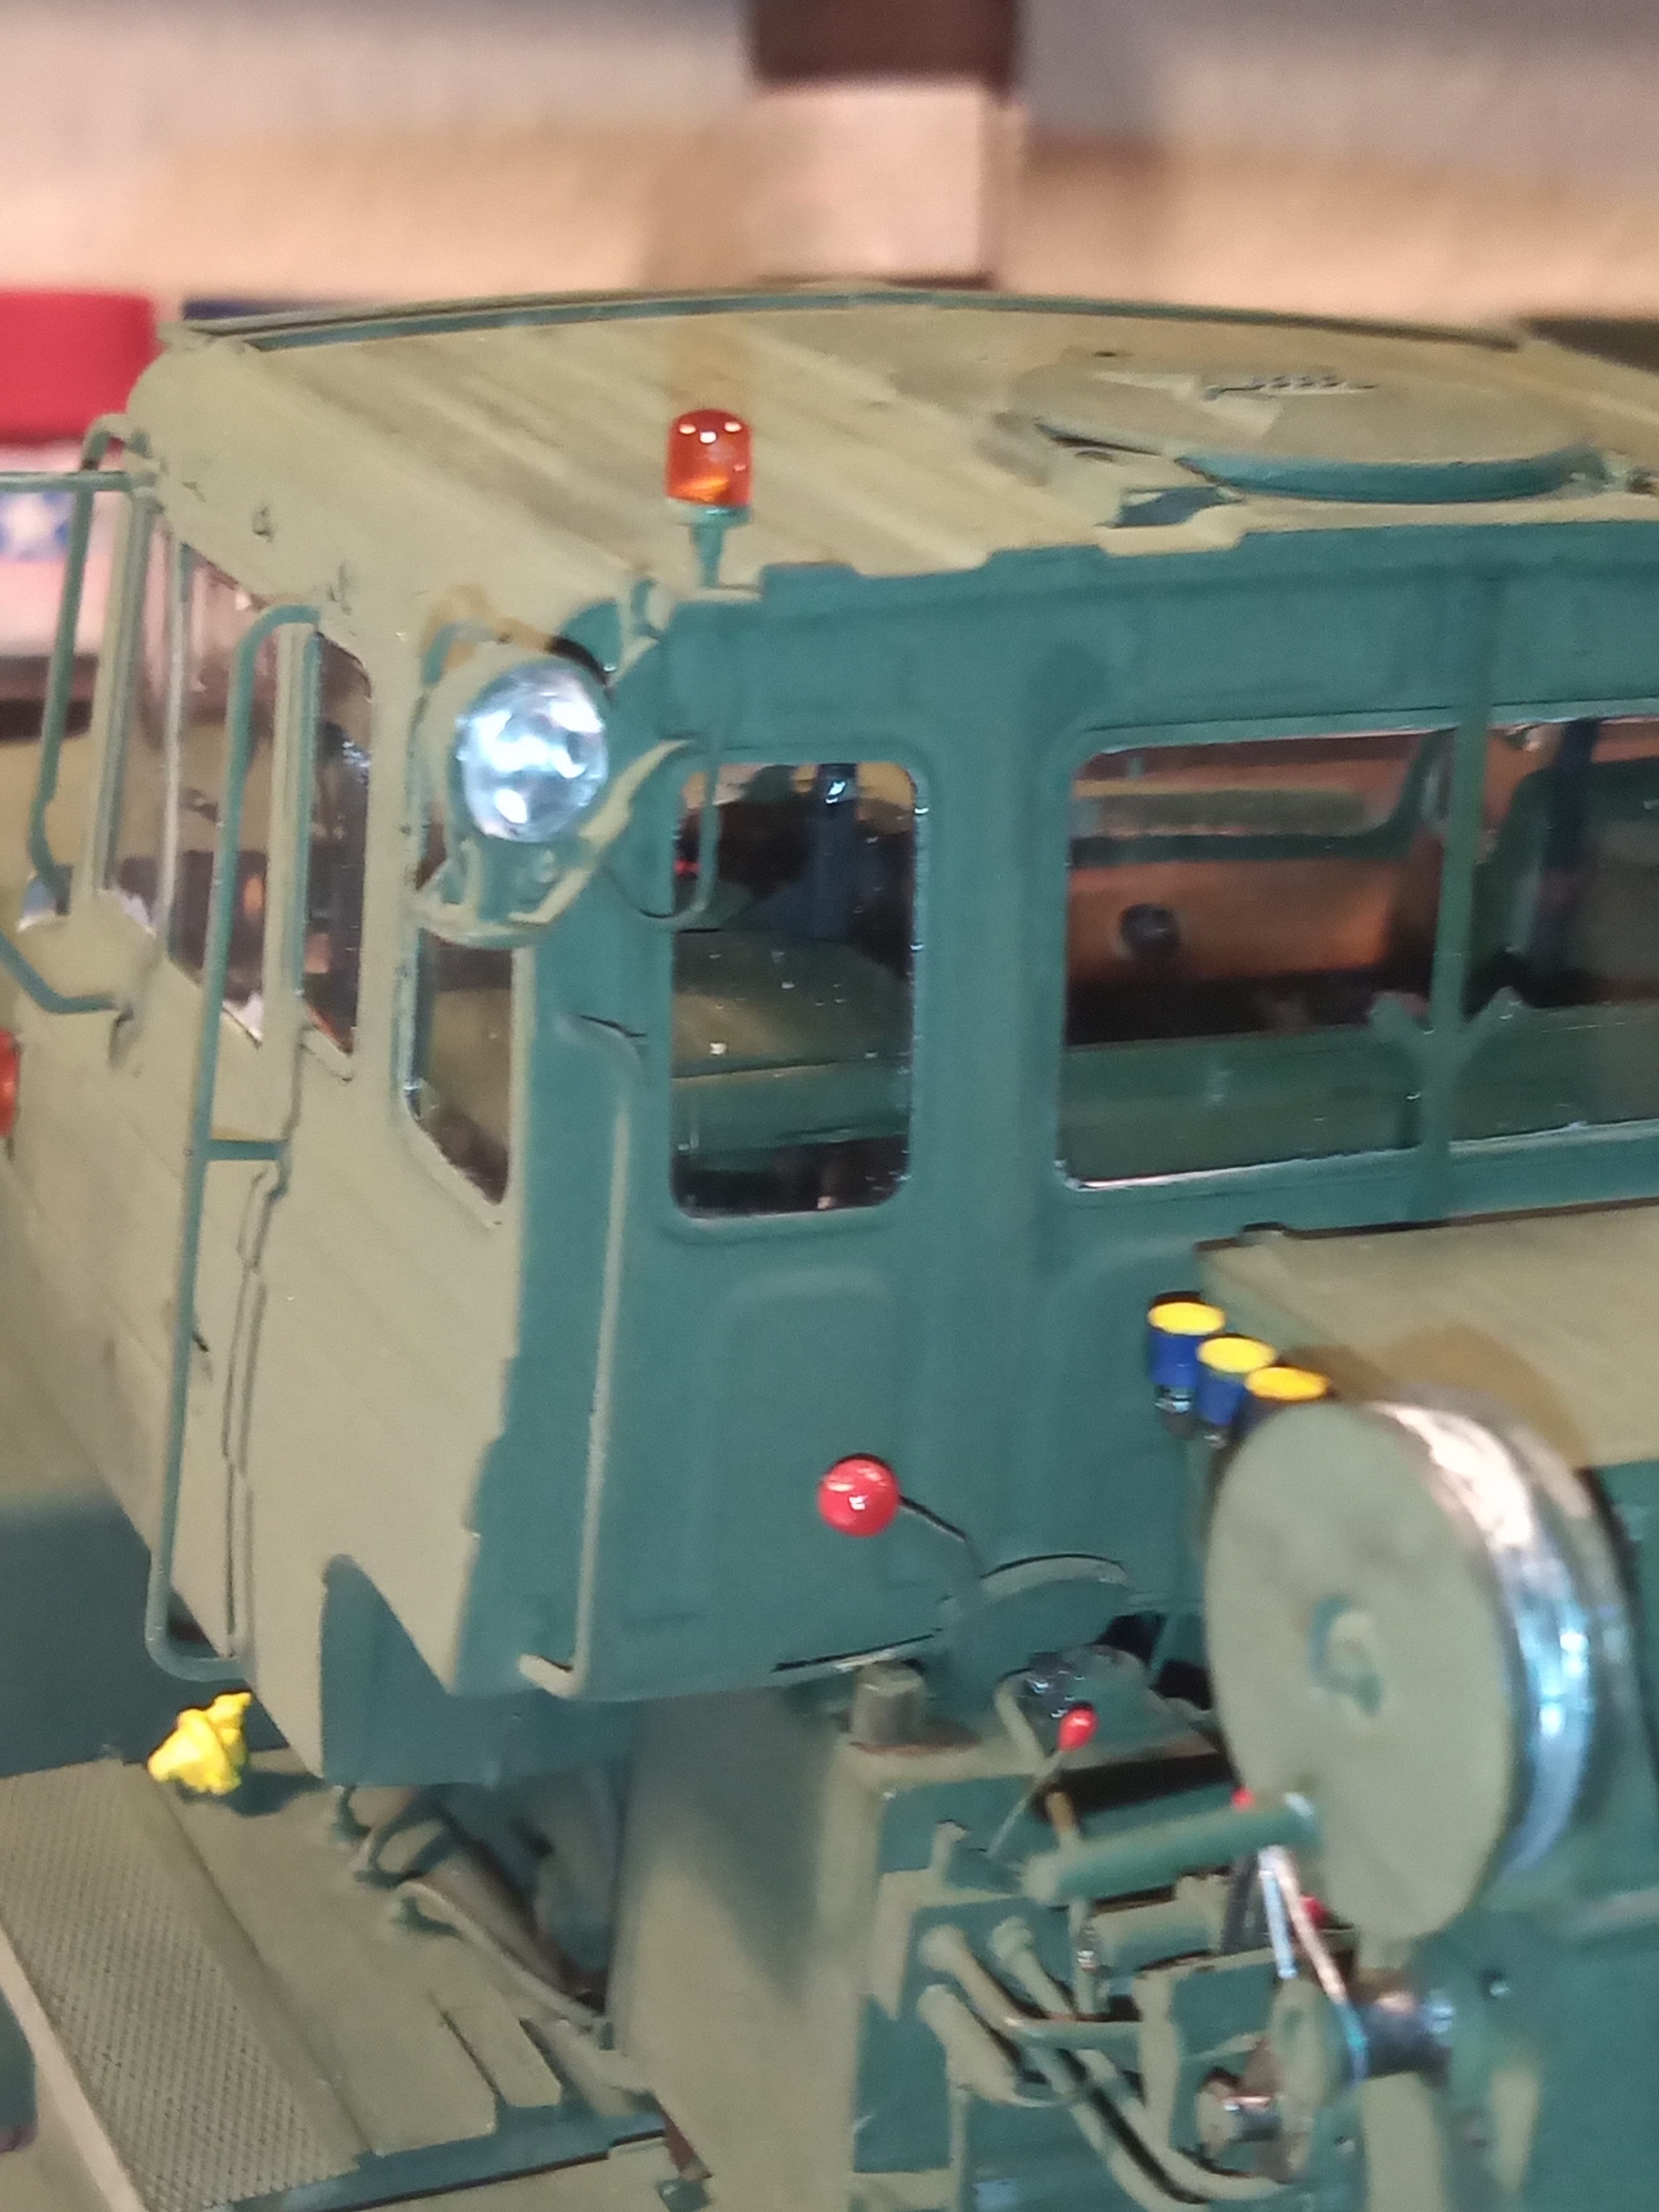
Still lots of detail painting to do, things like the headlight surround casing needs to be painted which will need to be quite delicately done, some cables and wiring and sympathetic wear and tear on things like the tow bars, tow hooks etc.
And of course all the reflectors on the trailer and cab …
11 Likes
Last pictures !
Pllot added. Cable added between headset and PRR radio.
Scratchbuilt sunglasses
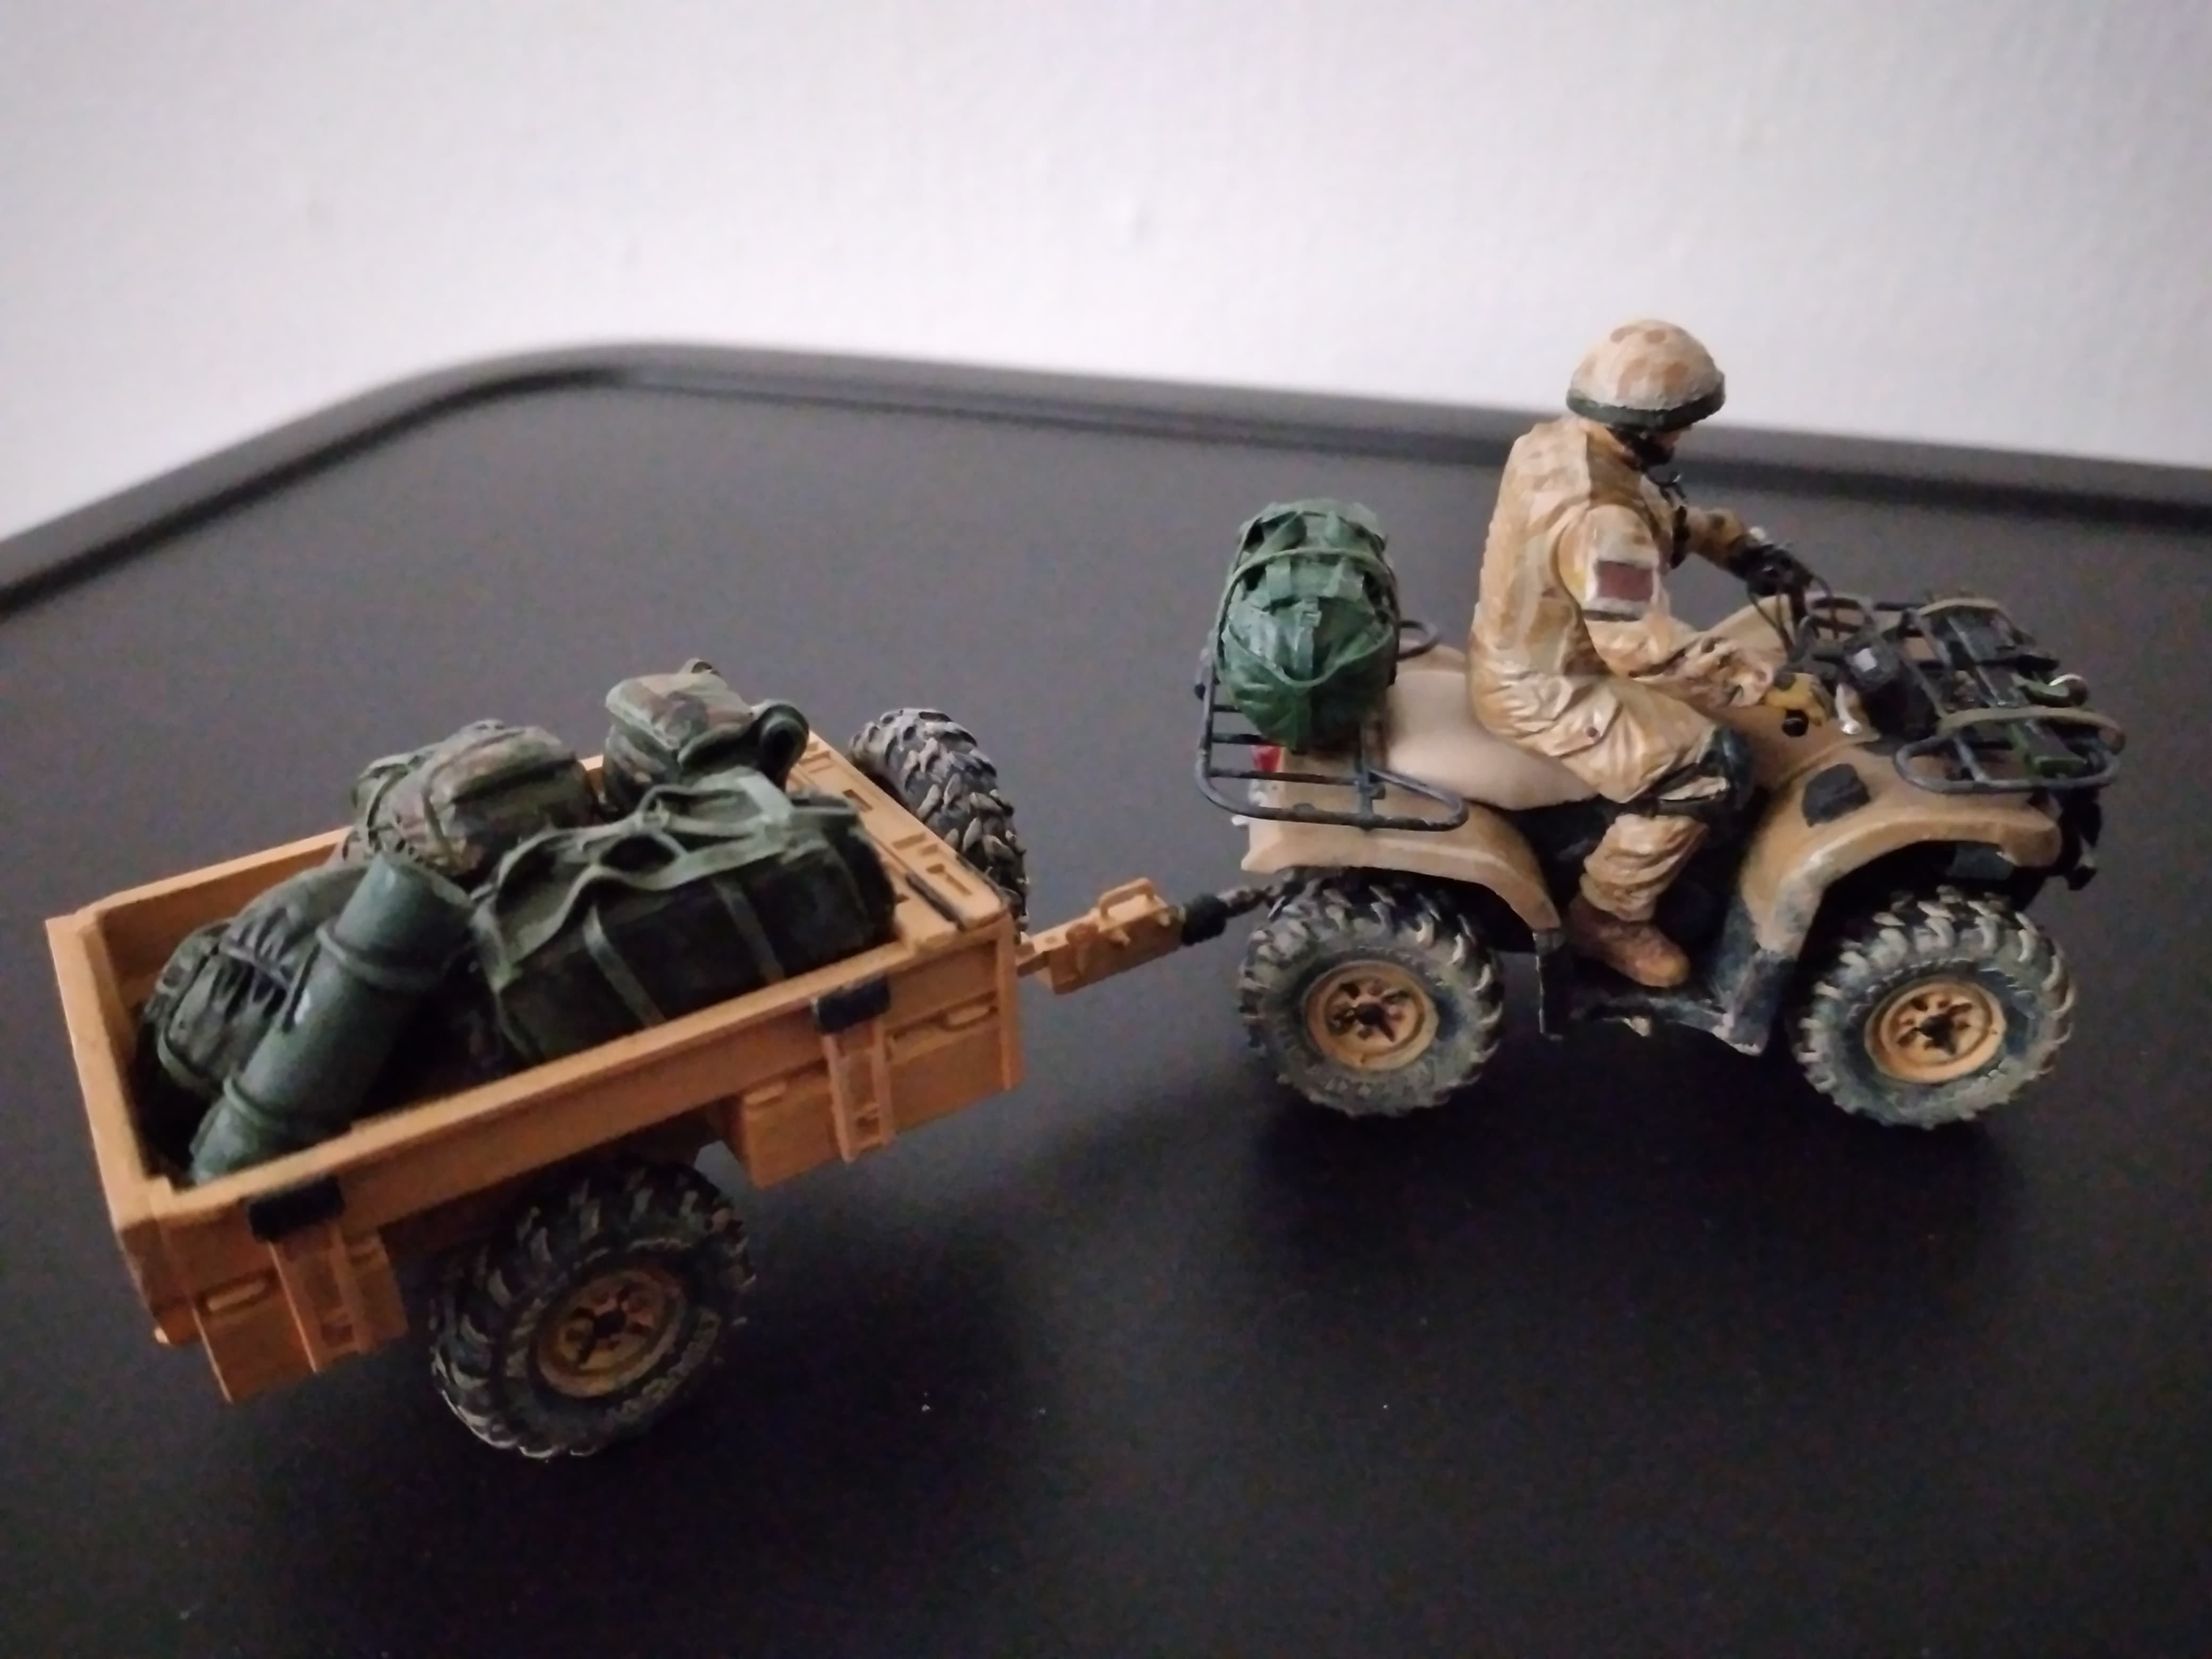
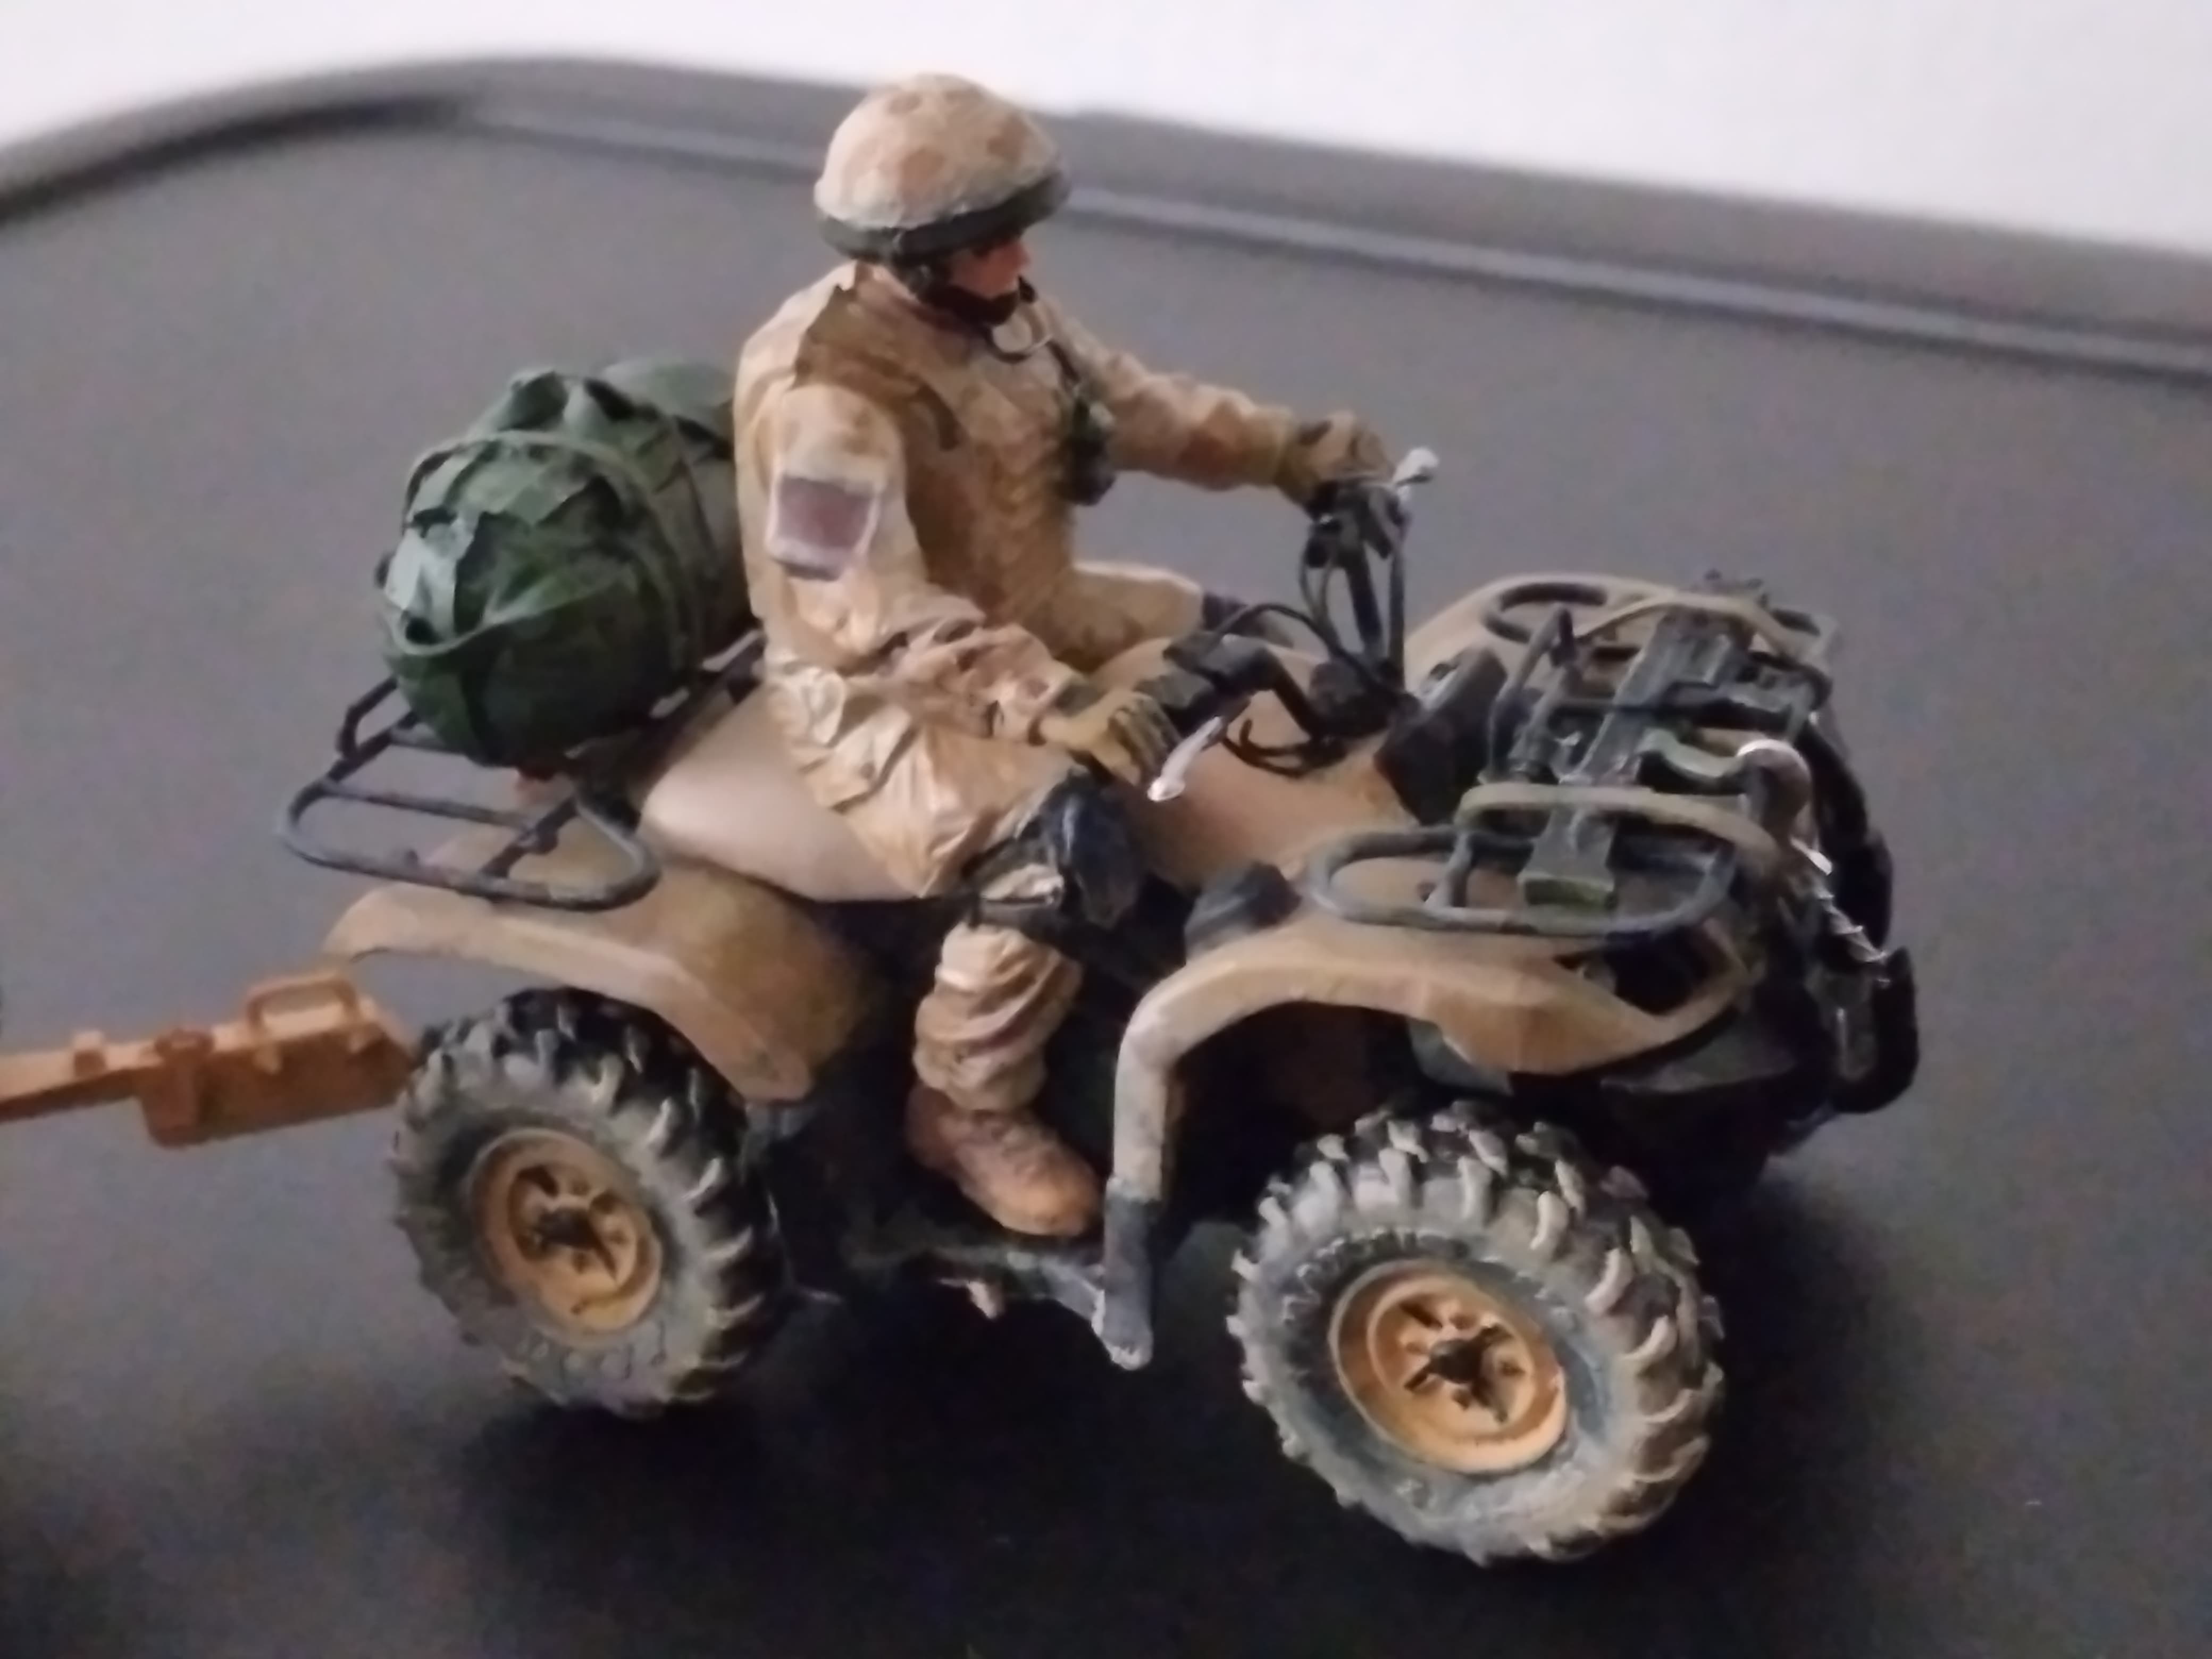
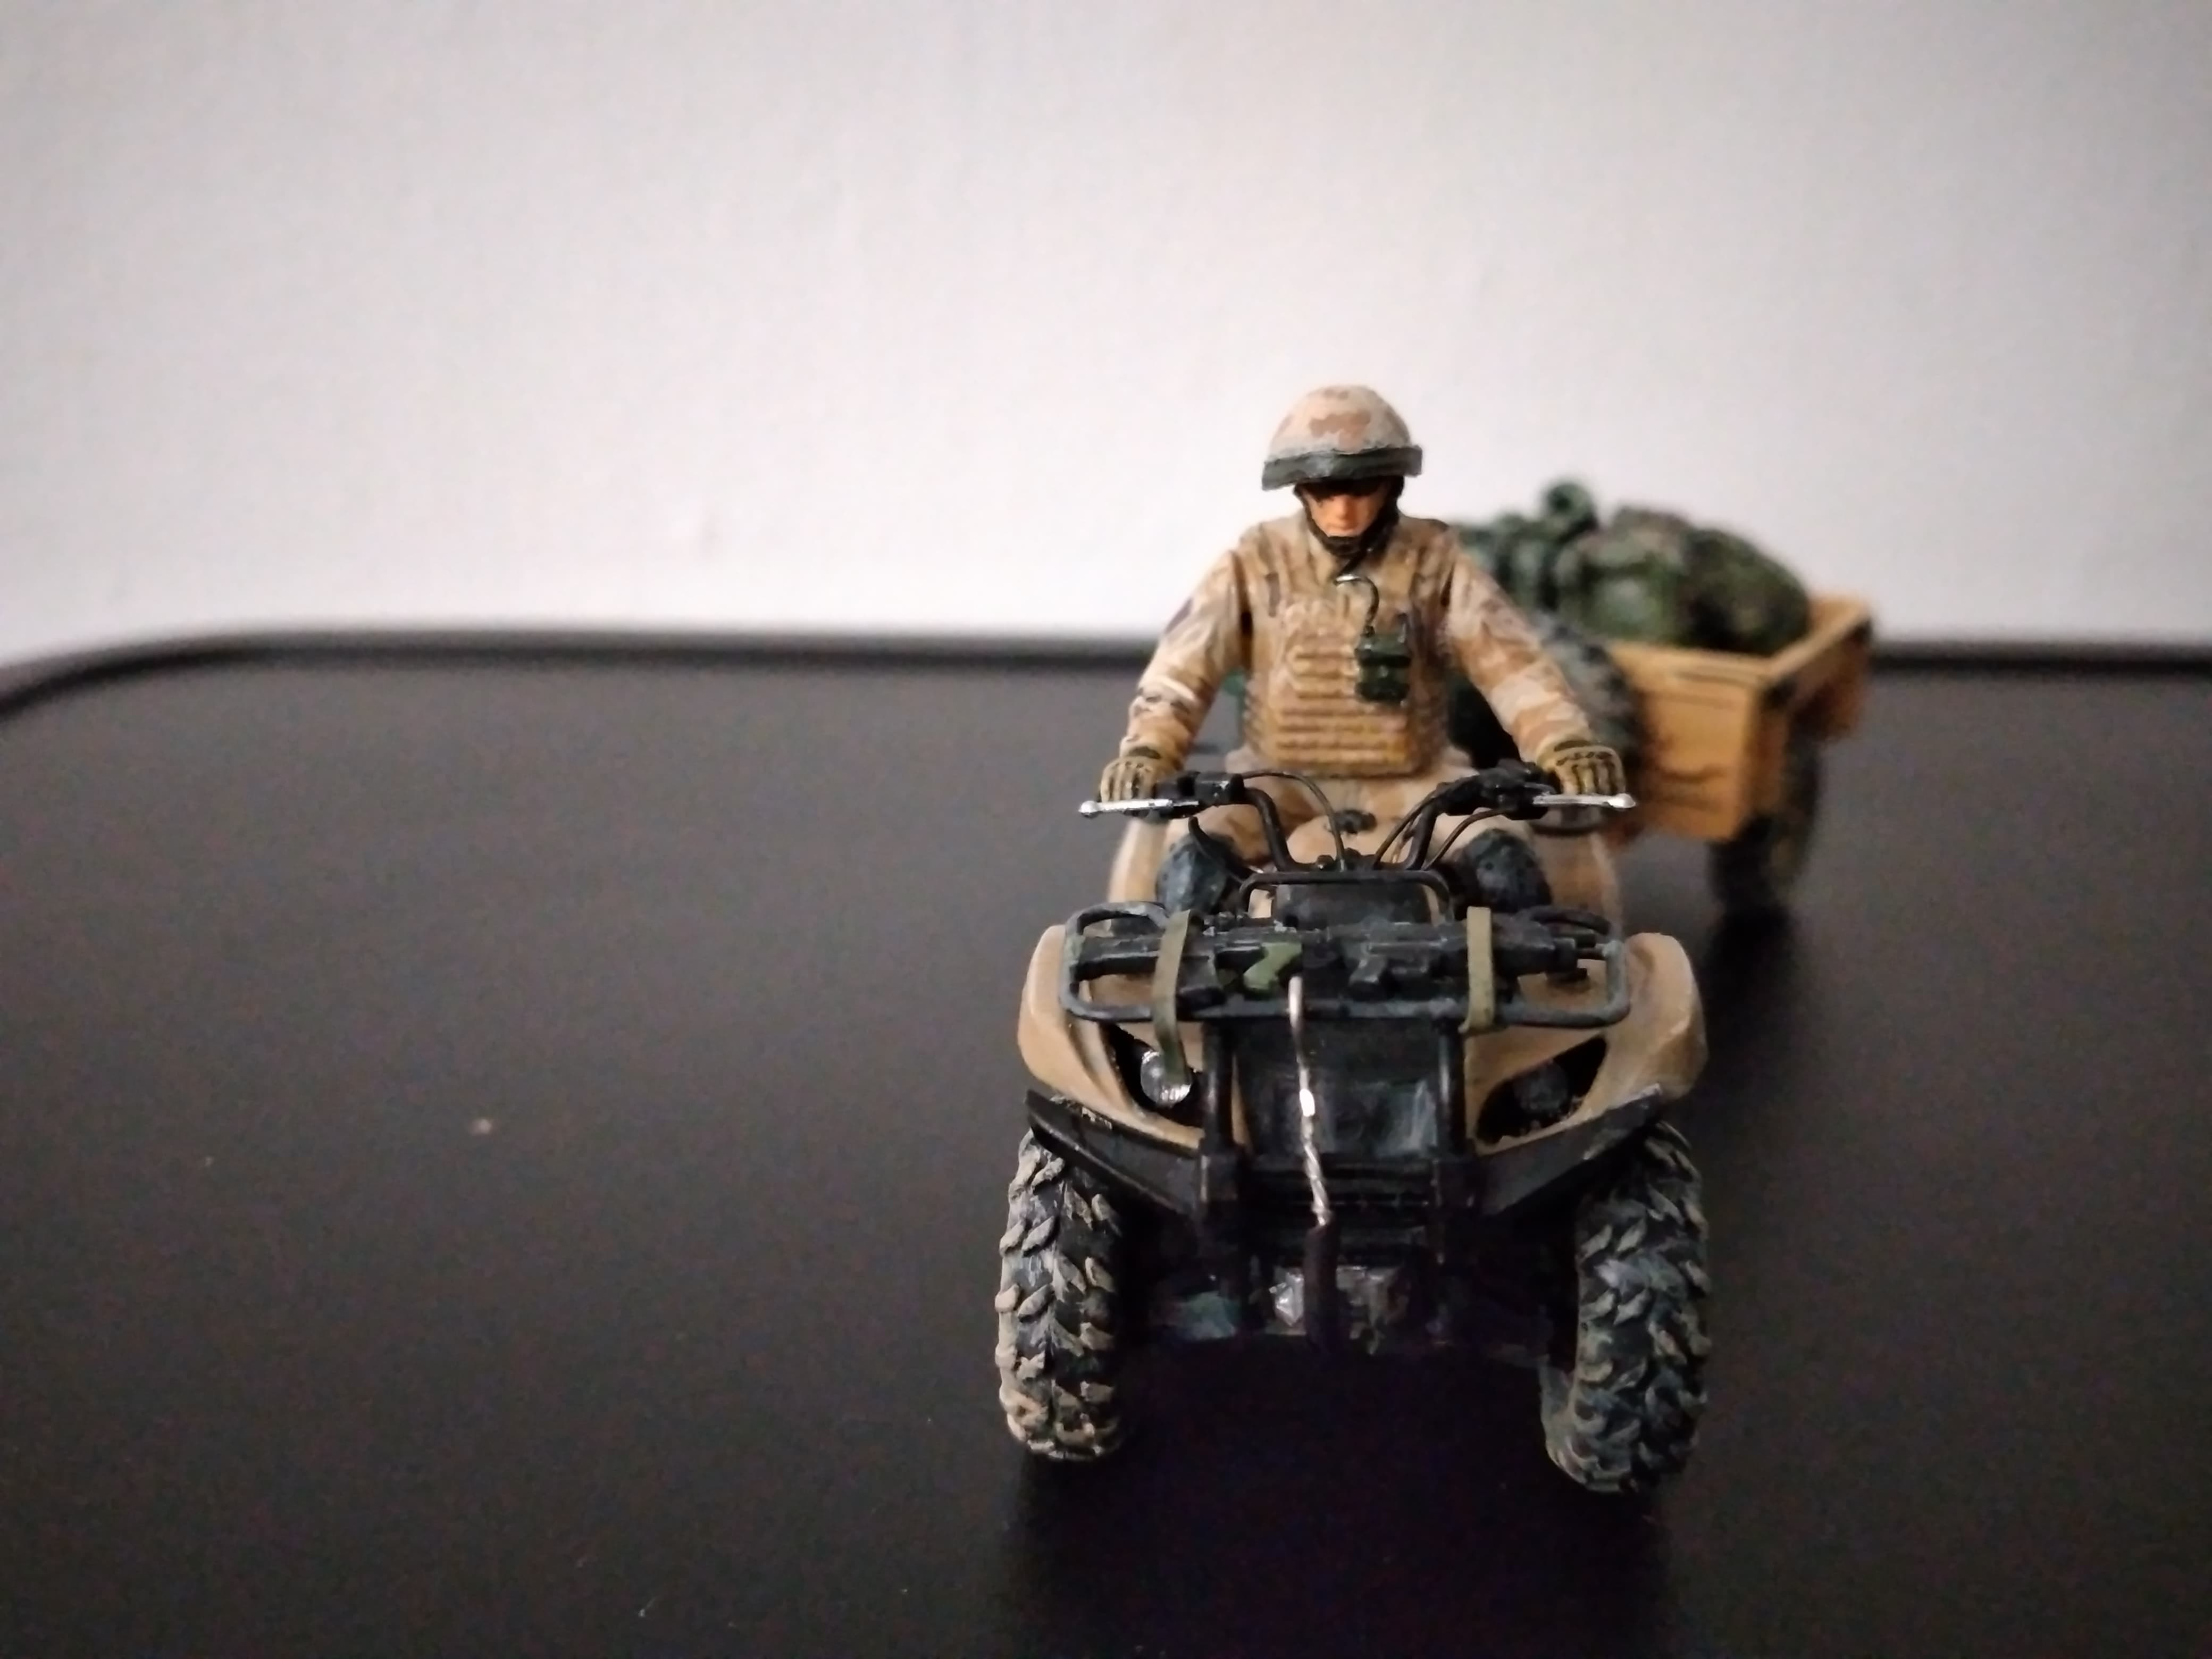
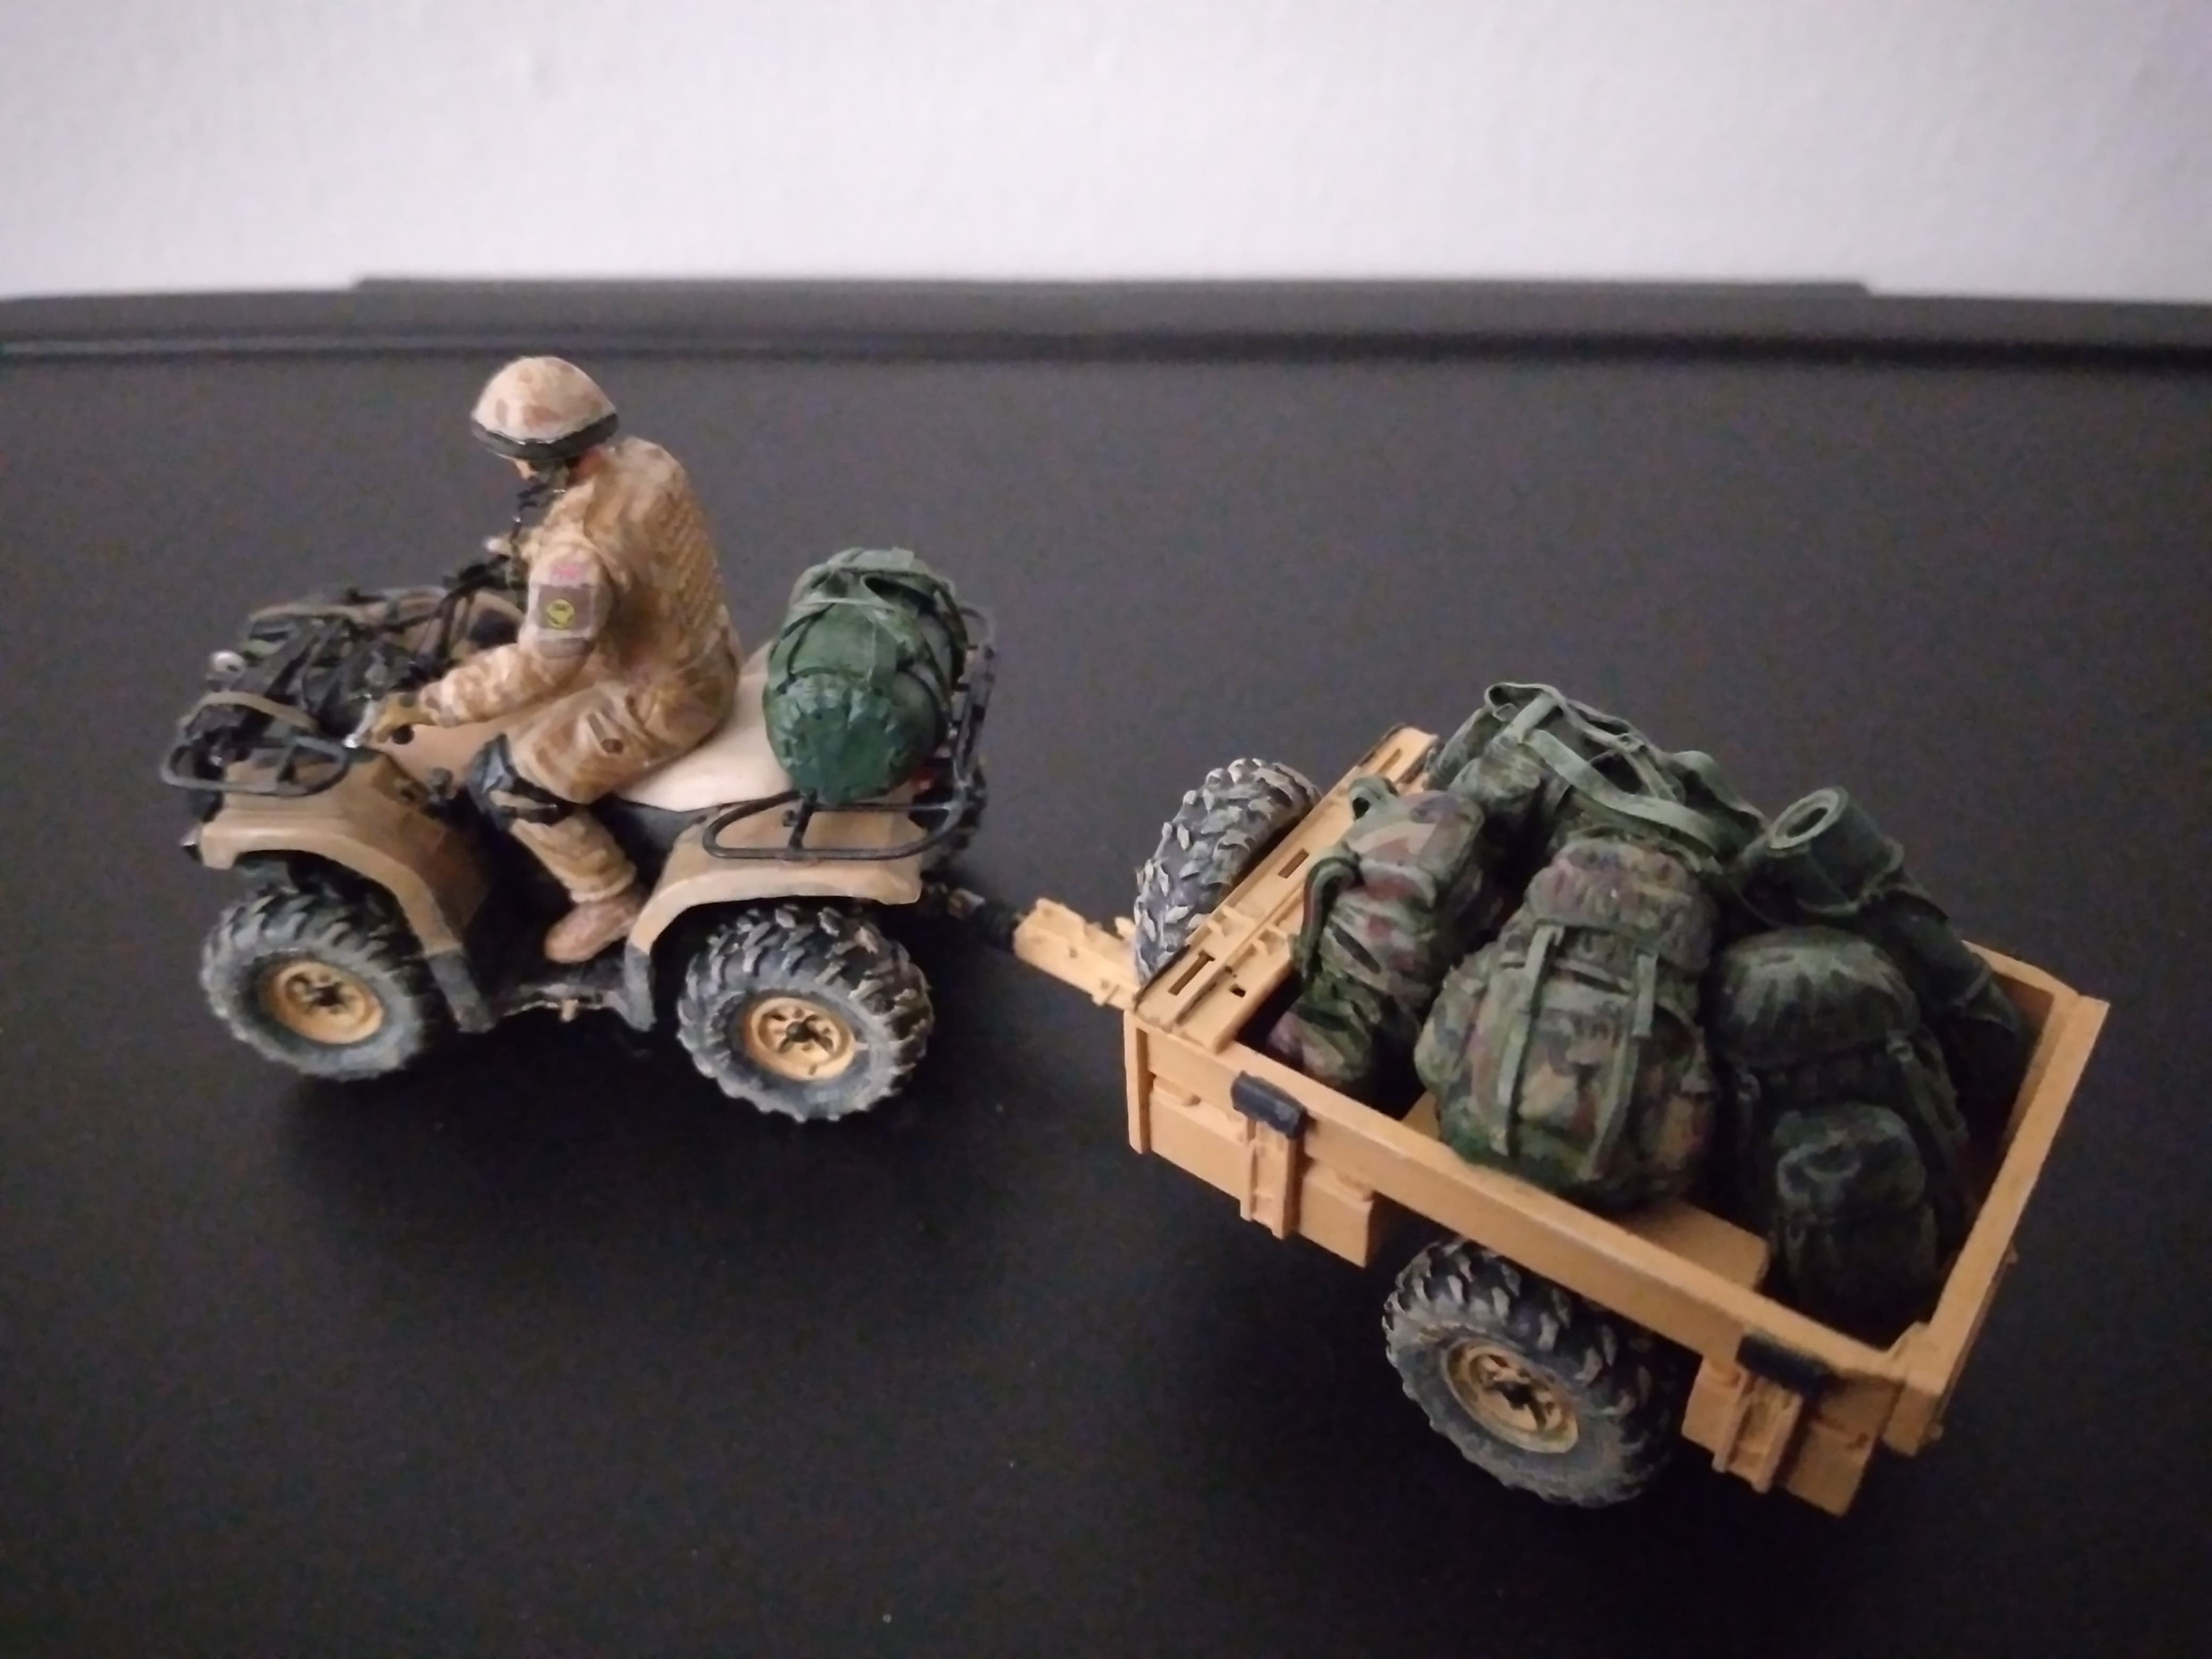

I call it done.
Thank you for this campaign proposal.
I wish to the other modellers to finish their kit.
8 Likes
Son, no2 use to be the fixing guru, on those things in Afghanistan, still recieving phone calls a year after leaving there.
2 Likes
Lovely build. I really like the headlight and working light lenses.
What’s the secret?
1 Like