Excellent job so far Stik. That kit looks very nice indeed. I hear ya about the high parts count ala Dragon, Miniart etc., it’s nice to just do a simple build once in a while.
1 Like
Thanks Richard. With a little more prior planning and less seat of the pants style modeling, this thing can really shine. But sometimes you don’t find some shortcomings until you’re committed and have already got parts glued together… ![]()
1 Like
Hi Carlos
how accurate are you looking to be ??
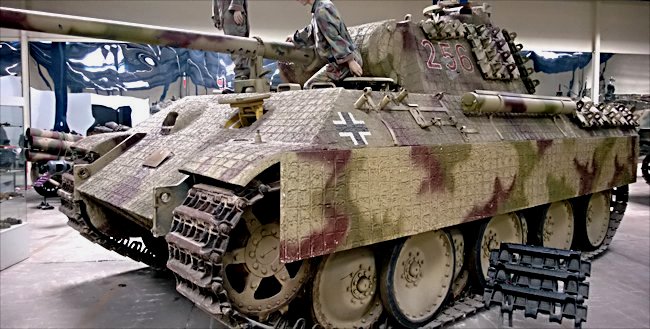
a few minor tweaks sees an accurate mid Feb mid March 44 MAN Ausf A going to I./Pz.Rgt GD in late March early April
cheers Neill
2 Likes
I’m not looking for a deep dive into accuracy, but I’ll consider an advisement and work from there. Please do tell what the minor tweaks are. Aside from the periscopes and engine deck grills I think I’ve spent all the money on AM that I will for this one. But if it’s something that I can do with scratch work, I just might be tempted enough…
2 Likes
Carlo
I remember your M-47 from the Italeri kit. It was outstanding, especially the engine! You are doing so again. As you know I like these kits as well. If you don’t mind, I’d like to recommend another; the Italeri 1/35 PzKpfw IV F1/F2/G that has been remolded that has nothing is common with the Italeri original. It is an excellent kit . . .
Bill
1 Like
Thanks Bill. I have built a few of the original Italeri panzer IVs back in the 80’s and early 90’s. I really liked those kits. I’d like to do one more, a short barreled F1. But I don’t care for the current price of those kits, MRC jacks up the prices of the lines they carry way too much. If I ever find one for a bargain price, I’ll pick it up.
2 Likes
Carlos,
This Italeri kit is completely remastered. It has nothing to do with the old 1970s era kit. I strongly recommend it.
Bill
2 Likes
Hi Carlos
yeah it is just a few scratch items;
at the rear of the turret roof the blank flange over the hole drilled for the Nahve;
MAN did not install the Navhe till late March
at the bottom of the hull rear plate there are four holes drilled to accept the DEMAG tow coupling
no MAN Panther got the tow coupling so you just see the 4 bolt heads
the 3rd as to MAN no bar or angle iron on the tube;
MAN did not install the bar till their Ausf G’s;
i have no idea how to do photos on the site yet
hopefully someone knows and can post
these are easy tweaks but take it from a generic model to an accurate MAN Panther between mid Feb and mid March 44 which fits nicely with the GD shipments;
cheers Neill
4 Likes
Ok, those sound easy enough, but I definitely need some reference drawings or photos, as I’m in the dark by your description.
First off, what is the nahve? The S-Mine launcher? And where is it located on the turret top?

The Demag towing coupling, I think that I know what that is… on the circular plate centered beneath the exhaust?

Bar or angle iron on a tube? The rod/antenna tube on the left side of the upper hull?
Posting photos is exceptionally easy on this site. Either copy and paste them onto your post, or upload them from your device’s photo library by clicking on the photo icon and filling the link to do so.
4 Likes
Hi Carlos
yeah a picture is worth a thousand words
thanks for the pointers
i am hopeless with computers
let me try some your tips and see where i get
cheers Neill
2 Likes
No worries Neill. I’m no computer guru myself. I found some line drawings of MAN production Panther As from that time period. But it looks like there were multiple configurations on the rear plate.
1 Like
Hi Carlos;
no idea if i am doing this right
below hopefully is a photo with the blank flange in place in the rear starboard corner of the turret roof;

this is fitted from early mid Feb to mid March 44 at MAN;
As to the hull rear plate and the bolts

the 4 bolts at the bottom of the hull rear plate;
these were drilled and then bolted to accept the DEMAG tow coupling which is the same as the BergePanthers;
the one you have the is the intergrated engine access hatch tow coupling which is standard for very late Ausf A’s and Ausf G’s;
hopefully this works and they are both relatively easy to scratch but will make it an authentic MAN assembled Panther for the timeframe
and again no bar on the tube;
MAN does not do this till the Ausf G production
cheers Neill
4 Likes
Carlos
thank you and can i just say that you were right and that this is some of the easiest photo posting i have ever come across
normally i have to get then in a folder then go through Imgur then paste codes then OMG;
i wish the other sites i post on had this feature;
cheers again Neill
2 Likes

Neill, thank you! I know exactly where to go and what to do now!
4 Likes
Well, my get up and go has finally returned. I got back to work on this last night and today…
I added the brass PE screens to the engine deck and cover on the turret top for where a S-mine launcher was supposed to go on early 1944 MAN production Panthers
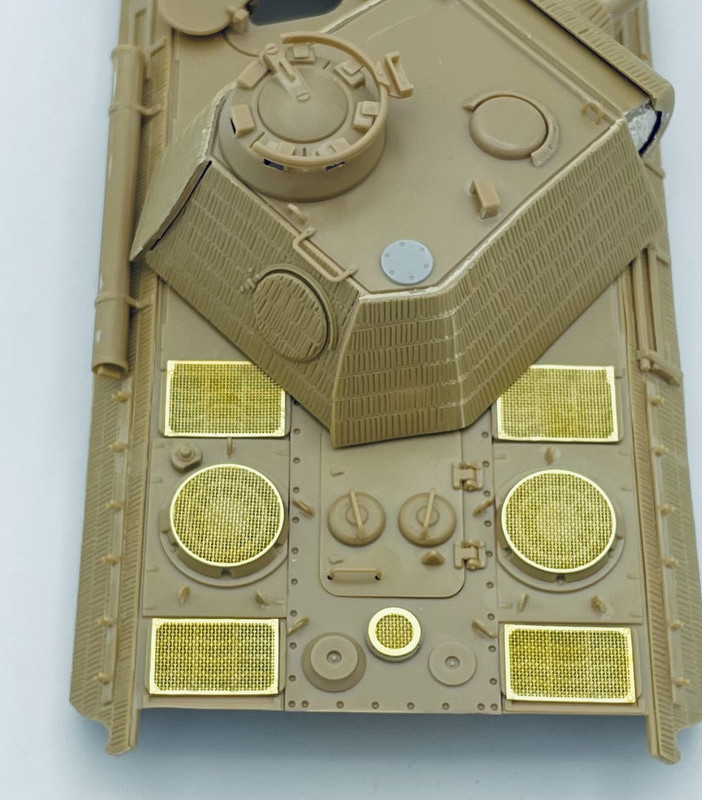
then I added most of the little fiddly bits around the driver and bow gunners hatches, so I could paint those areas before I install the periscopes that I bought.

and lastly I removed the reinforcement bar on the cleaning rod tube that was not present on early 1944 MAN production Panthers

I’ll have more to post in a few days…
13 Likes
Think personally you are doing marvellous on this Panther.Nice neat build indeed.
Well done.
Richard
1 Like
Glad you got it moving again.
1 Like
Nice to see the mojo back Carlos!
That’s looking great so far Carlos
1 Like
Looks like excellent progress Carlos!
1 Like