Hangar Queen XIII

Nice to see some action going on here!

Phil, I go with the big ones first, and if there’s overlap of stencils, I skip the stencil. I do this now following my F4-B build that was wholly enjoyable with one exception, death by stencils!

Rougepilot, keep plugging away, you’re making progress, you’ll get there!

1 Like

I’ve varnished the parts and have begun the process of reattaching the top wing. One small problem – two of the struts (one on each side) aren’t quite at the right angle. What options are there to fixing this? I guess one way is of making a controlled snap and then gluing in both sides, but that is hard with the fragile top wing that took some time to attach in the first place.

2 Likes

Great progress guys, nice seeing all these birds being slowly, but steady released from hangars.

I’m calling my Corsair build done. Made some more weathering than usual, but I have to stop or I’ll mess it up (already had to remove one or two attempts to make some oil dirt, spits and stuff).

So here are the final pics:

6 Likes

I love the Corsair. I need to build one. Yours looks great!

1 Like

Hi Everyone,

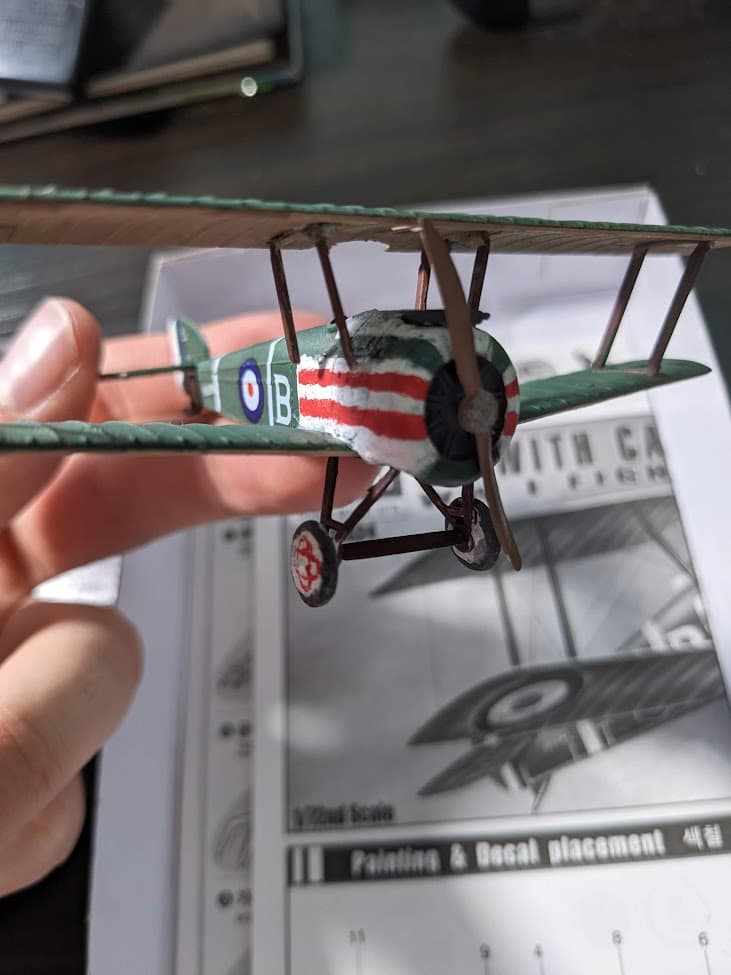
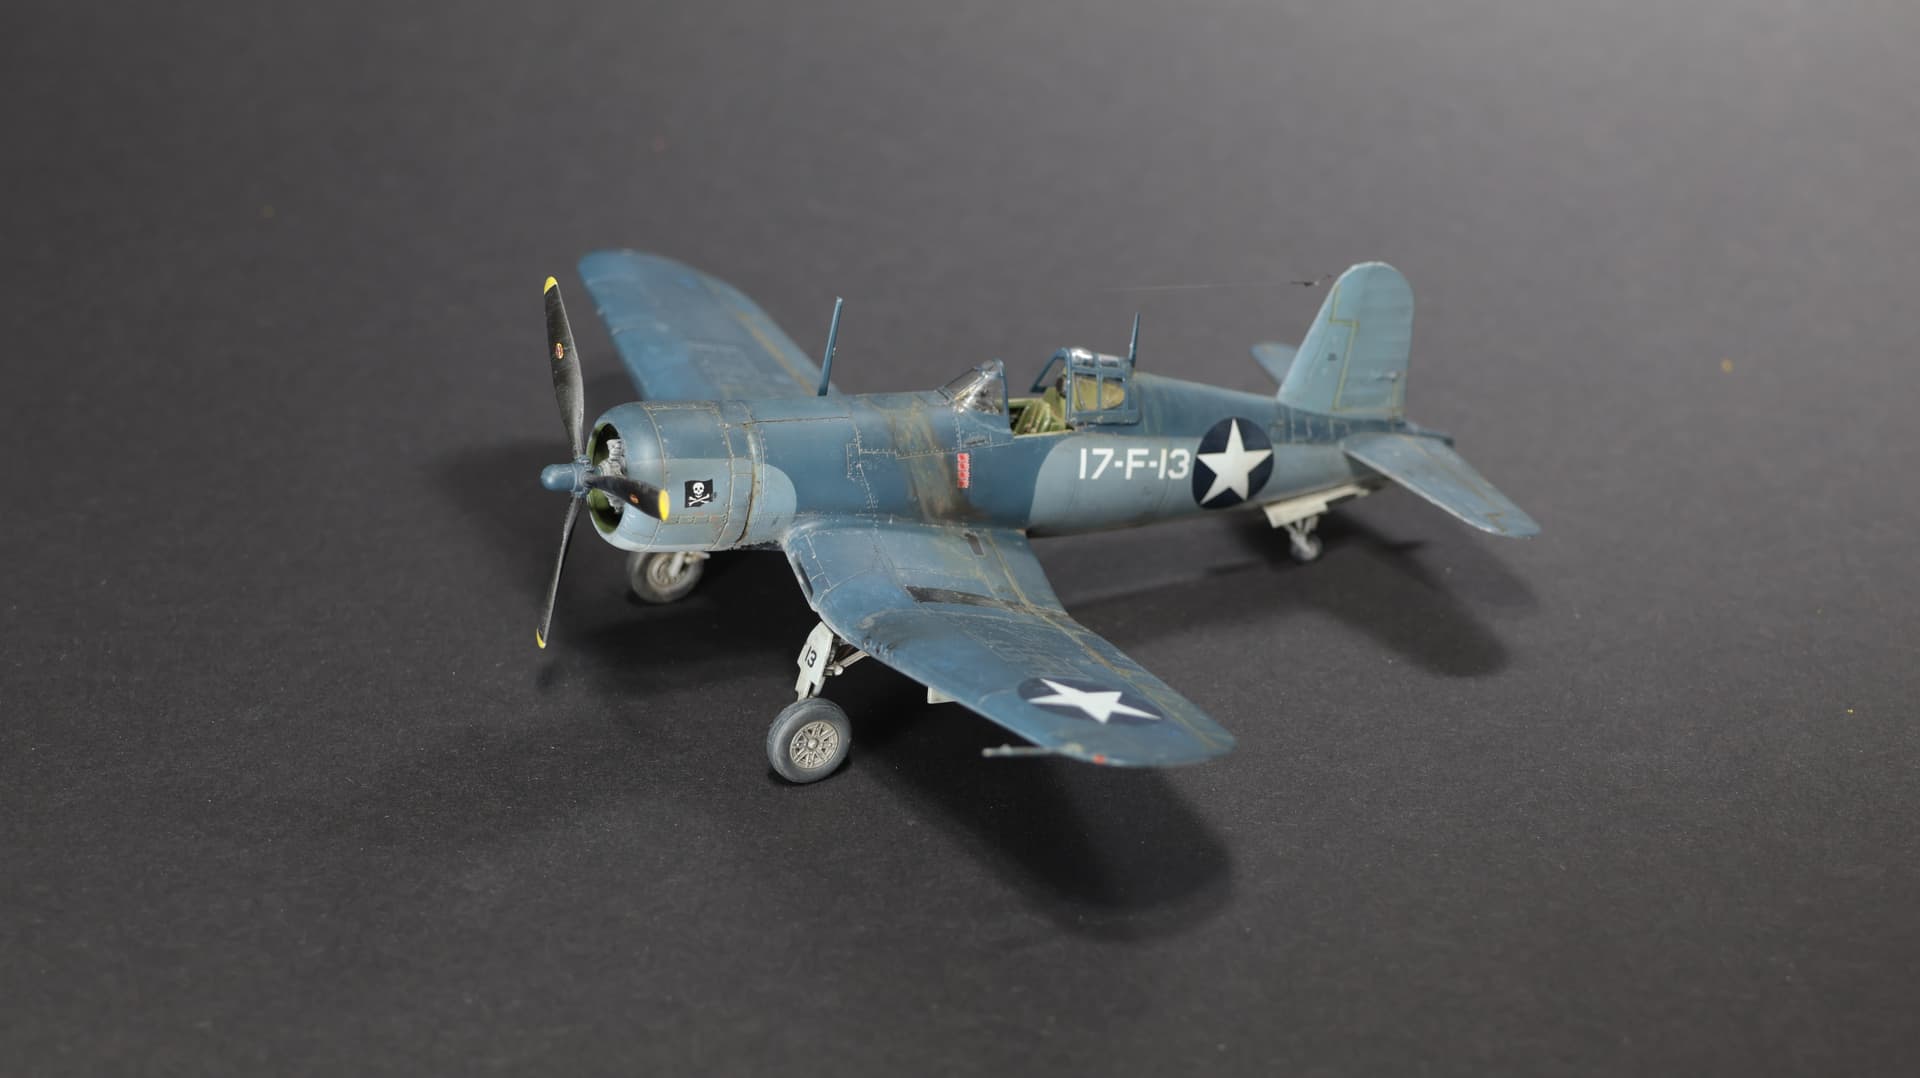
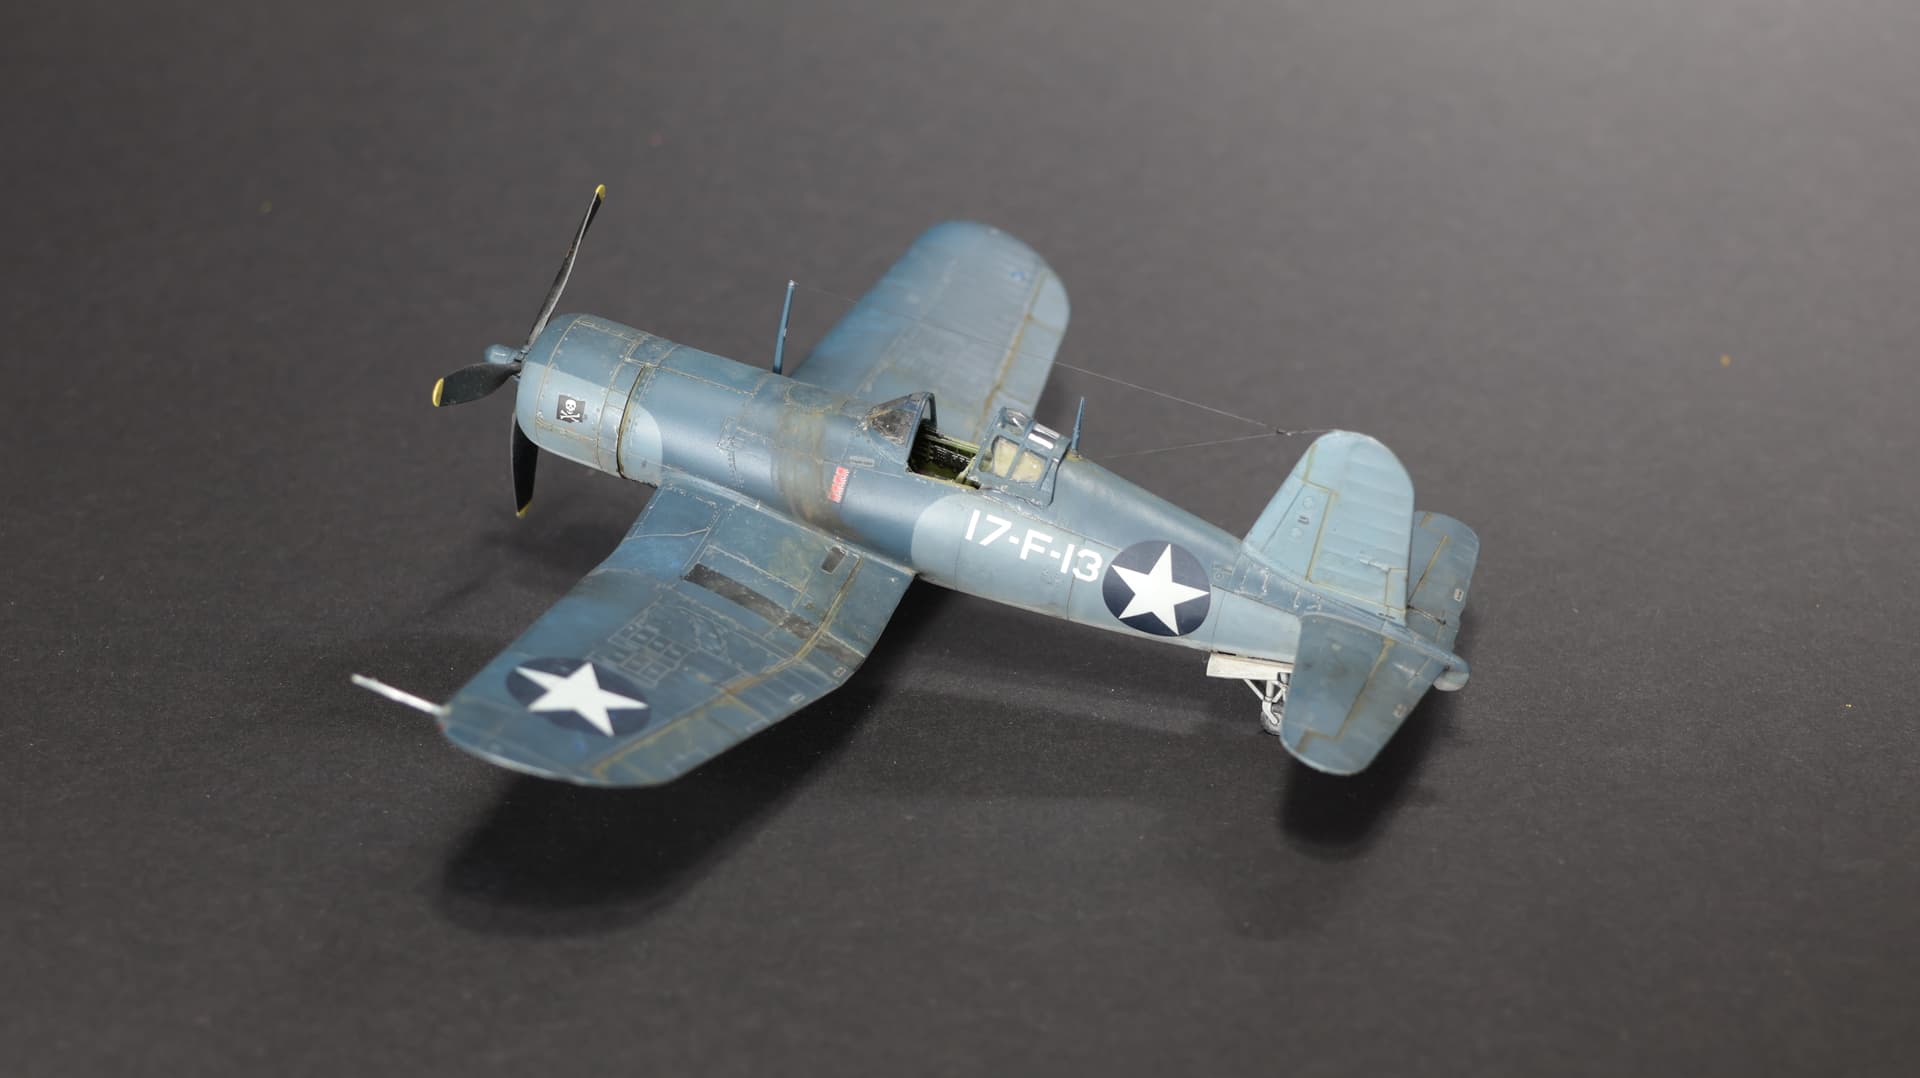
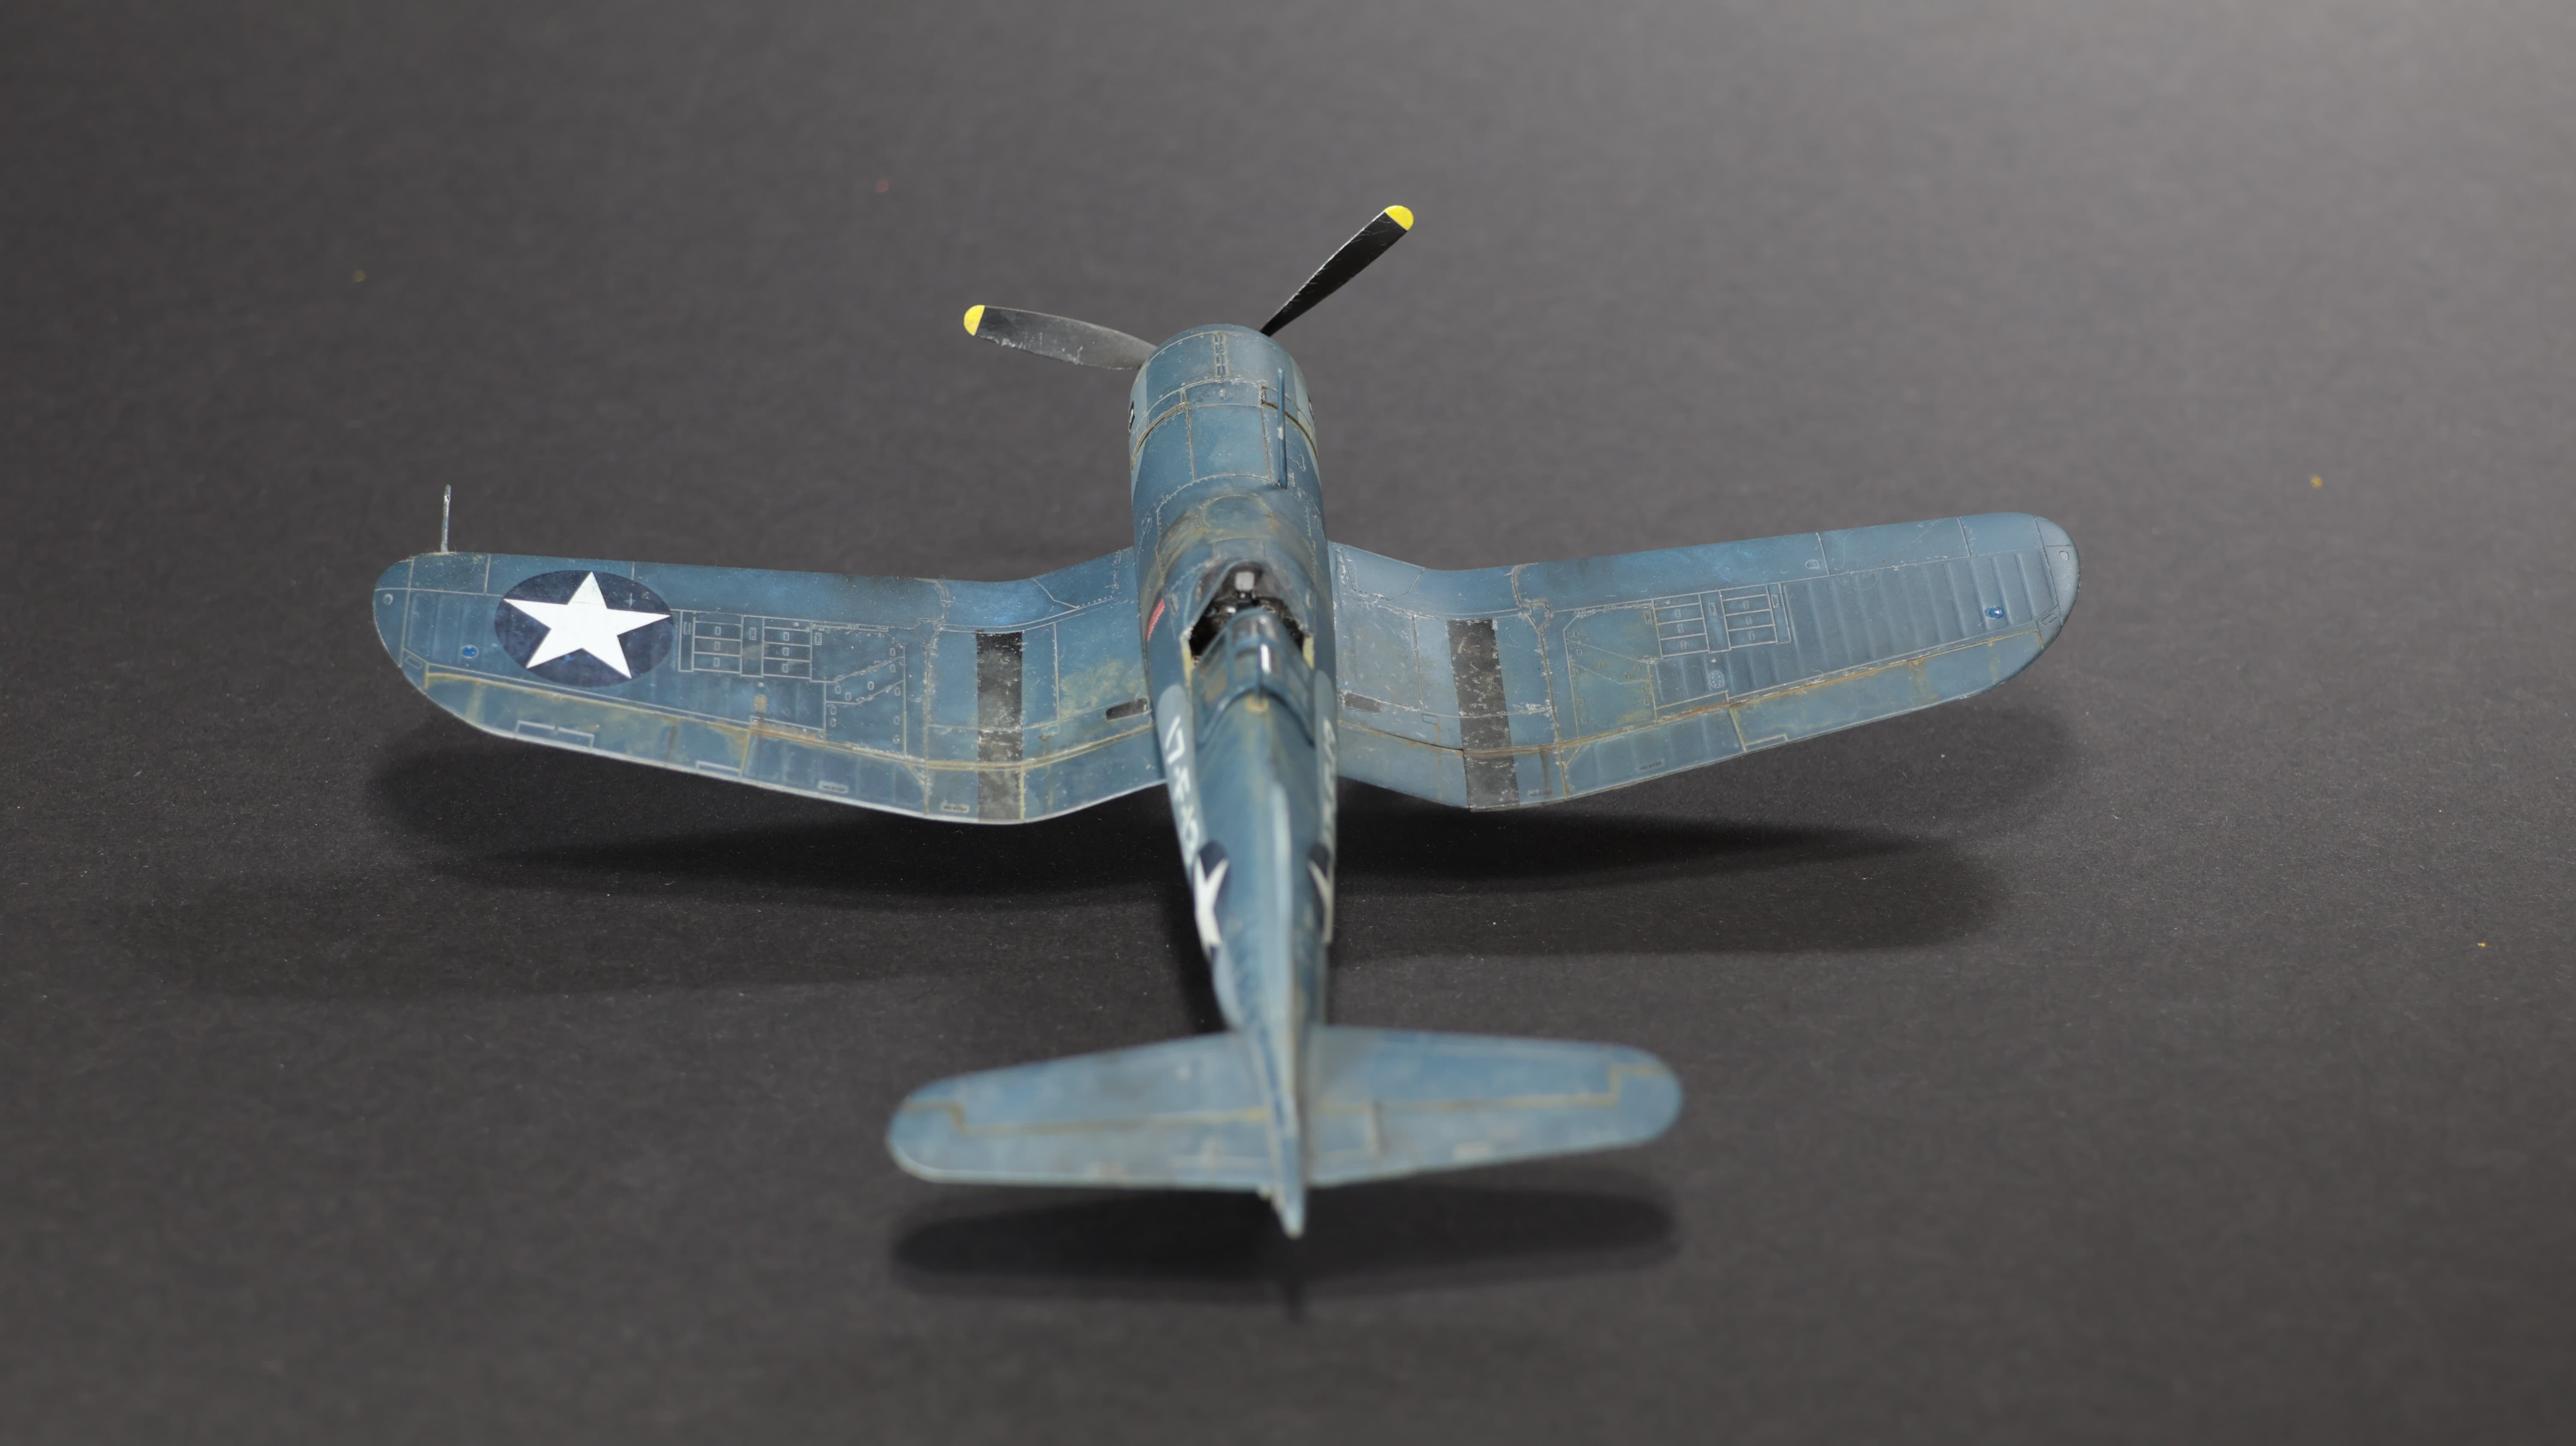
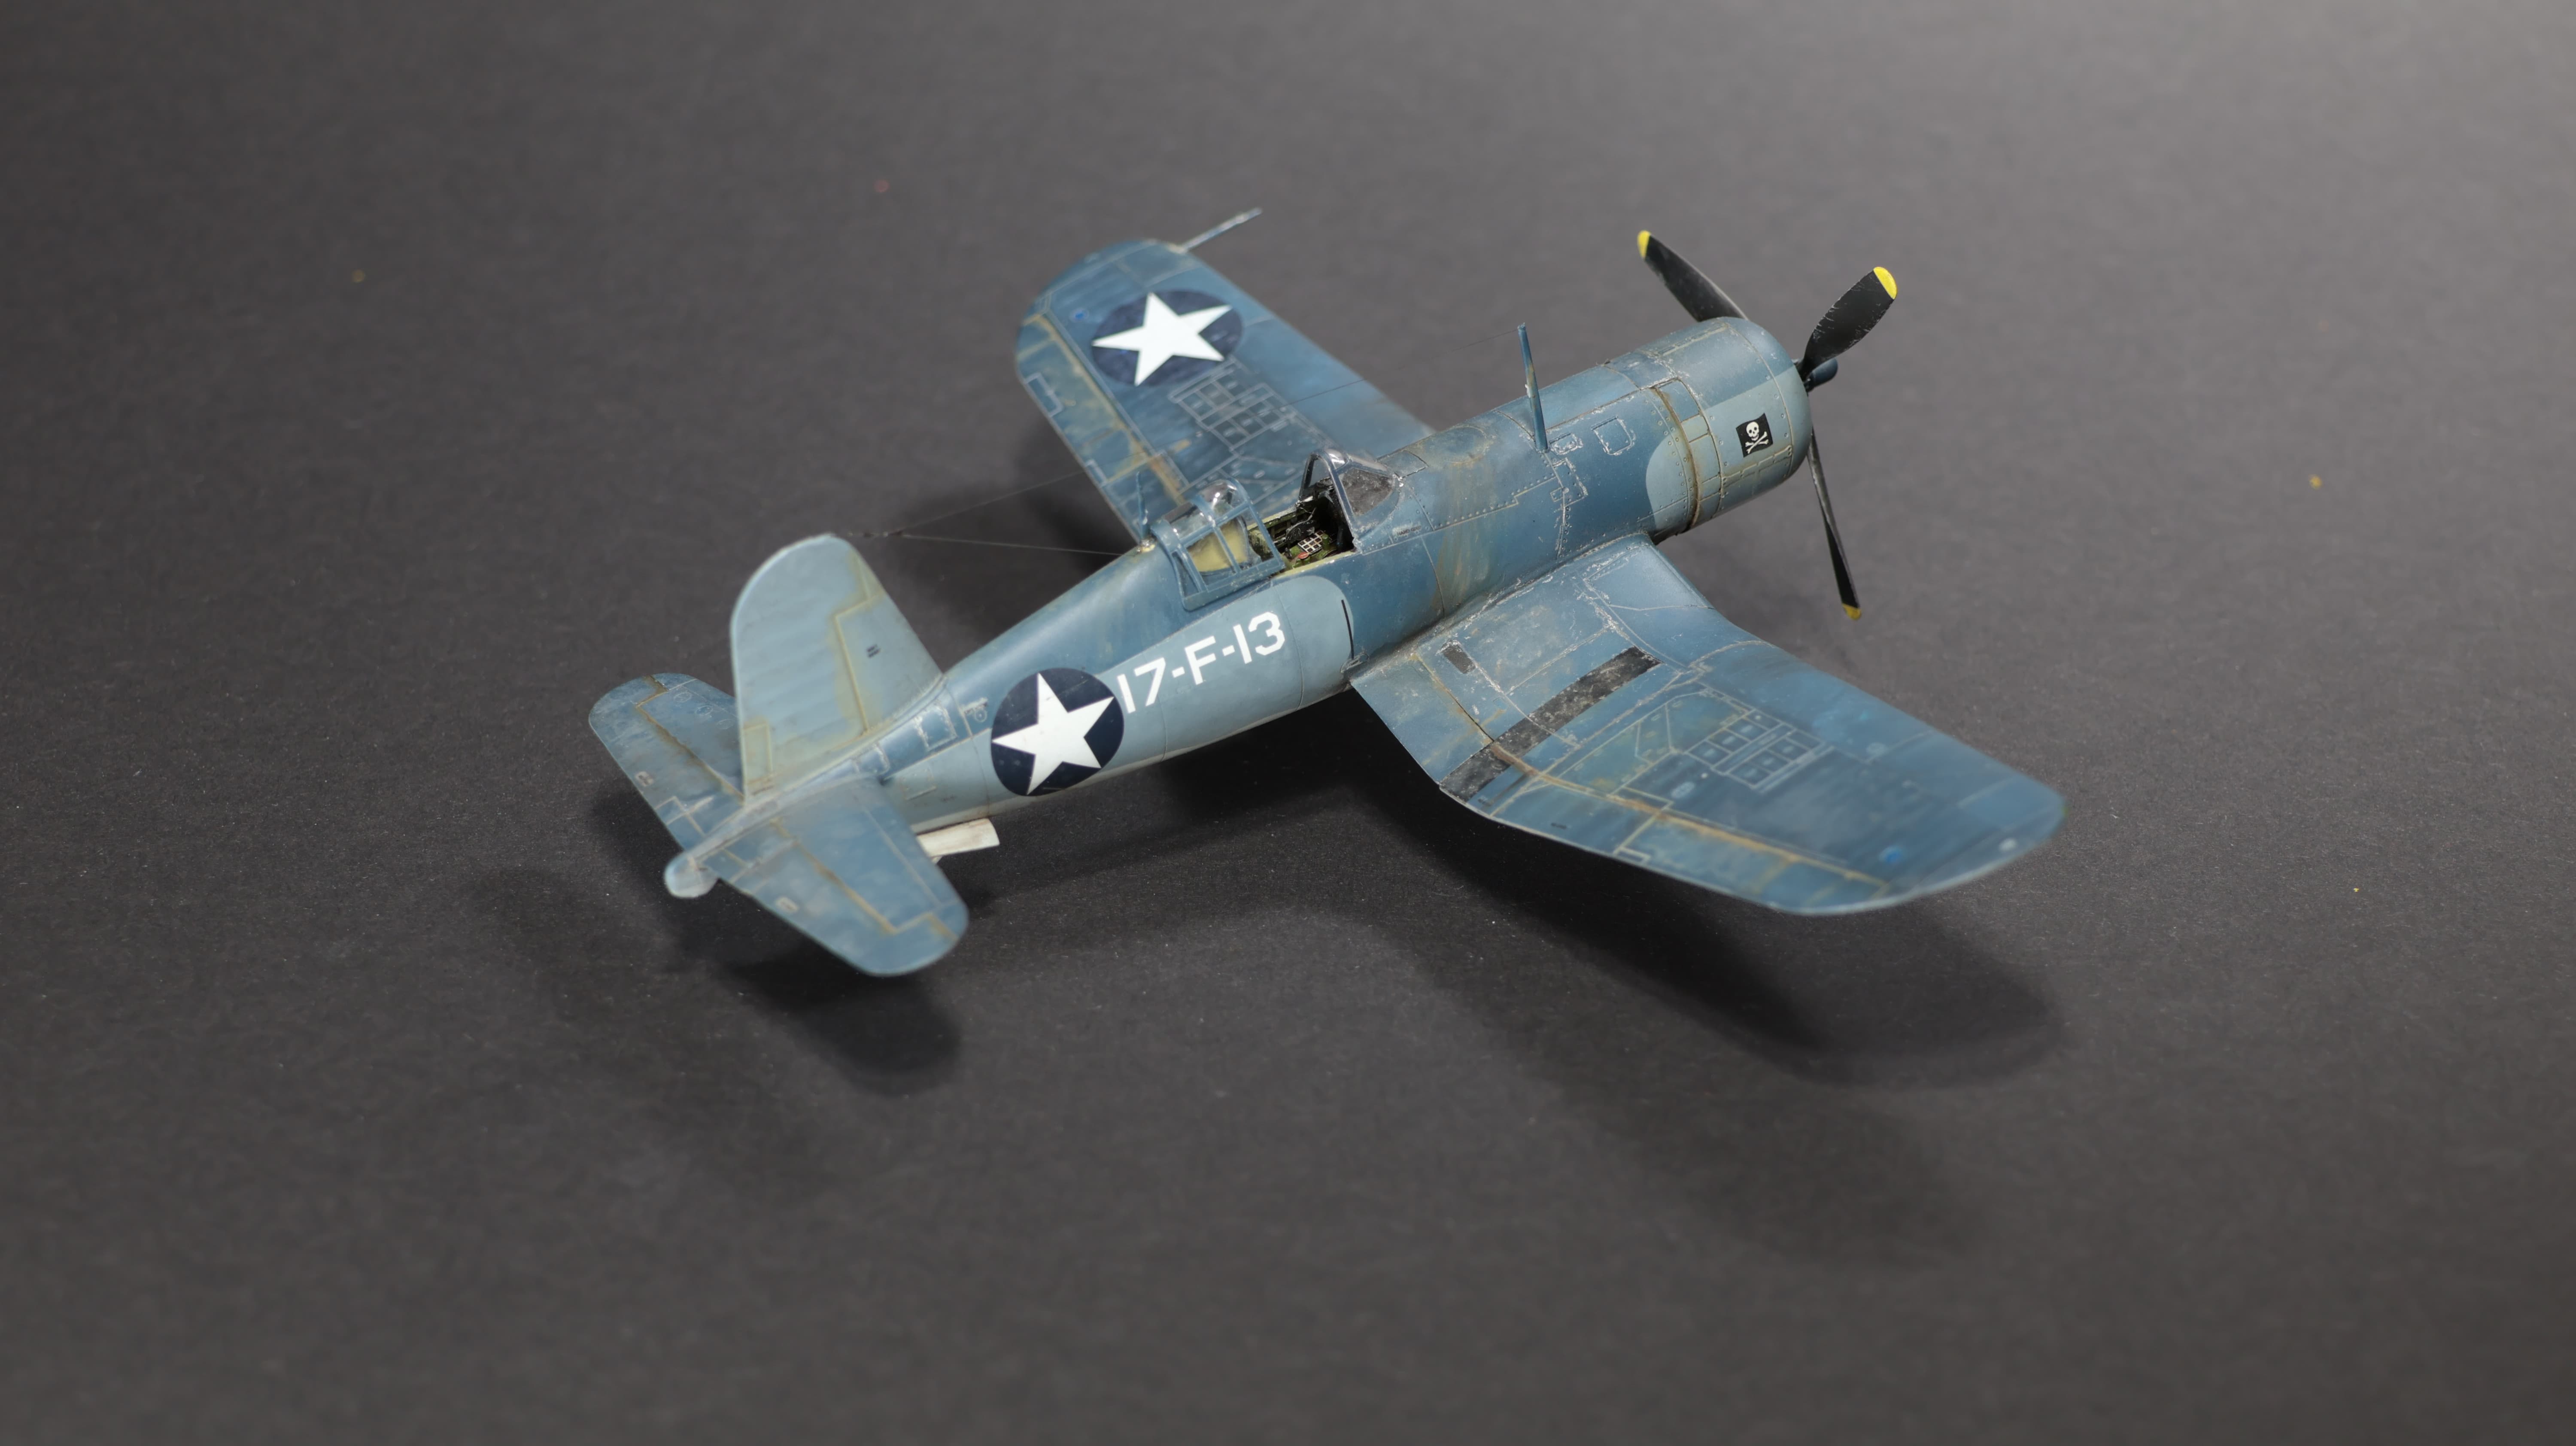
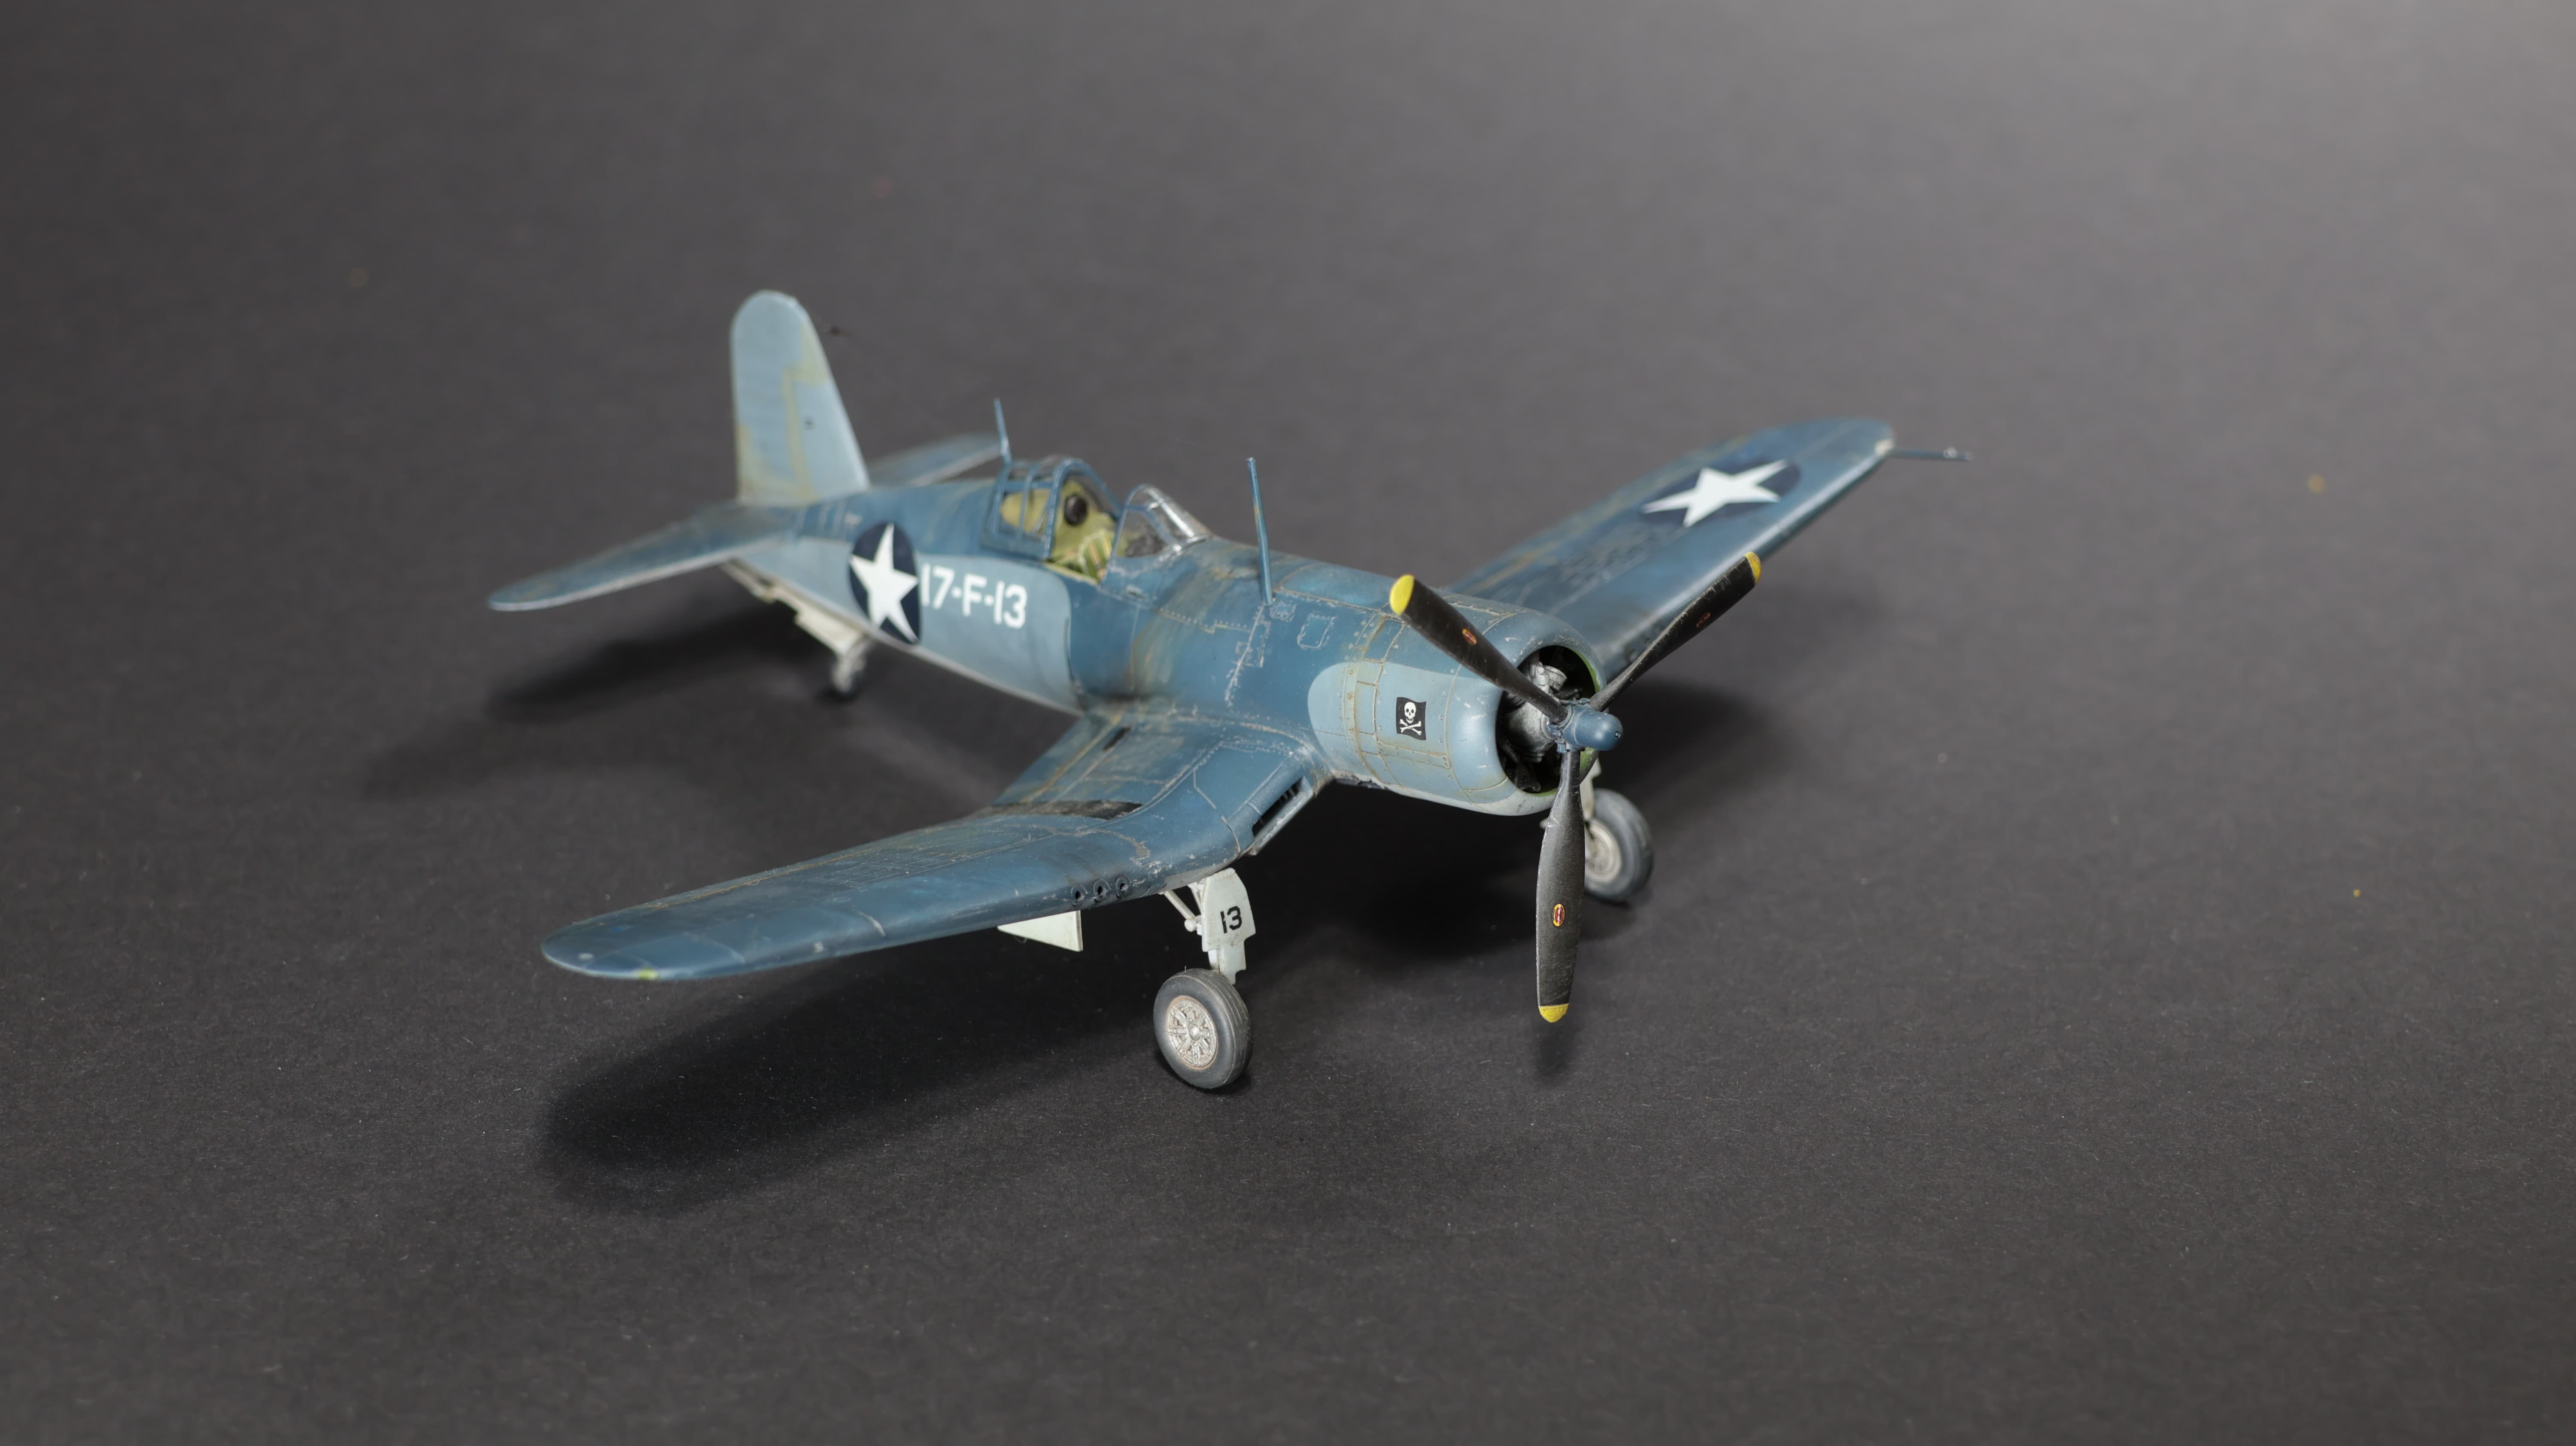
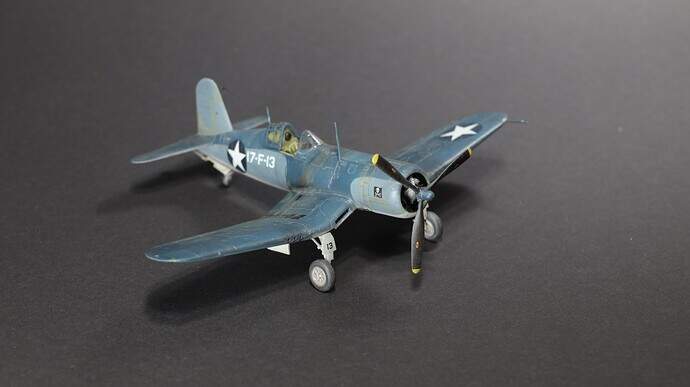
Radek, what a lovely Corsair! Wonderfully weathered, and for 1/72nd scale looks extremely detailed, great job!

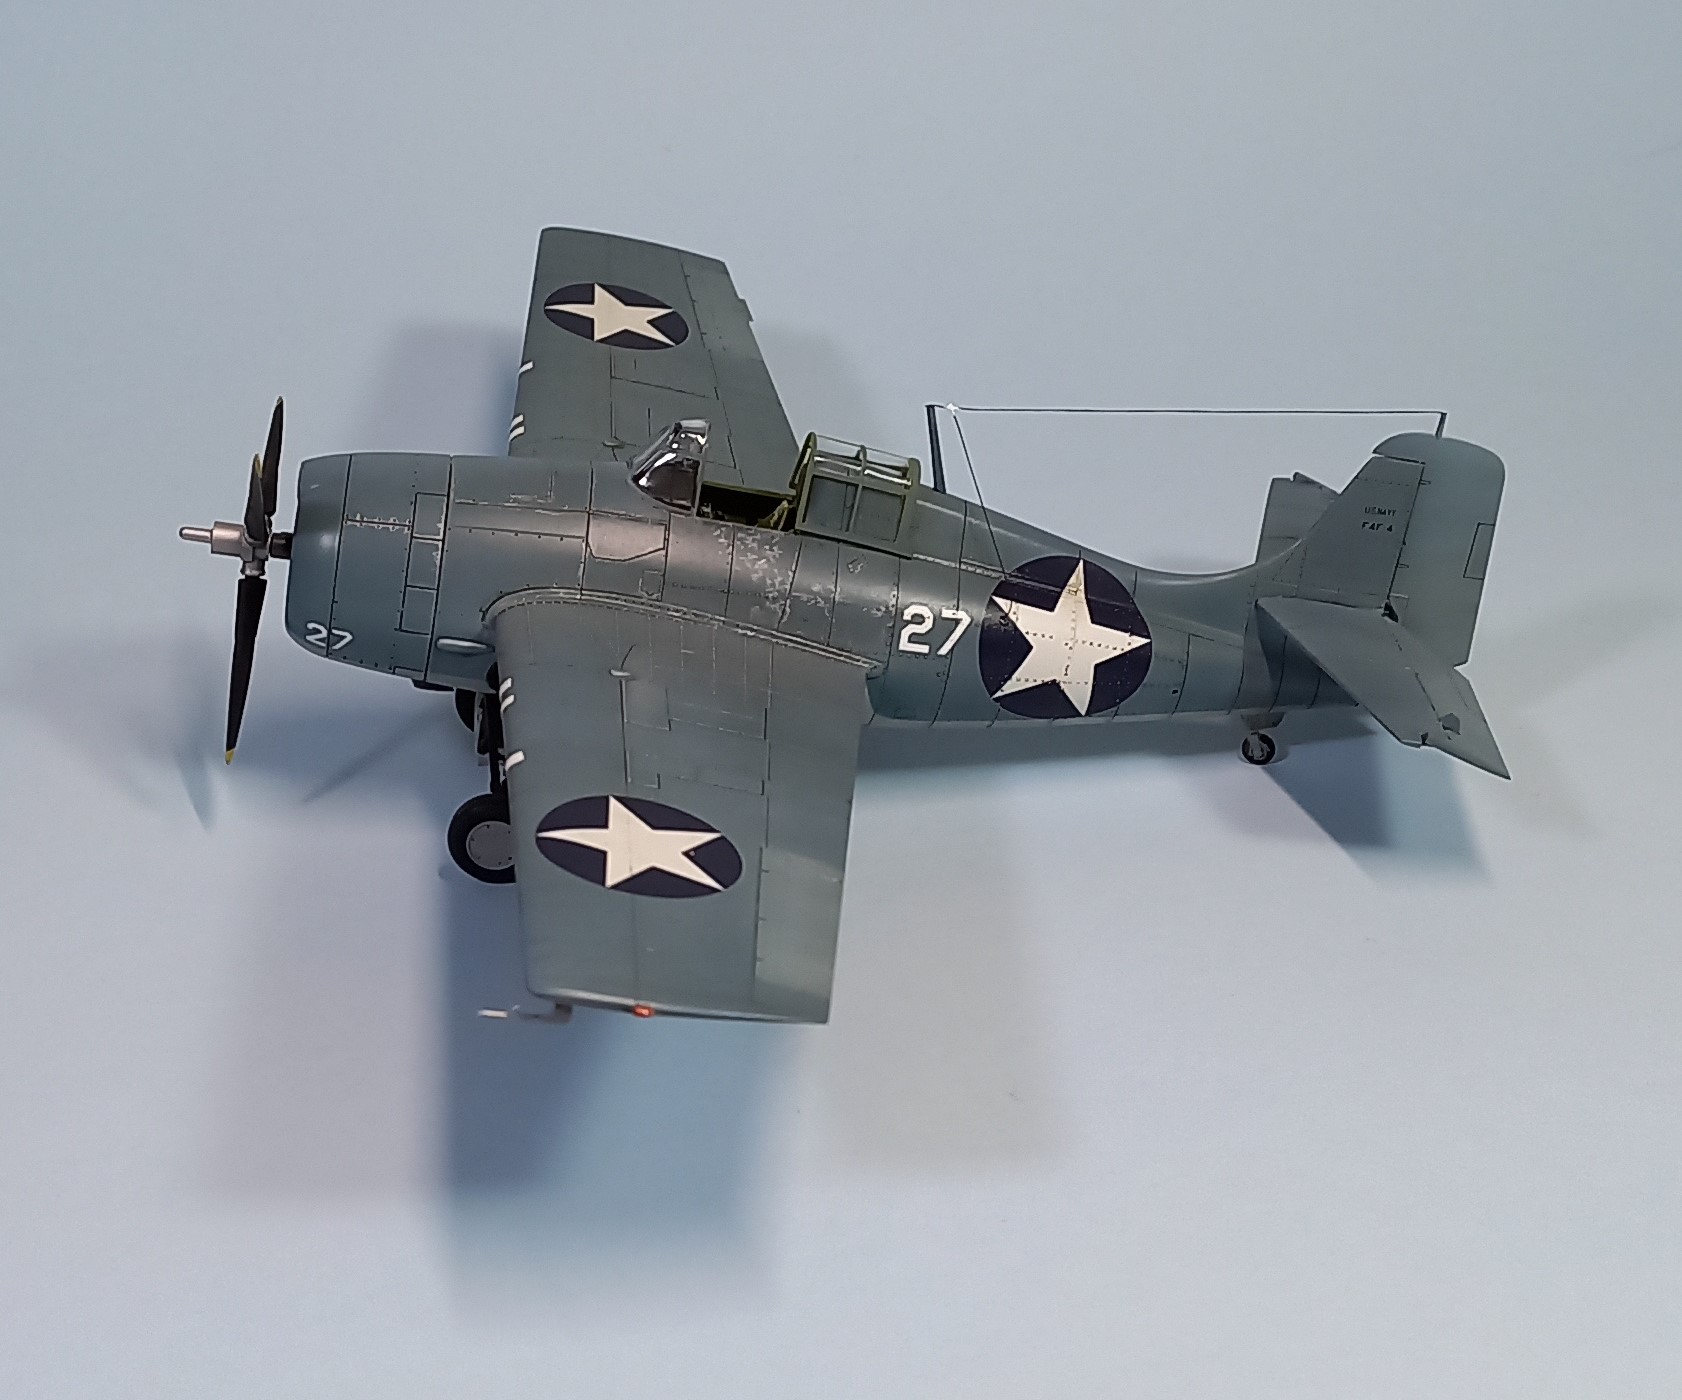
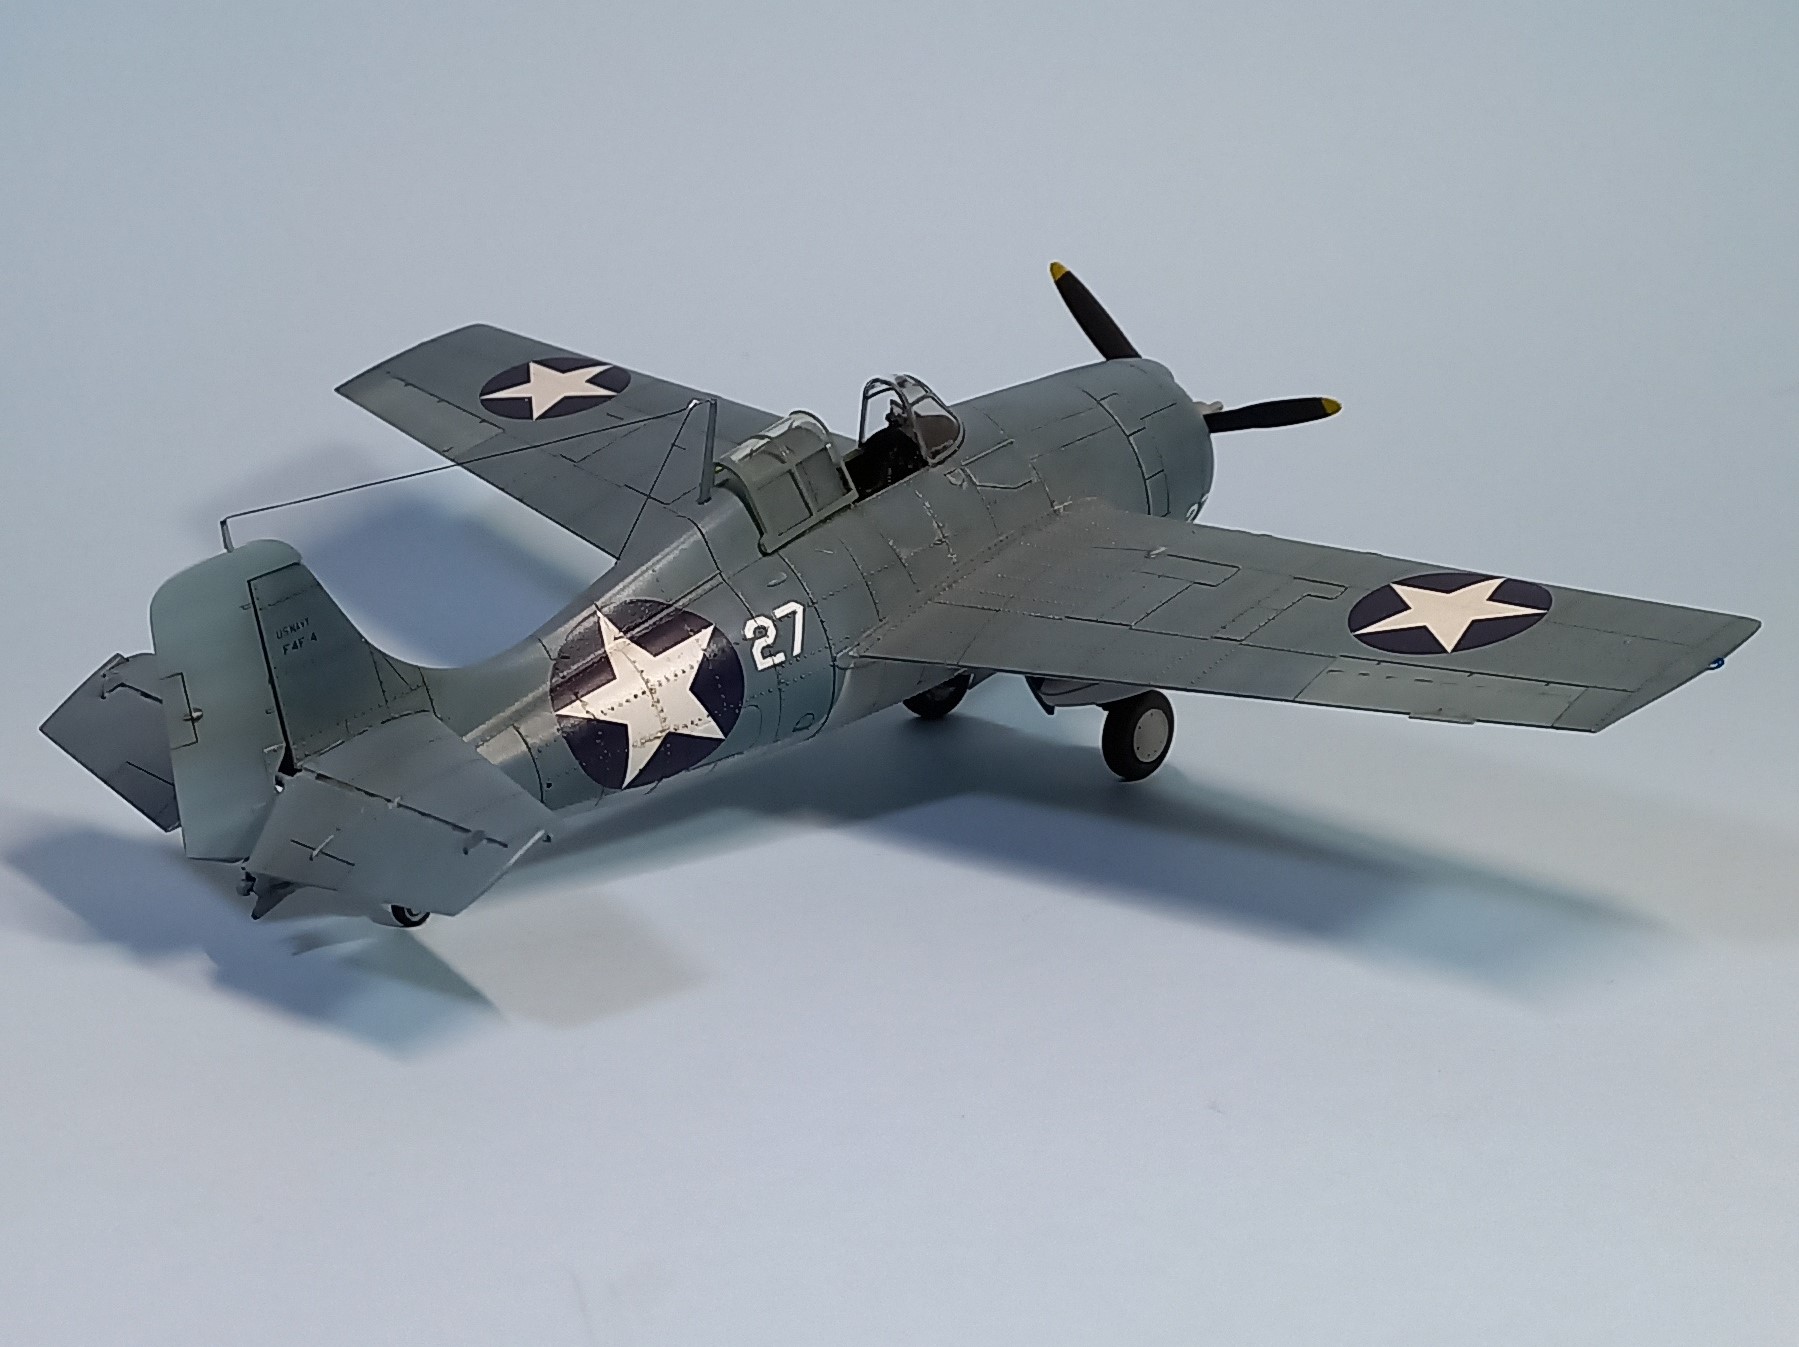
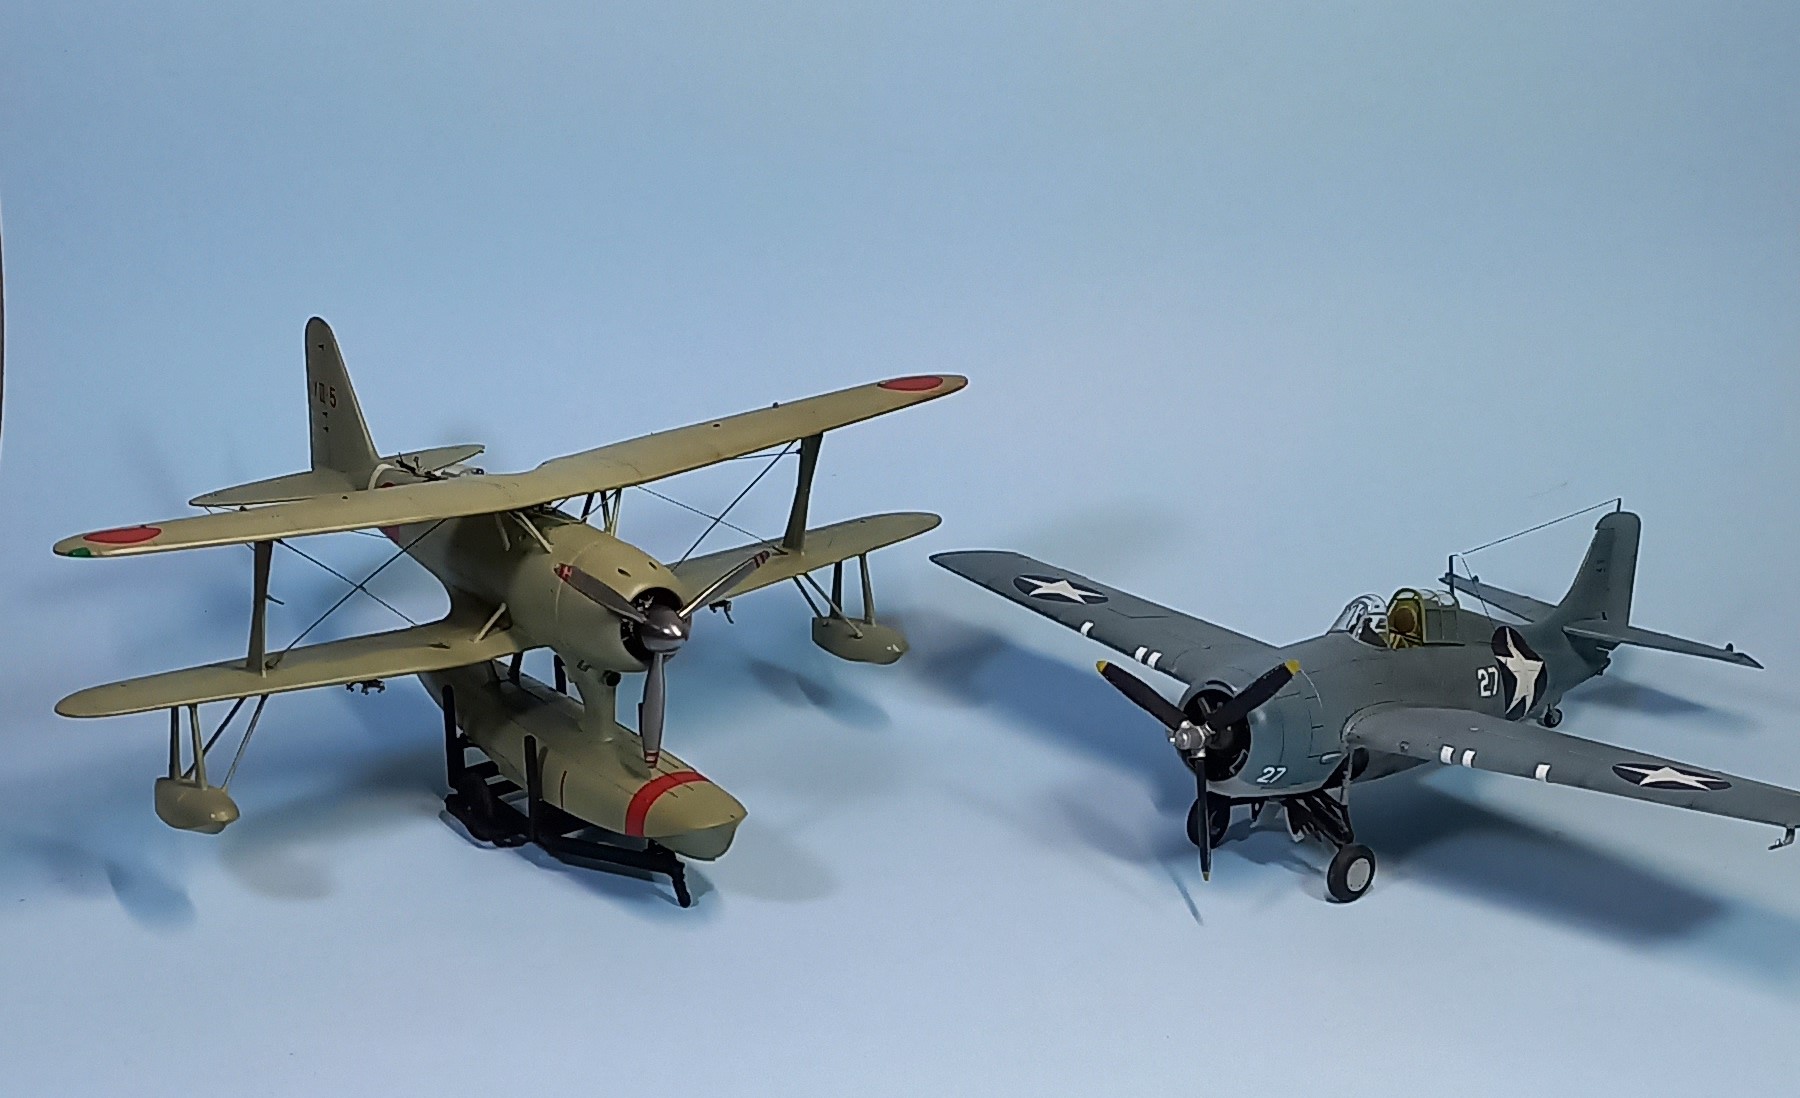
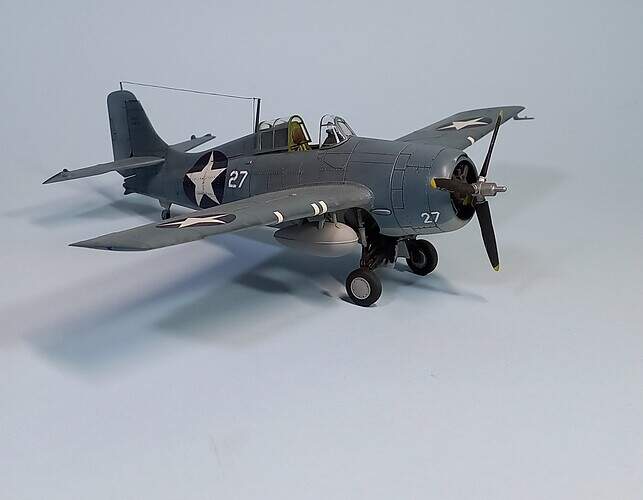
Once upon a time we had an 80th Anniversary of Guadalcanal campaign. I opted to do two builds, one Marion Carl’s media generated mount taken early during the campaign, and the second was to be Joe Foss’s white 27, which seems to be the bird he was in when encountering two F1M2 “Pete’s”. That engagement resulted in everyone getting shot down and pilots swimming. I figured this would make a nice “Adversaries” display in the case, as I’ve already completed the F1M2.

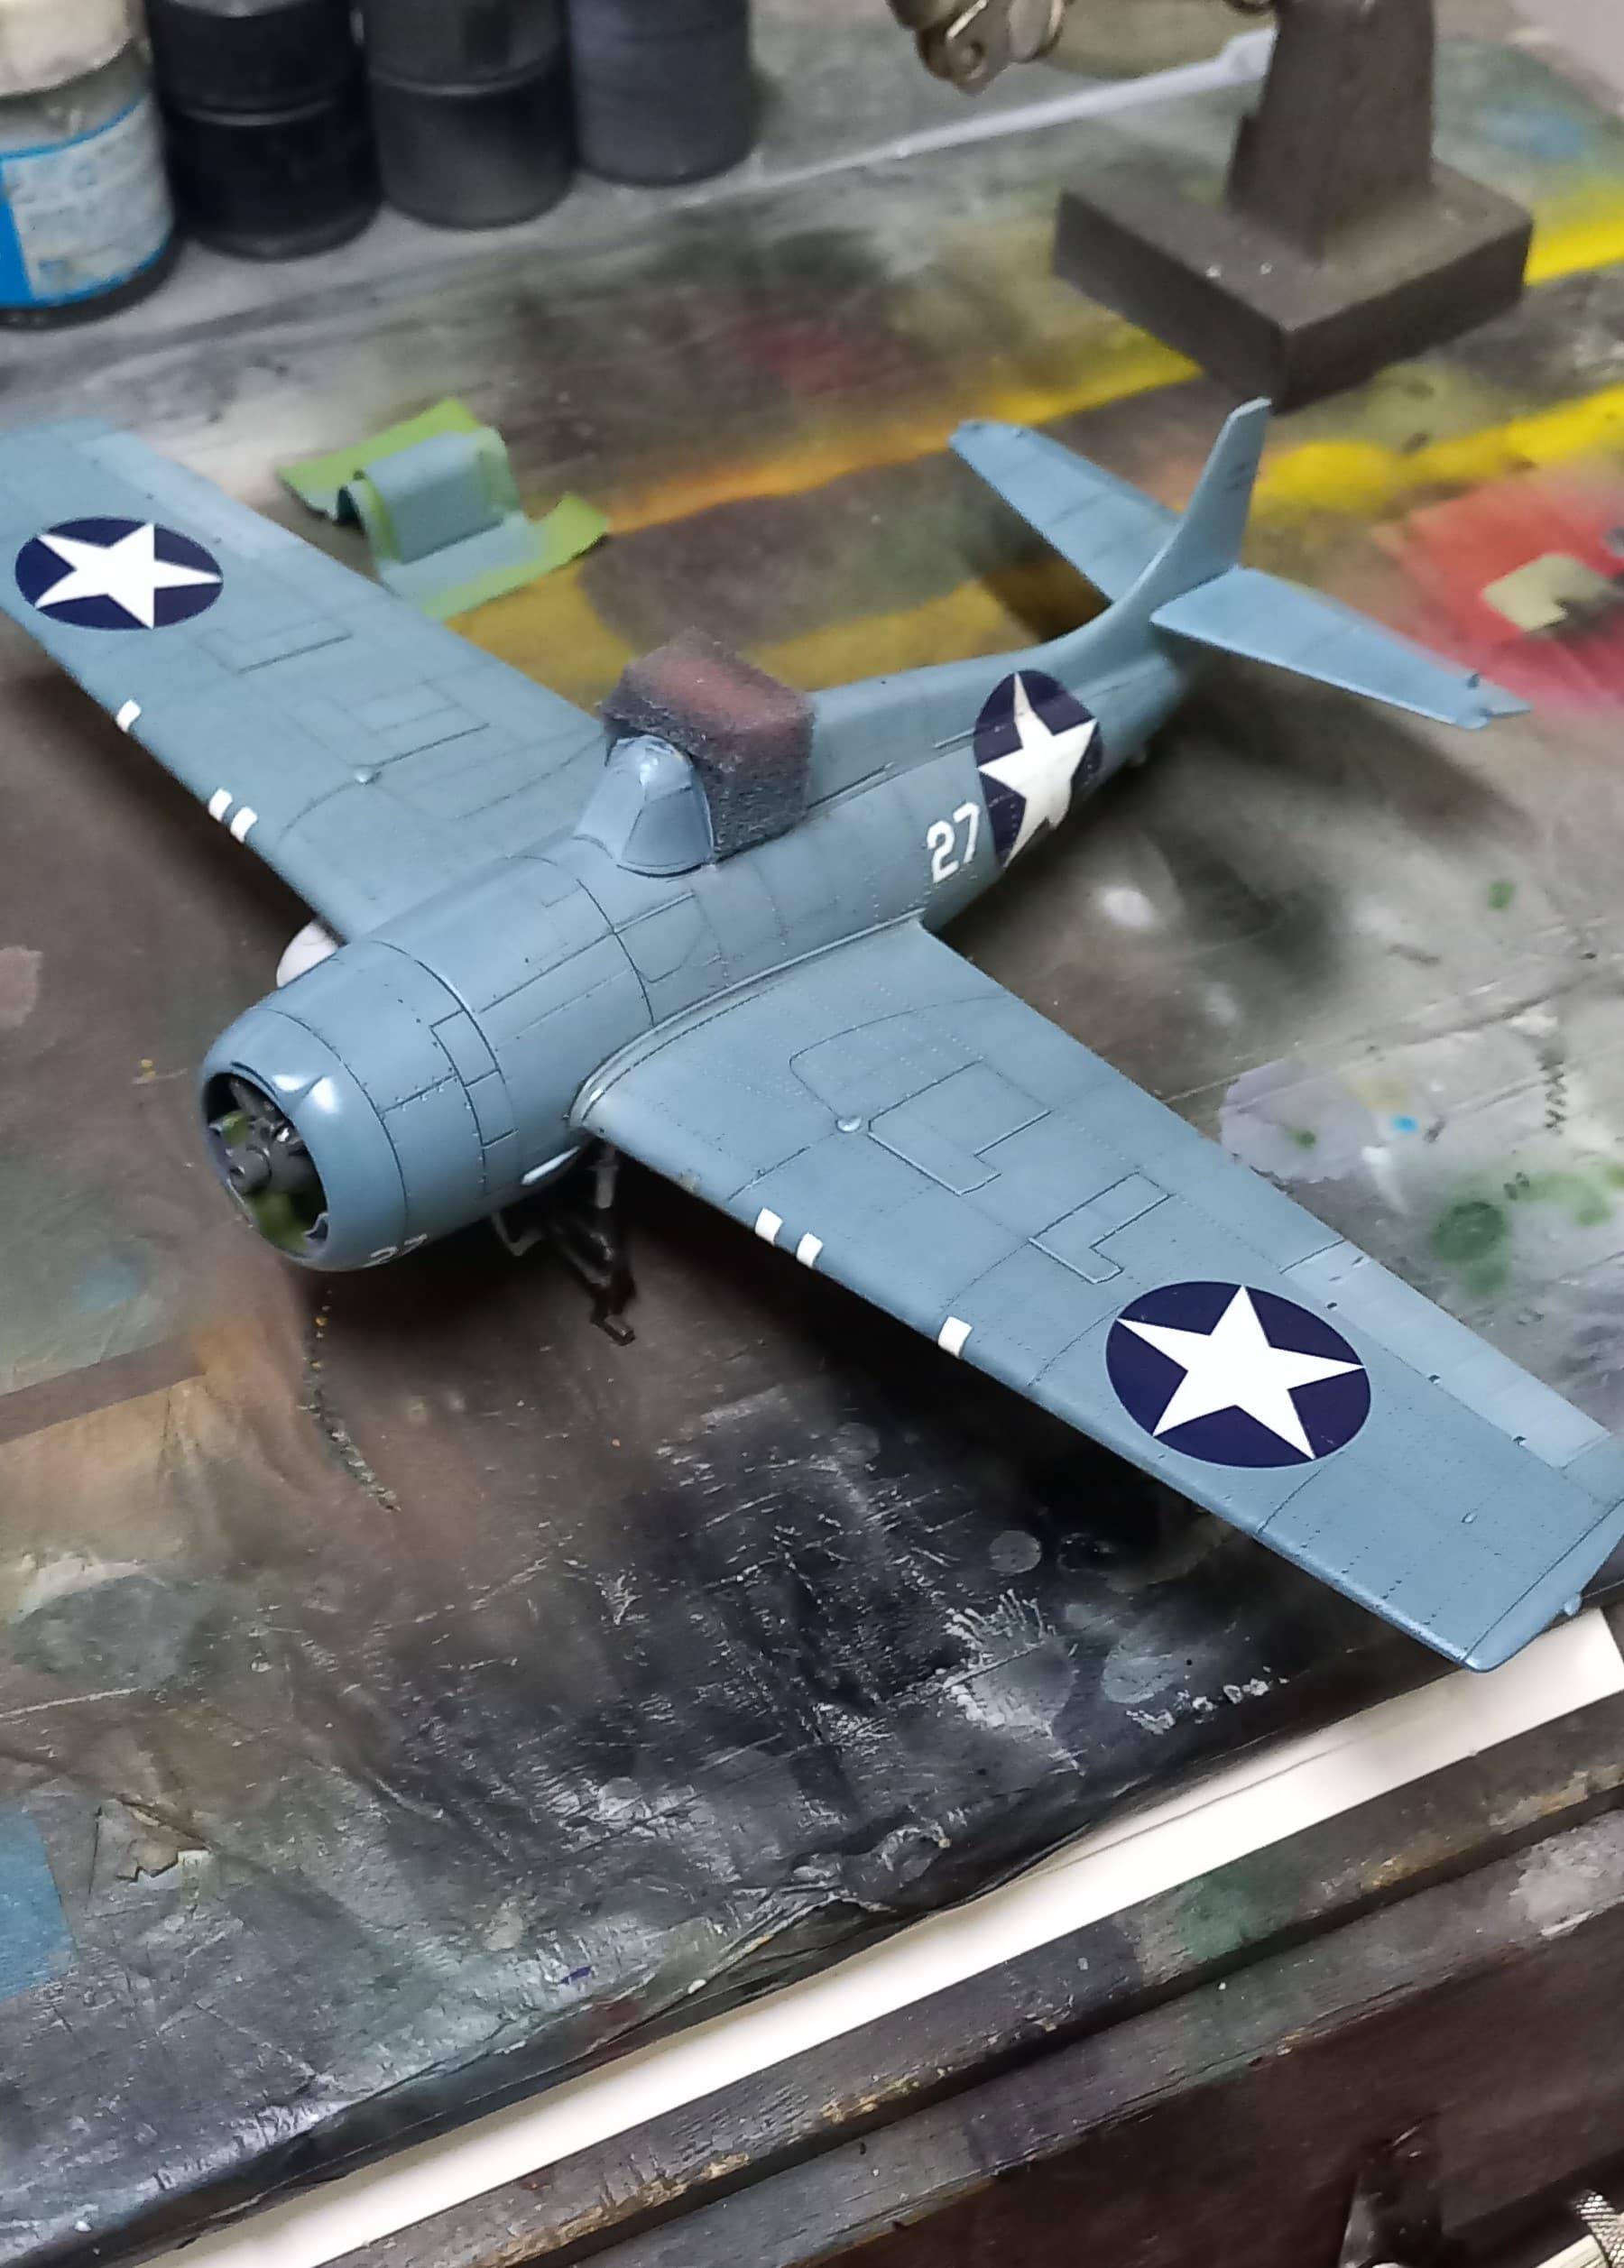
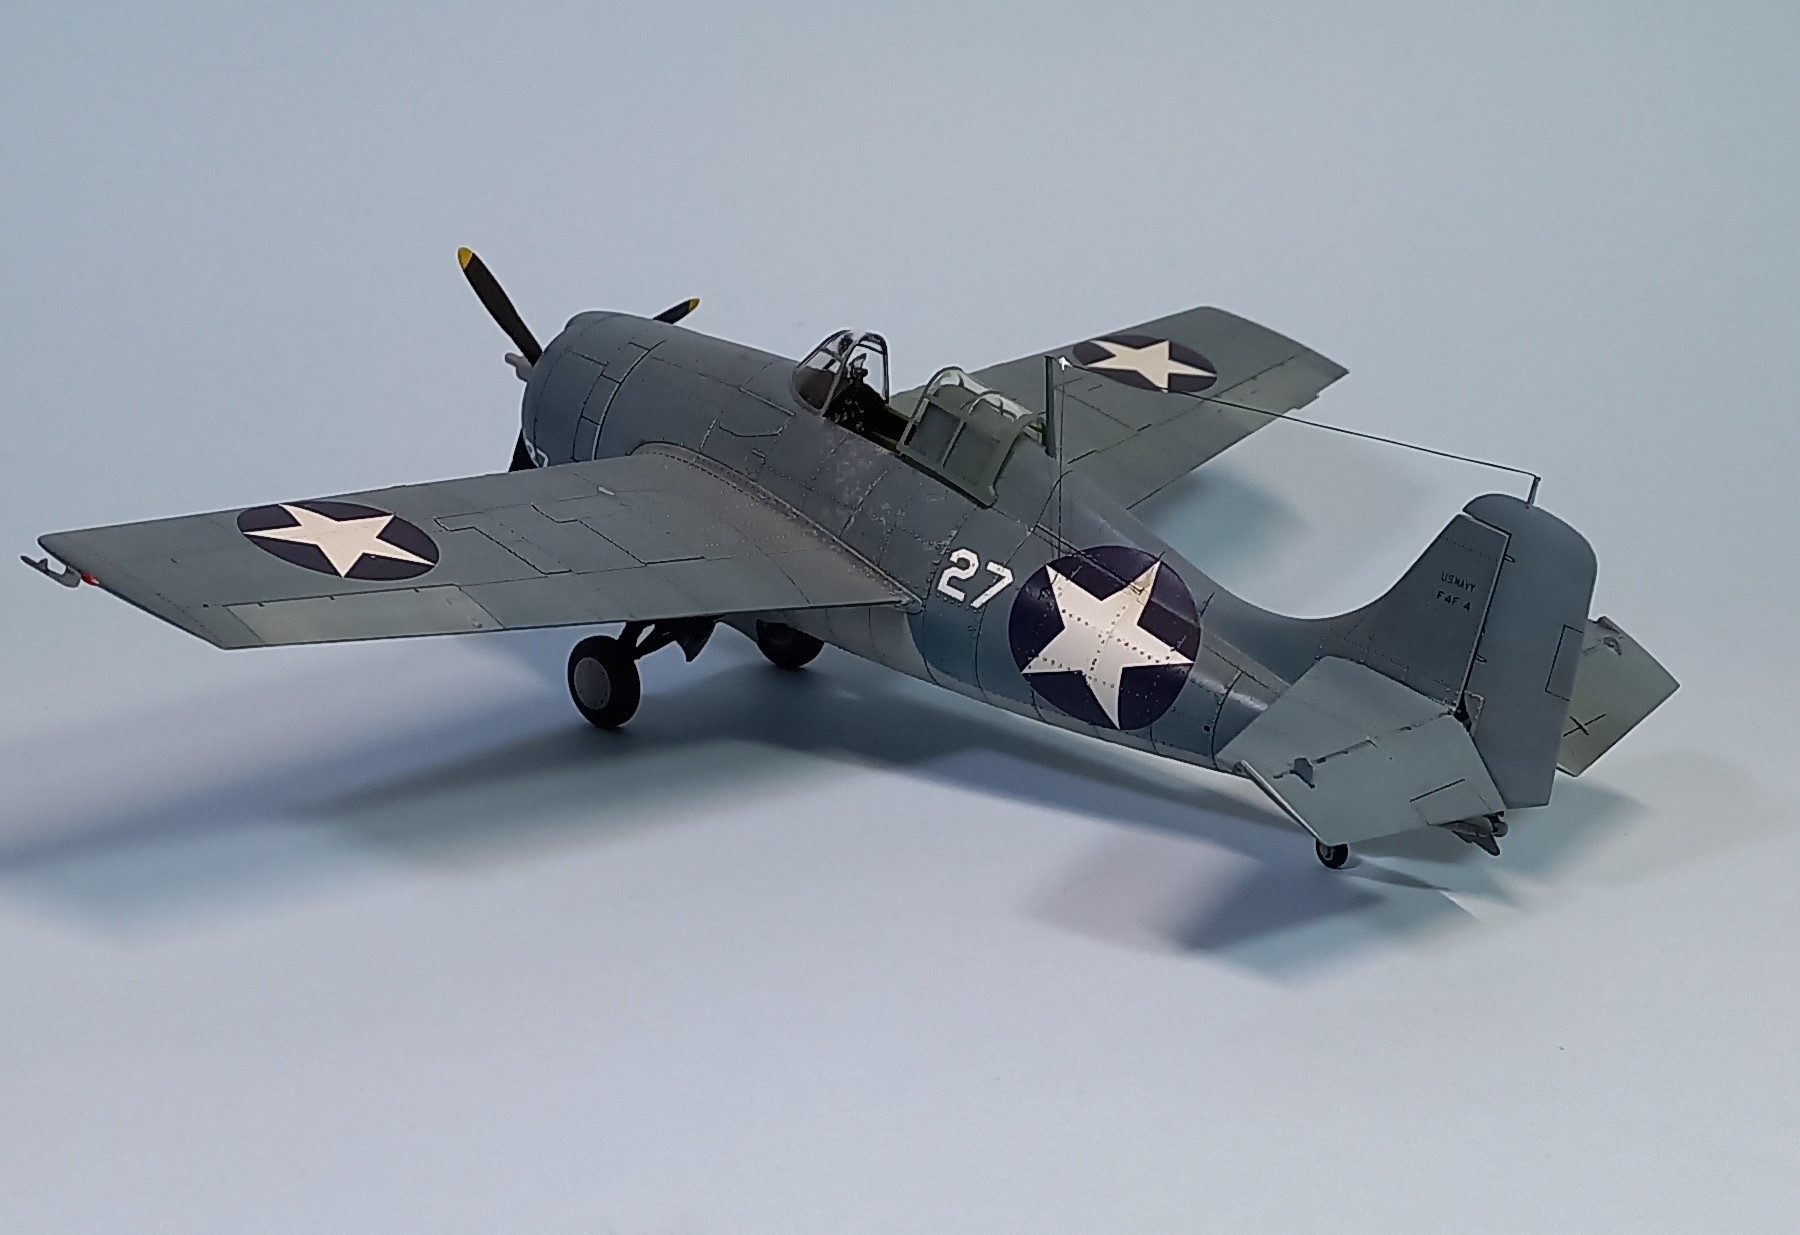
Most photo’s of Wildcats on Guadalcanal show the elevators in the down or relaxed position, and I thought it would be skill expanding venture to do this on my build. While a bit tedious, it was not a difficult task, and I was able to drop the elevators and make it look fairly convincing, not what I envisioned, but a darned good attempt with plenty of room for improvement. And then, my motivation completely evaporated. With no rhyme or reason the bird took up residence in the que where it remained untouched.

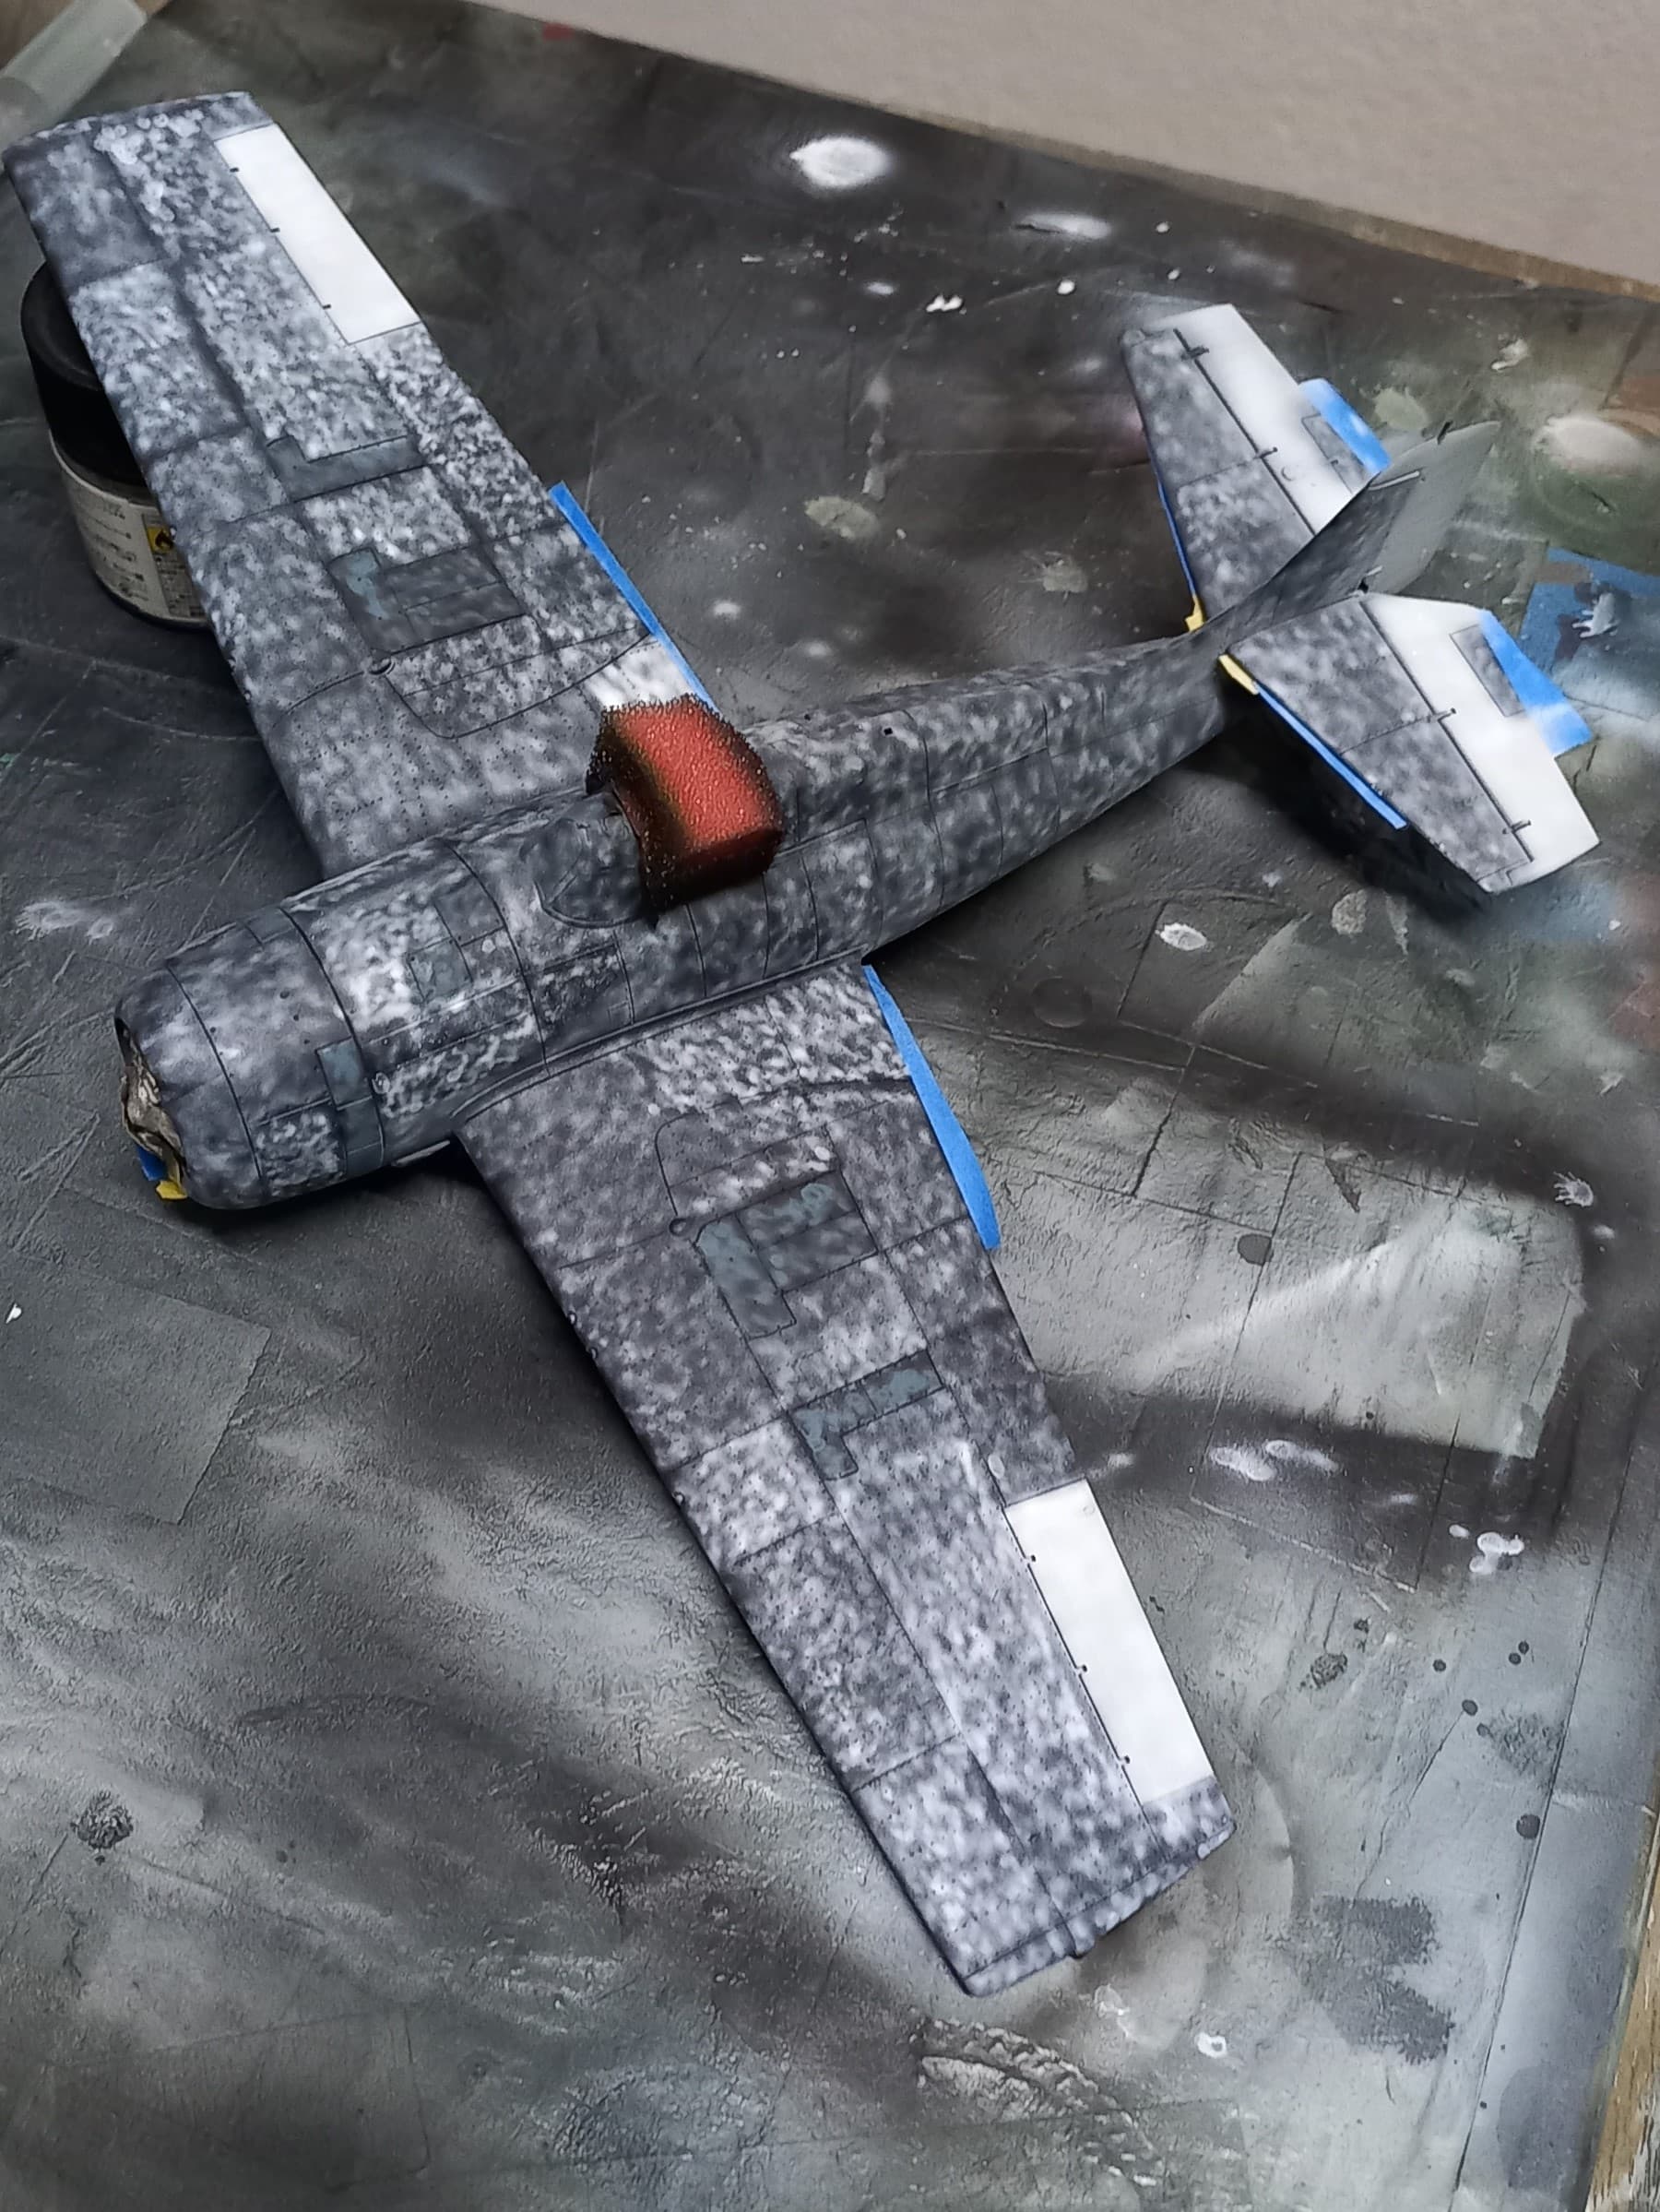
Fortunately for me, I’m easily motivated to model! Determined to get this one finished, I black based the bird with Mr. Surfacer 1500 black, and then mottled various panels with white and extremely light grey.

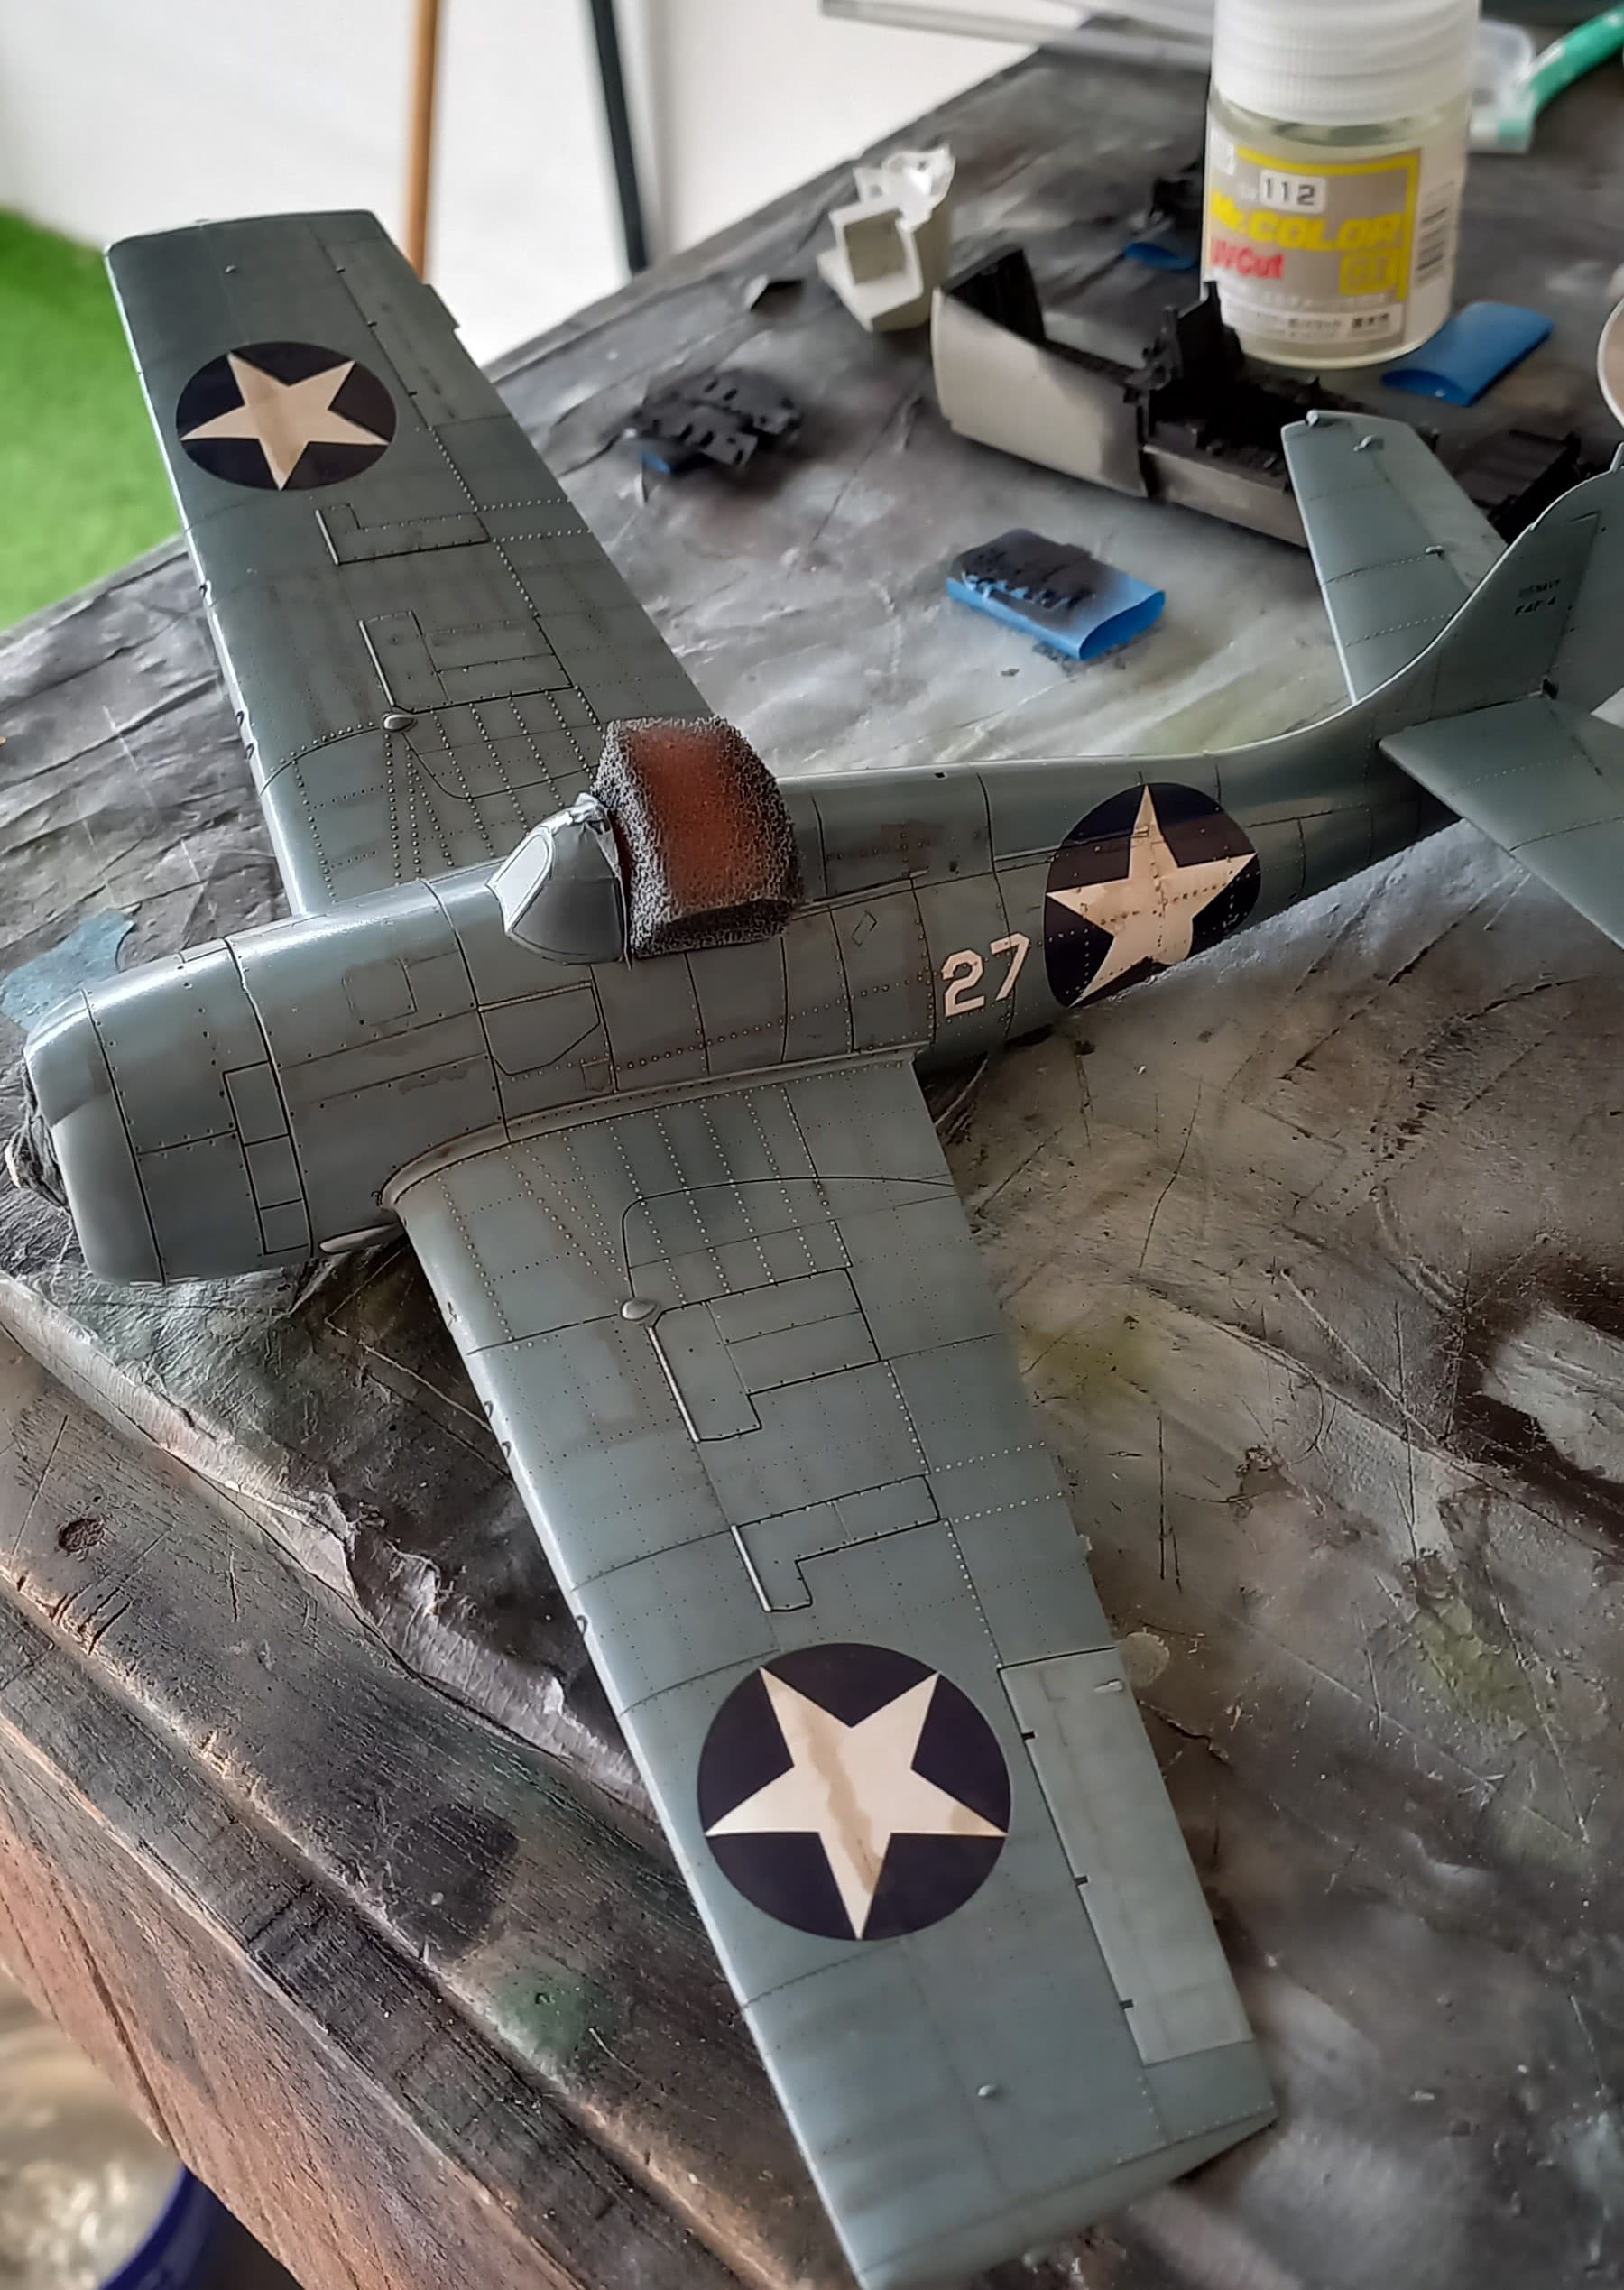
I then gave the airframe my mix of grey/blue and light blue to aid in weathering of the harsh environment of Guadalcanal. Then using a mix of decals from the dungeon I gave her an identity. Following this up with a panel wash, which the Tamiya kit makes easy.

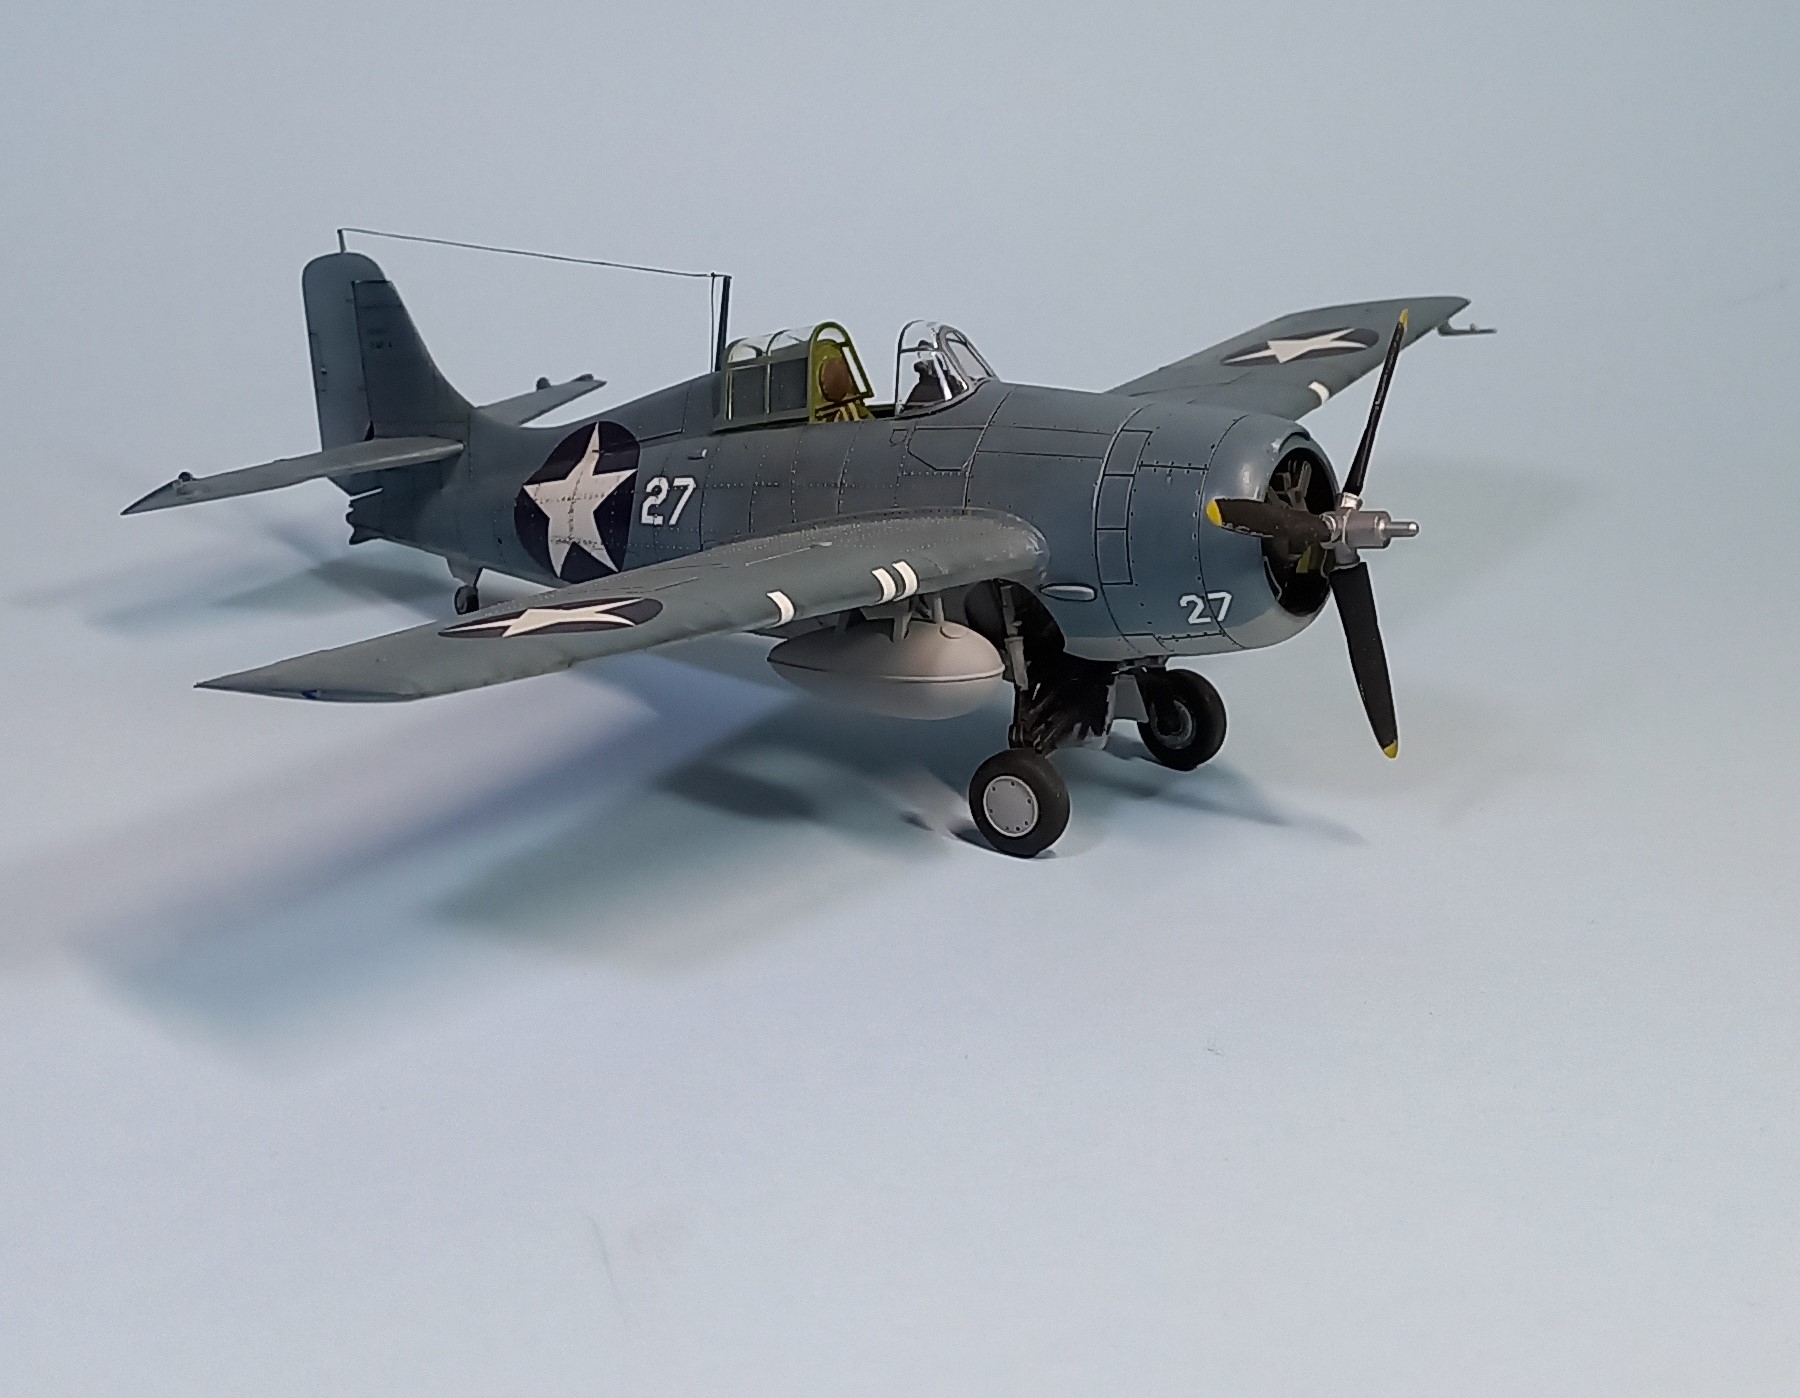
Next I used a Prisma silver pencil to further wear the finish, and gave the whole airframe several coats of clear flat. Using Tamiya tape, I painted it white and cut it into correctly sized strips to represent the medical tape used to cover the gun barrels to keep dirt and dust out of the guns.

Next up was the little things, and a dusting of the tires with some pastel, added the aerial line and called this one done!

And the “Adversary” pairing.

Overall, for cost and ease of construction the Tamiya kit still holds its own, and is a fabulous kit for a beginner to learn basic skills while affording the experienced modeler countless opportunity at a very affordable price, I highly recommend this kit to any modeler. That said, dropping the elevators was a first for me on this kit and I’ll most likely do it again spending a bit more time on the clean-up of the mating area. Additionally, the photos reveal that I neglected to give the drop tank any attention post painting, perhaps next time.

Anyway, I’m off to dust another queen off and bring it to the finish line, stay safe, and have lots of fun!

8 Likes

Really nice work.

1 Like

I think i’ll be able to coax in the spars and set them with superglue. I’ll run to the stores tomorrow for supplies.

Finally glued the spar into place. Now I will likely consider the model complete. I will take better photos later.

3 Likes

Congrats! You certainly yanked that one over the finish line, I hope you have a good sense of accomplishment on a rather finicky kit. Looking forward to seeing the final pictures.

1 Like

Thanks. The kit itself was decent, little flash, if I can remember correctly. The decals on the nose and wheels were finnicky, and so were the instructions for the landing gear and center struts. Not a bad challenge kit.

1 Like

Here are the photos!

Hi Everyone,

Back in April of 2022, we had the Naval Air Campaign, while I completed the campaign I also over committed. Having finished the SB2U-3, I also thought I’d be able to do an F3F-3 (Hobbyboss) for my personal tribute of the 80th anniversary of the Battle of the Coral Sea. Life got in the way of the hobby and found myself having to have surgery, to keep busy in the hospital I figured that I would have a great opportunity to work on Hasegawa’s F-8E. I was right! Sadly, I was not able to complete this wonderful kit for the campaign, so in true Hangar Queen spirit, I’ll be completing it here!

First, since this is such a great kit in my opinion, I am compelled to do a quick background on the build up to where it got relegated to the box waiting to get done. So, without further ado, here’s how it went!

The kit:

The tape up:

Cockpit (decal placed prior to softening):

Fuselage closed up:

Wings almost done:

At some point along the line I decided to make an expensive addition to the build, these and the F-14 decals from Furball are by far the most expensive decals I’ve ever purchased!

And that brings me to the point I’m currently at. Next up will be some minor filling and a primer coat.

Till next time, be safe and have fun!

1 Like

Love the Crusader plane.

I don’t know Geoff but the other decal manufacturers that I do know speak well of him. You’re getting good research and artwork. Cartograf is a premier decal printer. They are not making what you might think of selling decals as the market cannot handle what it should cost. That is a nice sheet.

1 Like

Thanks Ryan, I used their decals for the interior of my Academy F4-B, and they were in the top 3 of best decals I’ve ever used. Which is why I was willing to purchase them!

1 Like

Hi Everyone,

I was hoping that we’d see a few more builds trickle in as the year is winding down. I suppose with all the distractions going on in world, it’s to be expected. Anyway, it’s time for an update on the Crusader!

While filling the minor gaps along the wing flaps, I noticed that for some reason I failed to restore the panel lines just aft of the cockpit. This was done, and resulted in the repriming of the affected areas.

I also tried a new technique for me of painting the canopy seals using a yellow/orange color. I had debated whether to use decals, I’m optimistic!

Then it was off to paint the bird in the white undersides and light gull grey uppers. Using the black base method, things progressed nicely.

It was around this time that my phone (aka camera) went on the fritz, so photos were not taken. Suffice to say the colors went on nicely, and things were clear coated, and the decaling process initiated! I really like these decals!

So, this is where I am, expecting the decal process to wrap up soon, then it will be onto the fiddley bits and addition of some armament.

Till next time, stay safe and have fun!

5 Likes

Looks great, John. The shark mouth is great looking. I am considering using the same marking type on my F-14.

1 Like

Hi Everyone,

As time ticks down on this campaign, I’ve been able to focus a bit more time on the Crusader! After getting the insignia on the bird, I began adding the stencils. Starting with the wings, thankfully there’s far less of them than on the F-4B (Great Academy kit, but death by stencil for sure!). Preparing to move to the fuselage, I noticed a difference between the decal placement diagram and my project. It took a bit to notice, as sometimes things that are right in front of me don’t immediately come to light. Then the obvious hit me, I had failed to paint the windscreen and surrounding area black. Grrr, fortunately I hadn’t done too much decaling up front, so it became a matter of strategic masking and then a focused spray of black. The whole process took about two hours, one hour and fifty-eight minutes of masking and two of getting the black color on! Sigh.

I’m pleased with how it turned out, and now I can once again focus on getting all the decals down, followed by some washes and the final assembly. This is really a fun kit to build and decals from Furball are just fantastic!

Till next time, be safe, wash your hands and have fun!

3 Likes

Hi Everyone,

Happy New Year! And with a new year, it means that this campaign has come to an end. I’d like to thank everyone that participated and am happy to see that we were able to get five Queens out of the hangar and onto some places of prominence!

After going through the campaign threads here’s the final list of those that completed their builds:

Overall, a good year in getting the those Hangar Queens off the self of doom and onto a shelf of boom!

Congratulations to everyone who finished, and to those that didn’t get their builds over the line, rest assured that you have the opportunity to complete them at the Hangar Queen XIV campaign!

I’ll be forwarding the list of the completed builds onto Jim so that ribbons can be awarded. If you feel you were missed, please let me know. Again, thanks for participating!

Till next time, be safe, wash your hands with soap and water, and be safe!

3 Likes

Hi Everyone,

Ribbons have been awarded, shout out to Jim! Again, thanks for a wonderful campaign, and remember if you didn’t get your bird across the line, you can join us over at the Hangar Queen XIV campaign!

Till next time, be safe, wash your hands and have fun!

1 Like

Dude, I just finished my last two queens a few months ago.