Hangar Queen XIV

Group Build Title: Hangar Queen XIV

Group Build Leader(s): john41492

Group Build Description: The Hangar Queen was usually a plane that was relegated to being stripped down for parts or rebuilt to fly again. This campaign is for all those planes that didn’t make it over the finish line, or that sit upon the “shelf of doom”. The goal being to complete these builds and give them the recognition they deserve. Any scale, any subject as long it flies.

Event Details: (Remember to click “Going” if you want to join the build!)
[2023-12-31T10:00:00Z2024-12-30T10:00:00Z]

  • Going
  • Interested
  • Not Going
0 voters

Completion Award:
image

A Note about Awards: The following text is a reminder that in order for people participating and finishing their projects to receive a badge on their forum profile, they will need to provide their account username to the group build leader by the completion date of the build. The leader will then provide this list to the site admin who will bulk award the badges to those users who have finished the group build. If you don’t provide your username or finish the project on the timetable the leader has setup you will not be able to receive an award.

Thanks, John!

Michael :israel: :stuck_out_tongue:

1 Like

I will probably try to finish a Hasegawa 1/72 Sea Harrier FRS.1.
cover
DSC00476

2 Likes

No problem Michael, I enjoy doing this campaign.

How long does it need to have been in the hangar? I have a Camel to finish up from the Great War campaign that just ended…

Hi Everyone,

Looks like we’re off to a good start! Gary, looks like you’ve got the hard parts done, should be downhill from here.

Phil, watched your work on the Great War 2023 campaign, and of course this is the place for you to finish your Camel! Like in real life the longer they sit in the hangar the more likely they don’t get worked on. Looking forward to see what you do with the Camel, as I’ve got the Eduard dual combo sitting on the closet shelf where my SWMBO wants the shelf.

Till next time, stay safe and wash your hands!

Thanks.

I think I’ll also try to get my phantom finished this year. I realize there will only be ONE award and IF AND ONLY IF I actually get one finished.

But here is the phantom current status (Tamiya 1/48). I was stopped by realizing how many stencils I have to do. But I’ll start working on some a little bit at a time and see how it goes.


3 Likes

Hi Everyone,

Phil, I really enjoyed my Academy F-4B, the build was fine with the exception of having to install the landing gear early in the build. Painting was a breeze, and then came “Death by Stencil”! I found that doing the insignia and main big decals first, followed by the stencils on the underside wing tips to centerline, and crossing off the decal number on the placement diagram as I went along. Took four days. I’ll admit, yes it was worth it, just took a long and tedious time. Hang in there, I’m sure you can do it!

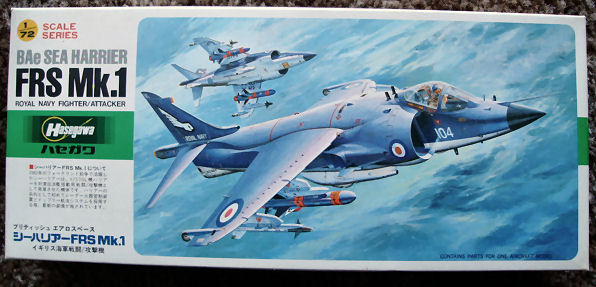
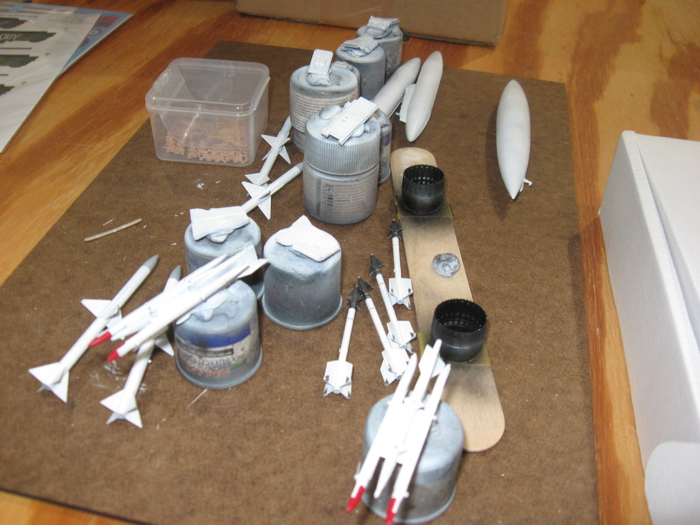
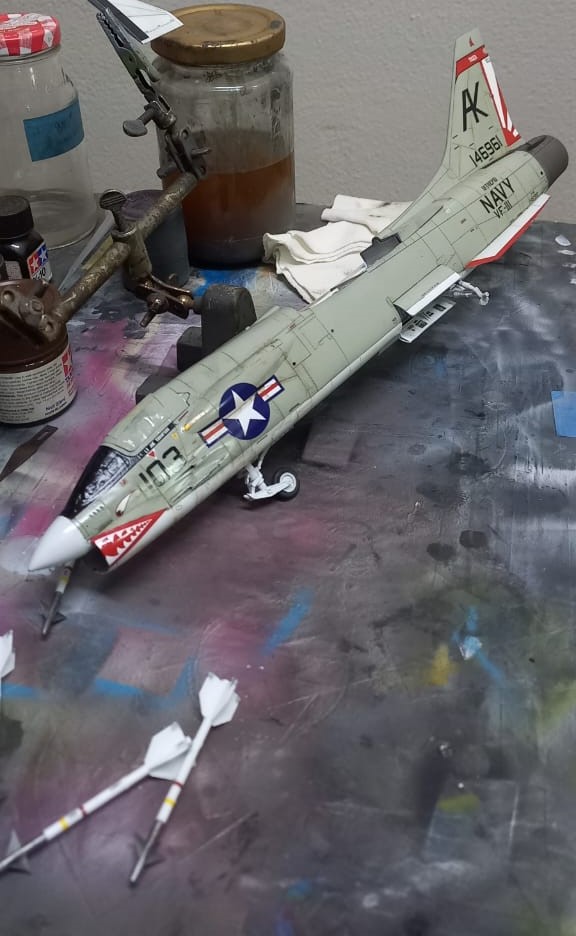
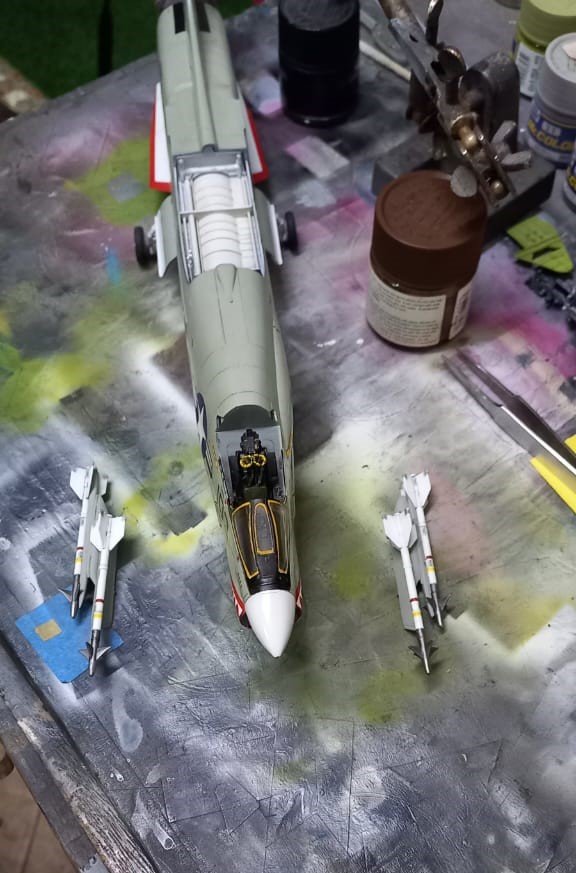
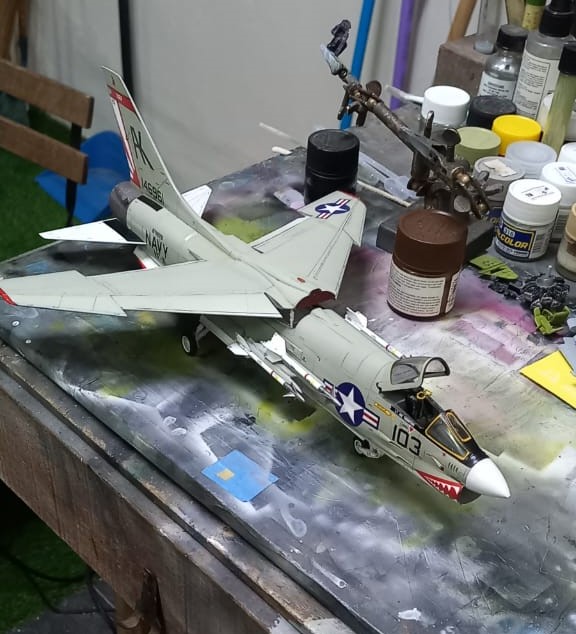
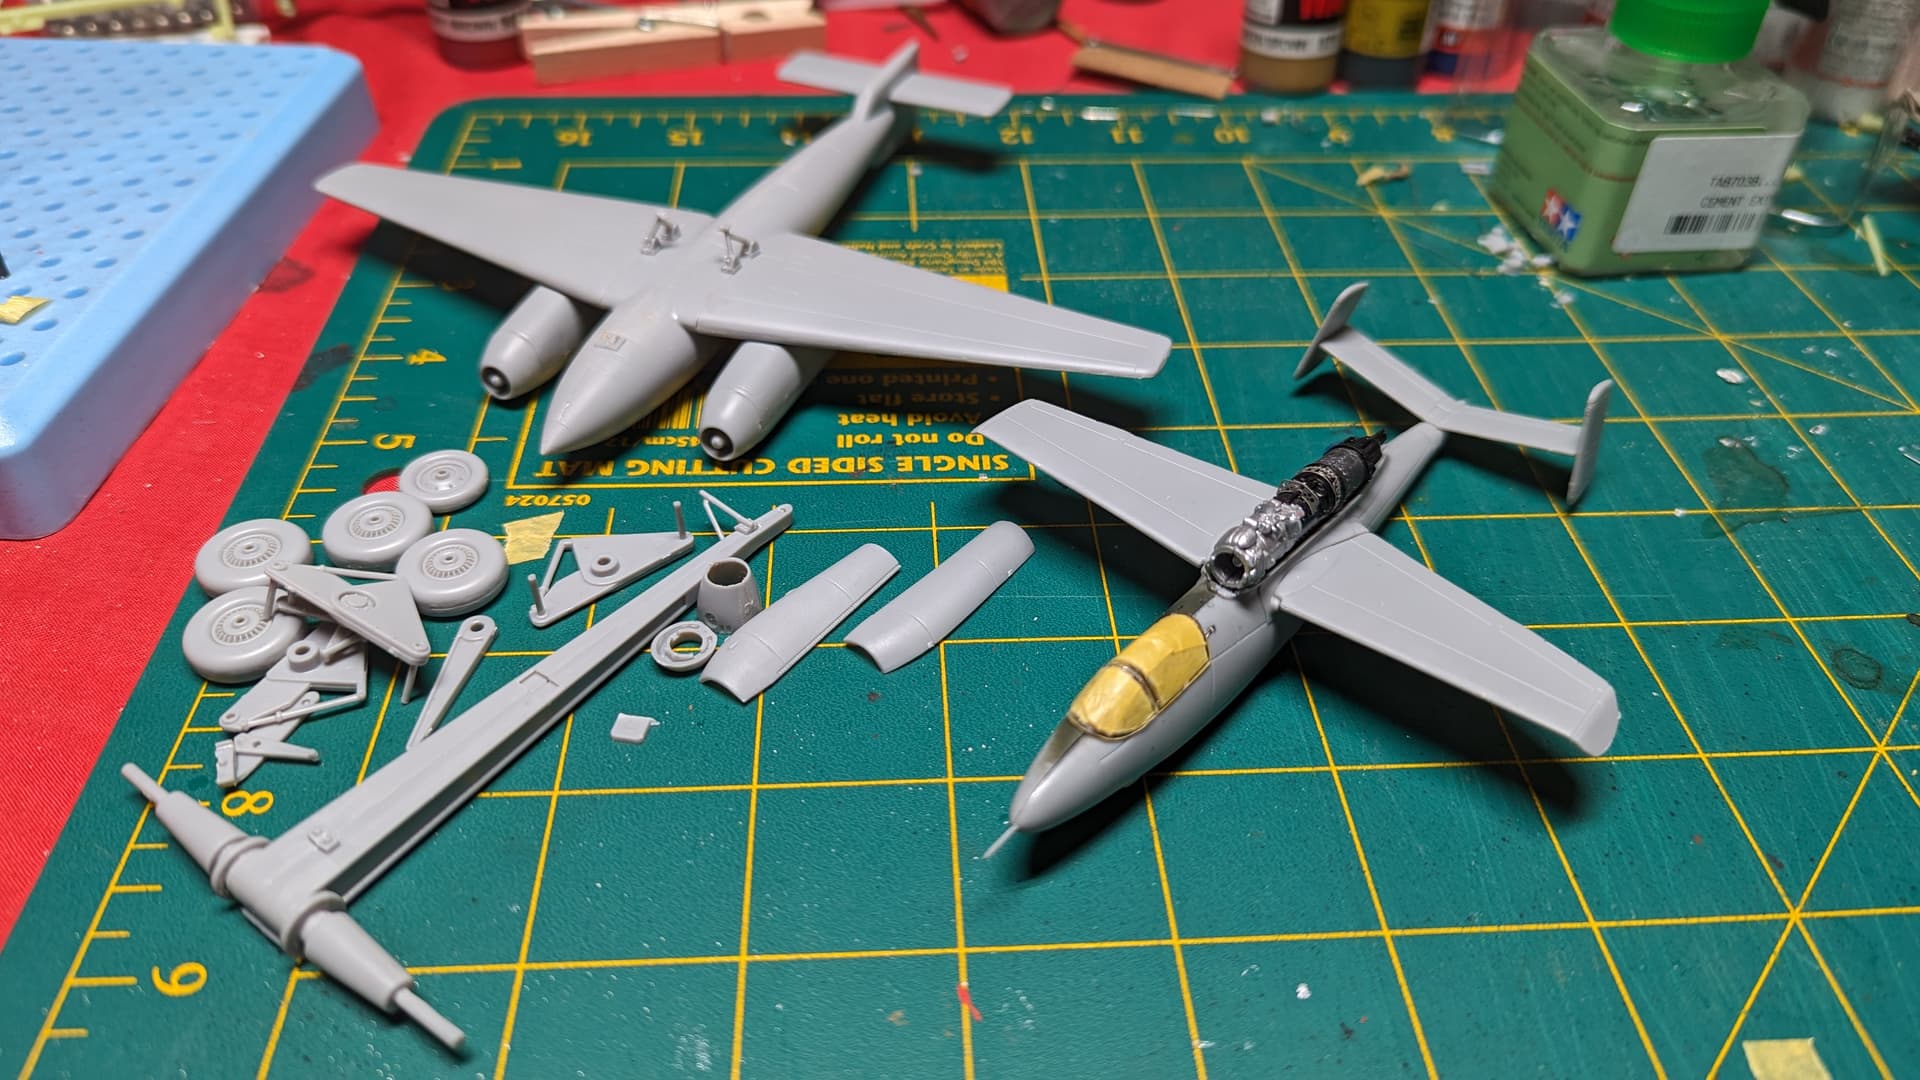
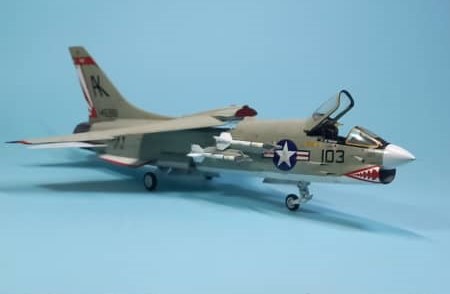
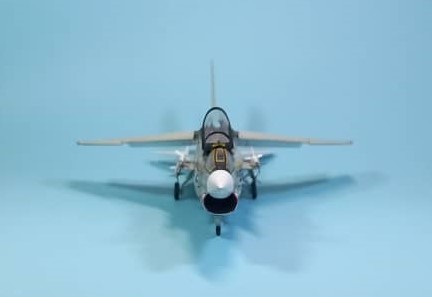
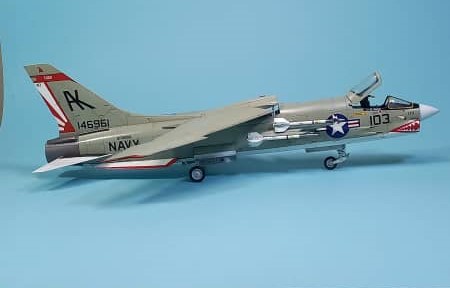
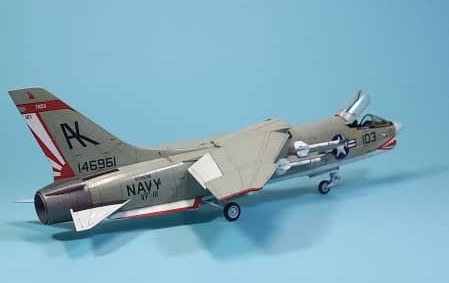
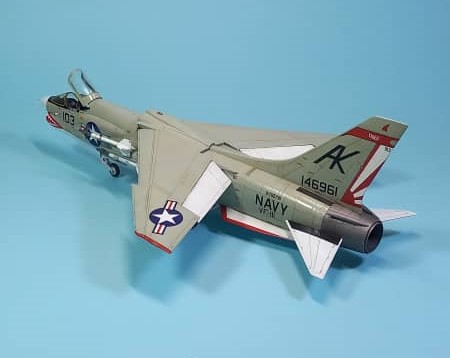
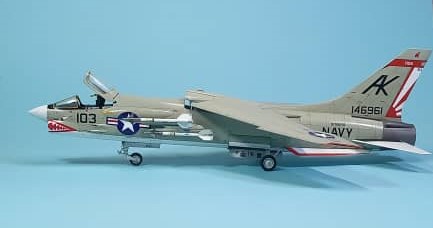
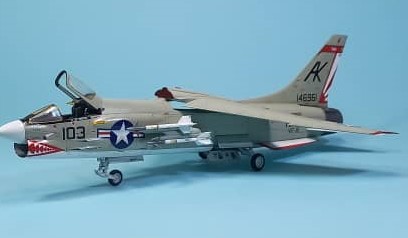
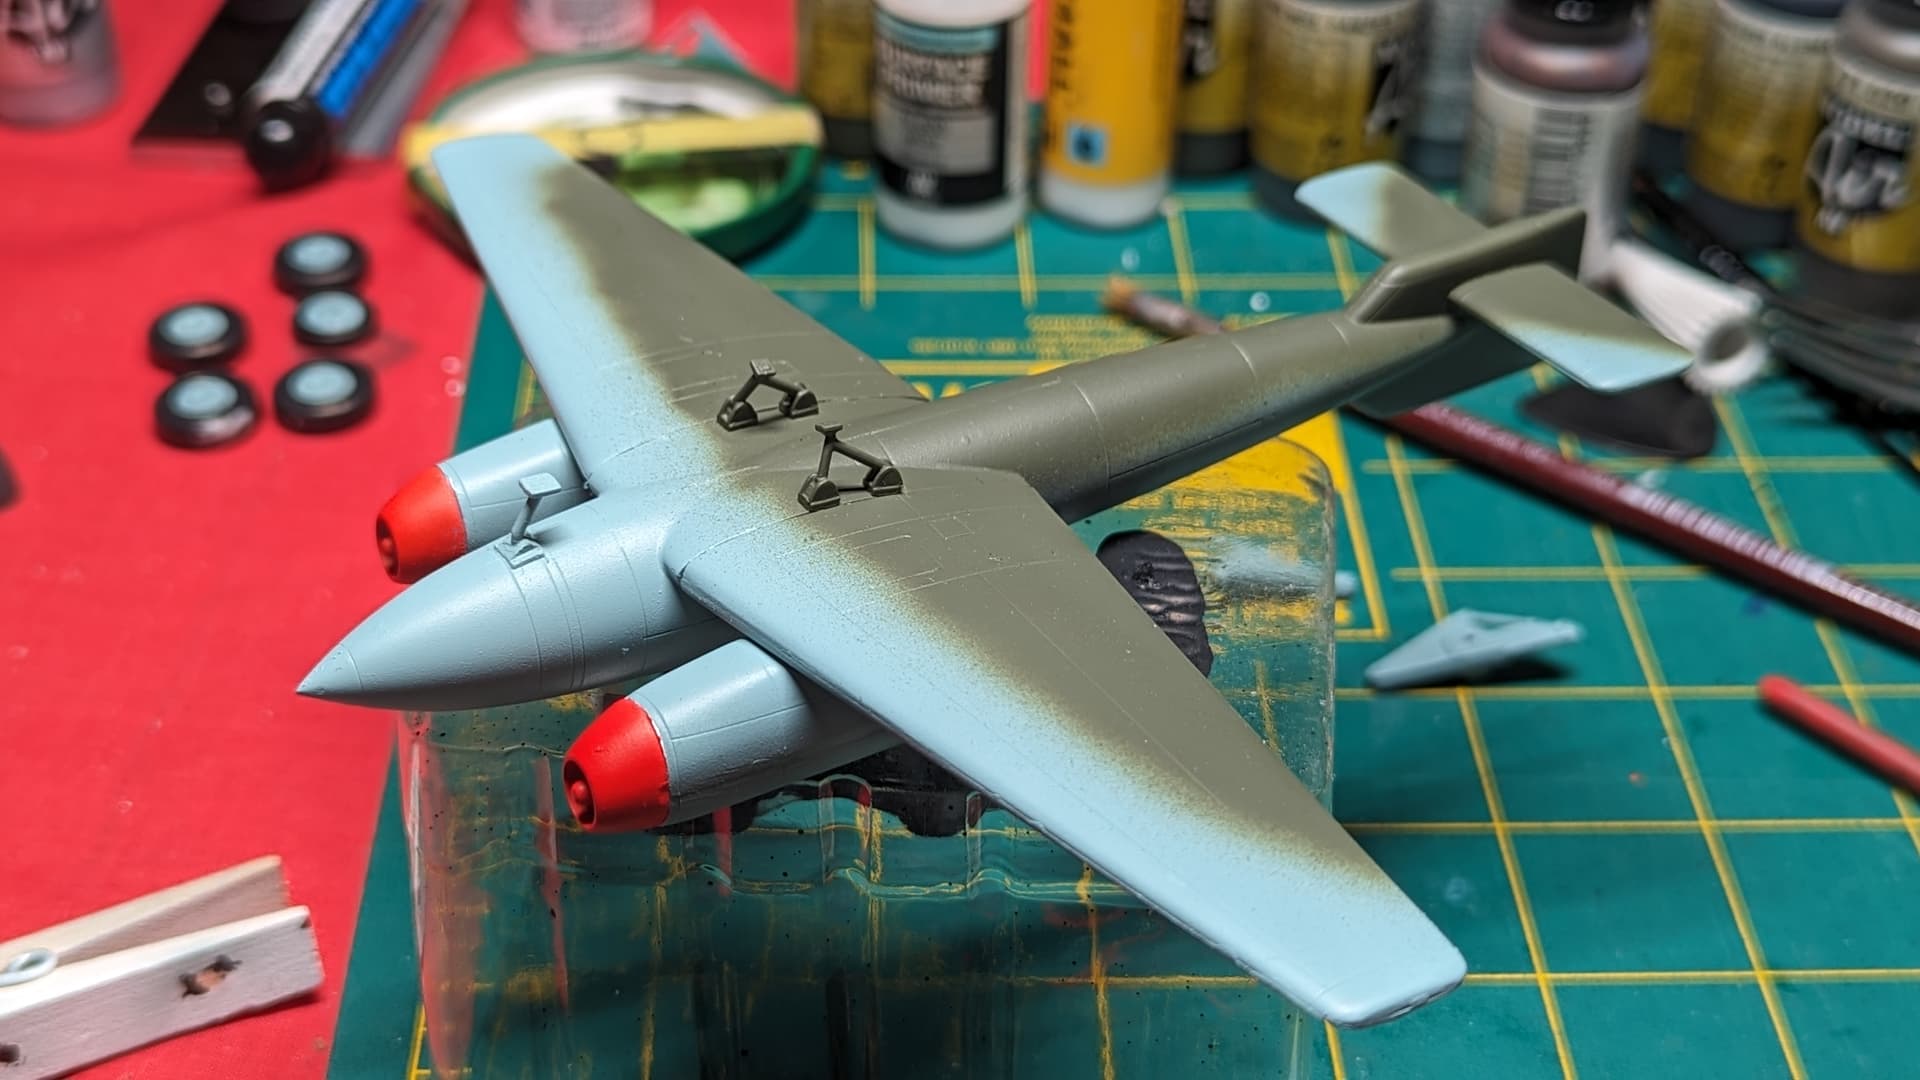
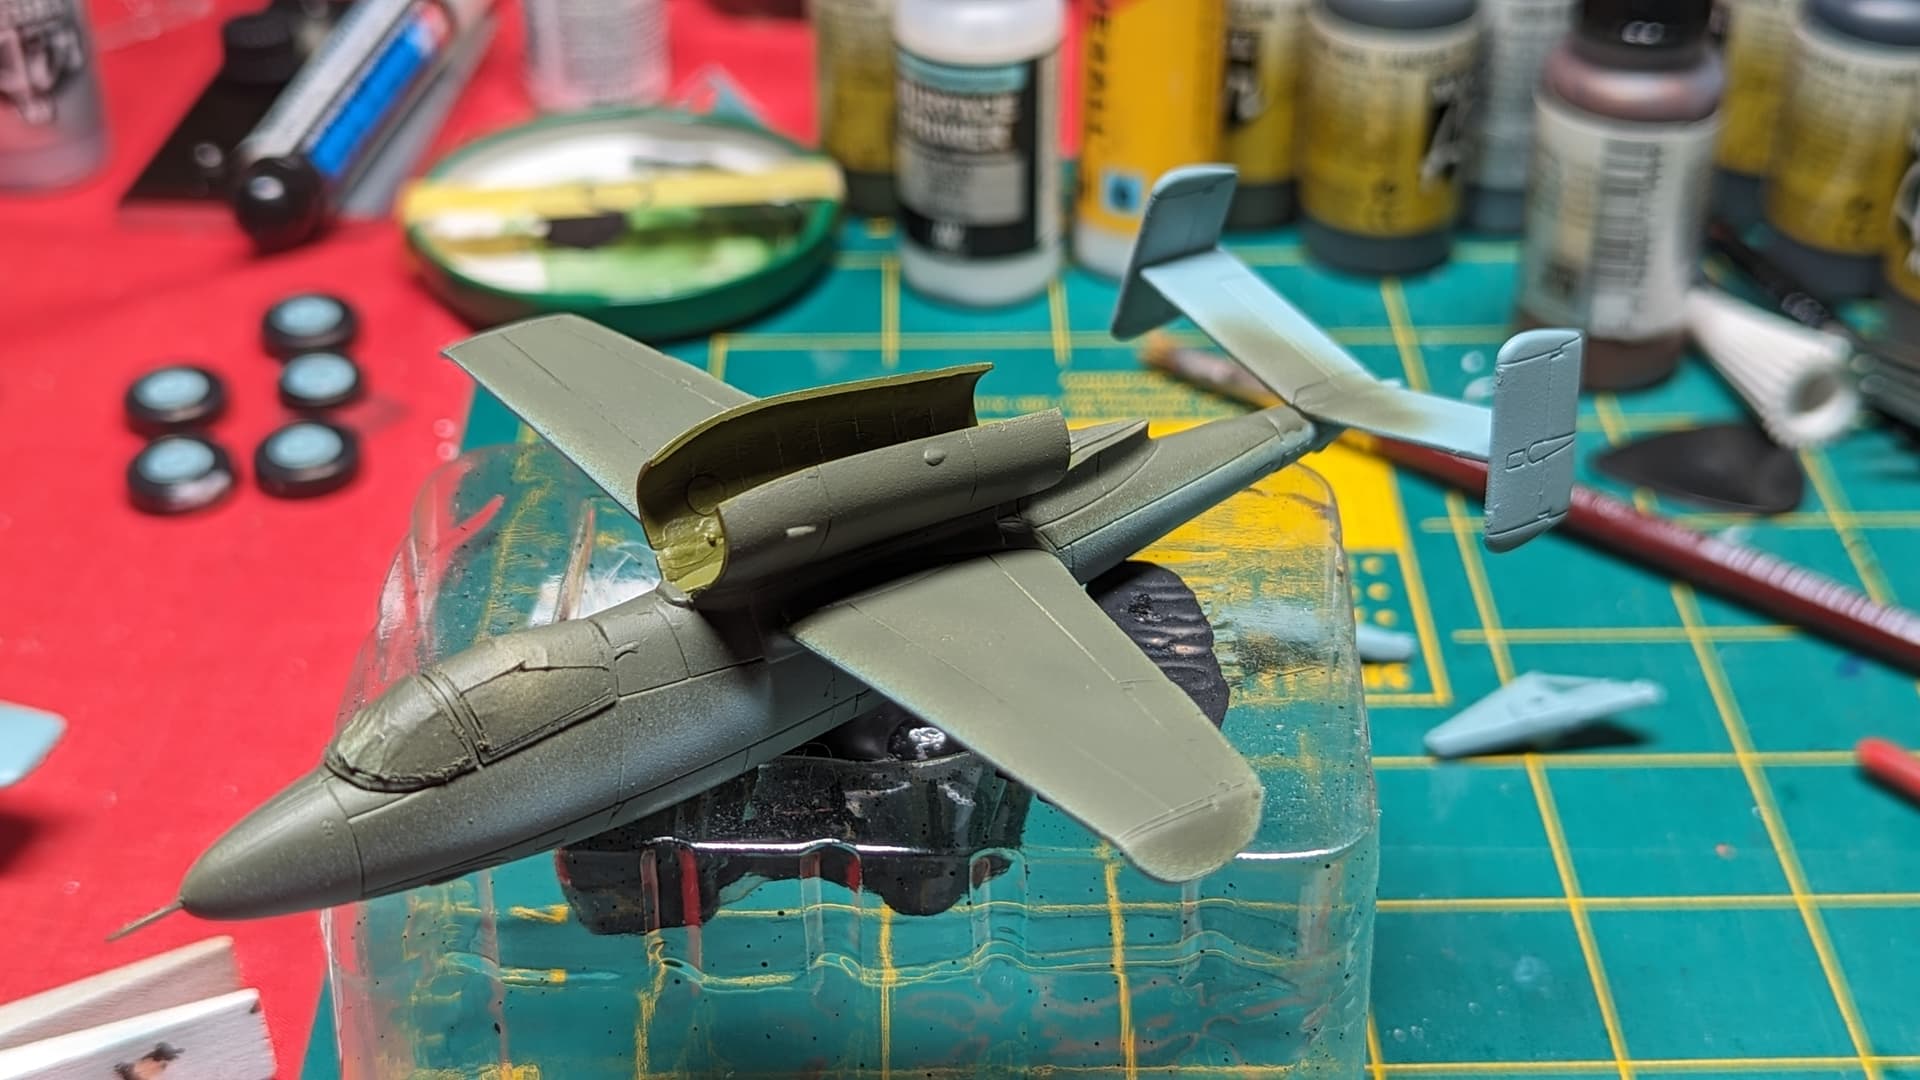
To those of you that were following along in Hangar Queen XIII, the work on my F-8 Crusader made good progress, and it has spilled over into 2024. The Hasegawa kit is fantastic, as are the Furball decals. I chose to do a bird from VF-111 off of Intrepid in 1968, which was a F-8C, for this build I merely omitted the IR sensor off the nose (I think that’s what it was) and filled the hole, I let the larger nose ride. For my audience and myself I’d call it fine, one thing Hasegawa is not so good about is providing different ordinance, while I get the desire to increase sales, it still is a bit of a pain. For this build I’d need some AIM-9 sidewinders, while the “Y” type missile launchers are included, the ordinance is only Zunni missiles are included. Off to my spares box, and getting four AIM-9’s from the Academy F-4B build, thanks Academy! I had no decals for the missiles either, so off to the F-14 kit and steal the decals for the missiles as I intend to purchase the Furball F-14 ordinance set. Problem solved!

WhatsApp Image 2023-12-23 at 22.51.51_99ce4076 (2)

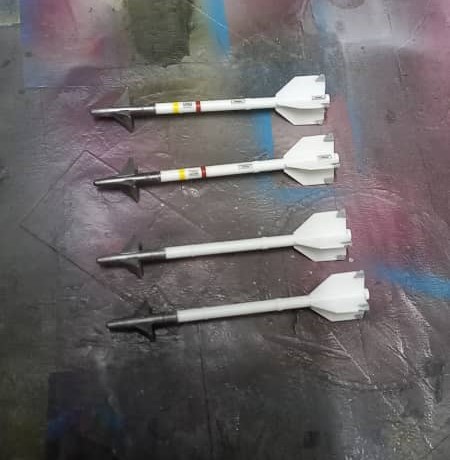
While I was letting the missiles dry, I completed the decaling process, the stencils were not as numerous as the F-4B, and process went quite smoothly.

WhatsApp Image 2023-12-23 at 22.51.28_30cacb9a (2)

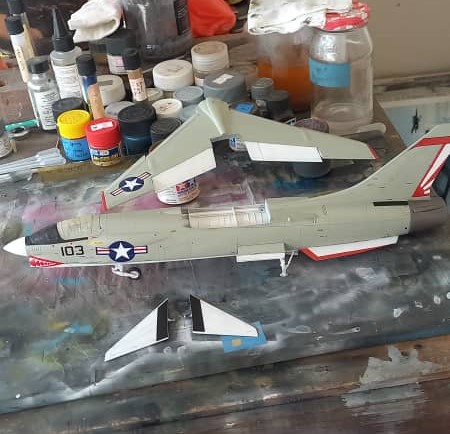
I then followed up by giving the bird a panel line wash.

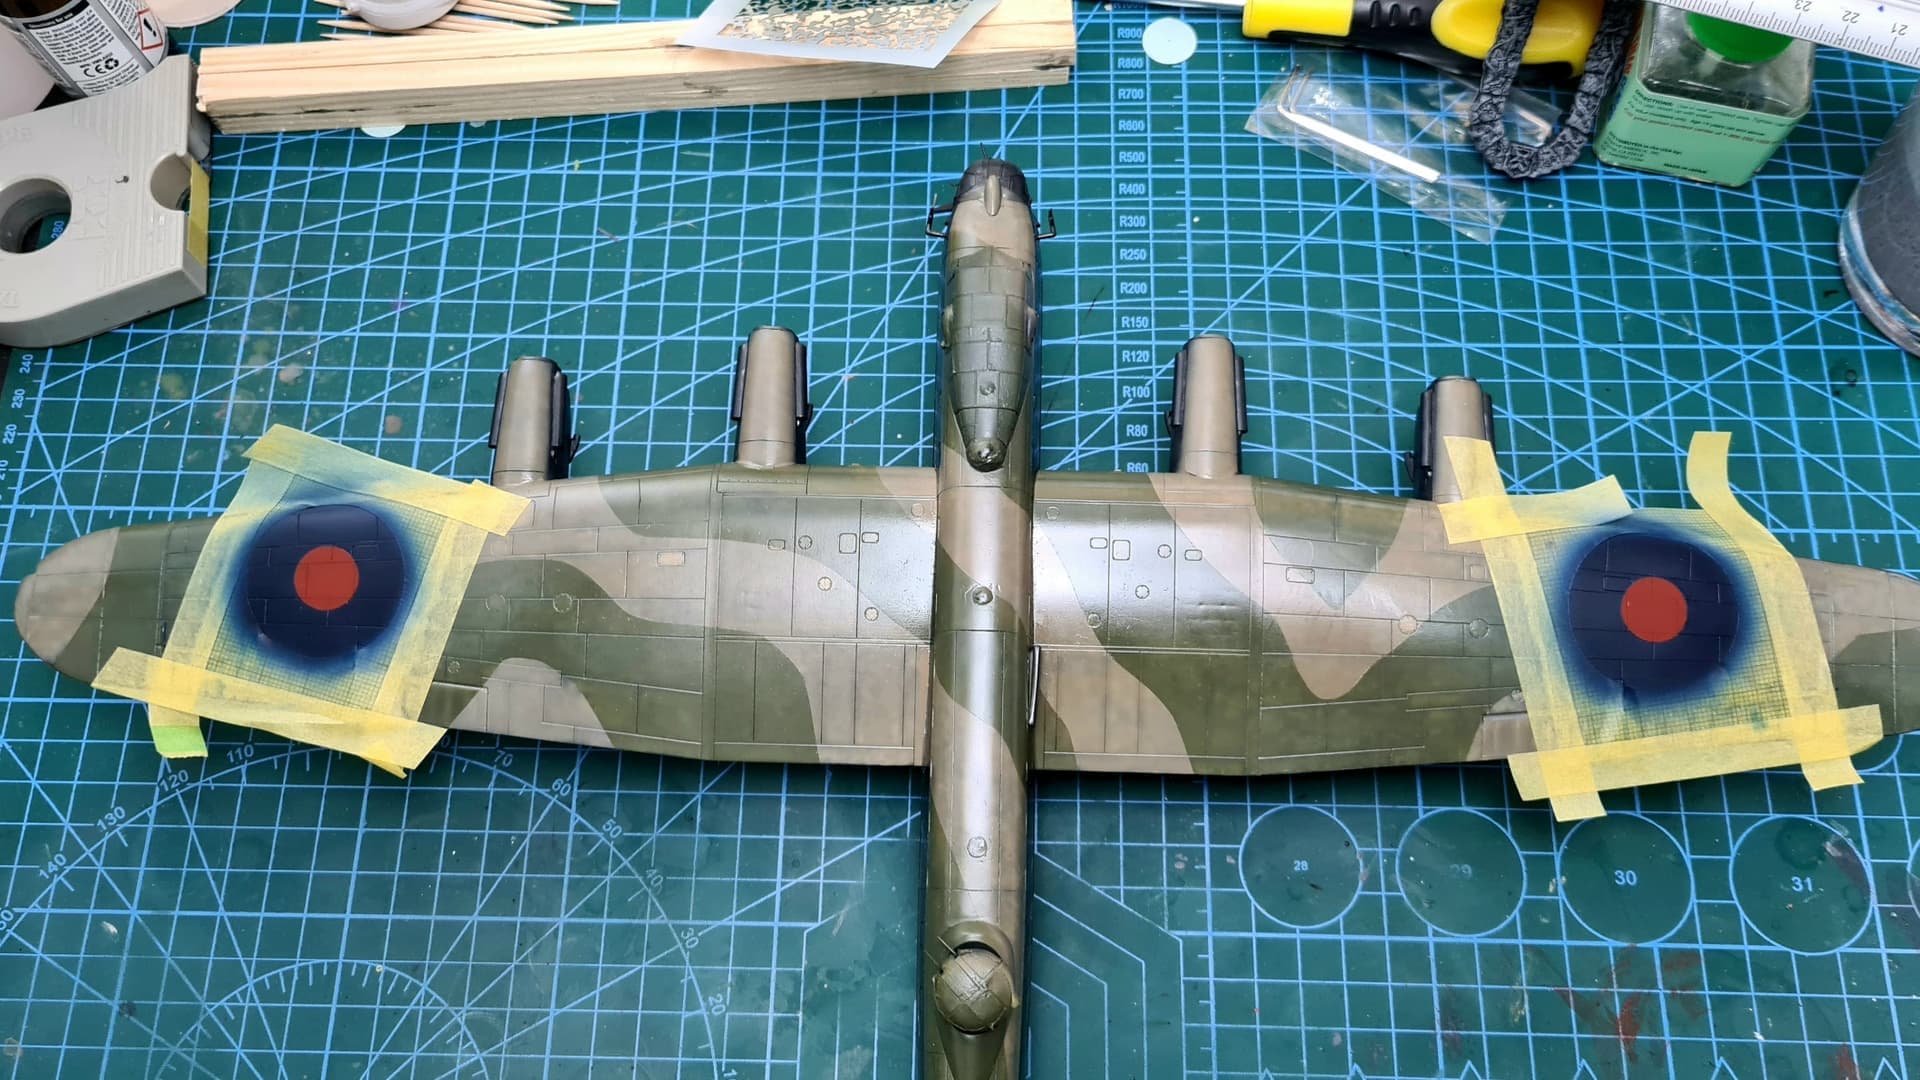
With everything looking pretty good, I decided it was time to remove the masks. This was a disappointment, as it seems there was leakage and maring of the clear part.

WhatsApp Image 2023-12-23 at 22.54.15_ae343e3b (2)

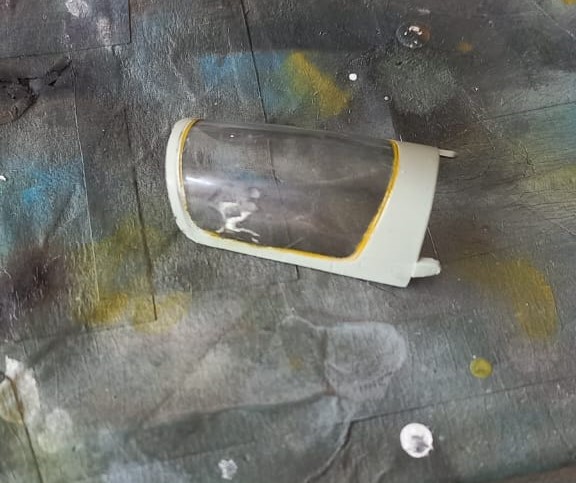
This was remedied by sanding the offending mar out, and then using finer sanding grits, and finally polishing sticks. This worked quite well, and since I’d taped off the painted area there was no need to repaint!

The missiles were then mounted to the launchers, they fit fine, though a bit fiddly.

The launchers were then attached, and the few fiddly bits were added. Thankfully I noticed the pitot tube as I was cutting the sprue to recycle it! Whew, disaster averted! I didn’t glue the tail and wings on as the fit is quite good.

Next up is let it sit, and then come back for a final walk through to see if I missed anything, hopefully not, and then some pictures and conclusions.

Till next time, be safe, wash your hands and have fun!

5 Likes

Ok, so it’s time to reveal my first entry for 2024 Hangar Queen edition:

It’s a Revell’s Lancaster I tried to build for “That’s not a big plane, this is a big plane” campaign last year.

Current state is:

Next steps will be to re-apply colours on wings as they were damaged by extensive sanding and random spills of MLT :stuck_out_tongue: . After it’s done I will continue my efforts in applying Techmod decals and see where it leads me (hopefull not into blind alley :smiley: ) .

5 Likes

Radek,
I watched your build with interest. I’m sure you’ll overcome the obstacles and make something you’re pleased with! I think it looks pretty good so far, keep it up.

1 Like

Thanks John for kind words :slight_smile: . I will go on to the end whatever the cost… I mean end may be with this one :smiley:

1 Like

A question about this Phantom. As you can see, most of the painting is done and it was sealed ready for decals. It’s been sitting around for a couple of years. I’m a little concerned about dust before I get to putting the stencils on. What’s the best way to dust it off thoroughly at this point?

Late to the party due to just joining… But won’t let that stop me.

This is the oldest one on the shelf… So 1st off.

I love the early German jets and oddball WWII efforts


This is a year long build? I’m sure I’ll get further entries, although only a couple before I hit recent purchases. I’ve been out of the habit I’m afraid.

4 Likes


It’s small, fiddly, bad joint fitting and just generally inaccurate and lacking detail.
Not sure if this is 1/72 in general or just this kit.

I’m glad I’ve been stocking up on 1/48 scale.

Happy with progress so far. Still have the Arado flying bomb to build as well, but this is nearly ready for undercoats

4 Likes

Waiting on glue to set before I start with under coat.

Happy with the progress for the weekend

6 Likes

Hi Phil,
The main way I get dust off my birds is to give a gentle blast of air from an unloaded airbrush, and then I use a makeup brush to wipe away any dust bunnies. I tend to go in the direction of airflow with the makeup brush. These can be found in any makeup section of a store that sells the stuff. they tend to be around 2 cm wide with long soft bristles over 2 cm. If the dust has turned to a stain due to humidity or a niece goofing off with water, I take a corner of a cotton rag (cut up old tee shirt) wet with water and gently wipe away going in the direction of airflow. Hope this helps, looking forward to seeing what you do with it.

Hi Drew,

One is never late to this party! Anyone can show up at anytime. Neat kit, yes it’s 1/72 released in 1991, so might want to check the viability of the decals. It’s been my observation that decals over 20 years old can be suspect. Good luck with the build, looks interesting so far, personally I never fully understood why they made flying bombs out of good stuff. I guess desperate times. Anyway, have fun!

Hi Everyone,

After letting the Crusader sit for a bit, I came to the conclusion that it looks fine. So now it’s in the display case! Did pull the posterboard and lights out and took some photos, so without anymore fanfare, here’s Hasegawa’s 1/48 F-8E modified to an F-8C representing the plane flown by Lt. Tony Nargi of VF-111 off the USS Intrepid on September 9, 1968. Lt. Nargi and his wingman were vectored towards MIG 21’s that were attempting to intercept a group of A-4’s where Lt. Nargi was able to get on the tail of one of the MIG’s and shot it down using an AIM-9. They engaged a second MIG, but were only able to damage it. Lt. Nargi’s kill was the 18th and final official F-8 kill of the war.

WhatsApp Image 2024-01-28 at 09.38.05_9f7e1924 (2)

Here, one can see why the ground personnel nicknamed it the “Gator”

WhatsApp Image 2024-01-28 at 09.38.34_f02fd515 (2)

WhatsApp Image 2024-01-28 at 09.38.42_bebc6dfc (2)

WhatsApp Image 2024-01-28 at 09.39.00_27d74a99(2)

WhatsApp Image 2024-01-28 at 09.39.50_6ee8d6c8 (2)

WhatsApp Image 2024-01-28 at 09.40.00_baad4496 (2)

WhatsApp Image 2024-01-28 at 09.40.19_ffd7d91f (2)

This is a great kit! I recommend it to any modeler, it’s only vices are the flaps are a little tricky if doing the extended wings, slight modification is needed to pose the canopy open, and ejection seat is said to be poor. While it’s rather bland, it does look the part, though I happened to have a spare seat with belts so opted to use that for overall ease (PE seat belts can drive me a bit batty sometimes!) and used the kit part to add the ejection handles.

The Furball decals used were fabulous! They went down with no issues and responded well to Mr. Softener decal solution. I’m going to have to sell off a kit or two so I can buy some more! Highly recommend! Hope you enjoyed.

Till next time, be safe, wash your hands and have fun!

5 Likes

Some 1sts today.

After some “friendly” language and persuasion, the He 162 has progressed to this.


I’m happy with the result as my airbrush accuracy is not great, but certainly getting better.

Next steps are construction of the carriage and decals and weathering.

Wish me well as off to dabble in oil washes as well.

4 Likes

Great looking Crusader. :+1::+1:

2 Likes