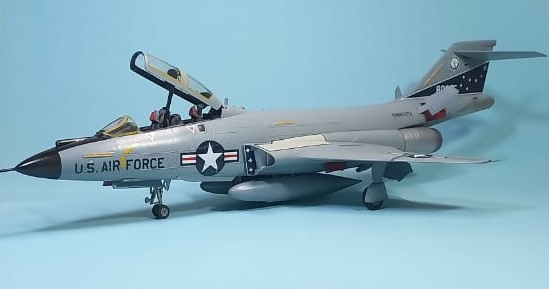
Lovely work on the crusader.
Goals to aspire to.
Lovely work on the crusader.
Goals to aspire to.
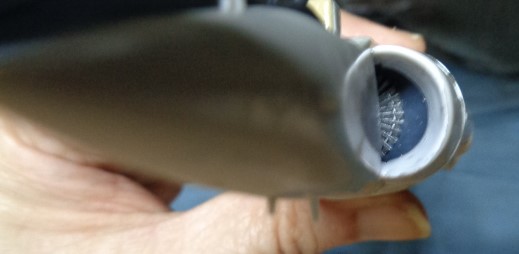
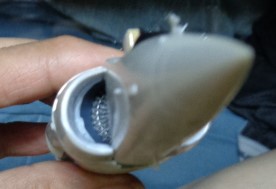
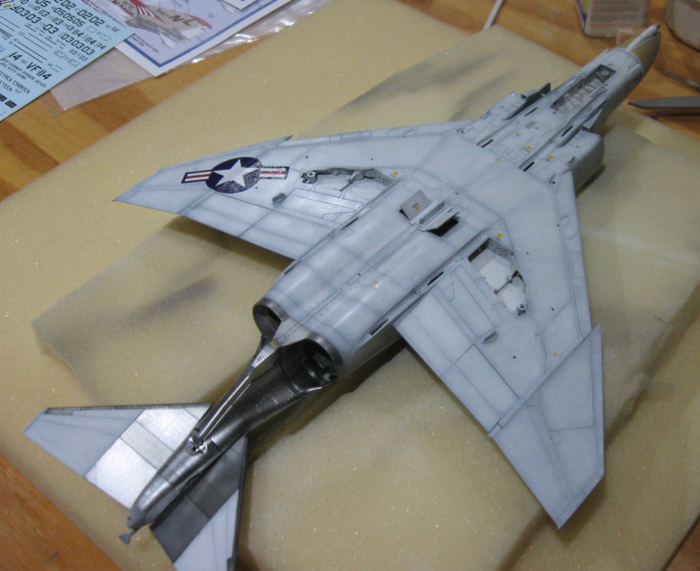
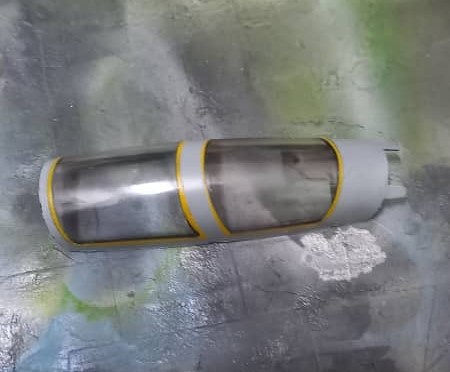
Attempted to paint the inside of the intakes Gloss White. Should have done this before I added the intakes, which is why it has been dormant for so long.
Hi Everyone,
Gary, it looks convincing from here, stay the course! Thank you, Ryan and Drew, your compliments are greatly appreciated! I was very happy to get this build finished. I’m pleased with the result.
That said, I’ve been doing a Century Series on the side. I would not normally post about it, however…Phil brought up a great modeling question. “What’s the best way to dust it off Thoroughly at this point?”. Well, 2023 might go down as my worst modeling year since 1979, though, it does go down as the year I beat the snot out of bad things. So, Phil, this is for you!
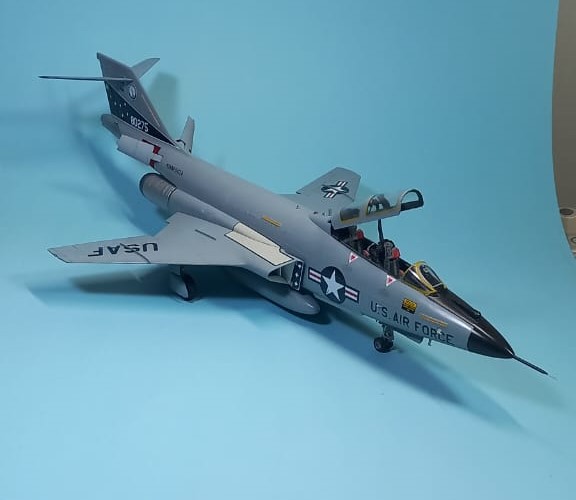
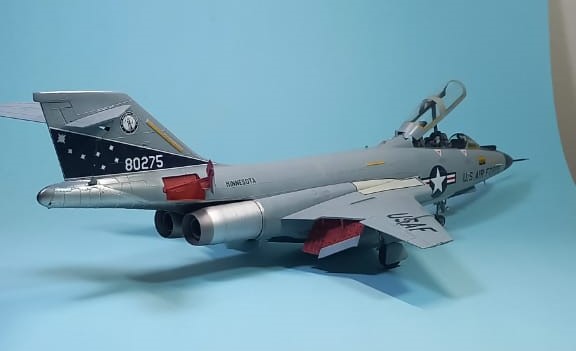
Last year I began a build of Monogram’s 1/48 F-101B. Overall, this is a typical Monogram kit, great interior, mediocre fit, and a pretty good end result. Where I currently live there’s a farm in the back yard, which is way cool! Though, when the rain stops, the dirt dries, becoming dust which fills the house and with the high humidity becomes a film of dusty mud. Add some lizard poop, and well at a meter it’s not too noticeable, but when you get close to maintain the model case, it’s quite apparent.
The pics aren’t so great, but trust me, this bird was covered with a film of dust, dirt, and a little lizard poop. So, step one is to use an unloaded airbrush and hit the plane with about 20 psi in the direction of airflow.
Then brush the bird, again in the direction of airflow
using a make-up brush.
With things looking pretty good, it was time to get rid of the lizard droppings. Results may vary on this trick. Since I gave the bird a gloss coat of clear lacquer using a wrung-out cotton swab with 70% IPA and gentle rubbing did the deed. If I’ve coated the surface with acrylics, I’ll use a drop of dish soap in a coffee cup of water. Gentle is the key. Once cleaned, it’s off to the races!
Ironically, the reason for this Queen was the canopy. While constructing it I somehow managed to break off one of the flanges. I repaired it, and promptly broke it off and lost it to the astroturf model monster out front. As I’m easily distracted, it sat. And sat, till motivation came in the form of “Clean this mess up!”. Out came the 0.20" stock plastic sheet, and using the remaining flange as a guide, I cut and test fitted the new flange.
Using superglue, it was attached and gently sanded to match the canopy.
And then painted to match the color scheme.
I safely moved on to get the canopy attached using white glue, and a little superglue to attach the lifting bar. Here’s the test fitting.
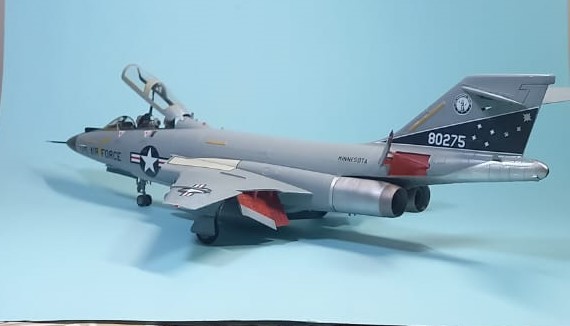
With that hurdle achieved, I did the nav lights and other lights using a silver base and then clear red, green and blue. With that I proclaimed her done. Number 3, of my Century Series! Hope you enjoy.
Till next time, stay safe, wash your hands and have fun!
Hello,
i am with my EC-121D:
I started this model last year, but due to the birth of my second daughter and the relocation of my workbench, i wasn’t able to finish.
Congratulations, a new born will do that to any project.
Love the Warning Star, looking forward to see what you do with it. Also, congratulations on the new addition to your life, truly the important stuff!
Hi Everyone,
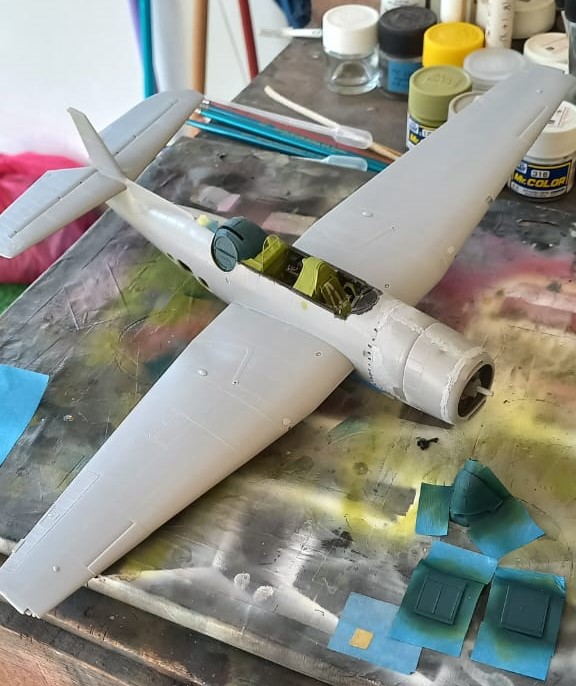
For those of you that are participating in or following the “1942: The Turning of the Tide” campaign, will recall that I hit that campaign pretty hard, only to discover that my choice didn’t meet the criteria. Well, this campaign is a great place to go to complete the project, show off your work, and get a really cool ribbon for your effort! My entry was Accurate Miniatures TBF-1C, which made its debut in early 1943, where they moved the radio operators station from the tandem seat behind the pilot, to down below the turret gun. I was surprised at how quickly the kit goes together, though I’m not too thrilled with the instructions. They can be a bit vague and drawings a bit nebulous, despite being thorough at the same time. Never the less, here’s where I was when my research torpedoed the project on that campaign.
I followed the main assembly with some Mr. Surfacer 500 to clean up any seams and gaps, I also used Eduard’s mask set for the kit, to do the clear greenhouse parts. For me, when dealing with a greenhouse canopy, these Eduard mask sets pay for themselves. I also, noted a gap, and going over the instructions and drawings found a space, that I couldn’t figure out. So, in my haste I took a scrap of stock styrene and filled it. This would later come back to haunt me, as I discovered that this where the pitot tube goes. Oh well, worse mistakes have been made.
I did ground this area down and then smoothed it into the wing area, and once done was quite satsfied.
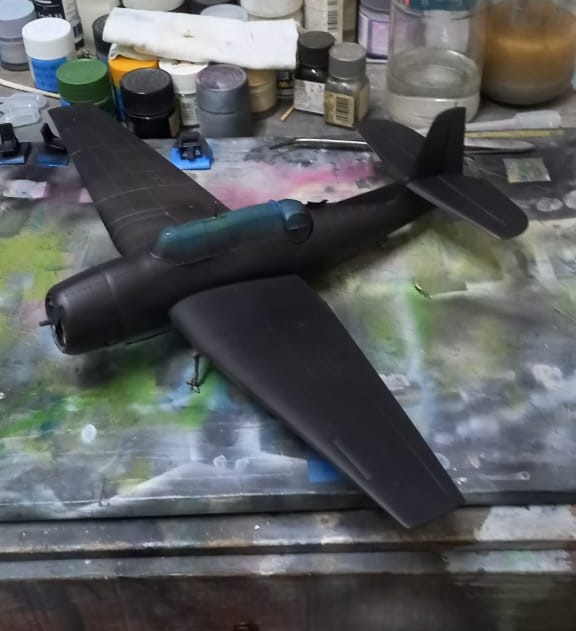
It was about this time that my phone, which is my camera shot craps. While waiting to replace the phone (planned product obsolescence, is a bummer and the new model causes great grief for all electronic gear and their set up), I continued the build. Once satisfied, the bird was given a black primer base on the upper, and grey primer on the lowers (Mr. Surfacer 1500 black and grey) it was then gone over, looking for any areas needing work.
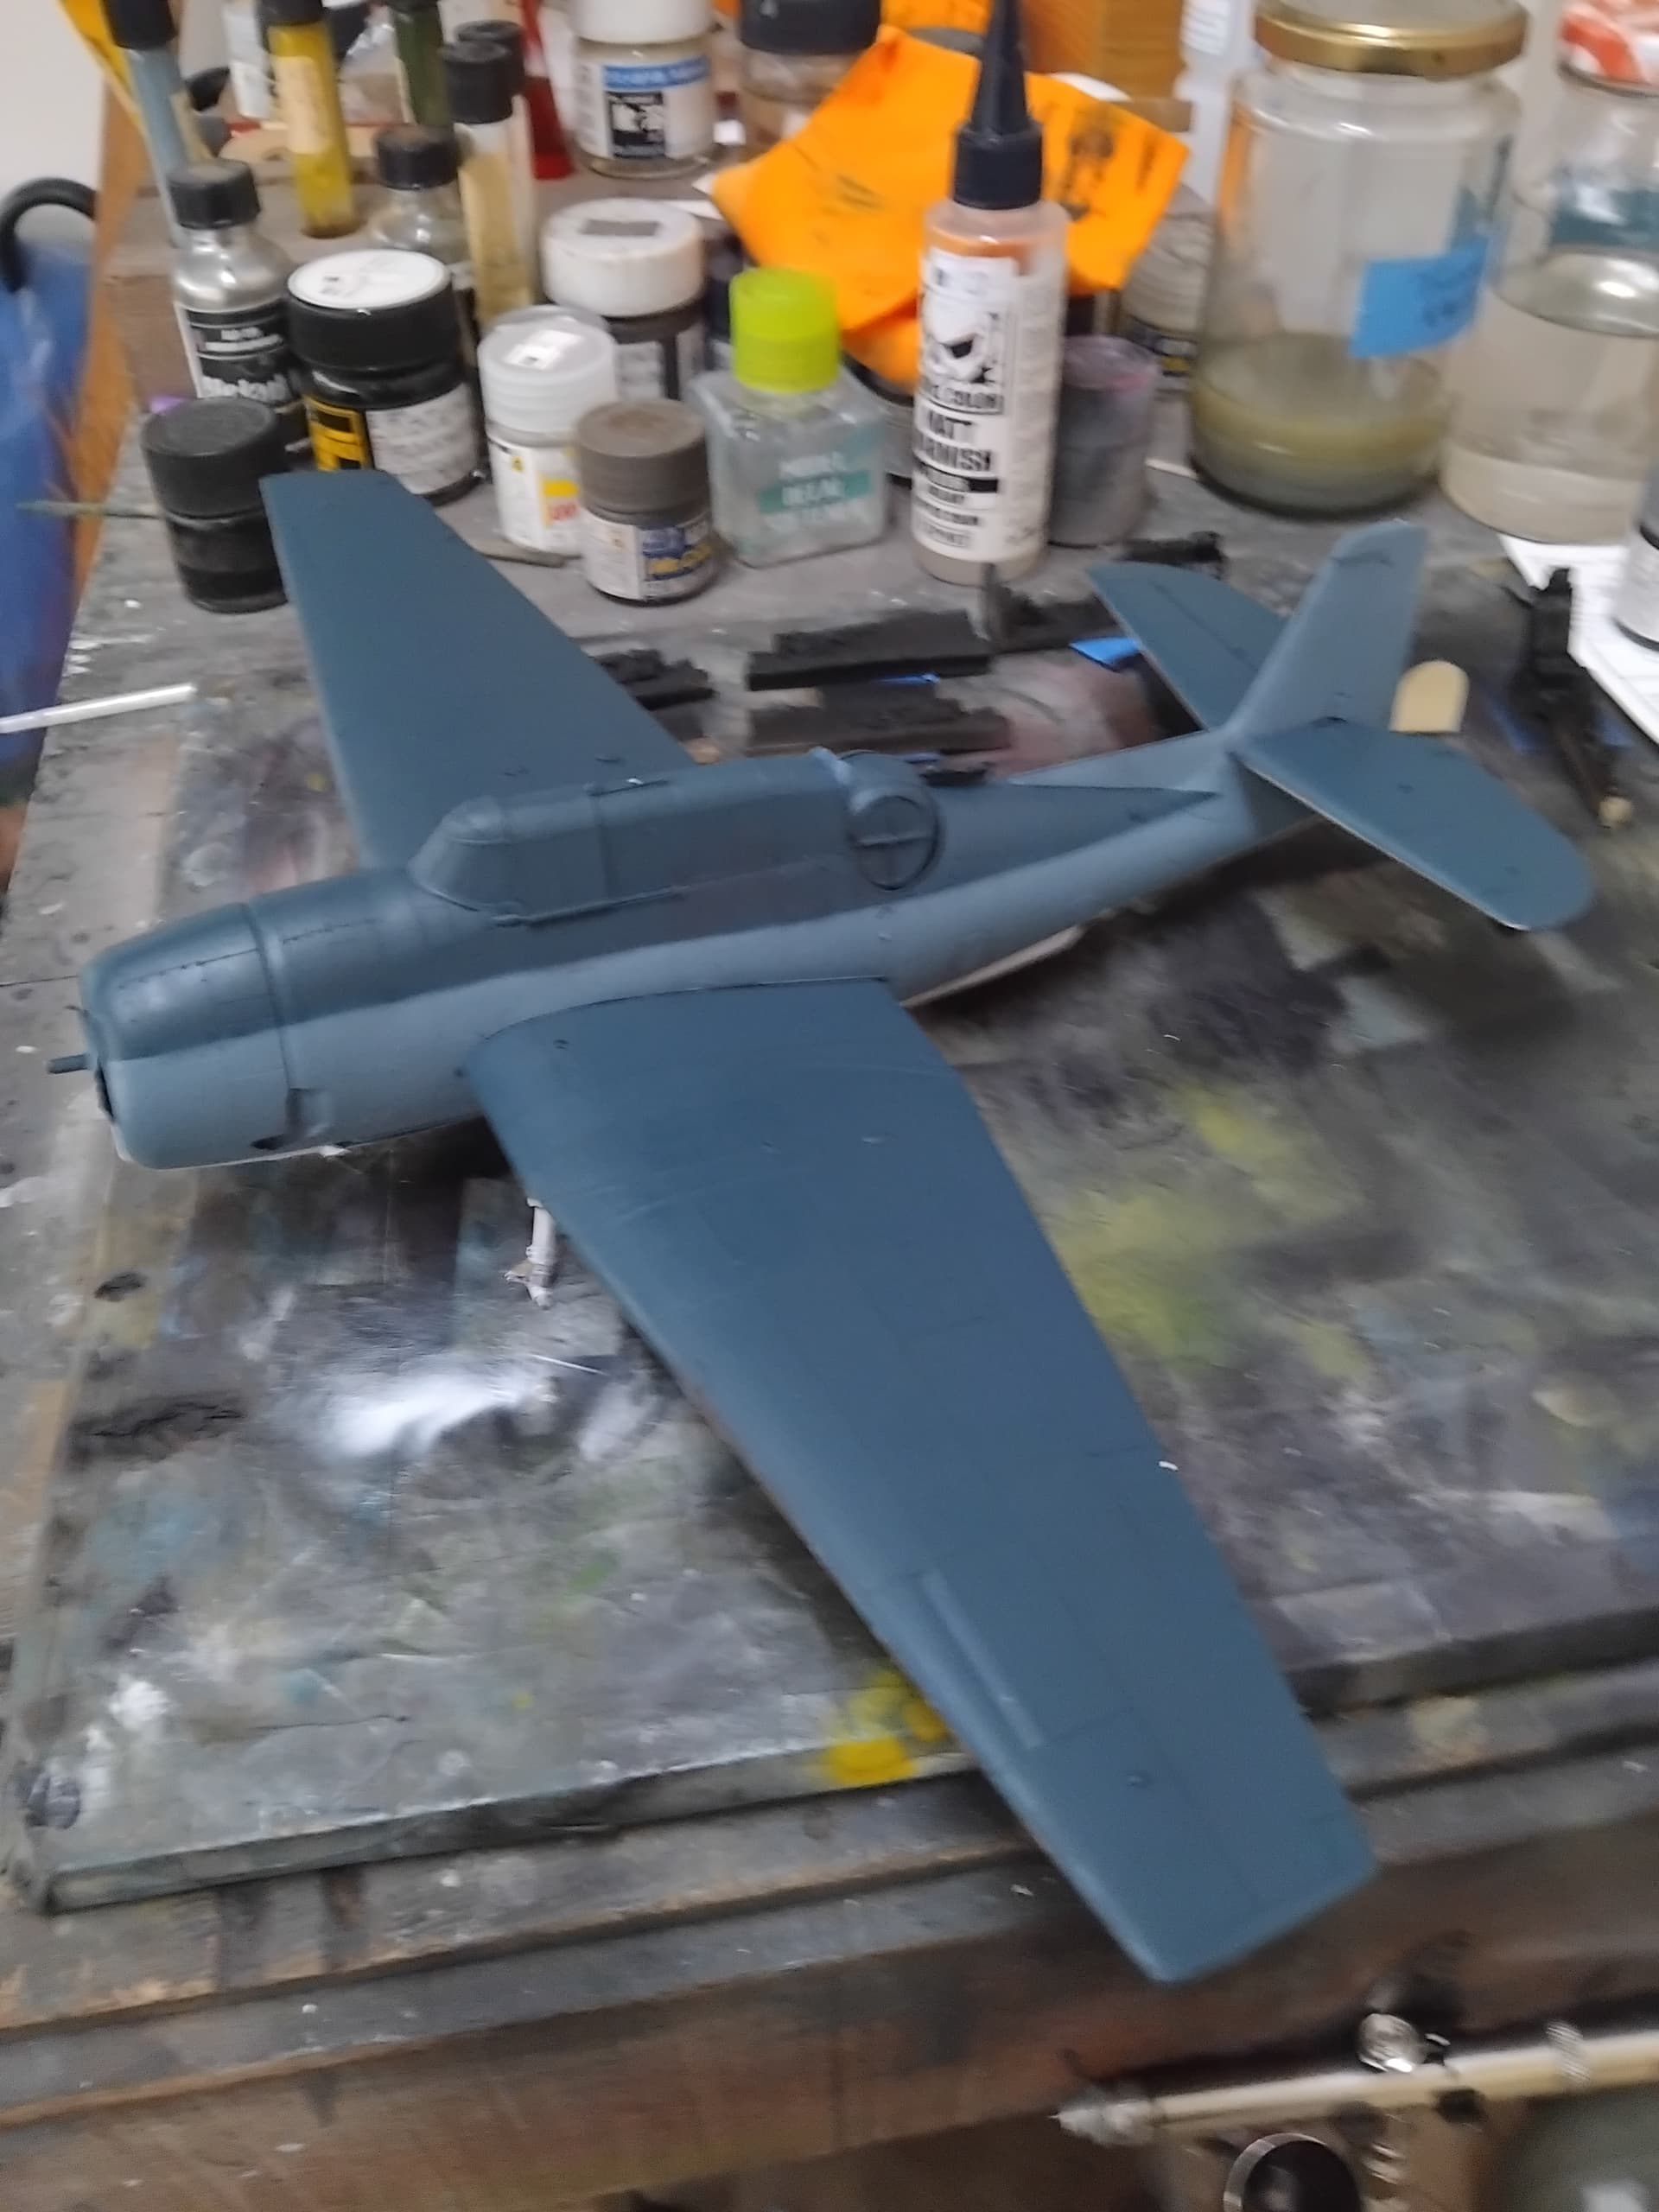
Finally, it was time to paint! I decided to do the intermediate blue first, something I’m still not sure if it was the best path.
Masking the lower portion of the intermediate blue, my attempt to get a soft demarcation was made by folding the edge of the tape over onto itself, and then placed where it should go per the drawings. Then the white underside went on, I began with flat insignia white at first, however, due to rough going I switched to gloss white.
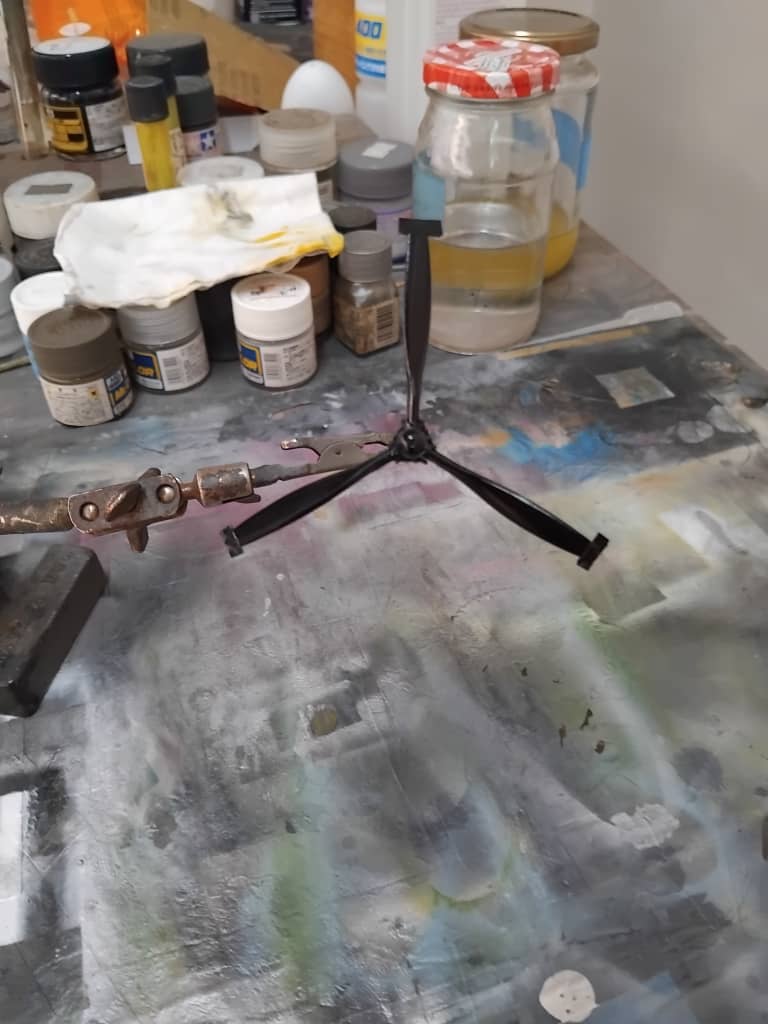
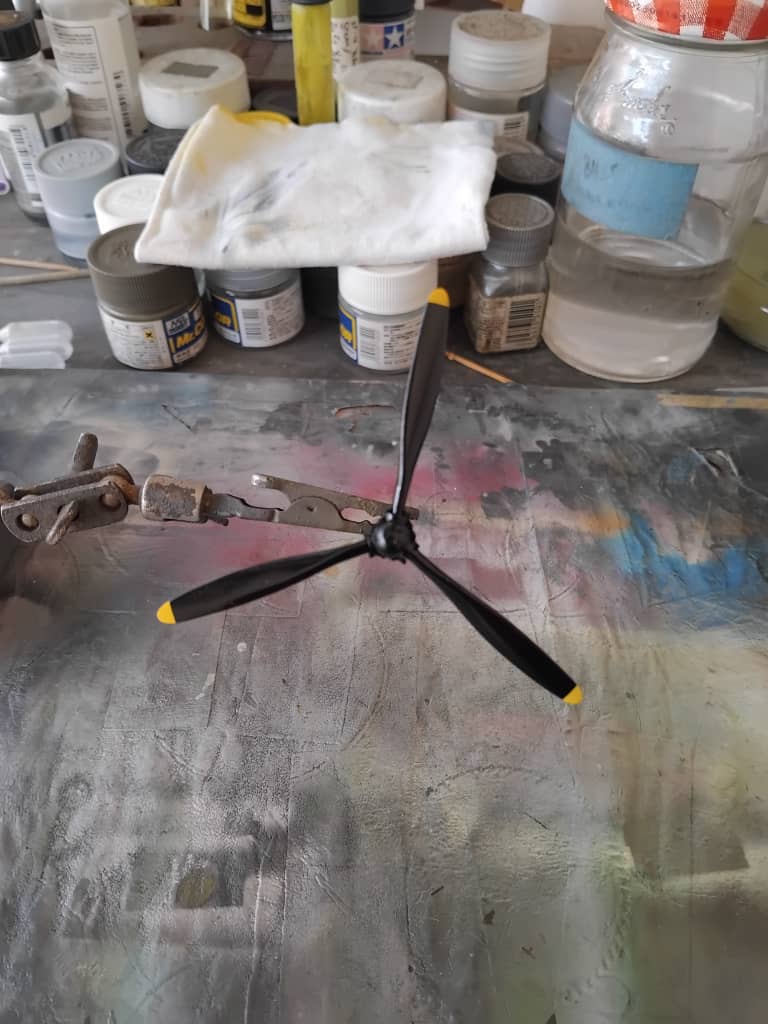
With the white down, I began the masking task for the upper paint scheme. Given the tediousness of this process, I allowed myself to get distracted and get some of the other parts ready for assembly further down the line. This would include the propeller. I thought this might be a good time to give a simple tutorial on how I paint US props. Having done this many times, I believe this procedure is very efficient with time, and gives a very nice finish.
The first step is to clean up the part and then paint the yellow tips. If the hub is to be painted, this would be the time to paint it as well. In this example, the hub will be aluminum.
Next the tips get masked off. I’ve found the tips generally range from 2 to 3 mm in 1/48 scale. Check references, for the Avenger, it worked out to 3 mm. So, the tape is cut 3 mm and burnished onto the tip of both sides of the prop.
Next, the prop is painted gloss black. My usual go to is Tamyia black, however, I’ve been practicing with Mr. Color gloss black (difference between acrylic vs lacquer). I’m getting better at getting the lacquer to be as nice as the acrylic.
Off comes the tip masks.
Then the props are masked, I begin with thin strips of tape nestled next to the hub, and then laying tape wide enough to fully cover the prop blade.
Then the hub is painted, in this case I used Alclad II airframe aluminum.
The prop is looking pretty good at this point!
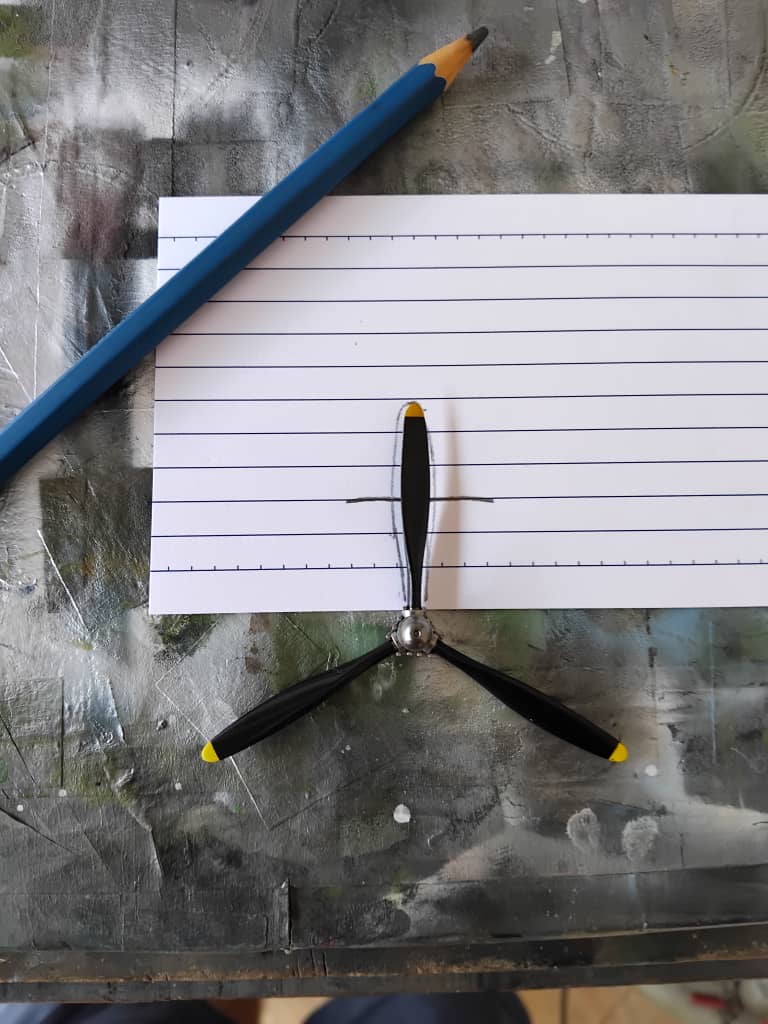
With a good-looking prop, it’s time to put the propeller logos onto the blades. Most US props have the logo located at the midpoint of the prop blade. An easy way to get the location the same on each blade is to make a template. Using a scrap piece of 3x5 index card, the prop blade is traced.
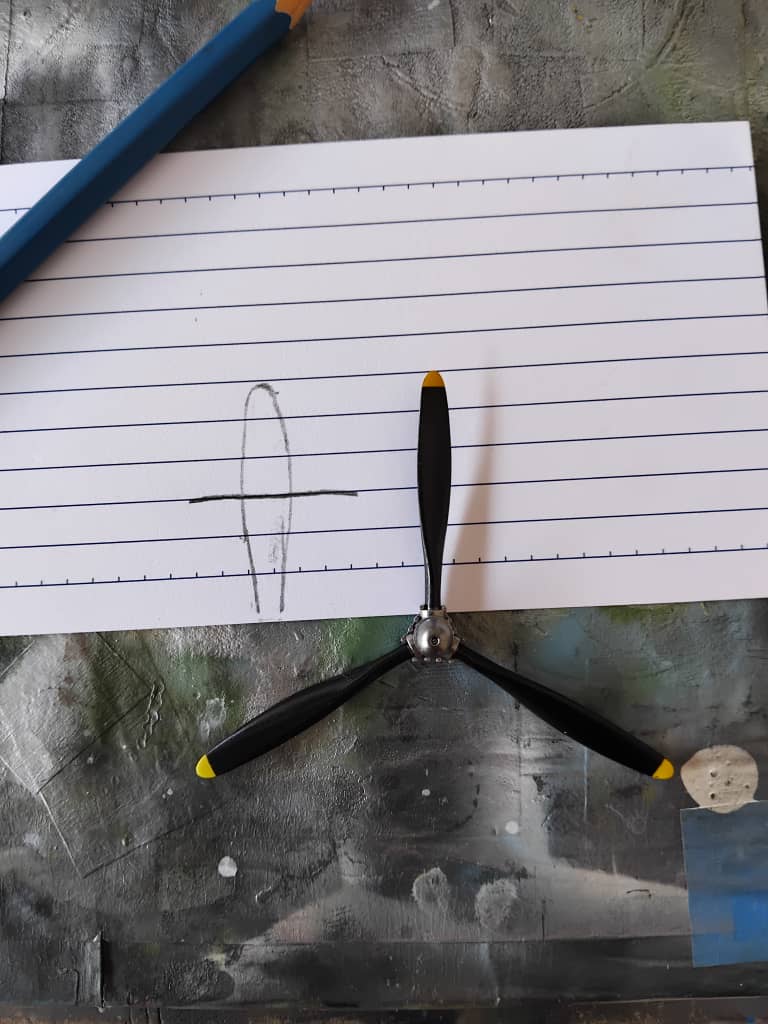
Then a midline can be drawn onto the template to mark where the logo will go.
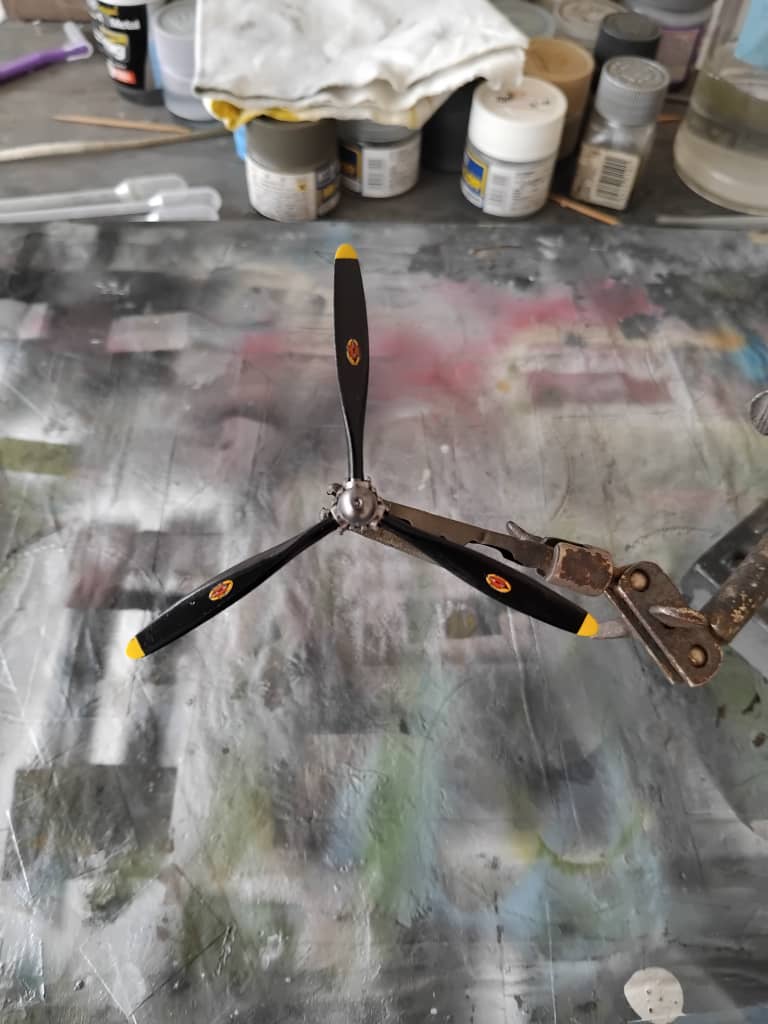
Now comes the time to add the logos. All that’s needed are basic decal application skills, using the template to locate them on the prop.
Finally, the prop blades are given a coat of clear flat to dull things down.
The prop is now ready for weathering, being a carrier-based plane, this prop is done. Hope this helps.
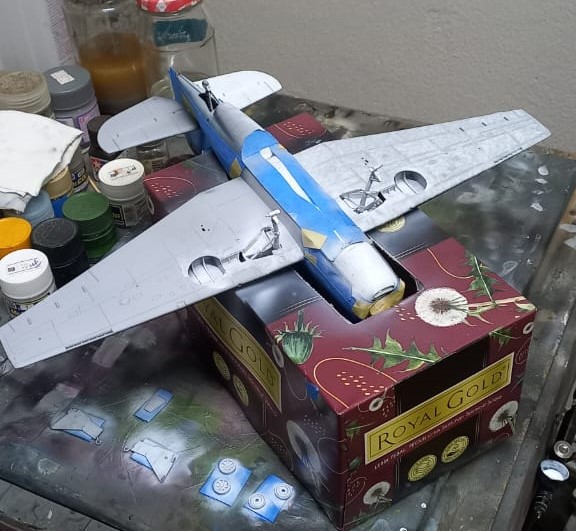
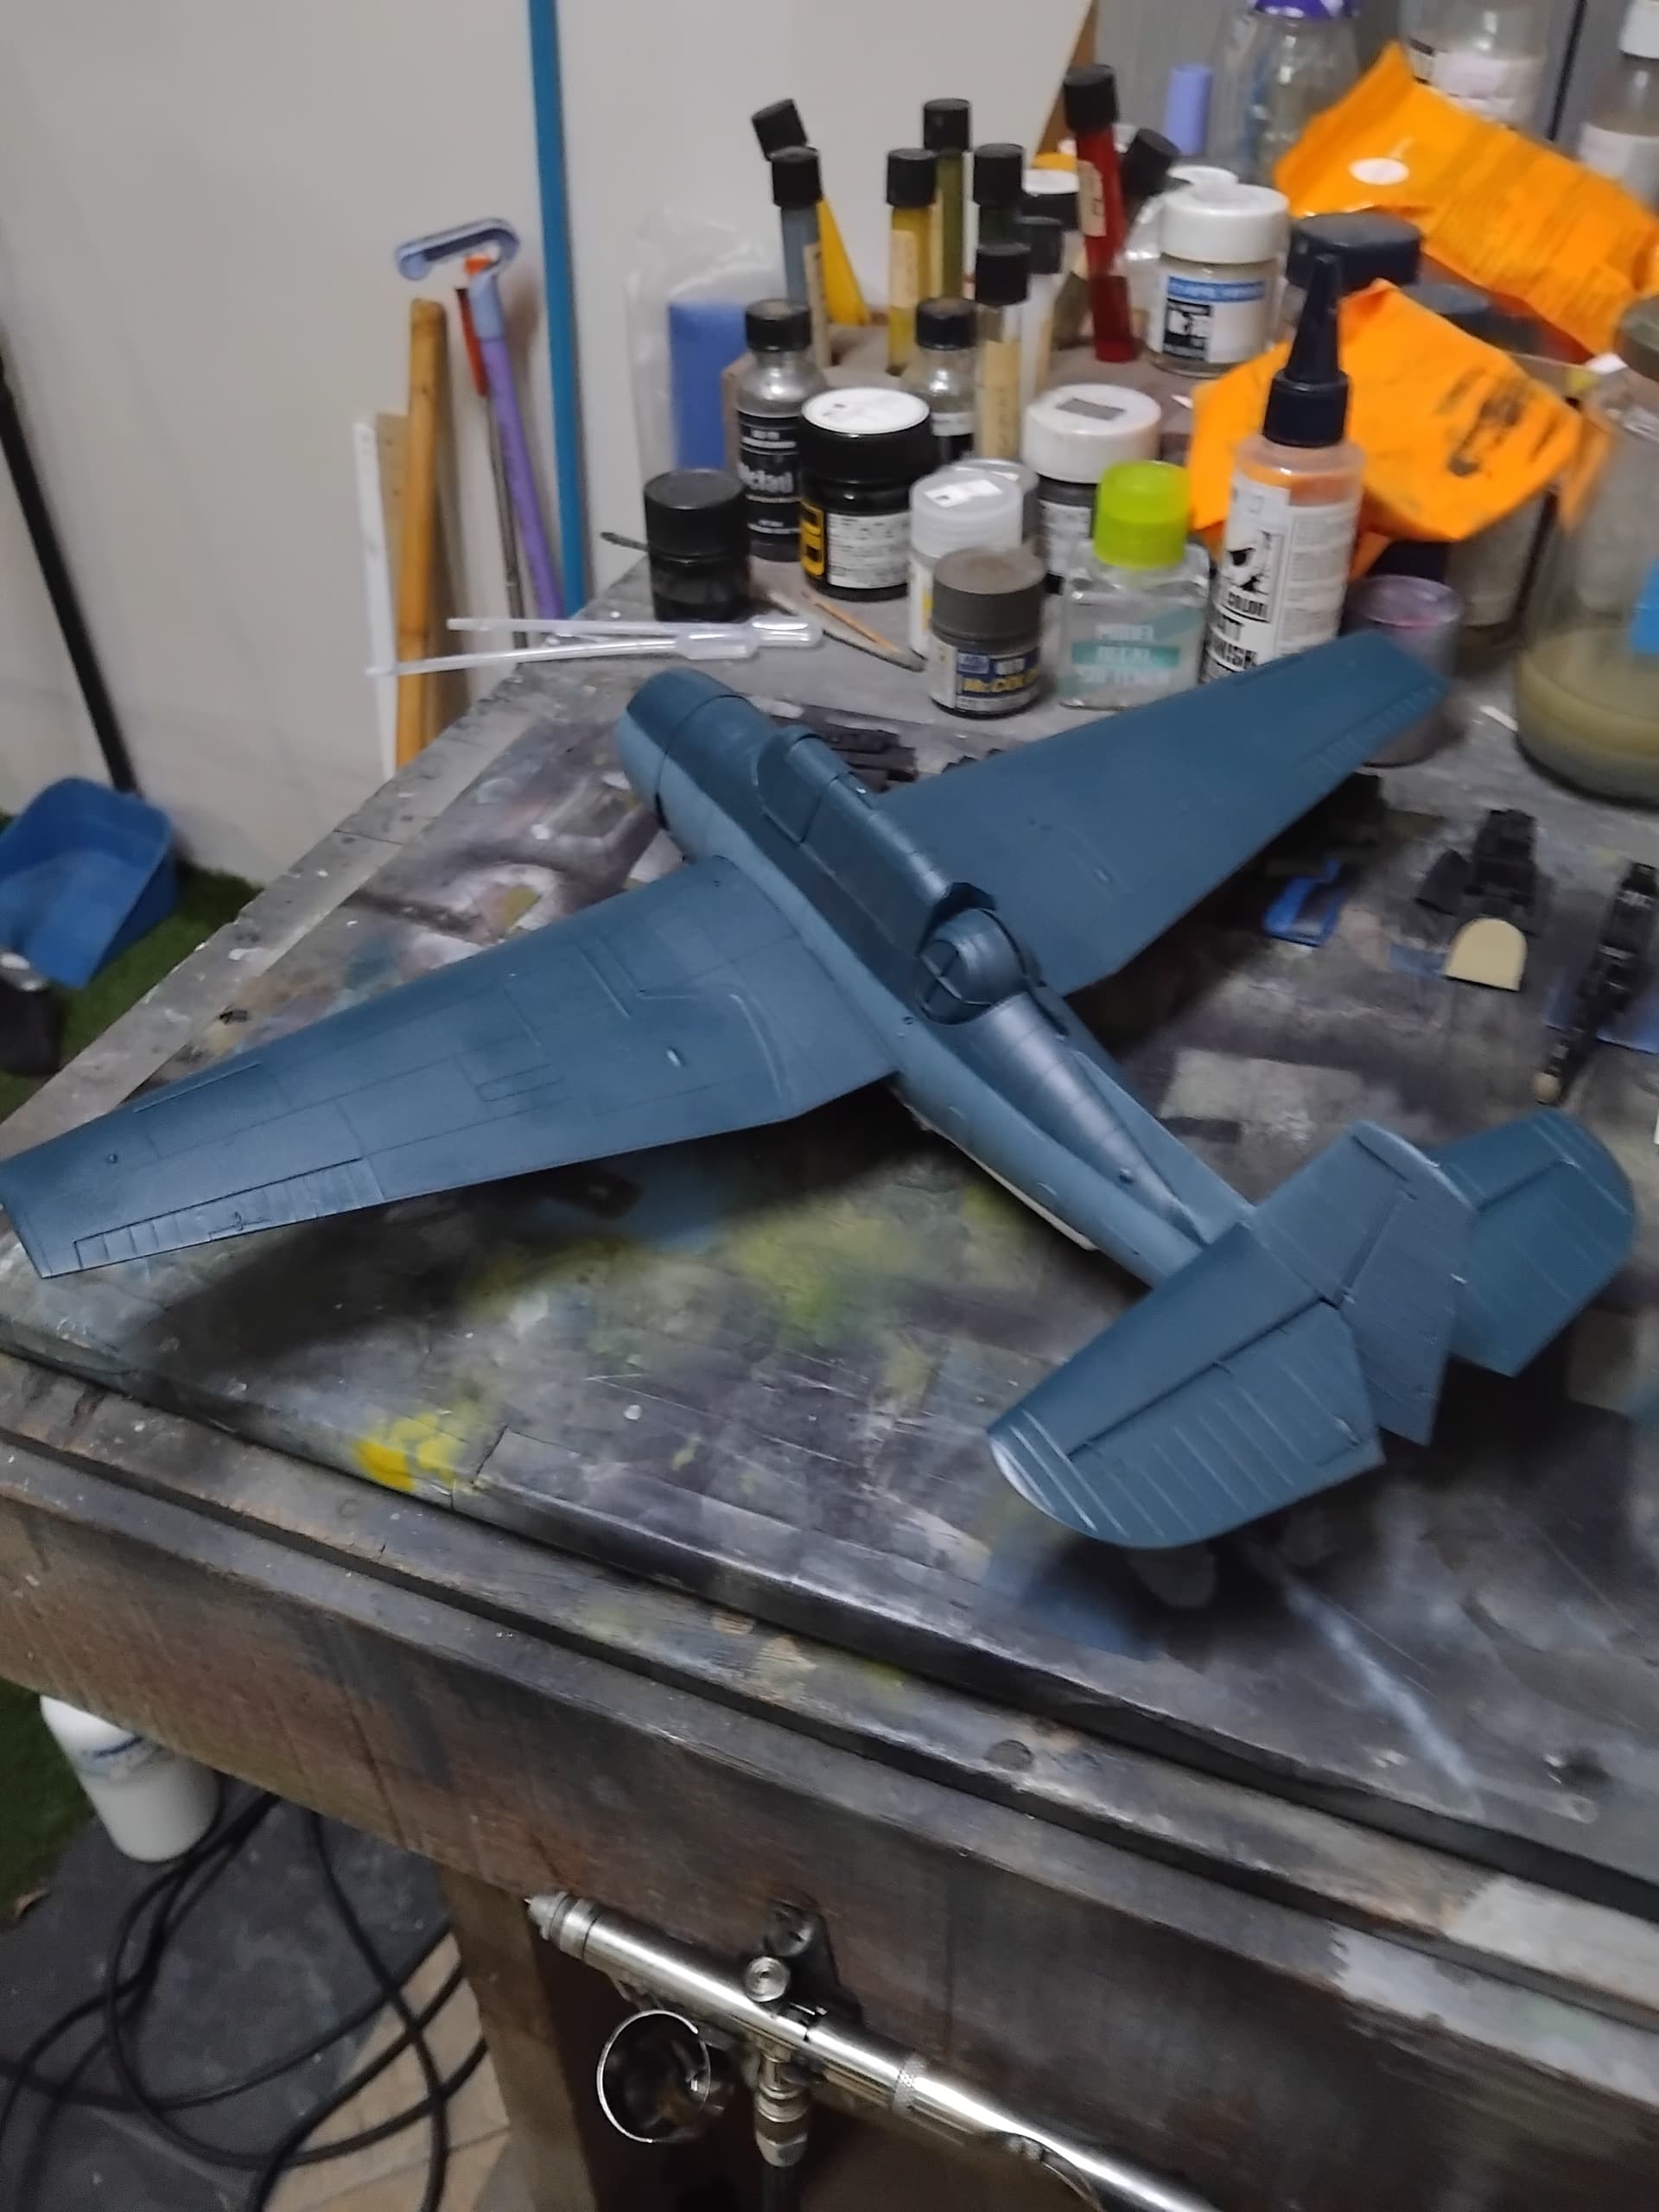
I finished masking the plane for the upper Non-spec blue paint, using the black base method the top color was added.
The masks were removed, and while it turned out ok, there will be some touch up work required.
That’s where I’m currently at. Hopefully there’s only one touch up session, we’ll see.
Till next time, be safe, wash your hands and have fun!
@john41492
Good save on the 101, way to go.
I like the tutorial on your Avenger prop. I’ll have to try the index card method next time I do a prop w/logos. Did you prime the prop before painting the yellow tips?
Don
Usually not. Mainly because of the cleanup process, though one could, I don’t see it changing anything. Glad you liked the tutorial! Trying to give back, after so many here have helped me.
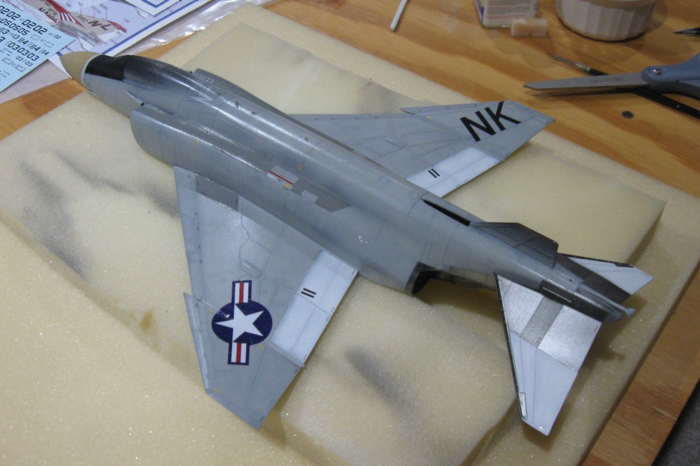
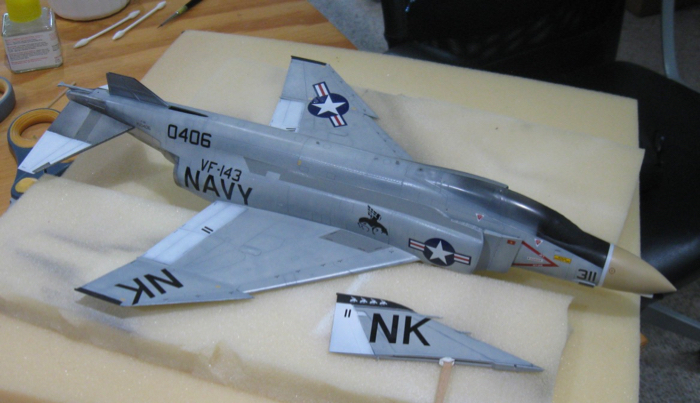
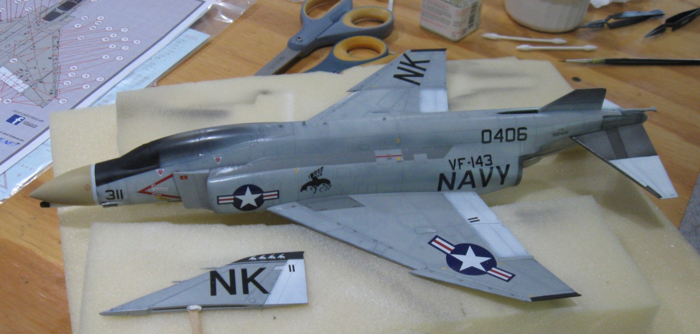
So I’m back to working on my phantom. It took surprisingly long to get the drop tanks into shape - I kept having small accidents that needed to be cleaned up, but that was all on me. I wasn’t surprised that I spent all day yesterday on the stencils for the sidewinders and sparrows and the inboard pylon. The stencils are the thing that made me stop before because of the number of them, but there is no way forward other than putting the shoulder to it…
I am VERY pleasantly surprised with the kit decals. They disappear when they go on. I have this long standing belief that Tamiya decals don’t do that, but so far, they’ve been really great. I read some where that Mr Mark Setter and Mr Mark Softer are very effective on Tamiya decals so I’ve been using them, but most of them haven’t needed the Mr Mark Softer after putting them on. FWIW.
Today I finally finished my 1st entry.
Has been sitting ignored for a few weeks
A few 1sts.
1st model with oil washes, and thus panel lines and weathering, 1st attempt at canopy masking and 1st attempt at camo sharing with the airbrush.
Cockpit is a bit of a mess, kit did not line up well, but it looks ok. Got some frosting, but I’m not losing sleep over it.
Overall I’m really happy this is done and looks as good as it does.
A few advances.
The main coat is applied. I had a lot of trouble with the satin paint. For some obscure reason, it didn’t cling well to the primer.
All that’s left is to finalize the tail unit, finish assembly and fit the decals.
I will attempt to finish my Skunk Works 1/48 MQ-9 Reaper. This has been sitting on my shelf of doom for 8 or 9 years!

In that time it has acquired a heavy layer of dust that needs to be cleaned off. Also, as my shelf of doom is rather full, some damage occurred to the wing tip.

The damaged area was replaced by with a piece of .020 styrene that was pre-shaped to match the wing tip profile. This was faired in with a touch of putty once the glue dried.
All the parts have been accounted for, except the clear window of the sensor turret, so making a replacement will be the next step going forward.
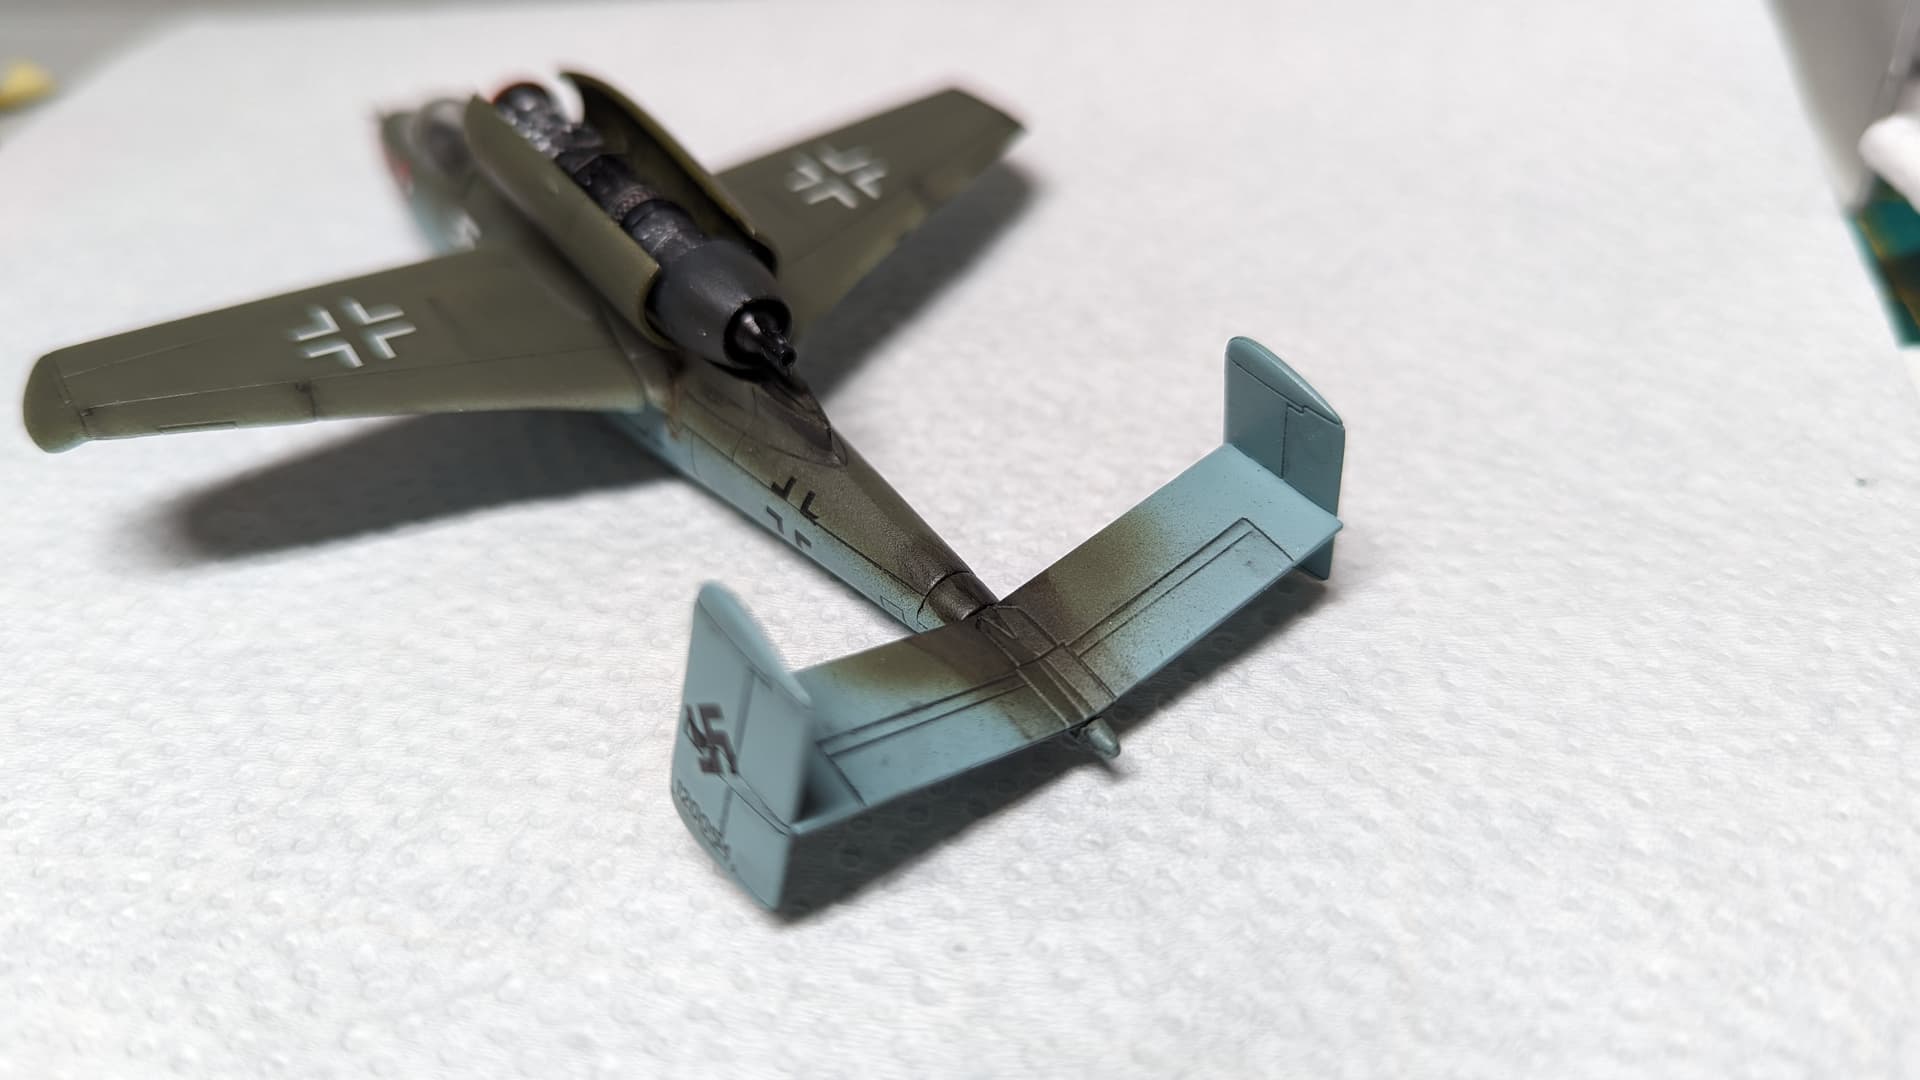
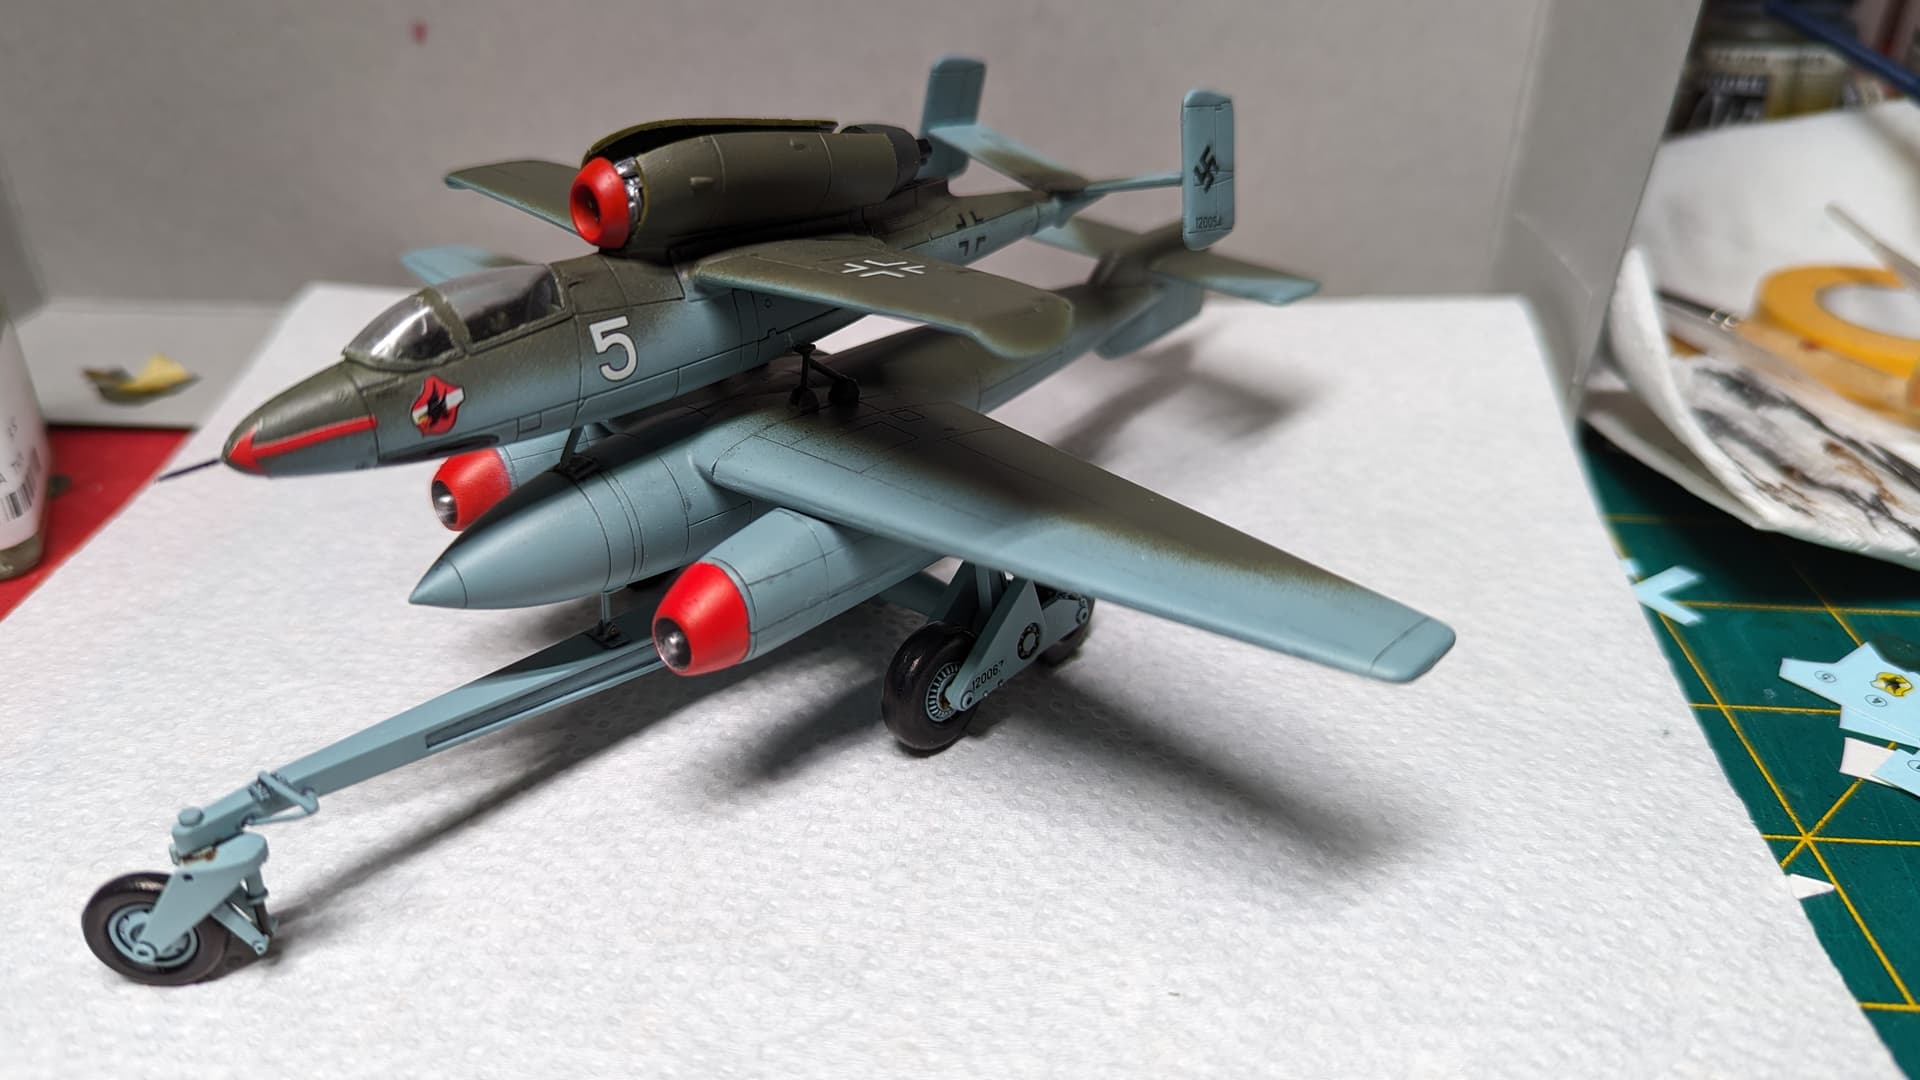
Drew, nice finish! I like it, and it certainly looks the part, good job, be proud in completing this unusual oddity.
Franc, loving the Warning Star! Looking forward to seeing its completion!
Ernie, good recovery on the wing tip, I’m guessing that has some size to it. Keep plugging, looks like it’s almost there.
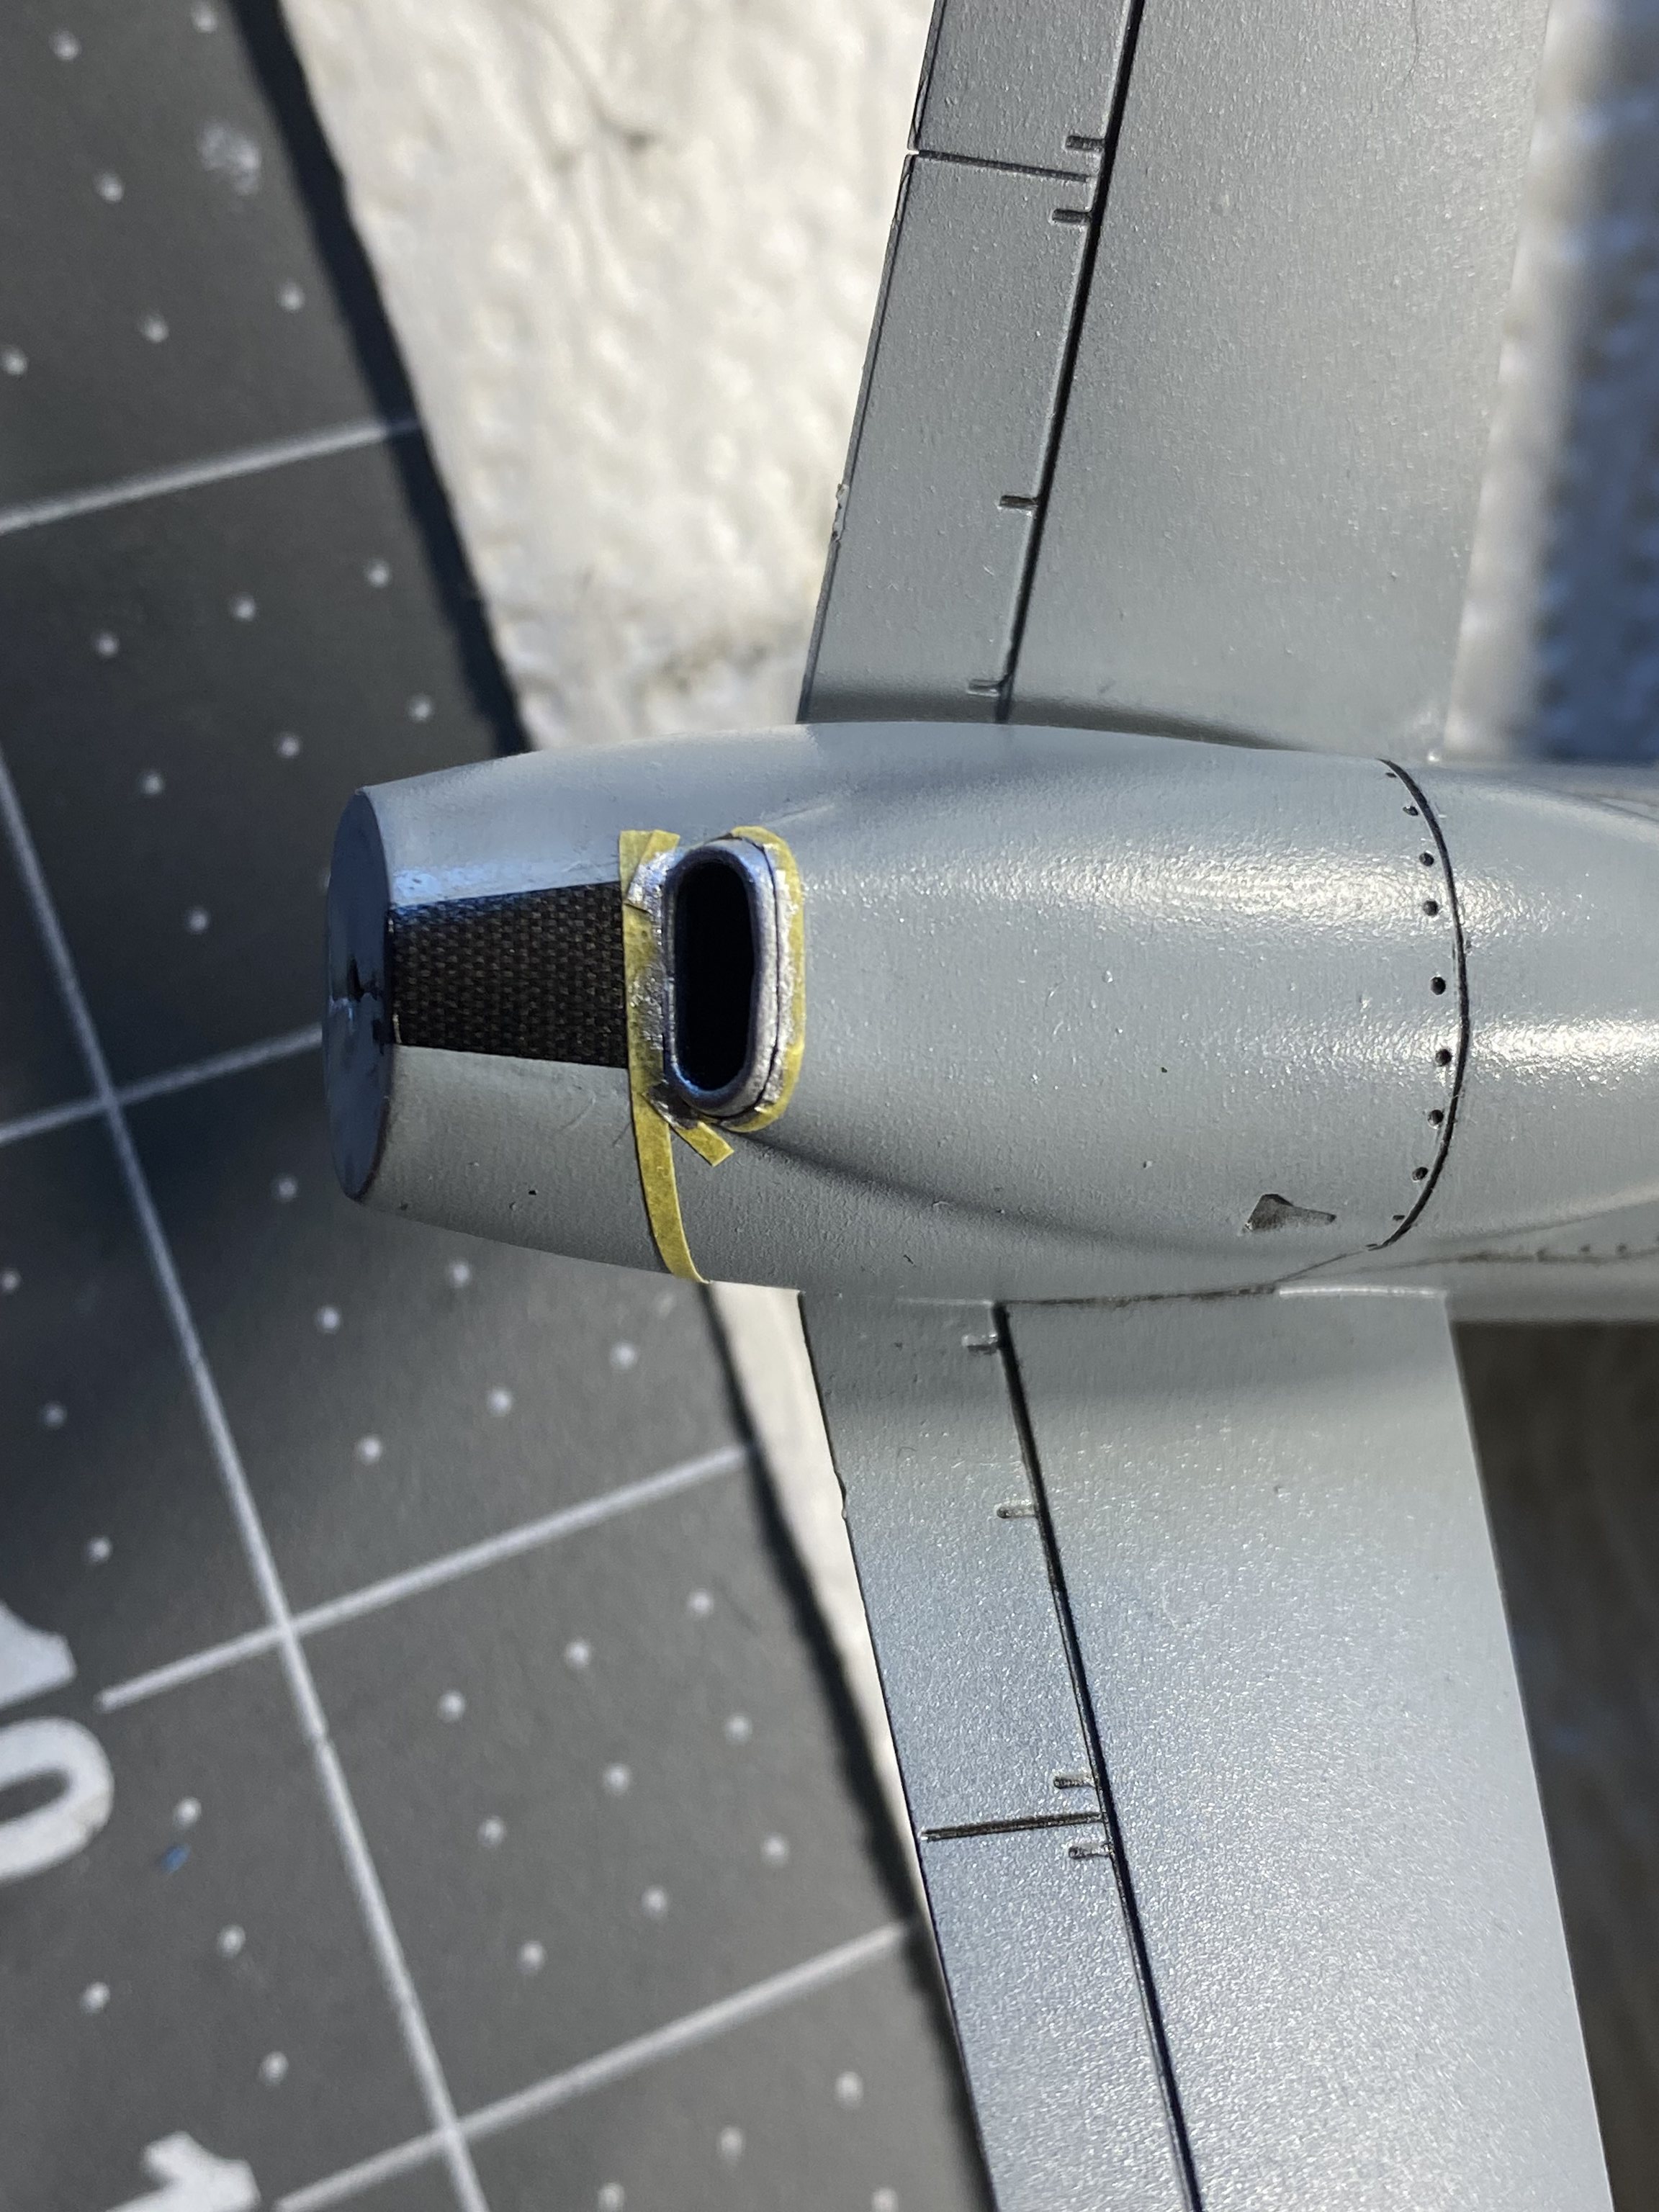
More progress on the Reaper. Had to touch up some spots on the upper surfaces; this turned into almost an entire repaint ![]() ah well, worked out. The heat Sheild behind the exhaust can be either metal or carbon Fiber. I elected to use some carbon fiber decal I had to cover this area and masked off the metal area around the exhaust aperture and painted that with Stainless Steel Meatlizer.
ah well, worked out. The heat Sheild behind the exhaust can be either metal or carbon Fiber. I elected to use some carbon fiber decal I had to cover this area and masked off the metal area around the exhaust aperture and painted that with Stainless Steel Meatlizer.
Moving along!
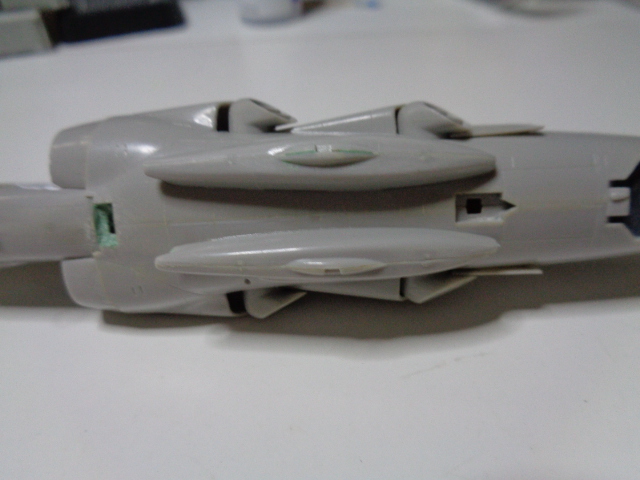
Finally got some work done on the Sea Harrier. Glued the gun pods to the fuselage.
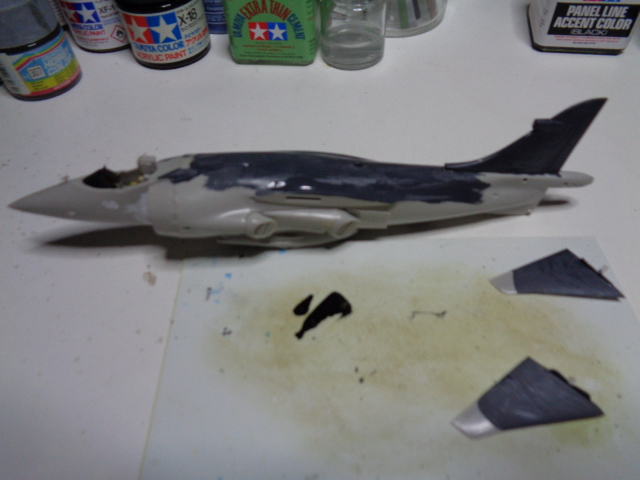
Started painting the fuselage using Mr. Hobby Extra Dark Sea Grey.
Some markings on the plane itself. There are a lot of markings. Not sure what shows up, but I think all the yellow stencil marks are on, on top are the no push and no step markings.
I need to add the side of the fuselage markings next then on to all the panel stencils.
Hi Everyone,
Gary, nice to see some progress, it’s looking good!
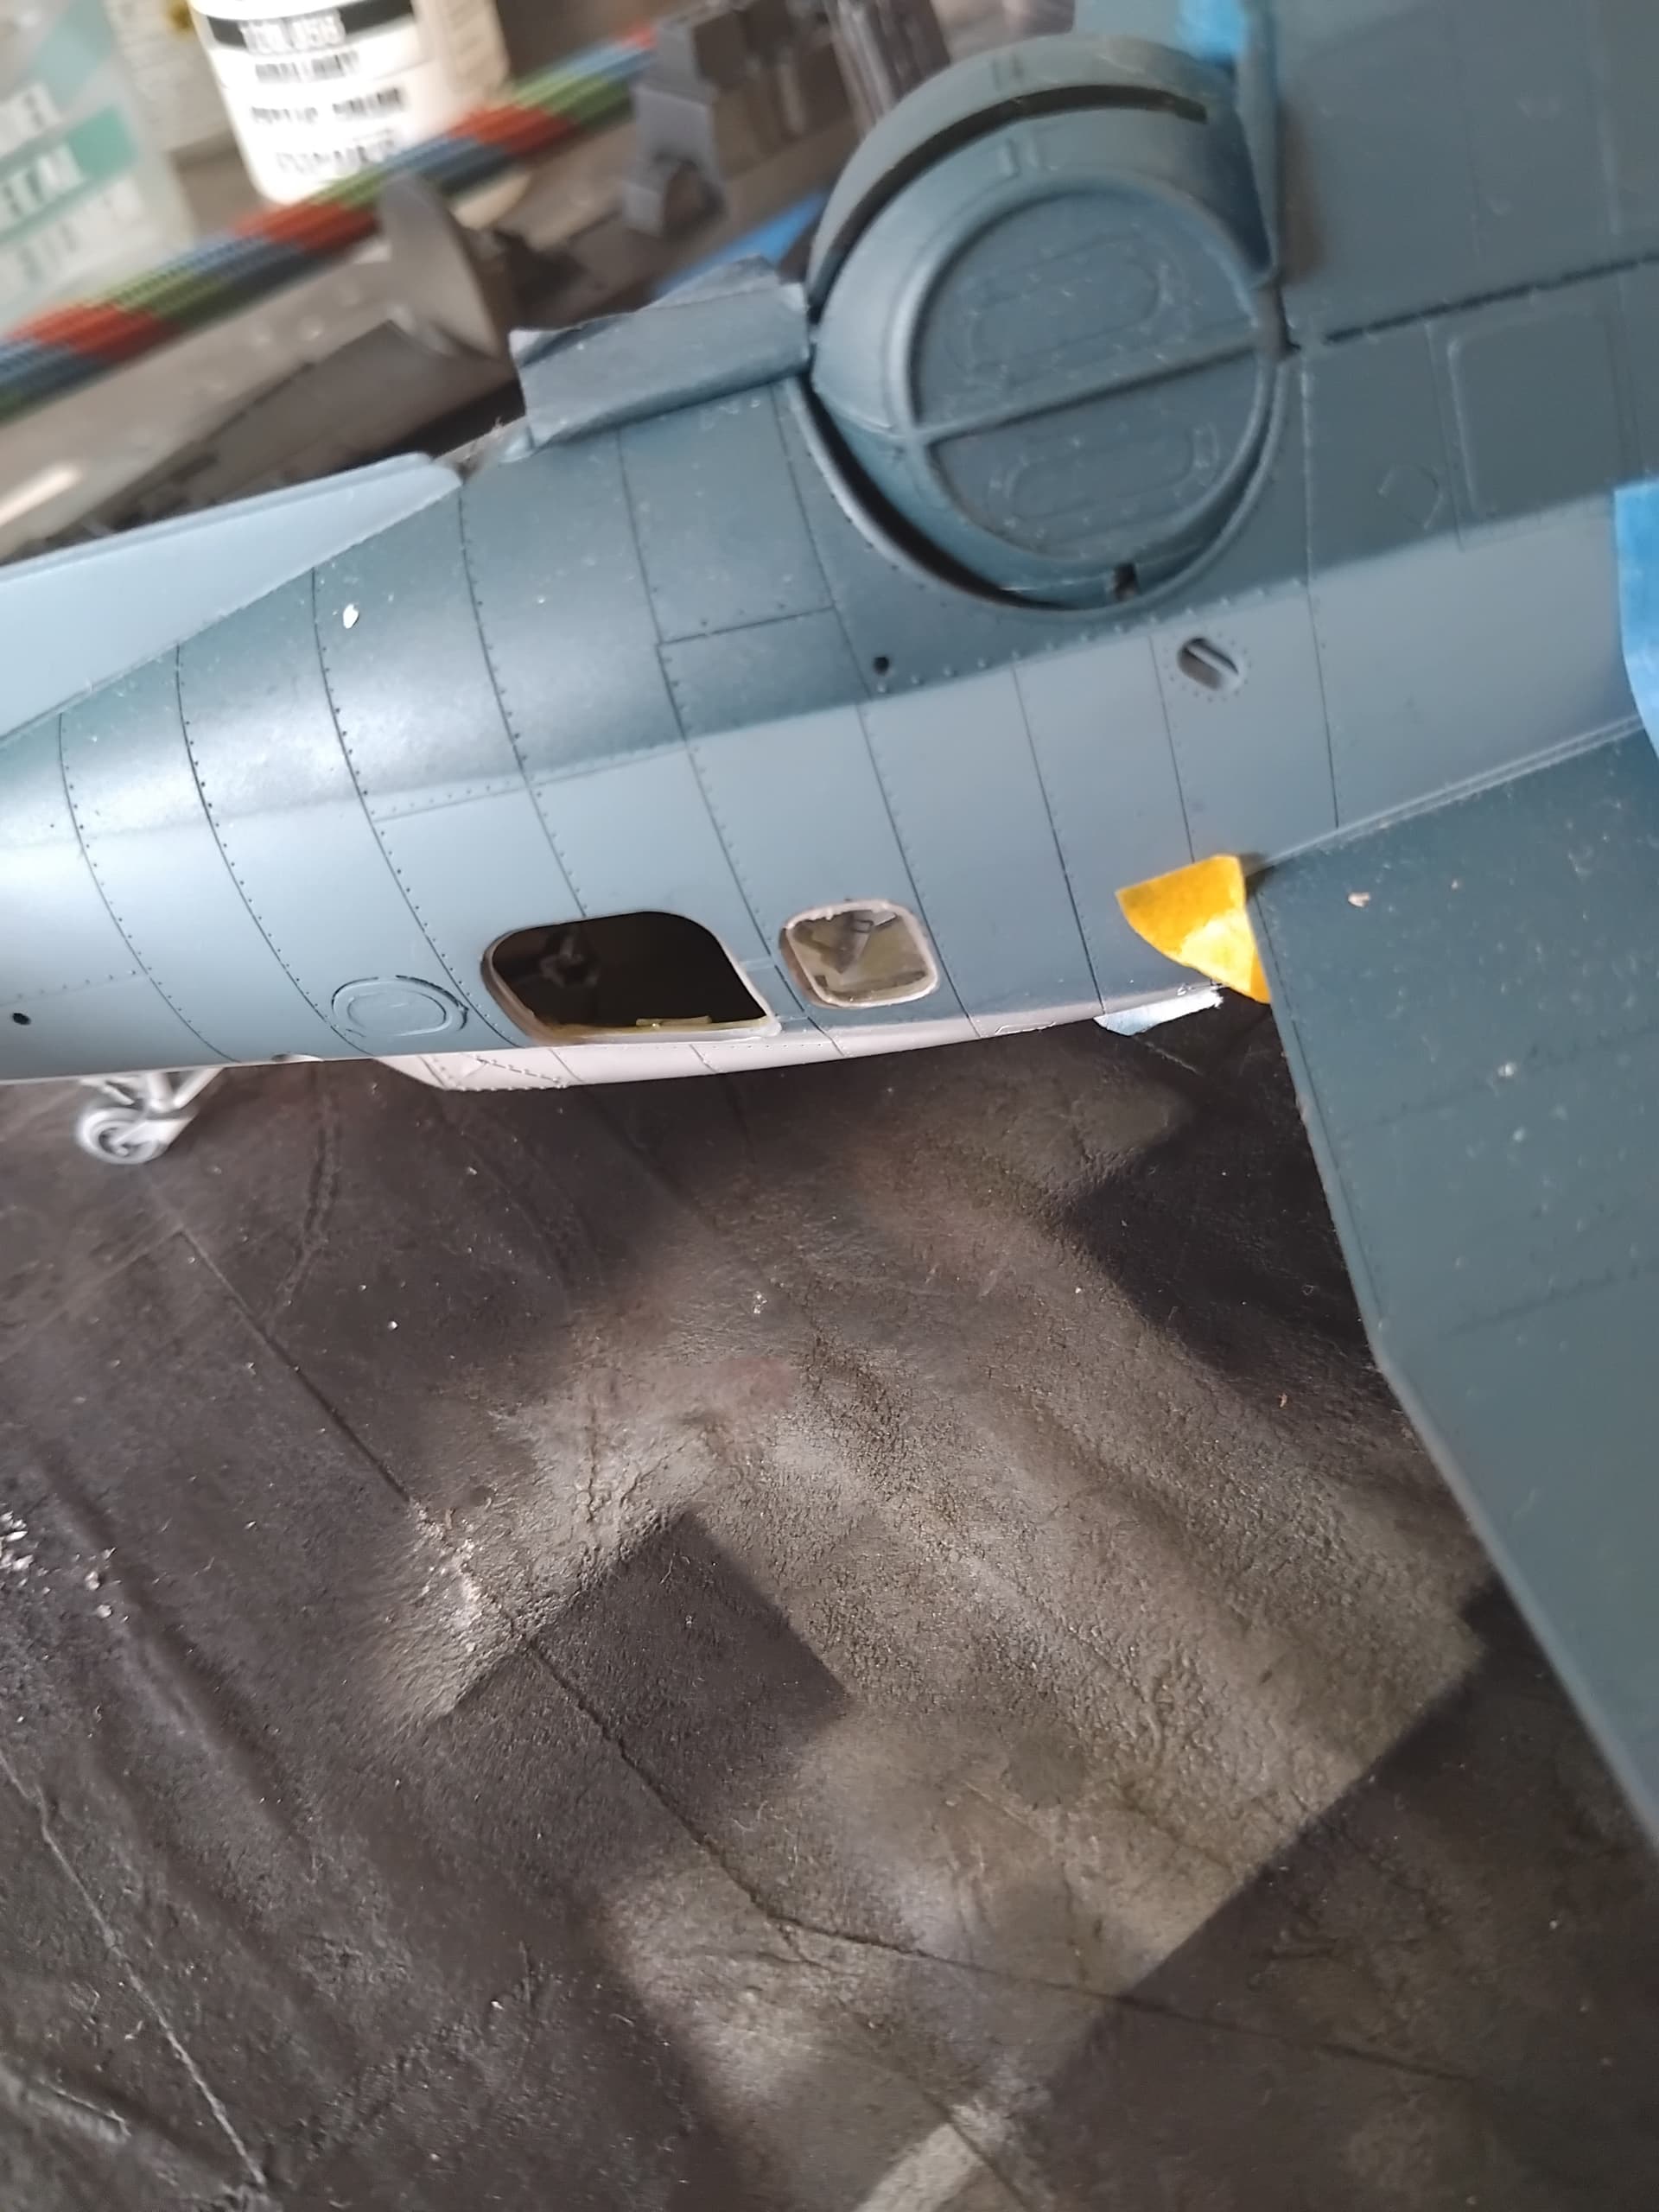
In my last update, I was jamming along looking to do some touch-up on the Avenger paint job. Well, as I went to touch things up, I noticed that a window was mysteriously missing. I launched a SAR immediately, despite having no idea when or where the window could have decided to fly and be free. I gave up the search after realizing that several cleanings occurred and the trash had been collected, sigh. The thought of having to scratch a window pretty much took the wind out of my sails. I also got distracted with a B-25 build, so the Avenger languished on the shelf.
As the B-25 got closer to completion, the need for shelf space became a concern and it became time to bite the bullet and scratch out a new window. I took some 0.15" clear styrene, and using the opening as a guide an appropriately sized piece was cut. Then over the course of two hours using 600 to 1500 grit sandpaper the window was shaped to fit the window opening. Not great, but not bad.
Ironically, as I went to glue the new window onto the bird, it fell. I use cut tissue boxes as a stand while working on planes towards the end of the build, and I knew the window fell into the box. Oddly, it wasn’t there! I swept below the work area, and no window. Convinced that the window was in the box, I checked again, as the thought of making yet another one was heartbreaking. Turns out a spider had set up residence inside the box out of sight. The spider got evicted, and the window was retrieved from the web. I wasted no time in gluing it into place and masked it once dry.
Finally, I was able to do the touch-up work on the paint job! After the window ordeal, this went fairly well. Satisfied with the touch-ups, I gave the plane two coats of clear in preparation for decaling. Typical of the environment here, I did get some build up along the wing near the fuselage, which will be lightly sanded down prior to decaling.
Once dry, an inspection of the clear will be conducted and it will be onto decaling. Hopefully sometime today!
Till next time, stay safe, wash your hands and have lots of fun!