Hasegawa 1/8 Scale Clerget 9B Rotary Engine

Thought I’d give the new forum a test post to see how things work.

This is an in-progress shot of my Hasegawa 1/8 scale Clerget 9 B Rotary Engine vignette. The engine model is pretty much finished, and I’m now working on a period French factory worker figure to accompany it.

7 Likes

Beautifully built Michael! What did you use for the metallic finish?

I have the same kit in-progress, and did a very similar finish on the engine stand with the chipping and weathering.

Cheers, D

3 Likes

Very nice, D!

I mostly used various shades of Tamiya metallic paints with some basic pre-shading. In a few places I highlighted some of the bare metal with metallic buffing waxes. Some limited acrylic and oil washes, but I kept the weathering to a minimum as I wanted to depict a factory new engine (perhaps after test running).

It’s been a long slog. I designed and 3D printed a bunch of replacement or new parts along with improving much of the kit’s details. Here’s a collage of 3D renders of many of the new parts:

Lots of work on the cylinder heads - new springs, valve stems, exhaust valve guides, ball joints and pin details on the rocker arms, etc. I replaced many of the molded on nuts and bolts with 00-80, 0-90 and hex nut details made from punched styrene card.

3 Likes

Really nice work, outstanding attention to detail there!

I have used Alclad as a base with a couple of different metallics from AK to get a burnt effect and next up is some oil paint washes. Mine is going to be a well used engine out for repair.

My build actually started back in 2017 as part of a larger project, the build log thread is here - https://automodeler.kitmaker.net/modules.php?op=modload&name=SquawkBox&file=index&req=viewtopic&topic_id=263386#2229943

Cheers, D

Awesome work. That engine looks ready to run!

Very nice, Damian! Your build looks a lot like what I started off to do, built the kit more or less right out of the box. I was intending to just do a quick build as a little “decompression” project after a long (very long!) two year project on a large diorama commissioned by a local museum. I normally build armor related subjects, but occasionally take forays into other genres to do something low-stress-no-stress and build my mojo back up.

I expected the Clerget engine to be such a project. (I also have a WNW Sopwith Camel lined up since I figured that, like a mountain climber ticking off summits, every modeler worth his or her salt should build at least one rigged aircraft model in his or her career! LOL!) Alas, it was not to be. As usual, I fell headfirst right down the ol’ research rabbit hole. The more information I found about the engine, the more I was unsatisfied by the Hasagawa kit’s details and accuracy. What I expected to be a project for a few weeks has now turned into a project that’s lasted about six months now. (And I still have to finish the figure…)

Anyway, here are a couple more “happy snaps” of some of the Clerget engine work:

These are forms and fixture I made to wrap the replacement valve springs.

An alignment fixture for assembling the cylinder head details. It was important to keep all the rocker arms at the same angle since the lengths of the push rods is fixed on the model. Trying to arrange these in the proper open-closed configuration would be really difficult since the open exhaust valve is always near bottom dead center and the open intake valve is is in another position. If the model is left to rotate, then these valves would always be in the wrong clock directions - hence keeping them all the same. Not quite perfectly accurate, but good for the visual effect.

The new 3D printed prop hub with carriage bolts made from 00-80 hex nuts and bolts with sections of brass tubing for the unthreaded portions of the shafts.

Test fit of the prop hub and crankcase front. Also shows some of the modifications to the kit parts (scribed panel lines around the valve tappets, replaced nuts and bolts, added crankcase oil drain plug, engine data plate, scribed panel line separating parts of the crankcase).

Rear of the engine with the new ignition wire guides and insulators.

The new 3D printed Nilmelior magneto compared to the kit parts.

Scratch built engine stand. I used mostly Evergreen styrene tube, sheet and structural shapes. The weld beads are two-part epoxy putty. The castor wheels and mounts are custom 3D printed parts with styrene rod axel pins and brass wire cotter pins.

Finished engine left side view.

The airfoil shaped T-air inlet to the Tampier Bloctube carburator (3D printed part) along with its paper gasket and bolts.

Final view of the finished engine and the planked wood factory floor base. The wood planking was done with wood veneer for the planks and round toothpicks (cocktail sticks) for the pegs.

4 Likes

IMPRESSIVE WORK!..That looks real.
Have a great day.

1 Like

Brilliant stuff, love it! Thanks for sharing the thought and build processes!

Cheers, D

1 Like

I have nothing further to add to the stuff I already said about this little gem!
Just breathtaking,
J

1 Like

So, I probably would have posted this part of the project in the Historicus Forma, but as the new site is still under development, there’s no sub-forum there for actual works.

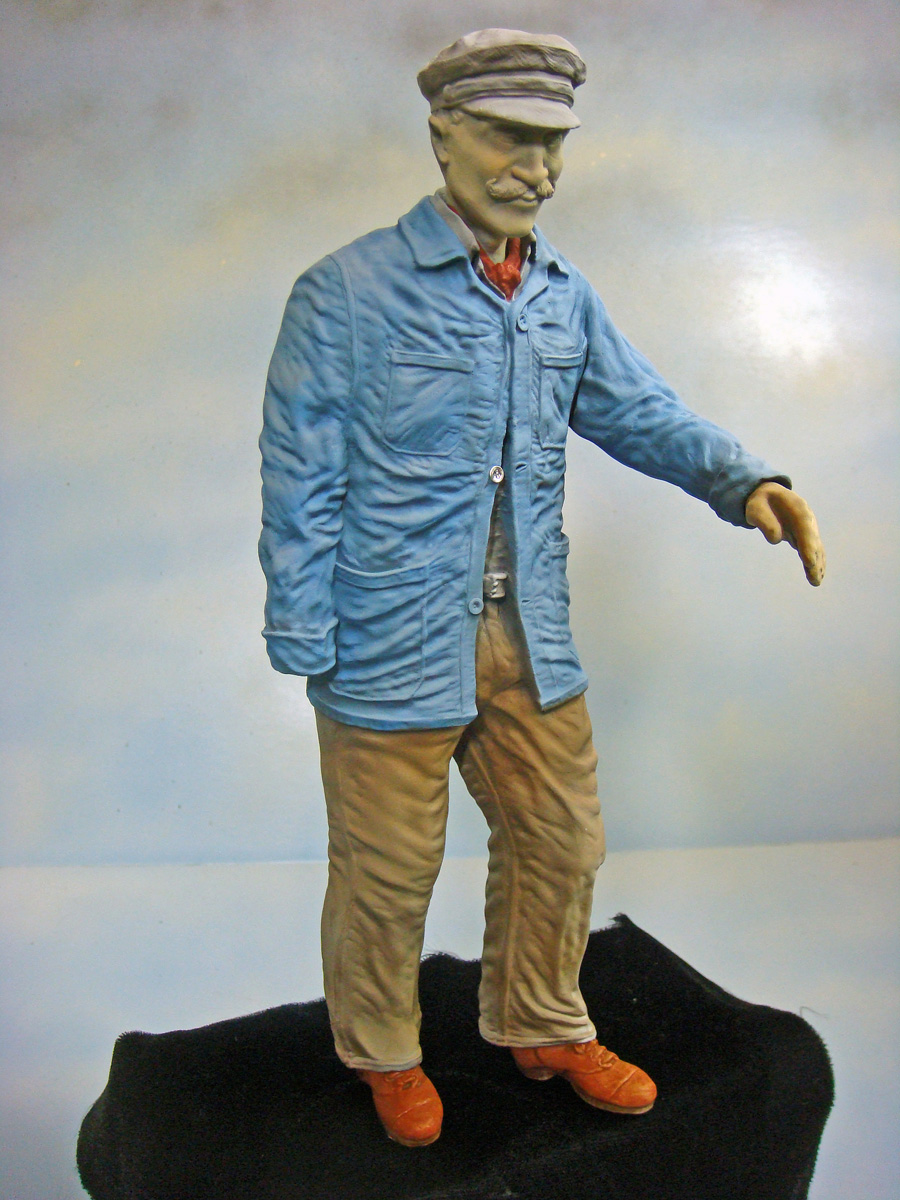
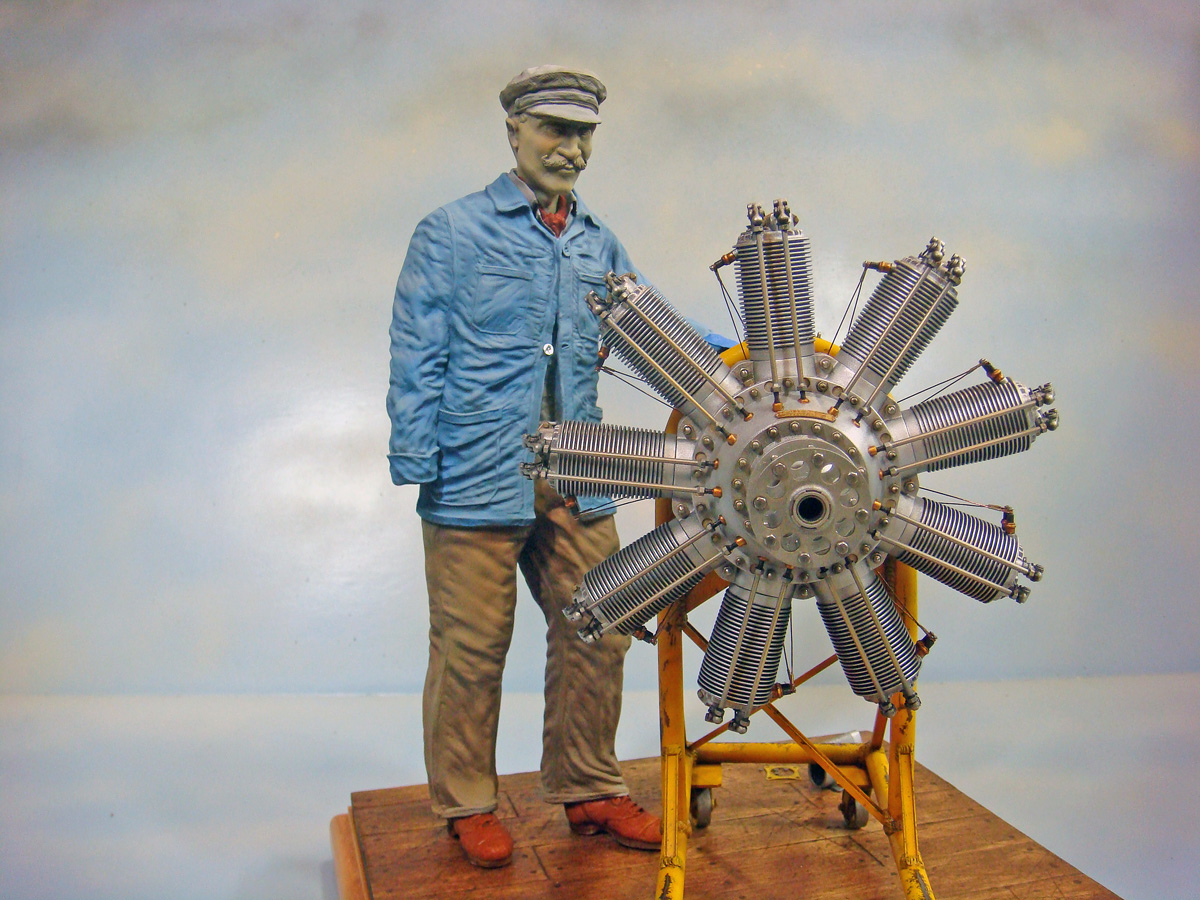
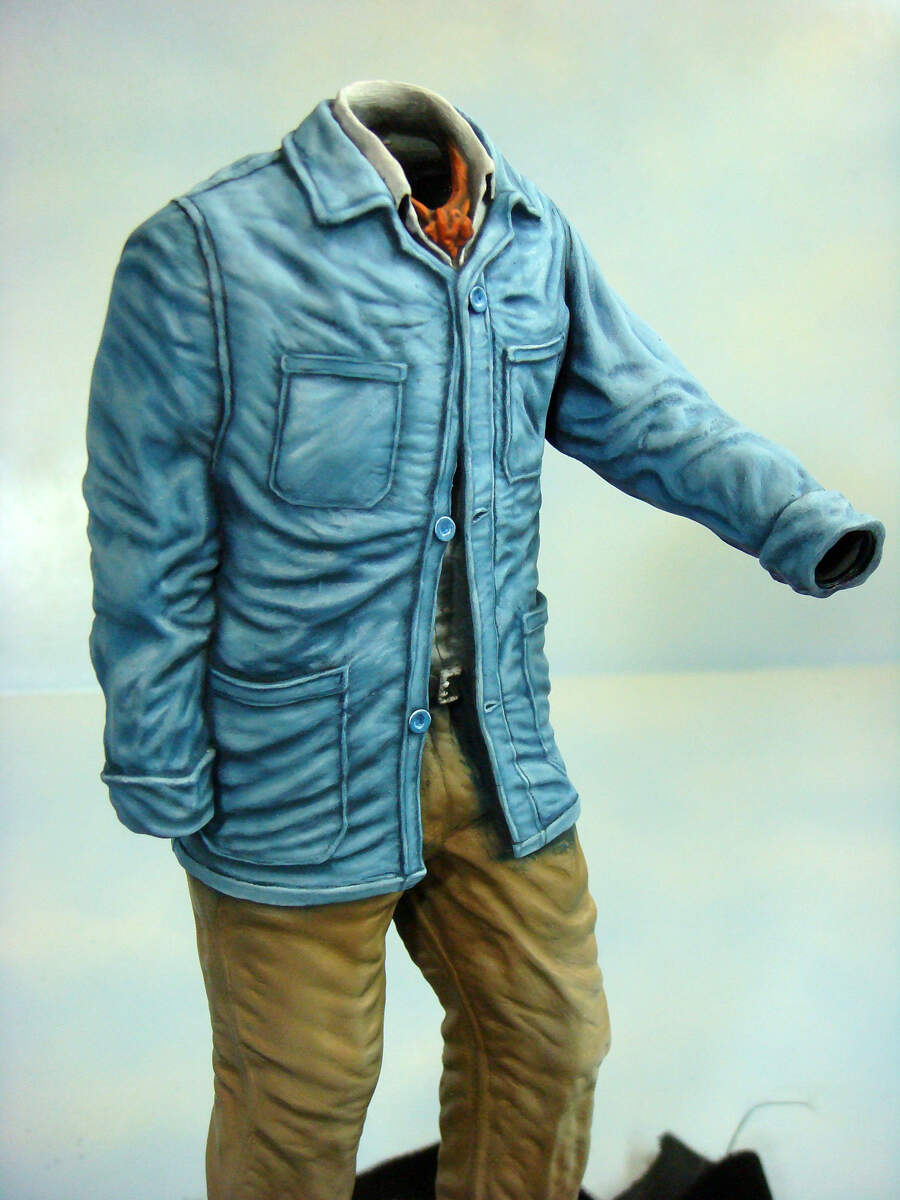
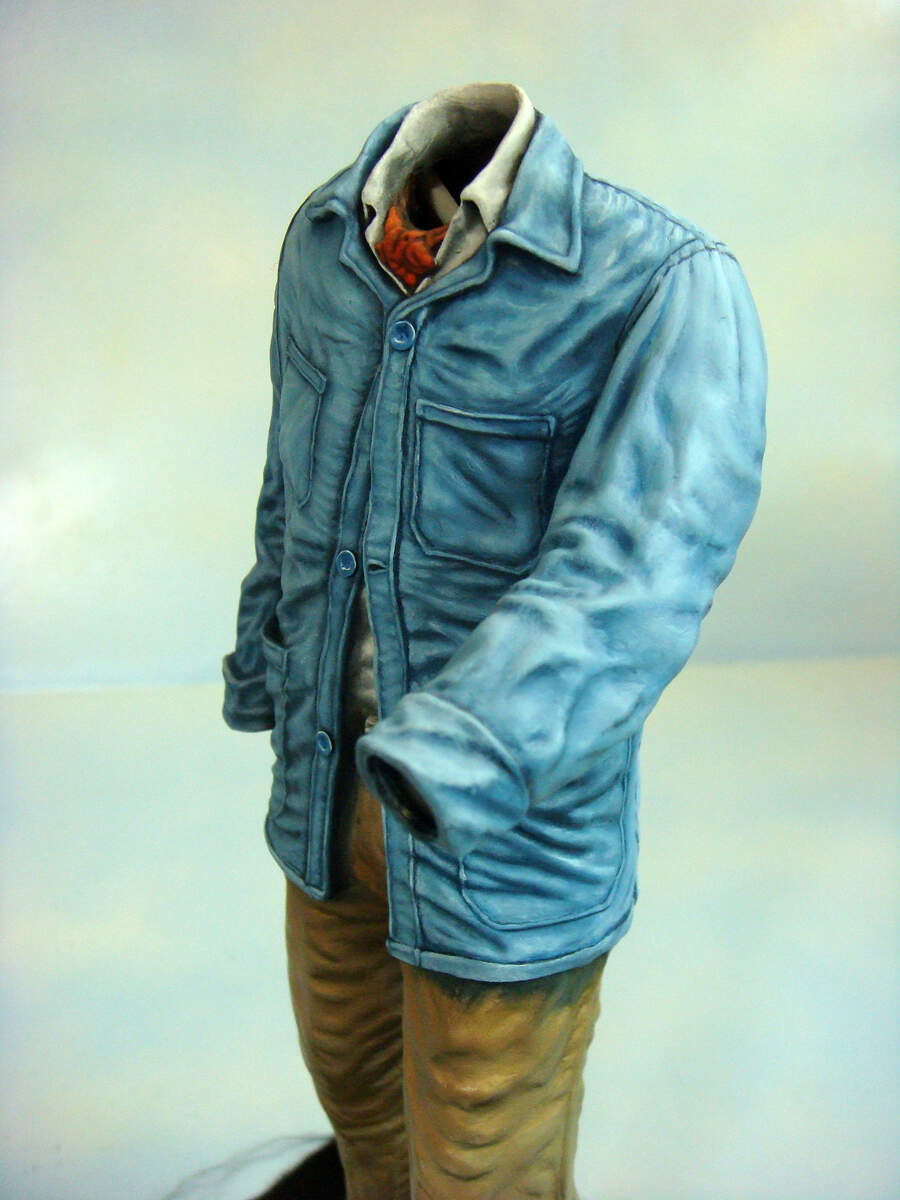
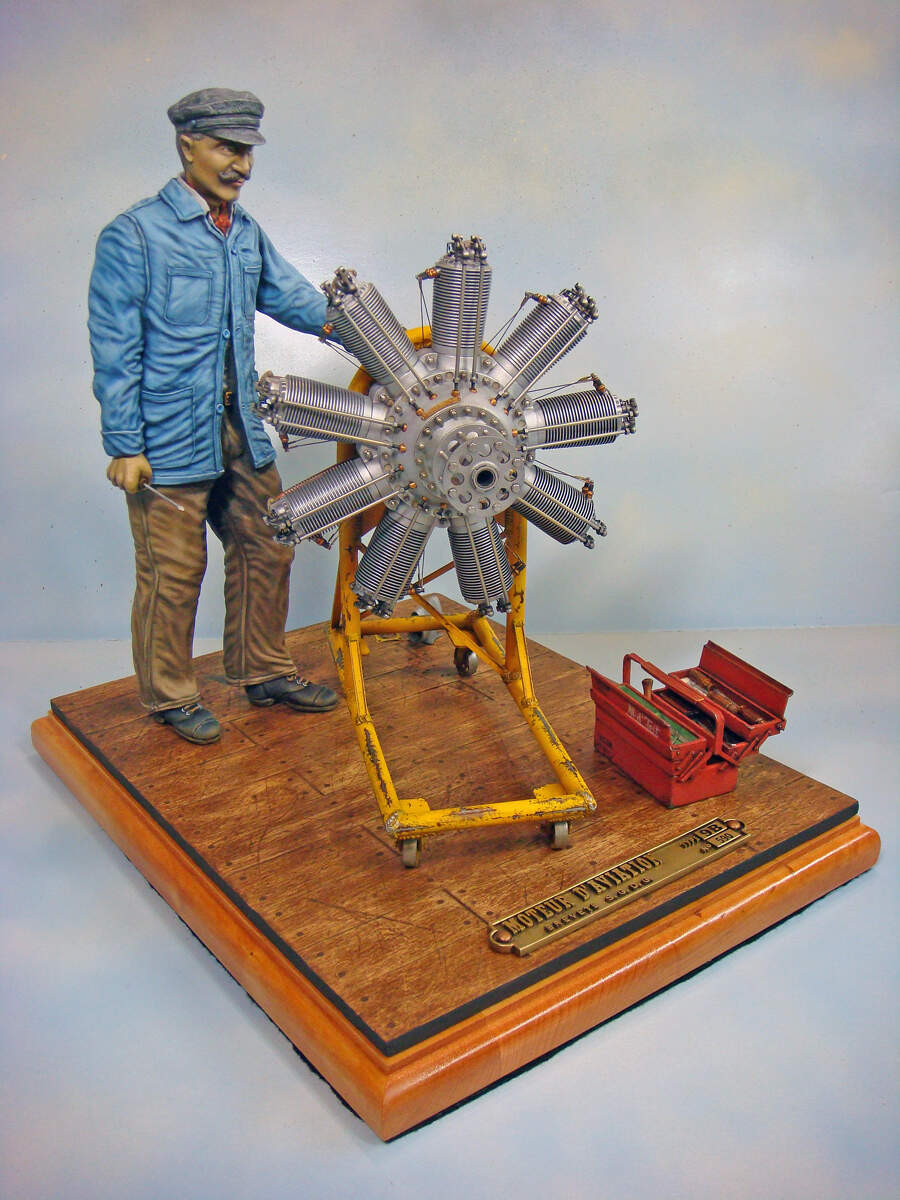
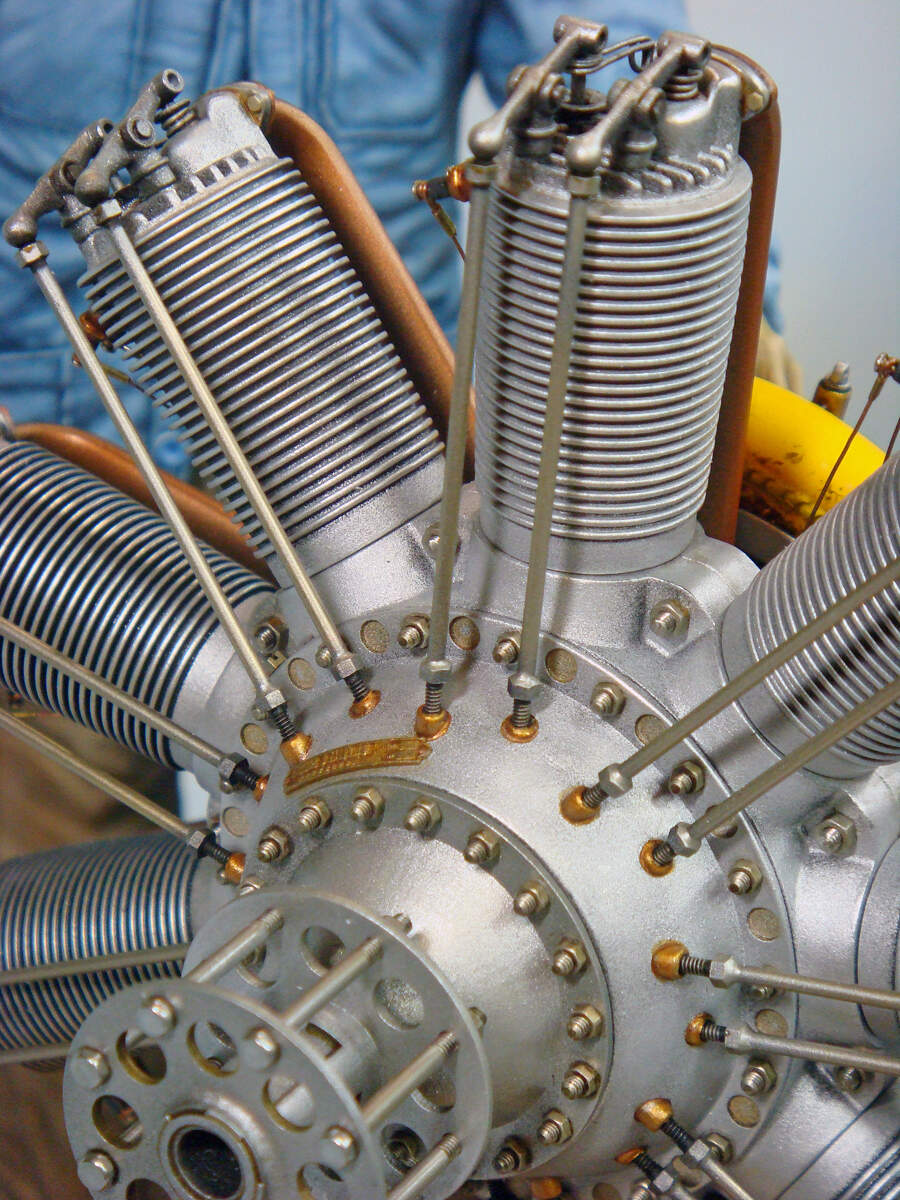
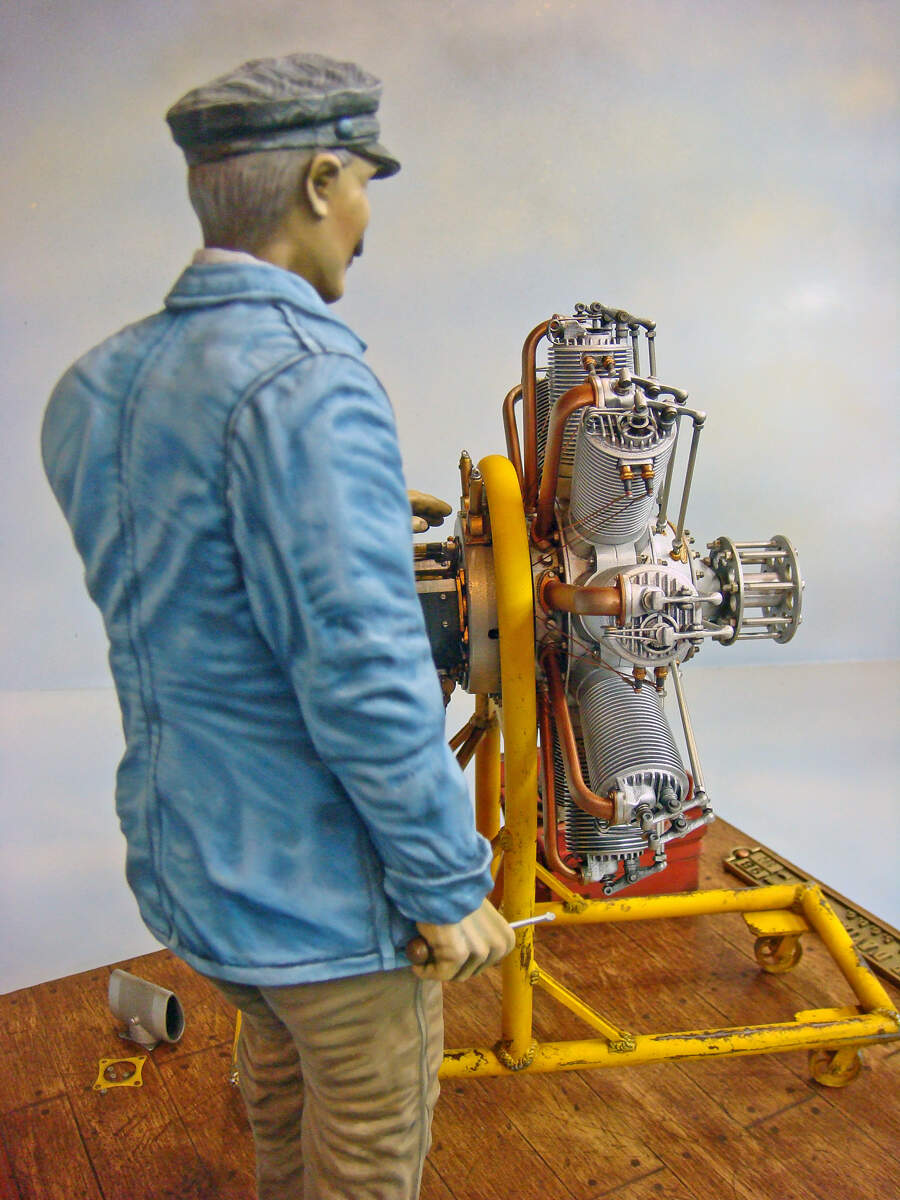
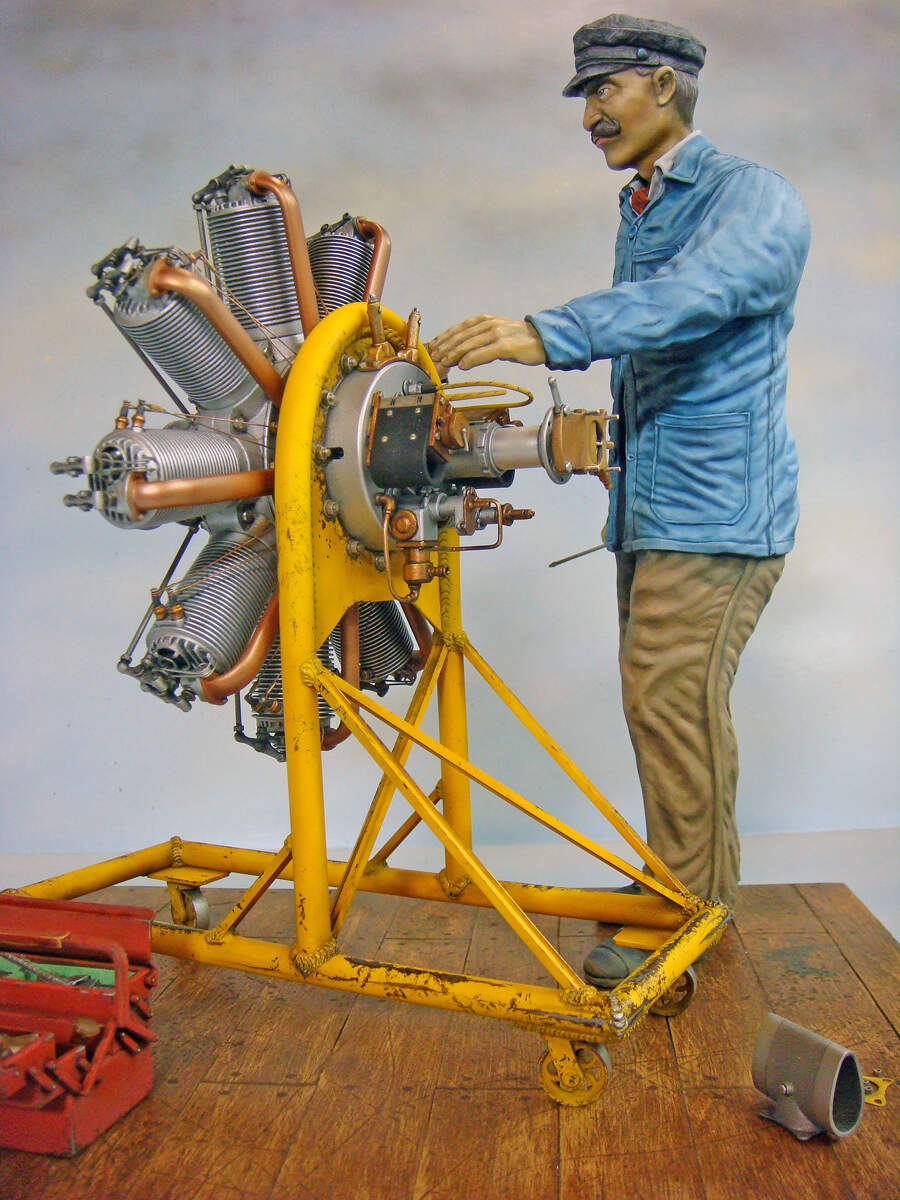
This is the 1:8 scale vintage French factory worker that I’m adding to my Clerget engine vignette. It’s main purpose is to help the viewer appreciate the scale and the size of the prototype. The figure was 3D sculpted and printed by “Holden8702”.

(“Holden8702” is the FaceBook handle of my friend who operates “Panzers vs. Tanks” 3D printing. He has a Shapeways shop, but most of his recent work can be found on his FB page. If you’re interested in this figure or have some other 3D printing needs, look him up. Highly recommended!)

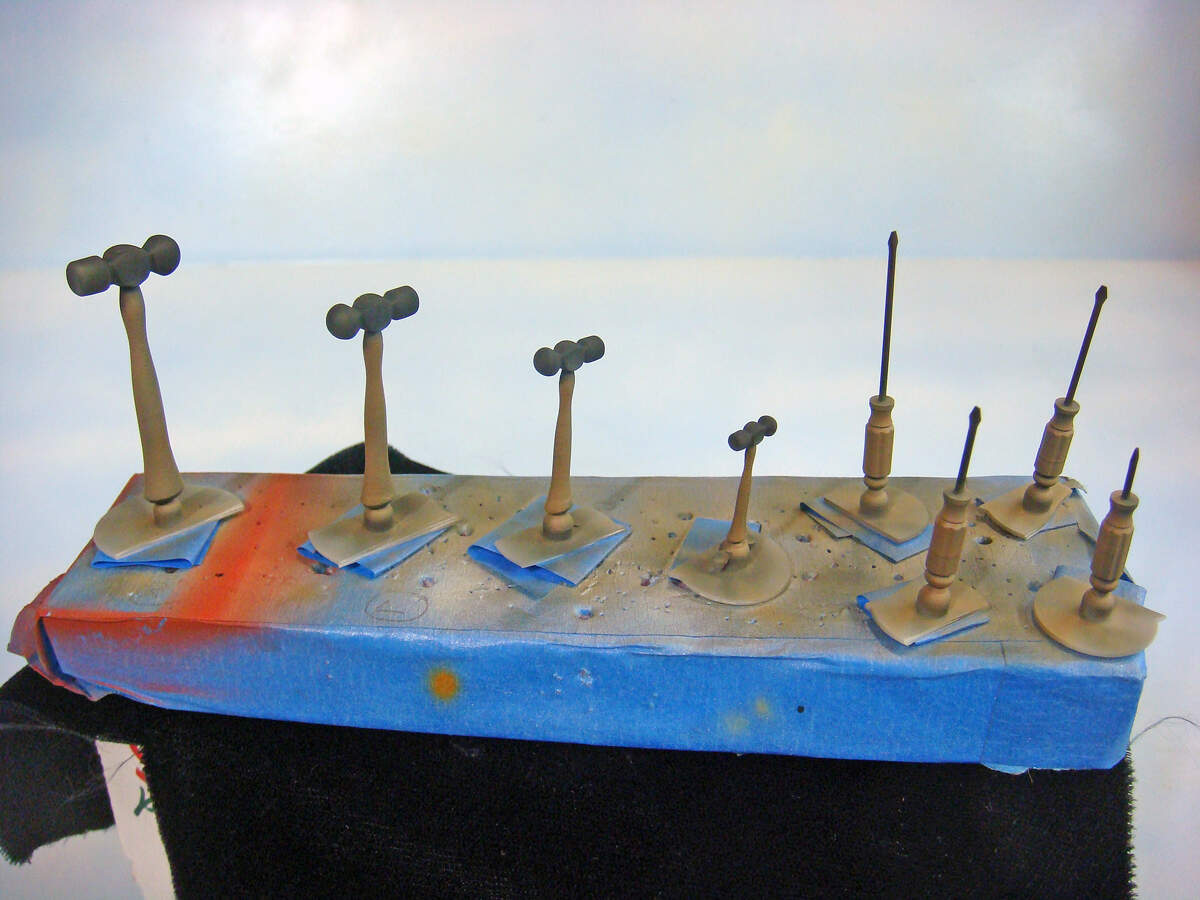
Here’s the figure partially assembled, cleaned up, and undercoated. This might be called a “color sketch” or “defining the volumes.” Basically, I’ve airbrushed on a gray primer followed by airbrushed black and white pre-shading. The pre-shading was followed by airbrushed basic colors sprayed on in thin, semi-transparent layers to retain the general shadows and highlights.

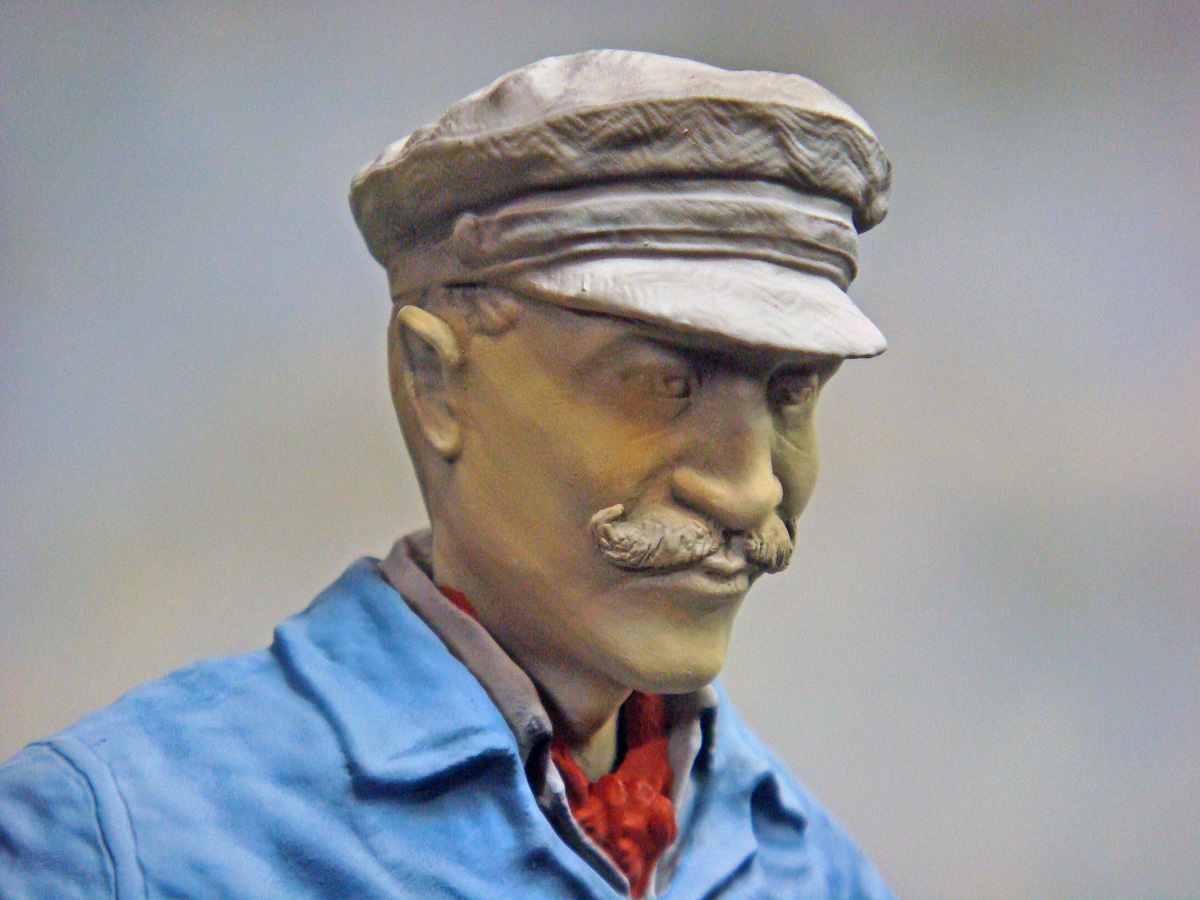
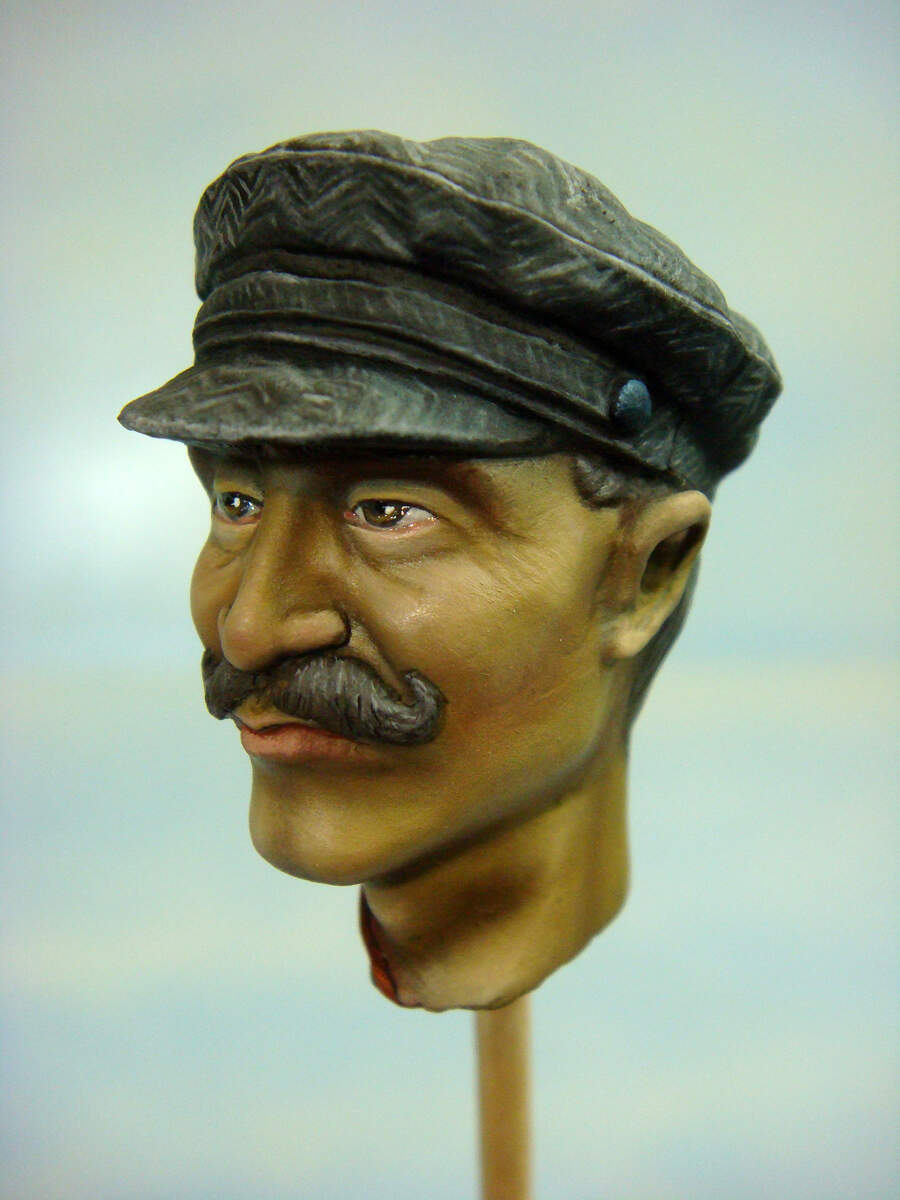
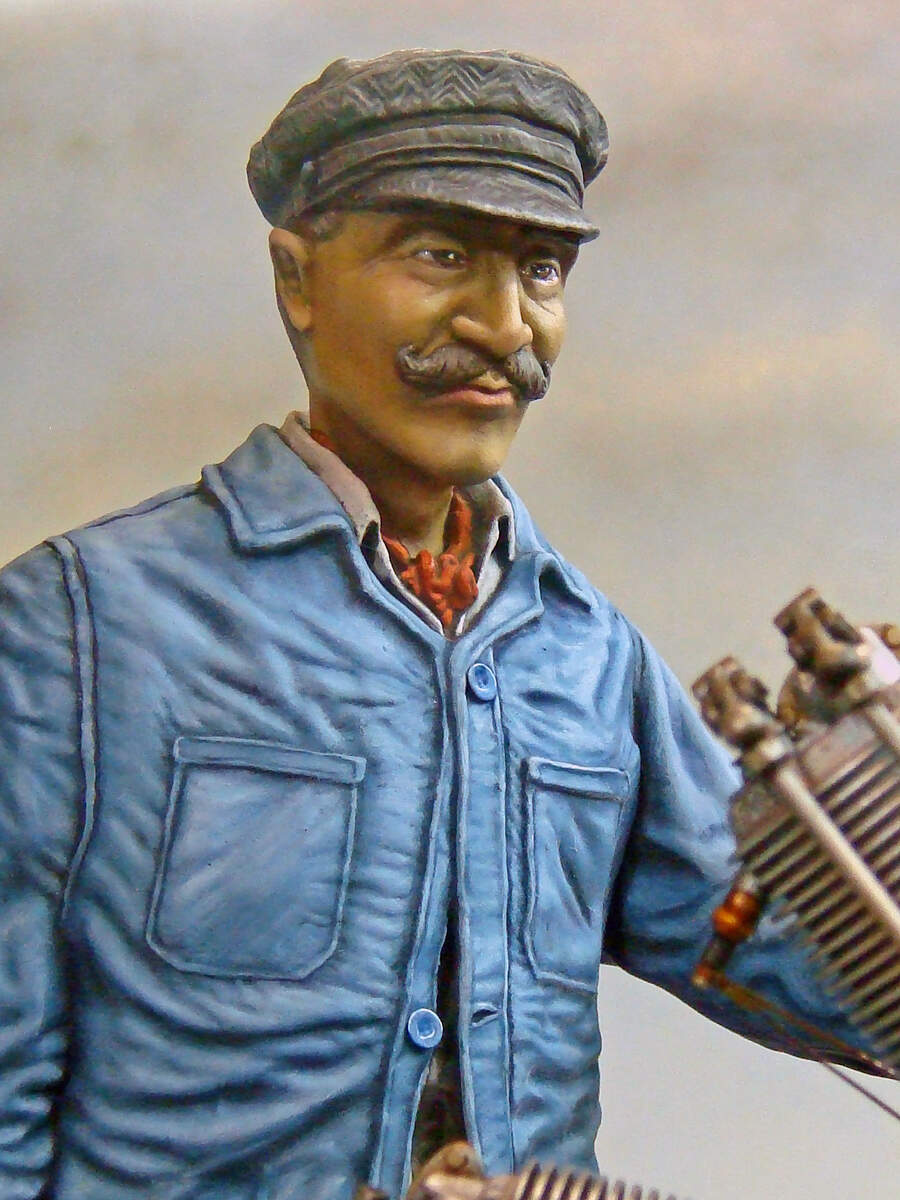
The face received some work to enhance the shape of the mouth, mustache, hair, and forehead (after undercutting the bill of the hat).

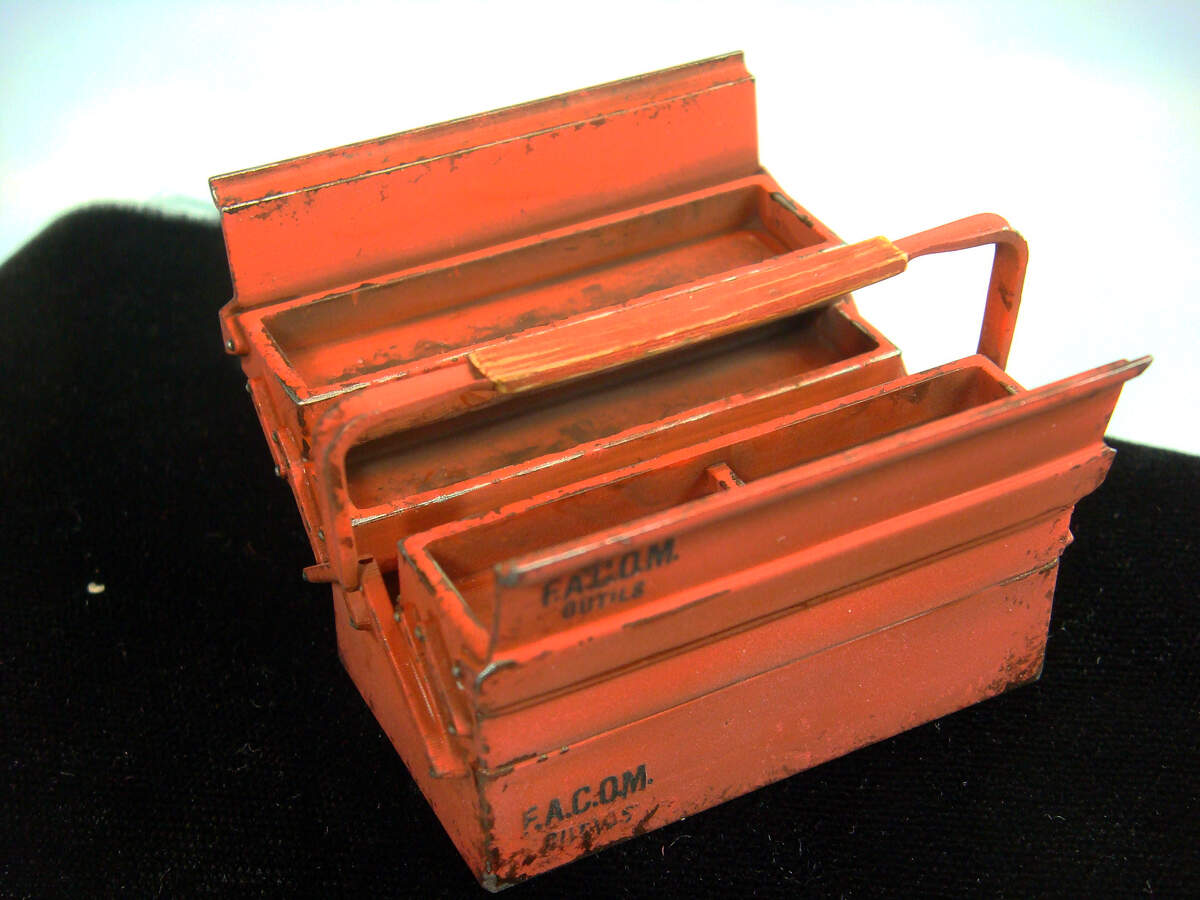
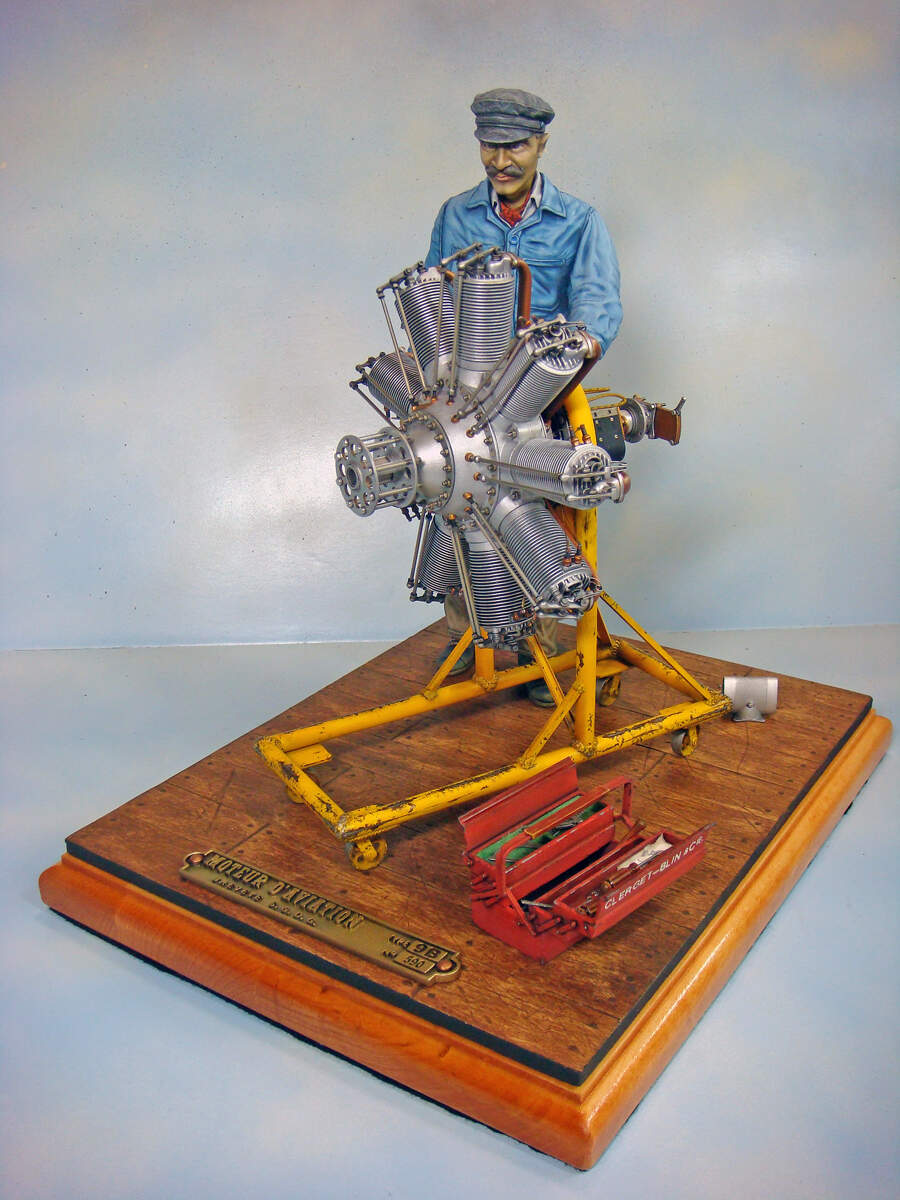
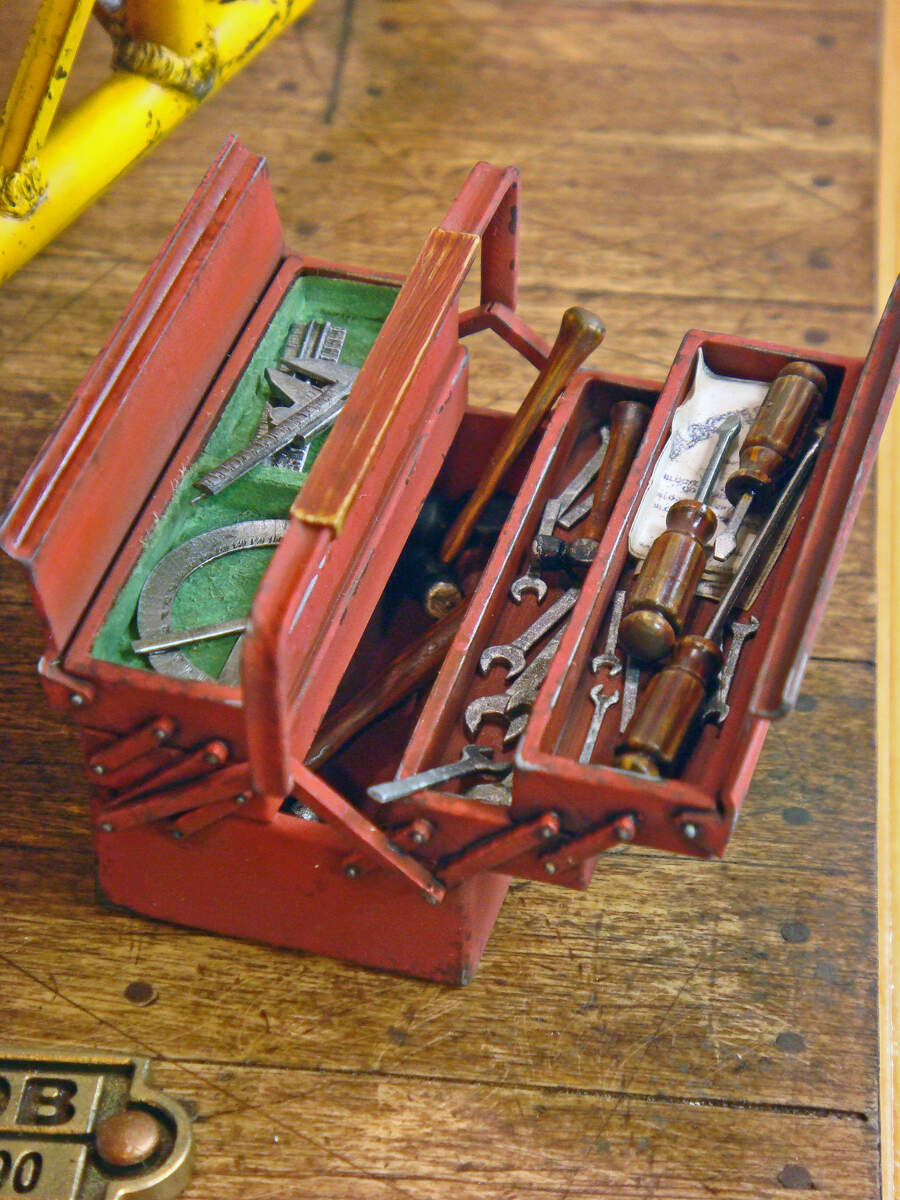
I also made a few other small changes like making new jacket buttons, sharpening the seam details, and filling in some of the wrinkles. This is the final composition or arrangement of the figure and engine. I have some tools and a tool box that I might add later.

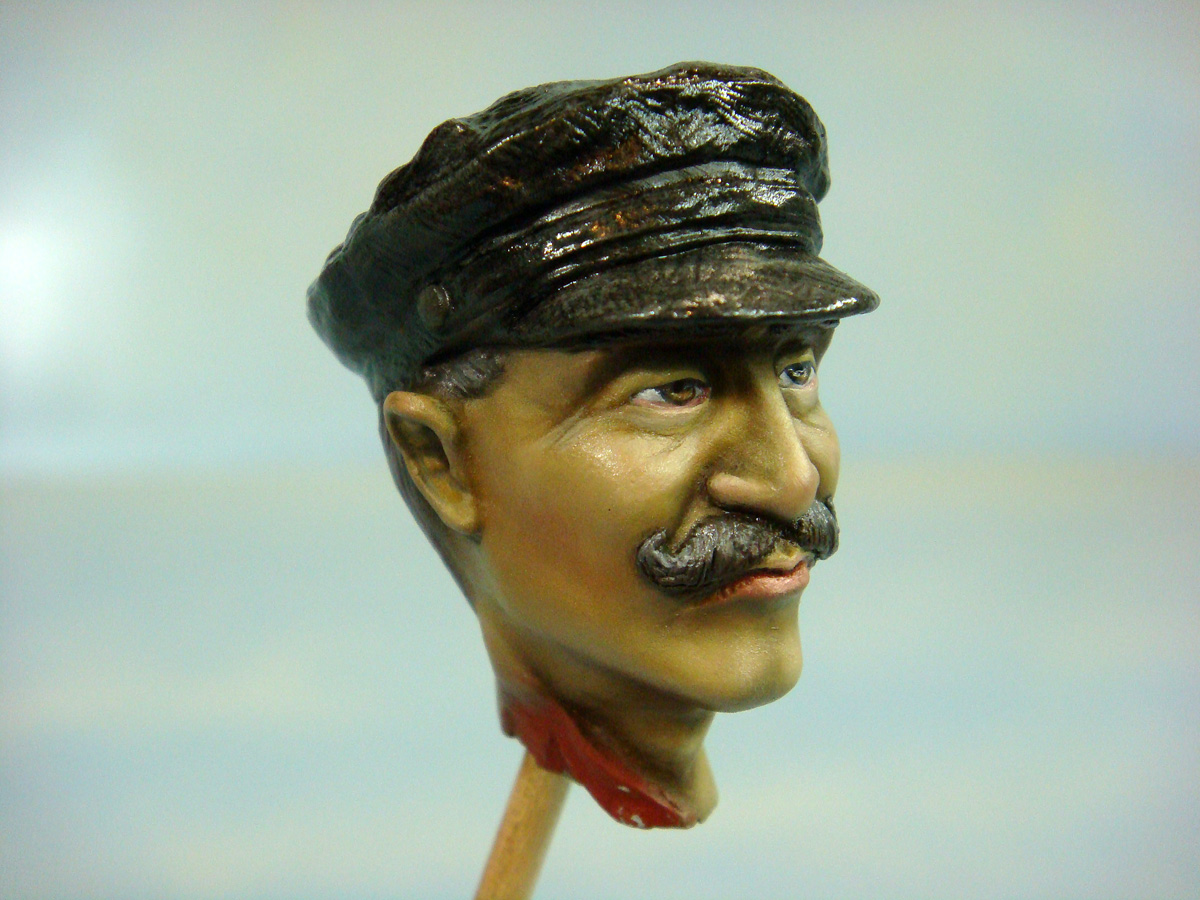
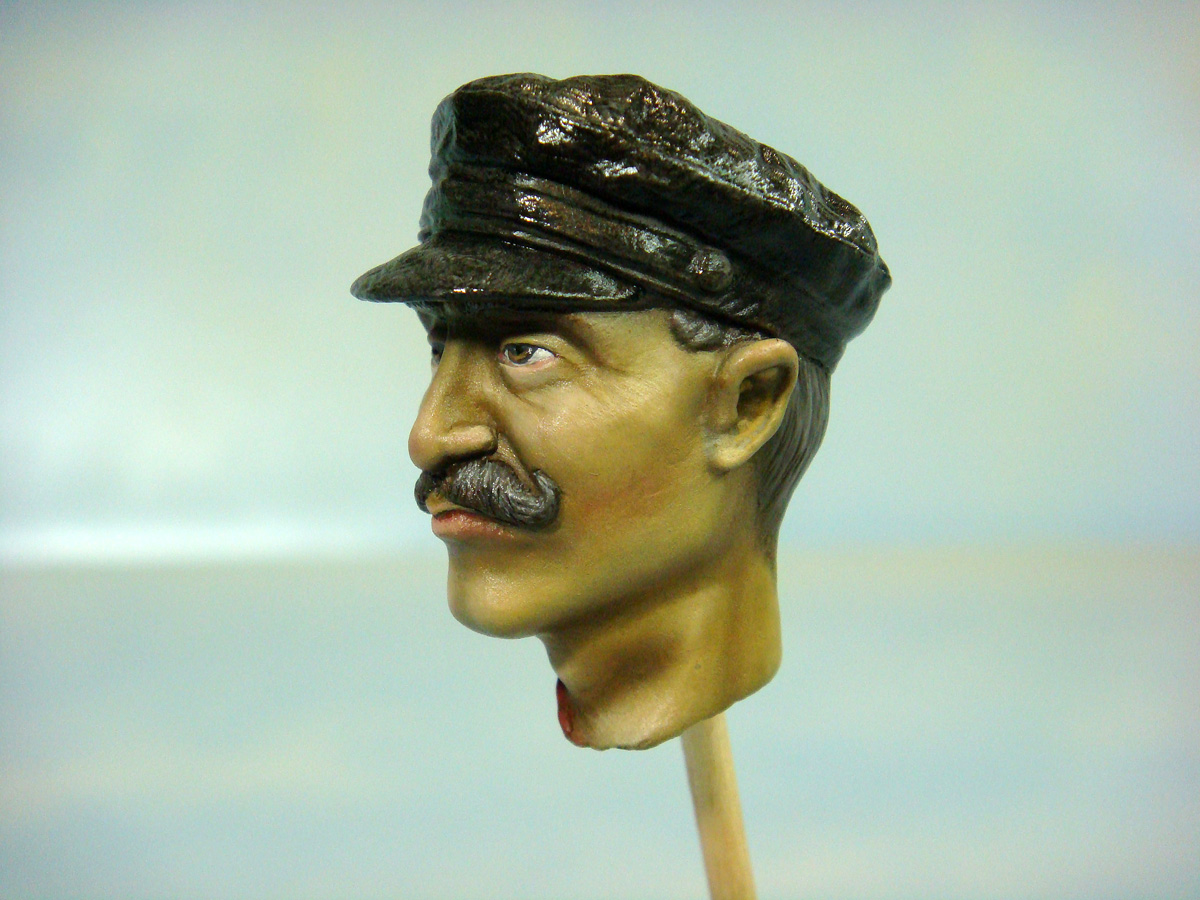
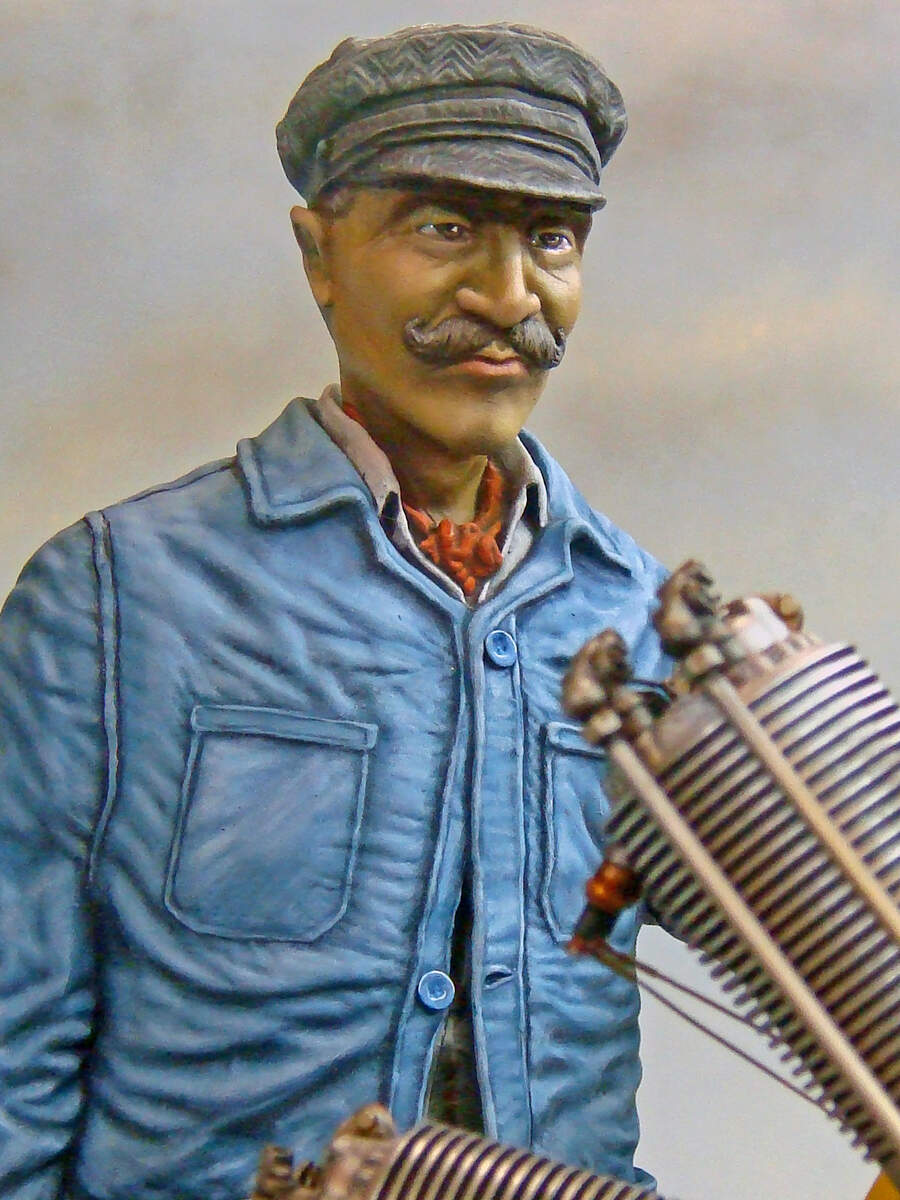
At this point, I’m now doing the finish painting with artist oils, starting with the face and head.

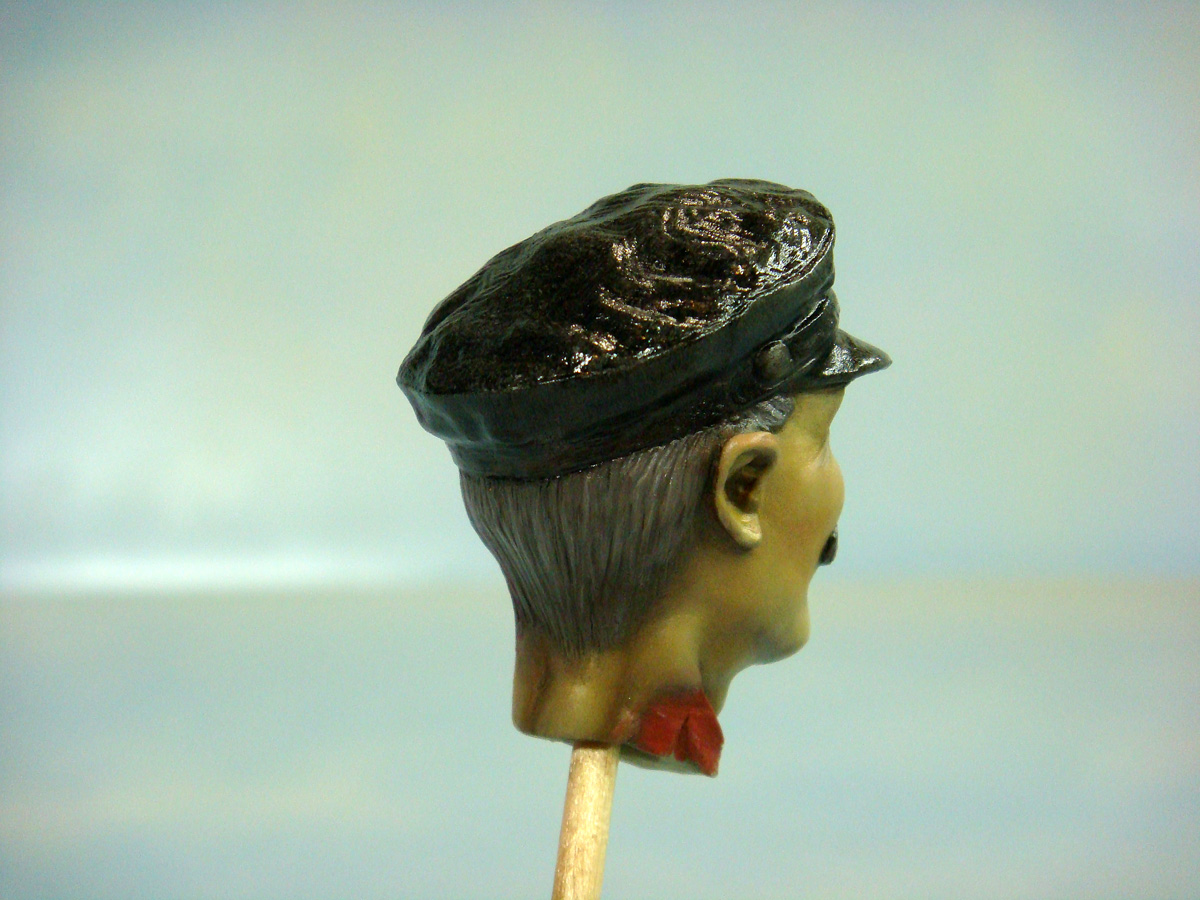
The wool, tweed hat has just been undercoated with black here. There’s still a lot more work to do on that. I’ve never painted a tweed texture, so this will require some experimentation.

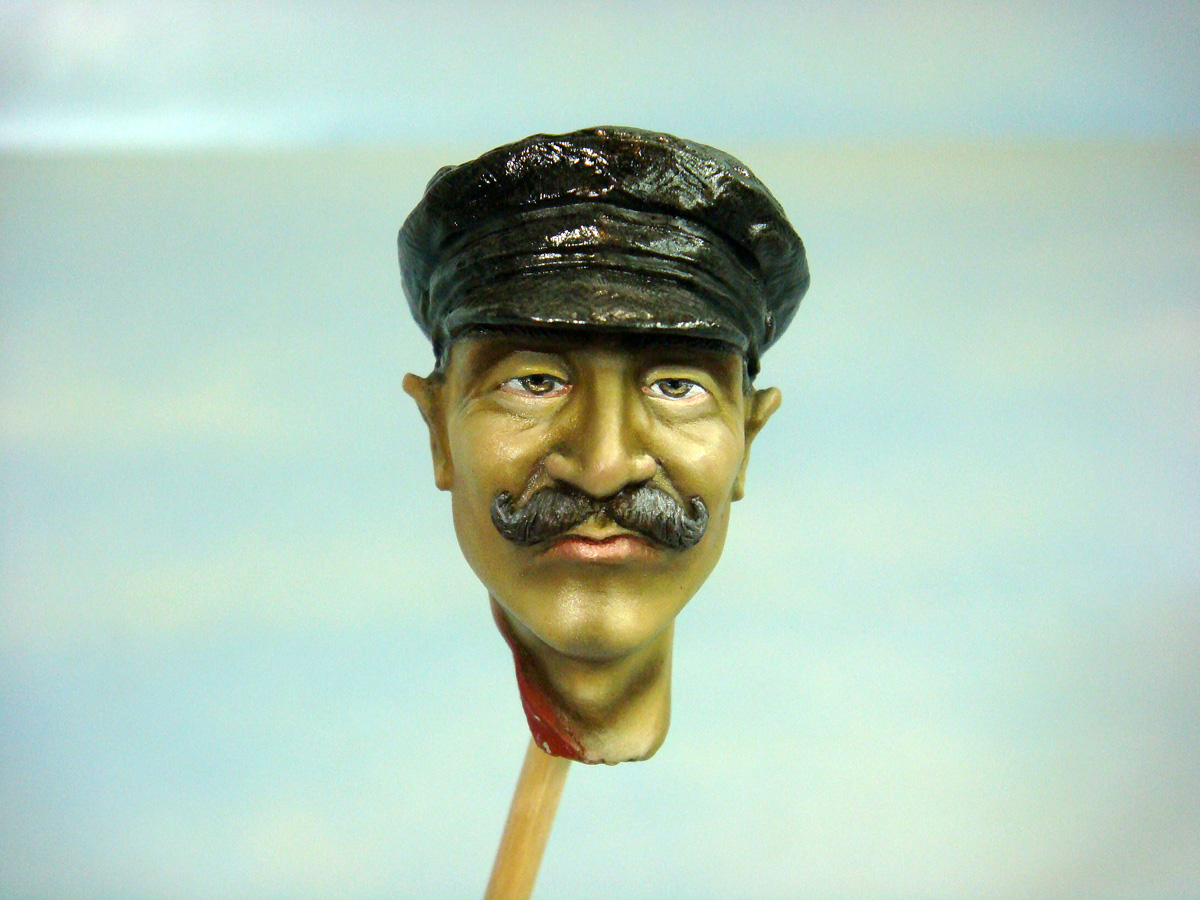
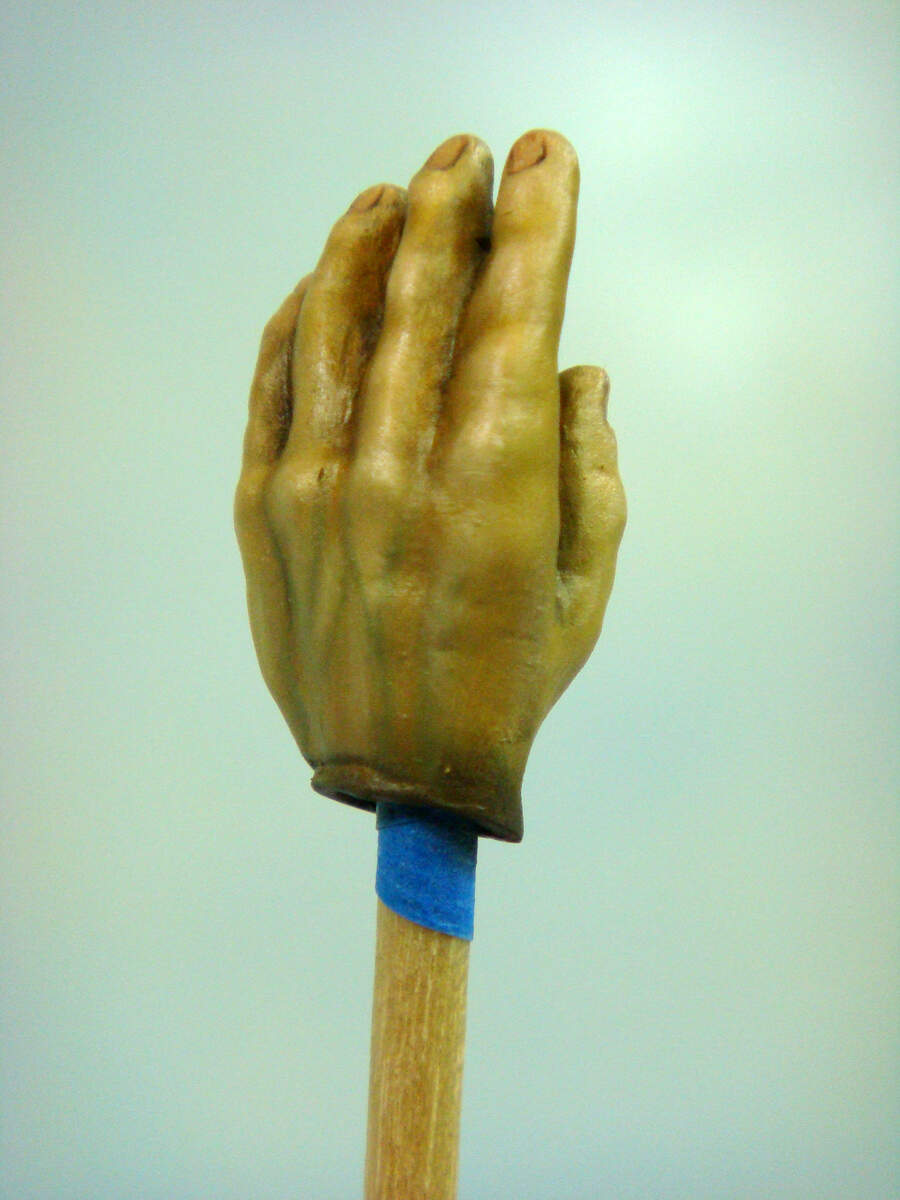
The basic skin flesh tone was mixed up using the three primary colors, this time, cadmium red, medium cadmium yellow and Prussian blue. Once I was happy with the basic color, red and blue were mixed to make a dark, reddish violet, and that was added to the basic flesh to create the shadow shades. Titanium white was mixed with the flesh for the highlights. All very basic and simple color mixing.

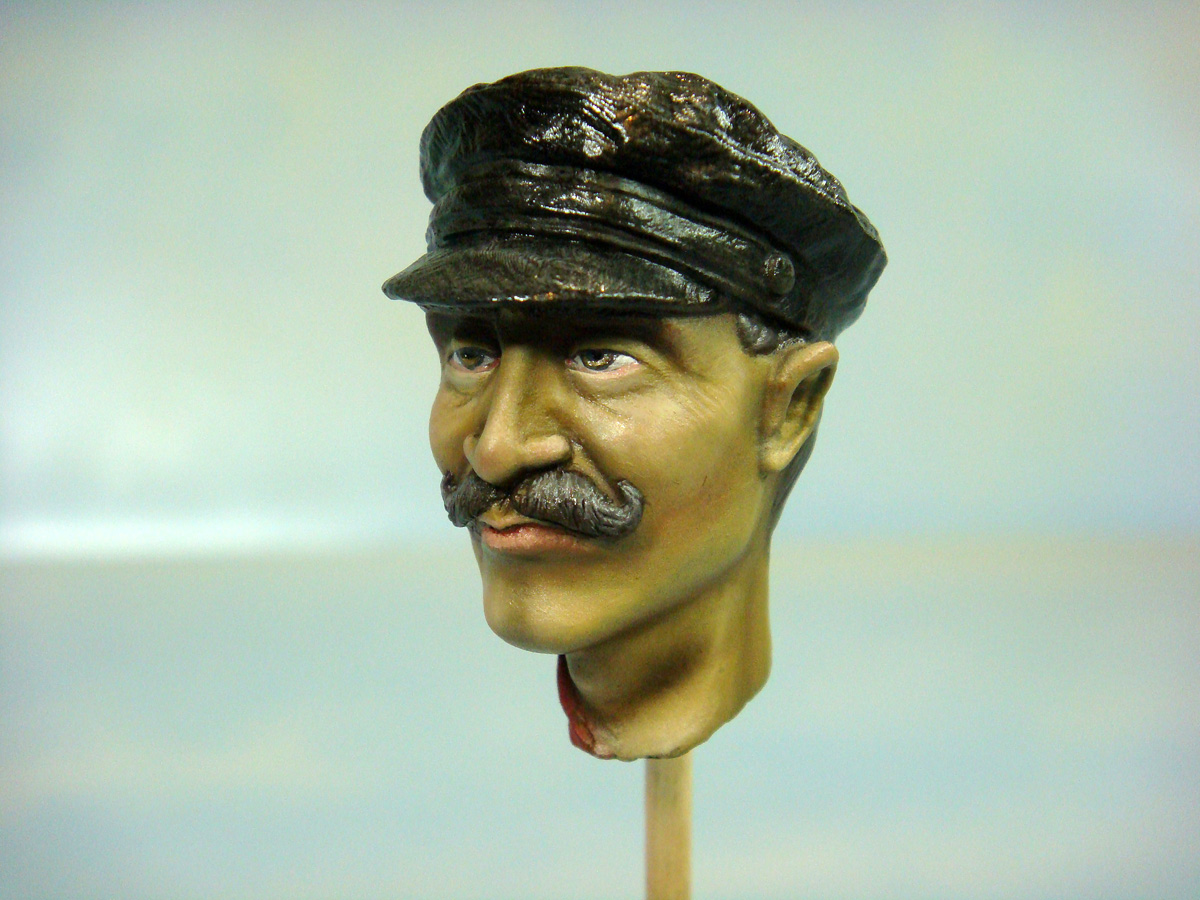
I did bring in a couple of different reds later, alizarin crimson and Indian red, to “warm up” the flesh colors here and there. I also used a touch of Payne’s gray here and there, too.

I may still do some small touchups and additions to the face, but for now, I’m satisfied with what I have.

Now for that tweed hat…

2 Likes

Brilliant. Just brilliant.

1 Like

I wholeheartedly agree, outstanding!

Cheers, D

1 Like

amazing work on the engine and figure

1 Like

Dog

:tumbler_glass: :tumbler_glass: :tumbler_glass:

2 Likes

Well, I thought it was about time to post up a small update on this project.

I’ve completed the figure’s head and hat.

The hat and scarf have been give an overcoat of Testor’s Dull Coat, but I avoided the flesh areas to retain the slight sheen from the oils. I’ve also give the eyes a couple of coats of Future to really give them a glossy, wet look. After the first couple of coats of Future dried, I added a small, pure white “glint” to each iris. I allowed those to dry and then added one more coat of Future.

I’ve also finished up the shirt, scarf and work jacket. As with the face and head, this was all done in artist oils over the acrylic undercoats.

The figure’s left hand has been painted and is ready for installation when I get to final assembly.

I’ve still got to re-sculpt the right hand to which I’ll add a tool of some sort. However, before I can do that, I need some 1:8 scale hand tools. So, off to the ol’ interweb to see what 3D designs might be available.

After some looking, I found a toolbox, a nice ball peen hammer, some measuring tools and a screwdriver handle that I though could be made to work. I got all of these designs from Thingiverse. All were originally designed for printing on FDM printers, and all of the tool CADs were done by different folks as 1:1 scale, full-size, so they all needed to be rescaled. I had to make the screwdriver shaft designs myself since none of the complete designs were suitable for my needs. The toolbox needed some modifications to make it printable on an SLA printer as well as rescaled (it was originally a 1:24 scale model).

Here’s the toolbox with it’s initial base colors and some chipping. I’ve also added a couple of homemade decals (French tool maker, F.A.C.O.M. Outils, and the engine factory logo, “Clerget-Blin & Cie.”). These were made from Woodland Scenics dry transfer letters on clear waterslide decal paper and applied like normal waterslide decals.

These tools are all still just in their primer base colors. Much more finish work still to be done on them.

Finally, as a bit of an after though, as I was looking through my references found online, I came across a picture of the cover for the factory Clerget 9B engine assembly instruction book. I decided to make a model assembly manual to go on
the vignette. This was made by copying the front cover image to PowerPoint to make a printable full cover. This was cut out and added to a book cover made from
a piece of red construction paper with printer paper pages. Although I’m pretty pleased with the way it turned out, since it was an after thought, I didn’t account for it in the vignette’s composition, and now that I’ve test fitted it, I’m not sure if I’m actually going to use it. Needs more thought and consideration before committing…

Maybe I’ll make another, smaller copy of the book that might fit into the toolbox… ?

2 Likes

That is all just breathtaking work and painting and everything man. Brilliant!
Some day I may get my mojo back if I keep getting inspired with this stuff right here.
J

1 Like

Thanks, old friend! I appreciate the kind words!

No worries. Well deserved !
J

1 Like

So, to close the loop on this project, here’re some “happy snaps” of the finished vignette. Not much else to say about the build that hasn’t already been said. It was an interesting and instructive project. It was also a refreshing change from my usual fare, and that allowed me to experiment and play around with a some finishing techniques that I don’t normally employ - lots of bare metal and shiny stuff along with some new oil painting flesh tones along with a new variation of my usual blending techniques.

All in all a fun project, but I’m glad to be moving on to something new now.

Happy modeing!

4 Likes

Brilliant

1 Like