That looks awesome Michael, lovely paint job! How do you find the Alclad Black Primer to work with? I see a lot of reports on various forums that it takes forever to cure properly.
Looking forward to the next episode!
Cheers, D
That looks awesome Michael, lovely paint job! How do you find the Alclad Black Primer to work with? I see a lot of reports on various forums that it takes forever to cure properly.
Looking forward to the next episode!
Cheers, D
Thanks Damian. I find the Alclad black gloss primer fine for plastics. On small parts I am happy to use that primer and the metallics in the same session. On the white metal and resin experience has shown me you need a proper primer like the Tamiya rattle cans which I use as a base now for most the parts and then go from there, like the body above - four layers. By the way, the red over aluminium was an idea I copied from you to see how it would work. It came out well.
cheers
Michael
I’d love to take the credit for that, but I think it was Gabriel who posted up that process for a solid red finish. From my (unreliable) memory I’ve only ever sprayed clear reds over metallics to get a candy effect.
Cheers, D
Michael,
Absolutely impressive finish to the base Gravity Ferrari Rosso Corsa color.
I’m not sure if the Aluminum undercoat darkens the actual color or not or just is a 2nd seal so that the different material used for the nose and main shell look identical after paint.
I also use the Tamiya Gray Primer Sealer in a rattle can for small parts that air brushing would be way to time consuming, other then that I use my go to mixture of Tamiya Gray and Tamiya White primer sealer air brushed on. Both the bottles and rattle can are lacquer based, not acrylic lacquer like their paints, so either would work well over metal.
As for the Alcad Gloss Black, I’ve tried it twice, and tossed out both bottles as they just never really dried over a weeks time. I just use Tamiya’s Gloss Black thinned 2 parts paint to 3 parts thinner. Goes on smooth as silk and dries/cures over night.
joel
Michael,
I do have one question for you. I’m really thinking of getting one of the New MFH 1/24 scale Porsche 917 cars coming out soon.
My concern is how to polish all the small parts. I’m fairly certain I can polish the body and larger parts, but I can’t figure out how to do all the smaller parts without damaging them. How do you go about doing it?
joel
Hi Joel, thanks for the comments on the paint work. On polishing small parts, unless they’re easy shapes I don’t bother, just paint them with an Alclad metallic, like Polished Aluminium. If they’re polished, then I use 1000 followed by 2000 and lastly polish them off with a liquid metal polisher like Silvo (I am sure you have something similar in the States for cleaning the family silver). I have tried to use the Dremel on slow speed with a paste polisher but that is quite tricky. The parts will be much smaller in 1/24 so it will be a challenge but patience wins the day.
I don’t how much you want to polish up but on the Ferrari I have limited it to only a few of the larger pieces.
cheers
Michael
Michael,
Thanks for the info. I’m still debating on which kit to buy. I’m looking at ebay as my all time favorite Porsche is the 908/3 short tail for tracks like Sebring that I saw Joe Siffert drive one like a truly crazy person. Wheel hop was pretty common when he was at the wheel. It’s the version without those twin vertical wings on the rear deck. After that comes any Gulf Wyler 917. As you can see I’m truly stuck in the past.
I was kind of shocked at the prices for these 1/24 scale kits as my budget for the one kit per year is $250-300 if I actually get up the courage to try one.
joel
Joel, you’re right, they are pricy, but you get value for money in that the build will be a challenge. Not in a bad way but working with white metal and resin is different, lots of dry fitting, sanding, drilling, pre-planning etc. Tamiya they are not, but they have great detail and are probably more accurate than the other kits out there.
I haven’t seen one of their 1/24 scale kits but the Porsches were complex engineering and if the smaller kits are like their larger 1/12 scale brothers then you’ll definitely be in for a challenge.
cheers
Michael
Michael,
I’ve been studying both the earlier and current 908/3s and the chassis is super complex. These kits aren’t for someone like me who at times struggles even with a Tamiya kit. The biggest and most serious issue is my poor eyesight and total lack of up close depth of field. Things to consider for when and if I pull the trigger.
BTW, on my other site, one of the guys whose also a real car guy posted that on Hyperscale a member posted after struggling with a 1/12 scale MFH Porsche 956 stated that nothing fit, the #4 screws didn’t hold up any of the suspension everyone had to be re-tapped and replaced with #5 screws, and the list goes on and on. Bottom line is that the guy actually trashed the kit which cost him about $1,000. He said that he has no regrets at all. Several of the list members all said that they would have bought the kit from him for about $500. Guy must be rolling in cash to do that.
joel
Hmmm, that’s a bit crazy on the Porsche. As you know I built the 917/20 kit which was very challenging but if you have patience and some modelling skill you’ll get there. I would think his frustration would have been with the white metal parts. They are softish and so often come bent. It does require a lot of testing to ensure you get them back to shape but to me that is part of the delight in getting the build to completion. In the Porsche build there were very few issues that could not be rectified, a few that I created on my own and learned from. e.g. on the self tapping screws, I would agree they are too short (only 3mm long) but where possible I countersunk them to give a bit more depth or where they are just fixing in place I used 3mm brass rod and glued them in place.
The Ferrari 312 has been a much easier build - it’s a more basic car but also I have learned how you need to approach MFH to get the best out of it.
cheers
Michael
Michael,
My thoughts as well. Just to many of these kits are made and sold to even imply that they’re basically junk and not worth the money. Of course trashing $1,000 saying it was worth it, does show show his skill level.
joel
Well team we have just passed the 3 month half-way point for the HOTB Group Build, and I must say it’s a bit disappointing to see how quiet it is in here! We have 2 completed builds, 2 in-progress builds, and 5 interested parties yet to start, I know the move to the new site has thrown a few people off, and then separating the Group Builds from the parent forum has made it a bit harder to navigate, but we have seriously dropped away from the number we were seeing over the last couple of years on the old forums.
We are open to suggestions, what can we do to ramp up the participation again? I don’t want to pull the pin on the Group Build program, I intend to push through and keep it rolling, and maybe post updates back in the main AutoModeler forum.
Anyway, Roll Call and Running Build Updates below:
AussieReg (Damian) - Ferrari 250 GT California - Revell kit in 1/24 - COMPLETED
Joel_W (Joel) - 2020 Ford Mustang GT4 - Tamiya kit in 1/24 with IndyCal decals - COMPLETED
Cosimodo (Michael) - Ferrari F1 (Monza 1967 Chris Amon) - MFH kit in 1/12 - Engine painted, assembled and detailed. Basic chassis (cockpit engine and exhausts) assembled. Body primed and painted
Rick1956 (Rick) - Porsche 904 - Monogram kit in 1/25 - Engine modifications, assembly started
Tinbanger (Richard) - Jaguar E-Type - Airfix kit in 1/32
Betheyn (Andy) - Porsche 917K - Fujimi kit in 1/24
Littorio (Luciano) - Alfa Romeo Giulietta Spider 1300 - Italeri kit in 1/24
Forest1000 (David) - Porsche 911 GT3 - Tamiya kit in 1/24
md72 (Mark) - Dodge Challenger (2009) - Revell kit in 1/25
Cheers, D
Alas, you may have to update the list Damian.
The Ferrari has regressed. I put on the decals and it looked great. Then for reasons only known to myself I decided to try a gloss coat with Gravity 2k. Ooops! I could say I didn’t read the instructions but there weren’t any other than the 3 part mixture ratio. The finished result was a mess.
I can say with certainty is it difficult to strip a resin clear coat and multiple layers of paint but I am back to a bare body to start the paint process again. I did lose the decals as well and I have asked MFH if they will sell me some more but not heard back.
I also needed to order some more Ferrari red paint from Gravity and while on their site took the chance to see if they had any views on how to apply the 2k coat. They didn’t but what it did say, and maybe what caused the disaster, was that you should not use a syringe to measure and mix the three part solution which is what I had done and have always done to measure paint and thinner. I think squirting the liquids into a container may have created the problem. I need to find some pipettes and try again and this time on a test body.
cheers
Michael
Michael,
Really sorry to read that you’ve had a major 2K Urethane issue requiring total stripping of the Ferrari. The hardest part of the battle is removing it and all the paint as it takes a beating in the removal process.
2K is really nasty stuff, and i’ve still got my Gravity set setting with the rest of my clears, but I’ve yet to get the “balls” to try it out.
The mix of 3-1-1 needs to be followed but you can thin the final coat with a little more thinner if needed. The mix needs a cup and 3 pipettes, toss the 1st 2 in the garbage after each use, use the last one for the thinner to mix all three well together. Apply in lite, even coats. Usually 3 coats will be all you need.
Paul, from International Scale Modeler uses it for all his builds. His Subaru full build will take you through the entire process including psi settings. The guy is an excellent modeler, and is painting/finishing techniques work for me, which is what I do use.
He also goes through the need for protective gear, and wears a full respirator, two pair of gloves long sleeve shirt, super clean spray booth & filter which gets tossed after the 2K clearcoat is applied. Here’s the link to that you tube episode.
(12) ISM Car Modelling Techniques Part 4 - Clearcoat - YouTube
joel
Well that sucks Michael! I really hate to hear that the great work you had done has regressed back to bare plastic and metal.
Honestly, from everything I’ve seen and heard, I really don’t have any desire to even go near the 2K products. I will just continue to work on getting a better finish from my standard gloss clears.
I hope round 2 goes much better for you mate!
Cheers, D
Michael that is horrible. I would have sold my models and took up knitting by now if it was me!!!
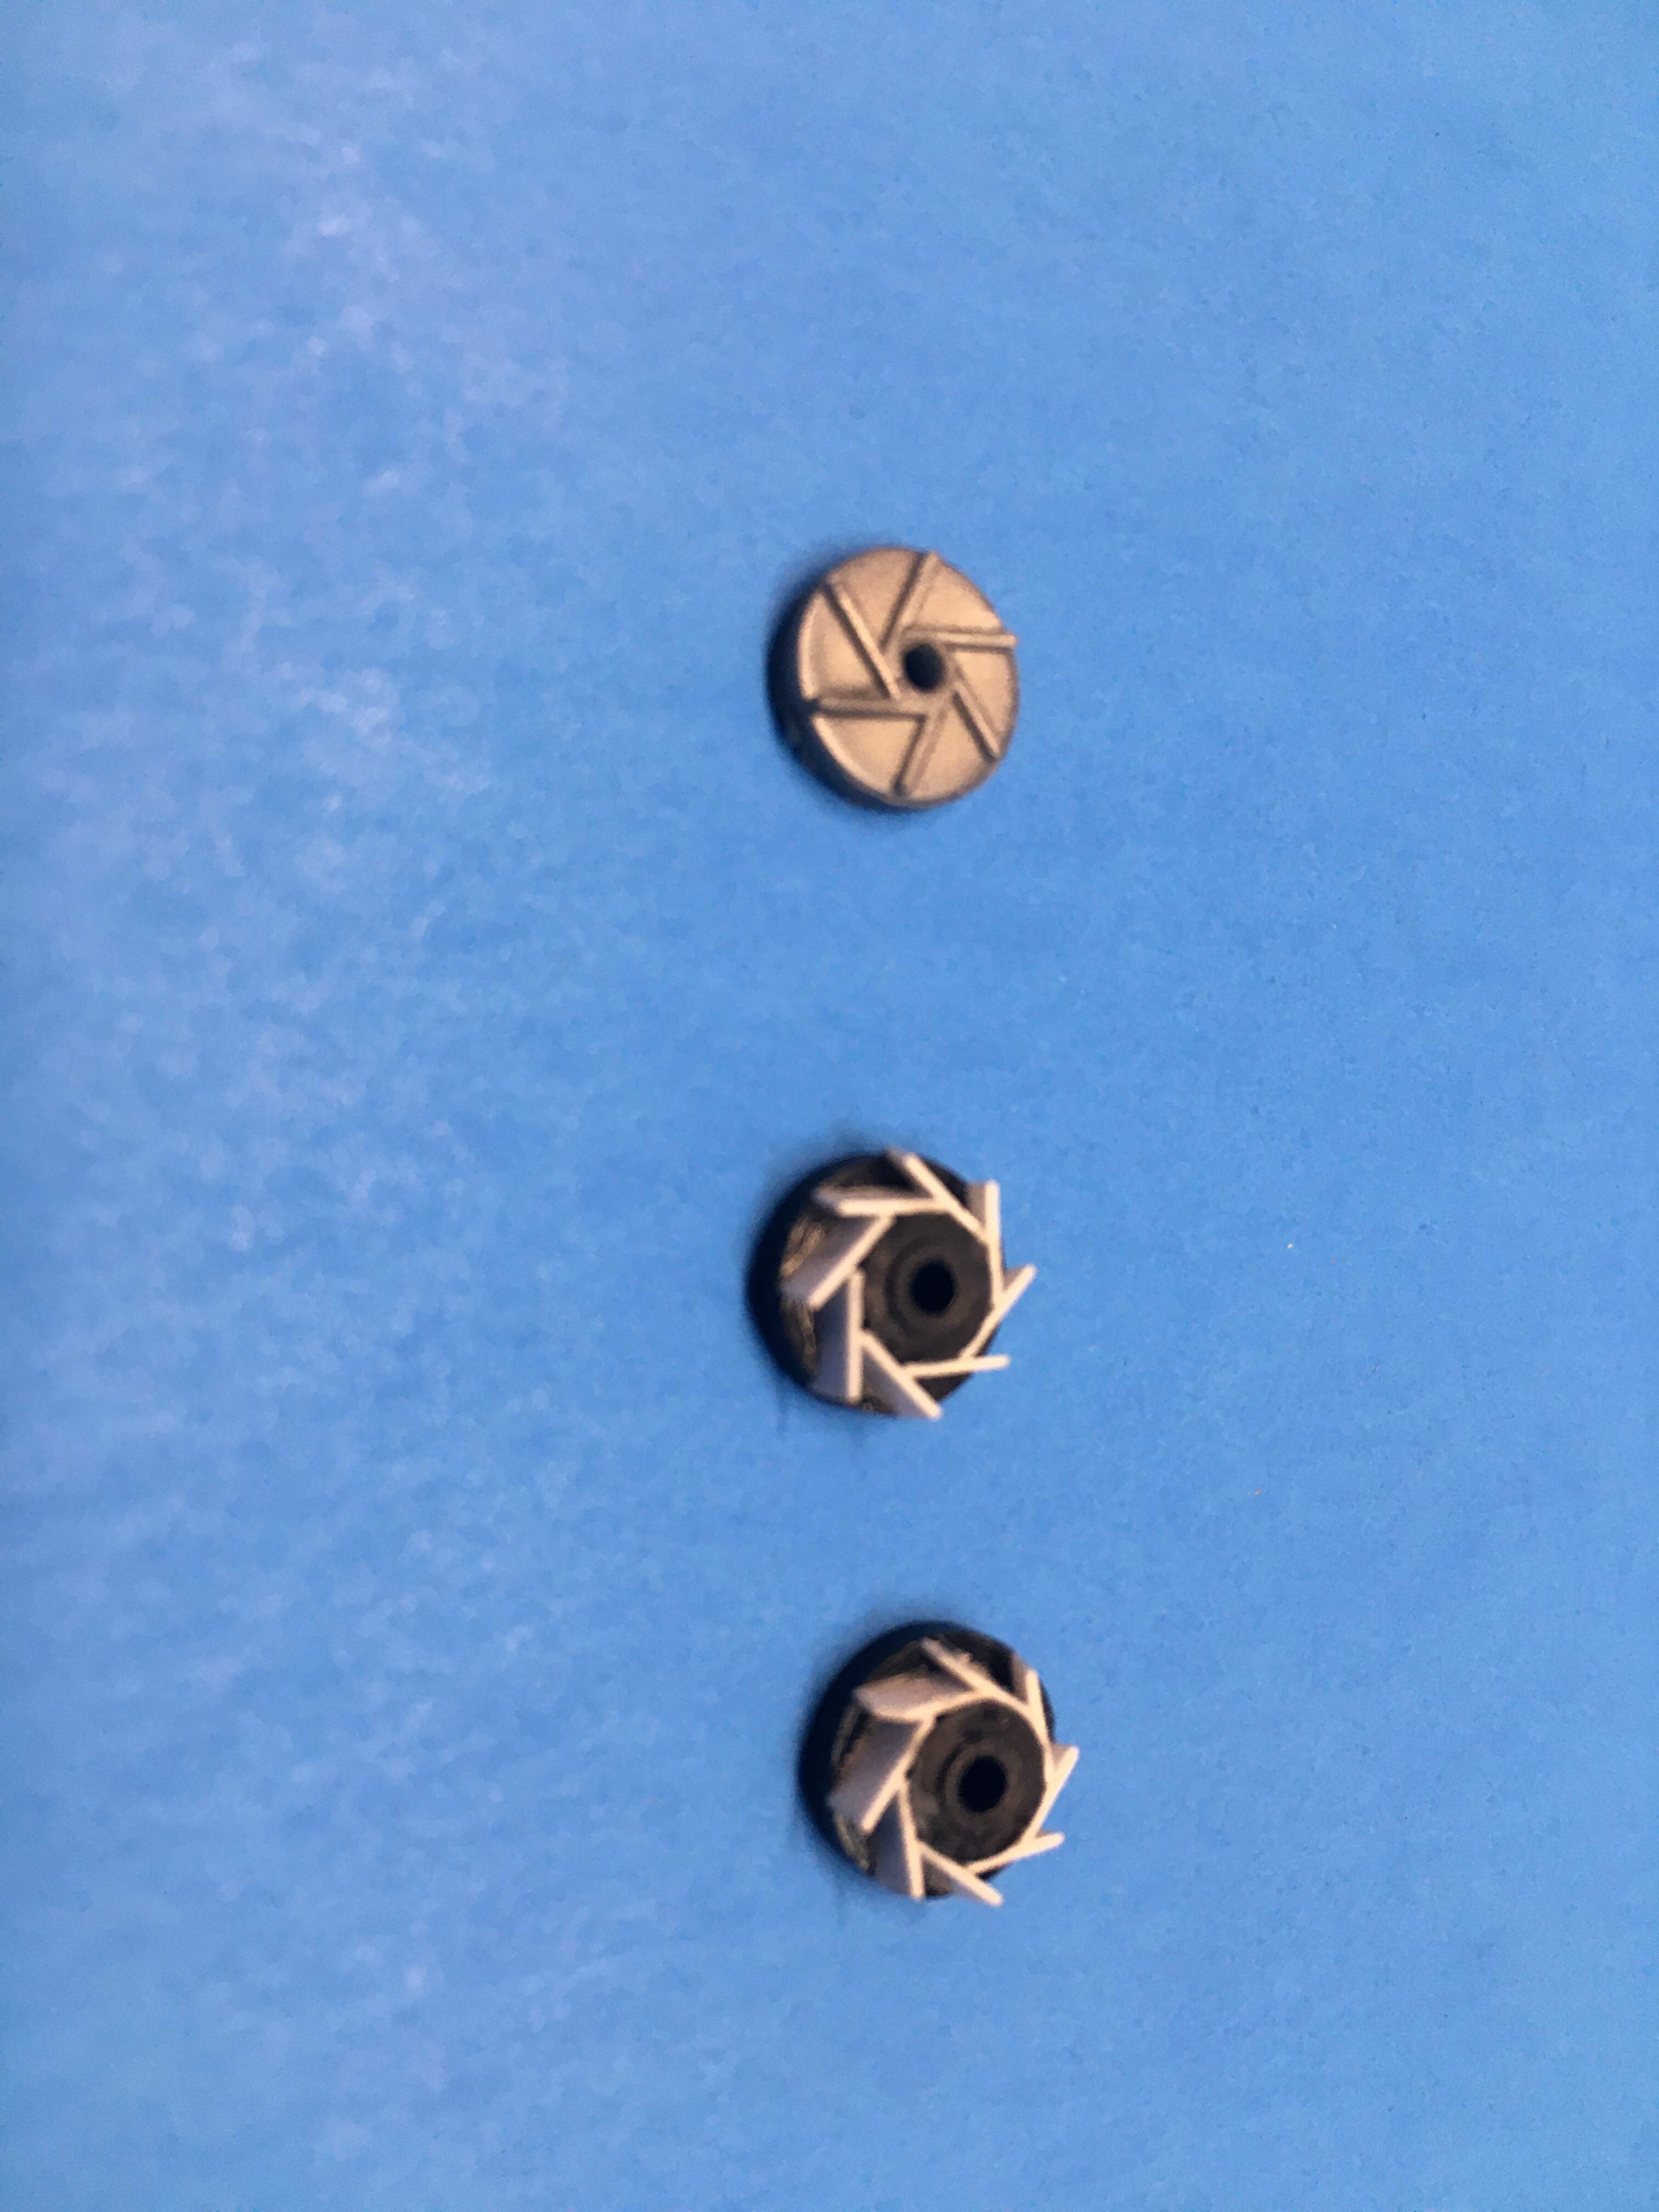
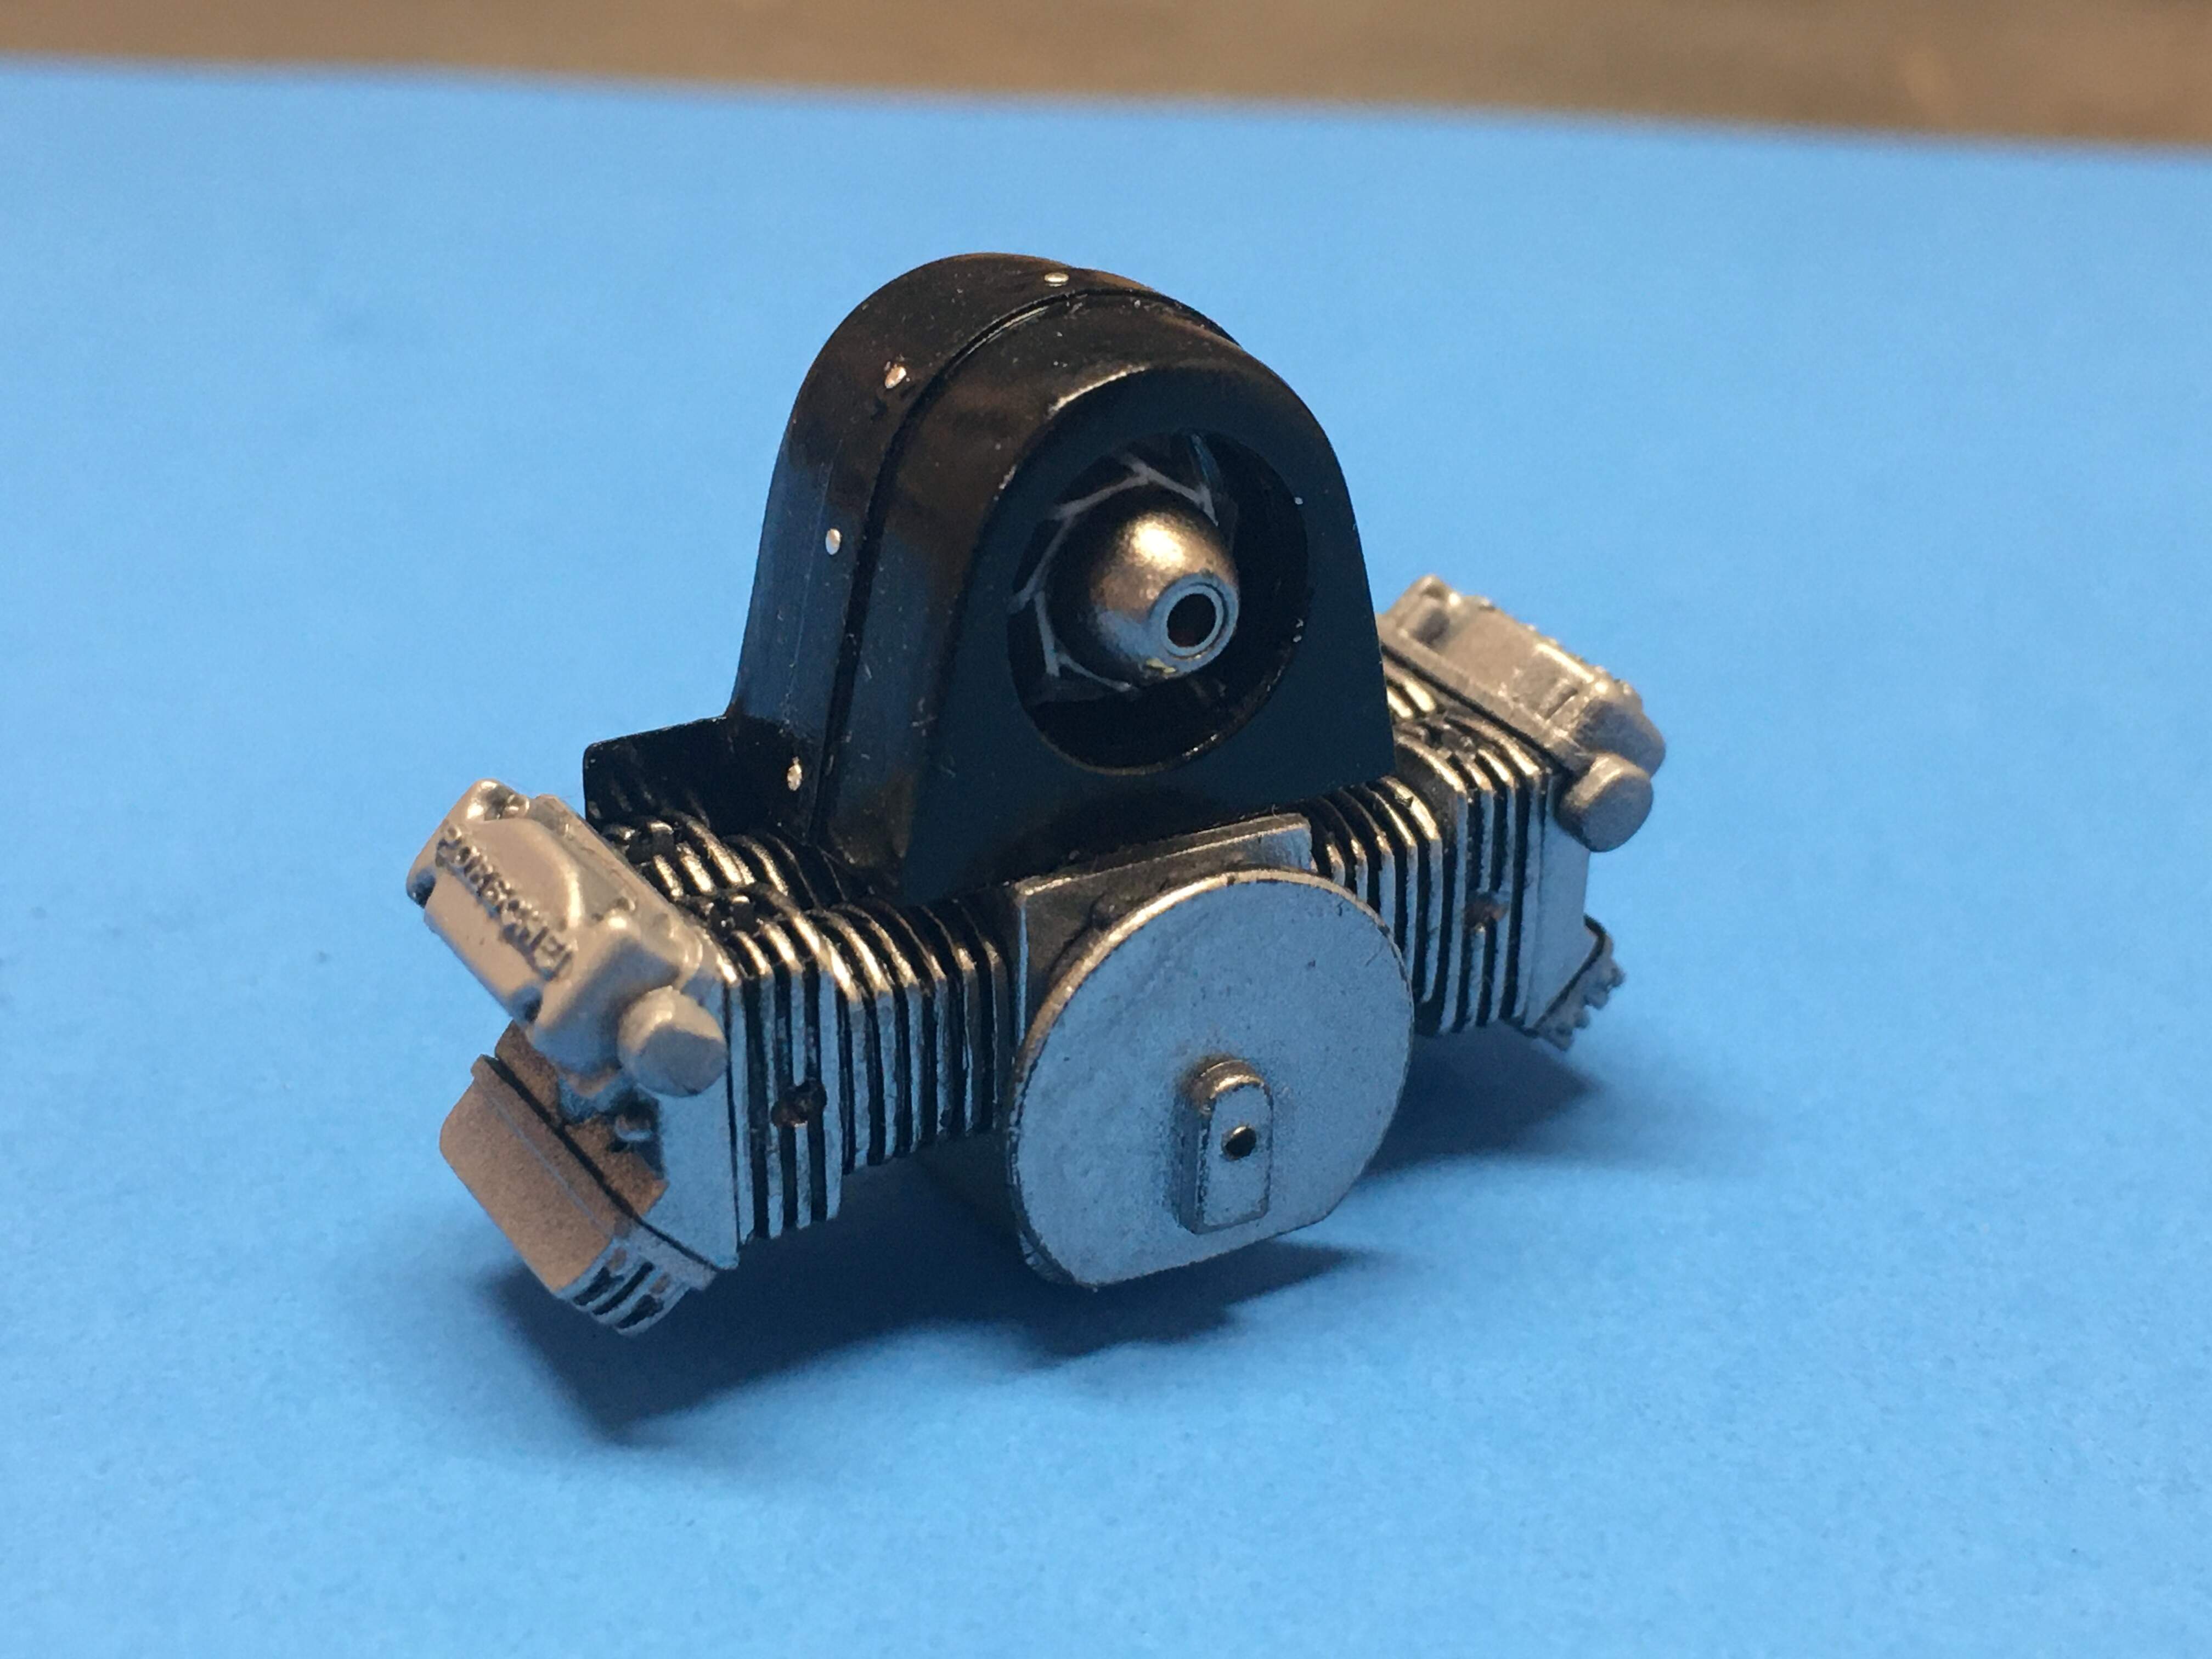
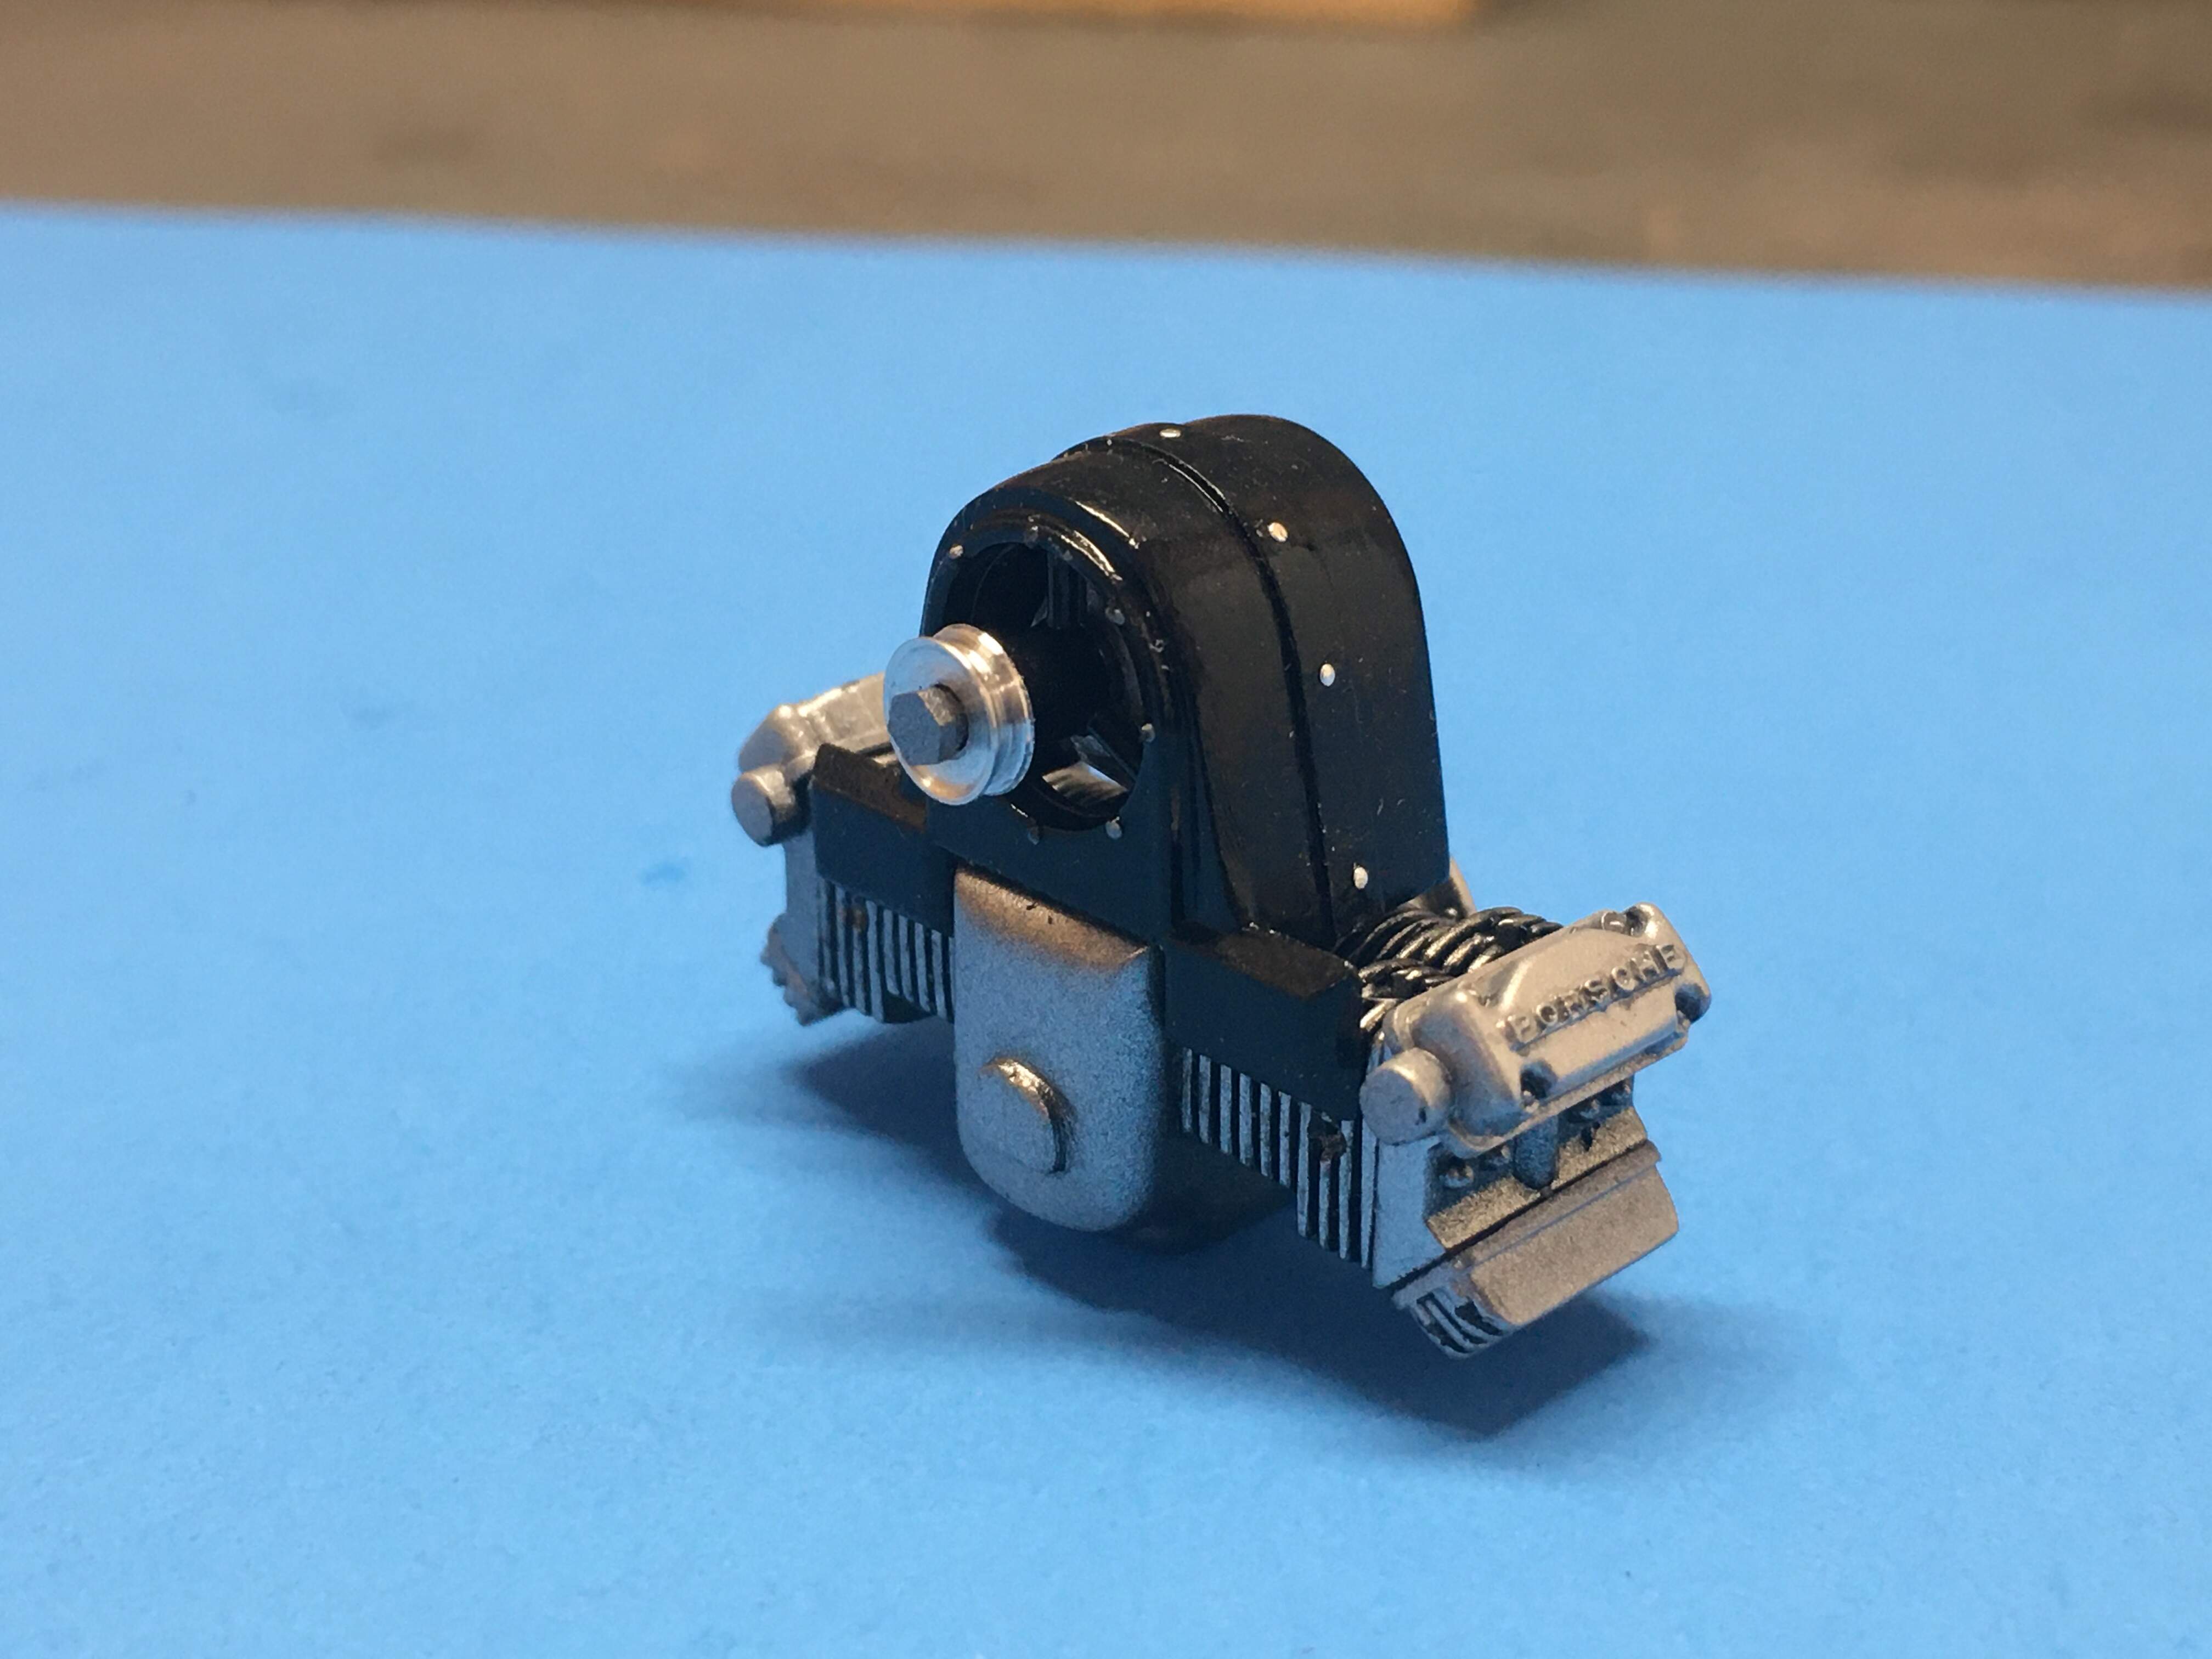
Well it is official. I am retired as of last Friday. Hopefully now I can make some timely submissions. Here is where I am at. Not much further than a few months back. I have been out of pocket with only the occasional peek to see if you guys threw me out on the street yet. I need to catch up on all the posts and completions.
Some before and after pics.
Thanks for looking and not throwing me out the door.
Rick
Rick, if you keep putting up scratchbuilt mods like that I will lock the door so you never get out!
Excellent work mate, really neat.
Cheers, D
Rick,
That’s some incredible scratch building on those impellers. Huge difference in the look of the complete housing.
joel
Thanks for the commiserations guys!
I should limit my experimentation to subjects that would cause less grief. Thanks for the video link Joel. I had watched a similar clip but had not picked up on the use of pipettes. I had sprayed as suggested but what I got was a strange sort of crater surface randomly spread around the whole body so it was consistent in that sense. Anyway good news is MFH can let me have some replacement decals for the excellent price of $12 so I can get back onto it now.
cheers
Michael
That is indeed some excellent building Rick. The improvement is very notceable.
cheers
Michael