Thanks for the tip on the warrior rotorhead, I’ll keep that in mind when I’m putting mine together. I’ve seen that picture before Gino and having been on the receiving end of dust storms like that I’m not sure if having the doors on would have really helped…well maybe a little.
That lynx seems to be fighting you a little. Interested in your glazing ideas and am interested to see how it comes out.
1 Like
I’ll keep everyone posted about how it turns out. The Clearfix usually works well.
To be honest with you, this is so far the only problem I’ve come upon. And it’s not the first time I’ve come across this on an old Matchbox. What it needs is a lip around the inner surface, so there’s something to grip around the inner edge. They tended to go this route for reasons best known only to themselves.
Everything else has gone really well so far. It’s simple, but what you expect from a pocket money kit from the 70’s. The big slot that needed filling is for the Sea Lynx prototype that can also be built from the kit. I might even get another one of these to build that one.
The Lynx is my favourite helicopter and I’ve got a bunch of them in the stash from 1/72 to 1/32, mostly Sea Lynx. A shame no one has yet done an accurate Army Lynx in 1/72. Airfix’s 1/48 is very nice and I live in hope they’ll scale it down one day.
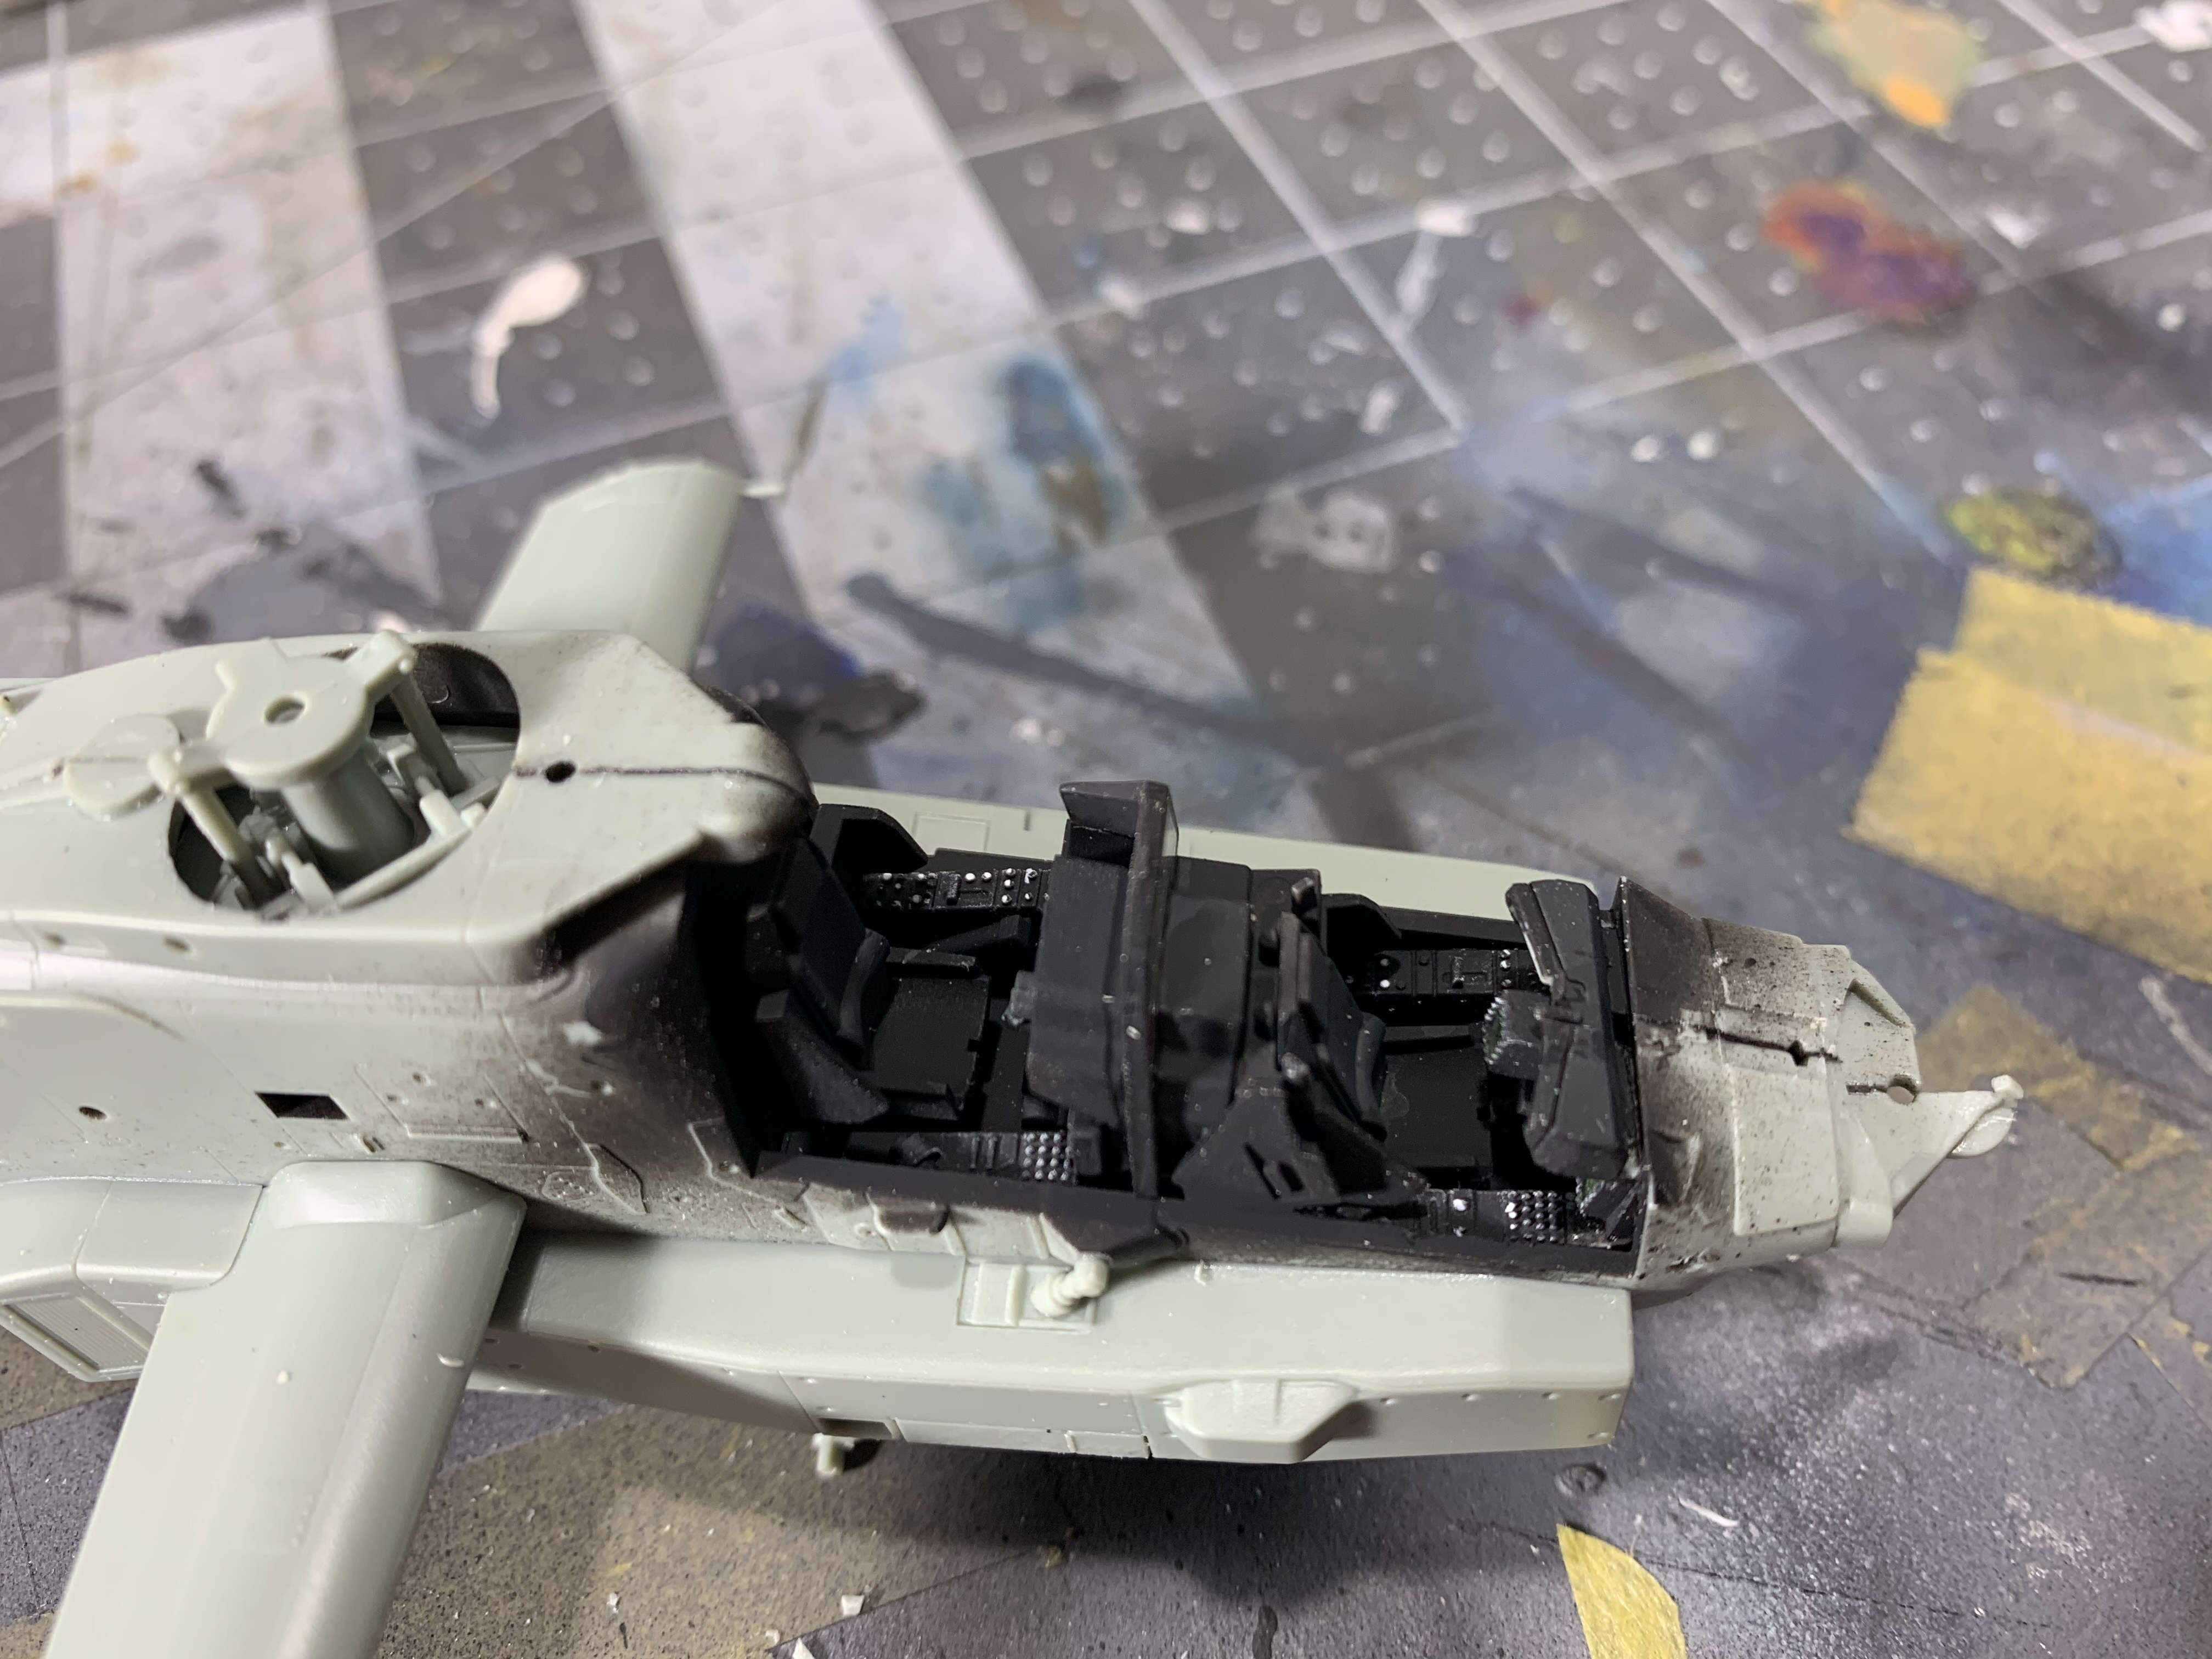
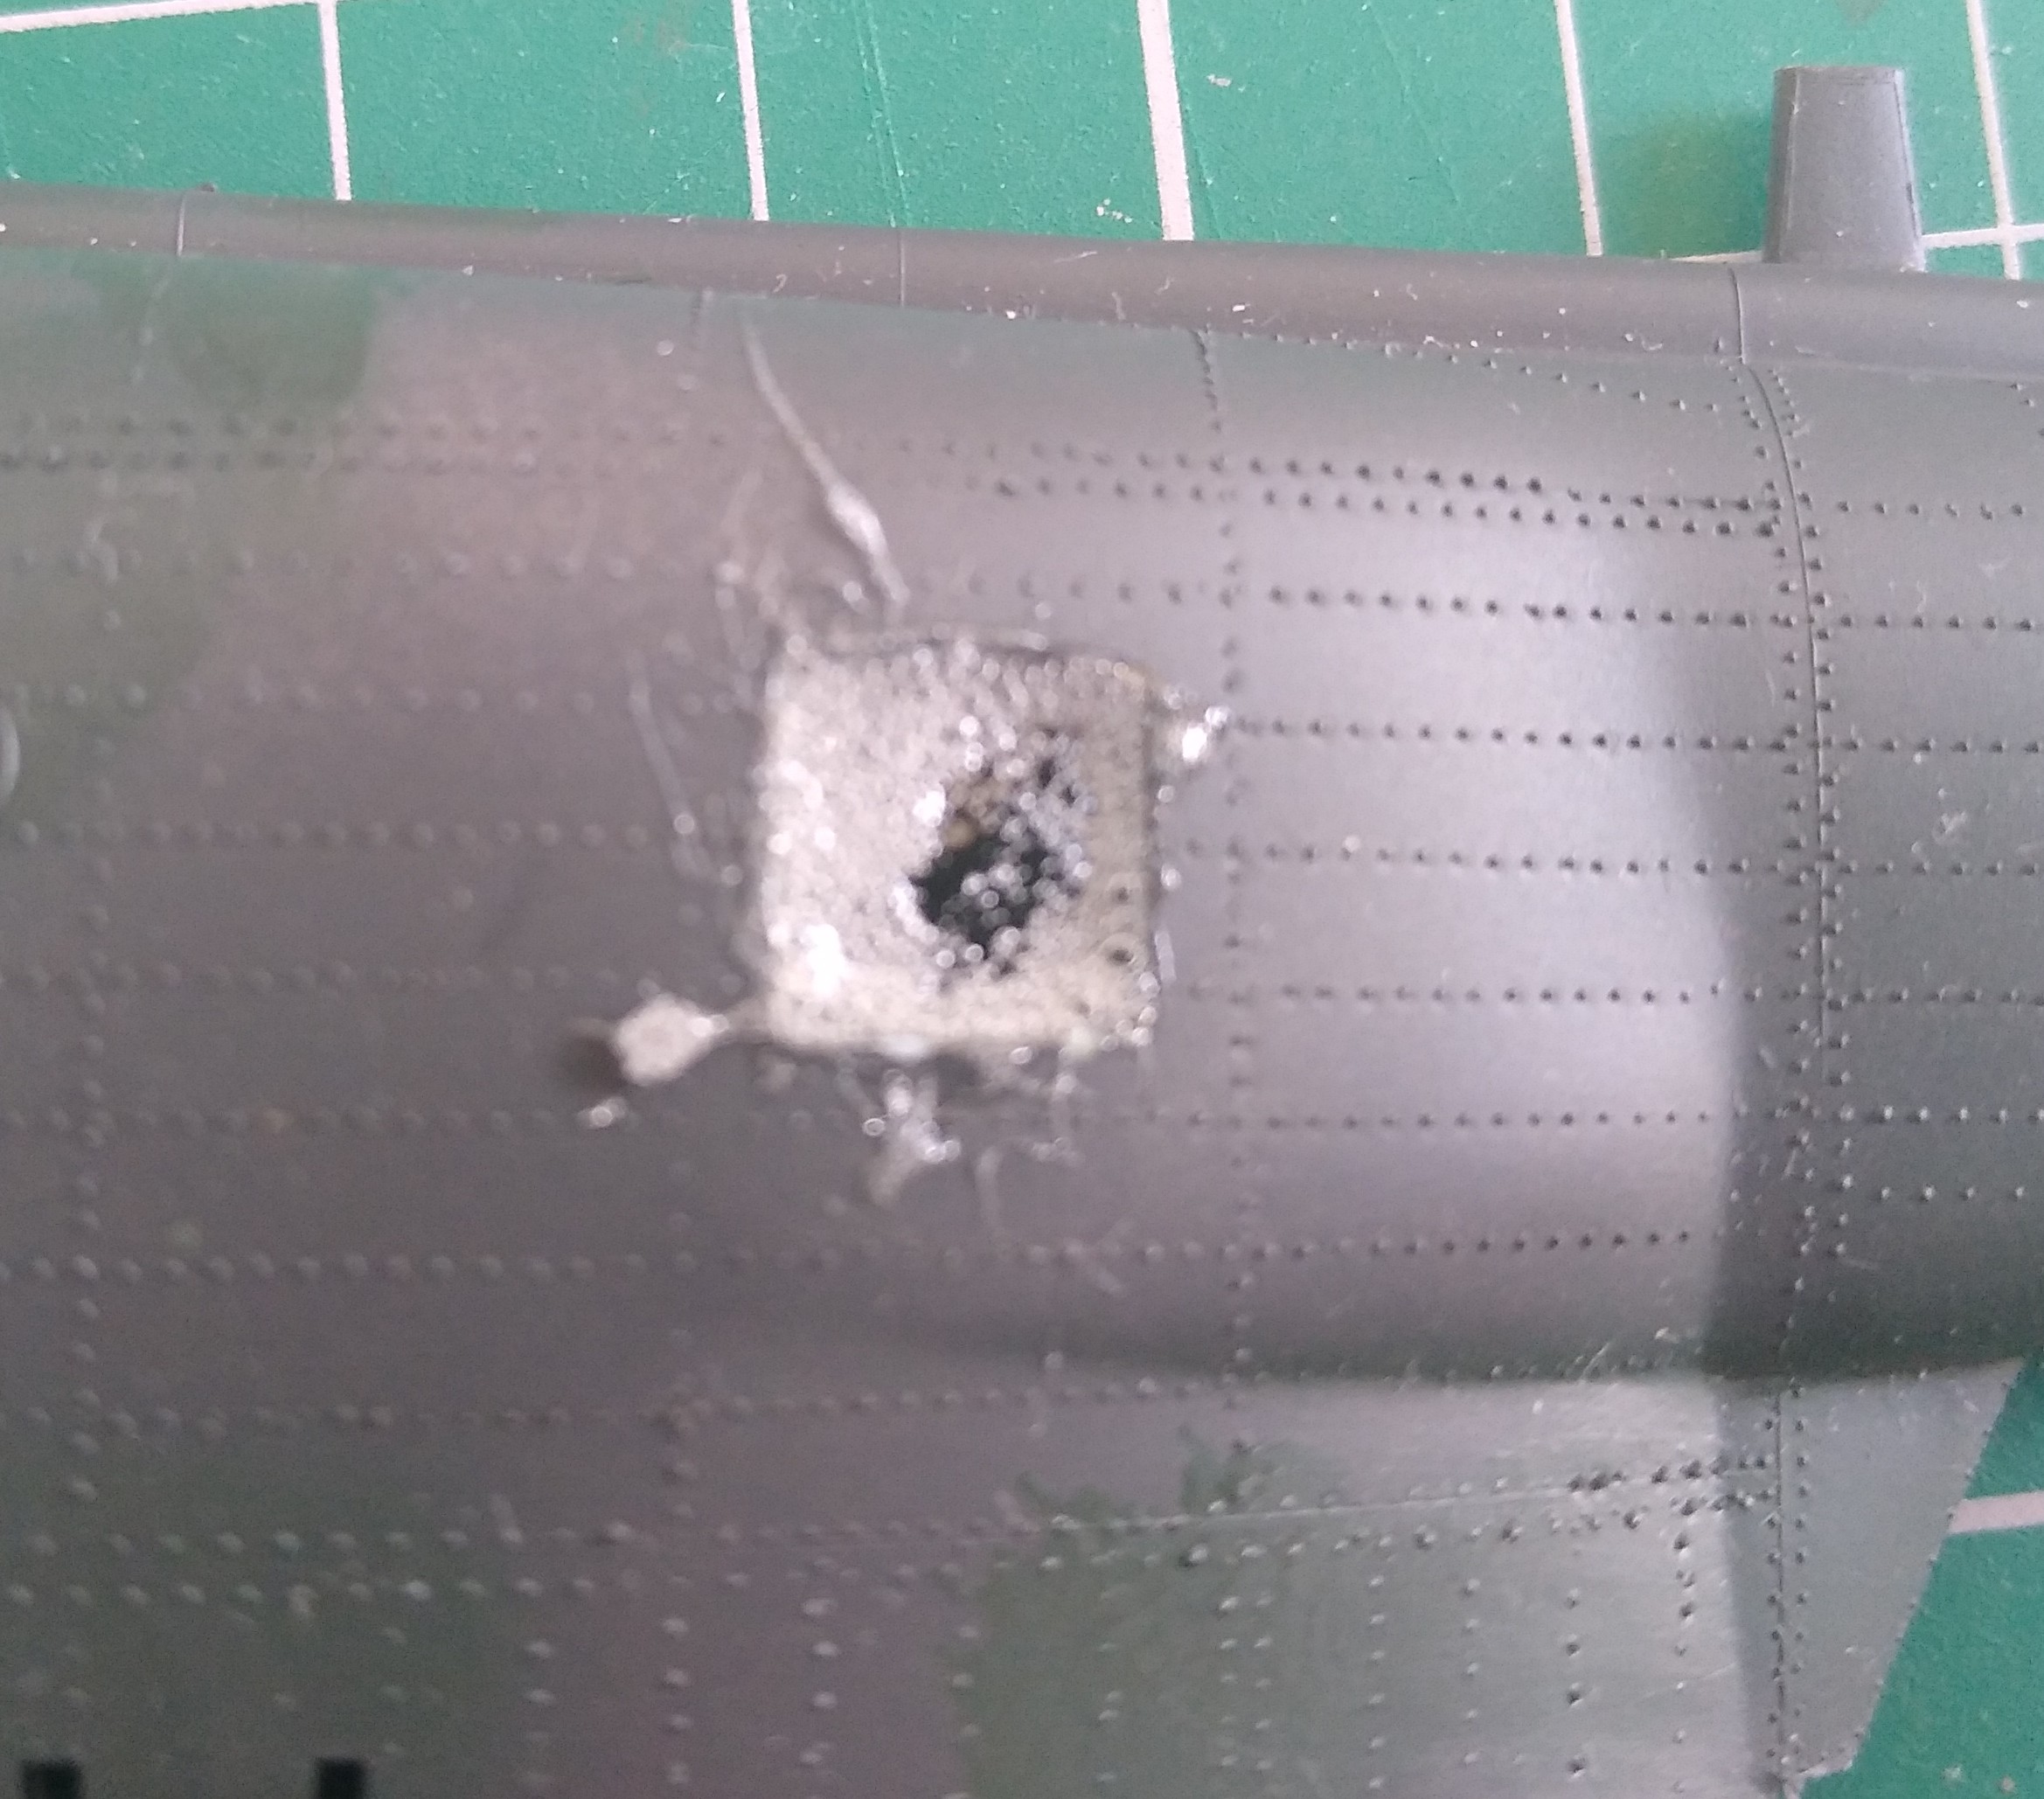
@phantom_phanatic hi Stephen, no i haven’t fixed the short coming of the tail boom on my kit, i will probably use to some copper wire and graft it on at the weekend. i have a sideline project going on at the moment and i am finding my progress rather slow on this helicopter kit, probably due to the fact that i usually build armour and airborne craft.
i still need to fix the heads up display console cover to make it fit as well and i need to figure out if i should put the clear green paint on the inside or the outside of the clear plastic on the main cockpit window and whether i should use the acrylic jar paint of the spray can version.
Some copper wire should do the trick.
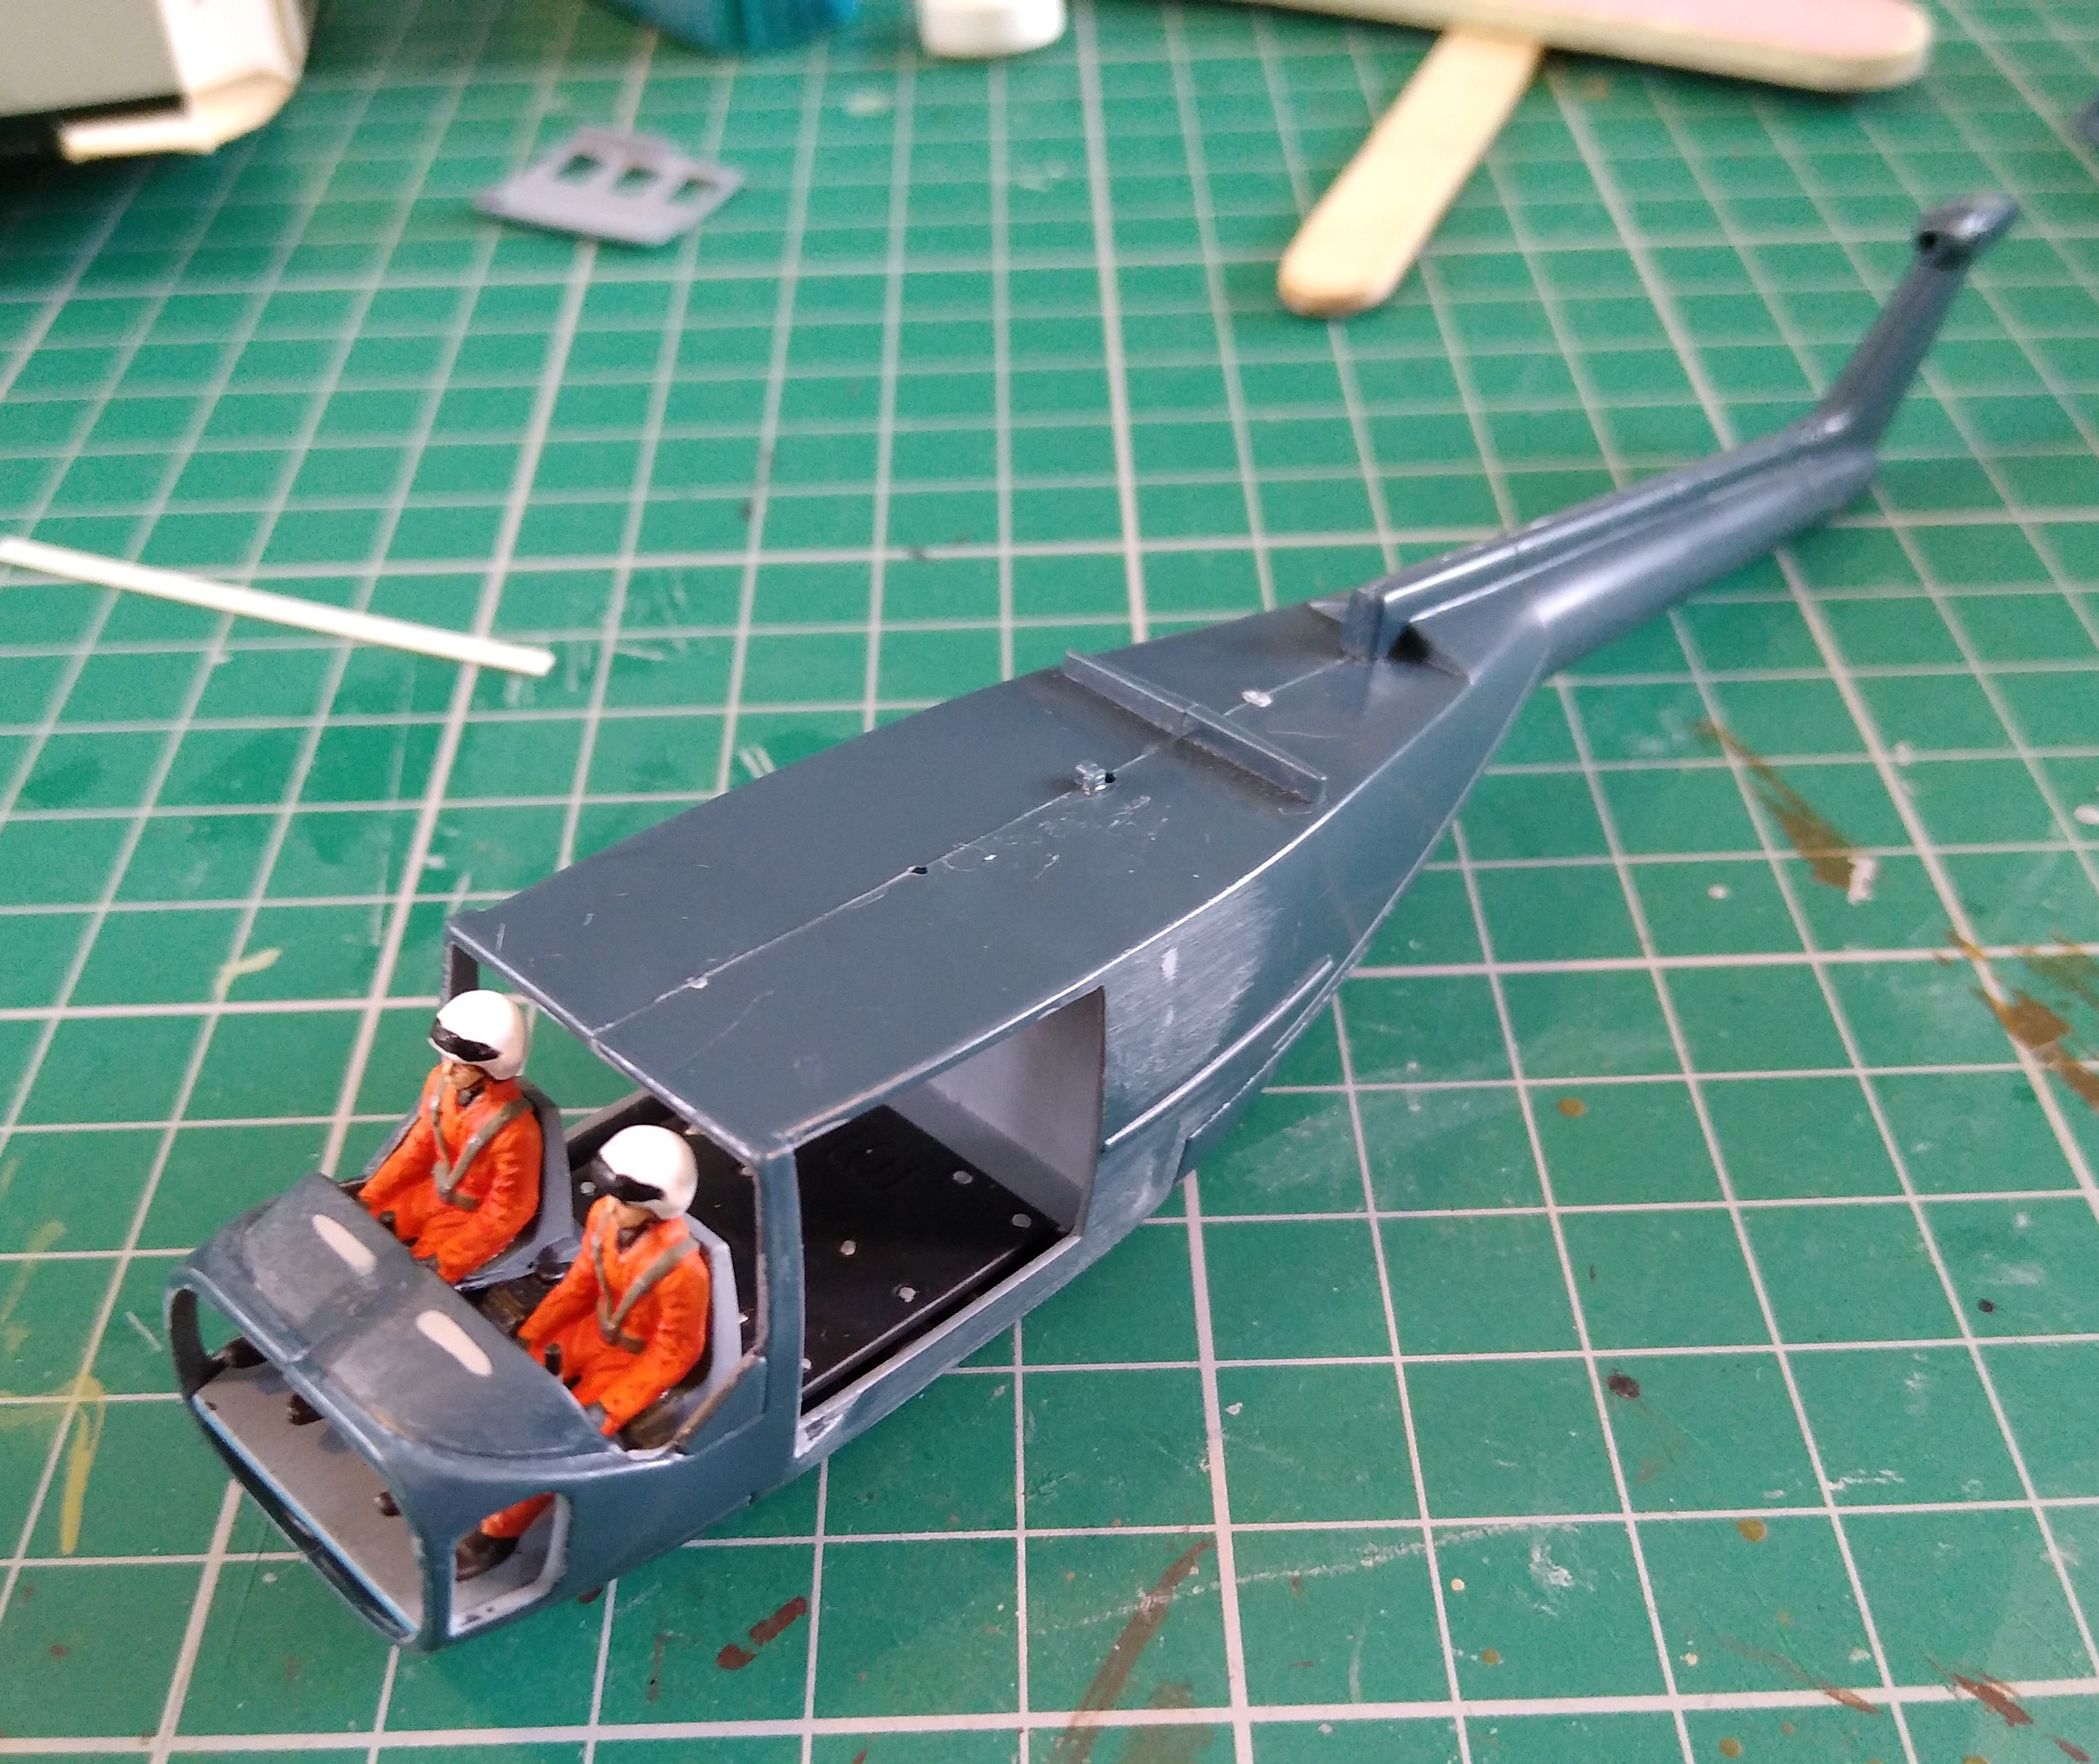
The top canopy panels on my Lynx needed to be painted blue. I brush painted them from the inside using slightly thinned Tamiya clear blue. Probably needs a another coat to get good colour depth. On a bigger scale I would probably spray or airbrush. Airbrush would give more control.
Hope it helps.
@phantom_phanatic yeah i will spray it for sure, just need to figure it all out and my brain is getting fried in this mini heat wave we are having in scotland right now… i’m surprised they haven’t started to run the “dangers of the sun” and “skin cancer” health videos.
1 Like
Tell me about it.
I took a break from cutting plastic earlier to repot some chilli and tomato plants and I sweated buckets out in the sun.
I’ve got no idea how clear paints spray. I know from experience that they do dry quickly and go gloopy brush painting. In this heat I don’t know how long your work time will be. Best clears I’ve used are Humbrol enamels and Tamiyas acrylics. Others just didn’t seem to work as good. Both of those do look like tinted glass when dry.
You don’t necessarily have to. Later models didn’t have them, but have the egg-beater antennas on top of the boom instead.

The egg-beater antennas can be had from Shapeways.

1 Like
ok well I couldn’t find Johnson Klear floor polish anywhere in asda, Tescos or Morrisons but I found this on eBay which claims to be the same stuff.
now the question remains on it application; do I dip the parts in it, spray it or brush it on? my guts are telling Mr to dip it in and leave the parts to dry on some absorbent paper towels…you never have these problems building armour kits…grumble over.
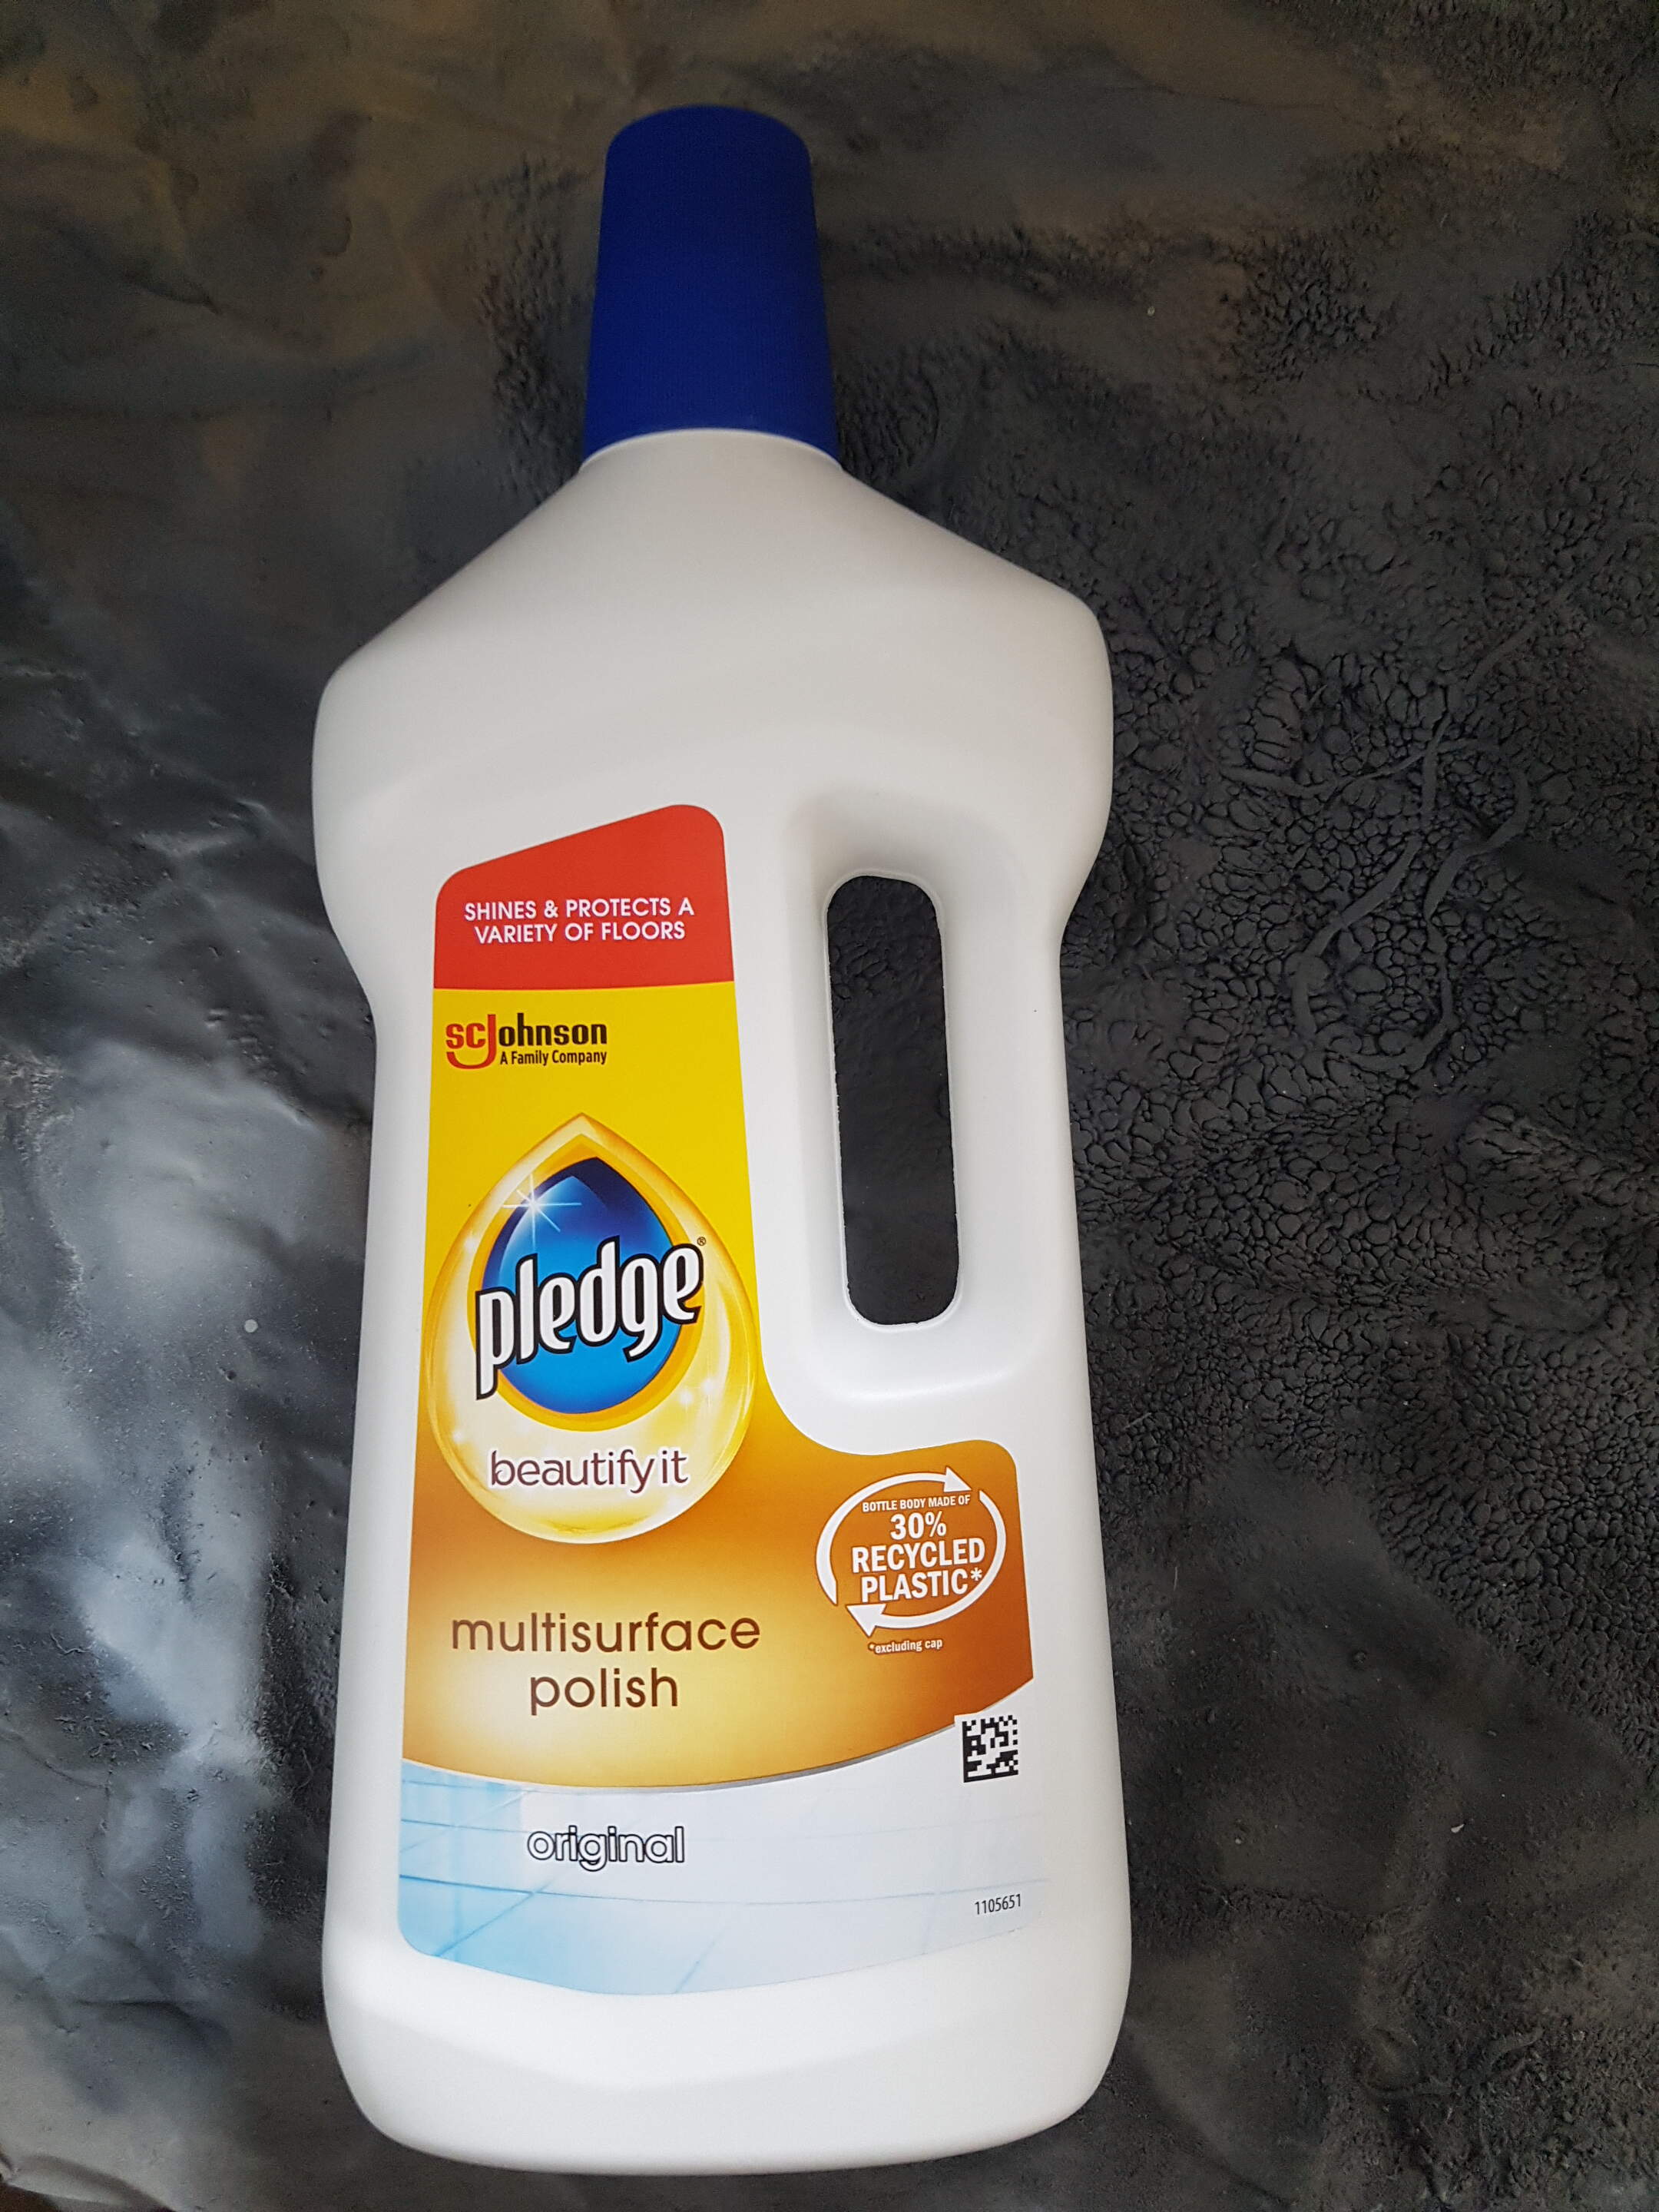
I would pour in a small bowl, dip and recycle most back into the bottle.
1 Like

Light ghost grey and medium grey on. Lightened the ghost grey with an even lighter grey mix left over from another build for highlights and to blend the finish slightly. Masked and painted the tail with mr color 1500 black primer.
Then glossed everything with mr color gloss. It was my first time using this and I found it needs thinning around 2:1 thinner to varnish with levelling thinner.
Now for many hours of decal fun!
Cheers, J.

4 Likes
Coming along nicely. Can’t wait to see it w/the decals added.
1 Like
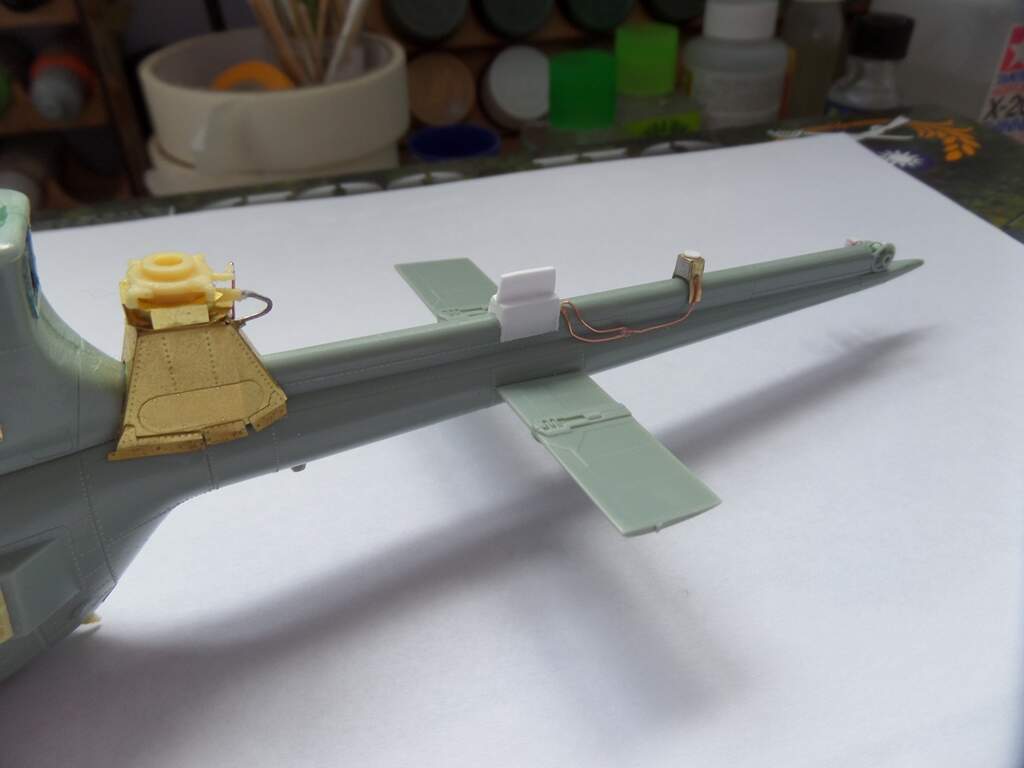
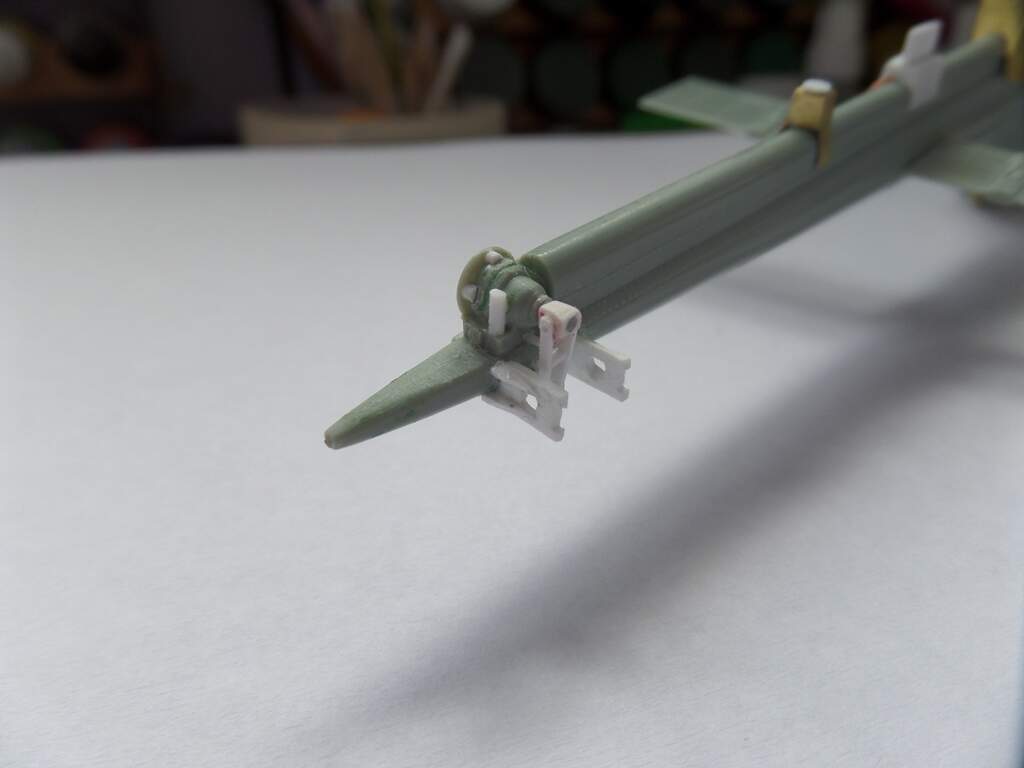
Well got around to adding the antennas on the tail boom and the vertical stabiliser brackets and although not perfect they are way better than what the kit has. Also fitted the base of the IR jammer, cables and vibration mounts. The upper parts come from the kit and are clear with iridescent stickers supplied as part of the AFV kit to simulate the coating on the lenses. They will be fitted after painting.


5 Likes
good to see you guys are making progress, i made the. skids up this week and seemed to have stalled on the production front.
Hello,
After two weeks of vacation in Belgium, i’m back behind my bench.
My previous experience with the Special Hobby models was bad. But the quality of this model changed my mind. The only point to pay attention to is the fragility of some parts.
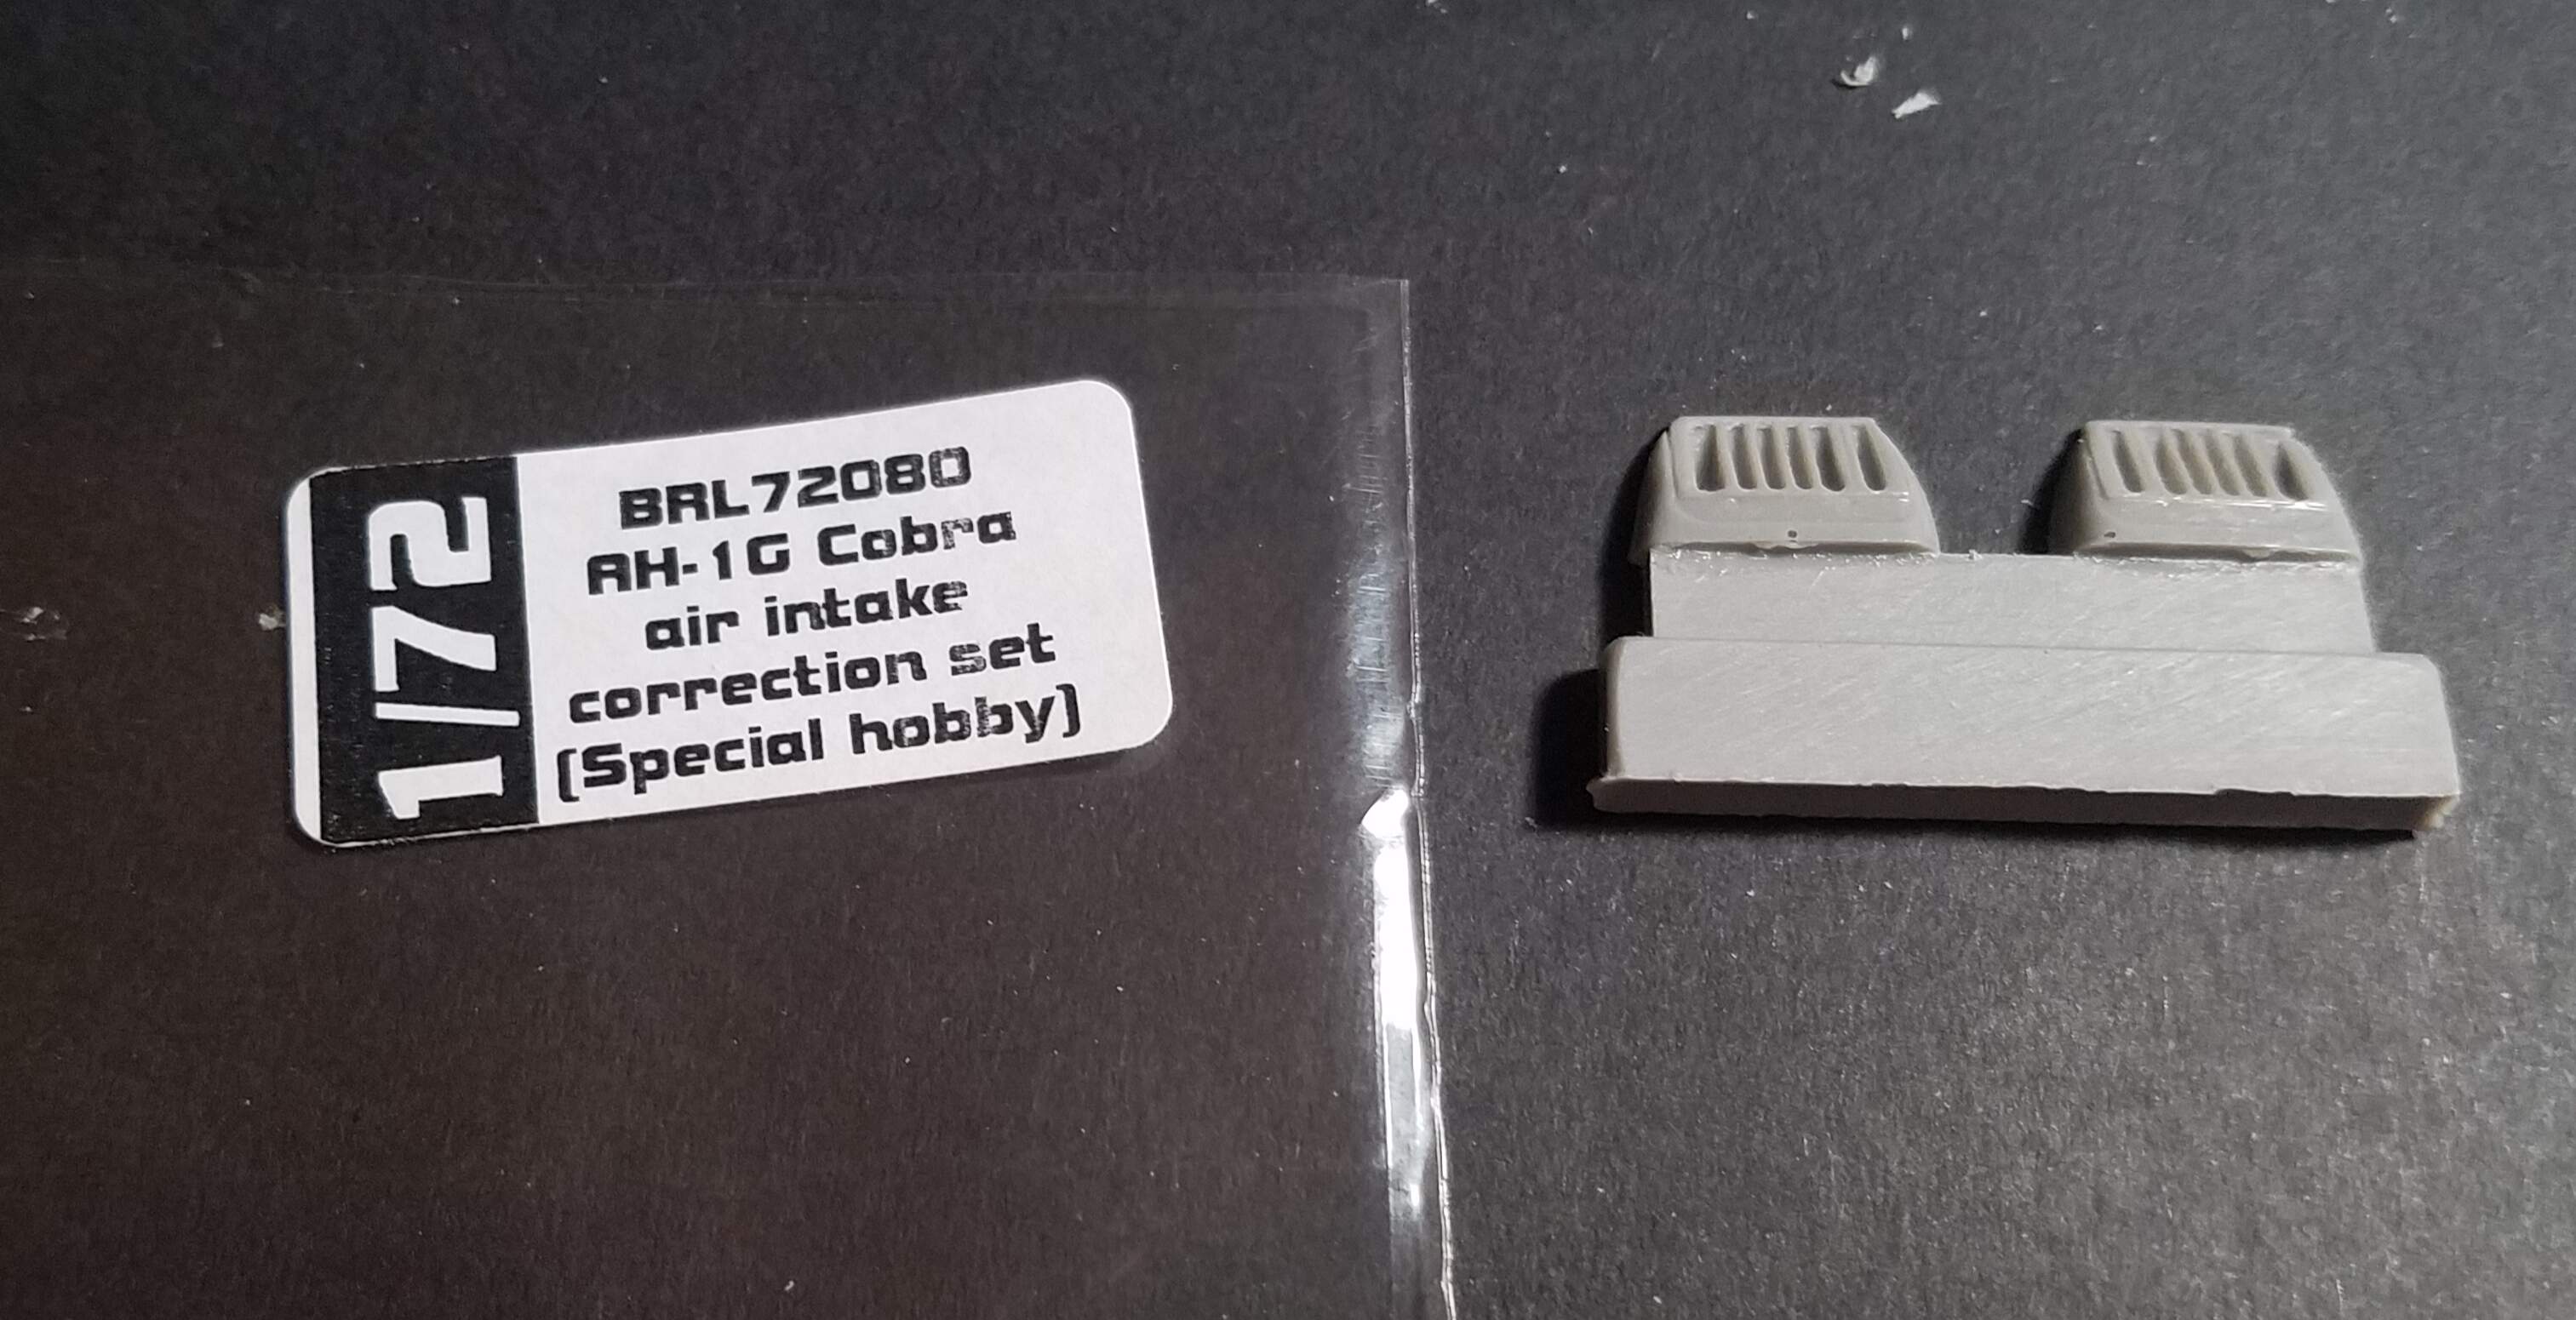
I added the Brengun intakes. But, I don’t think this aftermarket is a must-to-have.


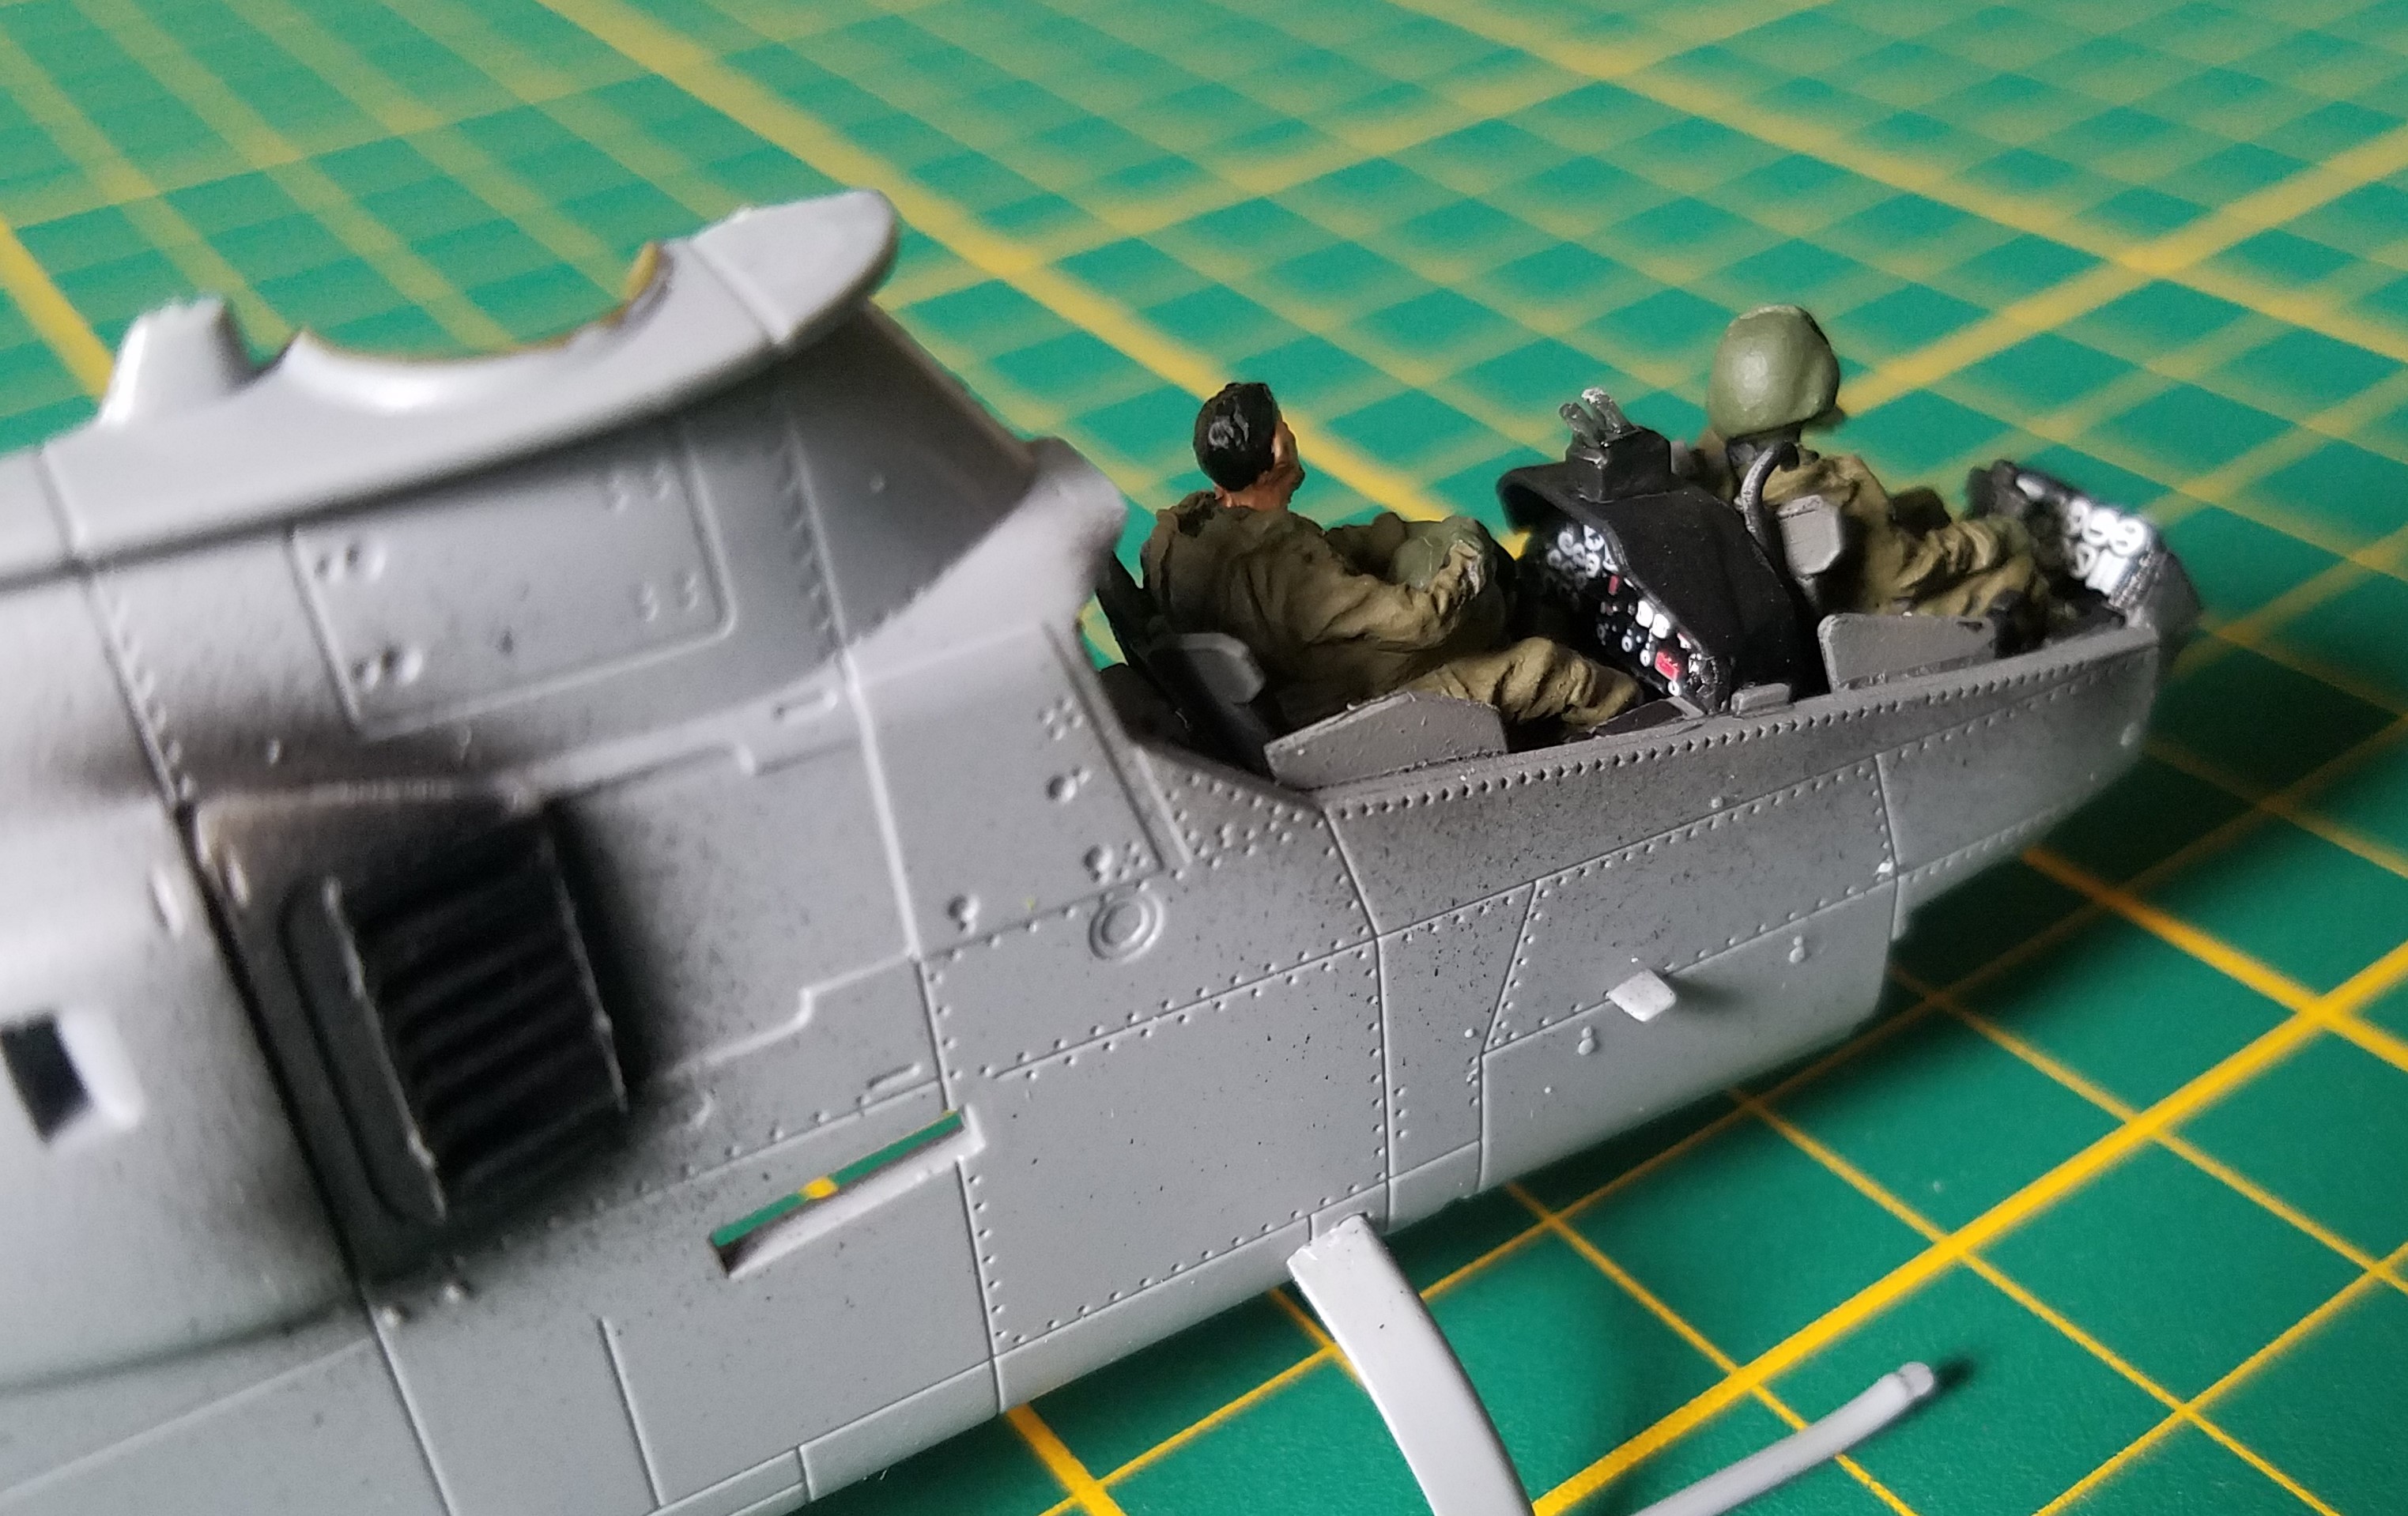
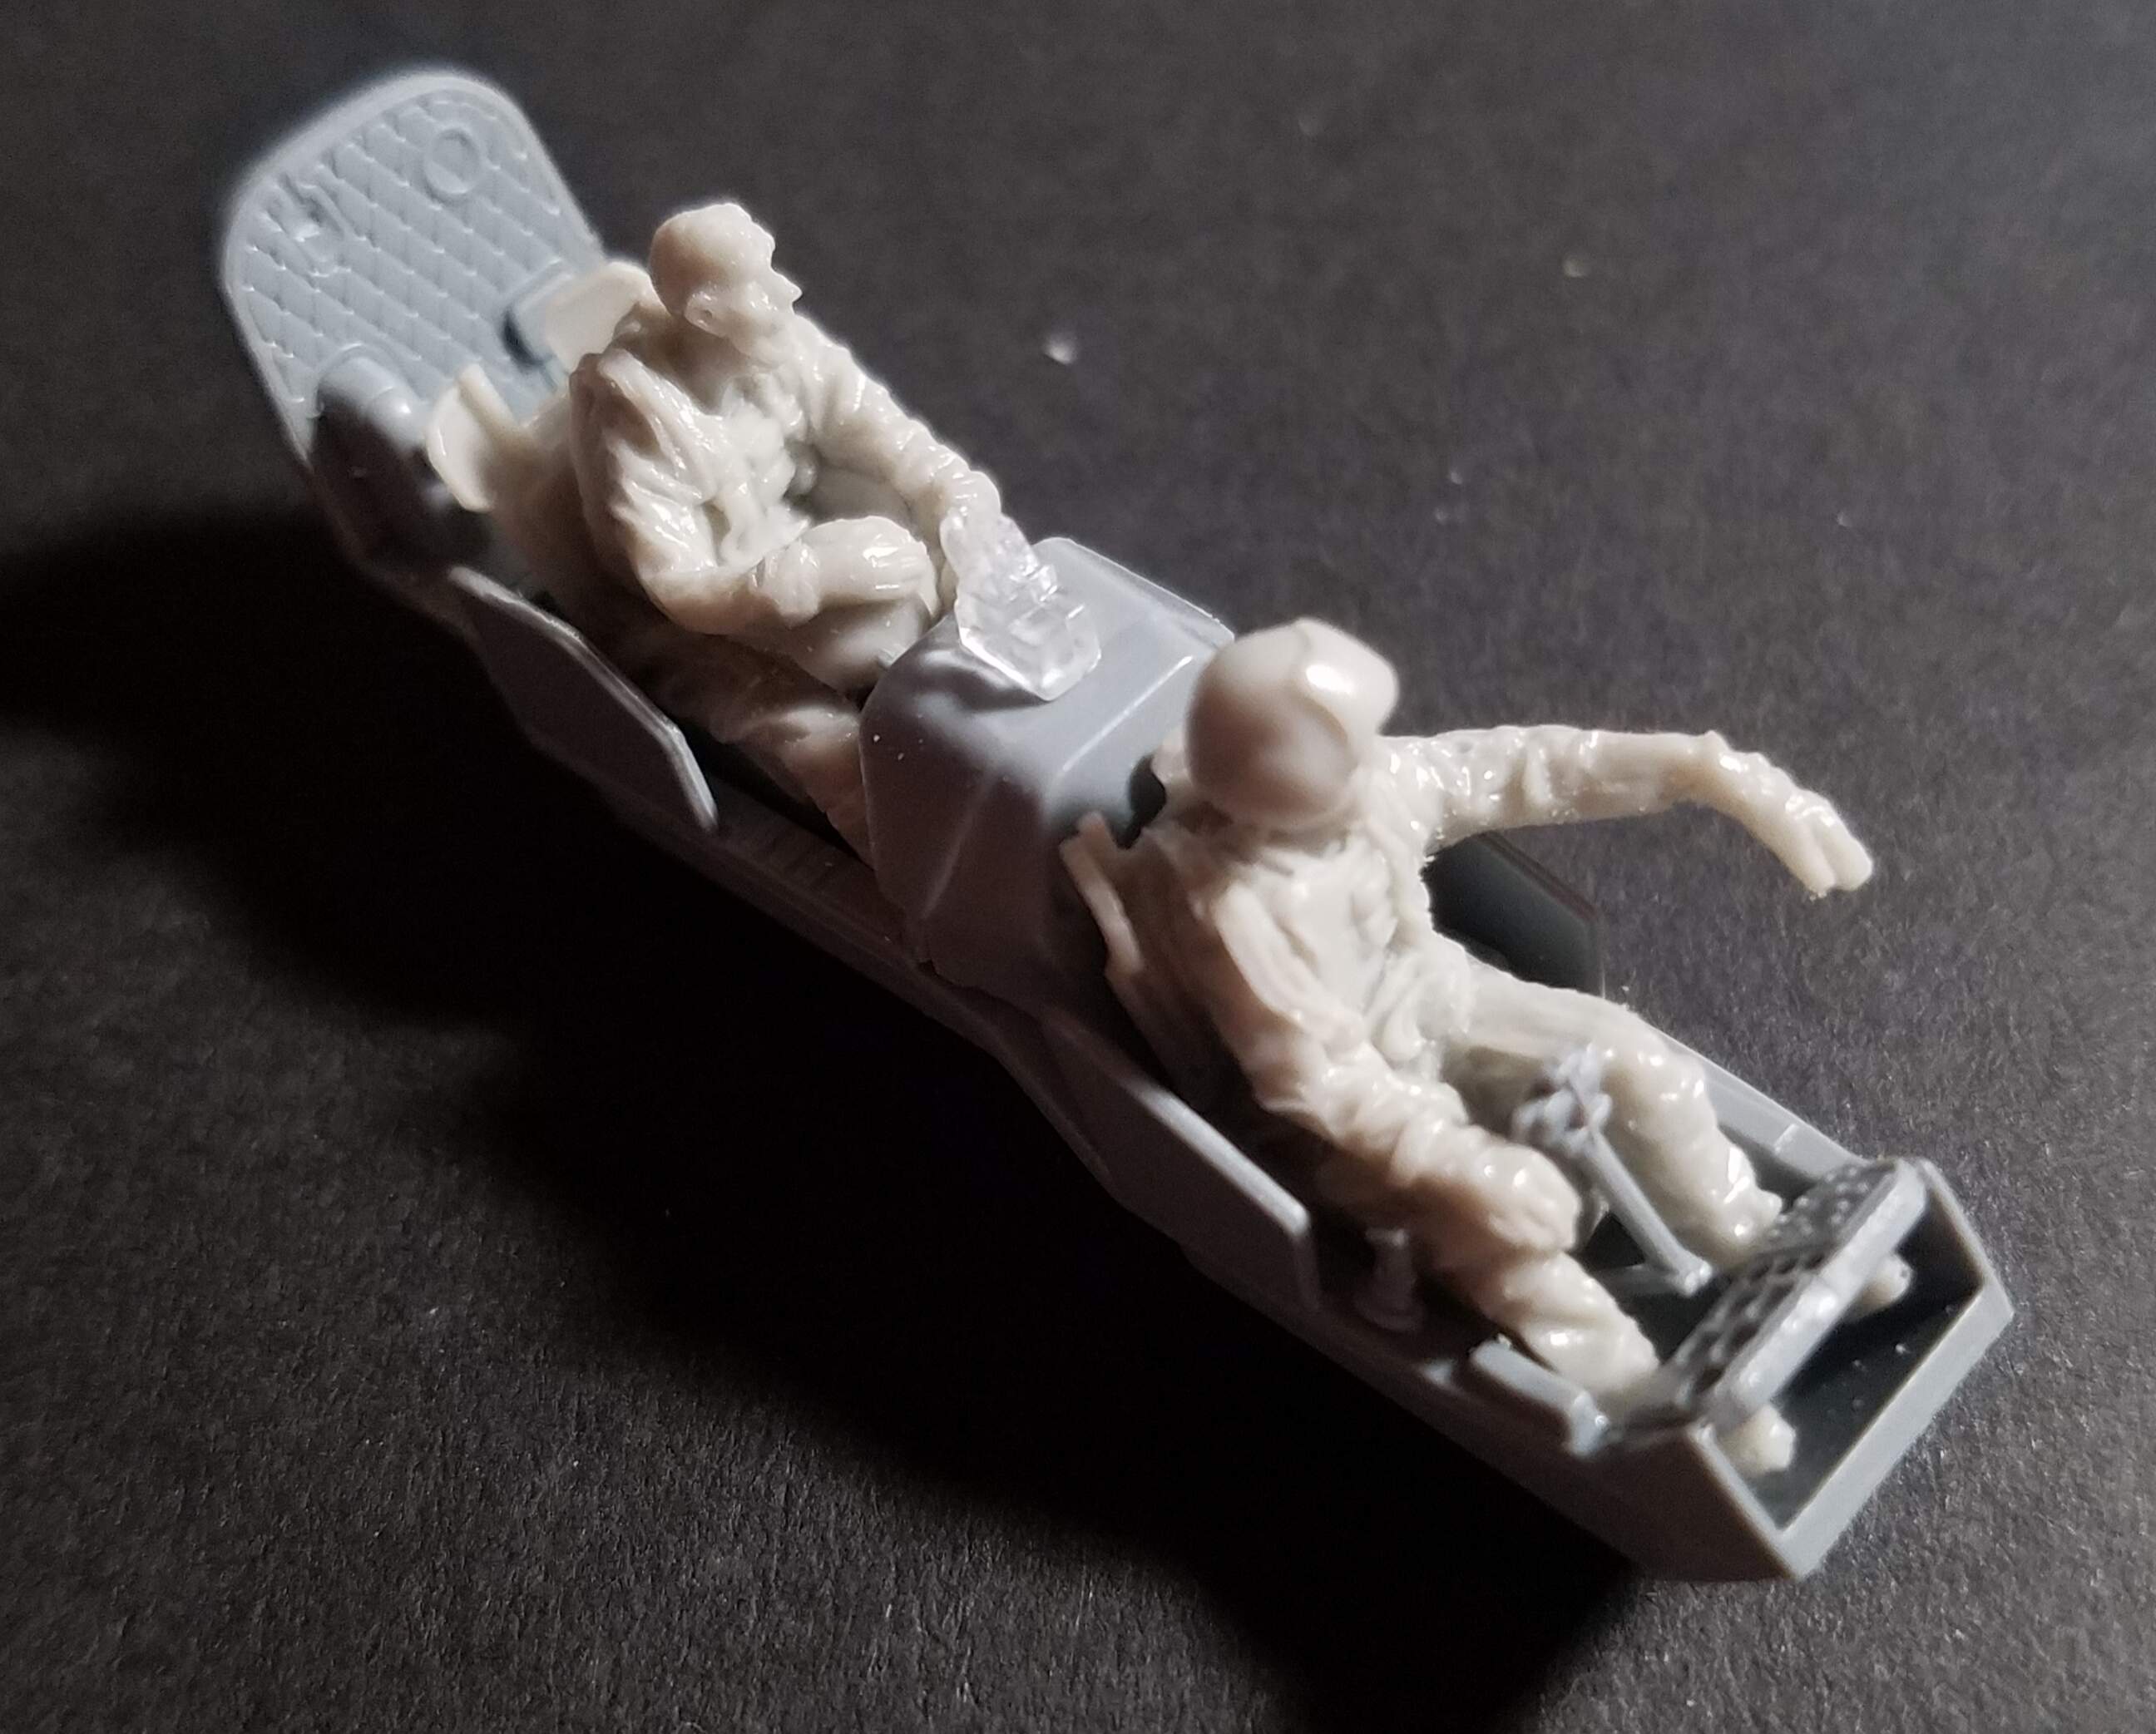
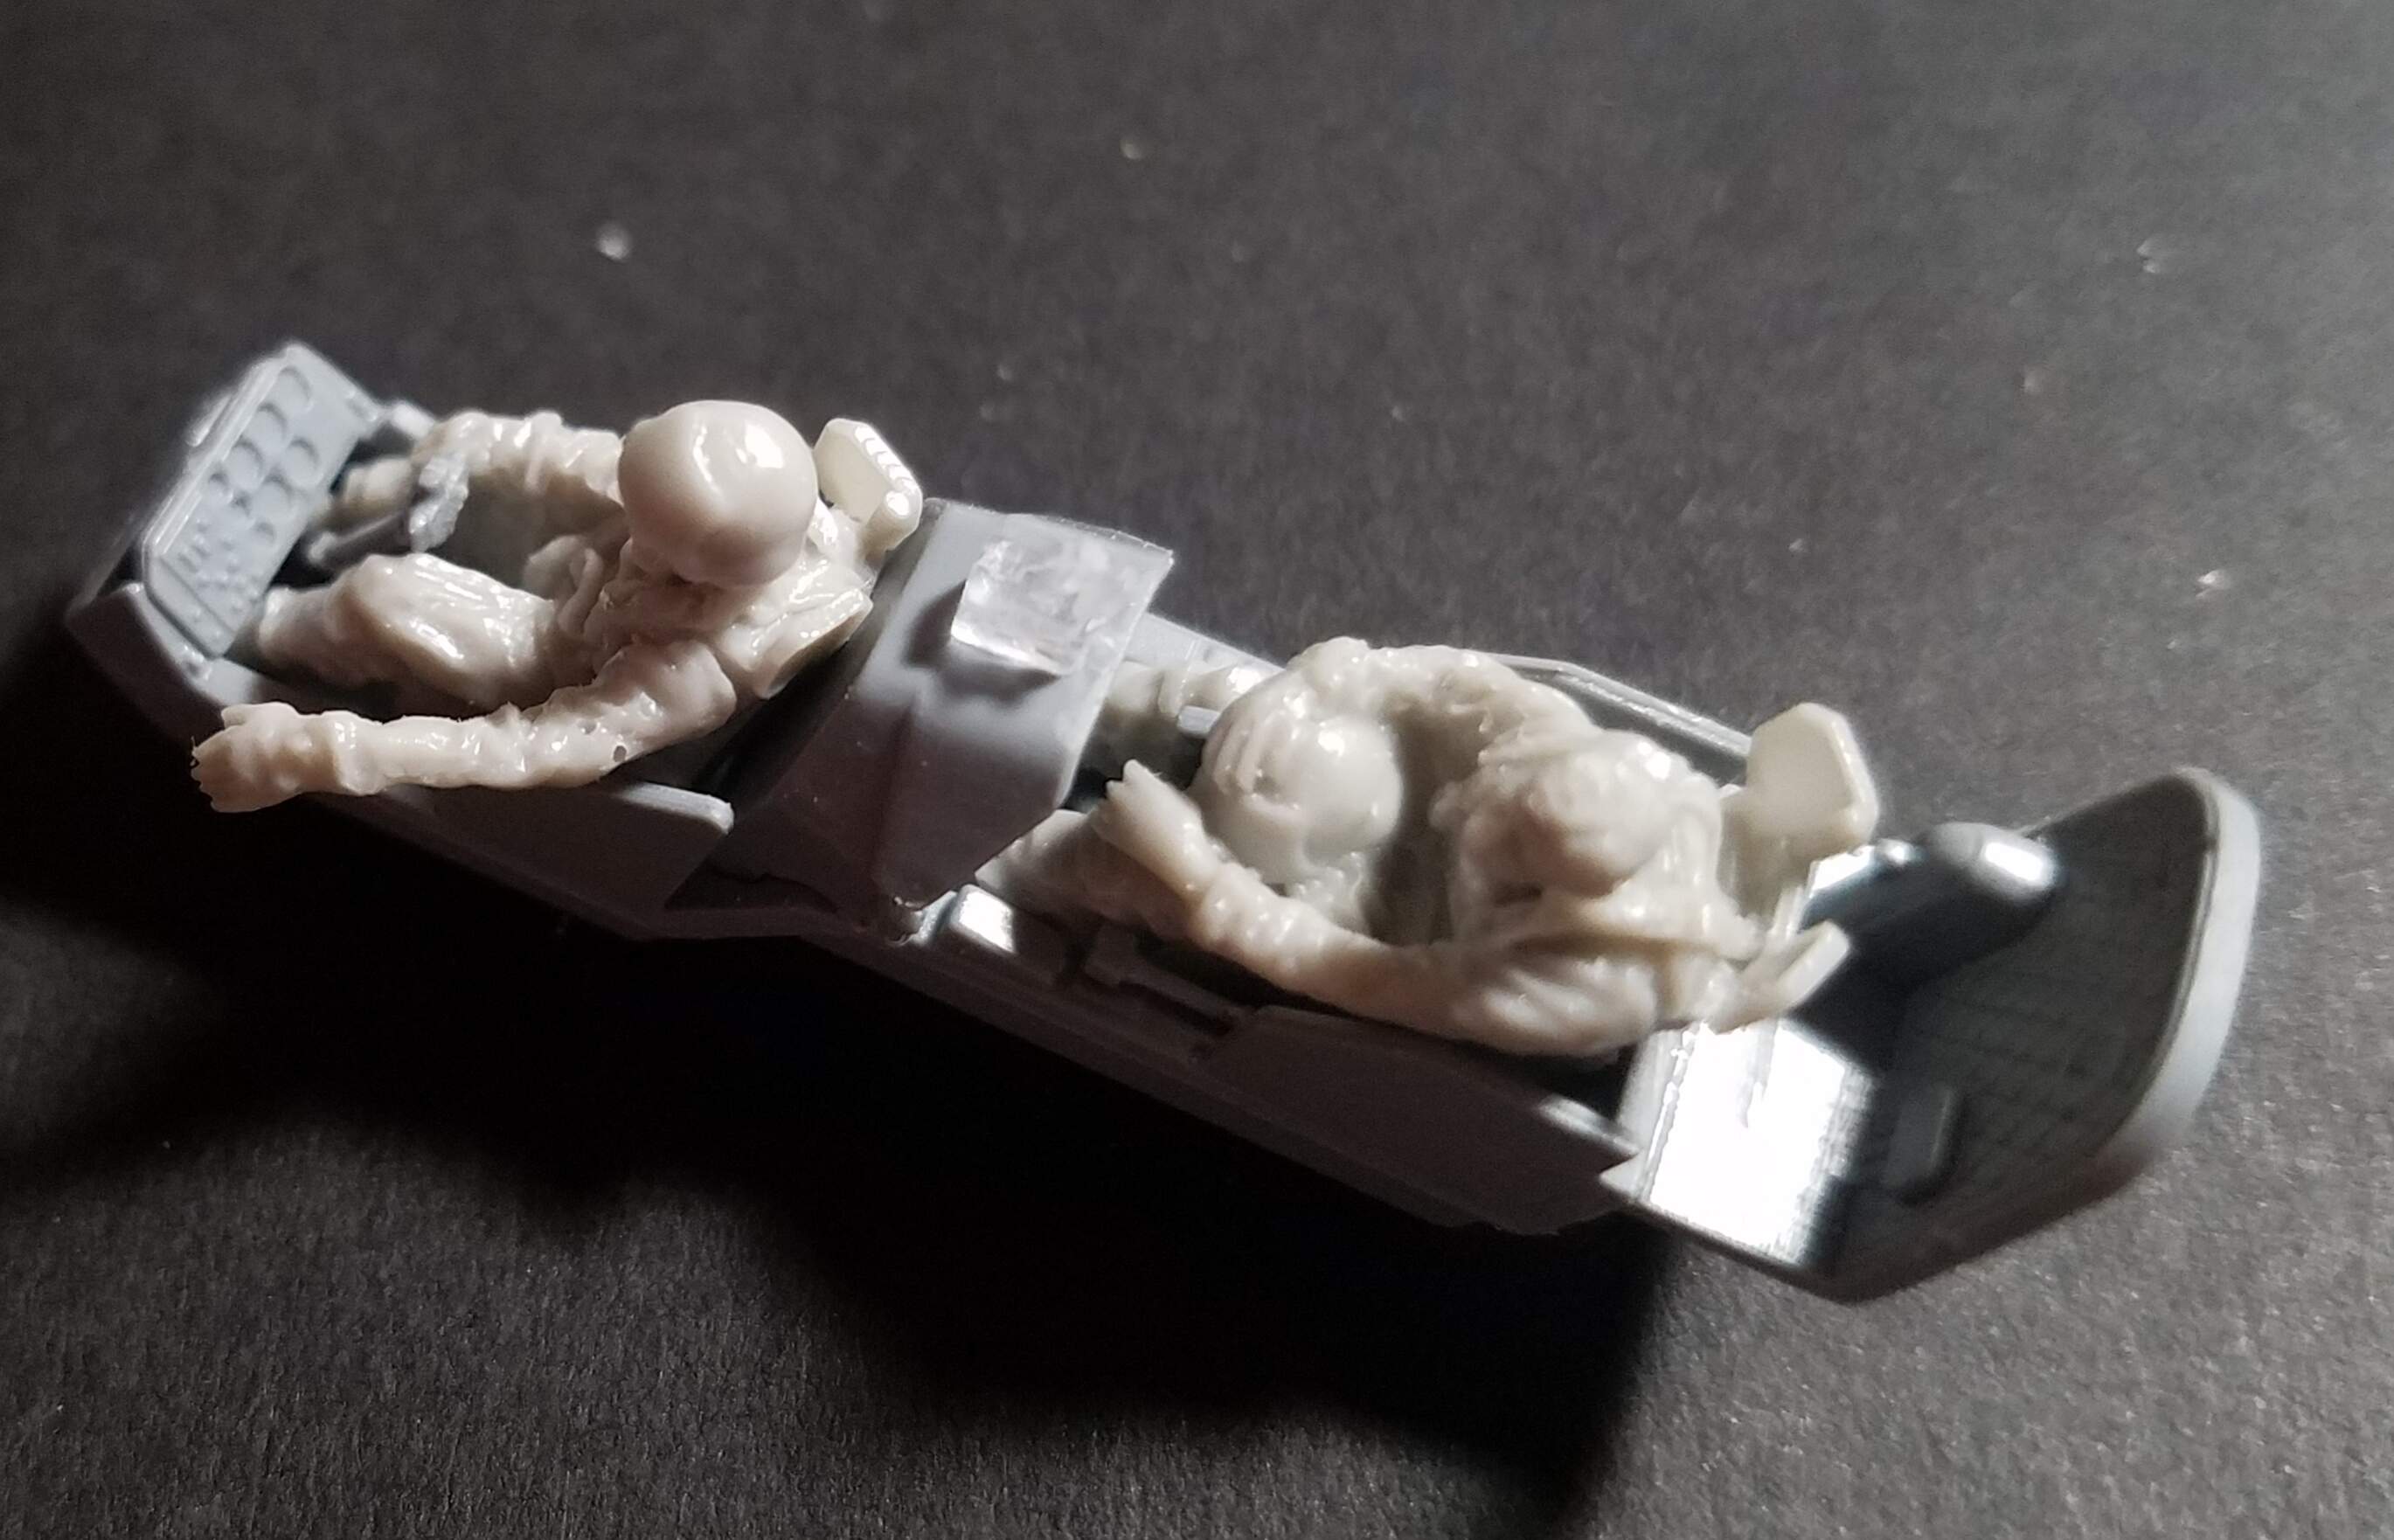
The cockpit is ready for paint
I must admit the figurines add a lot of life in the cockpit
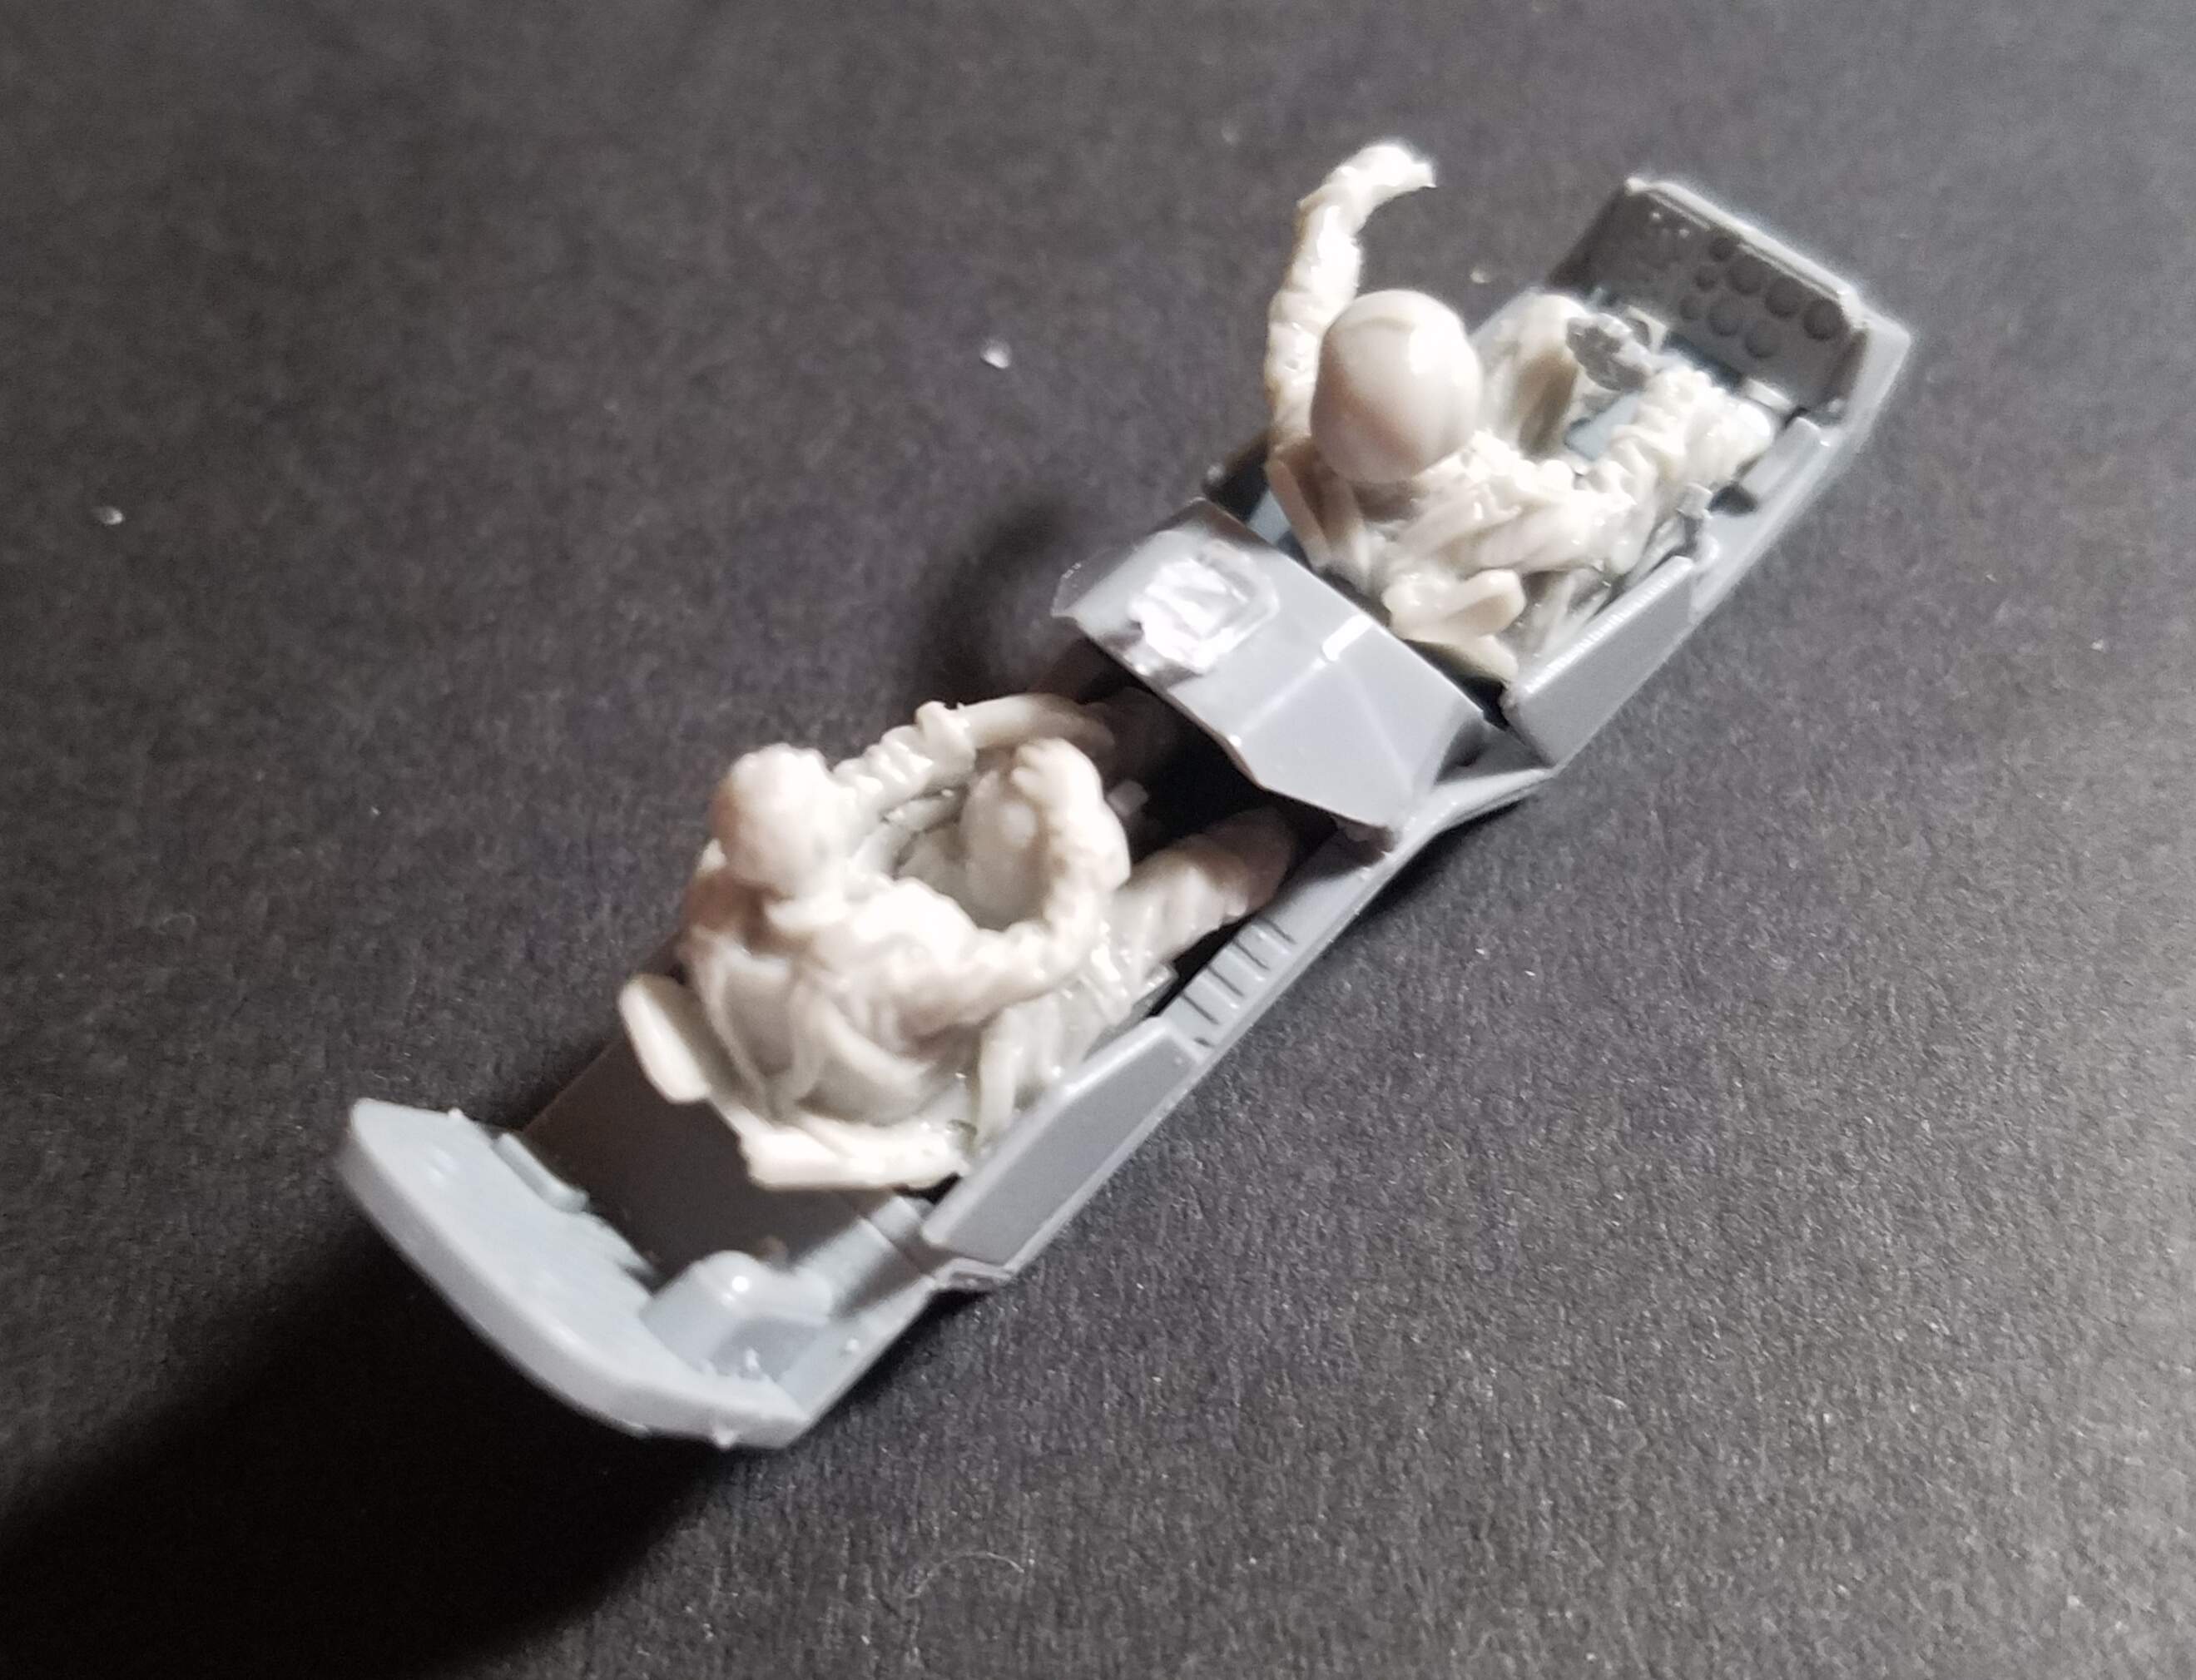
CMK had make a great job. I recommend !
Now, time to start the painting.
3 Likes
Everyone’s builds are coming along really well.
@FlyingSauerkraut especially looking forward to seeing your Cobra. Have this one in my stash so will be interested to see how it builds. Looks like a great kit, especially with all the optional ordnance they threw in!
Haven’t had a lot of time at the work bench over the last week or so.
I have however done a little experimenting with various clear adhesives I had to see which will be the best.
I used an old Airfix Sea King fuselage I rescued from the scrap box to do the test.
First up, Deluxe Materials Glue’n’Glaze. Went on well without too much mess and very clear. Very much like PVA glue in colour and consistency when straight out of the tube. I first applied it around the edge of the window and used a no.11 blade to pull it across.

Next is Humbrols Clearfix. Goes a bit stringy when you stretch it over, but dried very clear. Just left a few air bubbles which are probably from my own mistakes applying it.
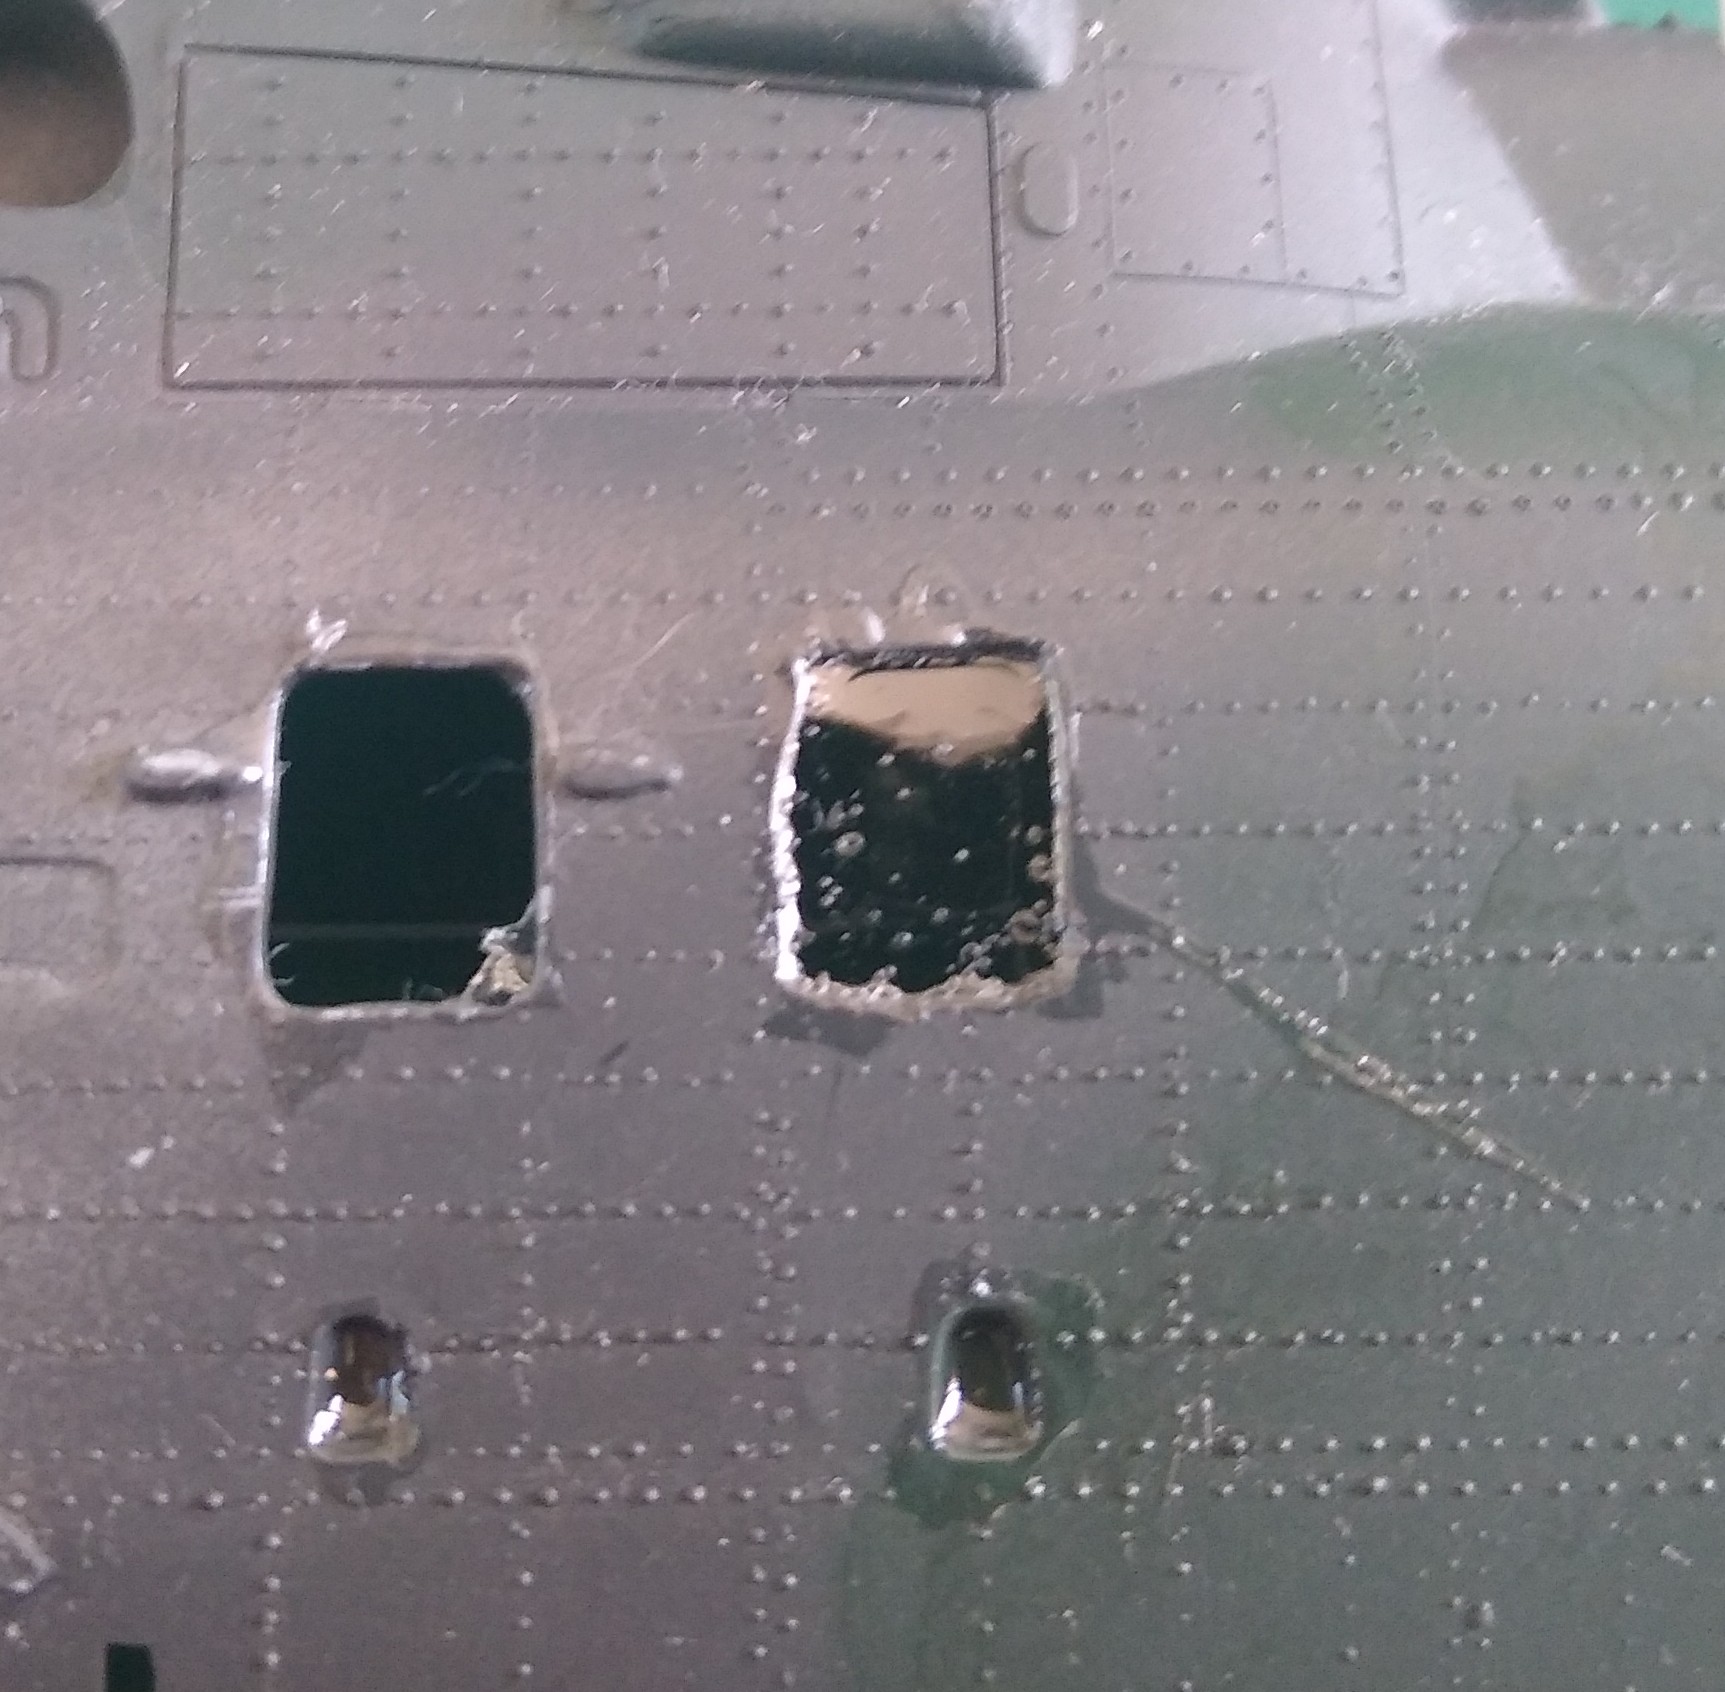
And lastly, Revells Contacta Special. Very messy to apply and I think the results speak for themselves.
I believe Revell do make a Clear adhesive, but I don’t have one of those to test at the moment.
I think the Glue’n’Glaze is the ‘clear’ winner here! However, it dries very thin and delicate and won’t stand up to much handling afterwards. Humbrols dries thicker and is a little tougher.
3 Likes
2 Likes
Well, it wouldn’t be Matchbox if it didn’t need filling and sanding.
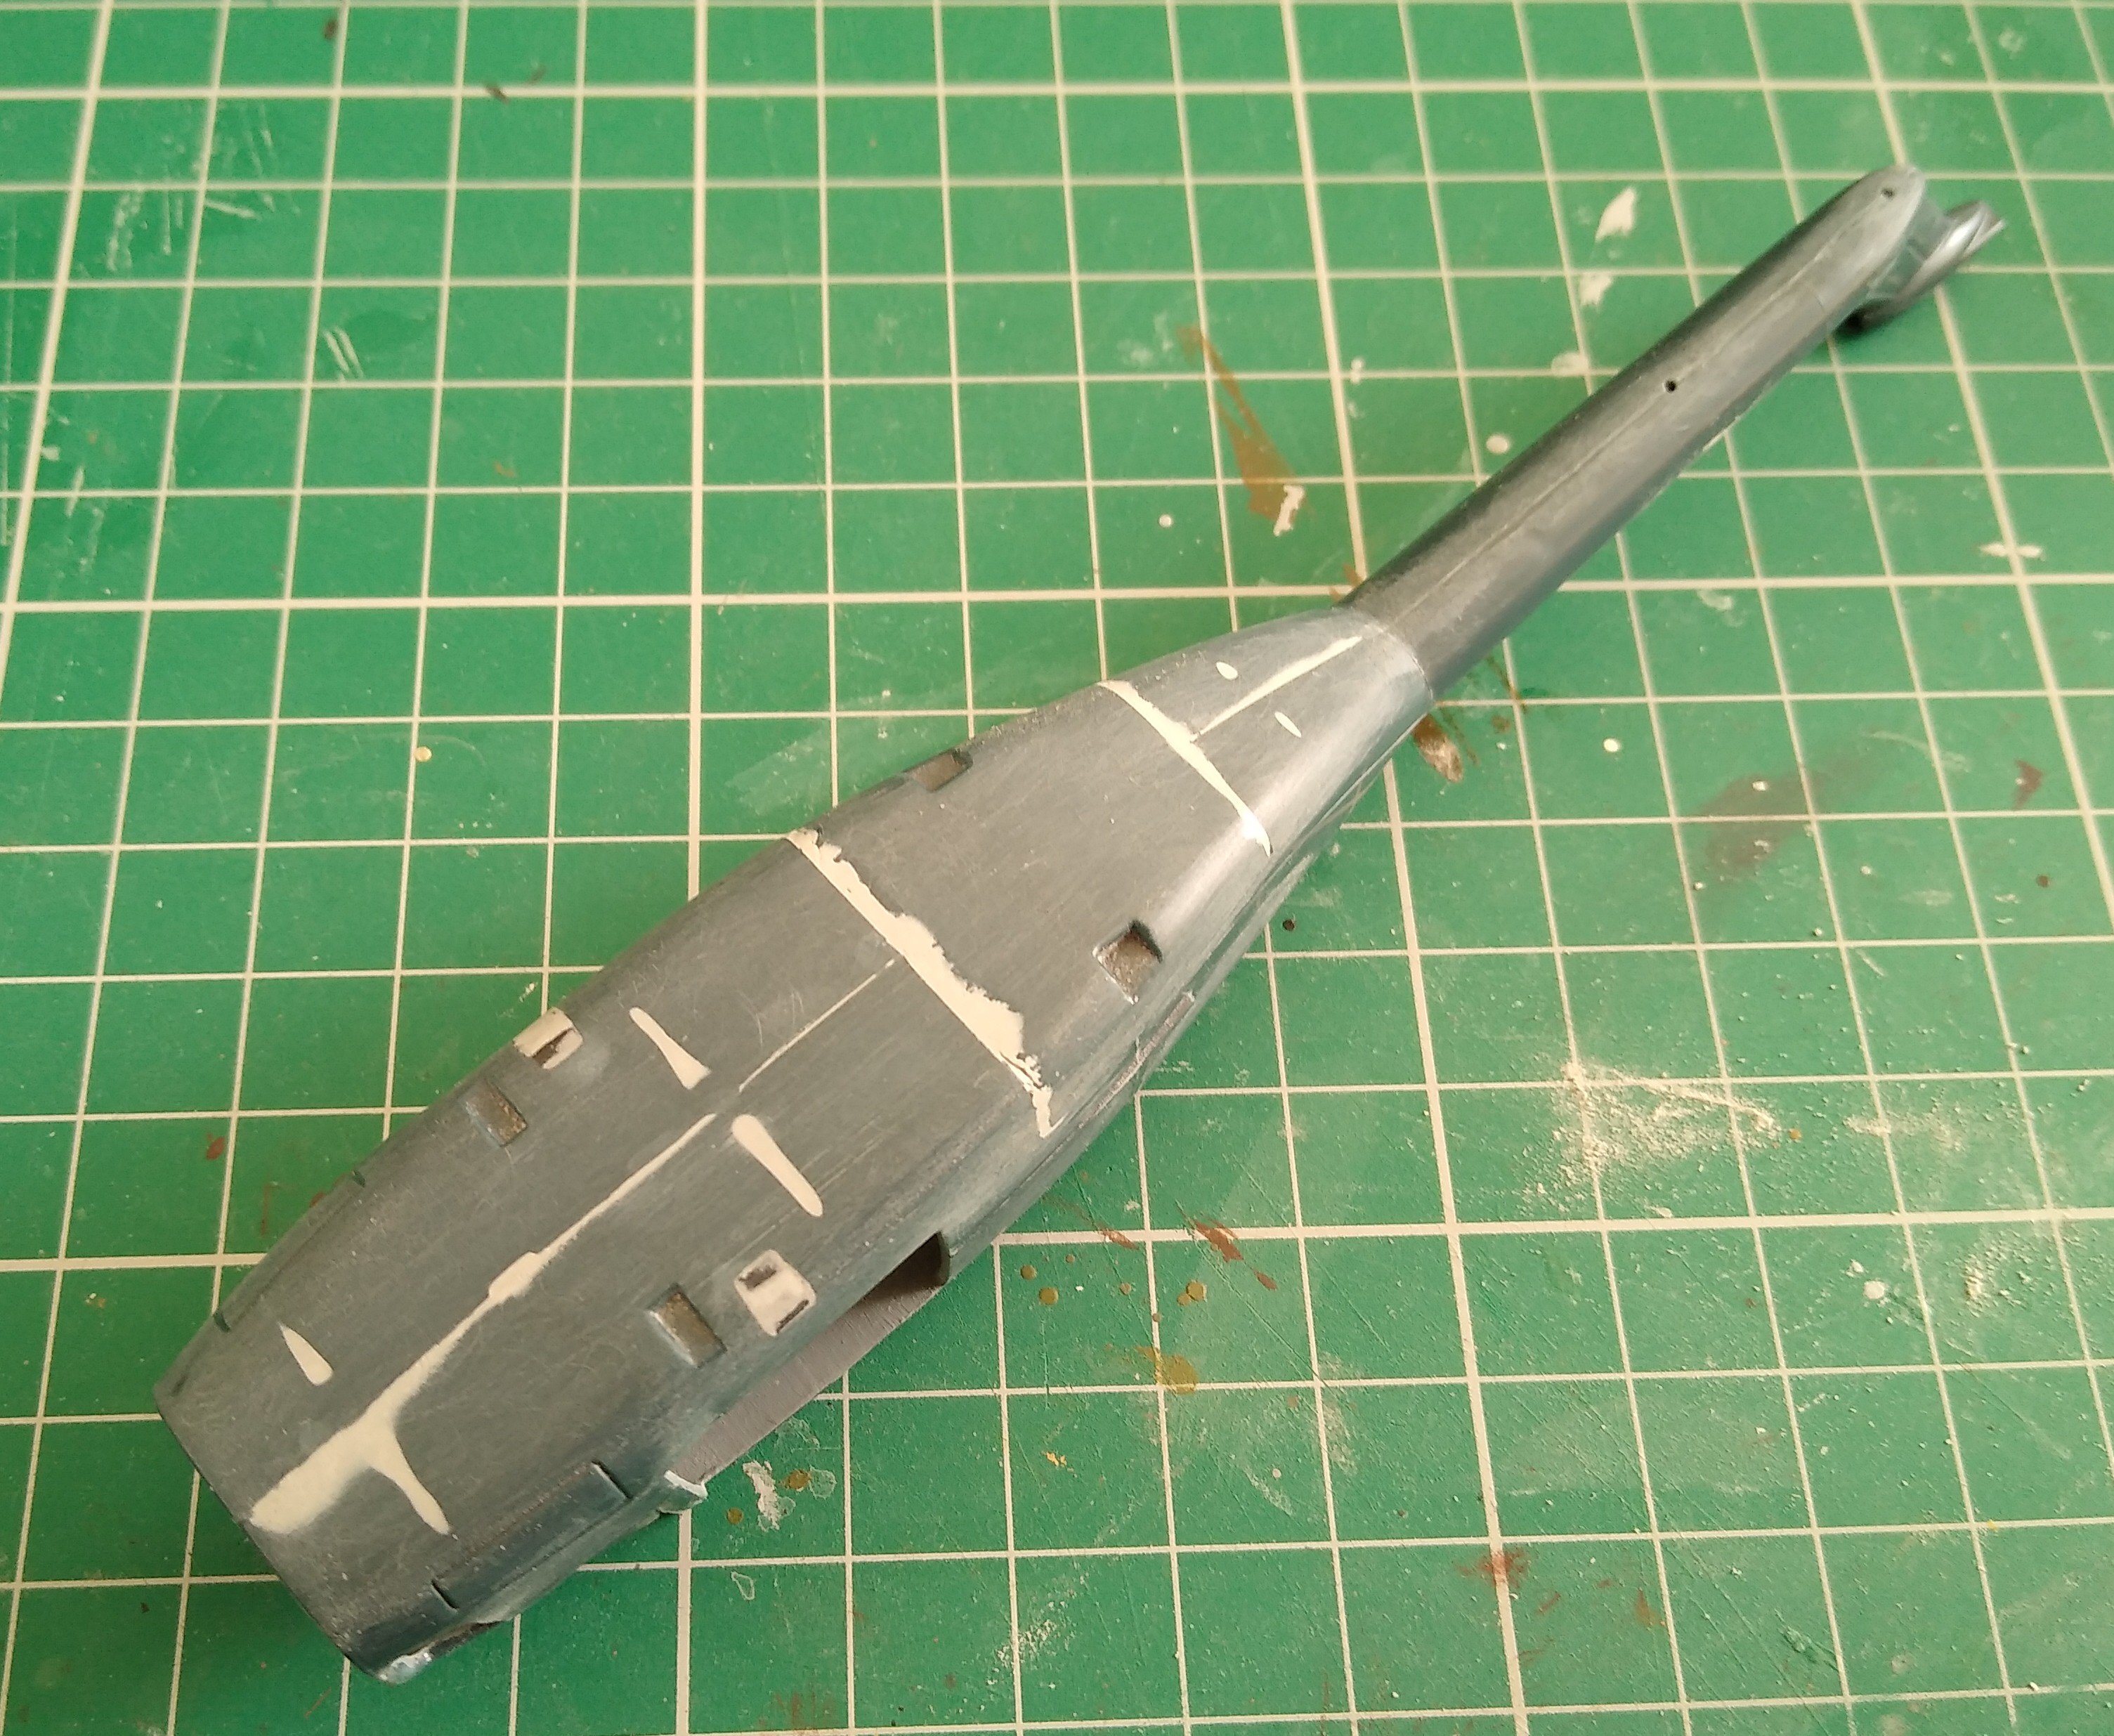
Fortunately, there isn’t a lot of surface detail to lose in the process. It’s all pretty smooth.
One more round and I think I should have it all blended in.
2 Likes