HMS Dreadnought 1907 1/350 - First Ship Build

Figured it’s about time I got a blog going on this kit. I was hesitant to start one as it’s my first ship and much could go wrong, but it’s been a few months and I’m nearing the end with no build stopping disasters so I think it’s safe to start from the top.

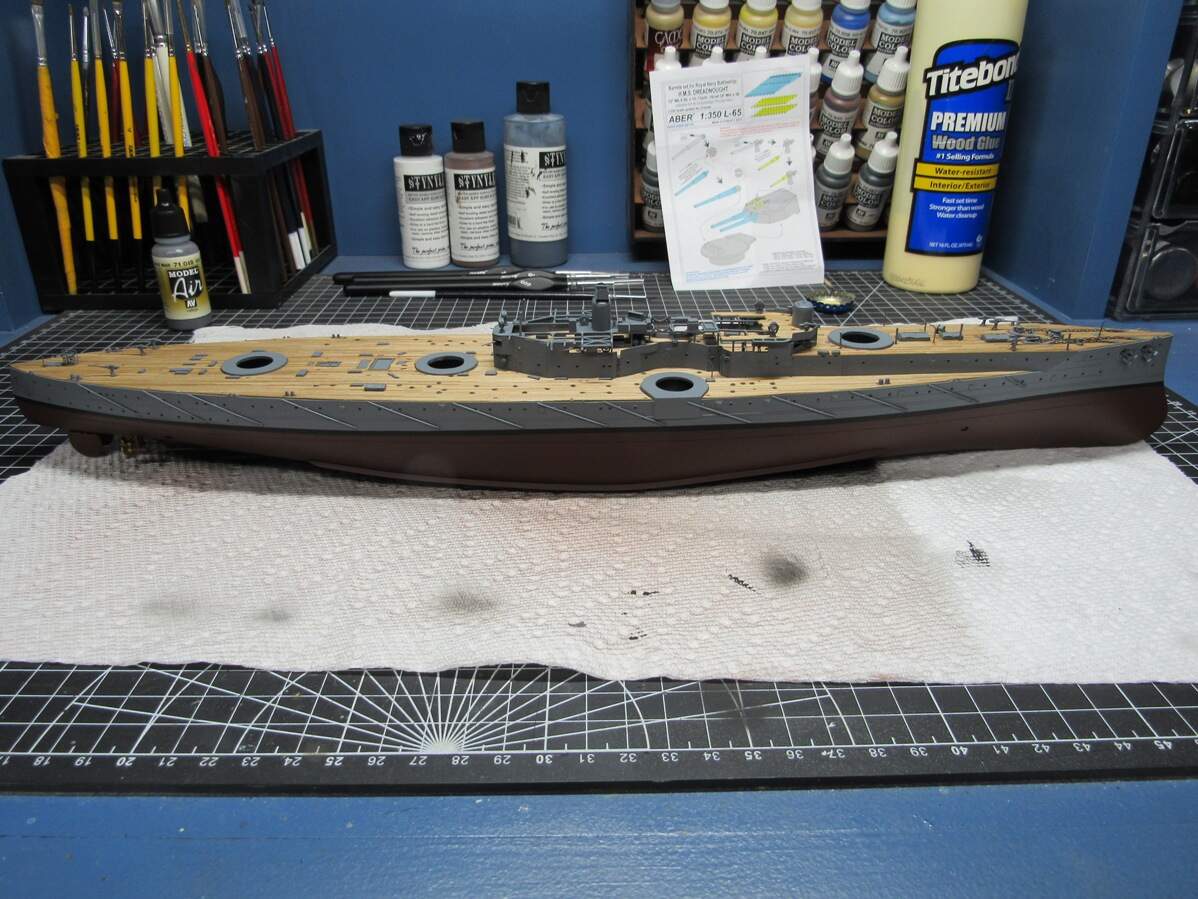
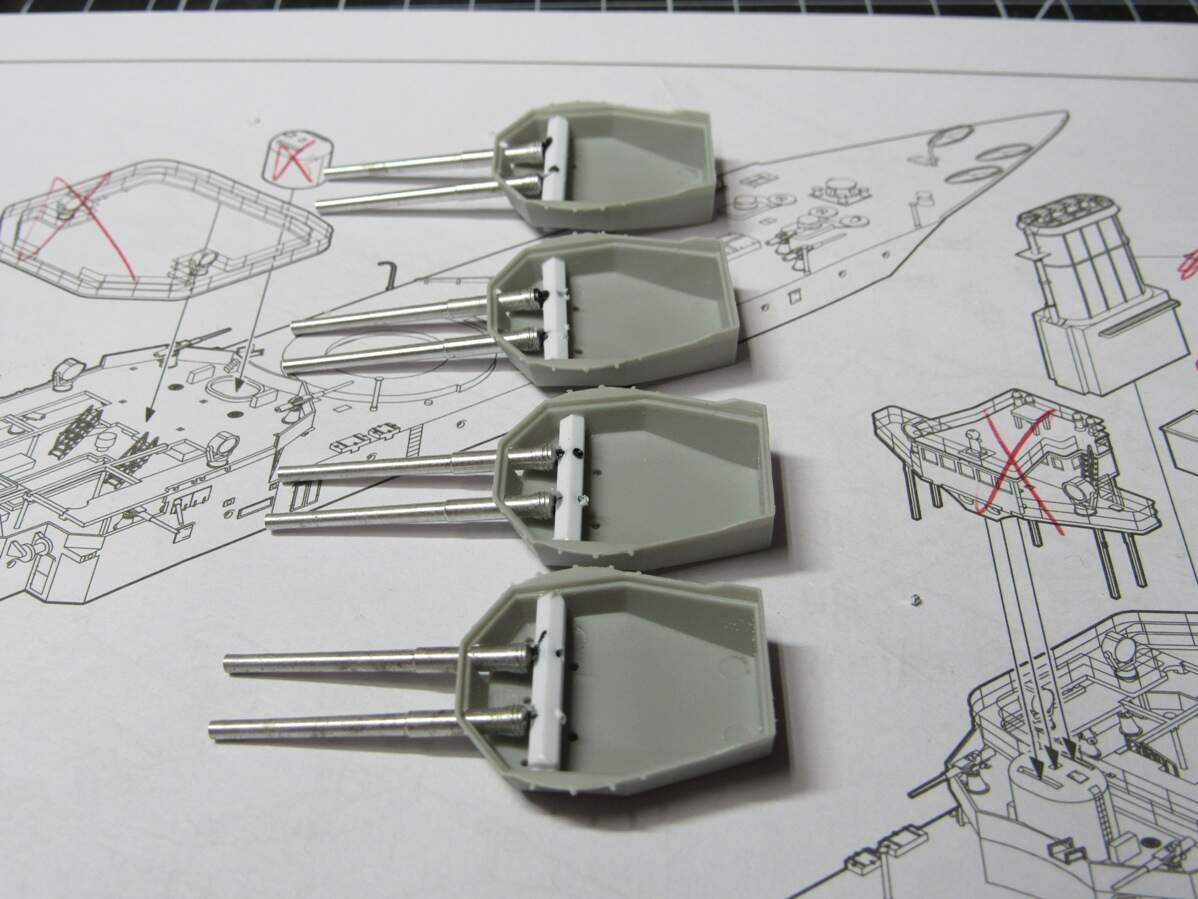
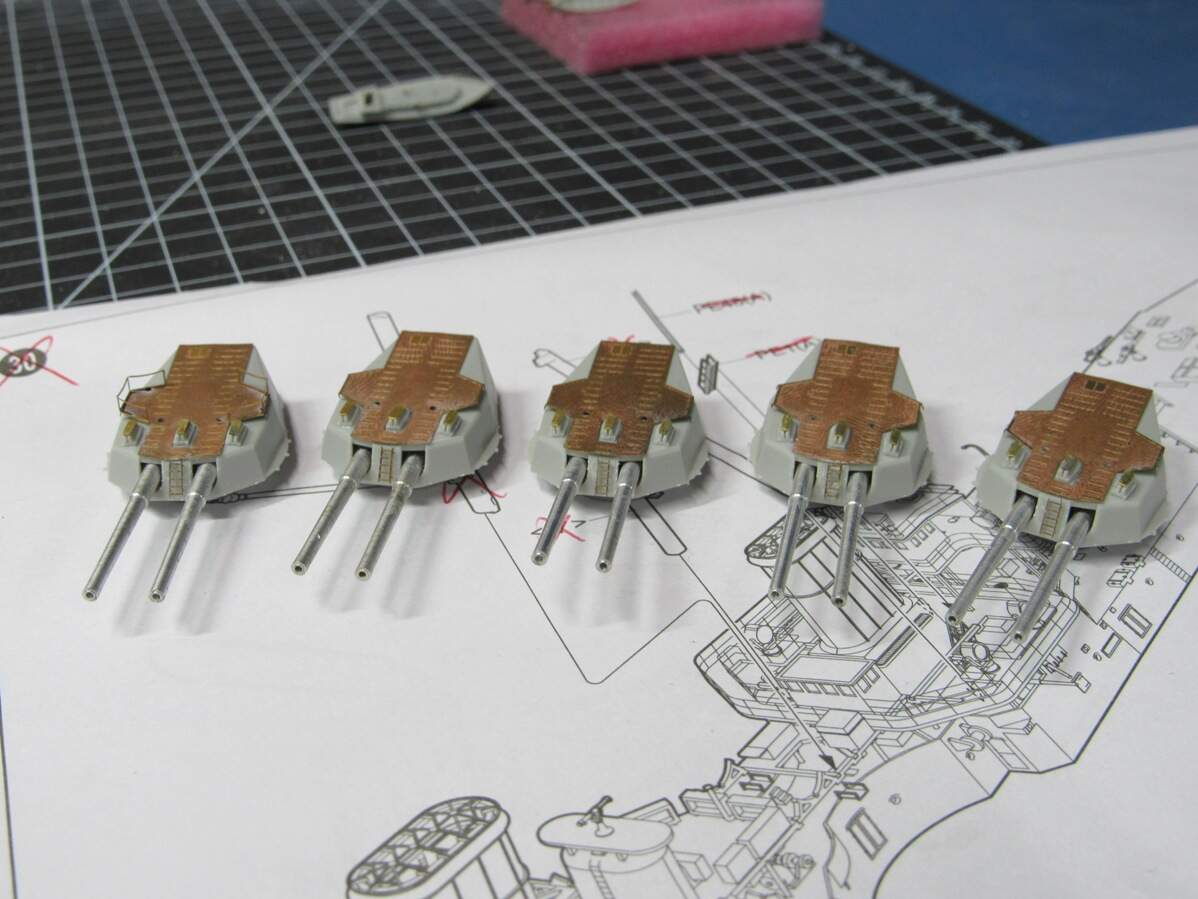
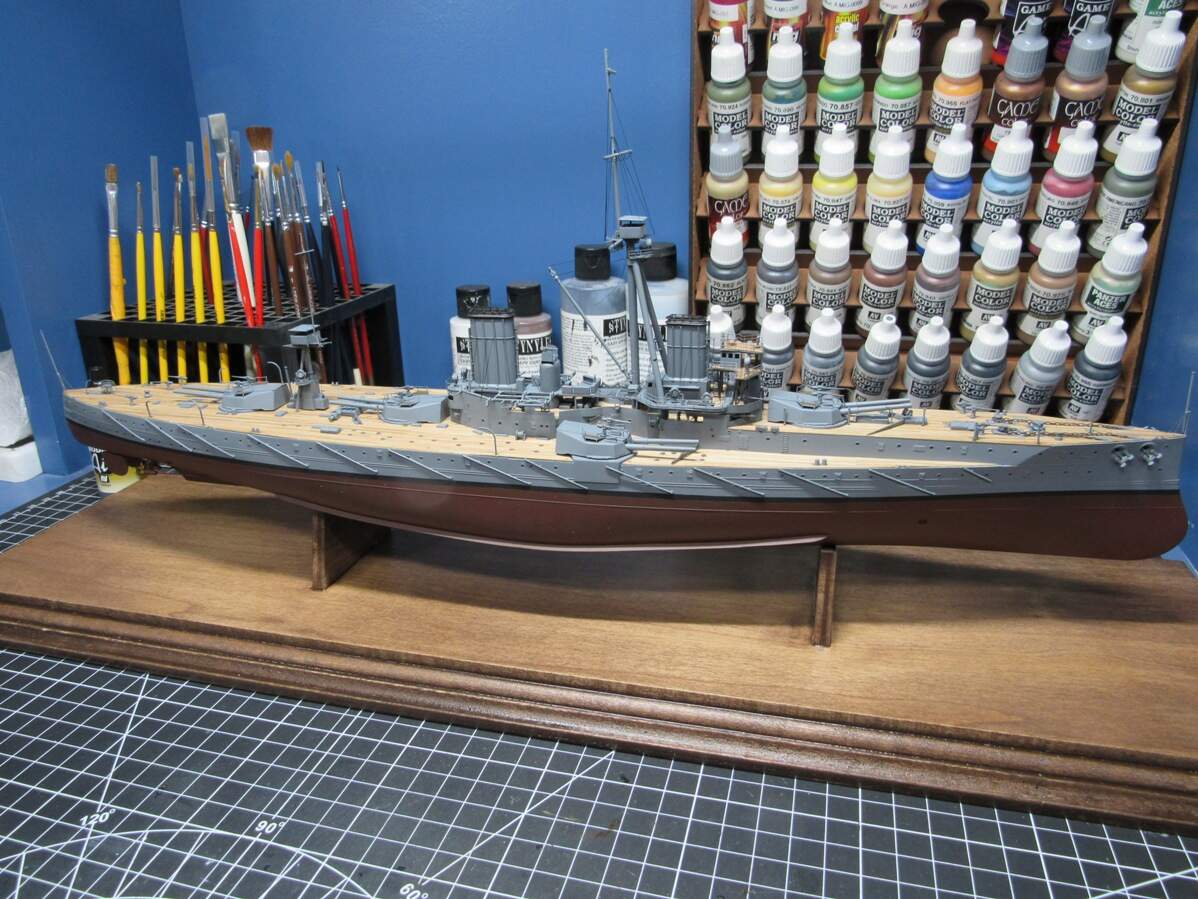
I’ve been wanting to build a ship for a long time, and the revolutionary Dreadnought is a ship I always liked, so what better place to start. I also figured go big or go home, so along with the Trumpeter base kit, I got both of Eduard’s PE sets (railings and general details), Aber’s barrels, and a wood deck from ScaleDecks.

Naturally the build started with the hull. No issues there, just some sanding and filling along the bottom seam as expected. One thing I don’t like about the kit is the instructions, to minimize the amount of painting I wanted to get the hull detailed up in one go, which requires combing through the entire instruction booklet to make sure you don’t miss any parts (I missed the PE ‘Dreadnought’ name on the sides).

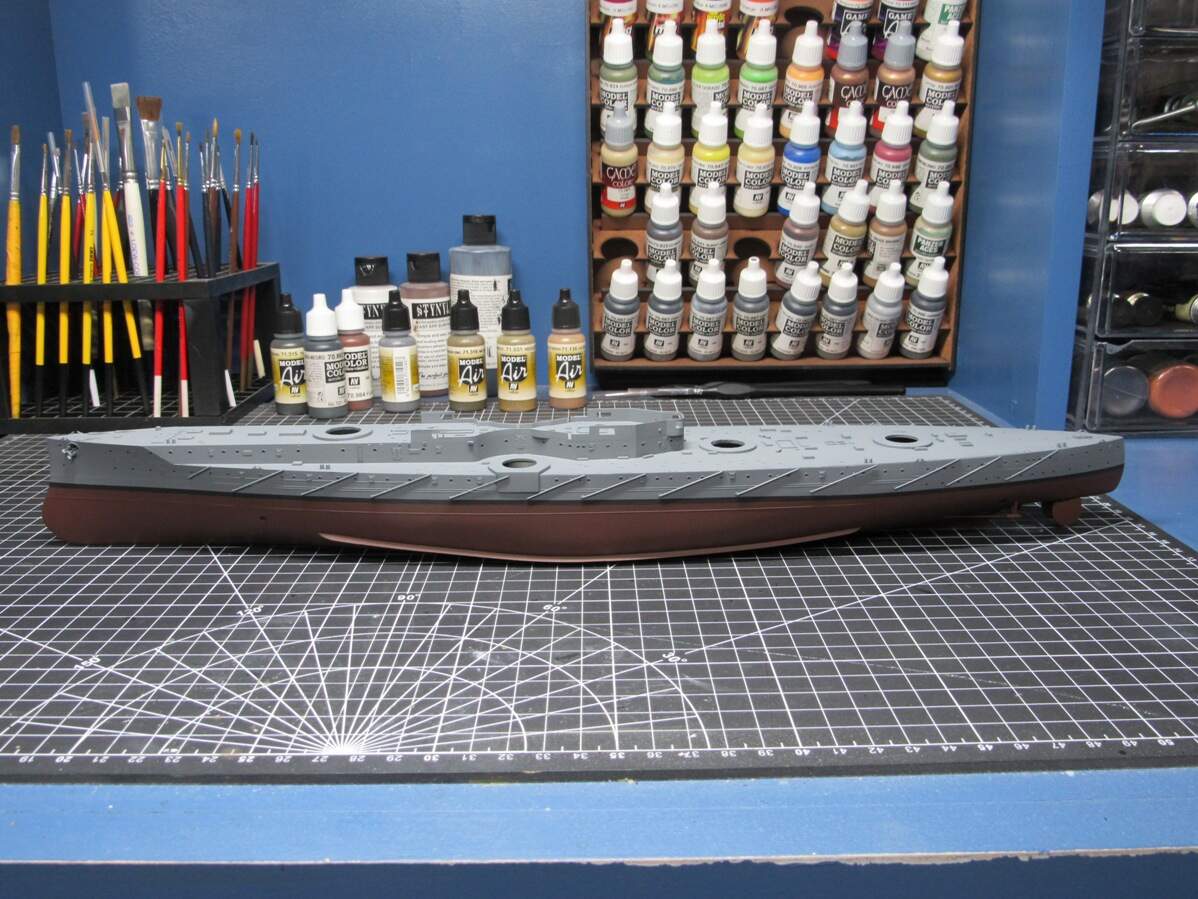
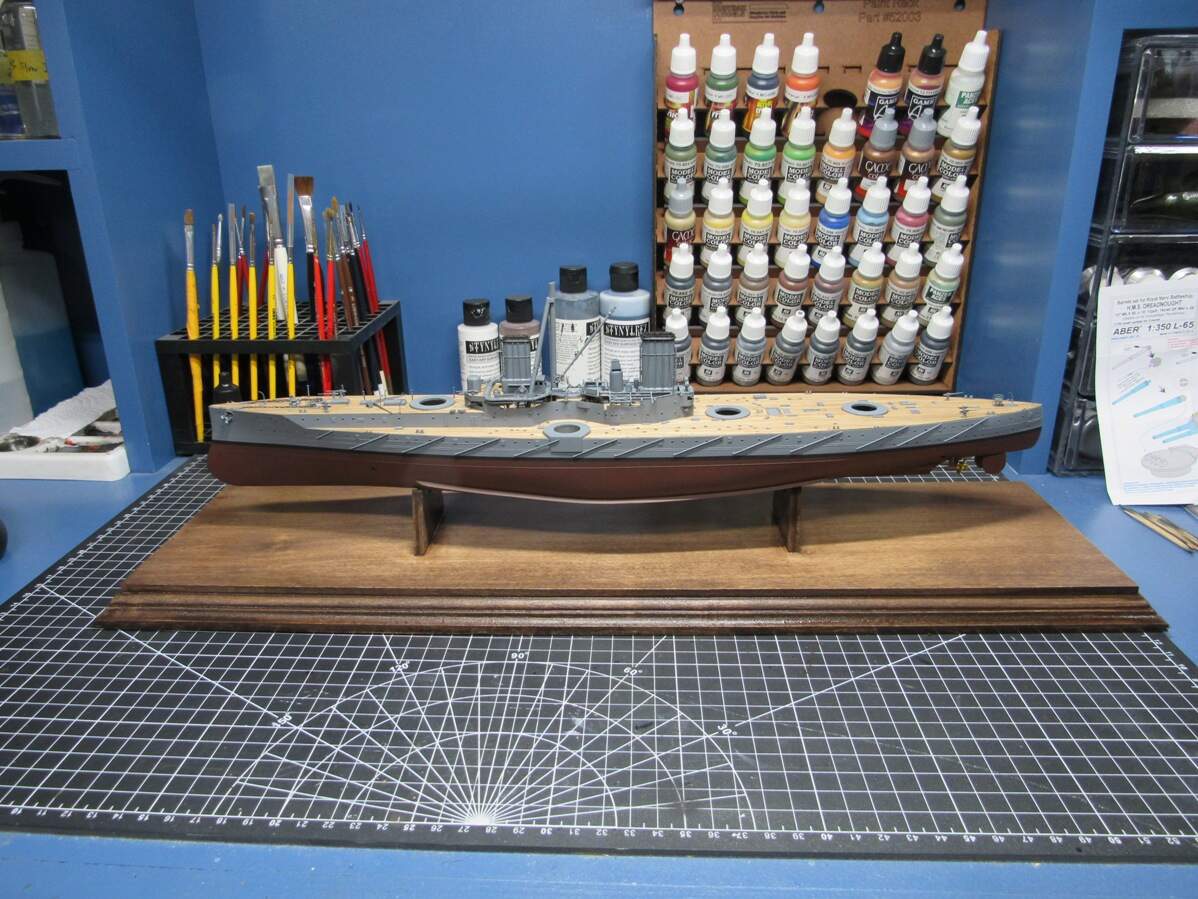
For the boot top masking I used a pencil through a block of wood to mark a uniform line around the hull. Then it was just careful masking and painting.

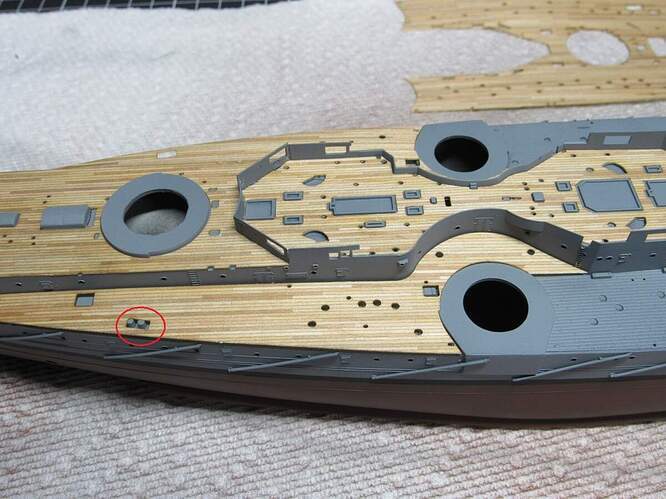
Next was installing the wood deck, and the first hiccup.

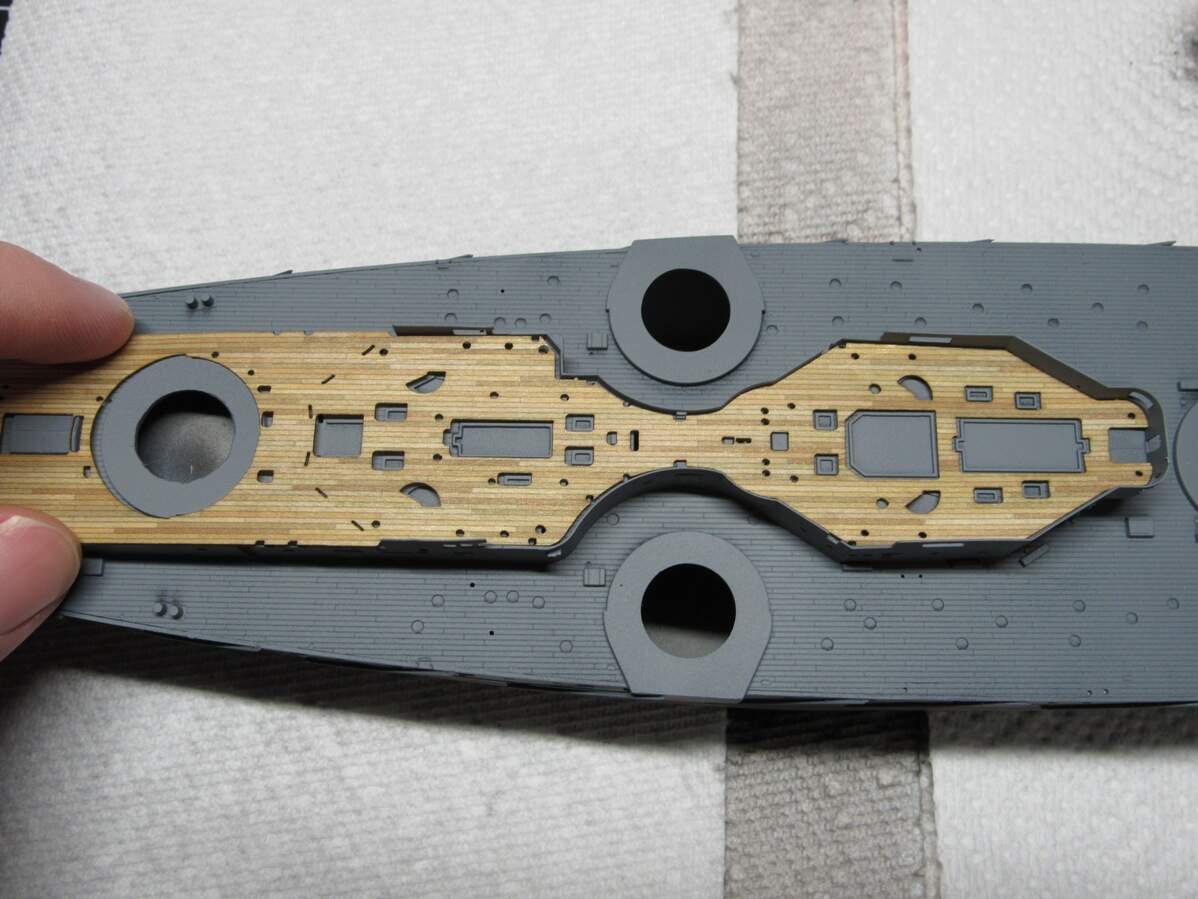
It’s out of scale along the fore-aft direction. A quick email to ScaleDecks followed by a quick response that there was a bad batch of these and they’ll send out a replacement. This is where the build stayed for a couple months while I got distracted by other kits.

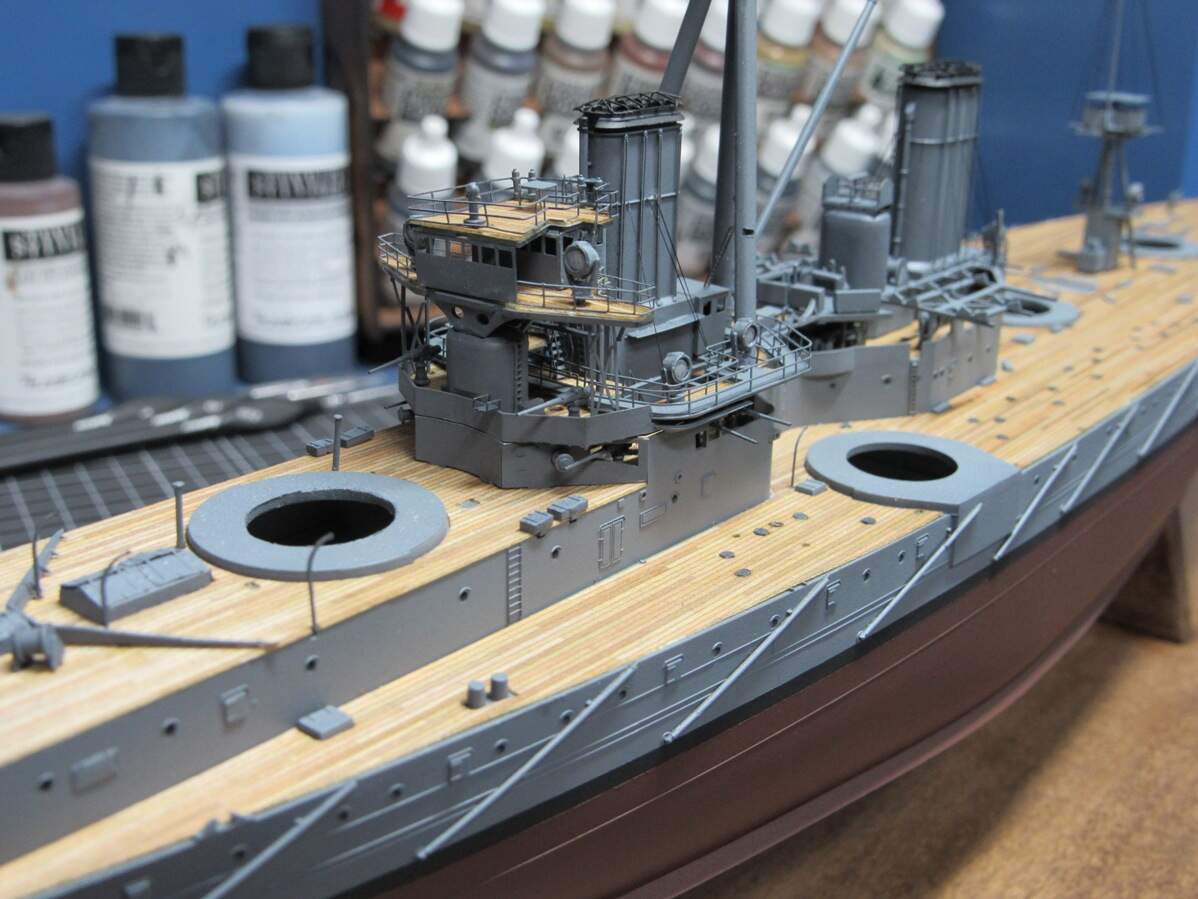
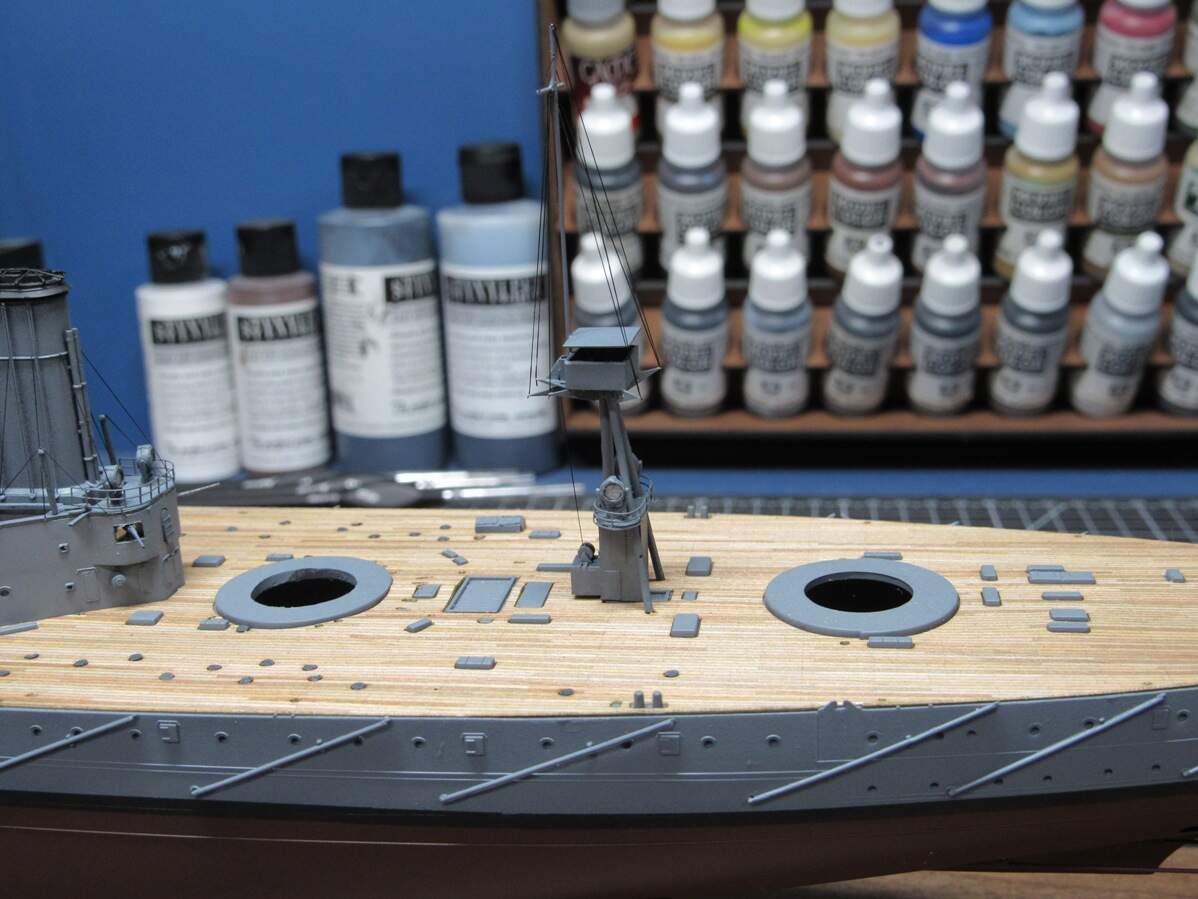
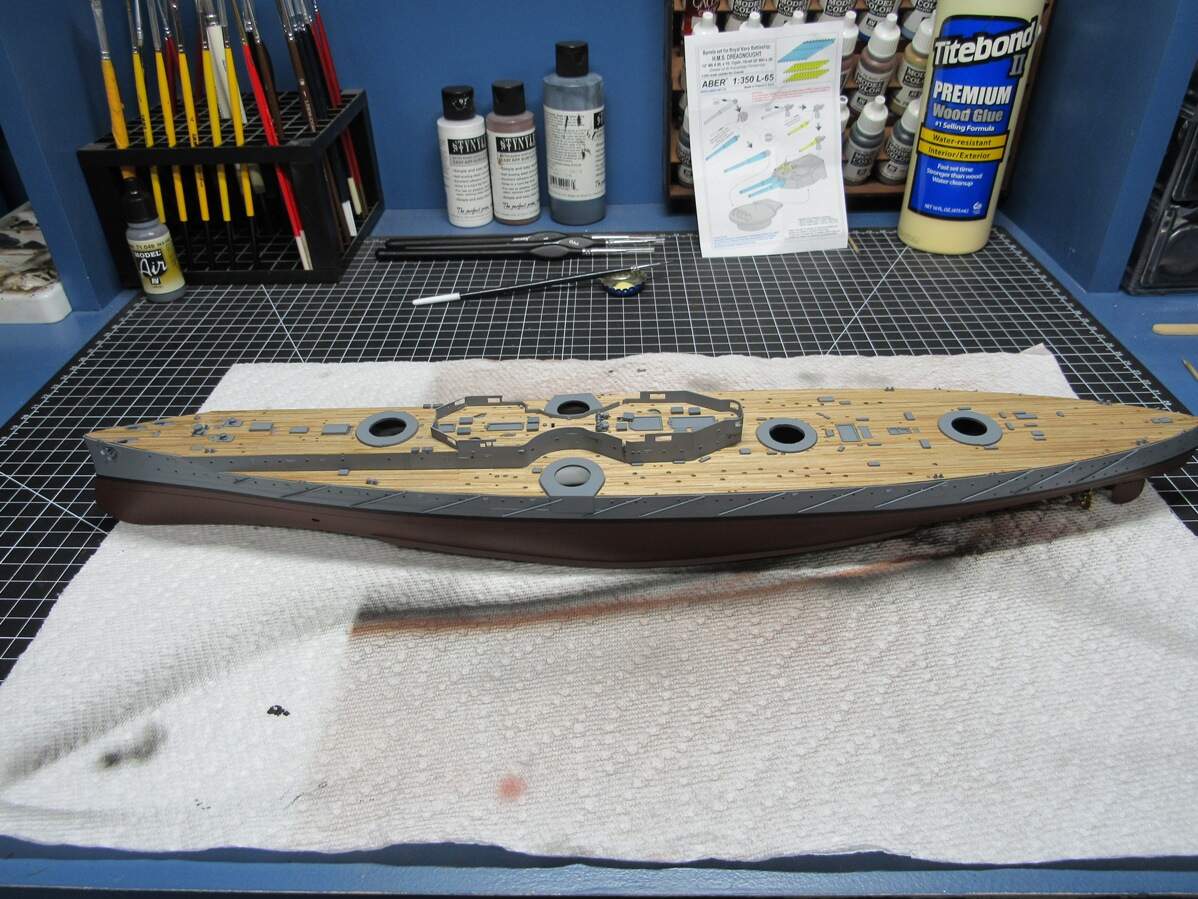
Eventually I got my replacement and finished up the other distractions. The upper deck went down fine, but when it came to the main deck I had more issues.

I thought I got another lemon, and figured the kit would be total loss without buying another deck. Not wanting to invest more I shelved it for a couple weeks. But it eventually dawned on me that the main deck piece was supposed to go on before the upper/fore deck was attached to the hull, as part of it would slip under the structure. Since I had already cut the port and starboard ‘wings’ from the main deck, I figured some more surgery wouldn’t hurt, and surprisingly got it to work.

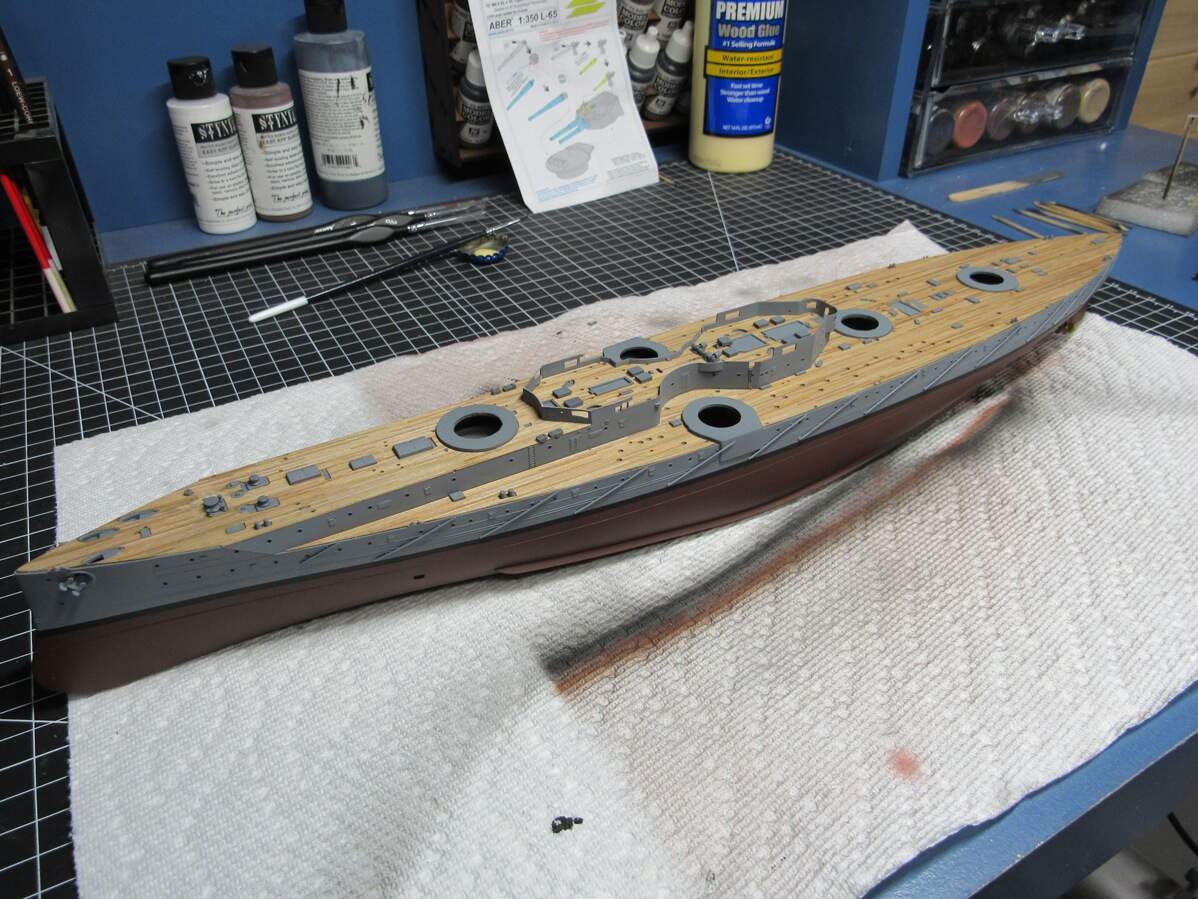
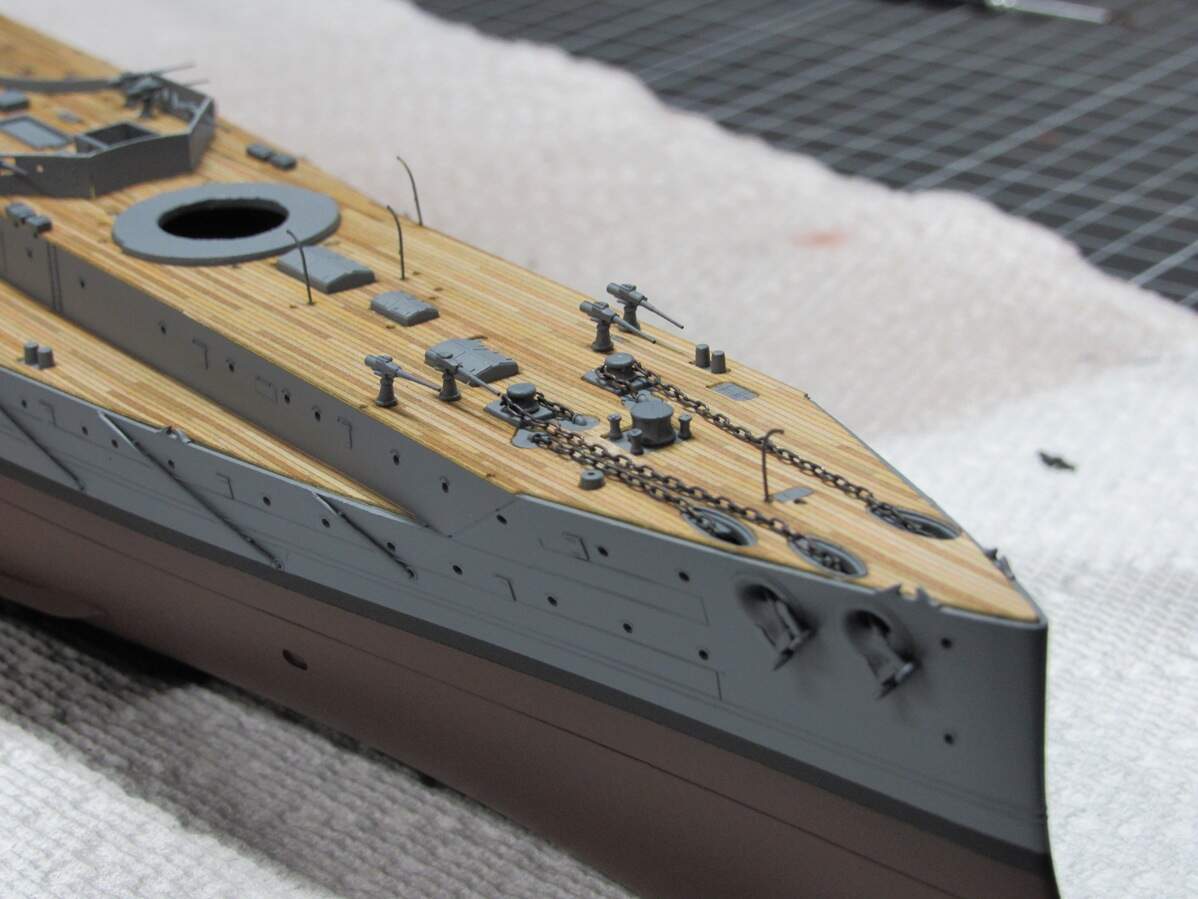
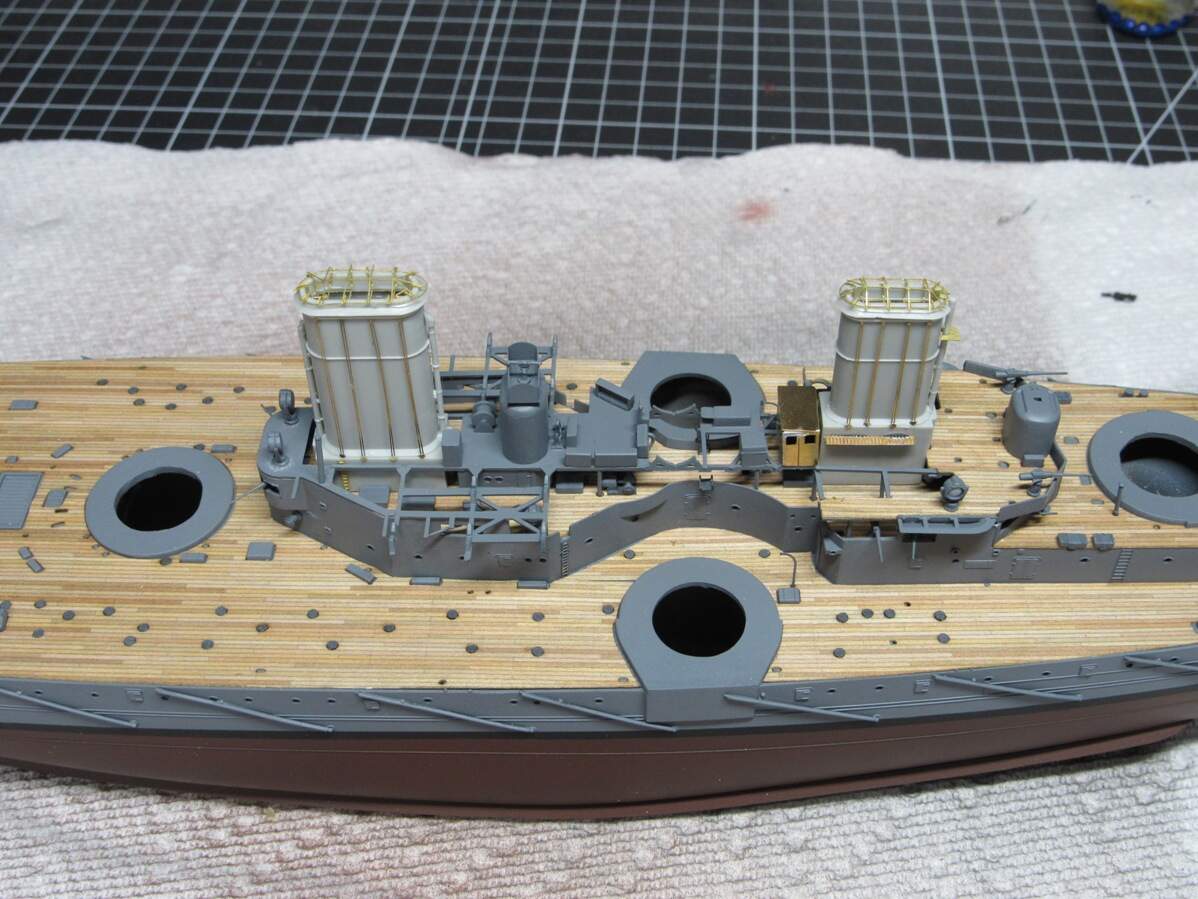
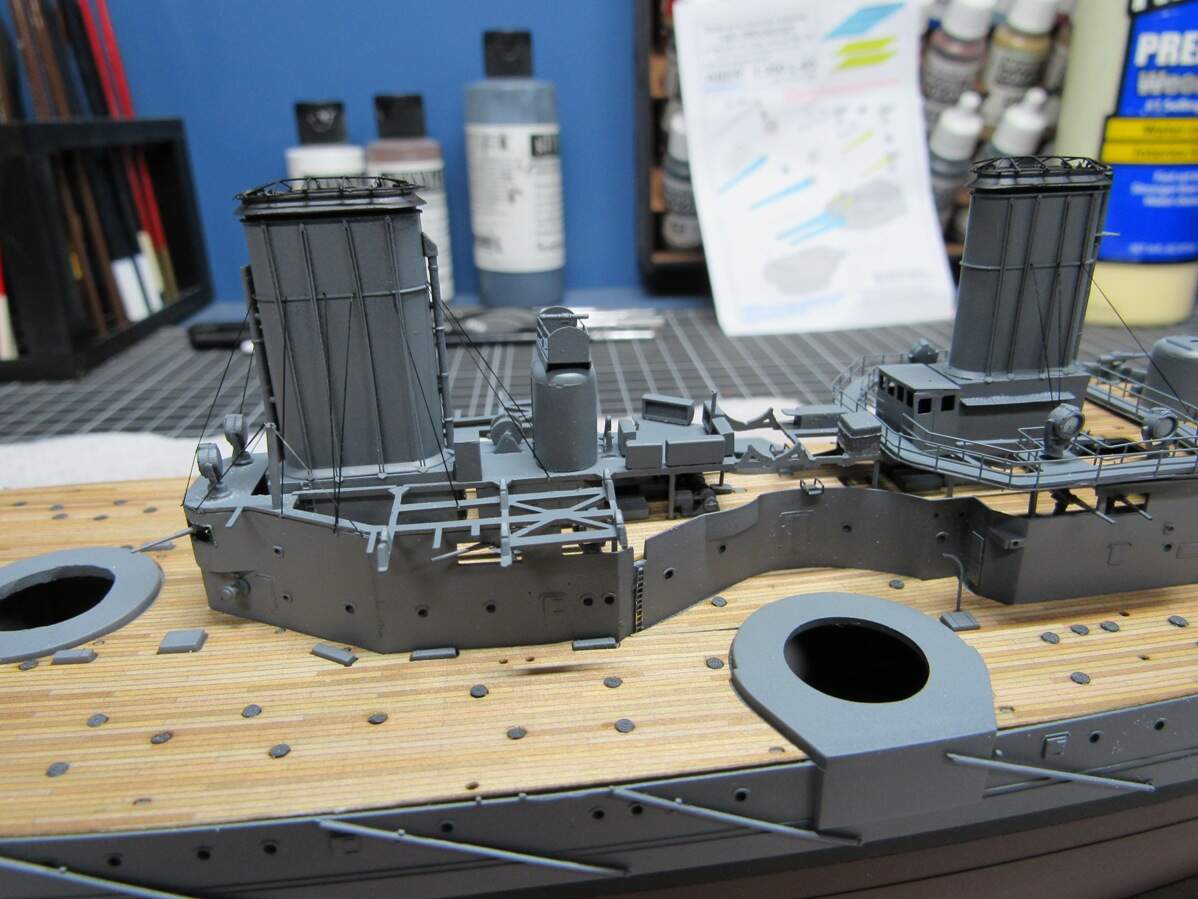
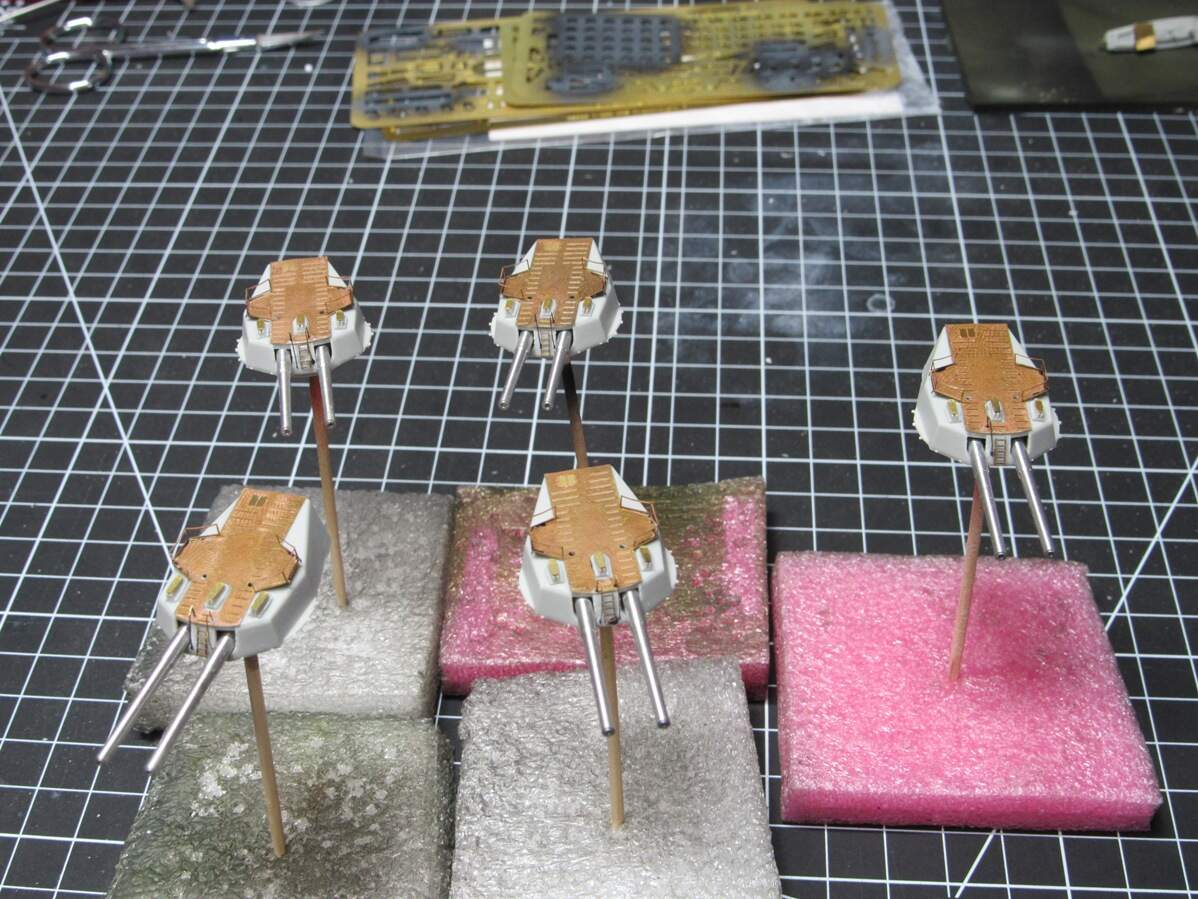
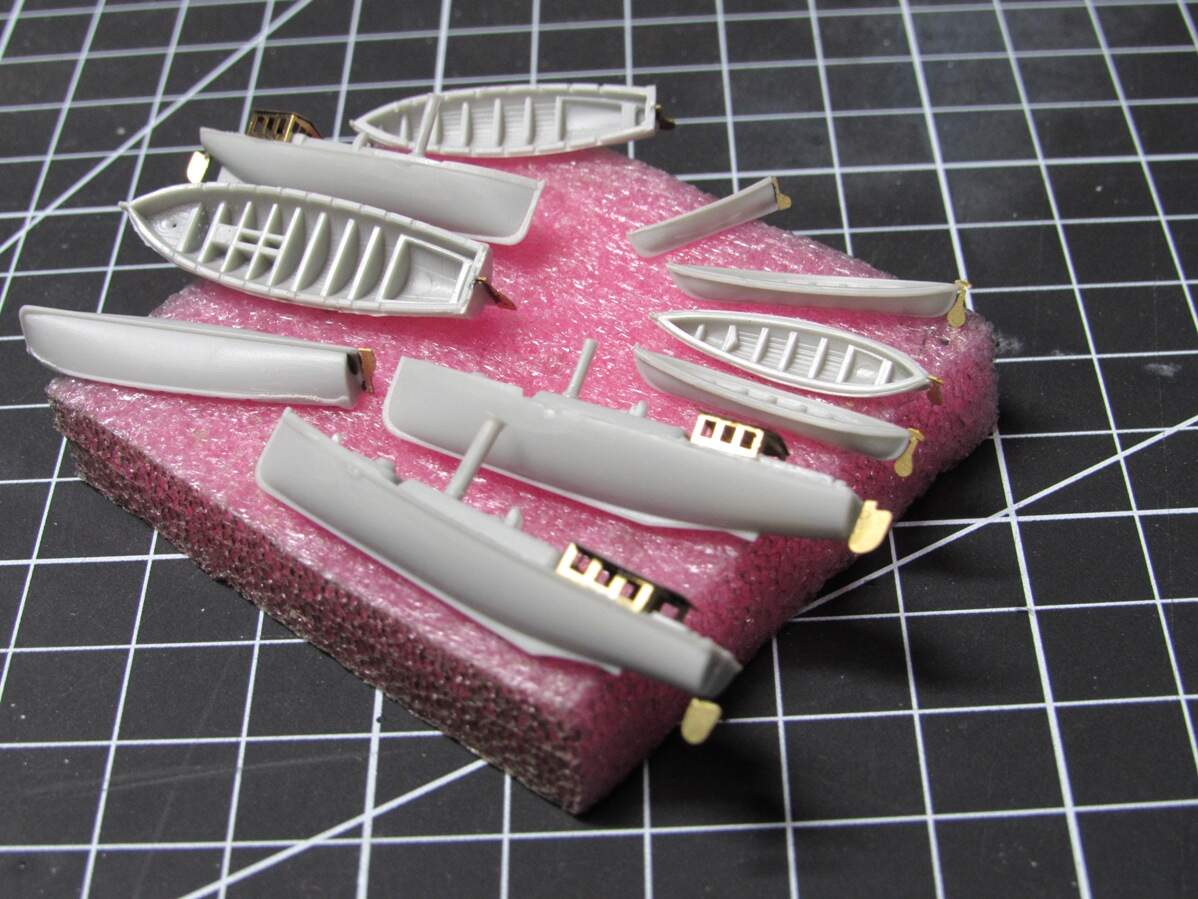
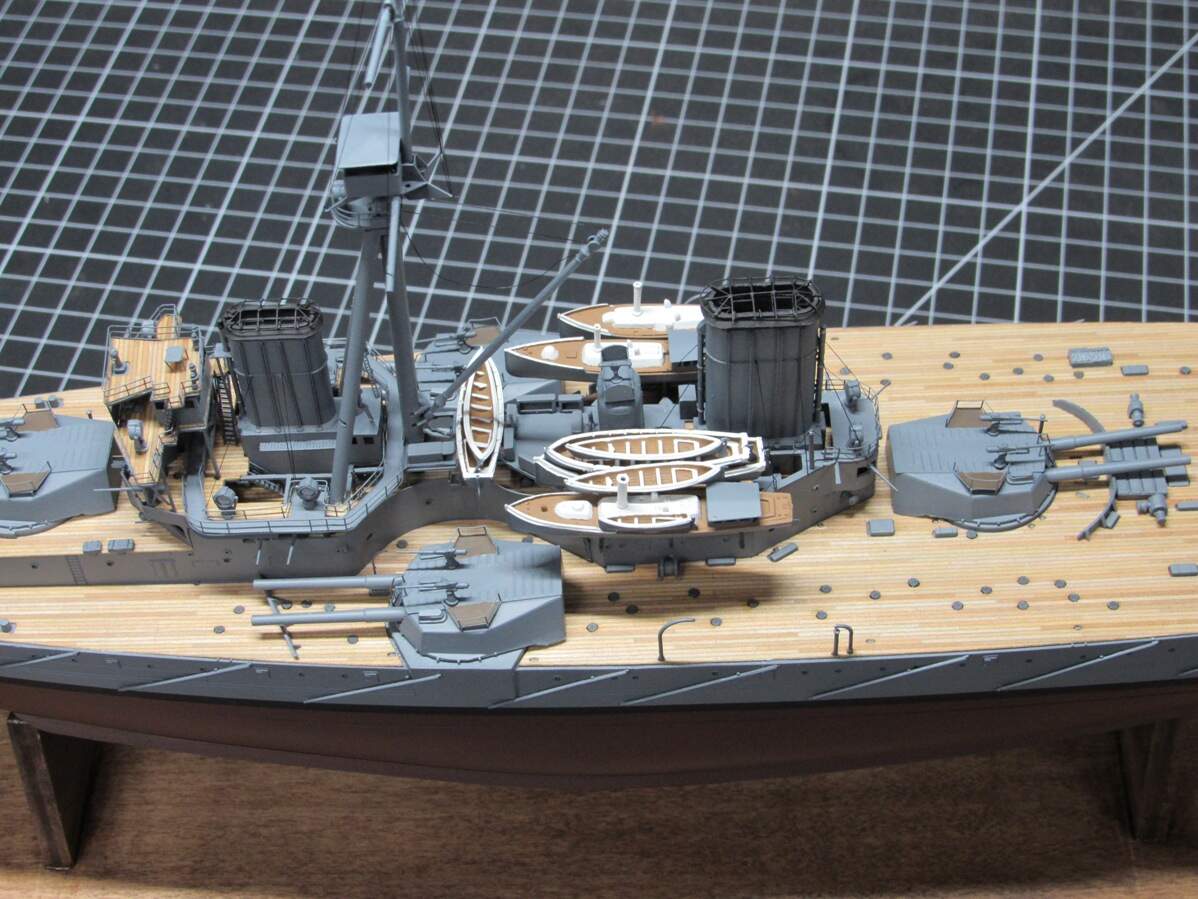
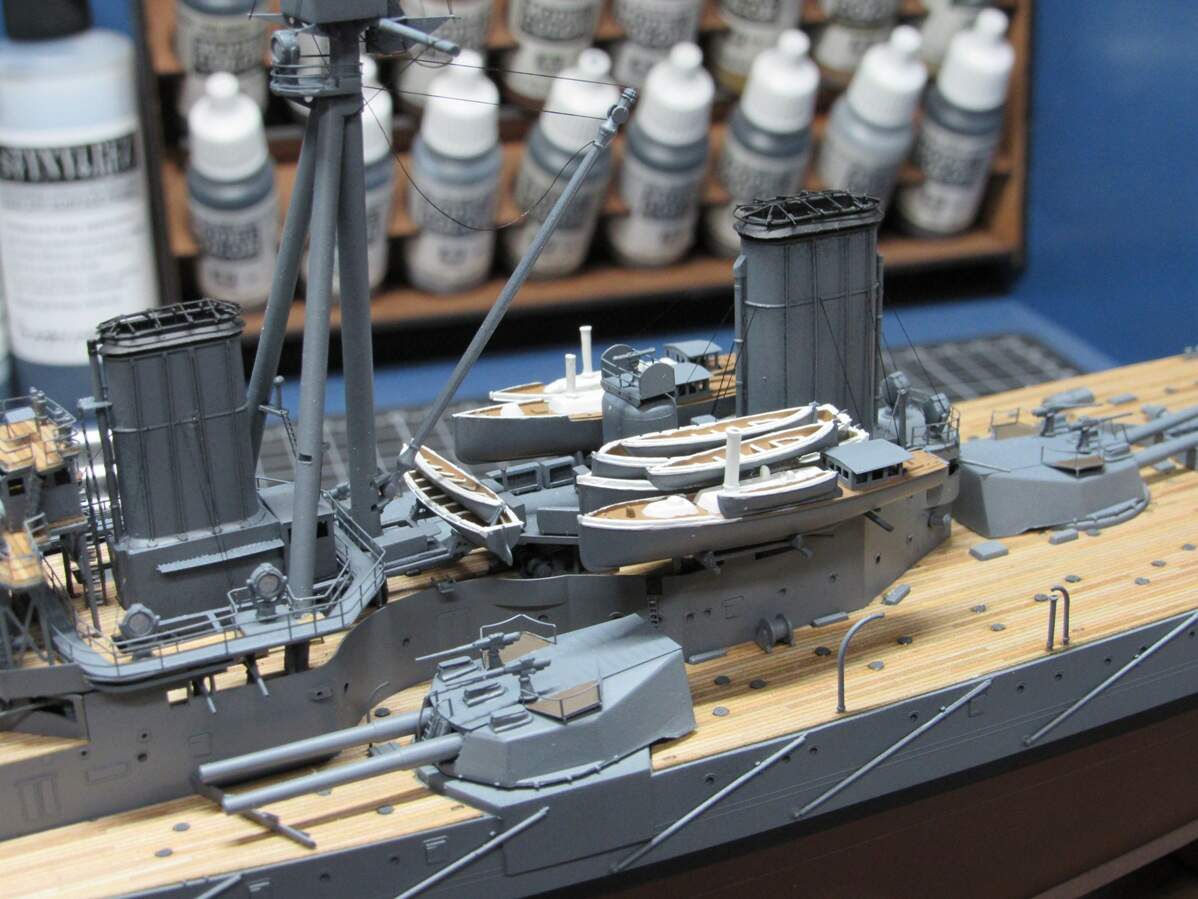
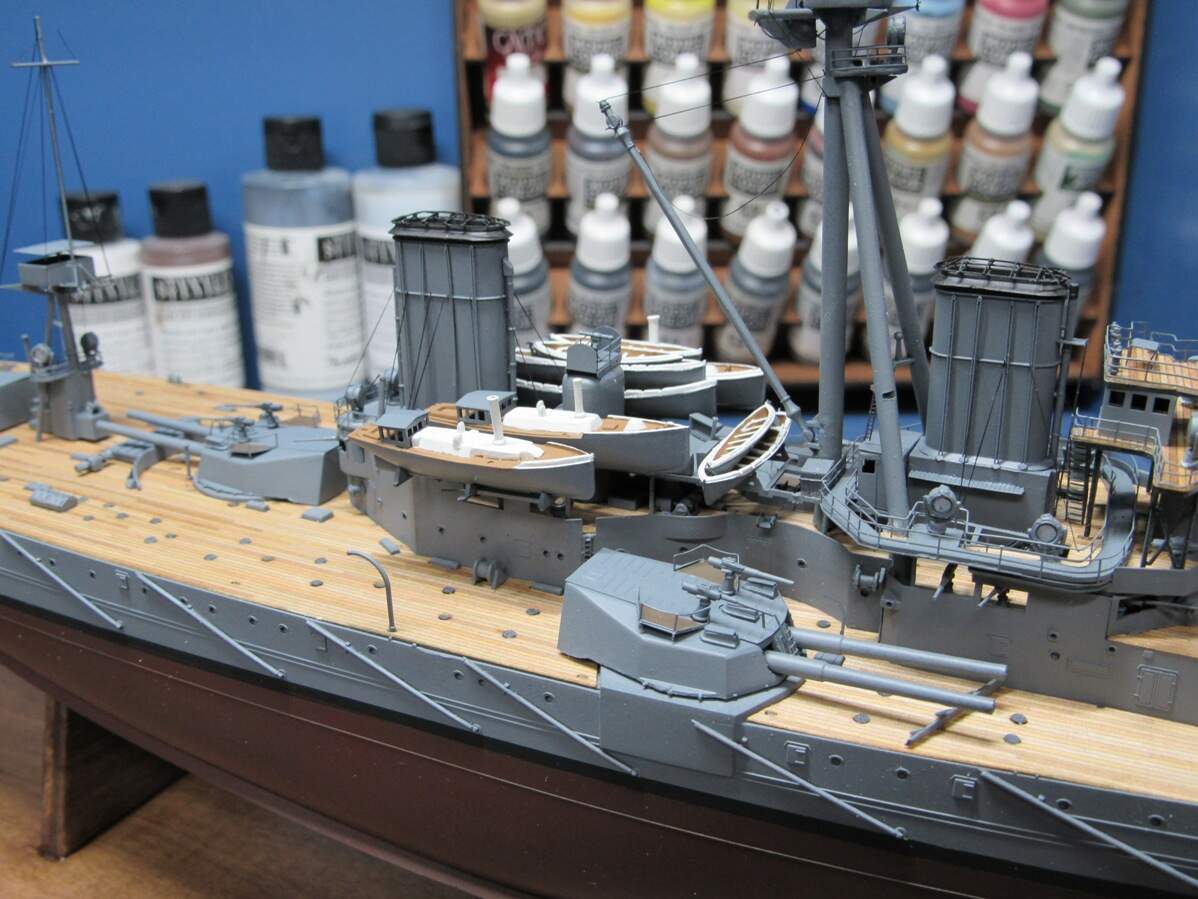
Now time to start filling in the details.

7 Likes

Little 12pdrs, barrels replaced and ready for painting,

Searchlights and some other details too,

Populating the upper deck begins. The anchor chain is kit supplied. I took some thin brass rod and bent it into a hook and hooked one end of the chain, then dropped the whole thing in a bottle of track blackening fluid. The rod allowed me to fish the chain out after an hour or two of soaking.

Boat deck added as well as more details,

Lots of sub-assemblies and detail painting make the build fairly slow, but it’s enjoyable. One step I was dreading though were the little PE gun shields around that main structure. I tried my hand at a couple, but could not get any to fit right. The AM wood deck raises the guns slightly so that the bottom of the shields don’t sit right to the structure. I opted to leave them off altogether.

Funnels built up and dry fit in place,

On the aft funnel you have those little PE ladders at the base. They blocked the fit of the funnel through the boat deck and required some careful sanding to make it work.

Painted and rigged,

More details coming…

8 Likes

The kit supplied main mast came broken in one spot, and also with a little flash on the edges. Fixable, but coupled with the fact that they seemed to flexible for the rigging I want to do, I decided to make my own brass replacements. Was a pretty simple job of just marking out some rod and tube based on the kit parts and cutting away.

It’s mainly 1mm rod, but looking back I think 0.5mm would look better. And it’s what I ended up doing on the mizzen mast.

This past week was spent making a proper base for the Dreadnought. The current paper towel base wasn’t cutting it, and the kit supplied plastic one wouldn’t either. A few months ago I scored a used scrollsaw for cheap, and decided to put it to use. There was a good amount of trial and error, and figuring on how to build a proper stand with the materials I had on hand. Eventually decided on a base made of some scrap poplar, with the supports from some 1/8" finished plywood. The supports were traced from the kit parts and cut on the scrollsaw, but with such a narrow edge for gluing they’d need more support. So I drilled some small matching holes and pinned them in place with some brass rod as well as wood glue. Went with a dark stain, which also has the benefit of hiding the ugly layered edges of the plywood, then two coats of poly and it’s good.

For a temporary case I’m planning on a simple acrylic box that’ll fit around that routered edge. When I finally get myself a tablesaw I’ll make something proper with wood supports and glass.

About all caught up now. I’m currently working on finishing out the bridge, main mast, mizzen mast and some other small details. And it’s shaping up to be an all modeling sort of day, so hopefully some progress soon.

7 Likes

For your first ship you’re knocking this one out the park. I don’t have the storage space for these big ships but I really enjoy watching them build up… And this is no exception…

Great detailing and nice saves with the wooden decking… Funnels look lovely and I like the faded below the waterline red … very aged… :+1:

3 Likes

I wholeheartedly agree with what John just said! I especially appreciate your save with the ScaleDecks deck. IMHO their decks are the best looking on the market, but they are also notorious for fit and quality control problems as well as their sometimes less than stellar customer service. Too bad, as ScaleDecks products are gorgeous, and they would dominate the market if they just got those things right as well!

image

Anyway, you did a wonderful job with your decks - and the rest of the build is coming together beautifully too! :smile: :+1:t3:

3 Likes

Thank you John. Fortunately I have two spaces in my living room that can house this model, and one much larger space for a future project.

Thank you Tim. I do agree with you that ScaleDecks do have the best looking decks. It’s part of why I shelved the project when the 2nd one didn’t fit. I couldn’t use another company, it just wouldn’t look right. I will say they responded in minutes to my email, but the replacing took I think around a month. I’m willing to attribute it to growing pains. If I ever pull the trigger on a 1/200 Arizona I’ll use them again.

Some more progress this morning after a batch of painting,

The bridge is on, though a little wonky. Some PE ladders and companionways added, plus the search light platform on the main mast.

The mizzen mast was painted, rigged and attached to the ship.

I’m actually enjoying the rigging, and after looking at completed kits I believe it’s what really makes the model. I plan on doing the cable spreaders with this kit too, and have a rough idea of how I’ll build it, but that’s a ways off. Next up is a little touch up painting on the main mast, then attaching and rigging it up. Taking a break now as my eyes are hurting. Wrestling with tiny black lines over a black cutting mat I think was causing some strain.

8 Likes

You are doing a lovely job on her. Looking forward to more of your updates…Cheers Mark

1 Like

Thanks Mark. Finished the rigging on the main mast this morning.

I also rigged the boom behind the mast. Kinda hard to get the EZ line to take a natural slack appearance, but I’ll leave it for now. I’m moving on to the rest of the deck details which will be nice to get out of the way. Then it’s the ships boats and turrets. Been a bit apprehensive on the turrets, the after market barrels will require some scratchbuilding just to mount them, and then there’s some masking around delicate PE on the top side that I’m not looking forward to.

4 Likes

I also rigged the boom behind the mast. Kinda hard to get the EZ line to take a natural slack appearance, but I’ll leave it for now.

I hear ya James! I’m a recent convert (and now a big fan!) of EZ Line for rigging taught lines, but it doesn’t work for slack lines at all. I’ve found that a combination of EZ Line for the straight runs and gently shaped wire for the looser ones can work pretty well.

Working the wire for the curved lines is more effort, but your beautiful Dreadnought is definitely worth it!

3 Likes

I’d have to scrounge for something suitable, not sure if I have any copper wire with the correct diameter. Would be a nice challenge

image
I’d have to scrounge for something suitable, not sure if I have any copper wire with the correct diameter. Would be a nice challenge

I don’t know where you’d buy it, but my daughter found this coil of very thin copper wire on the street as a child and I’ve been rigging ships with it for the past 25 years!

:laughing:

Hey James, this is a very nice entry into the salty side of the hobby!

Watching with interest! :slightly_smiling_face:

Looks like some motor wire Tim, I probably have some laying around as I used to be into messing with electronics.

Thanks Russell, I am enjoying this side more than I expected, and already have a couple more ships on the wishlist.

I decided to tackle the turrets. There’s no locating structure to use with the aftermarket barrels, but I found some lengths of hex rod with two holes drilled worked fine.

Two were a little proud of the lip, which prevented the bottom from seating right, but some careful sanding took care of that. PE has been started, using Eduard’s set to detail them up.

The heat and humidity seems to be causing some frosting, but paint should cover that just fine.

3 Likes

Really nice work on the Turrets…Cheers Mark

1 Like

Thanks Mark. Finished up construction on them tonight,

I managed to lose one of the hand grabs for the ladders on the front. It was in my tweezers and then it wasn’t. No sound, no visual, just gone. I figure I’ll hide it by having the missing side against the super structure next to the side turrets.

And a minor disaster. Lost about half my rigging on the main mast. An entire clump came undone, then I knocked off one of the spars during removal.

Is this stuff sensitive to humidity or temperature changes? My workshop is in an unconditioned basement. This is happening on the fixed ends too, not the stretched ends. I used regular medium viscosity CA glue to fix them in place, would the flexible rubberized CA be better? Obviously I want to keep this from happening again.

1 Like

I do not know how or why sometimes. It has happened to me before so I just take penance and redo it…Cheers Mark

Finished up the turrets today, and placed them on the ship. I was worried about masking for the brown color on the wings of the turret and decided just to freehand it with a brush, which I think worked fine.

Also finished construction on the ship’s boats. The instructions would have you build 14, but later only shows placement of 10, and then the color guide shows all 14 on the ship. I’m taking the path of least resistance here and only building the boats that the instructions tell me to put on the ship.

The aftermarket PE is a must for the 3 housings, the kit supplied plastic is just a detail-less blob.

Only other detail I added was drilling out the stacks. Sitting there now while the metal primer dries, should get to painting them tomorrow. Gonna be a lot of detail brush painting ahead. Haven’t had the heart to repair the rigging yet.

3 Likes

The P/E on the Boats looks great and so do the Turrets…Cheers Mark

Thanks Mark. Finally finished painting up the boats, doing a little each night. Some touching up, but they’re all mounted now,

6 Likes

Looking very nice and busy. Love the work so far…Cheers Mark