Joining in late, I just found this build log. First rate work, your Dreadnought looks fantastic! Fine job with the rigging, that’s always a hard part for me to accomplish but your work looks really spot on!
Cheers
Jan
Joining in late, I just found this build log. First rate work, your Dreadnought looks fantastic! Fine job with the rigging, that’s always a hard part for me to accomplish but your work looks really spot on!
Cheers
Jan
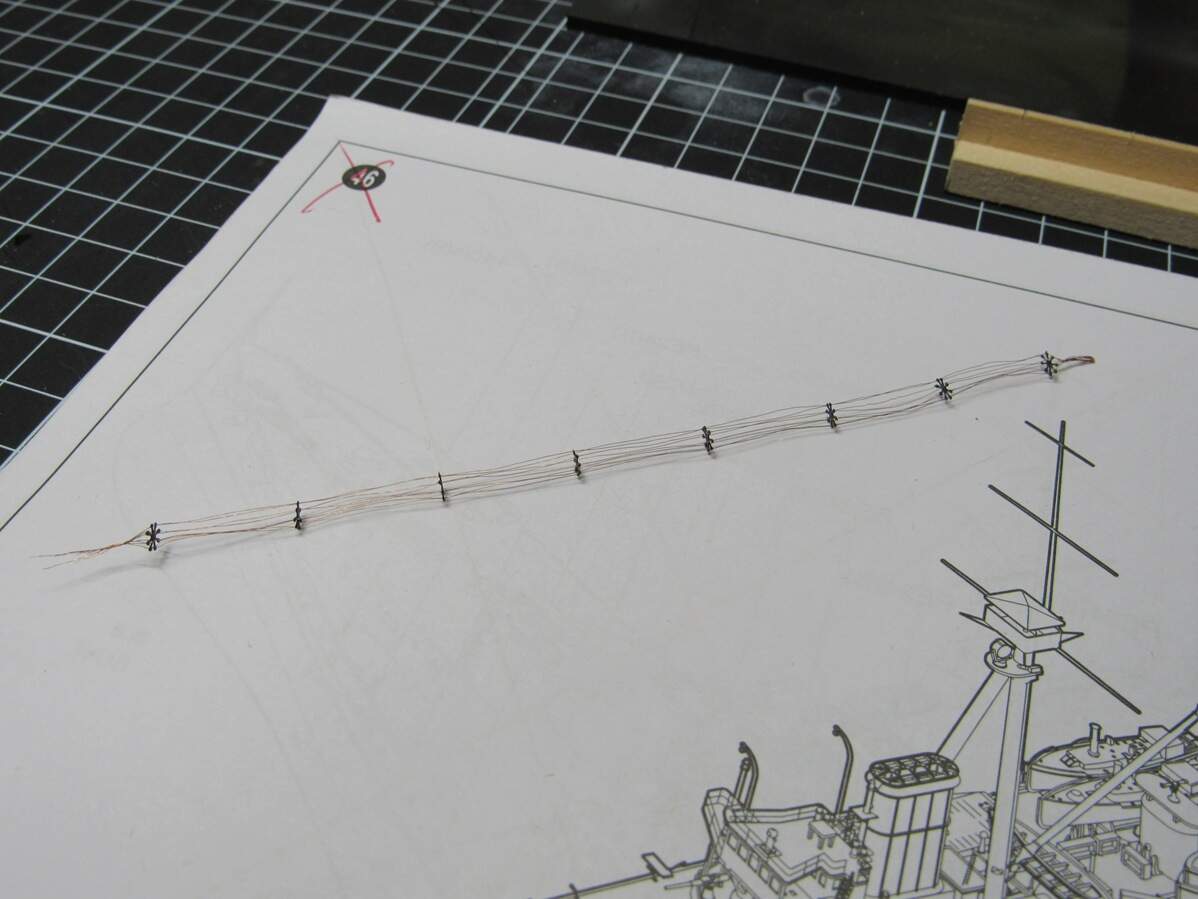
Thanks guys. Just finished one spreader, so I’ll cover my trial and error.
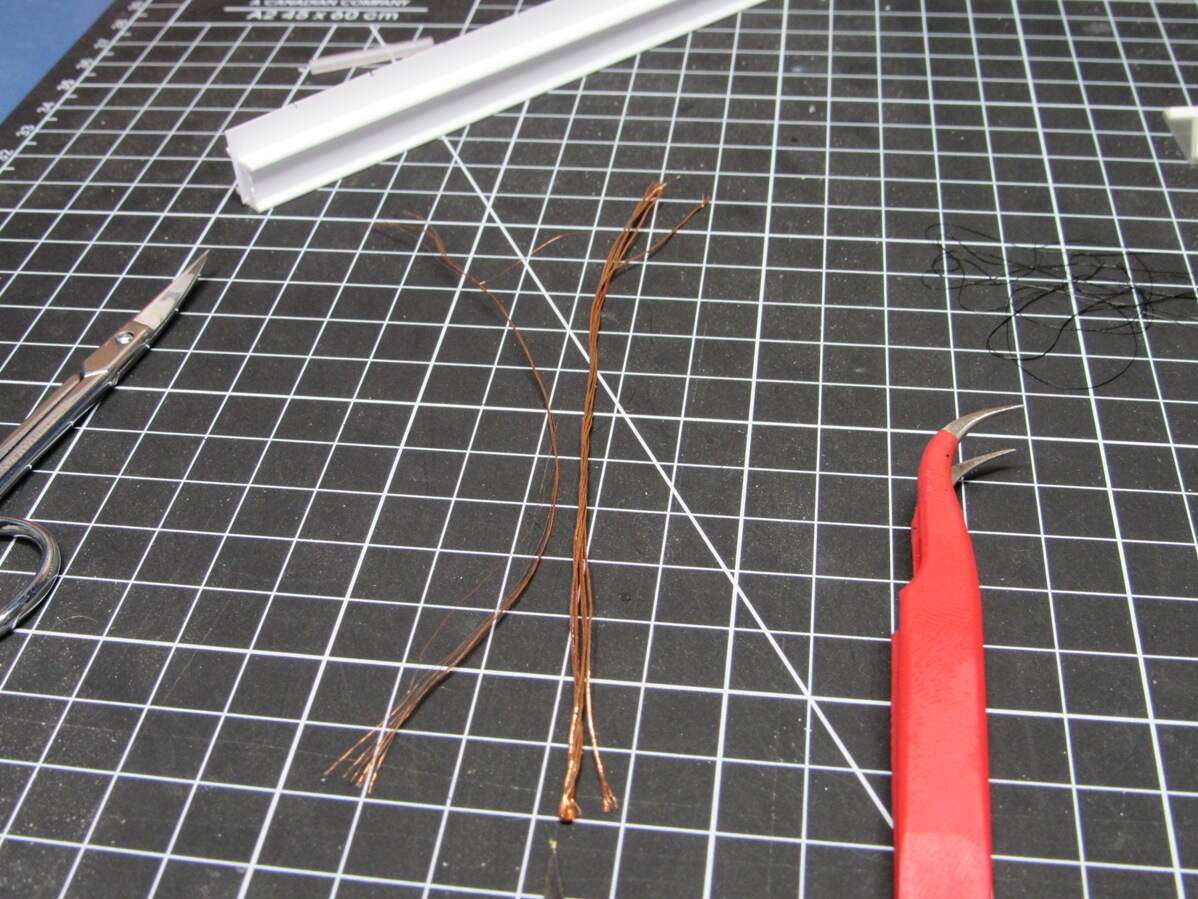
My first assumption was that I’d be using the flexible rigging that I had been using everywhere else. With that in mind, and figuring I could ease the painting process, I painted the spreaders black before hand. That was my first mistake, the paint for the most part didn’t clog the little threading holes, but they definitely made them smaller, and the flexible rigging was impossible to poke through, it just flexed away. Scrounging around I found some solder wick, really just copper braid. I unraveled a bunch and this proved to work much better.
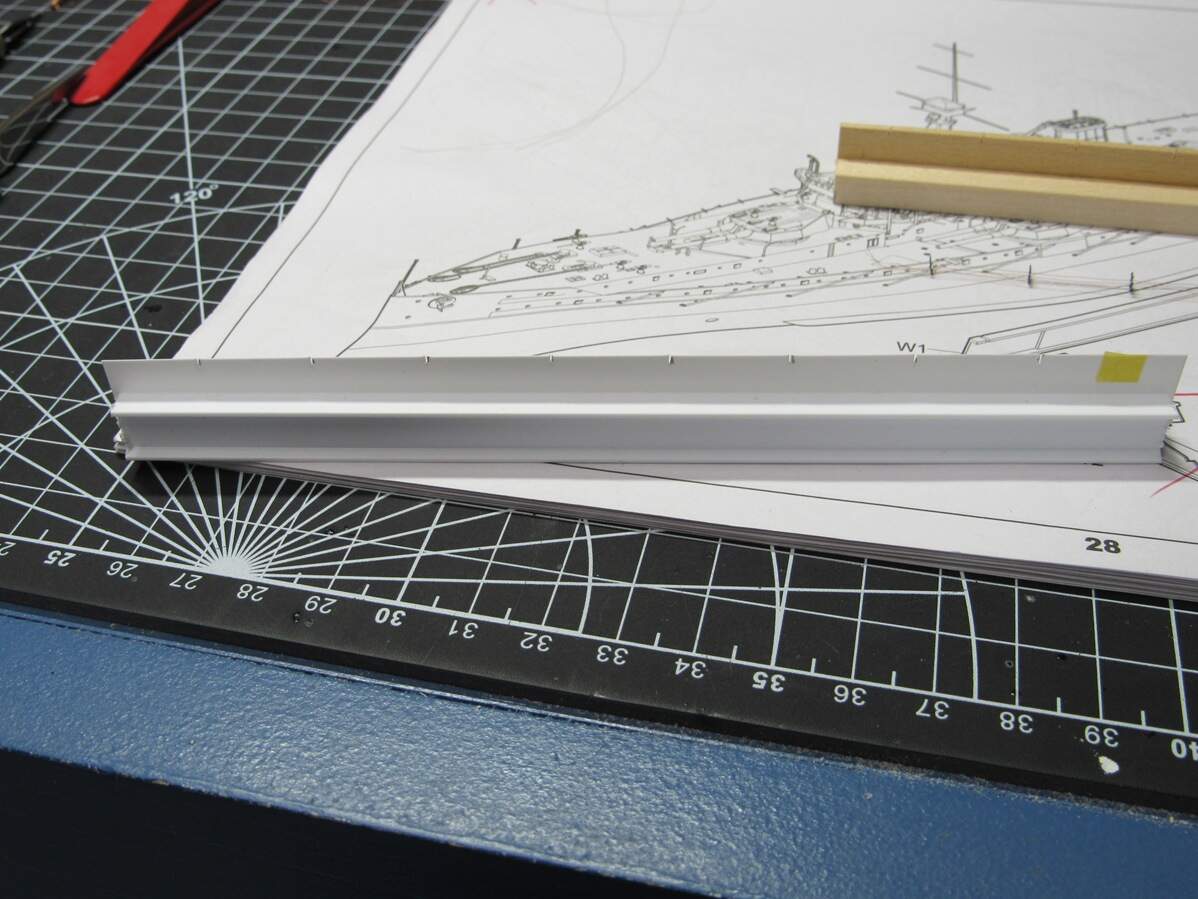
My original thought was to cut some thin slots in a piece of wood which would hold the spreaders. Eyeballing it based on a profile shot of the Dreadnought, the overall length would be ~120mm. Eight spreaders means 7 segments, so each one is spaced 17mm apart. The thin wood is pretty thick compared to the spreaders, so at best 3 out of 8 runs would be blocked off. Not wanting to pull the whole thing out when I got a little over half way done, I made another jig, but out of very thin plastic.
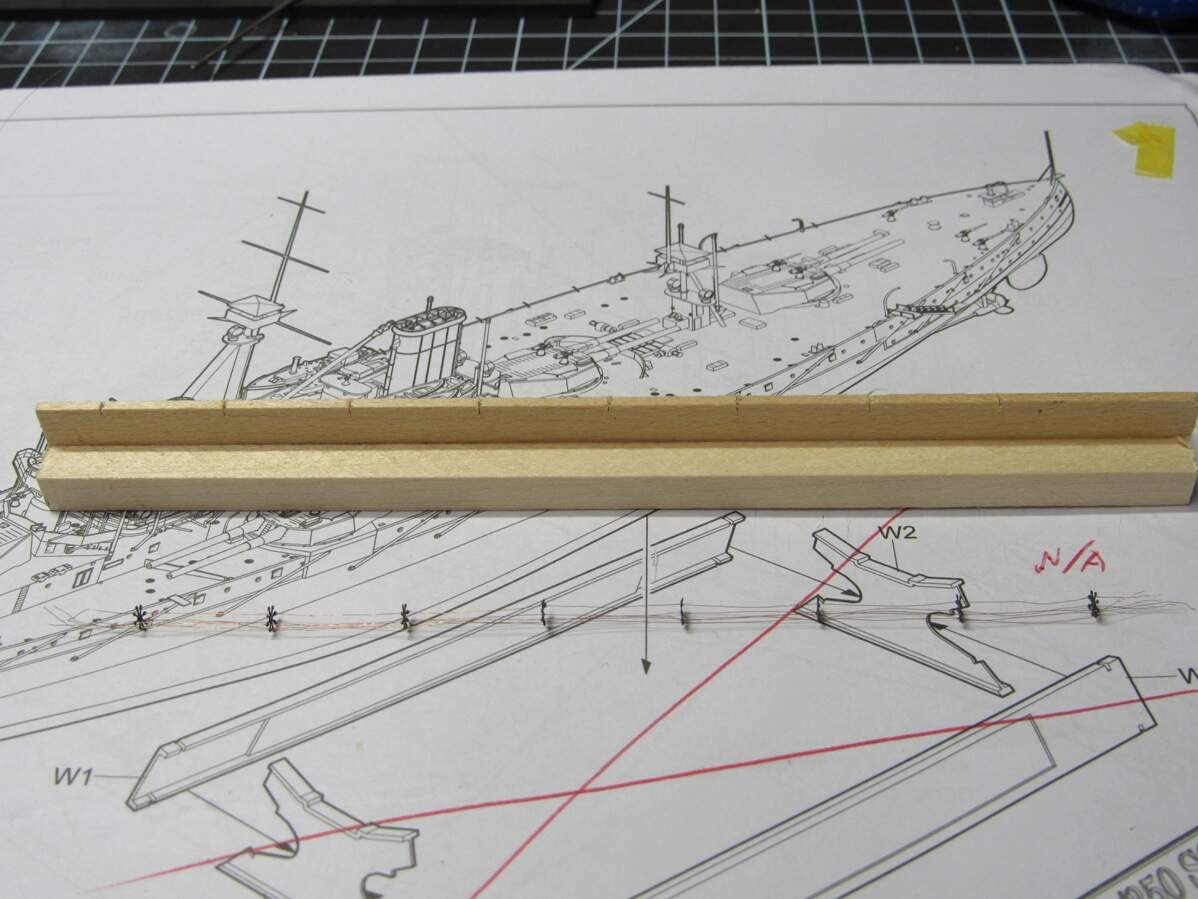
This proved to be too flimsy, Spreaders were constantly popping out and tilting around… Back to the wood one.
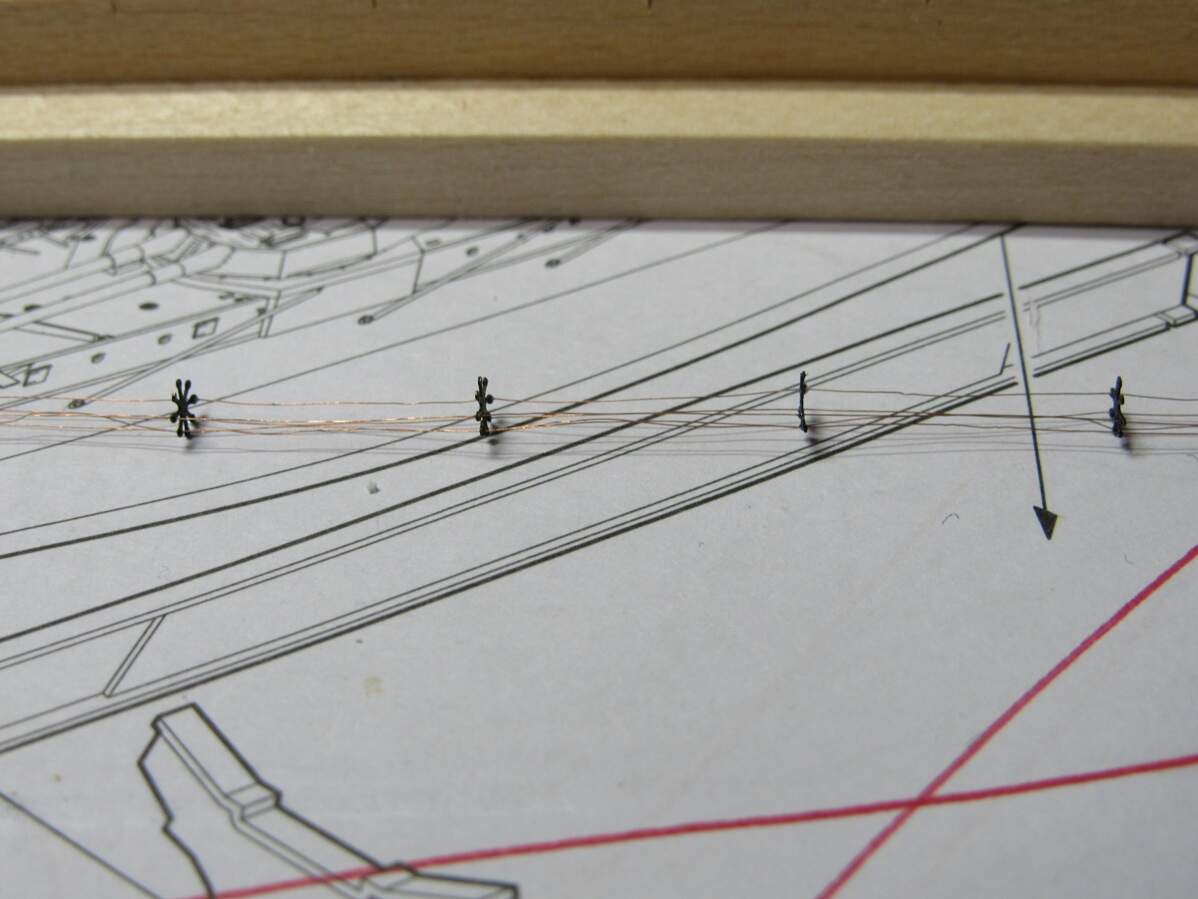
This proved to be much more stable and easier to work with. Got my 5 runs complete and glued in, took off and ran the last 3 without much issue. Twisted the ends and I had one run completed.
The biggest issue is the pre-painting I did of the spreaders. Poking out tiny holes with an airbrush needle when the wire won’t go is tedious work. I have the fret soaking in some acetone right now, so that should clear it up.
So to anyone looking to do spreaders, build a jig, don’t pre-paint them, and use thin copper wire as the rigging.
3 more to go
James, nice work on those aerials and spreaders… I’ve got the Lord Nelson in the stash and have put off starting her for that one reason… Am thinking of using piano wire in an experiment to see how that goes ![]()
Hi James, What Russ said. Nice job on the cage aerials. Will be good to see them in place.
Piano wire, no there is a thought.
Cheers, Si
Ditto. Lovely fix on the spreaders…Cheers Mark
Thanks guys. Russ, piano wire might work better. The copper wire has a tendency to crinkle up a bit, especially when doing the last 3 runs once I remove the assembly from the jig. Depending on the stiffness, my only concern would be bending them in together at the ends. Definitely worth a try.
Anyway, I got two spreaders done. It’s going faster now that I know what I’m doing,
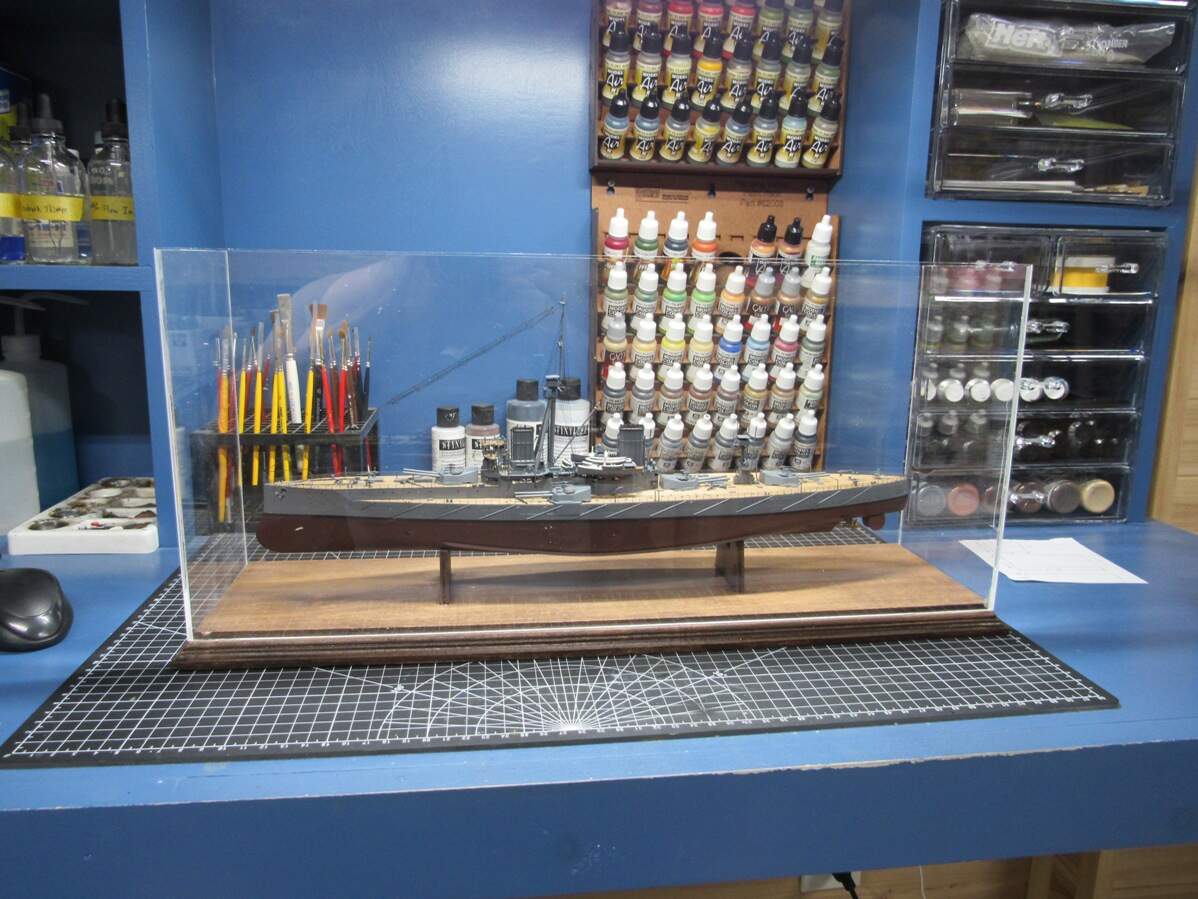
And here’s the WIP of the plexiglass case. Still need to do the top… and clean it,
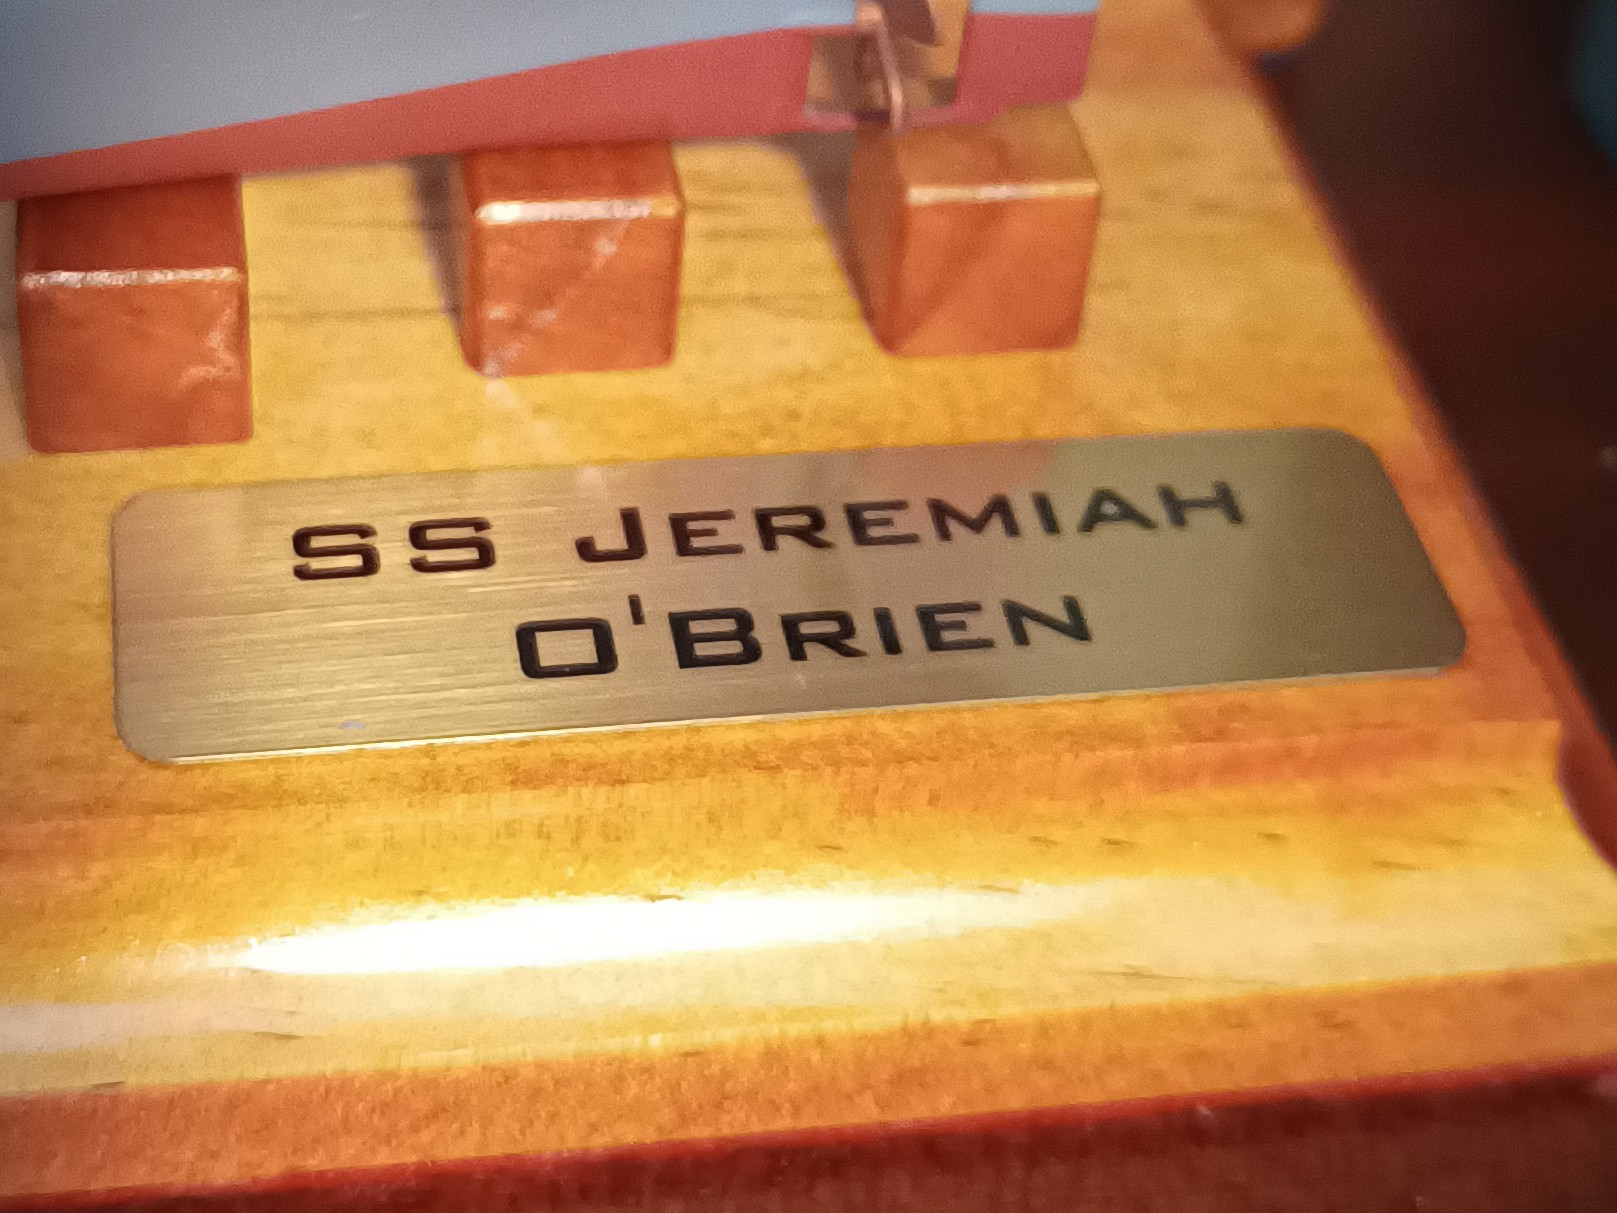
Question for you guys, how do you do your nameplates? I’ve got it primed black and was thinking a drybrush with a metallic color to make the lettering pop out.
I “contract” the nameplates out to a local trophy shop, who etch brass plate according to the artwork I provide (nothing fancy, just a power point file).
It’s fairly inexpensive and makes the build look quite handsome ![]()
The brass plate did cross my mind, the only argument I have against it is my impatience. I’m just so close to wrapping this one up. Earlier this morning I gave the dry brushing technique a go and got this,
I guess it’s acceptable. I could always retrofit a brass plate in there at some point. I may even redo the plexiglass to actual wood and glass when I get a more proper woodworking shop setup.
Last two spreaders done and mounted on my amazing painting jig
Barring any major catastrophe, this build should be done tomorrow. I’m gonna need to build a couple tanks after this to calm my nerves
I wonder if a black pin-wash around those raised letters would improve the contrast?
I wasn’t thrilled about the brass paint getting on the background, so it would probably help, but with the finish line so close my impatience struck again, and I left it as is.
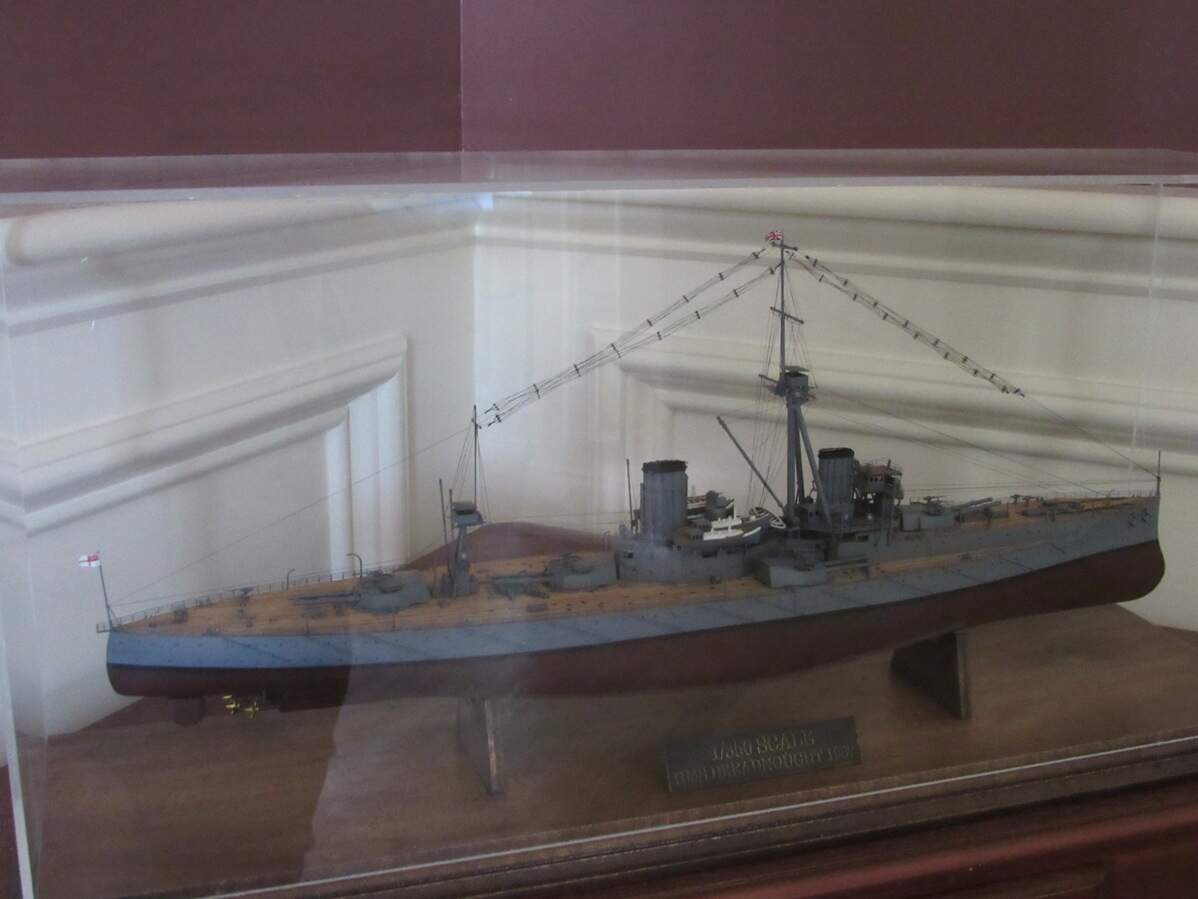
And speaking of finish lines, she’s done. Last two spreaders were added, flags were placed on aluminum foil and mounted on, nameplate glued in place and display case completed. Living room is a little more classy now,
It was fun. Definitely looking to do more ships in the future
James,
My compliments on a beautiful and, at least by my own standards, FAST finish! Also, displaying her in a corner like you have done is inspired, really sets the model off. Well done!
Thanks Tim, that corner needed something and I figured a ship would be perfect. It’s the only reason I bought that table. Room for one more kit on the bottom shelf too.
Very nice job and perfect setting for display - very posh !
compliments to your building skills and a very worthy display case and place ![]()
![]()
Looks fantastic. Lovely to see another dreadnought built up!
Congratulations to your commissioning of HMS Dreadnought! She looks spot on, great work, and the display is just first class! Fine work, in every aspect!
Cheers
Jan
James,this is a brilliant entry to the salty side of the hobby! ![]()
Nothing adds class to a living space more than a ship! ![]()
Looking forward to seeing what you’ve got planned next!
For the first ship build this is a fantastic job. It looks like you have been doing them for years. Brilliant details and finishing. Top marks all round and a build to be very proud of. ![]()
![]()
Congrats my Friend. You have done her justice. Beautiful work…Cheers Mark
James, that is a beautiful job, from the build, to the rigging, to the presentation!,
Look forward to the next one!
Frank