As there isn’t much online about this kit/conversion for builds, I figure I will share this build here as well as on Fine Scale Modeller for anyone else interested in the Hobby Boss and Perfect Scale Modellbau Barracuda conversion set. I’m no professional, so let’s see how it goes. To this kit, I am adding:
- Friulmodel Tracks
- Real Model “Short” PE Slat Armor
- PSM Leopard 2 Rear Grille
- Leopard Workshop Canadian Aerials
- Real Model Canadian Tank Crew Nr2
- Karaya Models Leopard Tow Cables
- Legend Productions Leopard C2 (MEXAS) Stowage Set
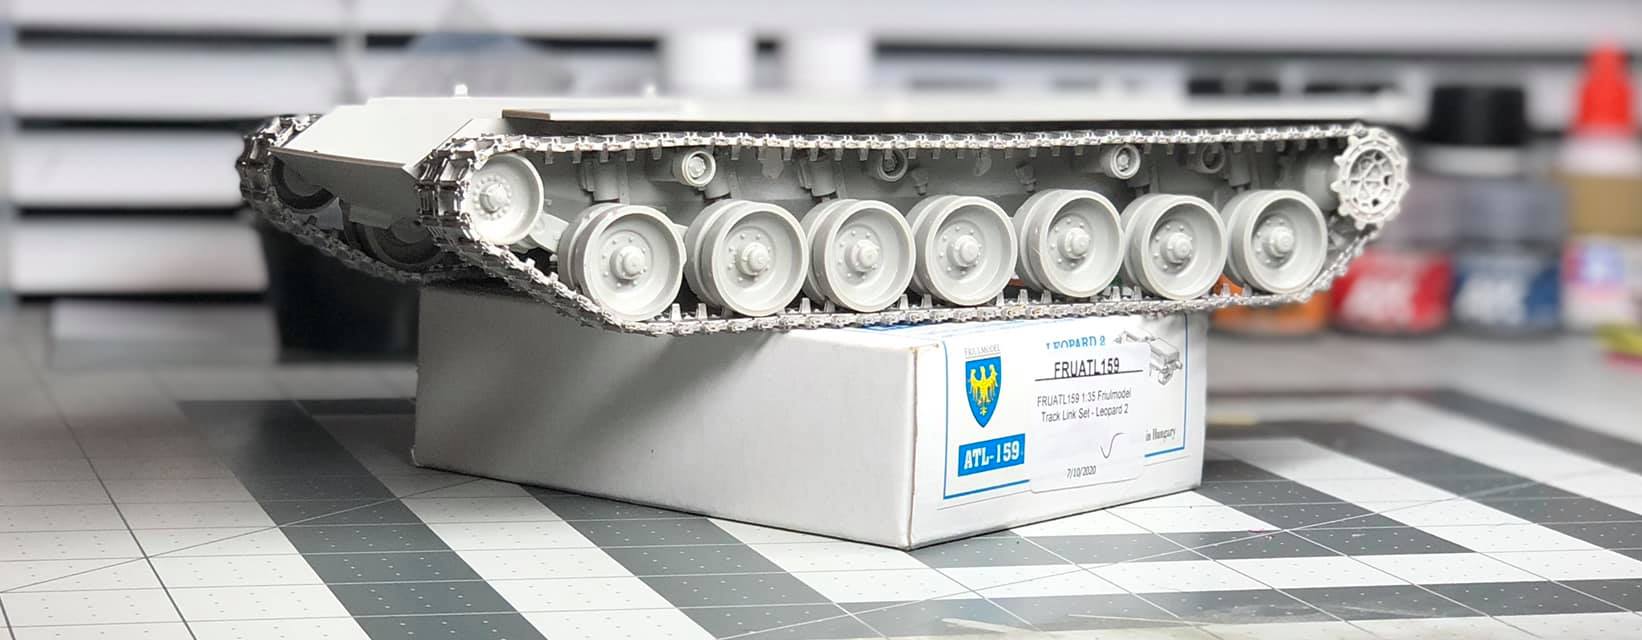
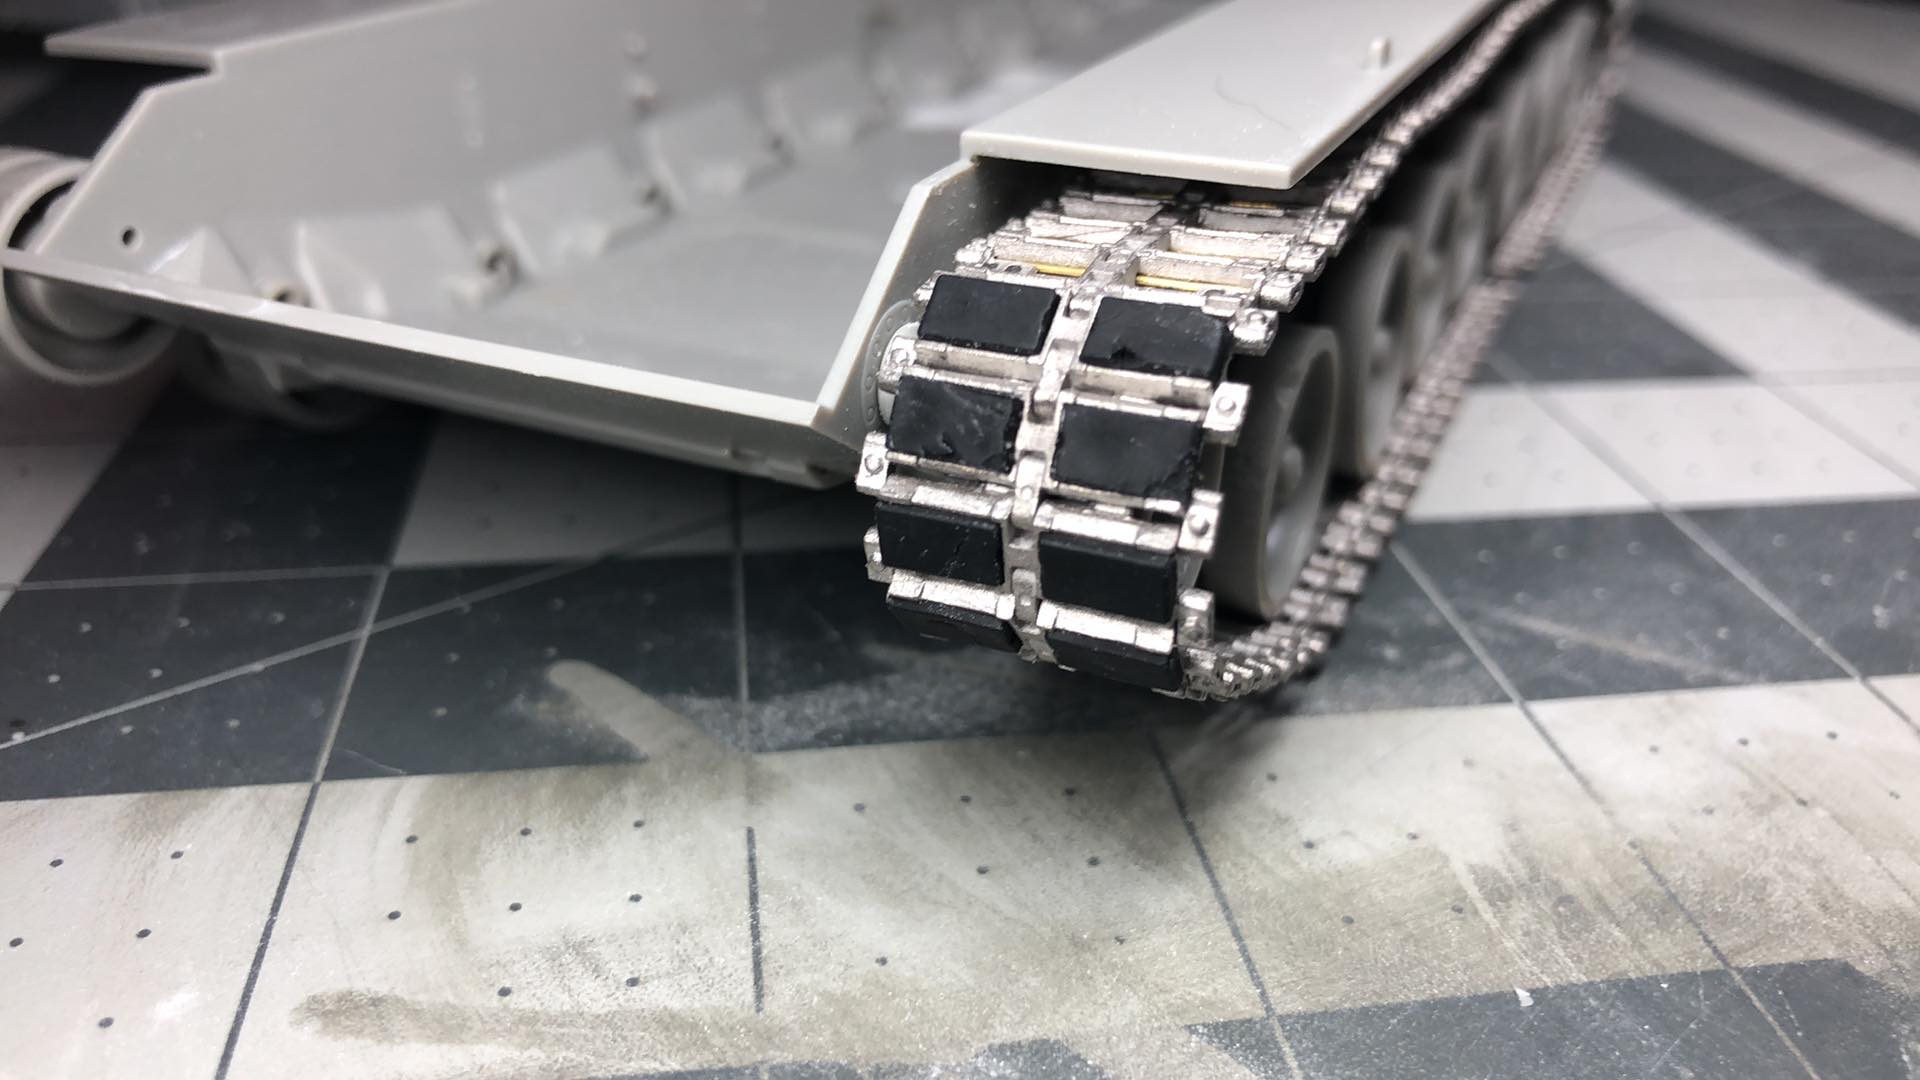
I started with the Friulmodel Tracks, and this was my first time using metal tracks. The Hobby Boss kit comes with simple rubber band tracks and mine had a lot of flash, so this replacement was much needed. They came out really good, and will be burnished later on. The rubber pads will be glued in after, but as you see, they can be chunked up to give a really great, in scale appearance.
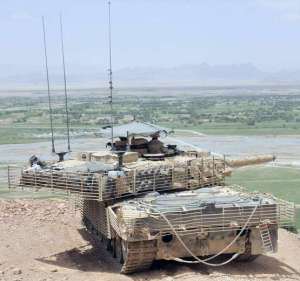
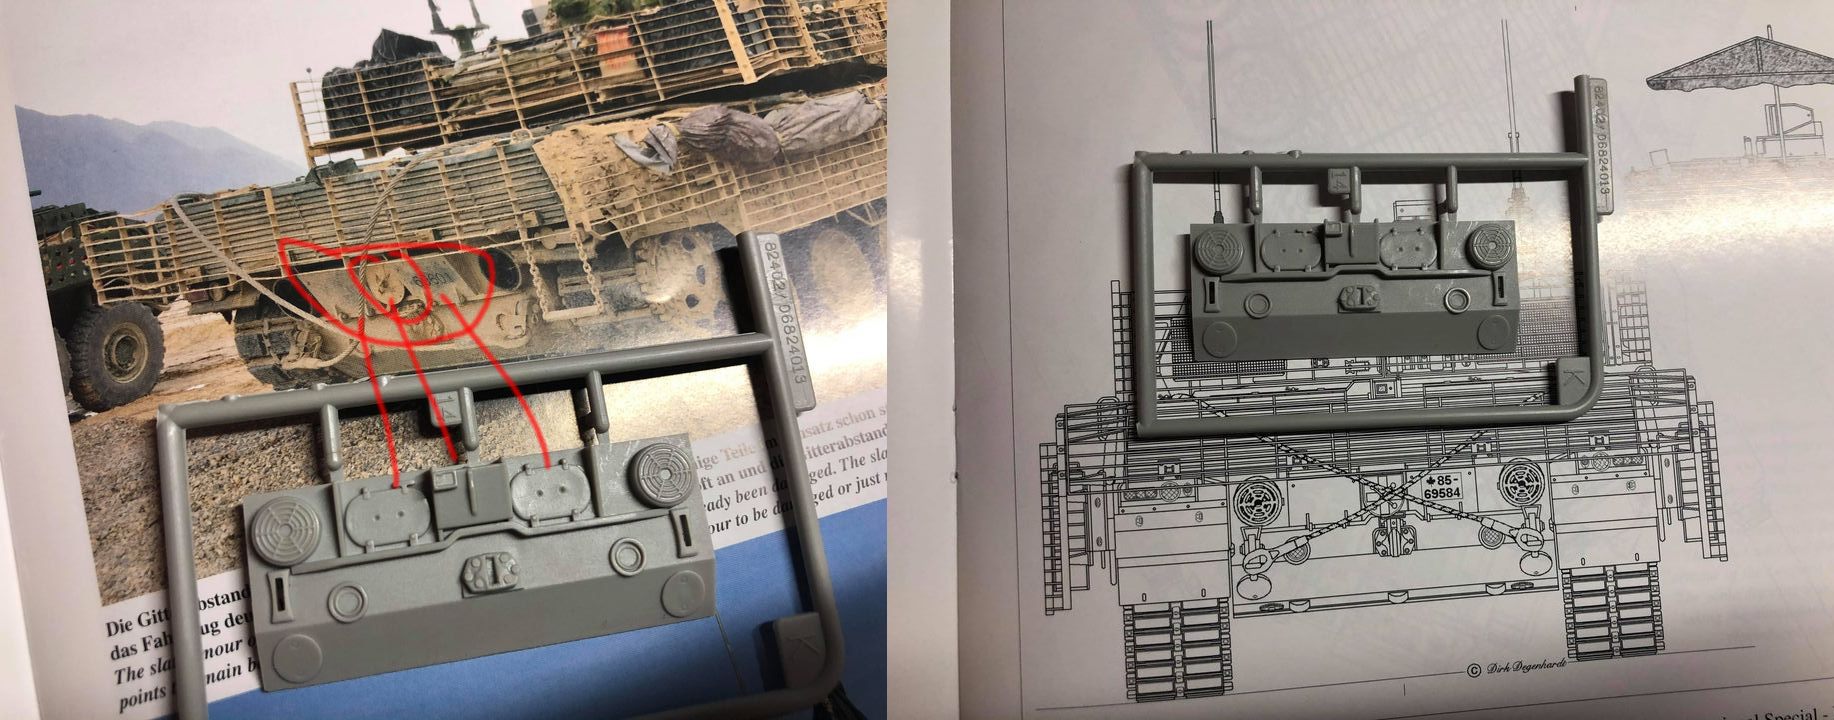
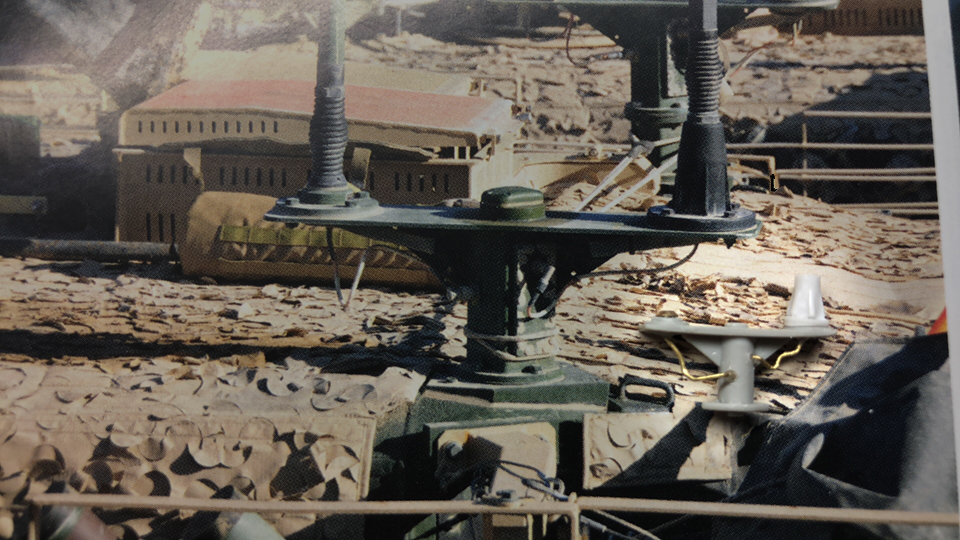
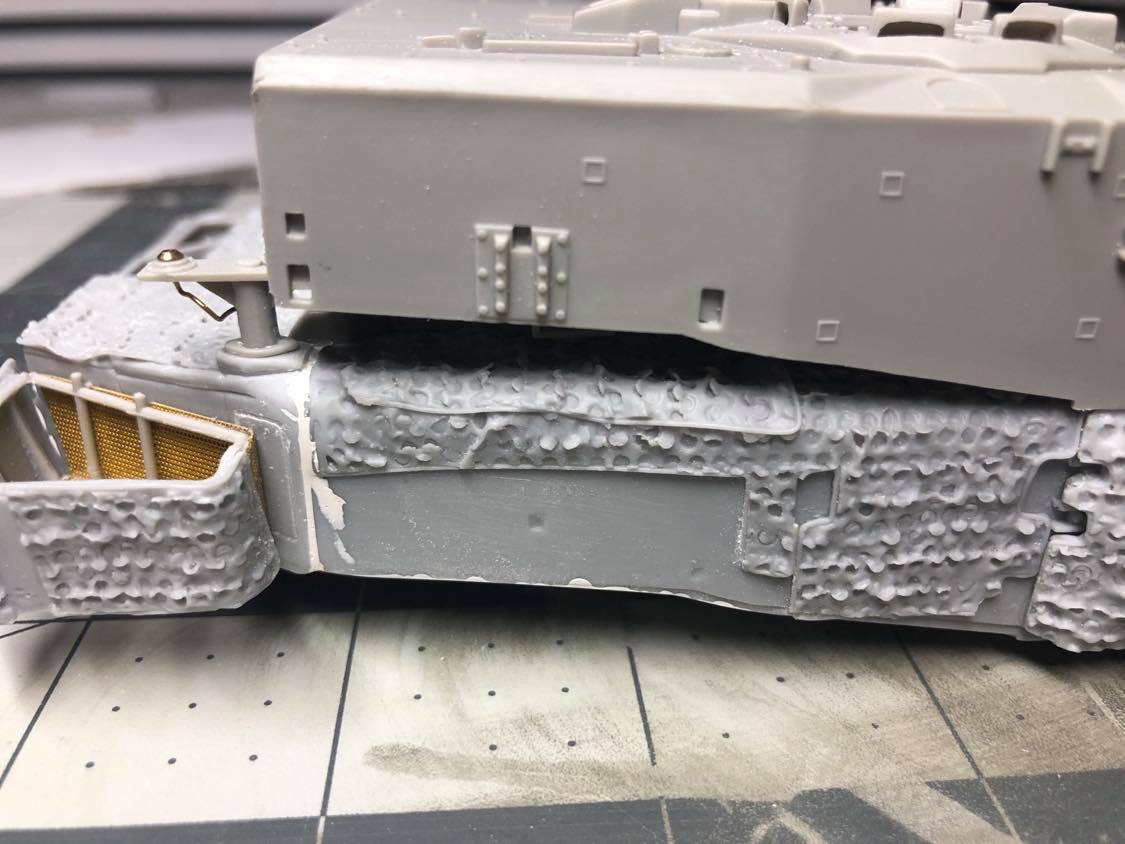
For the lower hull there are actually two extra holes for the return rollers, which you probably can’t see when the side skirts are on, but nonetheless I filled them with stretched sprue and putty and sanded smooth. Minor annoyance. The provided rear plate, part K14, is not accurate and I replaced it with the PSM Leopard 2A4M CAN “Heckplatte”, which is accurate for the 2A6M CAN, sort of. Let me explain…
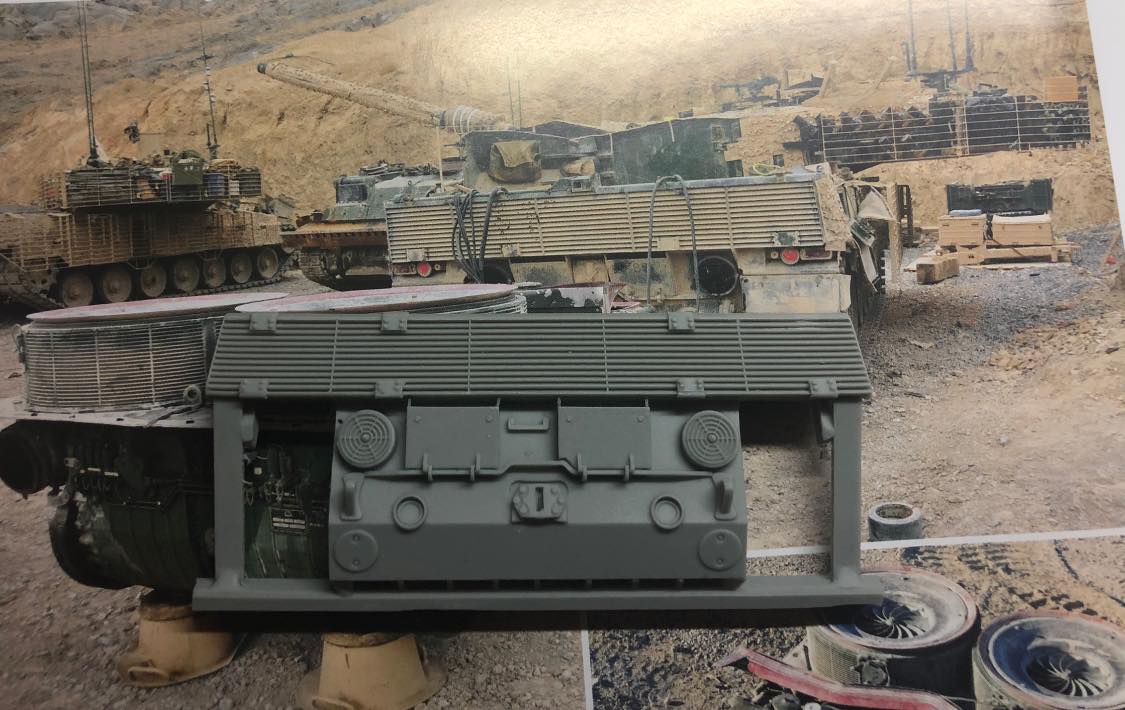
As you can see, compared to the Canadian 2A6’s that served in Afghanistan, the part is all wrong. and the details on the rear exhaust are shallow and just generally bad. In place of the boxes (for which a decal must go) are those little oval ports (no idea how you add the decal onto that), and the backup camera is on the big box in the centre, which is also wrong. The updated piece from PSM is much better.
The rear grille is molded onto the upper hull of the Barracuda conversion kit, and also molded onto this PSM part too. There is far too much resin to remove from the conversion kit, so I opted to remove the rear plate from the grille. This was the better idea, because those 8 flat mounting points on the grille needed to be removed (see on the very top right, I started removing one of them and it was tricky to re-scribe the slanted grille slots). The slat armor adds them to the grille later on in the build, so no need for them. By bashing these two parts together, I used a fair amount of putty to fill the gap between the upper and lower hull. At the moment, the upper and lower hull are not connected, so there are still gaps on the left and right, of course.
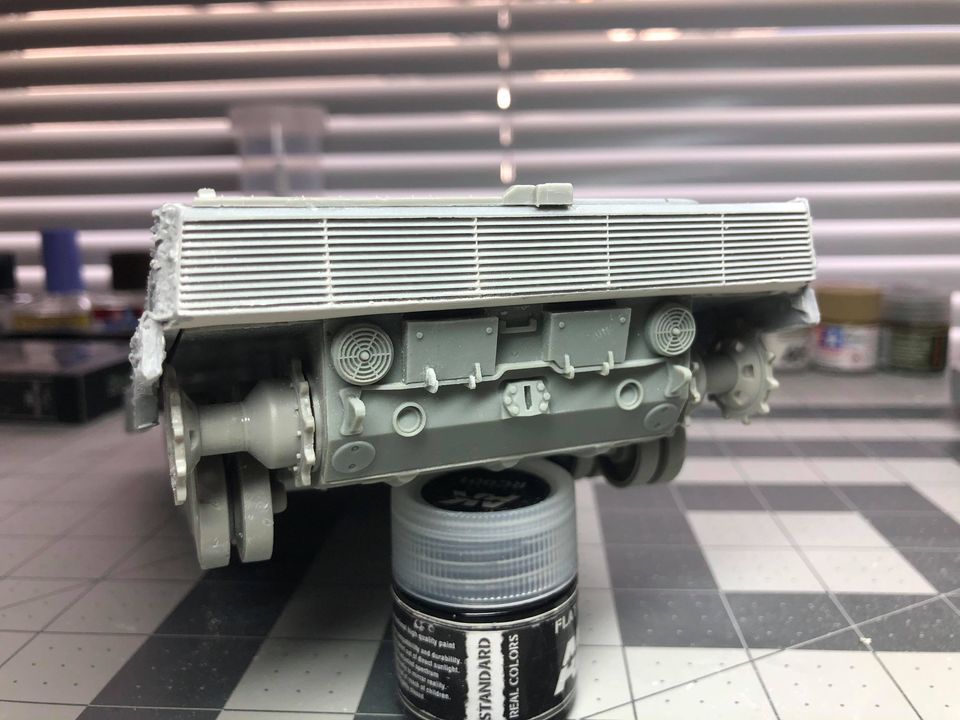
This looks much better. However, dumb me broke the little resin hinges off of the left box, so I had to try (and I say try, because the left hinge looks… meh) and scratch build some new hinges. I also had to remove the supports that connect the boxes to the upper hull, which I will add later once I fit the upper and lower hull. Another pitty with the Hobby Boss kit is the backup camera provided, it is literally just a blob of styrene. I can’t find any stand alone PE to fix this, so I’ll just leave it alone for the minute.
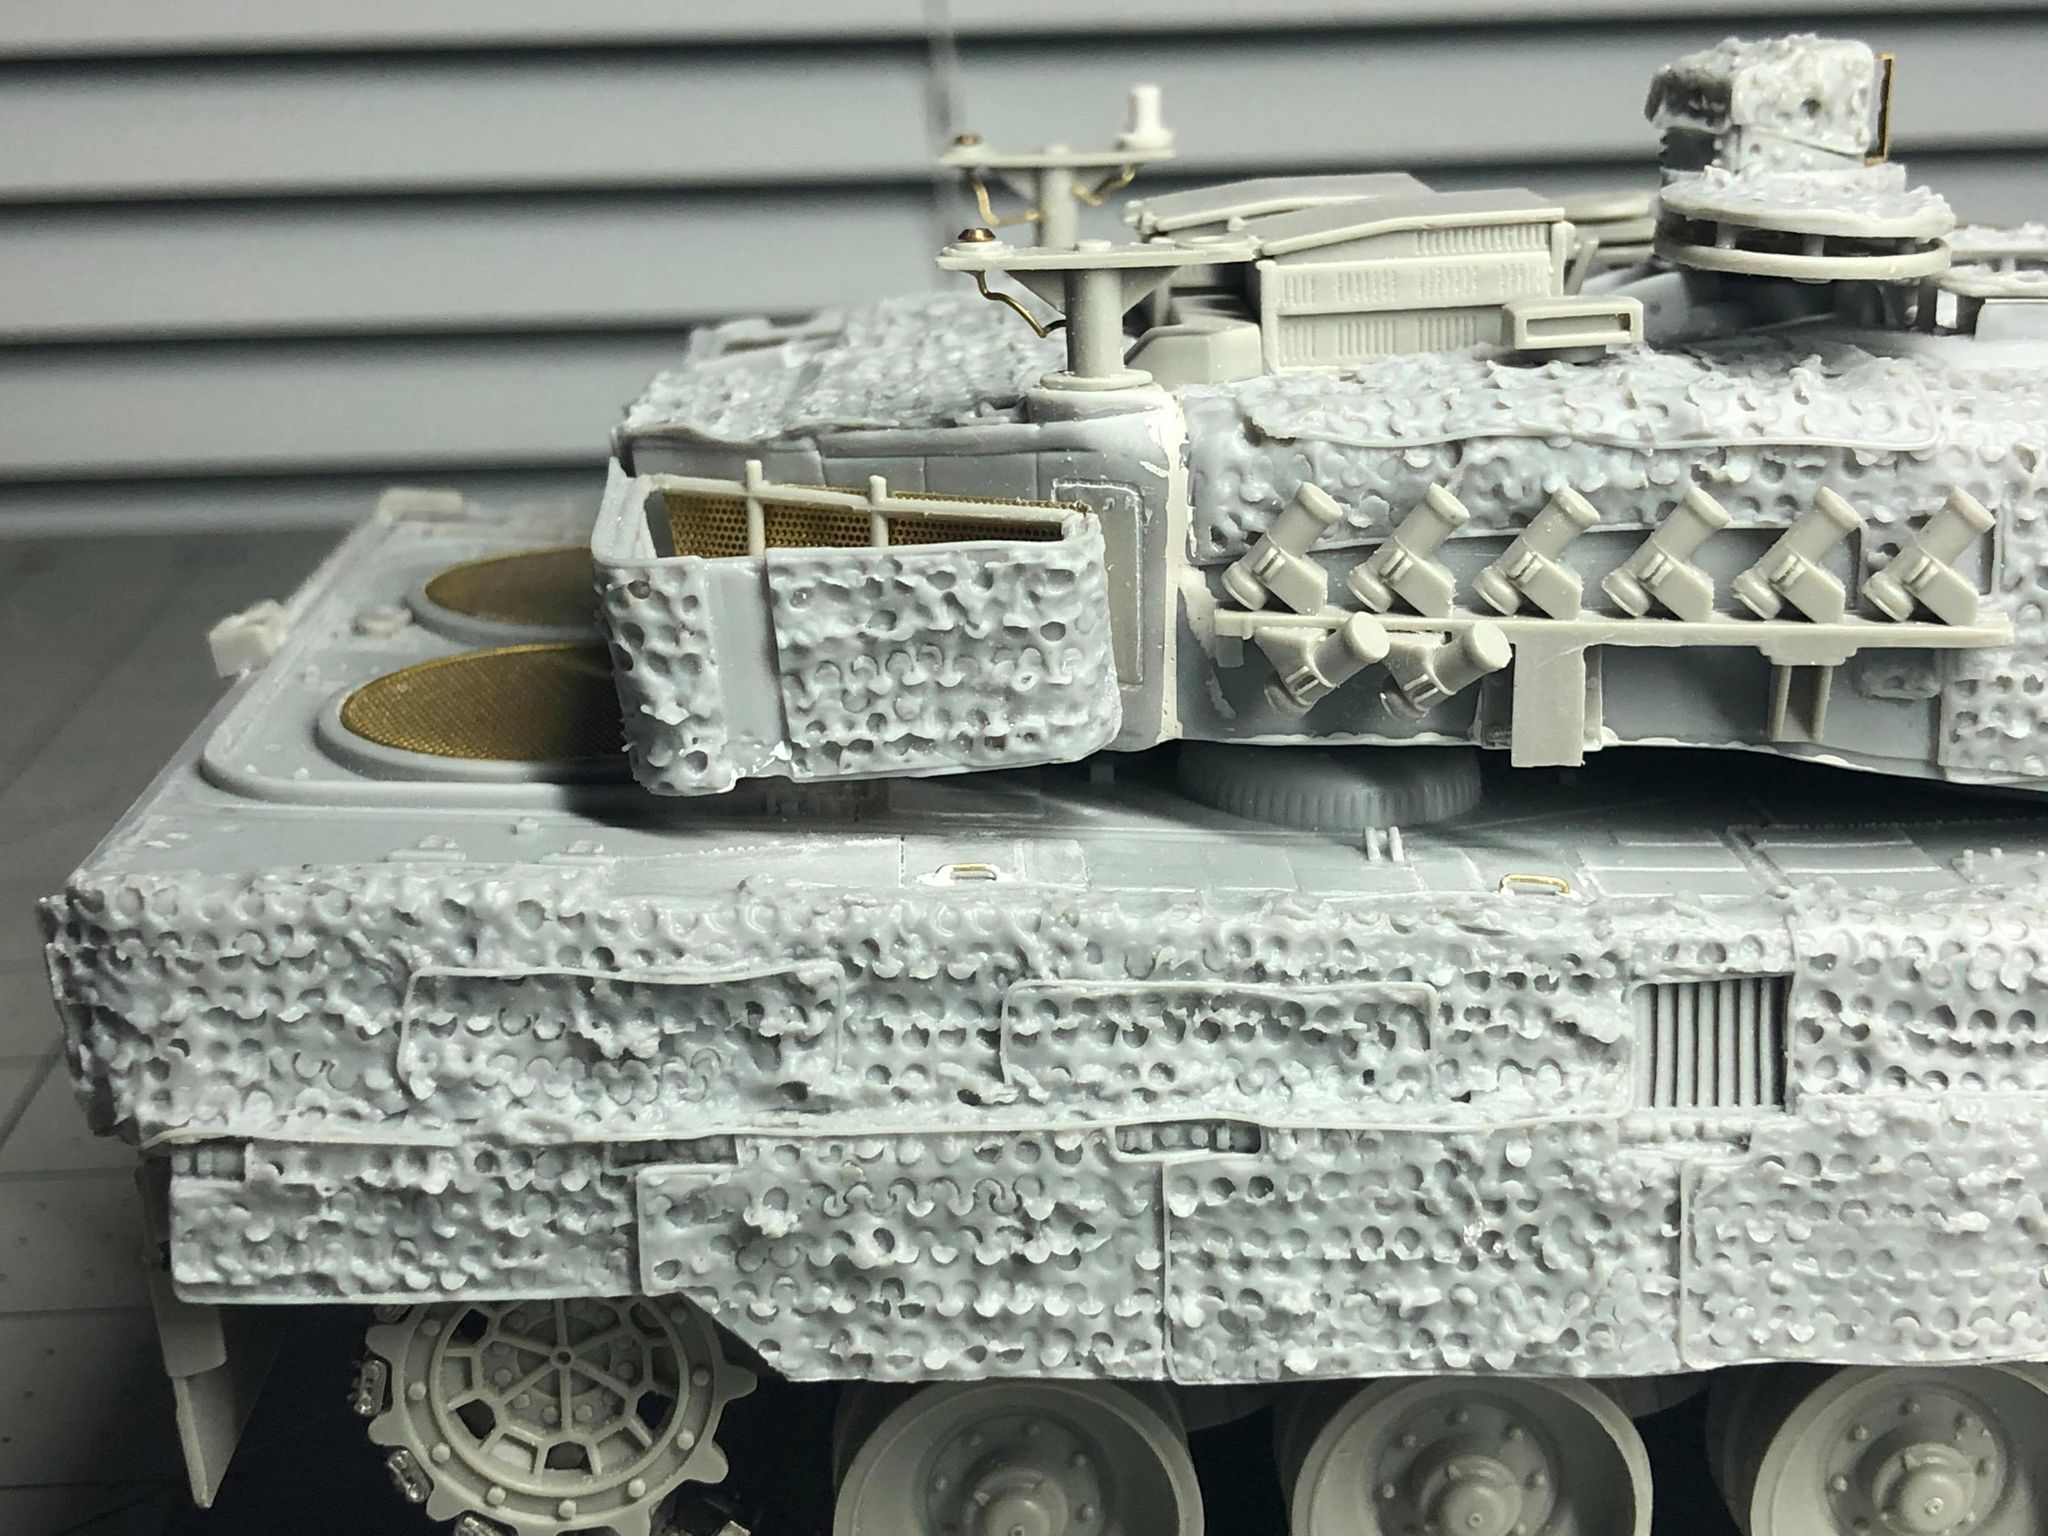
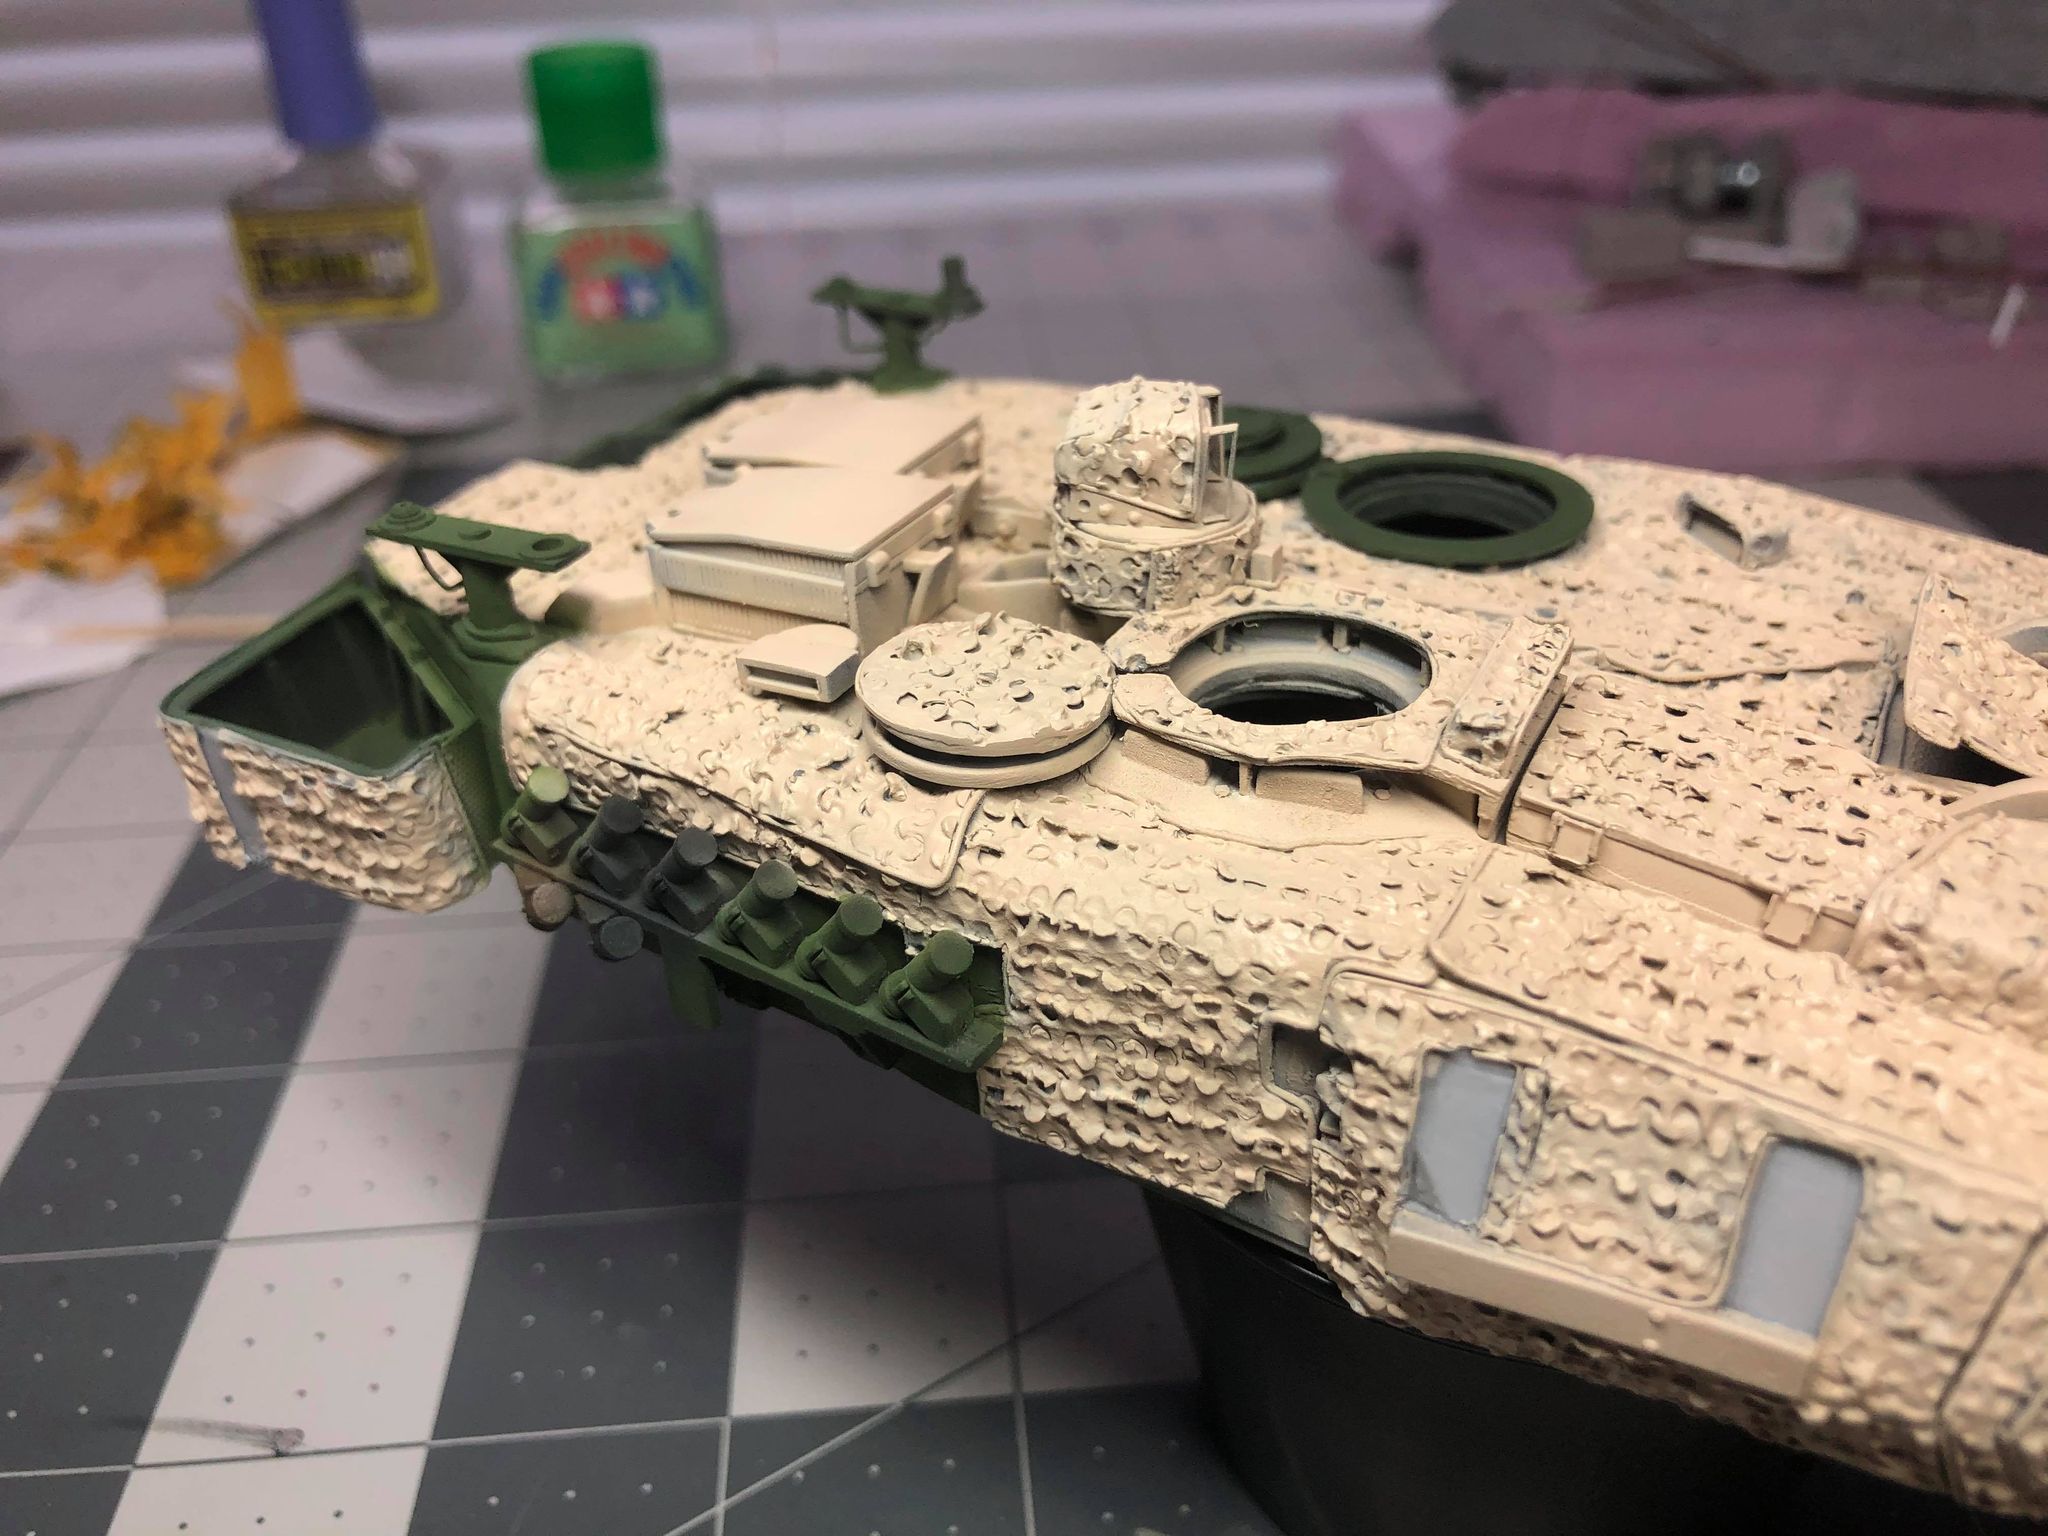
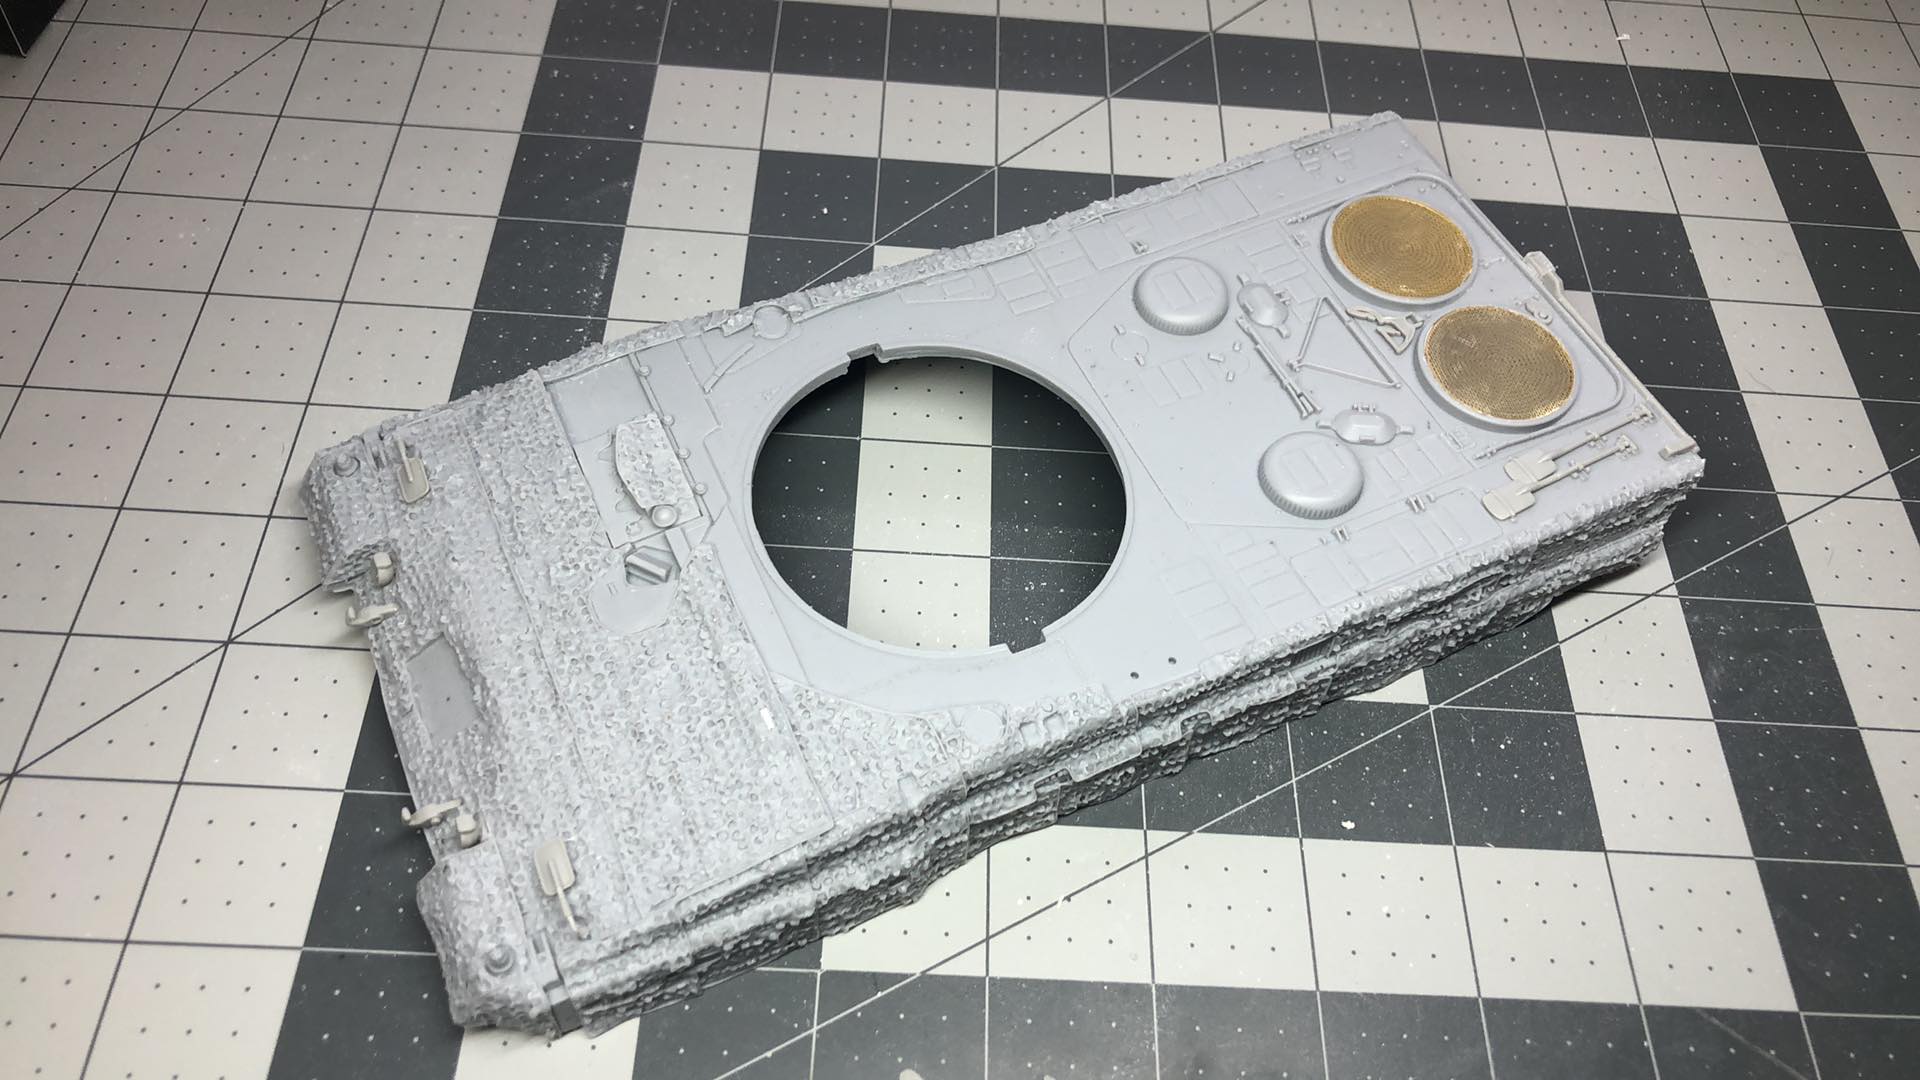
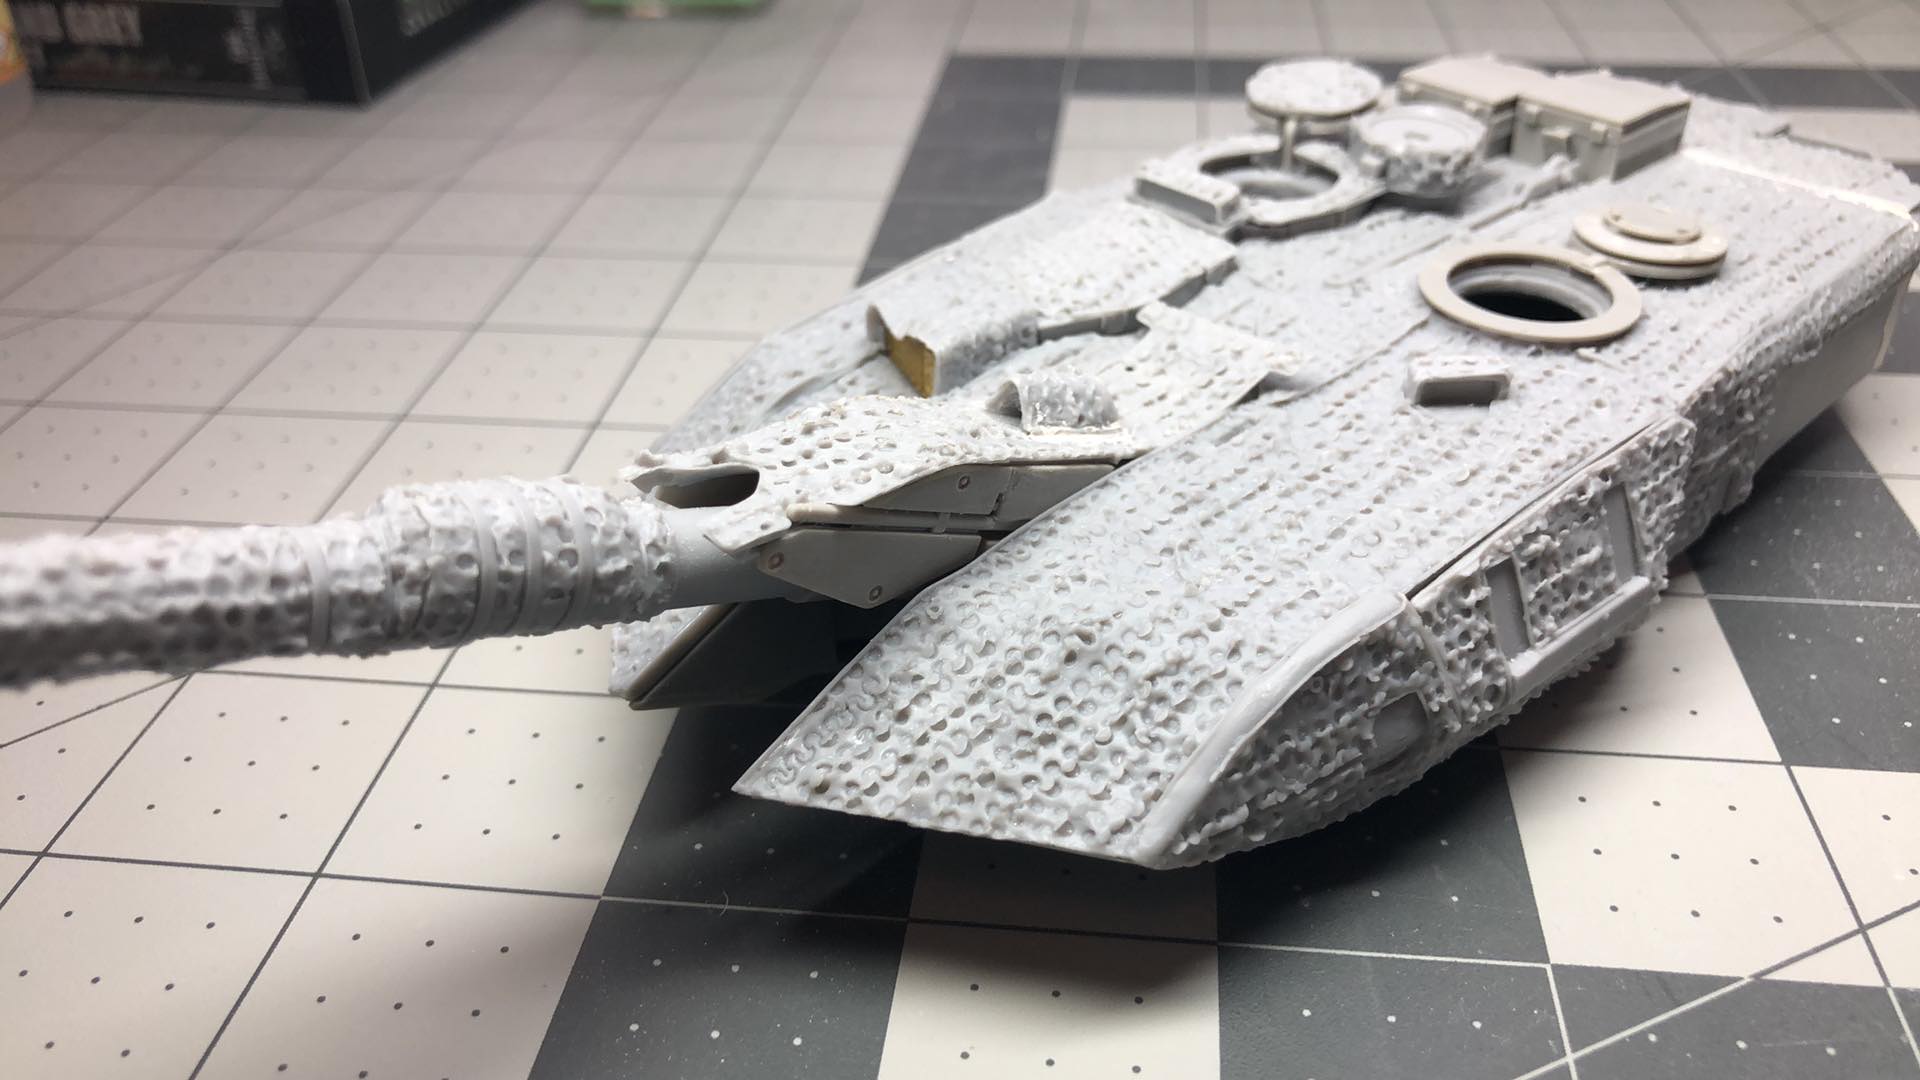
The upper hull has great detail, the PSM Barracuda conversion really is the only reason you should be building this Hobby Boss kit. If you want to build a Leopard 2A6M CAN, do yourself a favour and get the Leopard Workshop 2A6M CAN Conversion for the Tamiya Kit. Anyhow, the tools were an issue here. According to my reference photos, the shovels were too short and didn’t line up with the clamps molded onto the hull. Because I don’t have any PE or 3D printed clamps, that meant increasing the length of the shovels. I had to add a few mm to both shovels. I also noted that in my reference photos, the tool on the rear behind the engine fans (I don’t actually know the name) was often incomplete (i.e the handle was missing from the metal piece). This was good news for me, because it was also too short. So it was cut up, and modelled as such. The PE from the Hobby Boss kit is actually really nice, and fit perfectly on the upper hull fans. Take note that on the upper hull, the anti-slip patches are void of any anti-slip texture. I will try to correct this later with MIG Anti Slip paste. Lastly, the support for the gun barrel is also incorrect, but I couldn’t be bothered on this… The mount where it is hinged should be wider and welded the fan shrouds (like in the Meng 2A7 kit).

For the front of the upper hull, the instructions were not helpful. The lights on the Hobby Boss kit are a three piece assembly. But on the conversion set, the barracuda covers all of the light mount. So part M2 was useless and I only used part B51 and B21. Part B51 needed to be cut and sanded to fit, but in the end i think it came out decently. Same goes for the tow hooks, part B39, they need to be modified to fit, and the pre-moulded spots on the upper hull needed to be adjusted with a file.
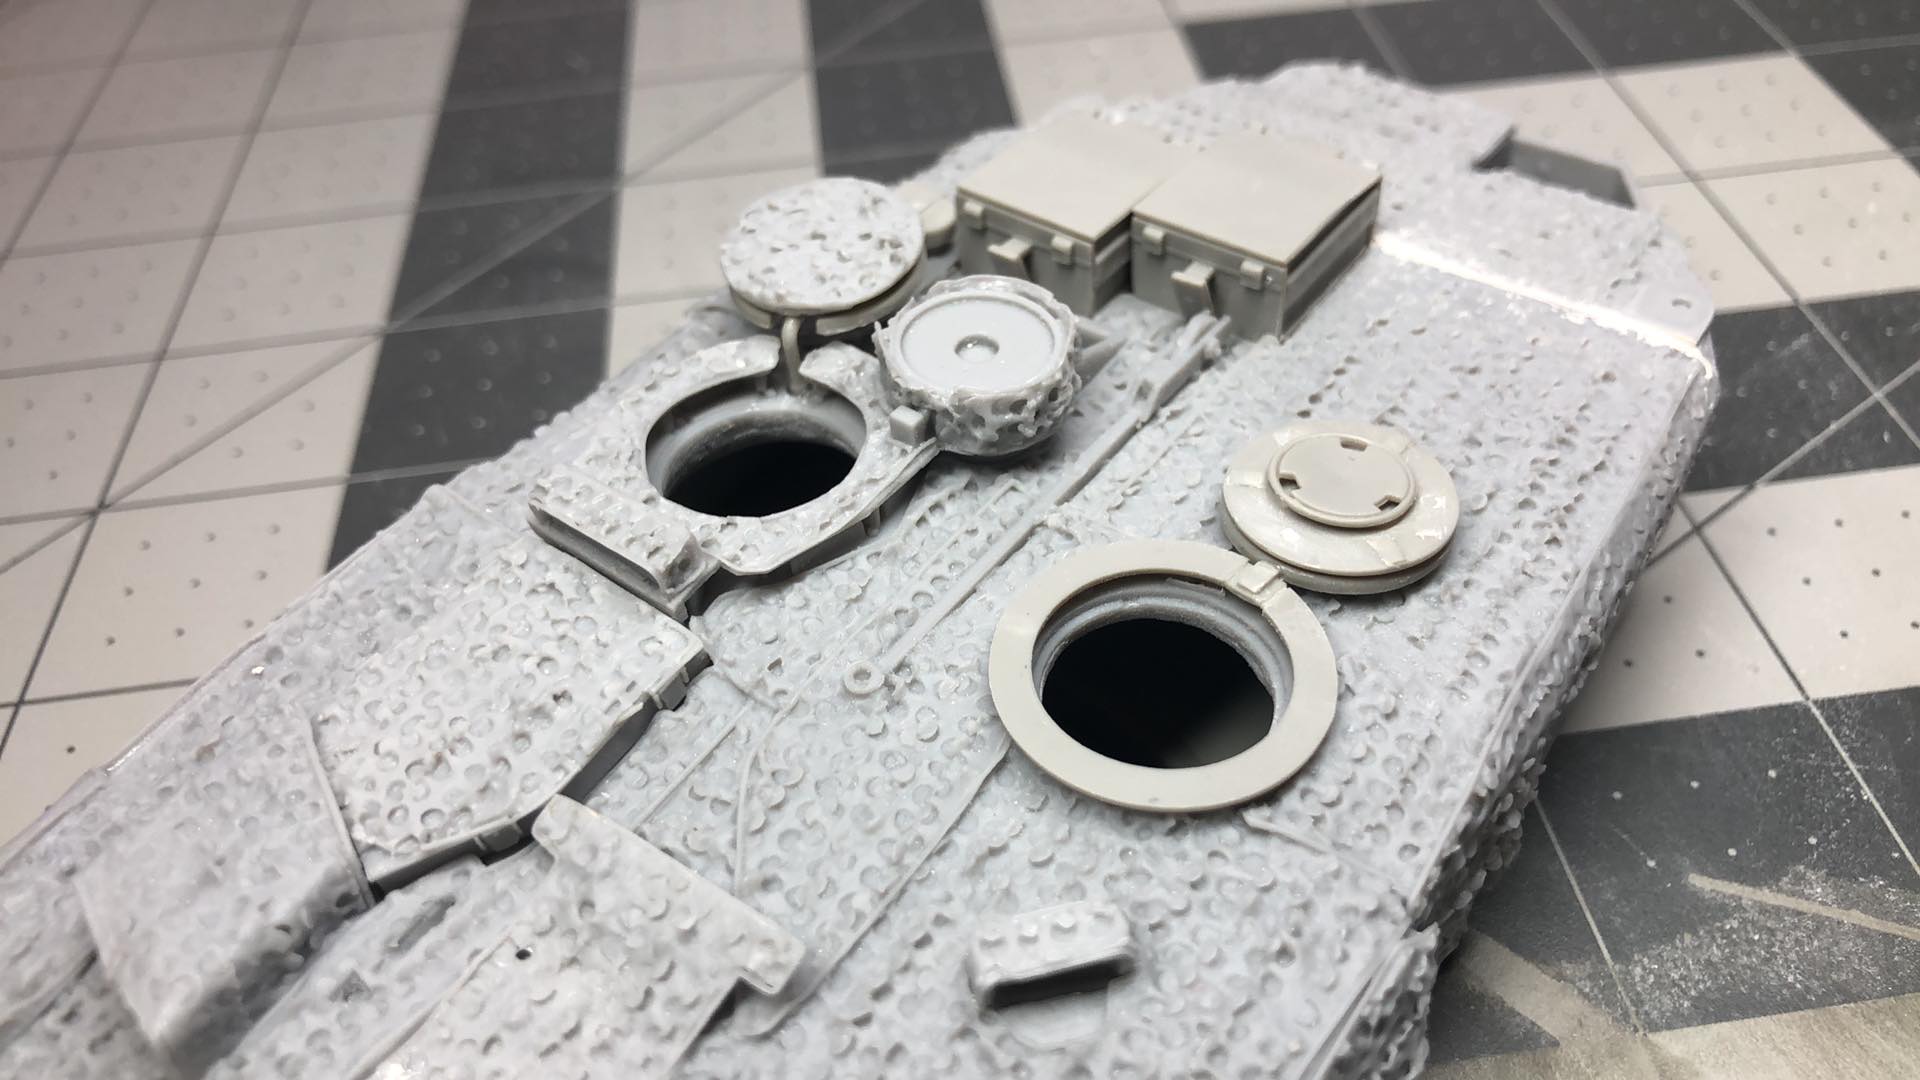
The mirrors, I modelled in the closed position, and looked at far too many reference photos than I want to admit. I think I got their placement accurate and I had to cut away most of the mounting bracket. The PSM instructions have you model the drivers hatch open (perhaps for clearance issues with the turret?), but this is going into a diorama, and that just won’t work. The spare track placement is correct, but beware that the instructions don’t call out to attach the bracket the track actually attaches to, which is odd (it is on the B sprue).

Now, onto the turret. I must say, assembling the gun was a complete pain. The barracuda conversion set comes with a great looking flap that replaces part D23 on the top of the gun mantlet. It needs to be sanded almost paper thin to actually fit and work though (PSM notes this in their instructions). Here you can see I have it all taped together while it was glued. The side brackets of the assembly, parts D8 and D4, have nothing to insert into, or really grab onto when gluing, as they would normally attach to part D23. If you glue the resin conversion piece (the T shaped piece on the top) to the assembly, you will not be able to attach the gun to the turret. I just tapped it all up to ensure the lower part of the gun assembly dried straight so that it would line up later (which it did).
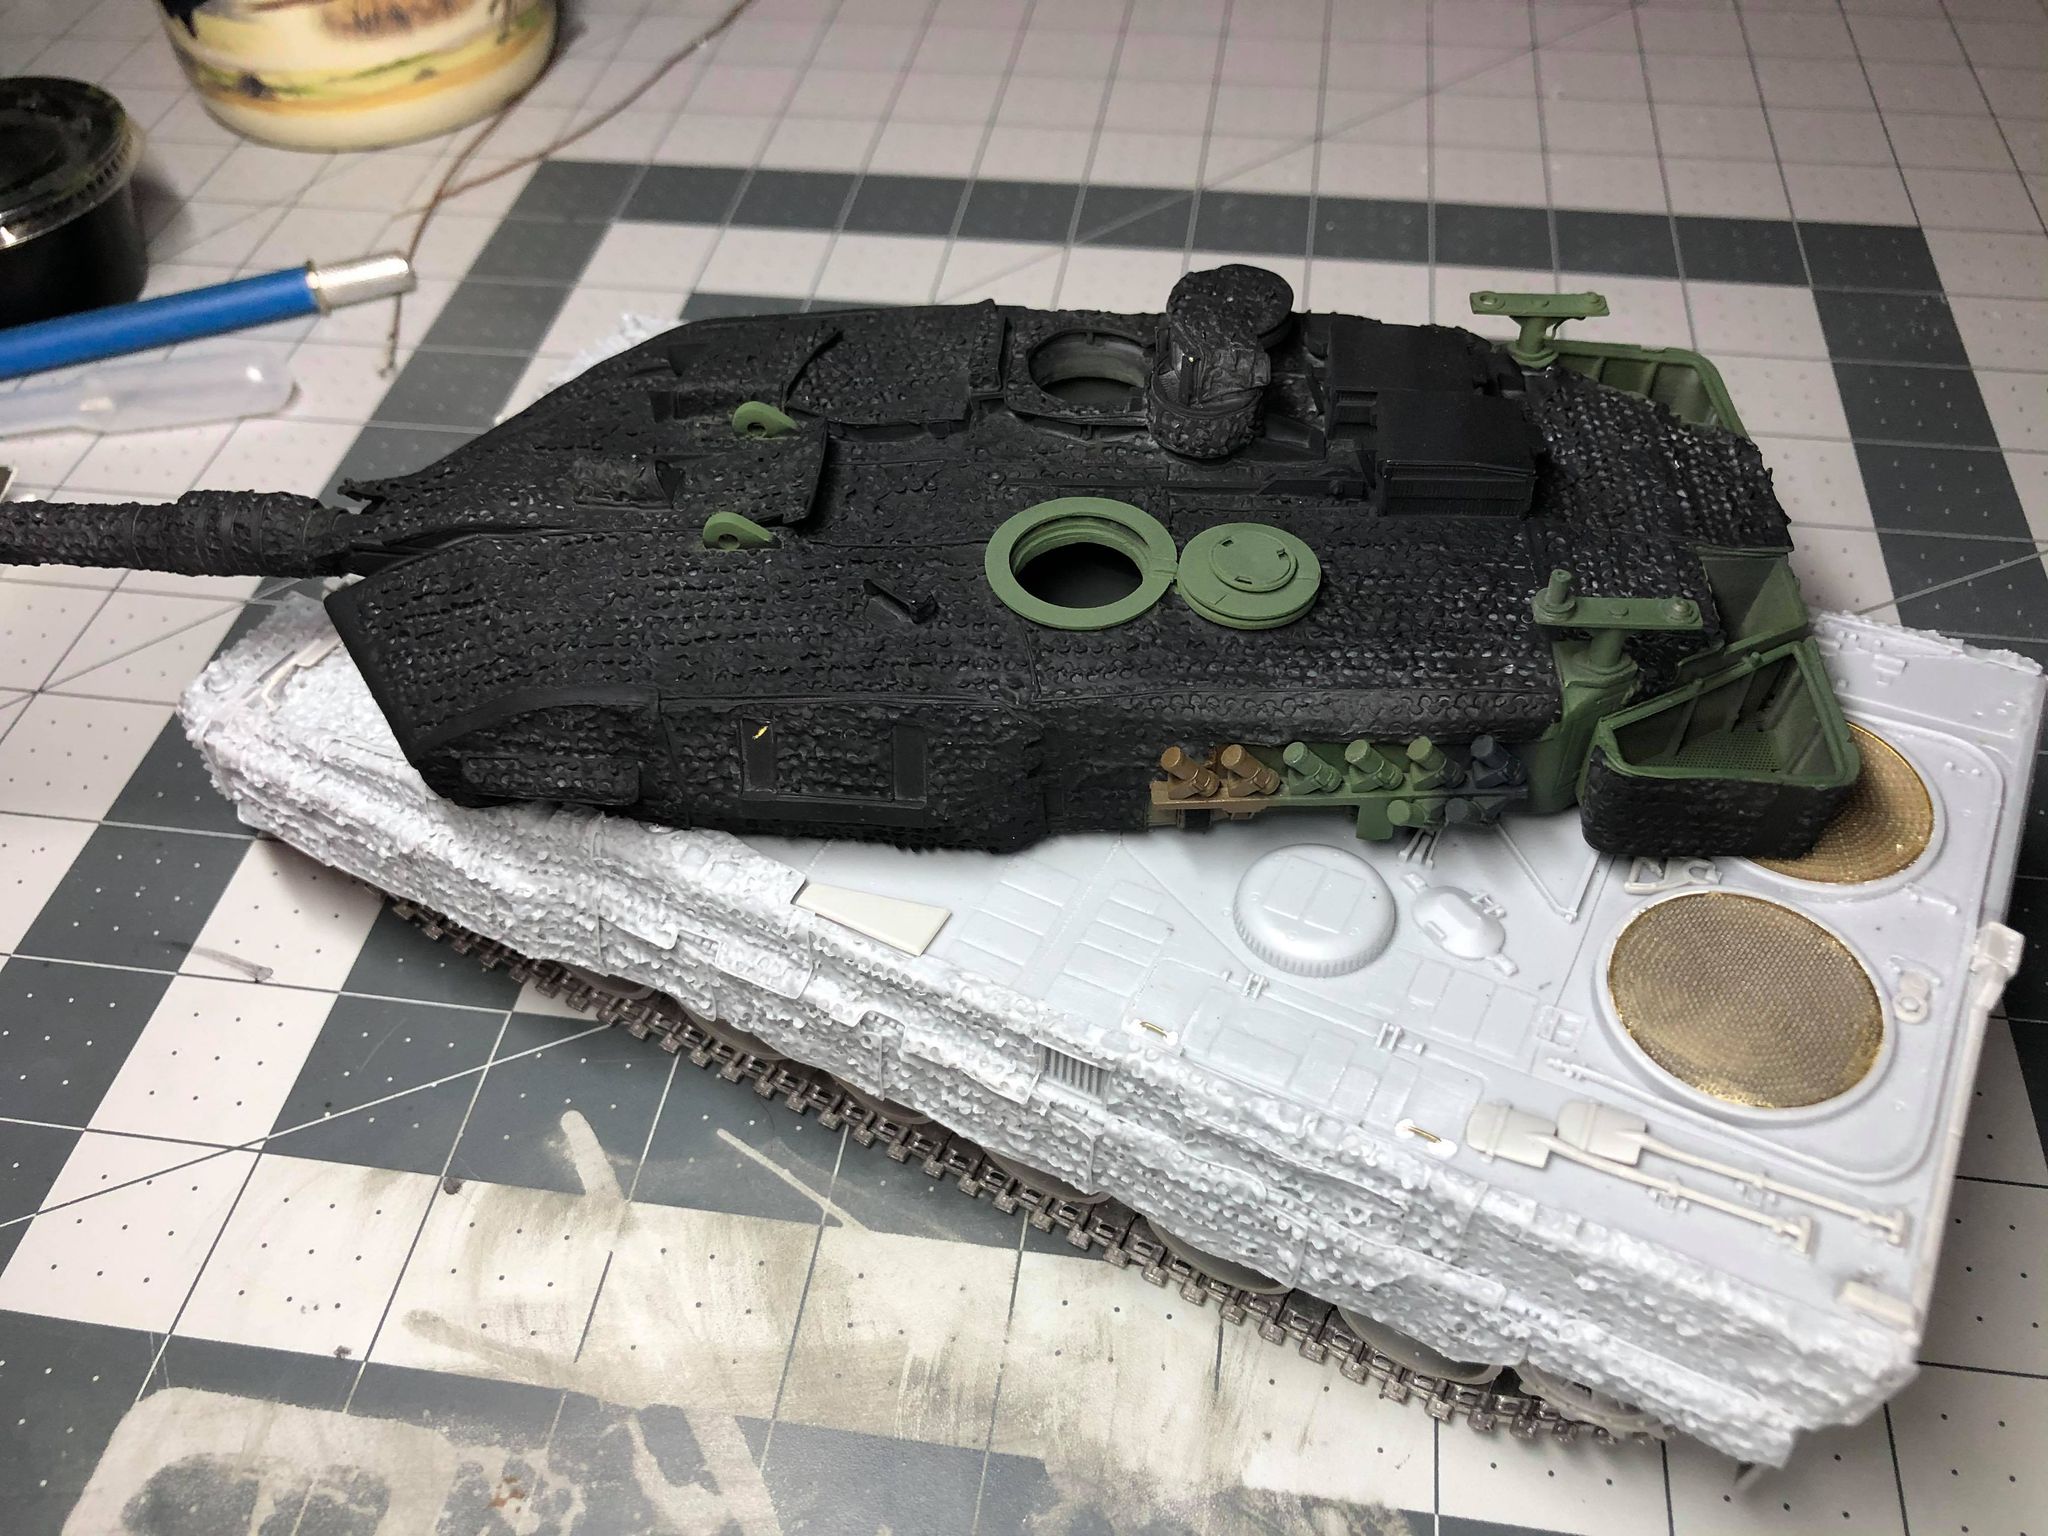
When assembled to the turret, you can see how the top flap on the gun assembly bends as the gun is raised or lowered (hence why it needs to be so thin). Now, with the turret the Hobby Boss kit really has made some big mistakes. Without reference photos or some knowledge of the Leopard 2, you will be out to sea… The instructions have you assemble the loader and commanders hatch in place of each other. The commander cupola is provided in the PSM kit and replaces kit part D22. The machine gun rail for the loader, kit part B8 is not replaced but is accurate from the Hobby Boss kit. Kit part B12 needs to be moved over to the loaders hatch, and kit part B10 needs to have the moulded detail removed (if you want to be accurate). This was important for me, because I am modelling both hatches open. I then used kit part B9 and the loaders hatch provided by PSM (which is actually the commander’s hatch, verified through reference photos). For one reason or another, the Hobby Boss kit has provided a place to put the opening mechanism for the commander’s hatch, but I could not find that part on the sprue, nor is it labelled in the instructions. So I just used a piece of sprue and “scratch built” a very simplified version. The commander’s hatch opens up and out and sits above the cupola, whereas the loader’s hatch flips open.
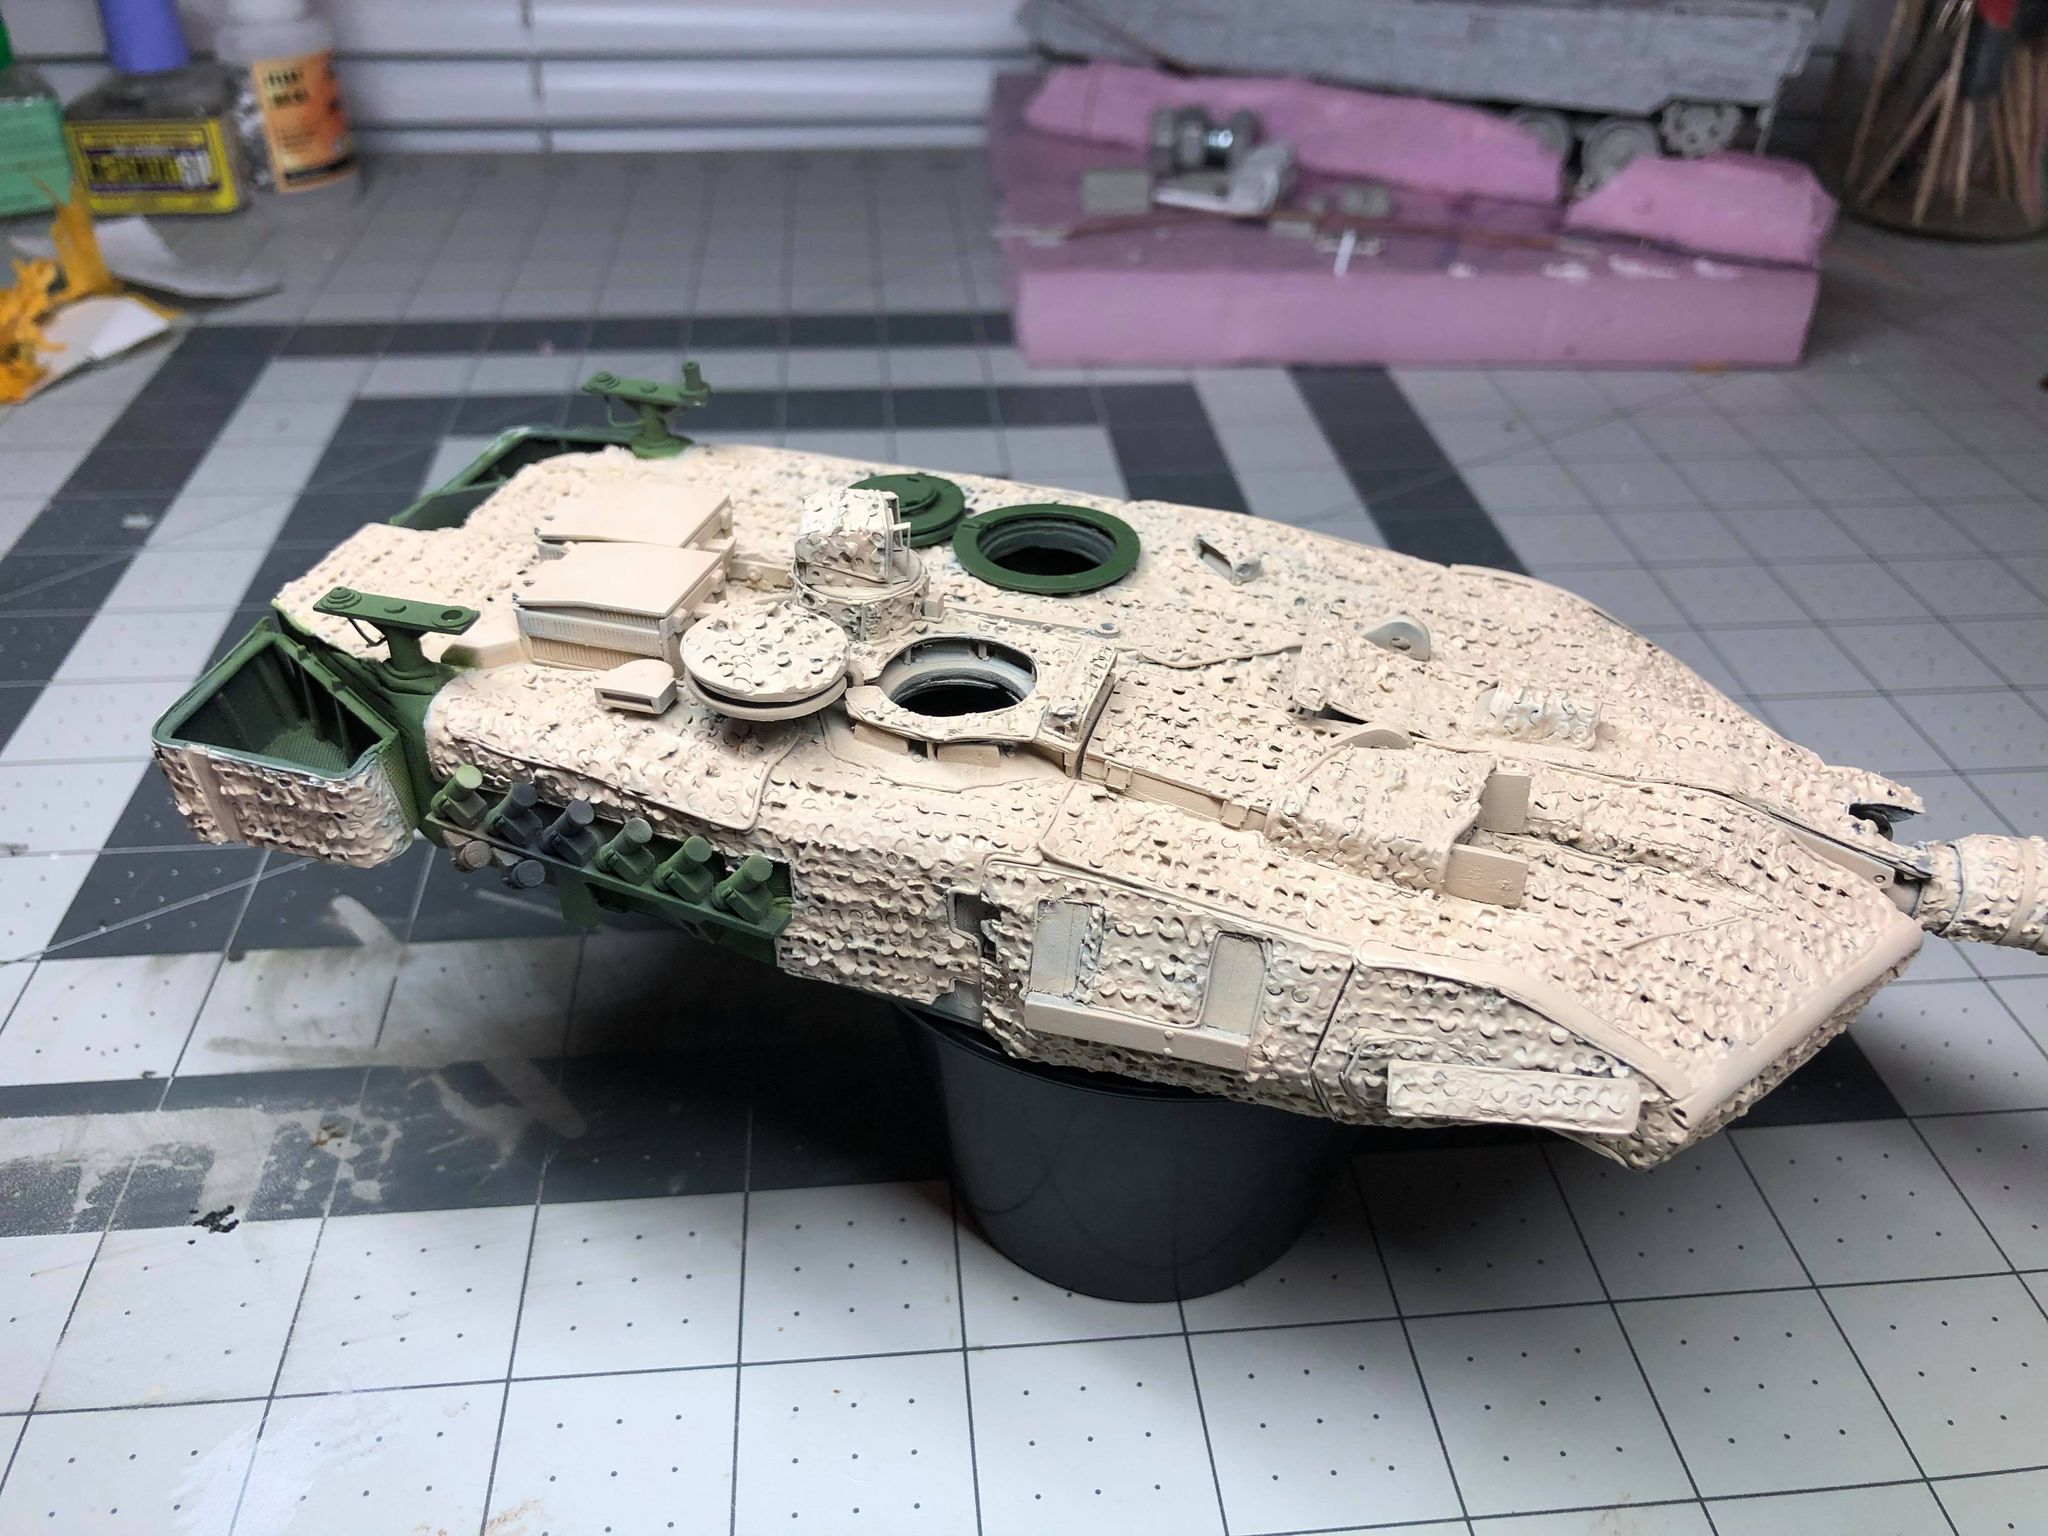
On the rear half of the turret is the basket and stowage. This is a big chunk of resin that needs to be fitted and I had to do some serious cutting and sanding to make it fit correctly (i.e not sag) and most importantly not interfere with the deck of the upper hull. That being said, the turret is rear heavy, because of the resin. I will have to add weight just under the gun to ensure it sits level on the hull. You also will need to fill a pretty decent gap, which is really an awkward spot to sand. Because the barracuda camo does not fully cover the gap, I left a panel line here, as my reference photos indicated that is accurate. The Hobby Boss cooling units are decently accurate, but I wouldn’t call them amazing (so i used them anyhow).

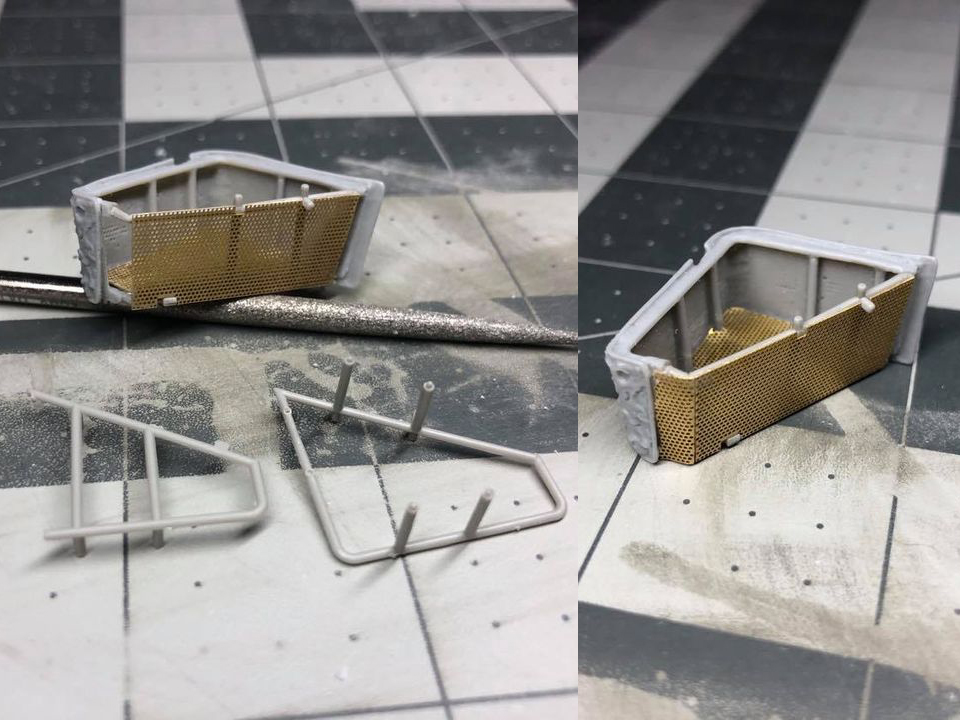
The turret baskets use the Hobby Boss provided side and lower frame and also PE. You have to cut the frame pieces so that they can be attached to the PSM part which has moulded frame supports and barracuda camouflage. When using the Hobby Boss PE, there will be a gap where the PE part 6 would normally attach to PE part 4. You won’t use PE part 4 for the inside of the basket because it is technically supposed to be moulded into the PSM part (mine is shotty at best, but you can’t place the PE on the outside of the frame supports and the inside of the barracuda, because it is moulded as one piece obviously).
The antenna brackets aren’t entirely accurate straight from the kit. The support structure is round in the Hobby Boss kit, where in reality it is hexagonal (but who is ever going to notice that anyways). I wanted to add some wires to the brackets to better detail the piece, and this was the smallest wire I had… it is probably a little bit out of scale, but whatever. I used the Leopard Workshop Canadian Aerials add-on parts for the mount, which also come with springs and brass turned antennas.

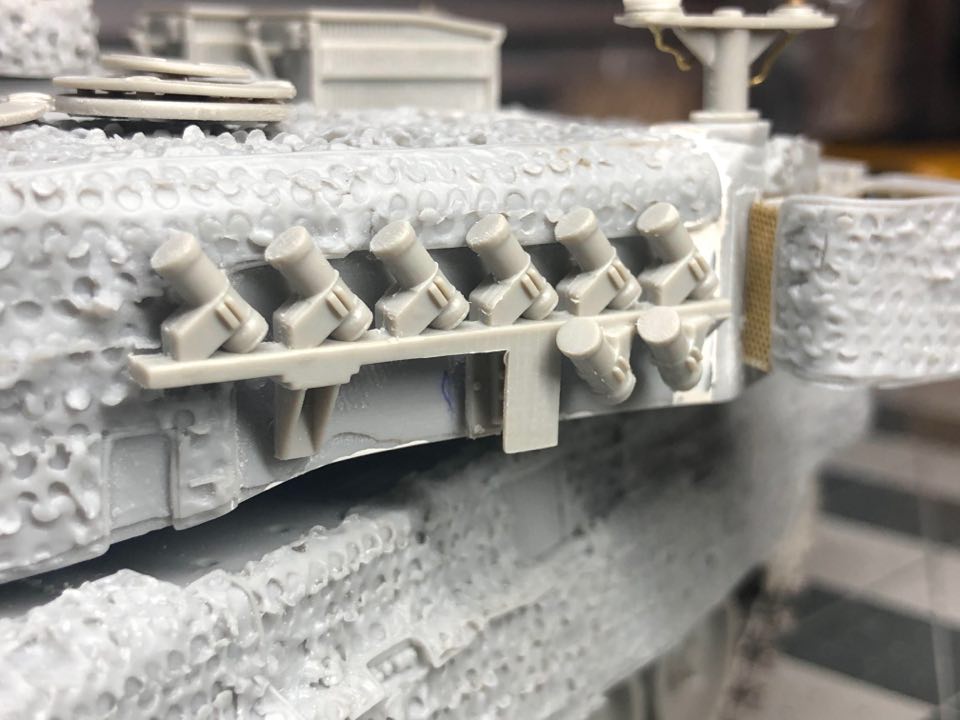
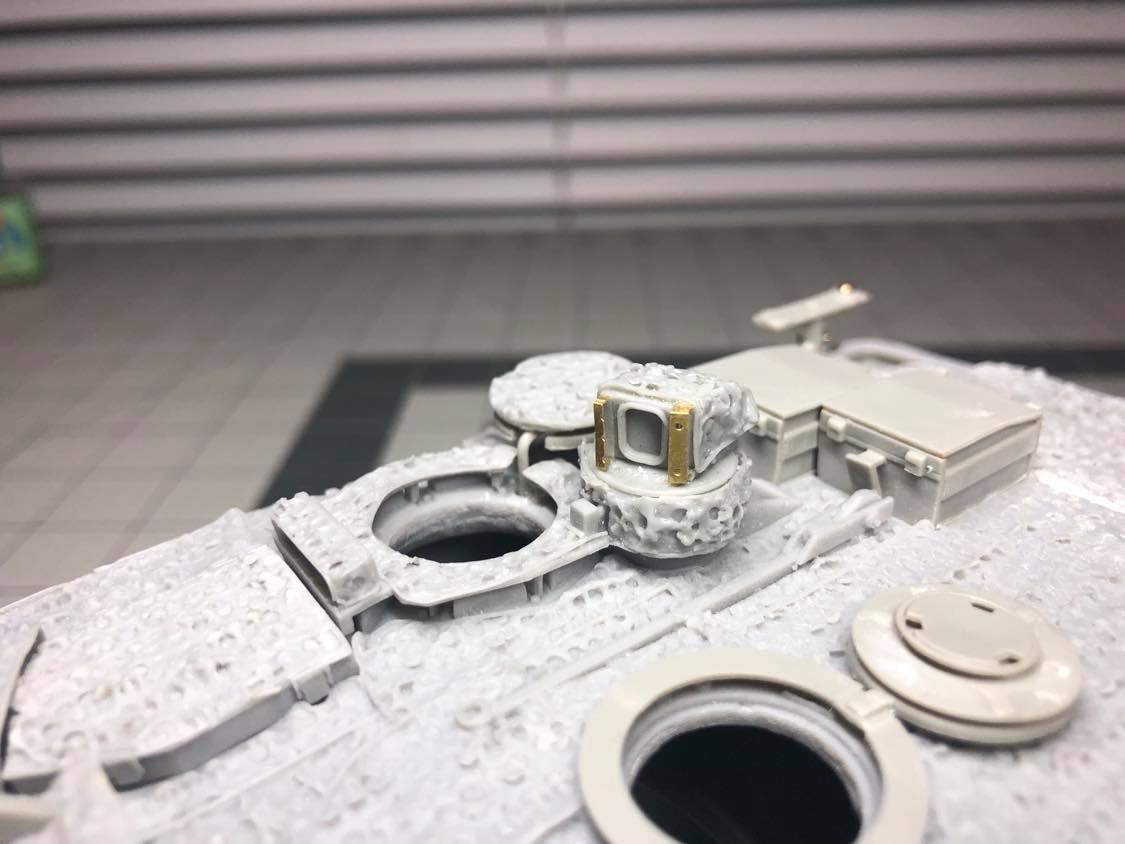
Next I installed the smoke launchers, gunner’s sight, commander’s sight and the barracuda camouflage that hangs off the front of the Leopards famous hollow turret cheeks. First issue tonight was that the PSM conversion does not have the smoke launcher attachment plate as seen in the Hobby Boss kit. Not only is this helpful for the correct positioning, but I want detail, so I cut these pieces off of the Hobby Boss turret and sanded them down paper thin to re-use them.
The Hobby Boss kit has you assemble a Bundeswehr variant of the smoke launchers, with 4 launchers on the top and bottom. The smoke launchers should actually have 6 on the top row, and 2 angled on the bottom row, and thankfully the kit does actually include these on the B sprue. They have a nasty mould line right down the middle, so I worked to smooth that out. I assembled them onto the plate I cut out from the Hobby Boss turret and glued them to the PSM turret. Also, the turret I got from PSM has a moulding issue under the smoke launcher hanger that needs to be resolved with more putty.
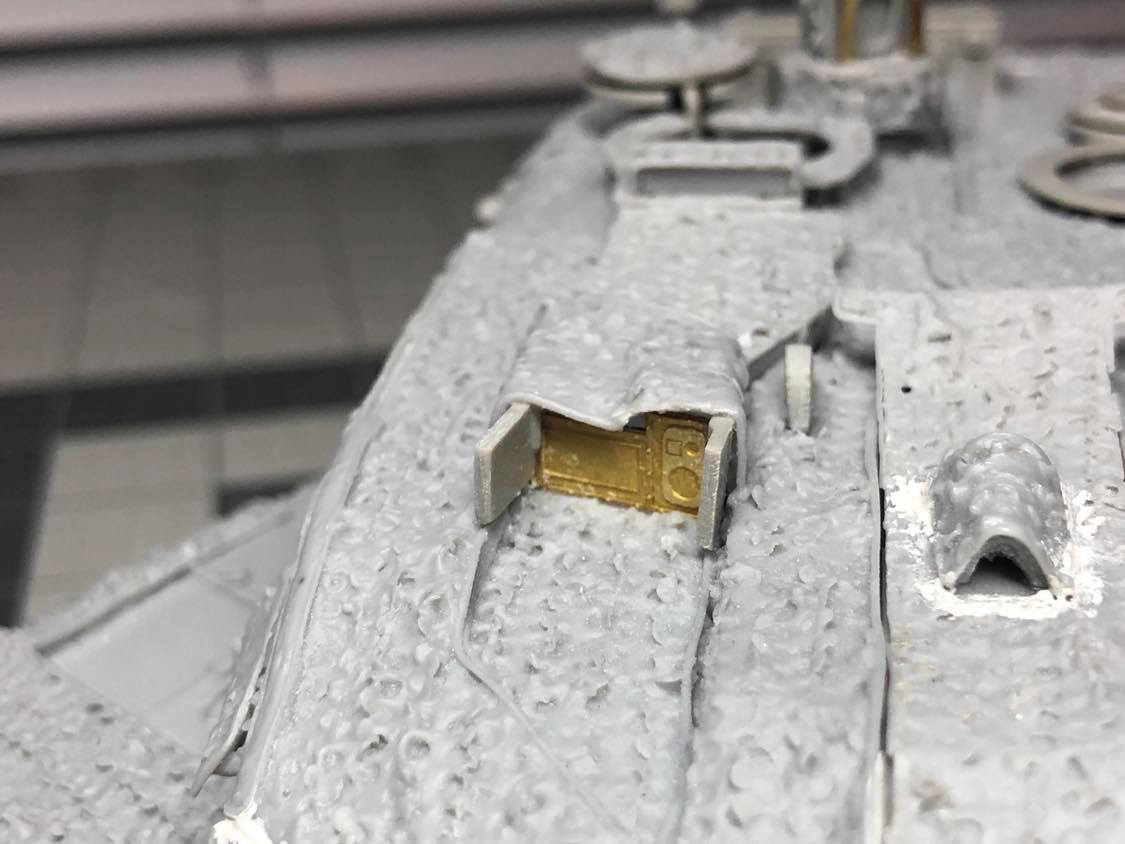
Surprise, surprise. I looked all over for the primary gunner’s sight covers, as the Hobby Boss instructions yet again do not indicate to assemble this in the instructions. I found what looked to be the right shape, but it was moulded in the closed position, so I had to cut it in half with a razor saw, and sanded it down as it was too thick for scale and didn’t fit with the PSM conversion. The Hobby Boss kit does include a nice bit of PE for the gunners sight, however. For the commander’s sight, PSM includes a nicely moulded sight with PE, wrapped in barracuda camouflage that replaces the Hobby Boss part.
The barracuda coverings for the turret cheeks required a bit of sanding to somewhat fit, then required putty. I used Tamiya thin cement mixed with their white putty to take advantage of capillary action to fill these gaps so that I would not destroy the barracuda texture, and sanded smooth. The entire turret is going to require more putty and sanding yet. They do look good though!

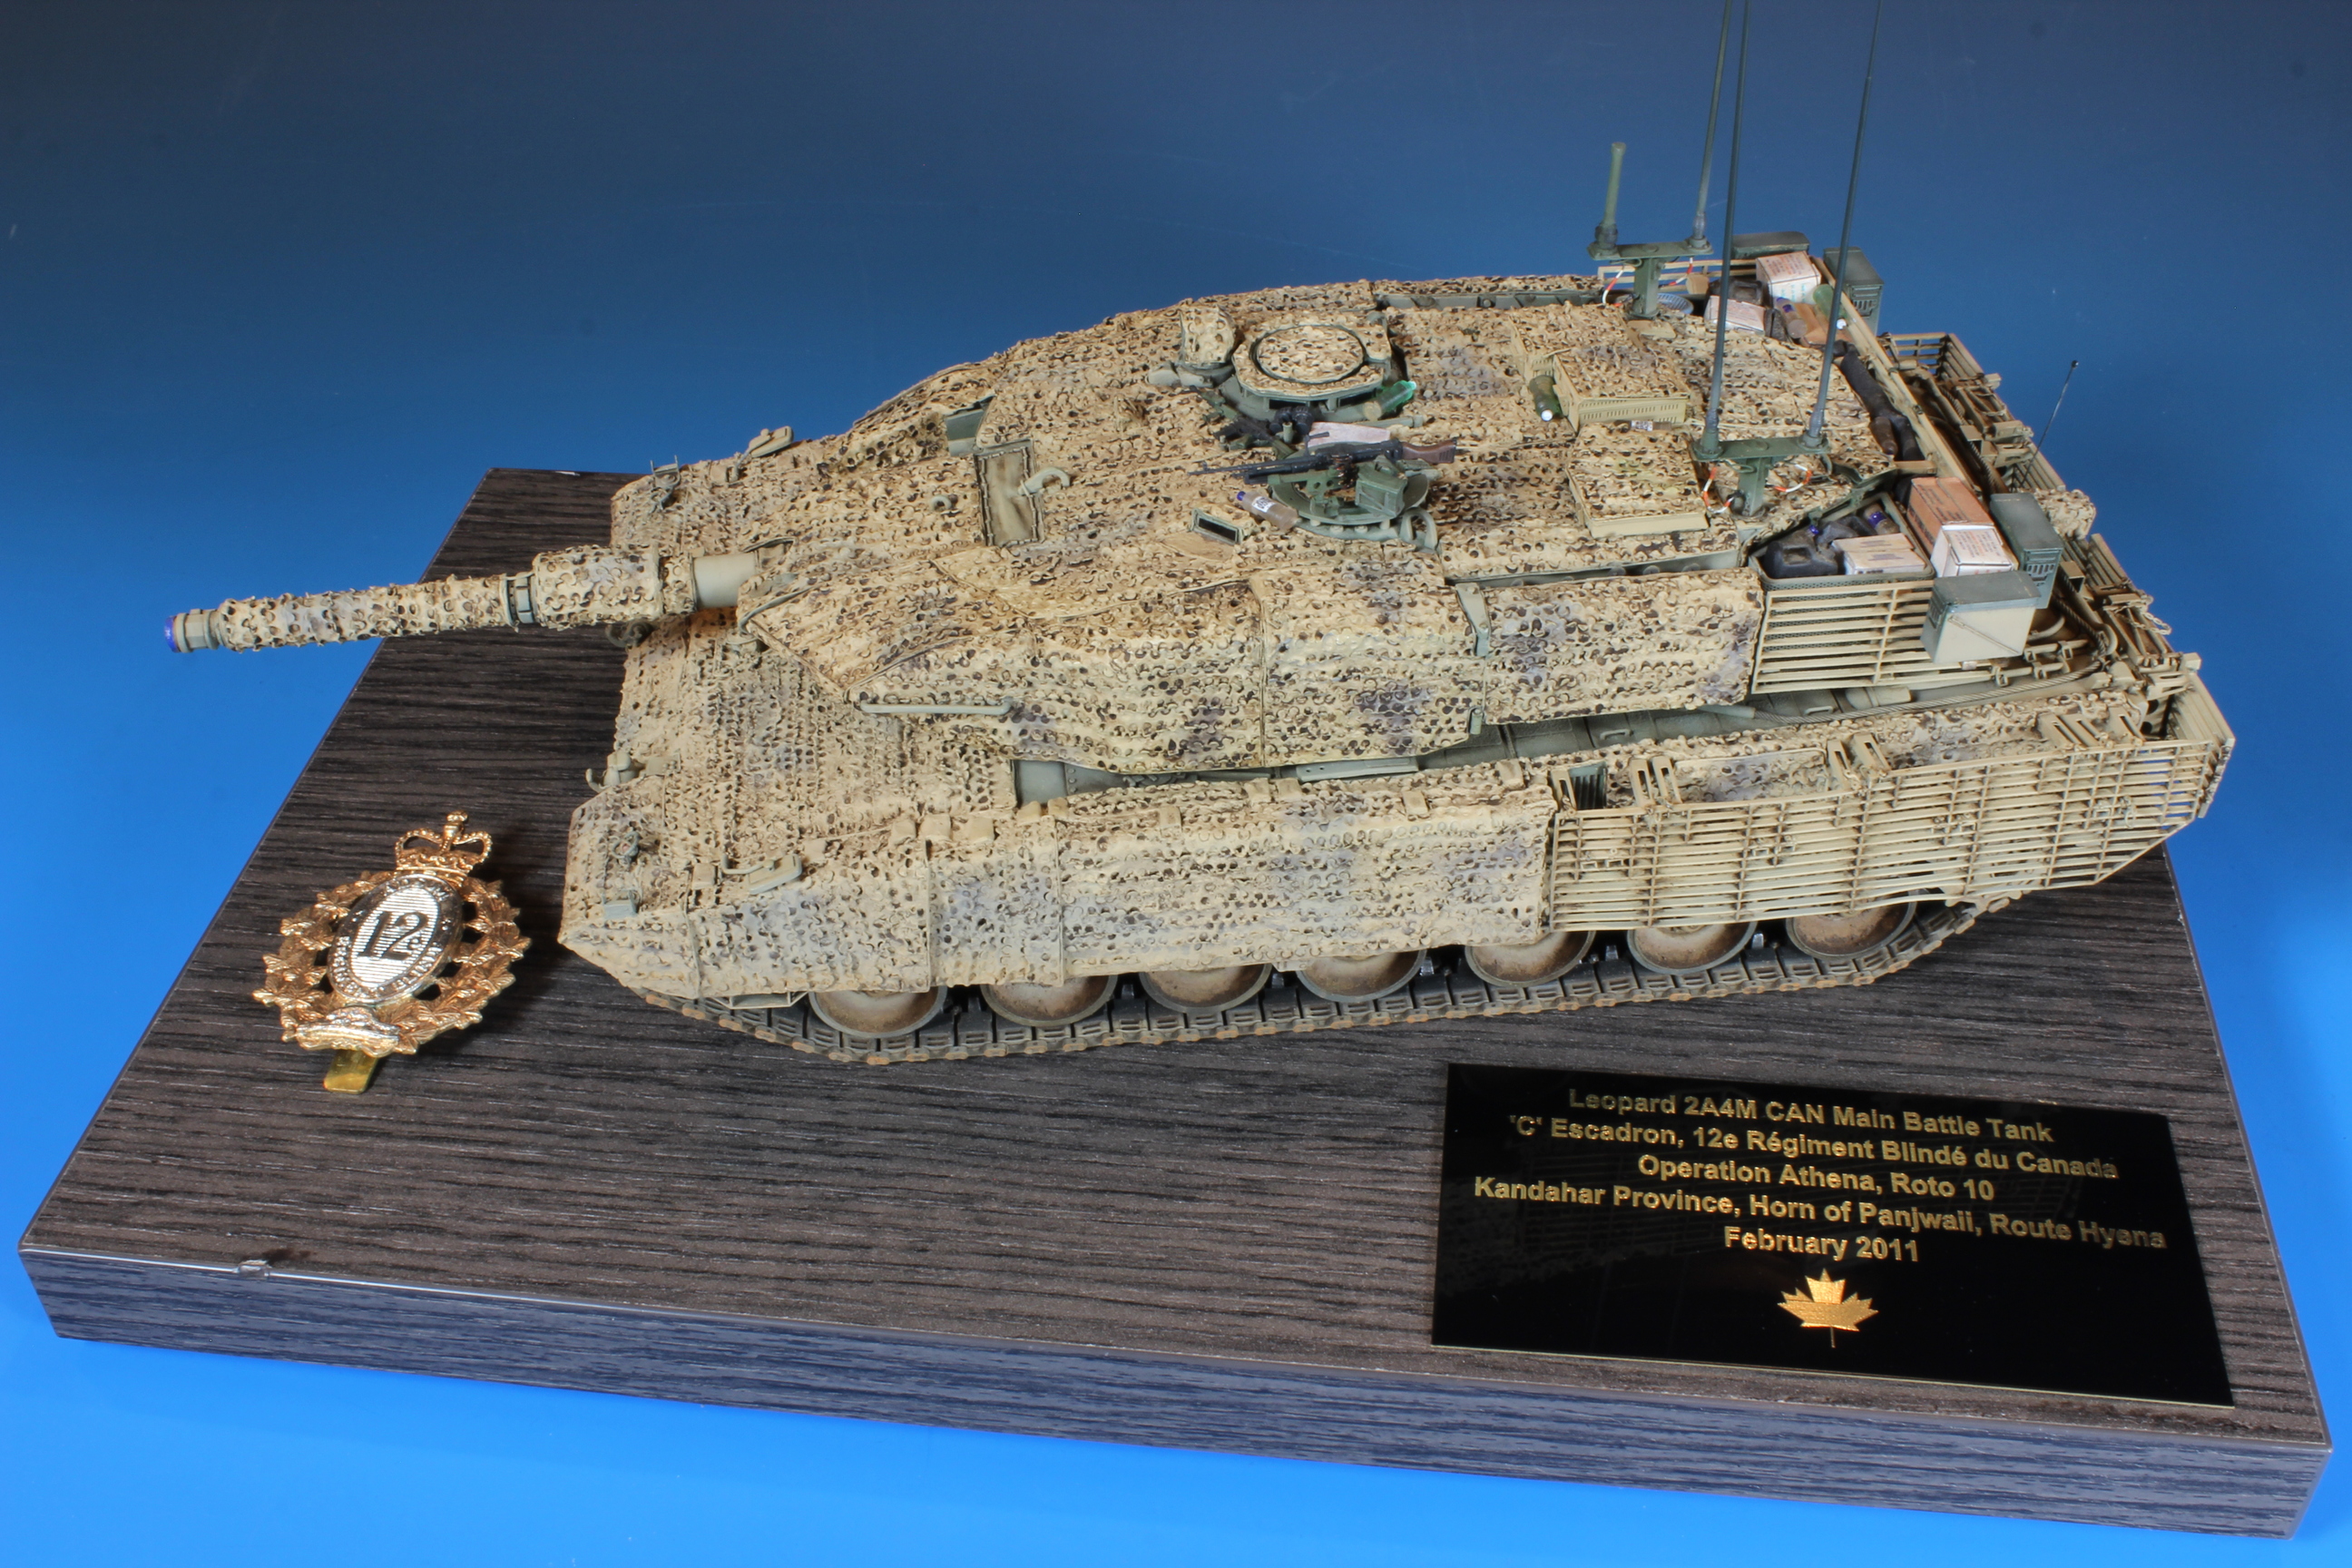
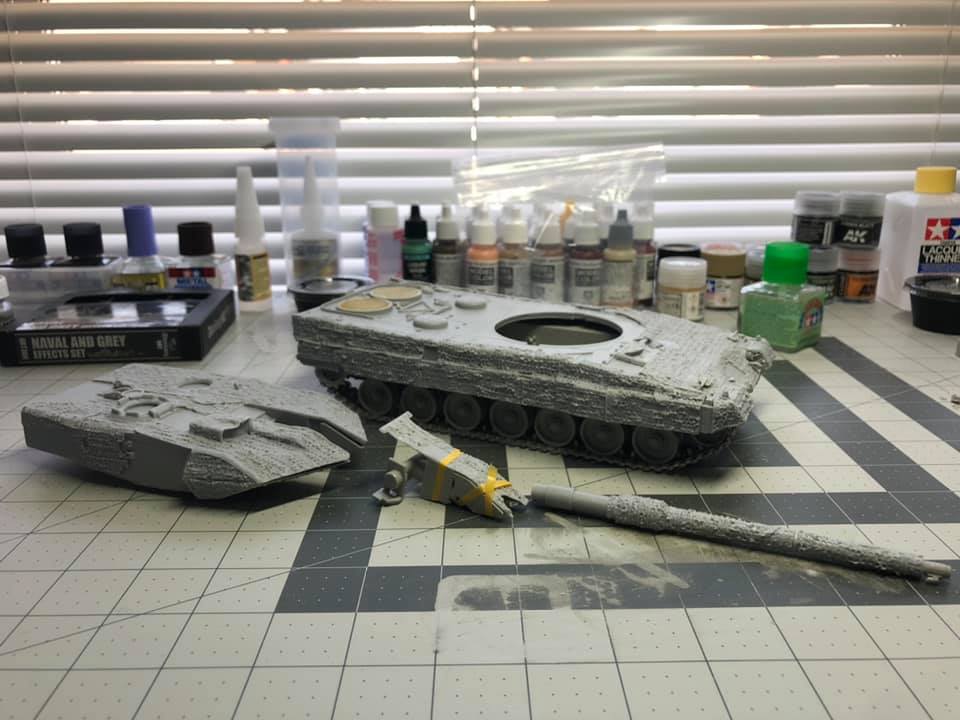
So this is where it sits now. Still need to finish up some details on the lower hull, add the umbrella to the turret, and bend all the slat armor PE before I go over the kit to see if I missed anything major. Appreciate you taking a look and any feedback!