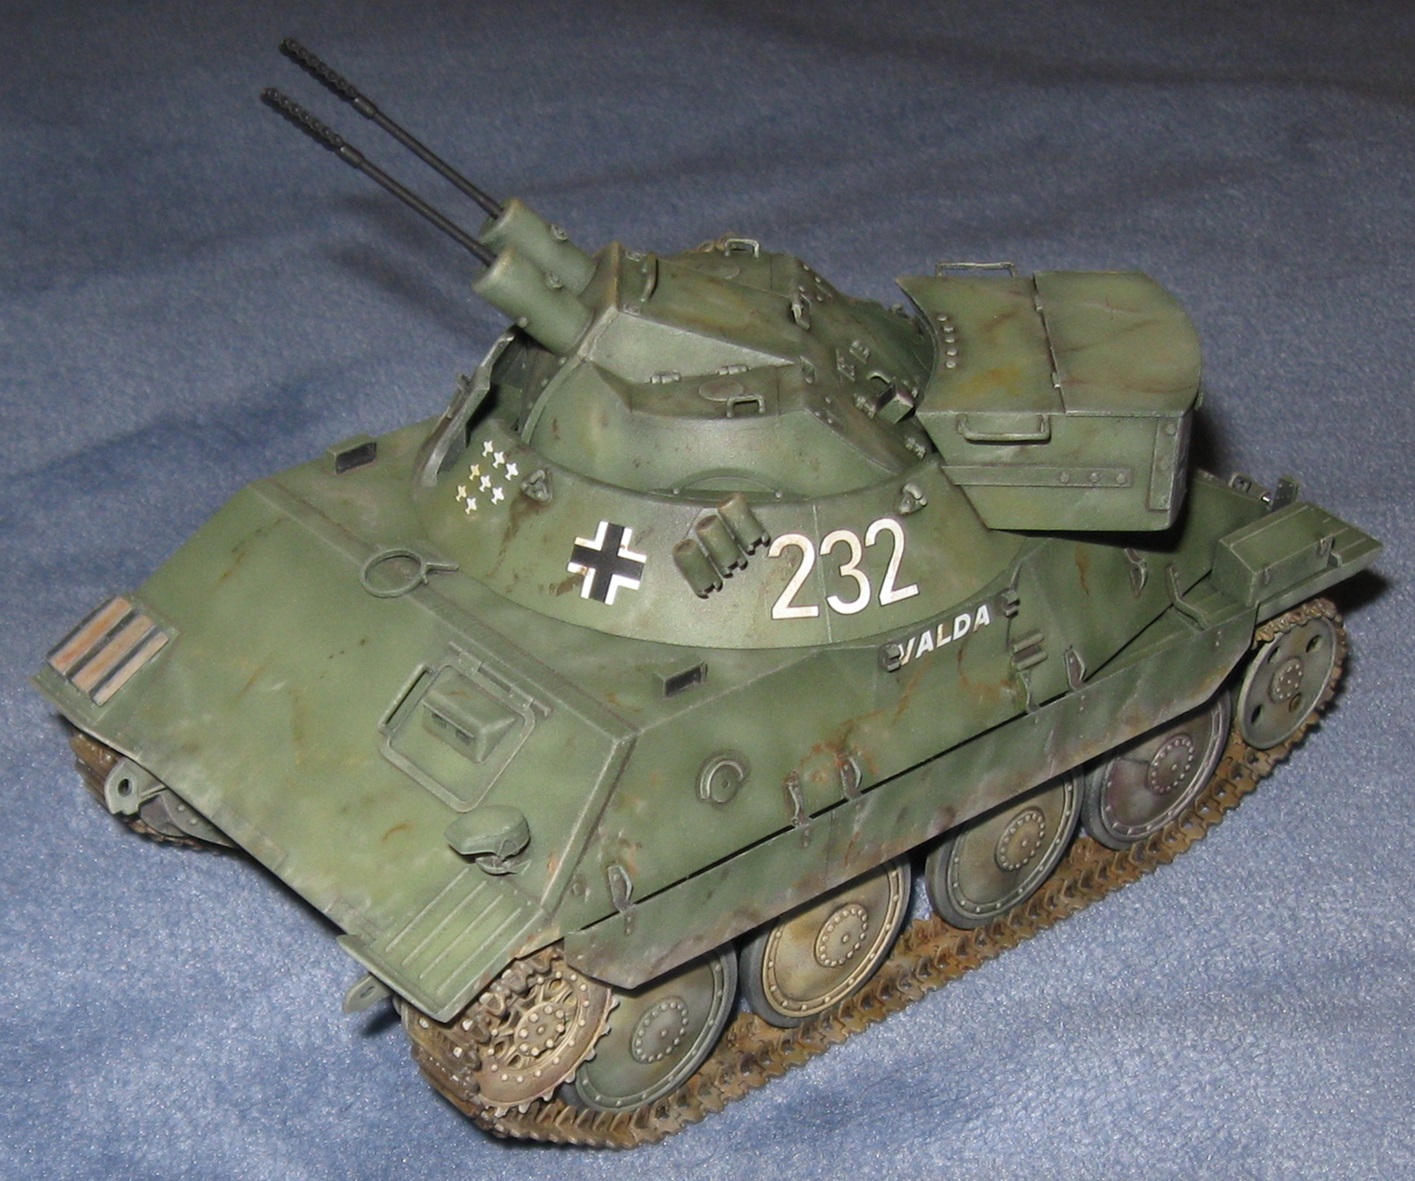
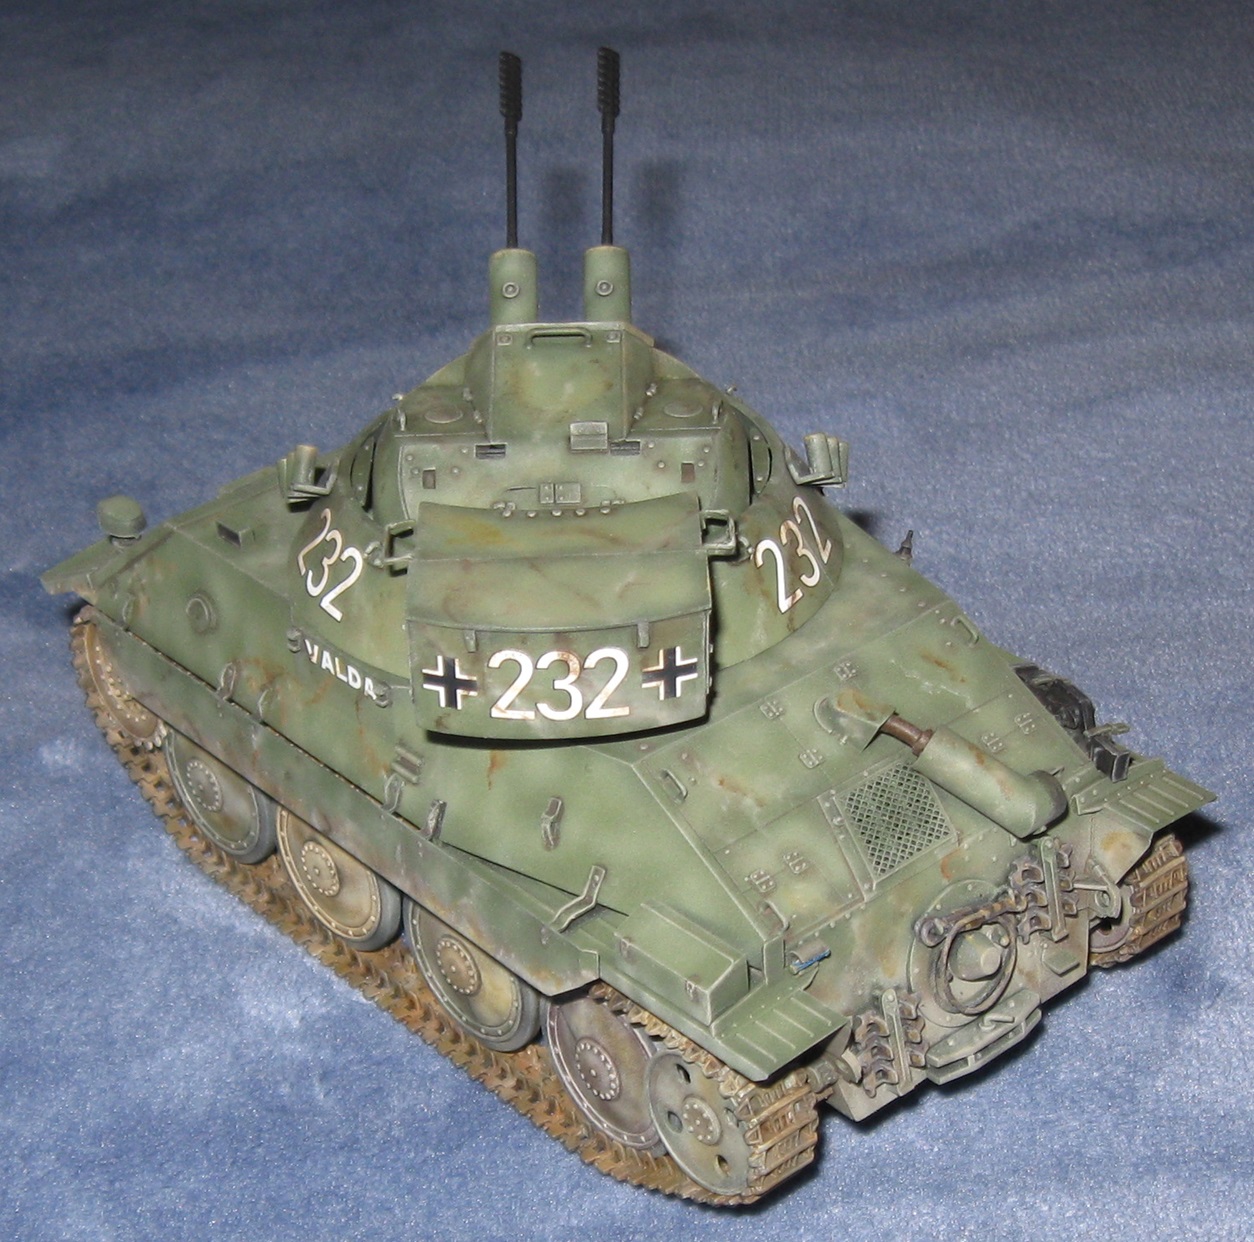
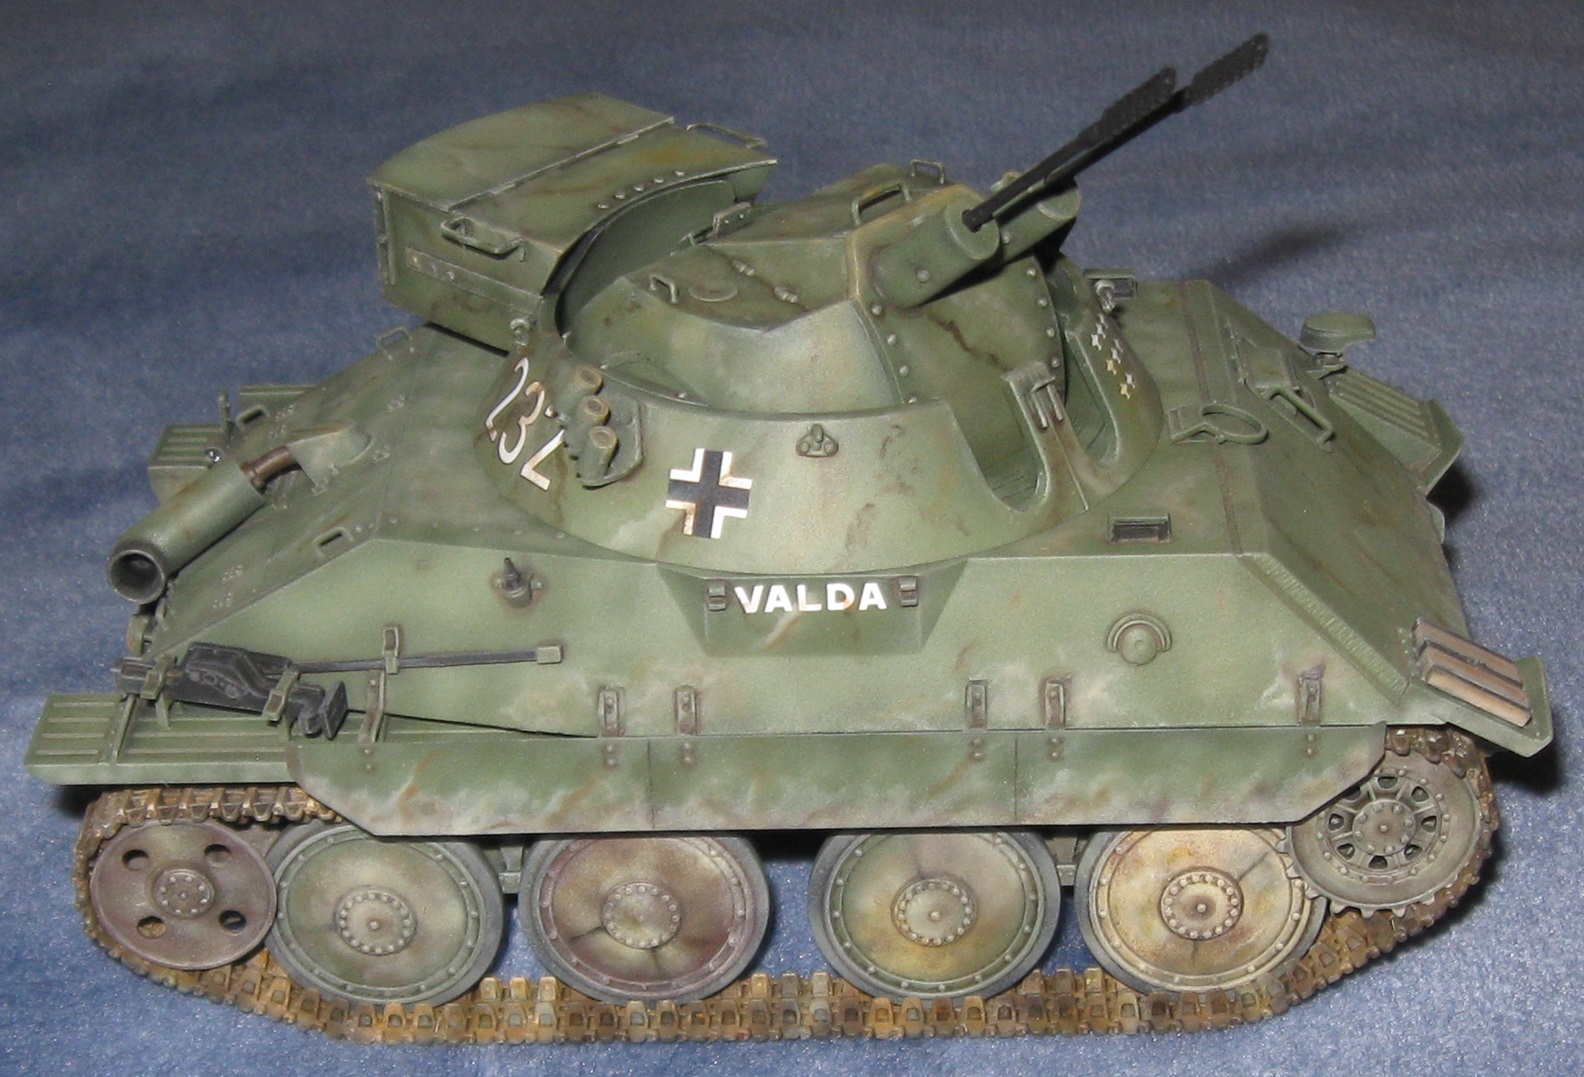
Finished: Takom Flakpanzer 38 Kugelblitz
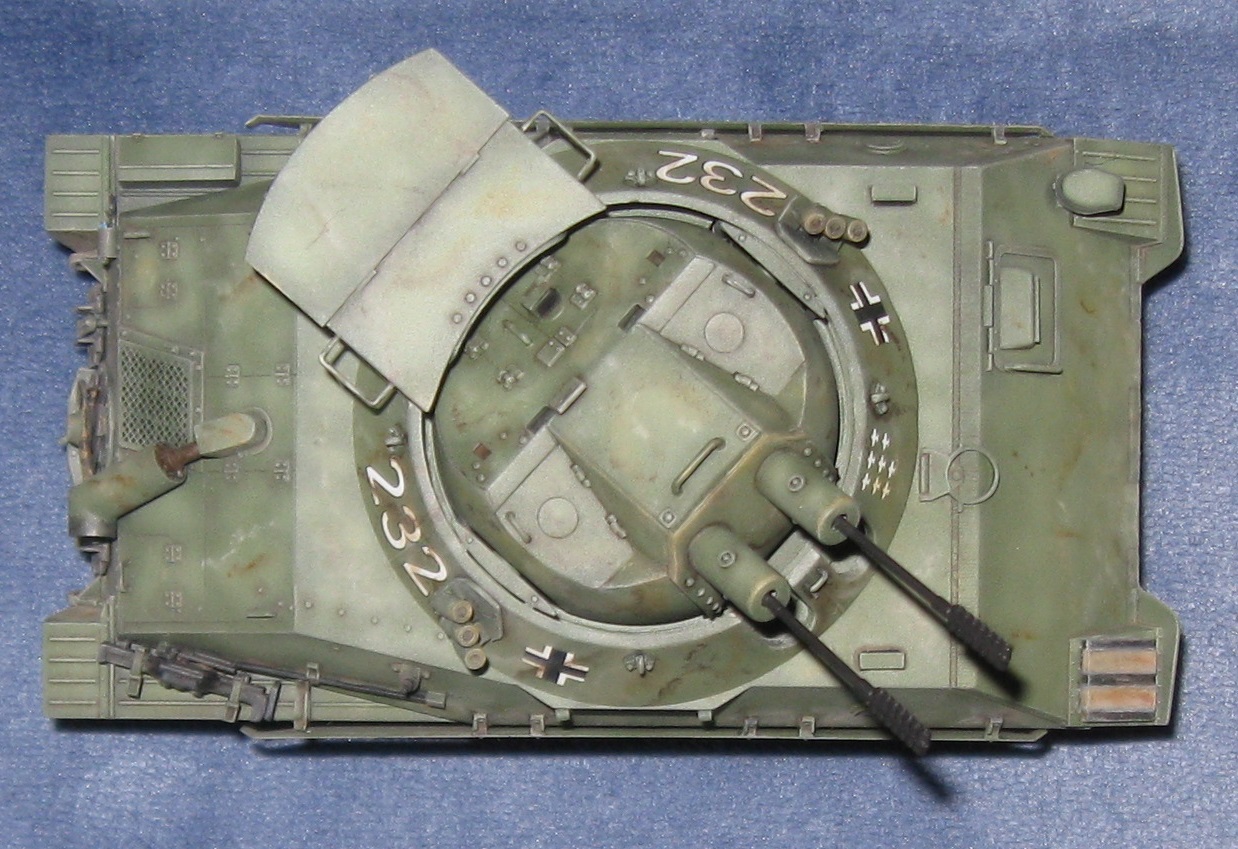
Thanks for the campaign!
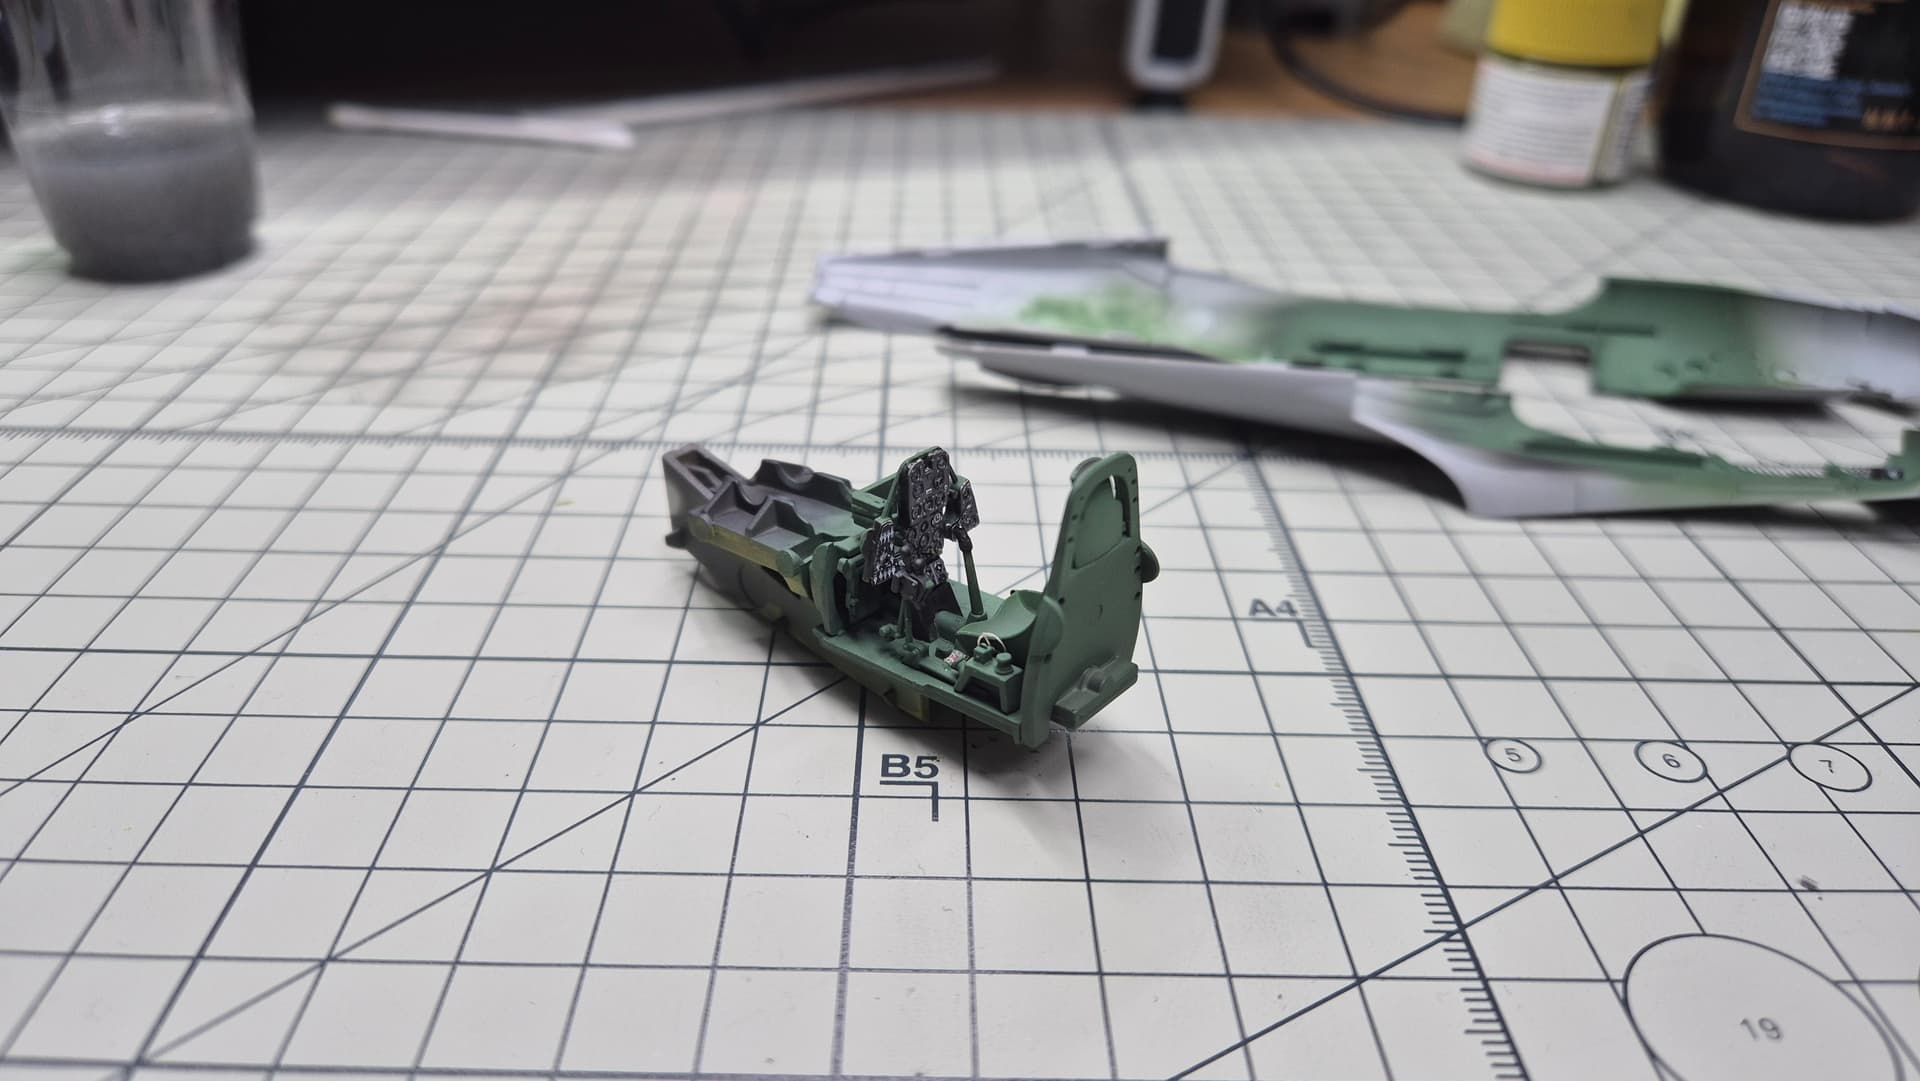
This one was too far along to use a different color for the tail light.
Finished: Takom Flakpanzer 38 Kugelblitz
Thanks for the campaign!
This one was too far along to use a different color for the tail light.
Every step of the build has its own meaning that’s part of why we love model building.
Nice build, Doug! Looks very cool and the overall green works well.
Congrats on finishing! ![]()
![]()
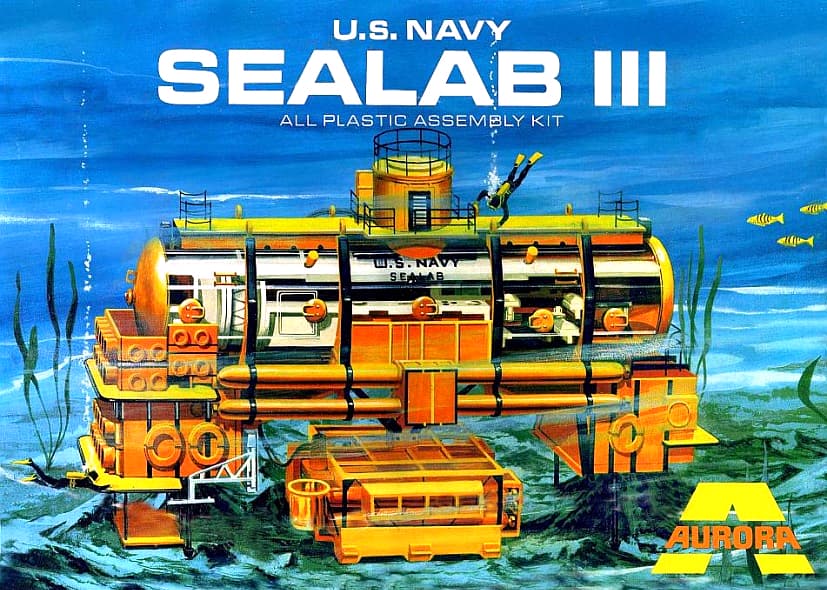
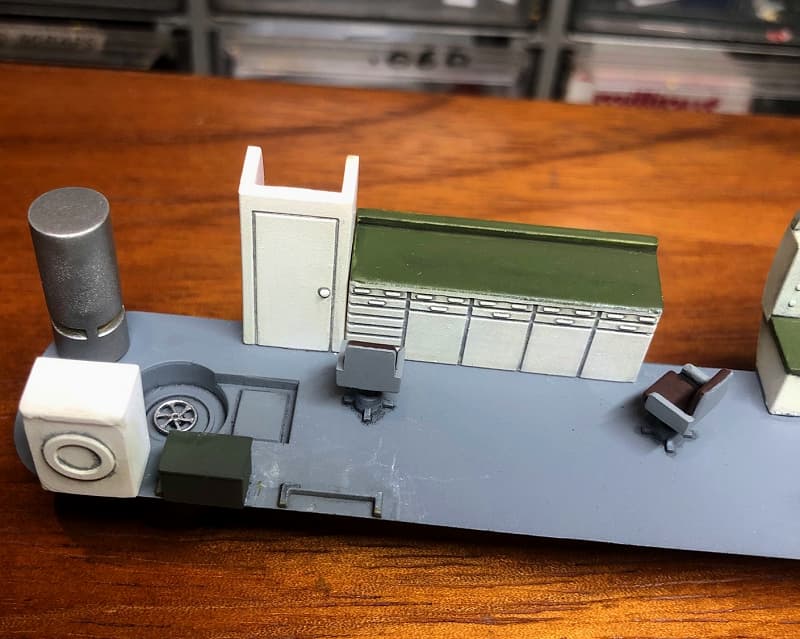
SEALAB!
According to Wikipedia,
“SEALAB I, II, and III were experimental underwater habitats developed and deployed by the United States Navy during the 1960s to prove the viability of saturation diving and humans living in isolation for extended periods of time. The knowledge gained from the SEALAB expeditions helped advance the science of deep sea diving and rescue and contributed to the understanding of the psychological and physiological strains humans can endure.”
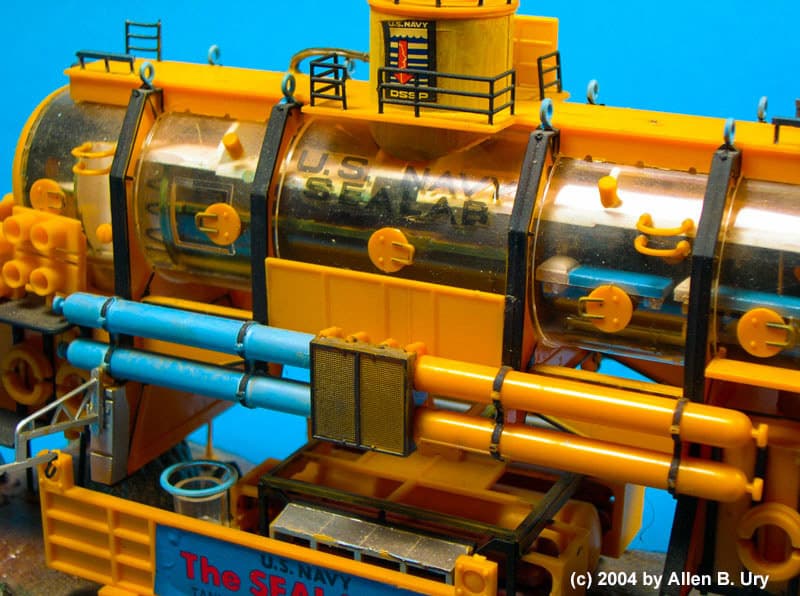
Always an innovative company, Aurora Plastics Corporation released a 1/93 scale model of SEALAB III in 1970. Although heavily promoted, the oddball effort was not a commercial success. The kit is perhaps best known for its use by George Lucas’ Industrial Light and Magic to detail various models for the original Star Wars movie. Released only once, it has become a collector’s item. No one seems to know what became of the original tooling; the molds may have been among those lost in the infamous Binghamton NY train wreck, or they may have been among the some 500 molds scrapped after Monogram bought Aurora’s assets in 1978. Anyway, complete kits have become extremely rare and can be found on auction sites going for $500 or more.
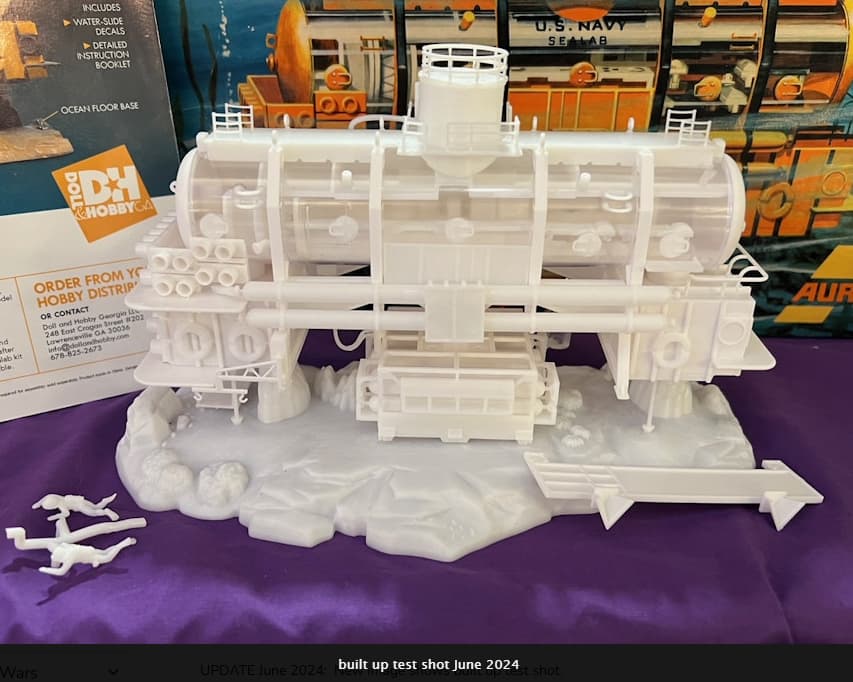
I was intrigued by this kit as a kid and always wanted to do one, so I was delighted when earlier this year a company called Doll & Hobby Georgia released a reboot of the Aurora model. An entirely new tooling, D&H pantographed the old parts to keep it as close as possible to the Aurora original. Although they apparently made some small improvements, it is, in effect, a kit of a kit. I can’t wait to get started on this one!
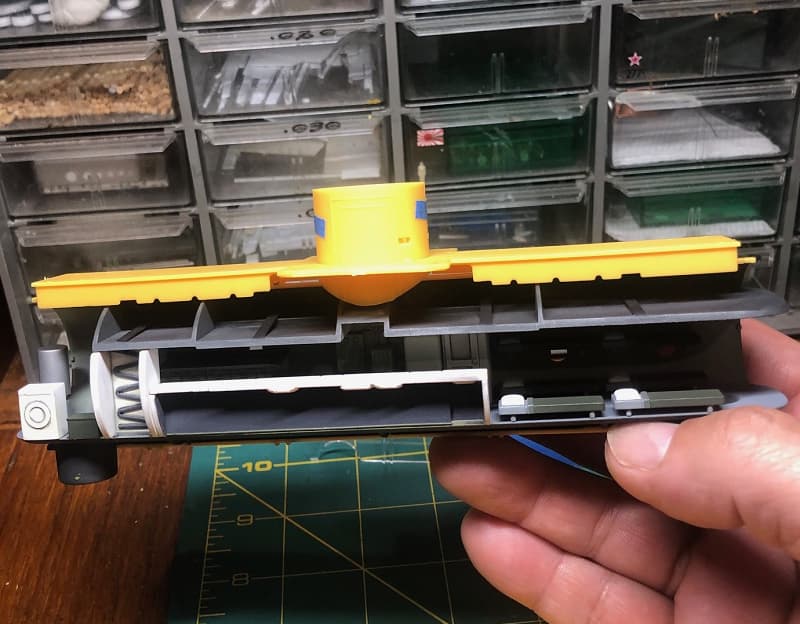
One of the cooler aspects of this kit is the clear side enabling a view of the habitat interior.
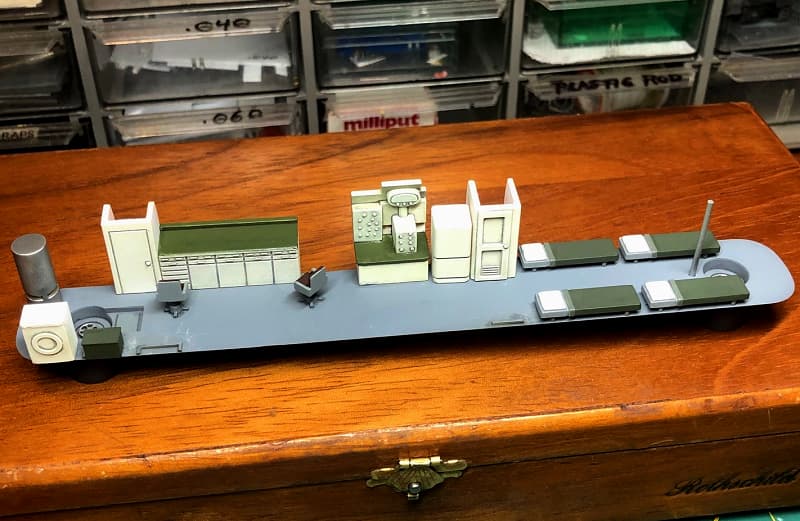
Accordingly, the first step is to construct the internal components.
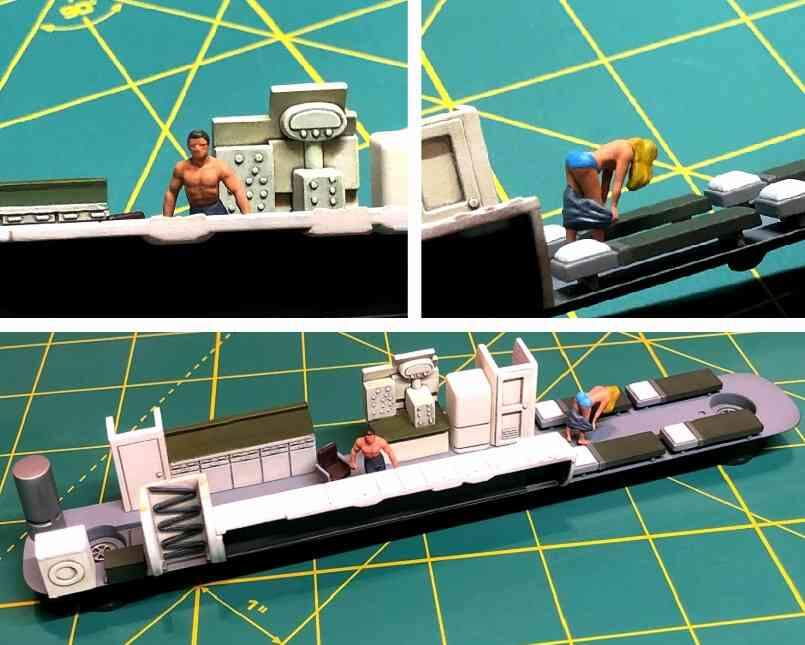
There aren’t many photographs of SEALAB III’s interior, so I mostly just assembled and painted the kit parts as per the instructions. This is the “lab area” with work bench and chairs. The cylindrical fitting on the left is the hot water tank, and I added a brass handwheel to the access hatch below.
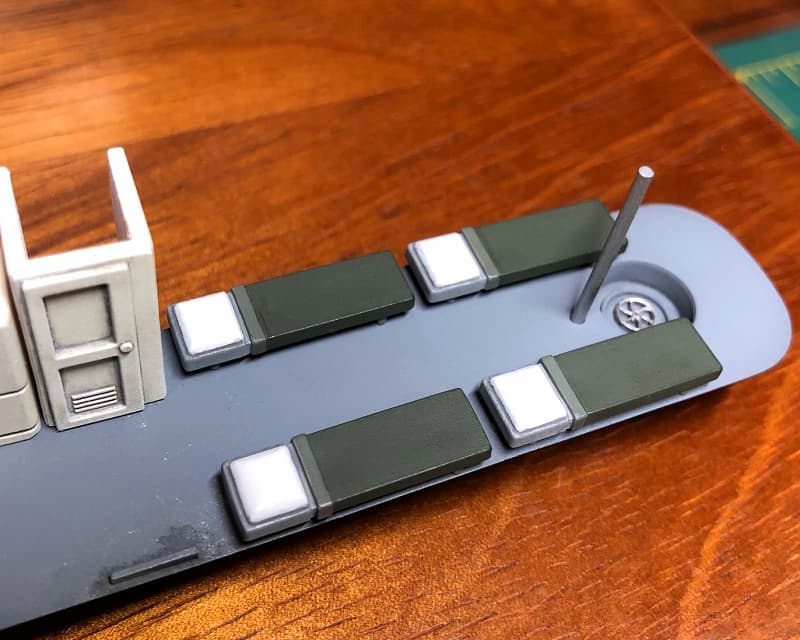
The berthing area is on the other side. The access hatch here received a handwheel as well, and there are four more berths to be mounted to the hull sides. The door at left is the lavatory.
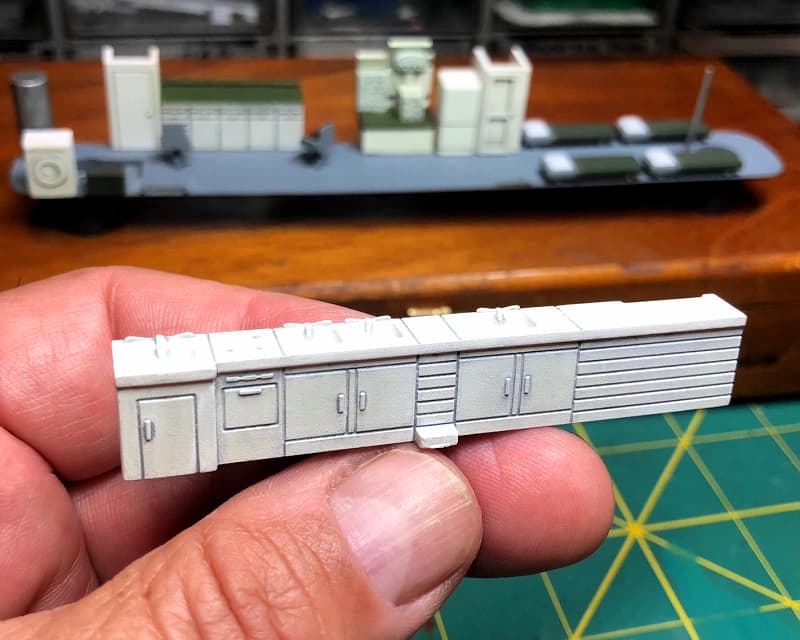
Another work bench with sinks and storage spaces will go amidships across from the power panel and refrigerator.
Unfortunately, all that nice detail on the sink front panel will be invisible as it will be facing away from the clear side!
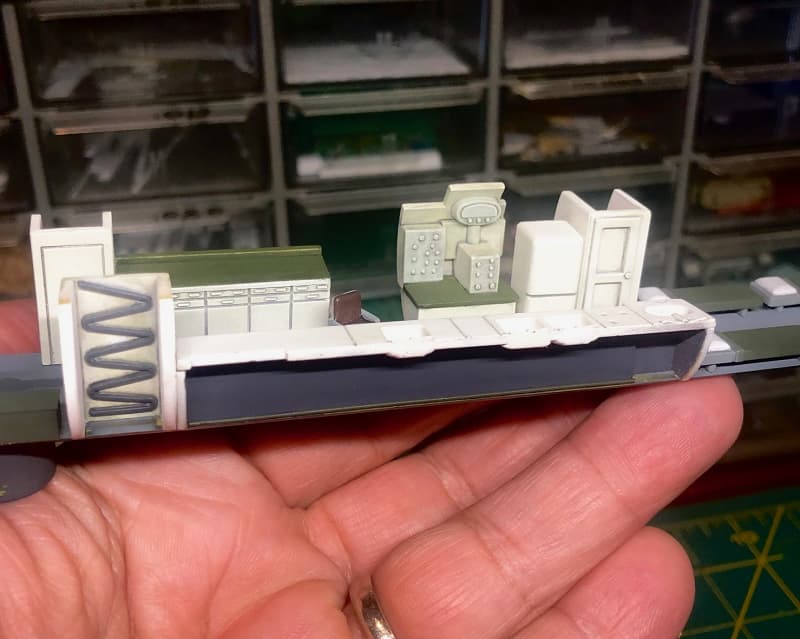
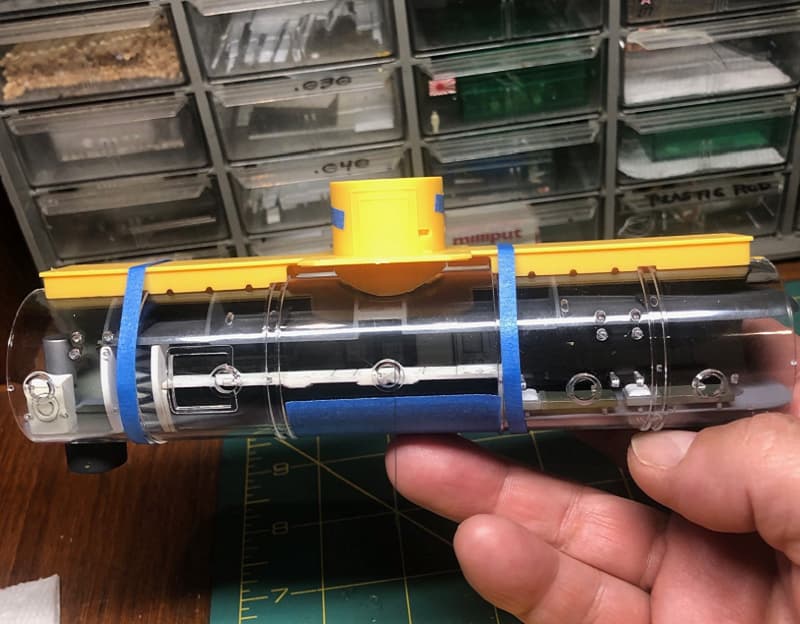
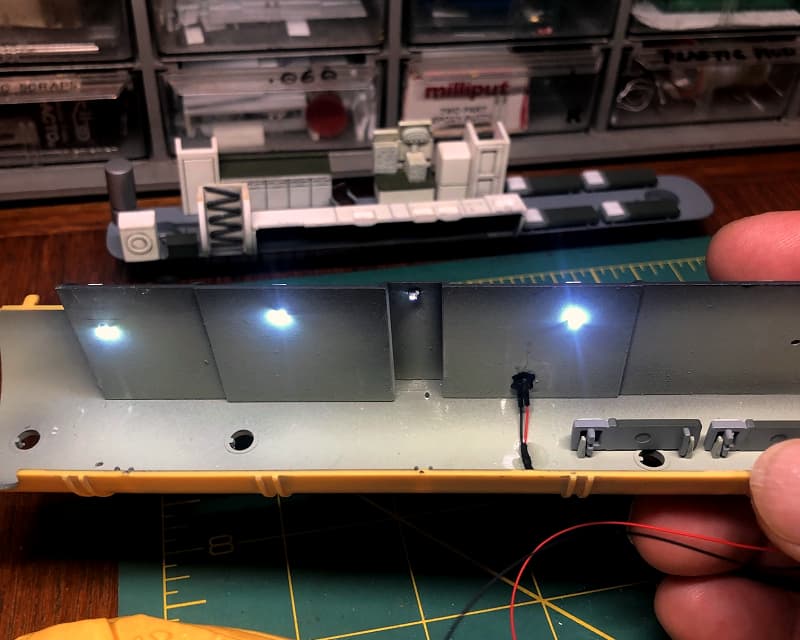
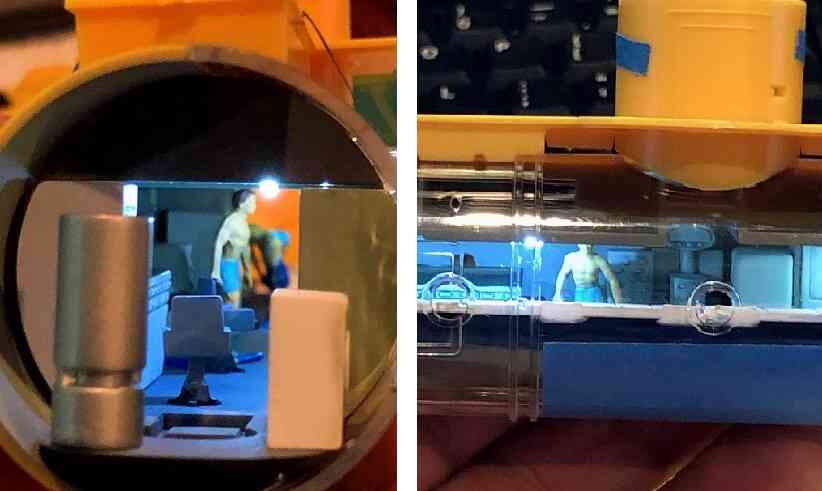
D&H’s renderings of Aurora’s interior are pretty decent, but when test fitted inside the habitat things get pretty dark.
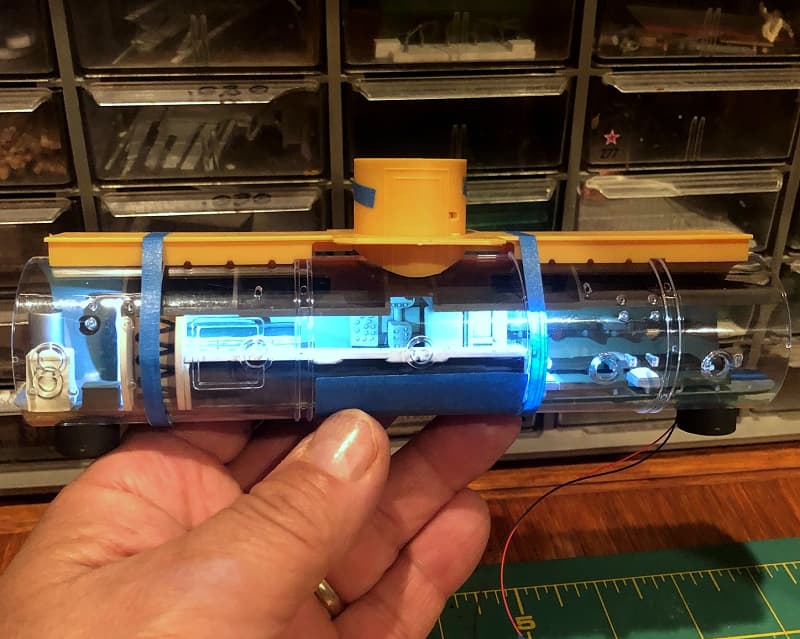
With the clear outer casing test fitted, the detail inside almost completely disappears. The interior is just ok and it wasn’t all that much work to paint and assemble, but it seems a shame not to be able to see it. Time to figure out some interior lighting, I guess.
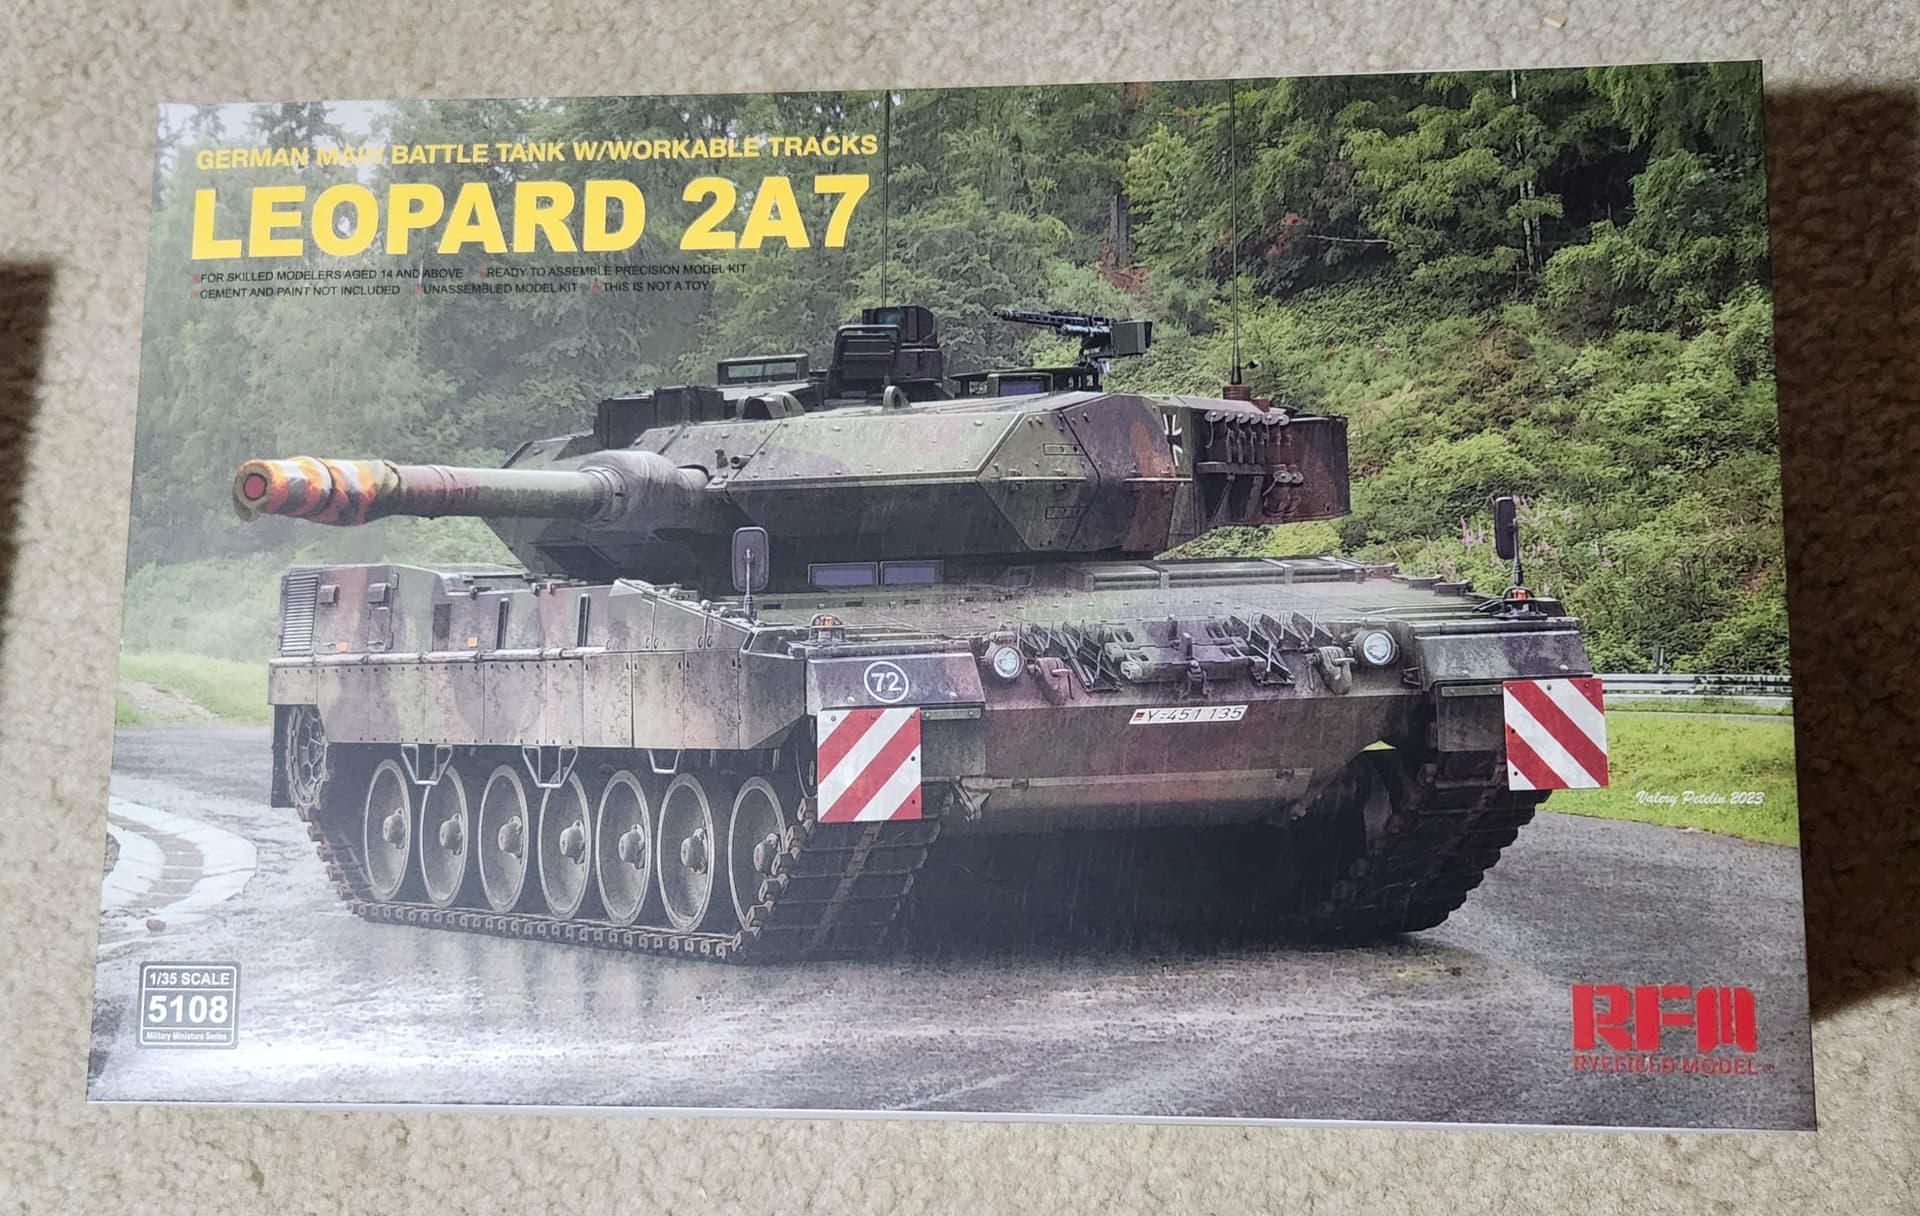
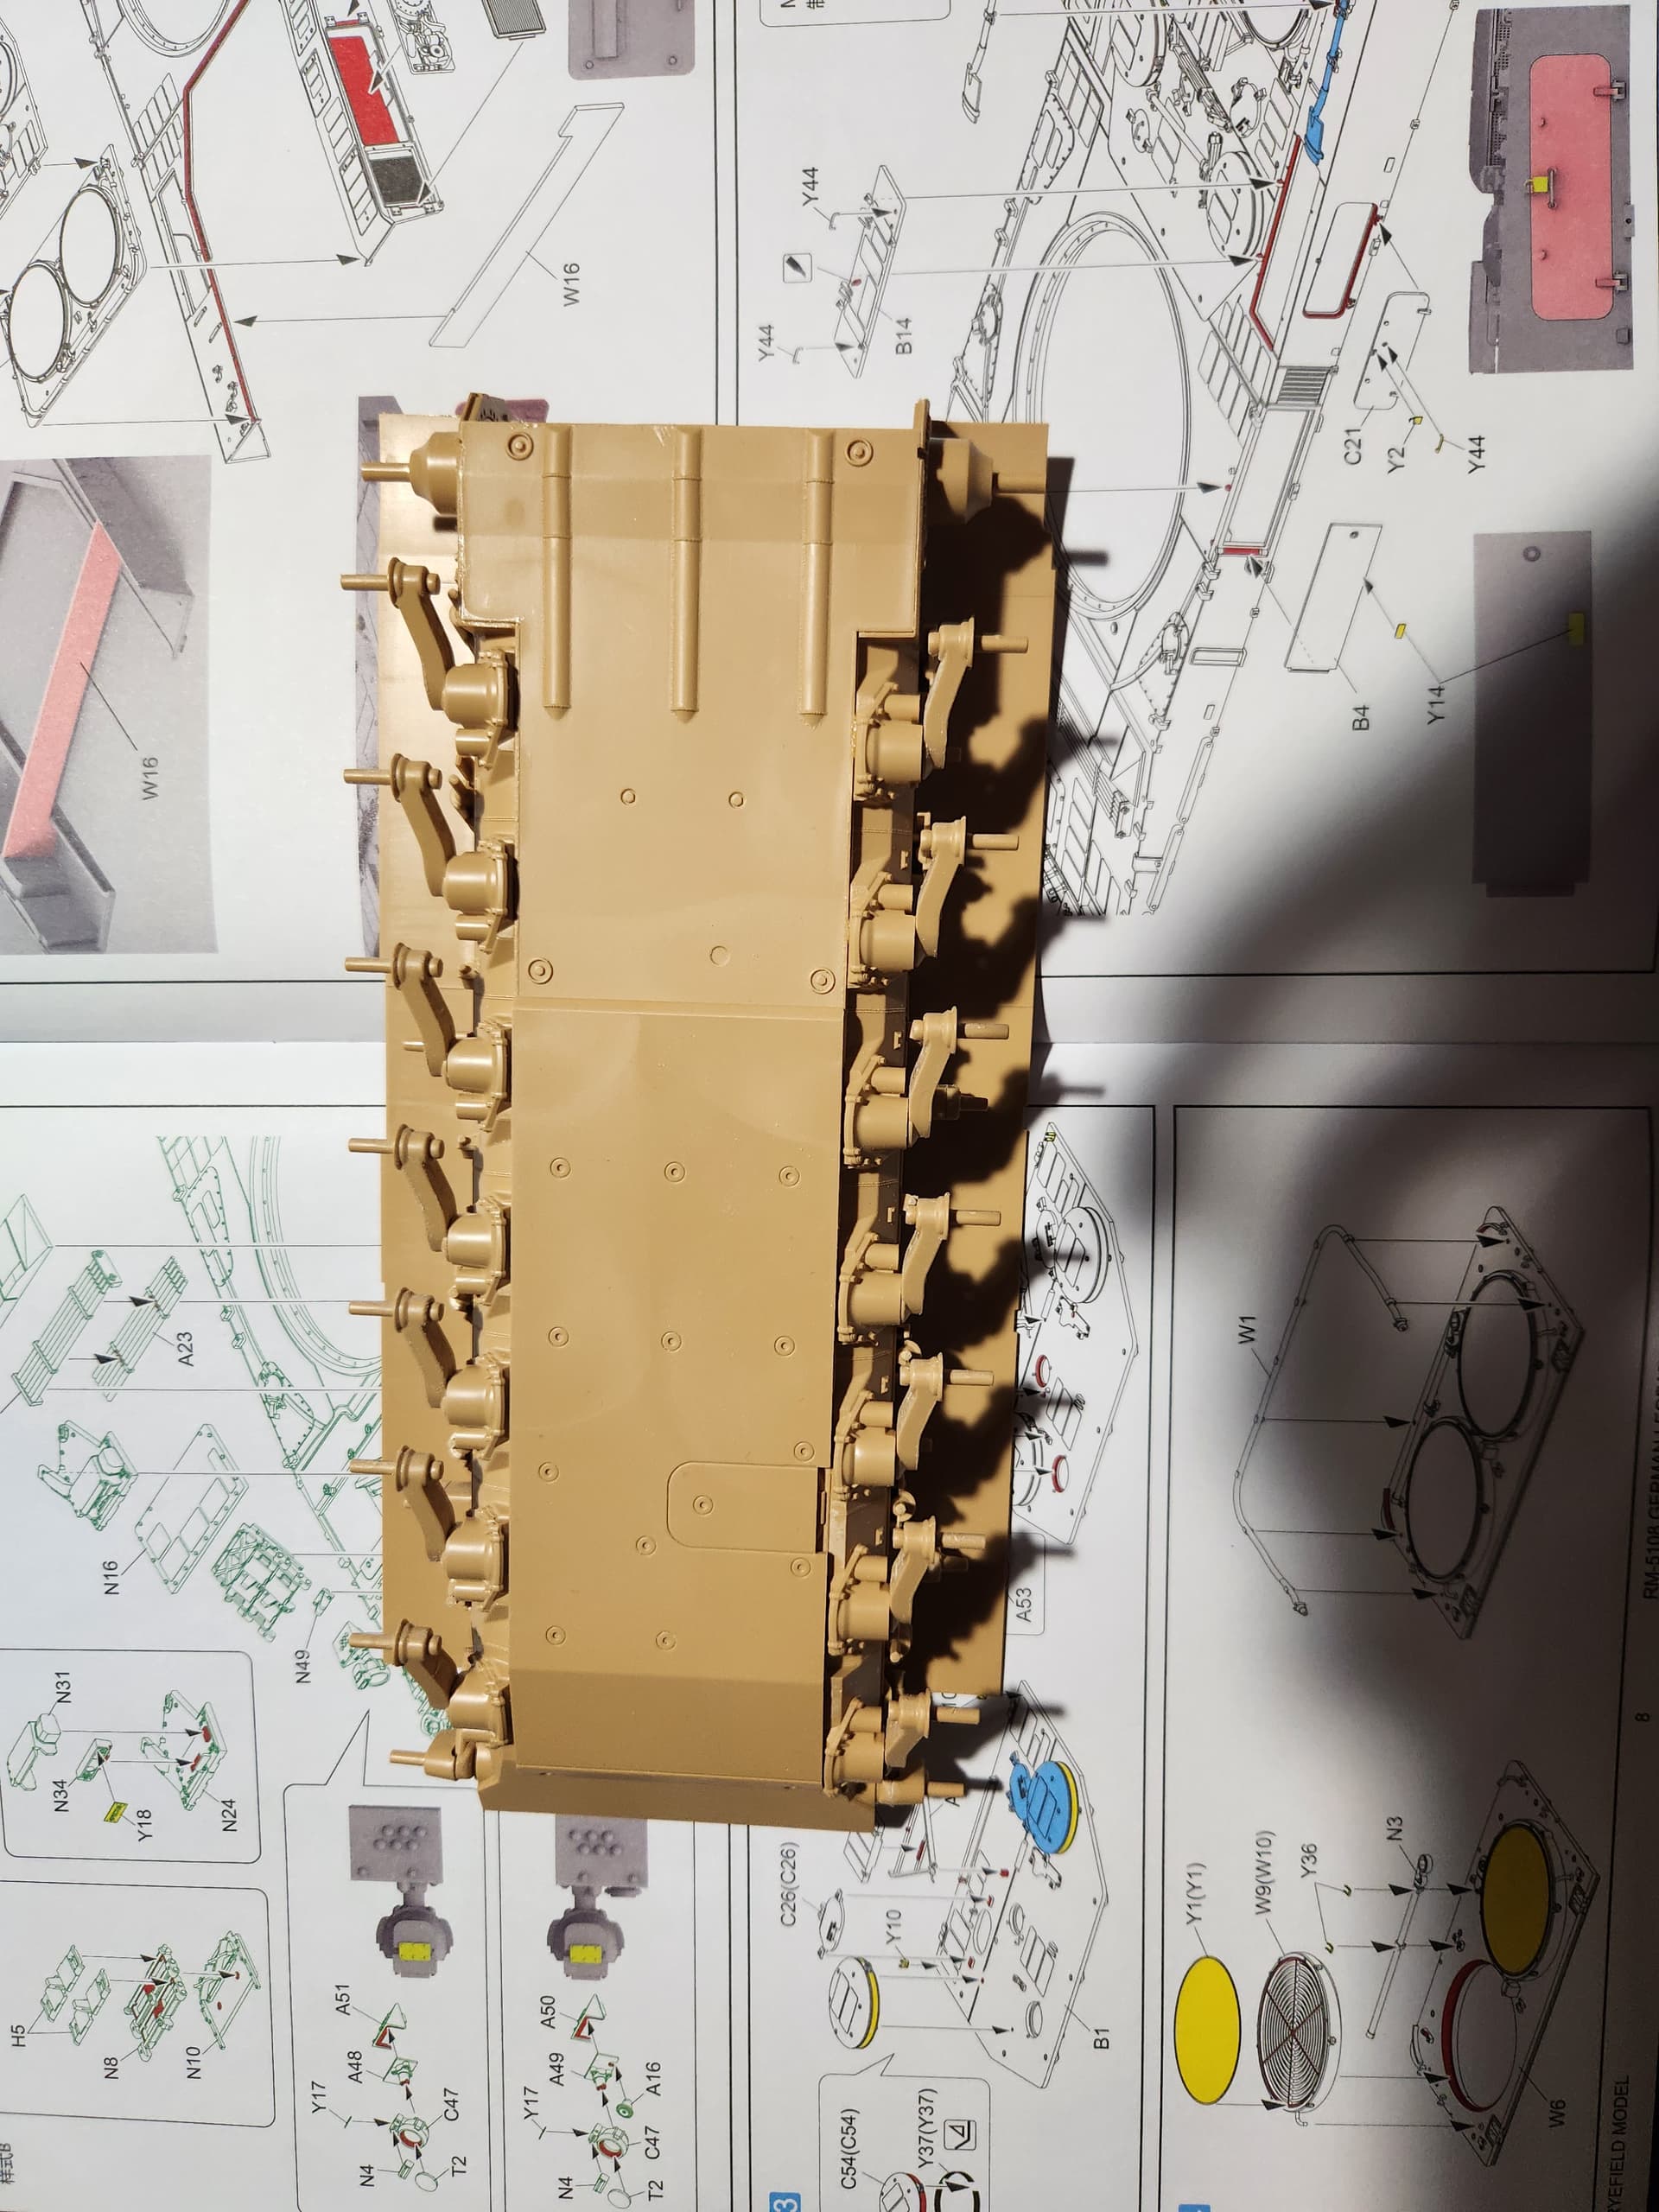
Going to join in with the RFM Leopard 2A7 from 2024. Tall box with plenty of plastic inside. PE, thread for tow cables, polycaps, tubing with metal pins, and 2 3D parts, a barrel cover and muzzle with the sight. Hull and turret come in their own small cardboard sleeves, rest in the usual bags.
First impressions of the parts are very positive. Crisp and clean, weld beads, nice detailing all around. Multipart track with jig typical of RFM moveable tracks. Gonna get this started and see how the fit is as I go along.
Nice choice of kit, Tiger ![]()
Tim, the sealab is a great model. I have never seen that before. Interior lighting would really make it unique and help show the interior details.
Looking forward to see more ![]()

Tim, the sealab is a great model. I have never seen that before. Interior lighting would really make it unique and help show the interior details.Looking forward to see more
Thanks Jesper!
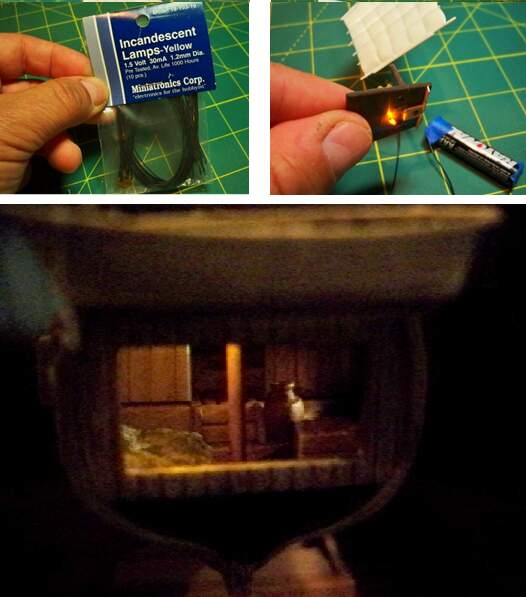
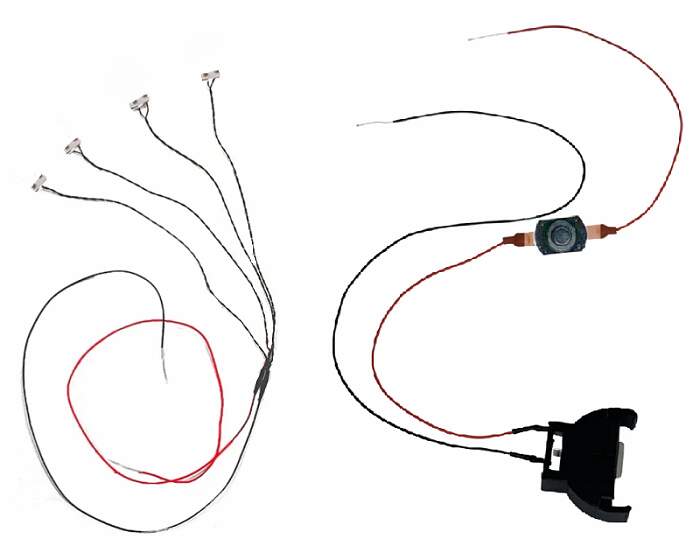
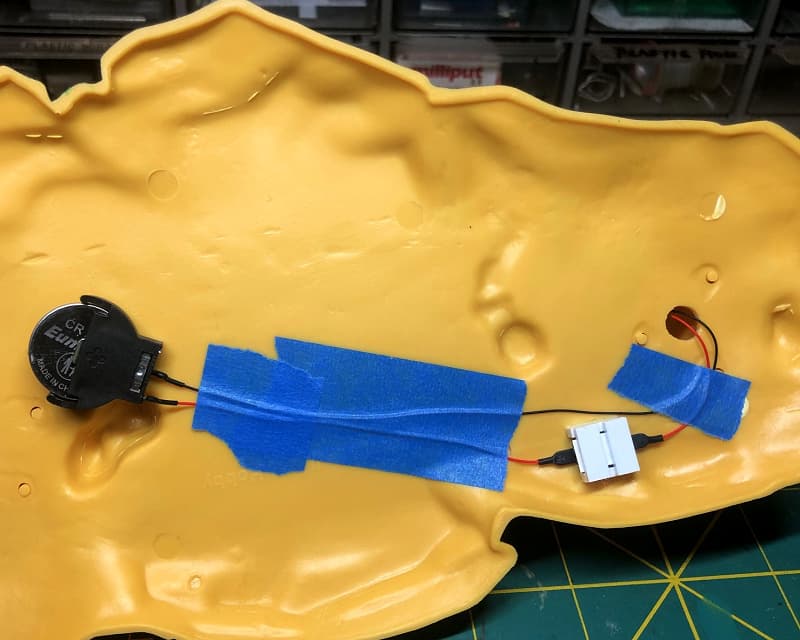
This time around, a quick Internet search showed that technology has improved. I found a company called Evan Designs who provided a super compact 4 LED set (cool white, “Pico” size) and a 3 volt DC coin cell holder with a switch. The LEDs are far superior to the small incandescent light I’d used previously being tiny, quite bright, and generating almost no heat. They also draw very little power and are supposed to last for years.
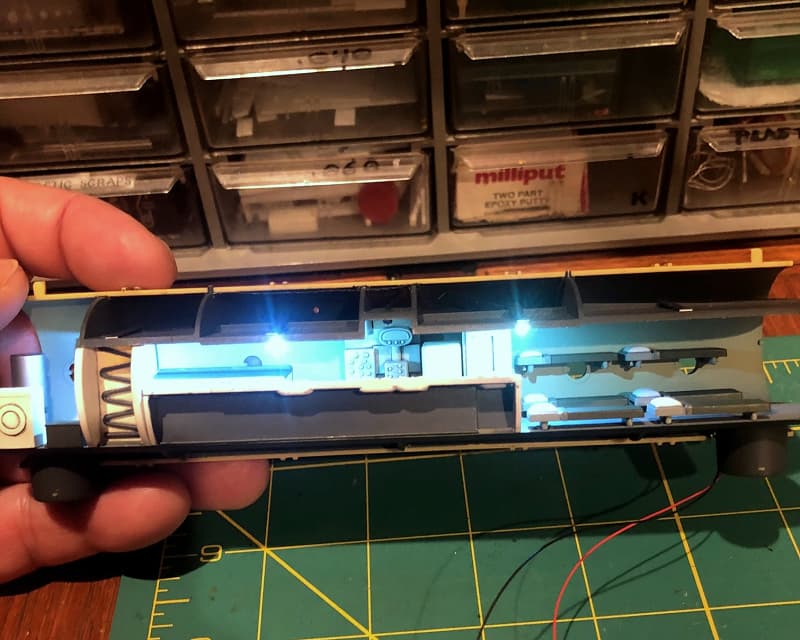
I inserted the lights through holes drilled in the habitat overhead, and they light up the inside quite nicely! The wiring was easily concealed in the dry store spaces above and behind the lavatory inside.
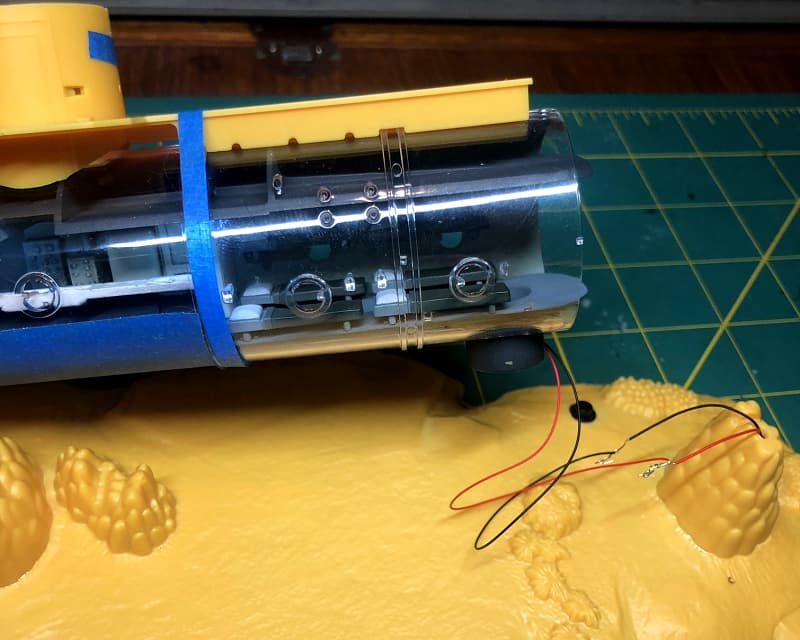
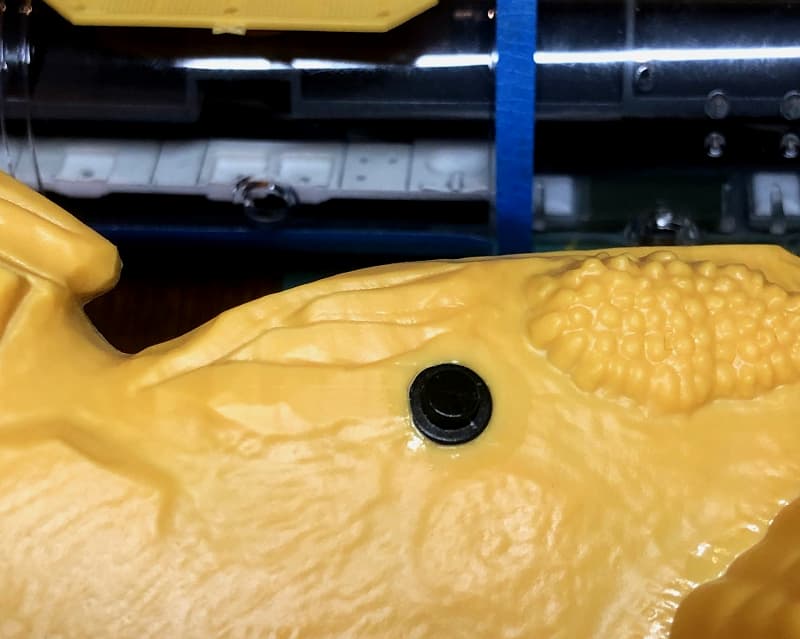
Passed down through the access hatch below, the wires run through the “seaweed” support column down to the 3 volt DC coin cell holder under the sea base. I drilled a hole in the base for the small push button switch, but that will be the only visible component apart from the lights themselves. Once the base is painted the switch should be pretty inconspicuous.
The kit interior is pretty basic and I didn’t spend much time on it, but what is there can now at least be seen!
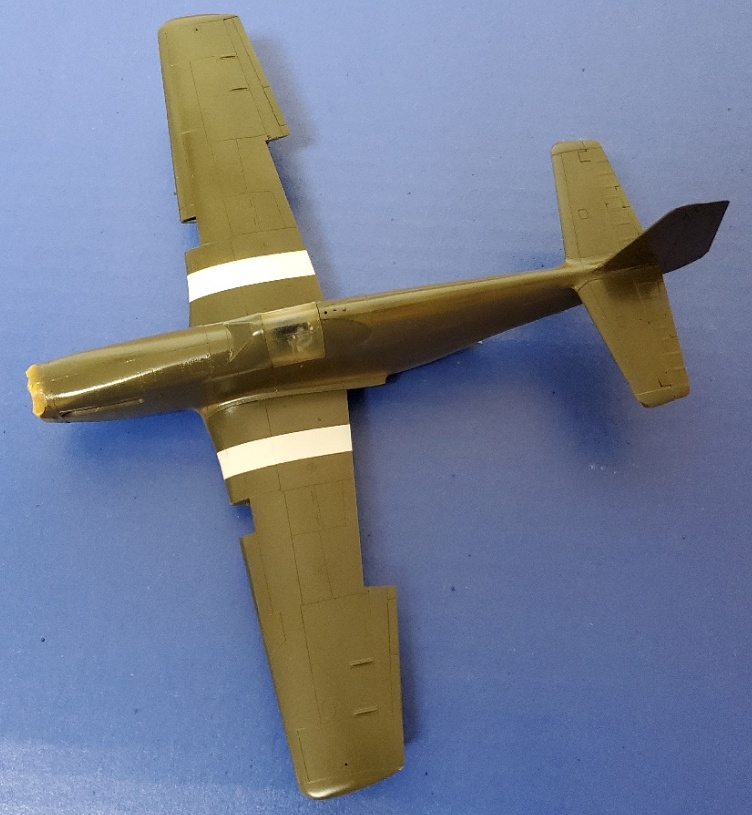
I know I’ve been gone for a while, but I have been working on the Eduard 1/48 P-51B. Gloss coated it for decals and it’s looking pretty sporty!
Michael ![]()
![]()
Started on the lower hull with no issues at all. Moved up to the upper and due to stepping on a rack frame, began the turret. I often go out of order as it is. Overall a rathersmooth build.
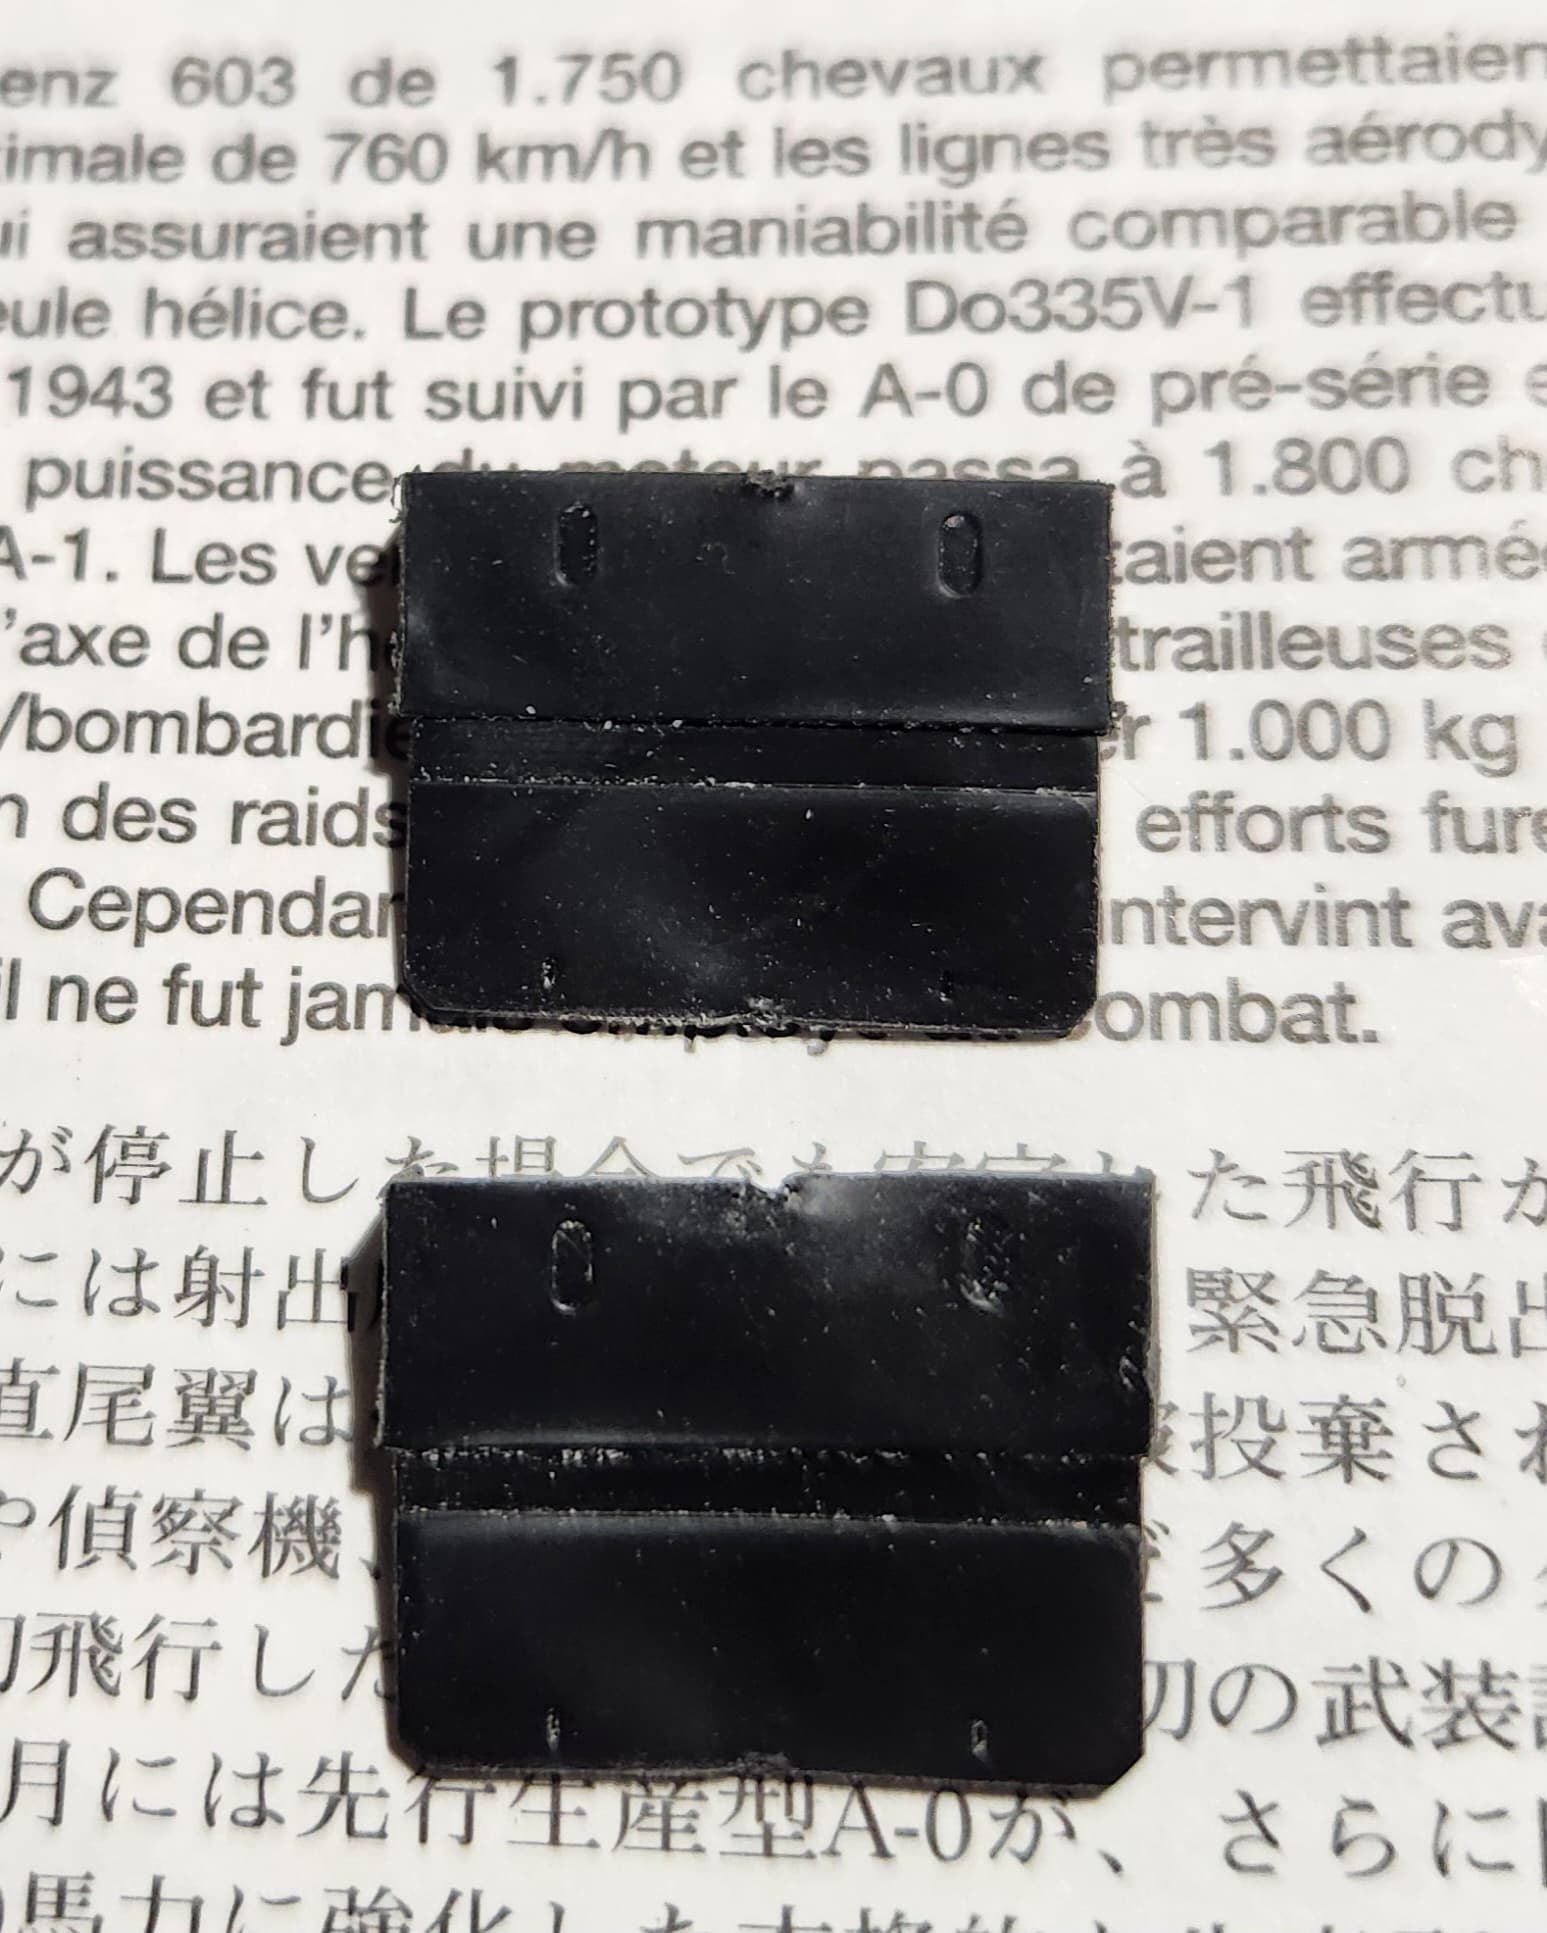
However, I just saw that the rear mud flaps are the same rubber like material as the polycaps…cutting and filing has resulted in rather unpleasing results and painting it will likely be a PITA. I might look into a PE set which would hopefully include a replacement as well as the chains for the smoke grenades.
Great light rigging, Tim.
Looking great - looking forward to see more ![]()
Great light rigging, Tim.
Looking great - looking forward to see more
Thanks Jesper!
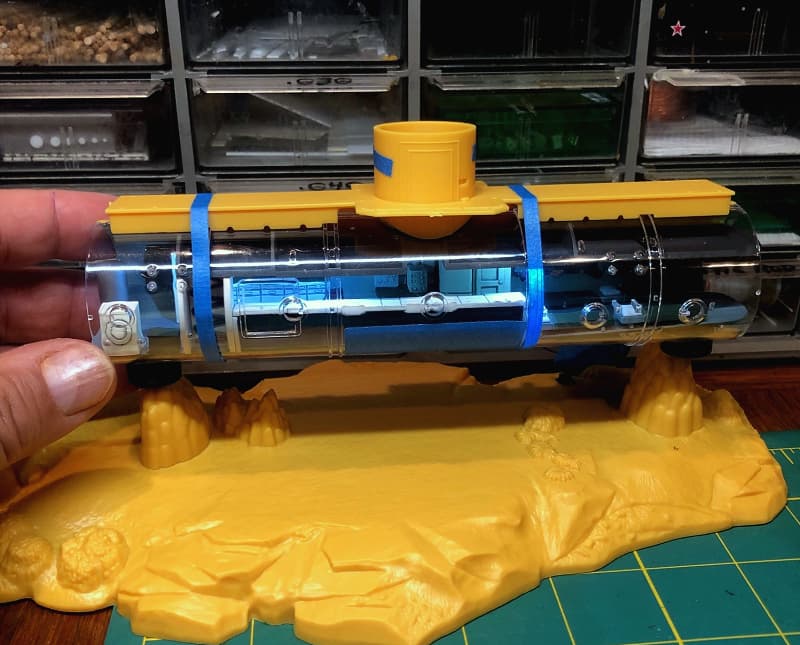
The brighter SEALAB interior is definitely an improvement, but it also highlights the fact that there are no people in there! The kit comes with four outside scuba divers, but that illuminated interior now cries out for some figures as well.
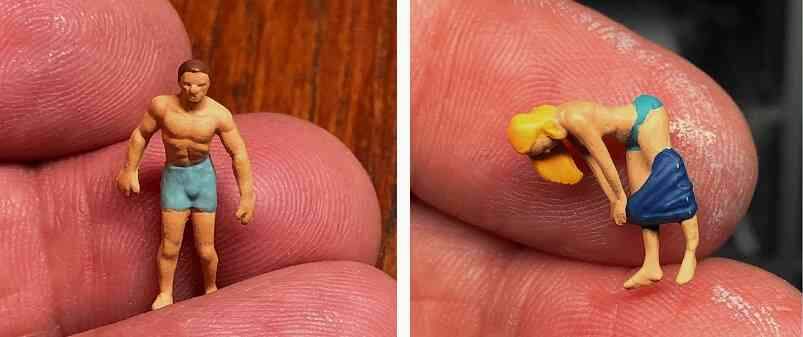
Photos of SEALAB aquanauts at work show them quite minimally attired without much in the way of uniforms. This makes sense as they had to swim in to access the underwater habitat, and the atmosphere in there was warm and humid. That cramped space didn’t leave much room for any excess gear, so things were pretty informal.
I was able to find some model railroad figures by Noch that should look right at home inside SEALAB. At 1/87 they are just a bit large, but the difference is within reason; the 5’ 10” tall male crewman comes out to 6’ 3” in 1/93 scale.
The beautifully sculpted figures came neatly pre-finished, but after smoothing the mold seams I repainted them with better skin tones and slightly revised clothing.
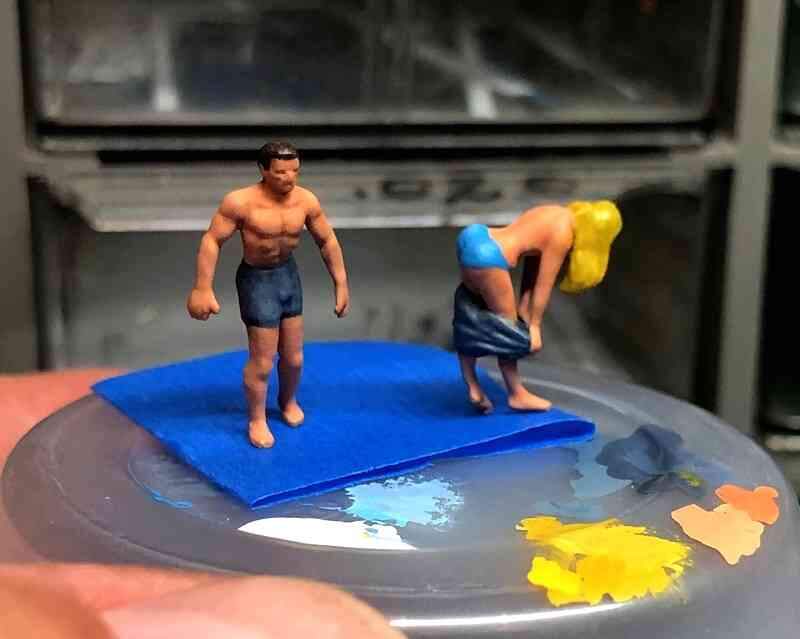
Before repainting the figures I had test fit them inside the habitat. It is all business in there with the male crewman stepping up to do some work at the lab bench and sinks…
and the female aquanaut just settling in for some rest after a hard day of research. Nothing sexy here… ![]()
Repainting completed, the figures are now secured and the habitat interior is ready to go aboard.
Ok, I finally managed to get off the “no-mojo zone” - hopefully for a longer time now. I managed to get cockpit of Airacobra mostly finished. Paints are from Tamiya range - XF-26 & XF-4 lightened with plain white. Unfortunately I destroyed the PE pilot’s seat, so had to use a kit’s original plastic part instead + some bonuses from Eduard’s PE set.
Minor updates on the Leo 2A7. Construction is nearly done. Tracks to do yet and some little bits. Only hiccup was the rear turret PE. I forced it abit and it got tweaked. But otherwise the ease of construction is still there. Its been a nice kit.
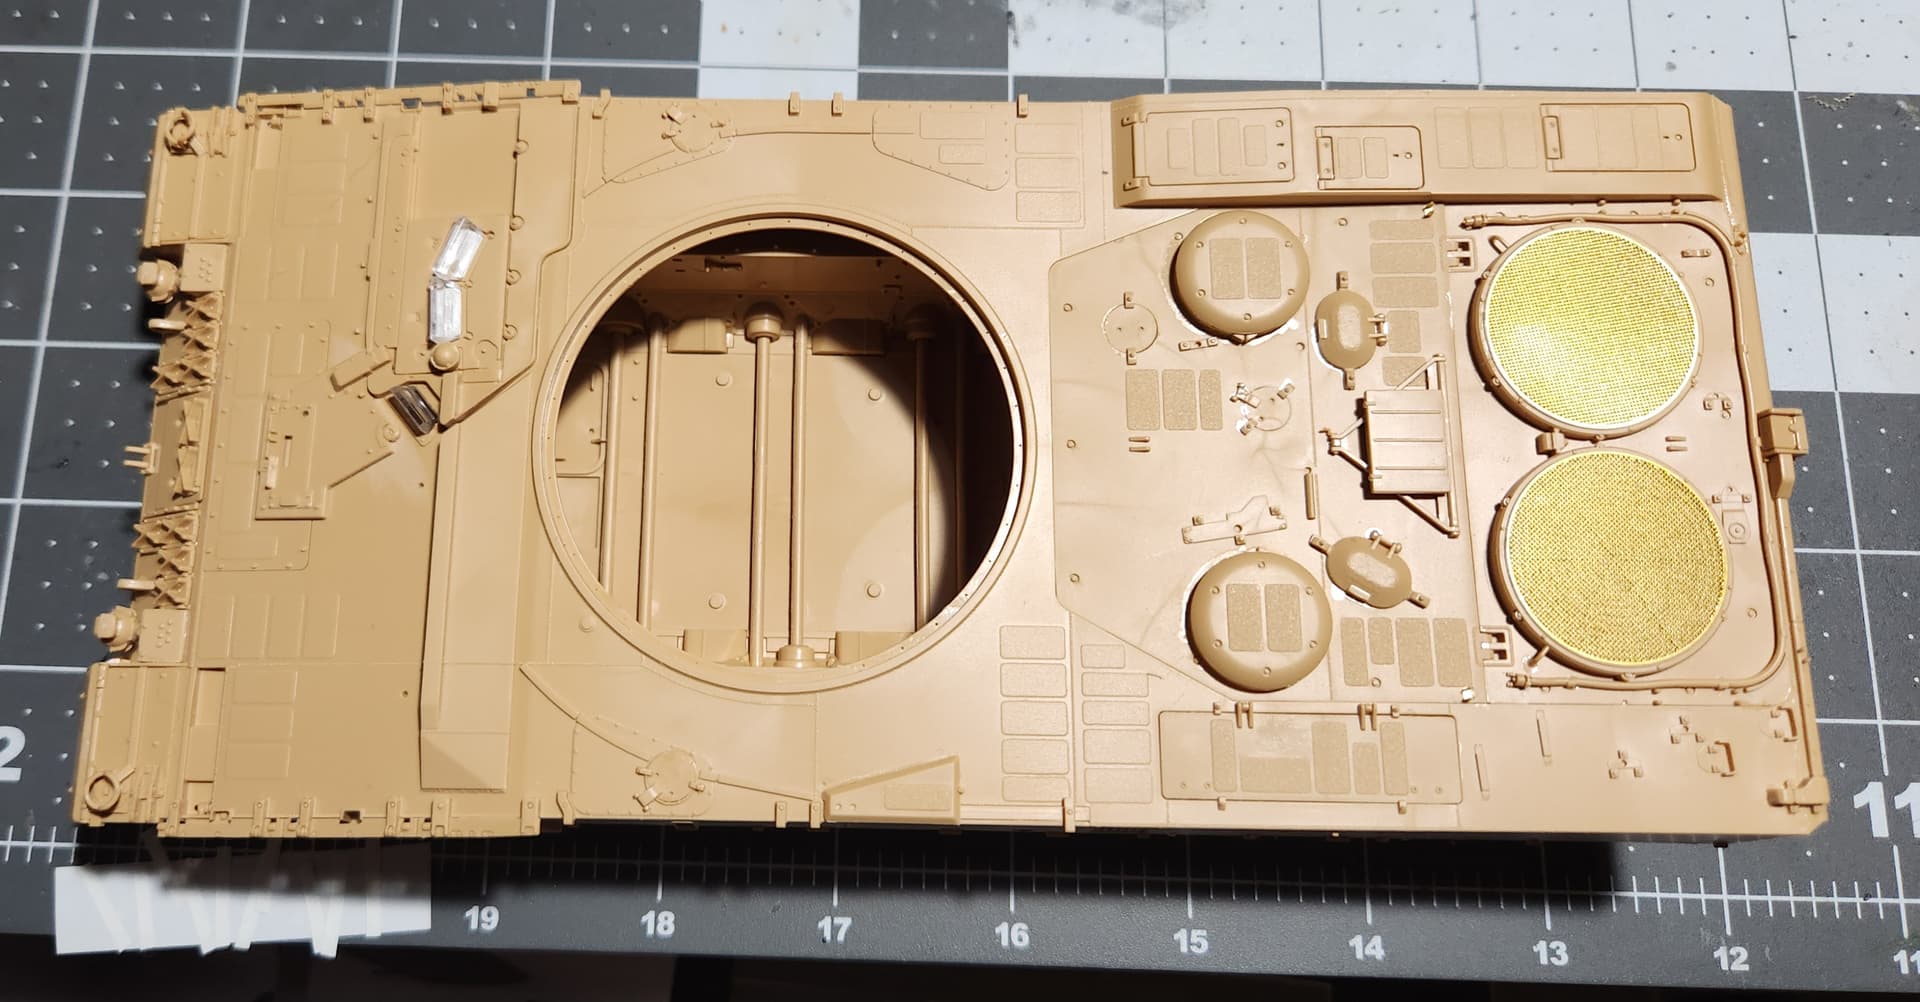
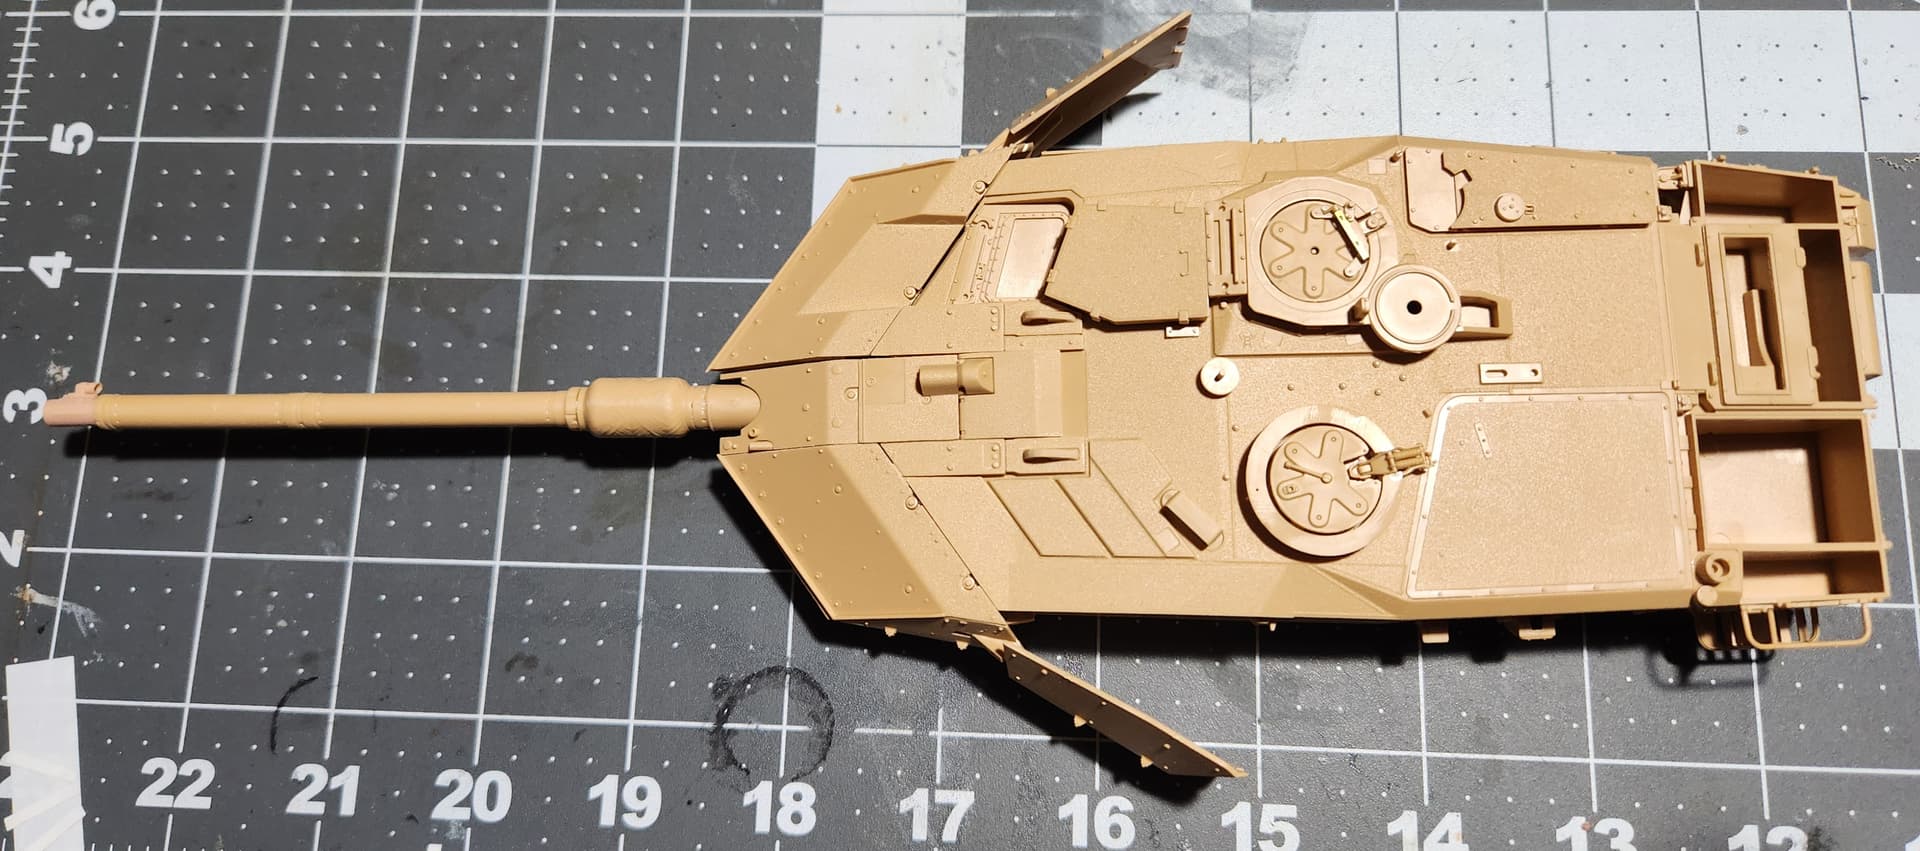
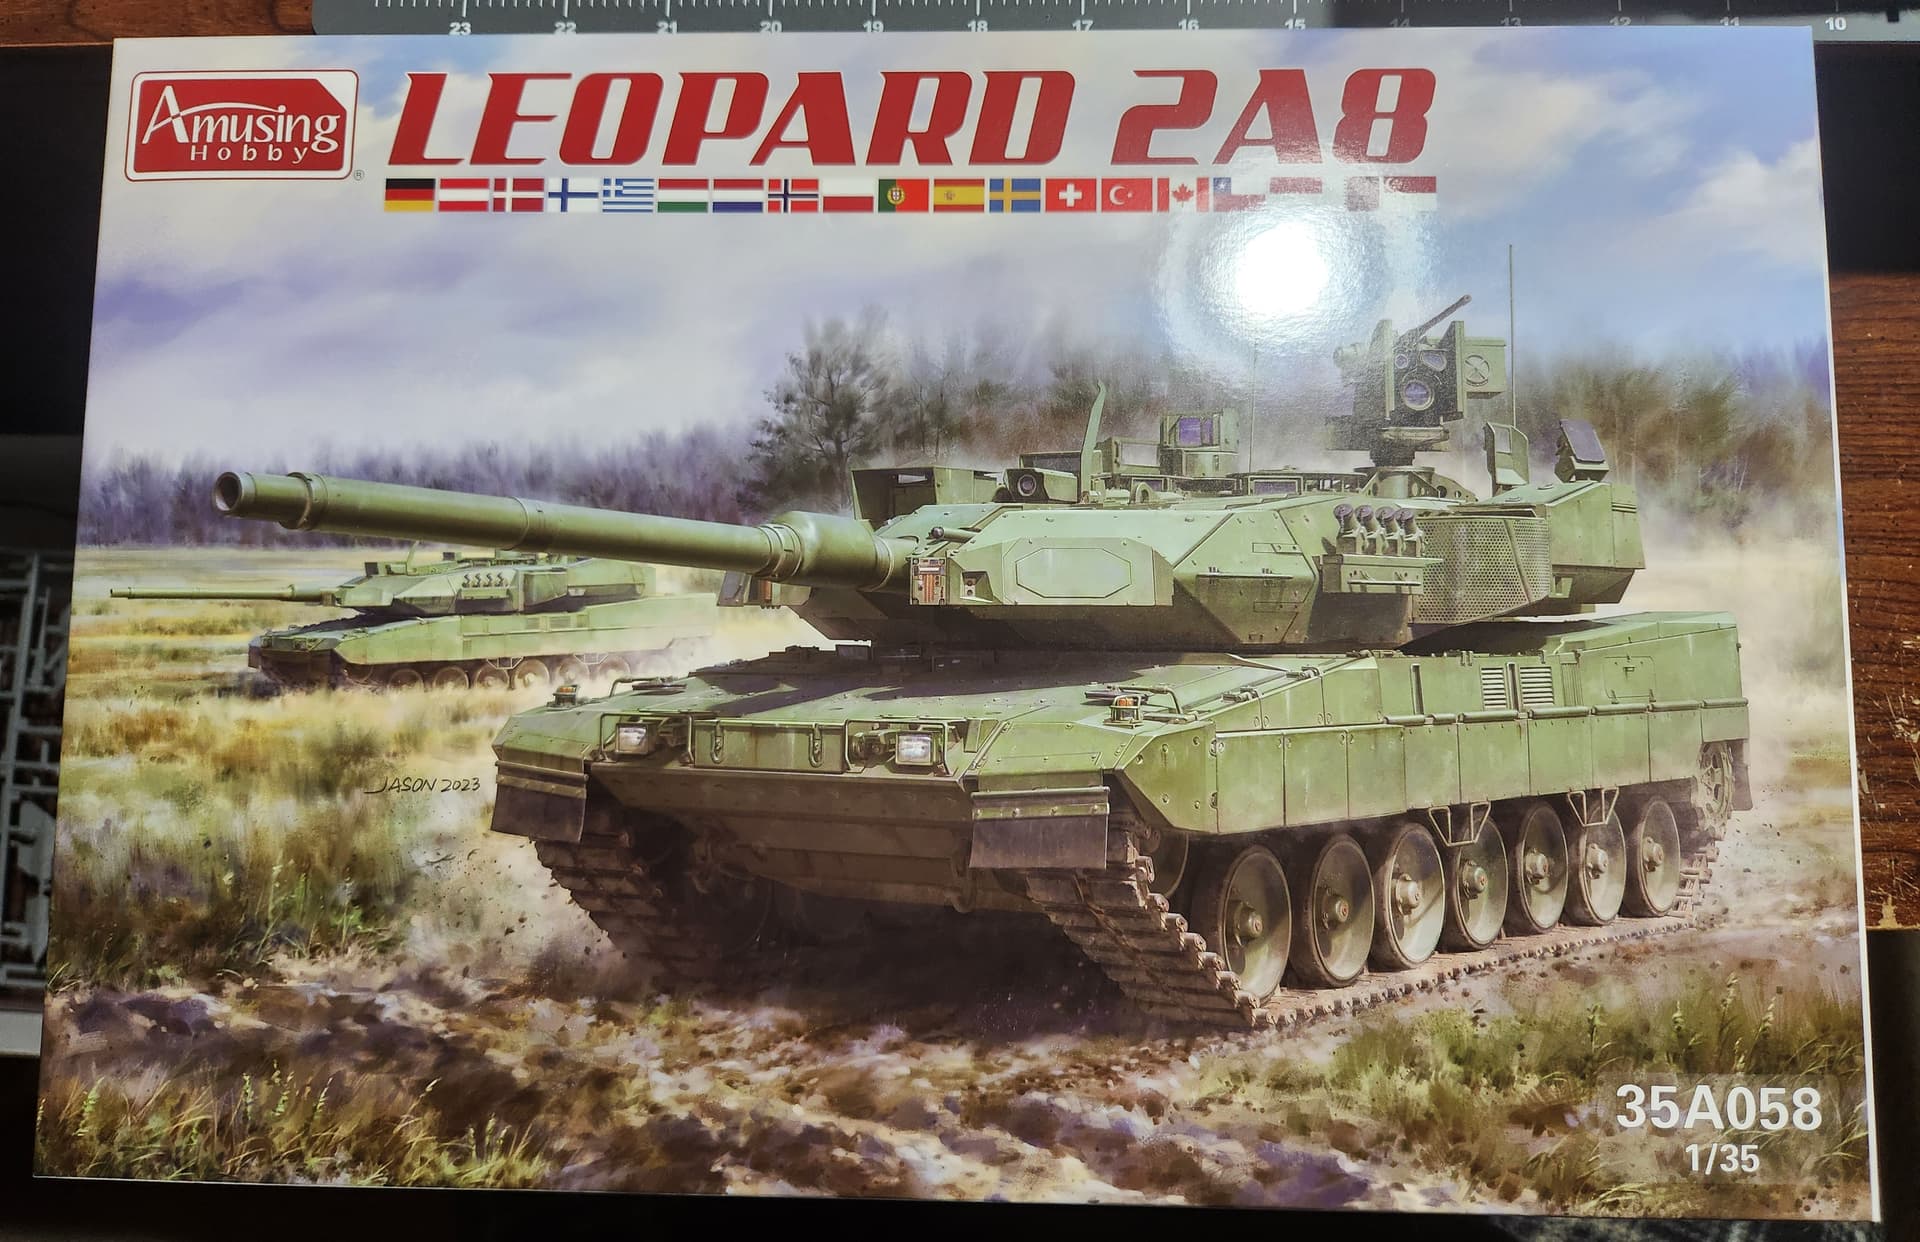
Decided to grab another Leo 2. This time the Amusing Hobby Leopard 2A8. First post war Amusing kit. With the multiple modern and experimental kits they’ve been releasing I figured I’d go with something relevant to my current RFM Leo 2A7.
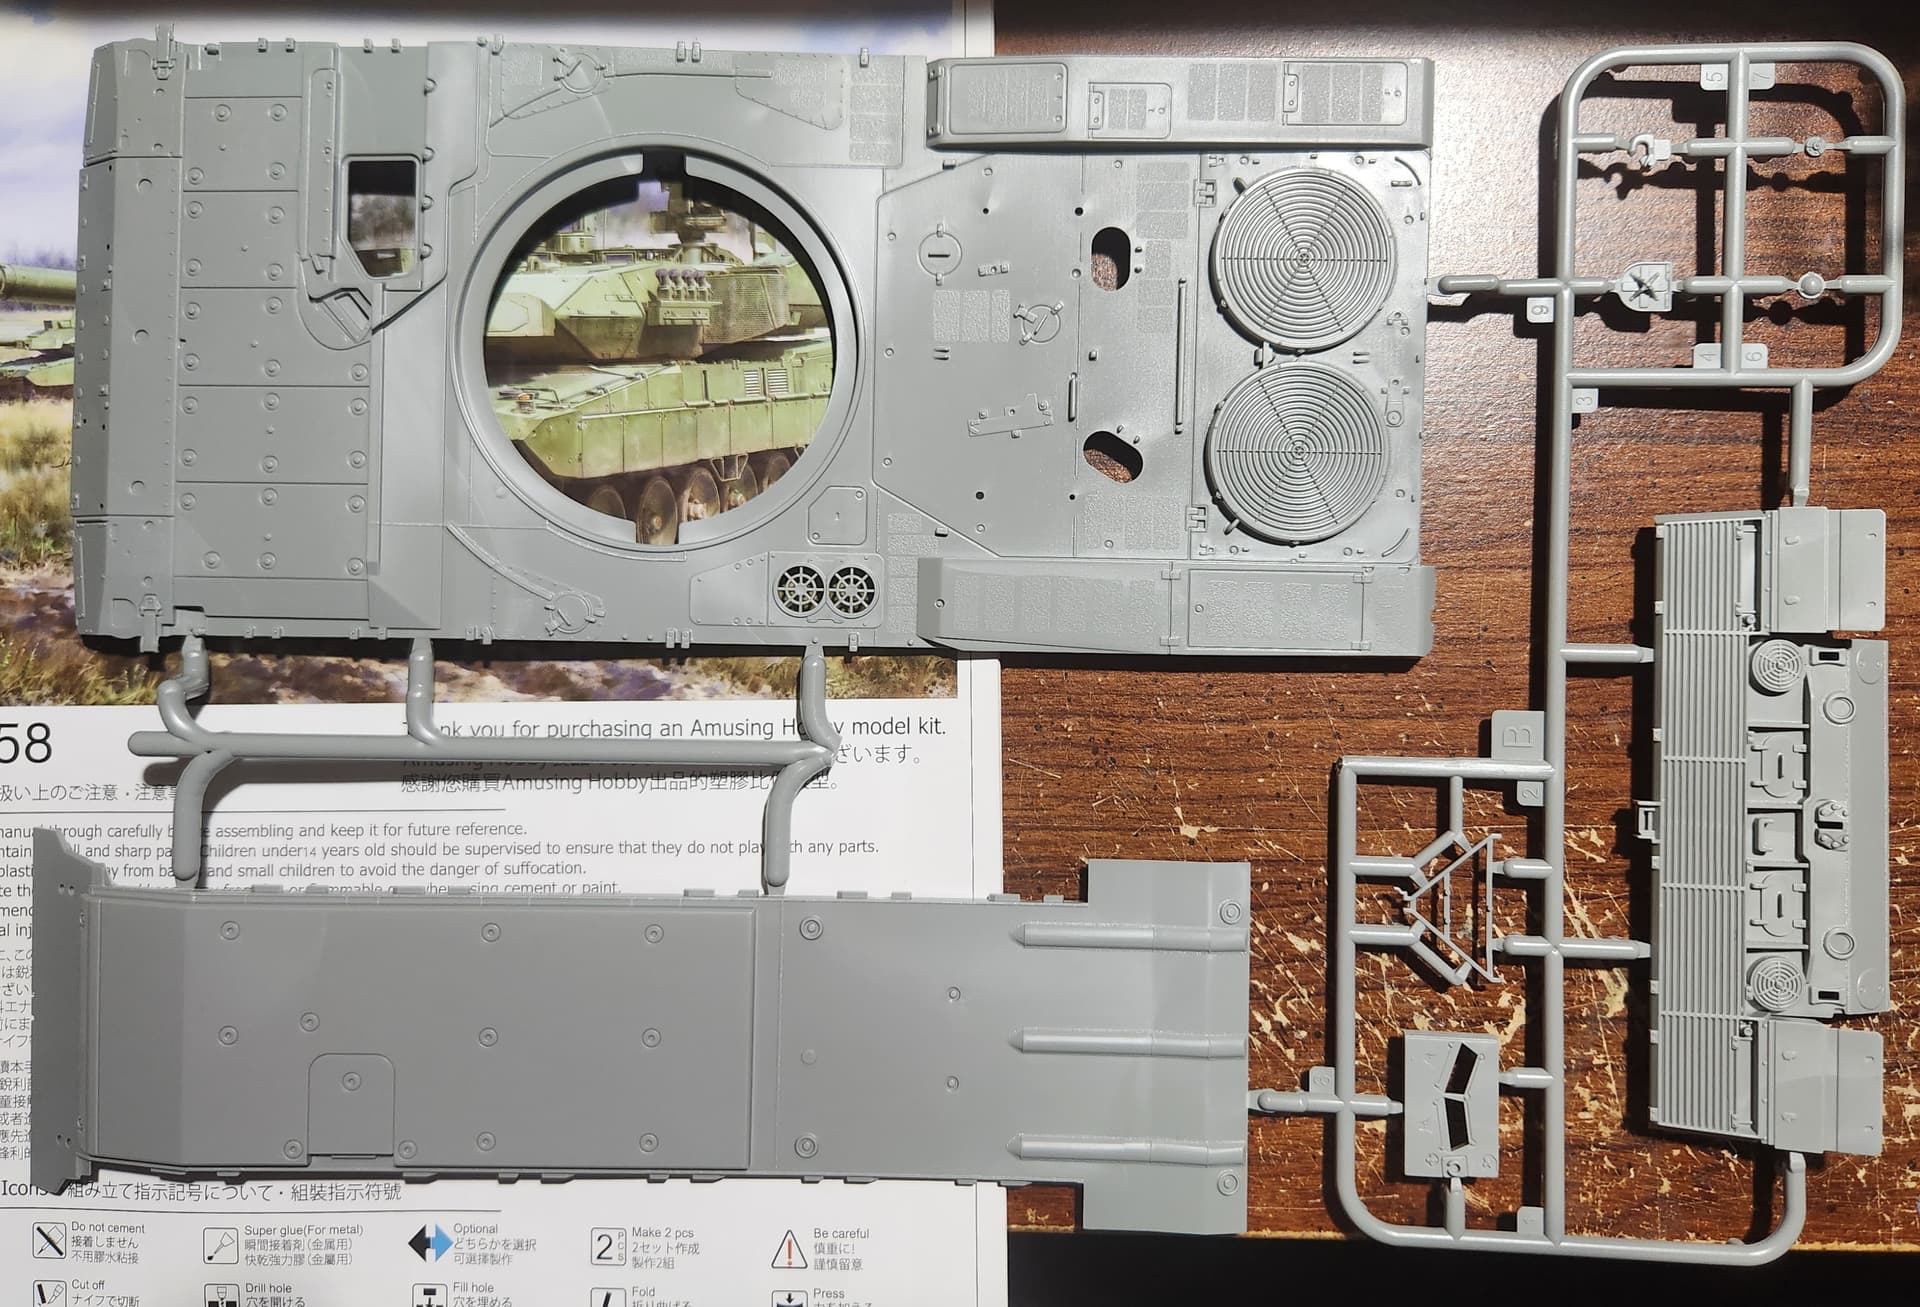
On first glance over the sprues this will likely be a much quicker build than the RFM. It still seems to retain a nice level of detail however even with the fewer and molded on parts. Posting pics of the turret and hull as an example.
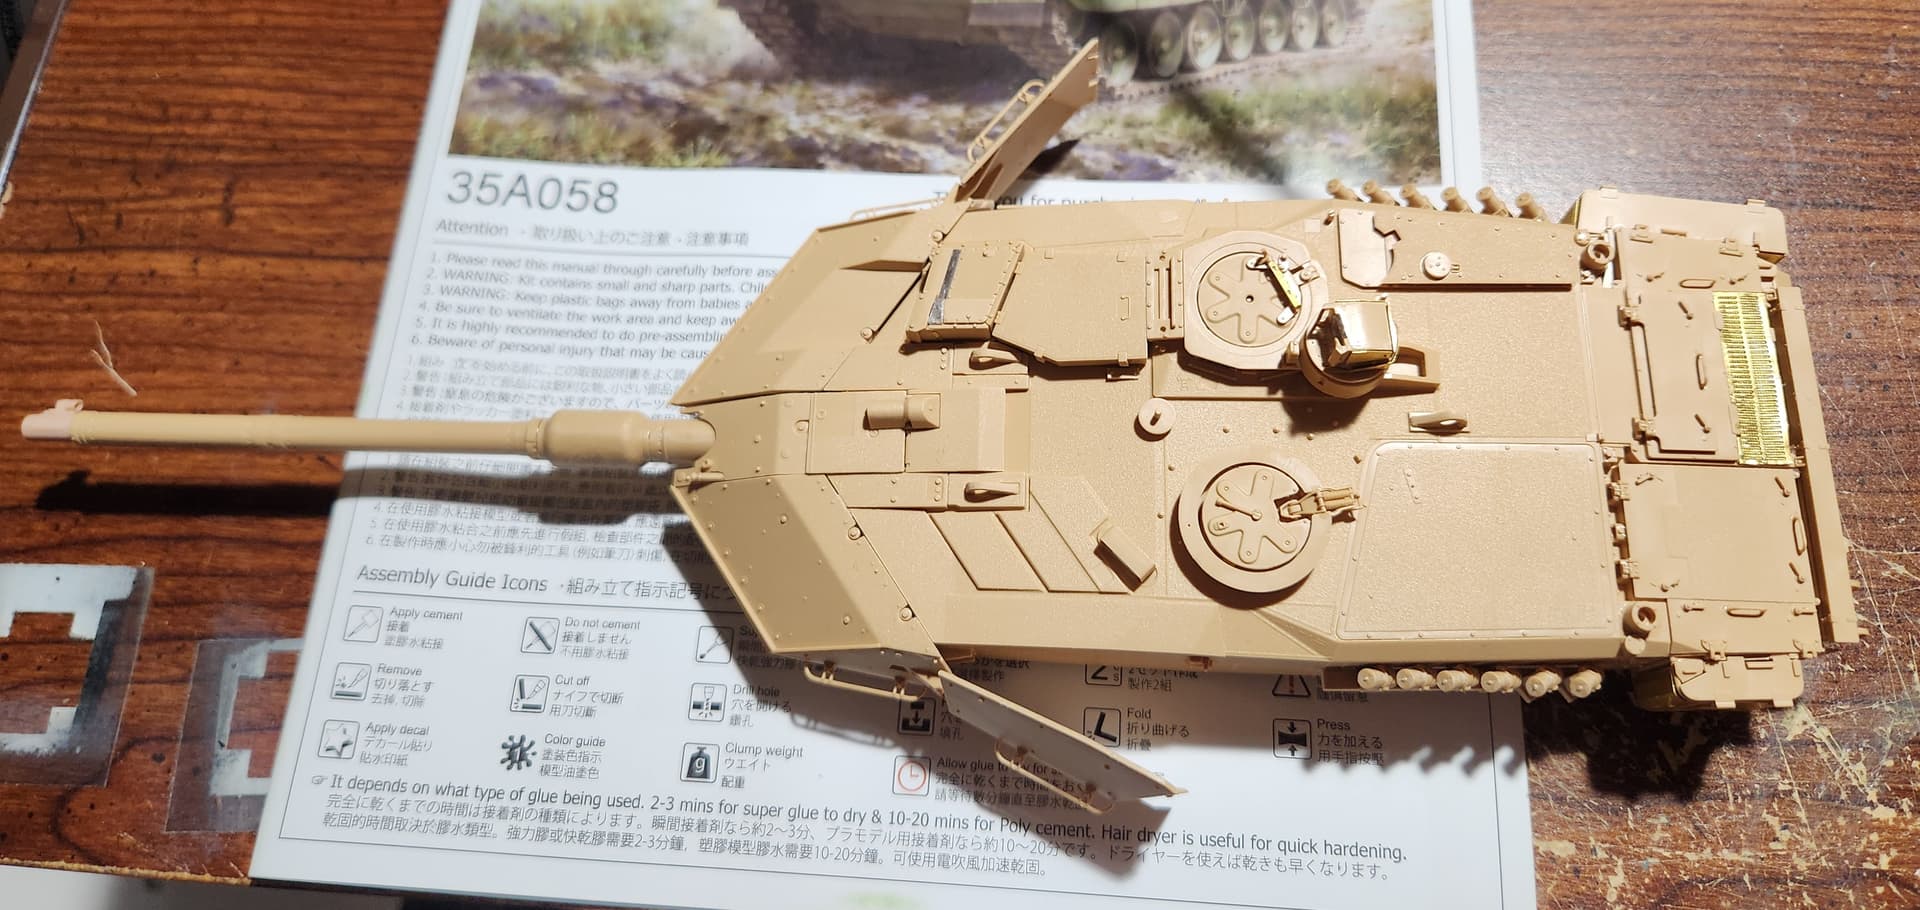
I can say I do not like the 3D printed barrel parts included as they have the odd ridges and more squared off areas where it should be smooth or rounded.
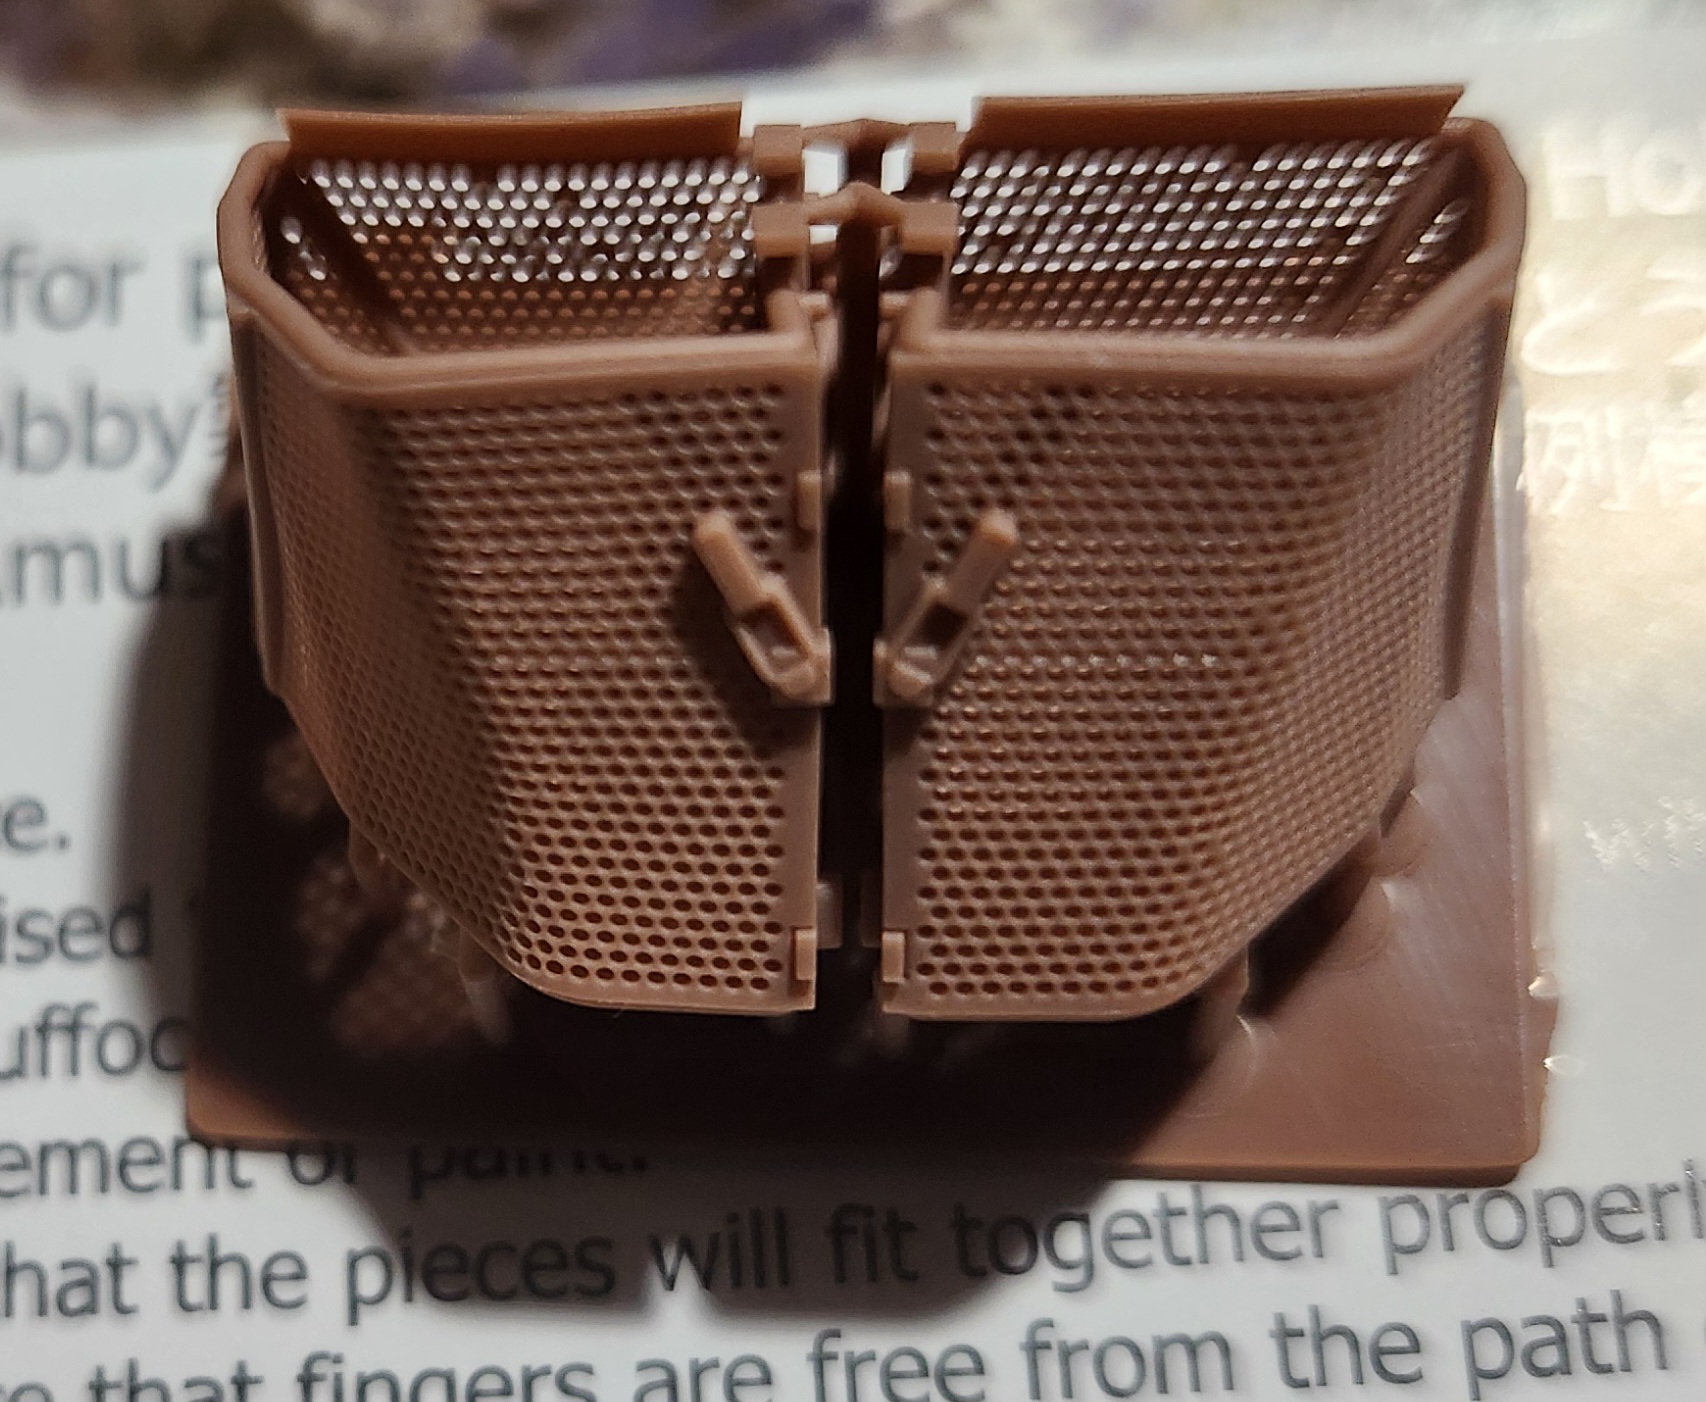
Their 3D baskets look far better and erases the need for the PE like on the RFM baskets.
I’ll post up wip pics as I start. Still working on the A7 currently though.
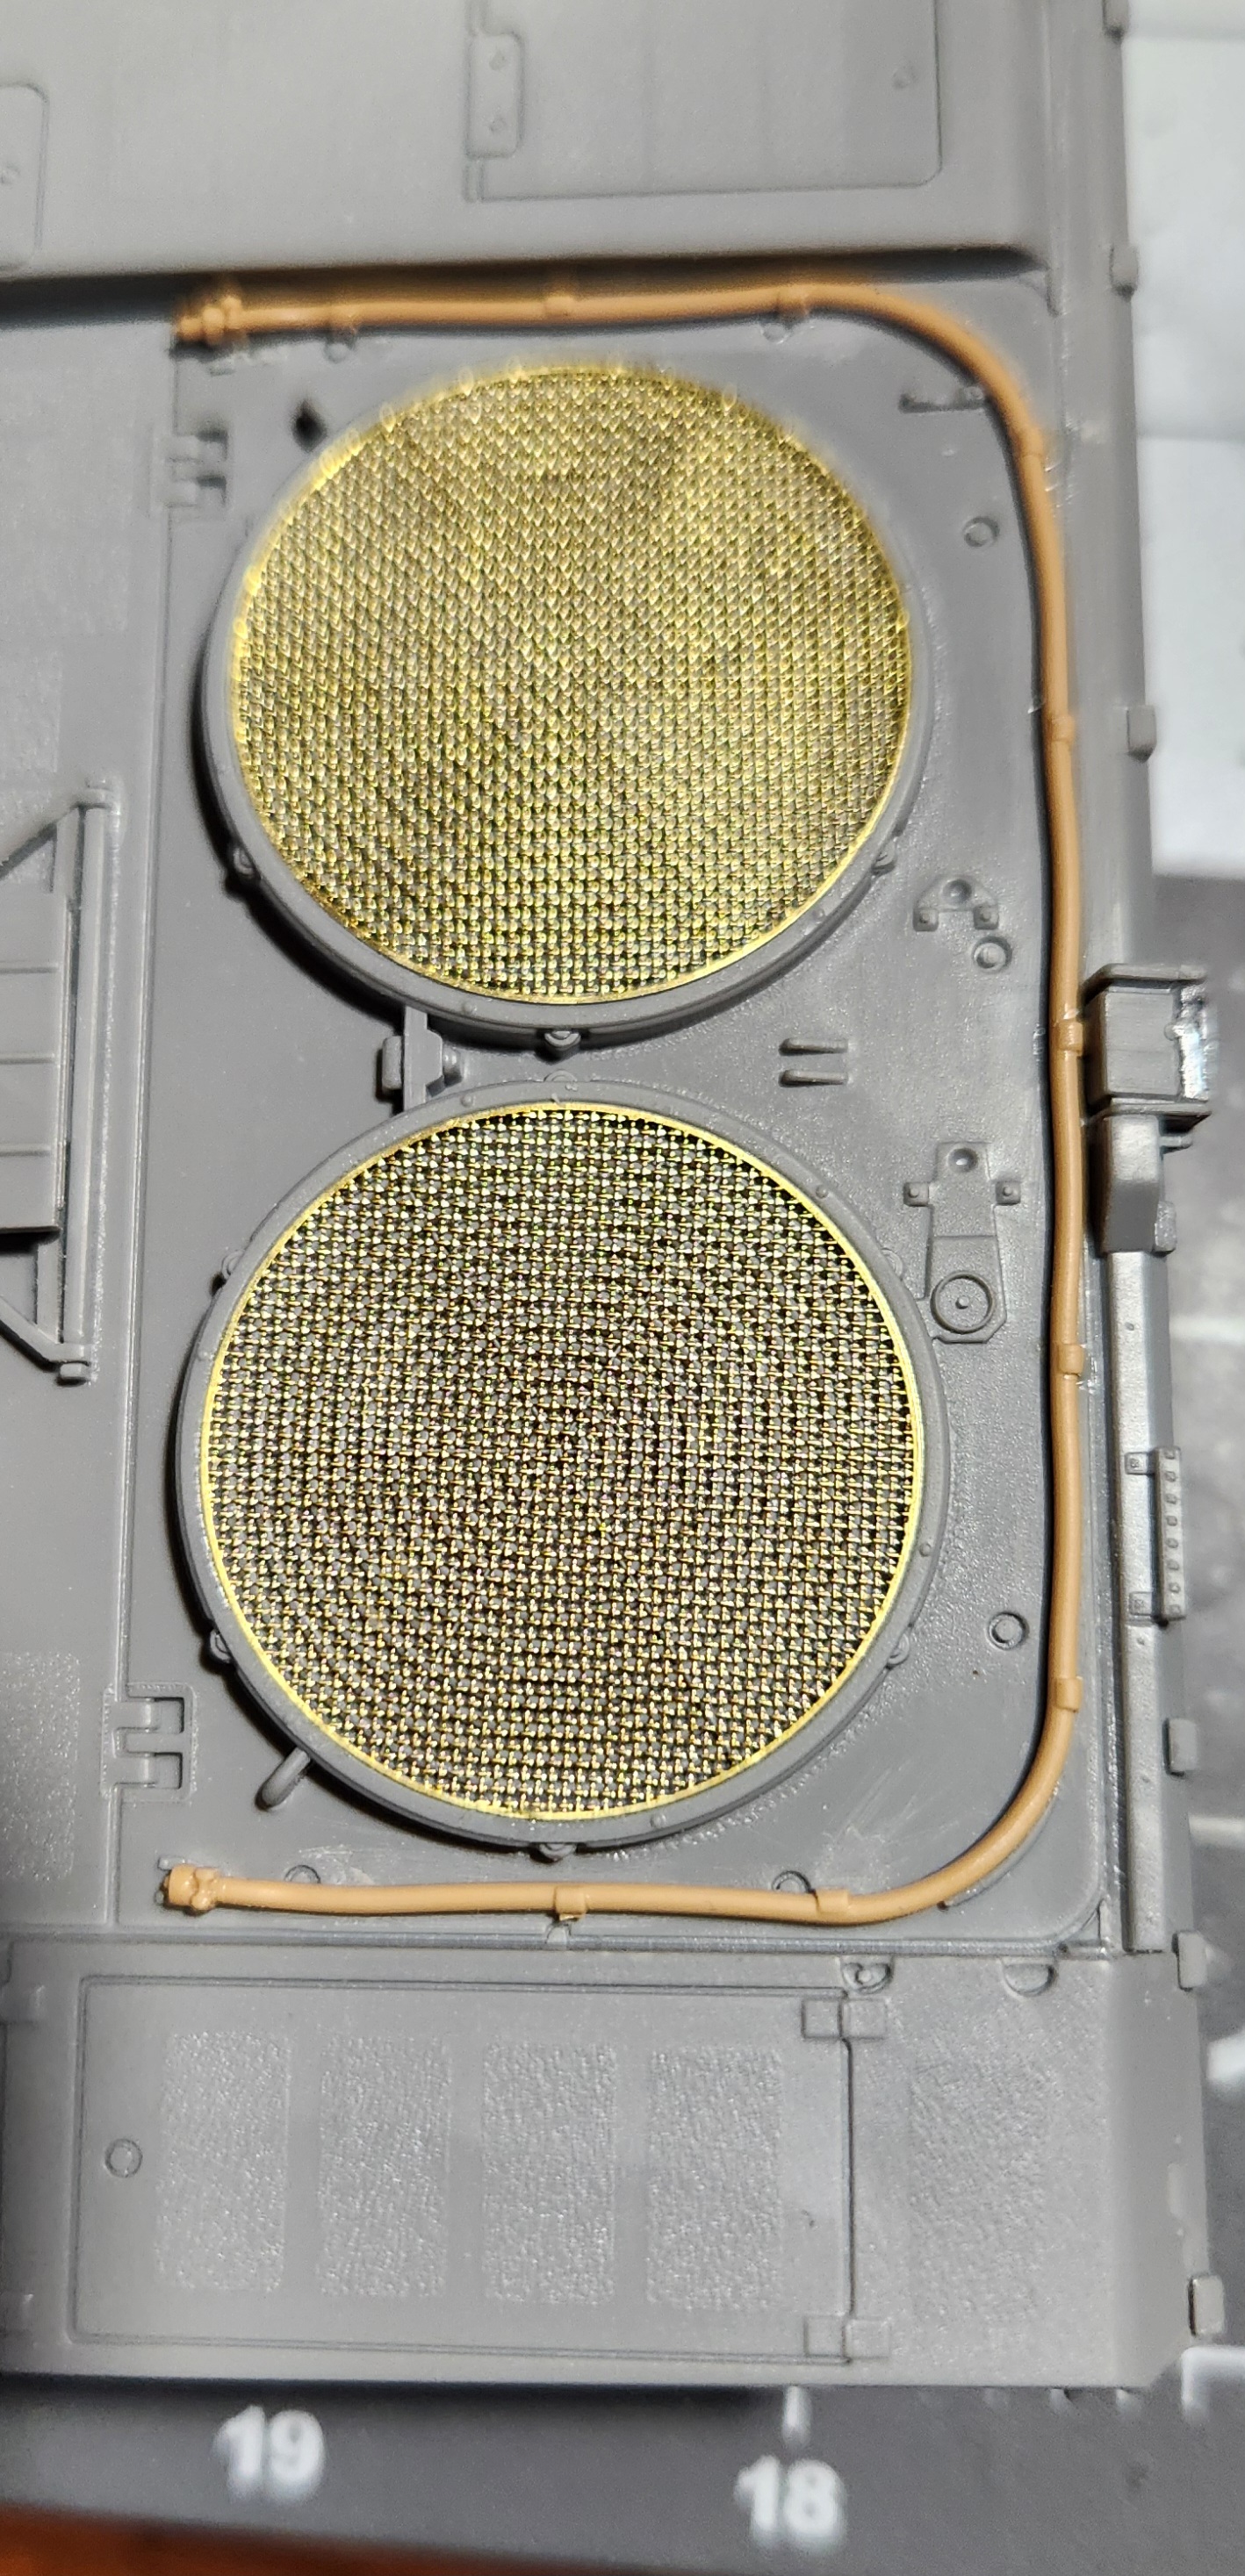
Started the hull on the Leo 2A8. Straight forward, nothing too complicated. Rear panel has the mud flaps molded on, no rubber seperate part like the 2A7.
Sadly, all the grab handles on the upper hull and rear are molded on solid, so replaced them with wire.
Amusing provides this rather thick rubber hose with wire inside for the fuel line. It’s way too thick when comparing it to the RFM version. Luckily the RFM comes with 2. One for the A7 and the other I assume for the A6. So I removed some bits and fit the RFM one.
From here I’ll add the headlights and hatch, mirrors and clean up smaller parts and tools for seperate painting. Then its onto the turret.
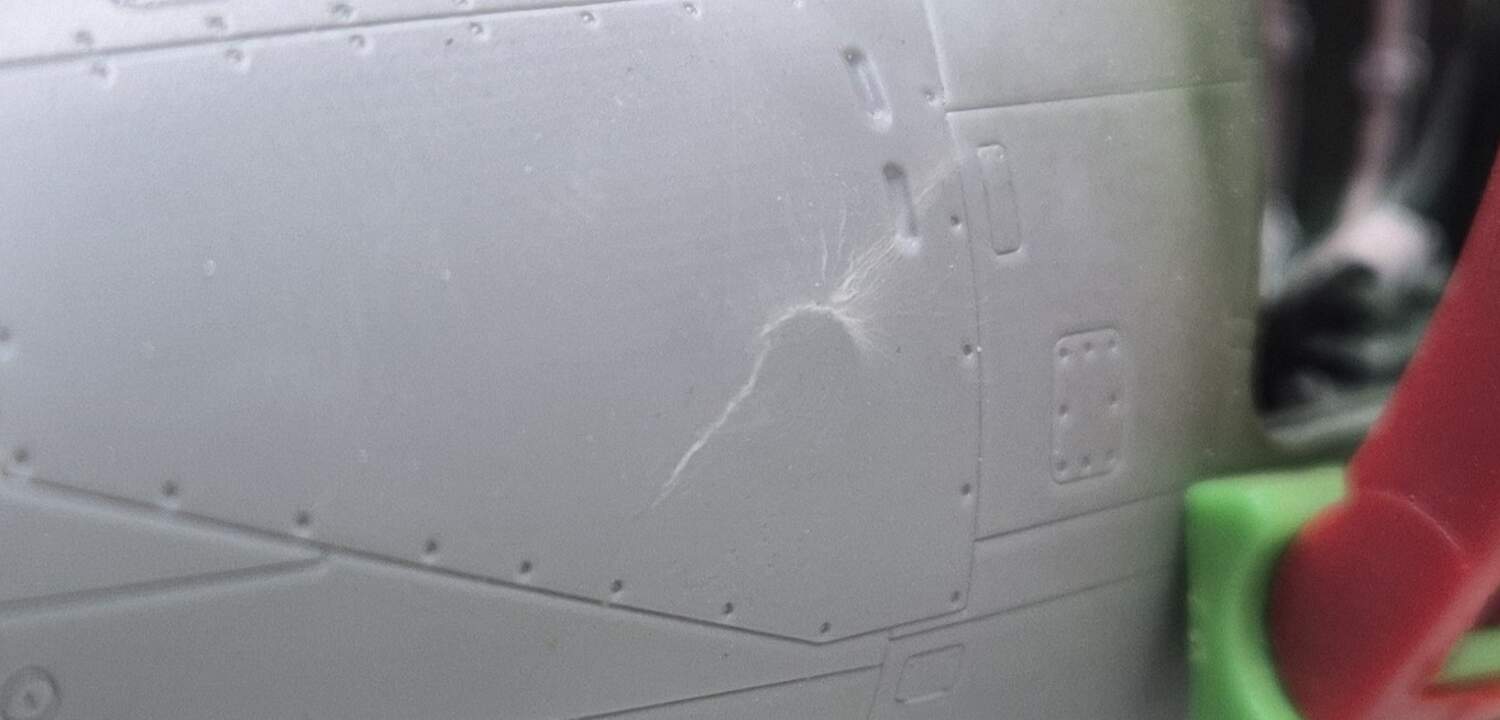
After 2 days fitting battle with Airacobra’s hull… I lost … 3 times.
Well, battle is not over yet, but it was really hard to make them fit… so after long periods of sanding, cutting, bending I decided to use an ultimate solution… CA to bond both halves. It still left a small gap between - a first loss of the day ![]()
The second loss was that only after I finally let the glued parts go out of my hands I realized that I pressed too much in some places and and caused a dent on the left side of the hull
It’s nasty one but the good thing is that after running back and forth with my fingers it doesn’t look like if surface extruded… So hopefully it won’t be visible after painting or won’t crack after some time.
And the 3rd loss is that only at that point I realised where the problem with fitting was and started searching Internet for confirmation. So if you want to avoid my mistakes - check some great video on youtube from Modeler’s Workshop ( https://www.youtube.com/watch?v=CXfkQEoGxtM ) explaining exactly what should be avoided during the build…