How do I make parts fit well?

Good day fellow model makers,

With my current Sd. Kfz. 11 kit from AFV Club I have been introduced to the first time ever that not all kits are having parts that fit that well together with assembling the kit.
After doing some research on scalemates.com I discovered that the kit is from the year 2002.
And in my book that’s a pretty old kit.

I have had a number of difficulties with this kit and it took me a lot of extra time and work to just complete one step at a time, especially later on with the project.
That’s why I’m asking this question here, are there certain methods or techniques to use?

It is a little hard to describe detailed and to the point, because it is such a general question.
But I’m hoping to acquire the information from you so I can improve my modeling skills as well.
Learning from this kit and being able to build and purchase more kits even if they are not as good as the newer kits.
For example, if there simply isn’t a newer kit availlable for a certain topic I find interesting.

Thanks in advance and hope you can help me.

You can remove flashing and sprue gate attachment points with razor and/or sanding sticks.

AFV kits are not beginner kits and they will take longer as they have more parts and need more work to assemble.

In general, don’t worry as much about the age of a kit as reading reviews and seeing posts of others build of the kit to find possible troublesome areas. Always take with a grain of salt the issues, your kit because of the molding process may or may not have that same issue. Look for thing like make sure step 5 is good otherwise step 25 will not fit well. Ensuring parts have a good prefit is ideal. Small sanding on one or both sides can improve the connection. Sometimes one or two swipes of a medium or light grit sanding stick is all that is needed. Most times a heavy grit is too much especially if not experienced.

4 Likes

Not to sound rude but there was a thread a while back in which you asked what kit to build next. Many people, myself included said to the tackle the other kit over the AFV club for the exact reasoning you are seeing now.

Kit age isn’t all that important, I am building a Hasegawa Ki-84 from the 1990’s right now and it fits nearly perfect. What is more important is kit difficultly. I would recommend getting a few tamiya or similar builds done first.

That being said, now that it is started let’s finish it up! As @Tank_1812 said make sure all sprue nubs, flash and any other obstructions are gone. Then test fit, test fit, test fit. Many fit issues are easier to solve before gluing.

Another sound piece of advice from @Tank_1812 is to look ahead in the instructions on complex kits, make sure a small error on step 1 doesn’t grow into a massive error on step 10. It is also okay do things in a different order than the instructions suggest, as it sometimes makes things easier

8 Likes

Test fit,sand,scrape,test fit,sand,scrape some more,putty,and sand.

I liked the above point about the glue helping to fix stuff too.

I really do try to avoid such kits,bench time is precious,and i dont want to get too aggravated,thats just me.

3 Likes

That’s the biggest reason parts won’t fit correctly, especially slab sided parts. I recall over the years reading about folks having difficulty with DML’s MLRS kits, and also their Scud. Never had problems with either. Plus I use an Opti-Visor to inspect every gate location, although the ultimate fix is just test fitting everything.
In other instances, depending on the part, a piece of granite for sanding flat parts helps. It corrects small molding errors, mold seams, and sometimes even the tiny protruding lip around a knockout hole. Sometimes they’re even raised a bit. I check all of those as well. And finally, if it has alignment pins (barrel) I generally just trim them off. More often than than not they prevent the two barrel halves from getting a tight fit.

5 Likes

AFV kits can sometimes be a real PITA to assemble. Sometimes they can have more parts than necessary (I don’t think they used much slide-molding). This may, or may not, be relevant to your build: some 20 yrs ago I built their M5. The engine deck comprised 4 or 5 flat pieces, which had to fit perfectly square, and in alignment. The least little miss in clean-up meant two of the parts didn’t fit properly, which threw the rest of the assembly off square as well. So…meticulous clean-up is a must. It also helped to glue 2, or 3 sections together, then wait for the glue to set up before adding other parts so I wouldn’t have any crooked, or mis-aligned sections.
:smiley: :canada:

2 Likes

Dry fit as @Tojo72 said. Remove all flash as @Tank_1812 Tank posted.
As you dry fit look to see if the hangup is on one or more areas.
Also, check flat parts or flat edges to see if the part is warped.

2 Likes

I feel the best advice anyone can offer you Roland is to team up with an experienced model builder in your vicinity, someone that can answer your questions in real time so you can gain some hands-on experience for yourself, that is the best teacher there is. Frankly not everyone has the aptitude for scale model building, I work with some pretty smart guys that admit they wouldn’t even know where to begin building a model. I’m not trying to dissuade you from enjoying the hobby but give yourself a break and choose a kit that is less challenging so you can complete it and admire what you’ve done, that’s what makes you appreciate the hobby. I would suggest that you try a Snap-Tite model of your favorite car or airplane or tank, one that would allow you to move through the build process quickly so you can spend time learning to paint and get some use out of your airbrush, in fact you don’t even have to buy a model, get yourself a dime-store water pistol and paint it to look as real as you can. Best of luck though whatever you decide.

Cajun :crocodile:

Their Centurion kits are very similar. And many locations where the sprue gates were are angled, so you really have to lookj closely.

1 Like

Thank you for all the pieces of advice.
One reason I might be able to think of why I’m having such difficulties with this kit, could be my assumption that the manufacturer has done everything properly.
And that the kit parts are at least free of any errors or contimination, such as residual plastic or other dirt I might have to remove for myself.
I’m also assuming as standard that the kit instructions are good as well, that they are correct.
But I’m now learning that is not always the case.
And that I’ve probably just being lucky that I constantly had kits that were so nice to build.

I’m going to try and check the forums more regulary, try to plan a day for this when I check as standard.

I also must admit I didn’t do a good job in processing all the information I did receive in previous placements I made here. I’m not much more serious about it and write everything of information down in my Bullet Journal of my own topics and others which I’m going to check. And write useful information down from that as well. So my apologies for this. I’m going to improve.

Furthermore, I’m feeling that some of the advice like sanding and test fitting. I’m already doing. But that I might not know what to pay attention for. What could be signs of a bad fitting part? How do I know if the drawing in the instructions is correct? What if a part just doesn’t want to fit well, even after I’ve tried to make it fit well? Like making a hole bigger or cut a little bit of the piece of?

Maybe it is just lack of experience and I’m now planning to just avoid AFV Club altogether whenever I can. Like @Tojo72 just said. Because I’am sharing his opinion that bench time and hobby time is really really precious in my case. And that it is best to continue my journey and just discover which kits are more for my taste and which ones I just don’t like. Because I didn’t had the best experiences with them.

One more thing, I have only had once an experienced in the past with a ICM Henschel 33 D1 Kit of a truck which was even worse than the AFV Club kit for me now. Because the instructions were of bad quality and I had the same issues with fitting as I’m having now. And I threw it away, because I just couldn’t get myself anymore to proceed any further with that kit at all. It is tempting for me to just throw it in the trash and start with a nicer one, like the Tiger or Jagdpanther.

But then again, I’m not giving up that easily and if I can even do it slightly I’m going to finish this kit to the end.

2 Likes

Not all kits sre created equal,some people love the challenge of doing difficult kis,there are build reviews of a lot of kits,I always research them on Google before buying.

1 Like

I wouldn’t avoid a company based on experience with one kit. You’ll limit yourself to available subjects. For example AFV club makes the finest line of Churchill tanks. I built the ICM spitfire once and it was so bad I tossed it, but they make some really nice kits

It should be obvious when parts fit well, no seams, or small enough seems they can be sand flush, squared up joins, nothing crooked etc.

Every single kit requires clean up of sprue gates till they are flush or you will get fit problems. Some really nice kits can’t even have paint on the seams or they won’t fit. Also make sure mold lines and flash are cleaned up.

Get a bunch of really high grit sand paper like 1500+ this allows you to work slowly sanding without removing too much material

Edit: final point, do not be afraid to use filler if you have to. Don’t use it as a crutch. But some kits no matter how much you try will need some filler to hide small gaps

2 Likes

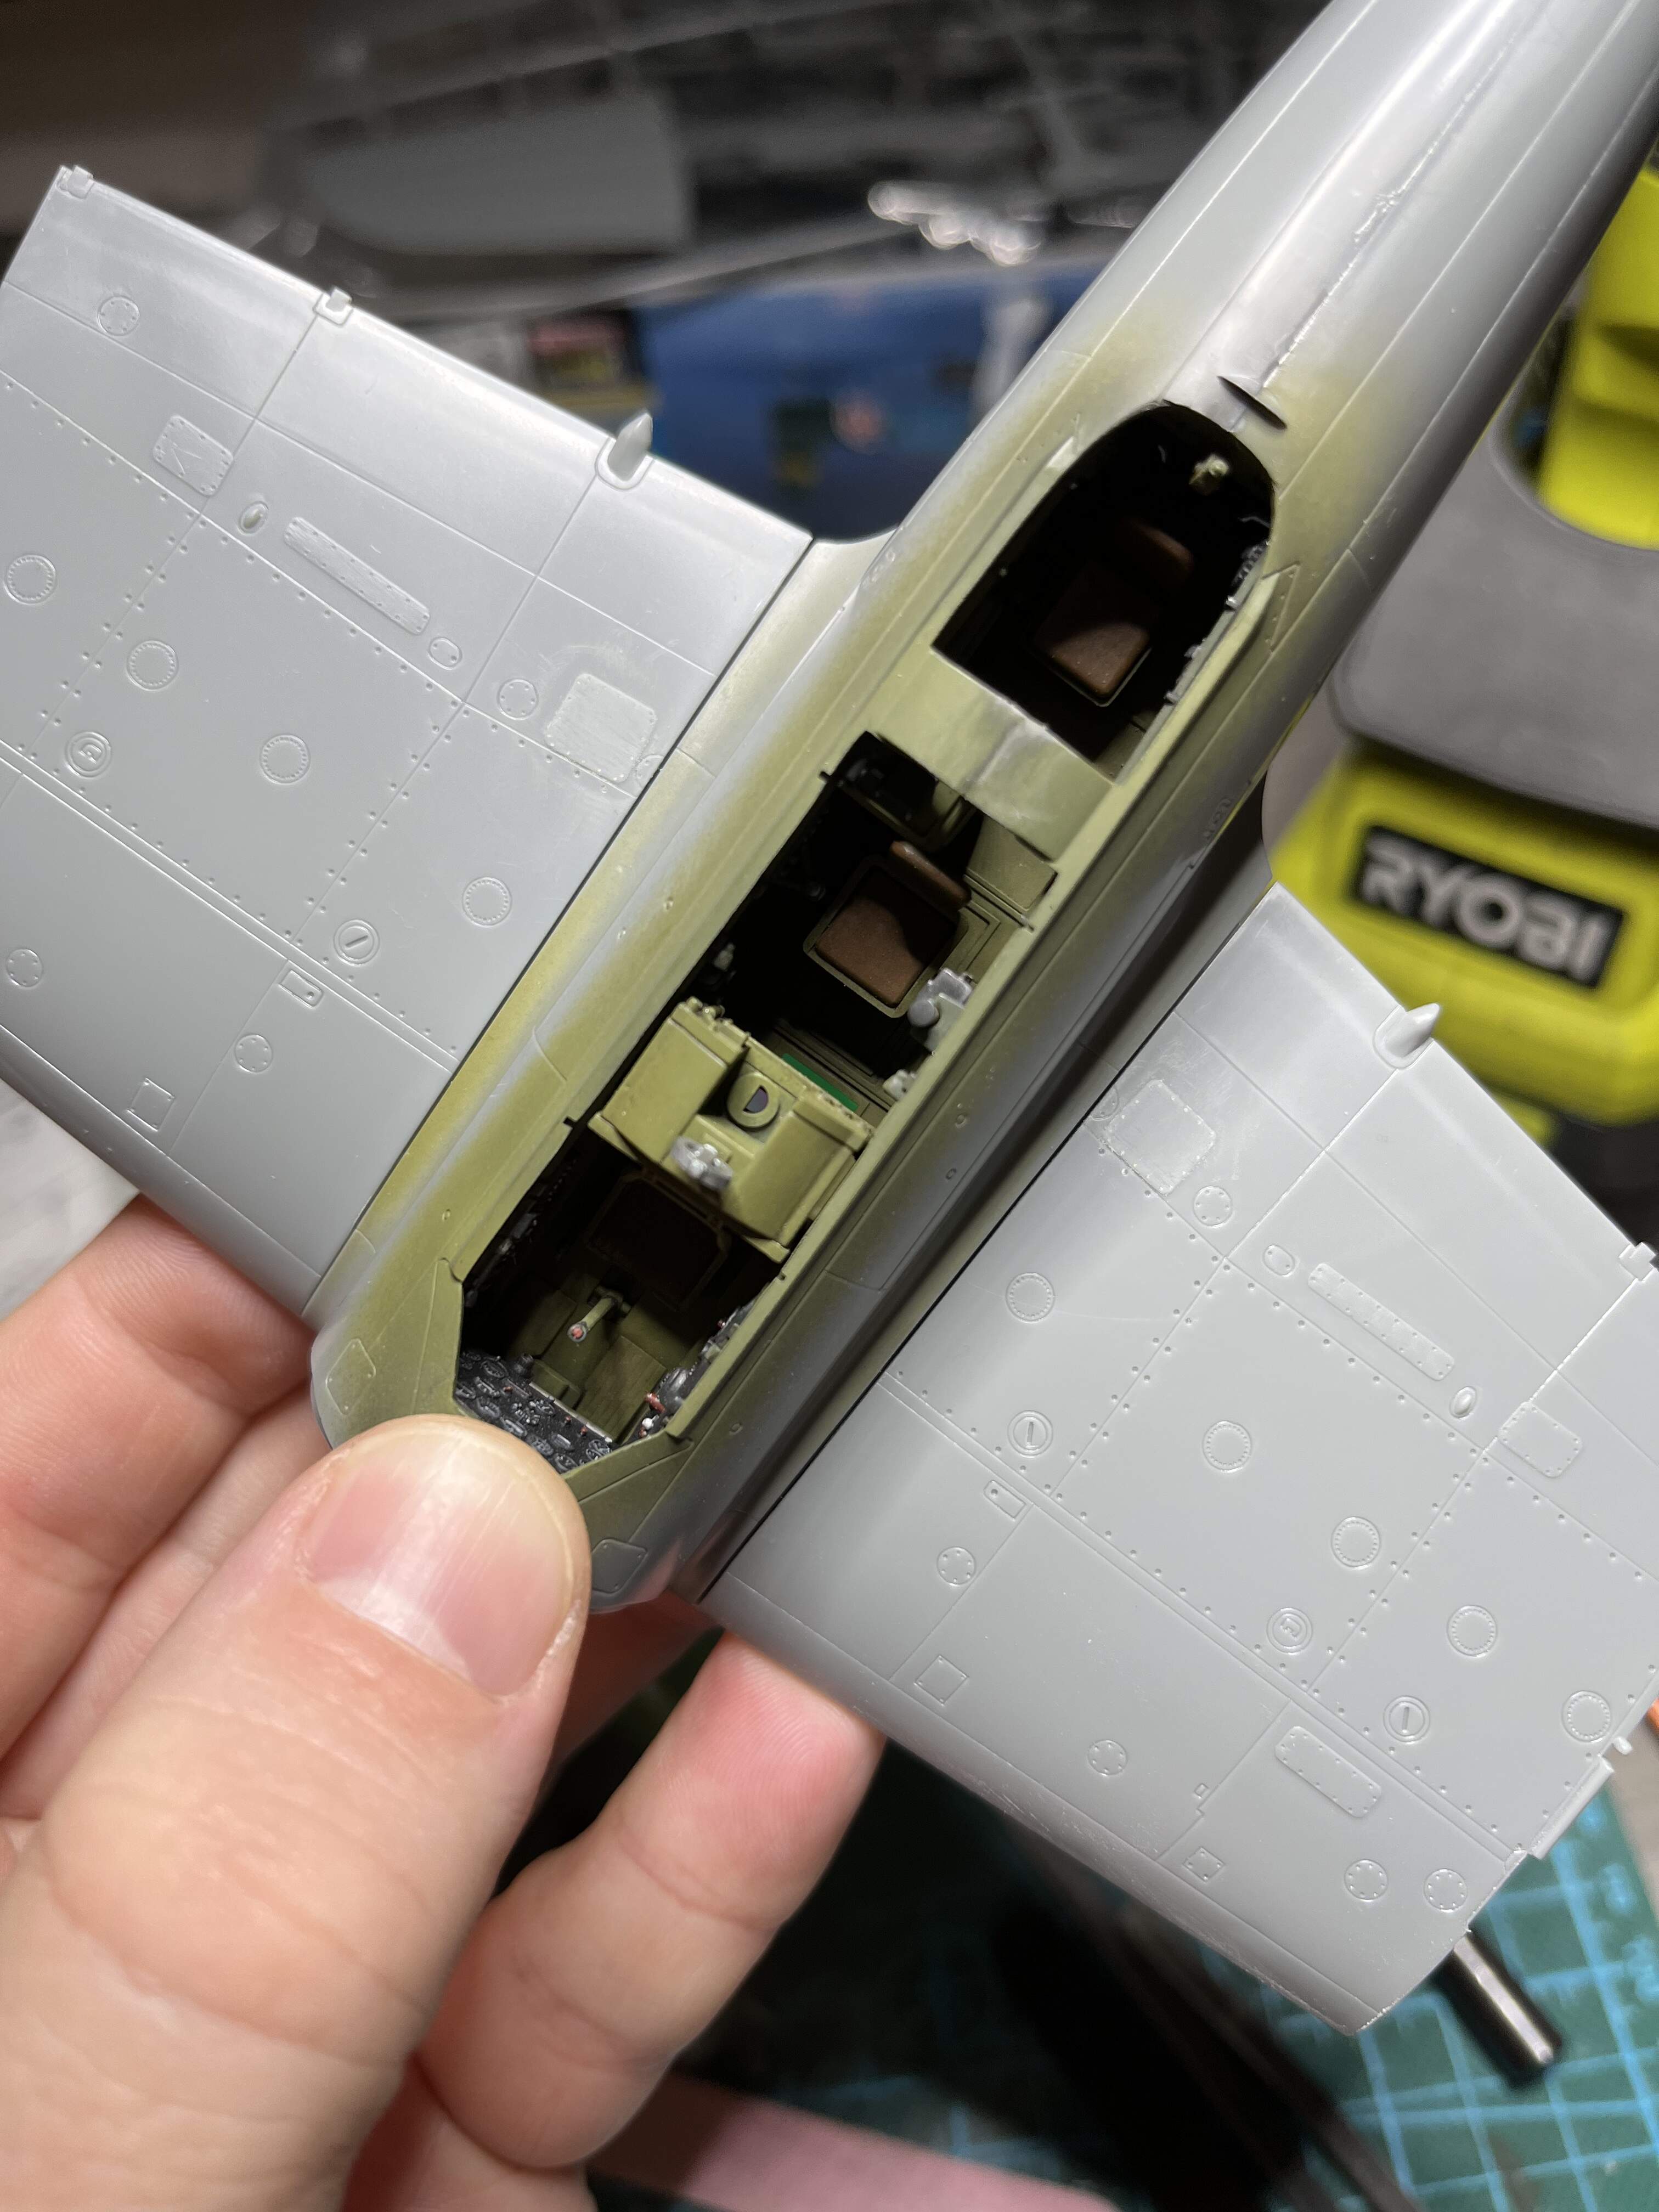
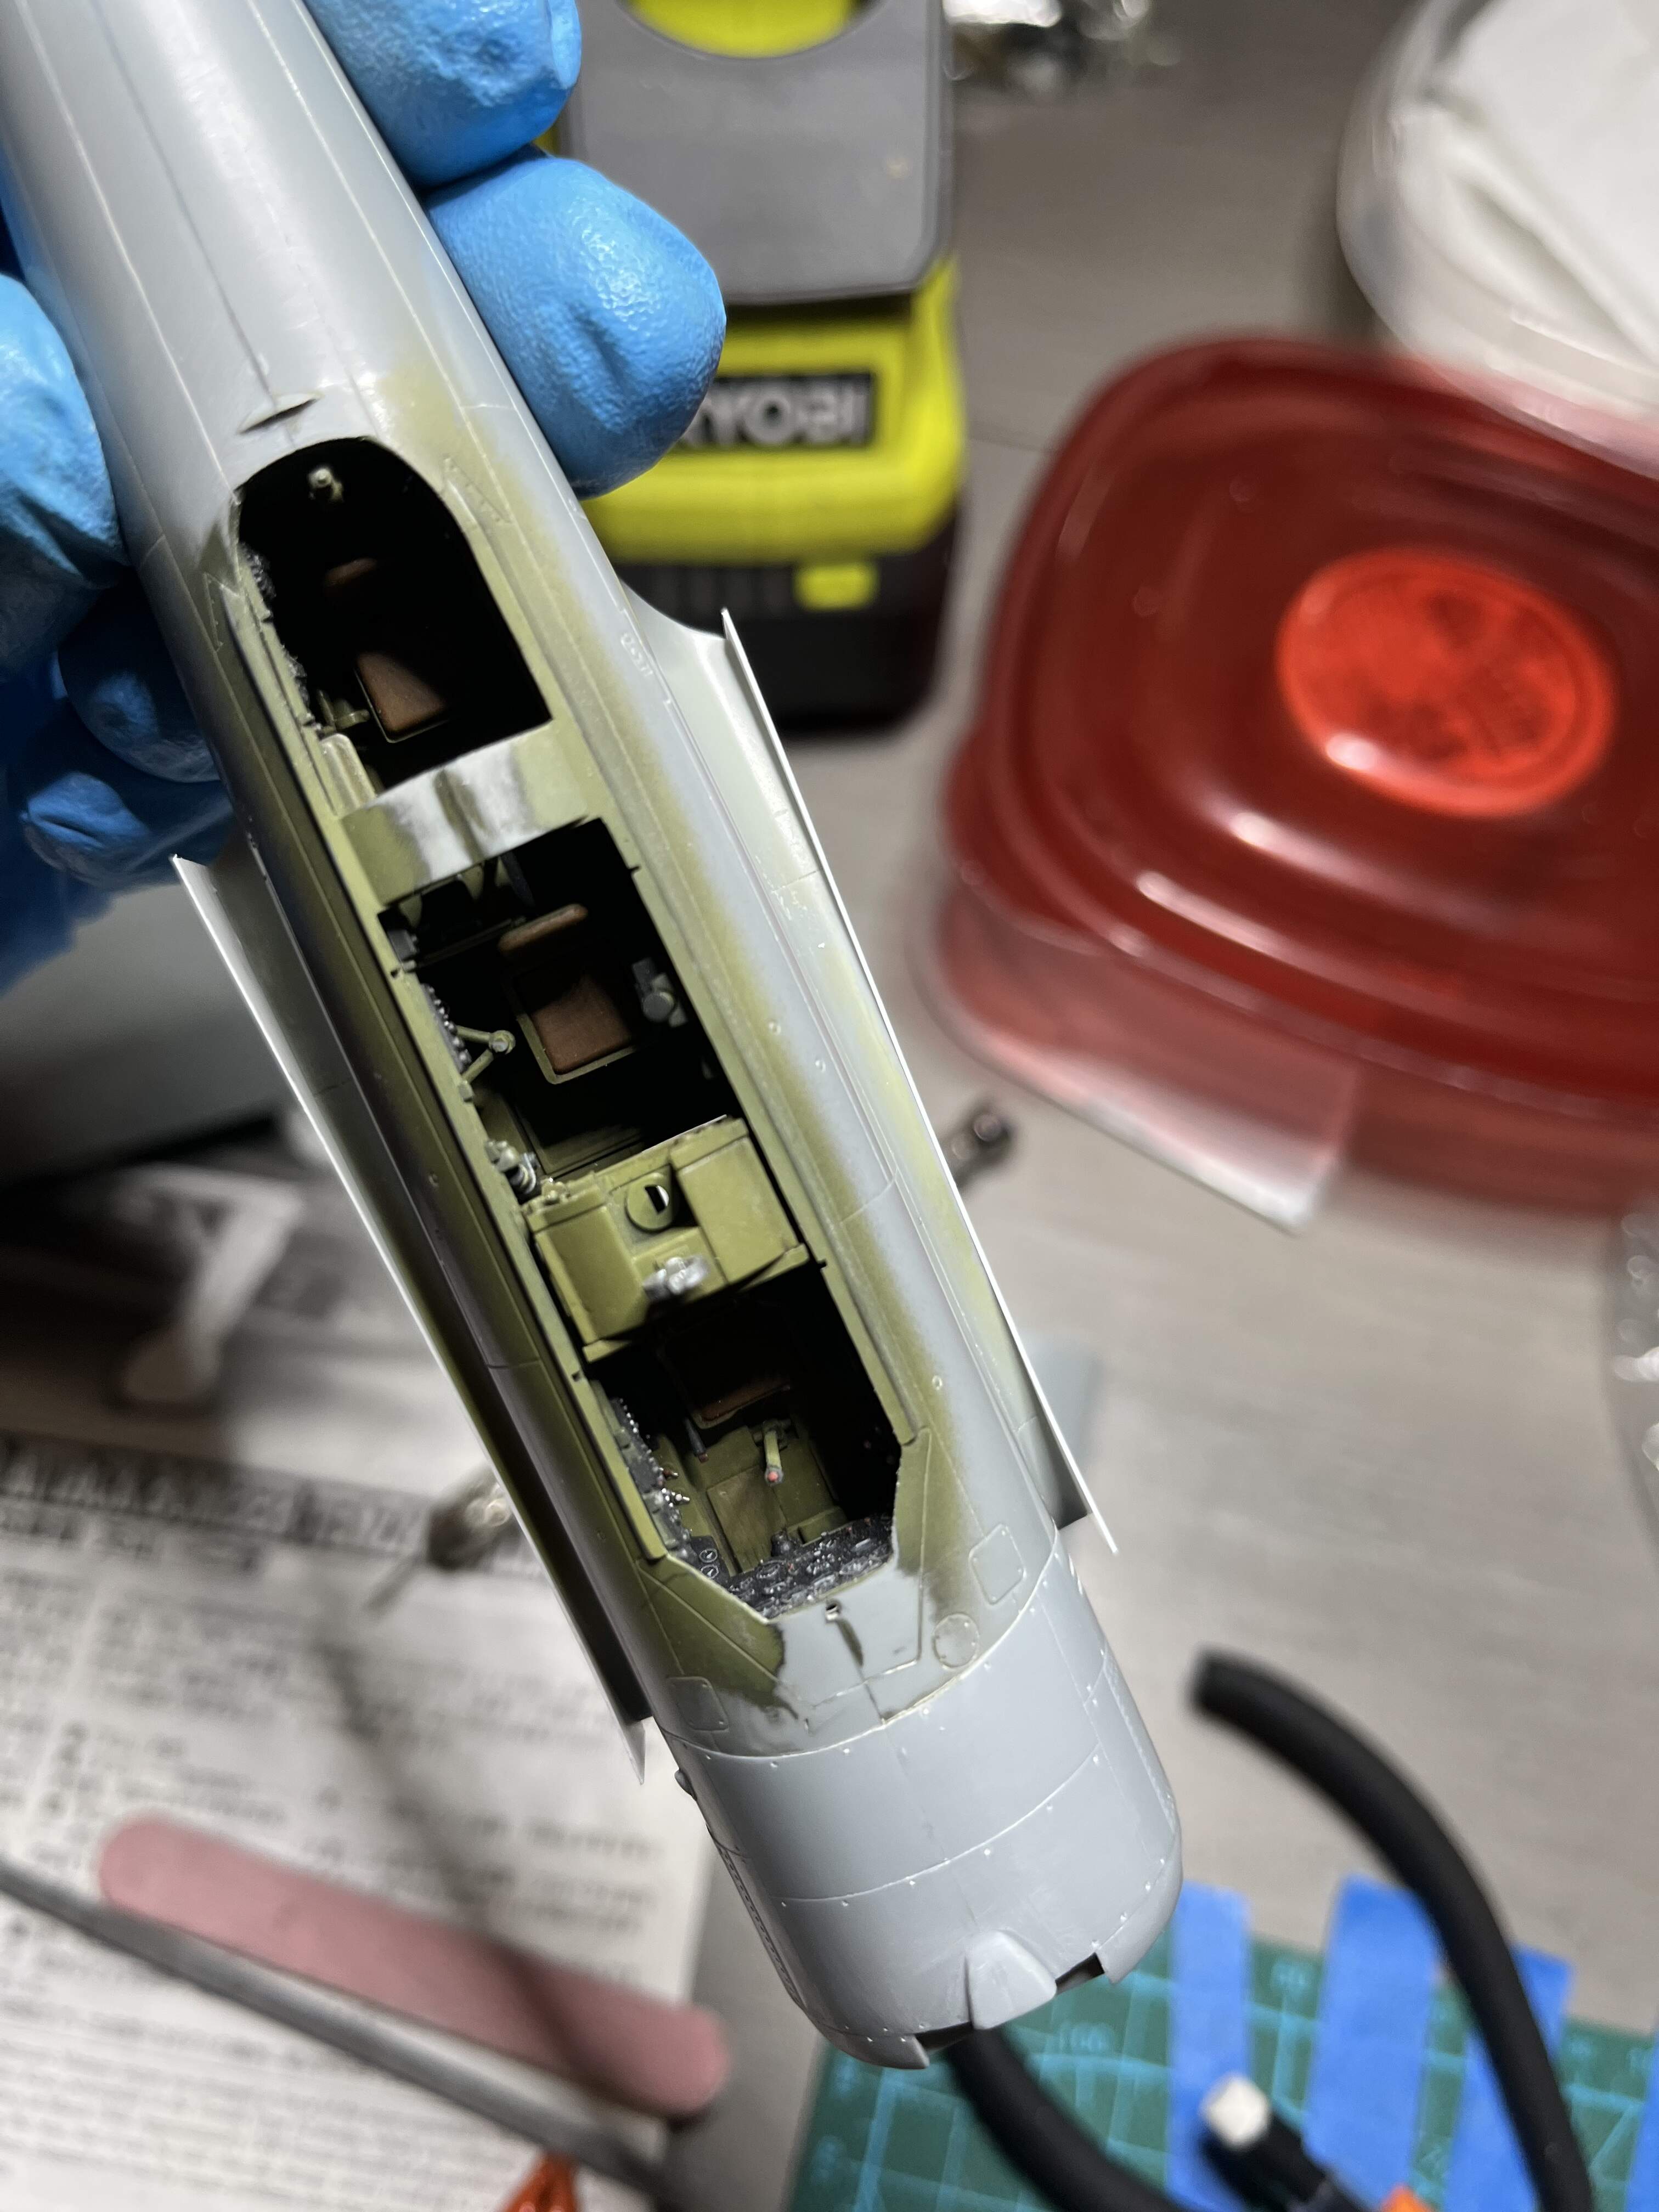
The first thing you have to conceptualize is that EVERY SINGLE injection molded part has imperfections that must be addressed before it will fit as the kit designer intended.

A lot of these imperfections are not as obvious as others, so you must learn to study each part to identify these imperfections and then decide how to address them. This is a slide show that a friend in our local modeling club put together when we were discussing this basic modeling skill.

Basic Modeling" Mold Seam Profiles

Once you have identified the molding imperfections, you will usually use the same basic tools and techniques to address them:

Cutting / carving using the hobby knife to trim away the imperfection. Useful for large, heavy mold seams or excessive draft features.

Scraping using the edge of the blade of the knife to remove minor seams or light imperfections. Note that the closer to the tip of the blade you use the more control you will have, but the slower the removal will be.

Filing using needle / jewelry files to level large imperfections or to remove or mitigate tooling marks from the cutting or scraping process.

Sanding using various grits (600, 400, 320, 280, 120 etc.) to smooth out light imperfections or to smooth out tooling marks from the earlier steps.

Buffing using 4x0 steel wool or a pot scrubbing pad (which can be very aggressive - be careful!) as the final smoothing effort to perfect the surface finish of the part in the areas where the earlier tooling steps were taken.

Test-fitting / dry-fitting to check your work. Sometimes you will find that the molded-on alignment features (usually pins and holes) do, in fact, hold the parts in the correct alignment with each other. If you find that the parts are not in alignment or that the pins and holes don’t match in size, you should fix these problems (drill the holes larger or cut away the pins).

There are, of course, more things that you can do, but these are the very basics. As a matter of routine, I “clean up” the sprue attachment points and 100% of the mold seams around the edges of each and every part. In my experience, it takes more time and causes more trouble to try to predict which mold seams can be left assuming that they can’t bee seen or won’t interfere with correct alignment than the time and effort to simply address the issue 100% of the time for each and every part.

1 Like

Something else to consider with injection molded parts - drafting.
Squared corners are often not square, depending on how the kit is designed and engineered. A perfectly square corner is very difficult to remove from a mold, so most “square” corners are at a slightly obtuse angle.
Correcting these won’t necessarily help with fitting issues, and could in fact make them worse, because two adjacent parts with off angles are designed to fit together to from a correct angle.
This thread showed not just some very bad molding on the P-40 kit, but further down shows extreme cases of drafting that are very readily apparent:

Here is a topical example. Hasegawa is regarded as making some of the better 1/48 Japanese aircraft. Decent detail tamiya like fit … usually. While buiodking my B6N I ended up with a rather large wing root gap

It could be closed by bending the wings up, but this threw off the dihedral. After thinking about it for a while I decided .01” shims were the right course of action


This eliminated the gaps. Had I decided hasegawa kits were to be avoided because of this issue I would be preventing myself from building some other fine kits! Sometimes fit issues are a kit issue and take some creativity, sometimes we make our own fit issues. I am not sure what the culprit was here as reviews claim a near perfect fit but solving it was easy

3 Likes

Don’t known where you are living in NL, but maybe you might consider joining a Sunday building event organized by “Modelbouwenzo”. They are based in Hoorn and entrance is free.

2 Likes

This is really excellent advice. Model clubs and to a lesser extent, model shows, are great ways to identify and learn new skills while getting firsthand critical feedback.

Even at shows where you might not enter any of your own models, just seeing other models in person can be a great motivator and inspiration - seeing and knowing what is actually possible is a necessary first step in learning how to do the same.

The regular meeting agenda for most model clubs usually includes some sort of “show & tell” where members display their completed models and works in progress and talk about the issues and solutions they have had with that kit. It also provides an opportunity to ask questions about how someone did some task or to seek help on your own builds and problems.

Finally, there’s the comradery and friendships you can make. Many of my oldest friends, guys I’ve known for years and decades are folks I first met at a local model club. Priceless and beyond the value of any model ever.

4 Likes