I’ve had a few folks here and on other social media ask about my photography process. I must be doing something right at this point, because not long ago I was asking my modeling idols how they were photographing their builds! Happily they have all been generous with their guidance and advice, and I very much hope that my scribblings here will be of use to my fellow modelers.
I lose sleep over the notion that some of the work on my models may not be visible, or at least not as apparent, because of my photos. But I’ve found a means now by which I’m about 90% happy with my results.
I’m writing this article with my past self, who struggled so much with trying to get good results, in mind. I don’t mean at all to sound condescending or patronizing, and I know that there are many, many modelers here who understand this subject much better than me. So this is for the guys who are also trying to find the photography solutions that will work for them - they work for me.
So here it goes..
Setup

(I hate my iPhone camera so much)
This post is less about equipment than about the editing process, but it’s still necessary to mention, I think. My camera is a Canon EOS RP with a Canon RF35mm F1.8 Macro STM. I have little to no idea what any of those numbers mean, but it was recommended by someone who does and I’ve found it to work flawlessly. The camera and lens ran me about $3000, which is a little but of an investment but not too terrible. At any rate it’s calmed my severe insecurity about my photography. Also, I recently retired early from my city job so this was a gift to myself, hehe! I’ve had the Manfrotto tripod for years and it wasn’t terribly expensive.
Everything else in this setup is cheap. The LED camera light was about $40 (it’s cr@p because it won’t work without being plugged in, despite having a ‘charged’ battery, but it’s still good), the two little box lights (normally I have two, the kids evidently swiped one before I took this picture) ran about $20 apiece and their battery charges last forever, and the lightbox ran about $50. I bought all this off Amazon some years ago, and you’ll probably find them cheaper now.
The camera settings were on the money right out of the box. I’ve read a lot but still don’t understand much about the mechanics of photography.. I just know that the current camera settings have been pretty much on the money for what I’m doing. I do, usually, adjust the exposure up a step or two since this seems to change from shot to shot.
Photo Editing
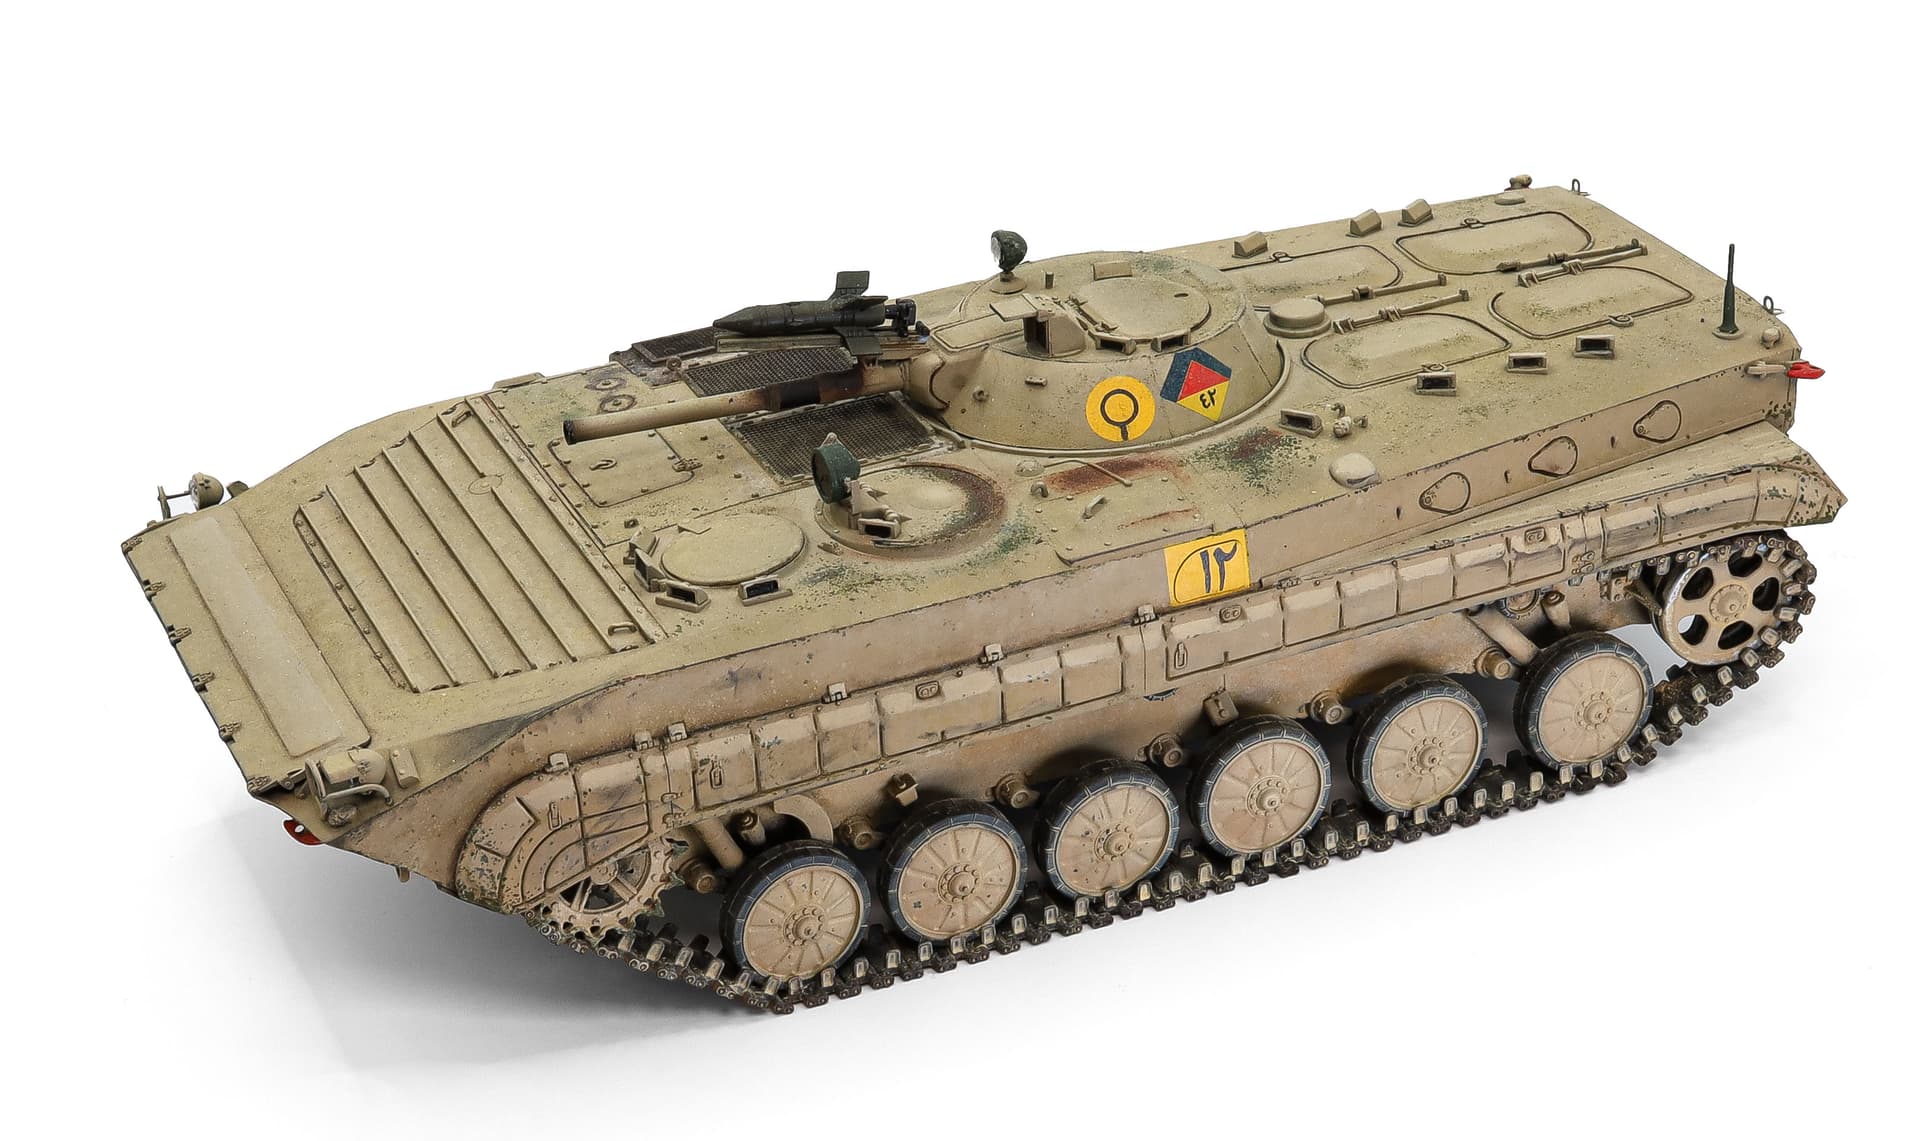
For this demonstration, I used a 1/35 Trumpeter BMP-1 I built a few years ago. The markings were painted, and are of the 42nd Armored Brigade, Iraqi Republican Guard Armored Division “Al Nida,” as the vehicle would have appeared in 2003. Otherwise, the kit was built out of the box, ill-fitting track links and all.
I use Photoshop Pro for my editing. Don’t be daunted by this program, like I was - it has a Byzantine amount of features and options but if you lock in on what you need to do with it, using PSP is a breeze. It’s also very affordable since it’s subscription-based at only about $11 a month.

So this is what we have after importing the photo from the camera. Even with all the extra lighting, we still need to do some polishing.

I don’t know much about photo composition, but these crosshairs help out a lot. Adjust the corners so that the middle box is on the middle of your model, leave some border on all four sides, and hit Enter. Then hit CTRL+SHIFT+A to bring up the Lightroom tool. It’s not absolutely necessary but it’s SUCH a useful tool.
Lightroom Edits

Here’s what we got. Again, pretty good as far as the colors and lighting, but it looks a bit flat. With Lightroom, we can make it so much better.

A really useful feature is that you can save the adjustments as a file and upload them to your next editing job and they’ll automatically apply. Very much a time-saver. You can see a tremendous difference between this photo and the last one. Again, I don’t know what a lot of this stuff is - just play around with the sliders to get it to look right to your eye.
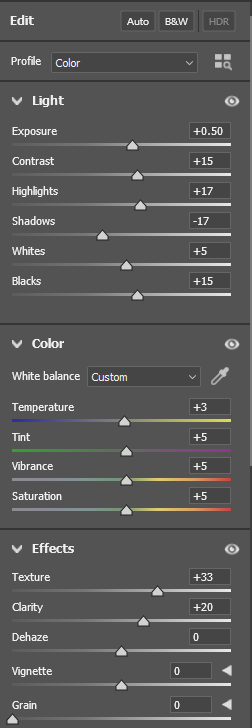

These are the settings I used. If you want the file as a base to work from, PM me and I’ll be happy to send it to you.
Lightening Up the Background
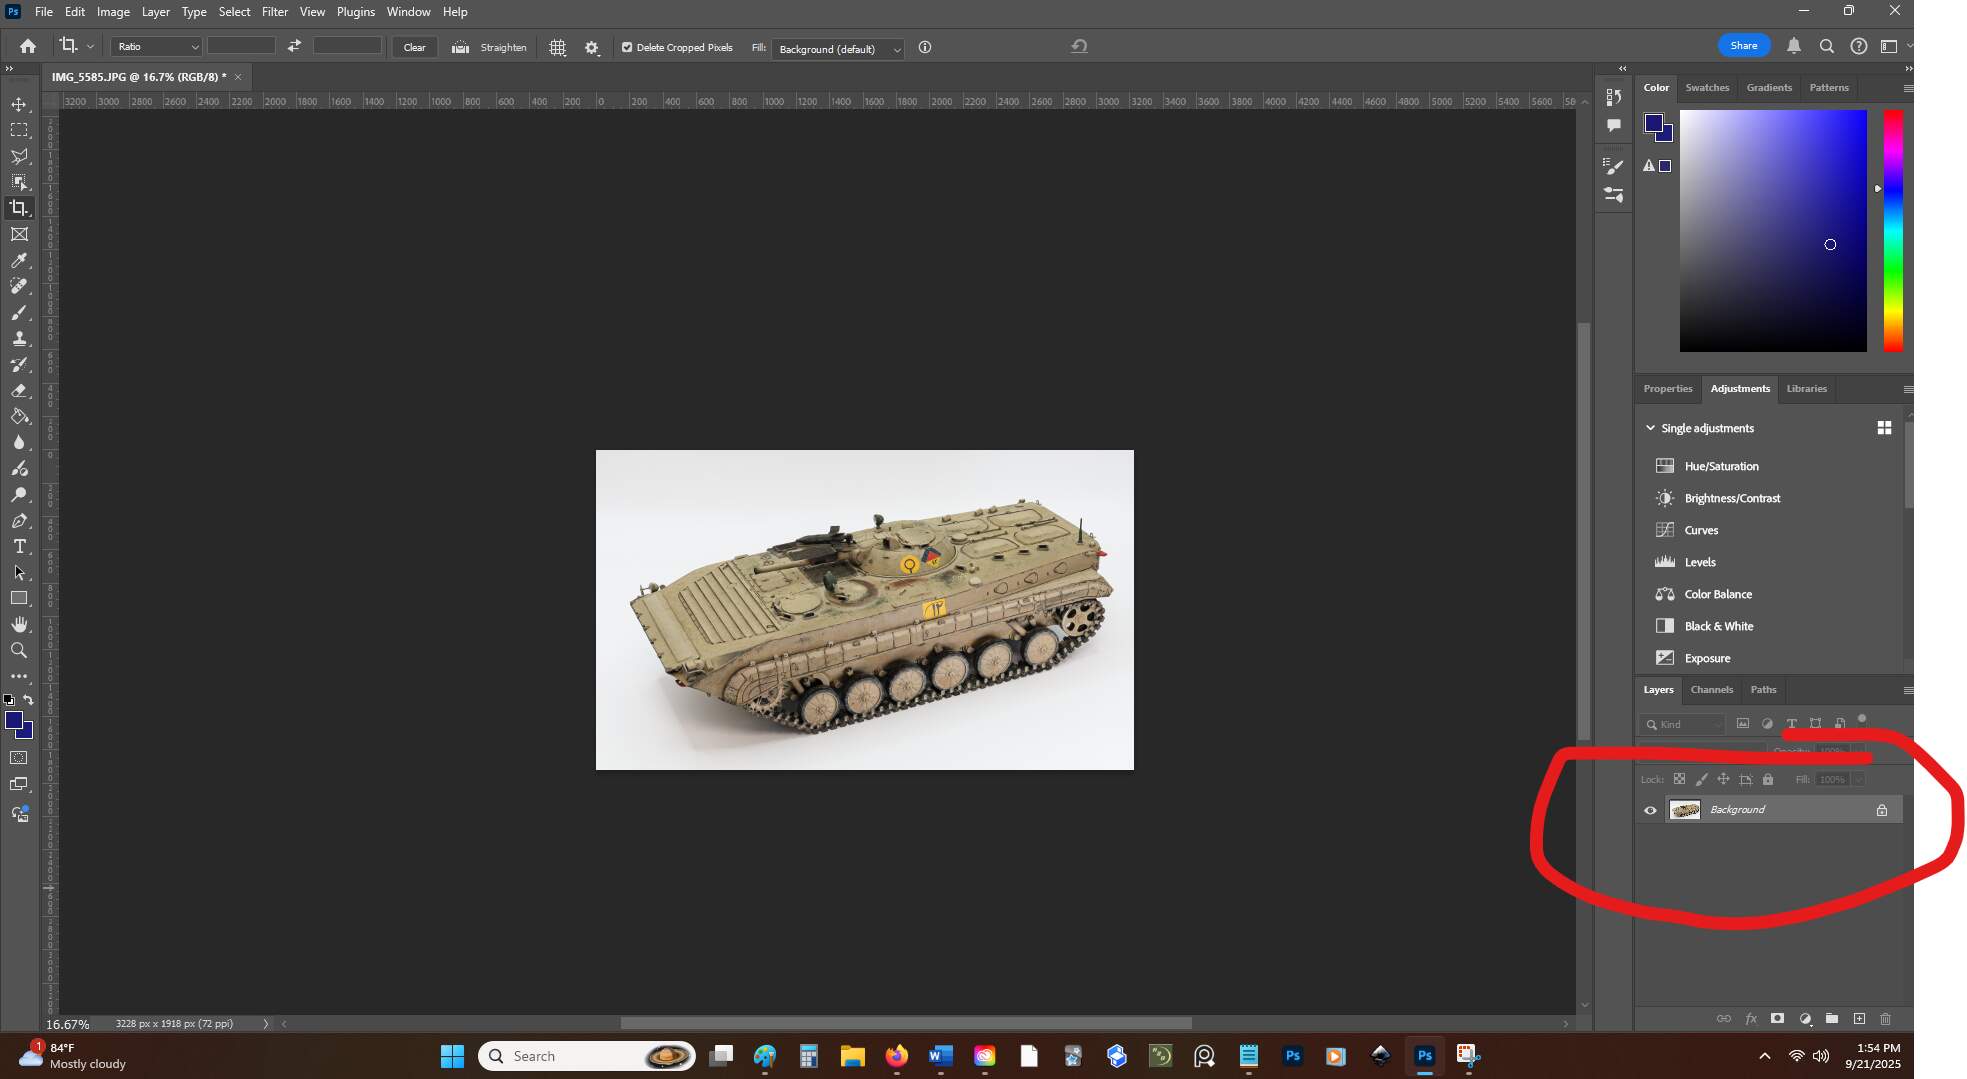
After finishing up in Lightroom, I cropped the photo a little more. Now we’re gonna work on that background to make the model really pop out. Look over on the layers palette and click on that little lock icon.

It turns into this.
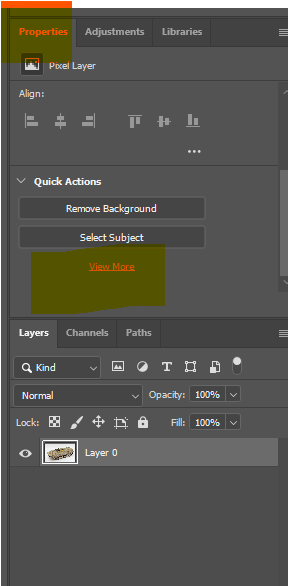
Now go up to Properties and click on View More.
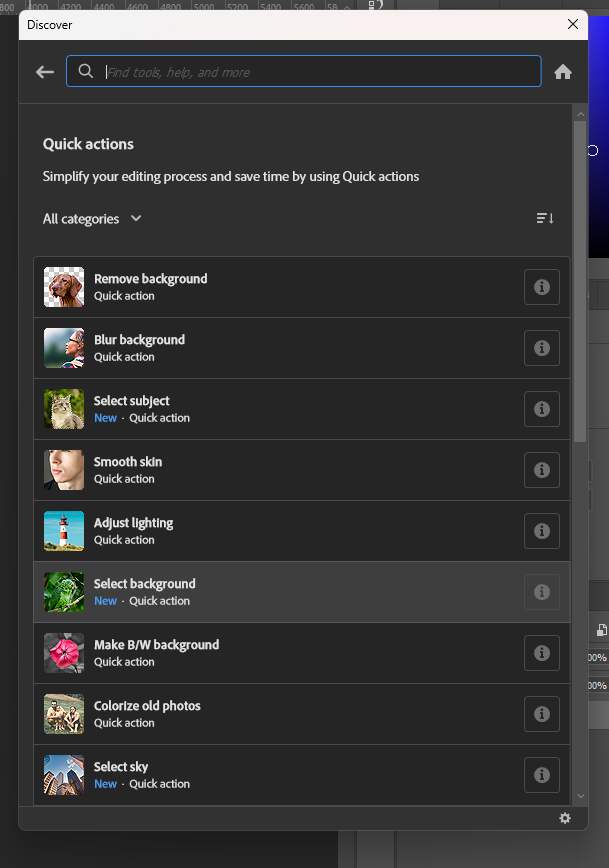
Click on Select Background.

Now the marching ants are locked in on the background, and we can edit it without altering the model.

Can’t see much from this photo, but use the brush tool to paint the top part of the background, just above the shadows. Be sure to use pure white, as any amount of gray will show up on the internet and it’ll look horrible. You may have a weird border above the shadows but that’s easy to fix with the clone brush. I didn’t see it in this photo, but if you encounter it, PM me and I’ll walk you through the Clone Brush if you need help.
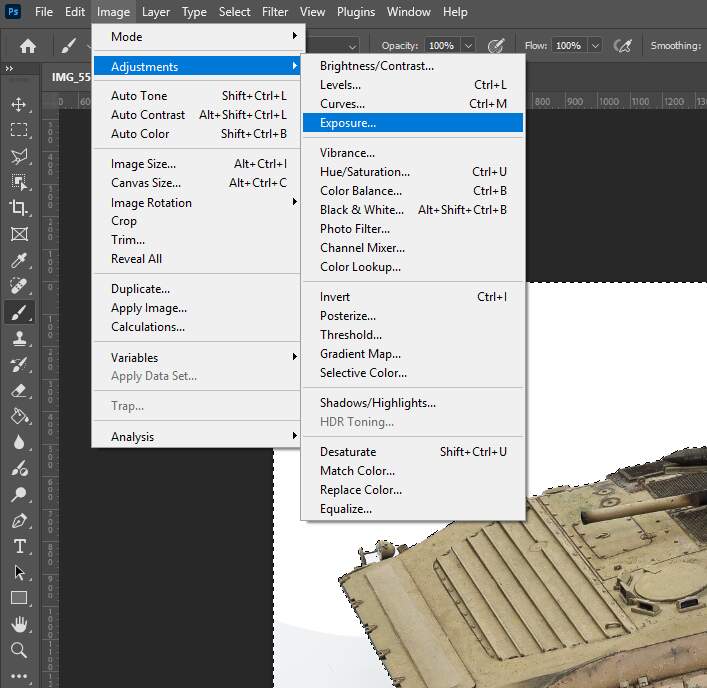
Next step is the exposure. Play around with this, you want to lighten up the bottom of the photo but you don’t want to erase the shadow. I went with 0.3 - a little bit of exposure adjustment goes a long way.


Set both the vibrance and saturation to -100, and the shadow will be gray and flat, which is what we want.

Now hit CTRL-D to remove the marching ants, right-click on Layer 0, then Flatten Image. Now you’ll be able to save it as a Jpeg.

Last Steps

After saving your Jpeg, the last step is to test it to be sure you didn’t miss any artifacts or abnormalities on the background. I upload my finished photos to Facebook in a post set to be visible only to me. This is where any mistakes will show up, and you can also check your Lightroom edits to see if they’re to your liking (they’ll look different on FB, for some reason). If all looks well, I’ll delete the post then repeat the process on any additional photos. If not, edit again and make another private post to see what it looks like. FB seems to be the key to seeing how photos will look across other platforms - if it looks good on FB, it’ll look good here, on Instagram, X, and whatever else.
Compare the unedited photo as imported from the camera..

..to the finished photo.
And that’s it! Please feel absolutely free to PM me here or on FB and I’ll do my best to help if you have any questions or run into any issues. I’m especially eager to help as that’s how I learn. I wish I were one of those gifted people who just ‘get it’, but I’m one of the many who have to screw things up before they figure it out.
Happy modeling, gents ![]()