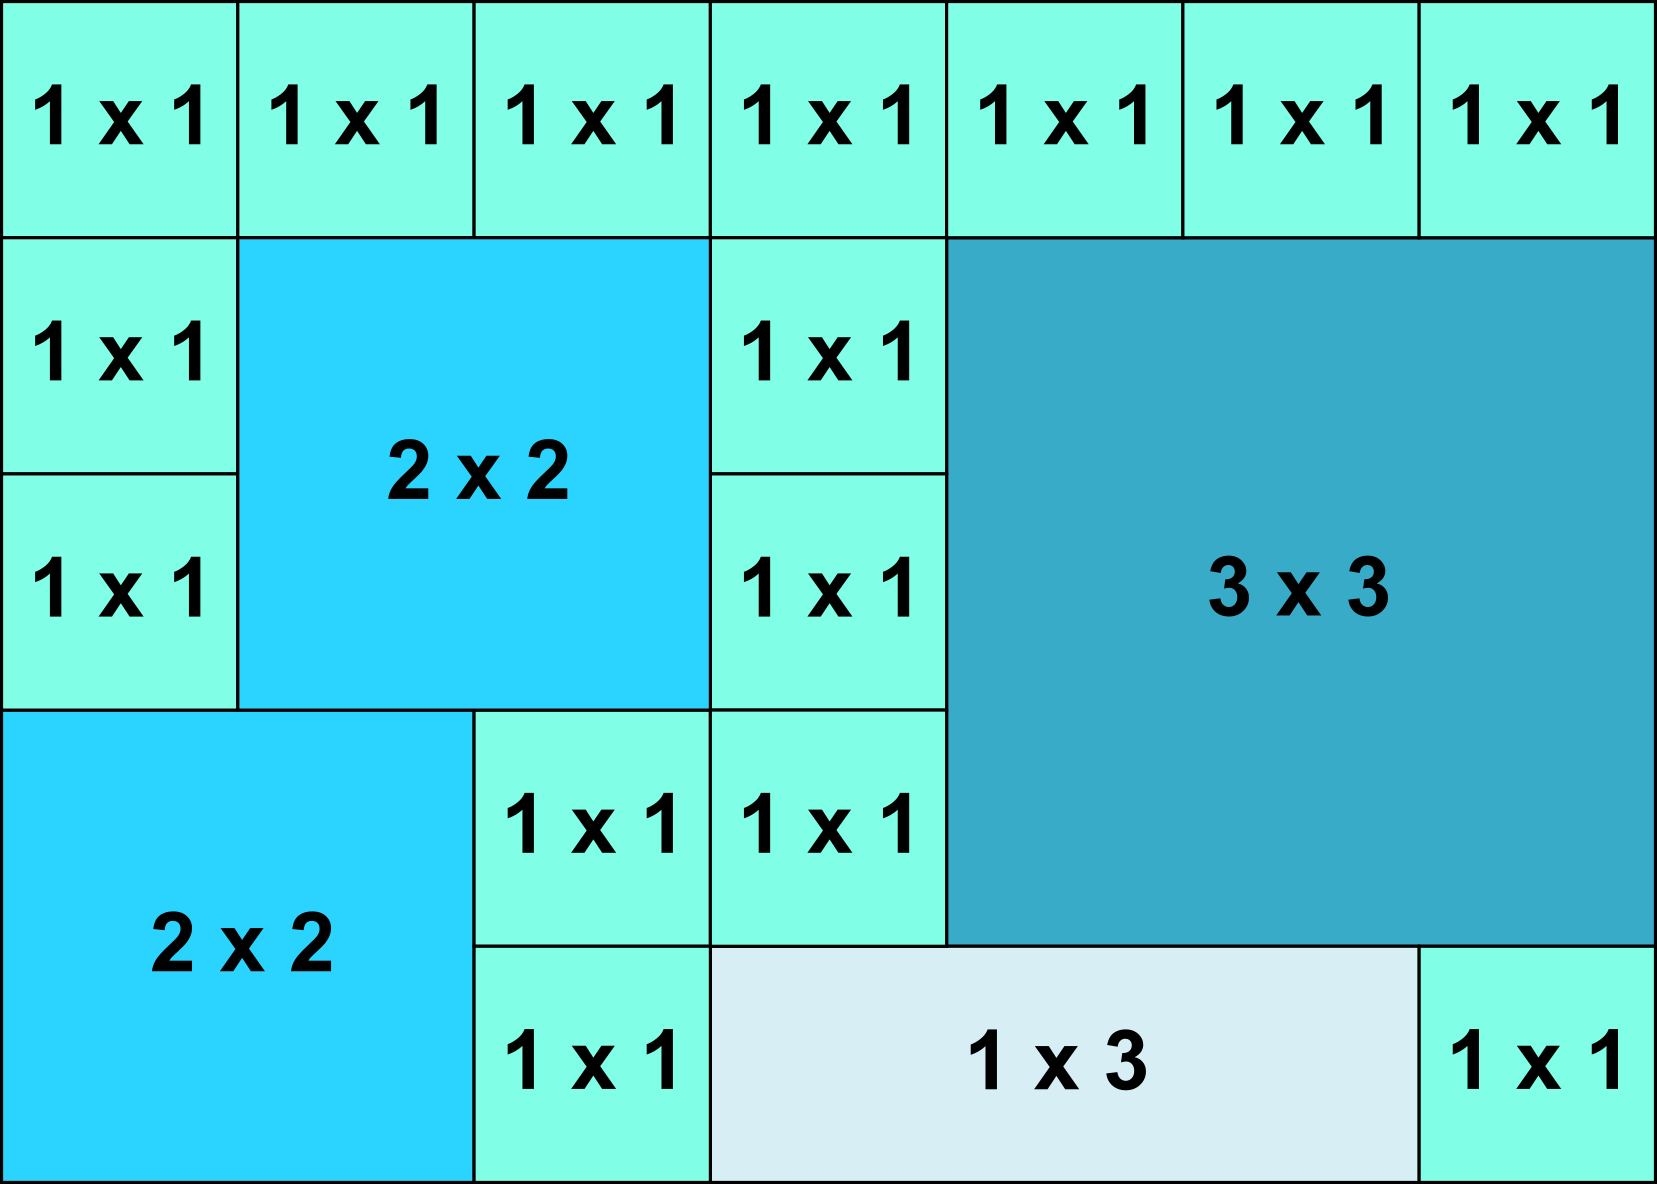
Hey, hey. I want to make a whole bunch of 1.71"x1.71" tiles out of Milliput. That works out to 5’ square in 1/35 scale. The tiles need to butt against one another to form a mosaic. Each tile will depict a square section of terrain.
My initial thought was to cut a 1.71"x1.71" square out of a piece of sheet plastic, cover the resulting frame with plastic wrap, then press Milliput into the form. How would I cut a true square of such exact dimensions? Would the plastic wrap goof up the sides of the tiles?
Another possibility is making an exact 1.71"x1.71" tile, wrapping it with plastic wrap, and covering it with Milliput. This would result in a fairly exact mold. Would the plastic wrap goof up the sides? Could I extract the square from the rigid mold without breaking it? How would I cut the square master to such exact tolerances?
I have almost no experience and no equipment for fabricating things to exact tolerances. Can anyone suggest a good way to do this? I really want to use Milliput for the actual pieces because it cures into a very stable, rock hard mass and I can sculpt it with ease.
Over time, composite materials come apart as the layers expand and contract at different rates. I want the finished product to last for an extremely long time without human intervention.
Rolling and cutting Milliput into uniform squares would work. How would I do that?
I could create slightly over sized squares and sand them down to the correct tolerance, but how would I do that without bowing sides or rounding corners? How would I achieve the correct tolerance?
Unfortunately, I lack the manufacturing knowledge to even know if I am asking the right questions.
My original plan was to purchase a 2" x 2" plate and use that as a master. I had to scrap that idea when I realized I needed 1.71" x 1.71" tiles. In a perfect universe, a 3.42" x 3.42" tile interchanges with 4 smaller tiles in the mosaic. The tiles must reliably interchange as they will serve as the basis of a 1/35 dungeon tile system, a 1/35 armor diorama tile system, and a 1/1 ocean floor tile system.
Maybe the tiles should be metric. I am on the fence about that.
Unless you make the tiles fairly thick (and thus quite expensive), using just Milliput will result in brittle and relatively delicate pieces.
You will be much better making the basic geometric shape from .030 or thicker styrene and then using the Milliput to add texture and relief. There will be no problems or issues with the epoxy putty delaminating from the styrene. If you’re really worried about that, just roughen up the top of the styrene with a swipe of 100-80 grit sandpaper.
I’ve made many, many scenic structures over the years out of epoxy putty layered onto styrene or wooden forms with no issues ever of them delaminating over time.
BTW, depending on where you live, I’d actually recommend using Avis Apoxie Sculpt as a much (MUCH!) less expensive alternative to Milliput. If you intend to make enough of these terrain tiles to conduct tabletop gaming on, then you’re going to be using a lot of epoxy putty. Buy the Avis Apoxie Sculpt in 1/2 lb or greater quantities for a project like that.
Frankly, if you’re going to make that much terrain, consider mastering a number of different tiles and then casting them using two-part urethane in open-top RTV molds. Even a modest sized 4’ x 4’ gaming area will require nearly 600 individual 2"x2" tiles, and that’s without any optional tiles to allow significant modifications of the layout.
Here are some examples of 1/72 terrain pieces mastered mostly out of styrene and Avis Apoxy Putty and then cast in resin in RTV molds.
I know many people make miniatures and terrain for gaming using all sorts of materials, producing gigantic layouts. Like you, they are very good at it. My health will never again allow me to game like that and I no longer have the friends. However, I still enjoy the subject matter and making miniatures passes the time. My goal is to sculpt a very small number of unique pieces, to the highest quality I can muster, to be passed down to others. For now, like everything I make, the pieces will all go directly into storage. I have no need to make duplicates.
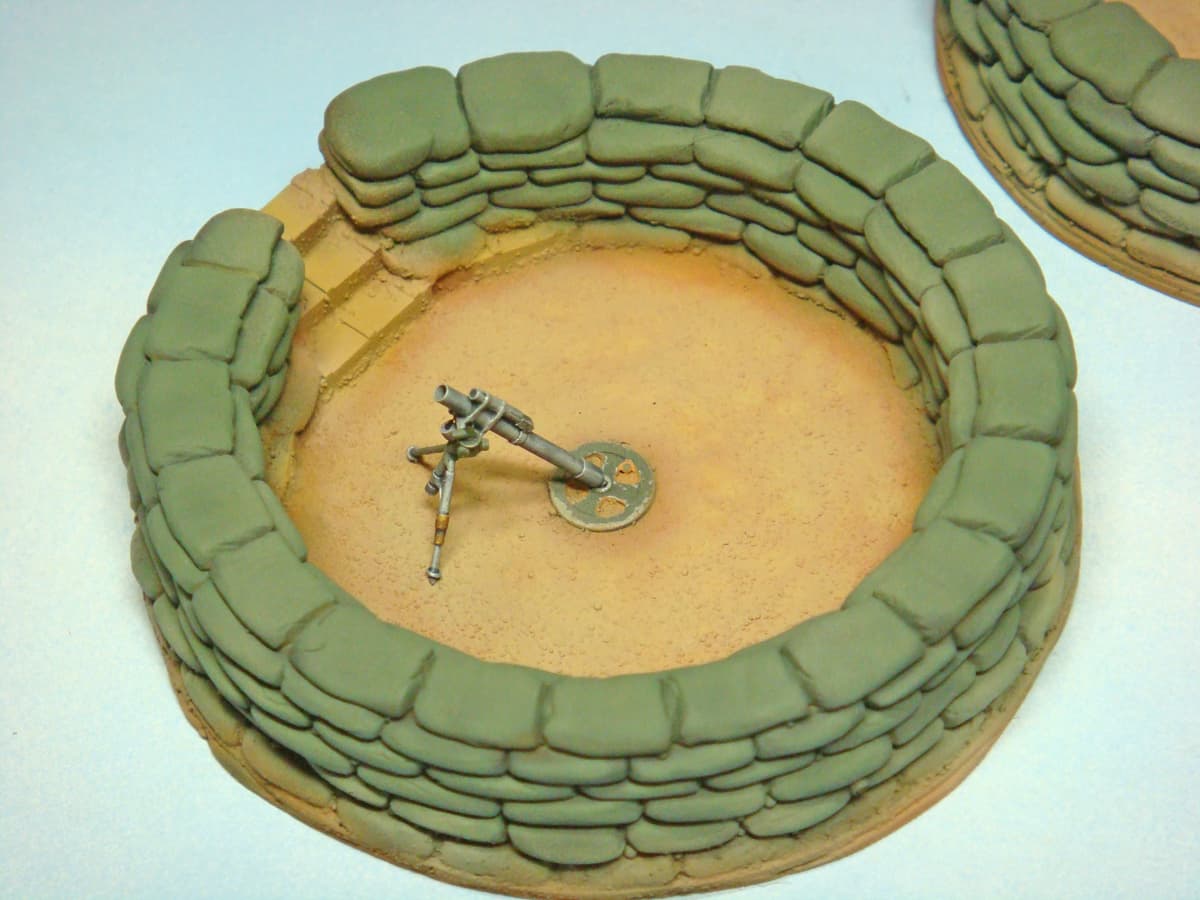
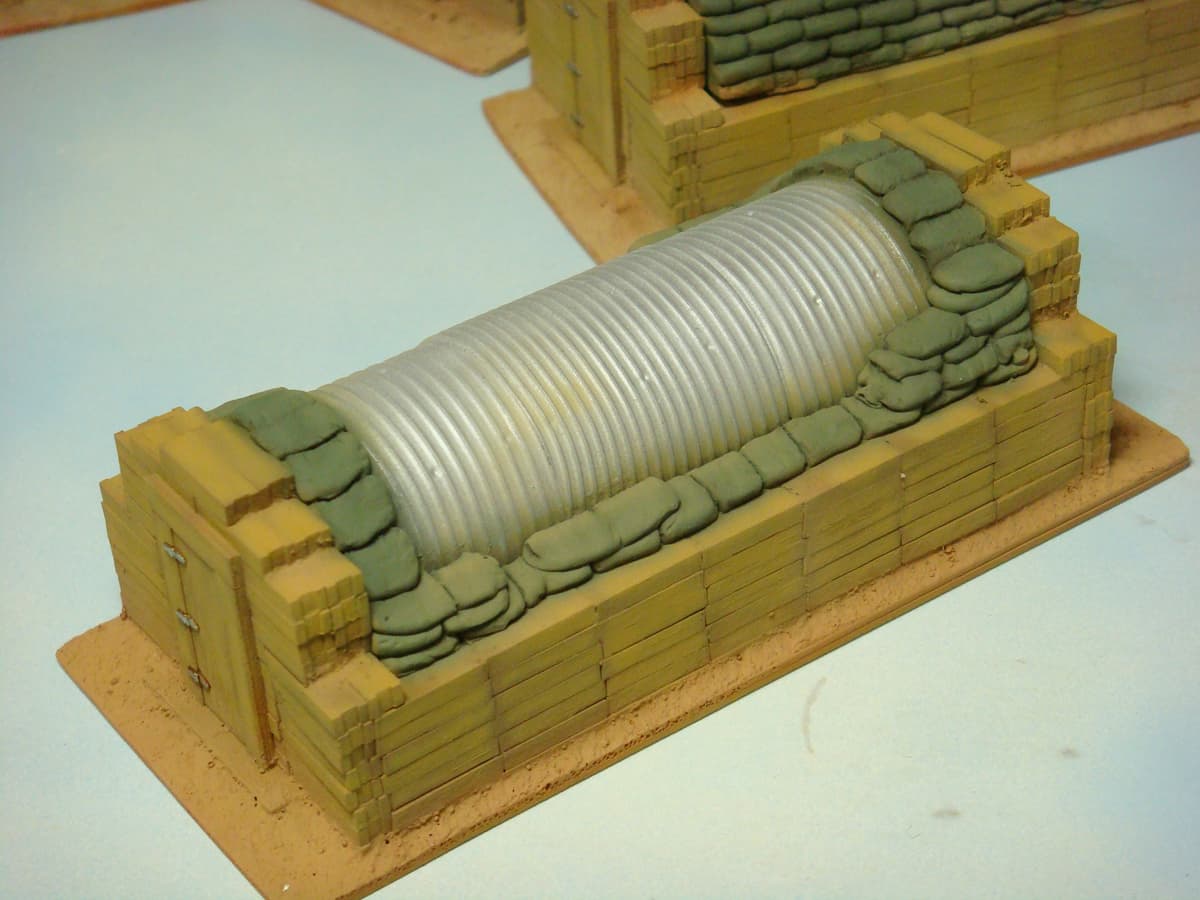
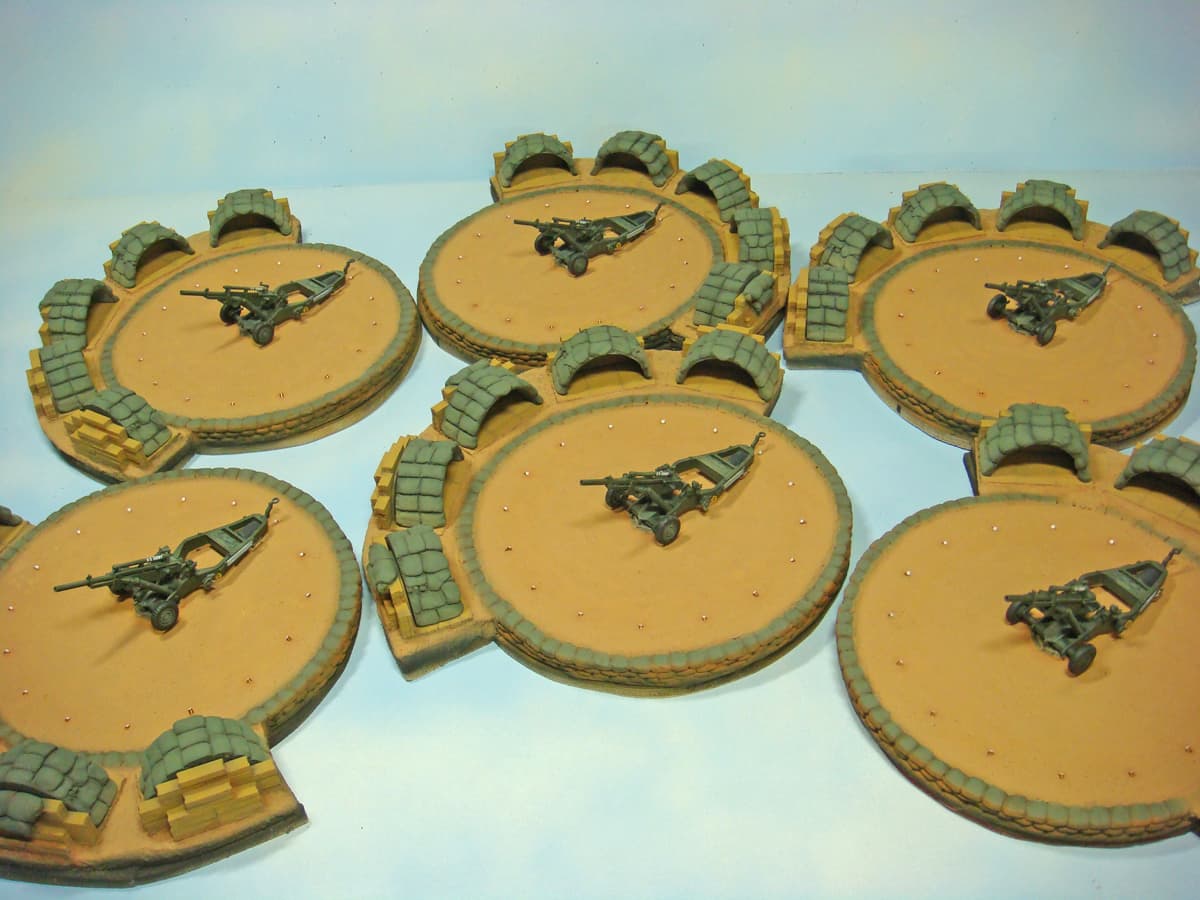
The original plan was to sculpt a mosaic of sea floor panels for my creature creations. When covered with fine sand, the tile boundaries will disappear resulting in a seamless patch of sea floor. Since I enjoy fantasy miniatures, I thought I could make some dungeon tiles as well. What the hey. When I started making armor models again, I decided to add 1/35 scale panels to the mix because dioramas look neat. At that point, it seemed wise to standardize on a single size panel for everything. Terrain is often fractal, allowing it to function at many scales.
About a year ago, I experimented with laminating Milliput to sheet aluminum with good results. So far, I see no signs of the Milliput corroding the aluminum. The resulting pieces, though far more brittle than wood, are very thin, strong, and resistant to moisture.
My Milliput drawer still contains approximately 15 bricks so supply is not an issue.
All I need is a way to make an accurate standard tile. Maybe I can make a frame from birch popsicle sticks. Unfortunately, my tool selection is very limited and I have no experience making accurate things to small tolerances. I do not even know how to go about cutting a perfect square.
You asked how we would do it, so here goes. Get and old 2 x 4 or 2 x 2.
Rip it on a table saw so that you have the 1.71 x 1.71 dimension you need. (A 2x2 is actually 1.5 x 1.5. That’s pretty damned close…
Set up your circular saw to cut the thickness that you want for each tile. Prepare to make assloads of them in very little time and virtually no expense. Works for metric too!
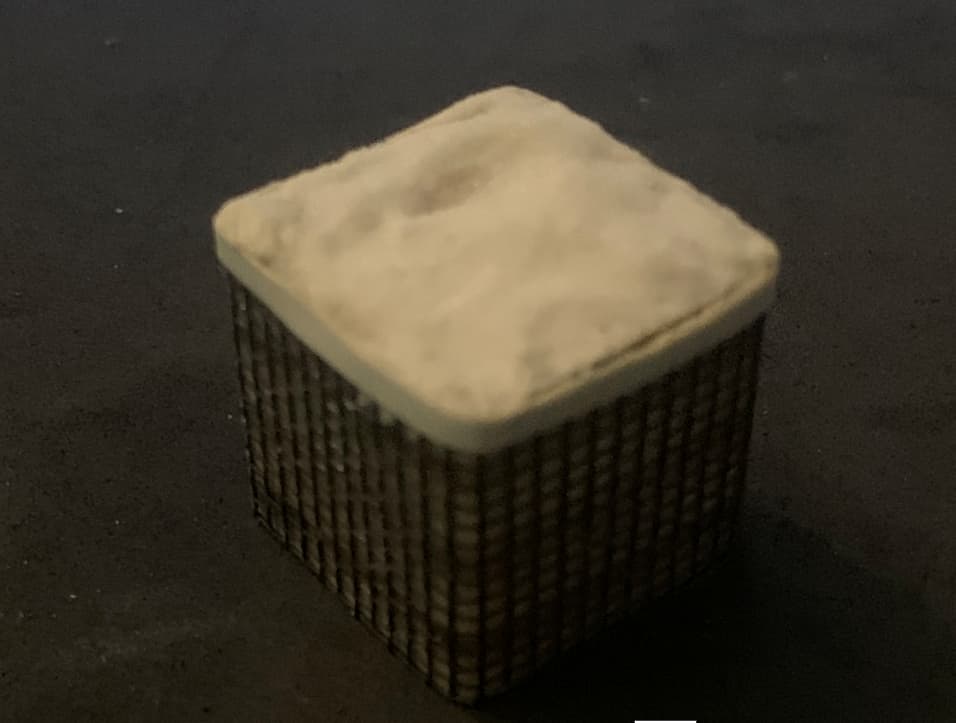
I used the exact same method to make these small Hescos, so yes, it does work.
I am often amazed by the expansive nature of my ignorance. Having just spent a few minutes learning about Hescos, bastions, and their use in civil and military engineering since Roman times, I must say those little pieces look quite convincing and my, what a useful little invention.
Unfortunately, I do not own a table saw or have access to anything approaching a wood shop. I do not even own a working Dremel type tool. (It broke years ago after using it two or three times.) Hmm. I must contemplate this upon the Tree of Woe. By that I mean, I need to figure out who I can throw money at to help me.
My suggestion.
Find some 2 mm plastic sheet, styrene or acrylic (plexiglass, perspex),
Should be possible to find in building supplies.
Use a steel ruler and a sharp knife blade to score the surface a couple of times.
Styrene sheets will break along the scored line when they are bent,
I think perspex behaves in the same way. Clear sheets are more brittle so
they will be easier to shape with this method.
Some lumber yards / building supply stores can cut the sheets (you pay).
If they can cut 1.71 inch strips then more than half the job is done.
Make a jig which accepts the 1.71 inch strips with a cutting guide (steel ruler)
to facilitate cutting the strips at 1.71 inch length and at right angles.
The jig is a largish base plate (plywood) with three guiding edges fastened to the top.
The edges define three borders of a 1.71 x 1.71 inch box and the fourth side is where the steel
ruler gets laid across, needs some guides.
What exactly are you trying to make? It may be easier to scribe the 1.71" x 1.71" grid into foam board, plaster, or some other base materiel than cutting a bunch of squares and hoping to get them to fit tightly together.
I would scrap the Milliput idea and go for Aves Clay Shay. It doesn’t shrink and it takes weathering like real stone. You could even crack some tiles for added realism.
I would cut your squares into a styrene strip that is the thickness you need mounted on a solid stern sheet backing, wipe it or spray it with a mold release agent and then pour the clay shay into each mold and use a tool to scrim it flat across the top. (Kind of like how mud brick is made.) The clay sets up faster than milliput so production time should be increased.
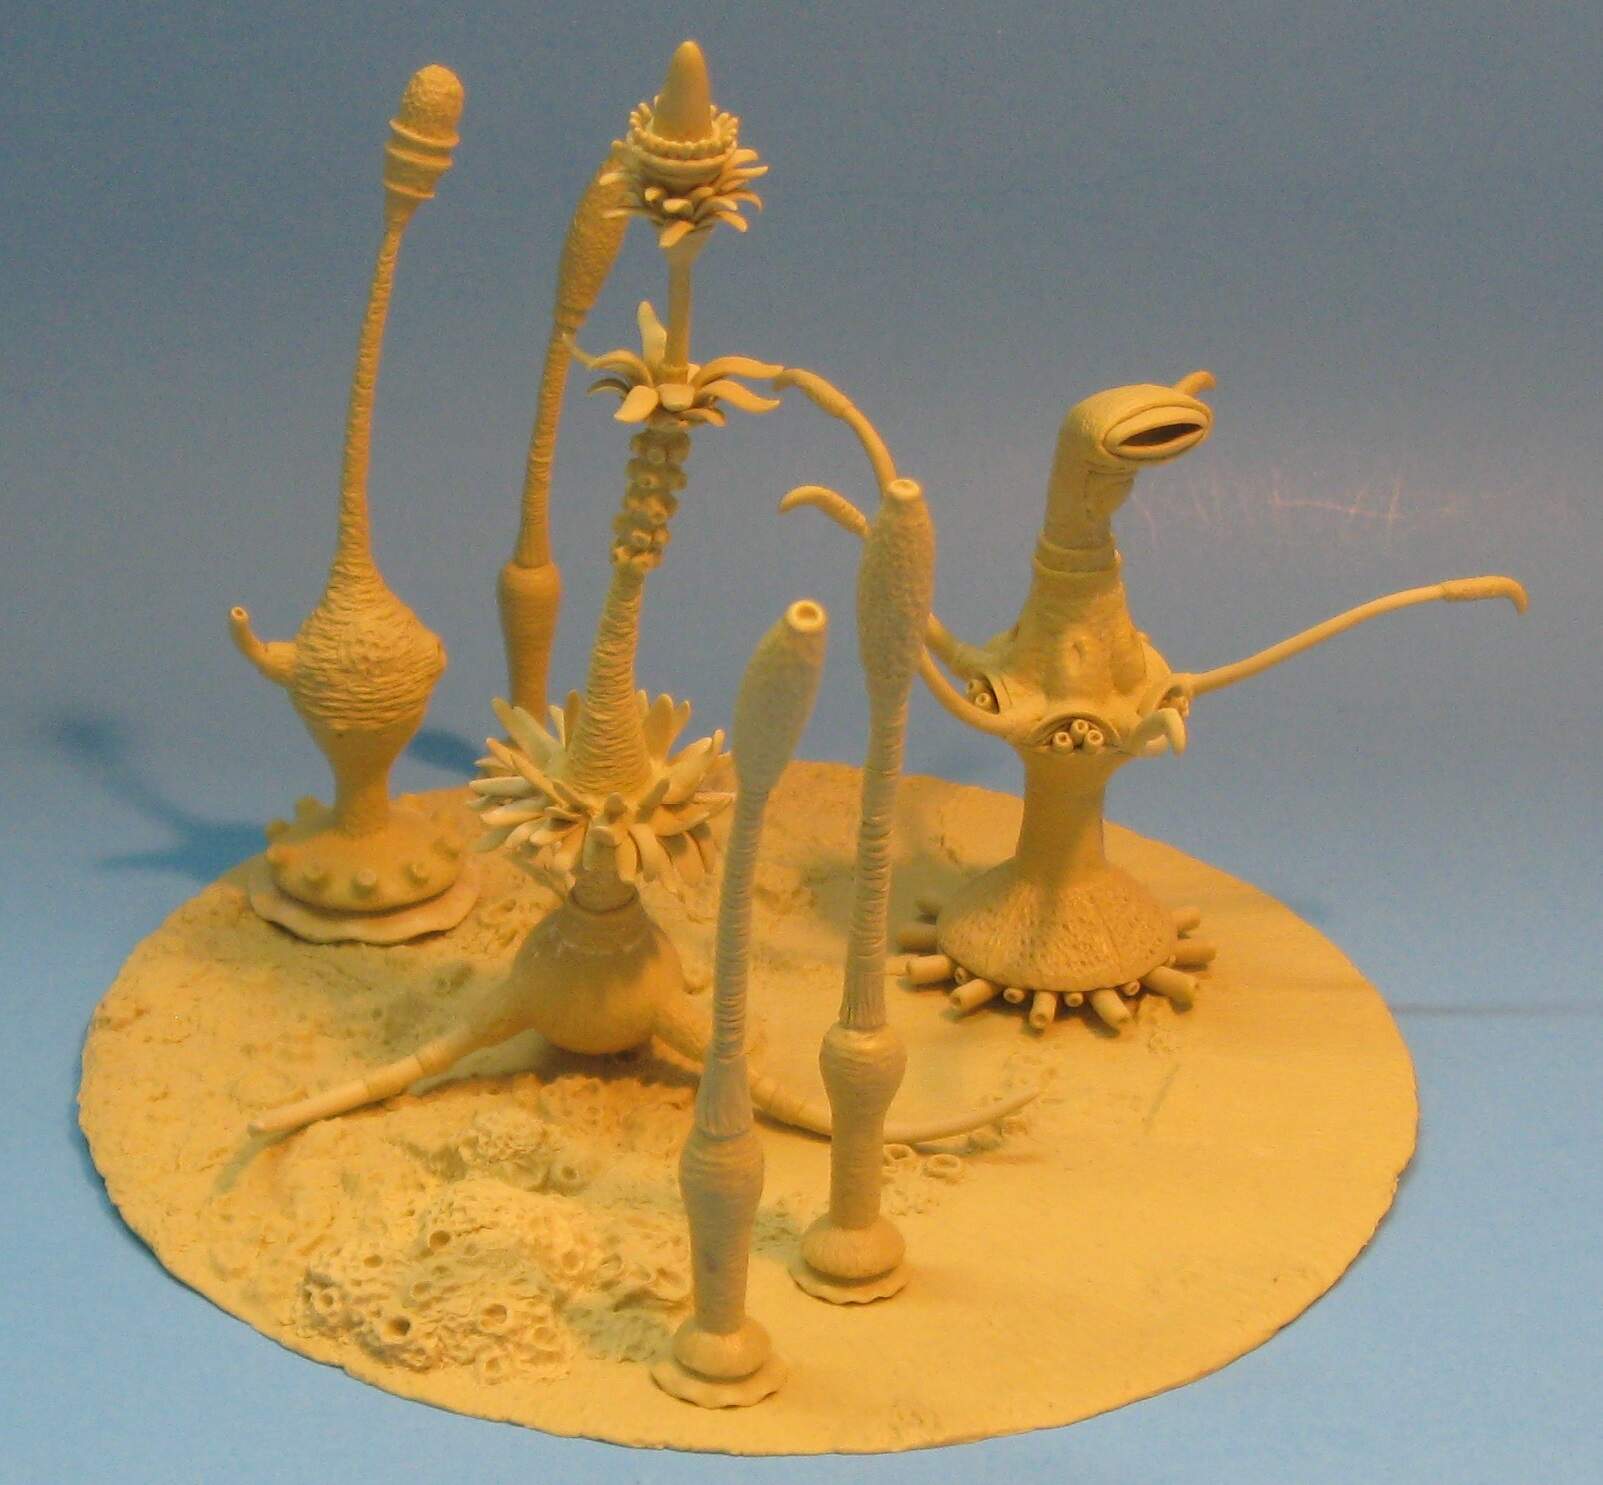
I want to create a grid system of sculpted terrain squares, such that all squares are interchangeable. Each tile will include a terrain feature, like a depression or smoking underwater vent or rock formation. When arranged and covered with fine sand, the result will look like a continuous stretch of sea floor.
The goal is to create a modular version of the piece shown above for an exhibit.
Please pardon me again. I need to make another picture.
I offer my sincere thanks for all the advice thus far offered. My brother can visit the local hardware store and have wood cut. I need to call and find out if the people at the store can make such an exact cut. Another local store sells acrylic sheets but they are further away. My brother has a miter saw I can use to cut long spars of wood into thin plates so that method may be possible. I am not sure if I can cut acrylic sheet that way. Would not the spinning blade melt the plastic and make a mess?
Please pardon the crude drawing. I edited the original to fix a geometry error and add the removable part. My hope is to produce a series of molds, like the one shown above, for making perfectly square tiles that fit into the grid described above.
The mold may need to come apart into two pieces to make extraction of the square possible as shown above. The hole in the bottom of the mold allows a finger push to pop out the piece, sort of like an ejector pin. However, the piece may grab the sides of the mold too strongly to allow safe extraction that way.
This may not be the right solution. I am not trained in this sort of thing.
I cut acrylic all the time. Slow speed and fine toothed blade.
The local hardware store can do those cuts for you. My local Home Depot has a sign that says they will not do rip cuts, but they have. They also do two cuts at no charge, but with a little creativity you can essentially get four cuts out of the two.
As for the exactness of the cut, that depends on the high school kid running the saw when you’re there. I’m usually pretty exacting when I have cuts done. Some of them don’t allow for the kerf. I’ve actually schooled them on a few things to get my cuts exactly the way I wanted.
Better to err on being a tad large. Another thing I do is finish pieces on my belt/rotary sander. They’re not terribly expensive and have a ton of uses. (Instantly sanding of the thin casting blocks on my larger cast Hescos for instance) I even use if for my metal furniture that I make. You can get your pieces, wood or metal, exactly the dimensions you want them to be.
And then of course, they do come ready made. Granted, these are only one inch, but I only searched for about eight seconds. You can make those larger squares and rectangles simply by gluing them together.
These are larger. And the hex tiles farther down look very useful.
My sister is a star. She sends me the stuff 10 or 20 bricks at a time.
Part of the reason I resist moving to a different product relates to artistic know how. Having sculpted with Milliput for years, I am accustomed to its unique properties. It was originally designed for making boat repairs and lasts forever. When cured, it is so non-toxic that aquarium owners regularly use it for anchoring live rock.
Some artists heavily favor Apoxy Sculpt over Milliput. For all I know, they are right. I have wanted to try Apoxy Sculpt for years. However, I have about 10 pounds of Milliput sitting in a drawer. It seems prudent to use it because the stuff does not last forever. Also, I am not sure how the two products react to one another. Reducing variables also seems wise.
Now that we know you definitely want it out of Milliput, and it has to be a specific size, the solution takes a different turn - a cookie cutter. Make the square from brass shim stock. You can achieve very sharp corners by scoring it before bending. Make the end a little longer than necessary, bend it around and solder it together. You can fashion a handle to solder across the top - across, straight up, back down and across again. On the vertical part you could even make a little grip out of yes, Milliput.
Mix the Milliput, roll it out on a flat surface using corn starch to keep it from sticking. Cut out squares. You can mash the remnants together and repeat. I’ve quite been doing quite a bit of this myself lately using the ultra fine.