IBG 1/32 PZL P.11c Polish Fighter

Hello everyone,

Thanks for taking the time to have a look at the build progress of this amazing kit! Very special shout out to the fine people at IBG for sending this sample for review and build. I won’t be showing all the sprues and goodies in this blog but here’s the link to the “Cracking the Box” article on AeroScale.

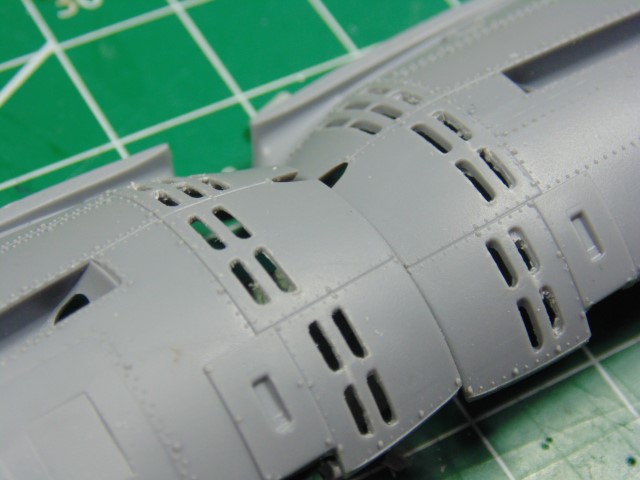
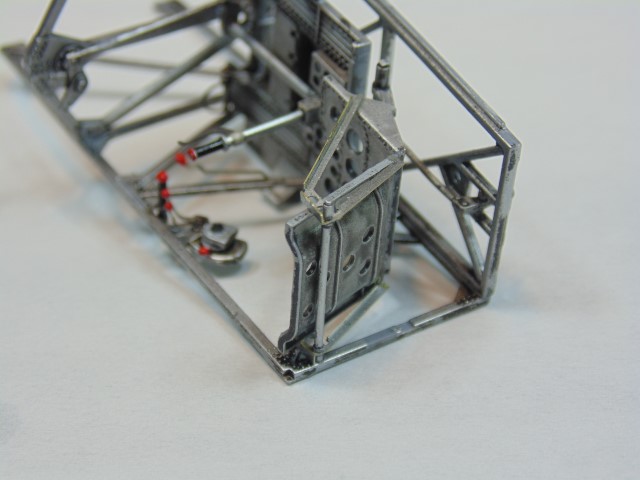
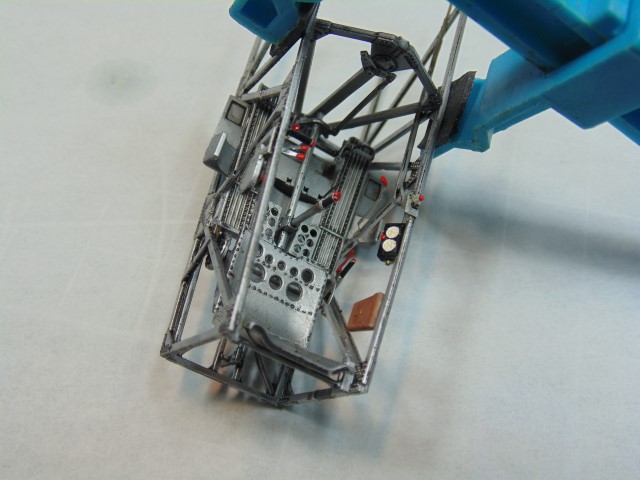
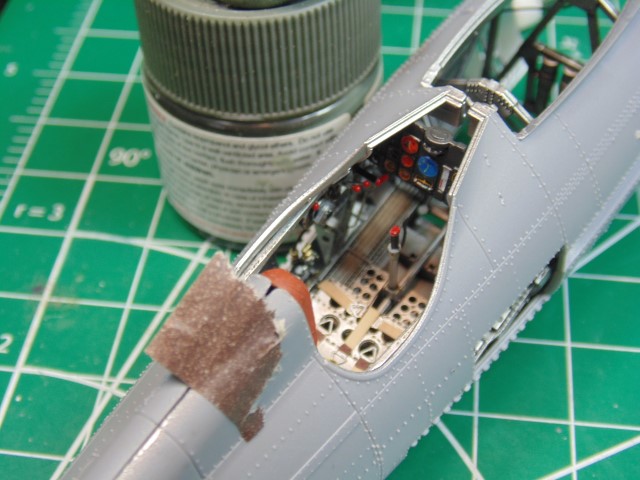
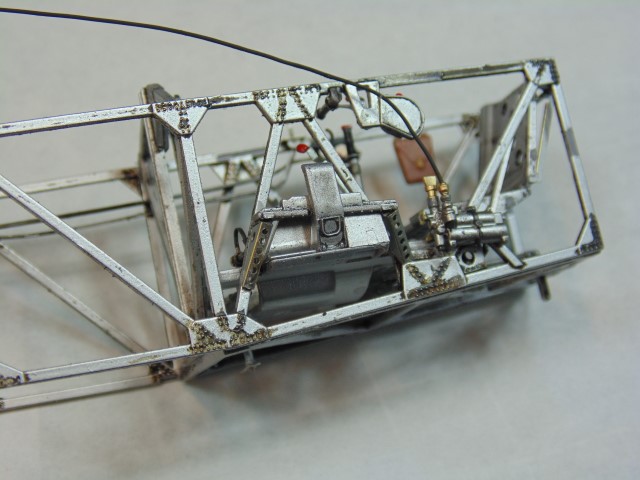
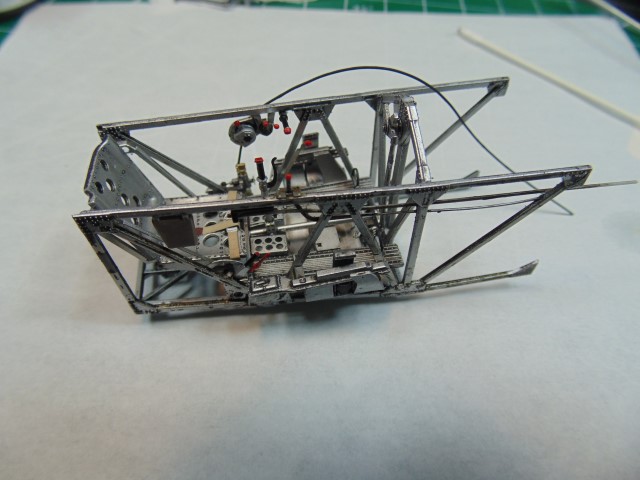
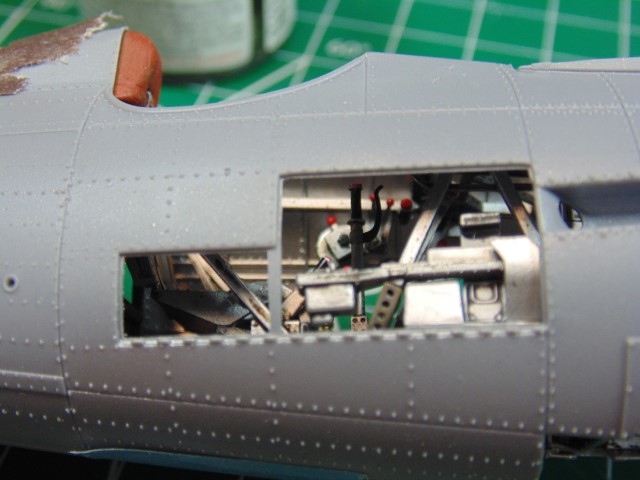
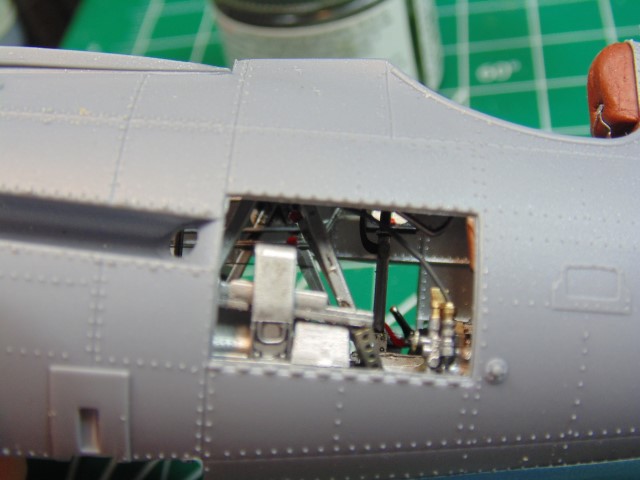
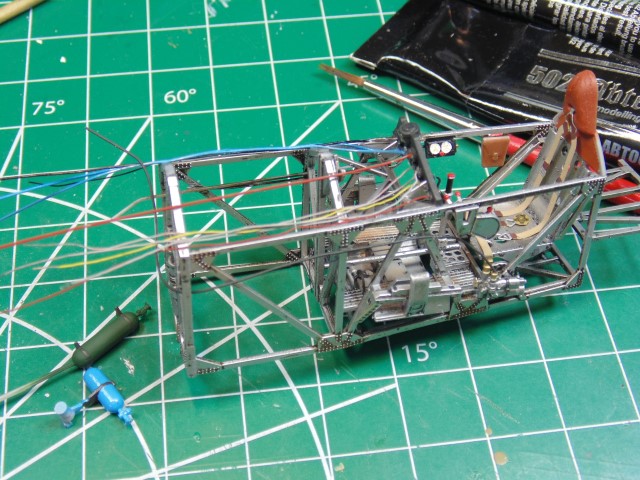
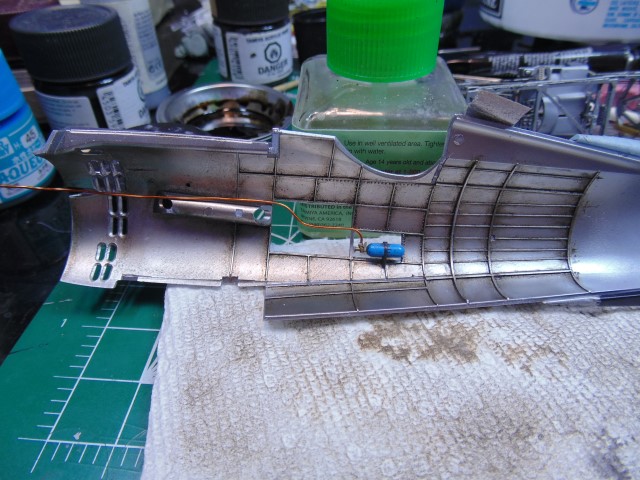
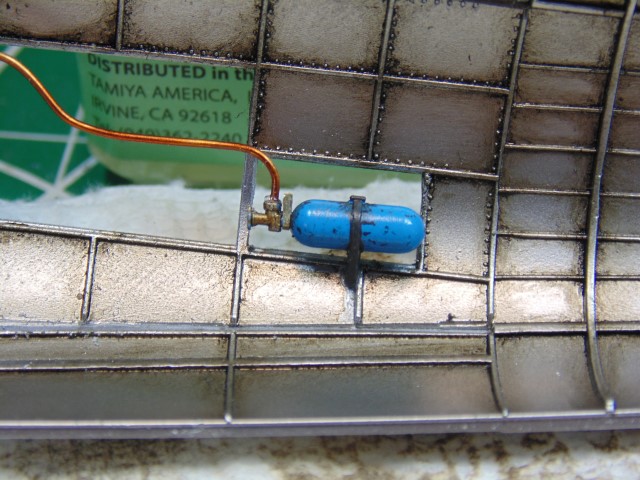
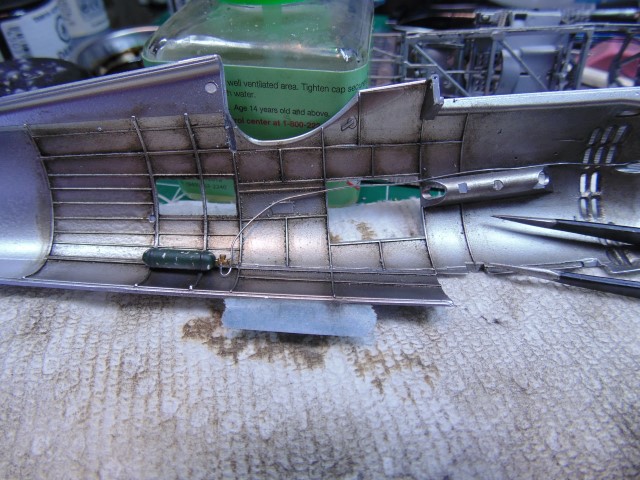
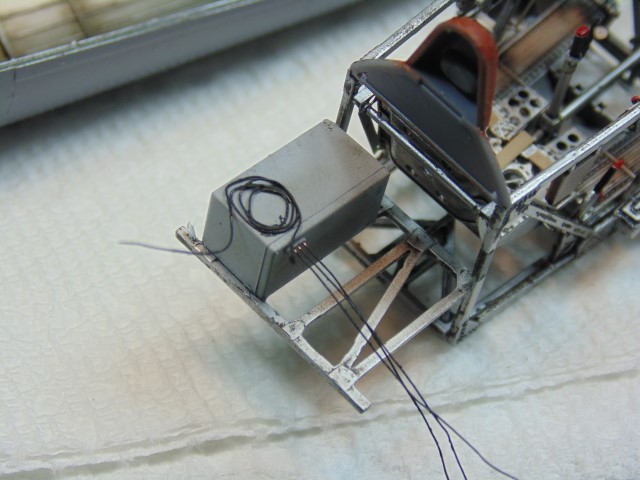
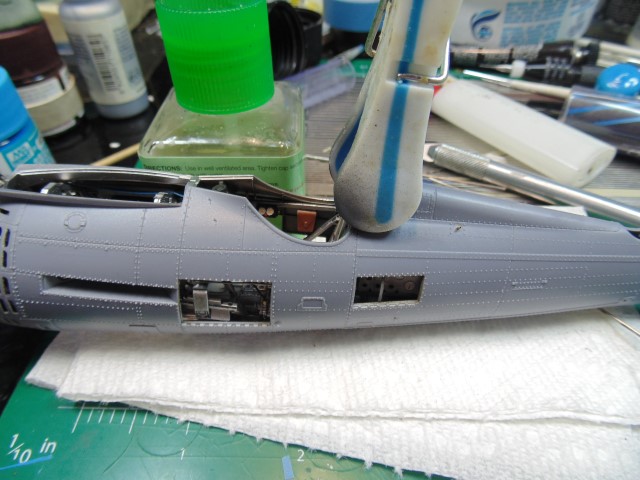
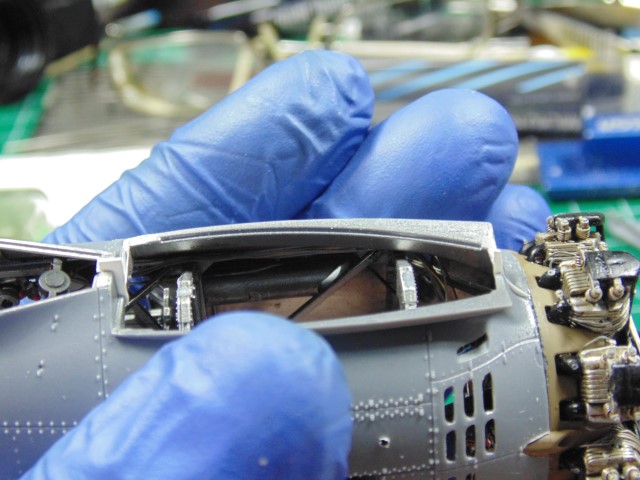
In the beginning my thought was to build it OOB but leave it to IBG to make something that screamed to have a few added touches. Don’t get me wrong, this kit is absolutely plastered with detail from stem to stern yet they left the door open for highly talented modelers to take it to another level. I’m not one of those so I’ll just be doing a few extra items to enrich what will be seen.

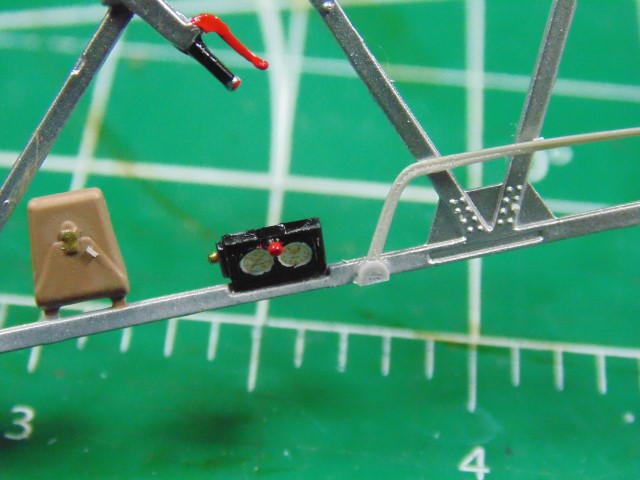
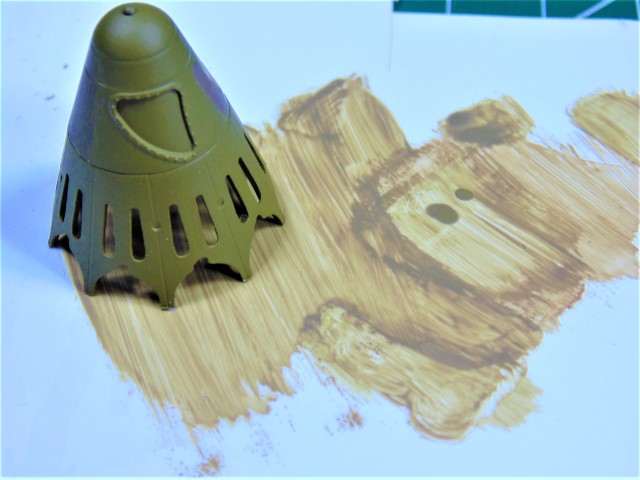
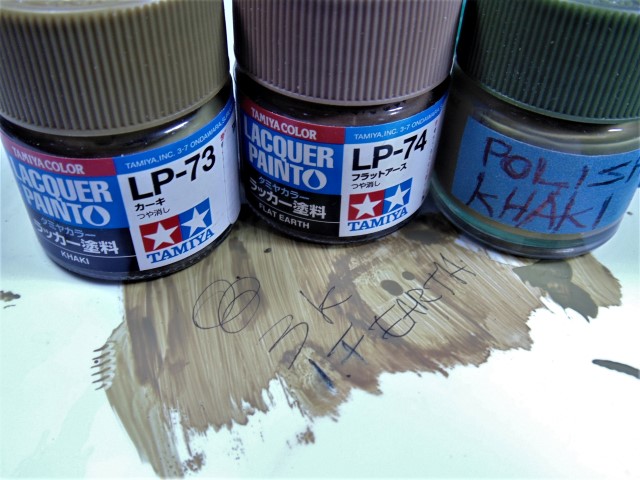
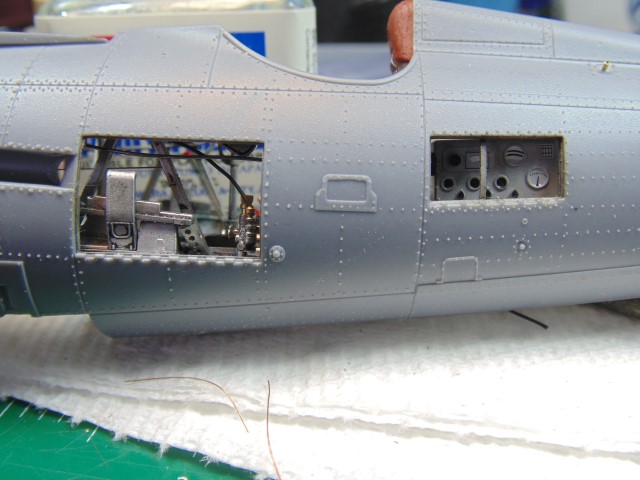
It is in your interest to pick up a reference book or scour the web for images, of which there are plenty. More on that later.

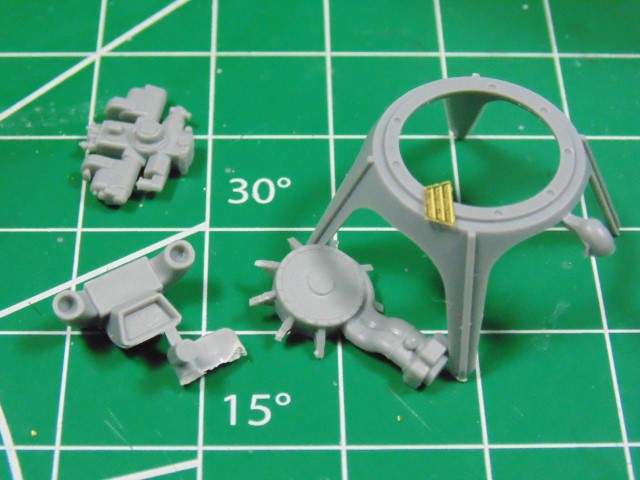
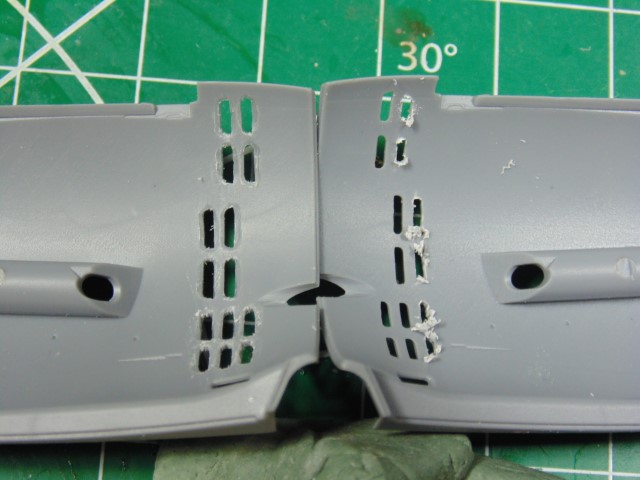
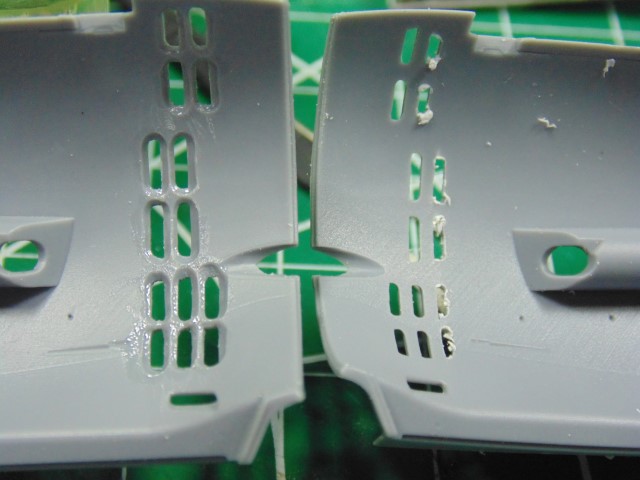
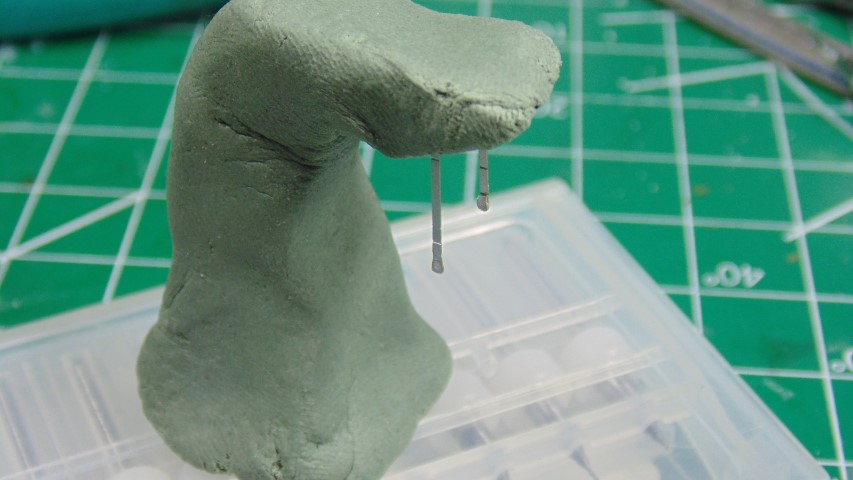
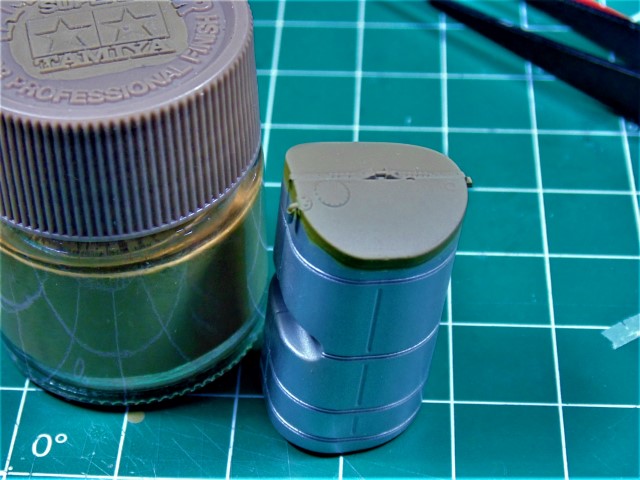
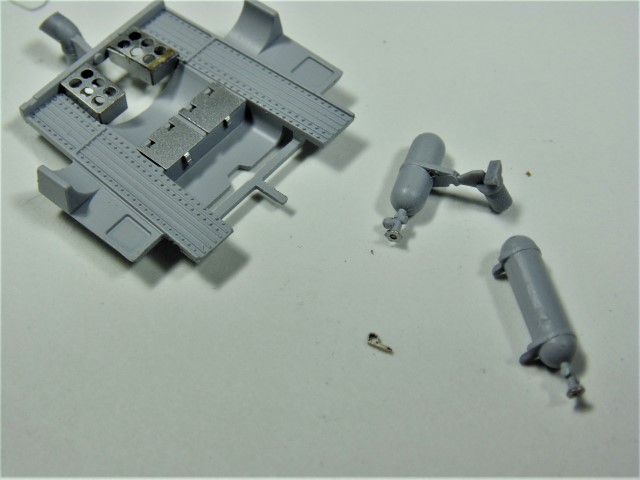
Lets clear some parts.

DSC00203 (Small)

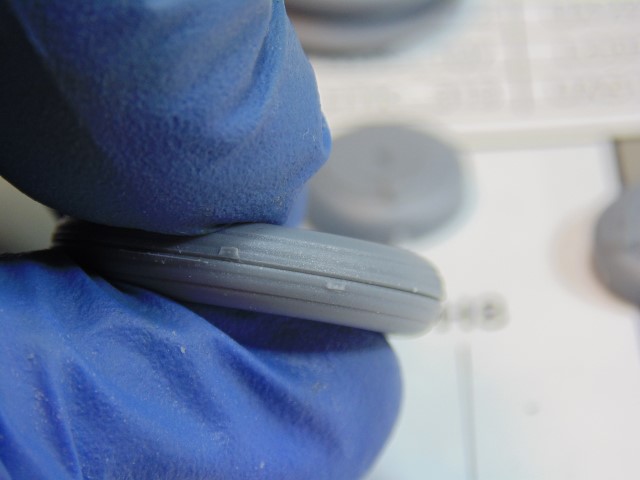
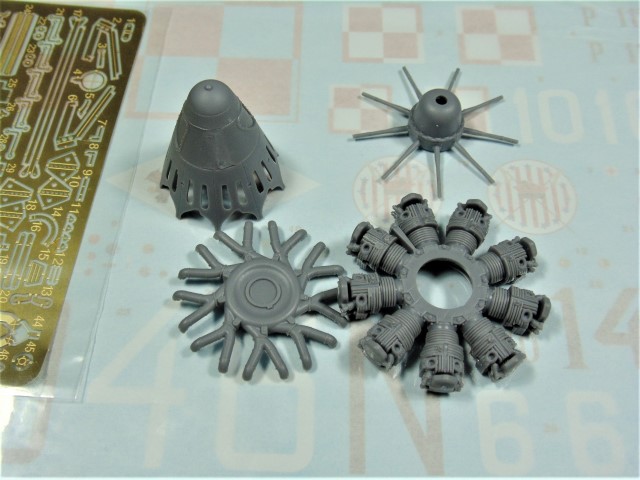
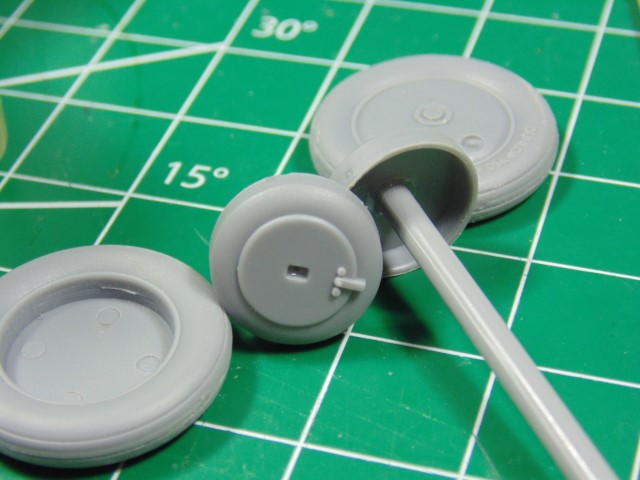
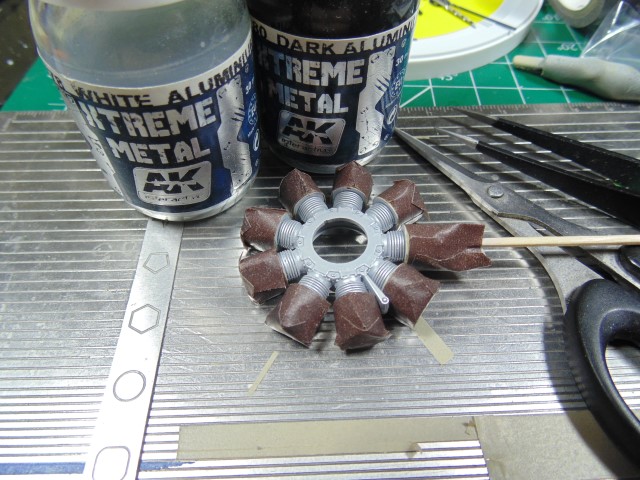
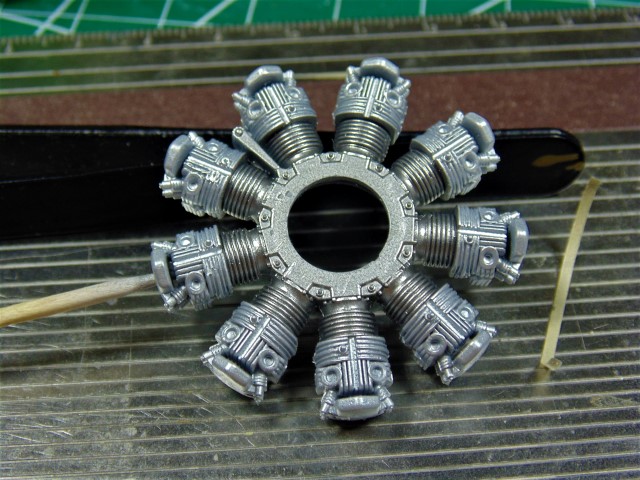
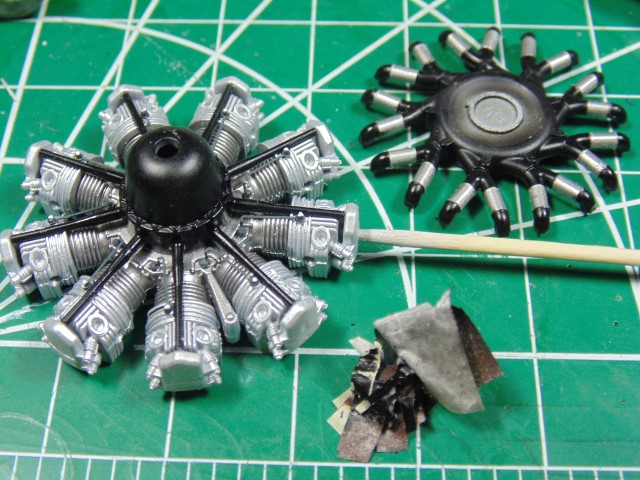
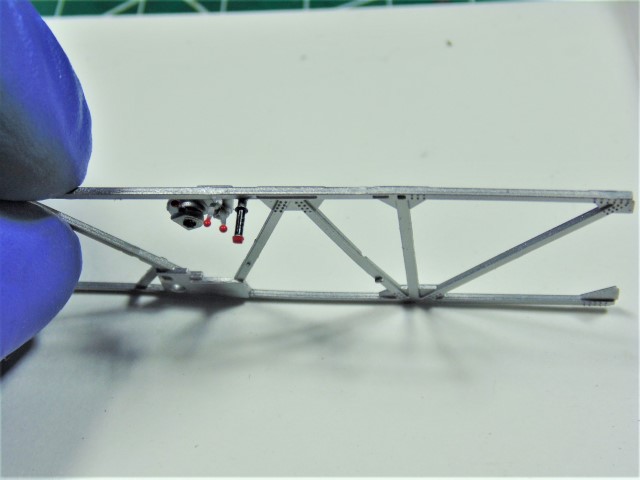
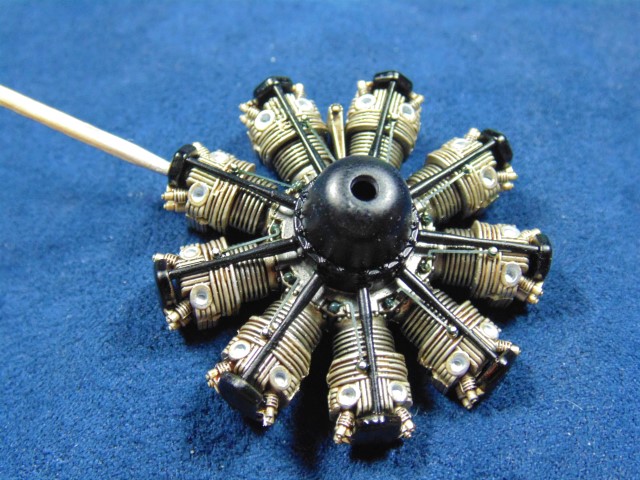
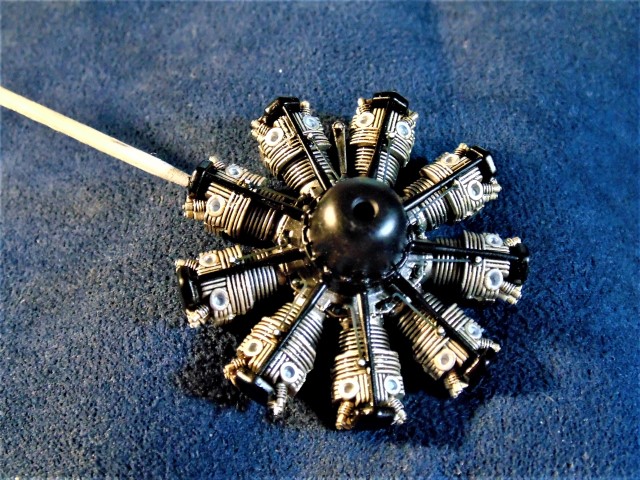
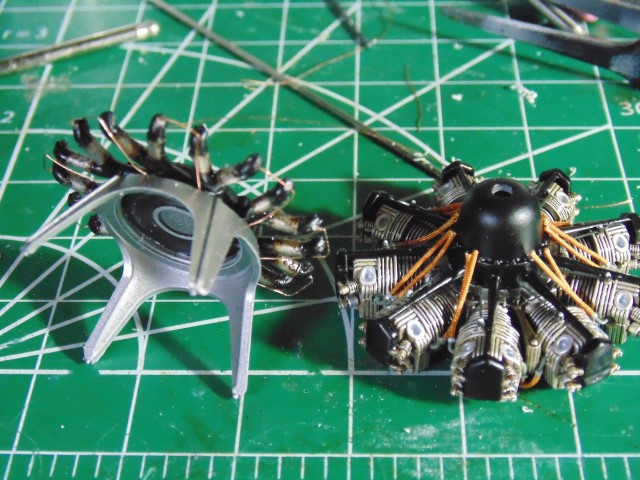
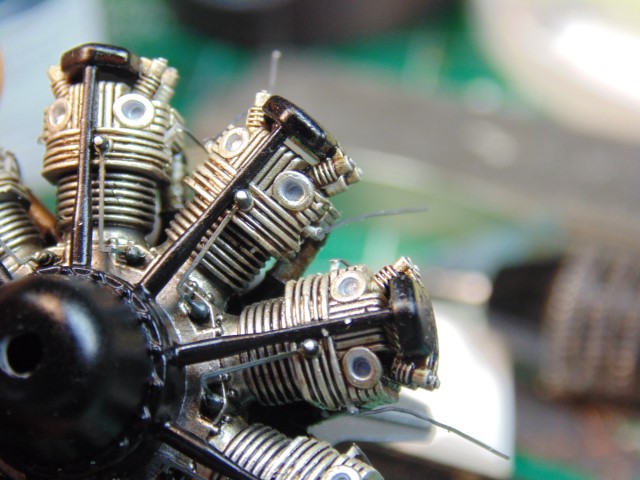
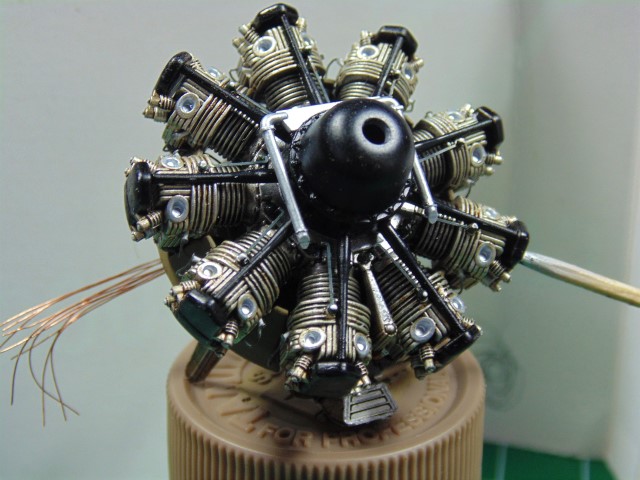
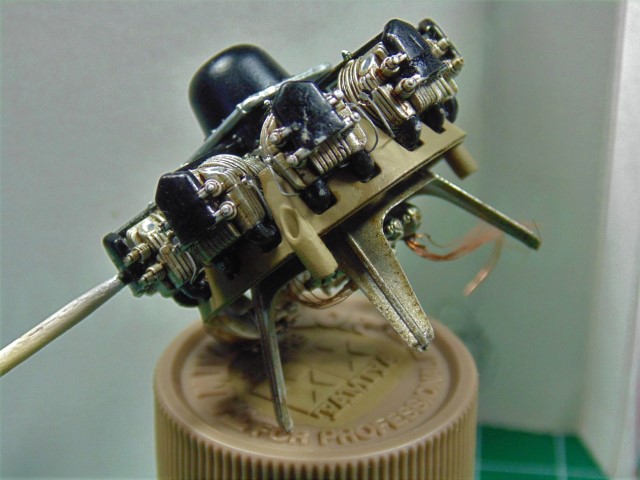
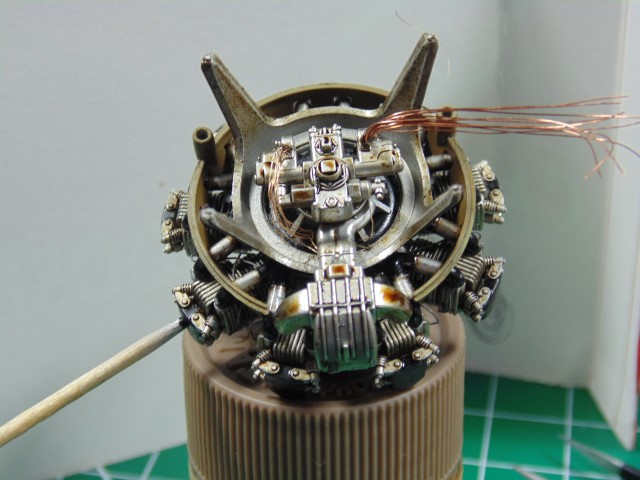
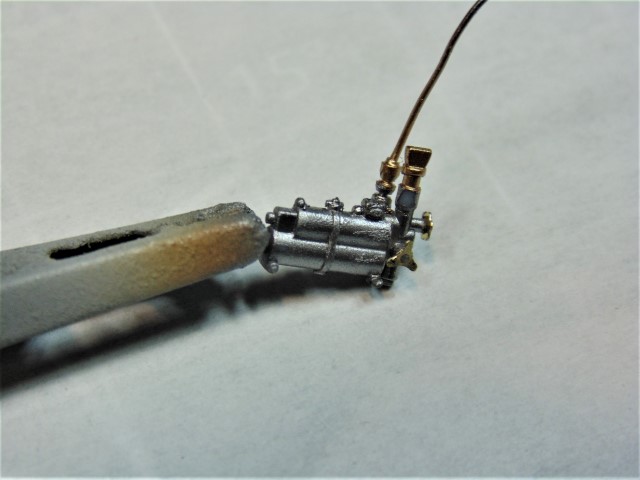
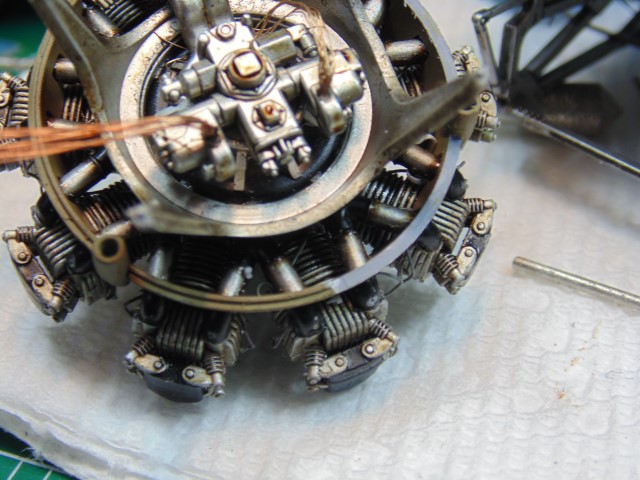
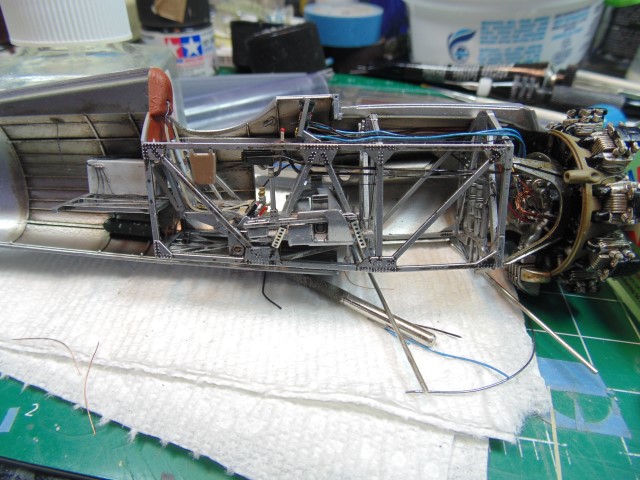
After the tires are sanded the tread looks great. Next was work on the Bristol engine.

DSC00205 (Small)

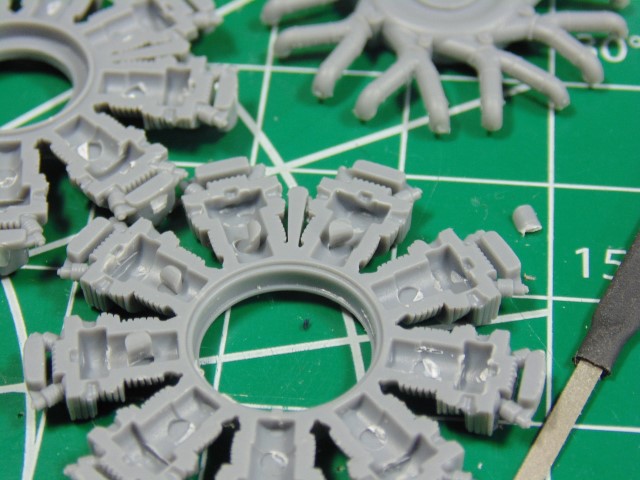
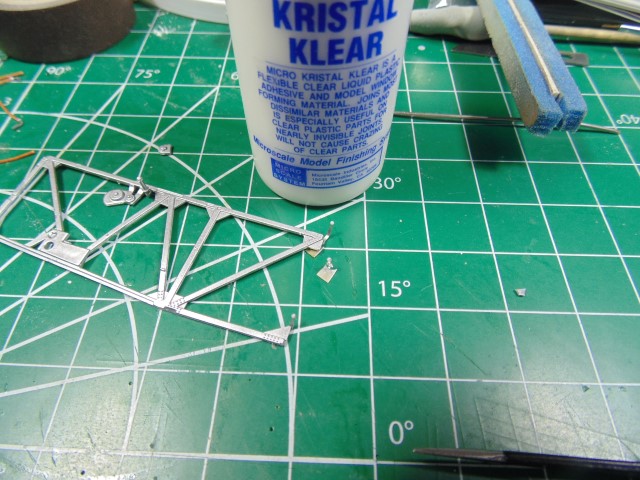
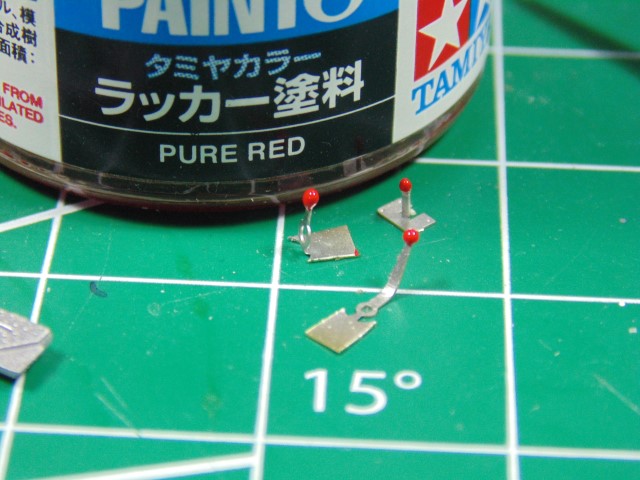
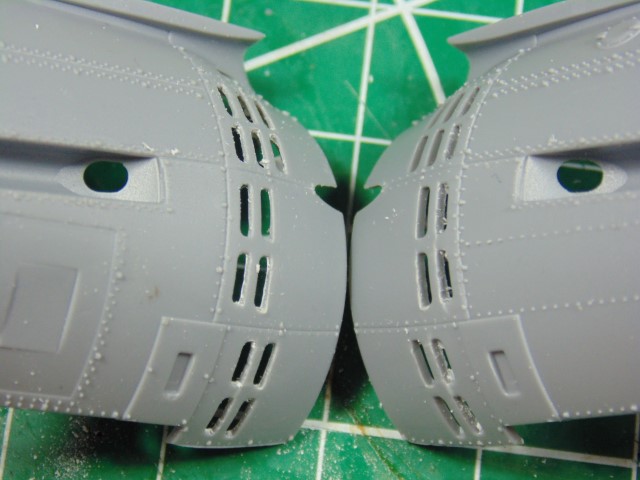
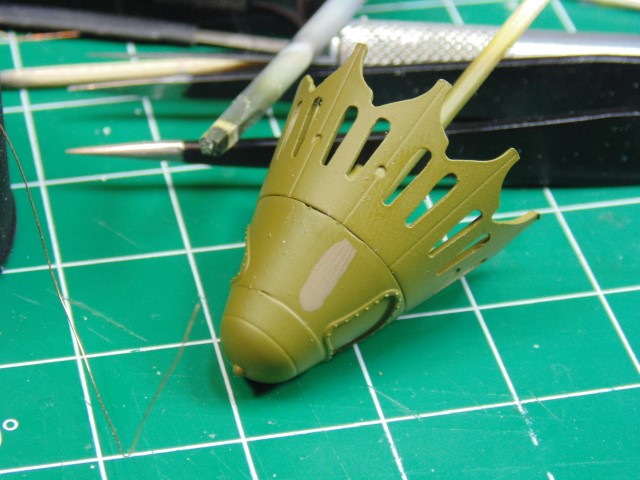
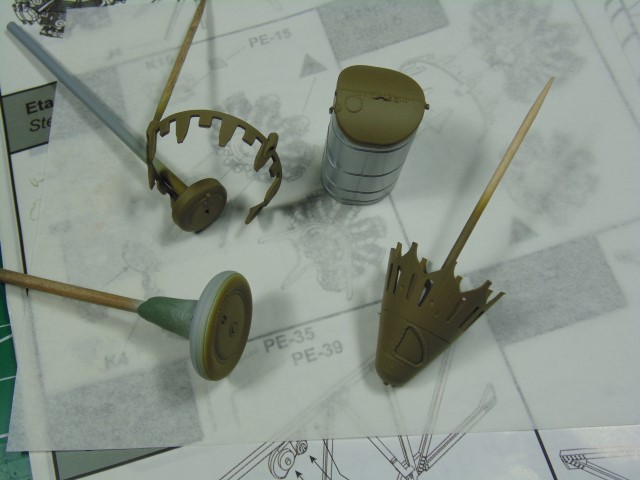
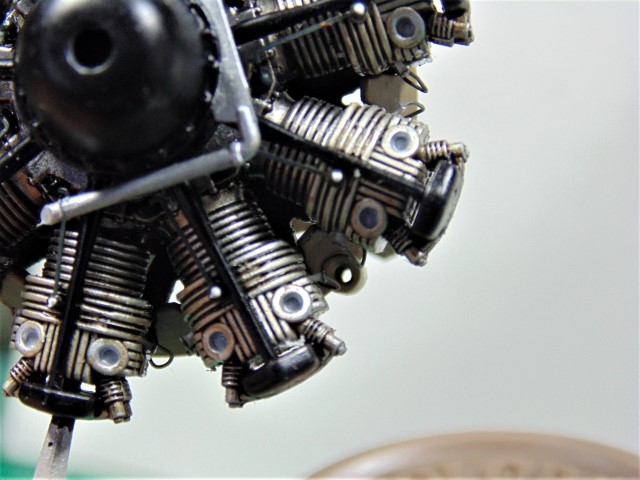
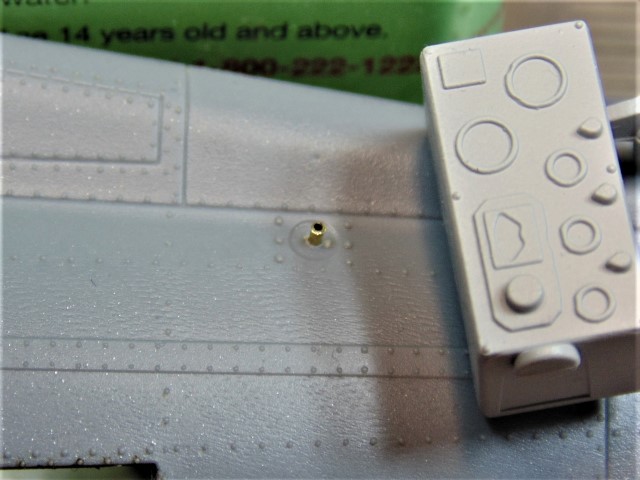
You’ll need to remove these ejection tabs.

DSC00207 (Small)

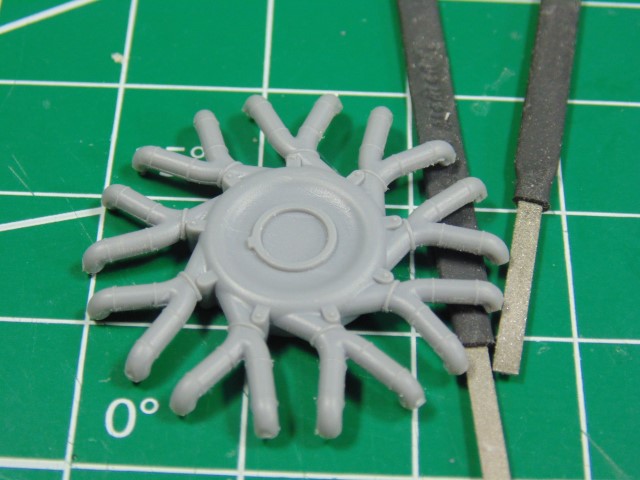
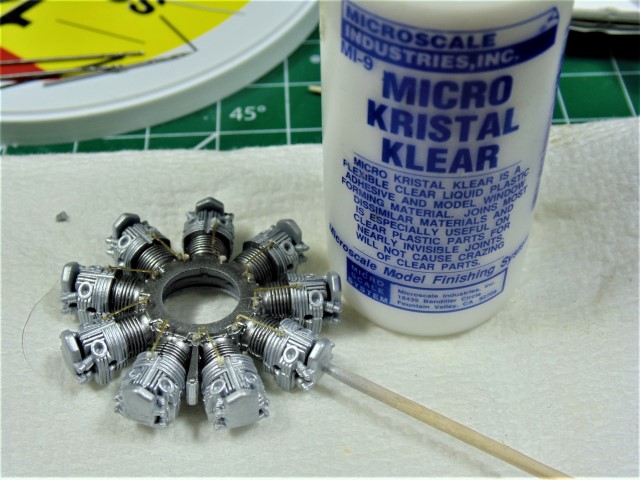
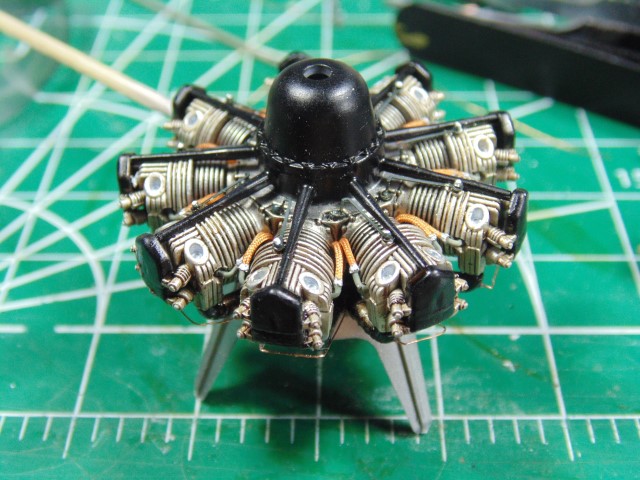
The intake pipes look very nice.

DSC00206 (Small)

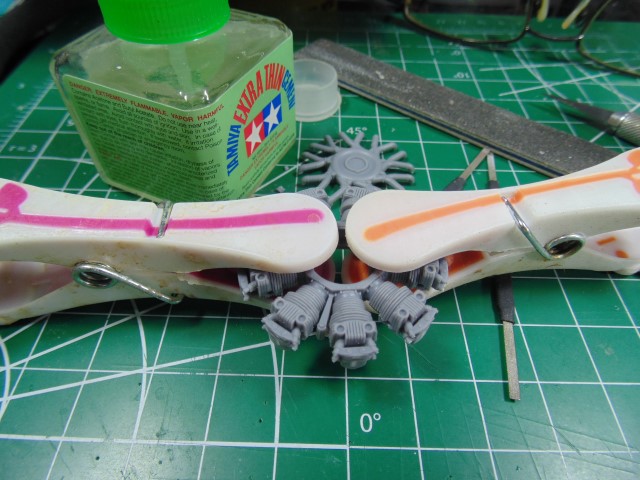
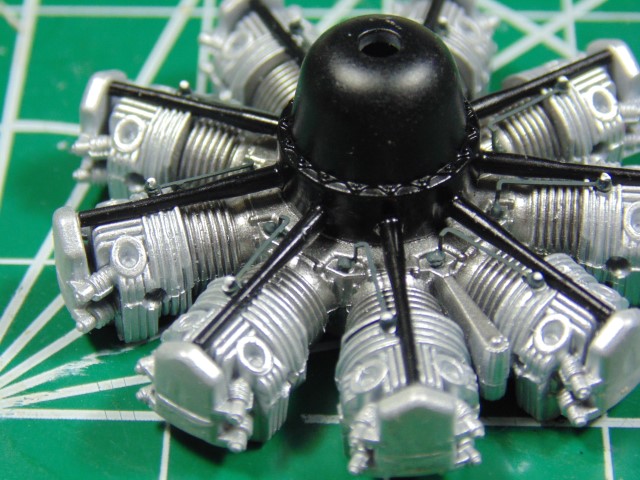
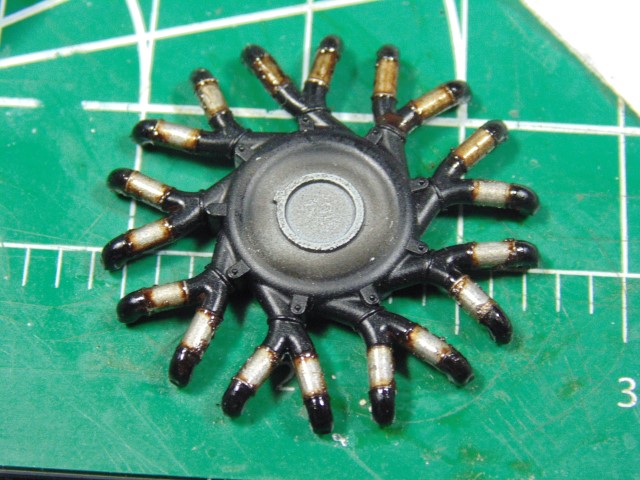
Start by cementing the center of the engine.

DSC00208 (Small)

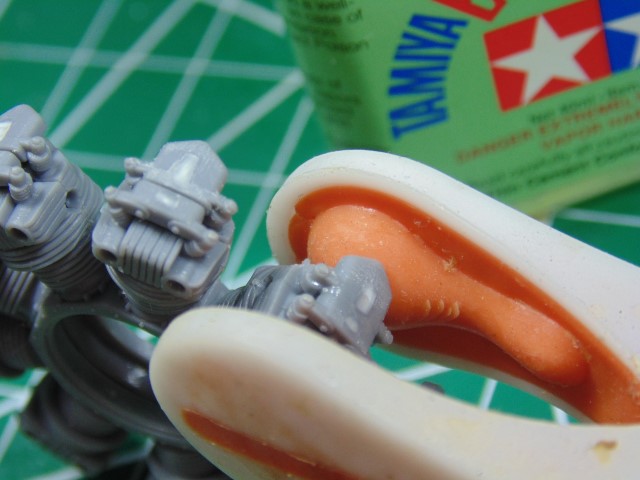
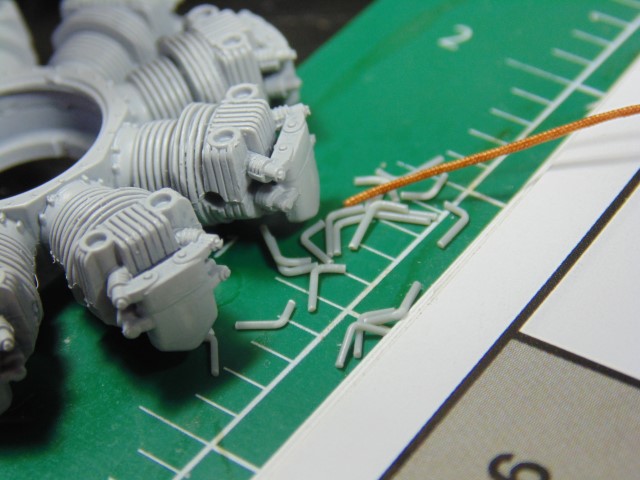
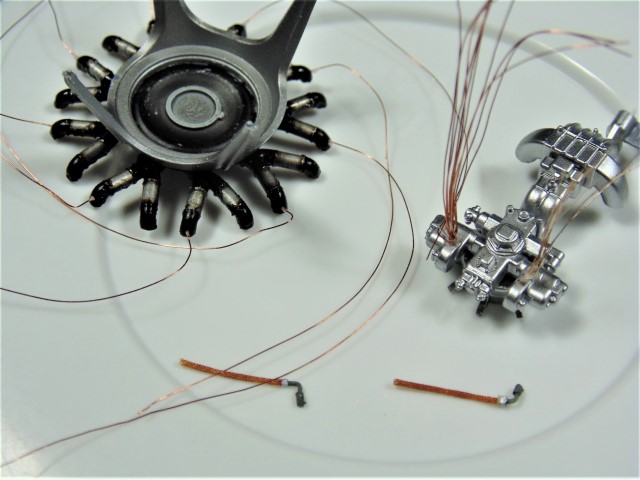
Then the cylinders but be mindful of the tiny pins on the front that hold photo-etched parts later.

DSC00209 (Small)

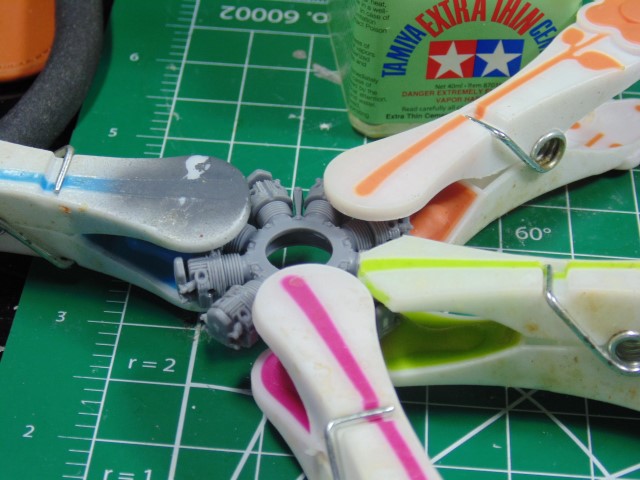
Then simply walk your way around the 9 “get up and goers’” :slight_smile:

More Soon… thanks again IBG!

4 Likes

Nice start H.G.! This looks like an interesting kit, good to see some of the less common airframes released in thirty-tooth scale. Strapped in now and following!

Cheers, D

1 Like

Yeah, I’ll echo that Reg for sure. It’s really great that some of the brilliant Polish designs are coming into the light of day thanks to those at IBG and others.

More very soon on this.

1 Like

A quick update for y’all.DSC00210 (Small)

Some really nice detail in the engine but man are those connection point super tiny. They did key certain parts yet you’ll need a close eye to see them.
DSC00218 (Small)

DSC00219 (Small)

The fit with these support PE bits is excellent. The pins they fit on though are a bit weak and I broke one while the engine halves were clamped… that’s on me NOT IBG.
DSC00225 (Small)

Note the plastic runner for the inside of the wheel. I plan to pin this with a brass rod because I know it will be a very weak point in this model with all the weight on it.

DSC00226 (Small)

The kit does not come with plugs or wires yet does have the spark plug holes. So I made my own.
DSC00229 (Small)
There are so many pictures of this engine and not a one is similar to another. Gives one licence though.DSC00231 (Small)
Not a bad start.

DSC00232 (Small)
Instead of CA I used PVA glue for the simple reason that monkeying around with their placement took far too long.

Thanks again IBG Models and thank you guys and gals for stopping by. More soon.

Hi Everyone,

Some more engine and interior work done.

DSC00233 (Small)

After a few coats of AK Xtreme steel the long pipes were masked and the connectors and collector were done in semi-gloss black. The tape is craft washi and for some reason this roll left glue residue. None of the other previous 9 rolls did this. Stick and pull, stick and pull HA HA.

DSC00234 (Small)

The push rods fit perfectly when the parting line is removed. The valve covers will be cleaned up and painted later. For now they’re places to grip for future work.

DSC00235 (Small)

The framework on this model is really accurate so I figured that some added detail was a nice idea. In photos you can see the round knob handles. I dip the PE in Krystal Klear repeatedly, leaving 30 seconds for it to dry a bit, until the shape looks good.

DSC00236 (Small)

Then repeat the process with the color. It’s super important to get a 90 degree angle when you dip so the part gets an even coverage. Use the wet paint in the cap for better control.

Huge thanks to IBG Models for sending the kit for the build and to Sunward Hobbies for sending the Tamiya lacquer paint.

Thanks for dropping by.

1 Like

Great work :slight_smile: :+1:

1 Like

Thank you.

1 Like

@HGBARNES
I’ve seen your work young master Barnes and methinks you do protesteth to much good sir!!!

1 Like

Hi Everyone,

Lots of projects on the go yet managed to get a few minutes to update. Thanks to all of you who have commented thus far. Please consider taking the time to add any insight you feel is important.

Now back to the show!

DSC00237 (Small)

Sure wish I could post pictures of the real thing, but you can do that when time permits. The frame is sprayed with Mr. Color Super Metallic 2 “Super Fine Silver”. Great paint and with a lacquer retarder can be hand painted. AK Xtreme dark aluminum went on for the handles. It looks nice and will be sharpened up with some wires, hoses and cables later on.

sparmax-compressor-tc-620x_600x

Here’s a shot of my new compressor After a month I can honestly proclaim love!!! Just in case any of you are in the market for such a thing. This was out of pocket and worth every cent.

DSC00240 (Small)

The side gauges don’t come with decals, that I know of, but they have spares for those wanting a different look to the main instrument panel. Reference pictures really help with the small details such as those added cables and half moon bit they’e connected to.

DSC00241 (Small)

Back to the engine since the parts have dried. Abteilung 502 engine grease added a bit of wash color.

DSC00242 (Small)

Then I took a few minutes to make spark plug cables, wires from the magnetos and the water/alcohol boost pipes. Truly wonderful detail on the kit parts.

DSC00253 (Small)

Here the heads got an engine grease wash while the cylinders got a darker look to imitate how many of the real life engines looked.

DSC00254 (Small)

And in a different light.

Thanks again for stopping by and huge thanks to IBG Models for sending over the sample for your entertainment along with Sunward Hobbies for supplying the paint. Next up, some delicate surgery.

2 Likes

Some more work to update Y’all.

DSC00255 (Small)

The louvers at the back on this particular aircraft were more open than on the later versions.

DSC00256 (Small)

Again, I wasn’t able to get in contact with the authors of the photos showing this. I leave it to you to look up photos on the web.

DSC00258 (Small)

The plastic is thick and needs to be opened up to help see more detail.

DSC00259 (Small)

Some of them will have the pressed metal but looking from the back will appear open.

DSC00260 (Small)

Several of the Bristol Mercury engines had pipes going to the air intakes so I replicated this. The braided cable is from ANYZ and wonderful stuff the plug wire ends are mine though.

DSC00261 (Small)

It looks nice and would have looked even better with a wash.

DSC00262 (Small)

Yes that was past tense because the cowl surrounding the prop governor/reduction needs the space between the cylinders… sigh! Thus, it was back to 0.2 mm led wire. So much for the bling :frowning:

Huge shout out to the great people at IBG Models for sending this kit for review and to Sunward Hobbies for supplying the paint. Thanks for stopping by Everyone.

2 Likes

Hi Everyone,

Quick update on the project. Adapt and overcome right?

DSC00263 (Small)

Seems the Mr. Color H-81 is far more on the later Polish Khaki then I wanted.

DSC00280 (Small)

The earlier was more a mixture of earth brown and olive green.

DSC00282 (Small)

Boy, there are almost as many opinions on this color as there are for RLM shades of grey LOL…So, I settled on a mixing my own brown green khaki as is seen in Polish uniforms. The mix ratio is roughly 3 to 1 but I may go 50/50. I won’t be stripping the paint yet wonder how the hairspray will react with two different tones of khaki. Should be interesting.

After that fail decided to work more on the interior. Leaving the handles this way lets the PVA glue dry in a tear drop shape so later the ends can be flattened to look conical. I think these are MG charging handles by each of the pilot’s legs but not sure. Regardless, they’re just another example of the incredible detail IBG put into this model.

On that note, many thanks to IBG Models for sending the kit and to Sunward Hobbies for supplying the paint. More soon, be safe everyone.

1 Like

I have the Silver Wings resin kit, I think that this kit would have been the better choice, if it had have been out at the time! Anyway I am watching your progress with interest and it’s looking good :smiley:

1 Like

Thank you for the kind words. Hey, with your skill that SW will look fantastic.

I got a bit stuck with the engine but this build of yours might just be the thing to get me through it, so thanks for posting. I’ve always wanted to build a model representing the first kill on the alied side. :smiley:

1 Like

Hi All,

With the khaki color resolved it was time to finish the engine and move on.

DSC00338 (Small)

These will be chipped later.

DSC00339 (Small)

A few parts needed to go on.

DSC00340 (Small)

Next I slipped the led wire in place.

DSC00341 (Small)

Then an engine grease wash.

DSC00342 (Small)

Gun ports drilled out.

DSC00343 (Small)

Then the fuel tank. Note the difference in khaki color.

DSC00344 (Small)

And that completes most of the engine area.

Next up I’ll be doing more of the interior. Thanks Everyone.

Huge shout-out to IBG Models for sending this kit and to Sunward Hobbies for supplying the paint and supplies.

3 Likes

Hi Folks,

Sorry for the delay. This work was done a while ago but sure brought back memories of how easily this kit goes together. Even with all the extra pipes and wires a few hours here and there flew by.

DSC00370 (Small)

Some delicate PE but nothing even a novice modeler couldn’t handle. At the tip of the cotton swab though you’ll need to add a sliver of plastic to the pins for them to seat in the notches.

DSC00371 (Small)

Multiple metallic paints were used with dark iron on the lever brushed lightly with rust pigment.

DSC00372 (Small)

Looks the part I think with the metal foot guards getting the same effect.

DSC00373 (Small)

On to the seat. This was a challenge because the PE didn’t bend right and need to be worked over. I used my photo-etch bender yet with all the angles and the thin connections you’ll need to use sharp tweezers. Also, the plastic connection points are really tiny and need cleaning out.

DSC00374 (Small)

Just a bit of patience, plus looking at my photos, and you’ll get the shape right.

DSC00375 (Small)

Any small issues are very quickly forgotten when you see the result. This is a fantastic piece of first rate engineering and a joy to construct. The best part is… you’ll see most of it!!!

DSC00376 (Small)

I think this is for fuel, but regardless, in real life pictures there is something holding a pipe which is not included in the kit part. So I hand made one then sprayed with AK xtreme metals.

DSC00411 (Small)

It widened the part so a test fit was needed.

DSC00377 (Small)

More PE and plastic added to the machine gun area… wow! And it fit perfectly.

DSC00378 (Small)

You will have to twist the machine gun holders to get them to seat properly but not a big deal, only wish IBG Models would make these suggestion in the instructions.

DSC00412 (Small)

A little more test fitting after some parts were added. The harness parts look excellent.

DSC00413 (Small)

Definitely leaving these covers open to show off the manufacturers work… NOT mine!

Thanks for dropping by!

Huge shout-out to IBG Models for sending this sample for the review and to Sunward Hobbies for supplying the paint and some materials for the build.

5 Likes

Great work so far, beautiful!

1 Like

Thank you Sir.

Hello fellow artists :slight_smile:

Picking up where I left off, let’s get the fuselage put together. By the way, I really appreciate the comments thus far, so if I missed thanking anyone… THANK YOU… eh, em… nearly threw me speakalator out.

DSC00414 (Small)

All these wires will be seen at windscreen and the open louvers. I chose these colors because they are in photos from the P. 11c restoration at the Polish Air Force Museum. The tanks still need brass fittings.

DSC00415 (Small)

The wash is a 50/50 mix of engine grease and smoke. It dried for a day and will be toned down a little bit.

DSC00416 (Small)

Tank looks passable.

DSC00417 (Small)

This tanks will only be seen if you shine a light at the seatback and know what to look for. Note the curl of the pipe. It will interfere with the frame unless done like that. Again, wash gets toned down.

DSC00418 (Small)

This tube will hold a rod where the antenna lines will be attached. The kit supplies a PE pin but I like something that will stay put. It may be over-kill but…

DSC00419 (Small)

You’ll be really, really hard pressed to see this detail wiring but it was fun.

DSC00420 (Small)

I could not get the inner engine cowling to mate to the front unless this lip was removed.

DSC00421 (Small)

For the most part it was a good fit.

DSC00422 (Small)

Radio has a light scratches

DSC00423 (Small)

Walk your cement back from the headrest.

DSC00424 (Small)

That way you’ll wind up with only one spot to correct. With these 0.3 mm spacers, at the windscreen and wing front, the body will match up with the circumference of the one piece inner engine cowl part. Note how many of those wires can be easily seen. Naturally, the spacers were trimmed down, but there was zero filler used!!!

Huge thanks to IBG Models for suppling this kit for review and to Sunward Hobbies for suppling the paint and some of the materials for the build.

All the best Everyone and thank you for dropping by.

6 Likes

Beautiful detail work. It appears this a/c could fire up and fly away when you complete the build. I can’t wait to see this one finished.
:beer: :beer: :+1:t2: :+1:t2:
Cheers,
C.

1 Like