After I finish masking I give it an overspray of matte clear (for Armor), Gloss clear (for Canopies.) This helps to seal the edges of the masking tape to reduce the chances of the final paint color creeping in under the masking tape.
My Dad taught me that trick painting real cars when you want a color break in the paint with no chrome strip or body element to separate the colors.
(Probably everybody already knows this! - Just trying to help.)
I was going to mention that or the other technique I was taught is never just use the tape width edges as is. Cut the edges off as that is where all the dust and what nots collect making it less tacky then the other sections of the tape.
Thanks! Great taping tips for the future. Analyzing my own work, there were clearly tape step-marks where instead of being lazy, I should have just pulled tape and redone the entire run.
And please forgive me if I don’t immediately get what you guys are putting’ down. My stereo equipment is really old.
Please know; my comment was NOT meant as any form of criticism. We were talking paint masking here so I just spouted out a contribution that happened to pop into my puny brain.
Odd. A while ago, I sent a text message to my brother in San Antonio offering to paint a racing stripe on his Dodge Hellcat — for FREE! He has yet to reply.
@ Tank_1812, Thank’s. I just got done using this to repair the worst of bleeds and crooked lines on the shelter cross.
@ 165thspc (Right Channel Mike), Thank’s for the really good tip! — duly noted for future masking efforts.
A variant of this is to paint with the colour which the tape/mask is covering.
Any paint creeping under will have the same colour as the paint already there.
Cool guys this is like having Purple Haze swirling around in the cans, great stereo with some quad riffs from other musicians in the above track I was thinking it before but now seeing as it’s become a focus of attention, is there an argument that the real thing might not have been painted with precision….? Are there any clues if they sprayed or brushed it? Did they ever field-mod ordinary trucks in an emergency? Not suggesting you change anything but just querying the necessity for perfect masking
I stumbled upon the ‘Scarlett O’ Hara’ tune and just had to include it. Glad you liked it!
@ Tim. Thank’s! Sure. I suppose all of the above are plausible. ALARM!!! Get me another bucket and prepare to aim the mop!!!
I’m not attempting to turn an ambulance into an over-riveted tiger tank. Merely kicking this kit off the bench of infinity and trying a few things as I go, i.e. masking large areas, which I’ve never done before… so hard edge is my story, though I’m hardly sticking to it.
No problem Mike – besides if there were 1:1 imperfections they’d hardly show at 1:35 anyway, so hard-edged appearance would be the way to go. All I was trying to say is if there were any finish-imperfections they might not be all bad
Hi guys, I’ve been kinda’ rotating between builds lately. As glue dries here, putty is curing over there, and paint is drying somewhere else. For now, here’s a small update on the Ambulance.
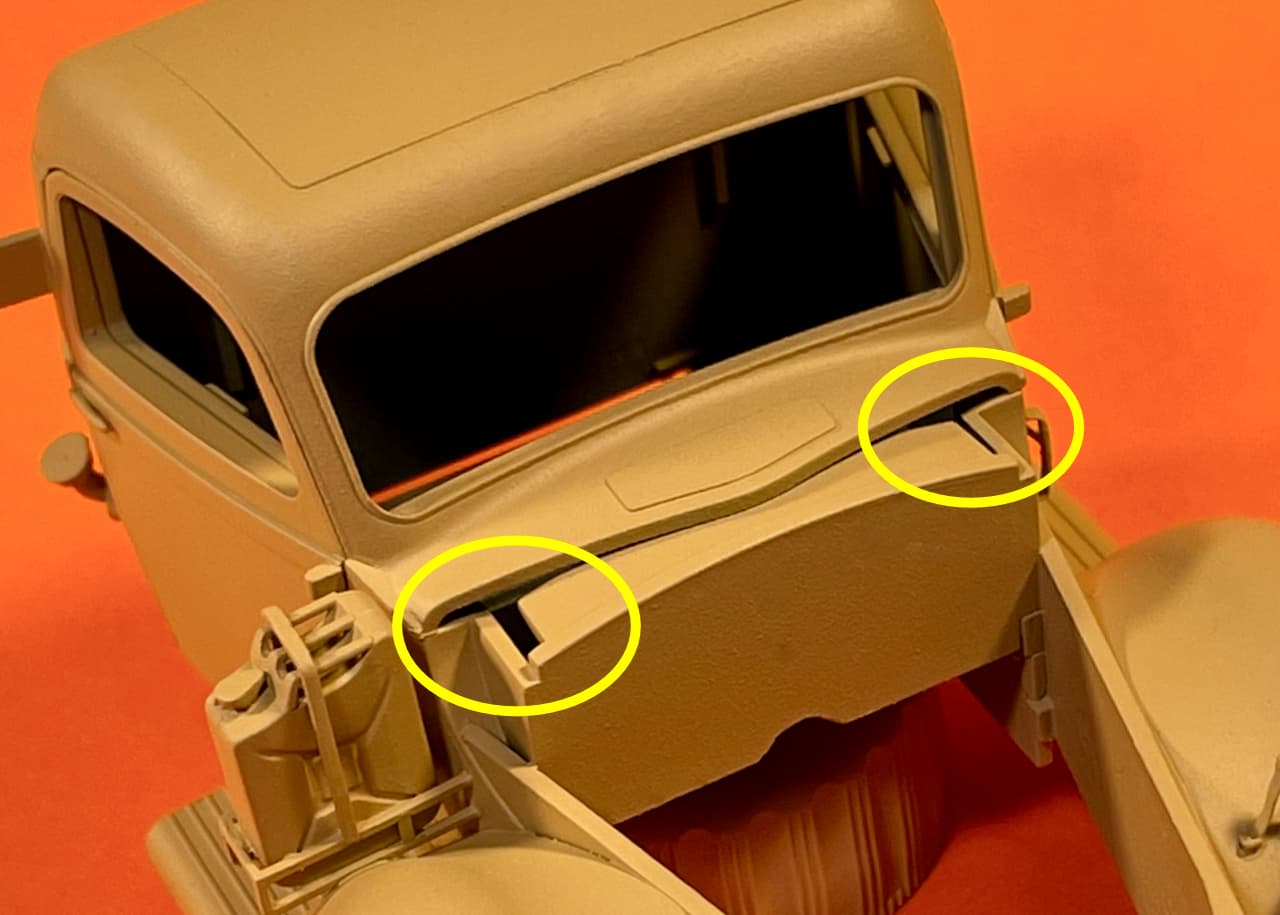
Plugged the two gaping holes in the firewall. Putty to follow.
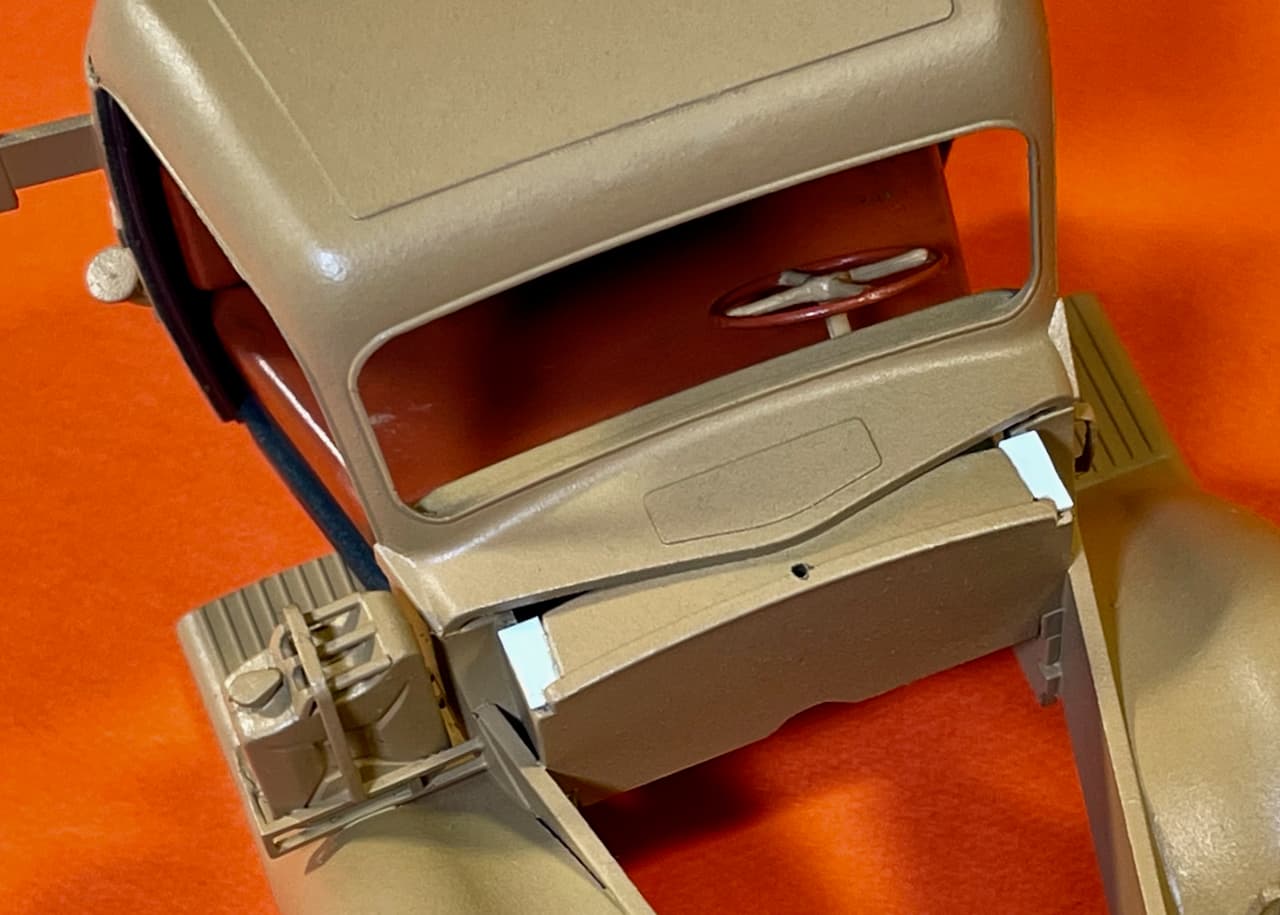
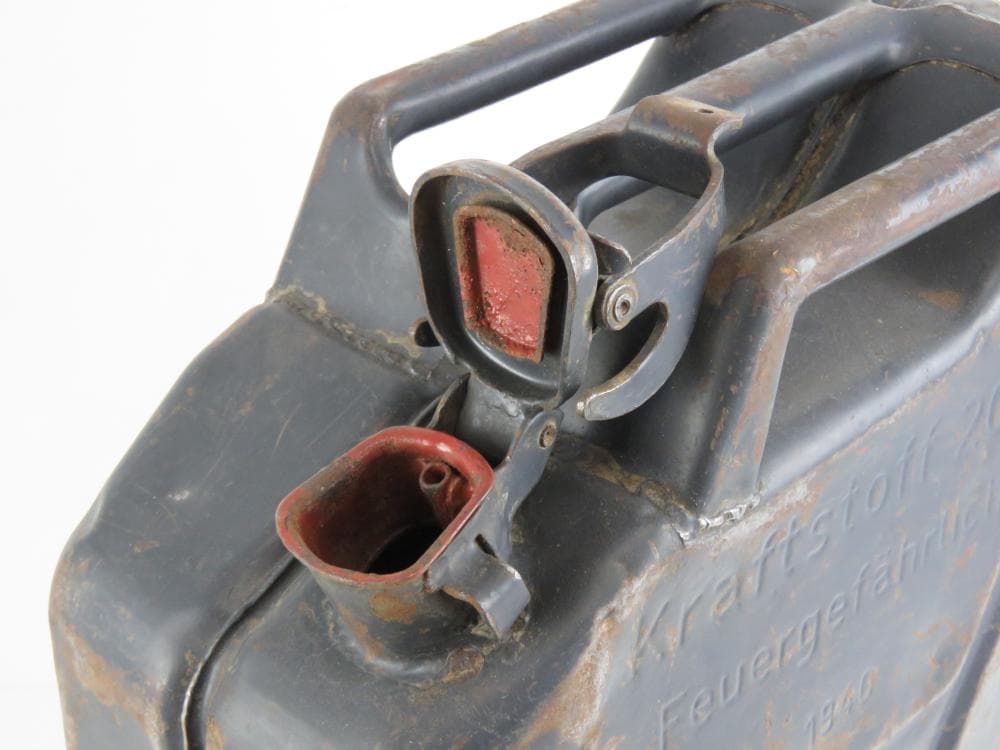
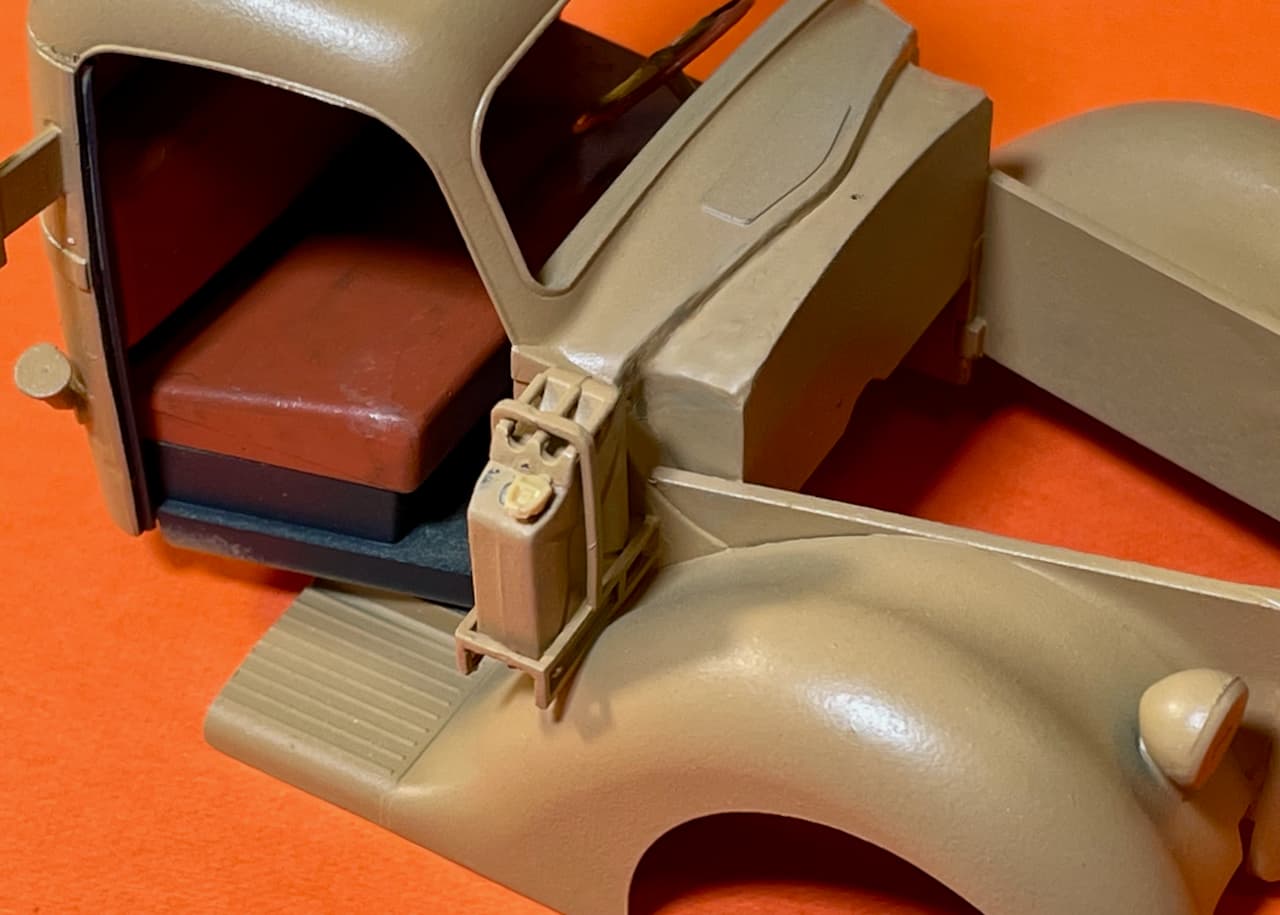
Hey Mike. The spout on the Jerry can looks centrally located in the pic. Not sure if it just the angle of the photo or not.
Just in case, it needs to be offset to the right side, basically equidistant from the central join and the outer edge. When you pull the cover handle back, it should sit between the two carry handles
@ petbat. Thank’s. You’re correct, it’s wrongly moulded. I seem to recall it looked odd when I first worked on the kit in 2014. I may cut it away and reposition it. On the other hand, if I can wiggle this can out, I’ve got aftermarket cans in my stash.
PS: I just checked… It’s painted-in and there’s no wiggle room, so the Jerry can stays put. However, I will replace and reposition the current spout with one from an aftermarket kit.
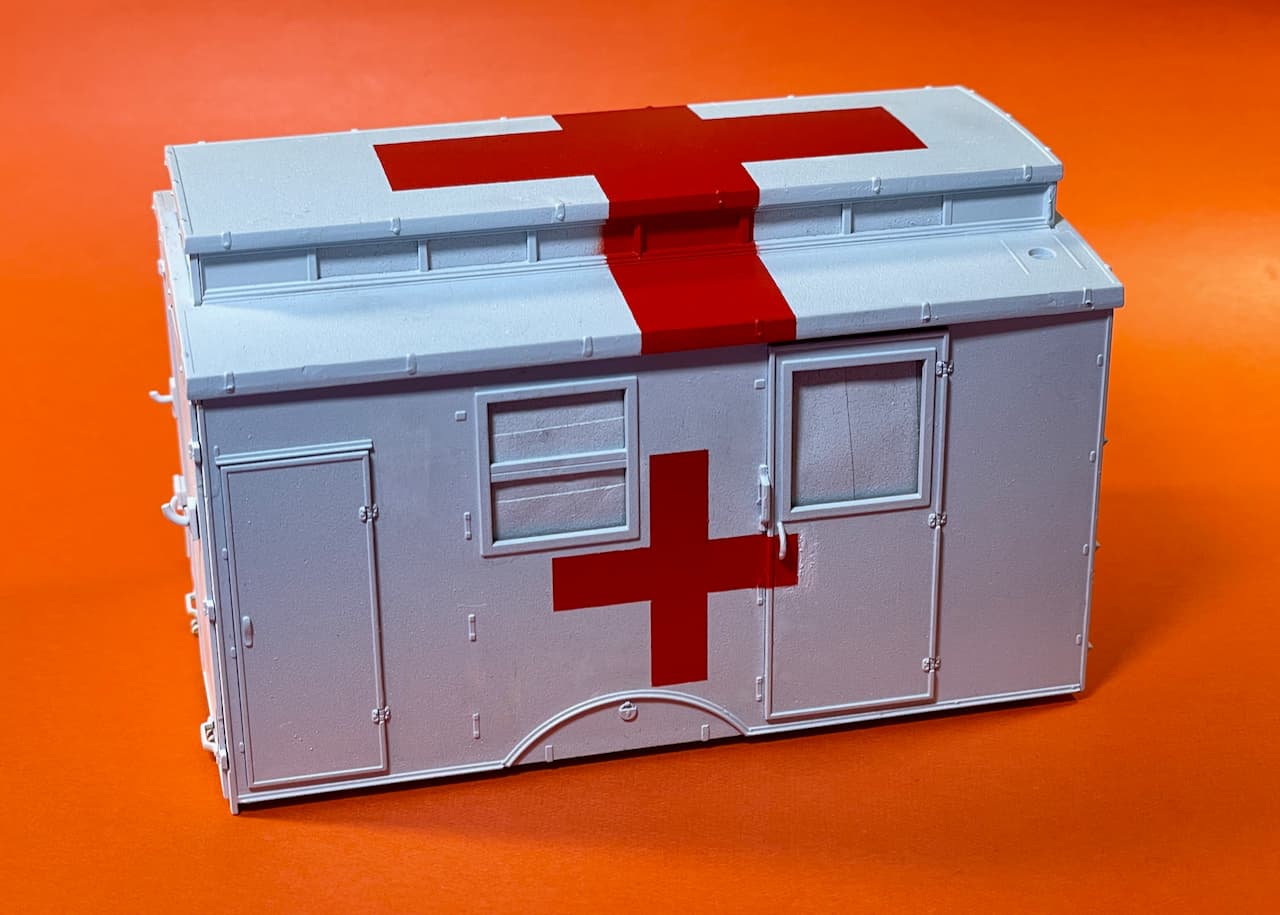
Unfortunately, there were some breakups which needed repair. In addition, the decals would not conform over irregular areas after applying the usual Micro Sol Setting Solution (red label). Never had this problem before. Eventually, I pushed-down the uncooperative decal bits with a cocktail stick and even an X-Acto blade. As you can see, the door area was most problematic — where the decals broke-apart without even a whisper. After that fail, it was onward to lock and load the wet palette.… white paint … red paint … white paint … red, no white? Wait… That was really close! Whew!
The area in question will need some more work — sanding, repainting and such. I’ll have to revisit that demon at a later date… perhaps while wielding a large splotch of weathering mud!
You’re being too hard on your self. This is shaping up to be something special. I have little faith that Hans und Franz ,despite their Teutonic reputations for fastidiousness, would have done any better.


 I was thinking it before but now seeing as it’s become a focus of attention, is there an argument that the real thing might not have been painted with precision….? Are there any clues if they sprayed or brushed it? Did they ever field-mod ordinary trucks in an emergency? Not suggesting you change anything but just querying the necessity for perfect masking


 In the meantime, the large roof cross repair is done. I can come down now.🪜
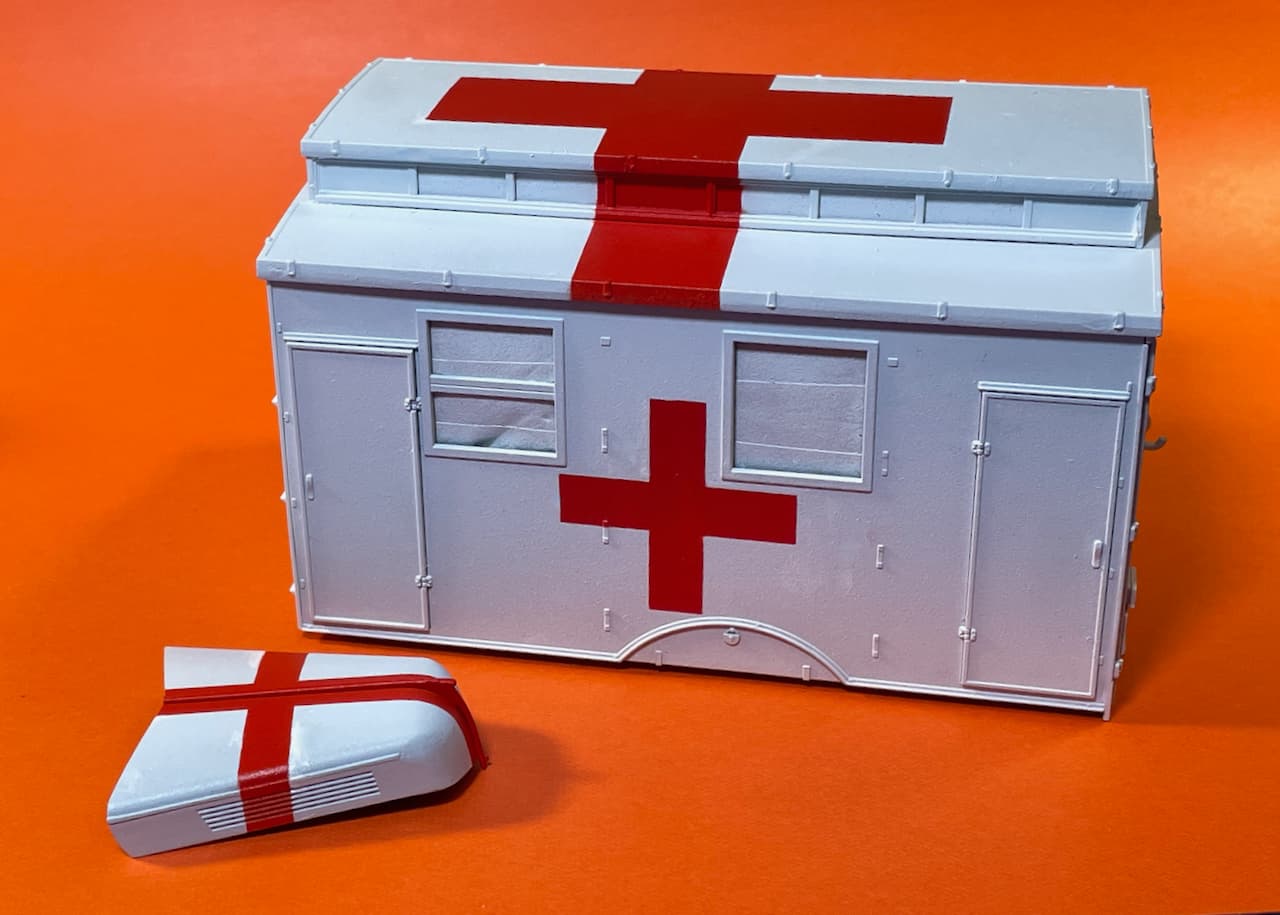
 Eventually, I pushed-down the uncooperative decal bits with a cocktail stick and even an X-Acto blade. As you can see, the door area was most problematic — where the decals broke-apart without even a whisper. After that fail, it was onward to lock and load the wet palette.
 … white paint
  … red paint