Thats some seriously cool work putting all that together … looks amazing.
The hard part of the Mirage is finally behind me.
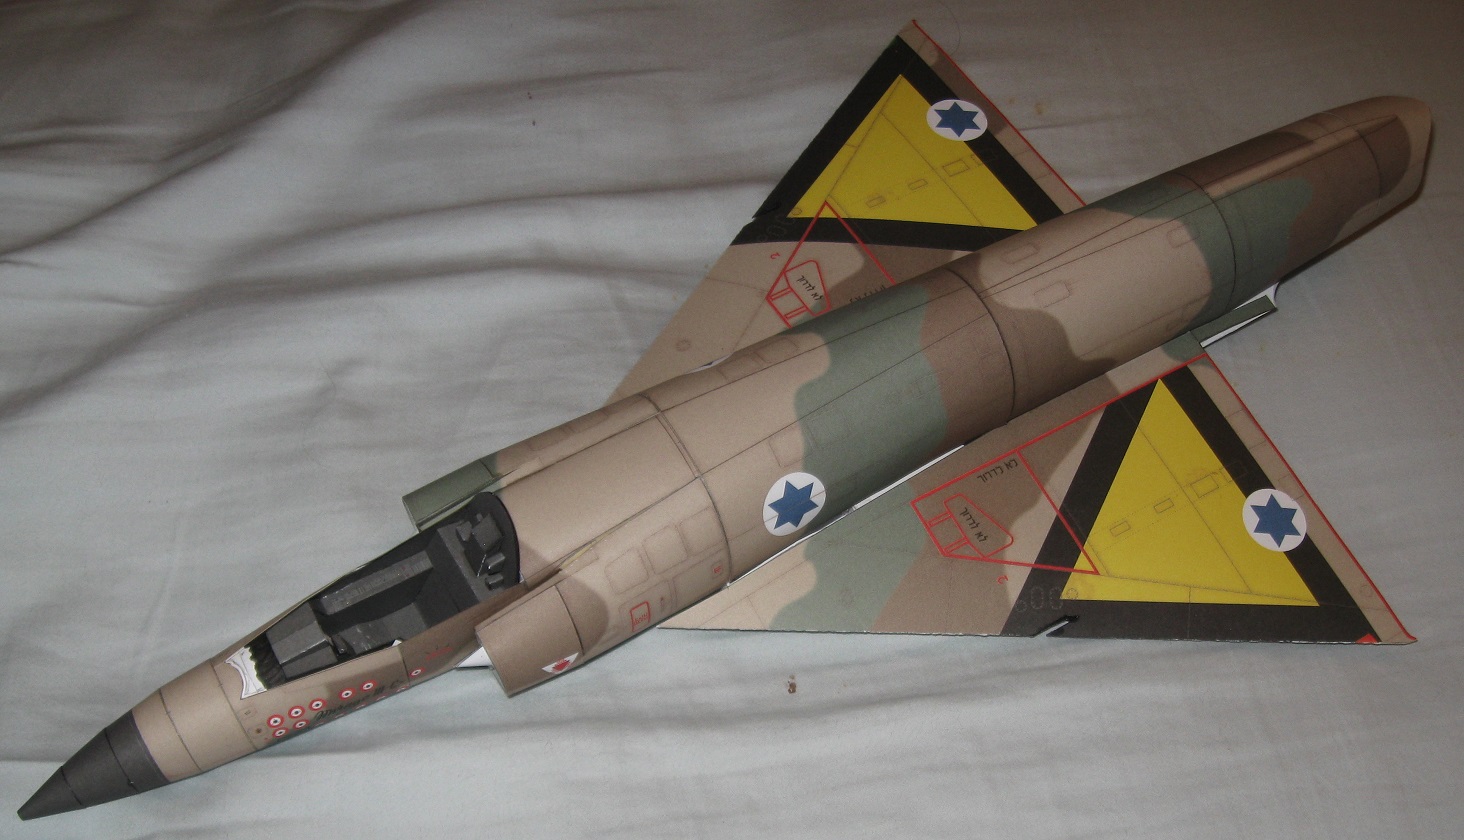
What matters in these pictures is the seam where the forward and aft fuselage segments meet. I chose to make it as tight as possible on top. As a result, there was a little bit of slop on the bottom, which I filled using Scenic Cement. Slop in the intake join was also rotated to the bottom. I will cover that up with some custom parts. Fairings will cover the join between the fuselage and wings, just like on the real aircraft.
All the control surfaces, pylons, and ordinance are built up so this model is now in the home stretch.
7 Likes
Well I tried. Life, eh? There’s always something. Even though I have not completed the kit, as of yet, I will share the details of the build thus far. But first, a little intro. I don’t build any one subject. My only criteria for choosing a model is “that looks like fun”. This is my first Meng kit, and only my second modern armor subject. (I know, crazy right?)
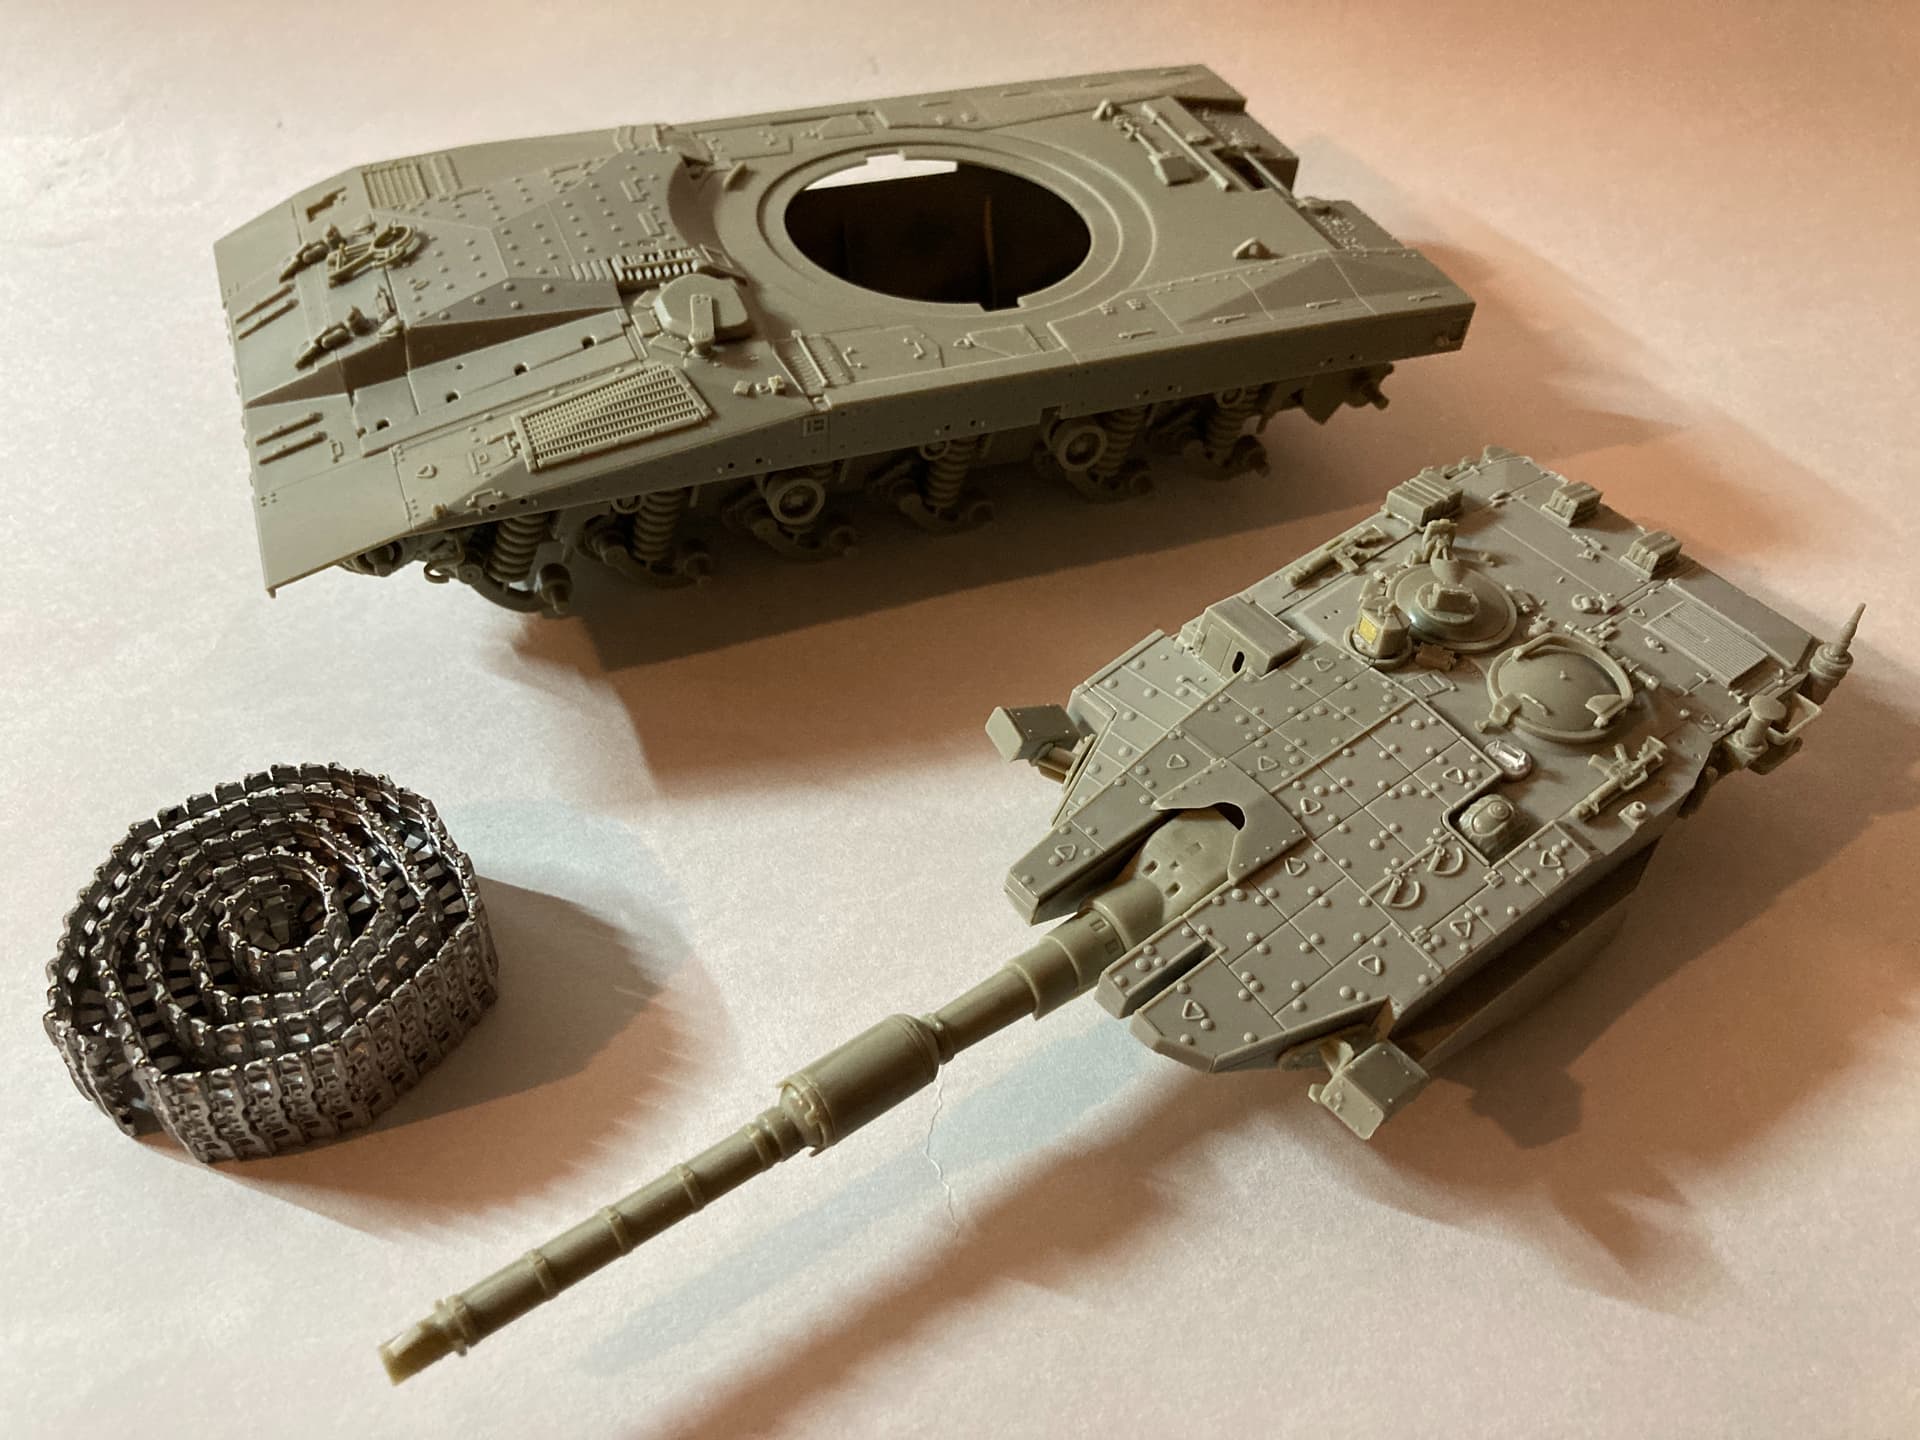
Meng Merkava III Baz with Nochri Dalet mine roller:
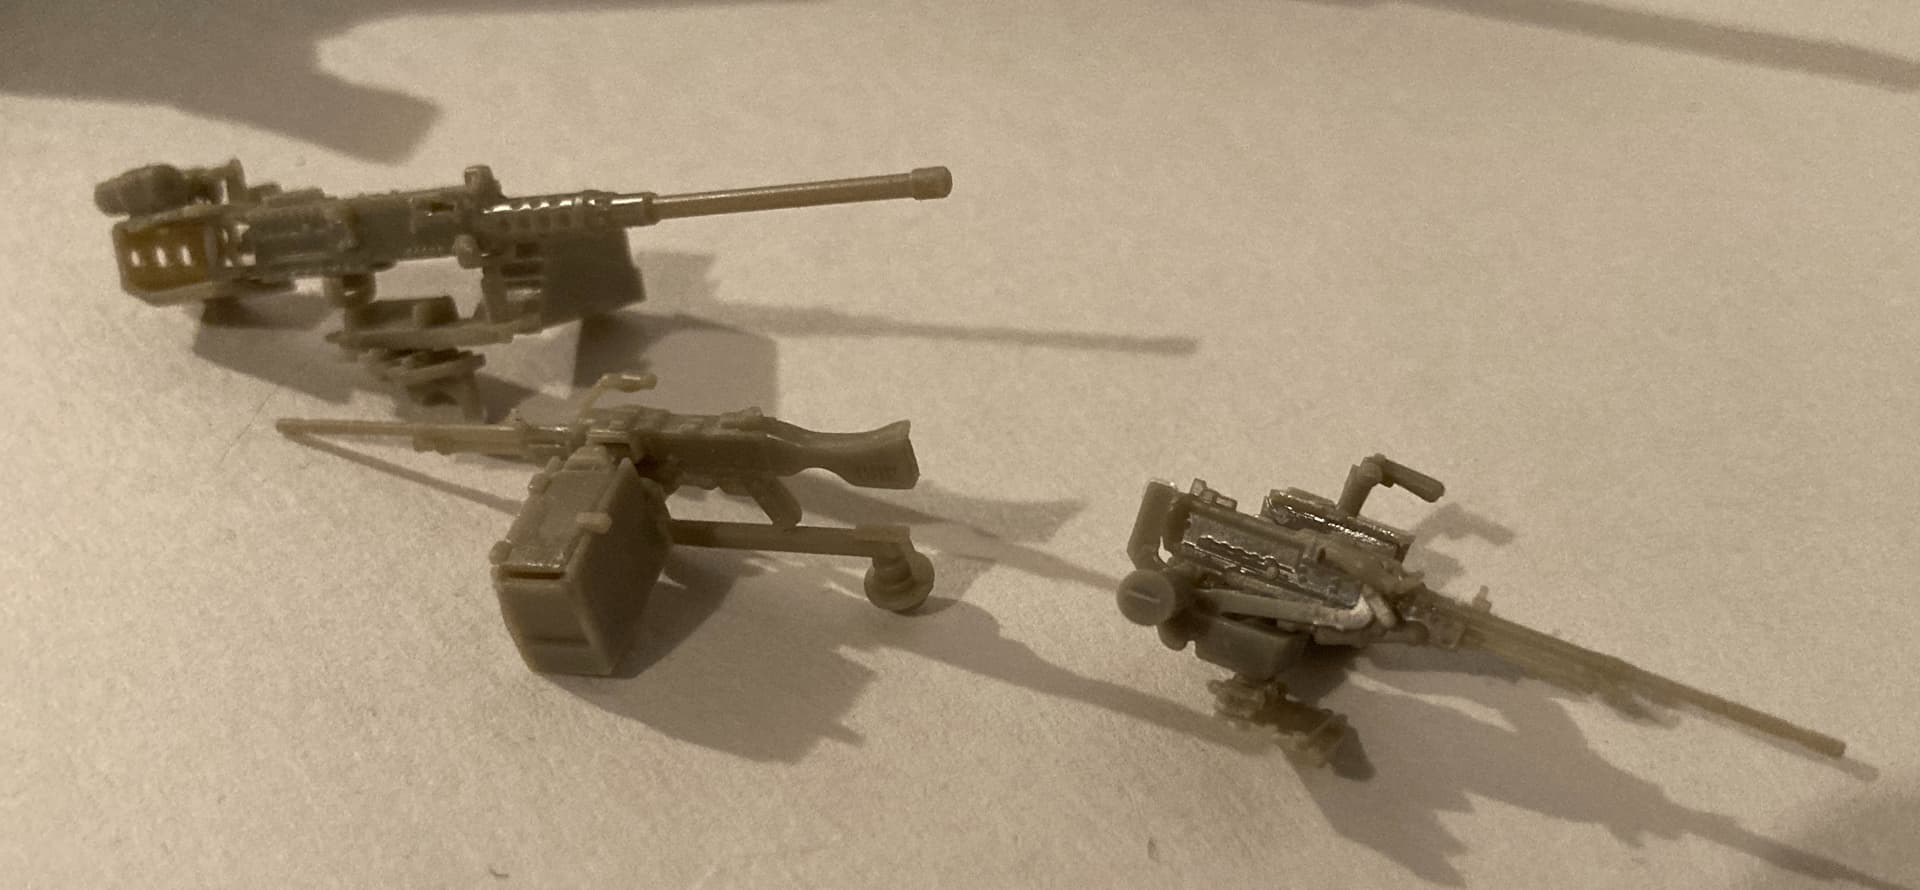
My only real complaint about the kit is the ambiguity of the instructions - glue this part to that part somewhere around here. This was particularly problematic with the MGs. OK, not the only grievance. Some of the sprue gates are annoyingly large on small parts. And some of the teeny parts are just plain silly. There were a few moments of -cut-boing- well I guess I won’t be using that piece. And one or two moments of -snap-hum…- didn’t want to use that piece anyway. Apologises to those of you who are gasping after reading that.
The turret is a very tight fitting affair. If I were to build this kit again I would clean up ALL the pieces that form the top of the turret and glue / fit them in place in one session. The MGs, as previously stated were annoying to build. I’m not happy with the result, but, I’ll get over it. I messed up a couple of spots, but that’s on me not Meng. (Oh, that’s the front of the smoke discharger… ![]() )
)
I chose to button everything up (down). I considered articulating the wheels to give a sense of motion (it will be going onto a sandy base) but, decided to keep things simple.
The Fruils fit, but they are tight. There is only one completed side pictured, the other side is almost done. My current dilemma is in deciding if I should prime the lower hull, wheels, tracks before attaching the upper hull, or attach it and wrestle with the tracks after the fact. Any advice would be appreciated. I’ve started the mine rollers, but have not gotten far enough on them to comment.
I have one question for those in the know: once a campaign is complete is the thread closed and archived, or can one still upload to the said thread?
I really enjoyed seeing everyone’s contributions. Man, you are some seriously fine builders gentlemen! (I am assuming that there are no women here…-cue stoning scene from Life of Brian) Thank you to all, as I have learned a lot, been inspired and been thoroughly entertained. I have to give a specific tip of me hat to @gtdeath13 and @ReluctantRenegade. The two of you are a wealth of IDF information. And of course @michaelsatin for making this campaign happen.
I will upload pics of the finished project at some point… just not too sure where. Cheers.
Pictures were snapped in a rush on my phone. I’ll do better with the final shots.
4 Likes
So much great work here, I am seriously bummed that I couldn’t finish. But I can’t leave Doug hanging. I’ve extended this one to the first of October. I don’t know if that will be enough for Evan (sorry!), but I hope it will help!
Michael ![]()
![]()
1 Like
Woo-Hoo! That’ll give me time to break the airbrush and get off my butt and paint the two Zeldas I have neglected for so long after focusing on my M51 build.
1 Like
Michael, thank you very much for the extension. That was very gracious of you and I sincerely appreciate it.
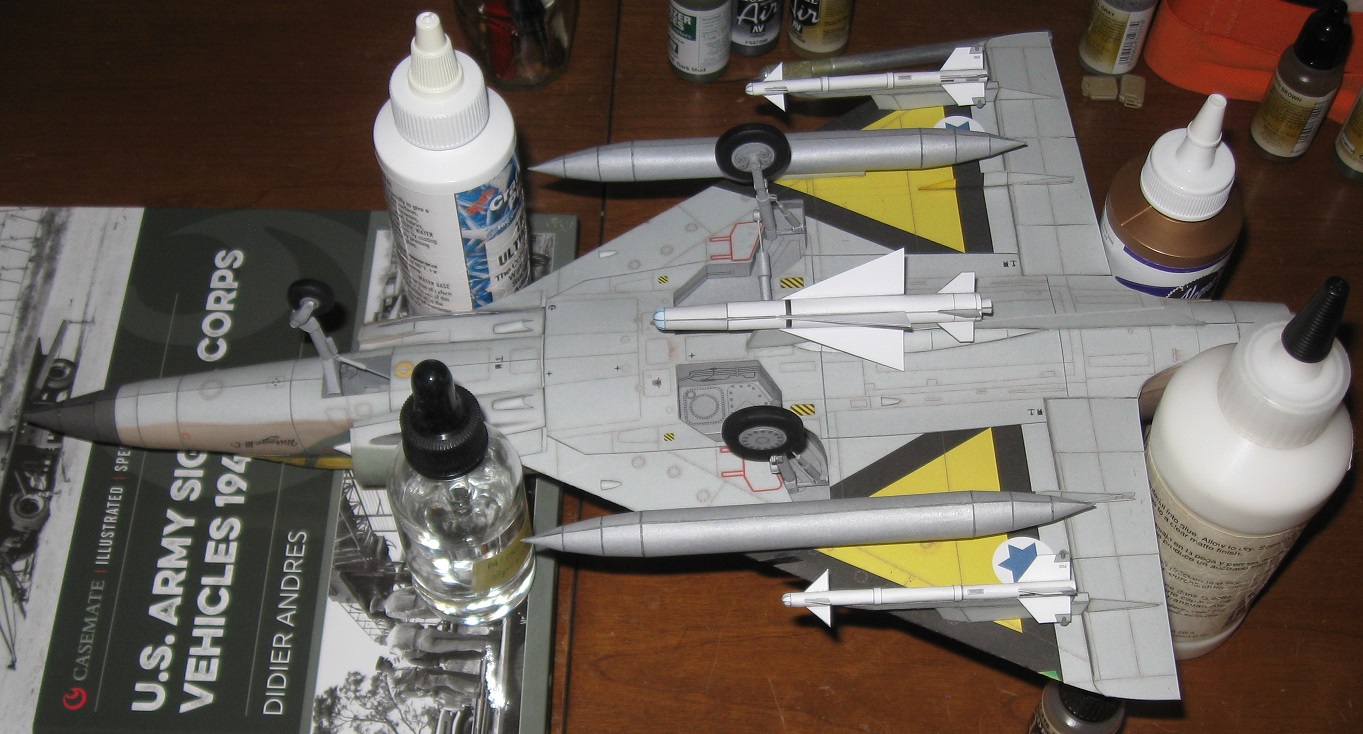
The Mirage now has fairings, a tail, a central weapon hard point, and most of the detail bits in place.
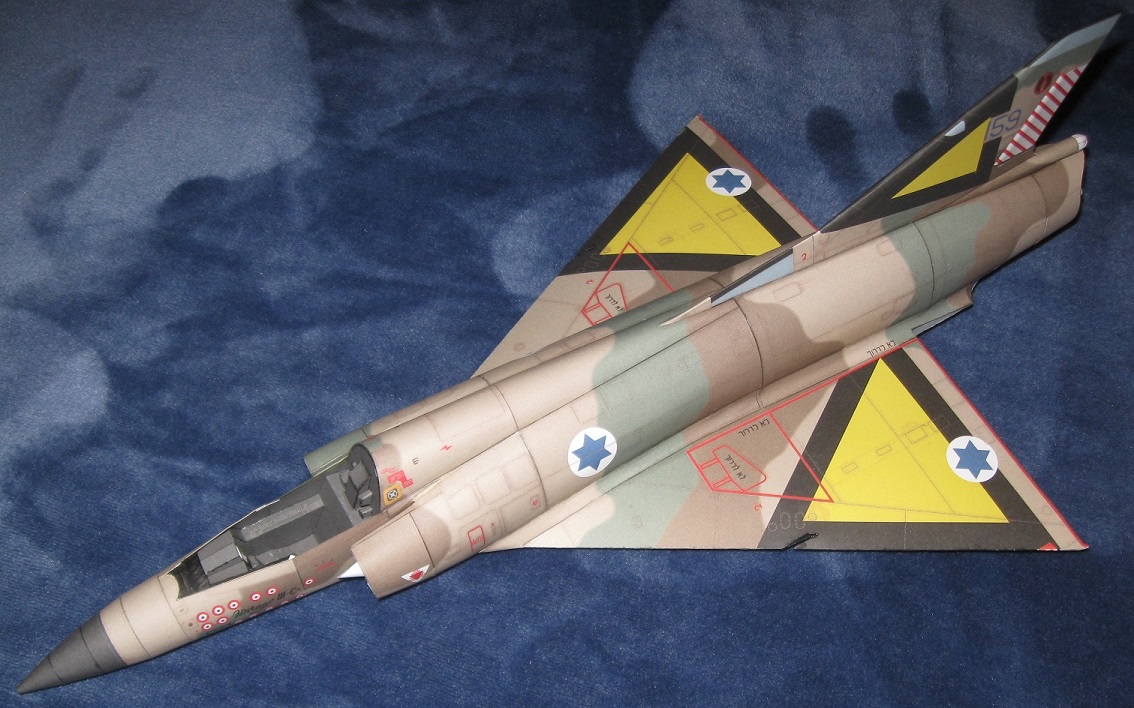
The fairings connecting the fuselage to the wings are extremely difficult to install. The spine fit fairly well. The tail was fairly easy to build but does not fit flush with the spine. The central weapon hard point was simple to build but suffers from poor fit. In order to achieve a decent result, I am using Scenic Cement as caulk at almost every joint. I am hoping the final clear coat will hide this caulk work.
I have now exclusively worked on this model every day for three weeks. The one hundred hour mark is long behind me. ![]()
The Mirage is currently just over 16 inches long.
6 Likes
100 hrs??
I’ll stick to plastic, thanks.
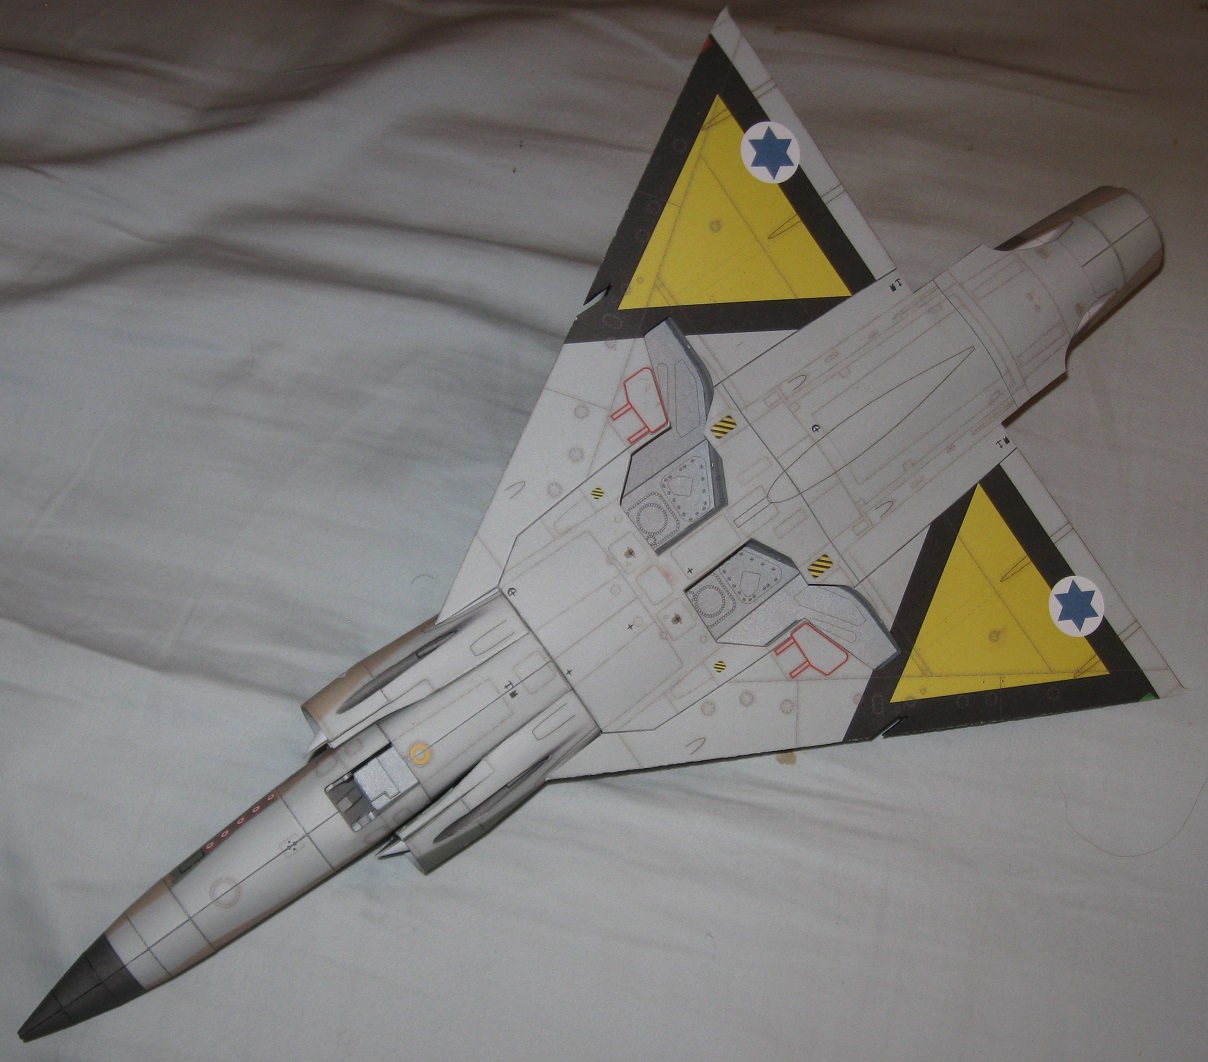
All control surfaces and weapon pylons are now in place.
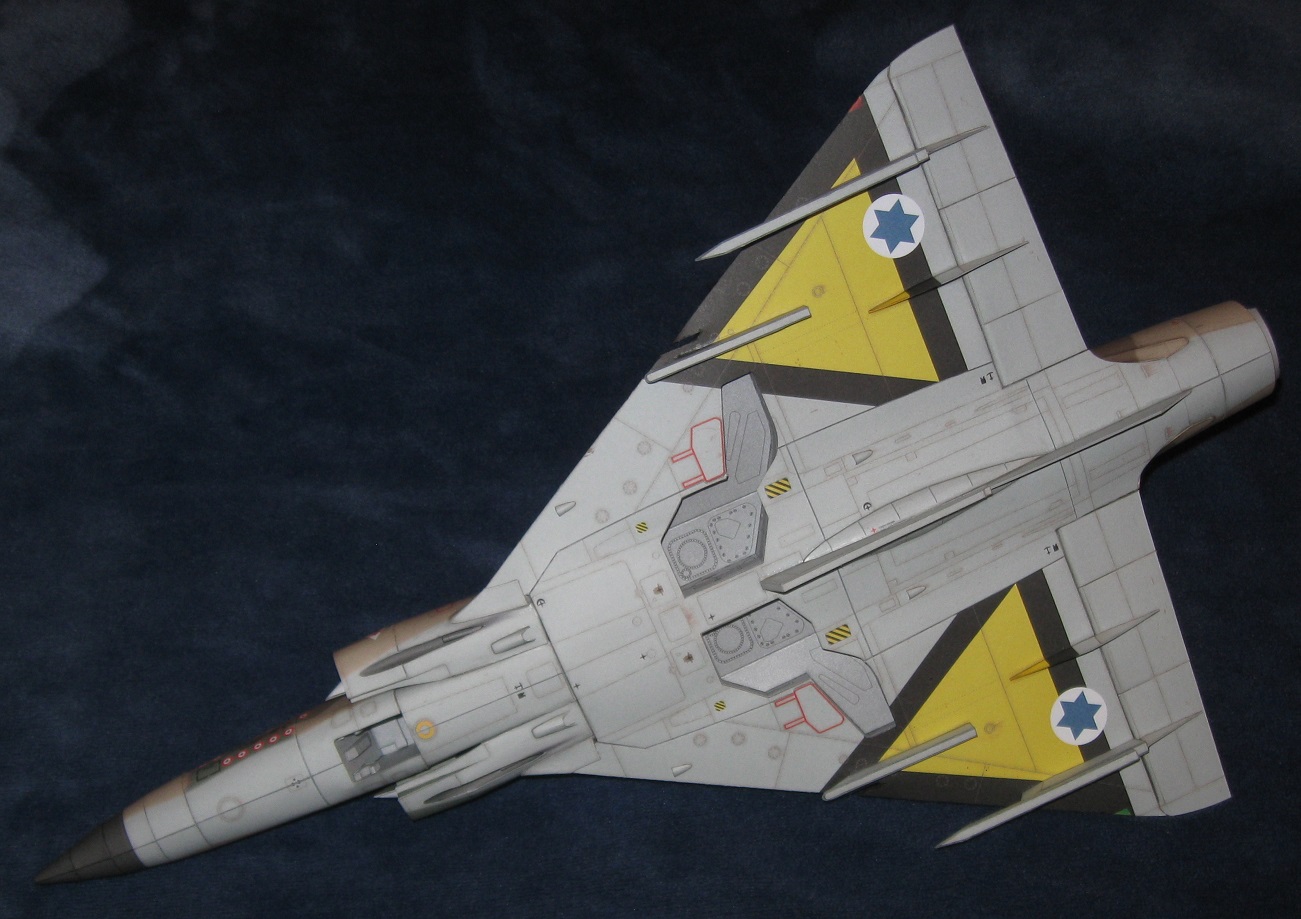
Actuator housings for the wing control surfaces fit very poorly and will require more work.
Forty-two parts remain to cut out, all for the rear landing gear. A number of parts still require scratch building to fix problems with the model. Approximately 100 parts remain to build up and install.
10 Likes
That’s a lot of in depth hard work… looks amazing though… very impressive ![]()
1 Like
Paper looks like a lot of work, guess I’ll stick to plastic…
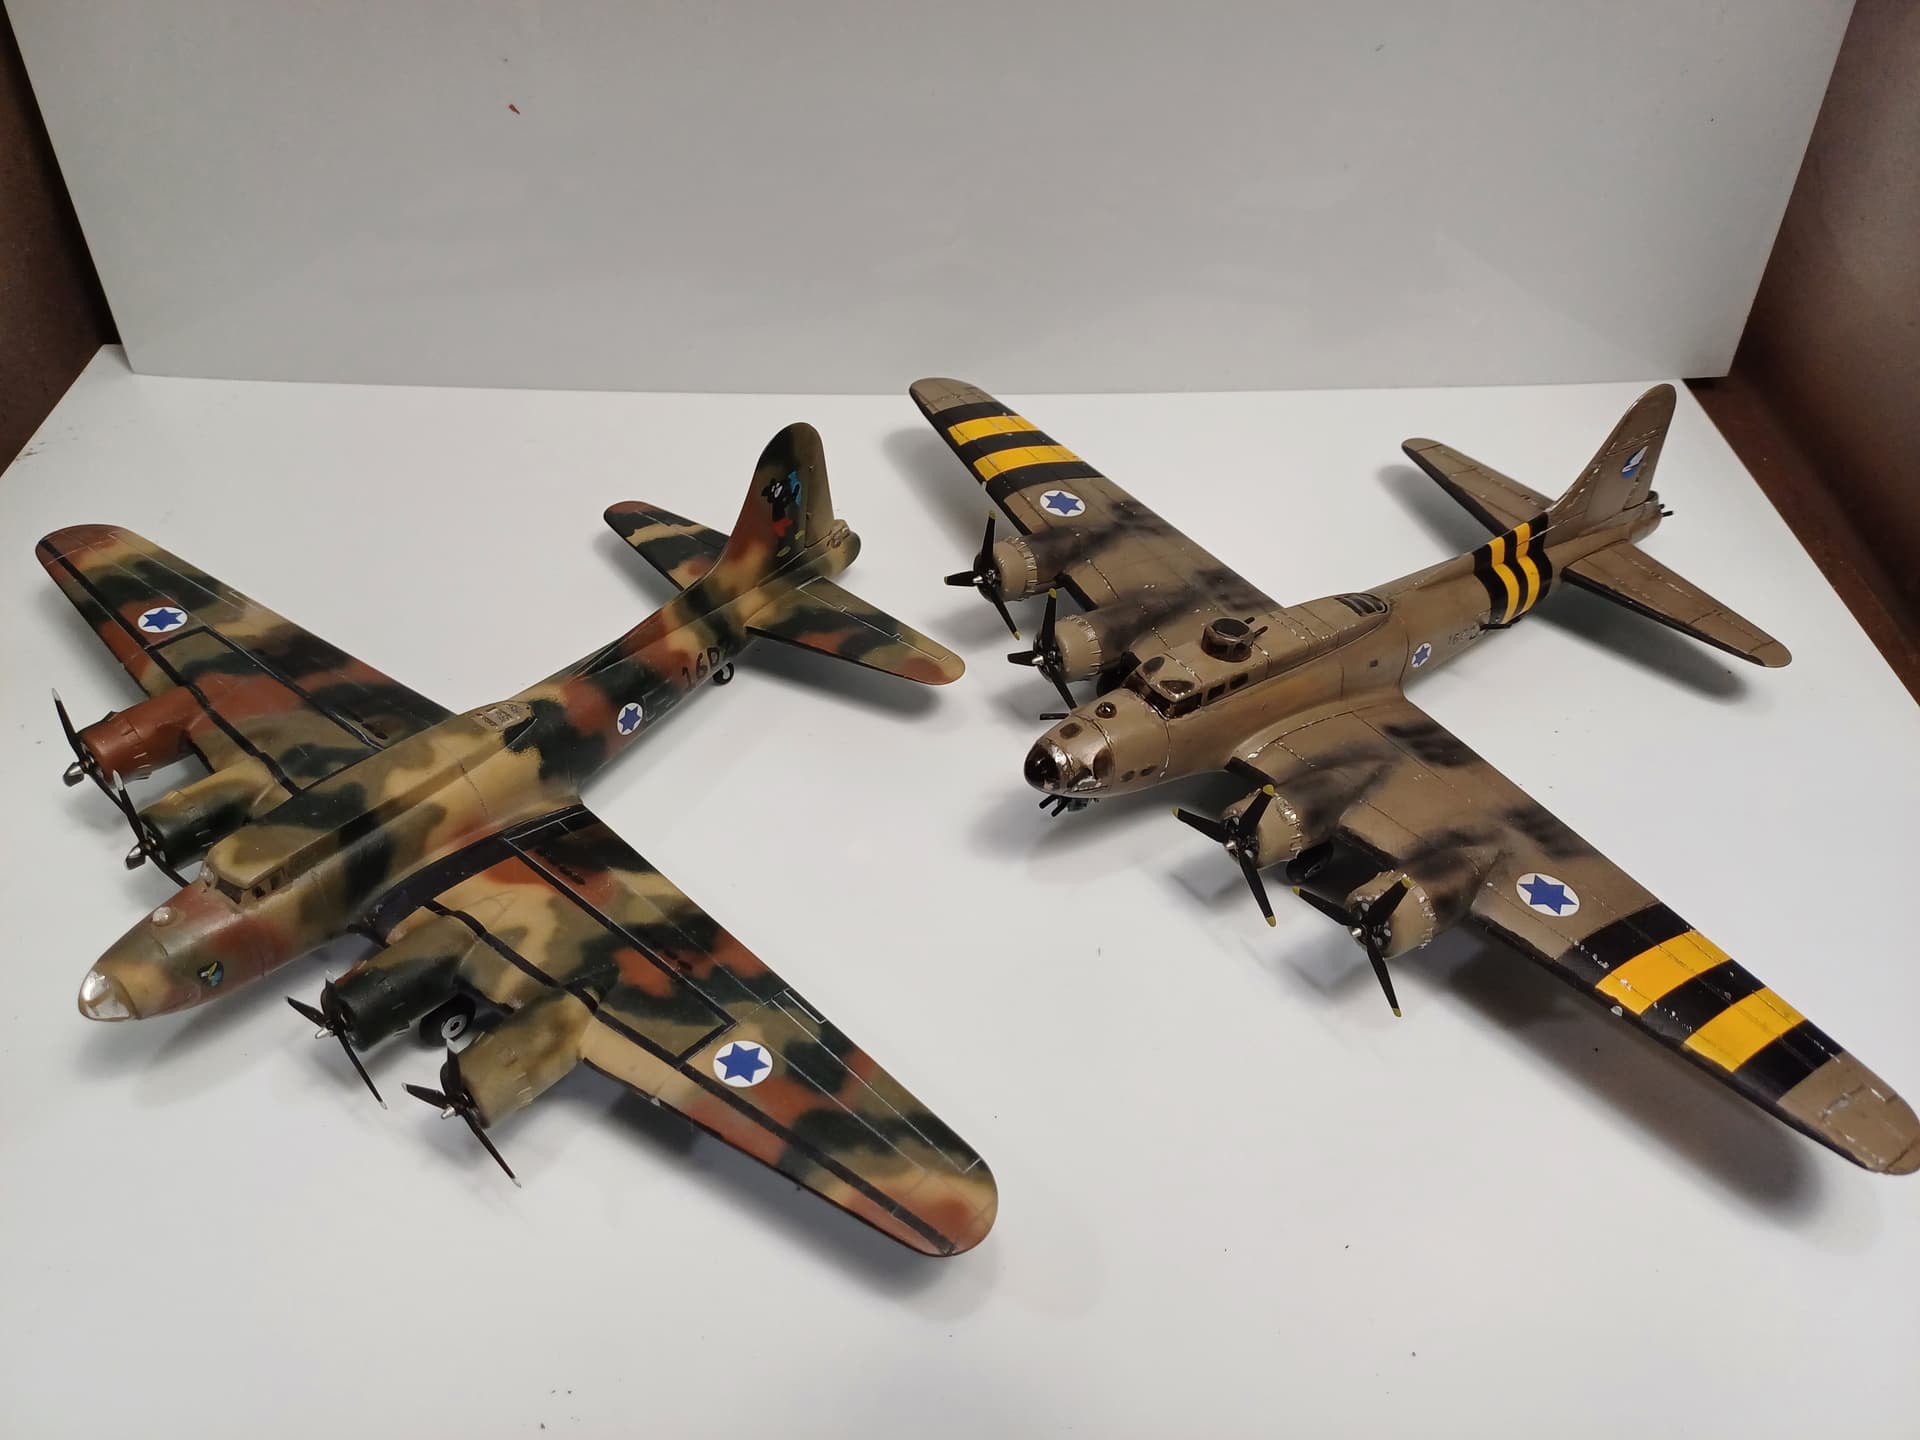
Eventhough this campaigh is finished thought I’ld show another B17, based on the multicolour camo scheme, without turrets and guns, is a bit what they must have looked like in 1948… did a bit less weathering this time…
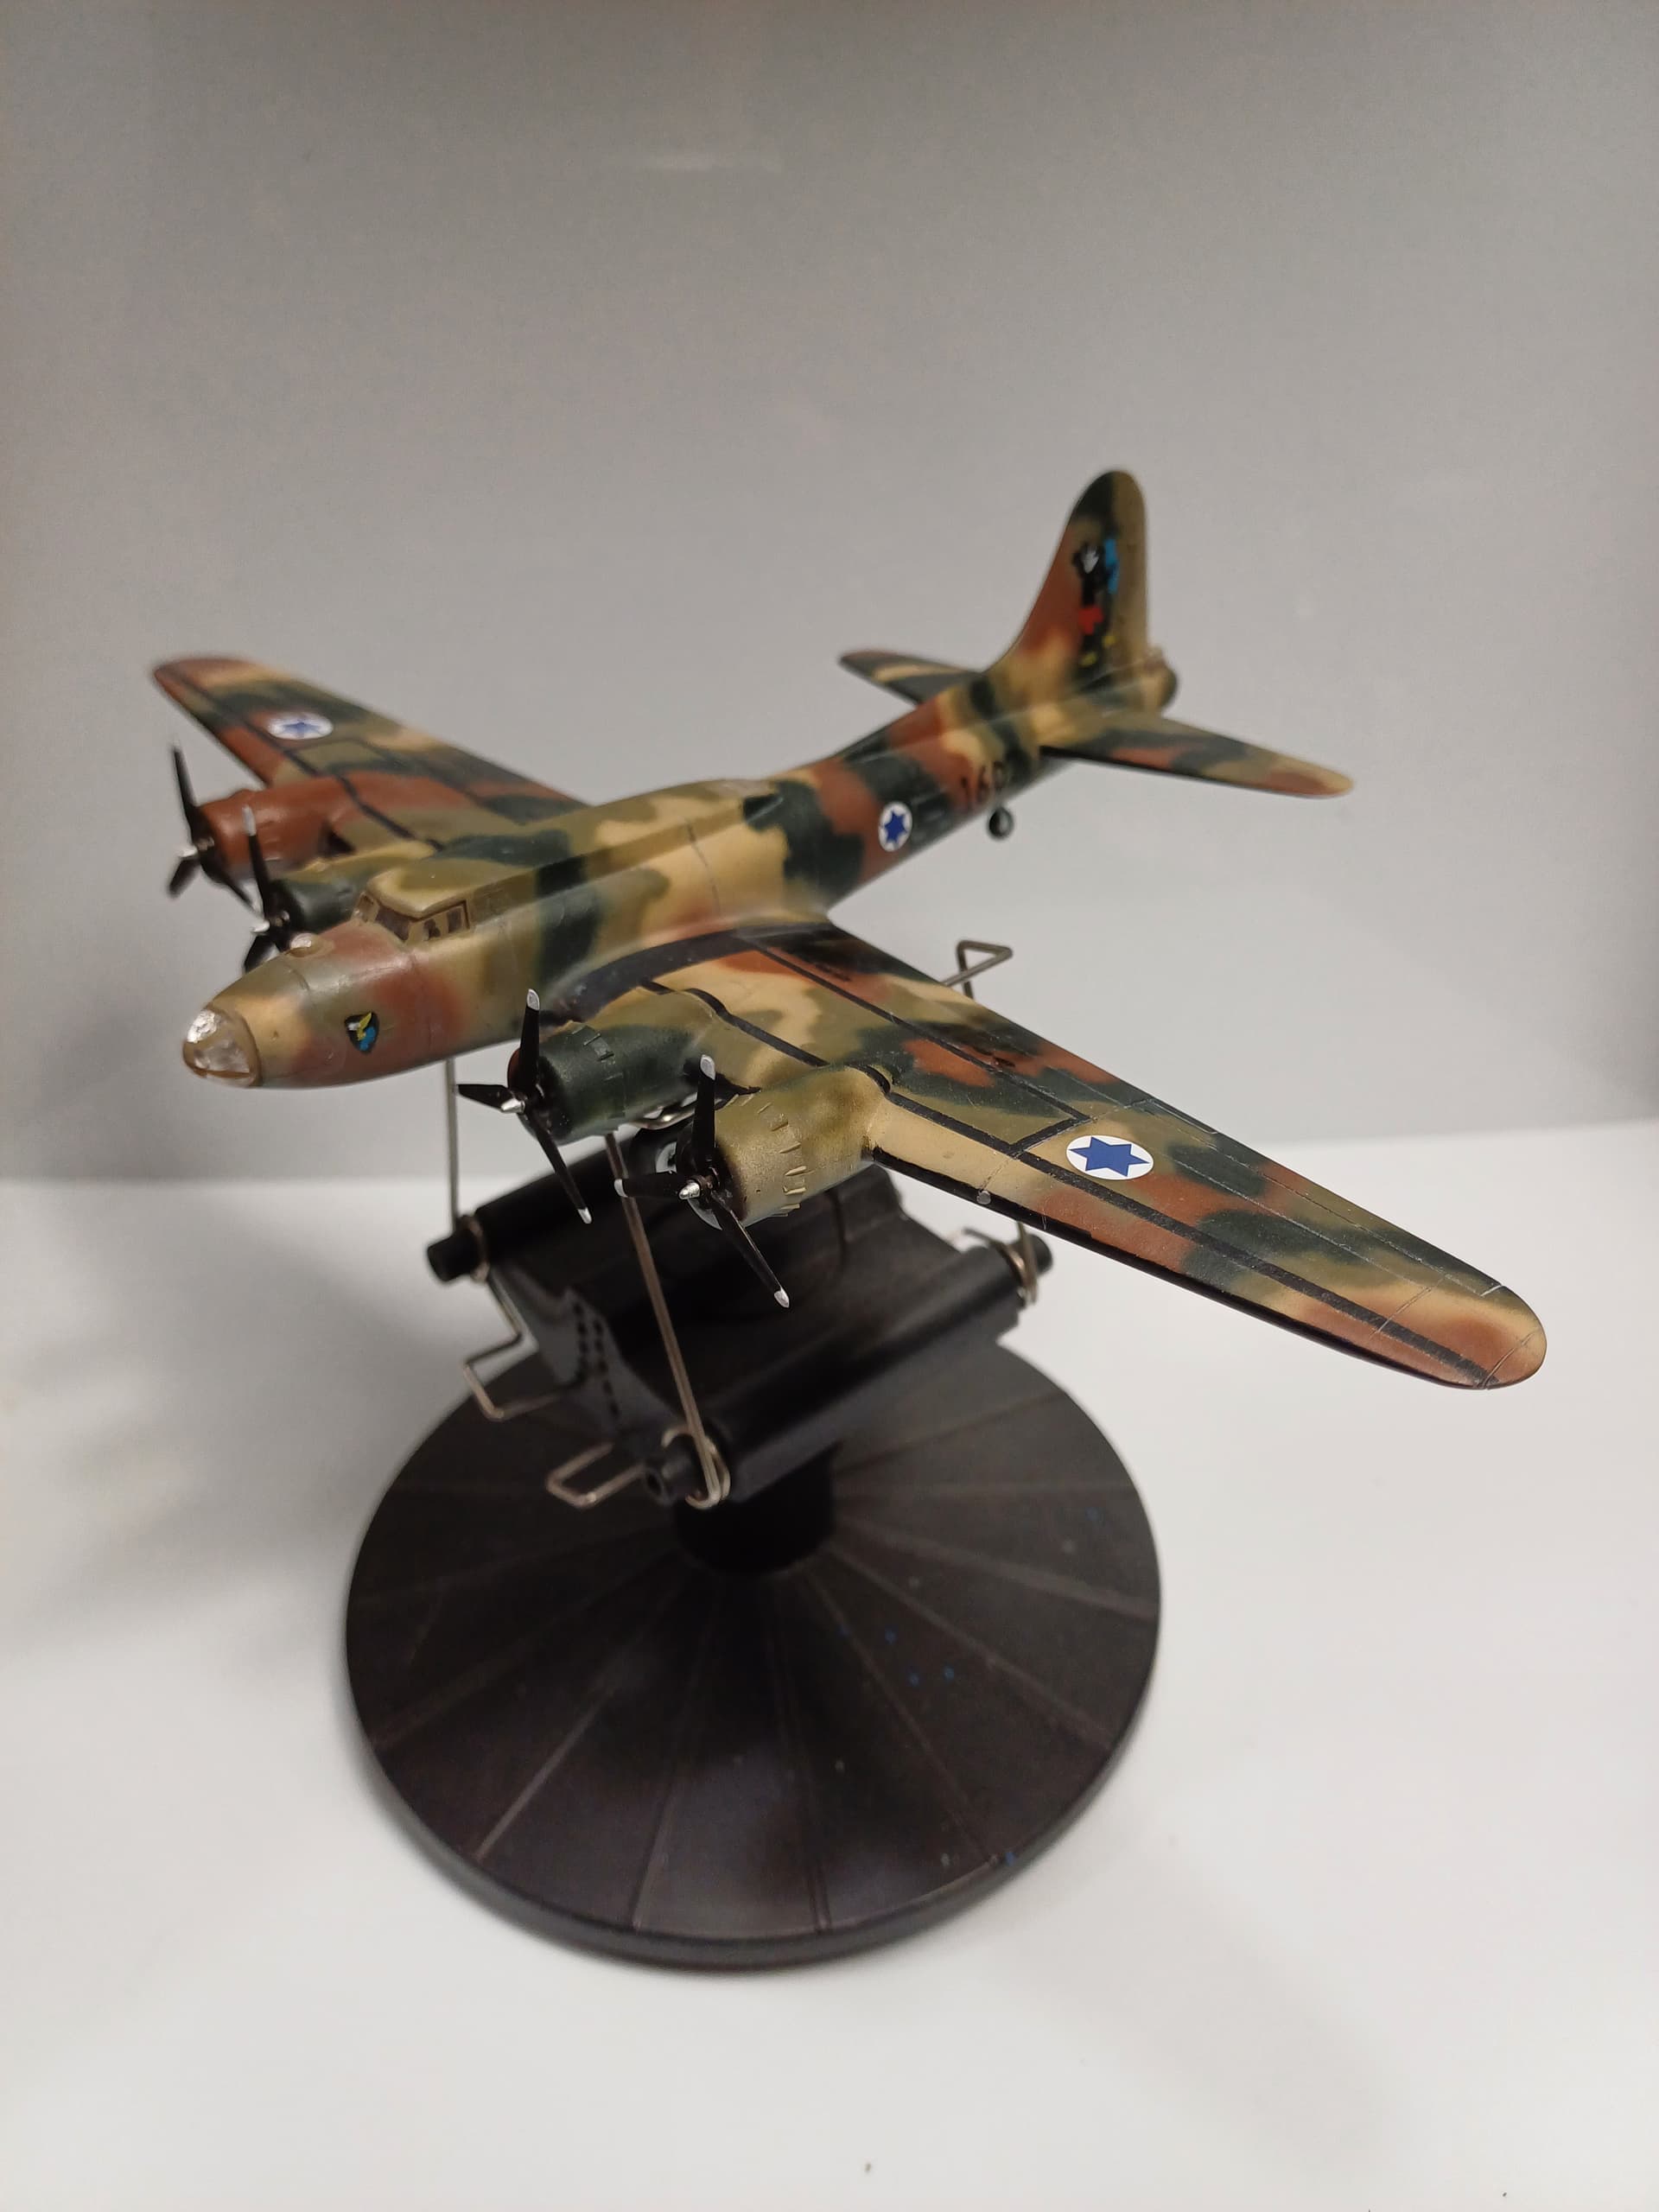
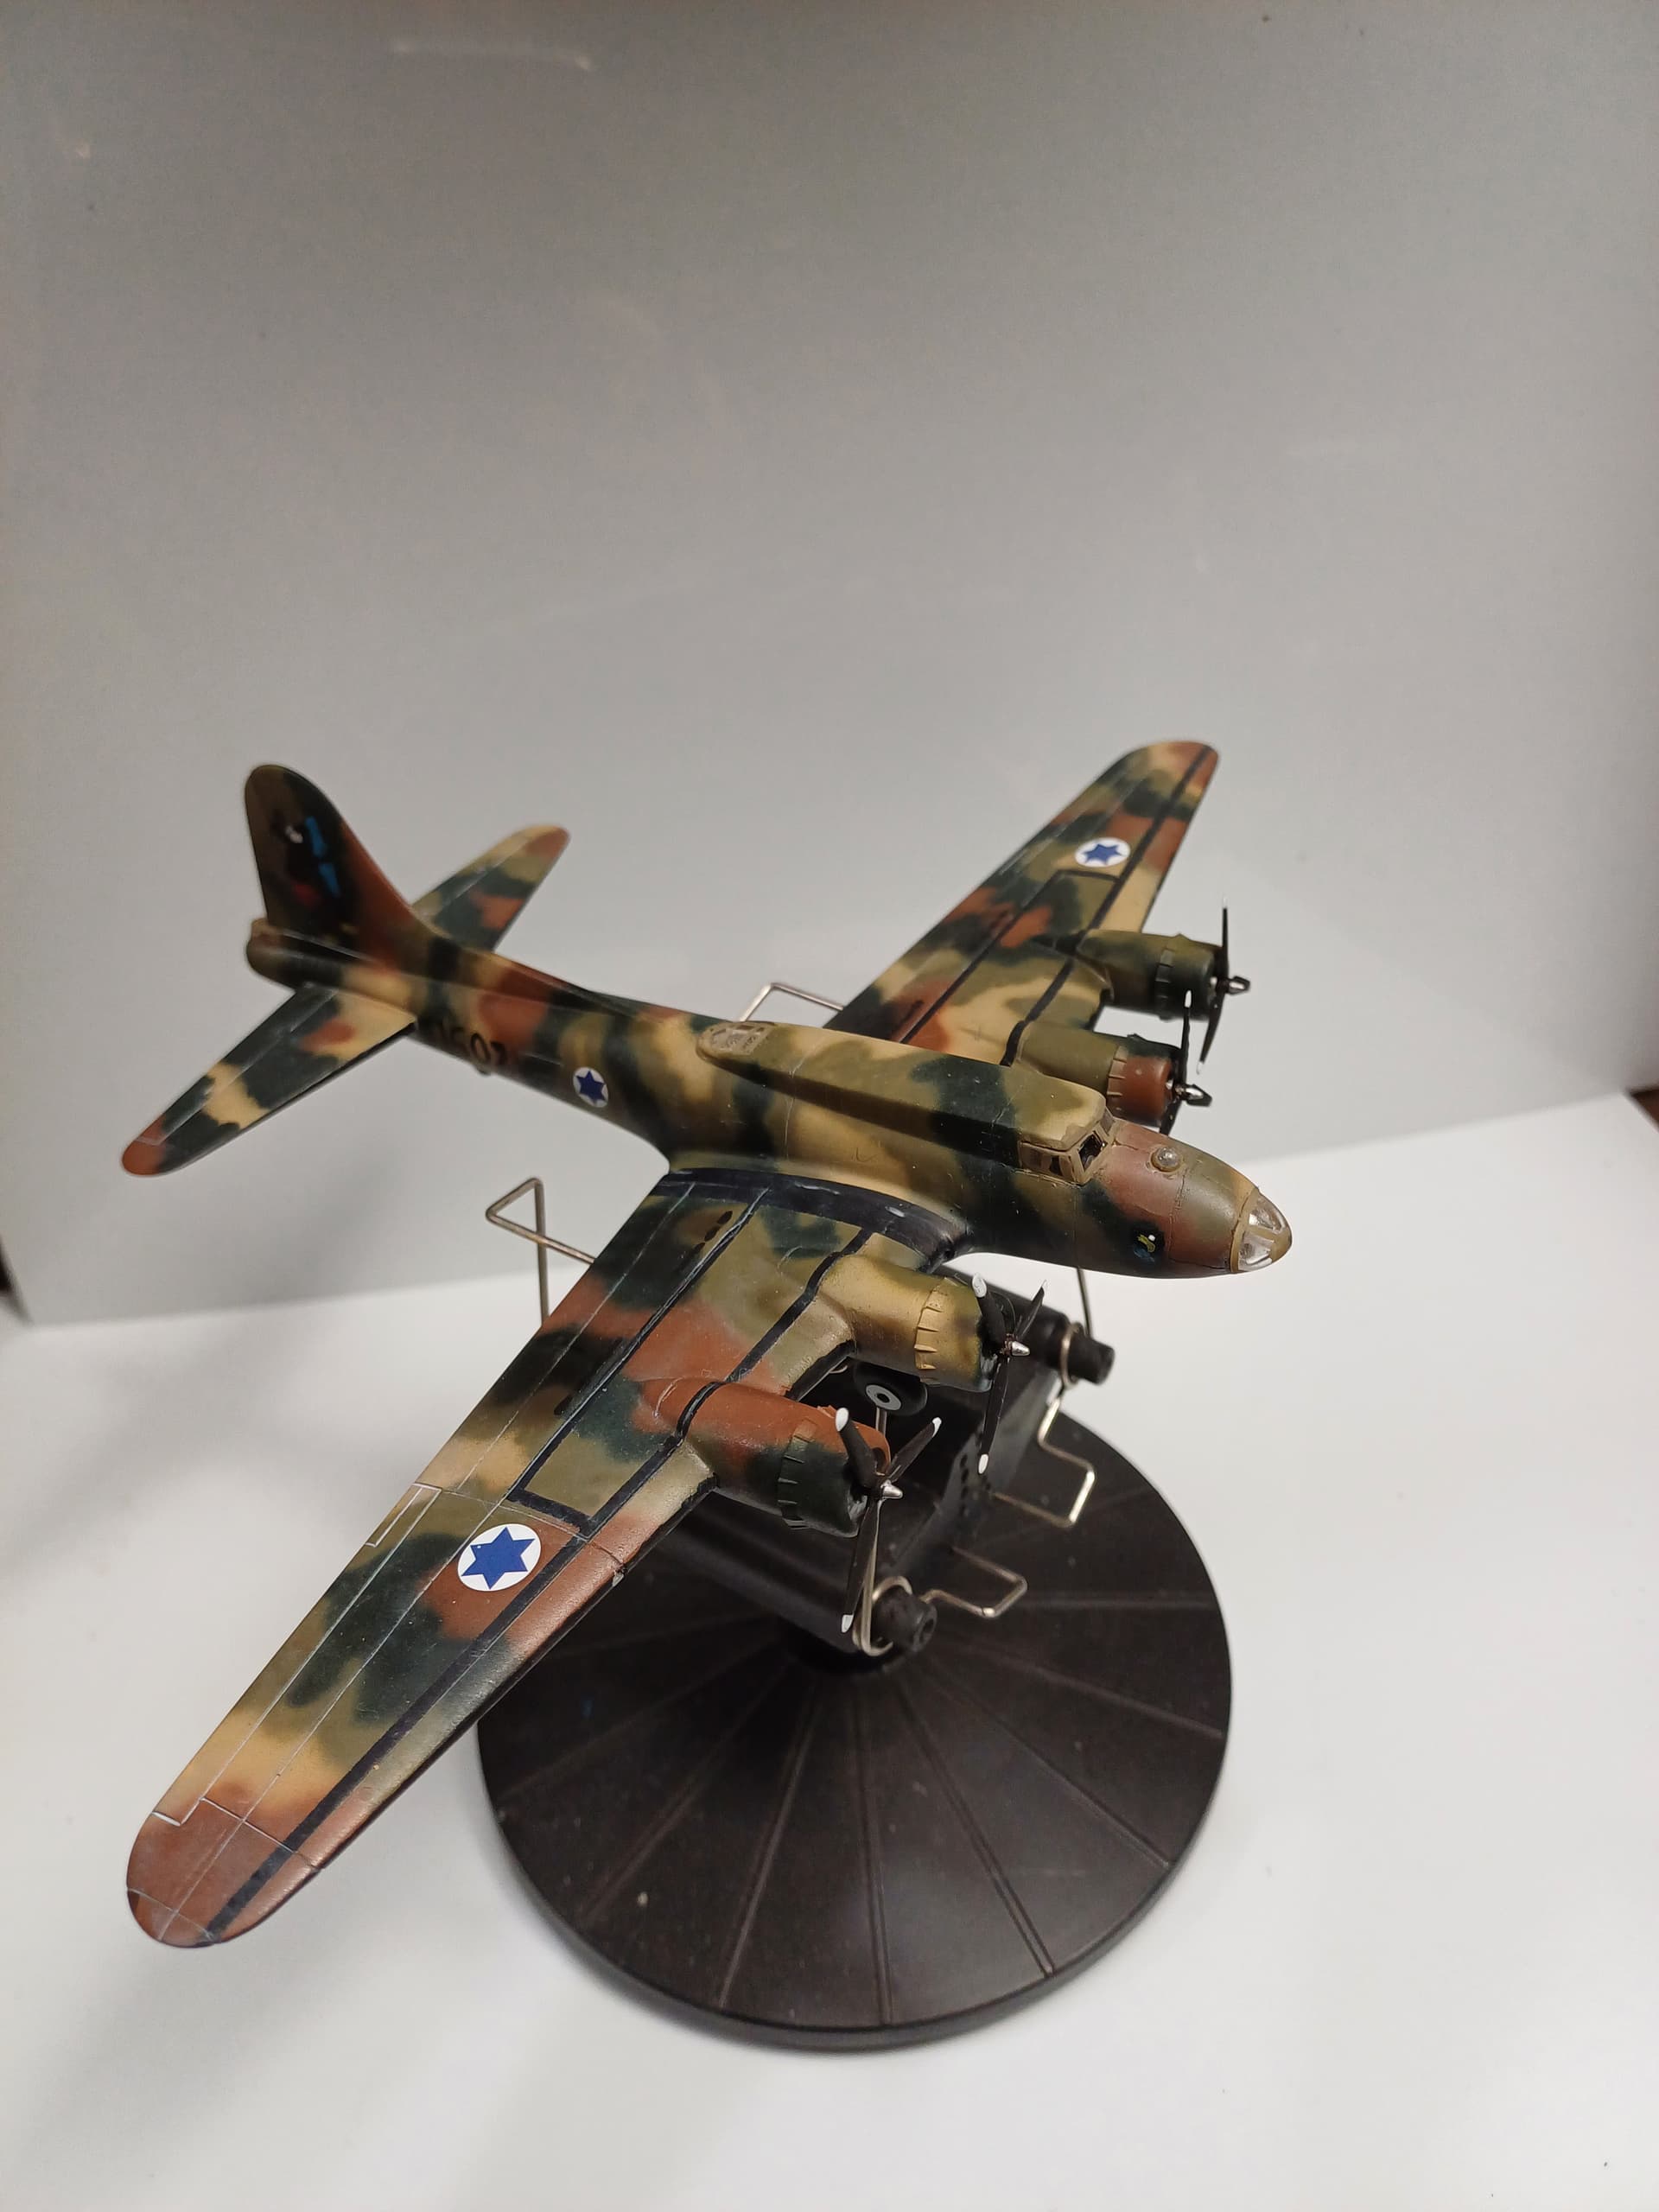

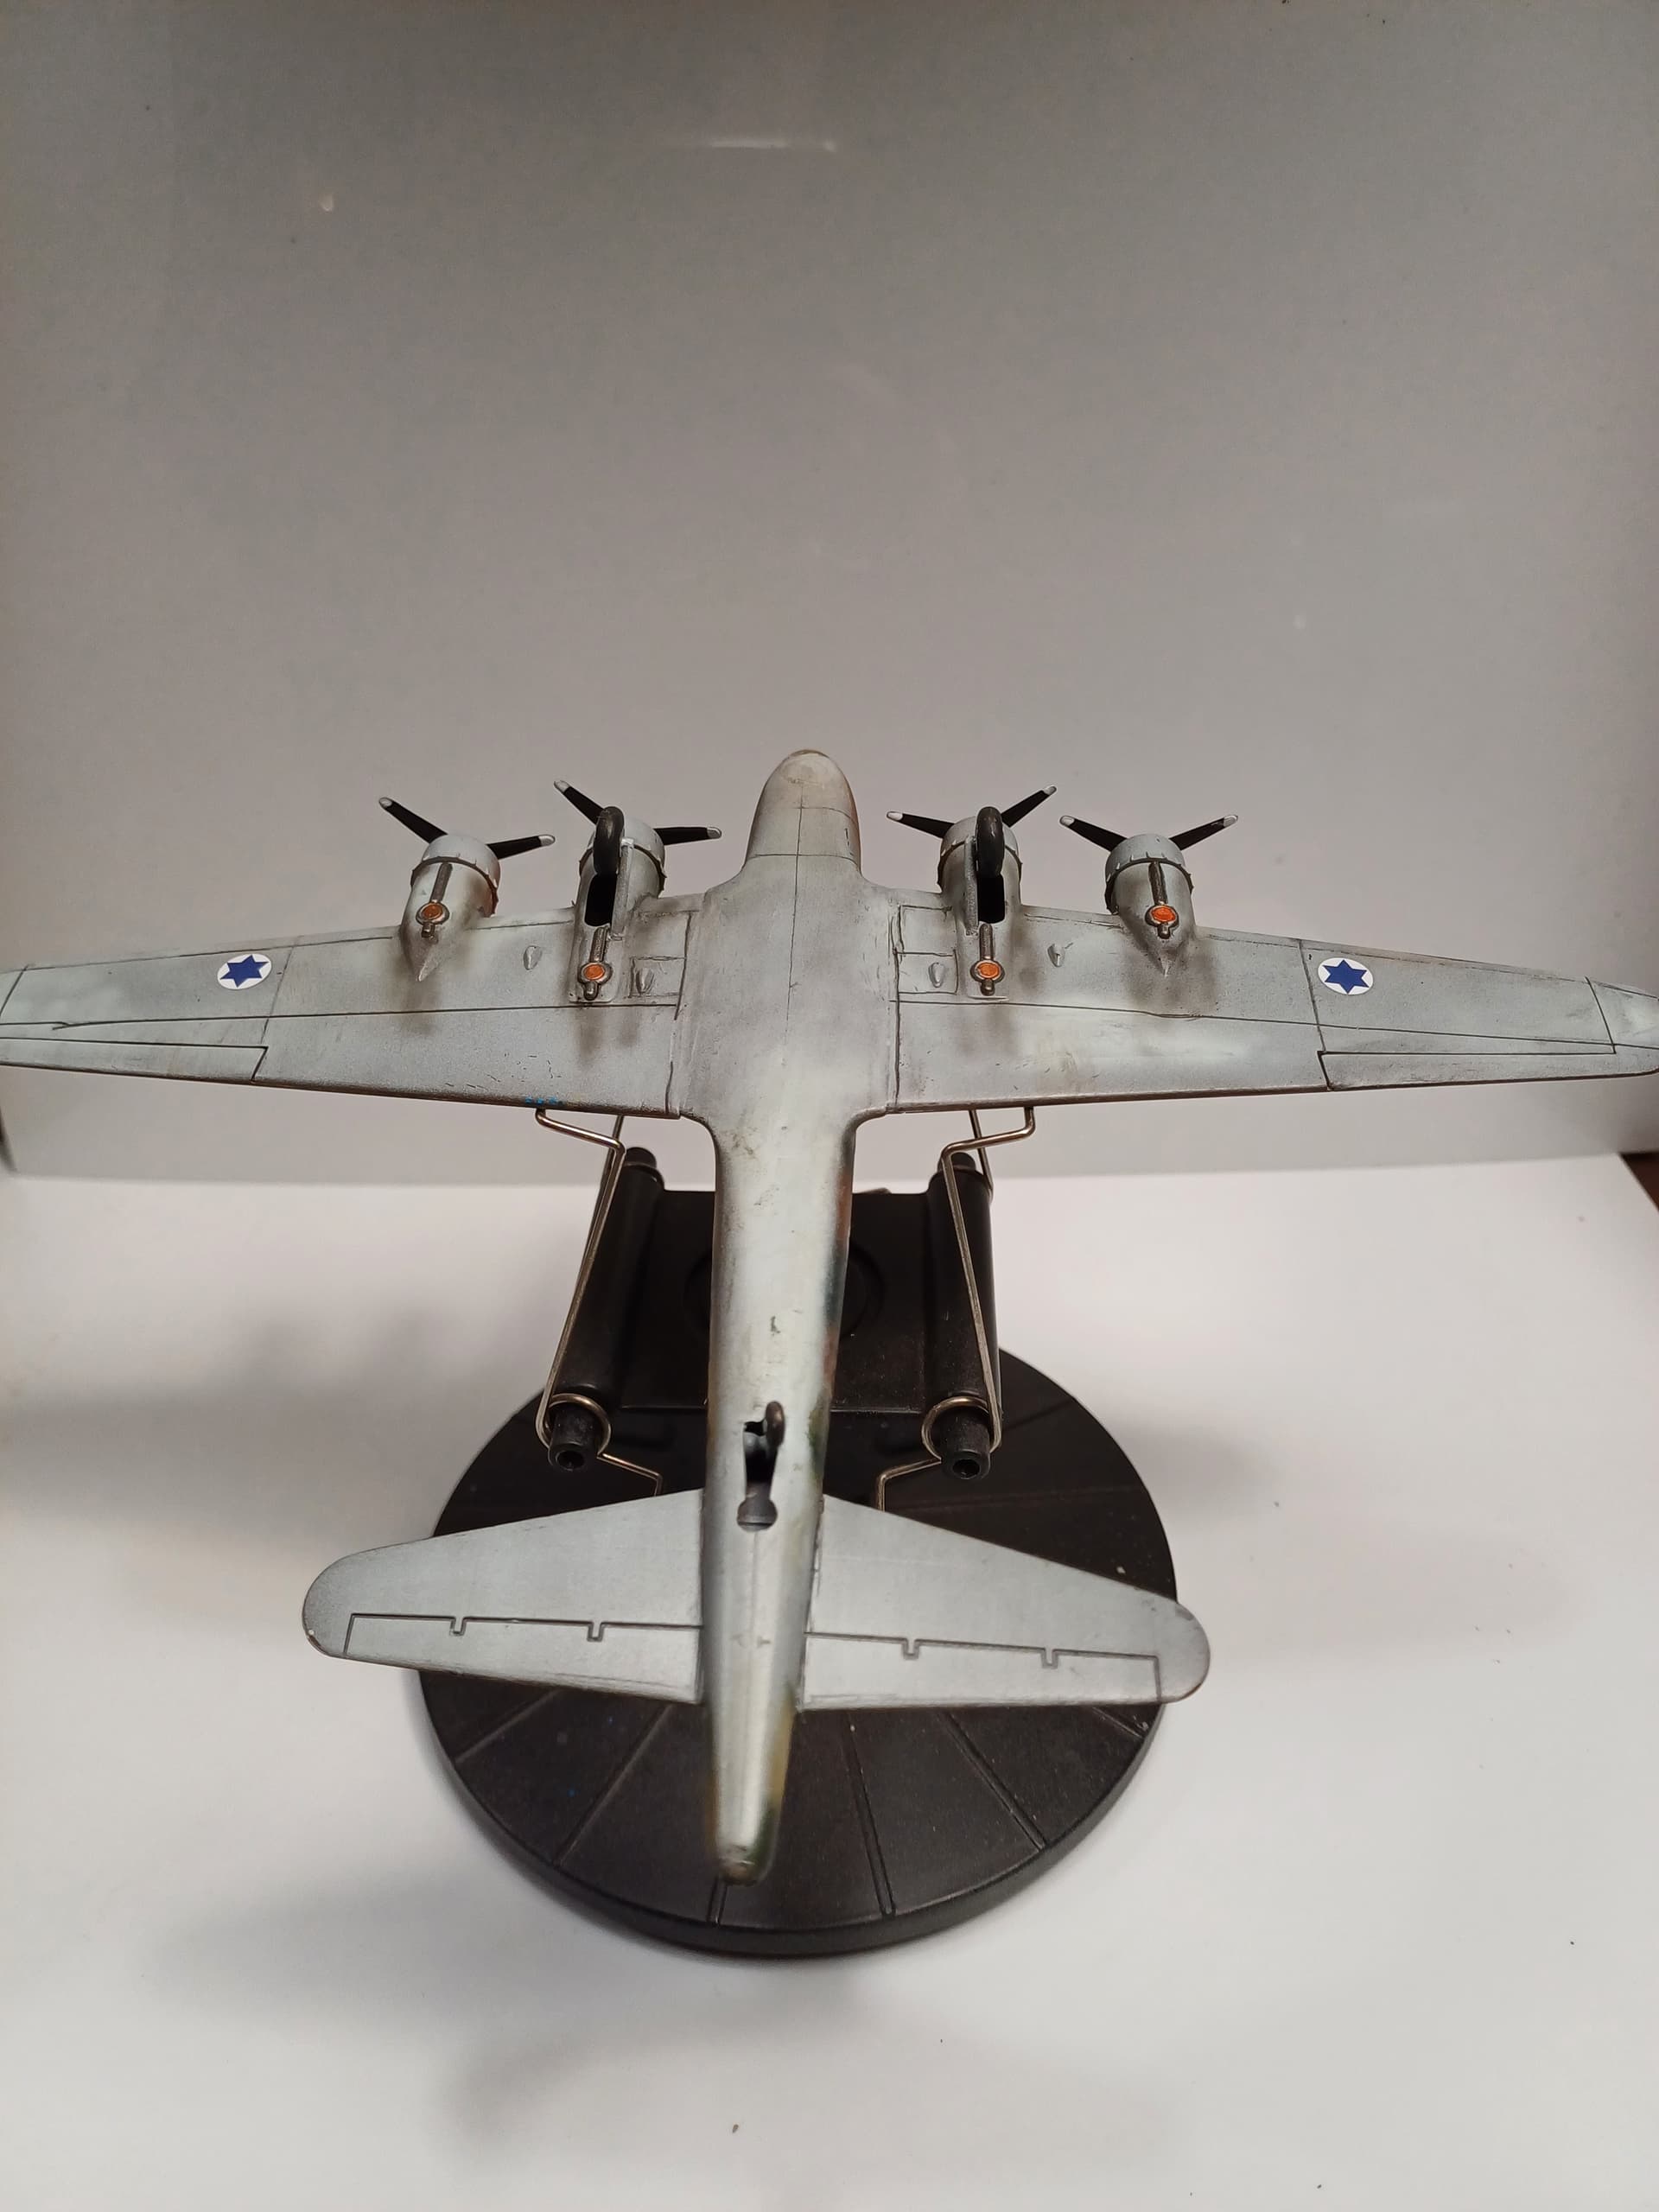
And a picture of bothe the B17’s together…
10 Likes
Very nice Bert
1 Like
Great looking models and the camo really makes them stand out!
2 Likes
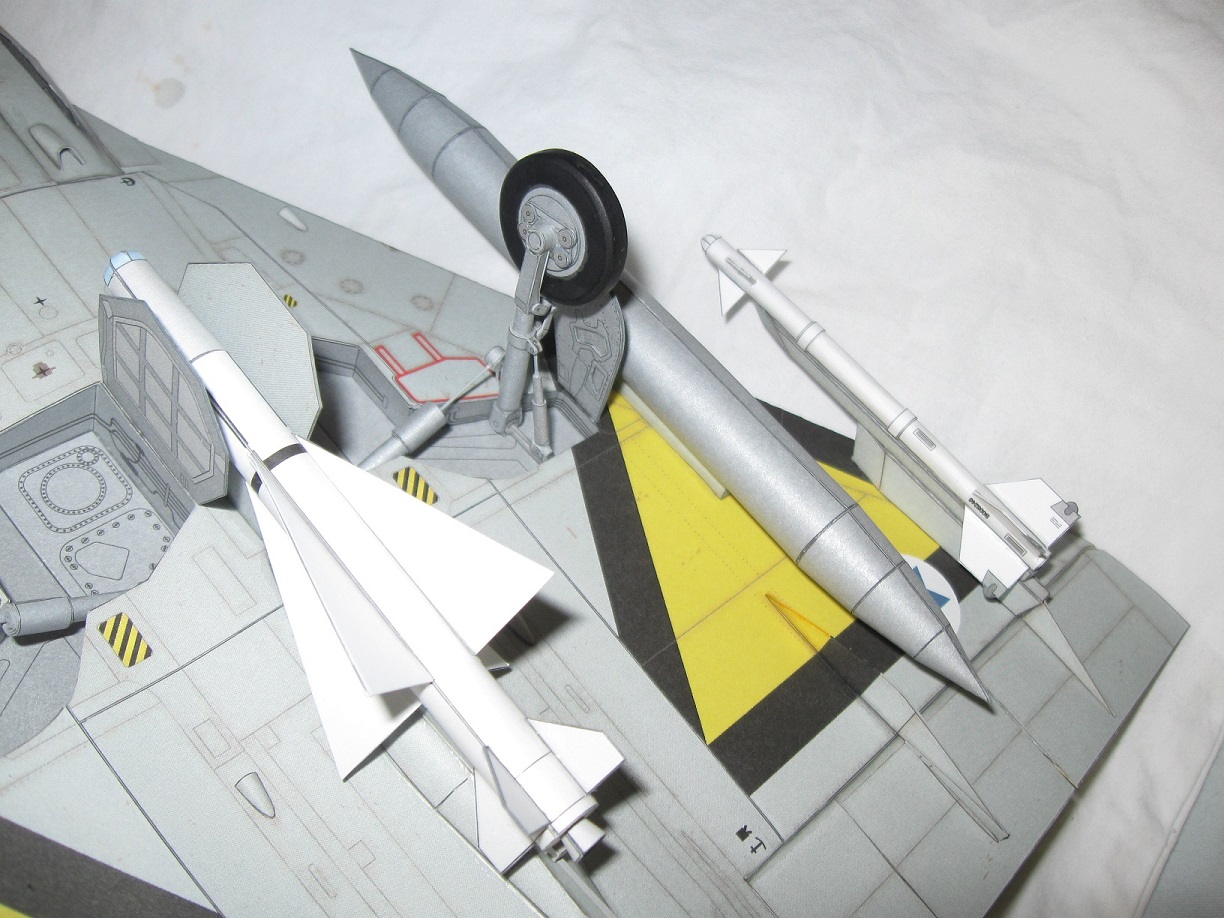
All first order parts for the Mirage are cut out and assembled.
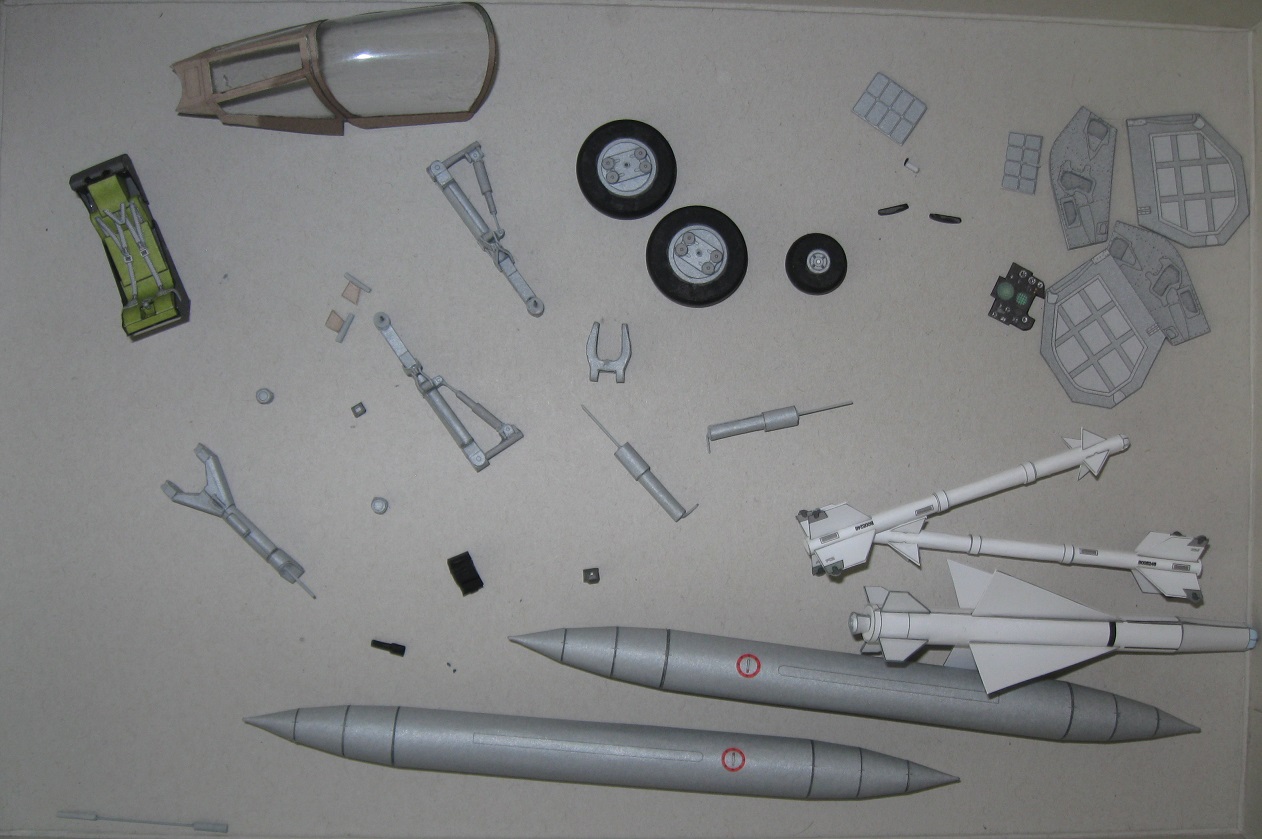
The canopy turned out fairly well. The model designer left almost no tolerance for error with the canopy framing, making the assembly process very challenging. It is not perfect.
The rear landing gear struts required a fair amount of modification. The wire part templates in the instructions are mostly incorrect. I have yet to test fit the completed rear landing gear struts and anticipate the necessity to make more modifications.
The front landing gear strut was fairly challenging to assemble. I heavily reinforced all landing gear struts on the inside so the finished model will not pancake. In my opinion, the landing gear were poorly designed all around.
I now need to install all these parts and hope the Mirage will stand without assistance. If great care is not taken, card model aircraft can be rather wobbly.
6 Likes
Very very nice!!!
…and then the walls all came tumbling down.
Card models tend to have bad instructions and an experienced builder of such models is always very wary of them. With two pieces left to install, a pair of landing gear doors, the instructions were more ambiguous than usual so I looked up some pictures of the real machine. The rear landing gear on my project were installed backward. Unfortunately, card models rarely provide opportunity for a Mulligan. I attempted to remove the rear landing gear but it was beyond my skill and the model was ruined.
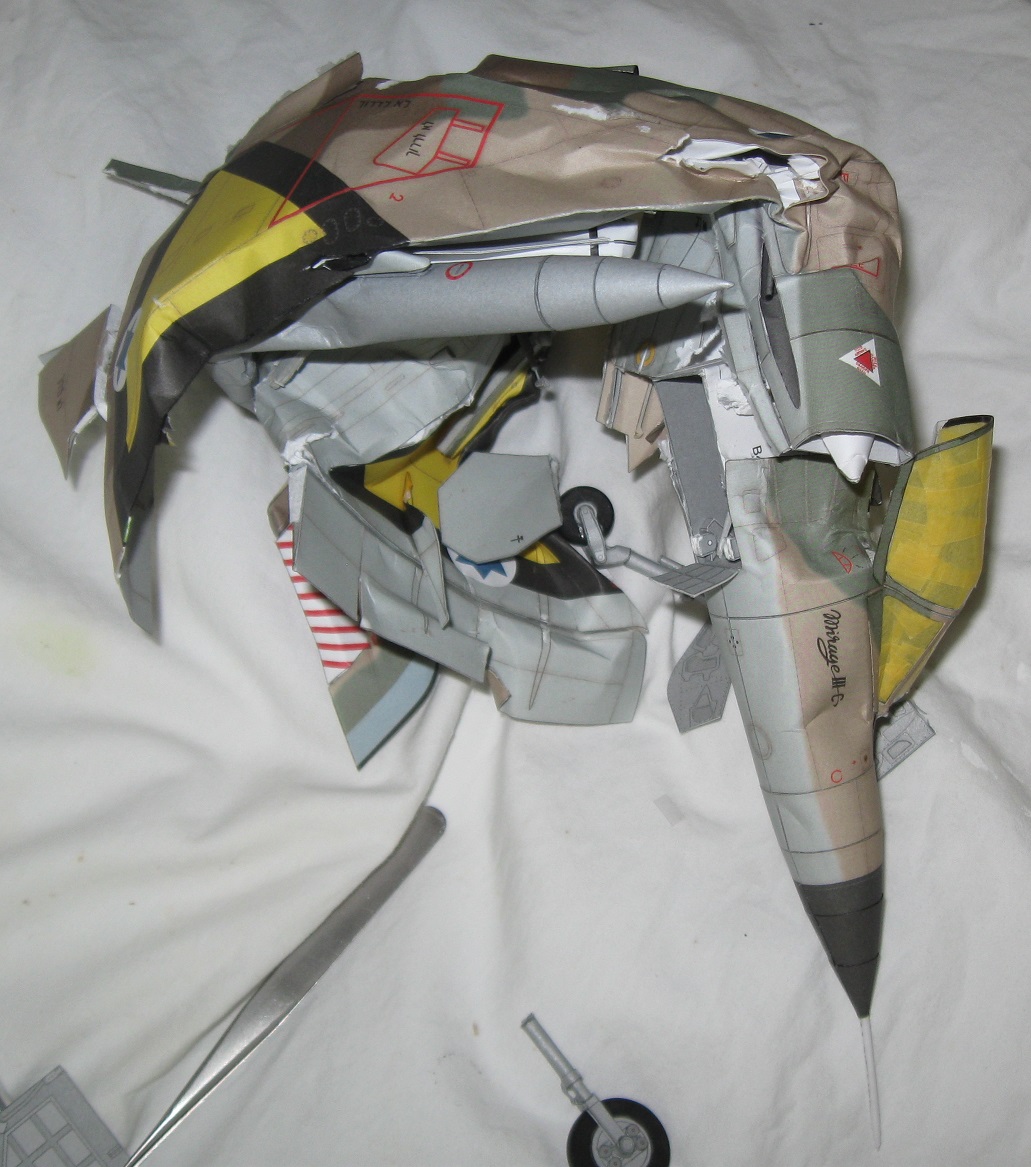
Que Sera, Sera. The project consumed about 200 hours and the entire month of September, 2023. I have never successfully completed a card model project posted in a model forum. I thought this was going to break the losing streak. HAHAHA! Nope. ![]()
Thank you for allowing me to join this campaign. I sincerely did my very best but that was just not good enough.
6 Likes
Damn! it was looking great… Shame. ![]()
Wow, never knew removing one little part of the landing gear could cause such damage ![]()
Such a shame because it looked really good, never have build a card model myself, that’s ehy this was so nice to follow ![]()
Ouch! That is very sad news indeed. On the plus side, you can always build another one…
That’s a huge loss… It was building up so well, and being cardboard, looked amazing… Top marks for the workmanship you put into it though… ![]()