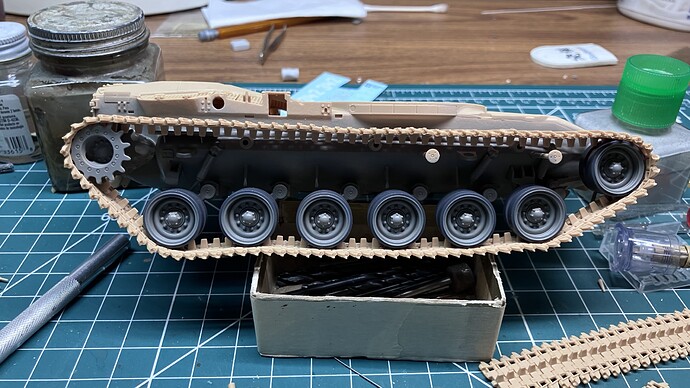
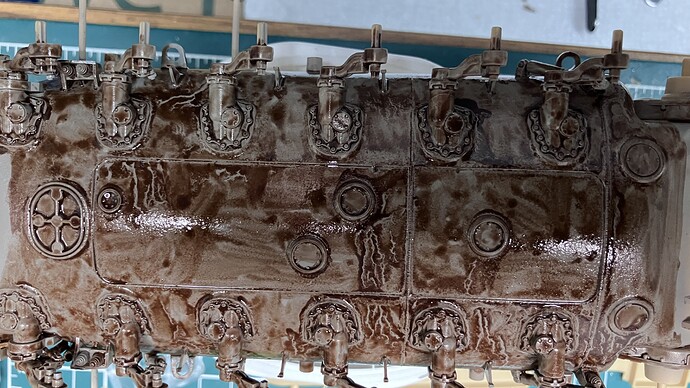
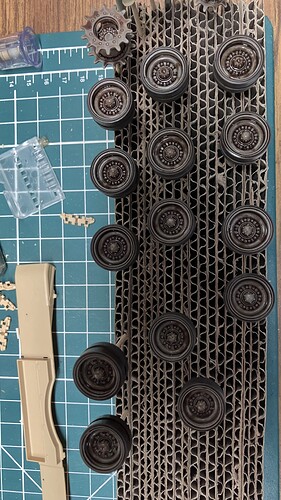
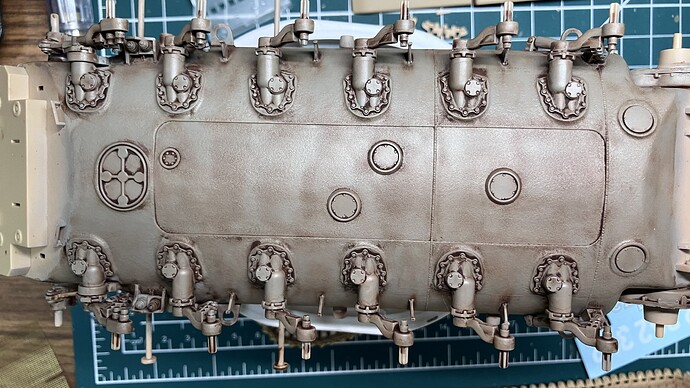
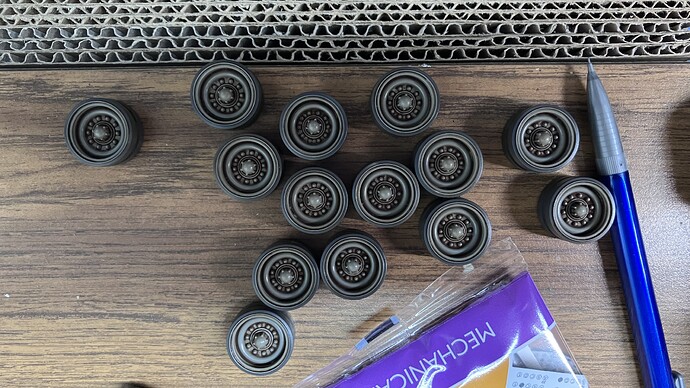
Managed to paint the lower hull and running gear. Also got one run of tracks finished and test fitted. Tracks are tedious. One hundred and one links per run with 4 clean up points on each. Meng provides a jig that in my opinion is useless. Tracks are snap fit on one side and pinned on the other. Once cleaned up the construction goes rather smoothly although a good pair of fine tweezers is necessary to install the pins.
Looking good though DV
Looks great. Are those tracks OOB? I don’t know if it’s my screen settings as on my iphone those wheels look gray. Are they painted gray?
Is it not meant to be IDF Modern Grey anyway ??
I though it was sand gray but then again I am not up to date on IDF armor colors. This just looks gray in my screen.
The color is actually grayish with a touch of green. Lighting makes it look more grey than it actually is. Once a dark wash is applied the color will change to a gray brown and look much more like IDF sand grey.
Got the wash on the lower hull and wheels. The wash is W&N Burnt Umber and Mona Lisa odor less thinner. I”ll let this sit for 2-3 hours or until most of the wet shine is gone. Then I will remove it using a Q-tip. I prefer the Q-tip to a brush as I have better control and can easily work in streaking depending on how much wash I remove. Down side is that when finished I have to search for stray strands of cotton that invariably get snagged here and there.
I used to use q tips a lot, but after I had my cataracts fixed I looked at the models in the case and saw cotton fuzz all over them. Hmmm…
I have switched from q tips to dried baby wipes. Cut them into strips then wrap the strip around some kind of rod and you are good to go. Way less cotton fuzz if any at all. ![]()
![]()
I switched to Chinese toilet tissue. Long story…
Yup. That’s the downside. Picking off the stray fibers is just a trade off for the better control I feel I get.
So this is how things looked after the wash has been removed. Once thoroughly dry time for dry brushing. Meanwhile, I started on the turret. Nothing exciting, just drilled out some holes in the turret roof. Guide holes provided, no paper template needed.
I started my build, finally… Firstly, there is no way an IPMS judge will ever gaze upon this effort, so I may actually get a little more enjoyment from it, not worrying about the little things. That said, I’m still going to do my best to make it a “good” build.
So to start, I’m using a Skif interior robbed from a kit I got for $10 at a show, in a Tamiya hull. Well, the Skif parts are a decent starting point, but extremely basic and lacking in any kind of detail, but that’s okay since they’ll only be partly visible at best. Plus, I’ve never worked with a kit that uses no locating pics at all. But on the good side, they used very soft plastic, so it’s easy to cut and hack. I’m adding enough detail so that any visible interior parts look “busy”, no points for accuracy beyond the basic locations of major parts.
Enough with the excuses, here’s the lower hull with the Skif floor from the engine compartment forward and the driver’s compartment bulkheads. Engine and trans are in, and I’ve started filling up the engine bay with doodads and parts from leftover T-54/55/62 detail sets.
 IMG_4428 by Russel Baer, on Flickr
Oddly, the kit I got has a lot of “damage” from something hot, like the sprues were laid on a hot grate or something. Affected parts will be hidden or replaces when possible.
Hey, easy! I’m an IPMS judge. So far, your build is looking great! Nice engine comp.
Oops… I meant that in a purely figurative way. Really. ![]()
I did some more in the engine bay, moving on to the rest. The major thing was to “correct” the mounting of the big fan, but I also added some greeblies and plumbing. I have the big radiator that attaches to the main cover, not sure yet if I’ll have that cover open or not.
 IMG_4429 by Russel Baer, on Flickr
You can never have enough greeblies in my opinion … ![]()
 IMG_4431 by Russel Baer, on Flickr
I need a bigger box too.
You actually have a box marked up for greeblies … outstanding ![]()
![]()
![]()

I might revert to more generic boxes for greeblies, stowage, weapons etc too. I now have those “letterboxes” with all the small compartments, but catch myself spending more time sorting parts then actually building at times.
