I dare the evil rivet counters to moan about this one 
 beautiful work Tim
4 Likes
Just a suggestion, and it won’t help on the gun turrets, but might do in later parts of the build. If there are other elements which have as much detail as you’re recreated here (and seeing the way you’ve built this, I’d suspect there will be!), then maybe add the rivet work first, and then do the handrails, ladder rungs, and so on after?
Hi Graham,
Thank you for the suggestion! I actually did initially plan to do the gunhouse rivets first. The thought was to reproduce them using a pounce wheel, but I didn’t like the look of the recessed rivets in tests and so abandoned the idea. I opted instead to place the scuttles first (since the footrail locations were keyed around them), then the sliding optics covers, then footrails, then top rails. The plan was to go from less delicate to progressively more delicate details to minimize handling damage during construction. That’s also why I mounted the gunhouses on that bit of scrap wood – so I wouldn’t have to touch them quite so much.
The final decision to use the Archer rivet decals was made only after the other details were already in place. As it turned out, this worked out pretty well as the 3-D resin decals are SUPER fragile. I didn’t mention it before, but while applying the rivets I have repeatedly had to replace prior rivet sections dislodged while handling the gunhouses – so frustrating! I can only imagine the mess if I’d tried to add the other details with those resin dots already in place. Anyway, at this point it makes sense to stay the course.
Although… maybe next time I could apply the rivets first and stabilize them with a coat of primer. Hmmmm.
![]()
1 Like
I can feel your pain about the caused damage, great that you recovered without any bigger problems. And I’m not getting tired of watching your gun houses in awe…absolutely stunning. I knew, in the very beginning, when you started your rather plain 1:200 kit, that you would perform that into something very special, and you are certainly doing that!!
Cheers
Jan
Jan and John, thank you for your generous sentiments! I must admit to being a bit tired of messing with these gunhouses, so the encouragement is most welcome!
![]()
1 Like
Credit where credit is due Tim. Those gun houses on their own have taken the Hatsuzuki to a different level and in my opinion (by no means a ship expert) they are show worthy entries in their own right with the painstaking detailing you have given them.
1 Like
Simply amazing Tim!
I know the frustration of being bogged down on the details but it’ll be worth it in the end 
1 Like
Thanks guys –
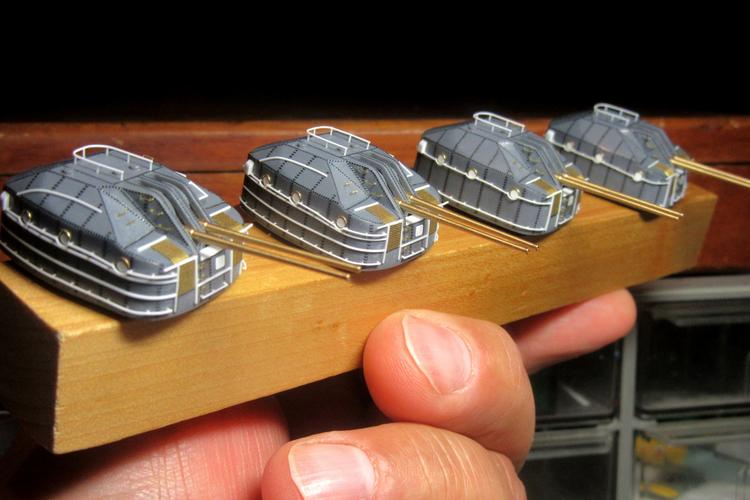
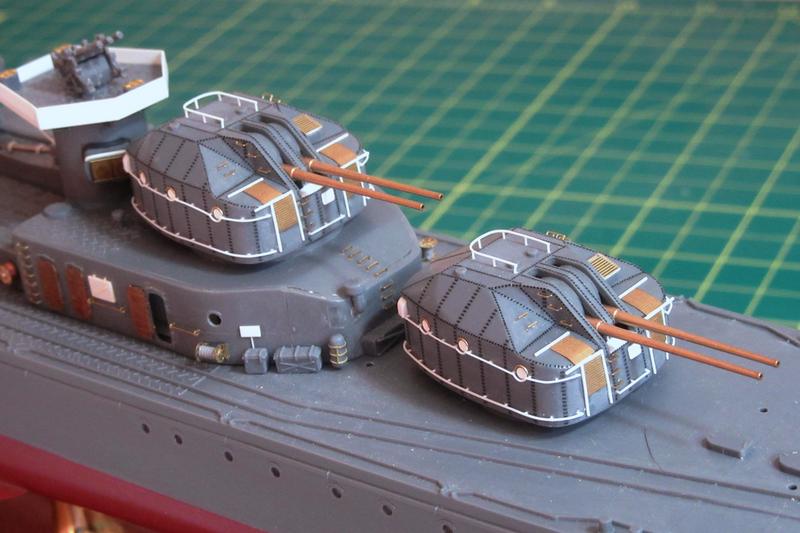
Except for painting, Hatsuzuki’s gunhouses are now complete!
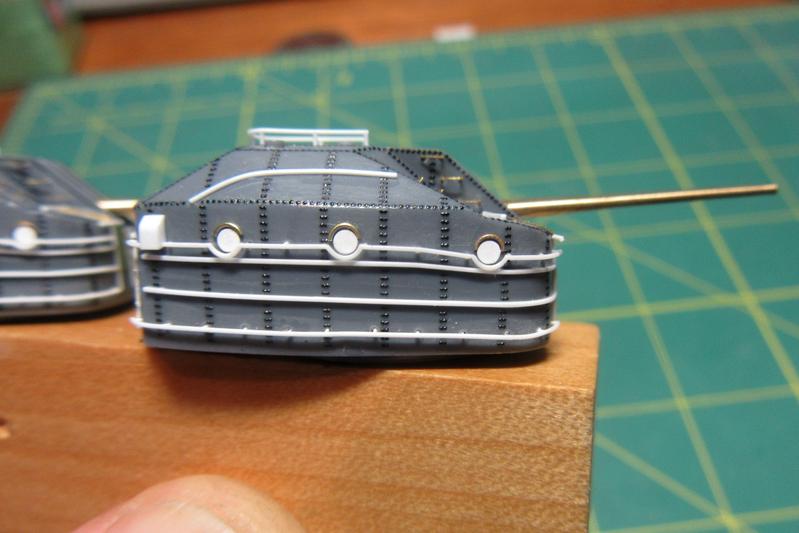
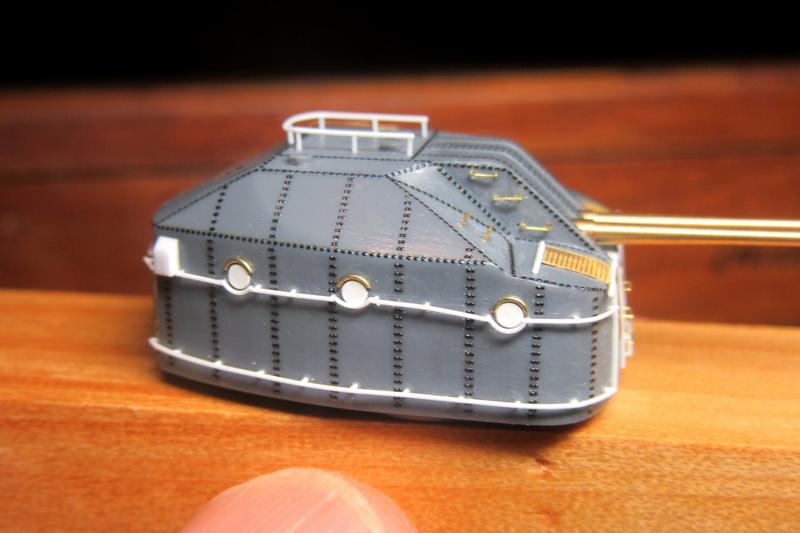
Each of the various improvements to these weapons has been a challenge, but the tiny rivet decals were definitely the most demanding; altogether the gunhouses received 144 single-line rivet decals and about 120 single rivets applied to go around curves, plus 224 double-line rivet sections – for a total of some 488 individual decals!
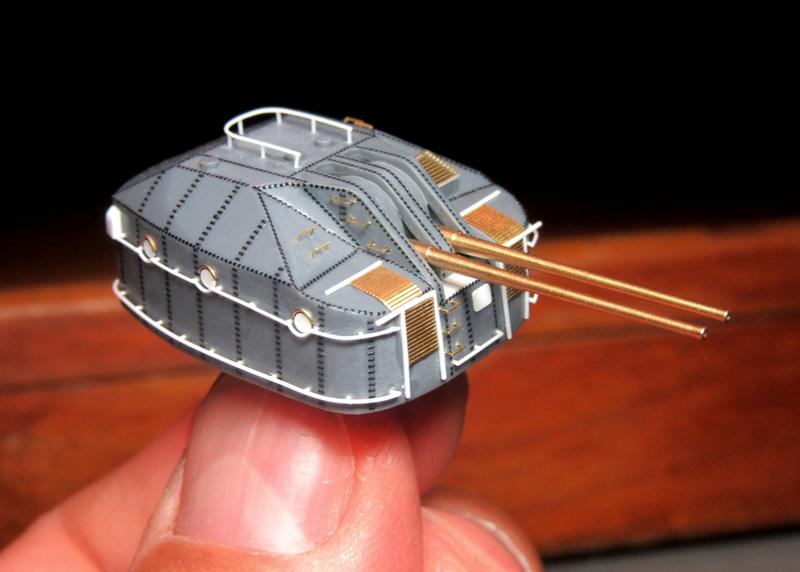
I like the look of the rivets, but after all that decaling I’m seriously glad to be done with these things!

11 Likes
Well done ! Something to be said about staying the course and getting a task behind you .
What’s next?
2 Likes
Stunning! Simply stunning! Well done Tim.
2 Likes
Well done. I guess we’ll see your picture in Webster’s Dictionary by the word “determination.”
2 Likes
But, but you missed the… no, you did that. But wait what about the… no, you did that too. But, but, but the thing… ow never mind, I’ll just sit back and like every post.  Hope you got the humor.
2 Likes
Tim, You have done a masterful job on those turrets!

Cheers,
2 Likes
Bet you can’t wait to see how they look with paint on Tim
1 Like
Tim,
just brilliant. I really can’t add anything more to what was said, I don’t find the right words. They’re just masterpieces! I’m in awe.
Cheers
Jan
1 Like
Thank you gentlemen for all your comments!

Really, though, these gunhouses just represent some fairly straightforward (if repetitive) modeling. I’ll be glad to be moving on to something else!

11 Likes
Amazing craftsmanship and dedication … they are superb mini kits on their own.
1 Like
Too beautiful to paint
1 Like
Simply beautiful, Tim! They look even better on board!
- and now, I see the triple 25 mm (?) AA gun, and very early on in your build log you mentioned that you’d replace them with Veteran - looking forward to seeing that, too. And so much more on your phantasmic build!
Cheers
Jan
1 Like
Superb work, Tim. Just superb! 
Cheers, Chris
1 Like
Hey Mr. R.!
I’ve been following along on your detailing of the gun turrets - nothing short of miraculous, the work you’ve put in.
Your picture of the lone turret on your work stand, with all the railings & such finished, my first thought was, “that looks obscene” - and that word is meant in the best way! I know you’ll be painting the turrets a uniform color, but just to look at the turret, before painting, it’s like “no way that goes on a naval vessel!” (maybe something from Star Wars, but not a warship!)
And it will be a shame once you paint the turrets, because the casual observer won’t recognize the effort you’ve put into all the detailing (like the footsteps on the back of the turrets). Maybe if they press their nose against the display case, they might start to appreciate the detailing you’ve done (but you’ll still have a nose smudge on the display case!)
So I can’t wait to see what’s next on this build - it’s been very enjoyable watching all the work you’ve put in her. 4-Oh!
Cheers,
Tim
1 Like
You are getting to the point I would be fearful that working on the model I would be knocking more stuff off than I was installing.
1 Like