I’ve just started the I Love Kit JLTV. I know this is not the best in town accuracy wise however I’ll try to turn into something acceptable.
The kit comes with a small PE plate, some masks for the various windows and windscreens, rubber tires and decals for one decoration only.
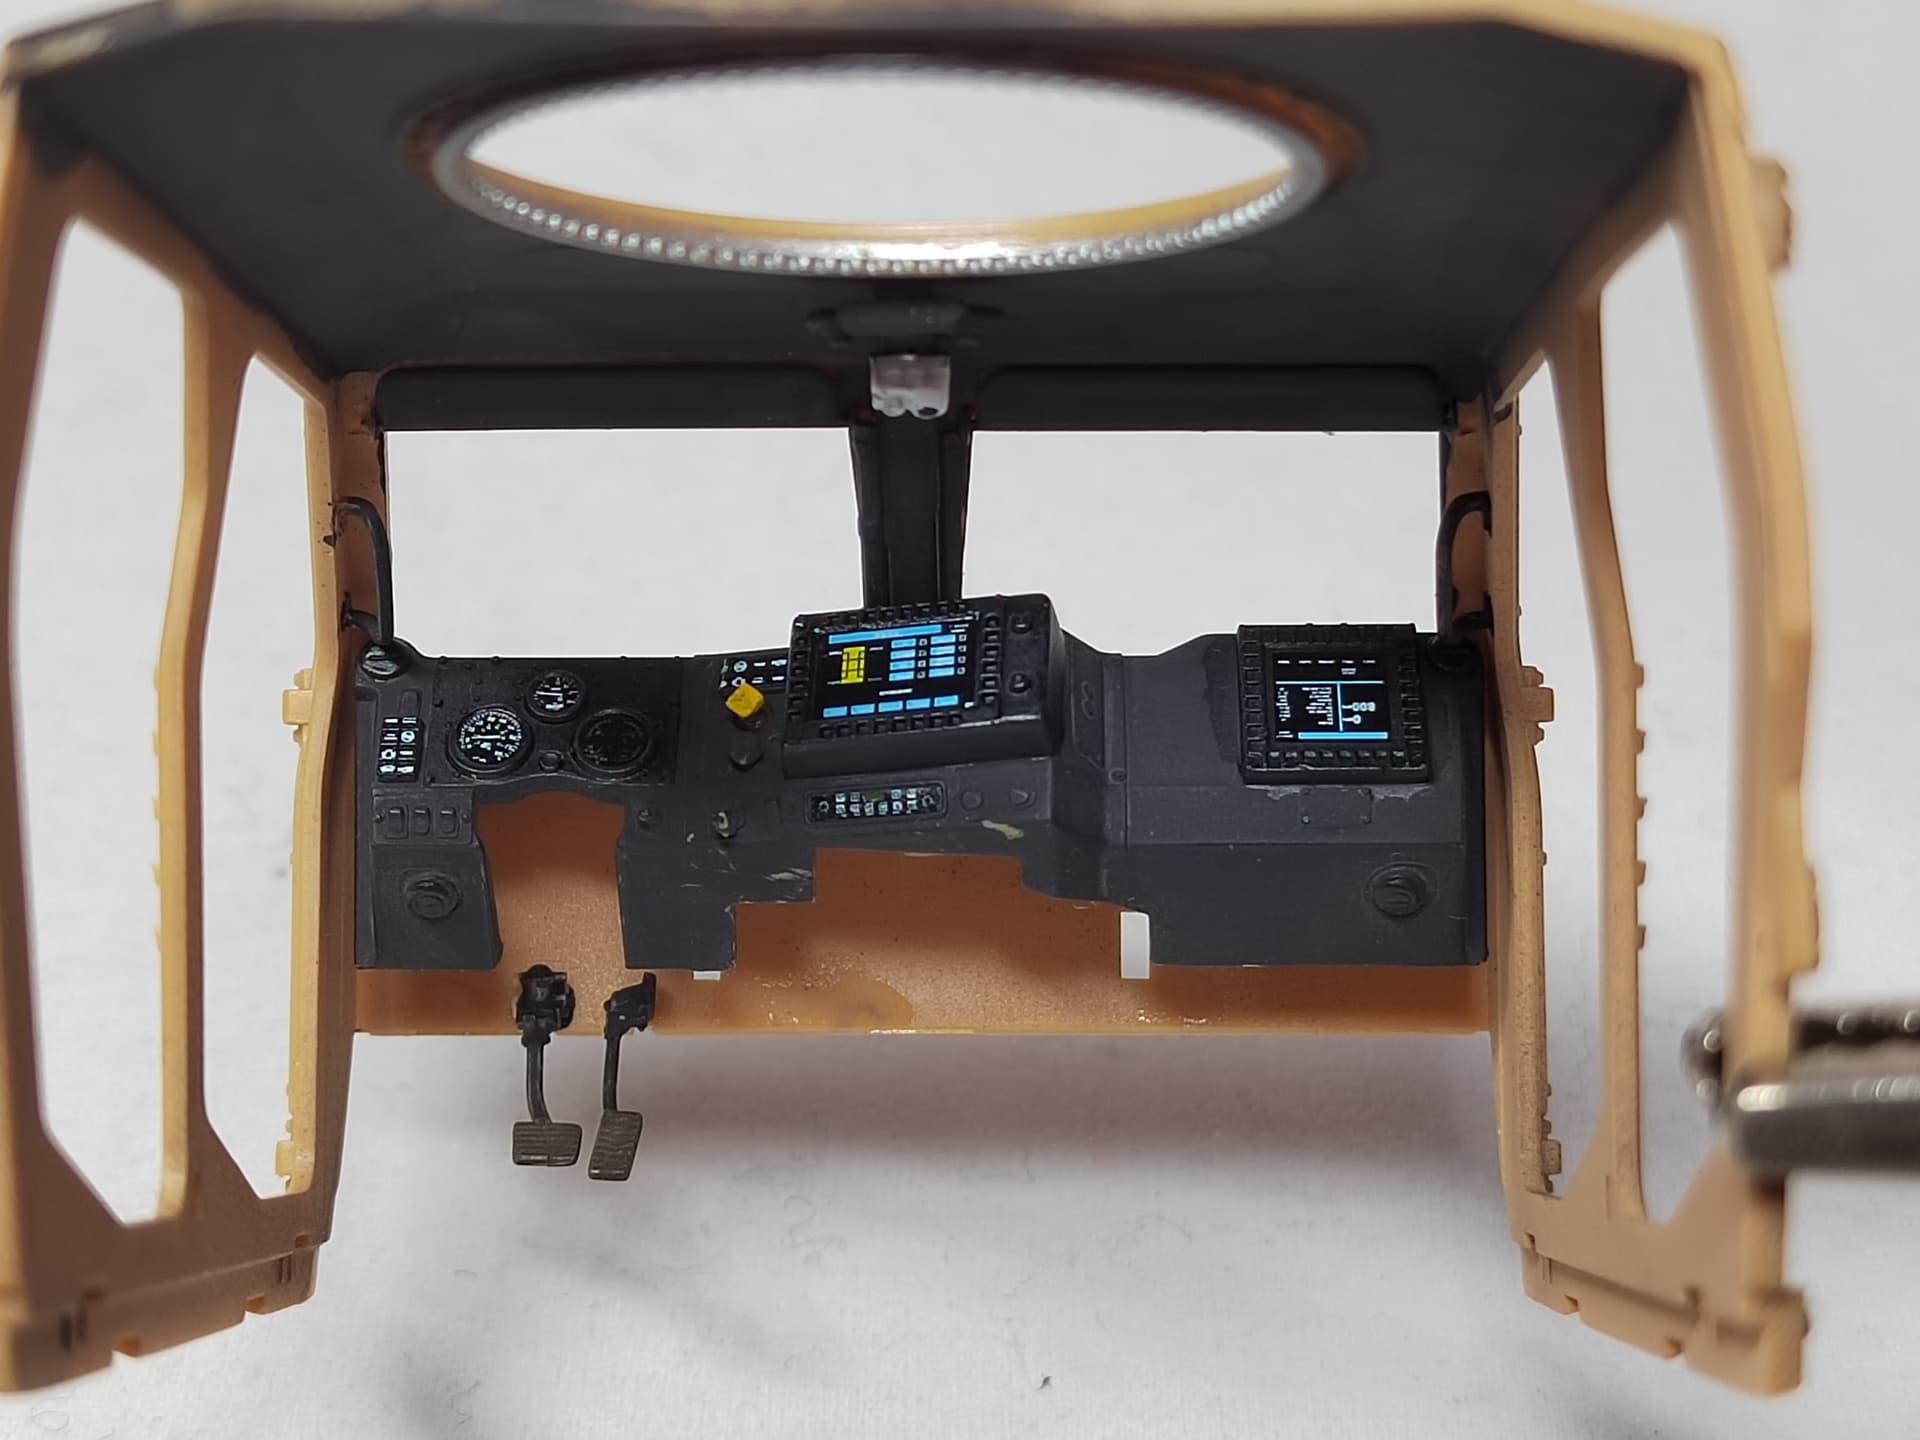
The instructions are typical Trumpeter style with the same lack of interior color instructions which is really annoying. Fortunately I found a thread dealing with interior colors at Armorama.
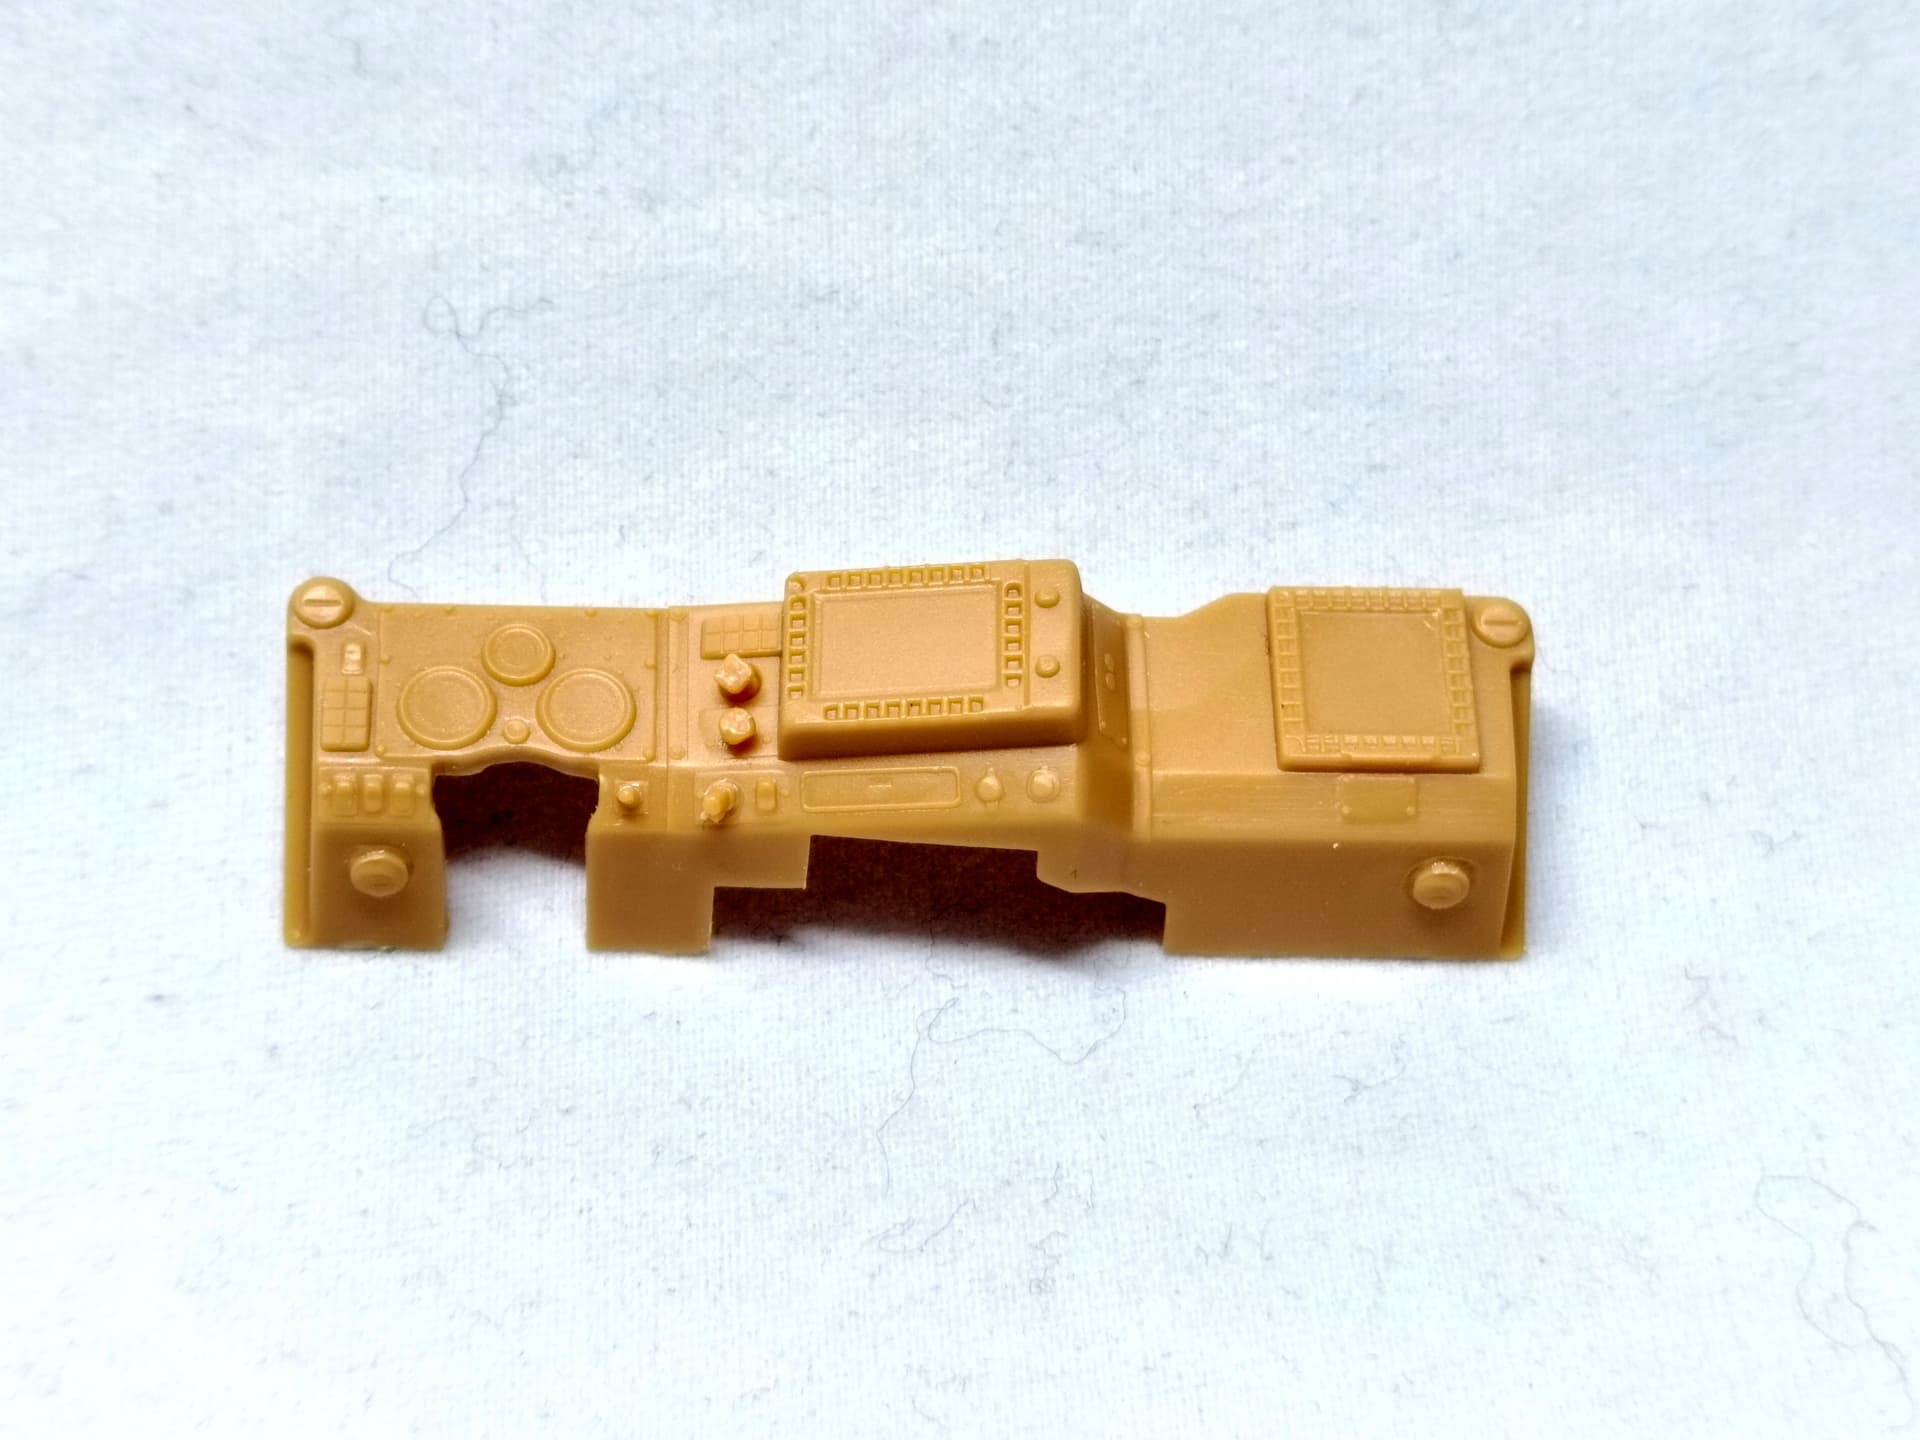
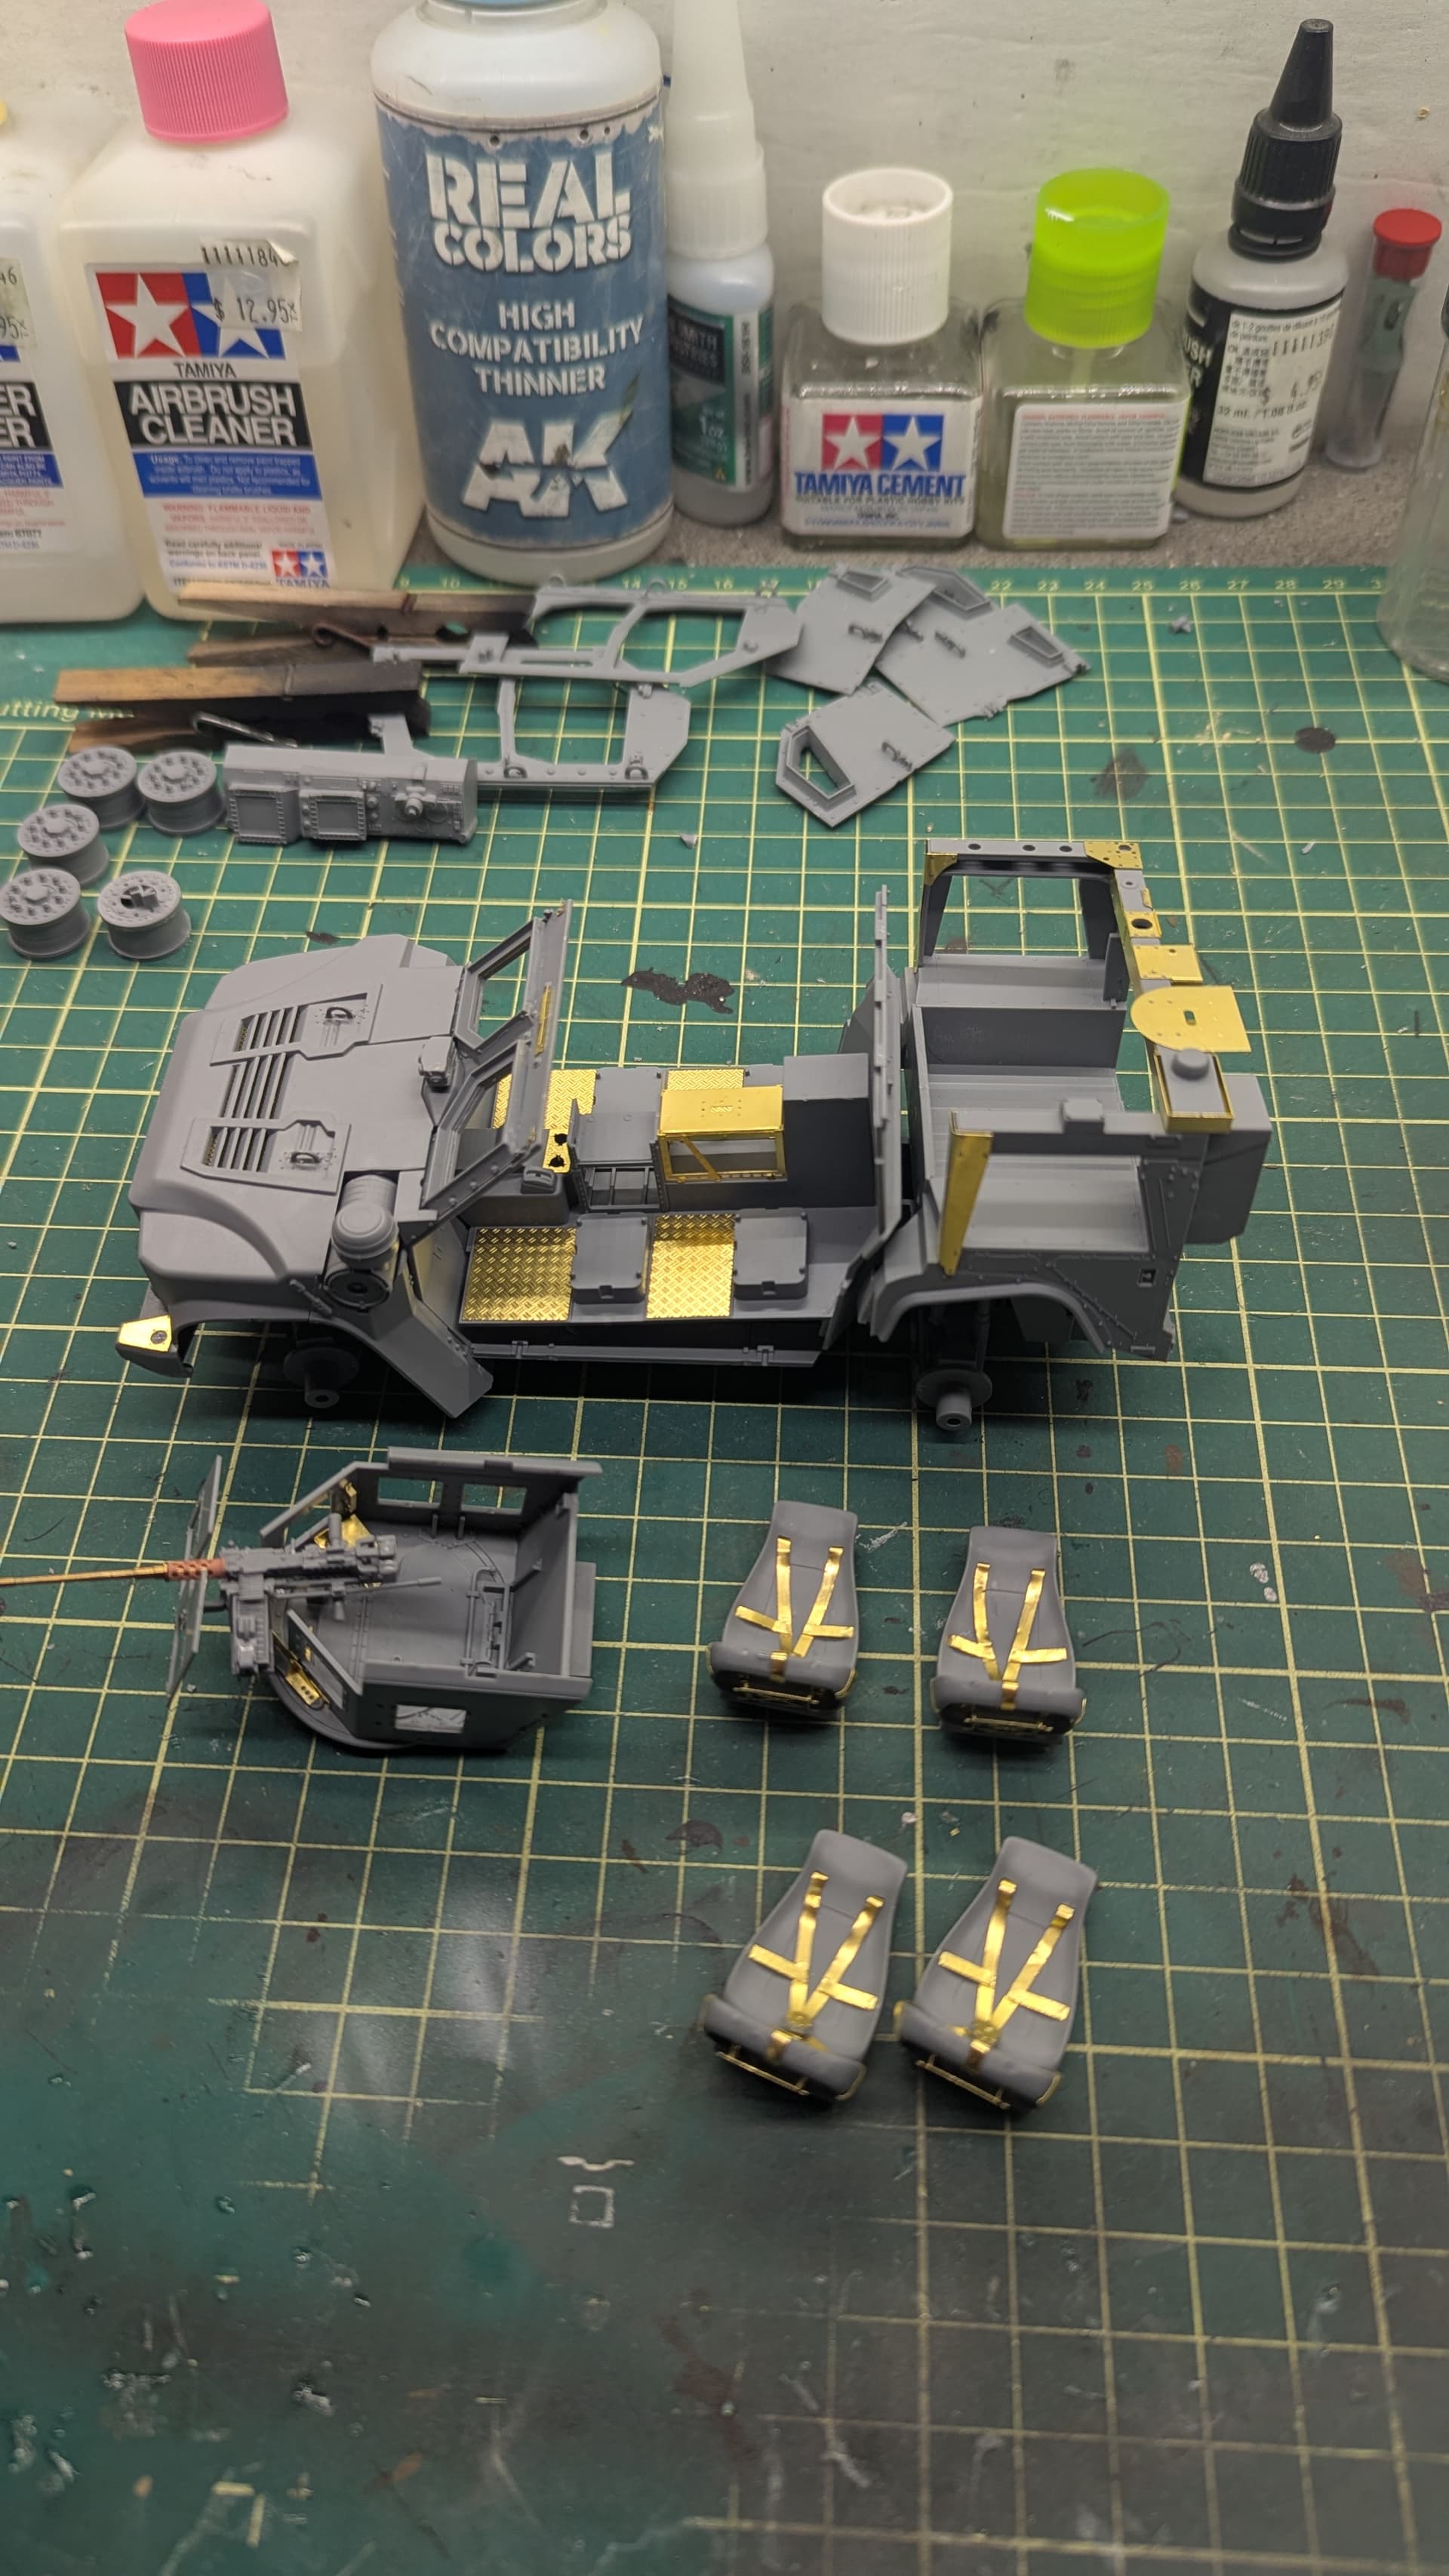
Today I started with the front part of the cabin as per the instructions. However I didn’t glue the dashboard as I intend to paint it first. Some decals are supplied for the dials, the screens and the buttons.
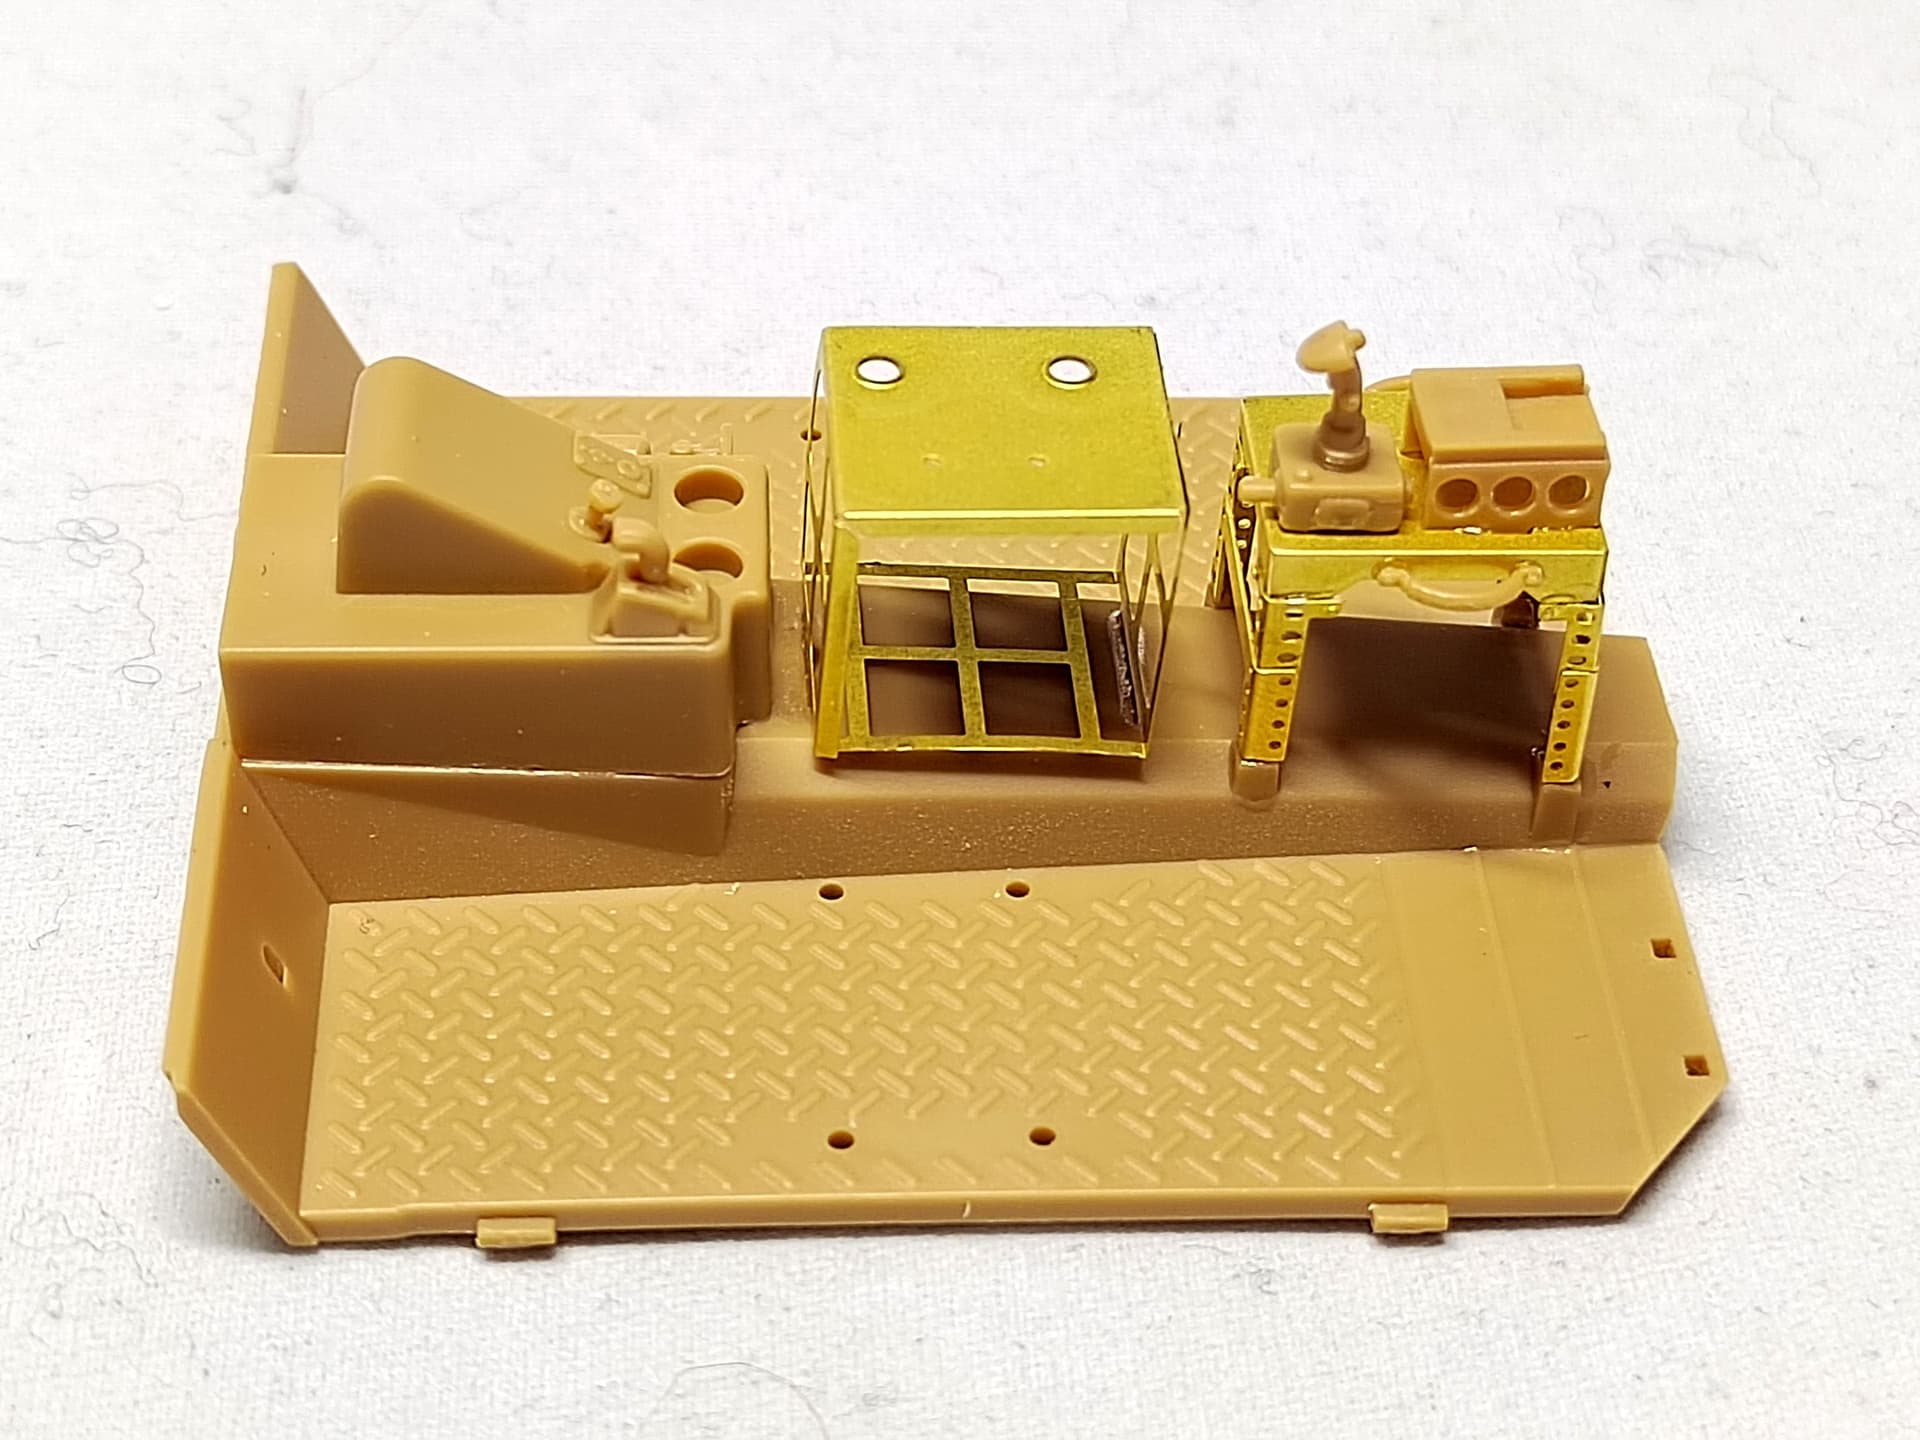
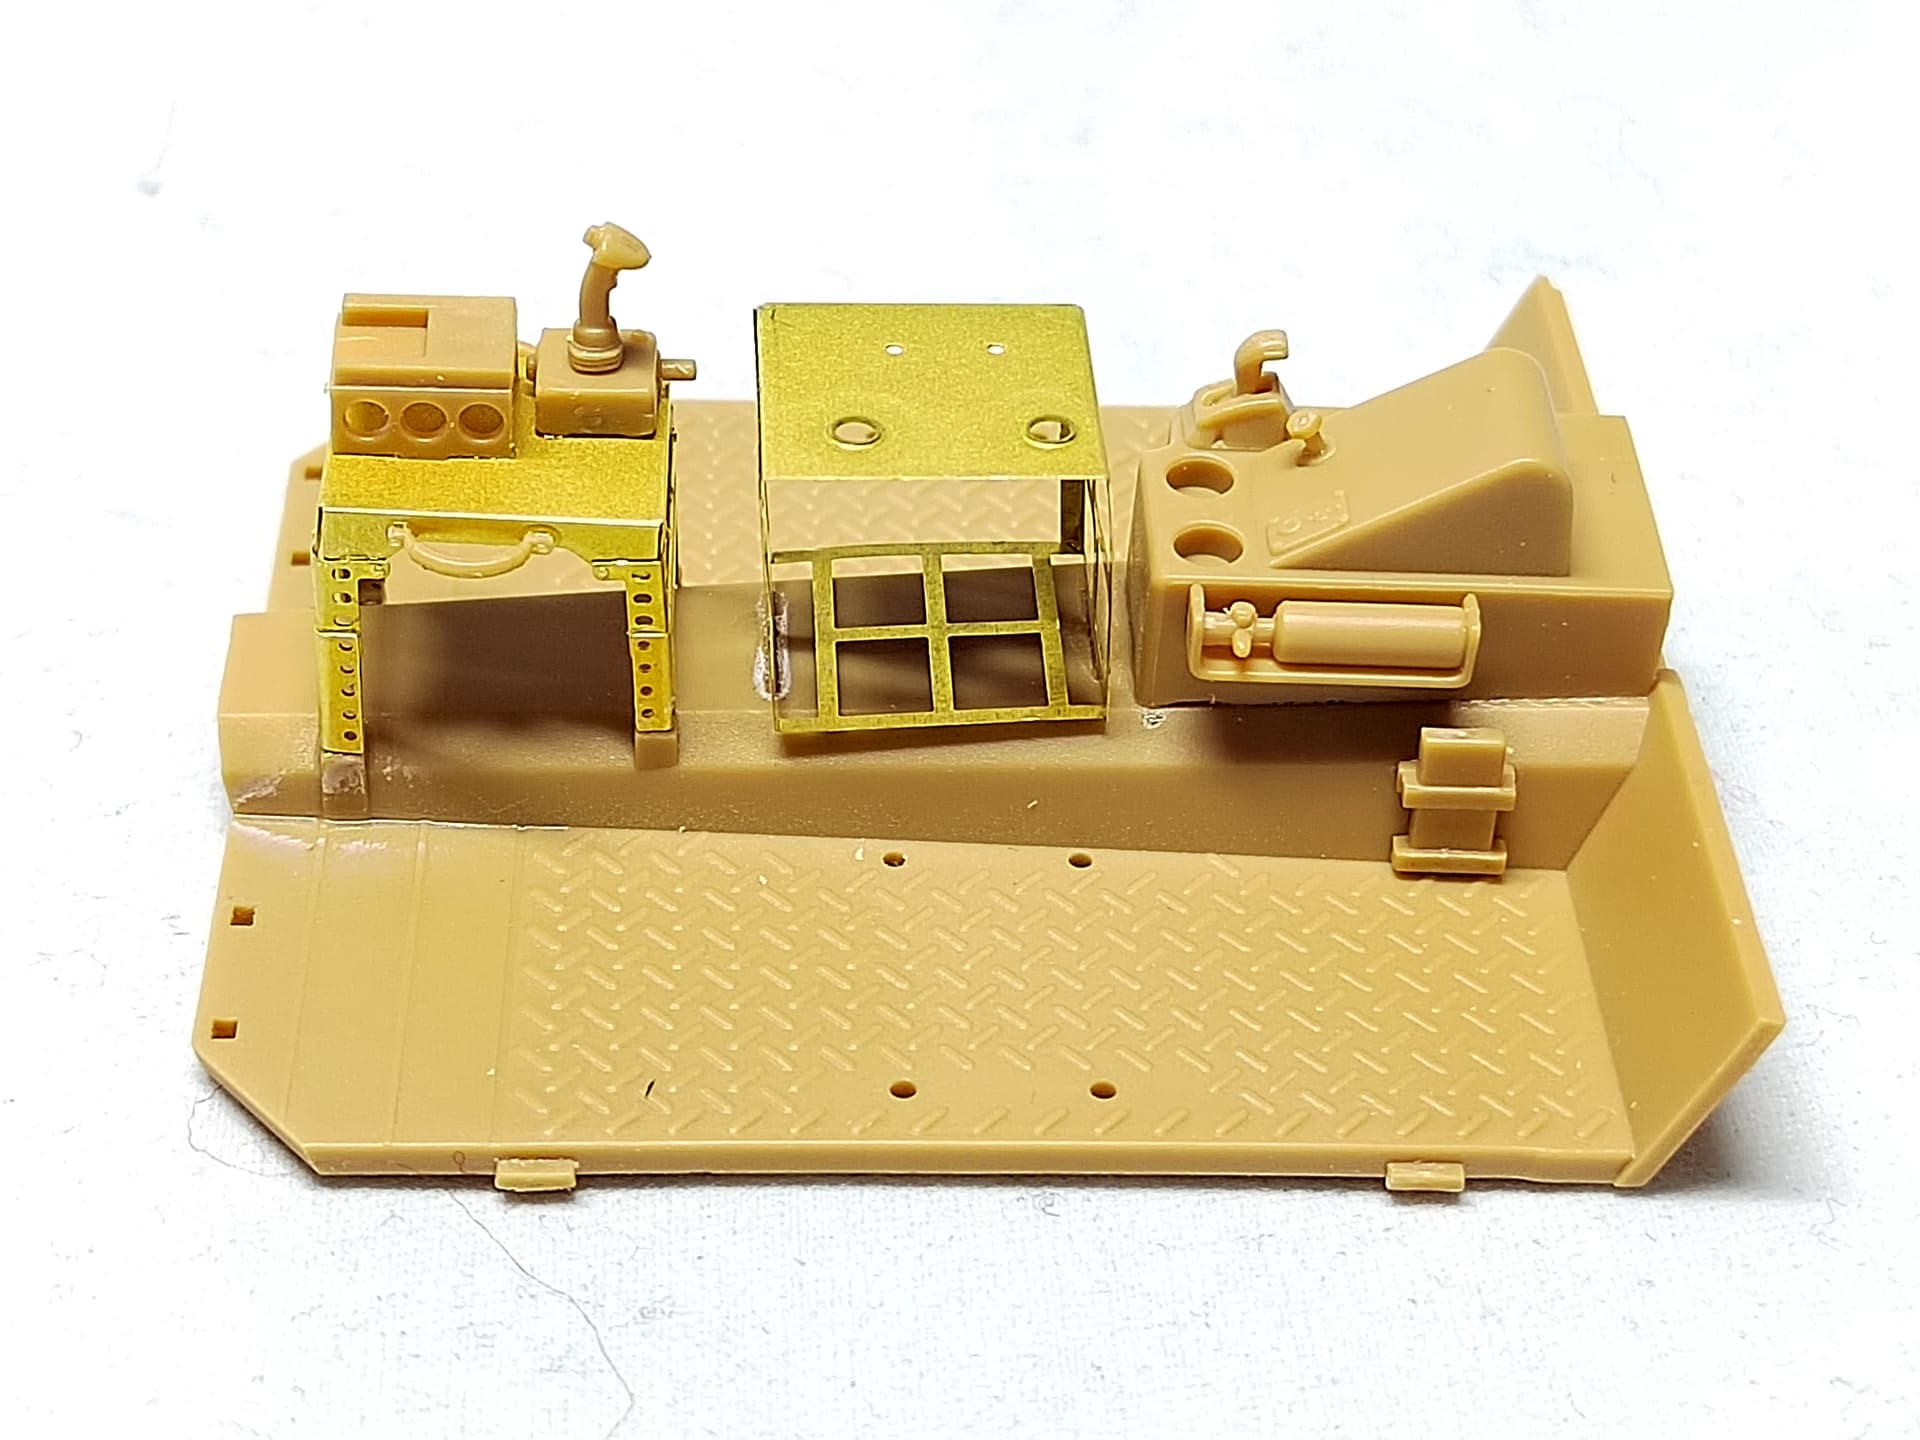
Then I began to add details to the floor. The central part with the radio rack and the gunner controls is a bit tricky as the PE parts are very thinned and fragile and come with no mark to align and glue them.
Jonathan, I won’t bet my shirt on the accuracy of ILK interior.
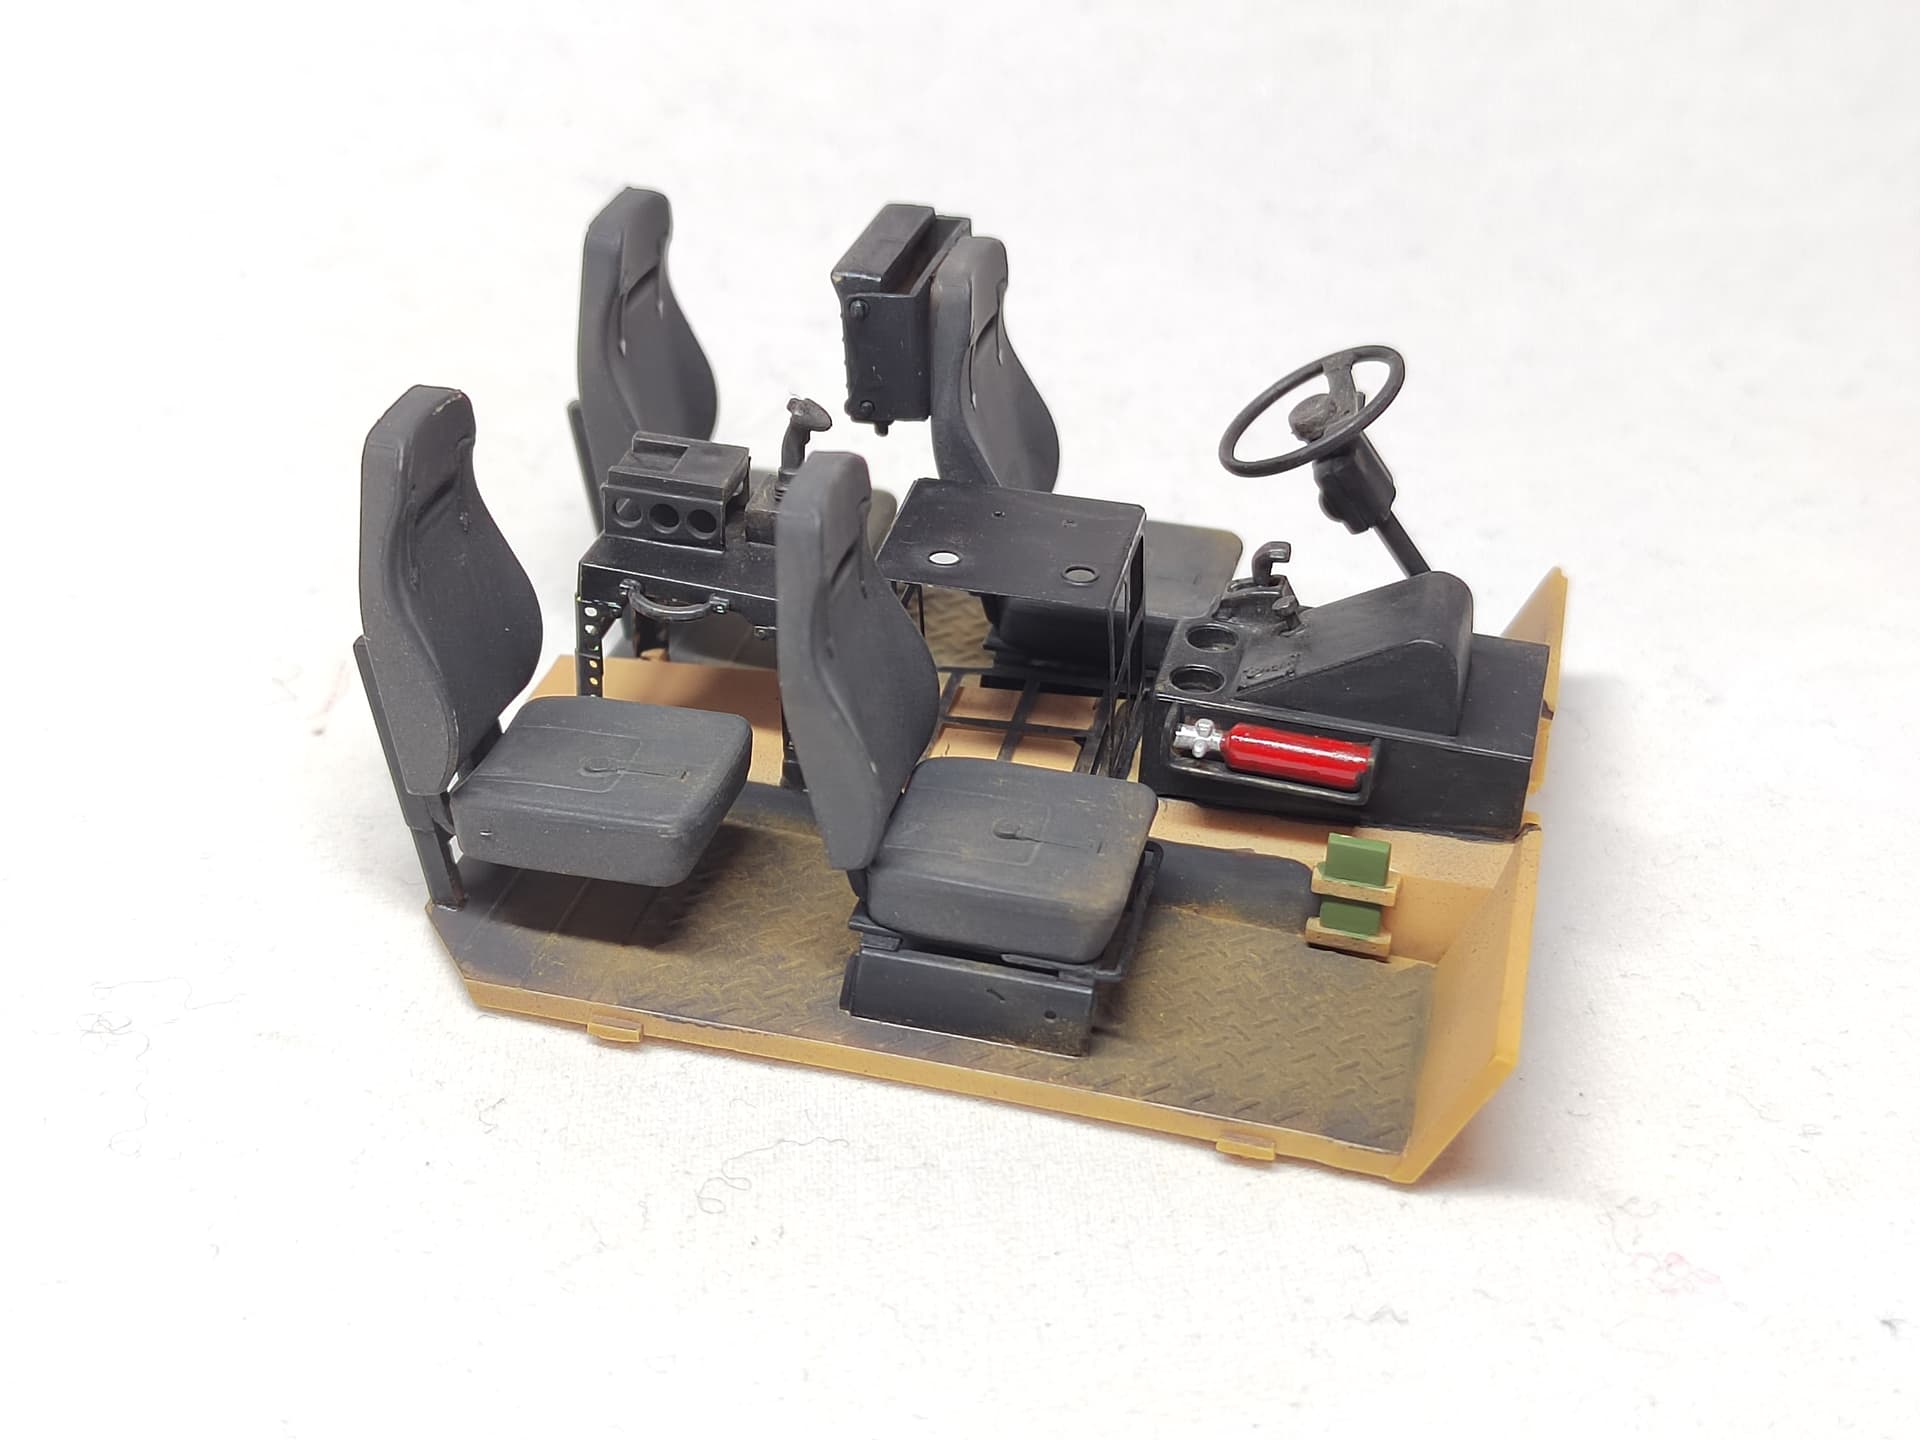
I have assembled the four seats this morning. The real issue is the way you have to glue the seat back to the seat itself. No way you can keep the right angle if you don’t put the assembly on the side when the glue is curing.
The seats are not glued yet. I’ll paint them first as well as the interior.
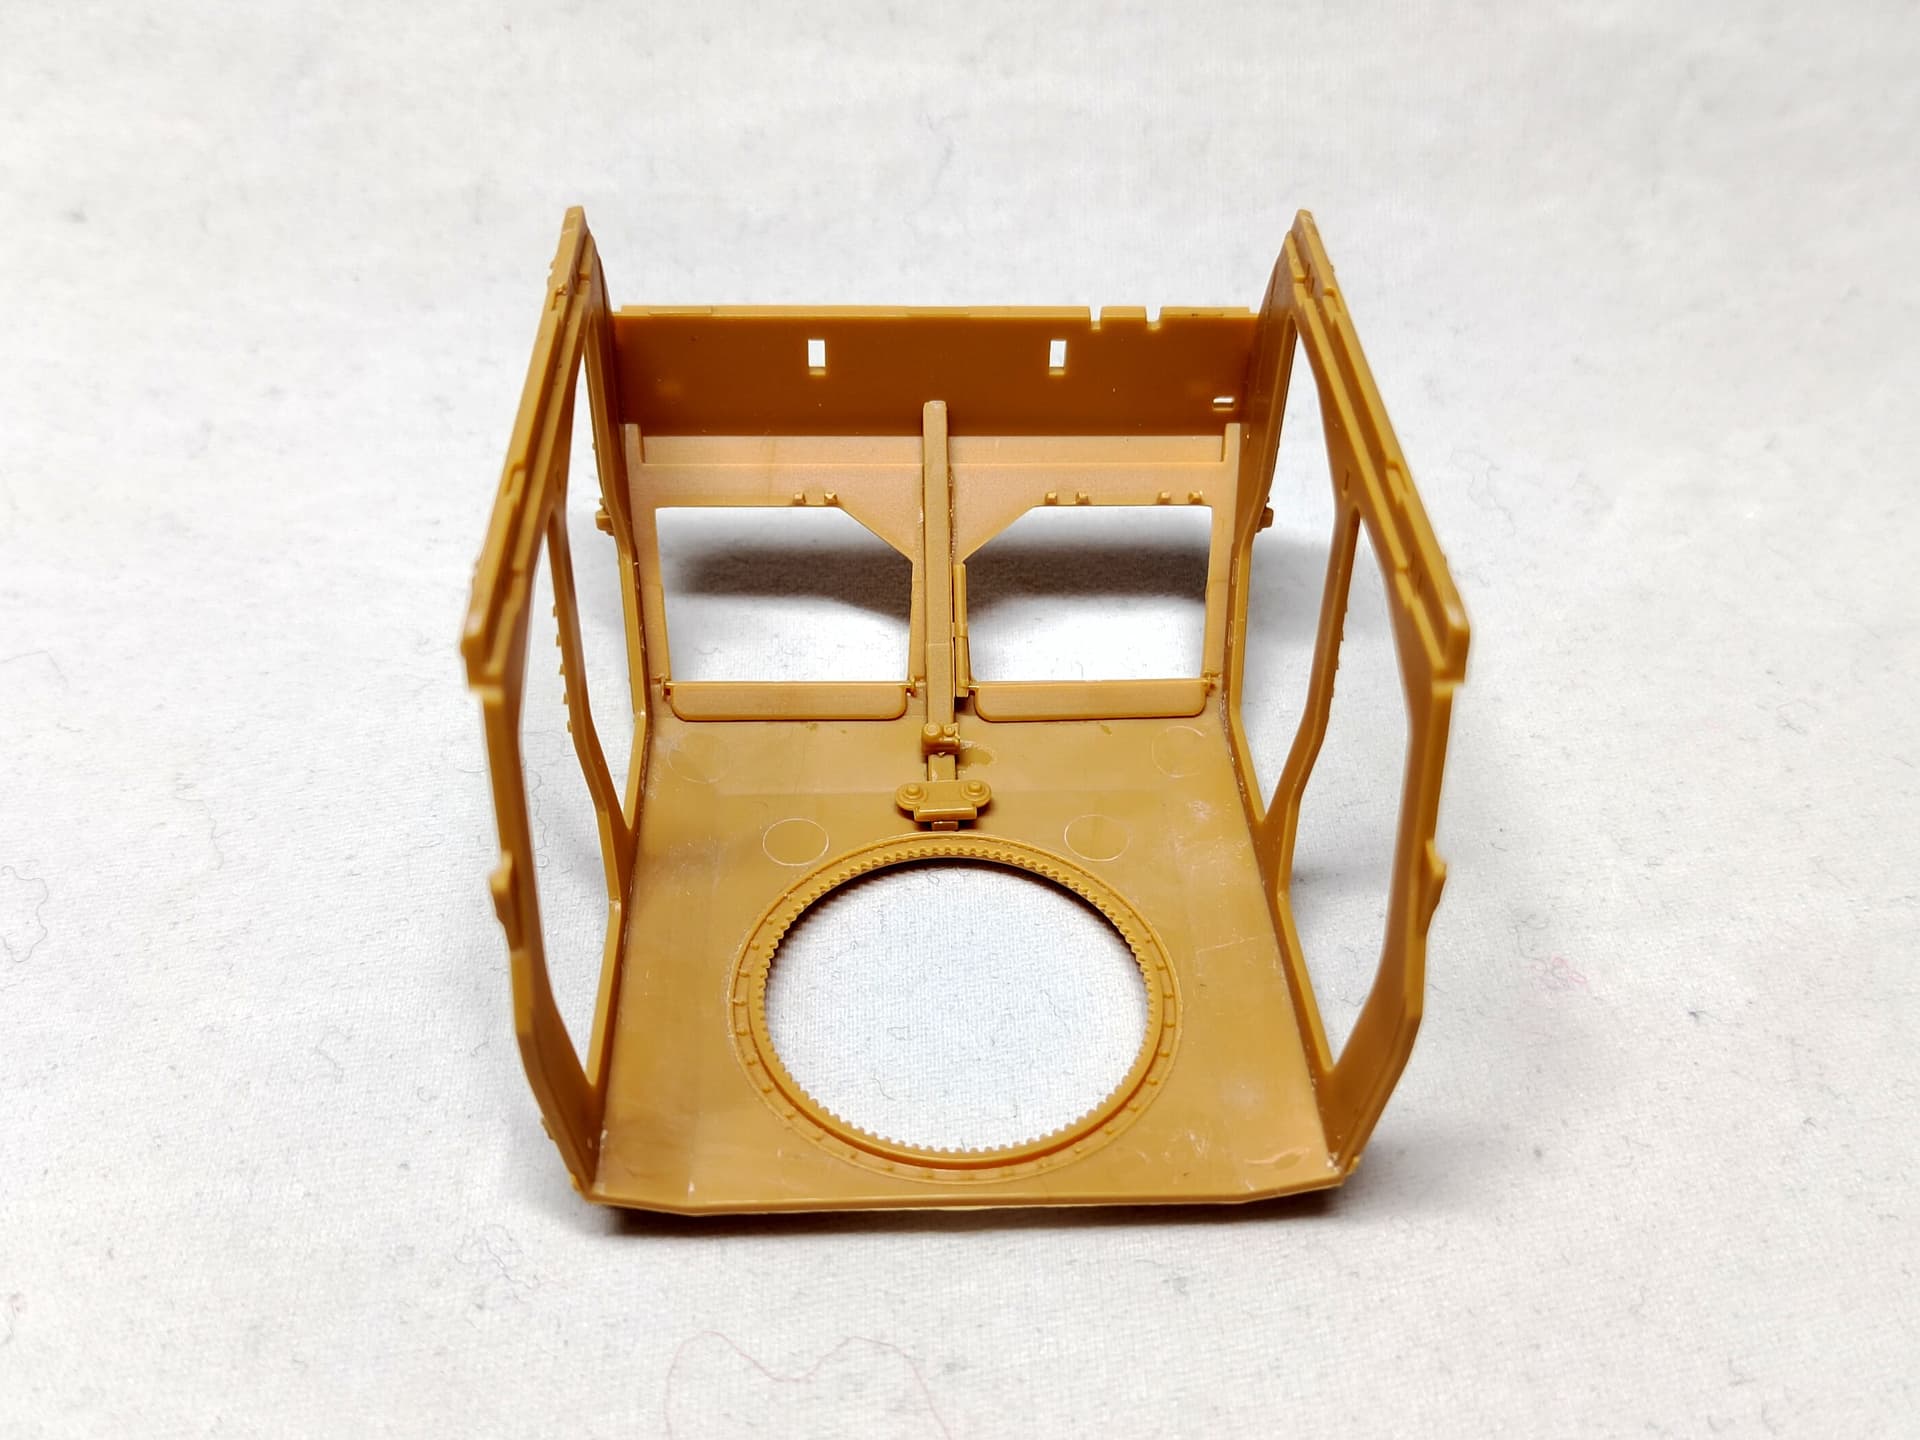
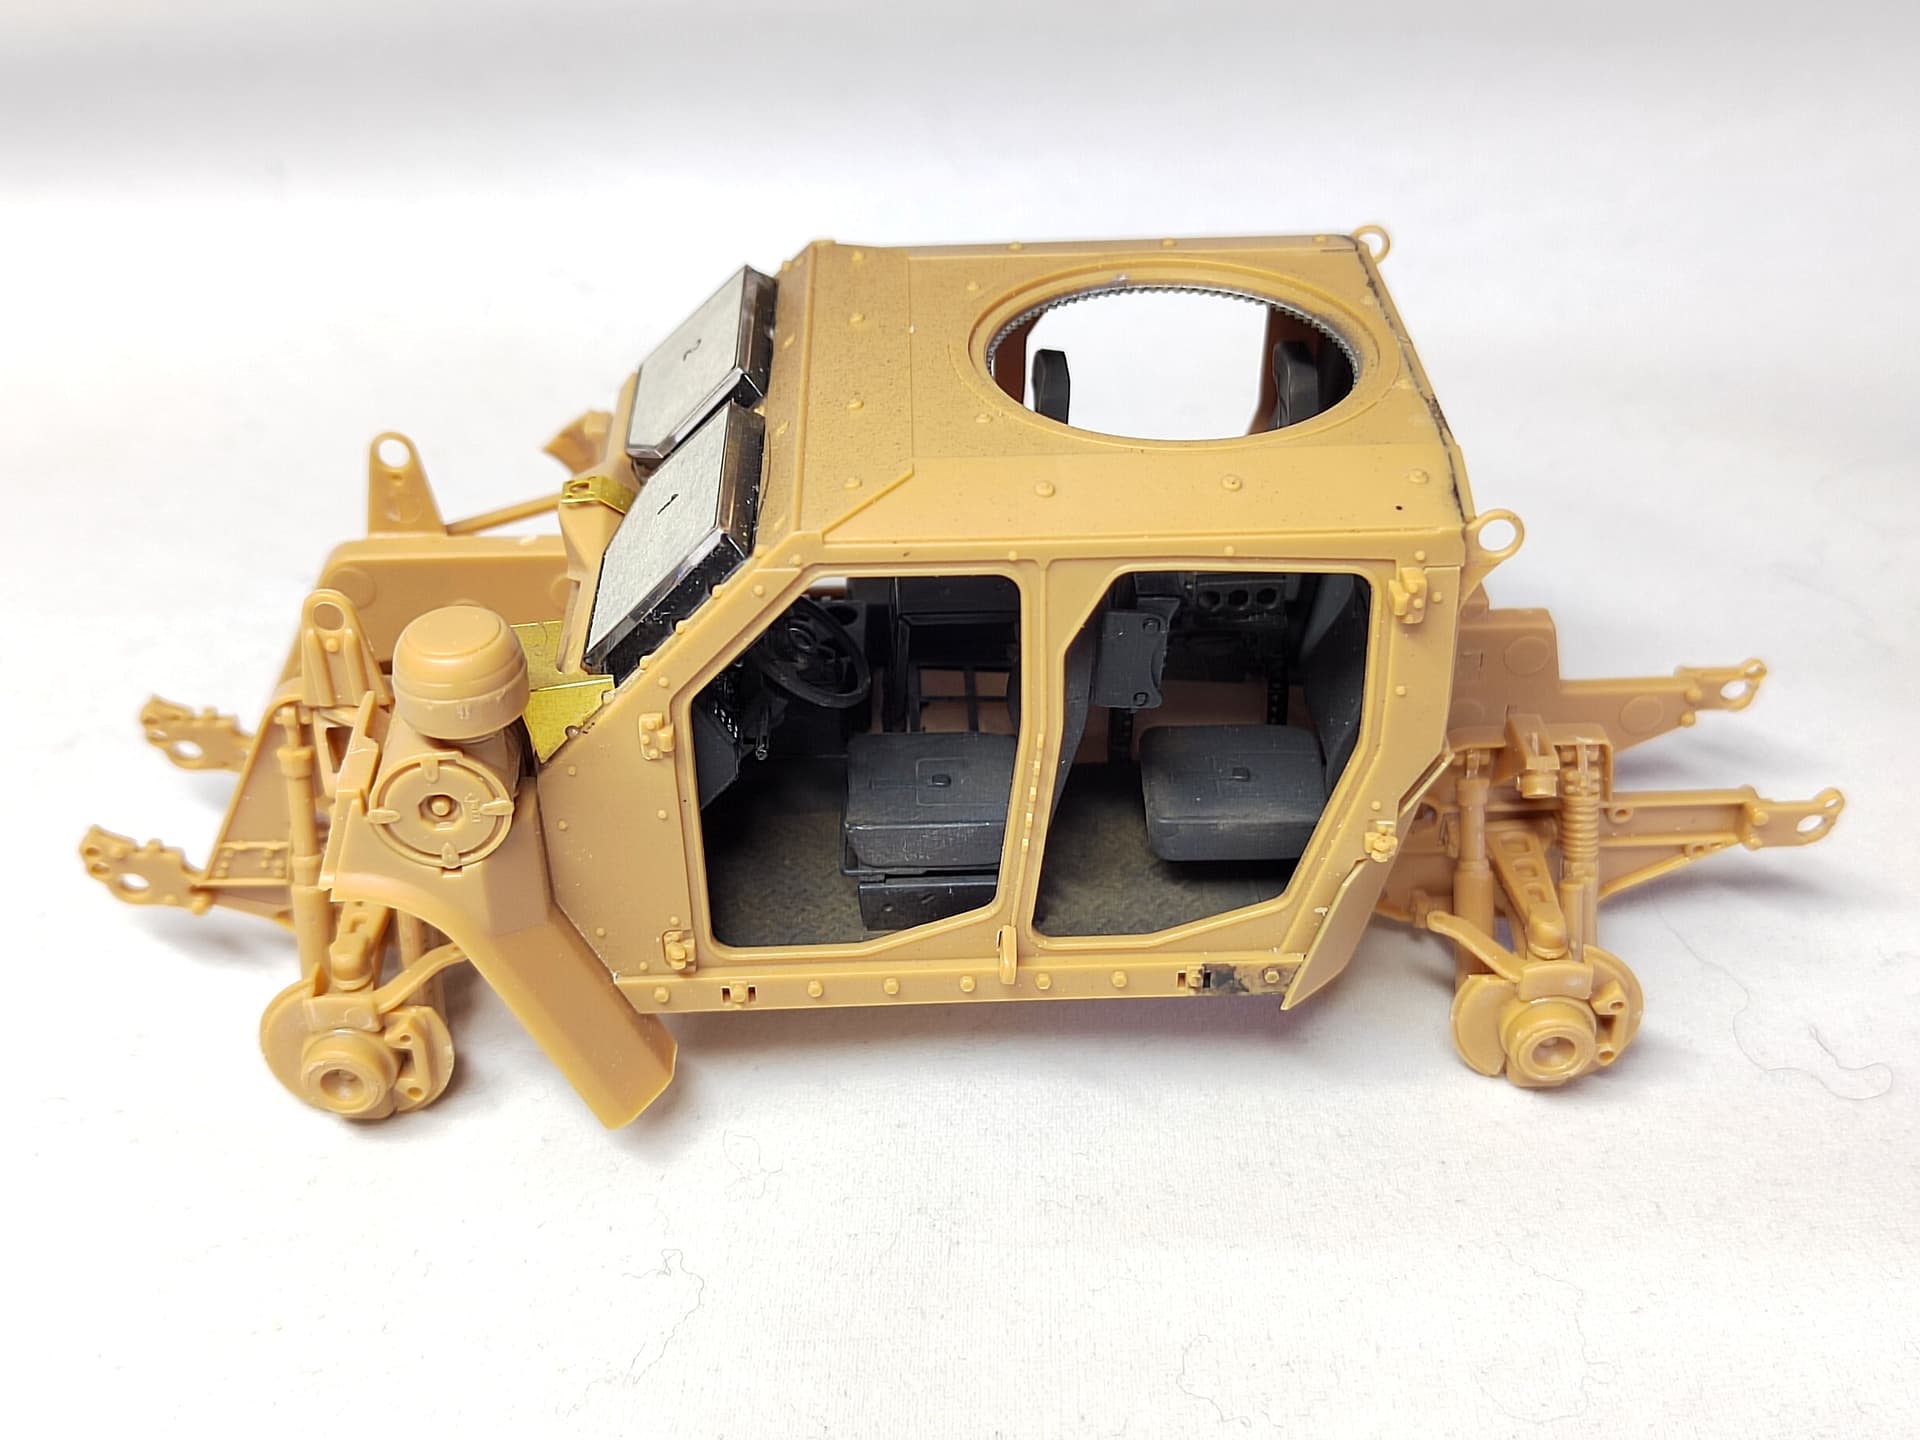
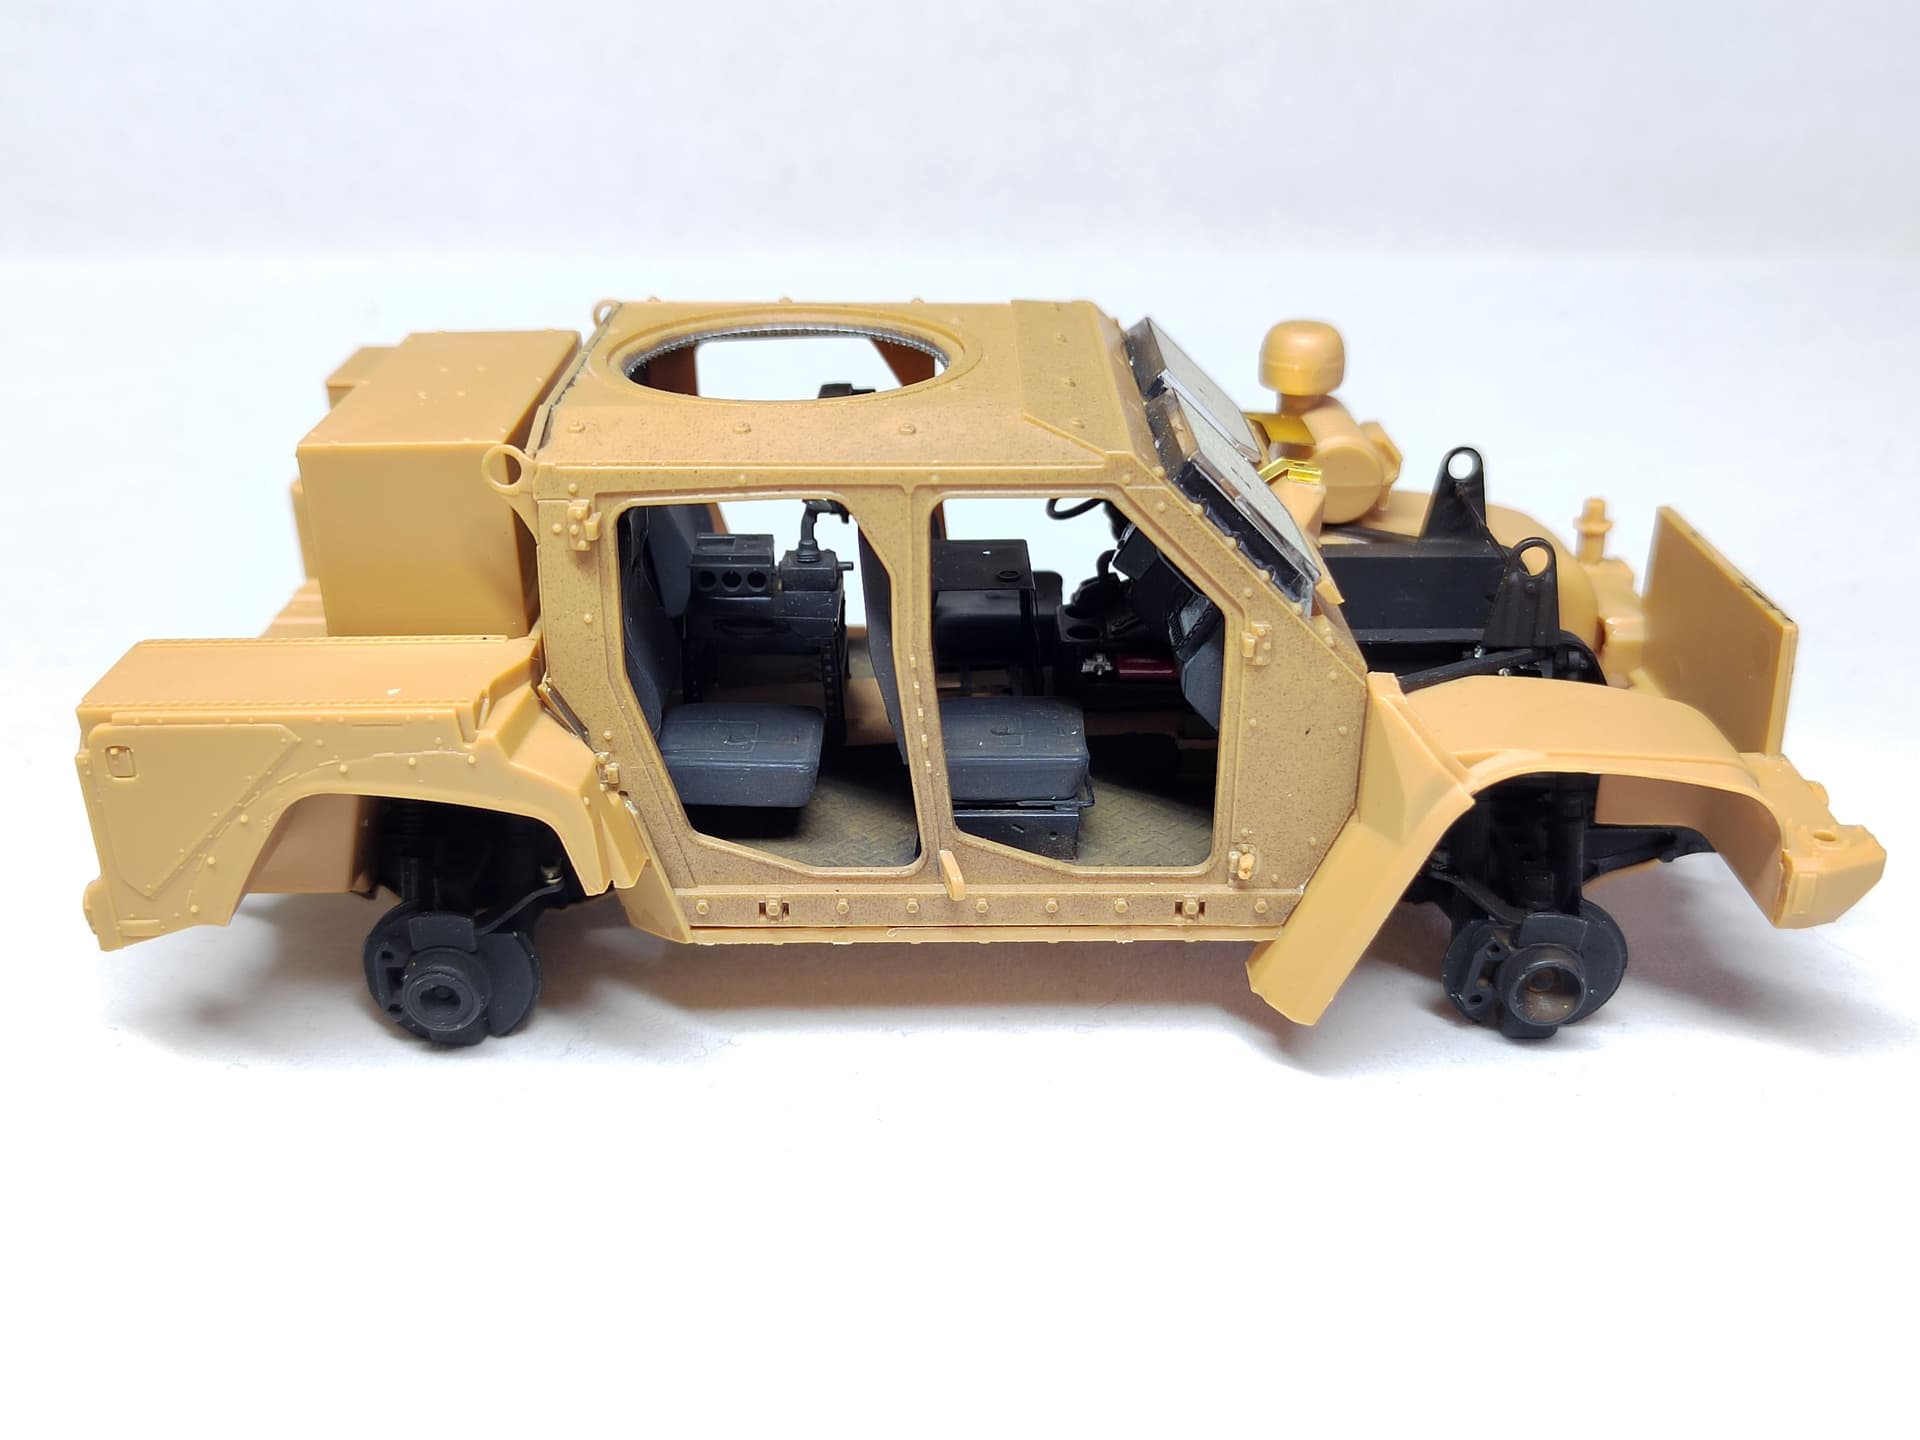
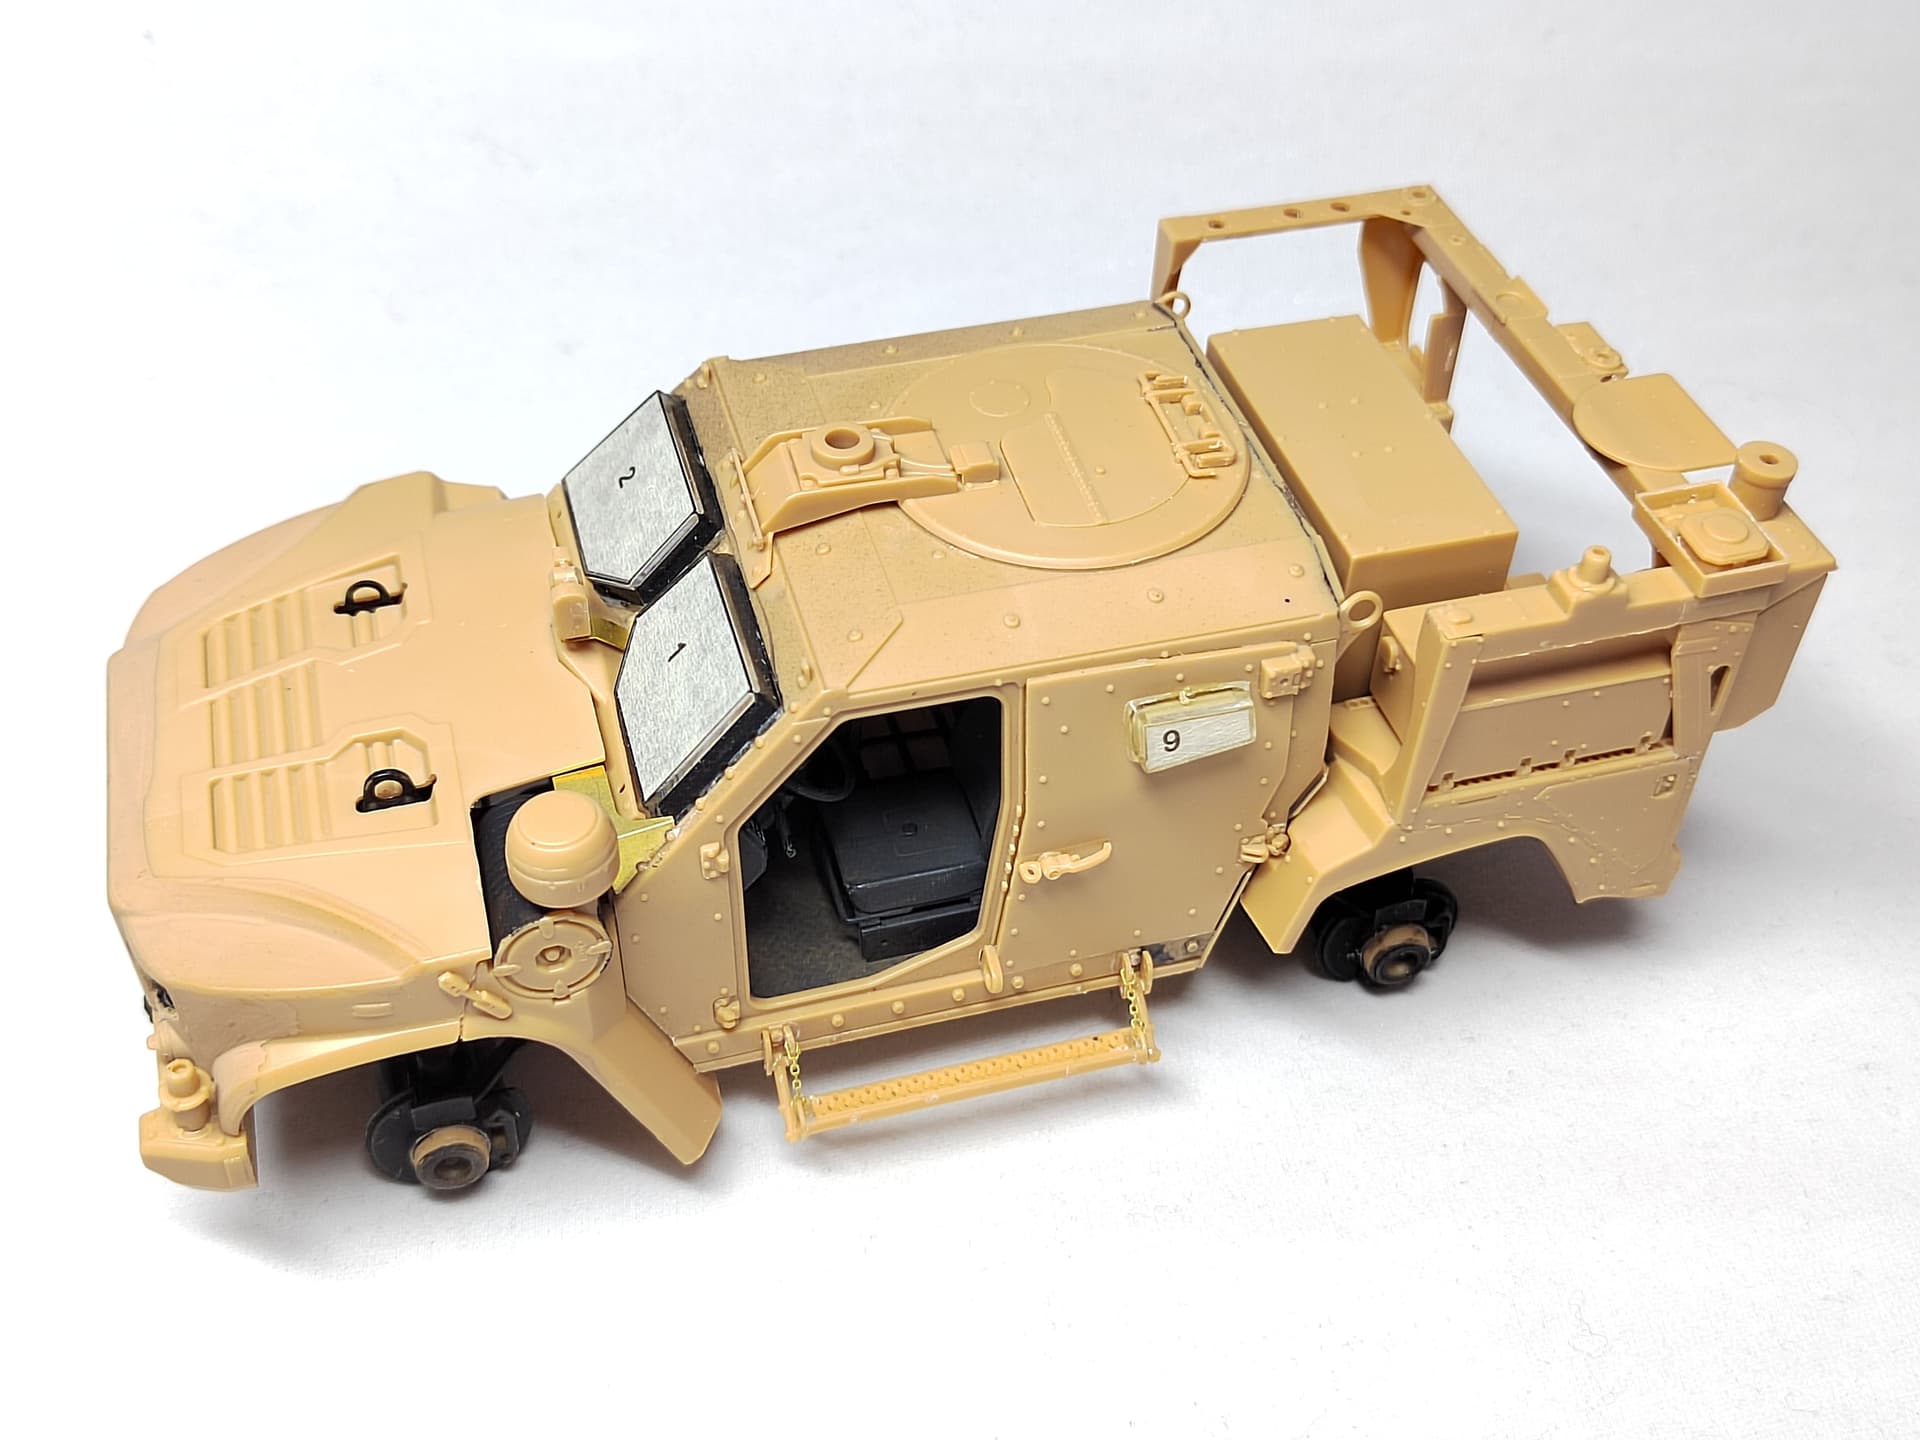
The cabin is assembled and just waiting for the doors to be installed. Maybe the driver one will be open.
I also tackled the first element of the TAK4 suspension. It is time consuming and you need to enlarge some positioning holes but the fit to the cabin is correct. .
The four suspension elements are ready. To help assemble the suspension triangles it is better to thin the bases E43 (parts with the hole for the triangles axes). Do not glue the lower triangle first as requested by ILK. Wait till all the sub-assemblies are ready to be glued.
The suspension has been dry fitted and the result is OK.
All has got a coat of black paint and will be glued to the cabin tomorrow.
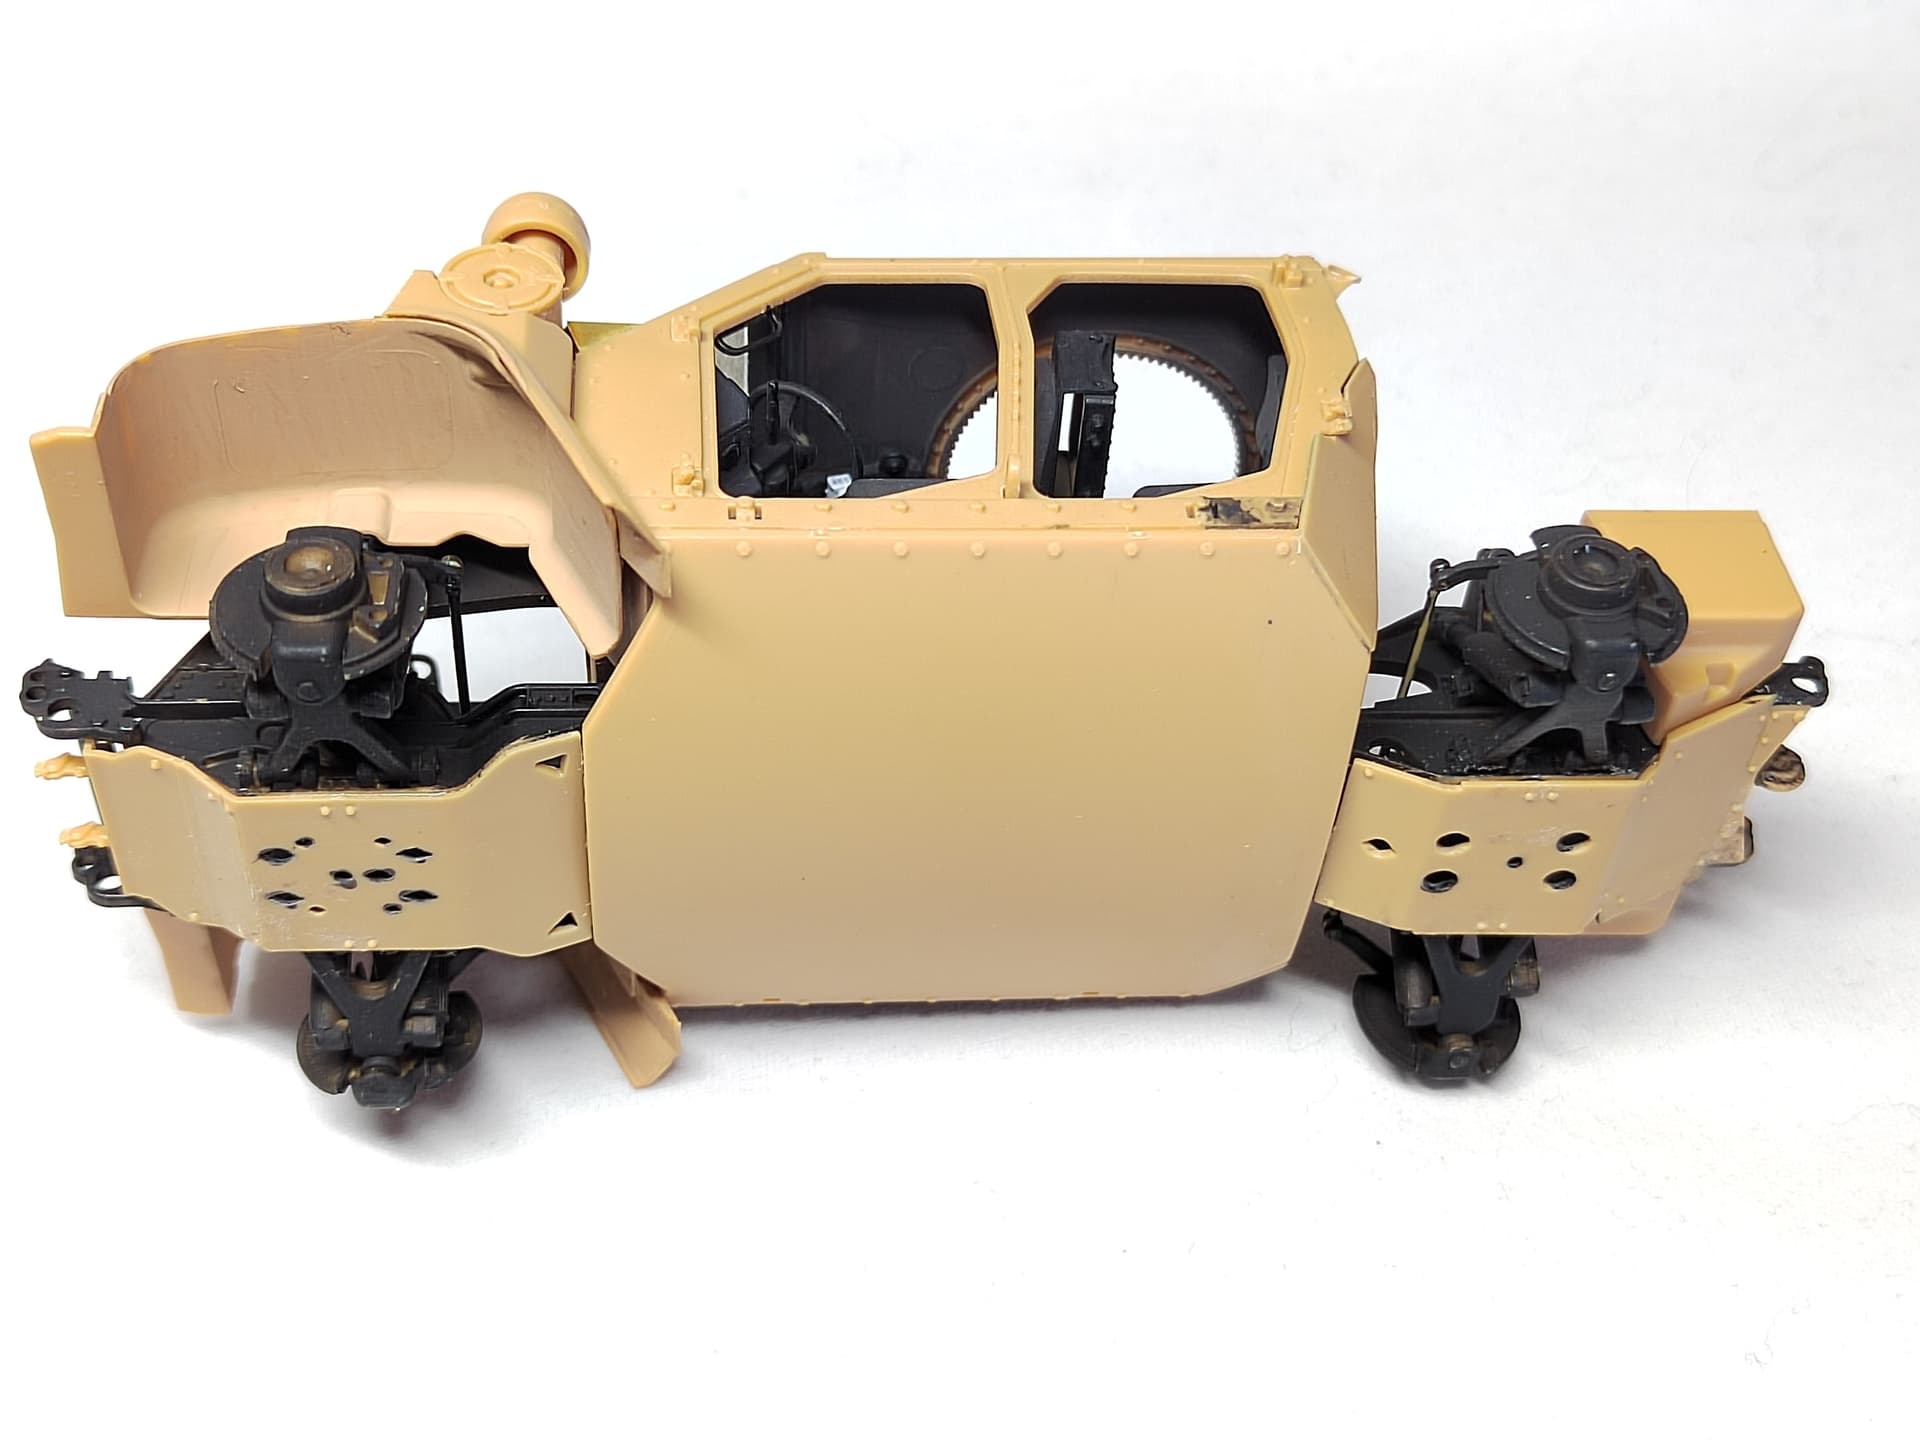
After the painting of the elements, the suspension is installed as well as the belly armor. No big issue. The belly armor was a bit tricky to fit. And the way the wheel arches are glued is not the best to guarantee their orientation is perfect. I checked with the hood to be sure of it.
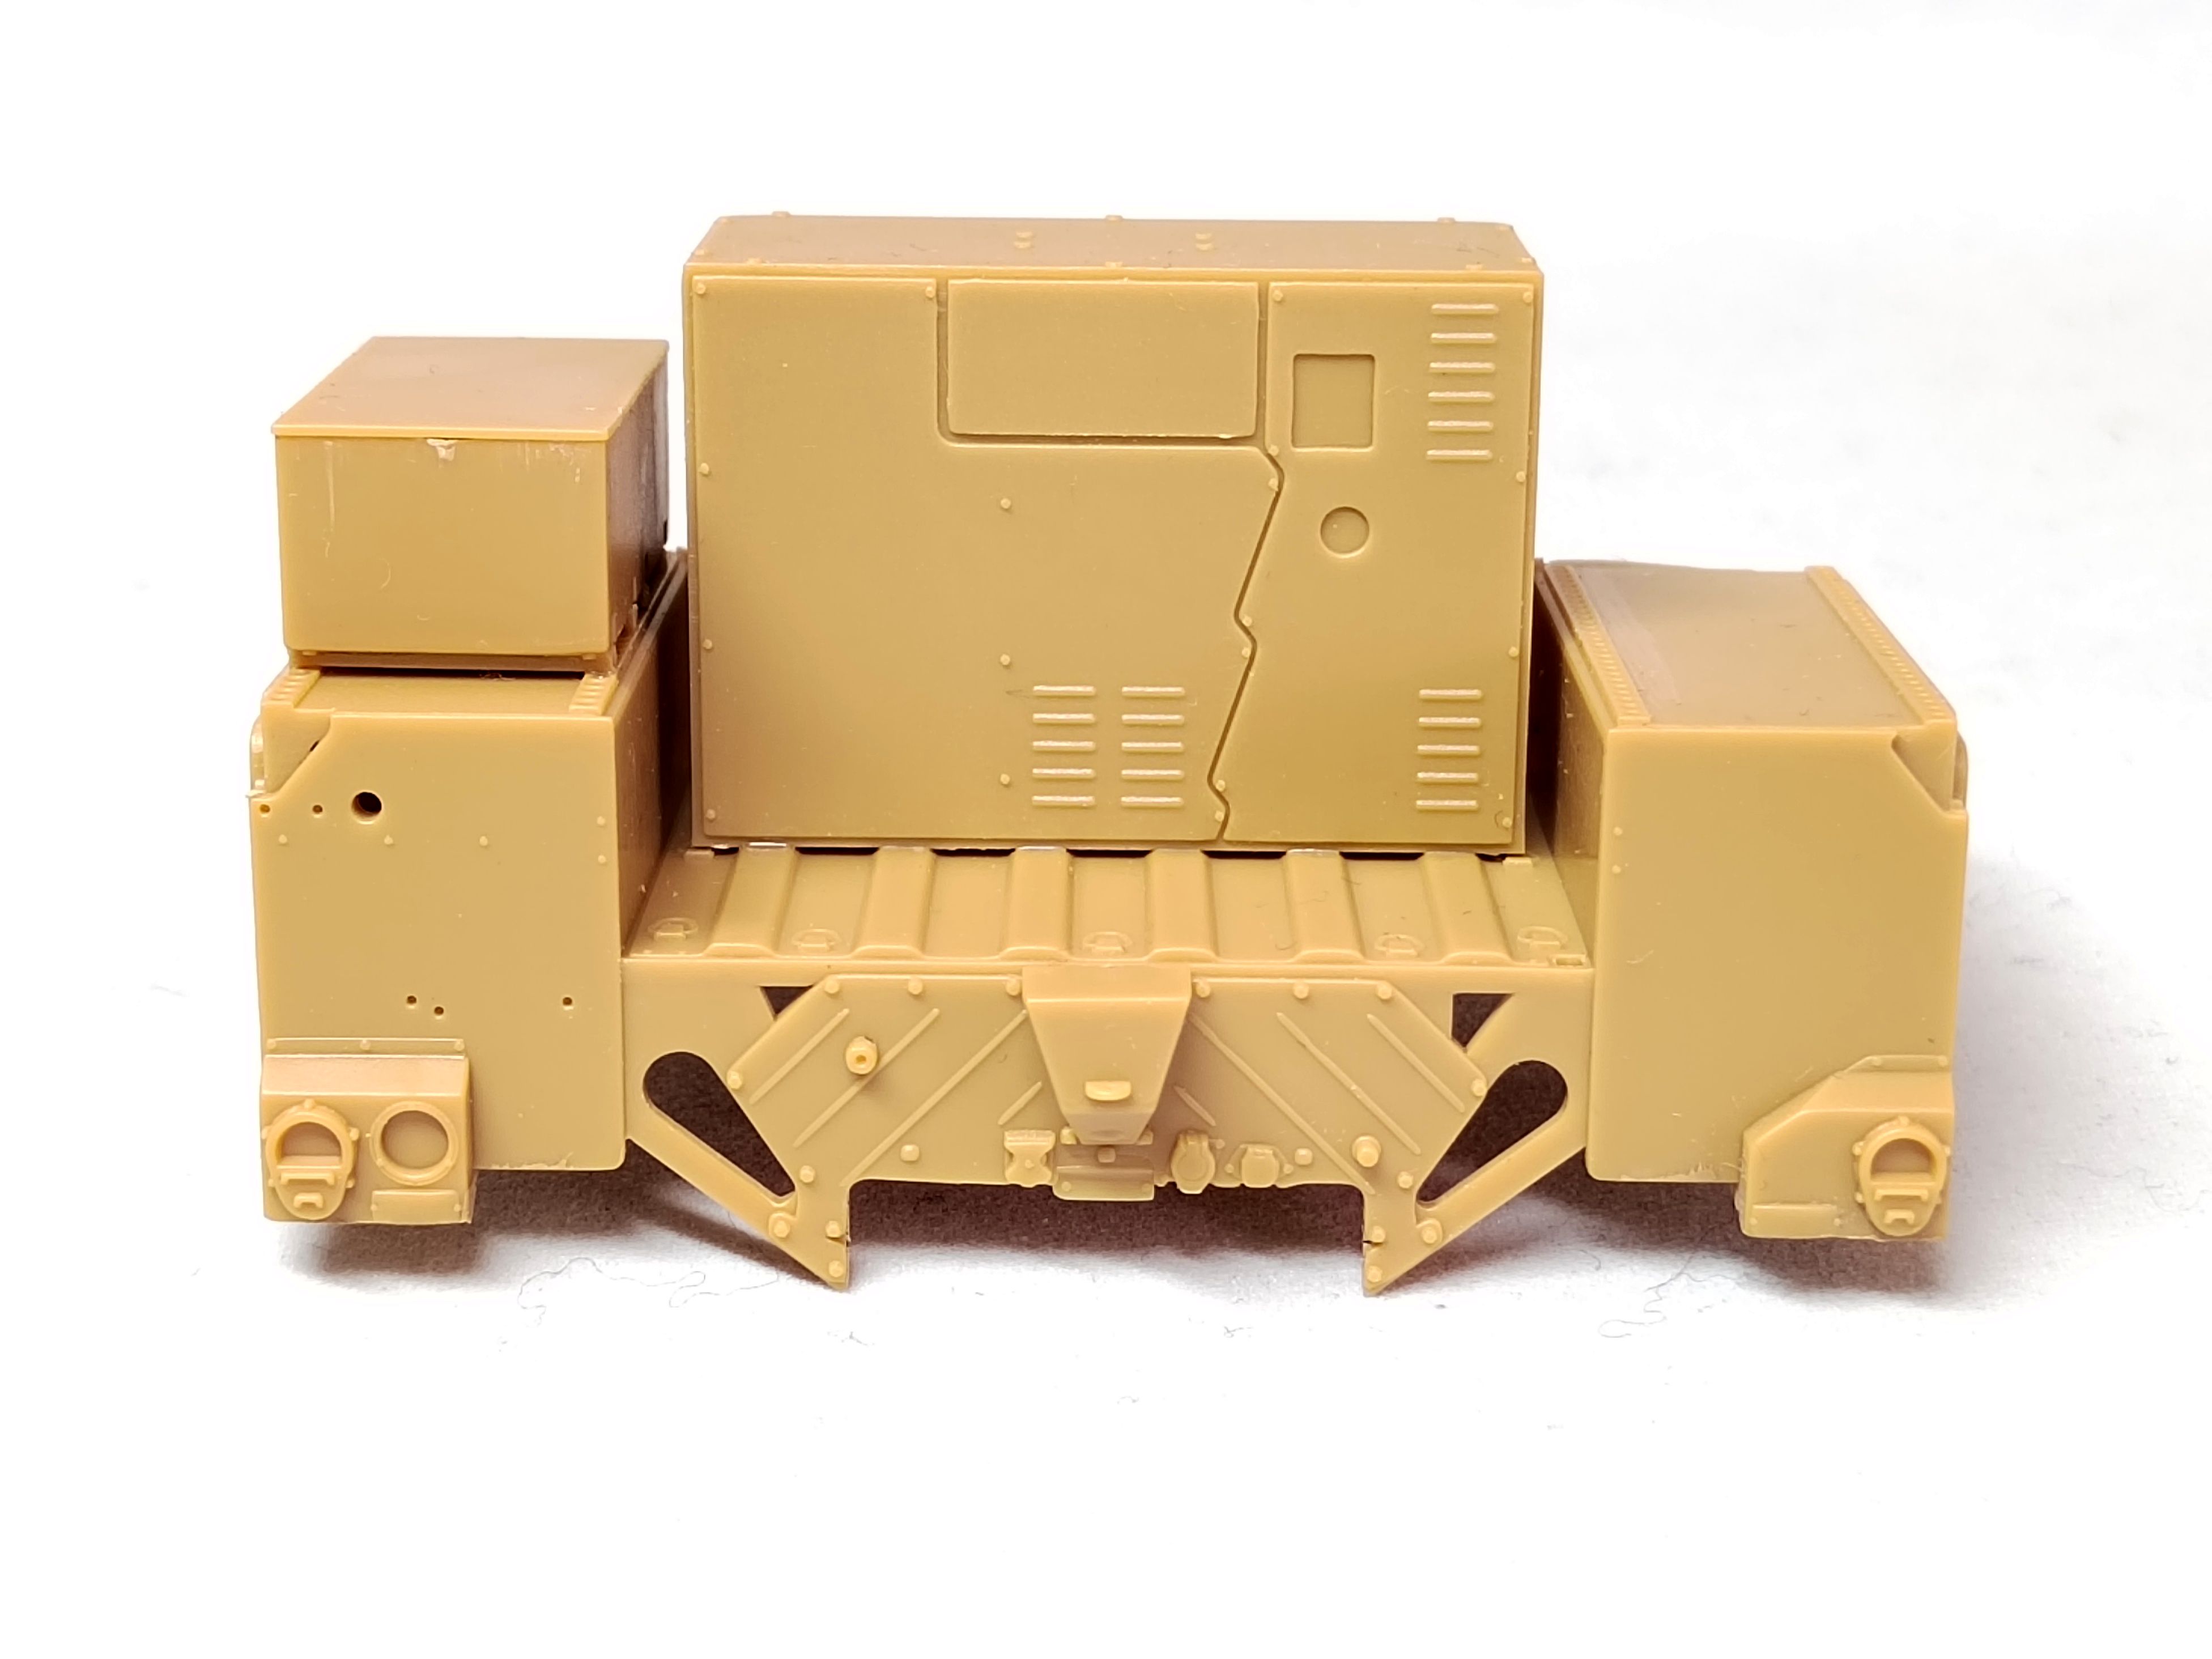
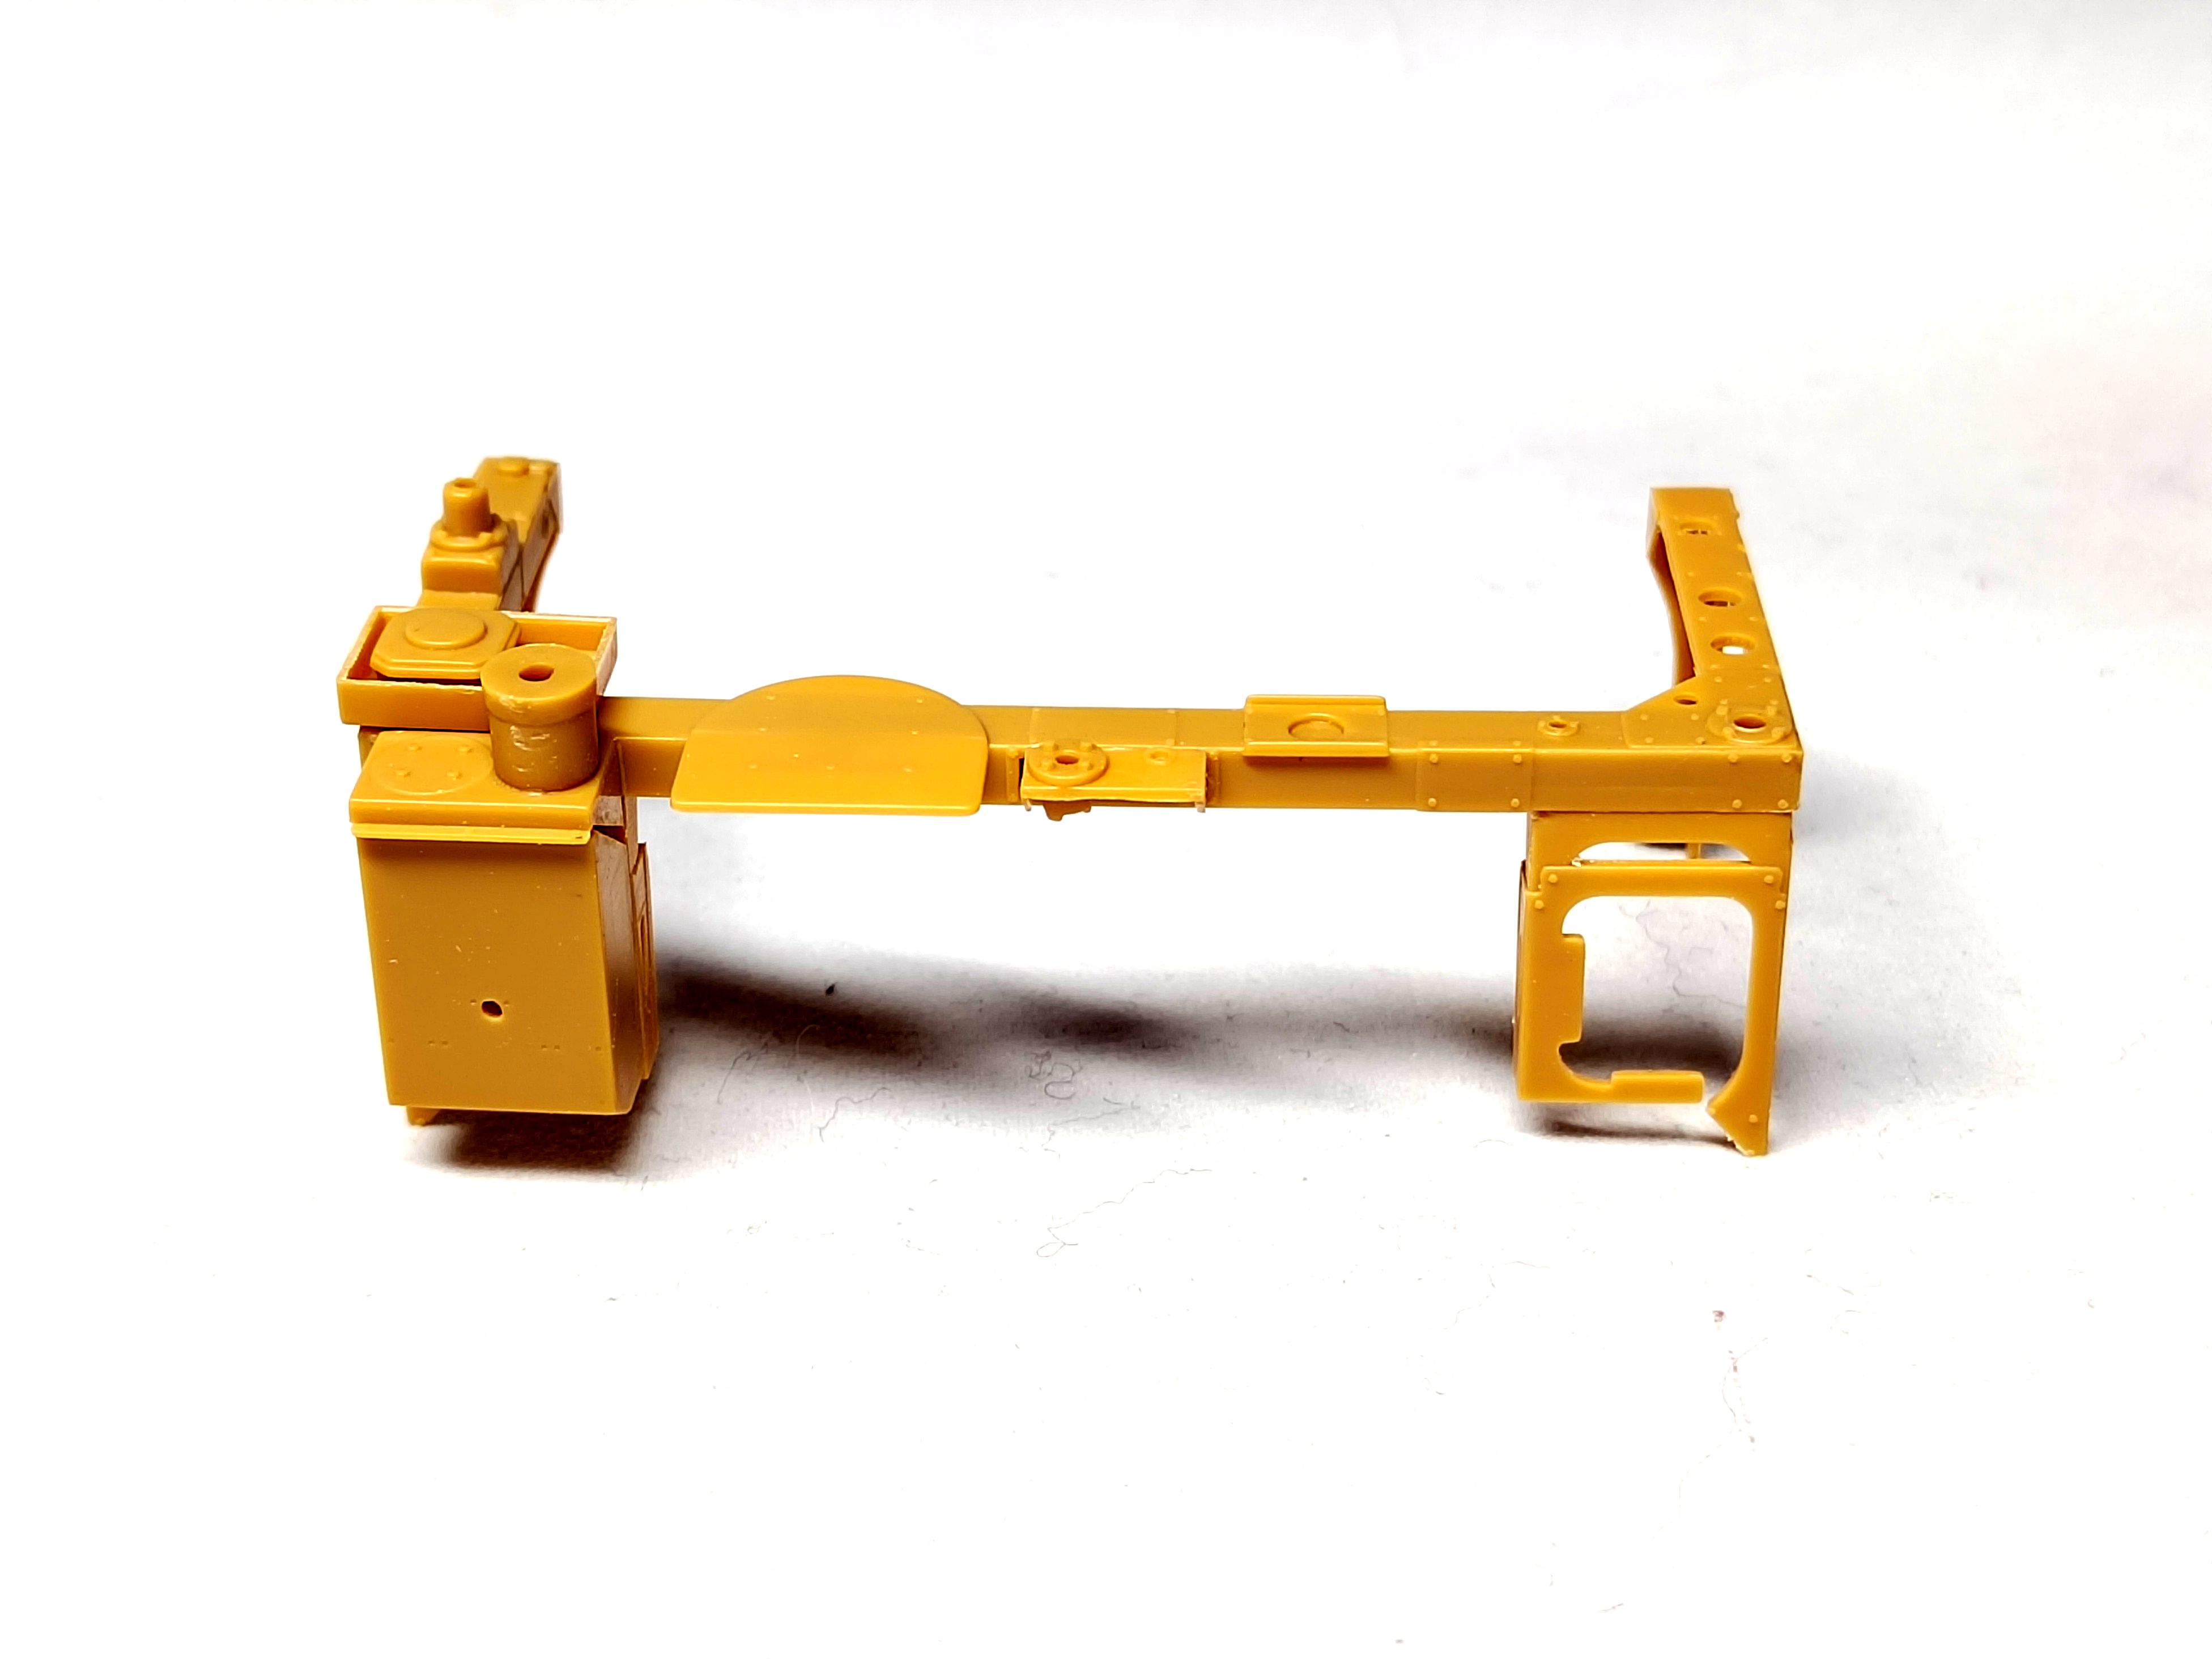
I’ve assembled and glued the cargo bed (?). The front part of the hood is solid because there is no engine behind. It has been painted black after the PE grille was glued. Then the central part with the Oshkosh logo has been added. The both elements were glued with no issue providing you follow the instructions.
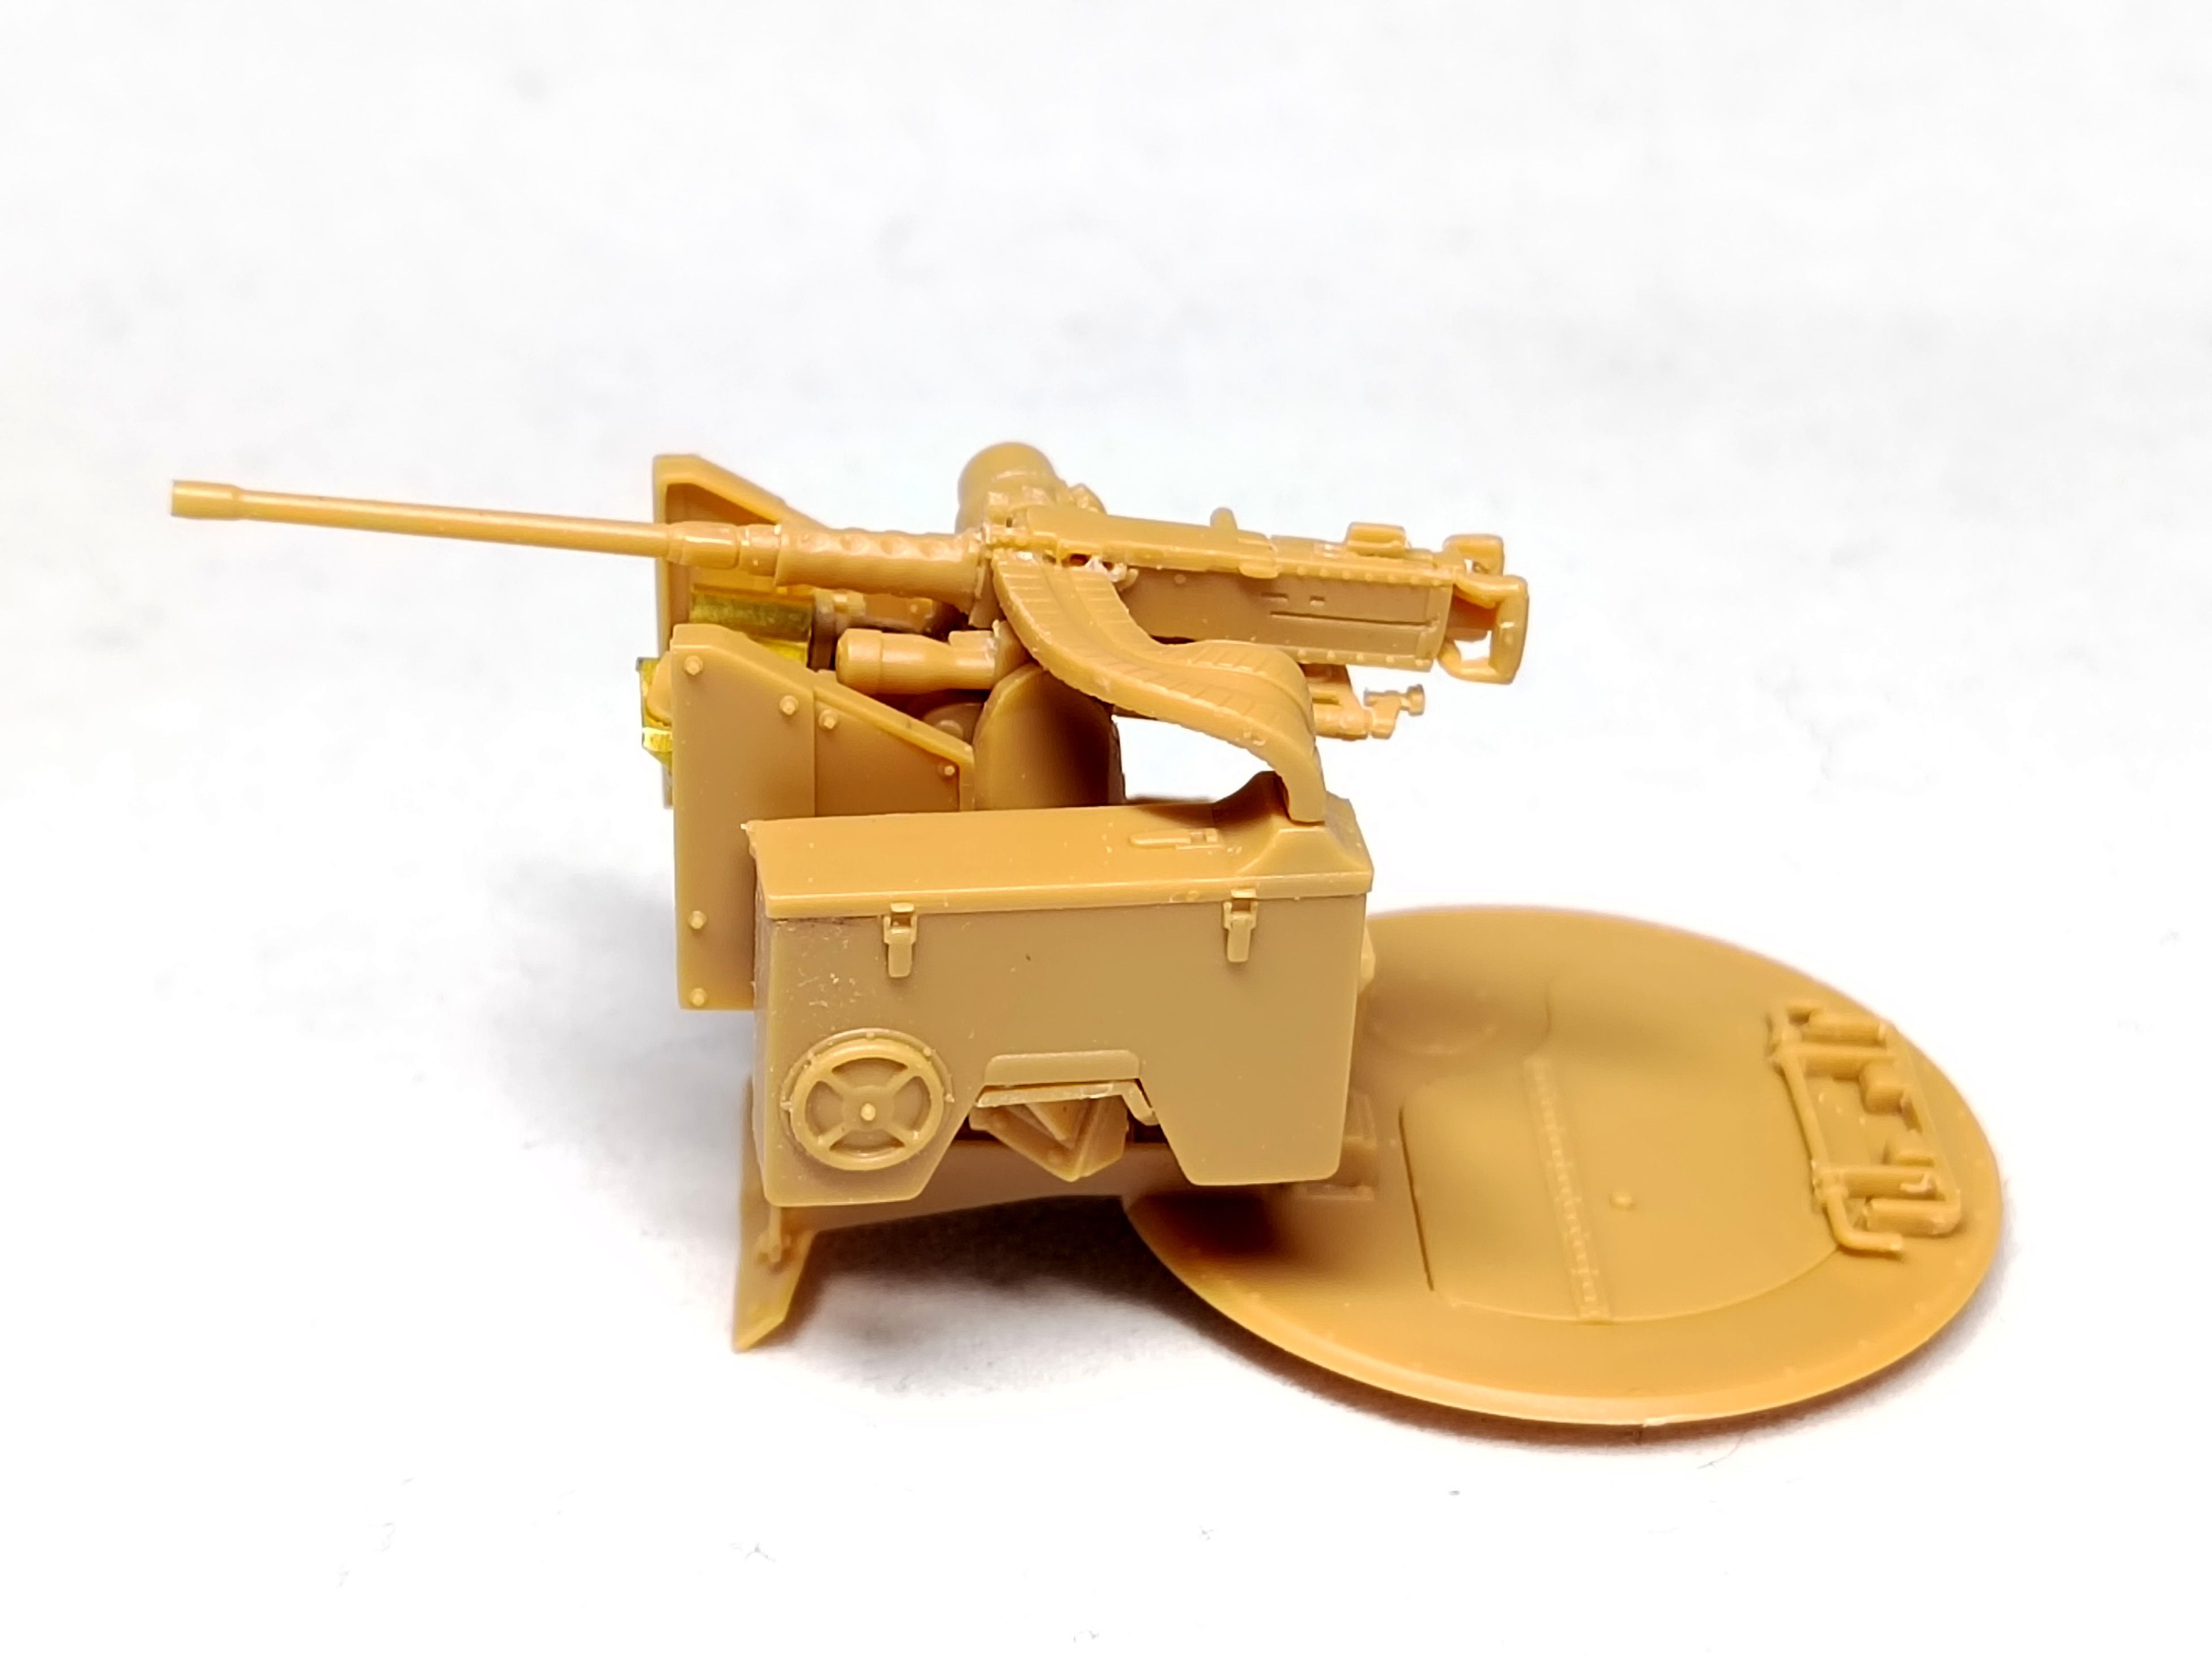
The next is step id the CROWS. To put it simple it’s a pig. All the parts need a thorough cleaning and dry fit before you use the glue. The PE parts must be shaped without any template and there is no positioning marks. The MG is terrific and the barrel made an angle with the body.
To be sure the feed chute will fit the MG I let the MG mobile in elevation. It is not glued yet.
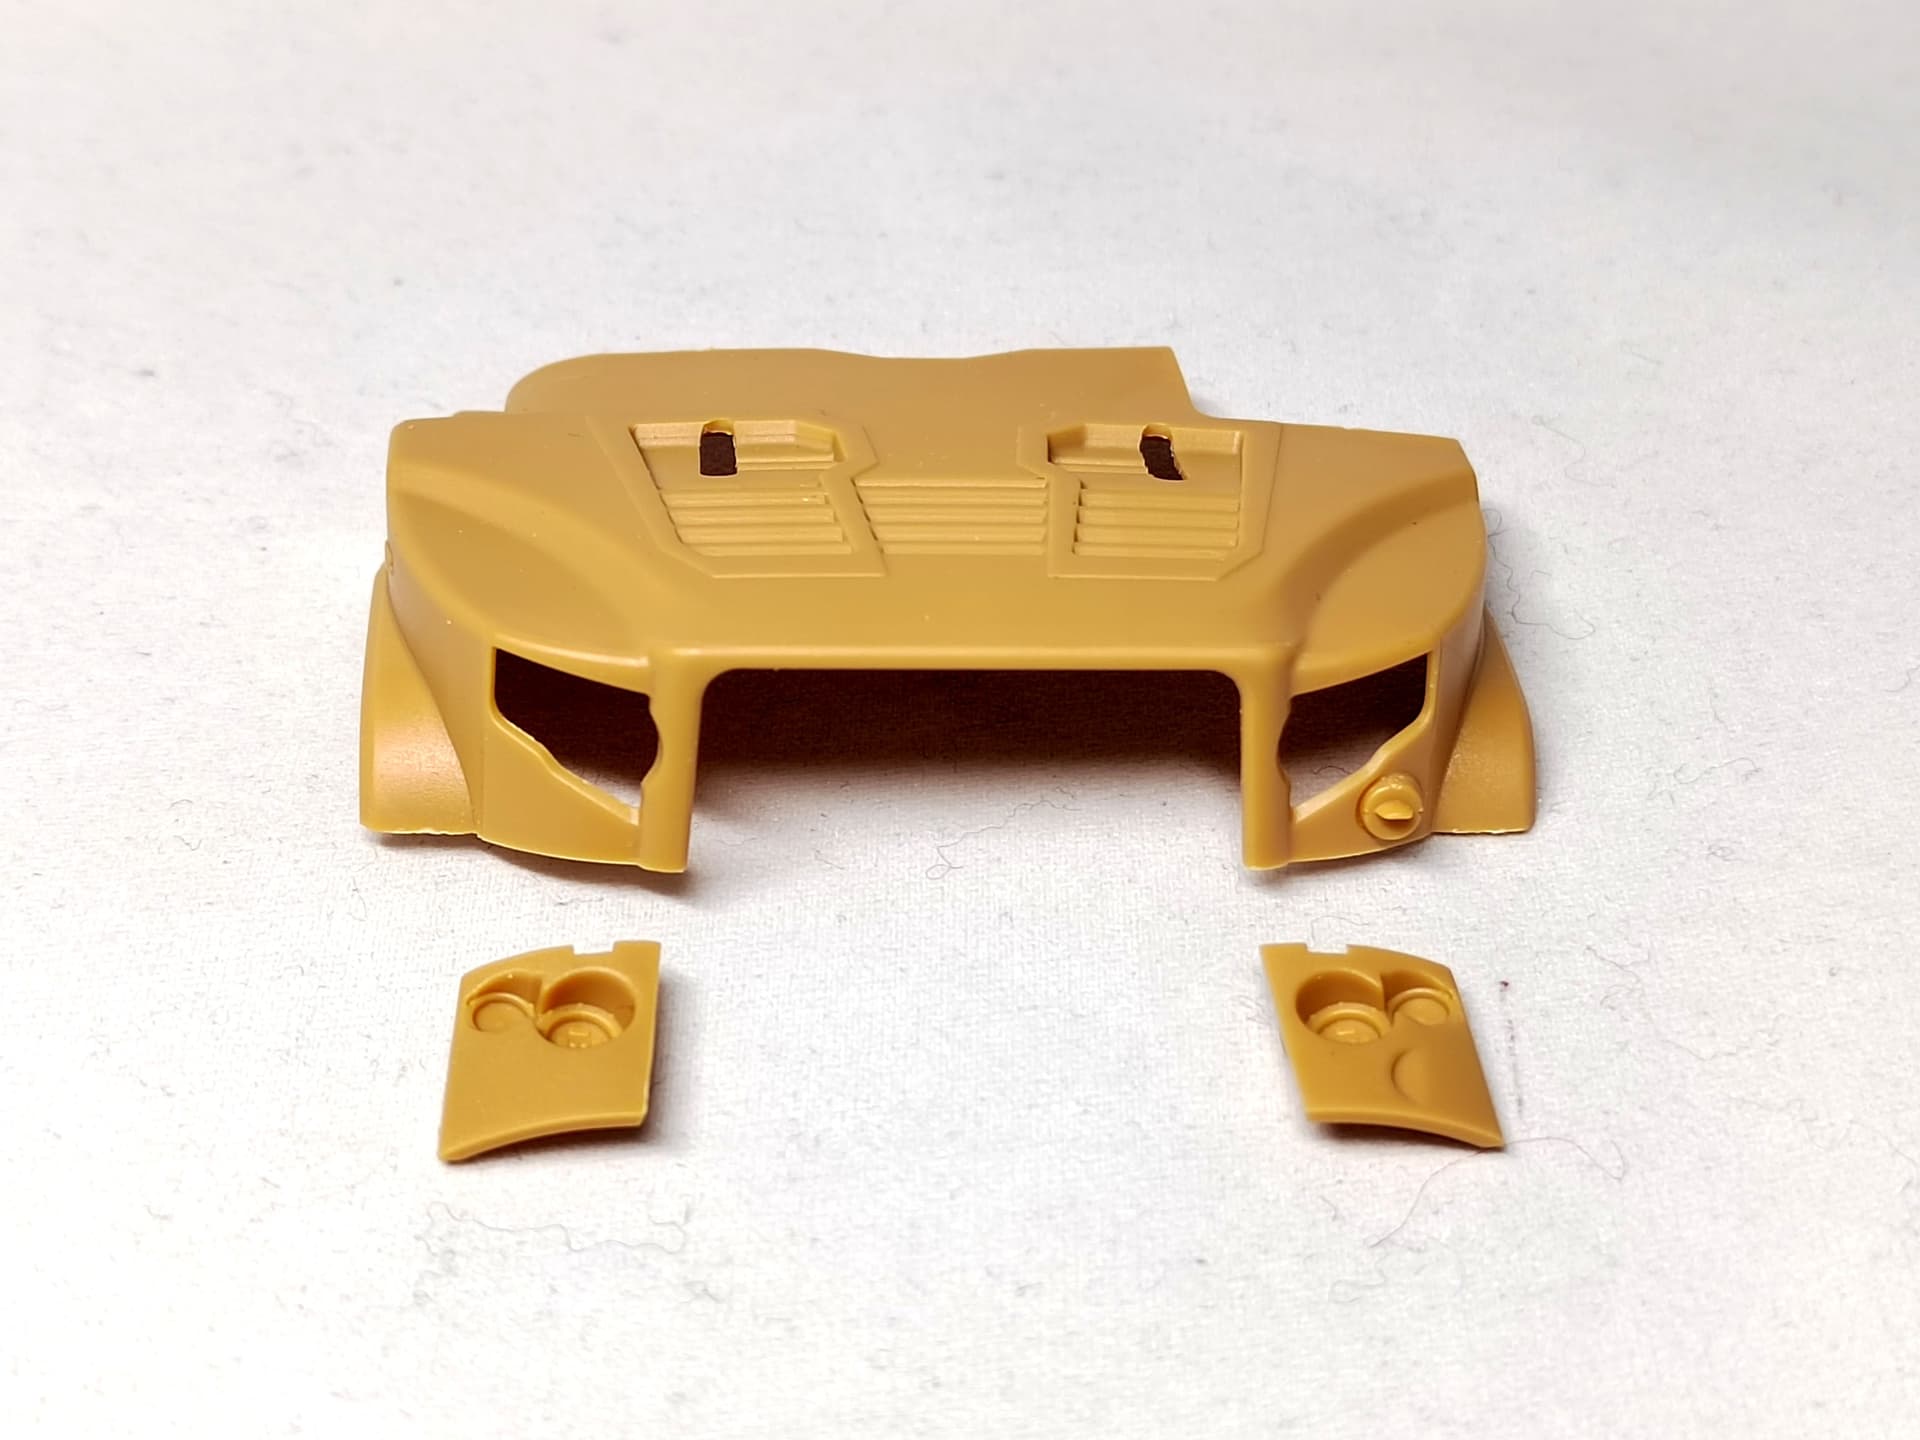
Tomorrow I’ll try to tackle the hood. ILK have you insert the headlights from inside. Not a bad idea as the fit is perfect. However I’ll paint the hood and the headlights housings beforehand. The latter are black.
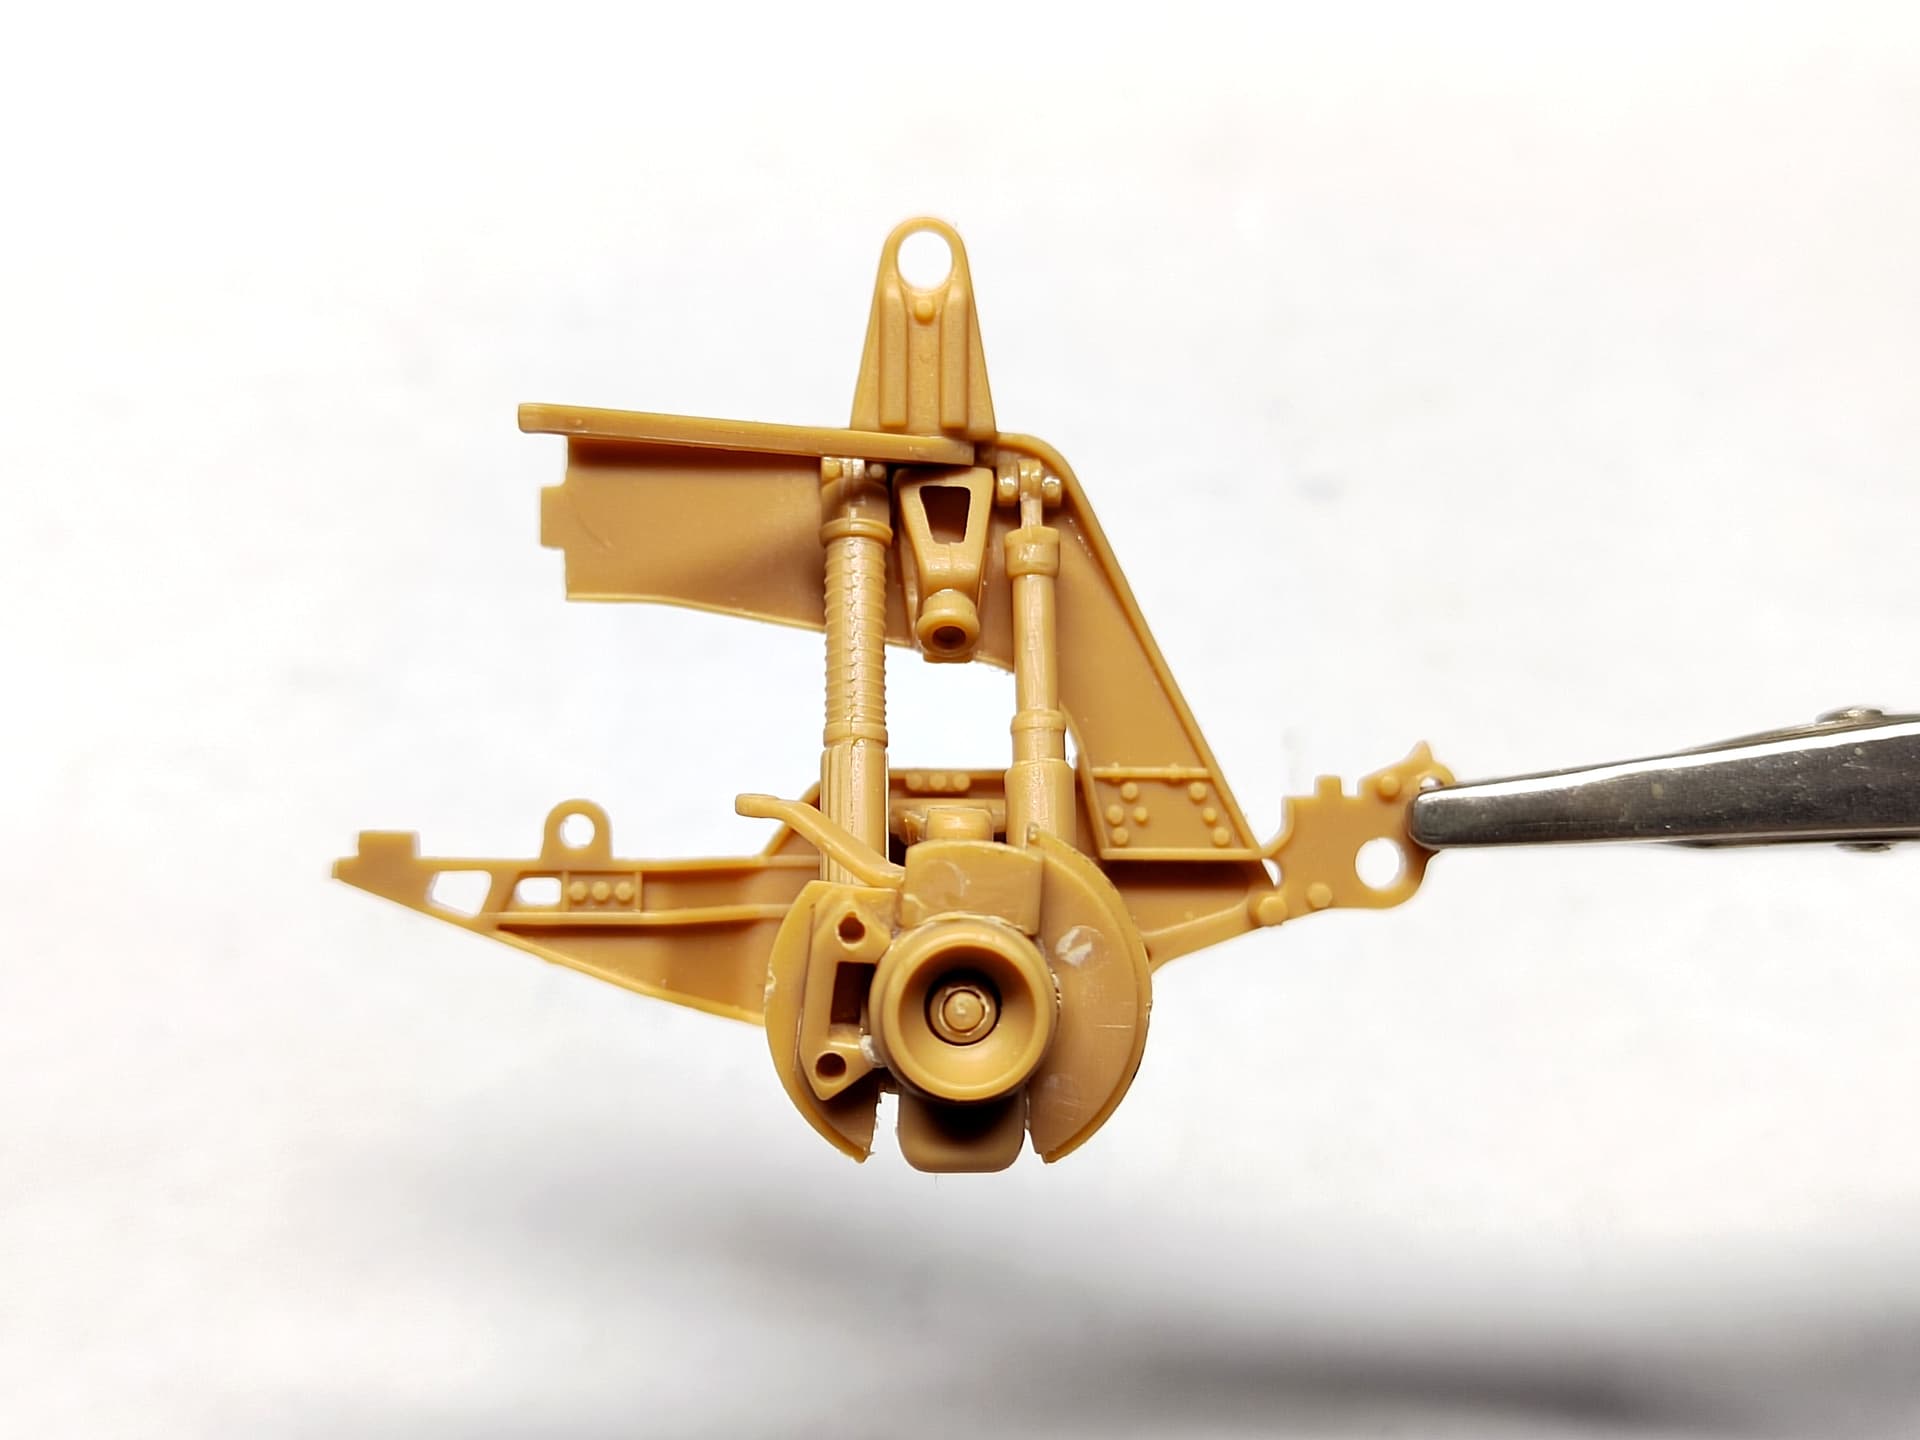
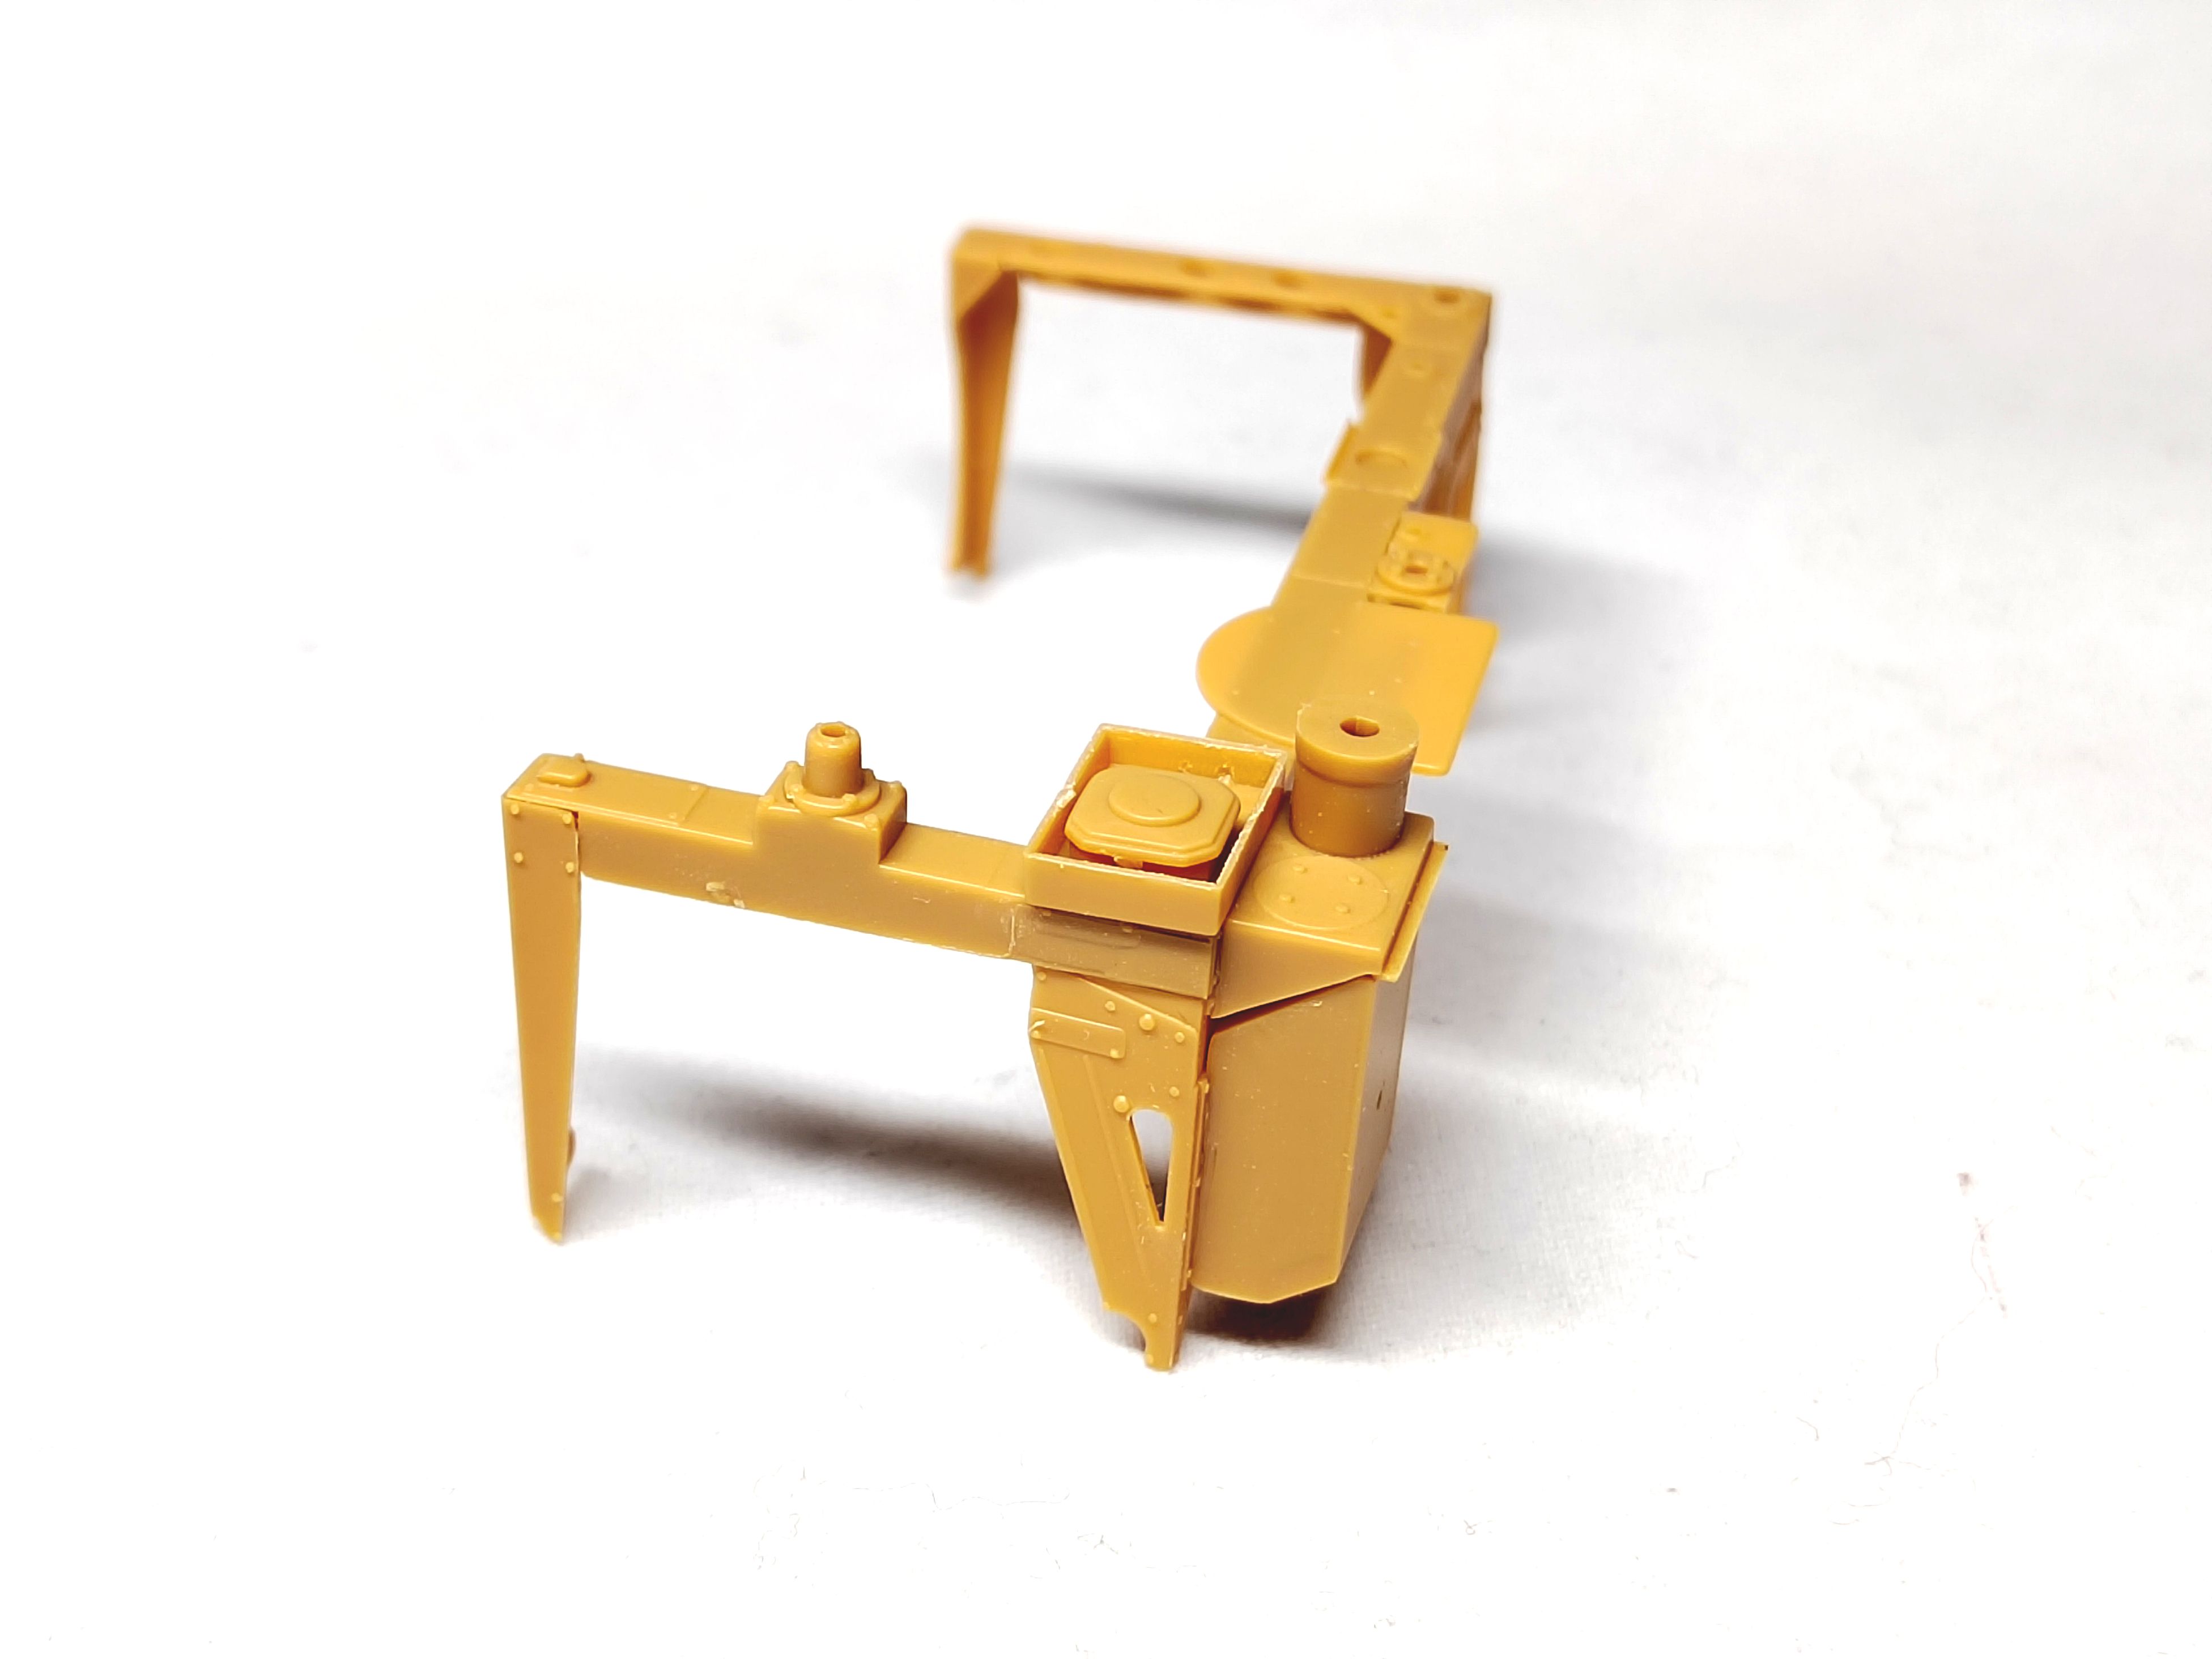
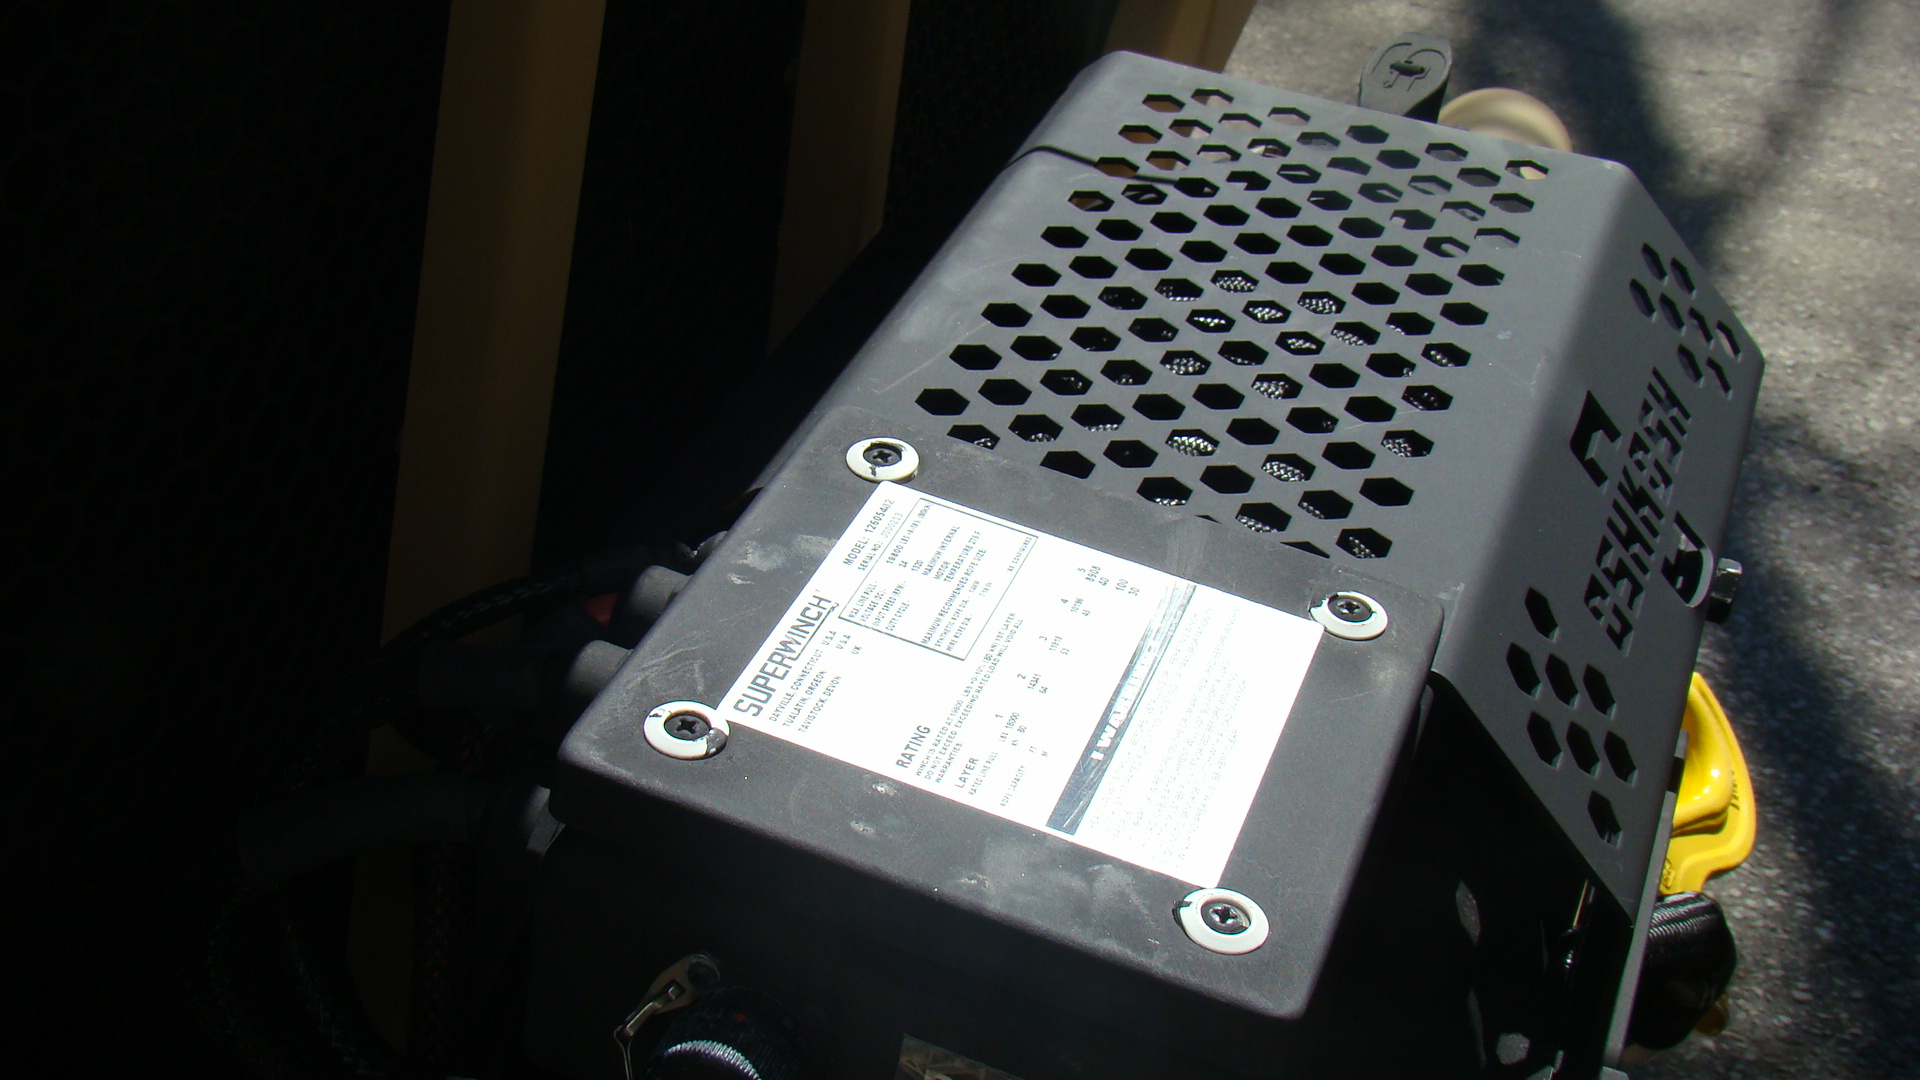
The front winch is assembled and dry fitted. There are 2 issues with it. First one of the OshKosh logos on the PE protection is reversed so you have to be cautious when you glue the part. Then the axis of the part in blue circle are too long so you can’t attach the winch to the vehicle chassis. You need to cut them both.
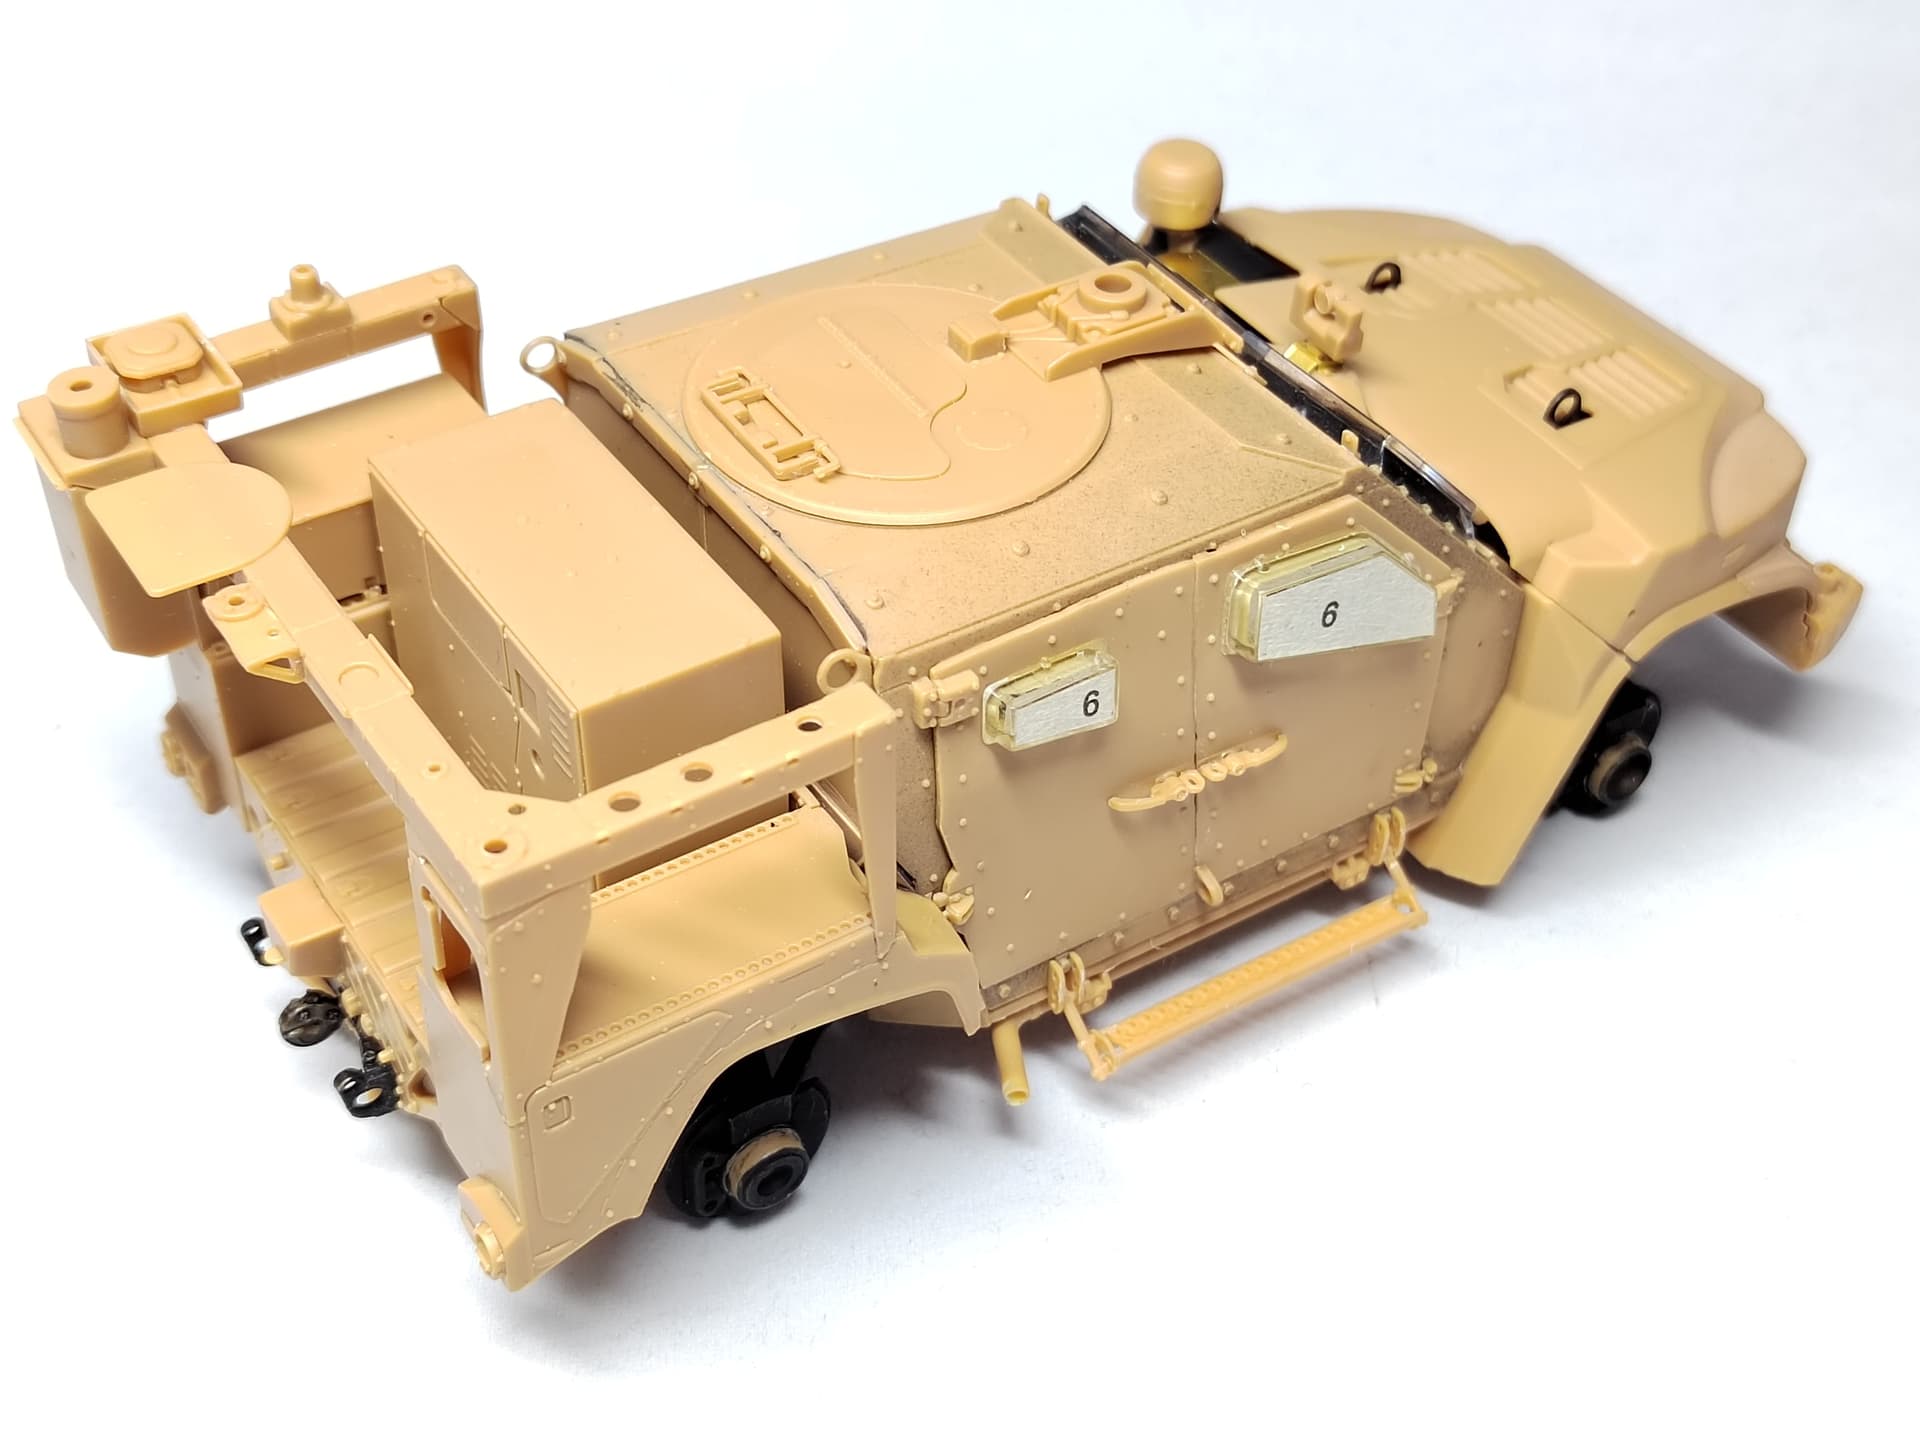
The rear frame has been glued as well as the hood. One foot-step is in place with the tiny chains which are a nightmare to attach. The foot-step assembly is “freely” glued. Nothing is designed to have all the parts set at the right angle. Moreover the PE chain is so thin that it is easily damaged when you try to glue it. The first side is not really nice. I’ll try to do better for the second one.
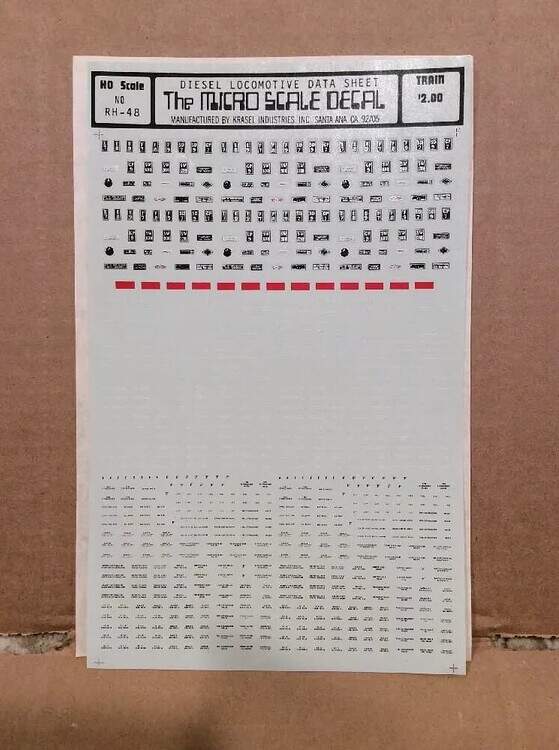
That square is there. It’s raised on the kit, but with the angle of my photo it looks level with the shield. They got that right, but did not supply a decal. I use locomotive data plates for things like that. The missing holes on top - I might replace that section with some perforated PE.
They also misspelled “EXHAUST’ on the decal. Minor matter of cutting up the decal.
What scale of decal do you use or recommend to pair with 1/35 as I get deeper into detailing now it would be nice to have a new source for extra detail decals like you mentioned.
I use a generic HO scale Locomotive data sheet that has a lot of useful decals, from data plates to red warning placards. They also have quite few tiny stencils that are useful in so many places like oil filters on engines and notices on dashboards - all things that you’d need a magnifying glass to actually read. And if they’re in the cabin of a vehicle there’s no way to read them, but they give a visual richness to just about any project you can think of.