International Paystar 6x6 1/25

I haven’t started this truck, as none of the required parts have arrived yet, but once they do, I’ll get after it. The idea is to make one of these:

The stunning International 5000 Paystar 6x6. I ordered the dump truck version of this kit, in order to make something like this:

Ahhh…it’s a lot easier to “build a model” manipulating pictures, than it is to manipulate styrene! I added a bed to the photo of the truck with a bare chassis et voila!

And this drill rig will eventually be tied down on the bed:

For what were clearly incorrect assumptions, I thought I could just build this, while waiting for the truck parts to arrive. Not exactly a just, in fact it has turned out to be an interesting and challenging build! It’s a real junk box special with 1/32 tires, several remnant 1/35 parts, a 1/25 seat and steering wheel, and plenty of evergreen.

As for the Paystar, as parts arrive I’ll eventually make up a front axle, transfer case, likely a bed winch, and front suspension - but as I don’t have the kit yet, don’t know what else will be needed.

Anyway, on we go - thanks for having a look

Cheers
Nick

13 Likes

Thanks for providing excellent entertainment :+1:
:smile:

3 Likes

Damn interesting, and well on the way, all considered.

Thanks for sharing.:clap:t3:

1 Like

As someone that has spent alot of time behind a drill rig, I am impressed you are building a kit of one. No worry about the tires as they all had different sizes, some more for offroad. So I am curious what kit(s) you are using to build the drill rig. I couldn’t make out in your notes if you are kit bashing. Finally is the drill rig for Geotechnical, Environmental, or someone wants a water supple well in their back yard! As a Geologist I concentrated on only one of the three.

1 Like

Well guys, thanks for dropping in, and having some fun with me on this project -

@Panzer948 - ah ha! someone who actually knows how to use one of these!

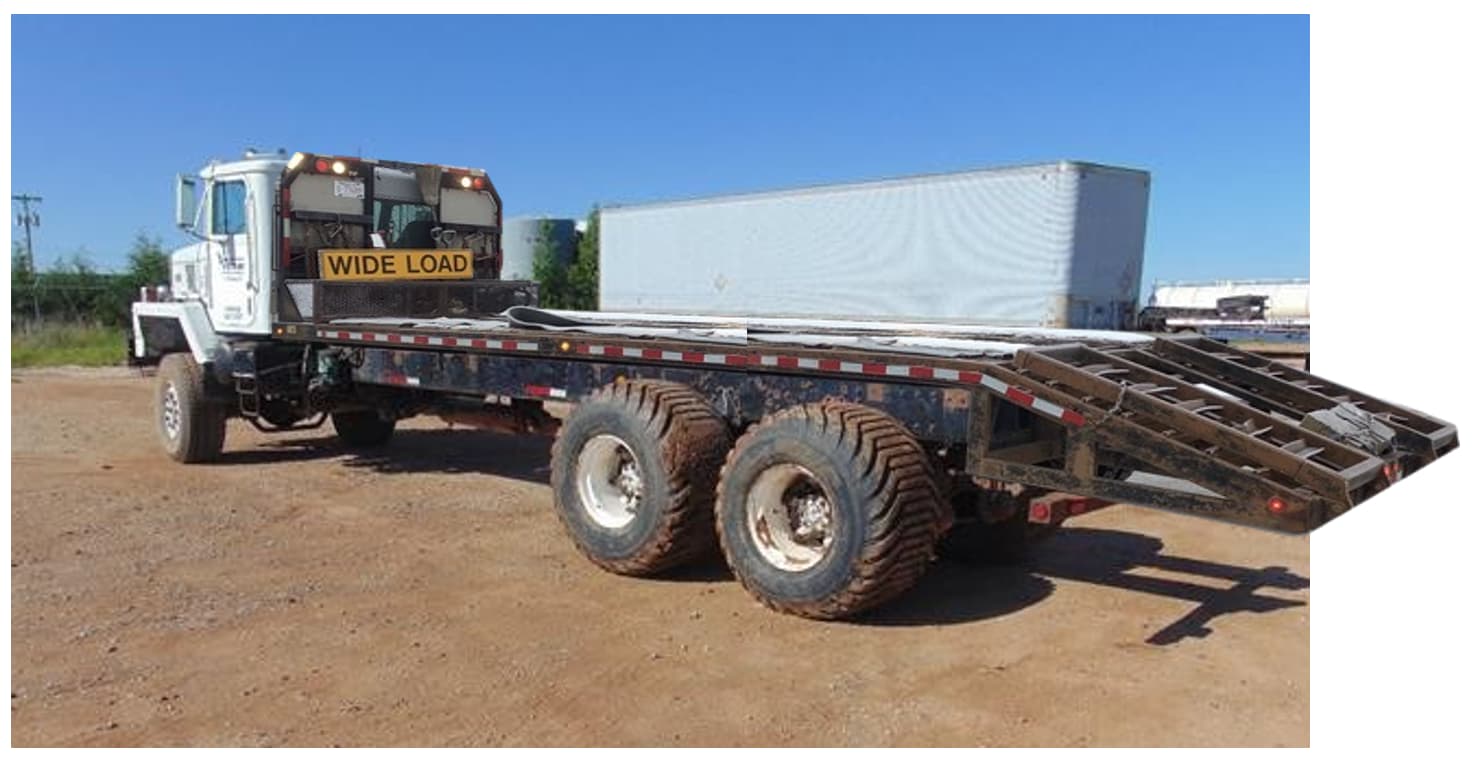
I have seen them on job sites, and being carried on trucks or trailers, and thought it was unique and complex enough (as opposed to a load of lumber, other materials or whatever else) to add to the character of the truck.

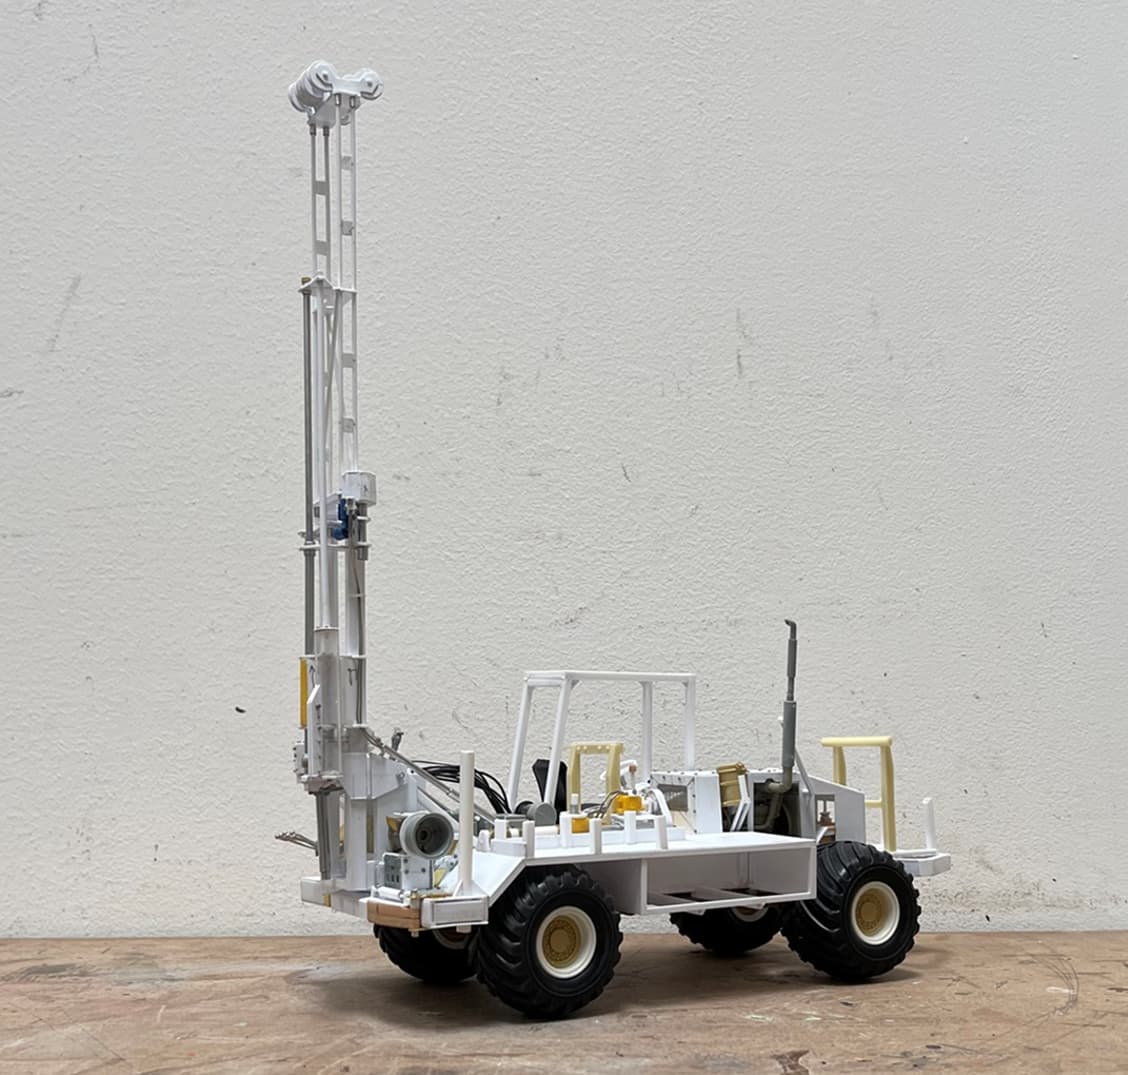
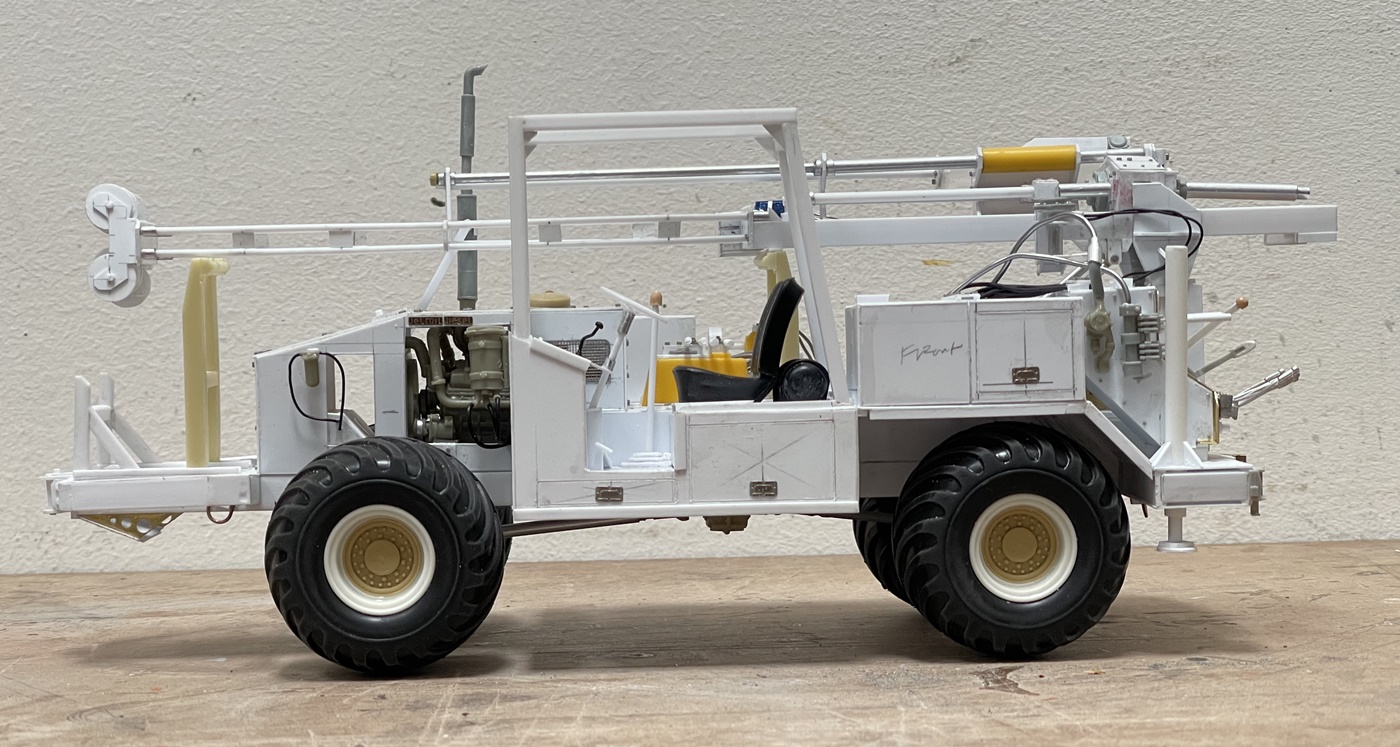
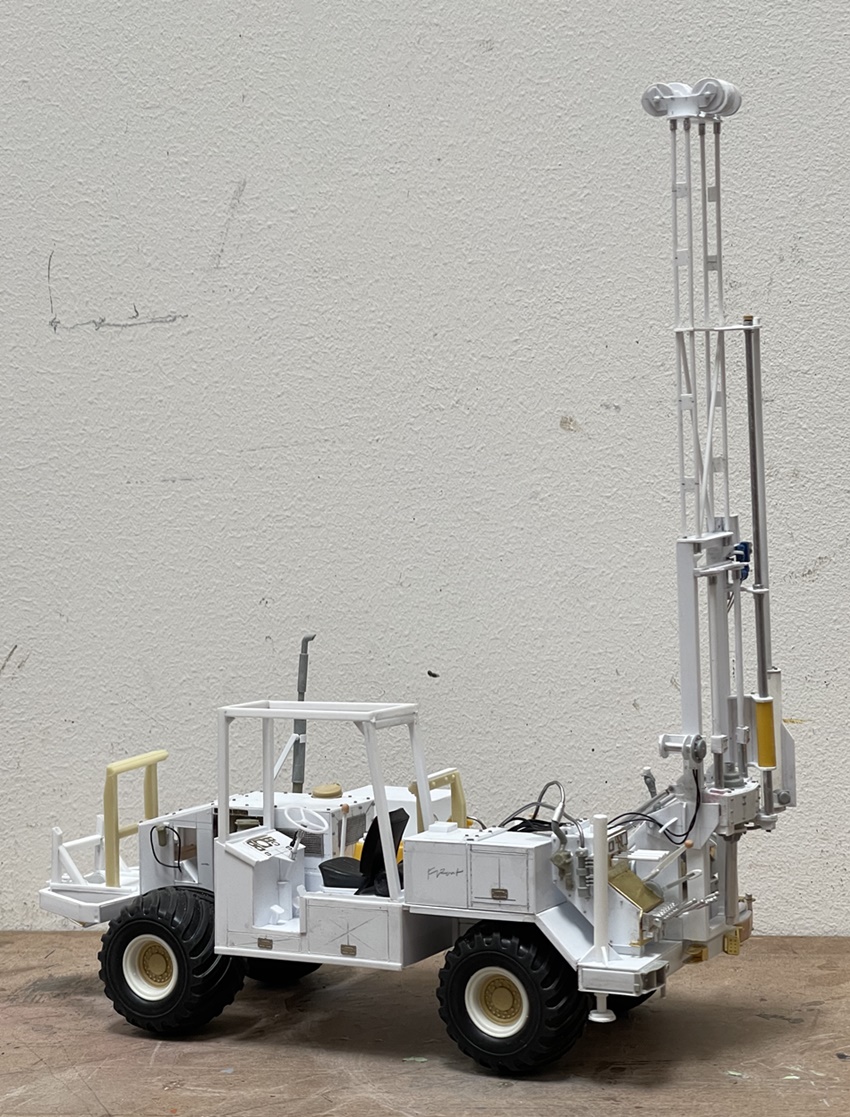
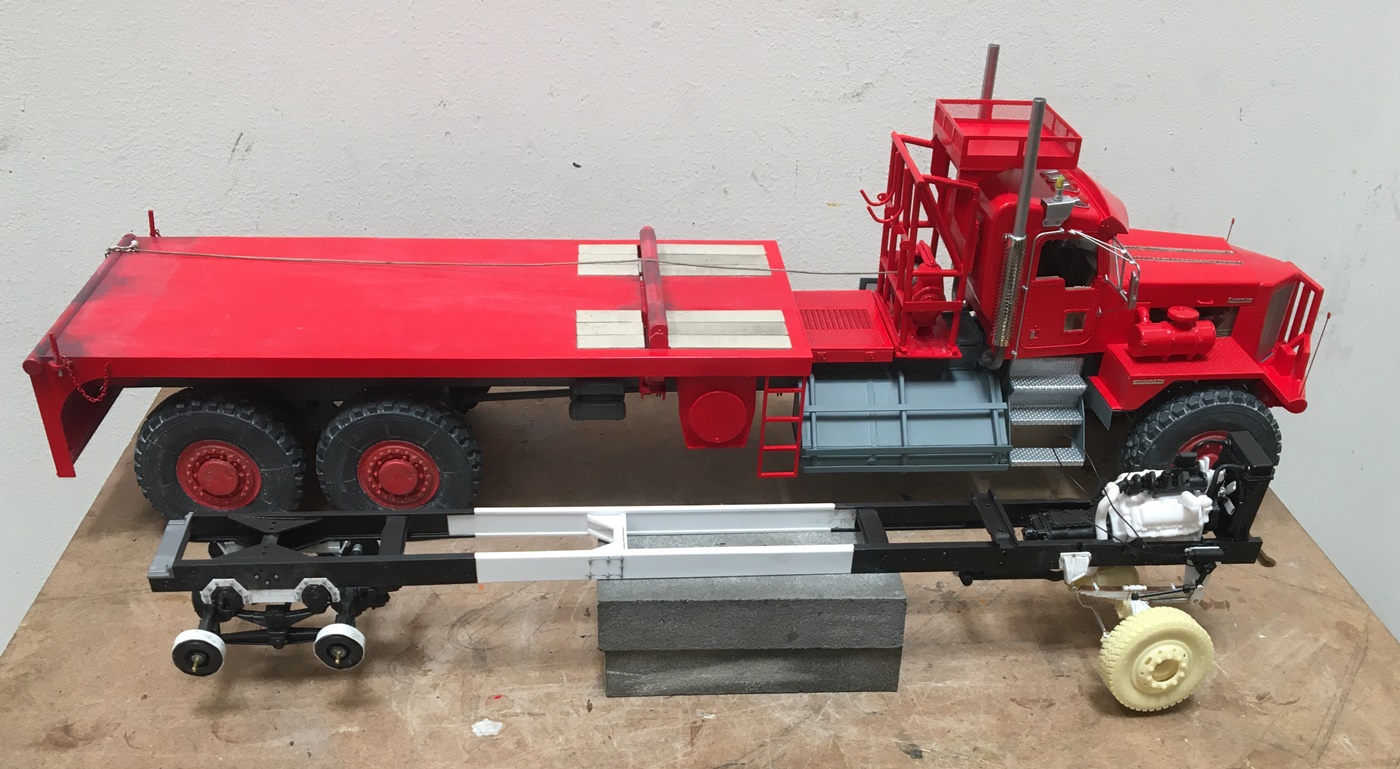
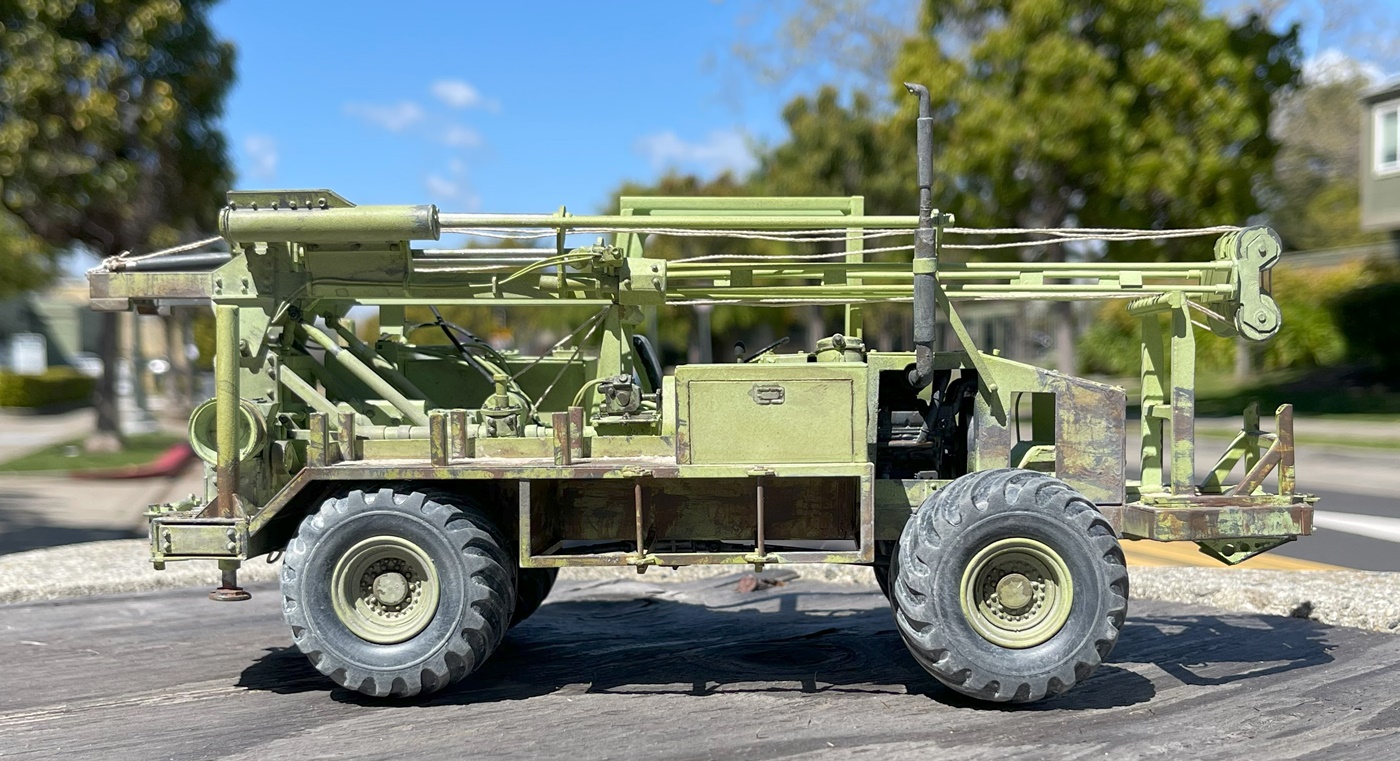
As I mentioned above, this was not supposed to be (in my mind) all that elaborate of a build, as it will, or was intended to be ancillary to the truck - alas, that was an incorrect supposition! This has been a lot of work and a pretty challenging build. I can say with clarity that it is a reasonably close representation of the real thing, but nowhere near a replica. The goal was/is to make something that looks like a drill rig, rather than making a direct copy of a drill rig - the eyecrometer has been used extensively! :smile:

With the aggressive tire tread pattern, I am assuming used for exploratory drilling in rough conditions, so I suppose Geotechnic, rather than use in generally developed areas?

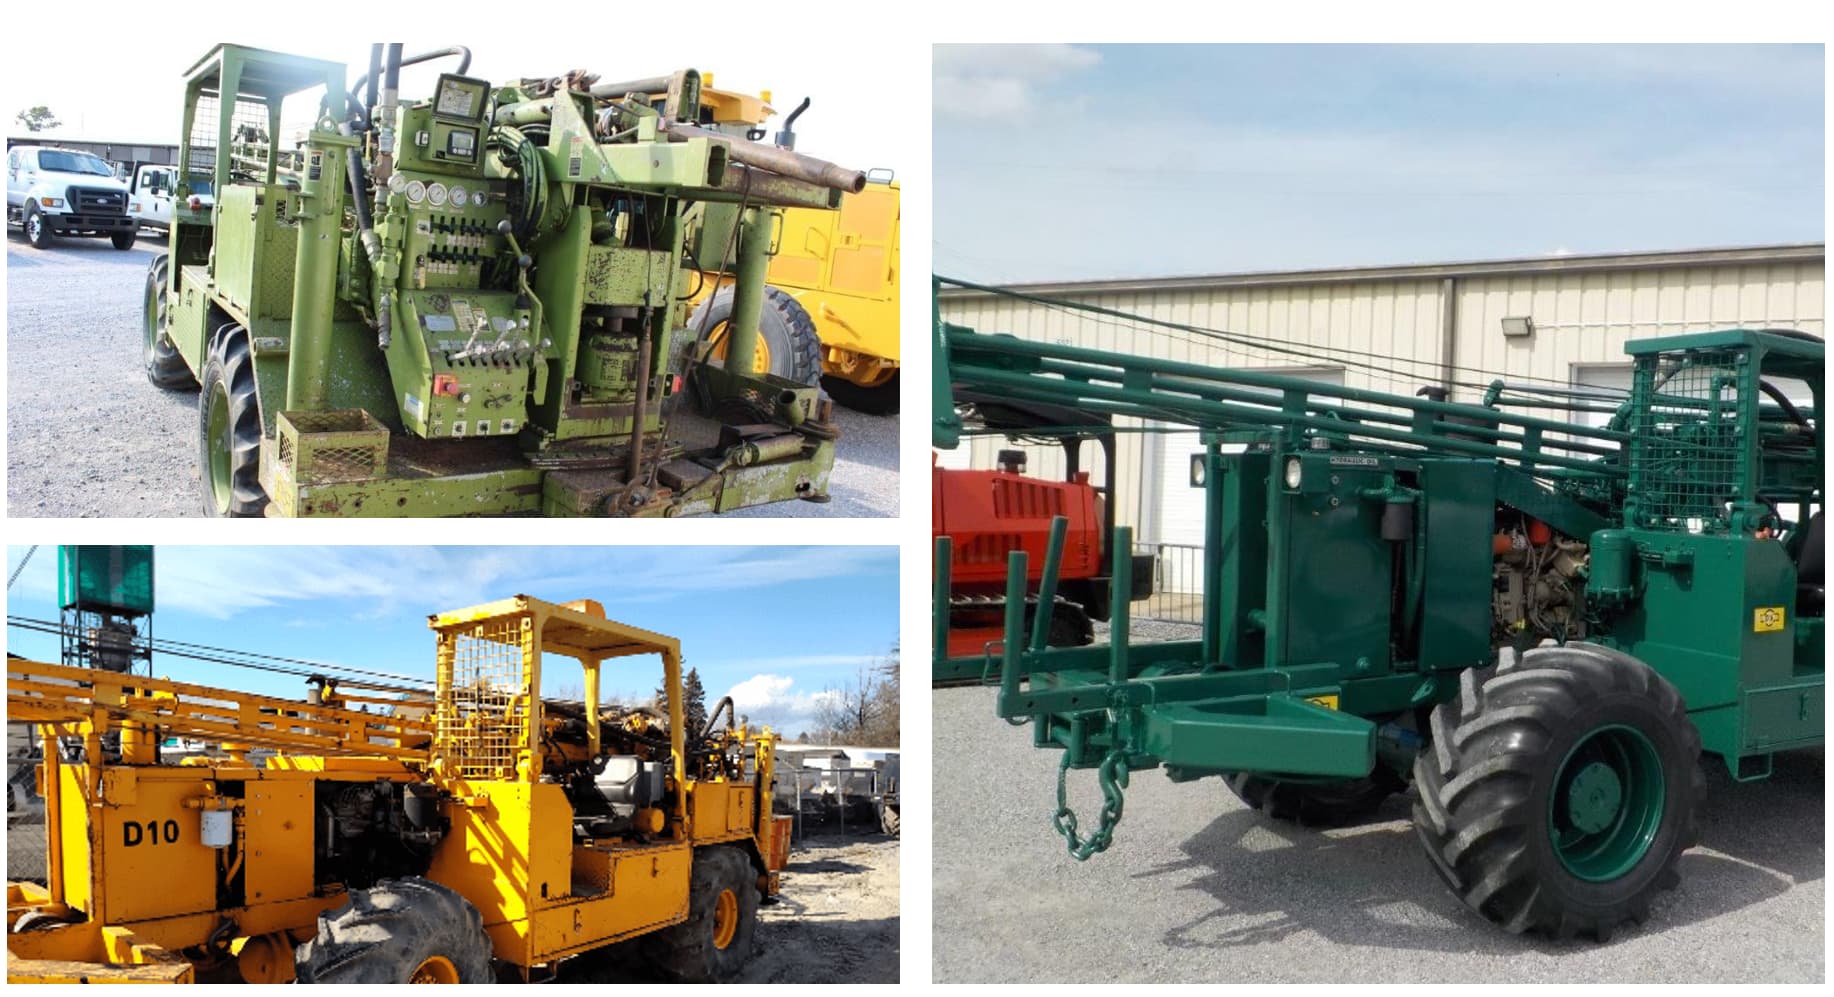
I did not use a kit, and this is largely scratch built. I looked at several auction site images as references, so this is not based on plans or a particular vehicle, and instead what I could interpret from several, such as these:

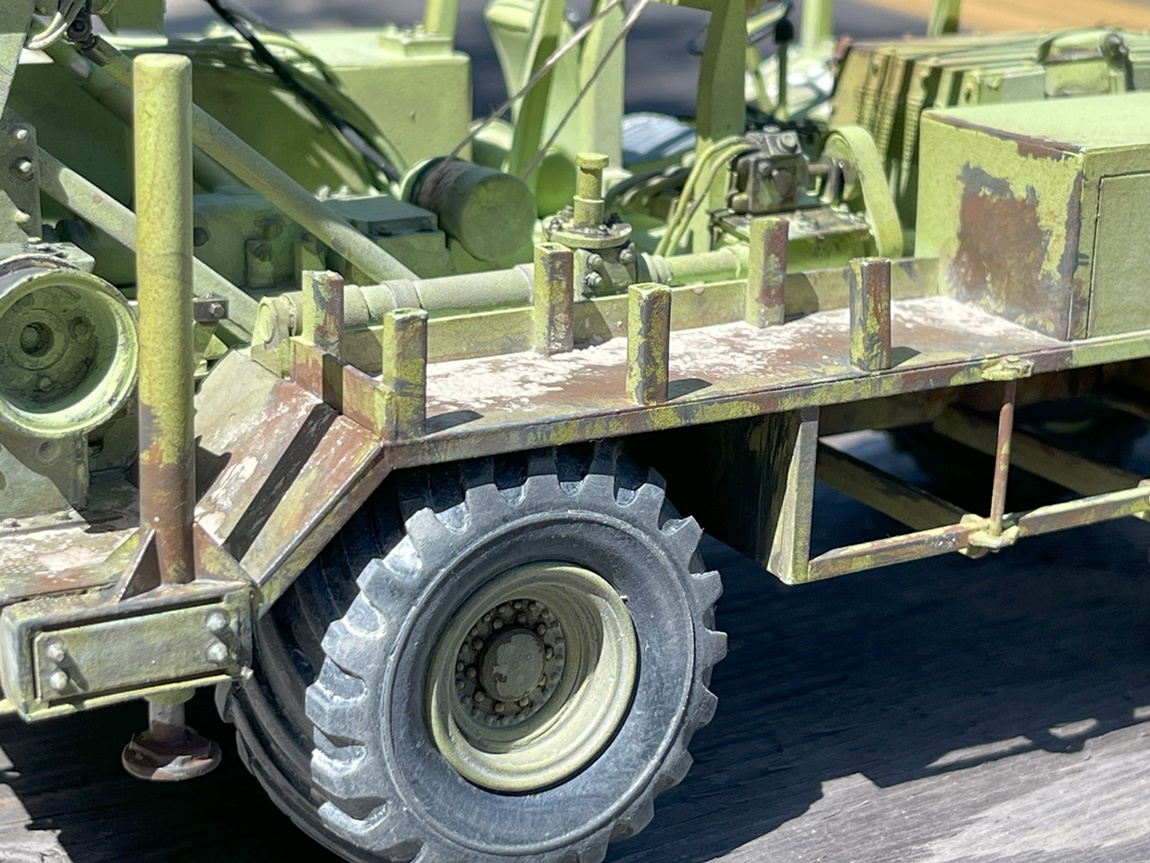
These examples are what inspired the use of the tires I selected. Fortunately, I have a few sets of these tires collecting dust, so decided this would be the perfect use for one set!

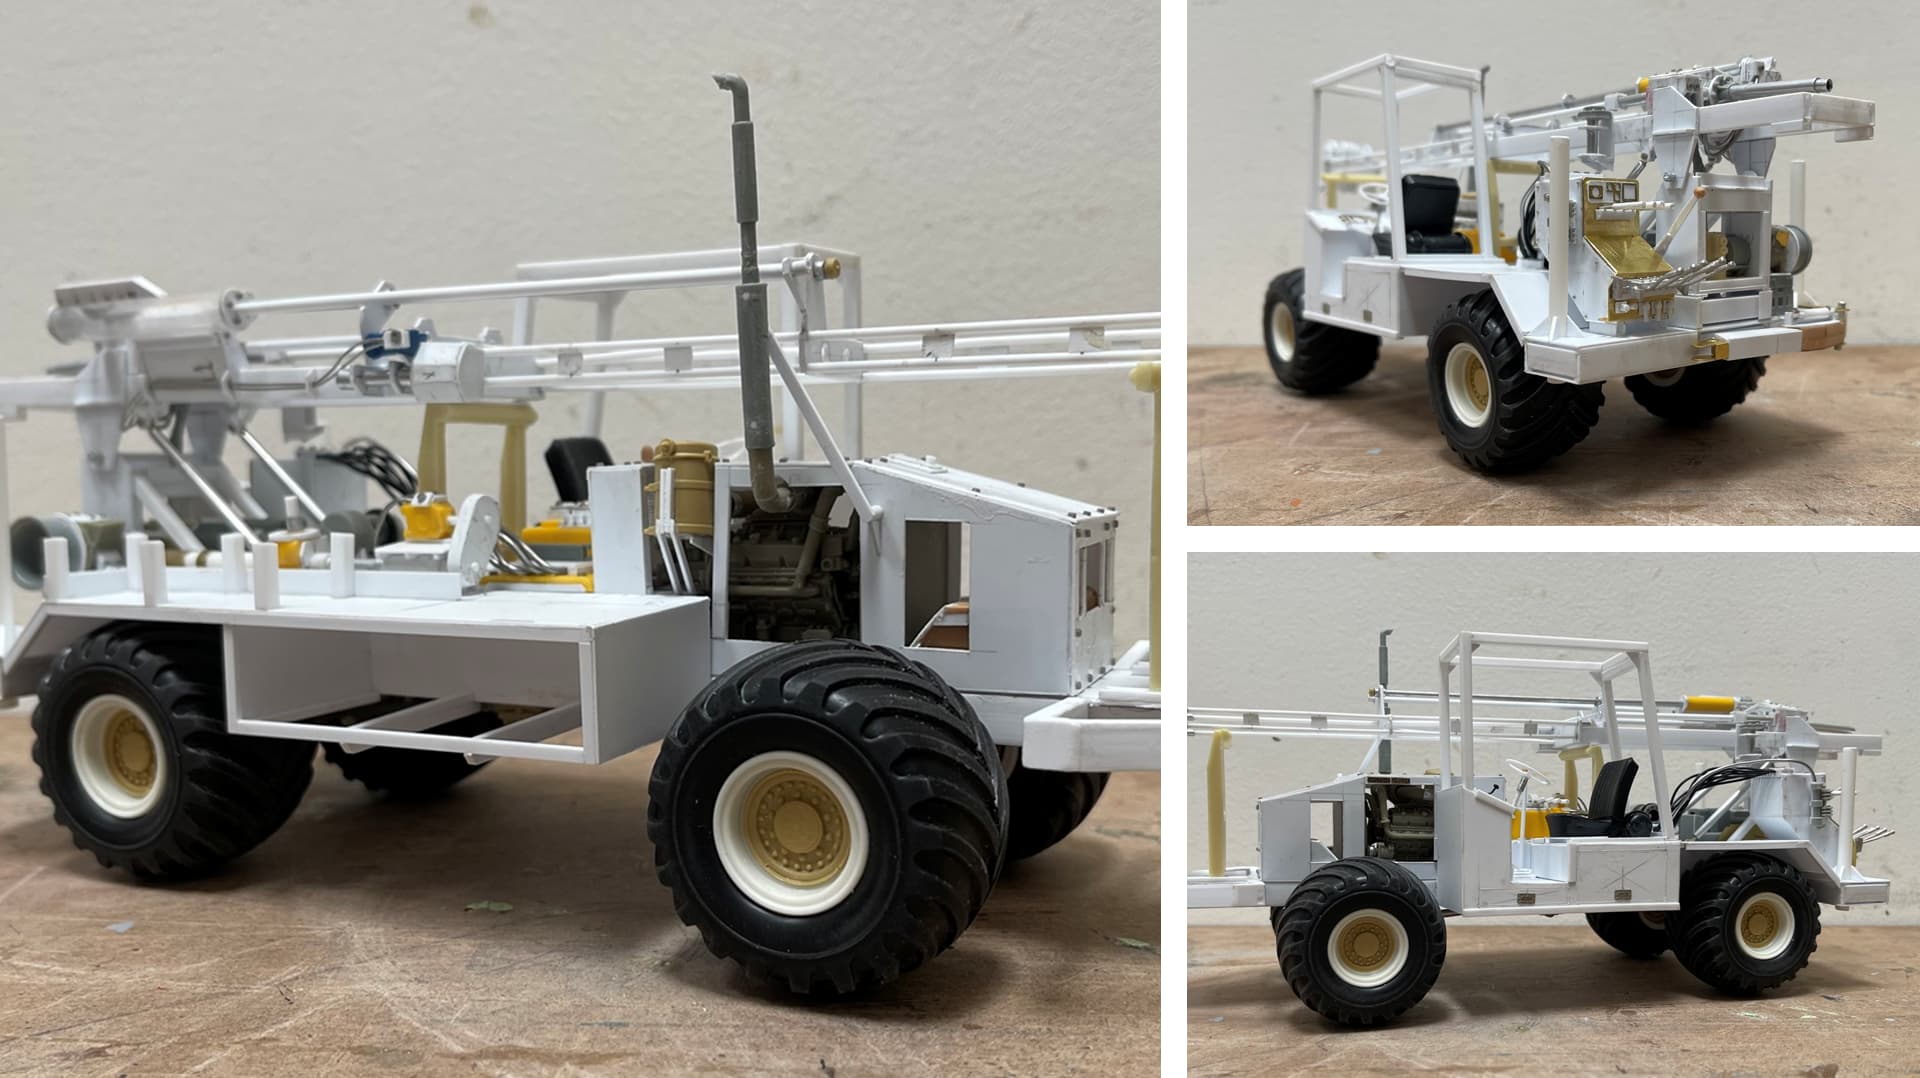
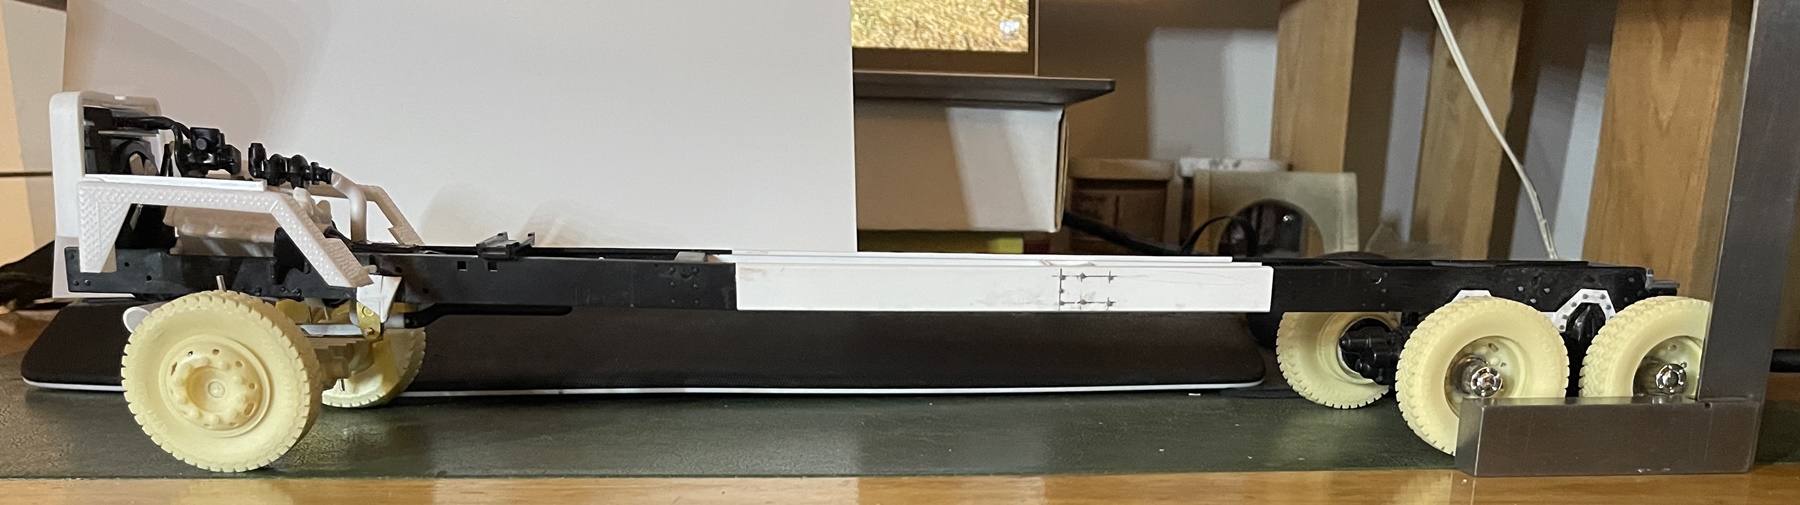
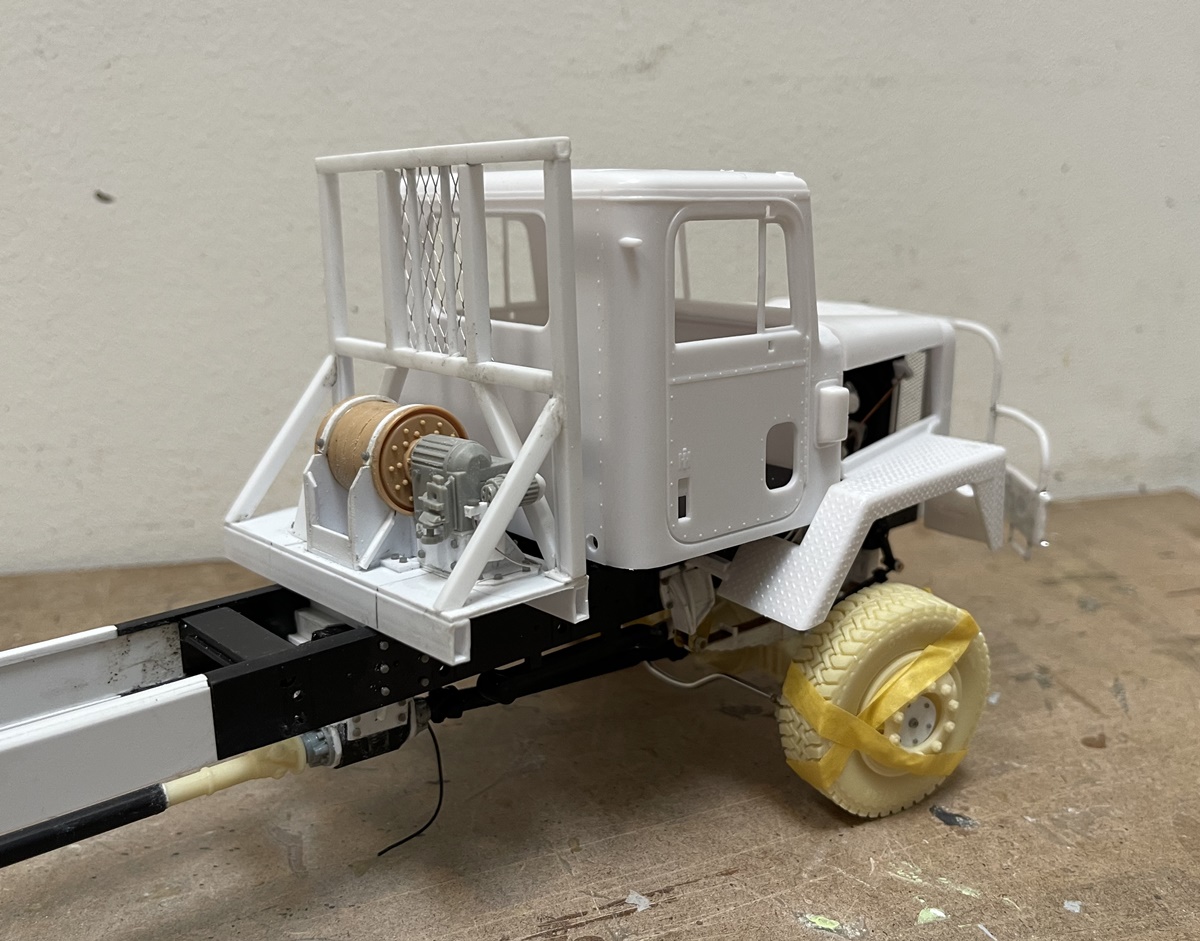
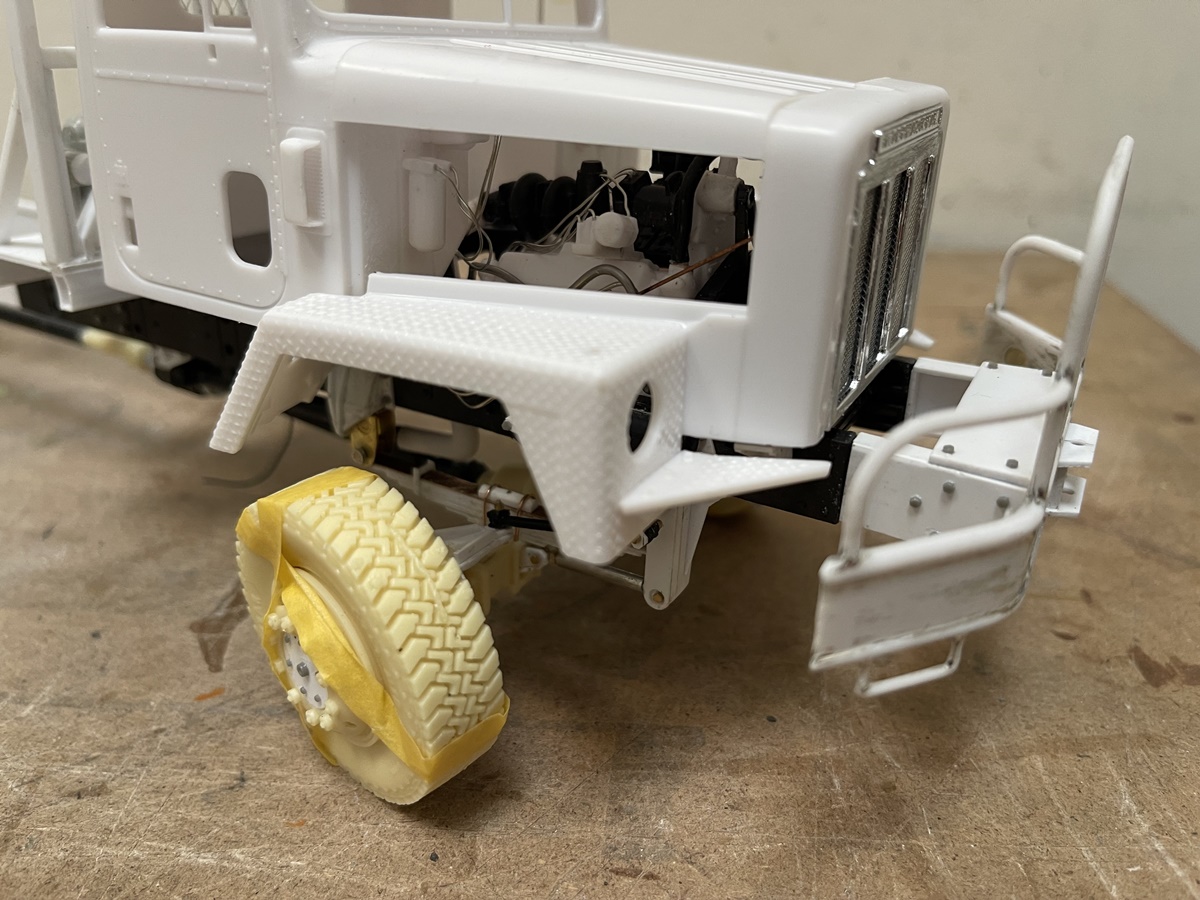
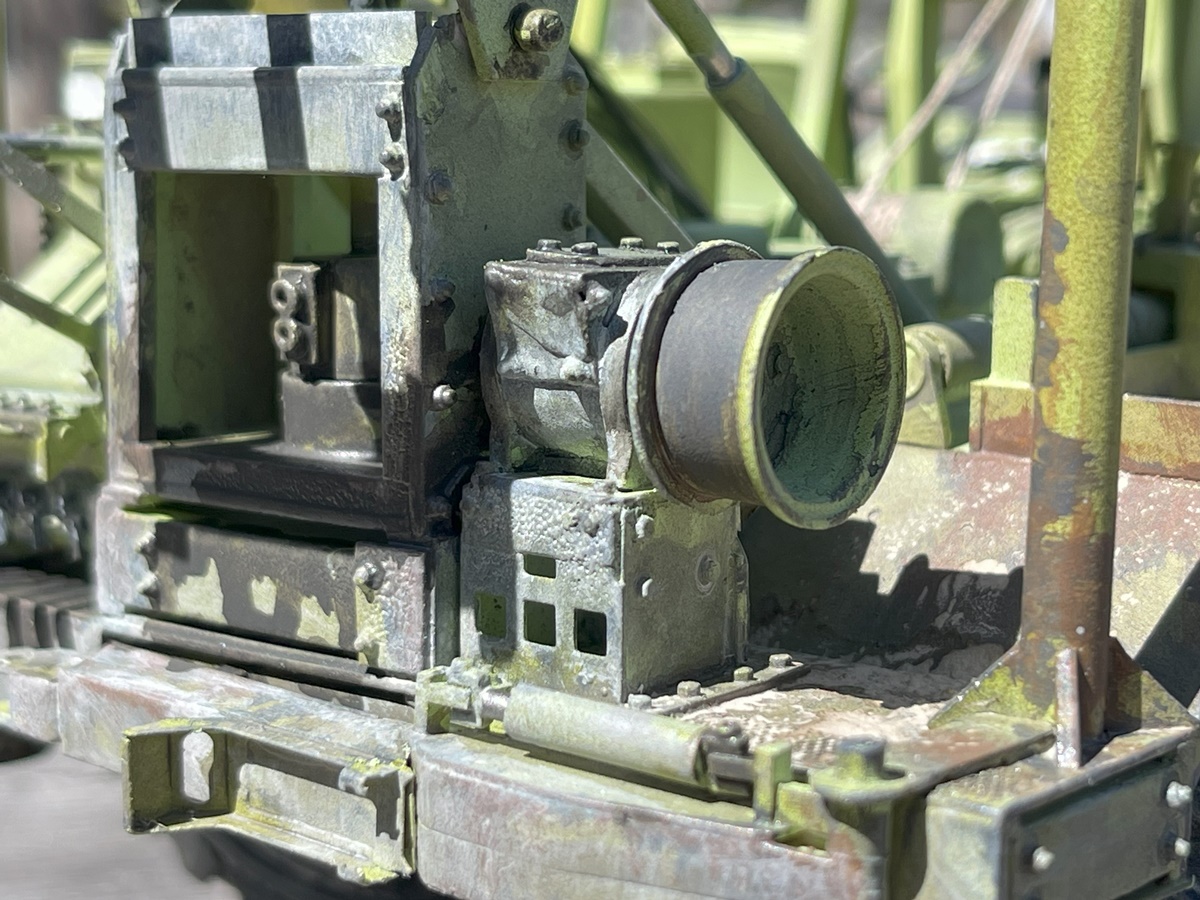
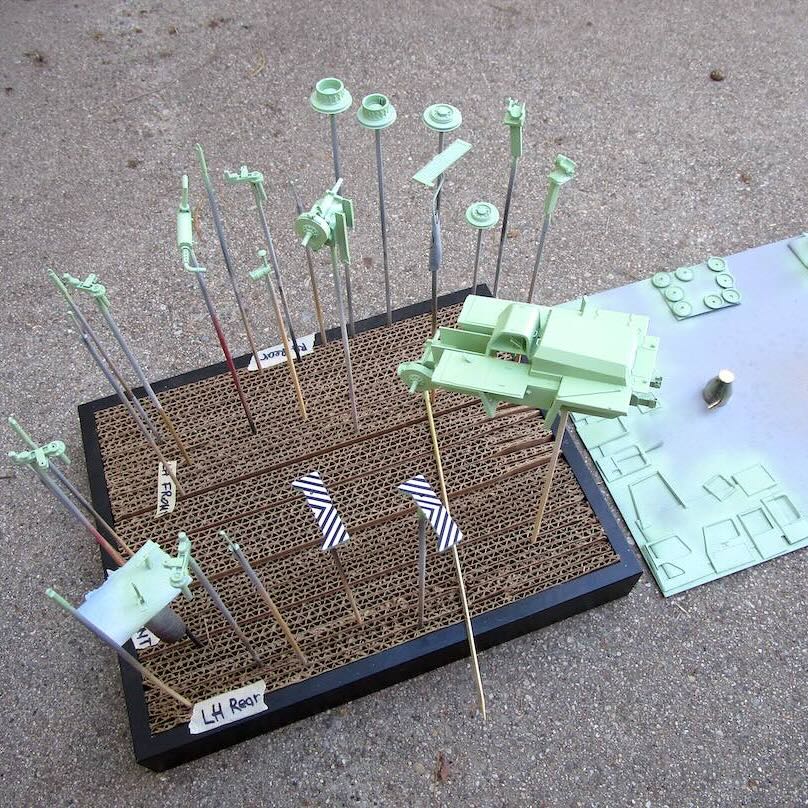
Regarding the build itself, it’s largely scratch work:

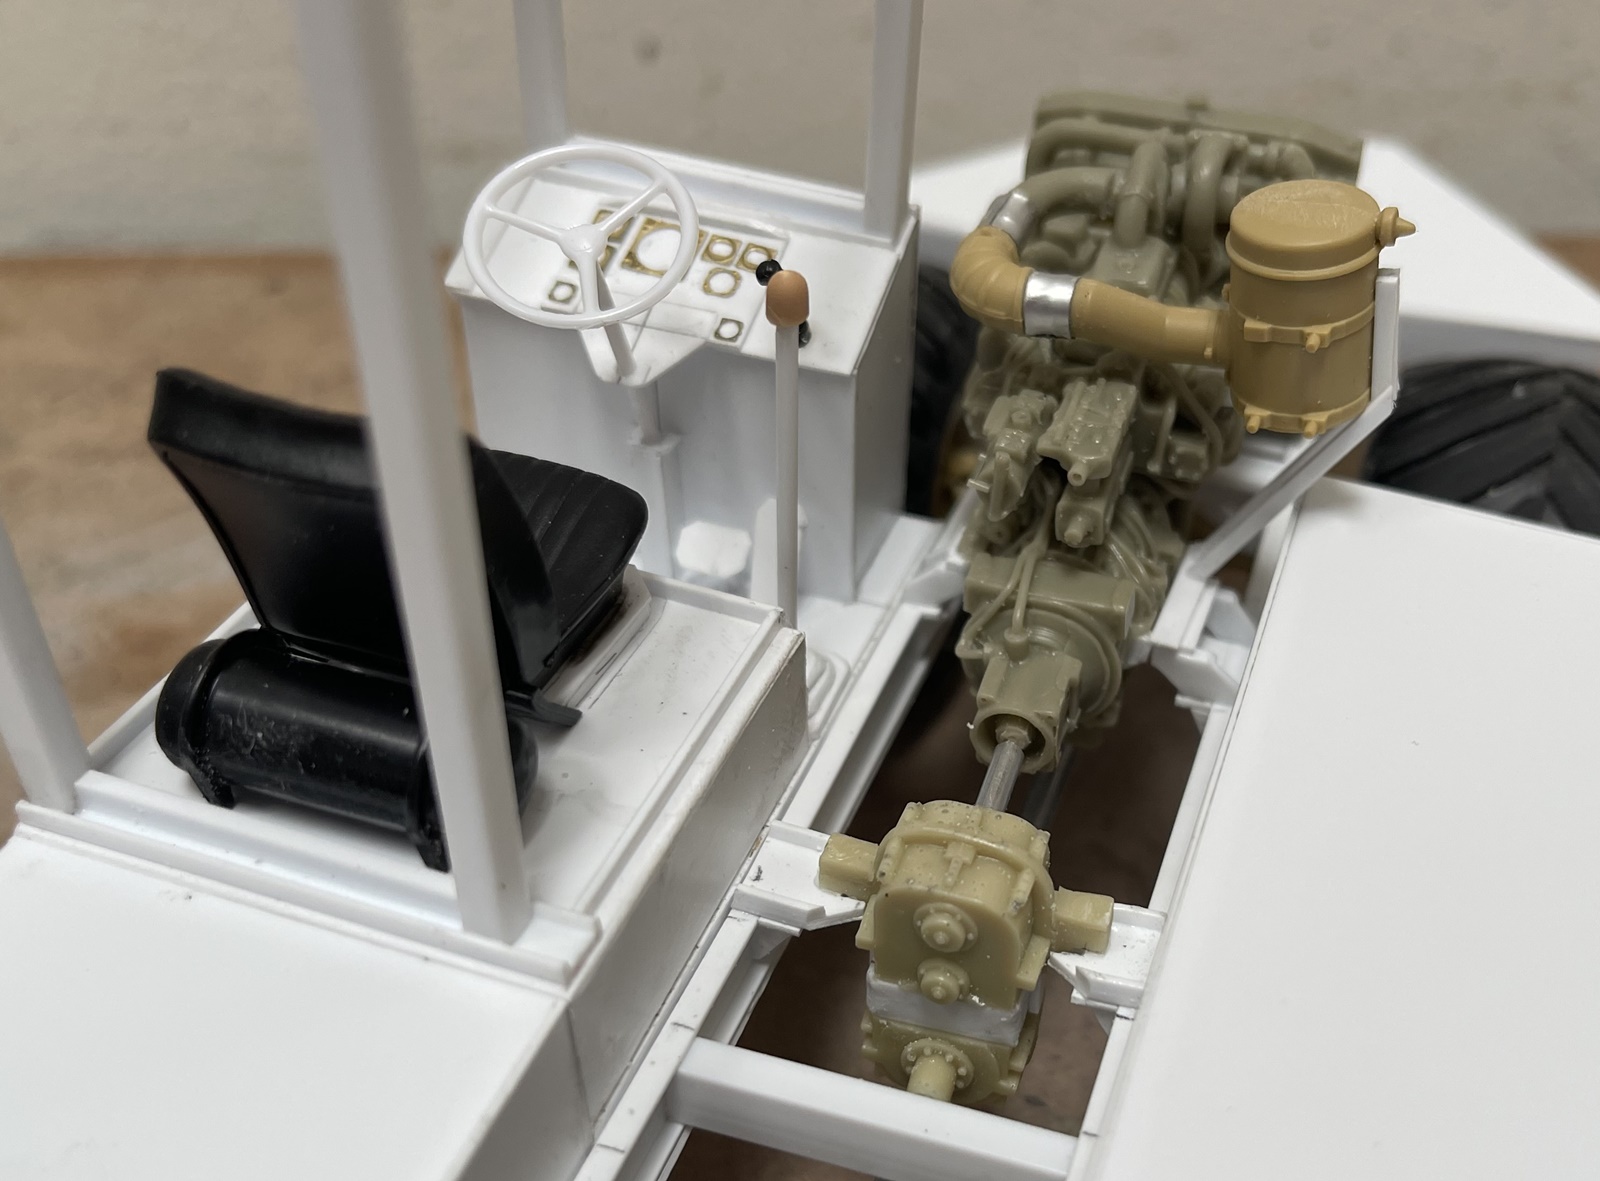
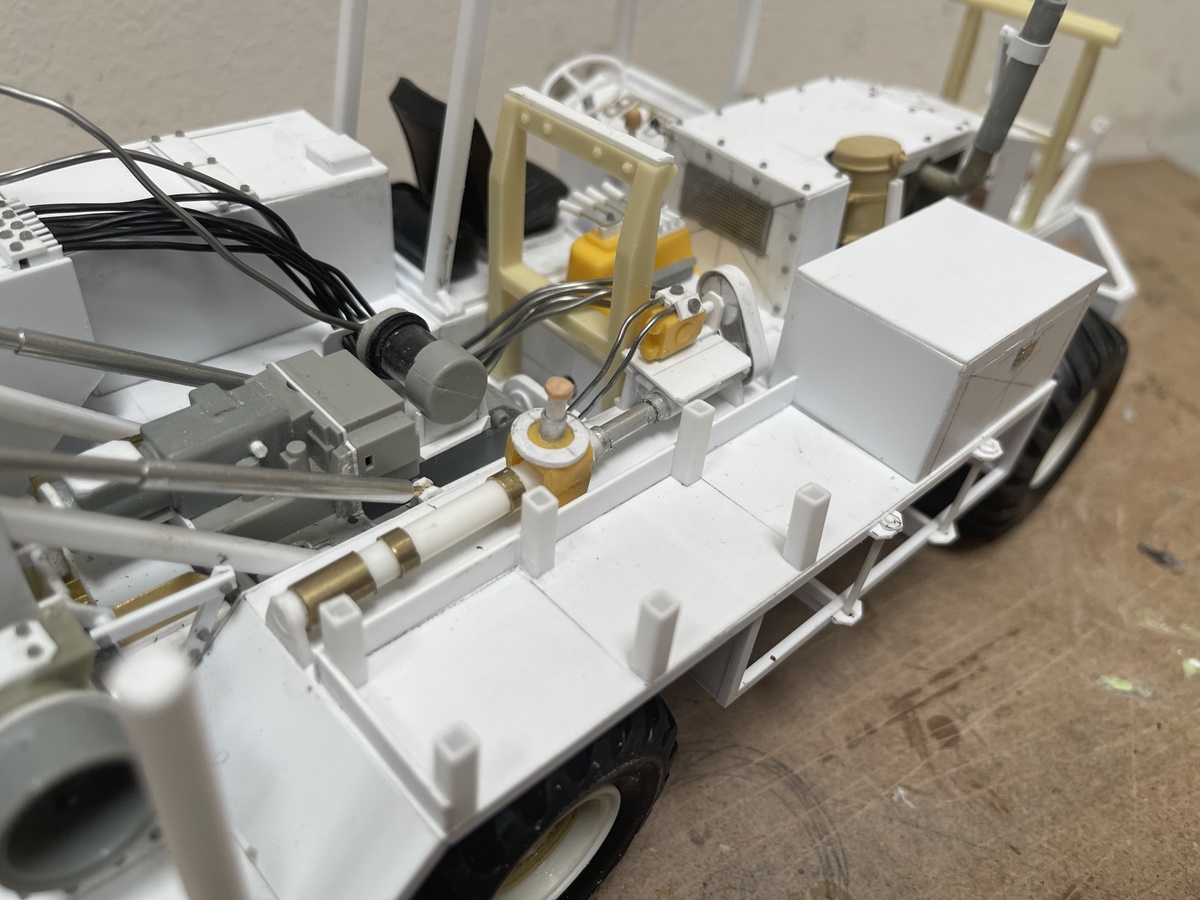
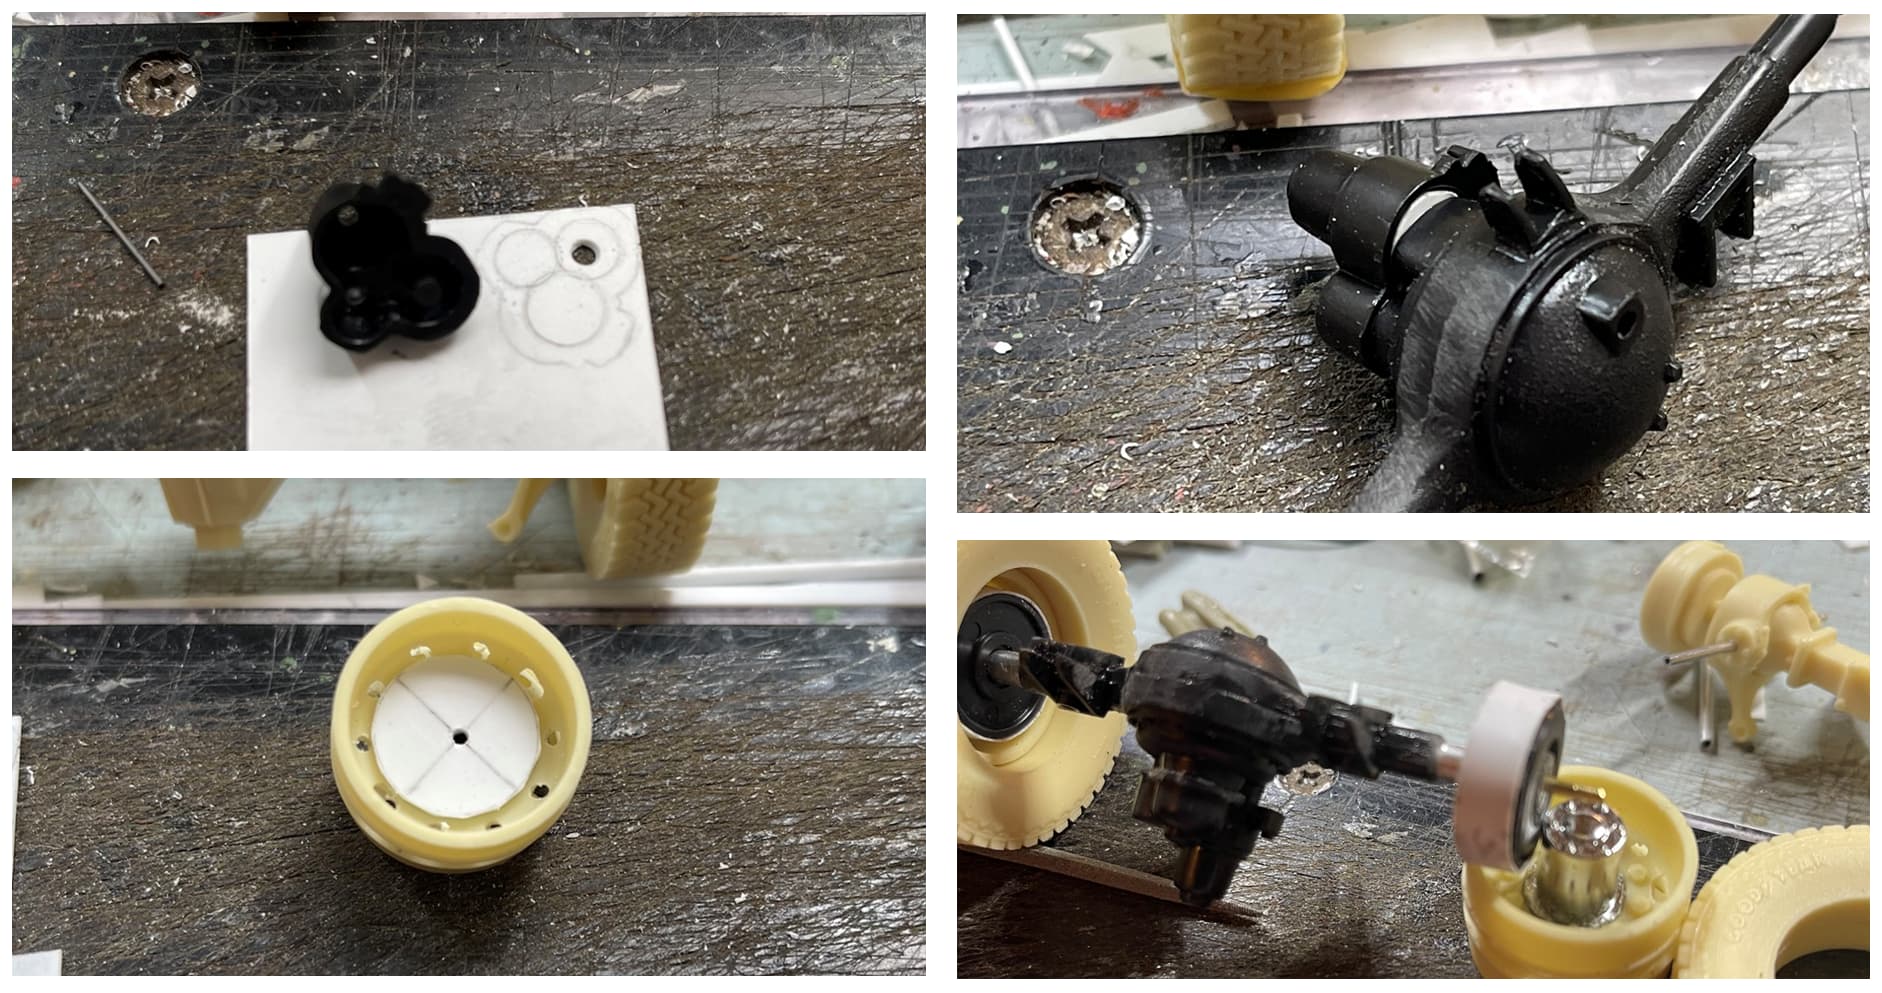
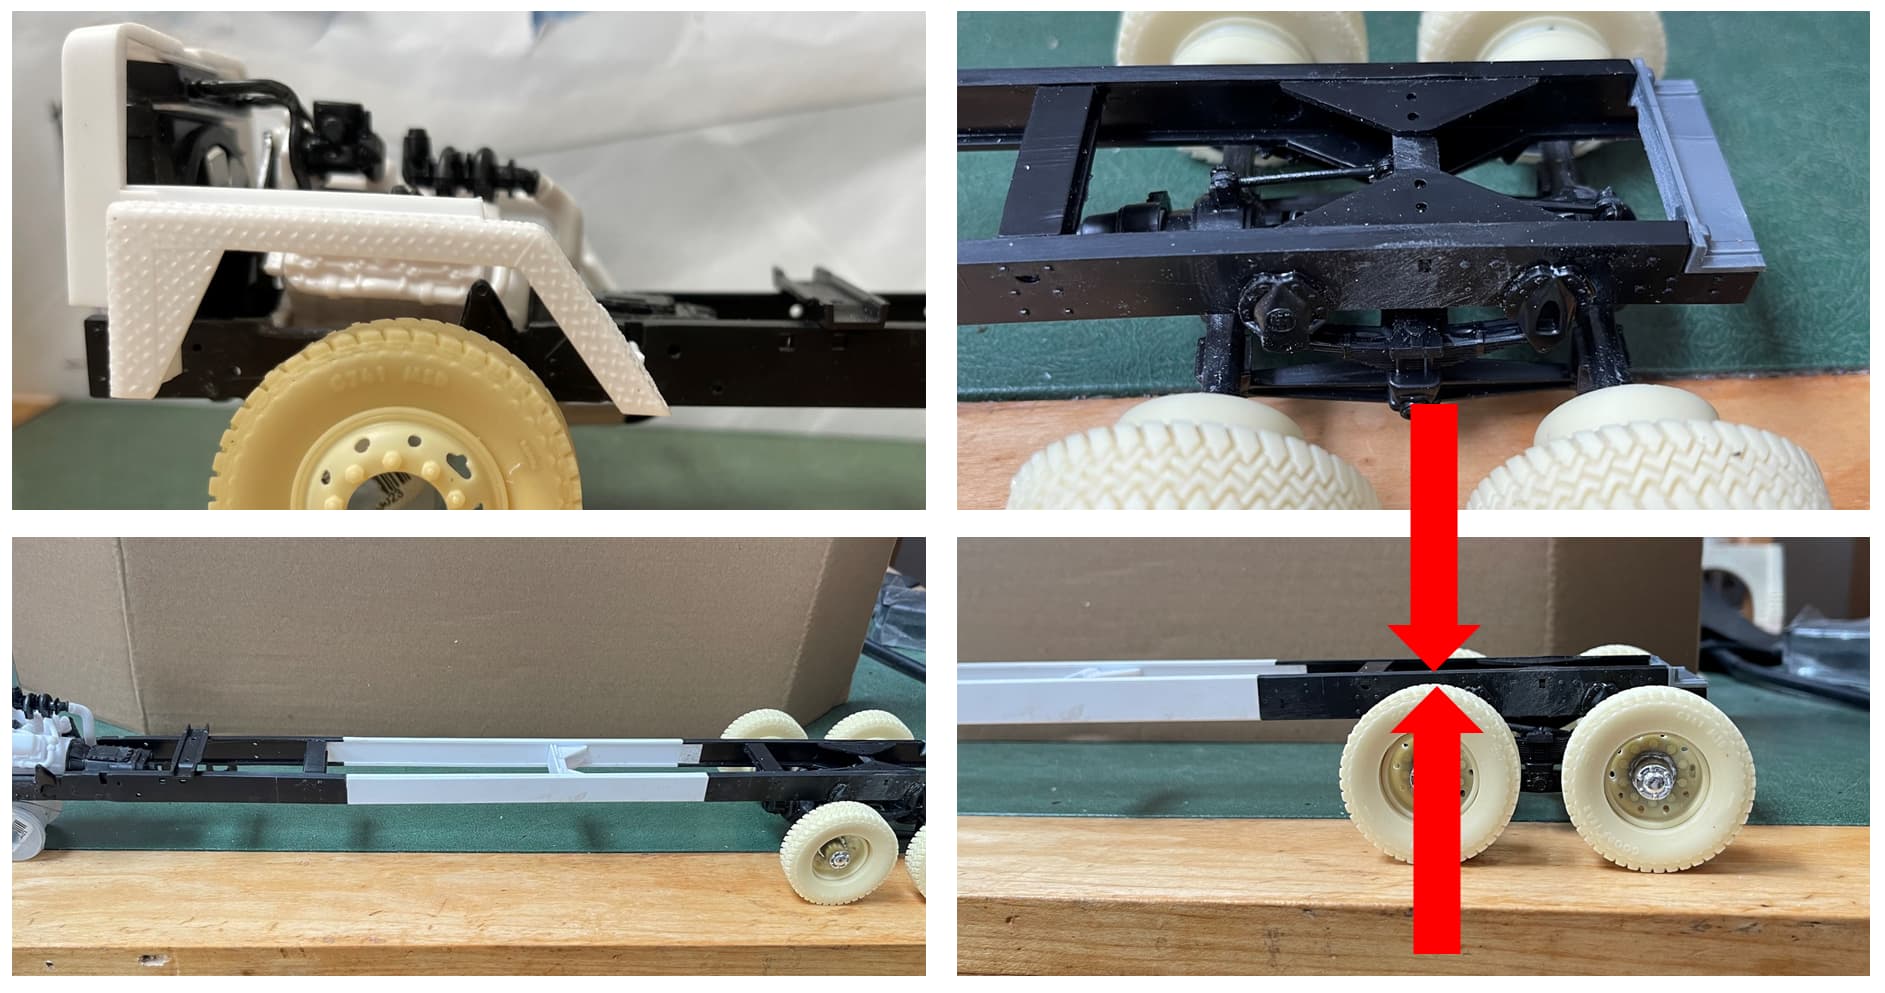
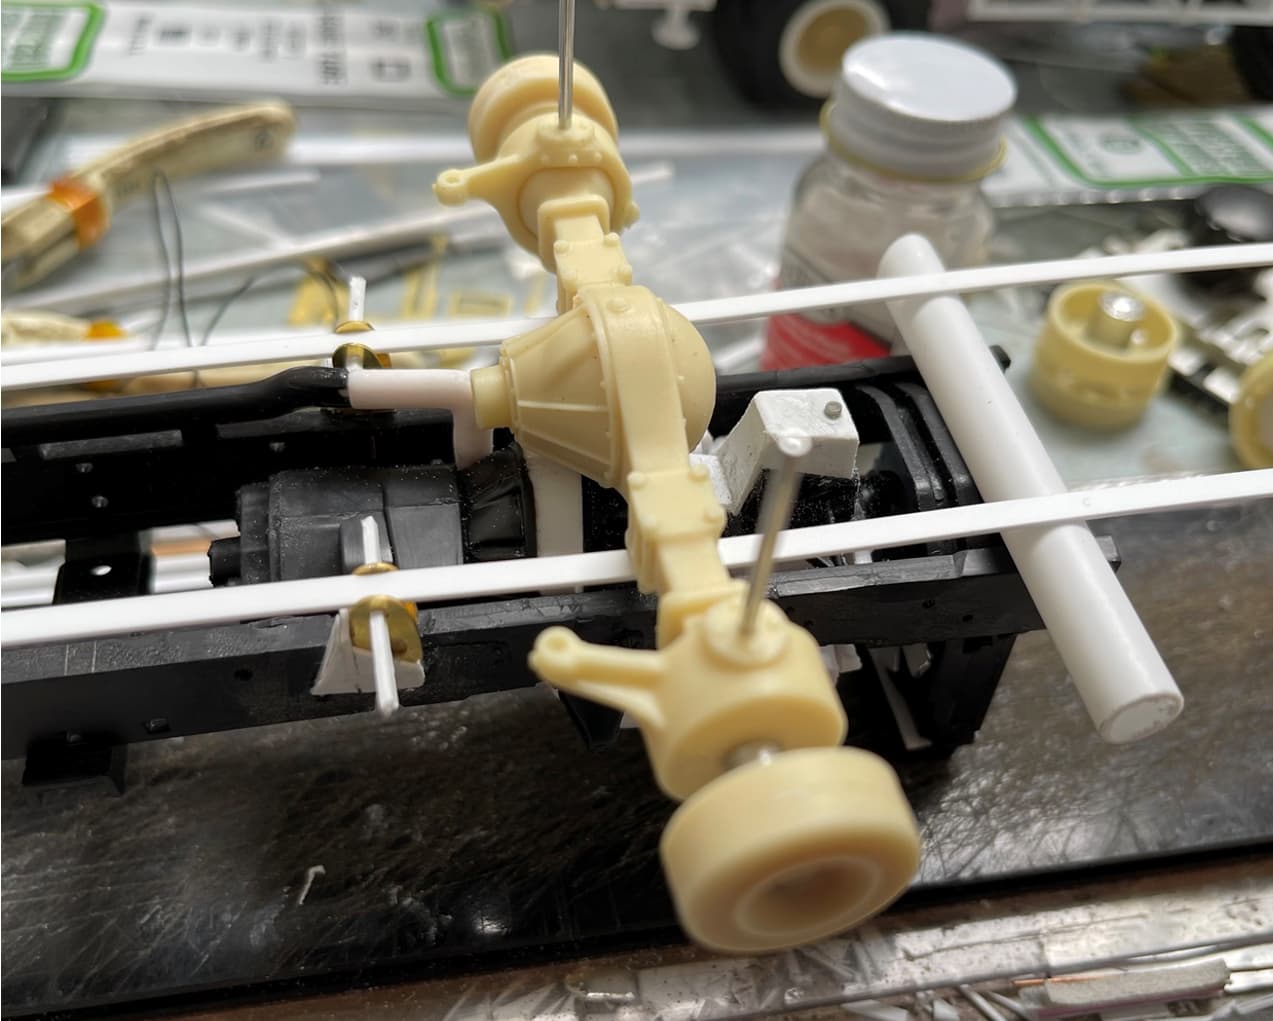
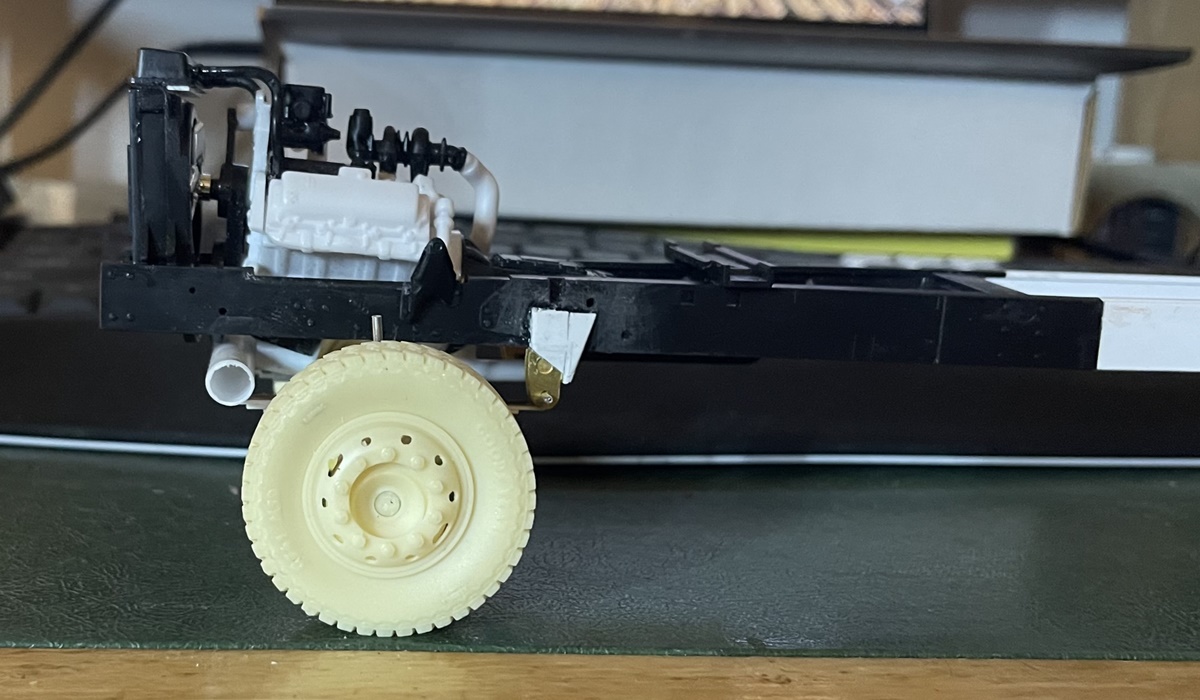
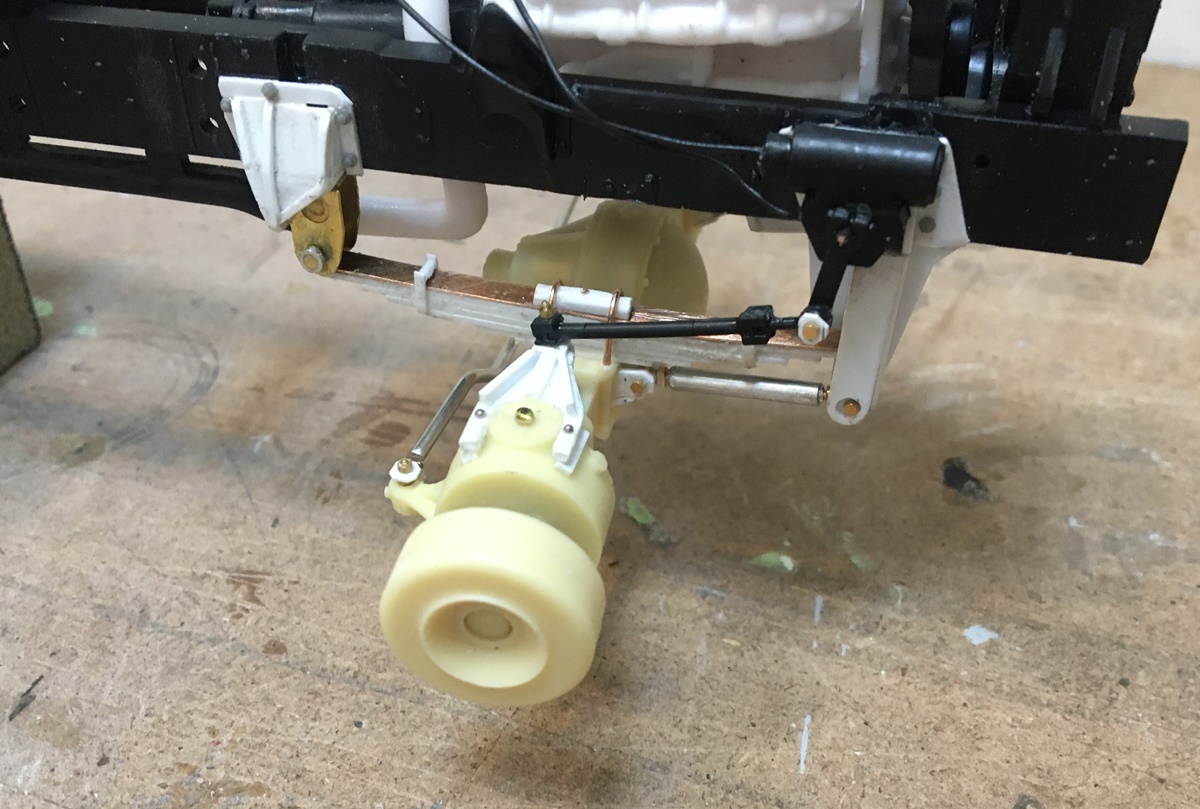
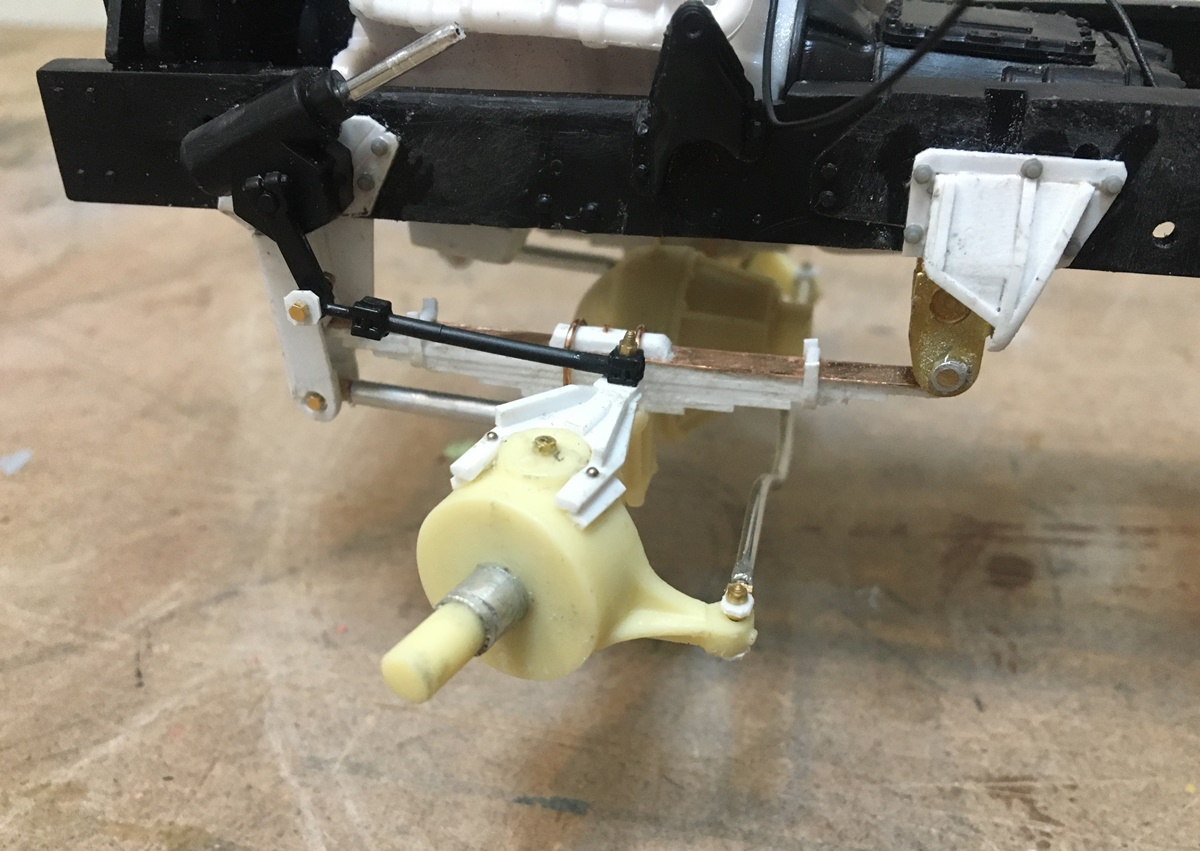
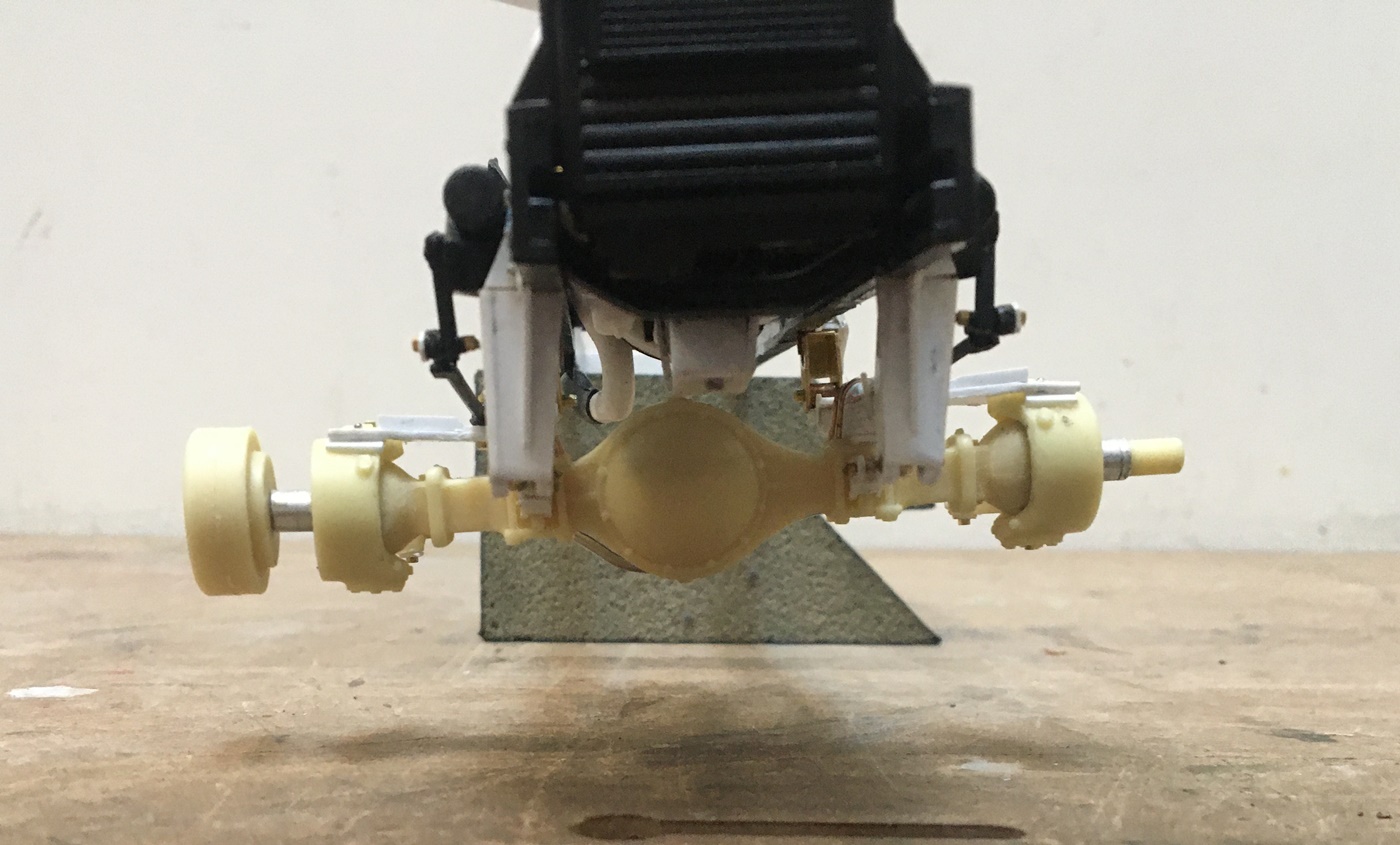
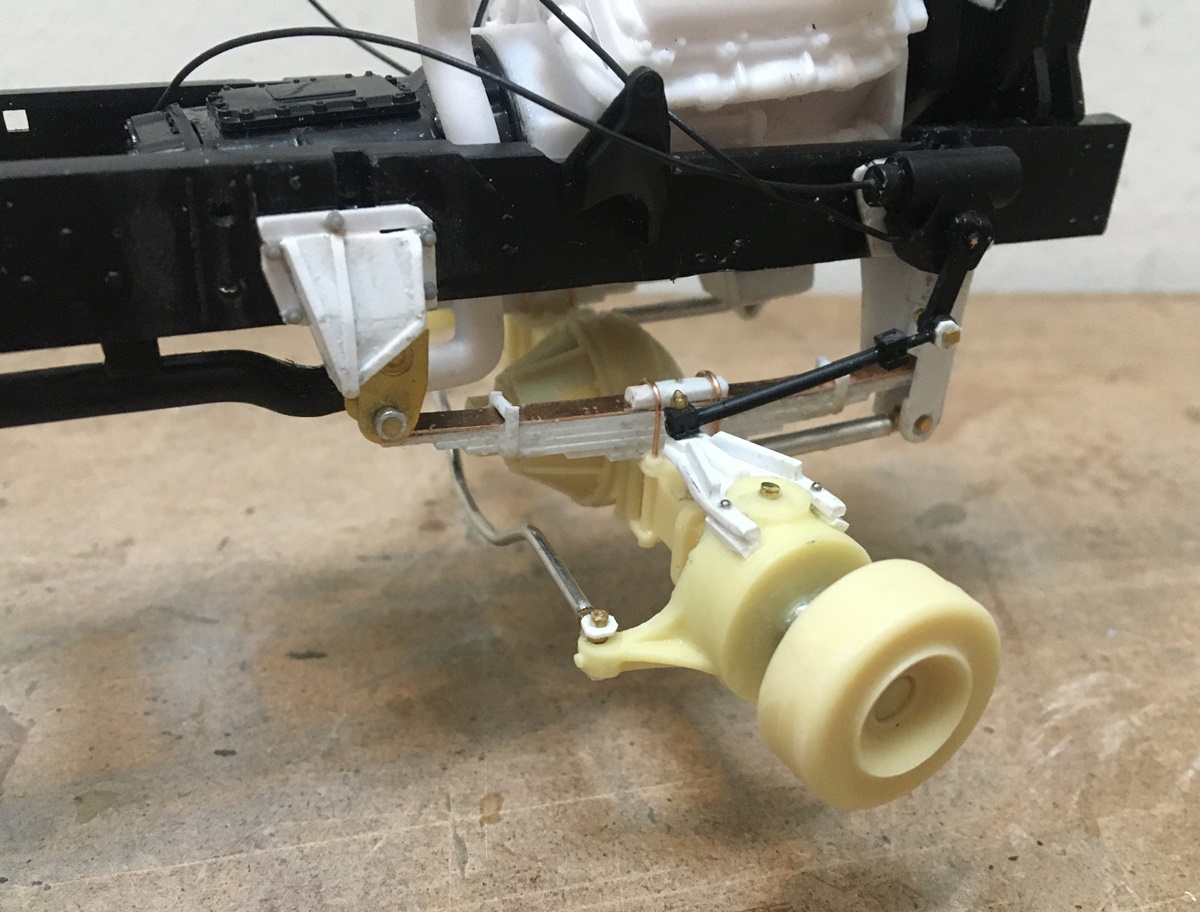
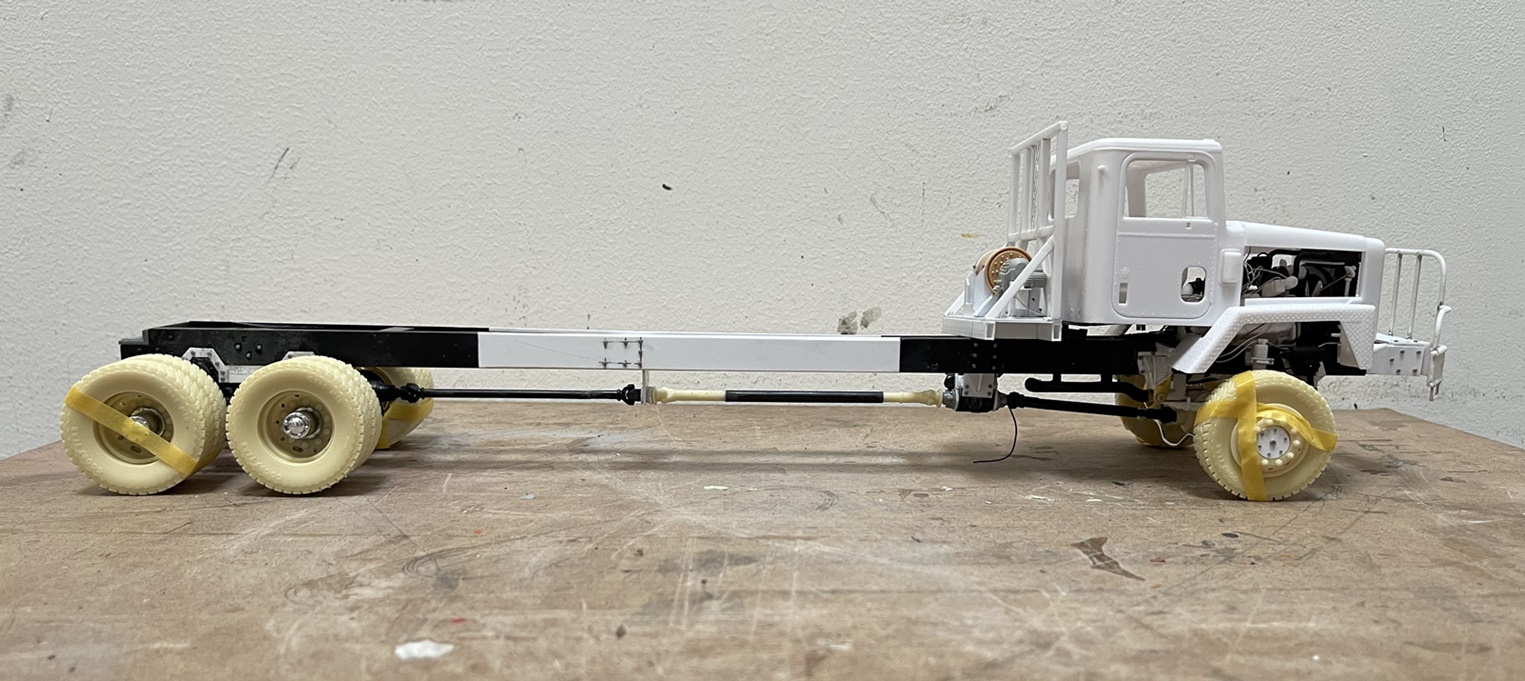
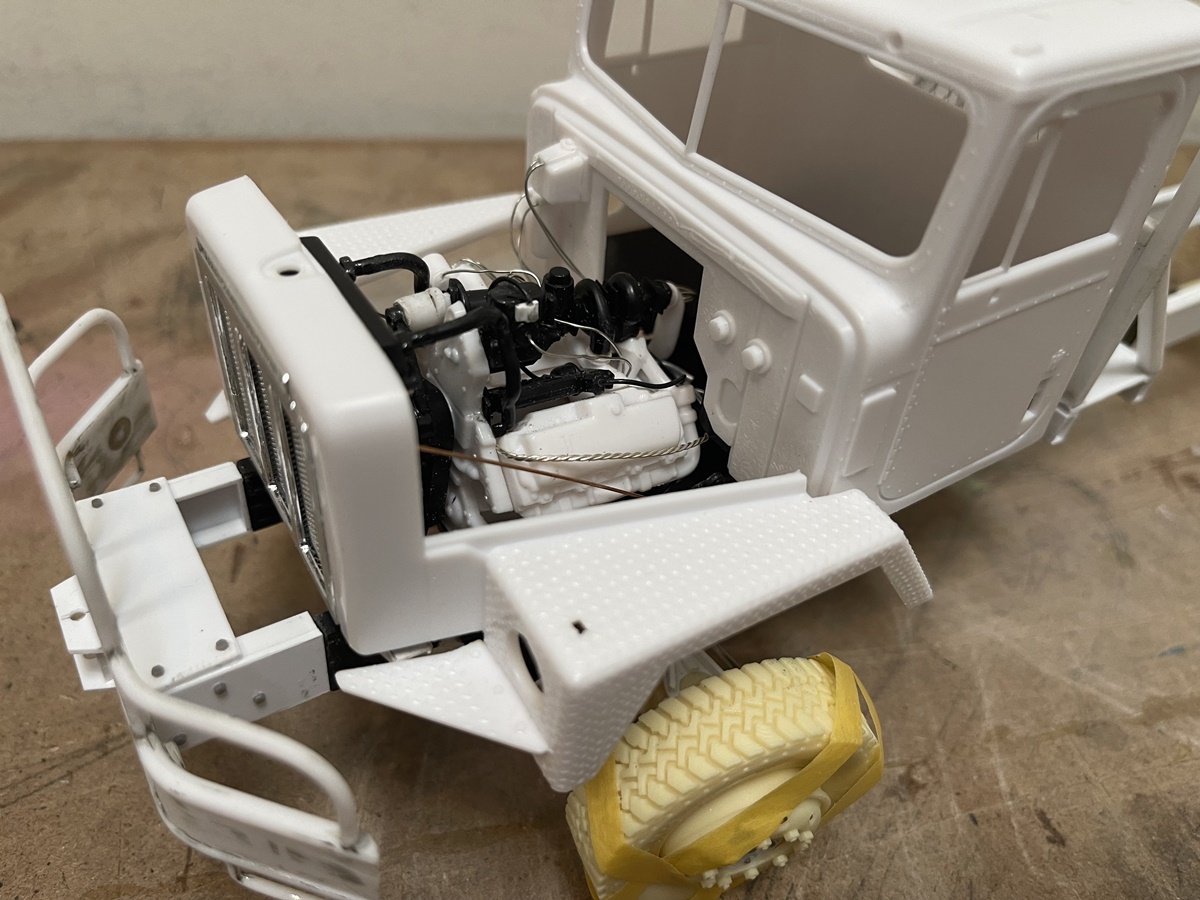
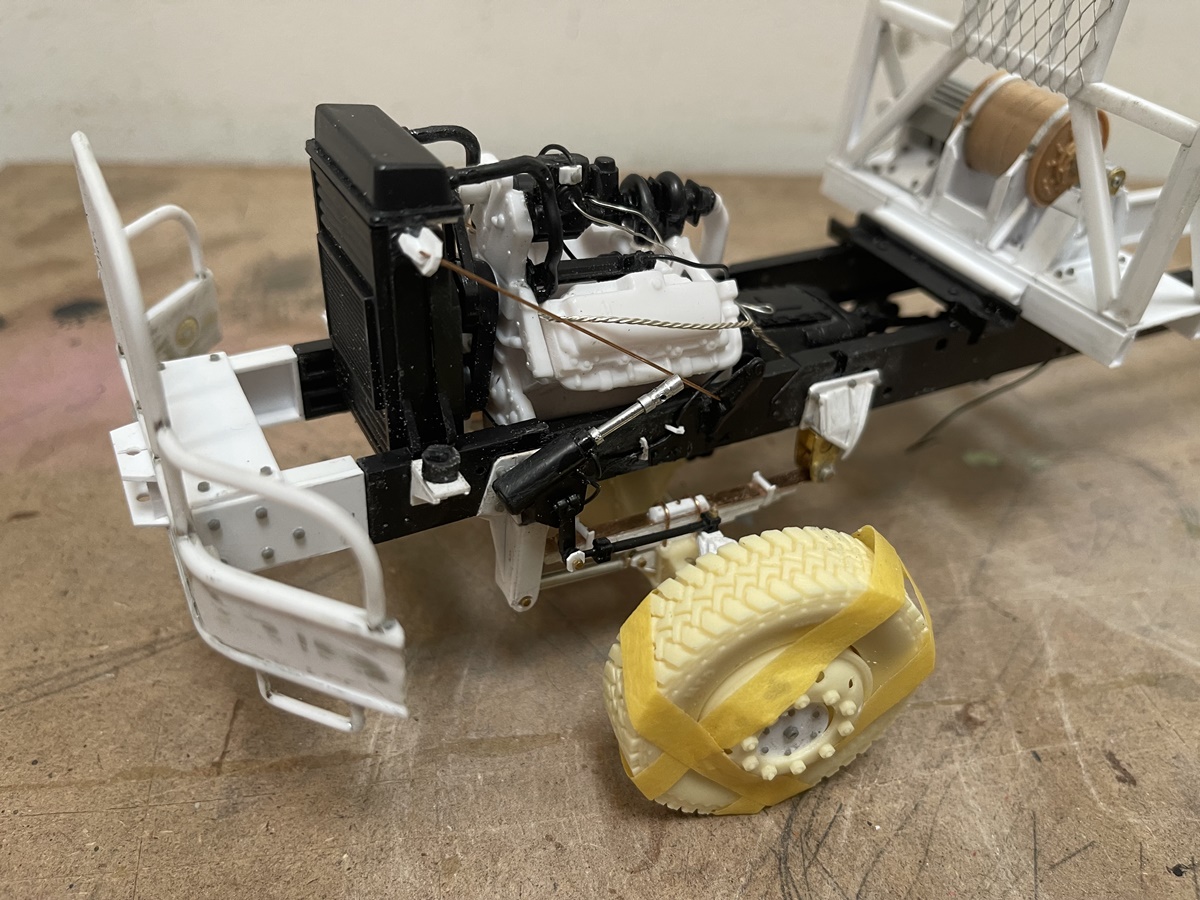
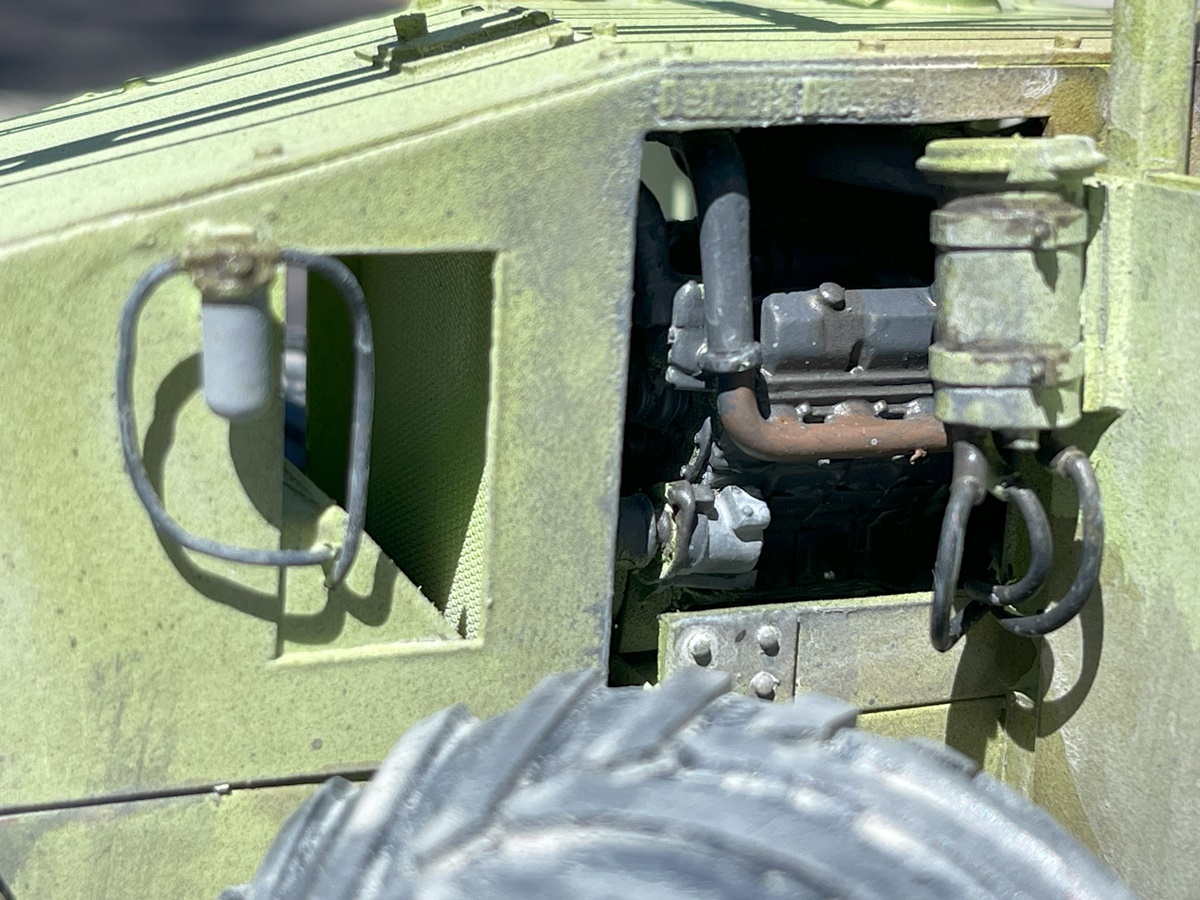
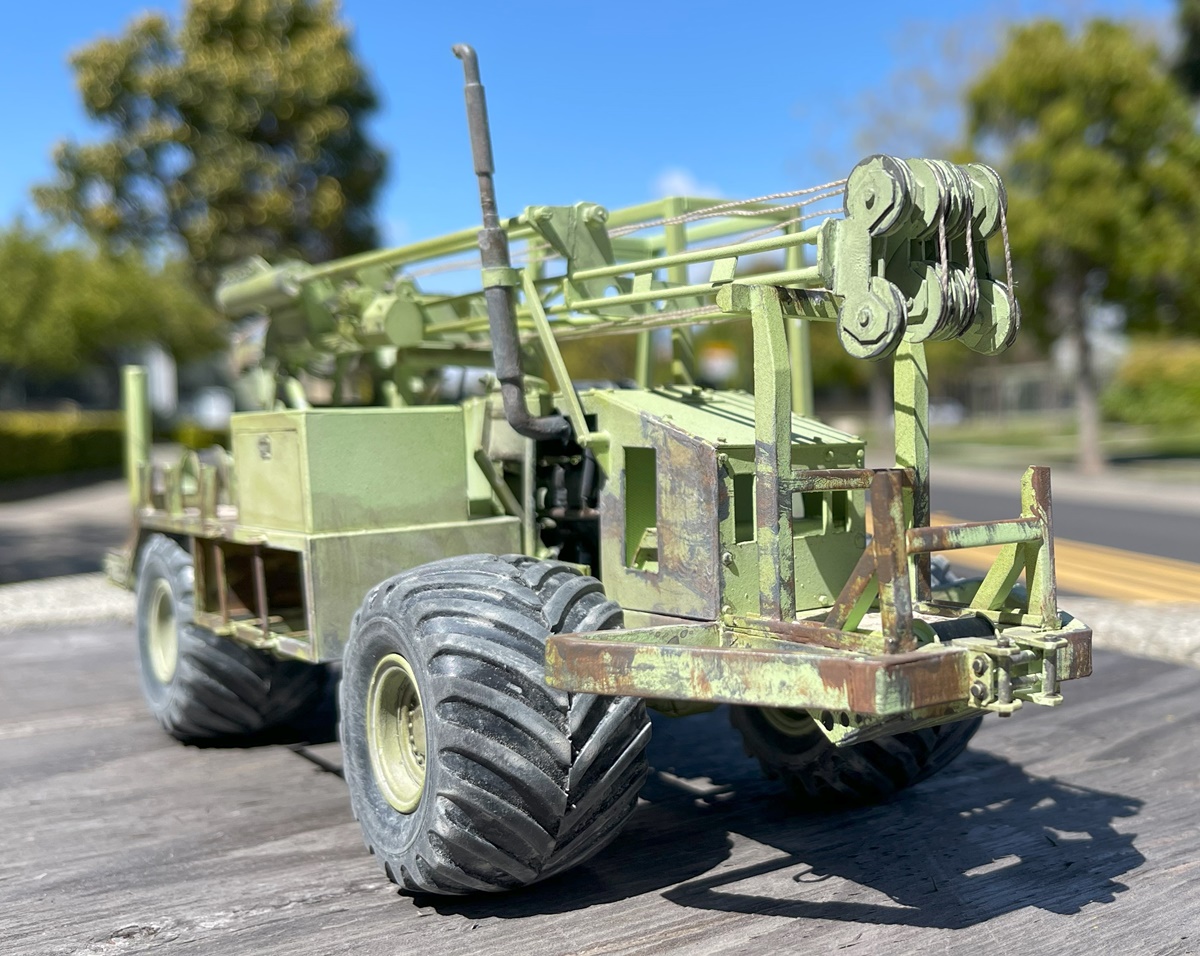
Above the basic vehicle - somewhere I read these ran/run small Detroit Diesel engines, and I had a 1/35 Detroit engine kit, transfer case, and some left over heavy axles and driveshafts so in they went. I inserted solid brass rod through the axles to handle the weight of the tires and wheels.

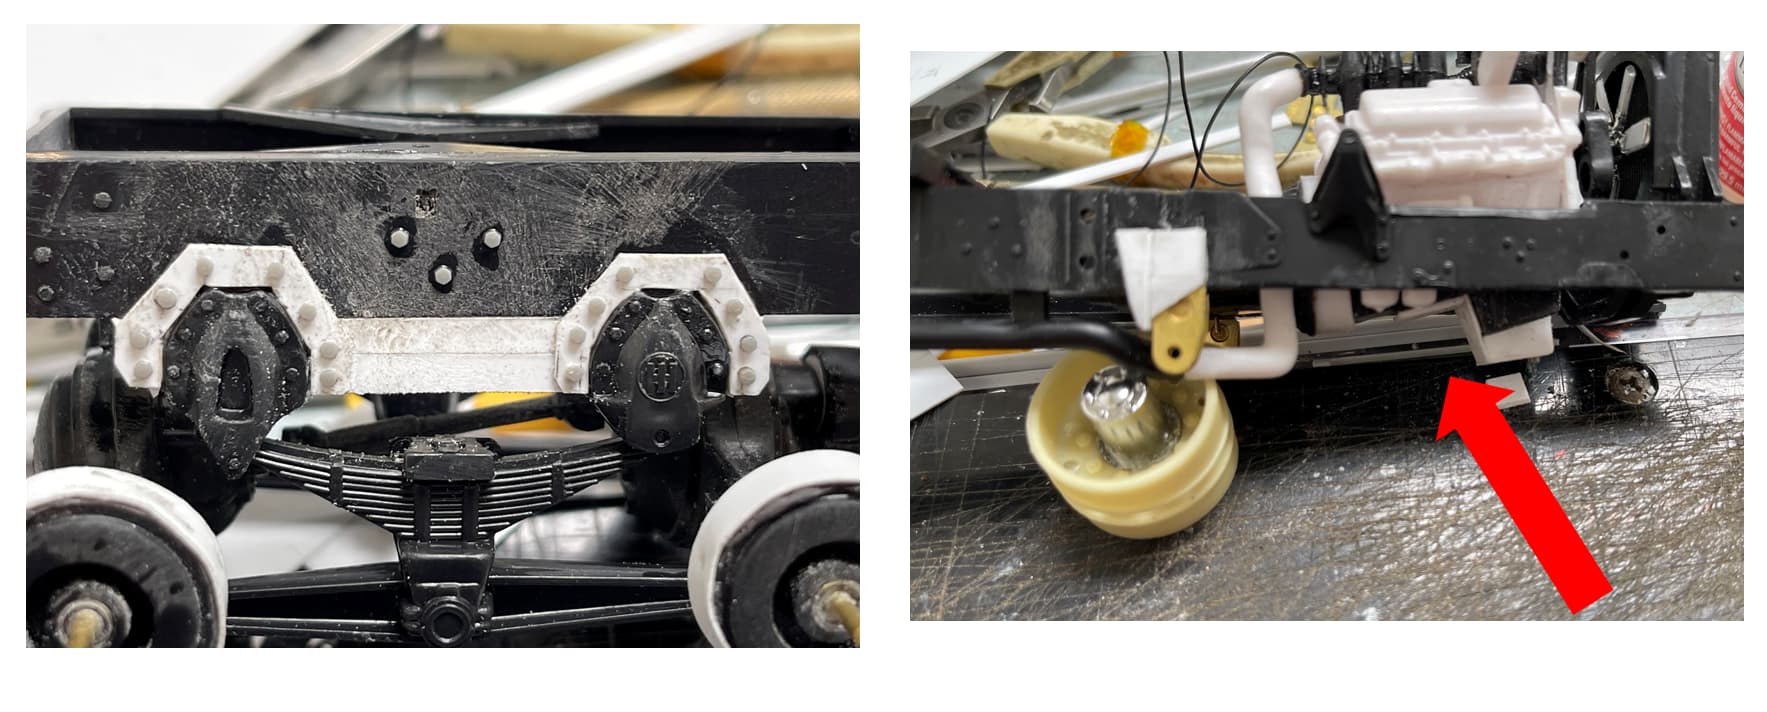
Using these random parts created some problems, like making mounts for each - the axles are mounted on unique brackets built using reference pics. The front can (or could, as I glued it in place) rotate vertically in the center, while the rear has brackets that go where leaf springs would otherwise mount, and brackets were made for the engine and transfer case.

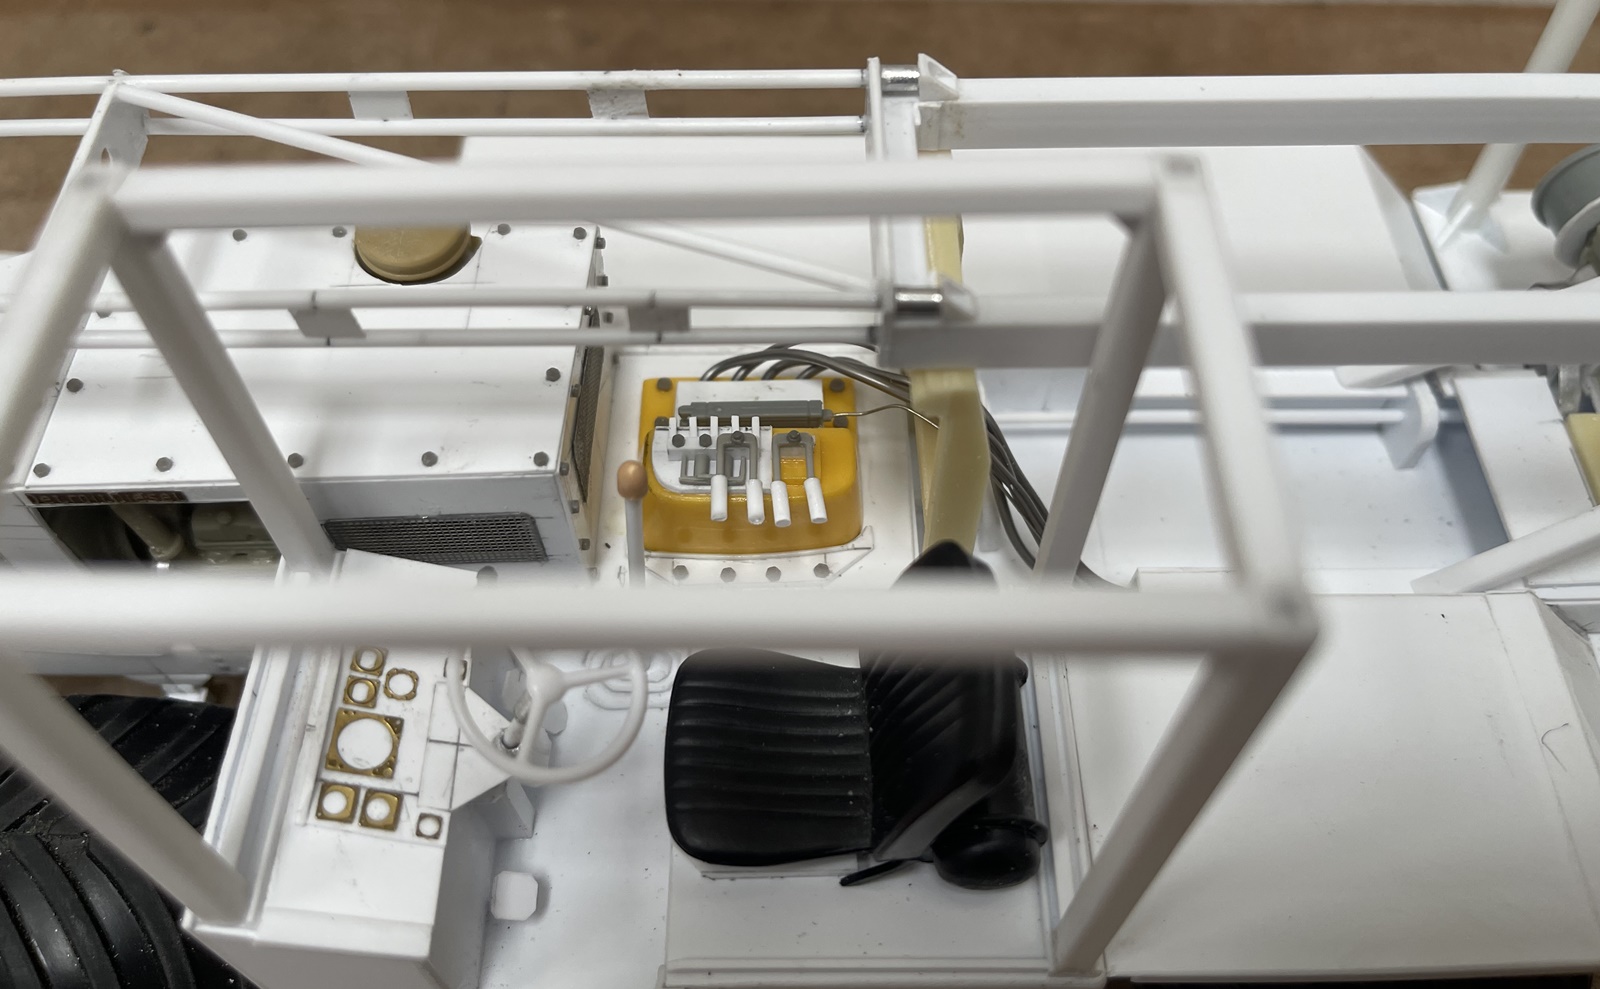
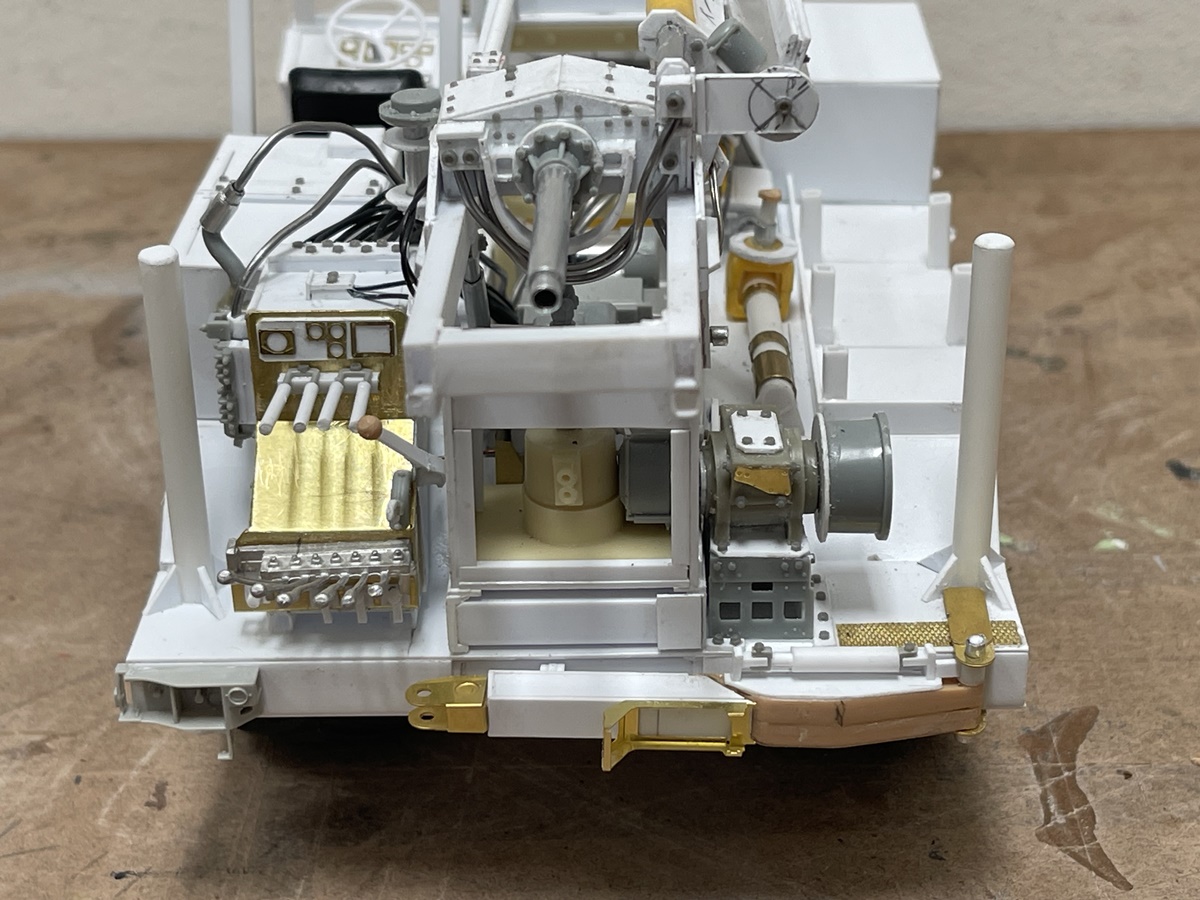
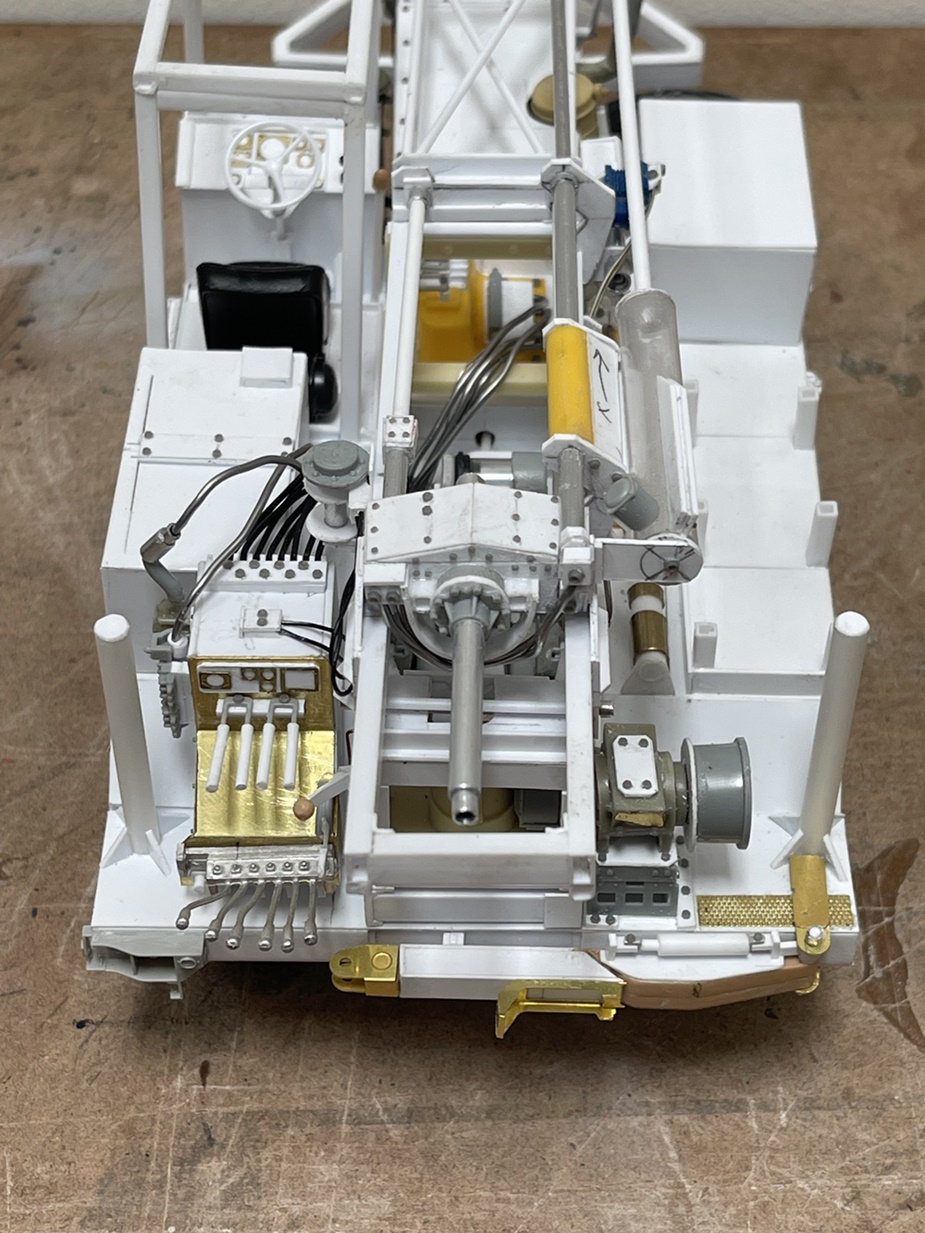
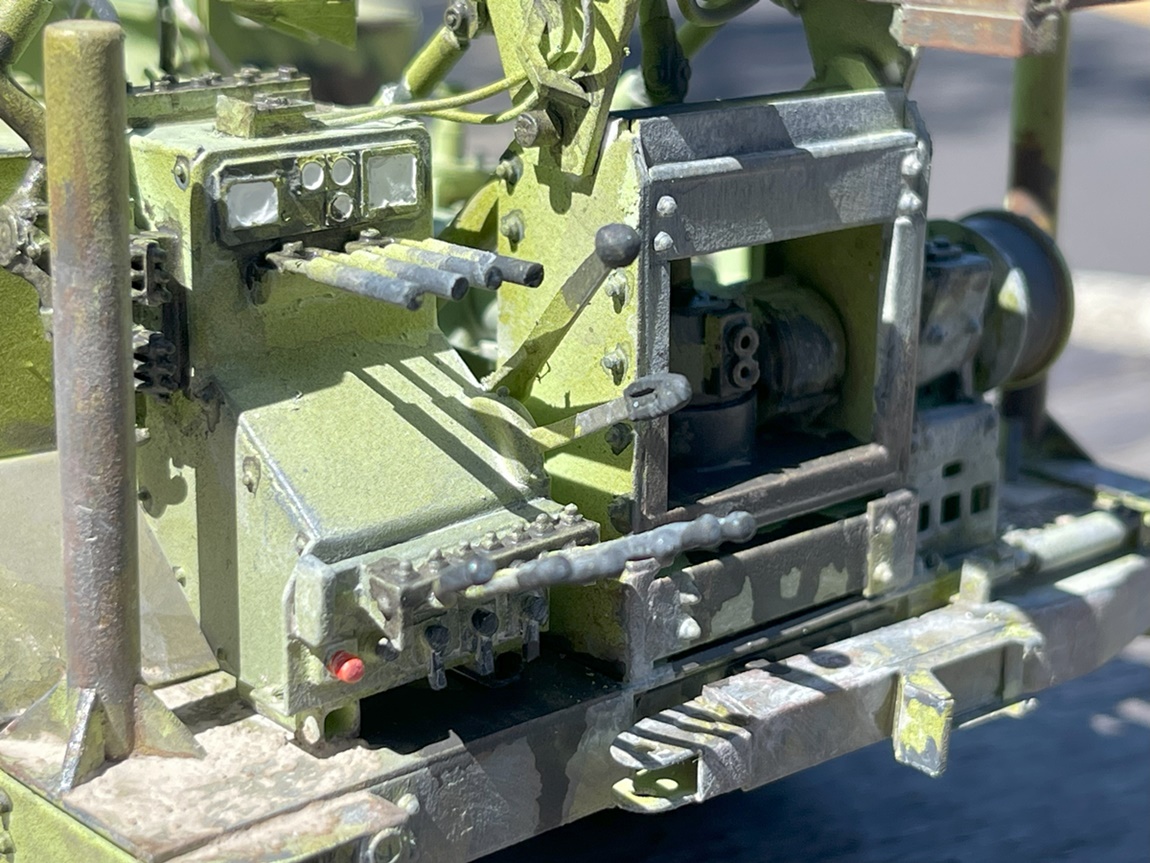
The gauges are PE bezels intended for use in 1/32 scale model aircraft. The steering wheel and seat are from 1/25 kits.

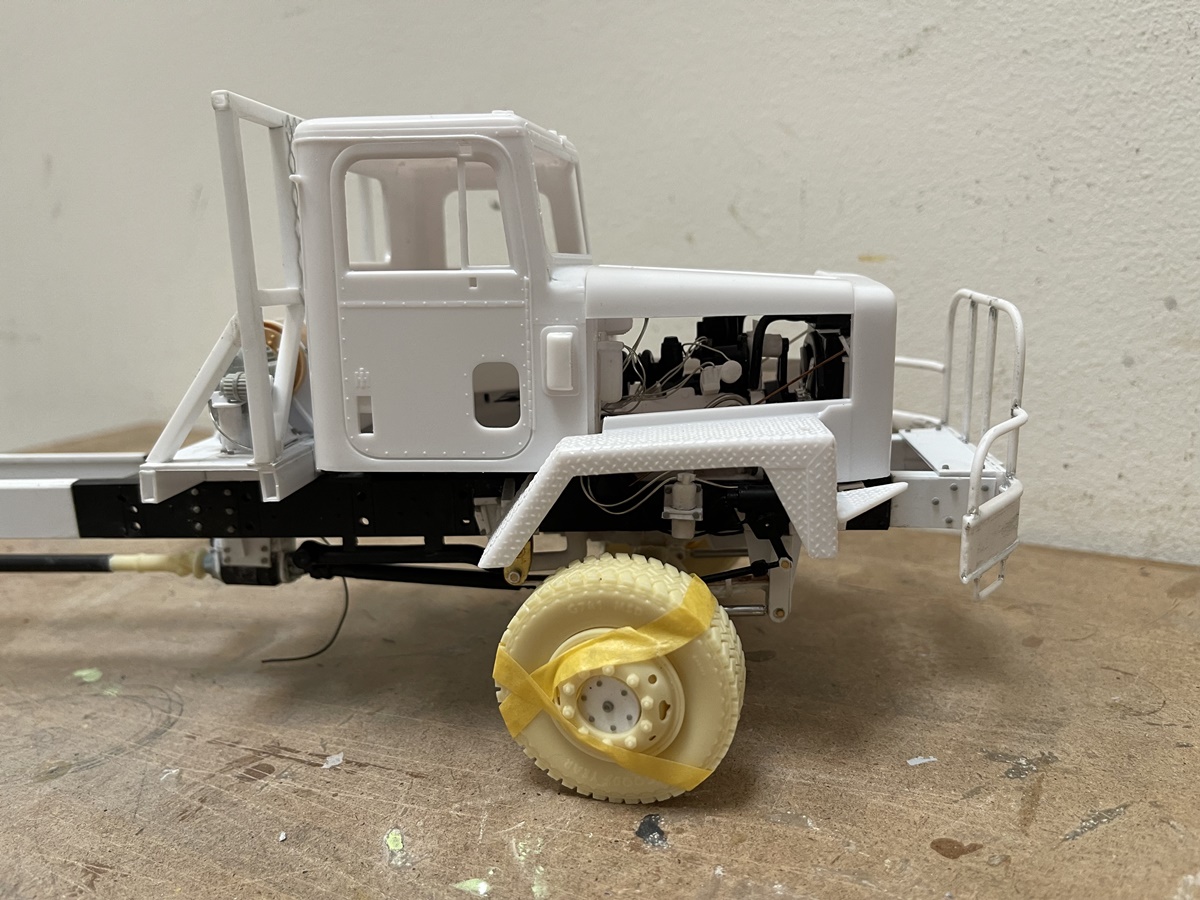
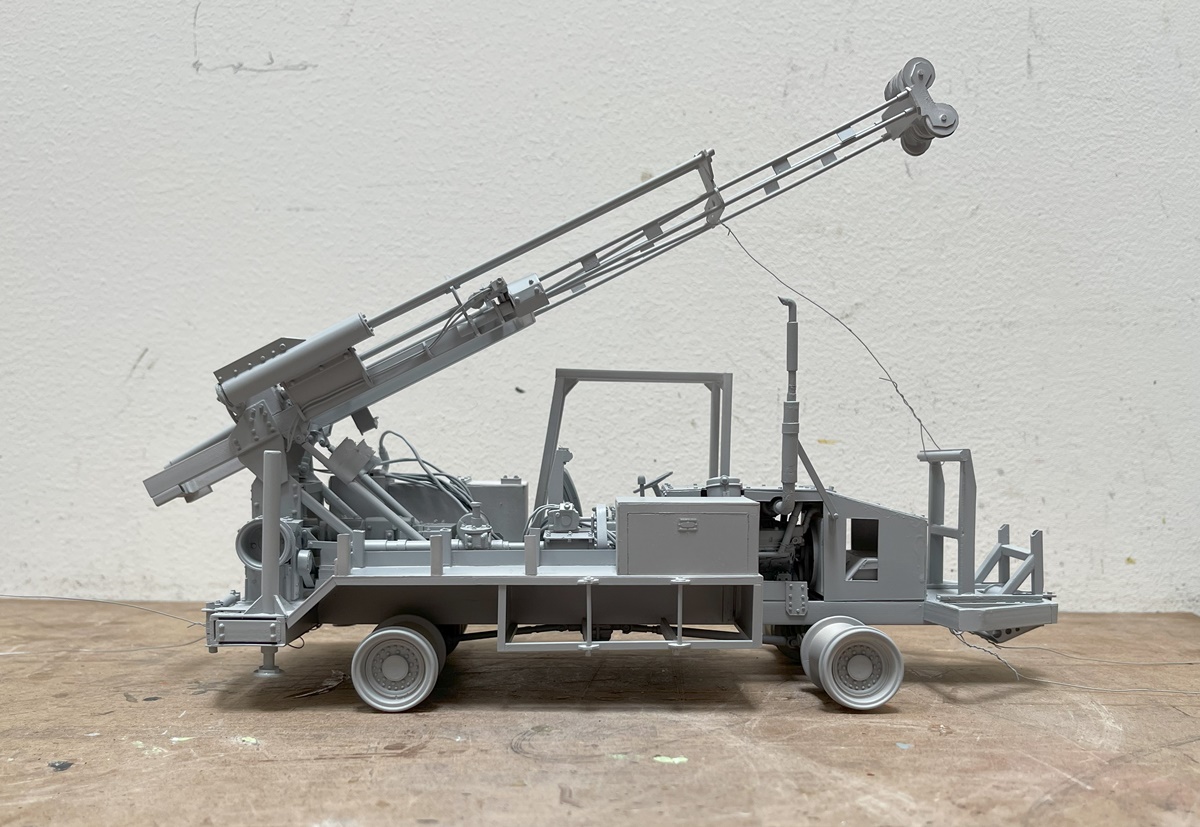
As this was being constructed from guess work, it came to my attention :man_facepalming: :sweat_smile: 
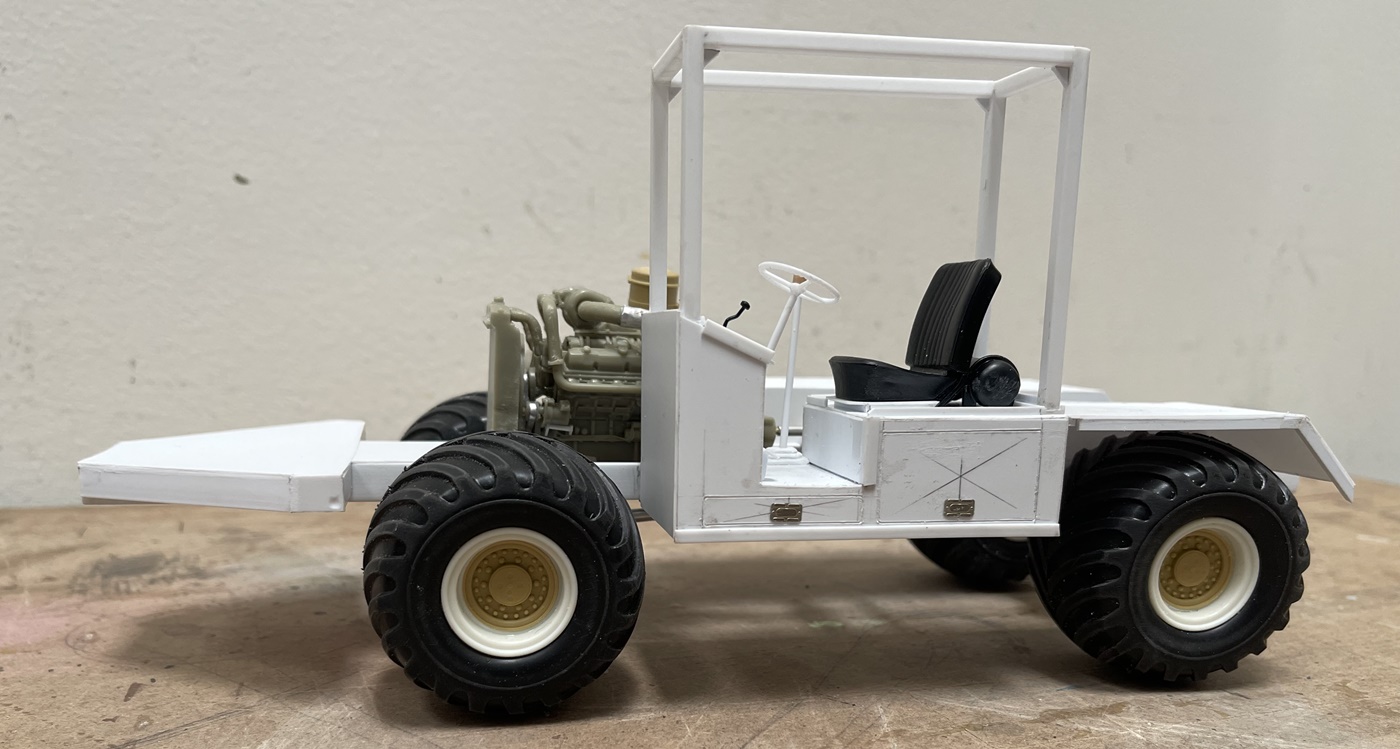
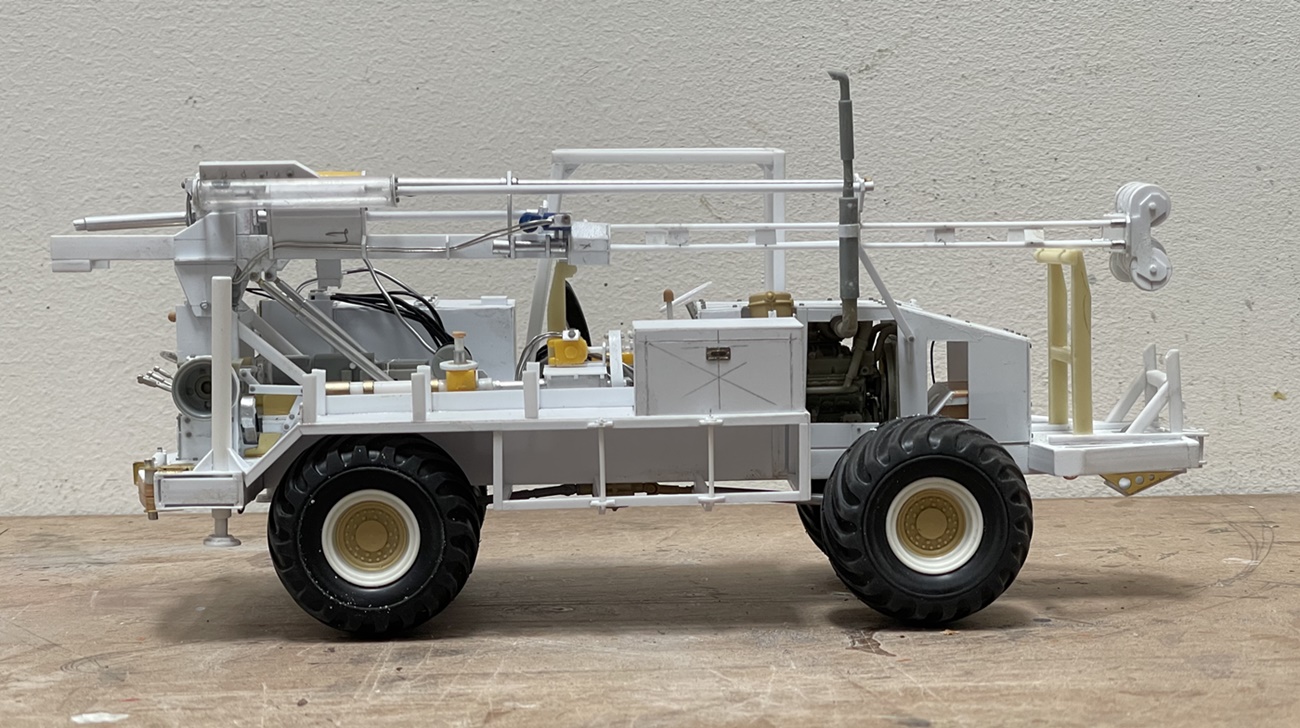
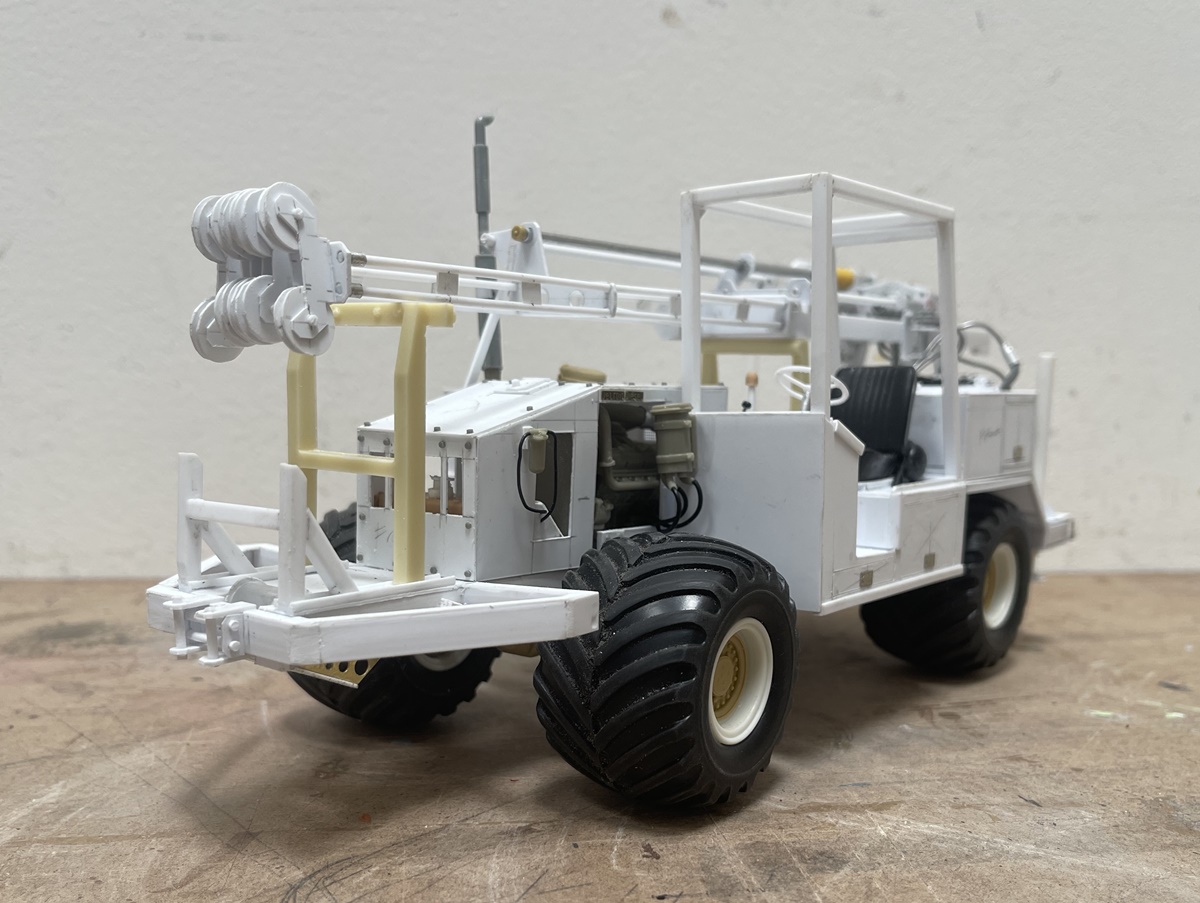
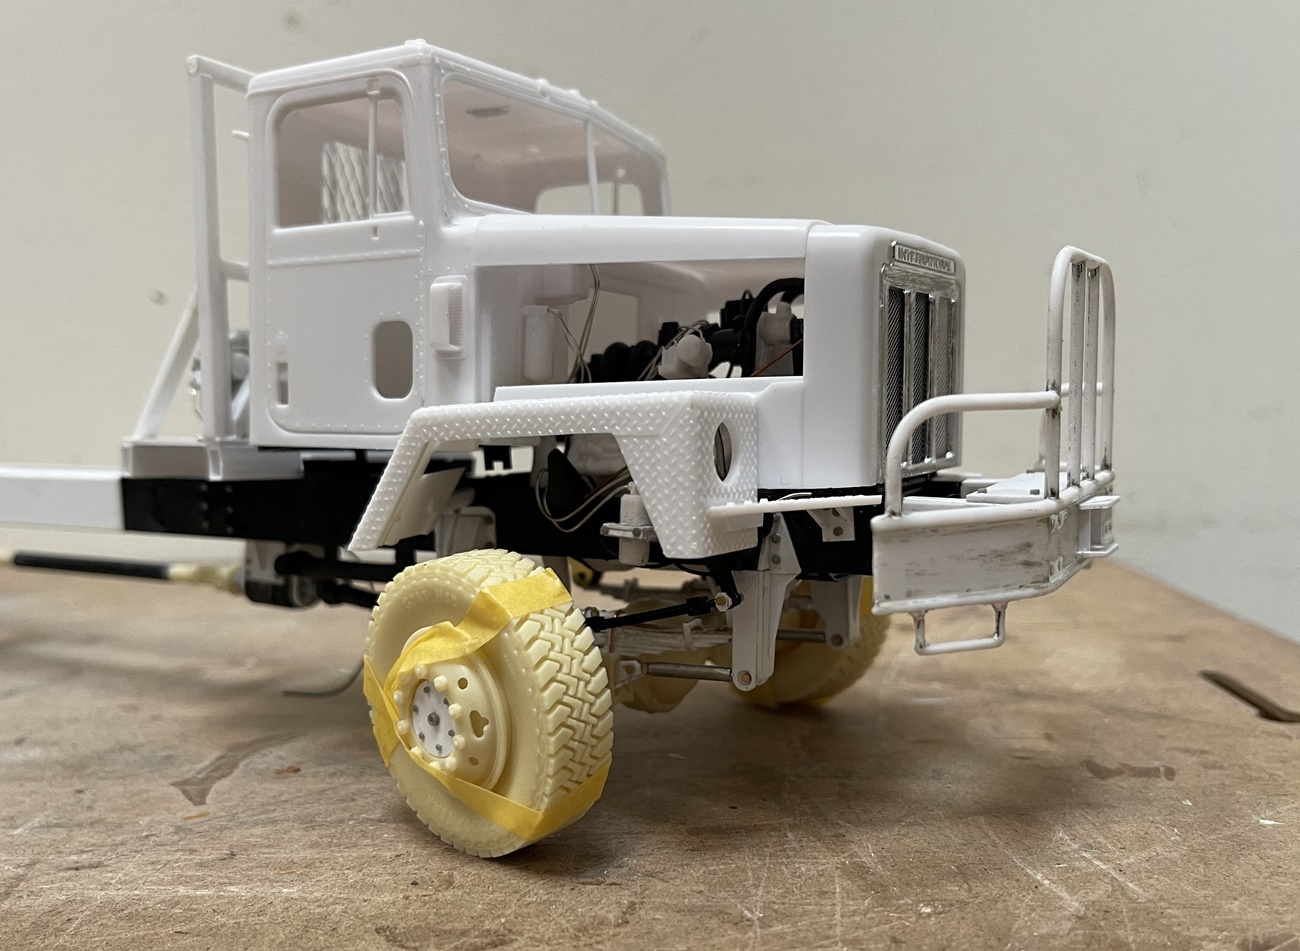
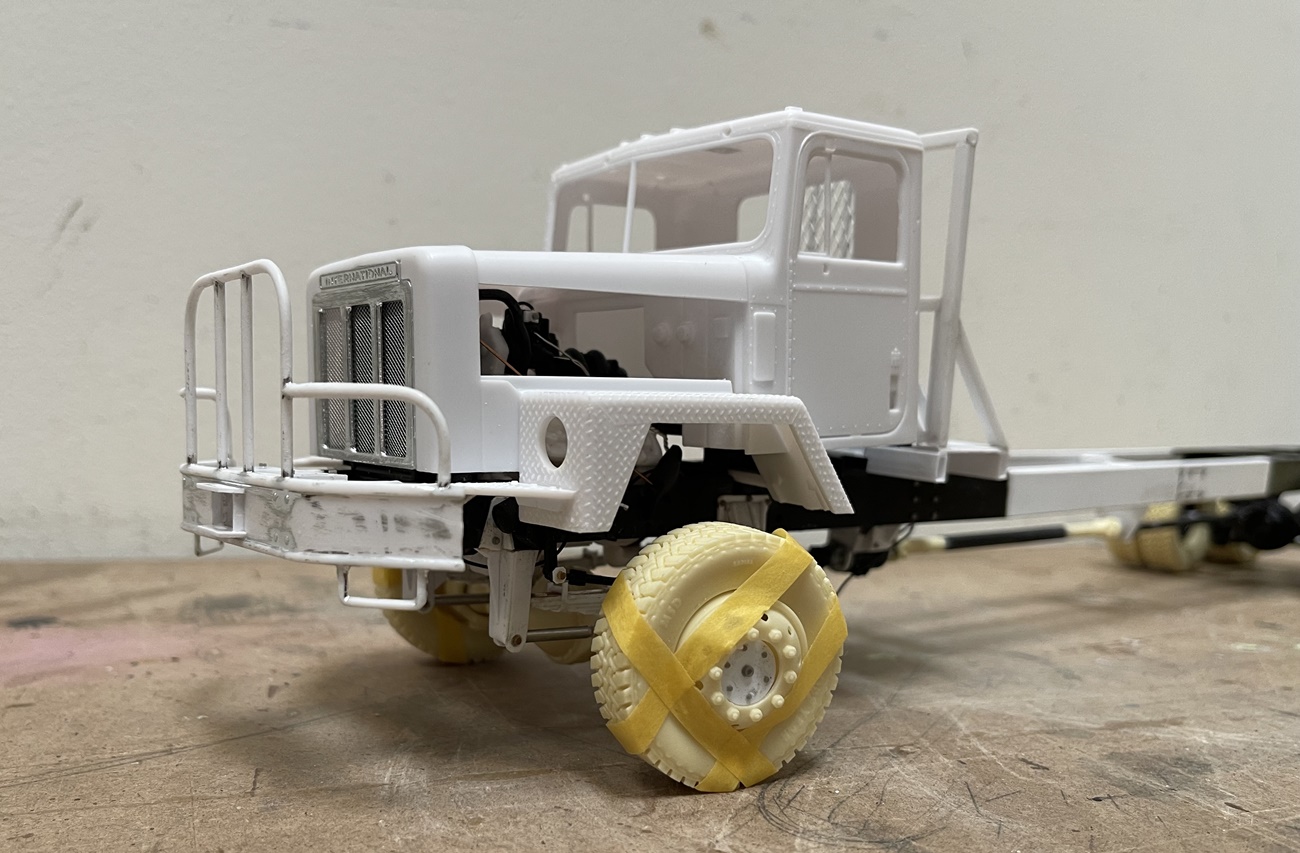
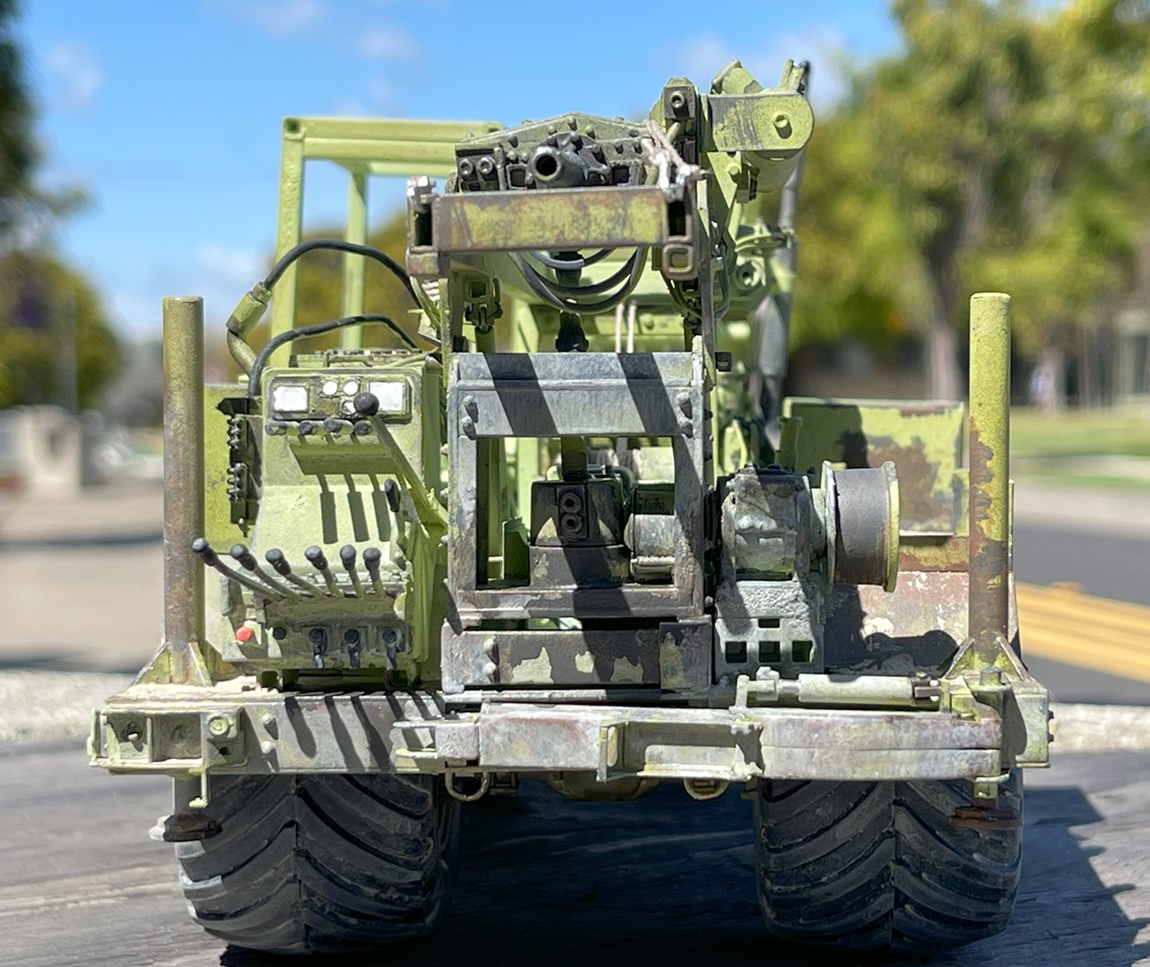
that I made a few errors - specifically, the nose was too long and didn’t require a full deck, and the cab - well, the four legs of the roll cage (ROPS) should not be vertical, and the rear legs should tilt forward/inward, so out came the knife and saw!

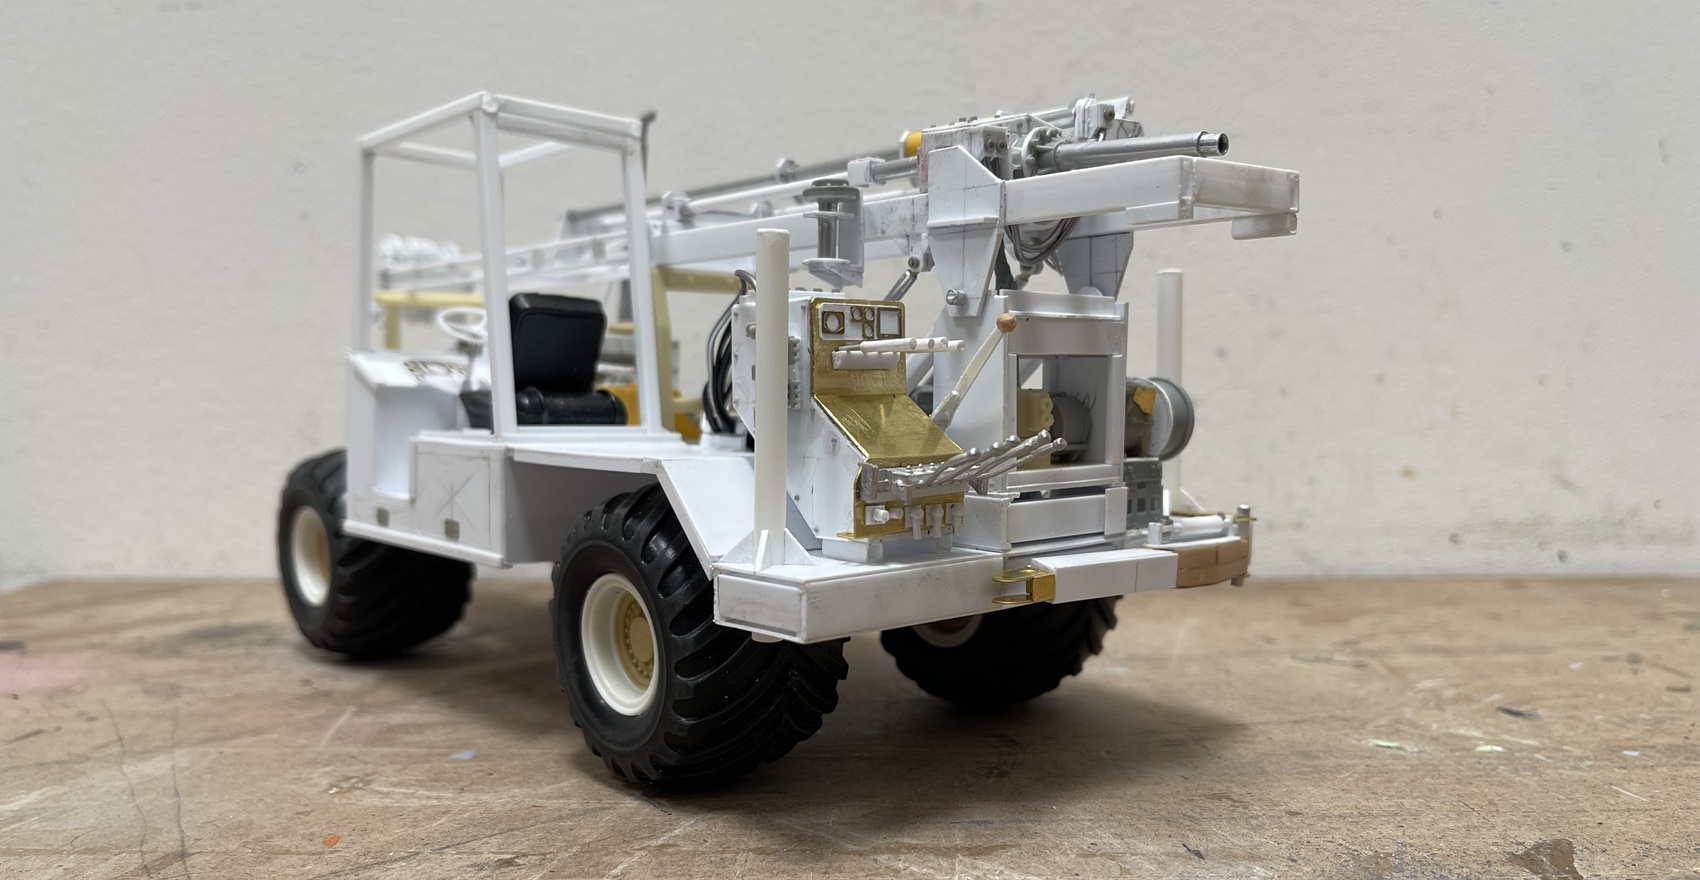
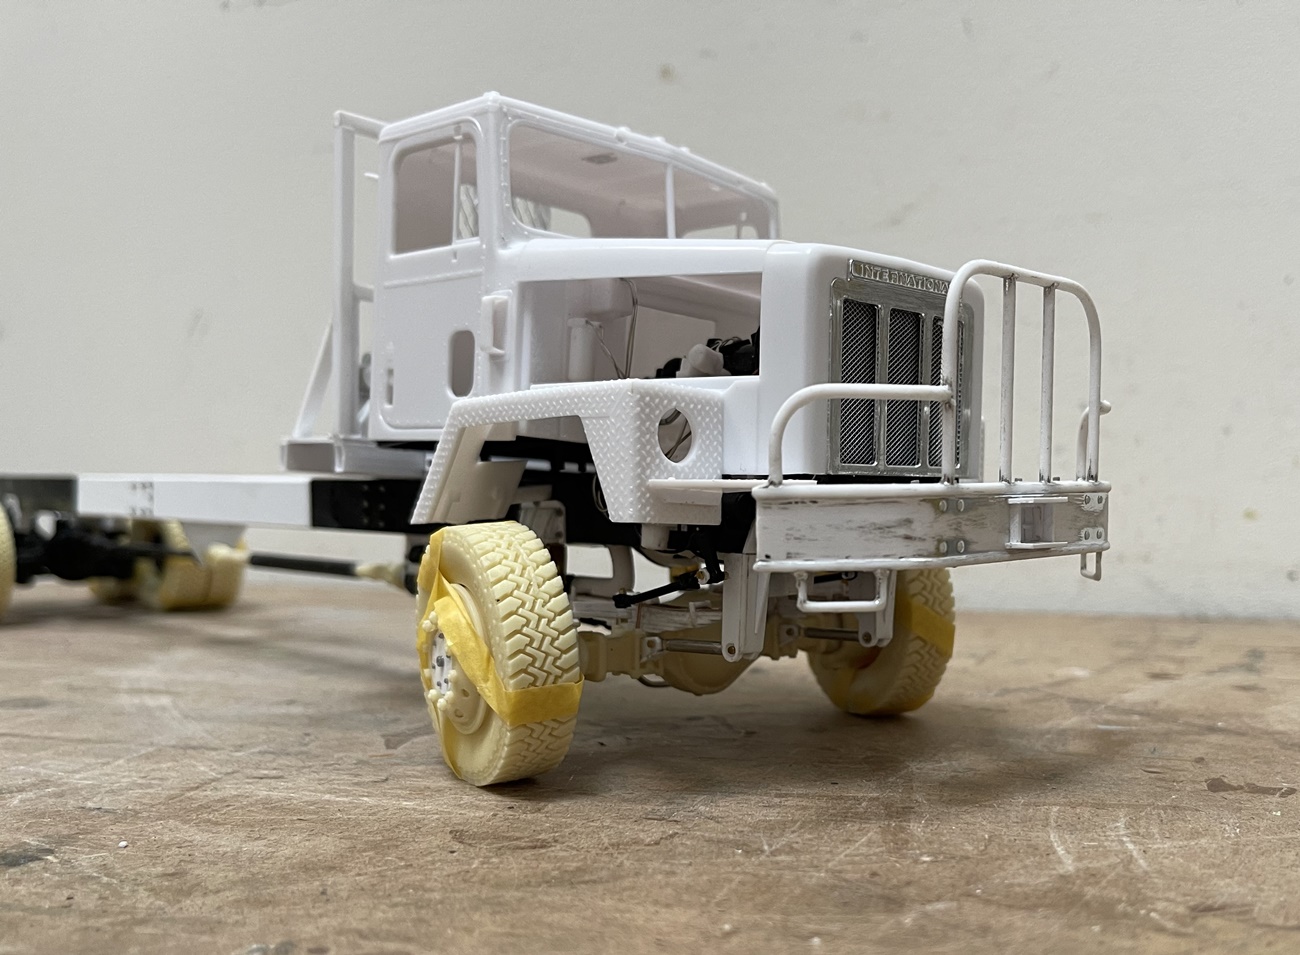
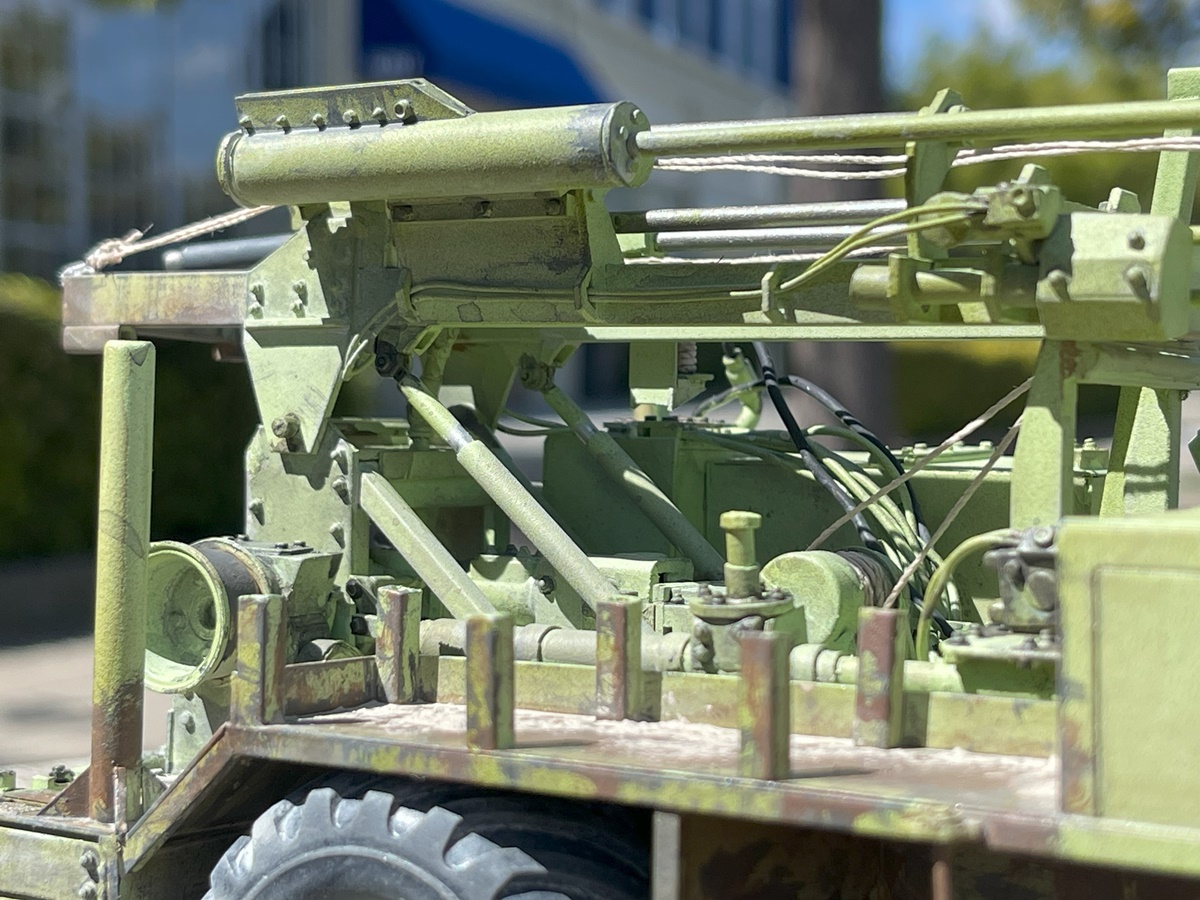
Before getting to the changes, I made a sloping hood, which I like more than the flat one. In real life, it looks like the area I called a “hood” is actually an integrated fuel or hydraulic tank - but, I’m not changing it now.

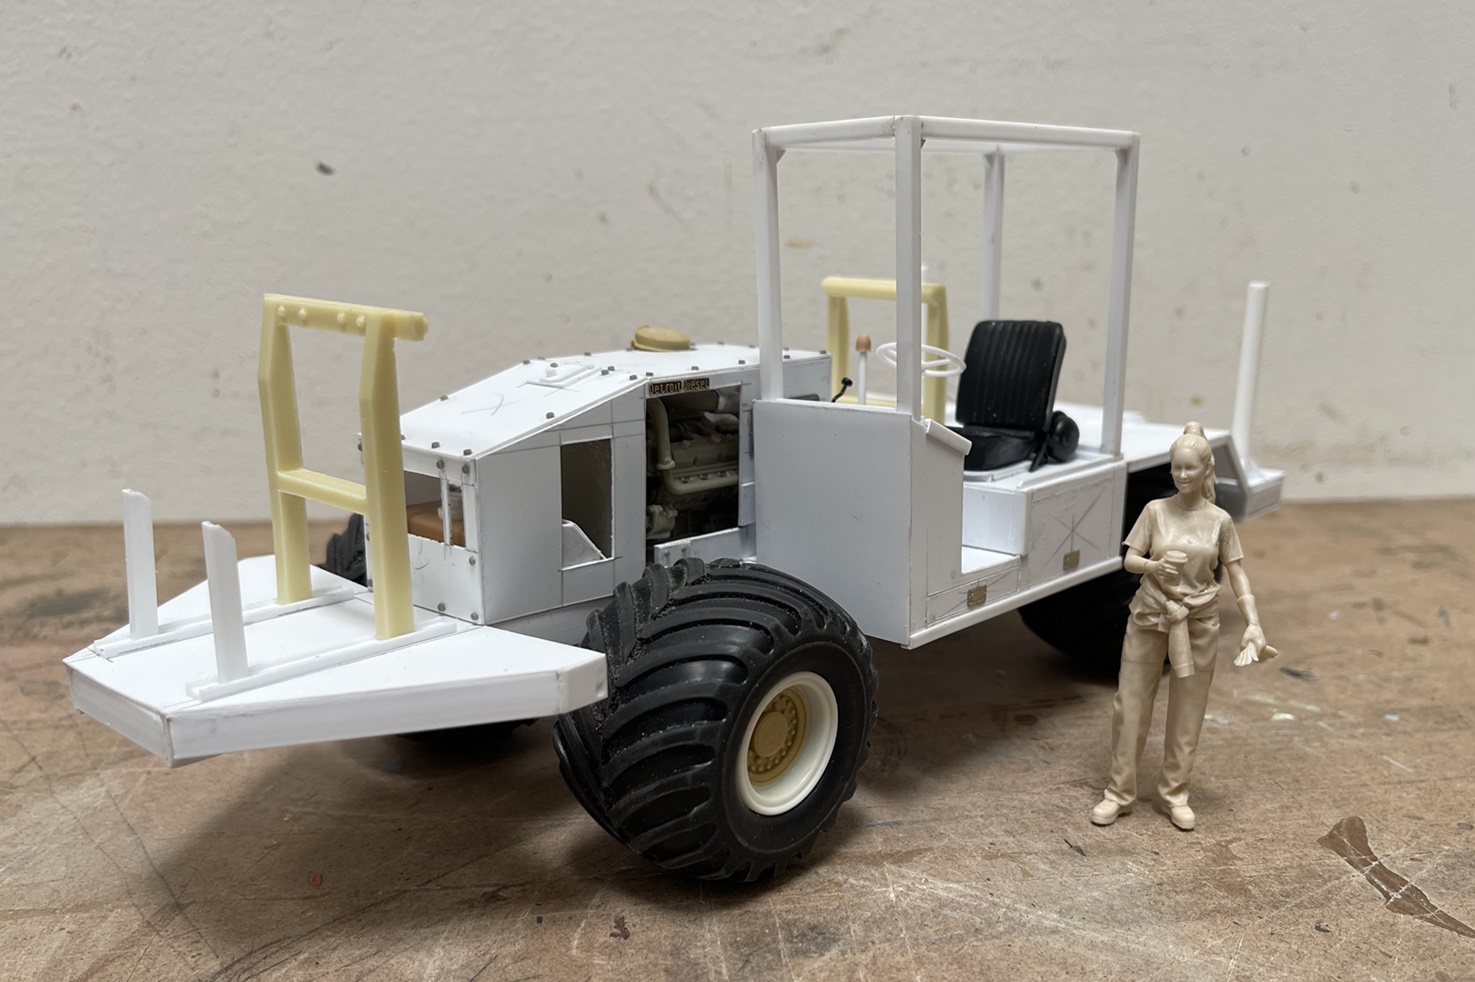
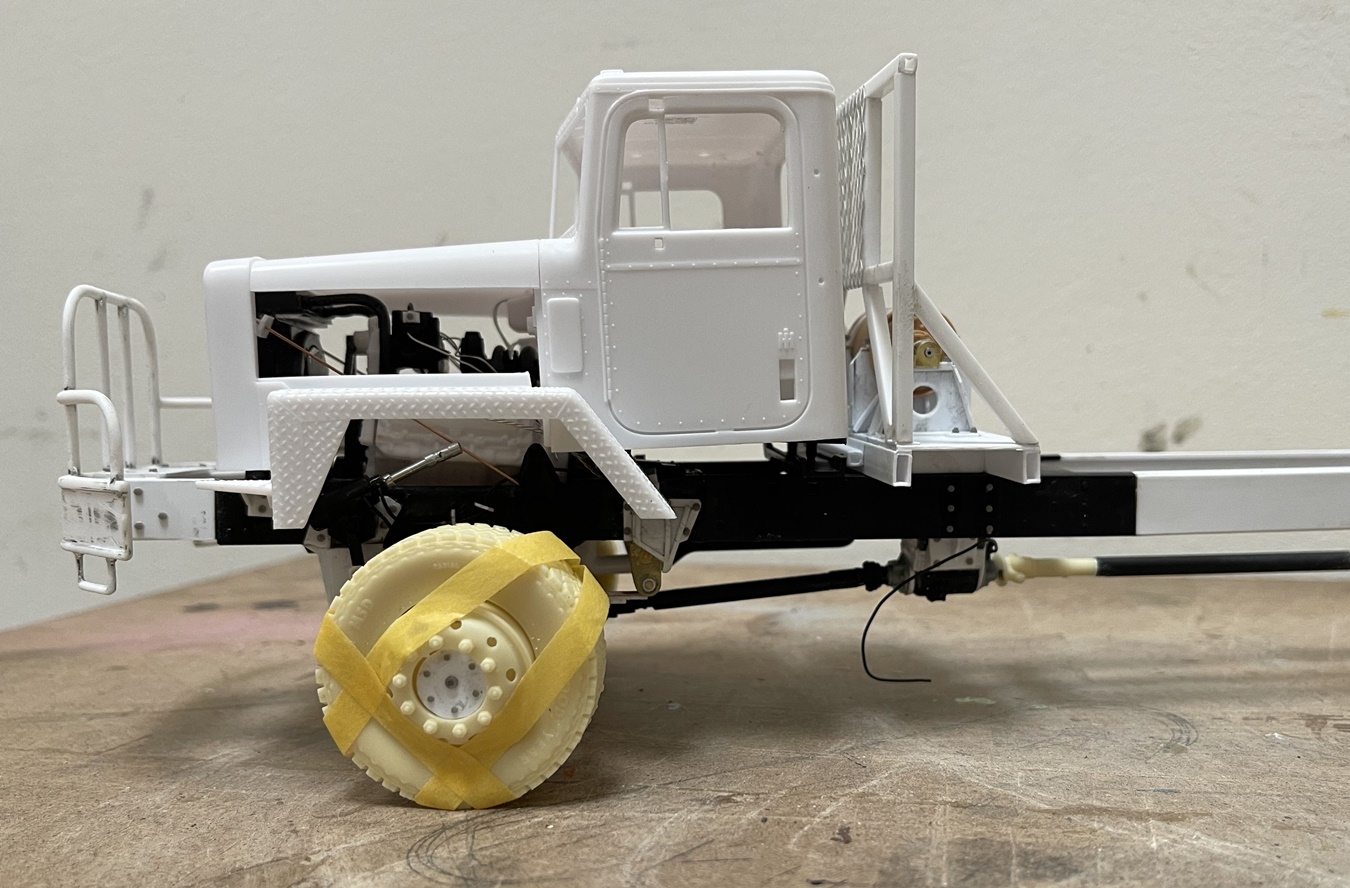
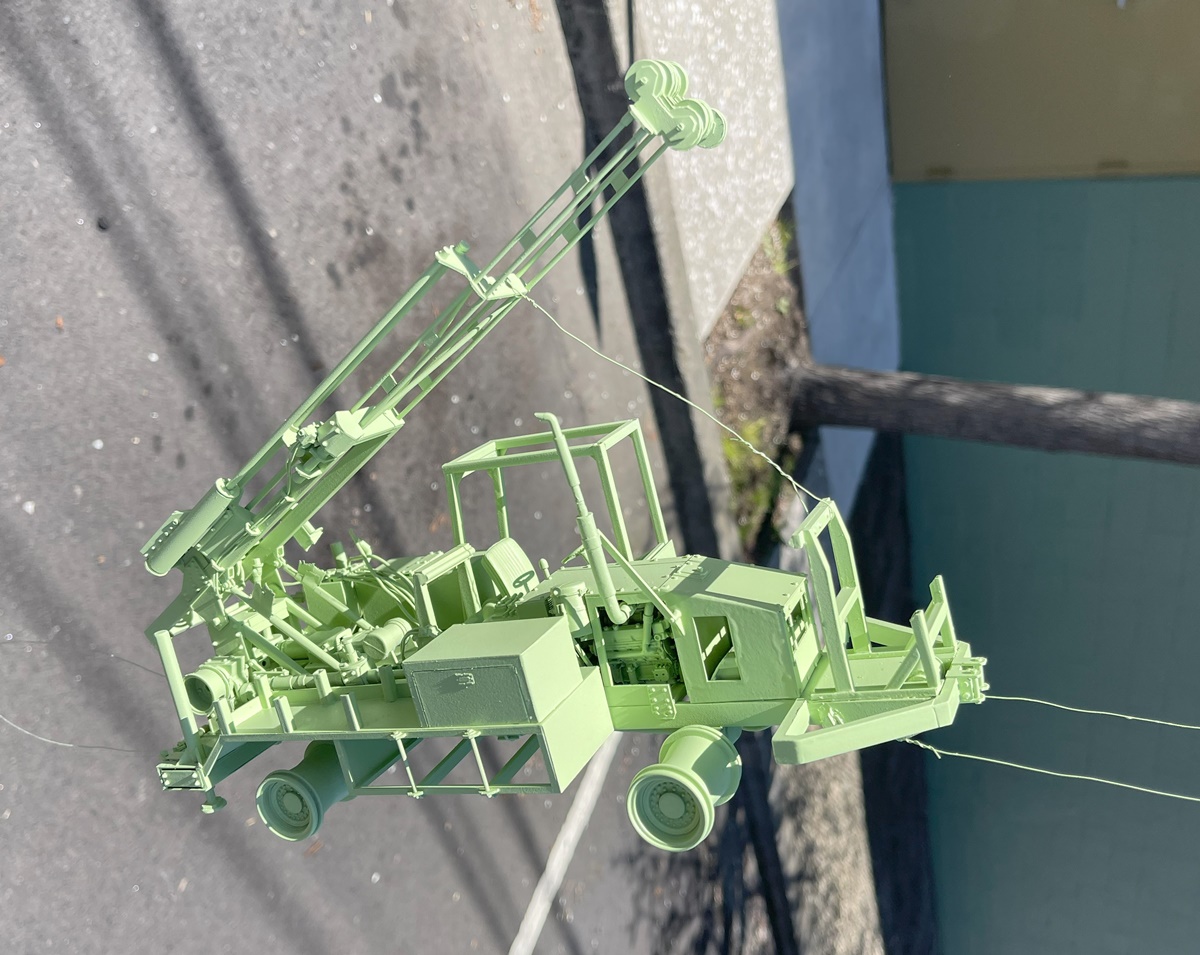
As you can see above, the cab and front end was corrected

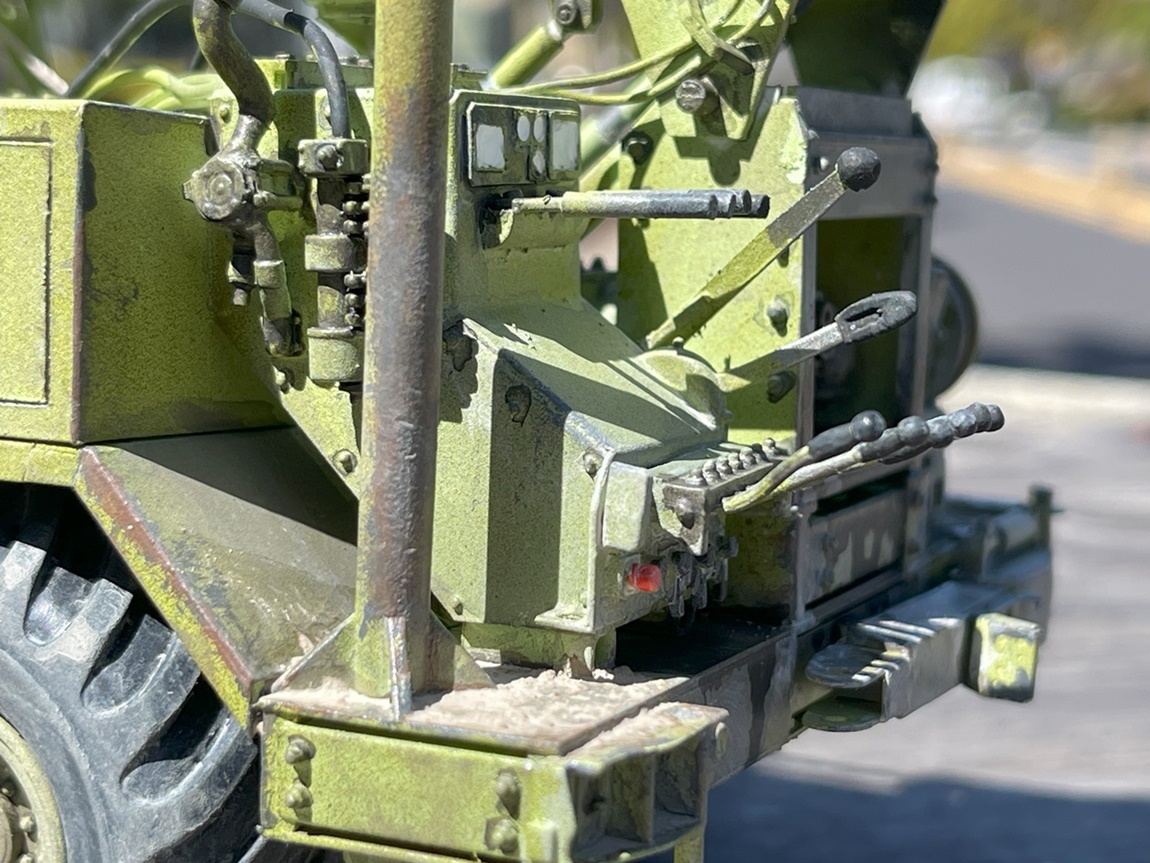
And various details added

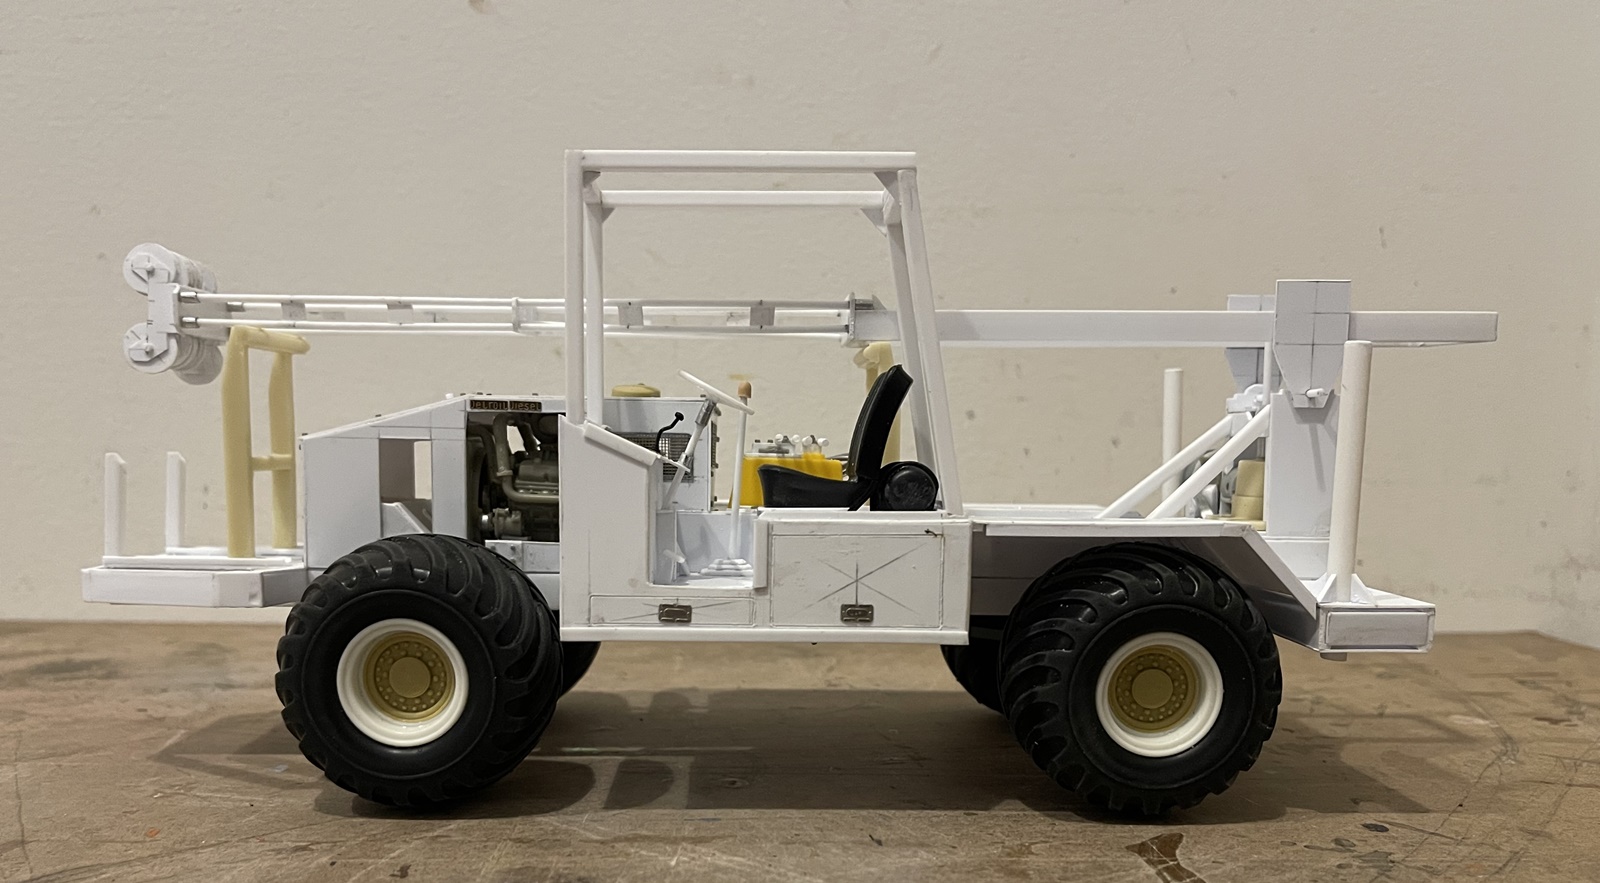
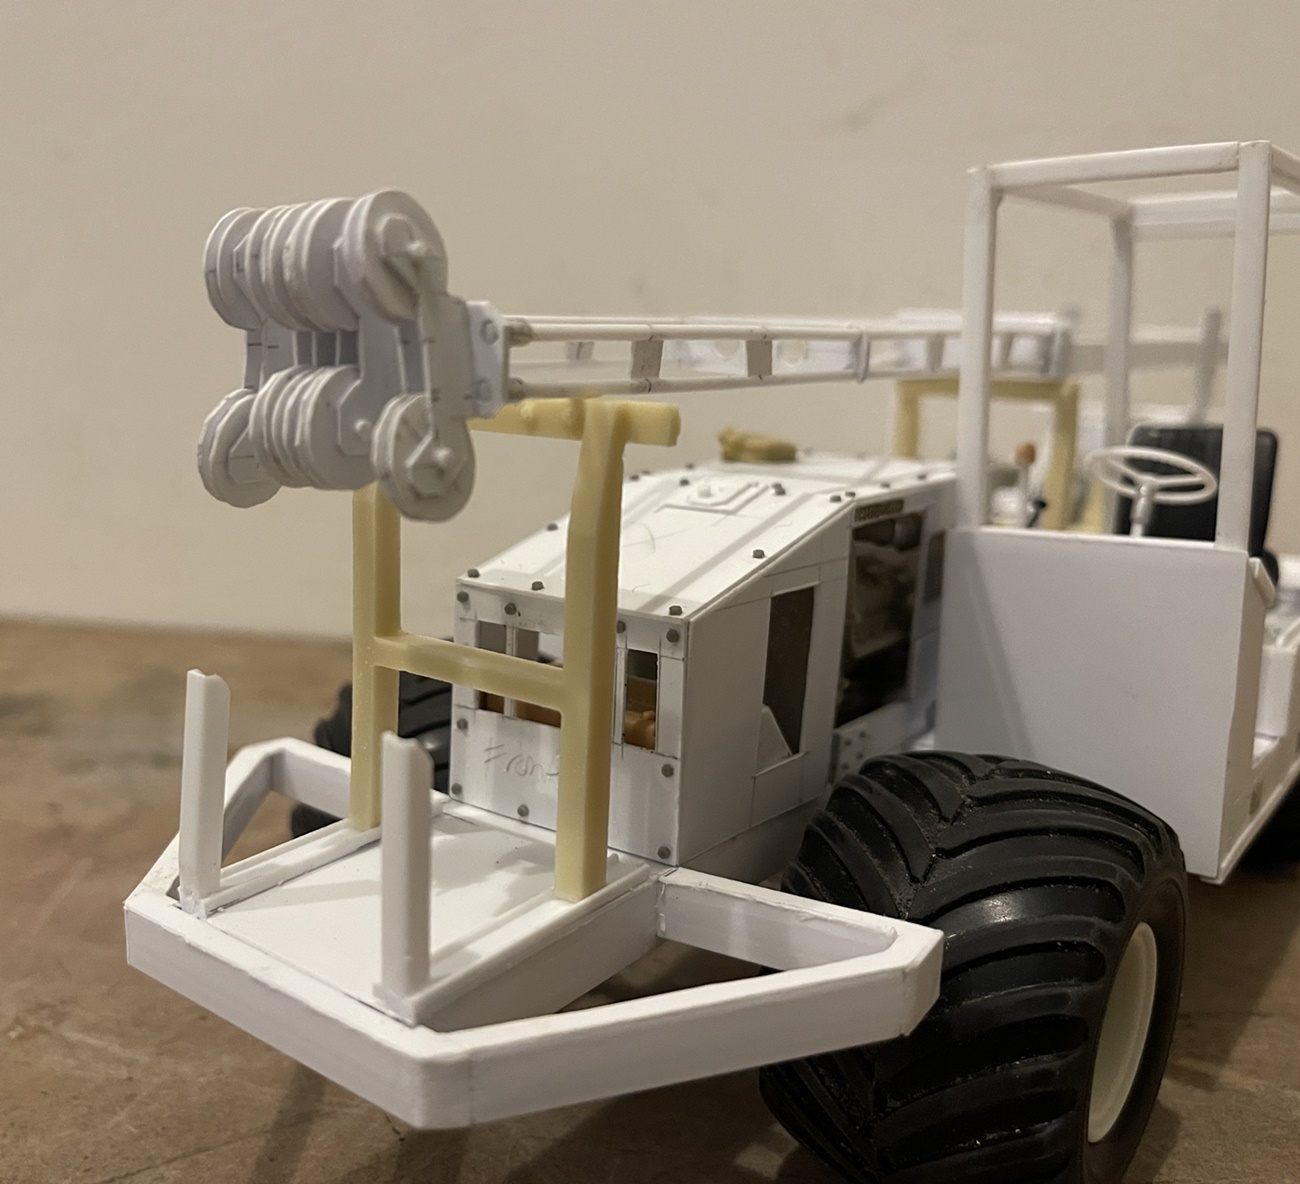
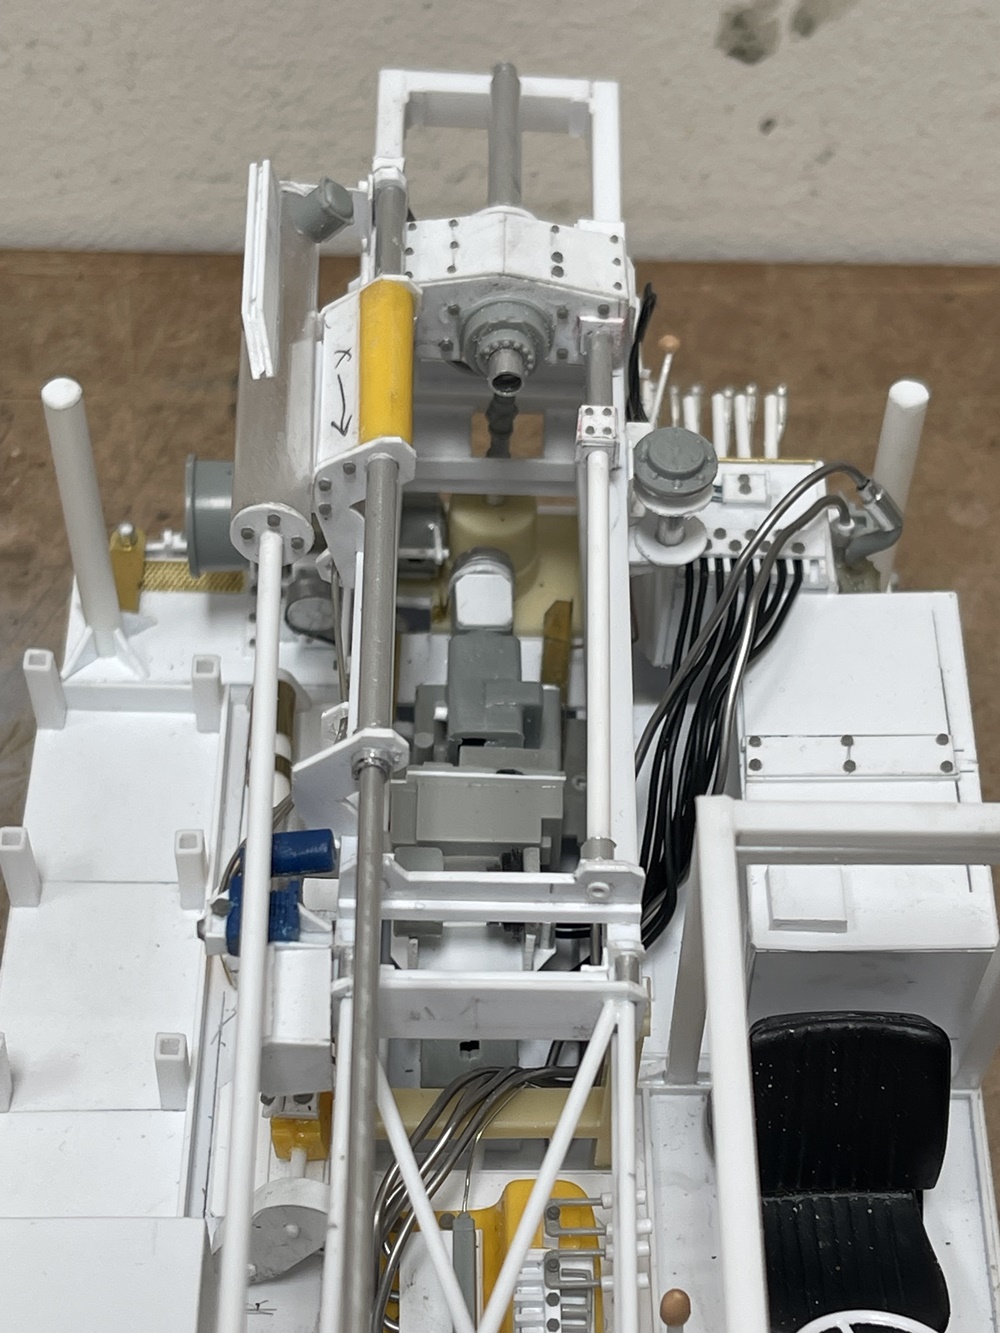
And, those pulleys…ten of them! yes, they have since been sanded, and are now round! These were a PITA, maybe even more tedious than making the lattice frame on the mast! There are ten .040" thick styrene disks, cut with a knife for pulleys, and 20! slightly larger diameter disks cut from .020" sheet to make/define the pulley sheaves :man_facepalming: this was an awful task!

1/35 parts are added where possible - mostly for hydraulic and engine parts, but also for the inner and outer wheel hubs. The 1/32 wheel hubs looked ridiculous - very toylike, so after some filing and making up adapters, these more convincing hubs were assembled. So, an evergreen and junk box special!

I’ve since added more, but haven’t taken any pictures yet.

Thanks again for having a look -

Cheers
Nick

7 Likes

As always, looking forward to a great build.

No punches the right size? I’ve got them from micro punches all the way up to over an inch and a half I think. I can usually find one that’s just right. I’d have gone crazy making these for my crane project without them.

5 Likes

HI Rob,

I’m sorry to report, no punches here. Instead a circle template, knife, small cutters, patience, and a sanding stick. I might look into finding some larger diameter punches tho - as I seem to make many between 1/8" and 3/8". The need for small disks seems frequent enough, as I find myself using them for all sorts of things. I’ve become accustomed to quickly grabbing a sheet at the right thickness, drawing a circle on it and cutting them out. But, in the case above - that was a headache.

On we go tho with the build - It is about ready for painting. I’ll probably add a few more bolt heads. I figured out a way to easily cut Meng bolts from the carrier which has made that a lot faster than when I started. In addition to bolt heads, I’ve spent the last few days adding hydraulics, a couple of winches, and other parts I can see in my reference photos - tho, I don’t understand exactly what they do:

I suppose this has worked out as hoped, in that there is a lot of stuff on this small rig, enough to make it interesting. As this is built using pictures of a few of these, well, it represents a composite. I’m glad you can just see the transfer case and drive shafts, as this will sit on the bed of the truck, my guess is that unlike many other of my builds, on this, you will actually see at least some of what’s under it.

The base of the mast and surroundings has plenty going on. You can see remnant parts from other kits, and a lot of bolt heads, evergreen and whatever else I had handy.

There’s now a winch and fairlead up front

And as you can see, more hydraulic lines in back

An interesting challenge with this is the mix of mechanical and hydraulic devices - there are three chain drives working via PTO shafts and hydraulic motors, and several hydraulic blocks leading to rams and other motors. In reality I suppose I showed about one third of what’s actually going on, but for my purposes, it’s done.

Last week the truck model arrived, as did the front axle, and more evergreen!

On we go - thanks for having a look

Cheers
Nick

9 Likes

https://www.harborfreight.com/9-piece-hollow-punch-set-3838.html

For the smaller ones, I have found UMM USA brand punches to fill the need.

https://umm-usa.com/onlinestore/index.php?cPath=21_145&osCsid=9538147dd3335253ffad9e76d31fdf8d

1 Like

Several times last month I tried to park within striking distance of a demolition site slated for a medium-rise apartment block, to take photos of two mobile drilling rigs somewhat larger than yours, each mounted on big-ass caterpillar tracks. I never succeeded alas and they disappeared overnight - they must have used two Paystar equivalents to get them out.

Anyhow I’d would’ve liked to see you scratch one of ‘em even though your version’s the last word in miniaturised scratch-brilliance :upside_down_face:

2 Likes

Well guys, as the drill rig is essentially done, I felt compelled to get into building the truck. I predicted some of my challenges, and was of course annoyed by a few that were unforeseen.

Up first the obvious. As this build will include kit, aftermarket, and scratch built parts, I figured the axles and wheels would not work all that easily, and I was right!

The top two pics are of the forward, rear drive axle - the kit left an annoying gap between parts in the differential, so took care of that. In retrospect, I should have had more appreciation for how easy this fix was.

Next, the rear wheels and their lack of hubs, from the kit or aftermarket was a problem. To resolve this I cut the hubs out of another kit, and sandwiched them between two inner wheel halves, then added a styrene backer plate. Next, the axles needed to me made wider to match the front, aftermarket axle, and to add brake drums. Not overly hard to do - but tedious. The axle housings were widened using various lengths of alu tubing, and solid brass road inserted to serve as the axles. The reason for all of this?

The outer faces of all my tires are now in line - what a treat! This pic does not include the brake drums or final segment of tube over the rear axle housings. You can also see, the front axle has a way to go.

But, feeling good about all of this, I attached the rear axles:

Perfect! …uhhh, except for two things. First, as you might notice the two red arrows - hmm, the gap between the top of the rear tires and frame rail, hmm, that looks a bit close. Oh, and unlike my last few builds, I used the kit supplied rear walking beam parts, and, again hmm, does it appear to be sloping? That is, the walking beam that mounts the axles sure looks like it is sloping forward? Another thought, while nice and cozy, the front tire in the fender well - yeah, cozy indeed, not good to see because well, there is no front axle in there - that does not look right.

And indeed, it was not right. Looking at my prototype photos, I found that the front axle on the 6x6 version sits lower on the frame than the solid axle on the 4x6 version, which I guessed. But, because of this, the rear axle centerlines that would occur using the kit provided parts would not be equally low, and they would be off by about 1/4"…great. So, out came the saw and knife, and out came the rear end - and now, it sits lower too.

On a related note - while the front axle sits lower than the typical front axle, it doesn’t sit that much lower, so keeping the kit as is would result in the front diff hitting the oil pan - another treat! So, again, out came the knife and saw, and now, like the real version, the oil pan has been modified to now be a deep sump version - perfect. You can also see the rear, front leaf spring hangers are now roughed in place - they still need work, but they are in, and this shows what’s basically happening:

This low tech mock up shows where the axle will be located, and generally where it will sit relative to the motor and oil pan.

On we go - I’ll keep working on the front. I’ll make the leaf packs first, then the front brackets. I will do the springs first because I want to be sure that when I make the brackets, they will be in the right location. A subtle point here is that the location for the leaf springs on the axle is just off-set from the frame rails, so the front brackets will need to be installed considering this and length of the leaf packs.

Thanks for having a look -

Cheers
Nick

9 Likes

Hello gents,

Still working on this truck - along the way, I tested out the suspension height:

I made up some leaf springs and hangers, then did some testing, and happily the ride height will work.

Knowing it would work, I kept after the front end, adding brackets, detailing the leaf packs, and adding steering. This is a twin steer, so there are two steering boxes etc:

This ate up a lot of materials - various metals, styrene, and some really small nuts and bolts, but it’s closer to looking like the right front end. Like the red KW, I added some thin metal sheet to the top of the leaf pack, and this truck also has the control arms on the front side of the leaf packs - thankfully, I hade done both of these before, so it went relatively smoothly, if not slowly!

And for fun, a comparison picture with the the big red KW:

As this truck will be hauling the drill rig, I needed to lengthen the frame rails - and even with that done, it looks tiny in comparison -

Thanks for having a look -

Cheers
Nick

7 Likes

Just catching up on this project, brilliant work as always Nick! You keep coming up with unique and awesome subject matter and dive in fearlessly where most of us mere mortals would be stopped dead in our tracks.

Keep right on truckin mate!

Cheers, D

1 Like

HI D, thanks - yes, some could say it’s a problem, like those guys who only build tri-five Chevrolets! (DD Speed Shop!!) :smile: And yes, I like both!

I have finally made enough progress to actually show something that is beginning to look like a big and clapped out truck:

I like the base kit for the most part - on one hand, it is sturdy enough for me to use as a suitable foundation for a tough truck, and it includes some interesting bits like twin steer and a decent motor. On the other hand, some of the parts are not great - like the one piece leaf/walking beam, which looks nice enough, but is not level. Hence, my twin drives do not sit flat - shoot. The funny thing is I suspected this would be the case, but was not in the mood to scratch up another rear end - I should have.

Another odd feature has to do with the front fenders and radiator cowl, which is one piece. It is: not square; and, it’s mounting points are not great - the kit would have you glue the front of the cowl to the top of the radiator, then glue in opposing mounting pins on either side of the chassis. SO, I beefed up the pins, installed a spacer above the radiator, and made body mounts to support the otherwise floating fenders.

And as long as I was at it, I cut off the lower portions of the butterfly hood so you’ll be able to see into the engine - I am not going to make another piano hinge set up!

In the last pic you can see the body mounts, on either side of the radiator, and you can see the rods used to keep the radiator vertical and in place. I also went ahead and built up a bed winch - this time hydraulic, noit chain driven.

So, thanks for having a look! Next time you see it, well, it will be shorter and hopefully the interior of the cab underway -

Cheers
Nick

5 Likes

Well today was nice and sunny, so I took the drill rig out for some photos, but, before a couple of process pics:

Ahhh! a space rig! :smile: So basic Tamiya fine grey primer, followed by some art store ugly green. After the green, I dusted it via airbrush with Vallejo, US Interior Green. Then went about adding some signs of heavy use:


Some grime, dirt, rust, and hydraulic fluid - I must say, I almost can’t believe how well this area turned out -

There are a few areas that could use some touch up, but I think I’m calling this part done, so back to the Paystar - and yes, the plan is that it will look as rough as this when it’s done -

Cheers
Nick

11 Likes

Fantastic!

That truly captures the work horse it is.

BRAVO!!

2 Likes

Looks awesome. Great job on it.

2 Likes

Very nice. Dig the subject, build, paint, and weathering! Wait, what?? ugly green??That green is beautiful :grin:

2 Likes

Love that green! :star_struck:

LOL

3 Likes

Wait a minute… I think there’s some sort of minty connection in the multiverse going on here. :seedling: :thinking:

—mike :flying_saucer:

3 Likes

HI guys,

Thanks, and glad you like it -

@The_Snowman, I appreciate your comment - this is indeed intended to look like a workhorse. The wear is based on looking at a few prototype pictures, which offered lots of good opportunities to mix and match weathering techniques which I enjoyed trying.

@HeavyArty, thanks Gino - glad it passes your eye test, thanks. I haven’t built a project with a lot of weathering in a long time, so this was a nice change.

@KoSprueone, hi KSO, thanks - you know, I forgot that you used this color on your rail car mover - which by the way is a beautiful build! I don’t recall who makes this paint, but there is a large rack of it at my local Blick’s art store. It’s interesting paint, as it’s acrylic, but unlike hobby paint, like Vallejo, it does not dry that quickly - but when it’s set up, it is really hard. It is not as fine as Tamiya or Vallejo, which is just fine for some projects, and as you can see, it takes weathering pretty well -

Thanks for having a look and leaving some comments -

Cheers
Nick

3 Likes