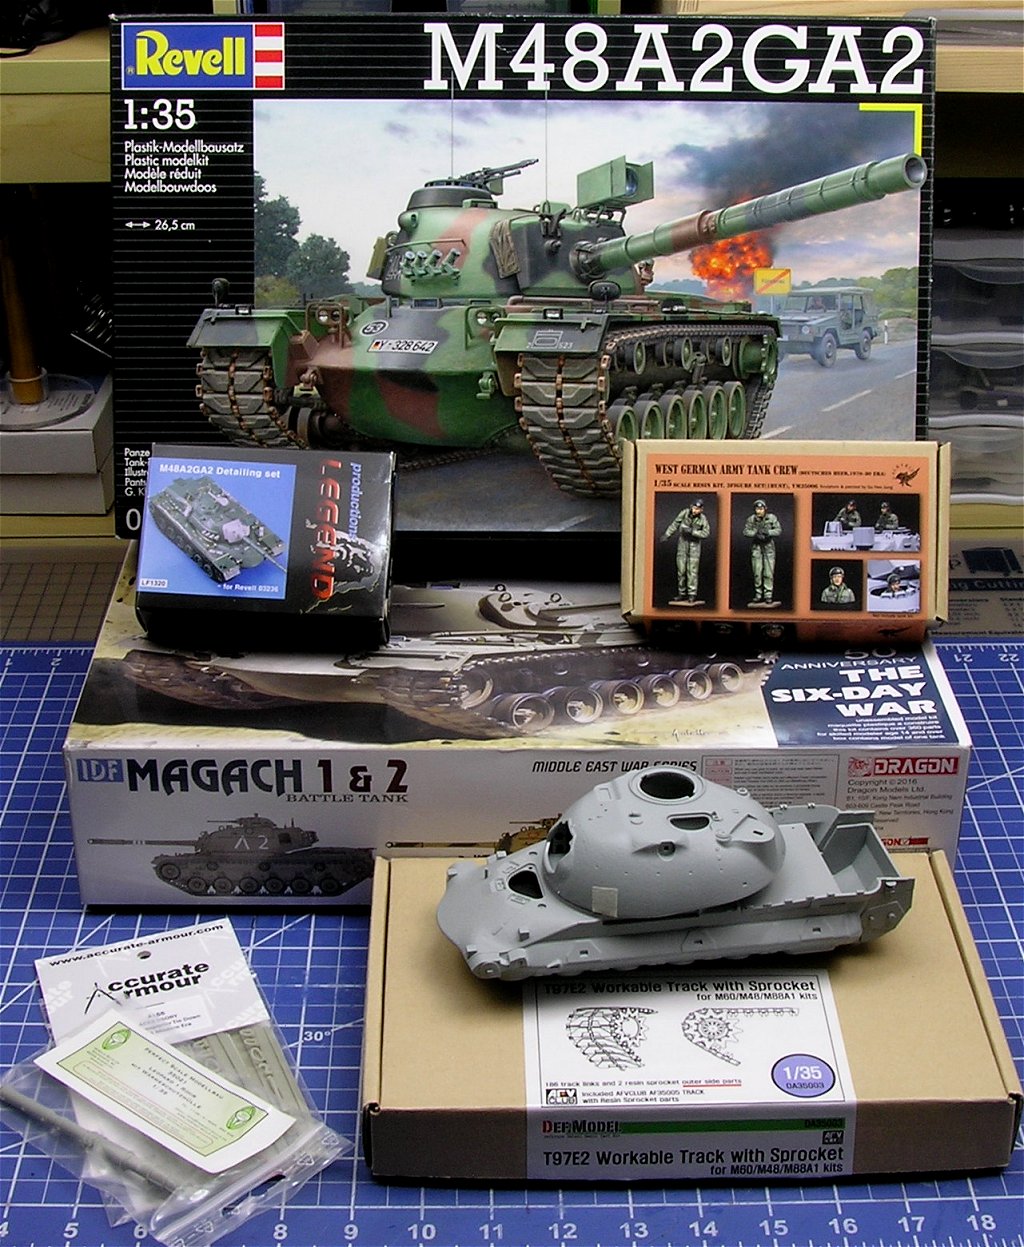
I’ve been wanting to build this version of the M48 since about 2012, so today is as good as anytime to get started. I’ll be bashing the Revell GA2 with the Dragon Magach 1/2 kit to get a better detailed end result. I’ve also been collecting some AM items as well, such as DEF tracks, Legend Production’s detail set, Perfect Scale Modellbau L7 gum barrel with thermal jacket , Valkyrie Models West German Army Tank Crew Deutches Heer 1970-80 Era and Tankograd Publishing ‘Cold War Warrior’ - PANZER M 48 and The M 48 Main Battle Tank in German Army Service, just to name a few.
Anywho here is the startup pic as I’ll begin construction today.
Thanks for stopping by and comment are always welcome.


10 Likes
Looking forward to watching the build sounds like an interesting kit bash build. Should be a fun build!
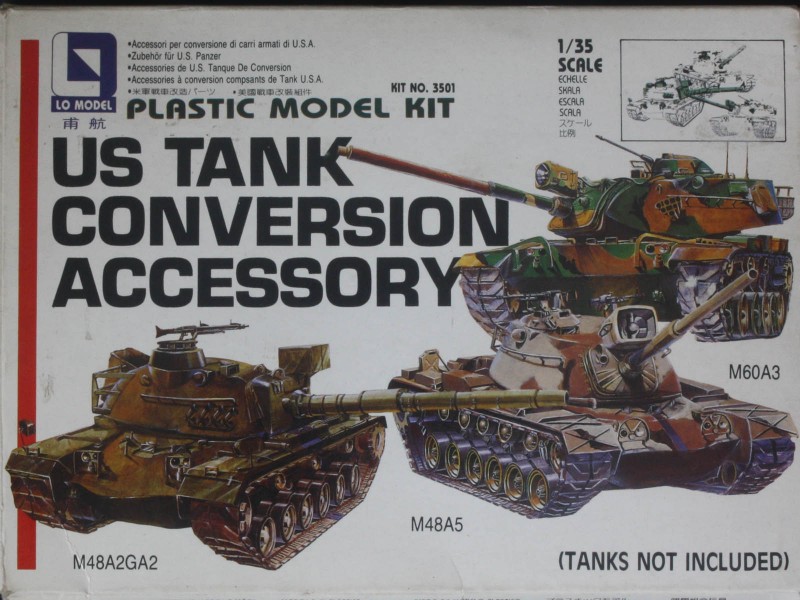
I did a M48A2GA2 long ago using a Lo-Models conversion set and a Tamiya M48A3 kit long ago.
1 Like
I remember the Lo Model set and I might still have the sprue sitting somewhere. I never used it. Wasn’t it a 105mm gun with the thermal shroud ??
1 Like
Looking forward to this. Starting to get very interested in the Cold War M48s used by Germany and others
1 Like
This should be an interesting build to follow! The DML kit is a far better base than the Revell, and the only real challenge is grafting the Revell mantlet onto the DML parts, but I can say for a fact it can be done so you can use the DML mounting and keep the gun free to elevate. Keep those pictures coming!
1 Like
Me too, I think Eric @Armored_Sprue is going to rock this one out of the park. He’s selected an excellent starting point.
Yes, IIRC the Lo-Mo set had the 105 w/thermal sleeve. Agreed there are a lot of very cool M48 variants from Cold War & IDF. With that boat like lower hull turns out what was old is new again aka mine/IDE resistant.
1 Like
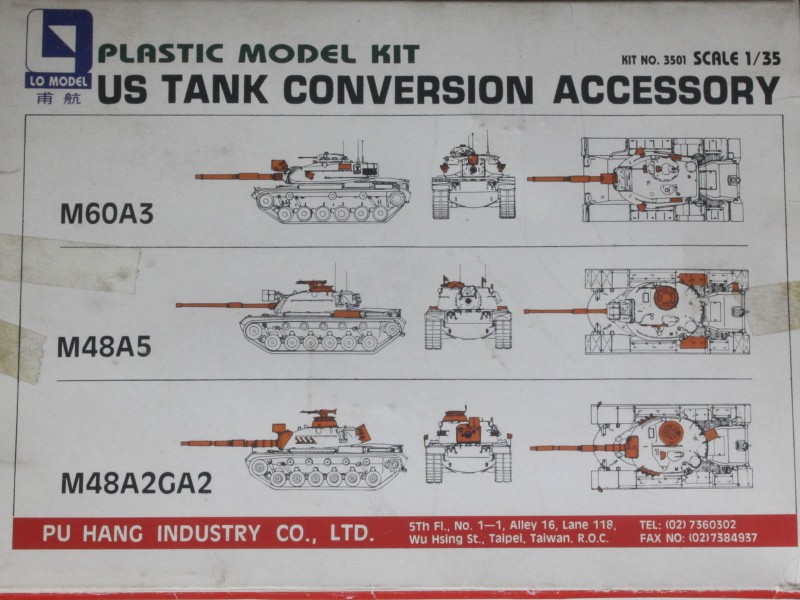
The Lo Model set was pretty useful for its time and was well molded. It had the parts to make/convert 3 separate tanks; German M48A2GA2, M48A5, and M60A3. These included cupolas, gun barrels, top-loading air cleaners, smoke launchers, and other assorted detail parts.
It was reviewed at the old Armorama.
2 Likes
I too had the Lo set - in fact I think I’ve still got one somewhere; I was going to use it to make the German 105 equipped version but then realised that the kit it was destined for ie the Tamiya one had the wrong rear hull configuration, and that the Monogram kit would be better, or at least the rear hull; that aside, these were useful little accessory sets and I think Lo Model showed great initiative in this venture.
1 Like
@HeavyArty Gino’s, yes that’s it!. Did a M48A5, M60A3 & M48A2GA2 back in the day using that set  Good Time
@BootsDMS Brian, definitely understand passing on the old Tamiya M48A3 kit for the conversion project. After finishing the M48A2GA2, I’m pretty sure the old Tamiya M48A3 suspension sits too high also.
1 Like
It does, about 3mm too high. Apparently Tamiya took their measurement from a tank w/no engine or interior, so it was too light on its suspension and too high. It has quite a few other issues as well. Paul Budzik did a great Correction Article on it.
2 Likes
Thanks for all the comments and the great conversation about the Lo models accessories kit. I remember seeing that in the local hobby shop (anyone remember them). While I’ve done a good bit of interwebs research on this subject but if anyone has any little golden nuggets of knowledge please feel free to pass them along.
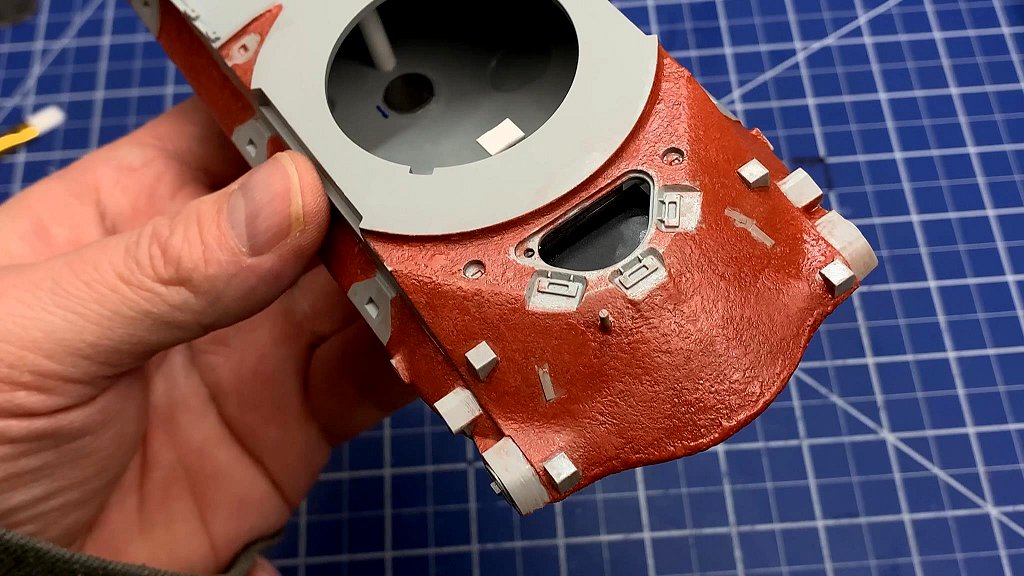
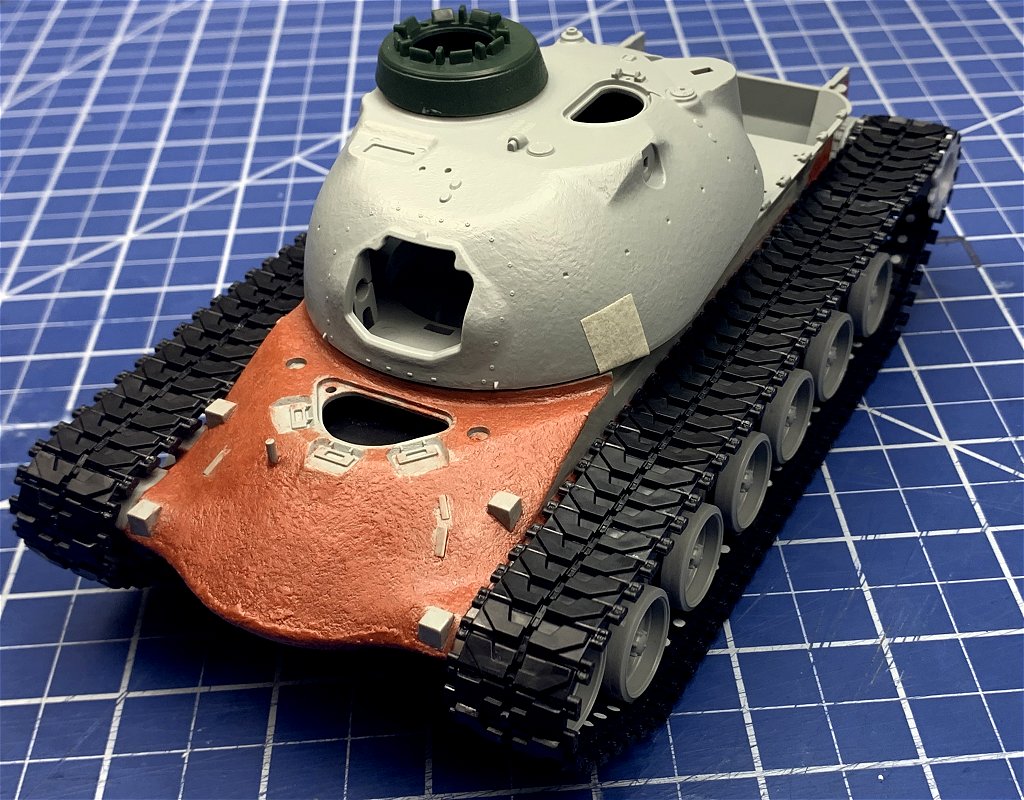
Todays game plan will consist of putting the DML lower hull together and retexturing it…so stay tuned.
Thanks again!!
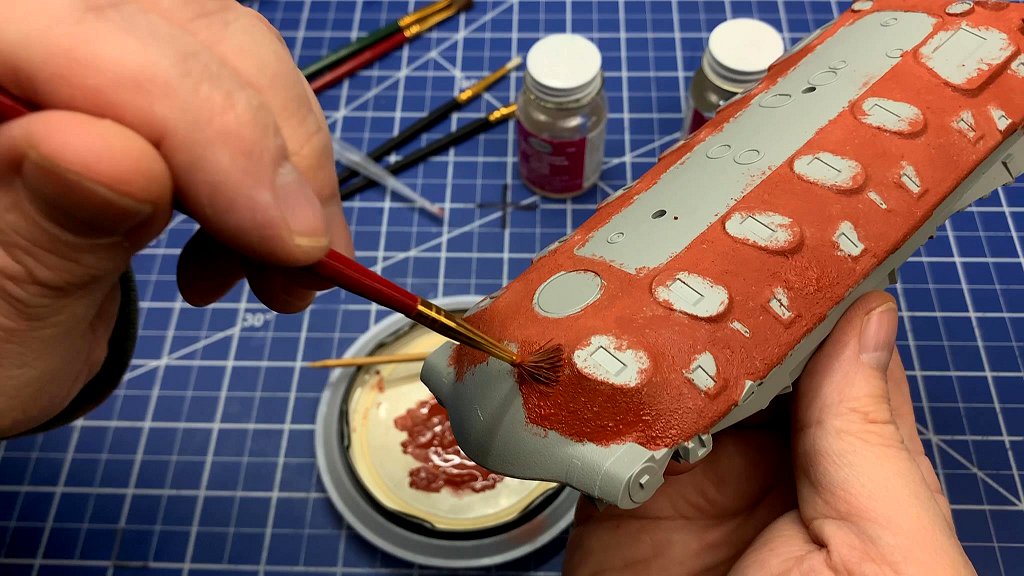
Here an update of what I got done over the past couple of days…Feels like a good start.
Texture the lower hull using Automotive Bondo . Once dry I sanded it down a little and sealed in a clear coat. Then I started on the suspension elements.
That’s it for now. Thanks for stopping in and comments are always welcome.
7 Likes
Good looking effect. What did you use to thin the spot putty?
1 Like
Wow yes that looks really good
1 Like
Thanks guys! I’m happy with the results even though the cast effect is over stated, I like it that way.
@ kosprueone: I used plan ol Testors liquid cement to thin the bondo.


1 Like
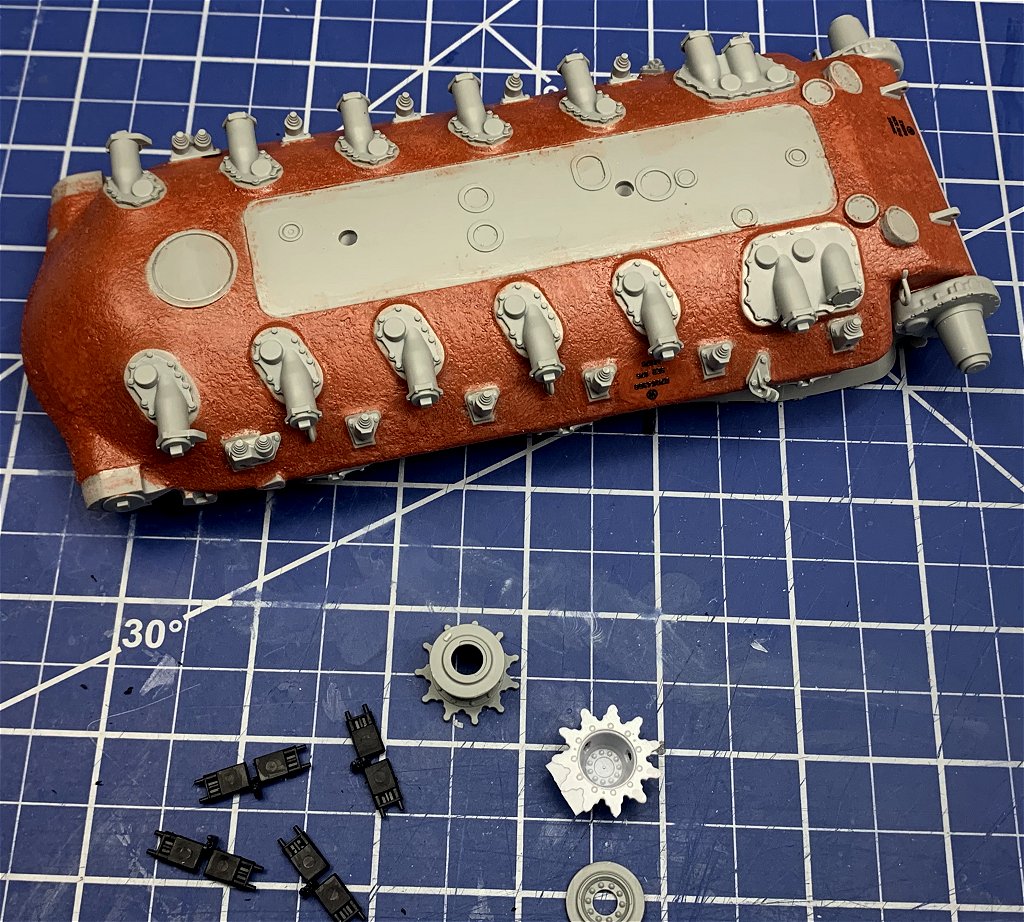
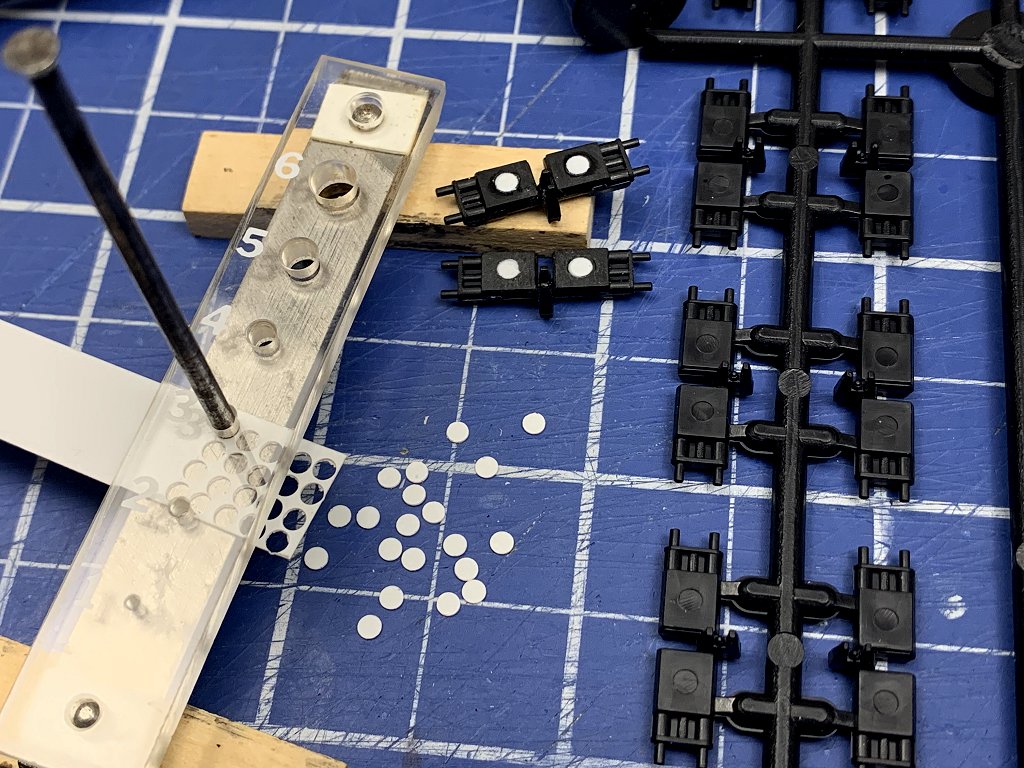
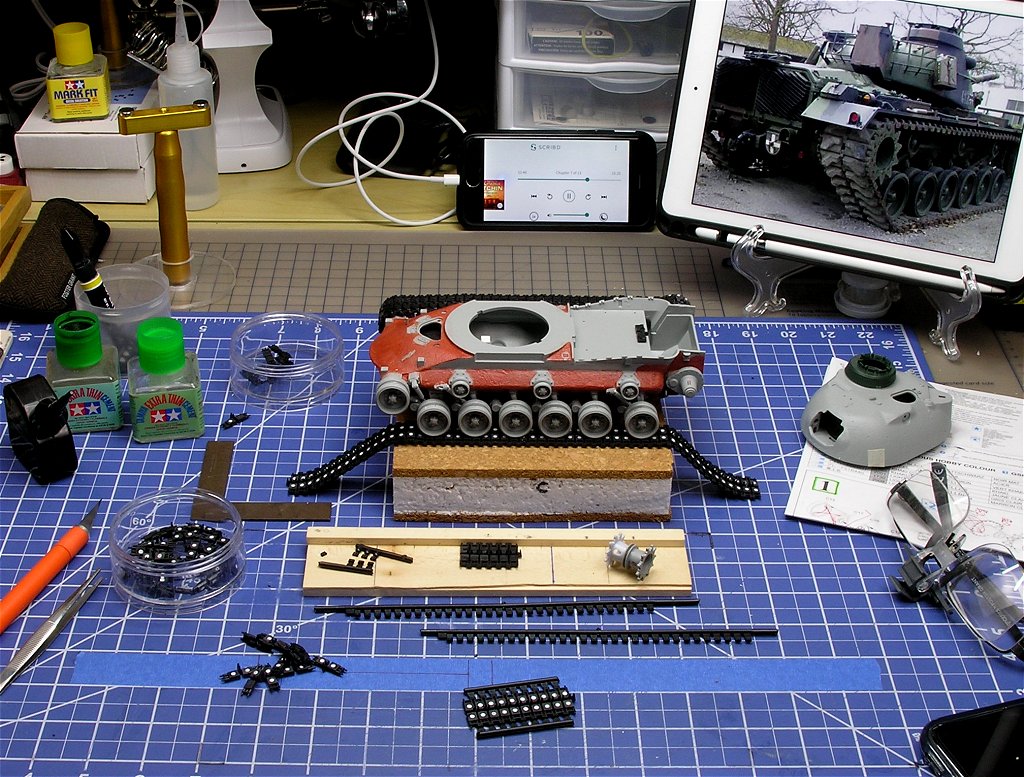
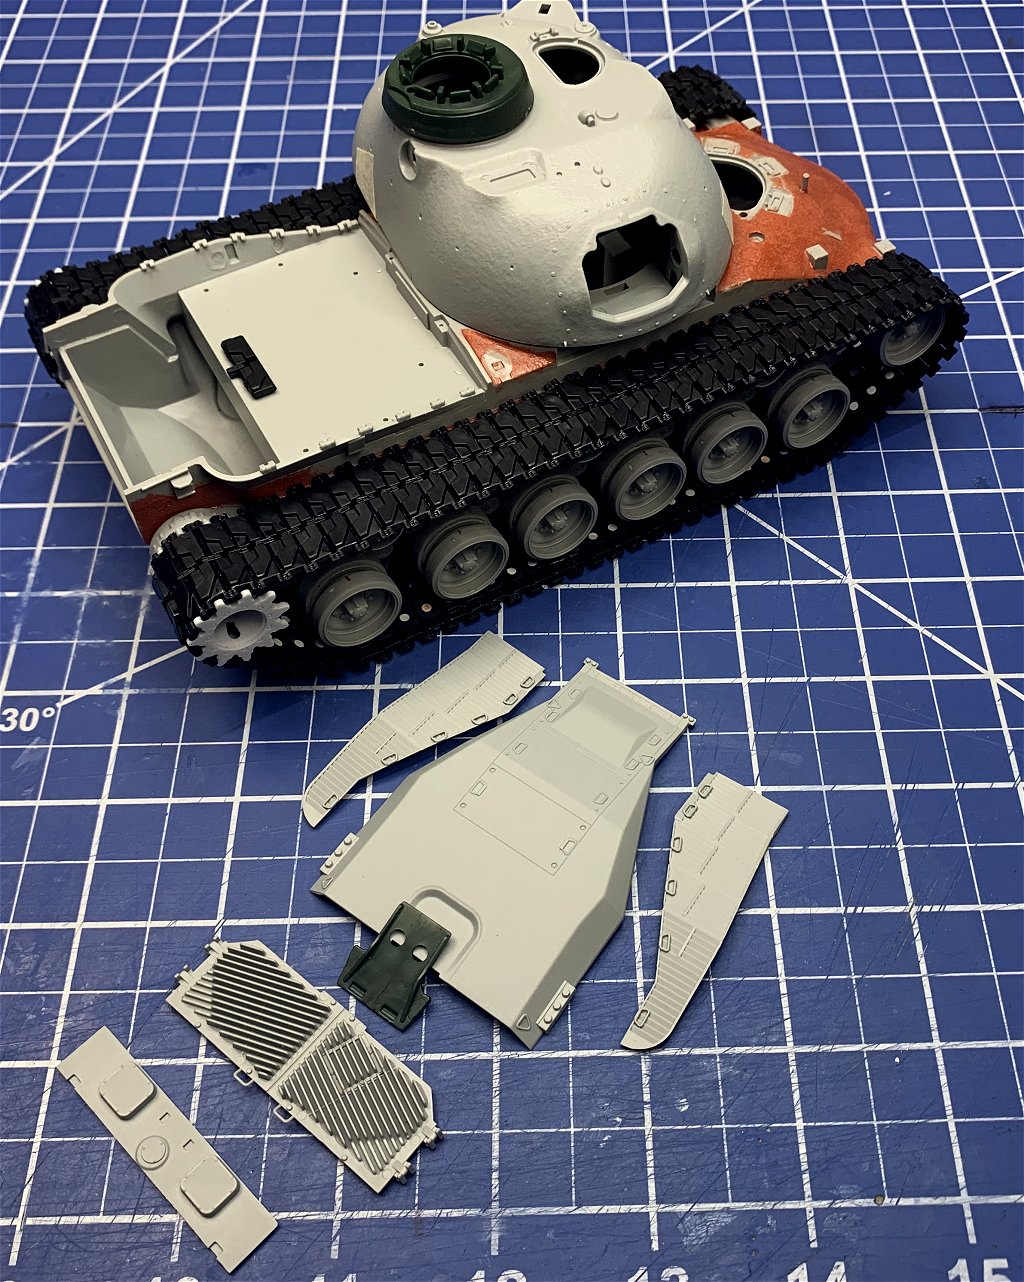
Made some great progress over the past week. Got suspension and tracks installed, in record time I might add. No real major problems other then ejector pin marks on each track link. I ended up punching out about 200ish discs to fill them, but it didn’t take as long as I thought it would. Once that was done the tracks went together quite easily. Up dated the drive sprocket with one from DEF models, a little tricky but doable. The only other down side was I wanted to build up the tracks so that I could remove them for painting. However the way the kit suspension goes together didn’t allow for that so I just attached them…oh well. All and all I happy with the results. Next up assembling and detailing the rear end.
Thanks for stopping in and see ya’ll next week!
7 Likes
Nice work fixing the ~200 punch marks! That’s quite a task. The model is looking great!
1 Like
Wow you have tremendous patience punching out all these discs. I used an AFV club track set on my Israeli Nagmashot and had to fill and sand 4 on each link, 2 each on either side of the guide horn and swore I’d never use them again. Great detail but way too much work. You’re a better man than I lol !!
1 Like
Thanks Everyone! I know it sounds like a lot of work to punch that many discs but once you get into the rhythm it does go by fast.
1 Like