Hold the phone, the truck is 1/24 but the tires are 1/16…wow!! Judges are gonna have a cow ![]() after seeing this in a contest table.
after seeing this in a contest table. ![]()
But, I like it em big!
Hold the phone, the truck is 1/24 but the tires are 1/16…wow!! Judges are gonna have a cow ![]() after seeing this in a contest table.
after seeing this in a contest table. ![]()
But, I like it em big!
It’s the Dolly Parton of Kenworths ![]()
So you noticed those tires eh?.. ![]()
I can imagine a judge, or really anyone who isn’t familiar with this rig assuming it’s some sort of fantasy monster truck - lol - it’s not ![]()
In real life the are a 29.5R25, or 73.4" in diameter, which is just over 6’ tall!. This turns out to be just over 3" in diameter for use in 1/24 scale. Happily, the 1/16" tires match this almost exactly -
I was glad to find this image, as it shows a tread pattern close enough to the MATV tire I’m using. I’ve wanted to try and build this for a while, but supplying the tires and wheels kept me from doing so.
The size of these trucks is remarkable - I think if I ever showed this in public, I’d have to include some photos to illustrate how big they really are.
I’ve seen guys build tires out of styrene discs sandwiched together, then turning the built-up discs in a lathe, then gluing on all the treads, then, then making and inserting the wheel, then making a mold and then making them from resin - too many “thens” for me! ![]()
Cheers
Nick
Now that’s an interesting build I will be following!
Now that a tall tire on a truck:astonished:. I can barely pay for 22.5” I don’t even want to know what that will cost for 10 or all 18 ![]() .
.
Glad those Blast model tires worked out good for ya. I have the same set for M-ATV that I hope to build soon.
I would say that if you ever enter it into a contest or show & tell them including a photograph of the real thing.
Hi gents,
I’ve made more progress this week mostly focusing on things around the cab and engine bay:
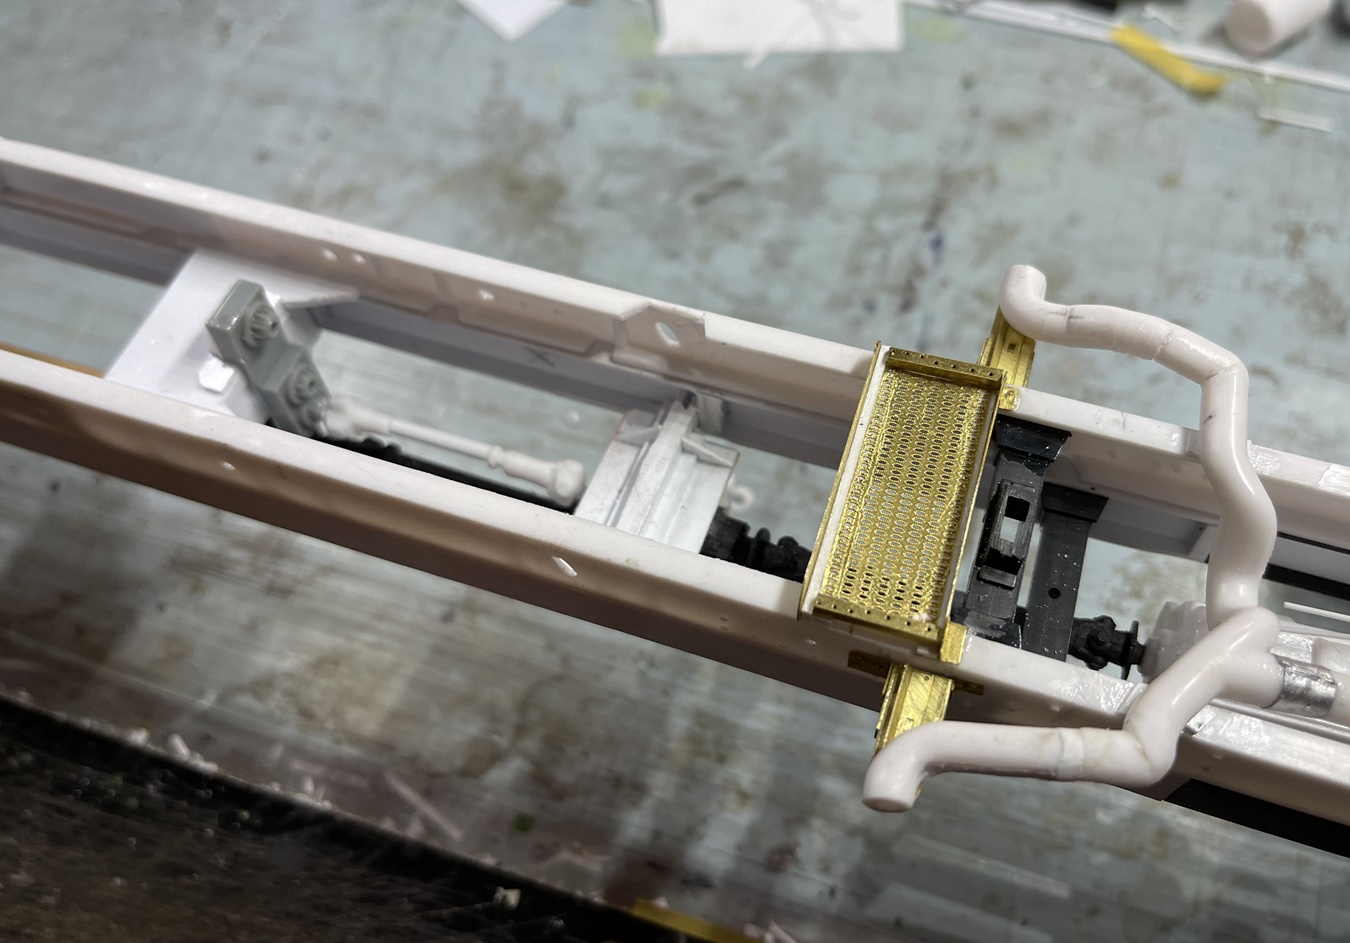
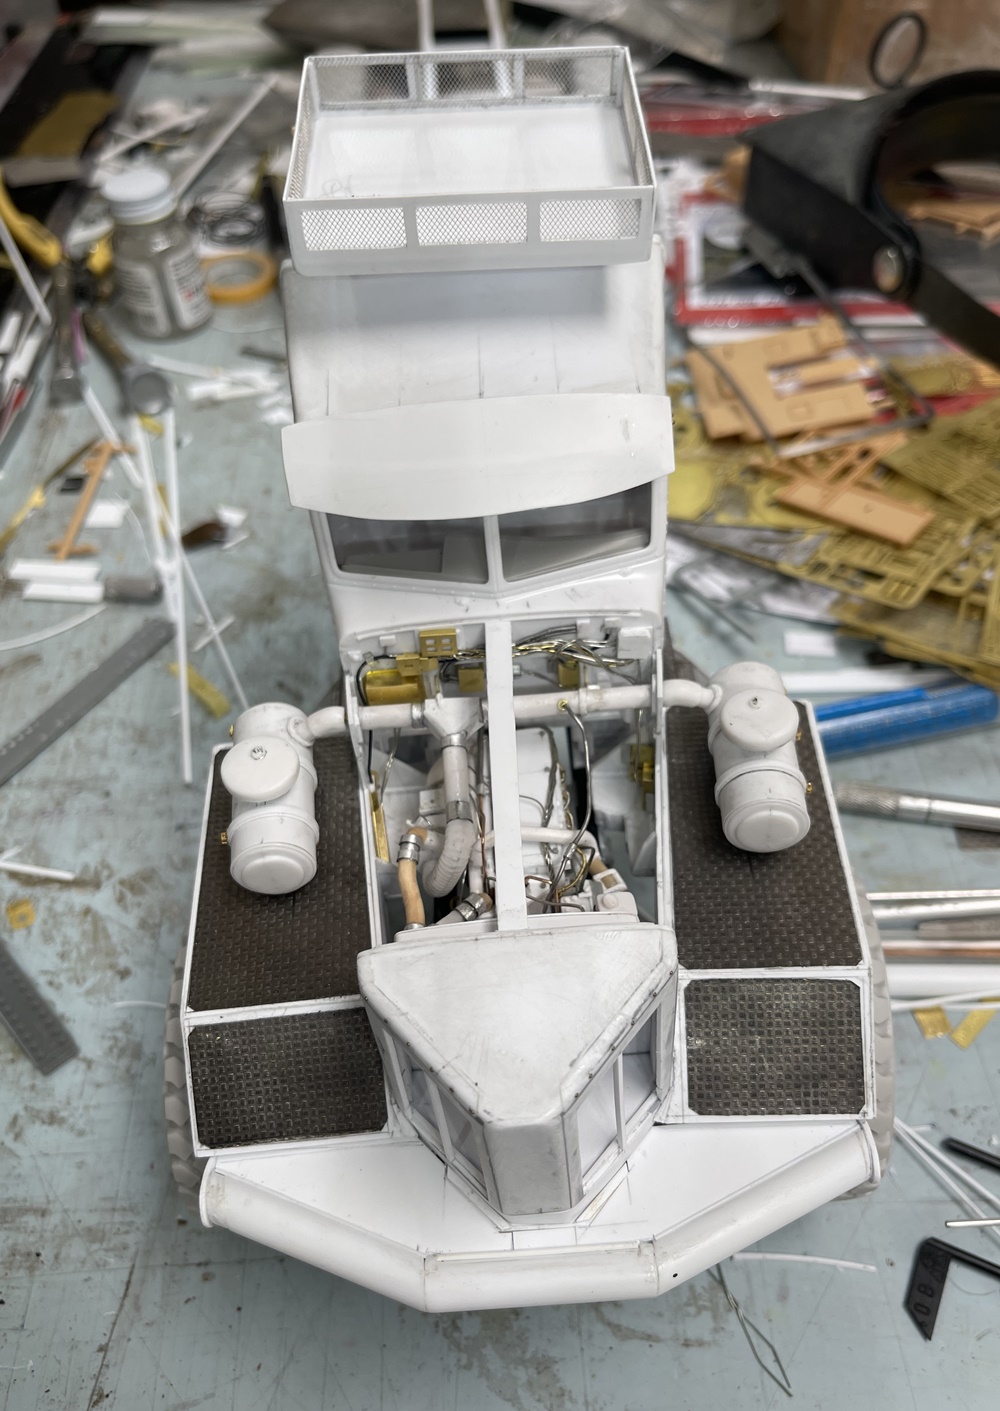
First up, but last built, the exhaust and related brackets. For this I started with kit parts, but needed to cut it up quite a bit to make it fit. What you can’t tell in this photo is how nicely balanced it turned out - equally long and wide on both sides, which is important because stacks will eventually project outward along side the cab. Mercifully, all this fit in without hurting placement of the cab.
Also worked on the PTO:
What you can’t see here is the white driveshaft is plugged into to the rear of the transfer case, then into a second transfer case (grey), which will allow another driveshaft to run back toward the cab to serve as a propeller shaft for a chain drive for a winch.
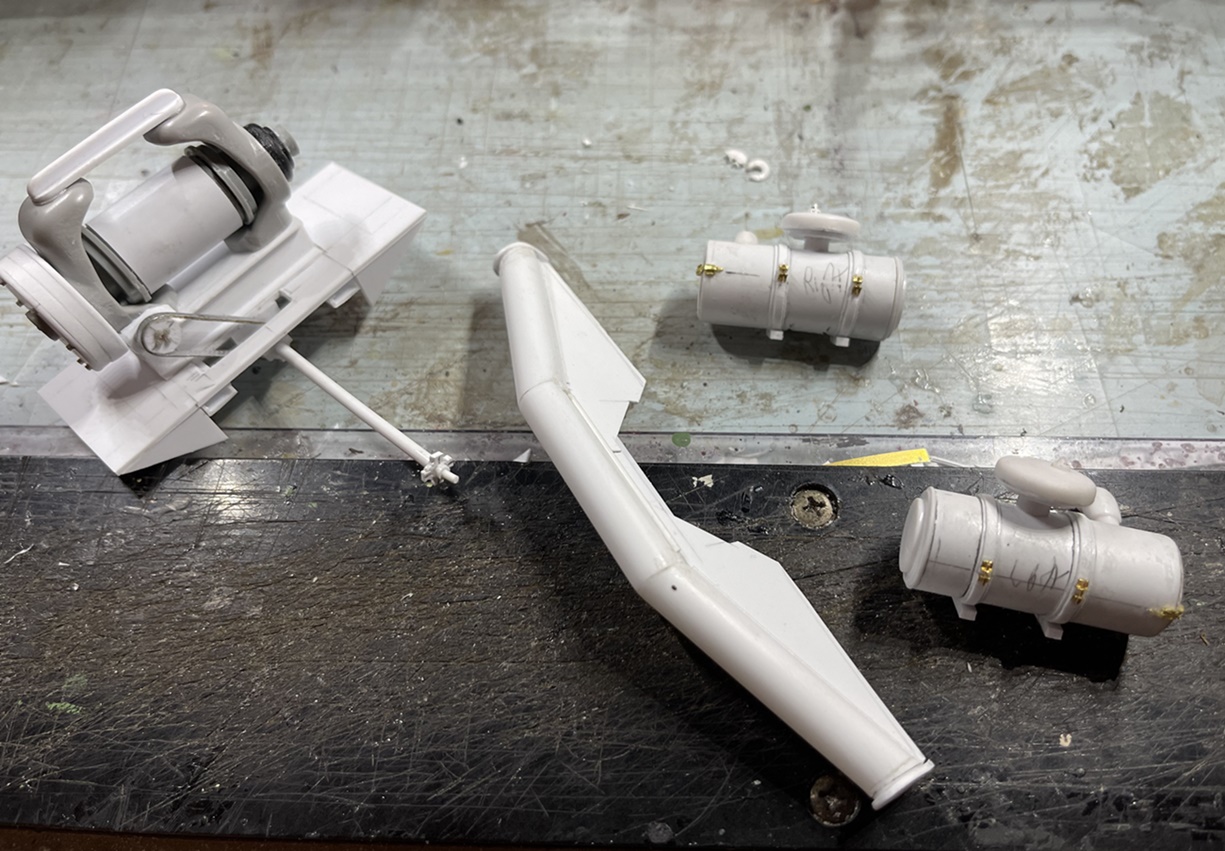
Along the way, I built up several parts that will stay unglued until they get painted:
On the left is the PTO driven winch. The driveshaft will plug into the second transfer case mentioned above. This still has a long way to go, but at least it’s started. I’ve built chain driven PTOs before, and used 1/12 scale motorcycle sprockets and chains (which look great) - not this time - as they are hardly noticeable (and expensive), so instead, carved my own sprocket and made a chain from lead foil - it will look fine once it’s painted up. The winch itself is made up of all sorts of remnant parts and evergreen.
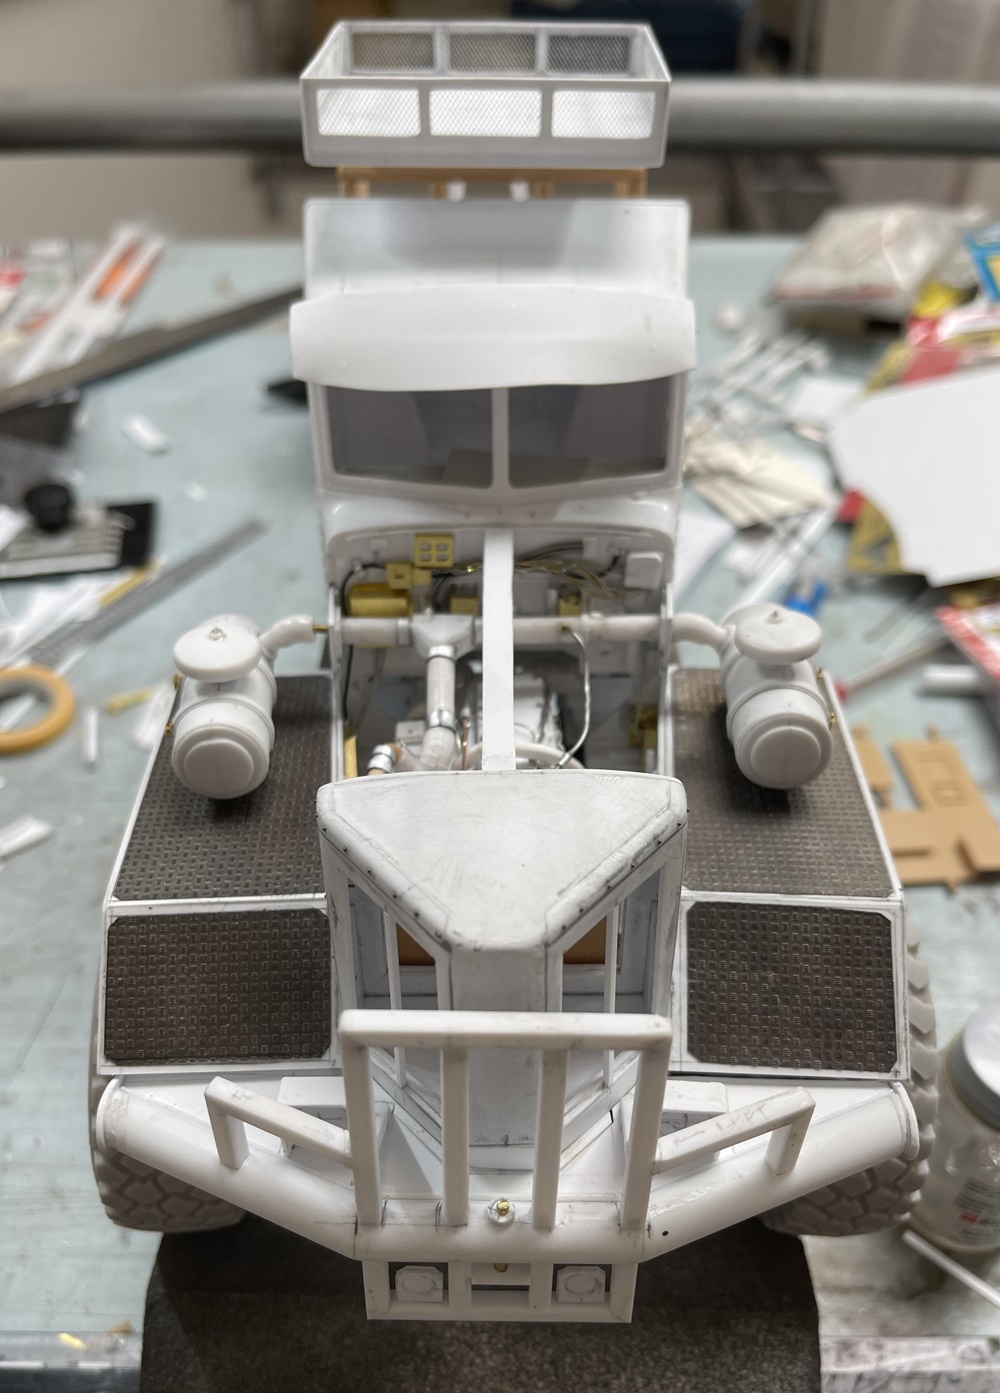
Then, the front bumper, which is a brute - it’s 3/8" dia tubing, cut to match the shape of the front frame rails, tapering back to the fenders, then filled in between. This was slow going.
Finally, made up the left and right air filters, which are huge! 5/8" diameter, and an 1 3/8" long. To do this I stared with 5/8" wood dowel, then wrapped it with .010" styrene sheet as a base, then added the various elements.
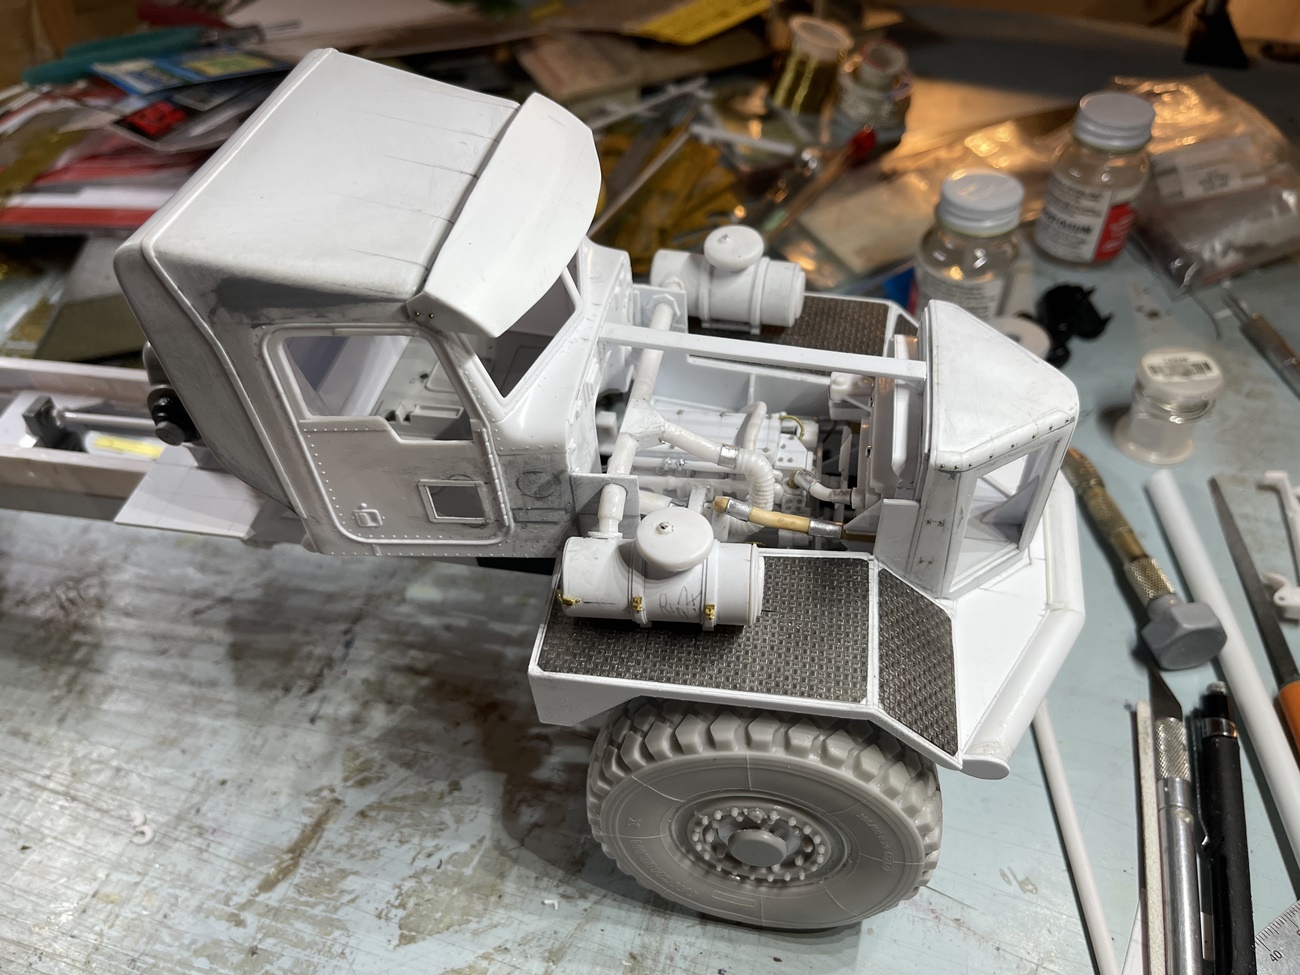
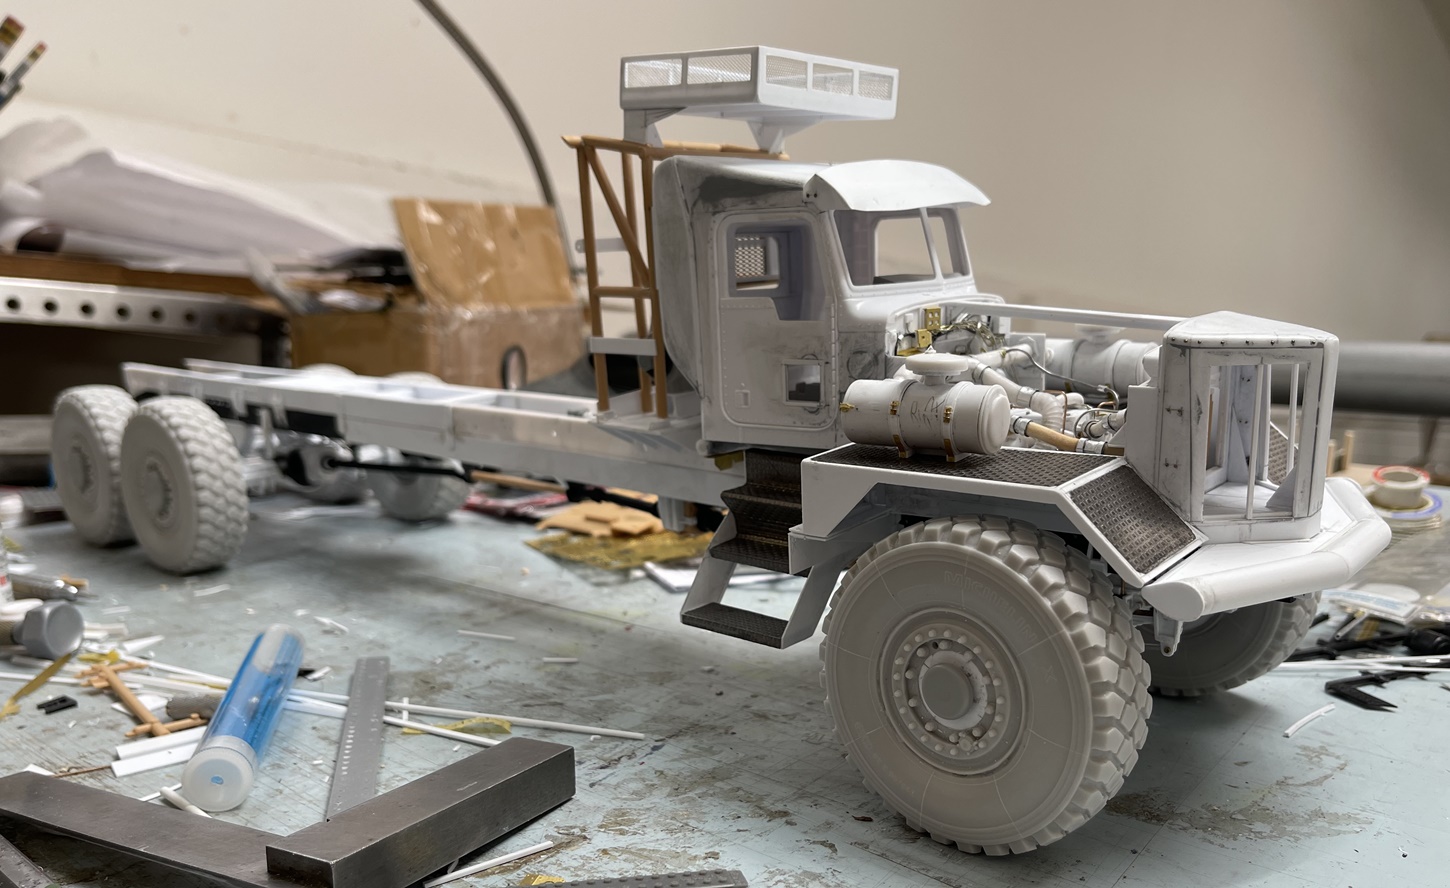
Finally, some of this dryfit:
Happily I managed to get a nice and snug fit for the bumper which still needs more detail, but so far so good.
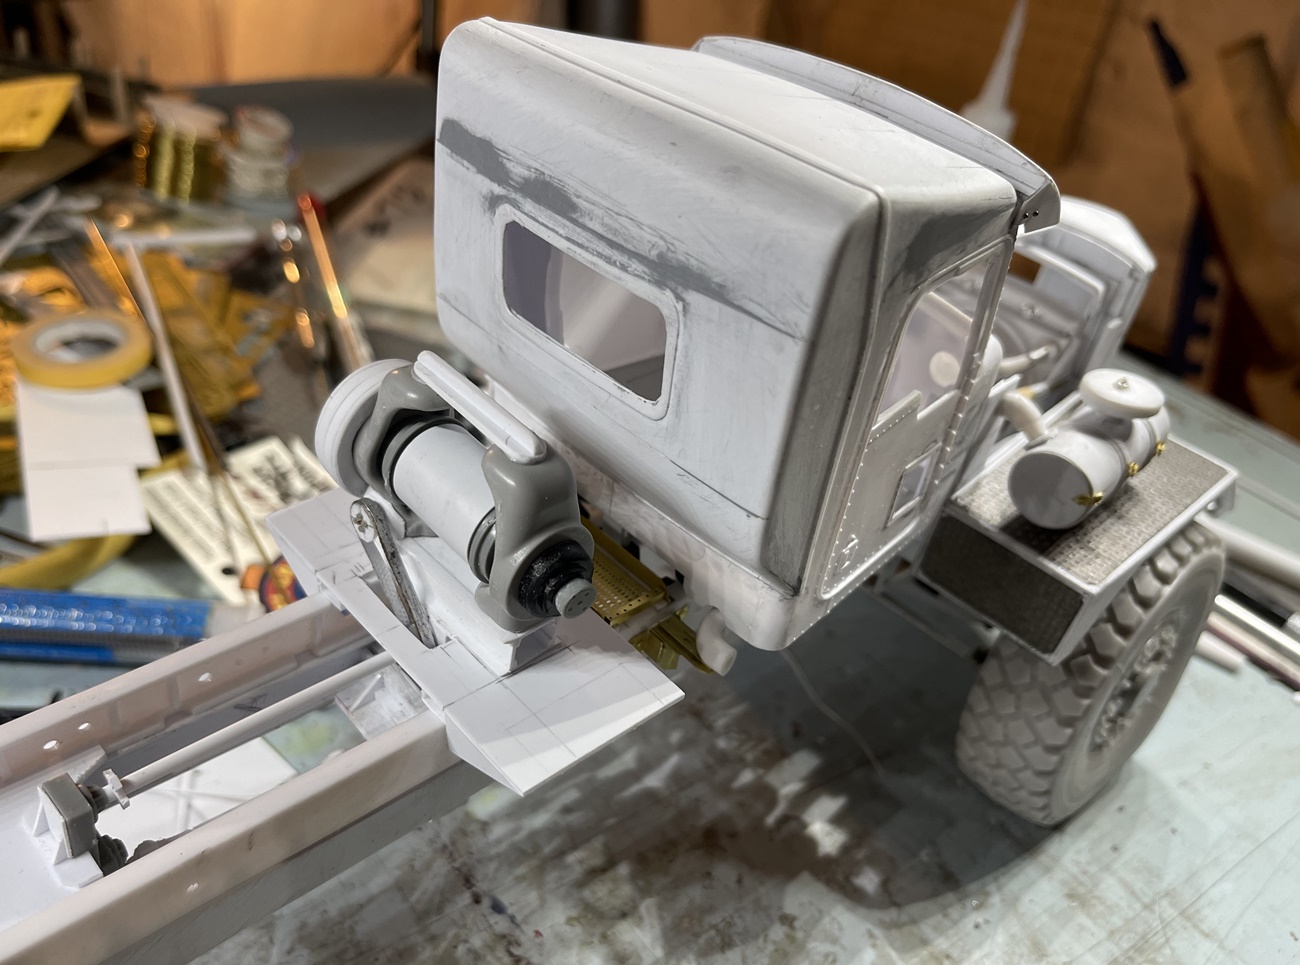
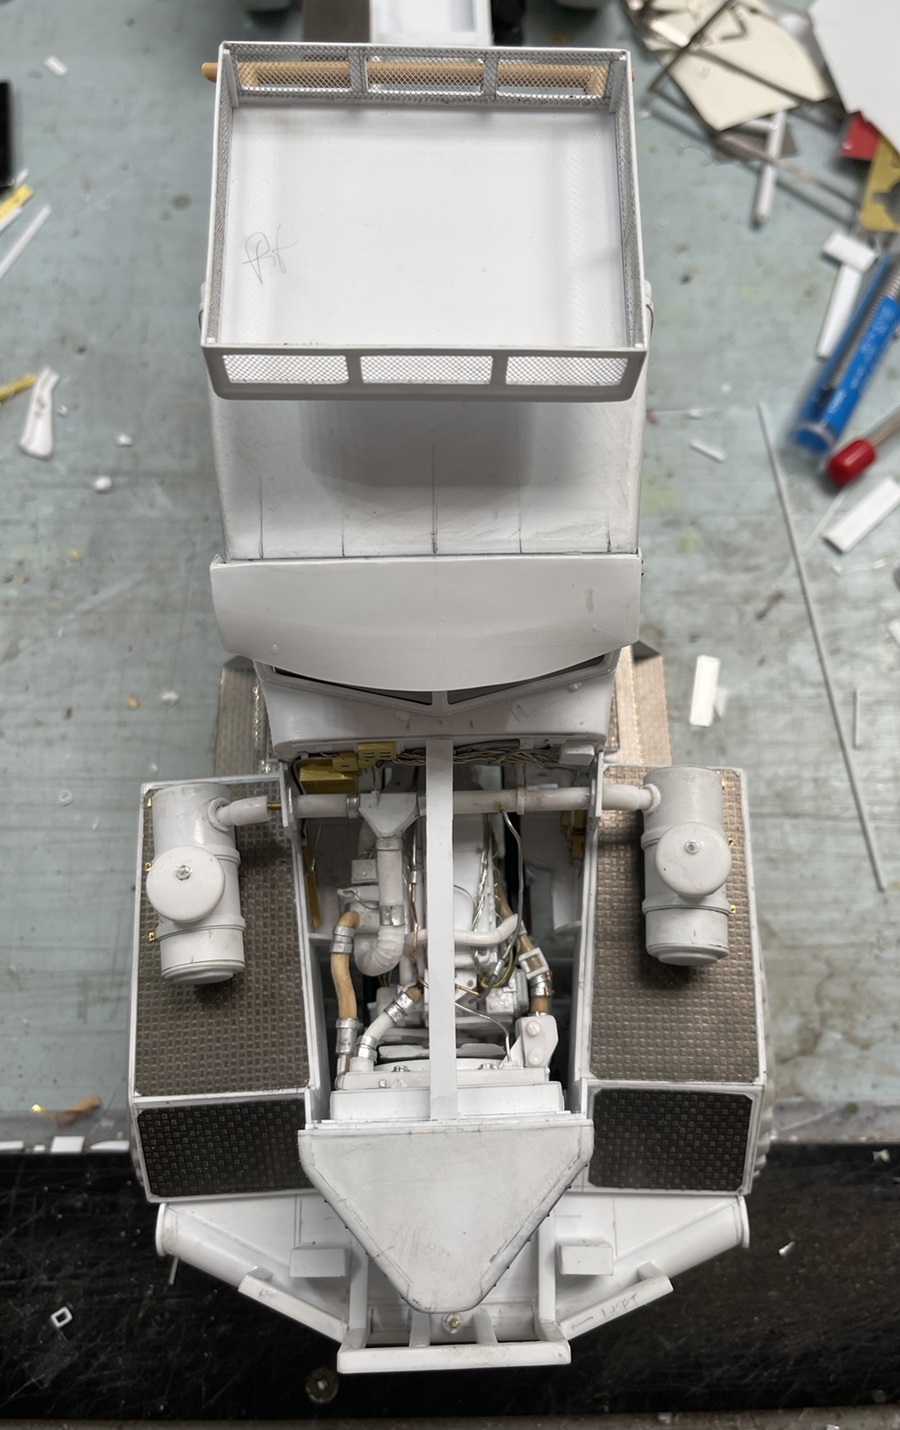
The image above gives a nice view of the basic PTO/winch setup - and finally, the side view:
I added a sheet of .020" sheet to the outside edge of the fender.
So, on we go!
Cheers and thanks for having a look
Nick
Beautiful work Nick , your scratch building [ engineering ] skills are off the hook !!!
Absolutely phenomenal work … Scratch building sorcery !!
Hello gents,
Have enjoyed the benefit of old fashioned radio - broadcasting the NFL playoffs, while I have stuck with serious thinking - model building! ![]()
![]()
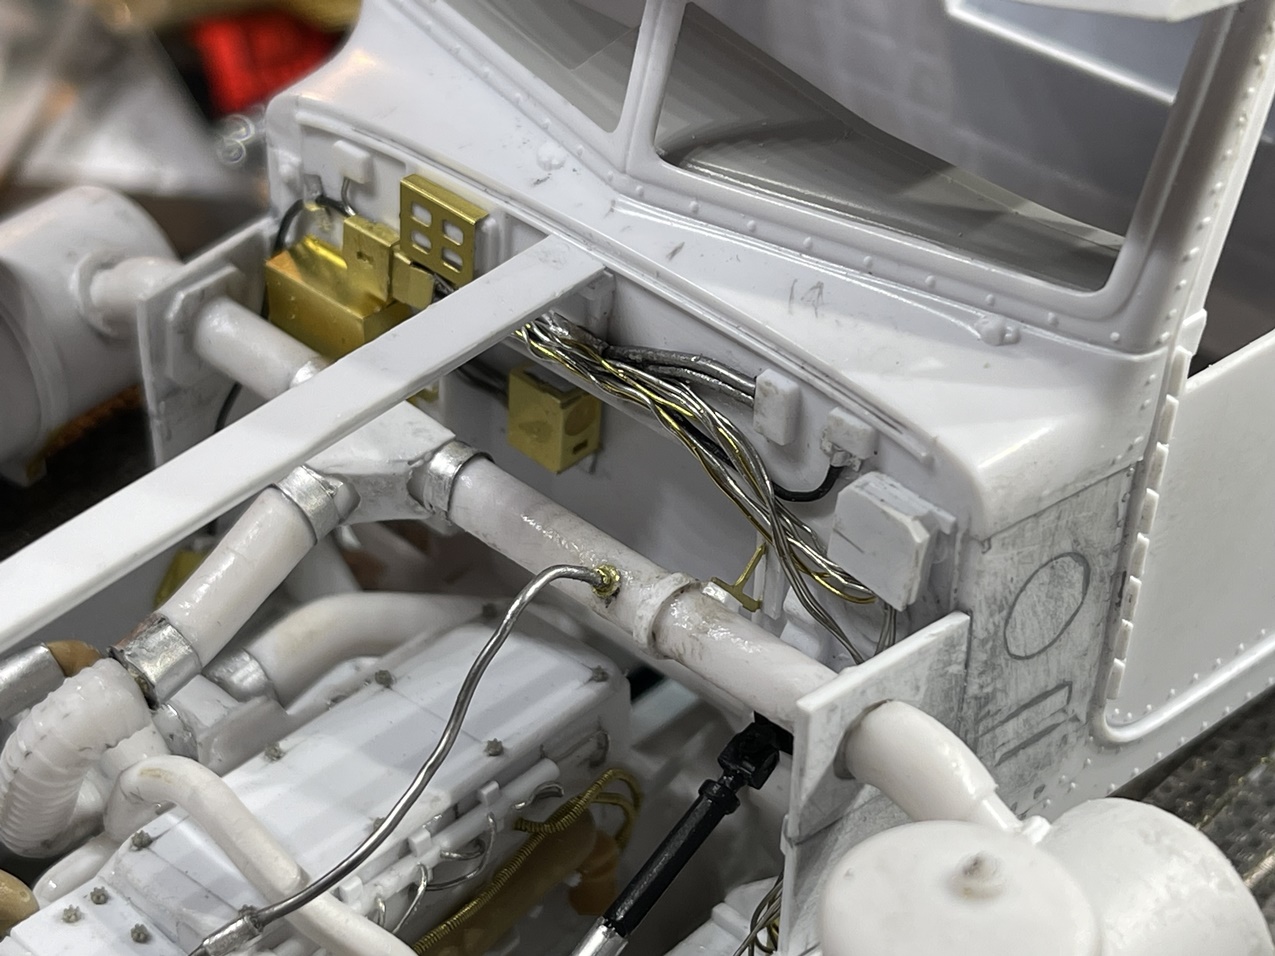
And model build I did. I seemed to have spent an inordinate amount of time on the firewall:
Nothing more than remnant bits of PE, some evergreen, wire, and lead wire, but, man, a guy spent a lot of time getting this done - - ![]() No idea why this takes so long but it does! Hopefully at least some of it will be visible when this is done!
No idea why this takes so long but it does! Hopefully at least some of it will be visible when this is done!
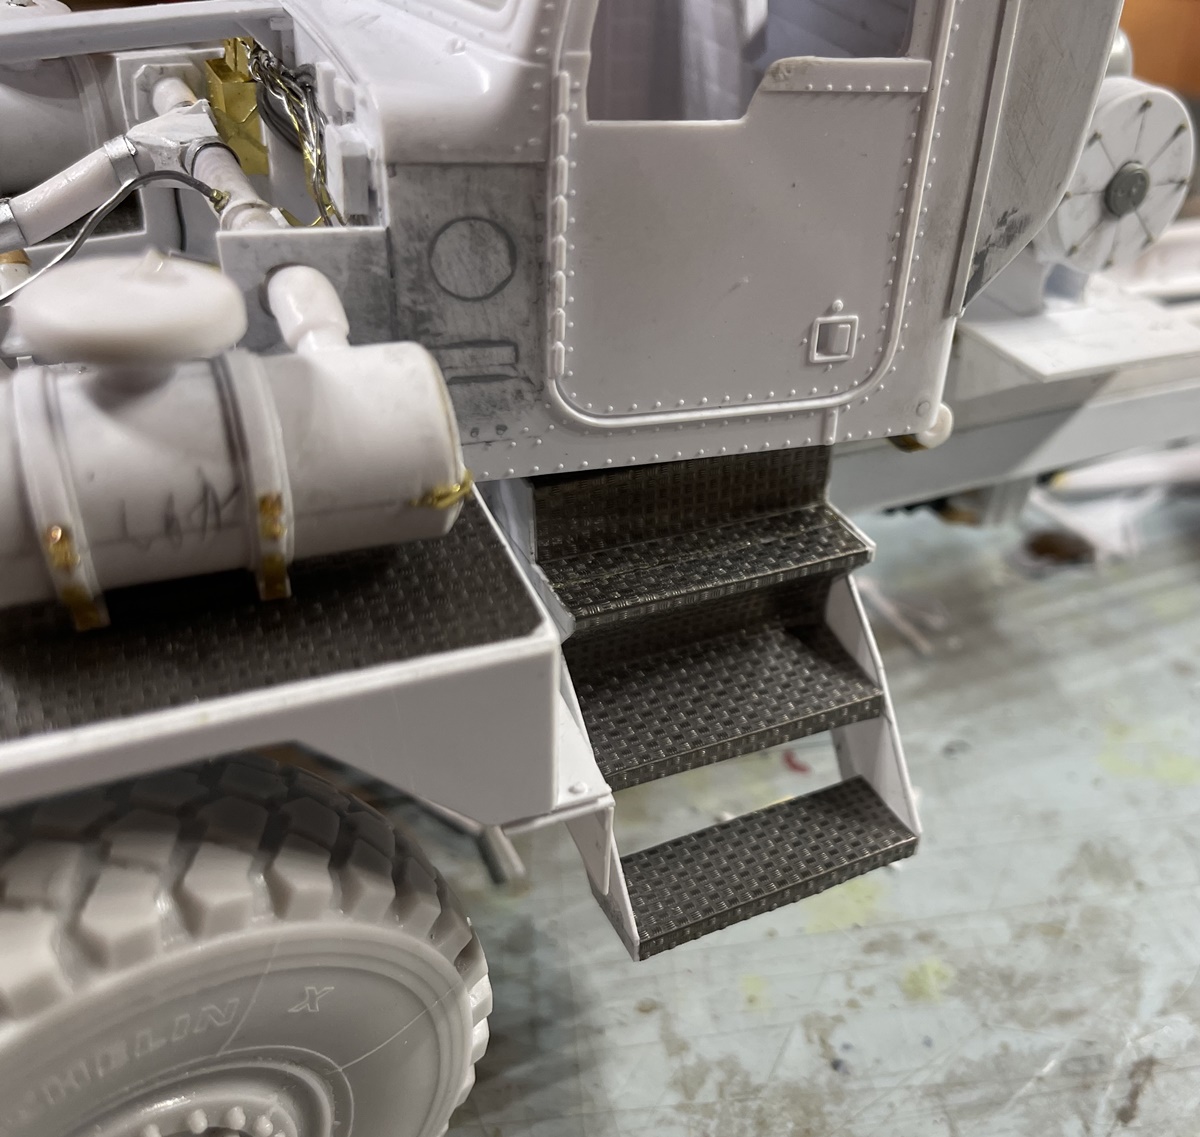
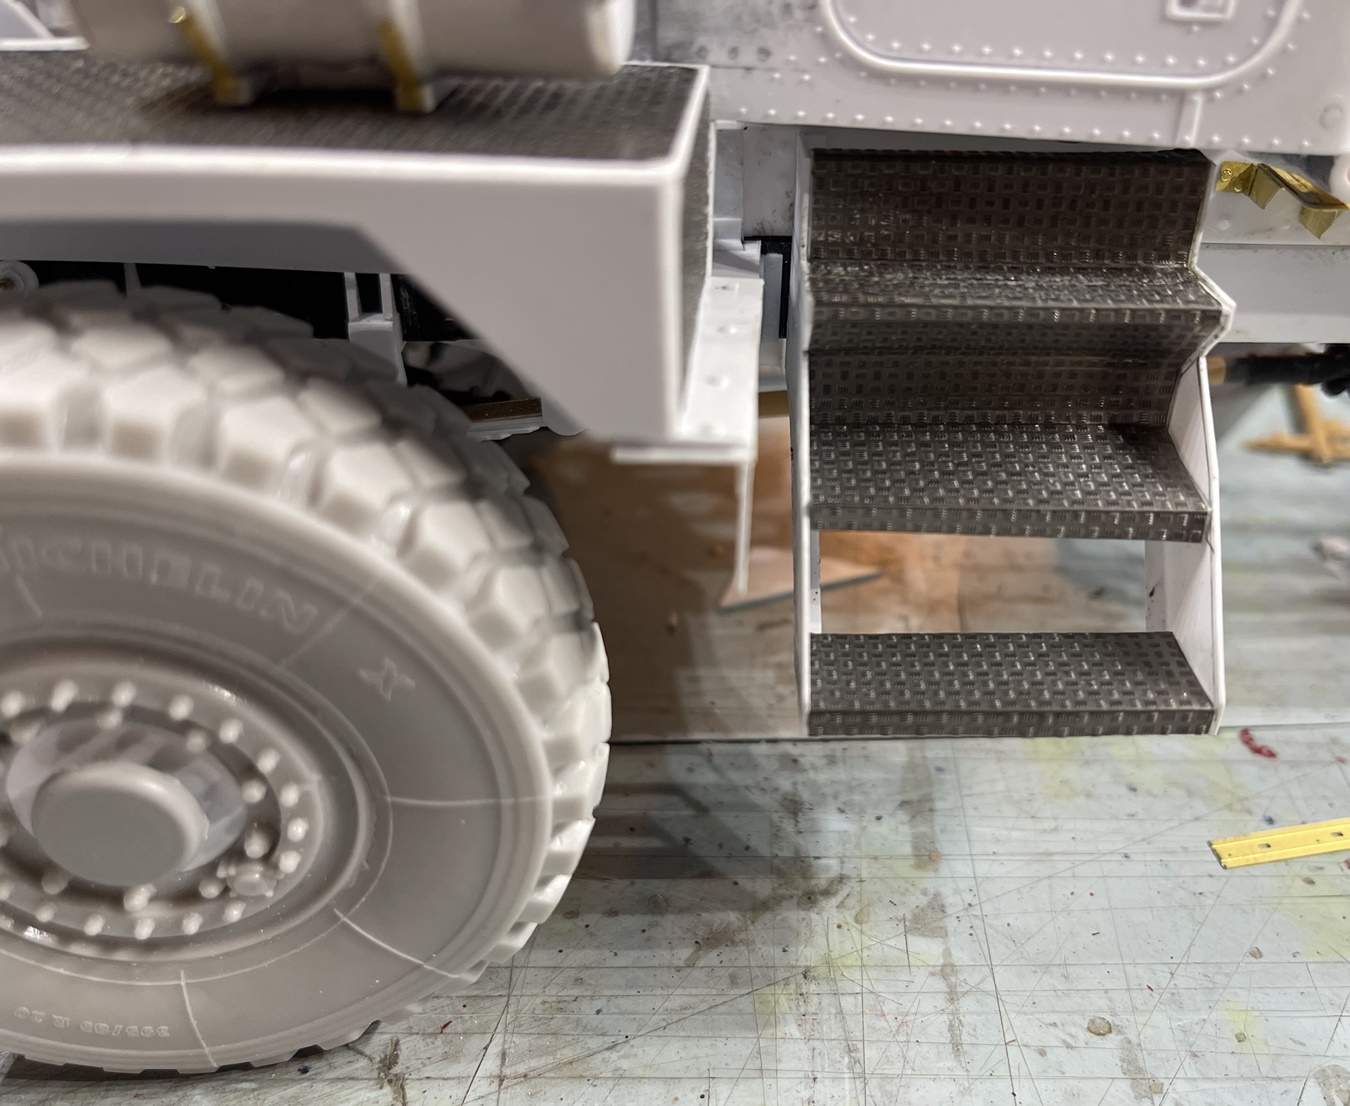
Next task, steps:
An equally time consumptive task! Though, with this there is more of a clear reason - first, laying it out, then making four sheets for the stringers, then adding internal structure, assembling, then more sheet for steps, then PE plate sheets - it just eats time!
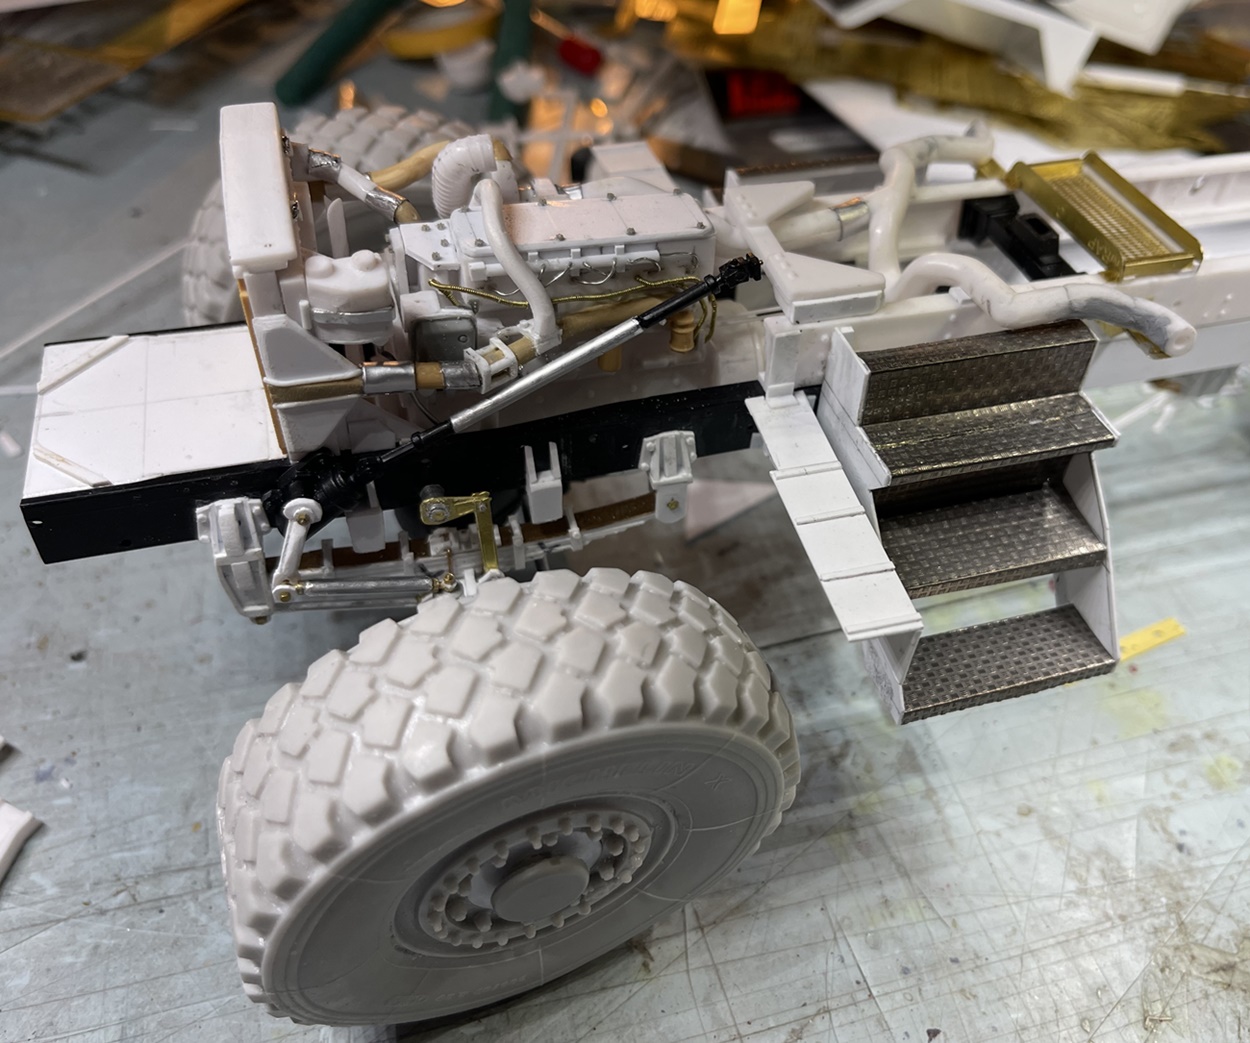
Finally, tho actually finished first, more work on the steering:
Yes - added a steering gear and column, pitman arm, drag link and steering column…yeah…bolted together with tiny, brass, nuts and bolts…really??? ![]()
![]()
![]() And of course, what can barely be seen here, torsion arms added, on both sides - why do we enjoy this hobby???
And of course, what can barely be seen here, torsion arms added, on both sides - why do we enjoy this hobby??? ![]()
Our hobby, what a treat!
CHeers
Nick
Take lots of photos ![]()
Okay, that engine and firewall are approaching ‘Cutty Sark rigging’ levels of detail now. Beautiful!
"And of course, what can barely be seen here, torsion arms added, on both sides - why do we enjoy this hobby??? ![]()
Our hobby, what a treat!"
To me that’s the beauty of it - you can go as far as you want, or your patience/sanity allows!
cheers
Michael
Hi Michael, ha, yes, I agree - I think it’s part of the fun to at least try and build some of the more obscure or complicated parts.
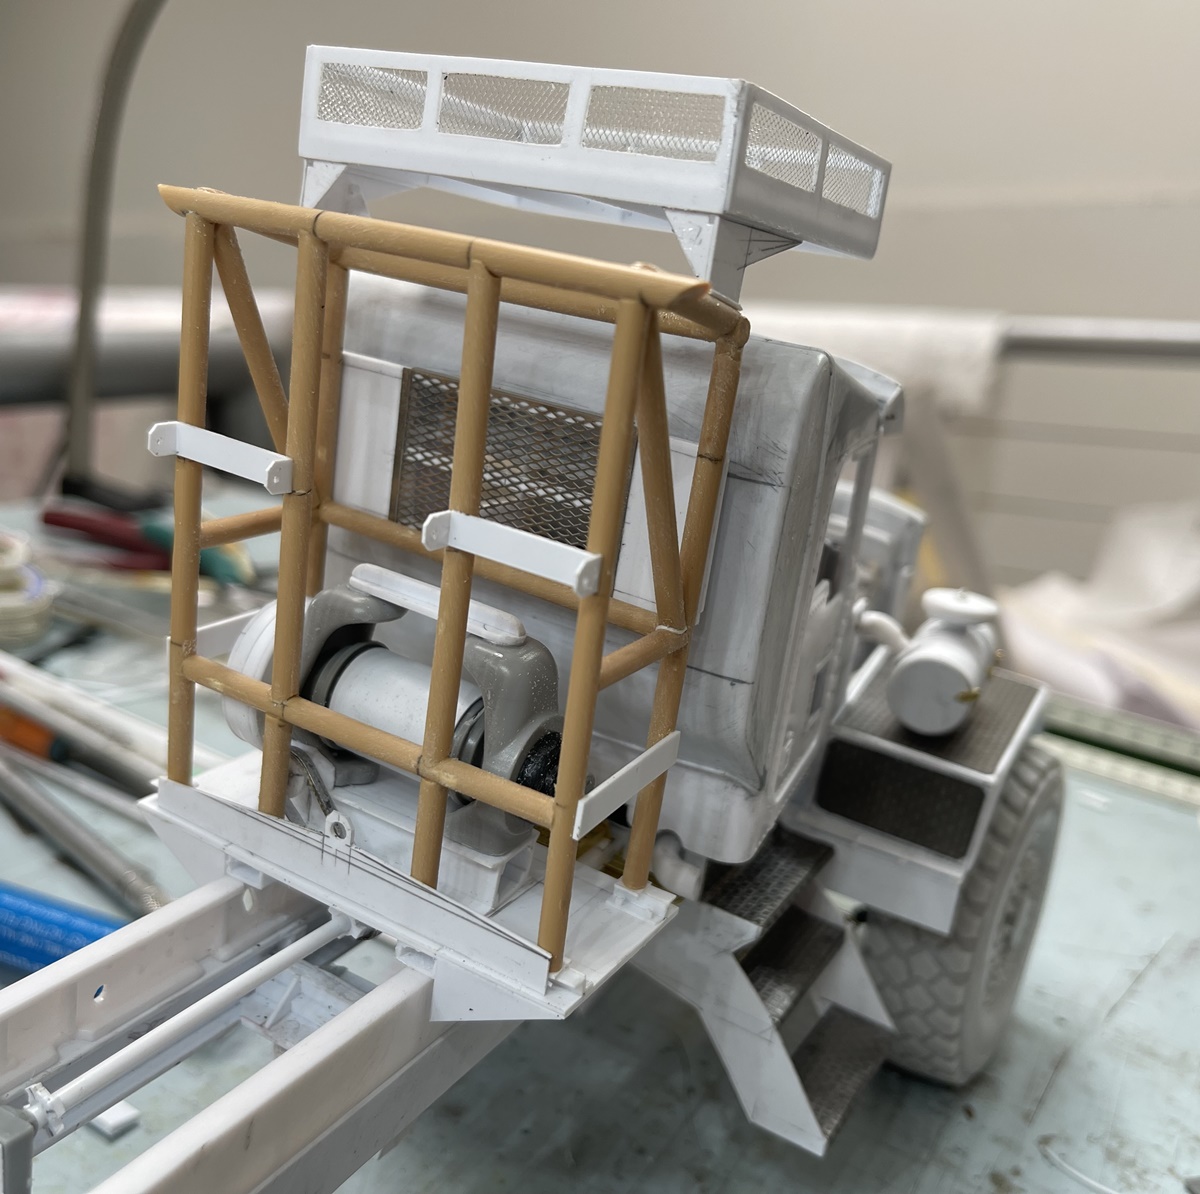
OK, on we go with some updates.
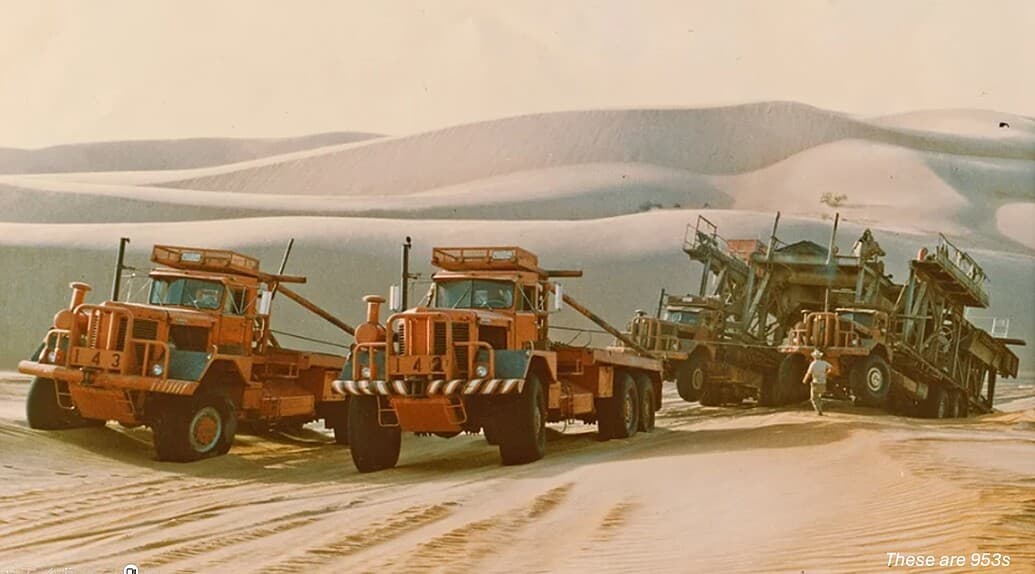
First, a little collage of prototype images, so you can see what I’m trying to do:
On one hand, this truck is not subtle, but, within the overall form are plenty of interesting attributes. like the rack surrounding the winch, which has a unique shape, and a storage rack. Also not subtle is the front bumper, which includes an interesting grill guard that includes lights and a tow pintle.
Now, my attempt at getting these details:
I think the winch rack looks about right. Of course, my prototype photos have some variations, but the overall shape remains fairly consistent. I wonder what the exact purpose of the storage rack is? maybe for extra fuel/water/antifreeze, maybe ropes or chains? While this rack is fairly big, it’s not huge or all that easy to get to, so I suppose it’s there for the “just in case” items?
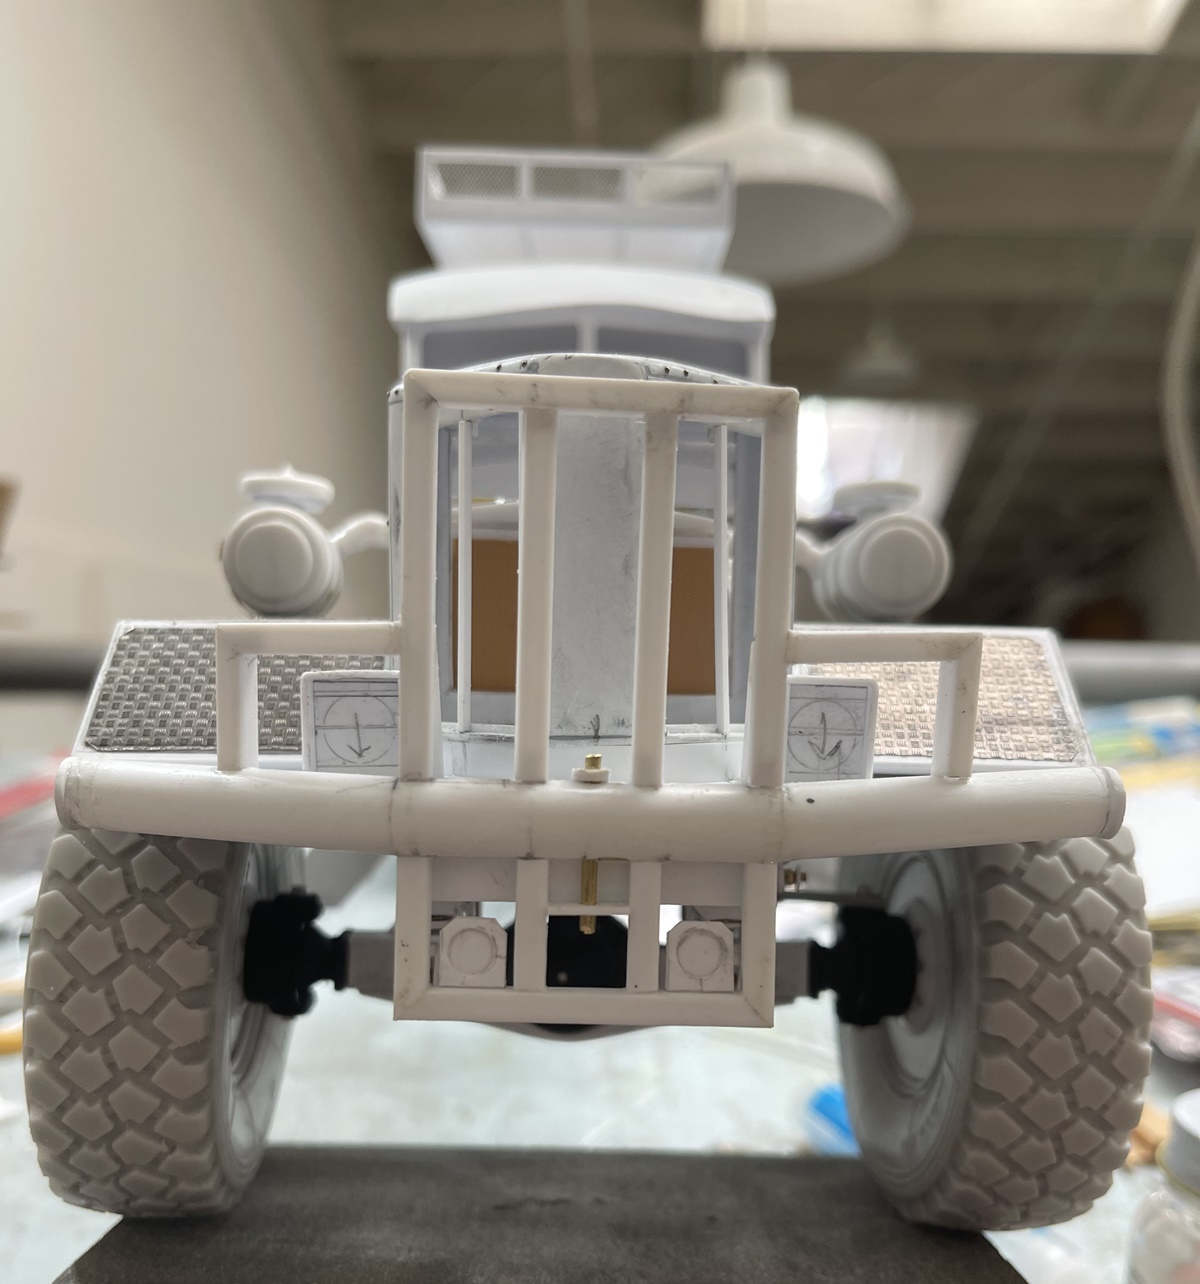
And, on to the grill guard:
The purpose of this is obvious enough! I still need to add a small splash to the inside, but it’s almost there.
Thanks for having a look -
Cheers
Nick
Arriving unfashionably late to this one, hoooooollllllllyyyyyyyy…I think that says it all. More proof you’re the da Vinci of commercial vehicle models - and what a way to obliterate the “miniature” tag ![]()
Yet more jaw dropping work Nick … agree about the top storage box … seems like an afterthought … and the way it is mounted with the support at the rear and not much to support at the front you’d think it wouldnt be good for having anything to heavy or it would bend and drop towards the front ??
I was just looking back through the photos you posted Nick of the real truck …
How about going that extra mile Nick and doing a dio of this ![]()
![]()
all 4 of them in 1/24 with the load as well … That’ll keep you busy mate.
HI guys, thanks for having a look -
@Dioramartin, well Tim we recently had a talk about making mistakes - and deciding what to do about it. About a year ago Ryan @Tank_1812 found a dimension I was looking for, and with it, well, I cut my chassis in half and extended it to the right length.
On this, a friend pointed out, that, in addition to what @Johnnych01 John mentioned, well, the roof rack looked to be a “a tad too high”…perfect… ![]()
![]()
So, I looked at it again and found two big problems:
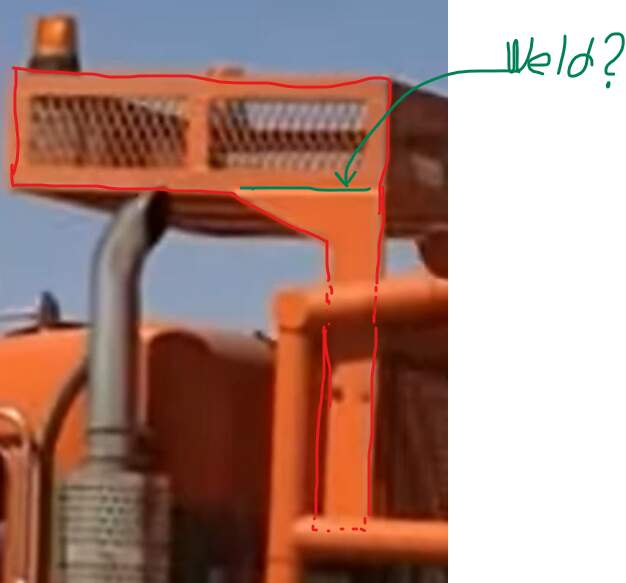
First as noted by the red arrow, the roof rack was likely sitting too high, and as illustrated with the orange dashed line and box, it was not sitting level!, projecting upward in the front, making it look even worse. So, out came the knife, and off went the rack:
Now, it sits lower, and is parallel with horizontal lines on the cab!
Back to what John said, regarding the purpose and strength of the rack:
I don’t know the purpose of the rack, but, think it looks awkward, and that it might break if you load it up. But, also think it’s strange enough to look pretty cool!
As for the mega diorama, that would be a project! But, having tackled and not finished a big and complicated dio already, I don’t need to add more styrene to the pile of the unfinished!
Thanks for having a look -
Cheers
Nick
I would like to disagree about the strength of that rack.
The area enclosed in a red line would form a rather strong structure if it is welded.
The vertical posts go down quite a bit and get good leverage from being attached to the tubular structure.
Depending on the thickness of the material I would be willing to say that the rack could carry a 1000 pounds.
One purpose that keeps popping into my mind is storage for tarps (I’m presumably wrong …)
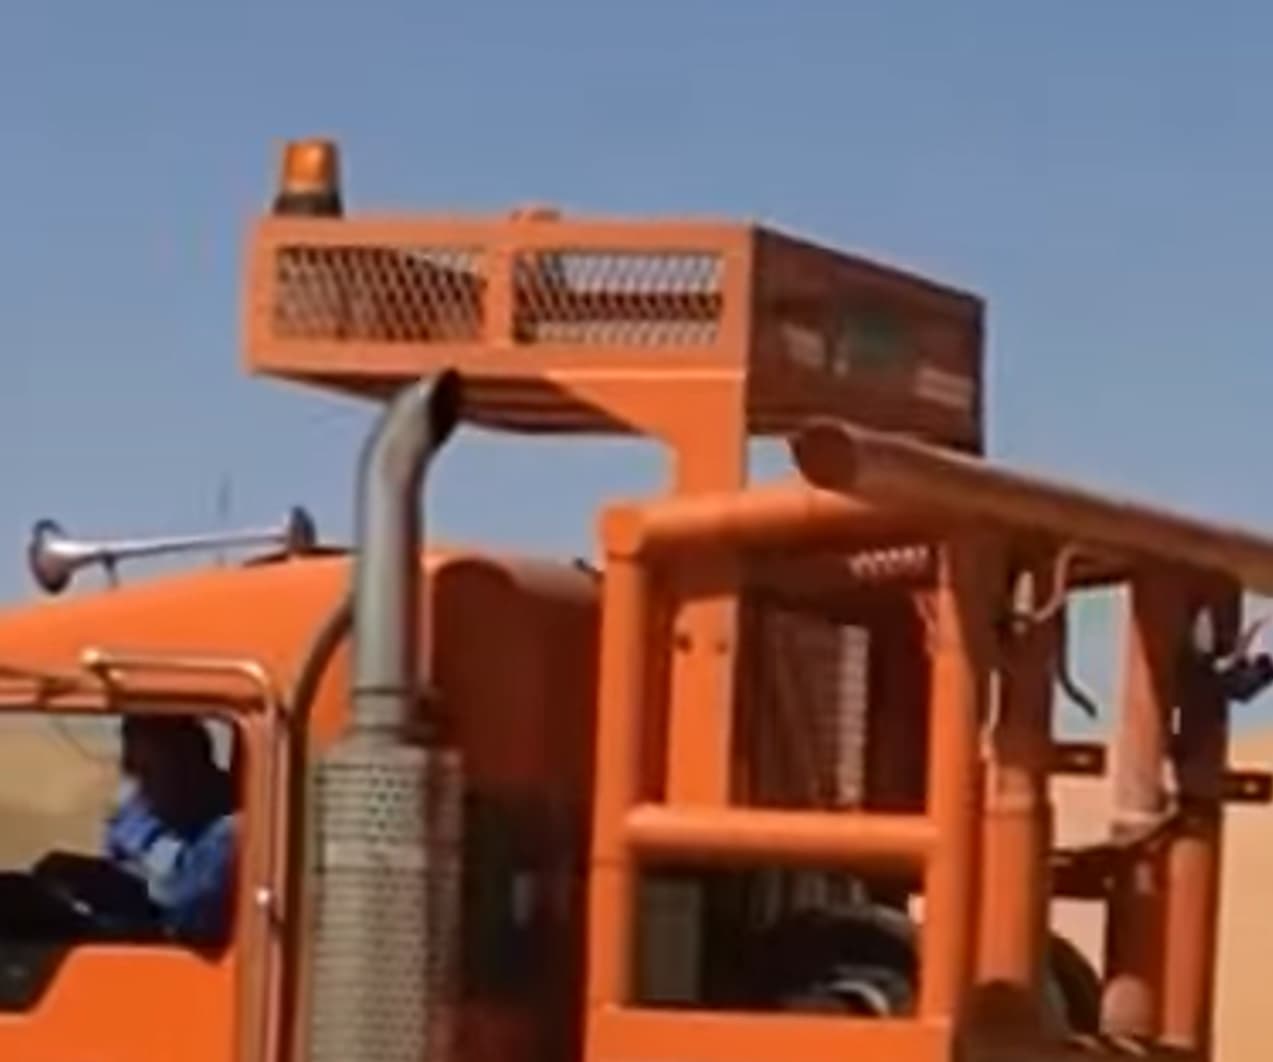
Hey Nick you may have already seen this, it’s from a driving simulator - so just some other guy’s guess (?) about the rack storage. Plausible?
Hello @Uncle-Heavy, well, I don’t know. Clearly the solution works, as many of these trucks have them in use (that said, there are several variants in construction/design), and even with what you note, I wouldn’t feel good about riding under a 1,000 lbs! ![]()
![]() Maybe a couple of hundred pounds, made up of the cargo you mention like tarps/ropes etc.
Maybe a couple of hundred pounds, made up of the cargo you mention like tarps/ropes etc.
I thought about your points, and concur that the welds and tiebacks would certainly hold it in place, but it might not be a very strong box. I think this because of how far it cantilevers beyond the gusset plates on the sides, and the potential that it would deflect/bend with a load (as the box is relatively wide, and only supported by relatively short gussets on the ends).
For a while I thought the frame might function like a flat truss, except, without any diagonal bracing it still wouldn’t be that strong (thinking again about relative length, width, and lack of internal bracing, it might twist/topple).
It obvious enough this works, but as the beam (or in this case box frame) projects/cantilevers out pretty far from the connecting point, and doesn’t have any diagonal bracing (ie the box does not function as a flat truss), I am assuming deflection would occur - that is, it could bend under a heavy load, which is why I pondered this to begin with:
I doubt the heavy mesh has much shear strength, though it might have some, and I suppose that if we could see more of the box frame we might see that it’s frame is made of angle iron, allowing the overall box to function as a truss? Who knows though? Maybe the box ix made of really thick framing materials? Maybe there is lots of internal bracing we can’t see? I just don’t know!
See? this is the fun of building with just enough info to allow questions to emerge!
Cheers
Nick