I seem to have this “thang” for building “sprangs”!

4 Likes
@ SSGToms, Freakin’ WOW!!!
1 Like
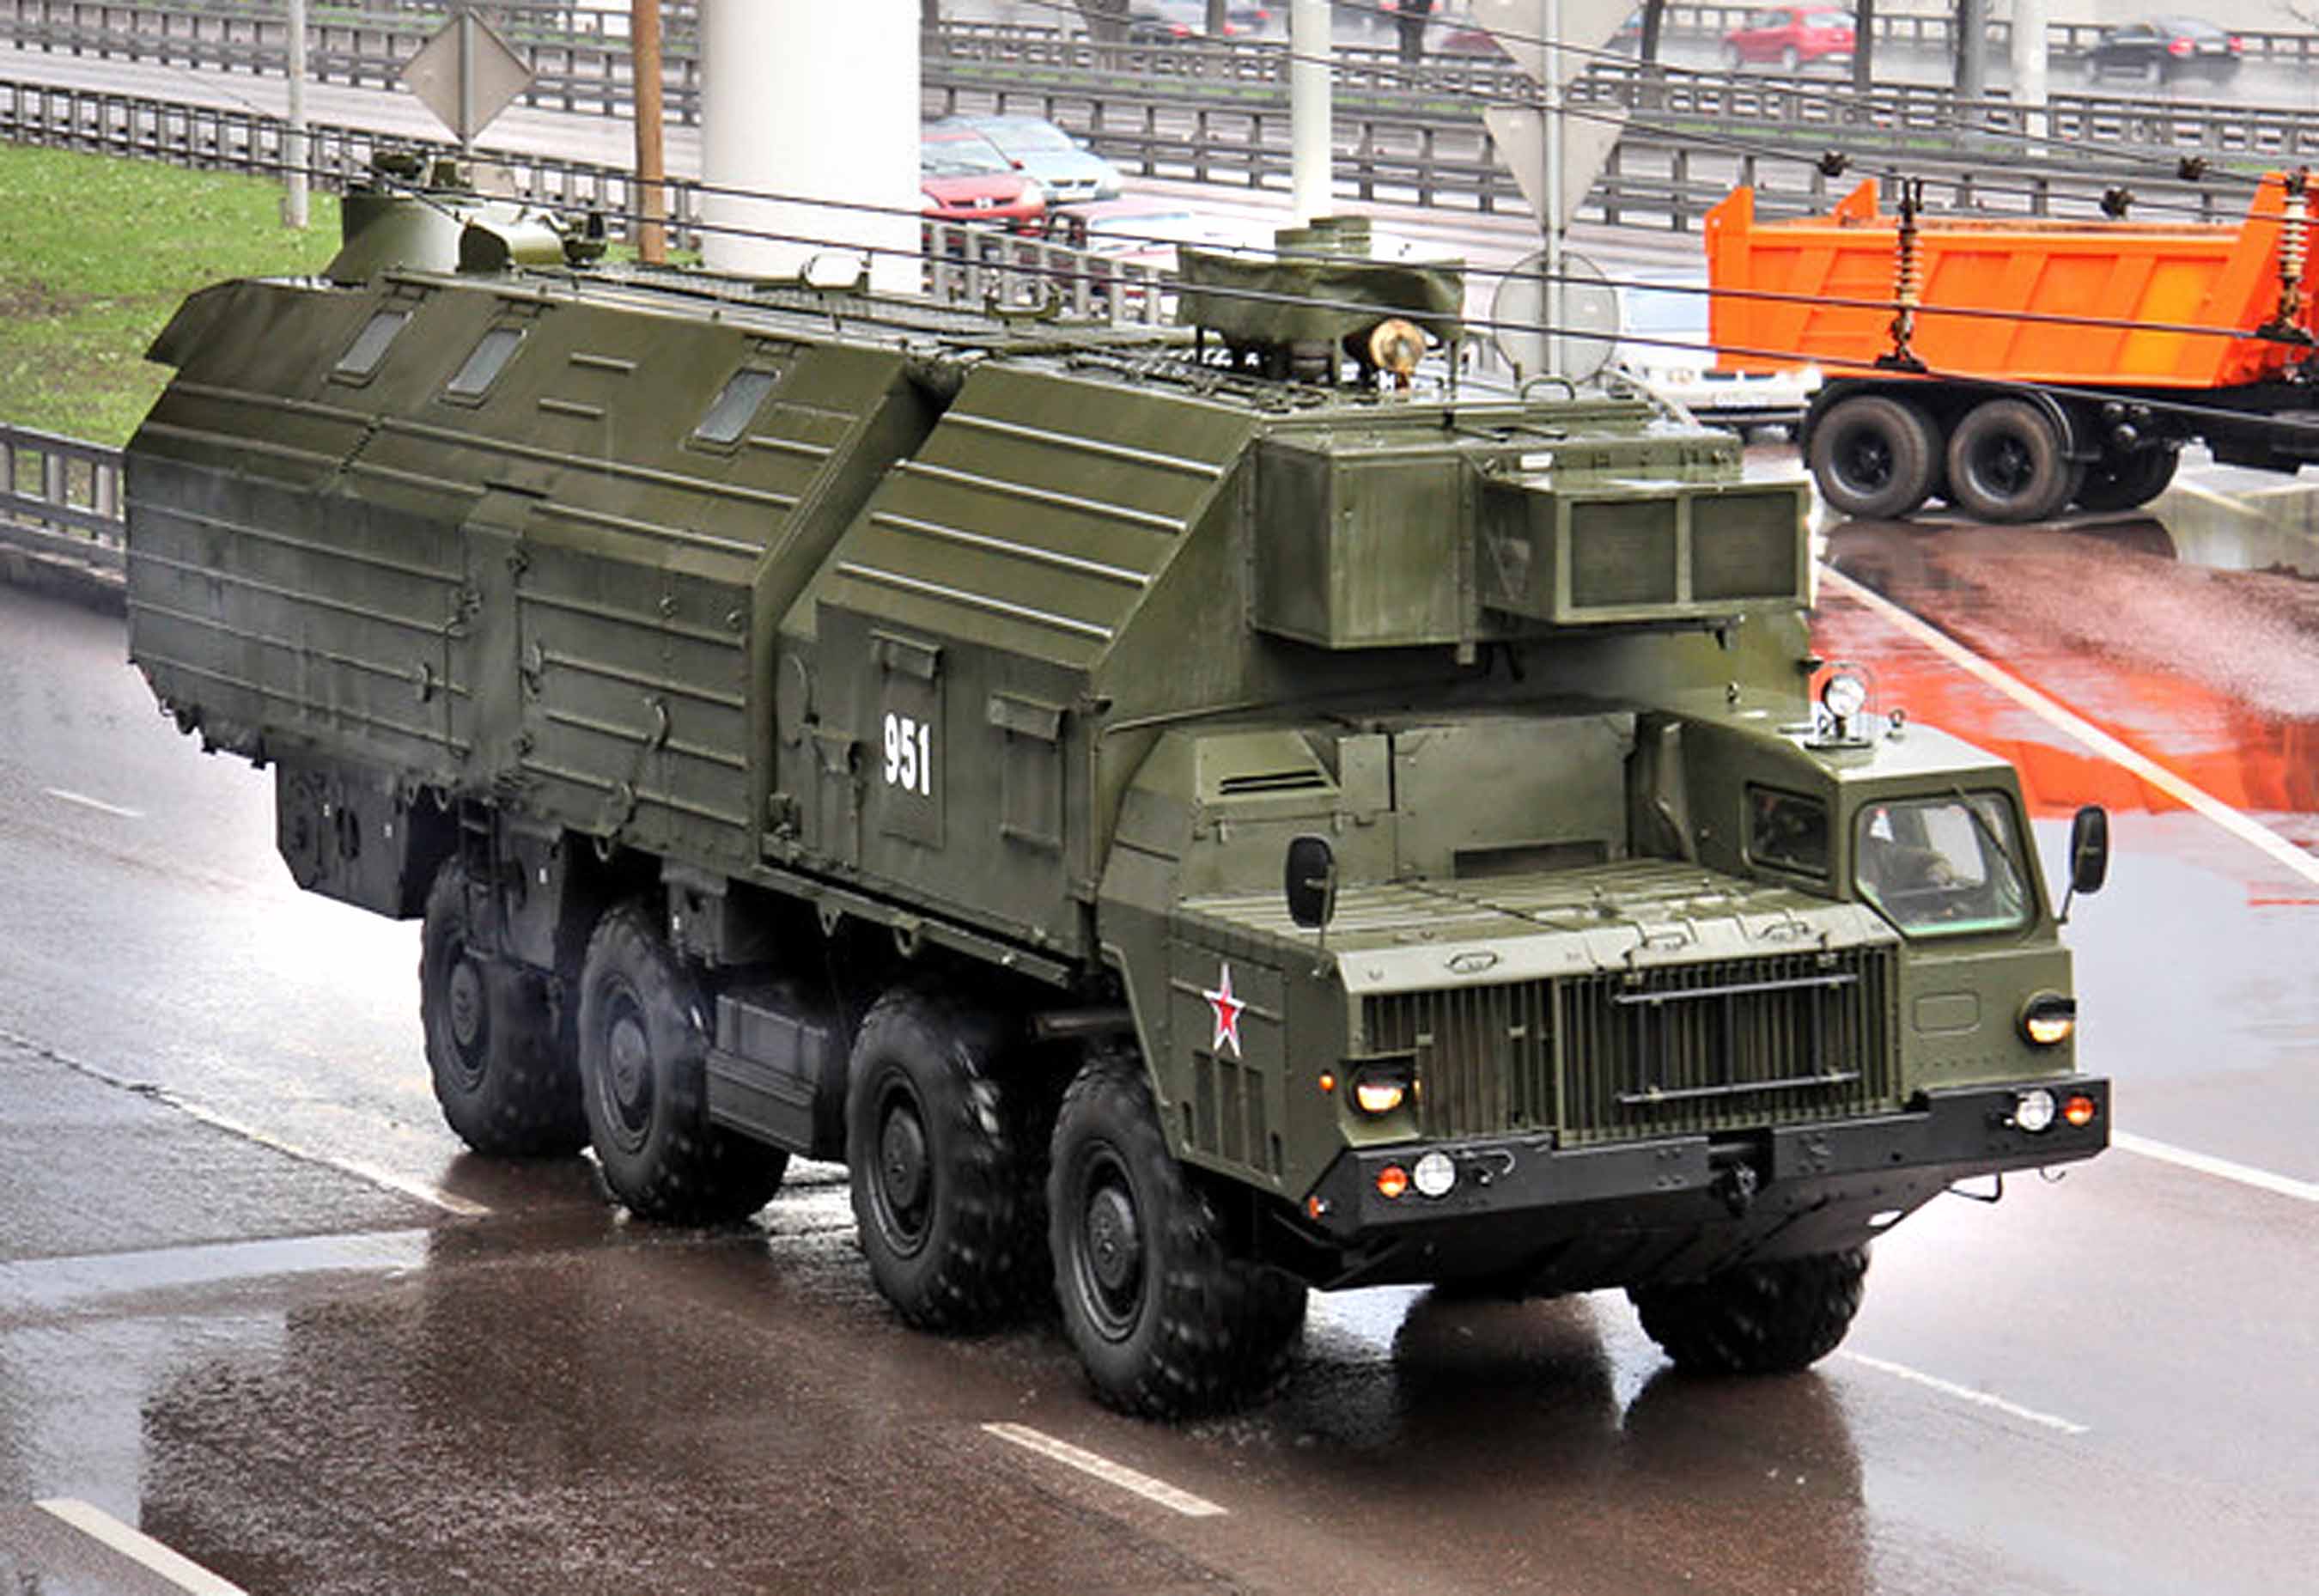
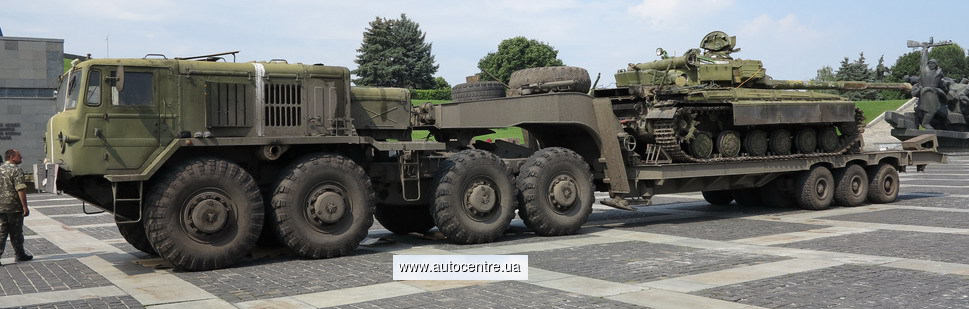
Any idea why they went with the split cab from the SCUD ? First thoughts may be to haul something long but that would hamper the turning radius of the trailer.
1 Like
I’m prepared to be wrong because this is one of only a few English sources I can find but, it looks like it’s just a case of standardization in design. The 547 was originally built as a TEL for the Scud with the cargo variant coming later.
The KET is based on the earlier 537 chassis which has a normal cab layout.
I fully agree. The cab was first split to accommodate the Scud TEL. This design brings the engine in front of the axles and lower down plus more forward on the vehicle, allowing even more room to nestle that Scud rmissile down onto (and into) the 8x8 carrier. This was done to better conform to normal highway height restrictions without the need to resort to the larger, heavier and more costly tractor / trailer design configuration.
(I would say the designers were thinking outside the box - or cab - on this one and I tip my hat to them!)
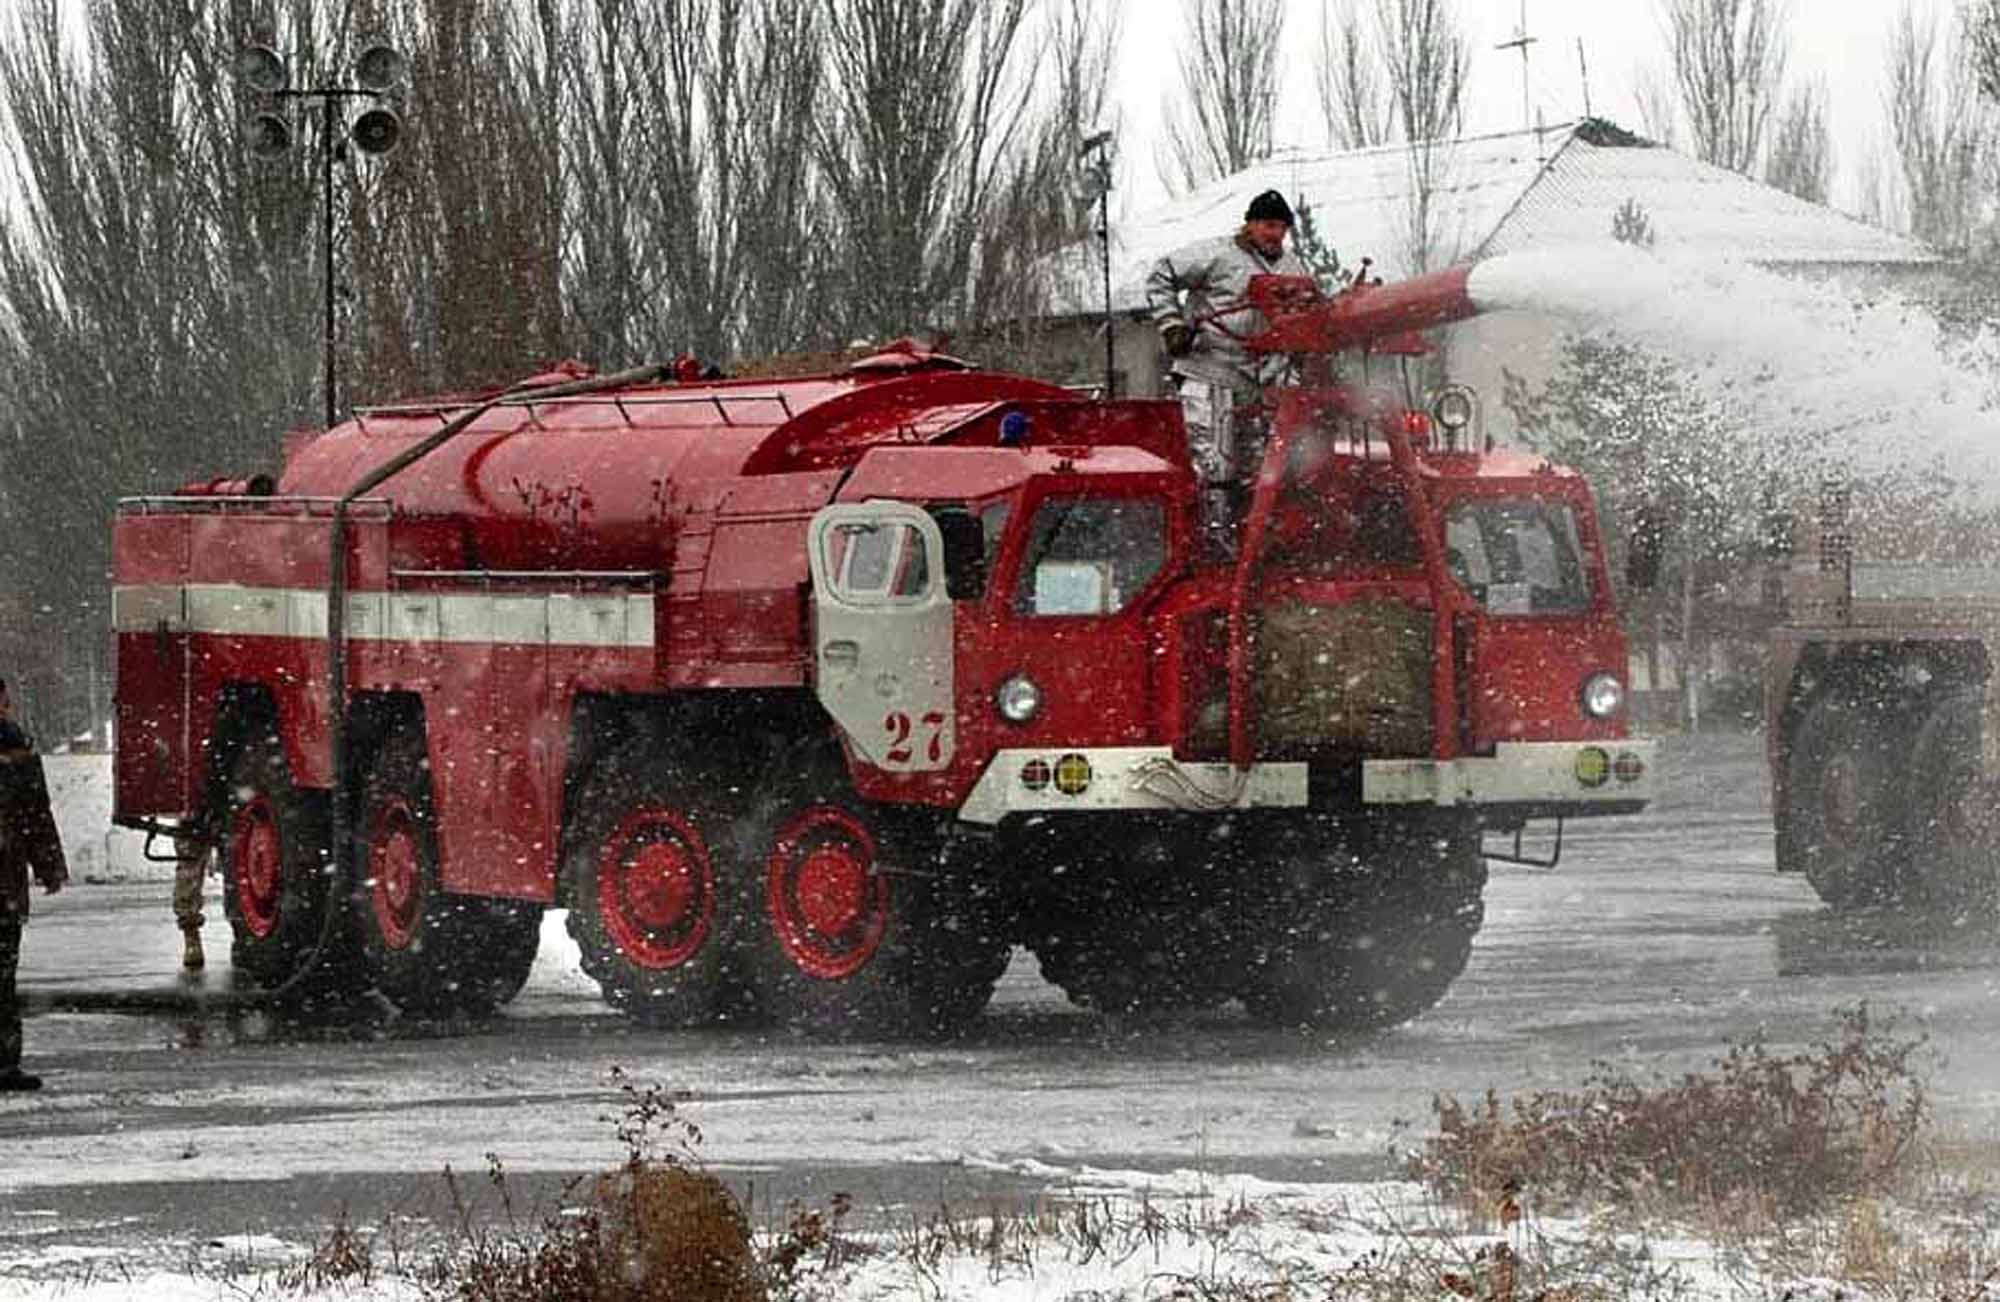
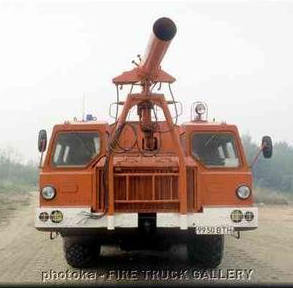
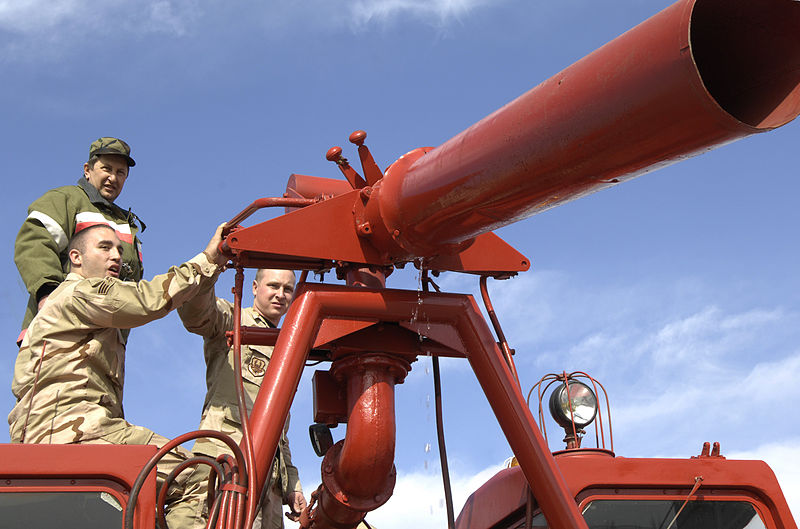
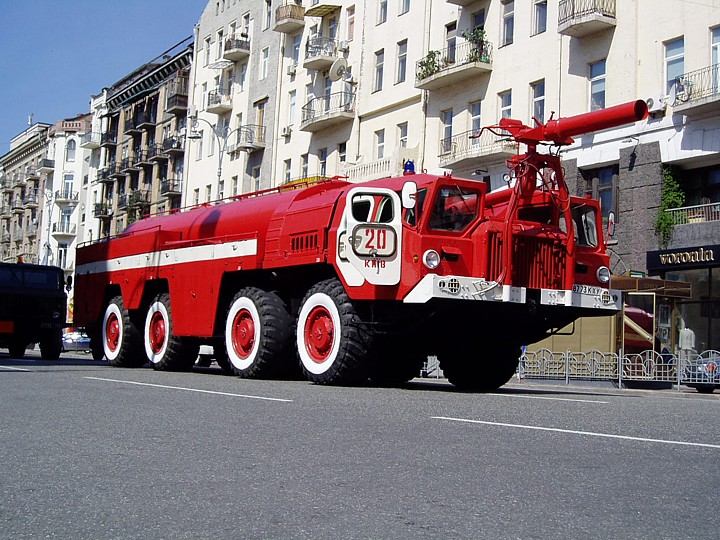
Later iterations such as the AA60 fire truck took advantage of the now standardized split cab to accommodate specialized equipment such as their “foam canon”.
I suspect the group is already aware that there was also a very rare 5 passenger cab version as well as a rather common two person (left side only) version.

This last image shows the ultimate Russian RV camper. It has electrical generation, heat, A/C and even a top mounted ground defense gun turret. Also it has sleeping and dining/cooking accommodations. It usually accompanies the Coastal Defense mobile gun and radar vehicles when deployed to support 24/7 crew rotation.
3 Likes
I really like the design of the fire truck!
Even this design came in three different sized models all using the same standardized cab and chassis: Small, Medium and Large.
2 Likes
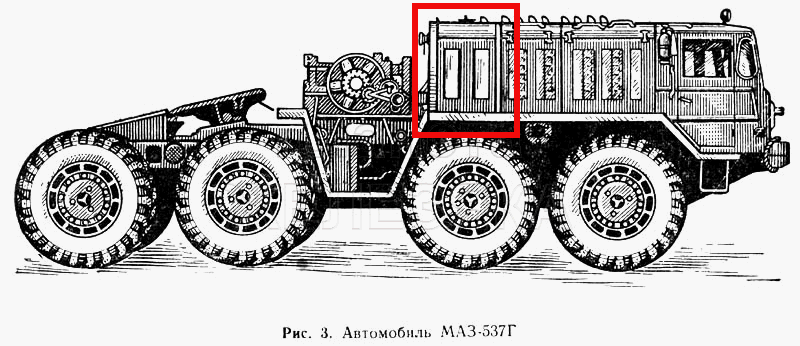
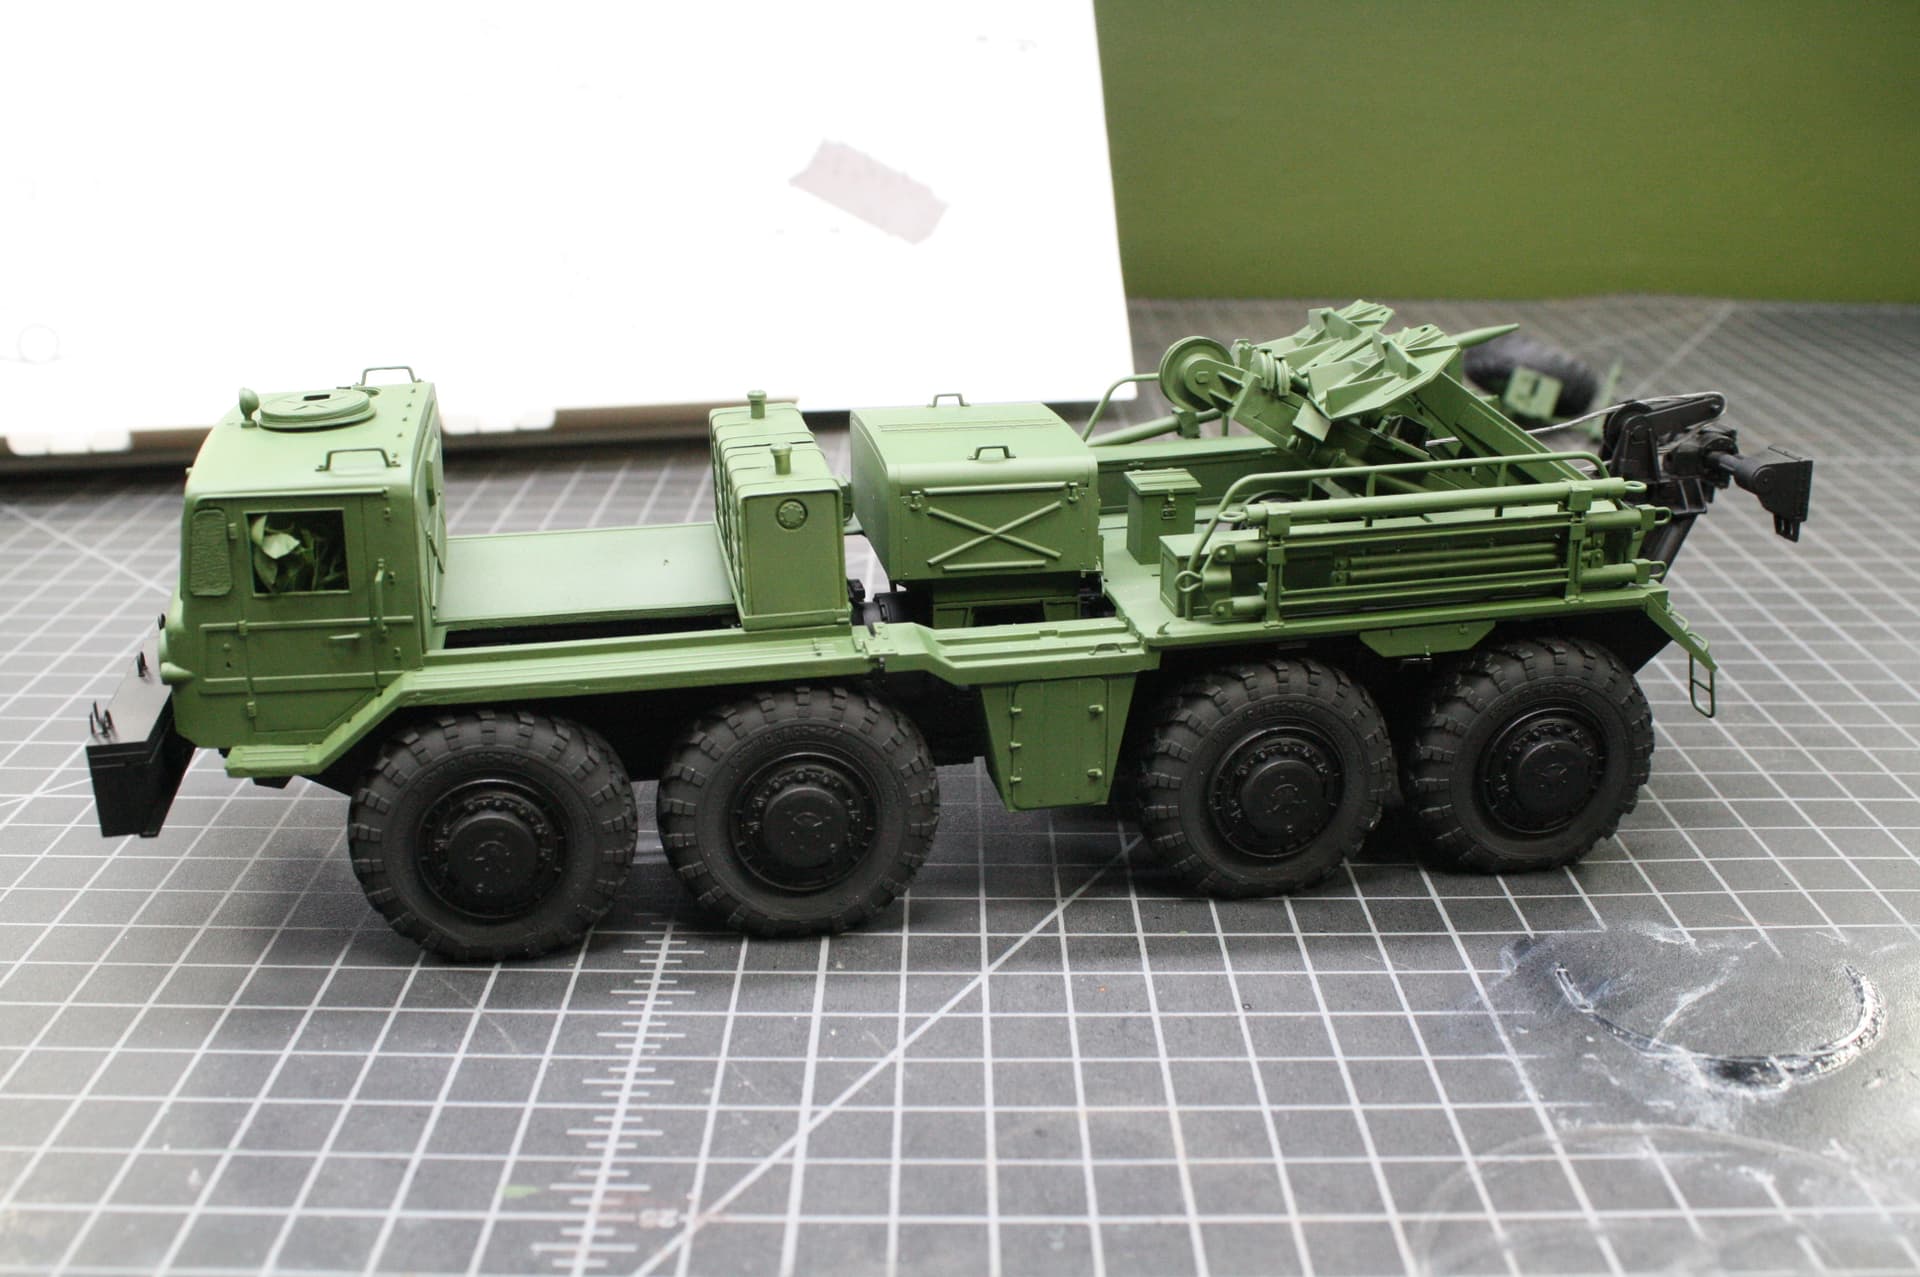
OK enough about the MA3-543 - we need to get back to the subject at hand which is the Sarge’s 537.
The 537 was designed primarily as a heavy towing vehicle (a semi tractor) hence the “normal”, side-by-side, cab configuration with the engine high, up over the axles and behind the driver rather than next to him/her. Leaving just enough room in the rear of the chassis for a loadbox or a winch and the fifth wheel.
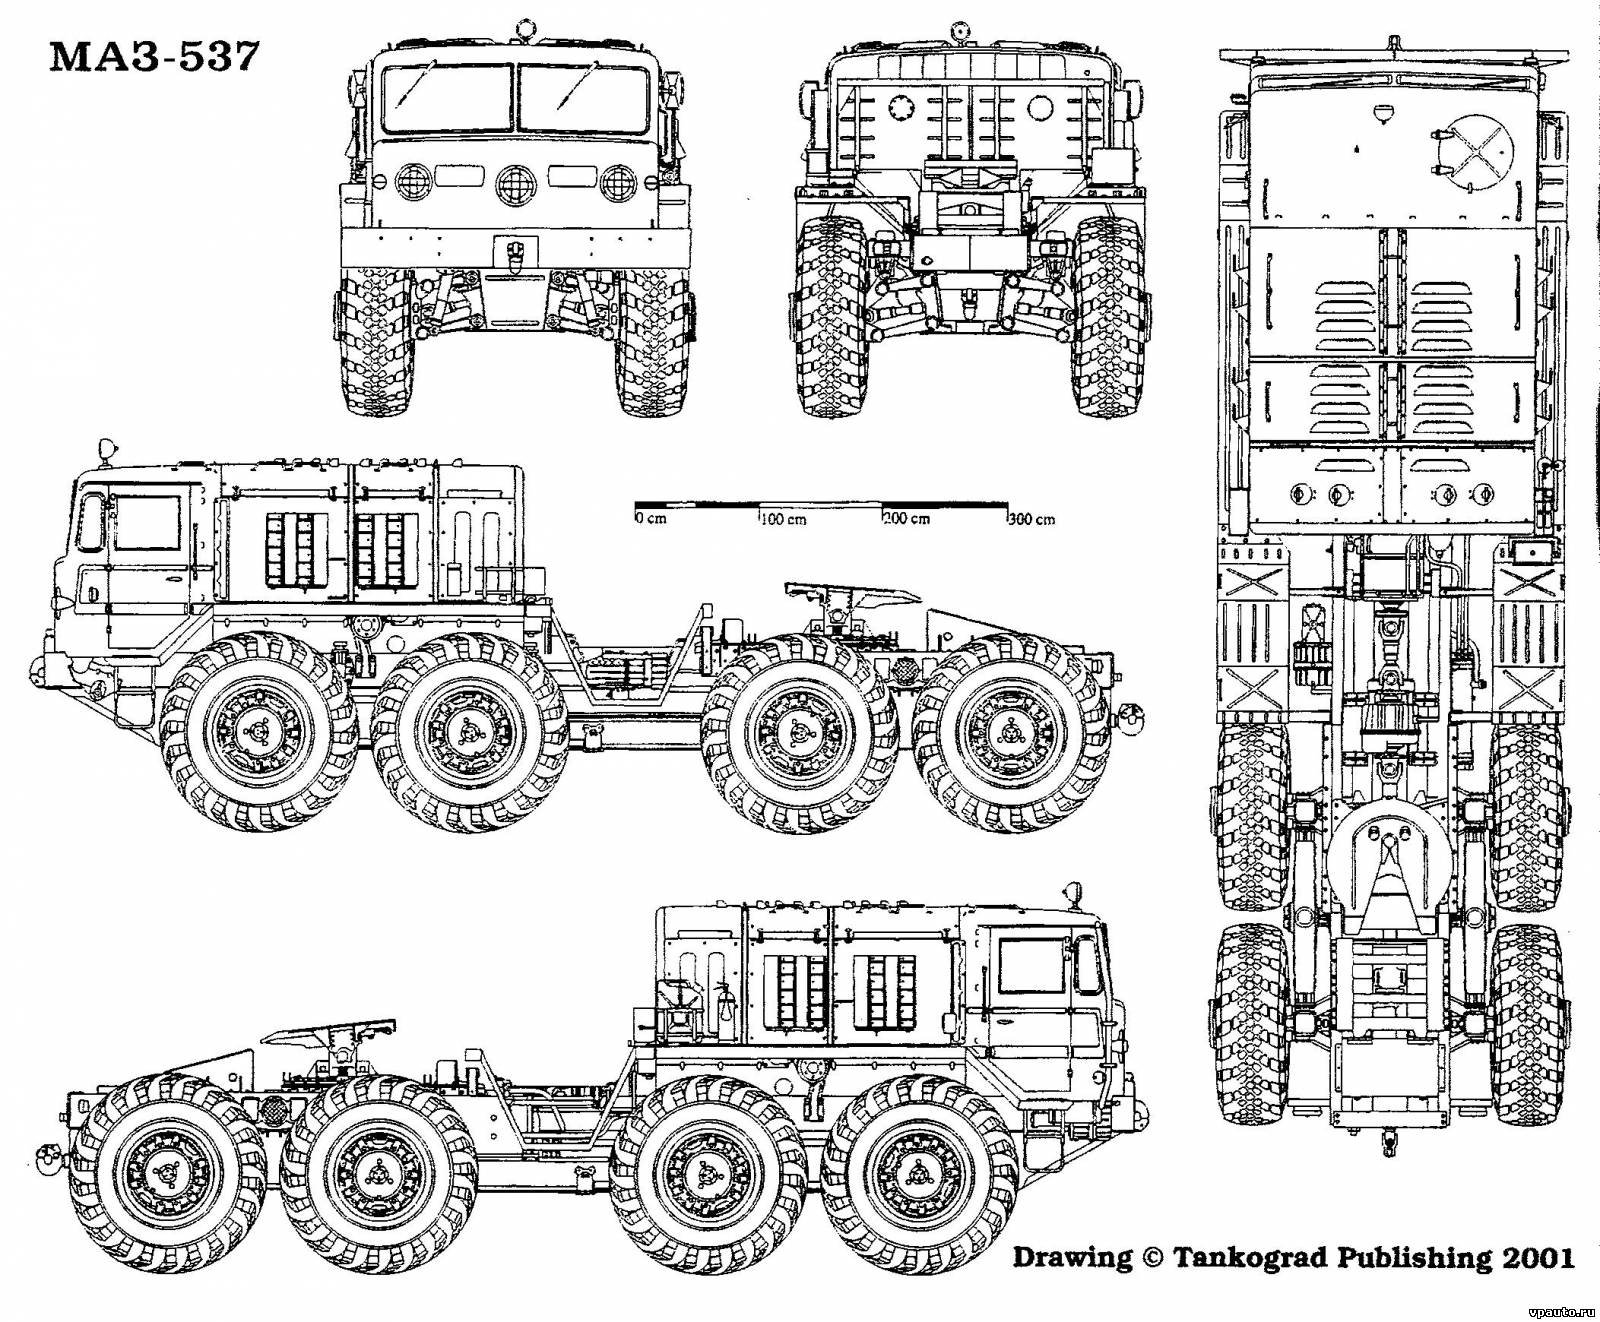
All the vehicles shown in this one post are the “LATE” version:
The primary external difference between the early and the late model 537’s is that on the late model the body sheet metal was extended to the rear to cover the fuel tanks to give them some additional protection and (I assume) to keep the fuel a little warmer from the heat of the engine during those long, cold Russian nights.
p.s. There was also an even longer crew cab version.
2 Likes
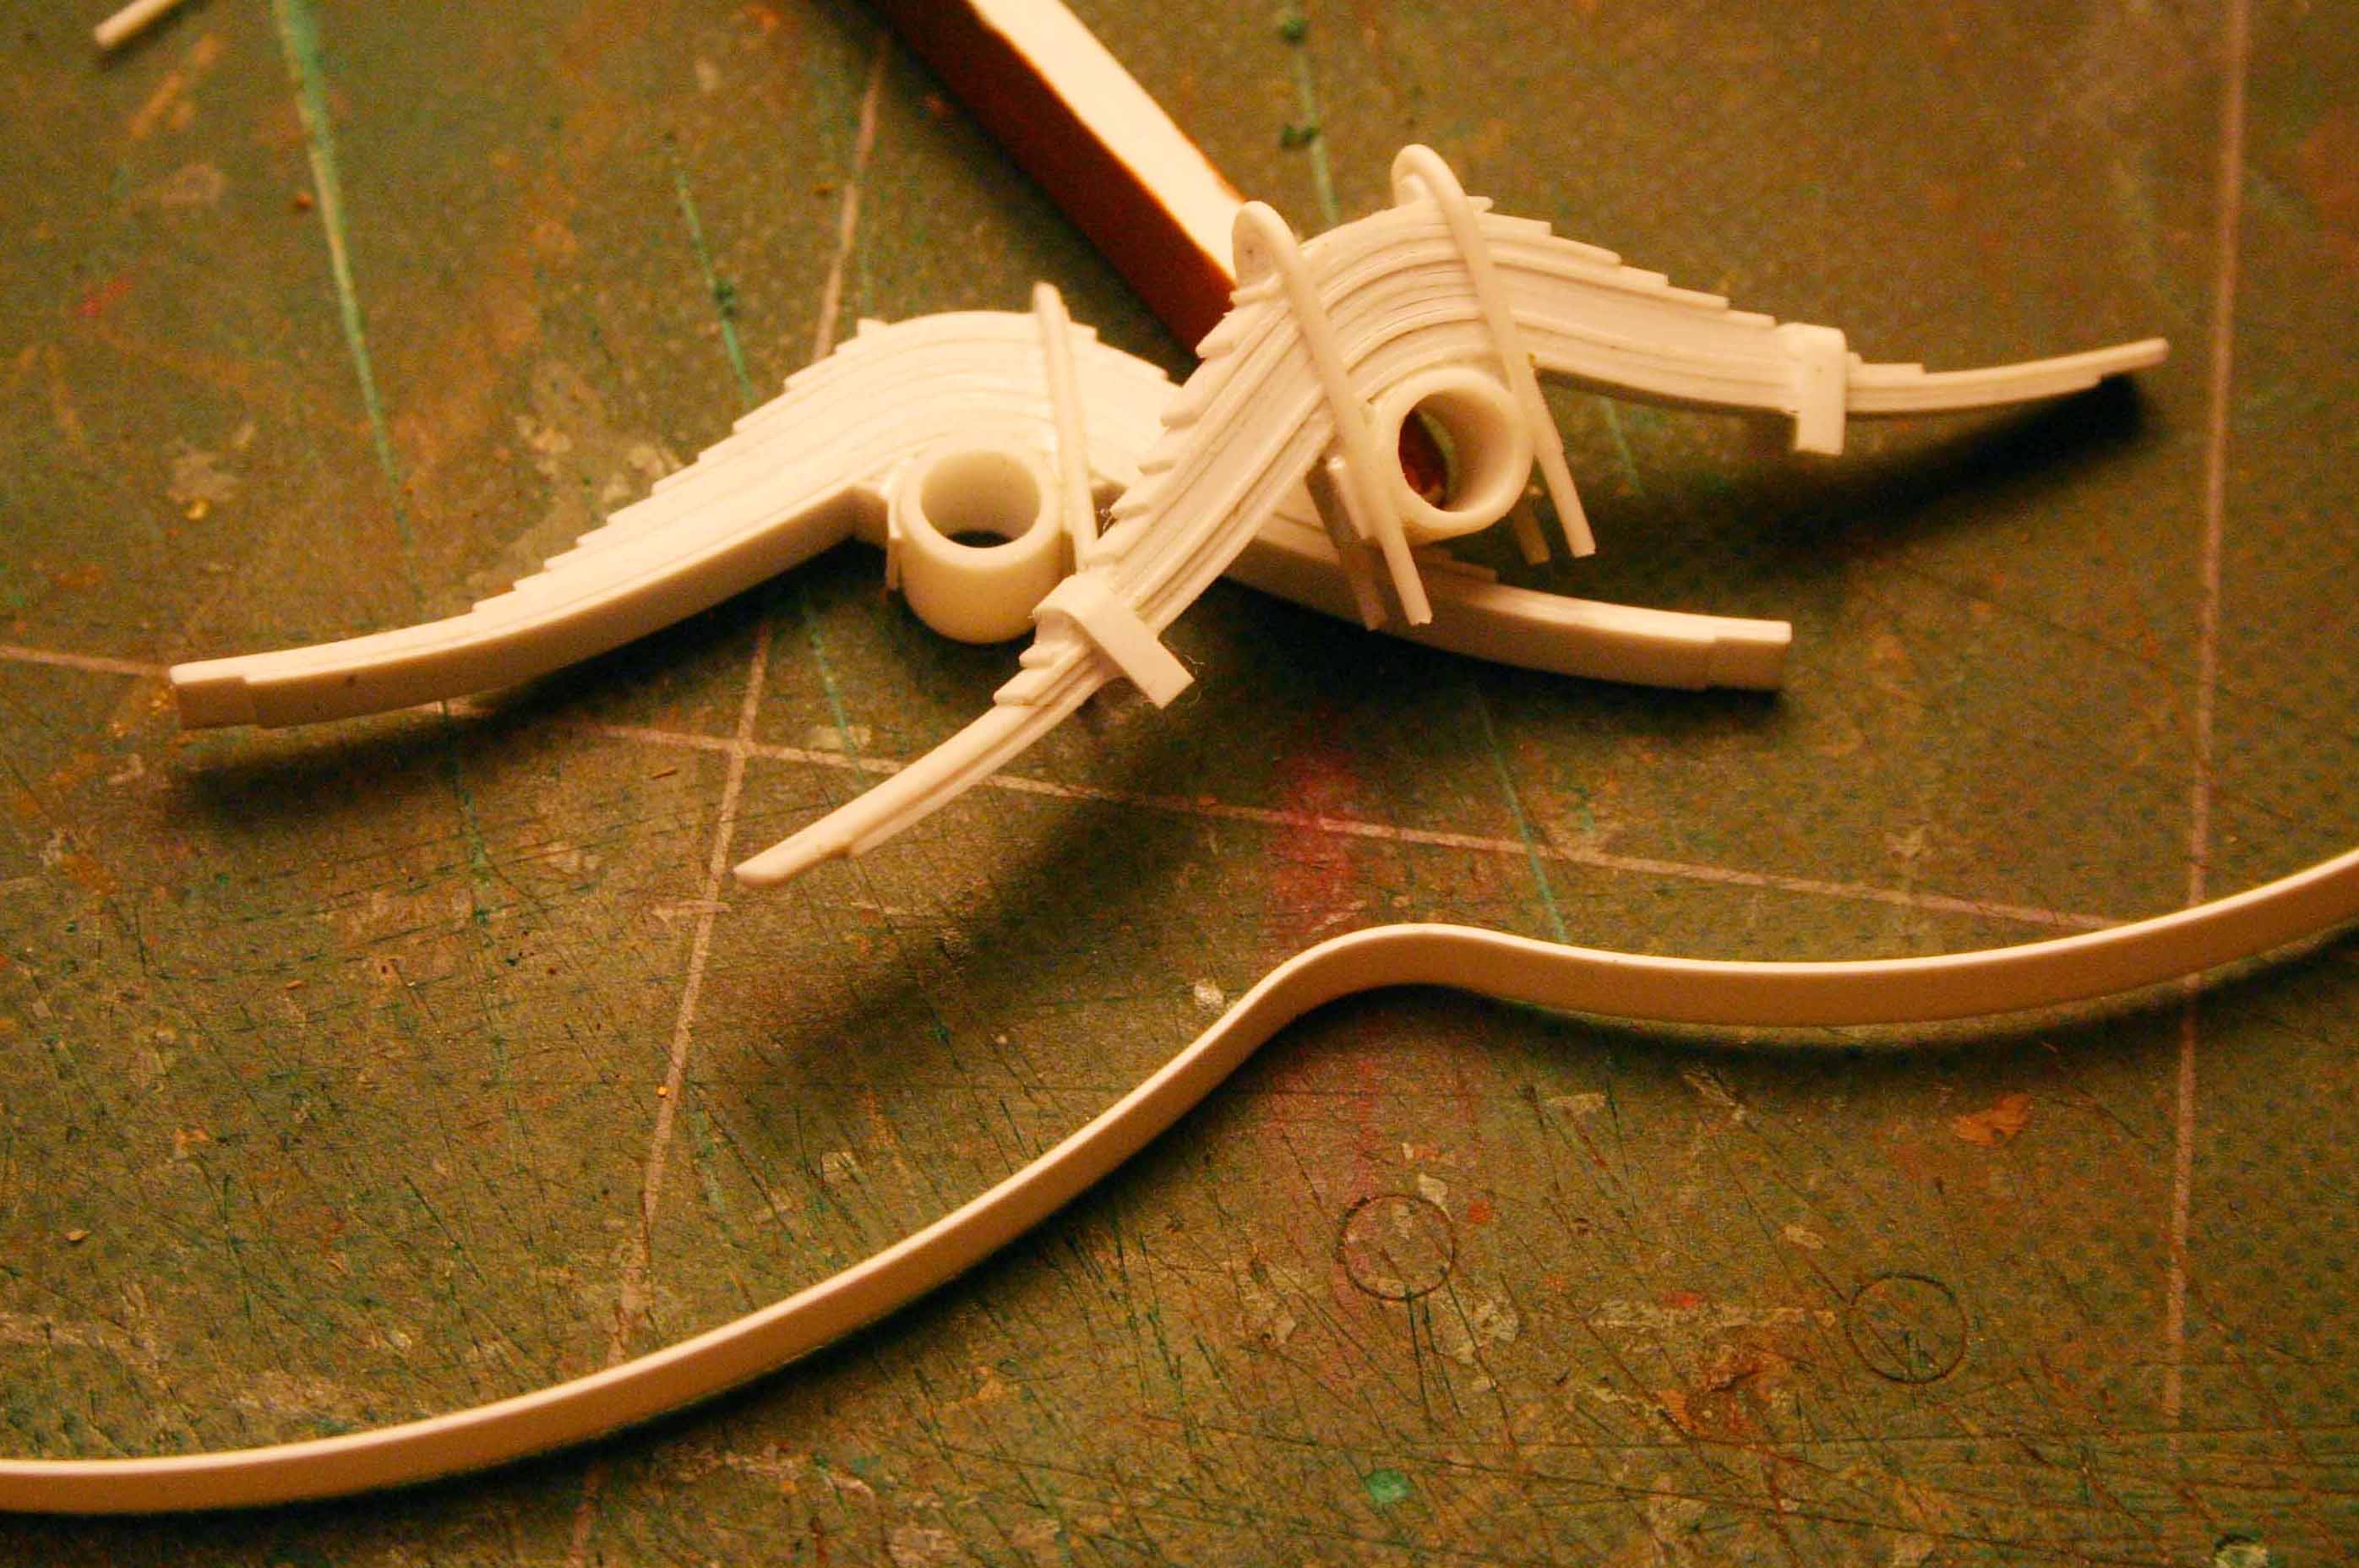
Okay okay so I didn’t get back to you tomorrow. Had some big time car trouble on Friday that needed taking care of and I went with my club mates to a show on Saturday. But I’m happy to report major progress on the KET-T, not all trouble free, I’m afraid.
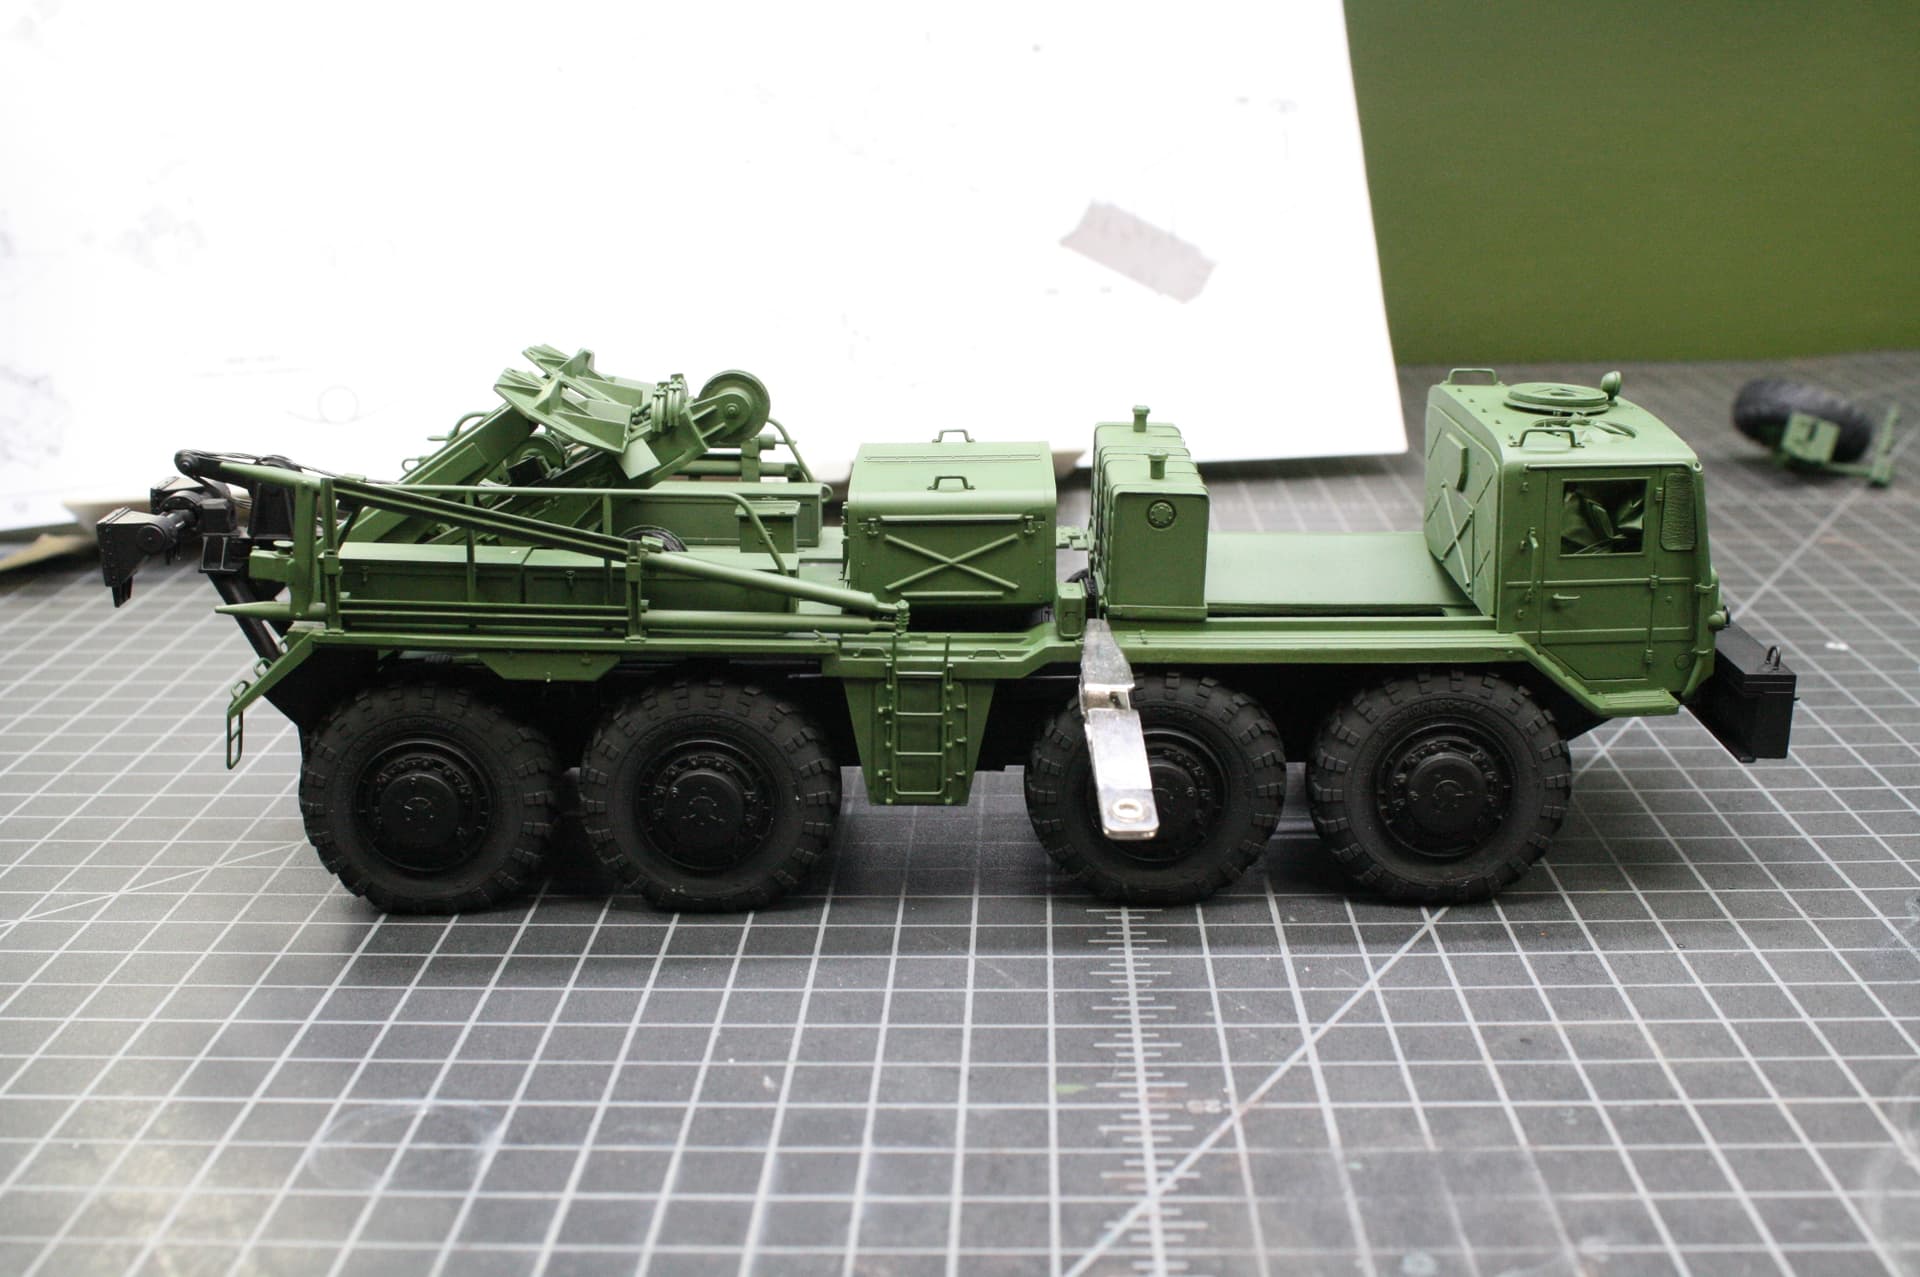
I got the boom on just fine and cabled it up. The rear fenders do not fit on the fender brackets and want to wing in the air at a 30° angle. I had to rip out the brackets, reglue them, and then clamp the fenders to get them to line up. Time for some different flavors of CA glue.
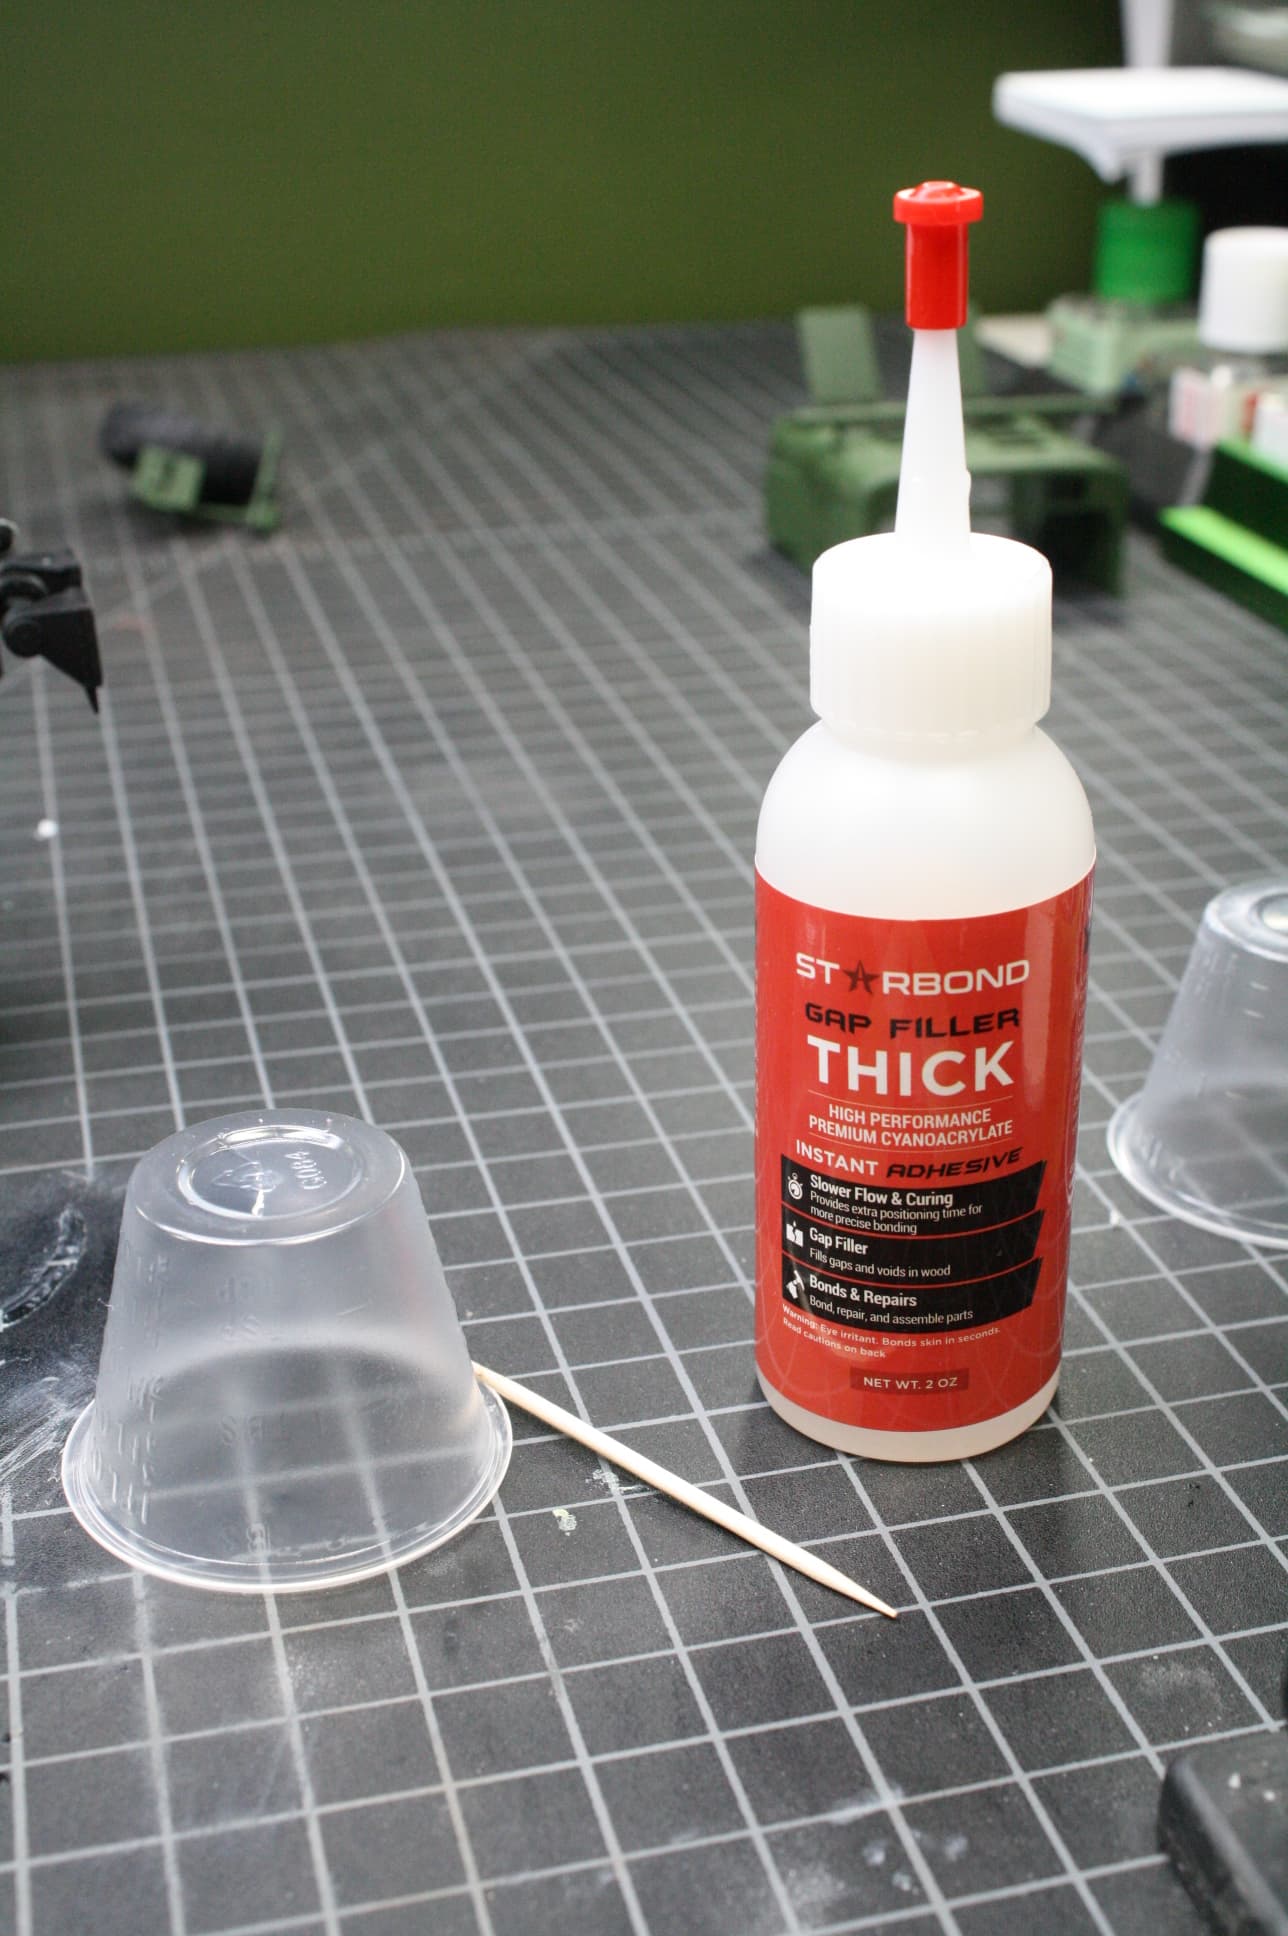
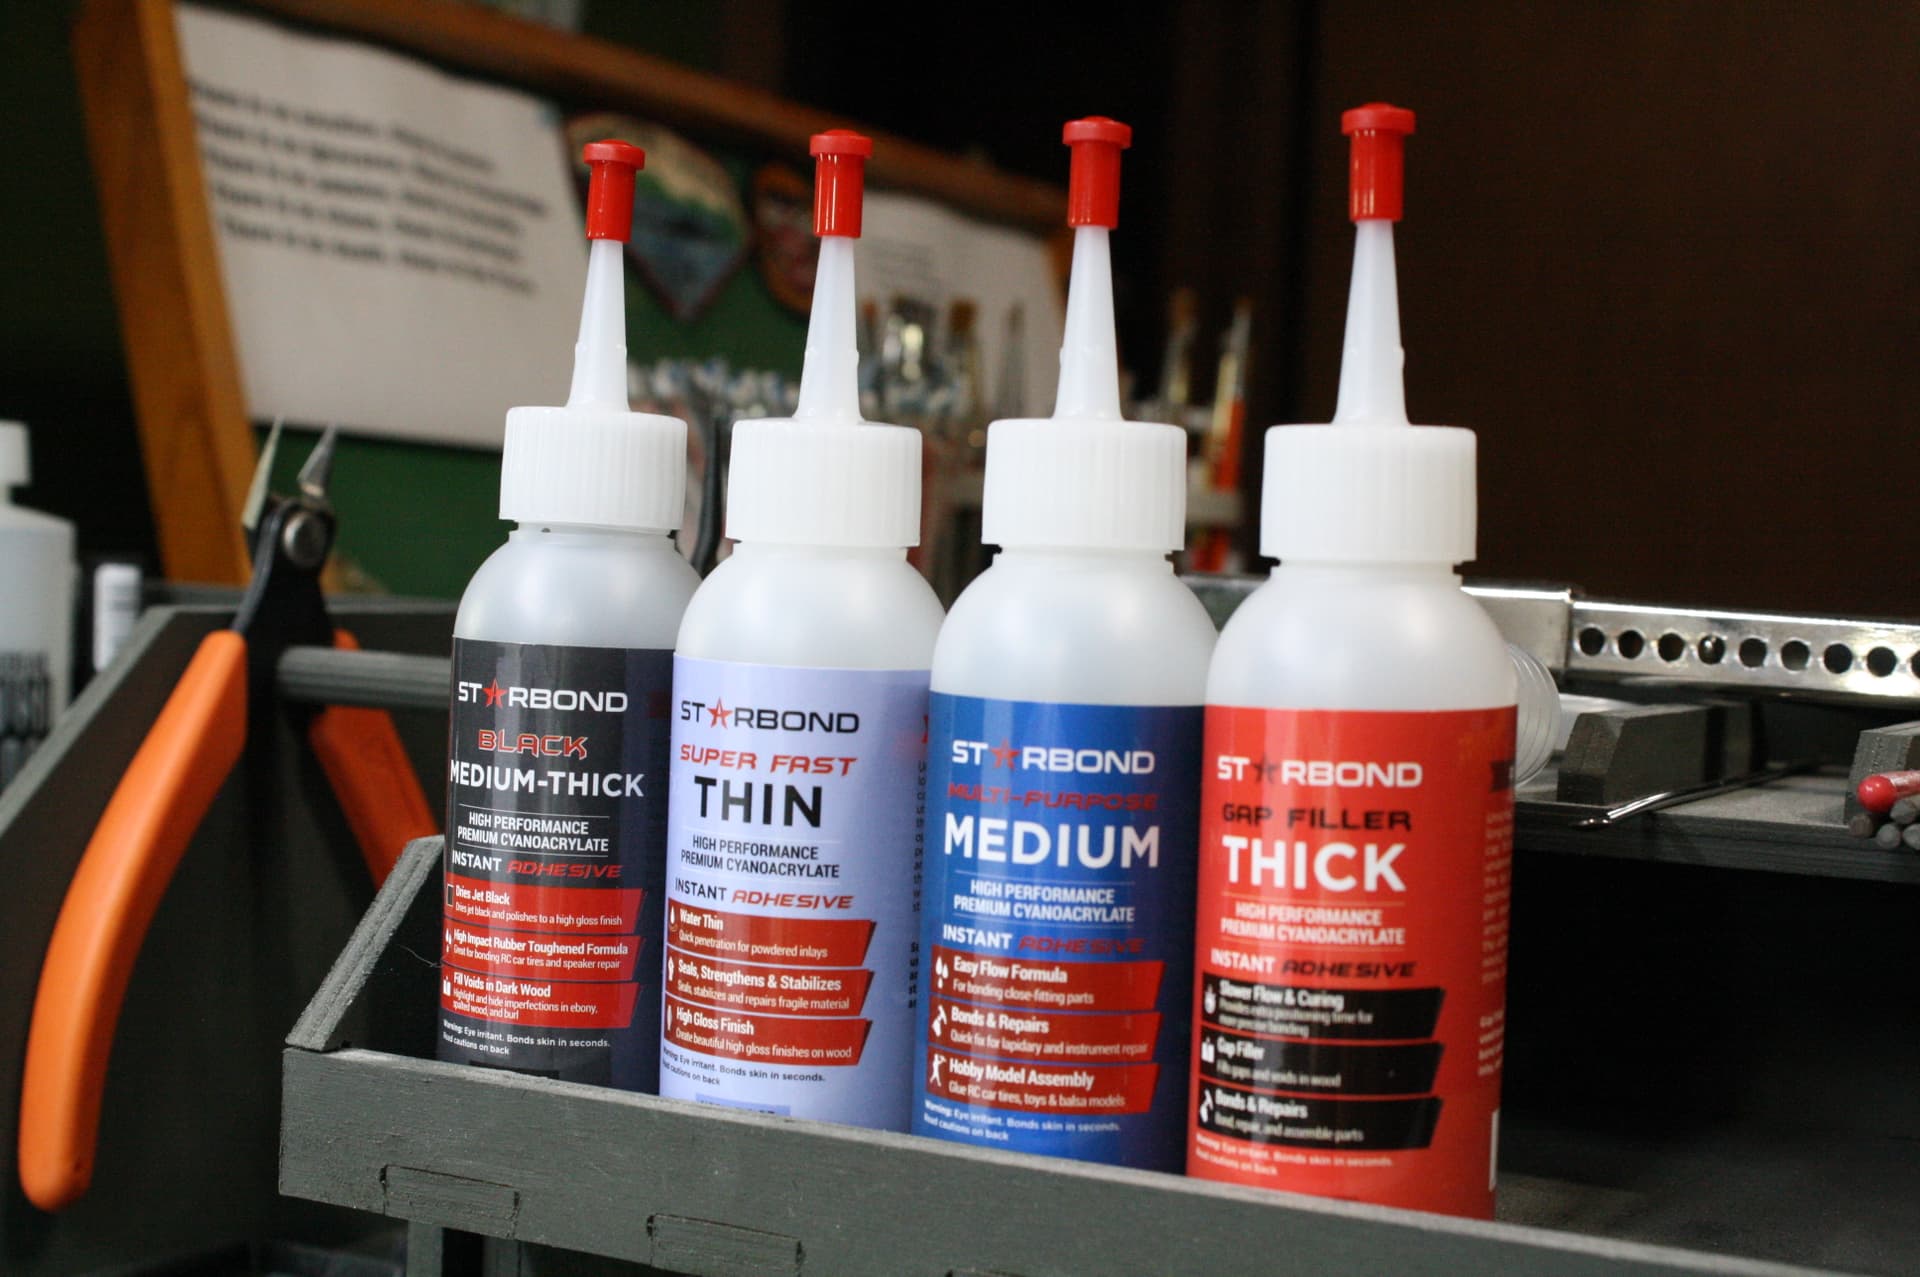
I was always a BSI glue fan until Wade @Armor_Buff turned me on to Starbond CA glues starbond.com
now I have and use their whole lineup and it’s changed the way I use CA. Especially the black stuff. It’s infused with rubber and gives you a 30 second working time - perfect for photo etch. Their other glues are great, too, and they sell bundles at great prices. Free shipping in the USA, too.
Anyway, I glued one support at a time and got the fenders on, then I kept gluing sub-assemblies on until I ran out of stuff. I then went around the model touching up glue marks and knife nicks. Until finally, a night and day’s work later -
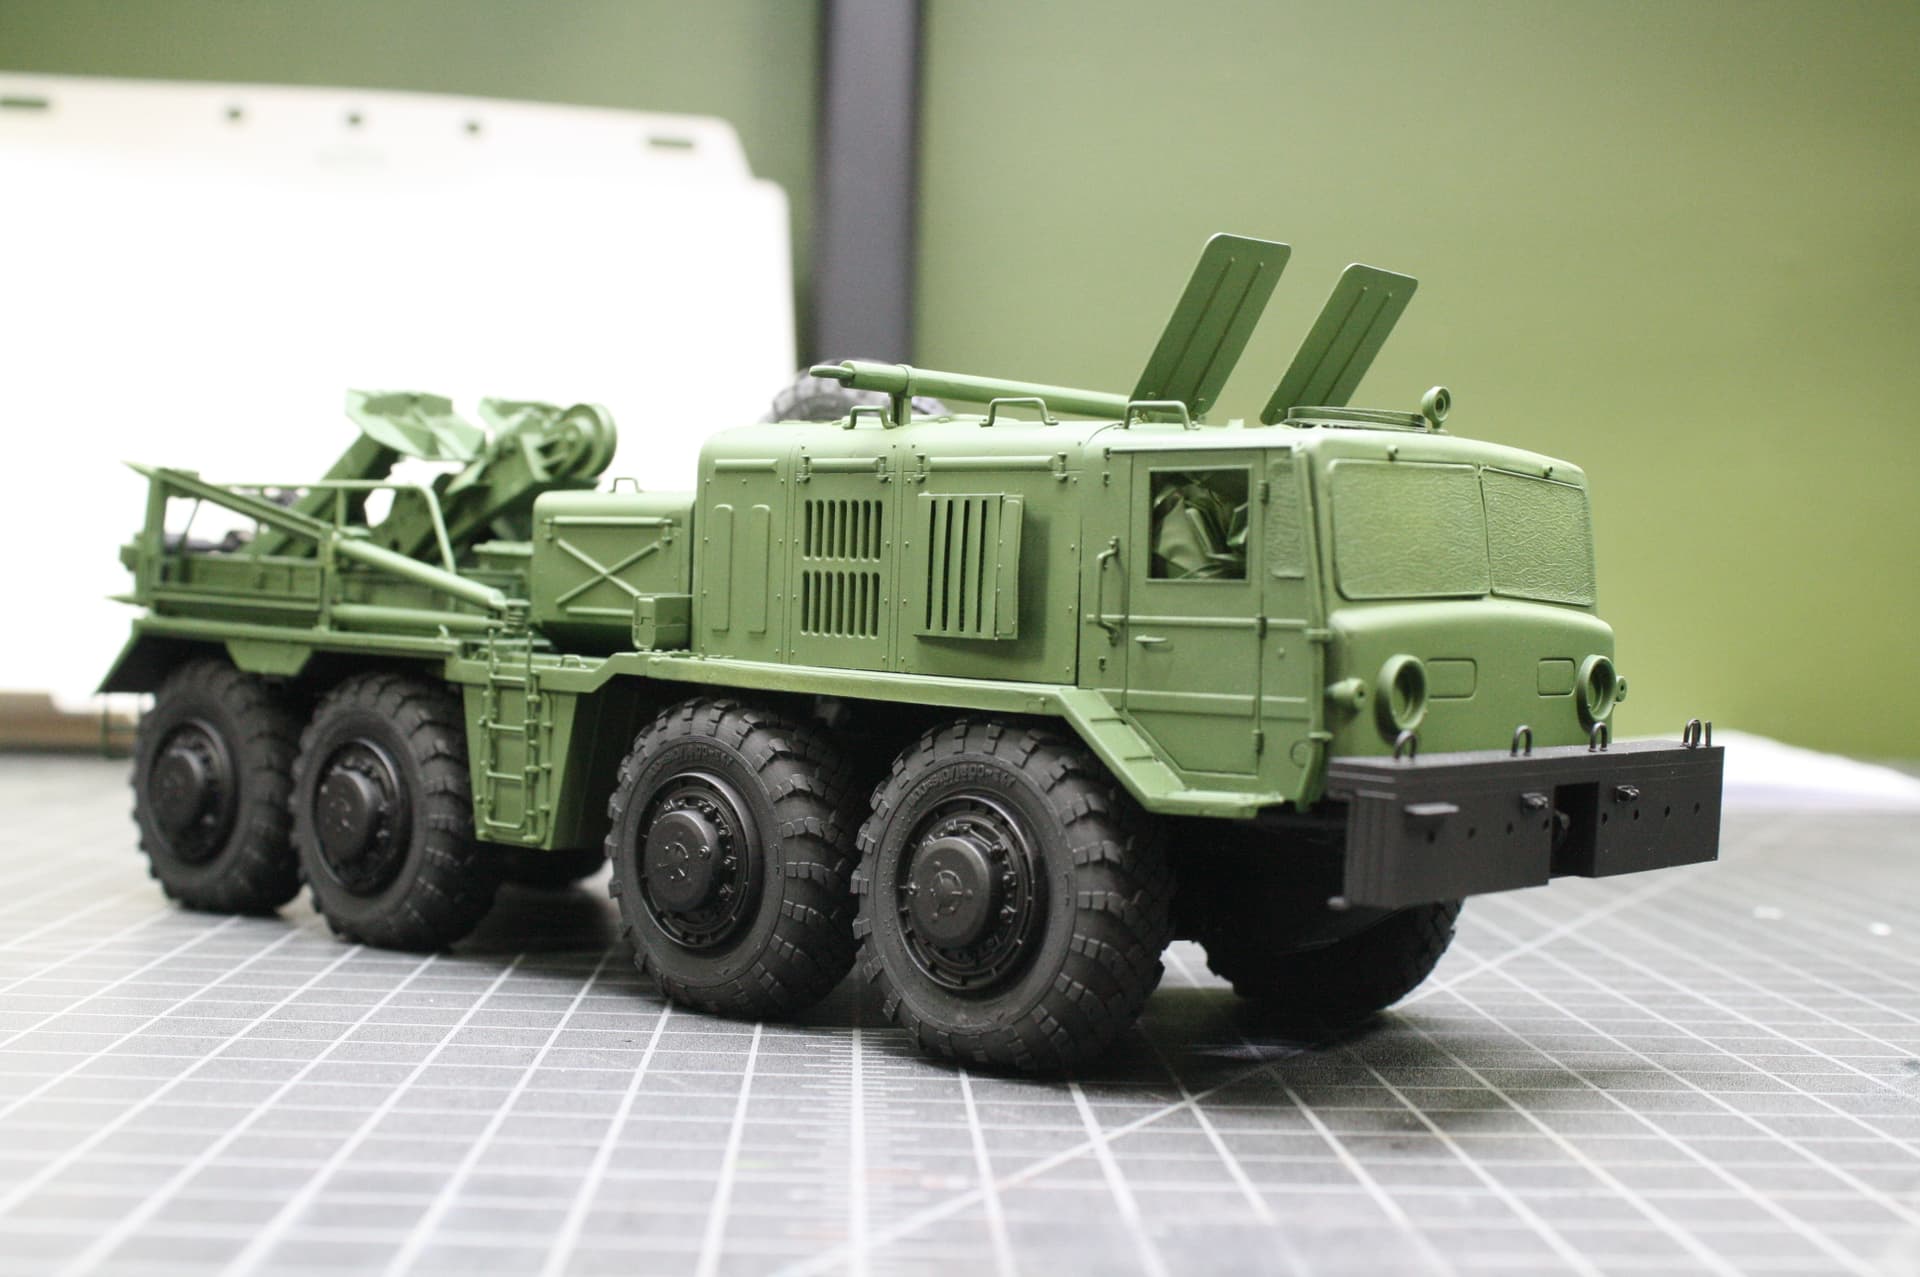
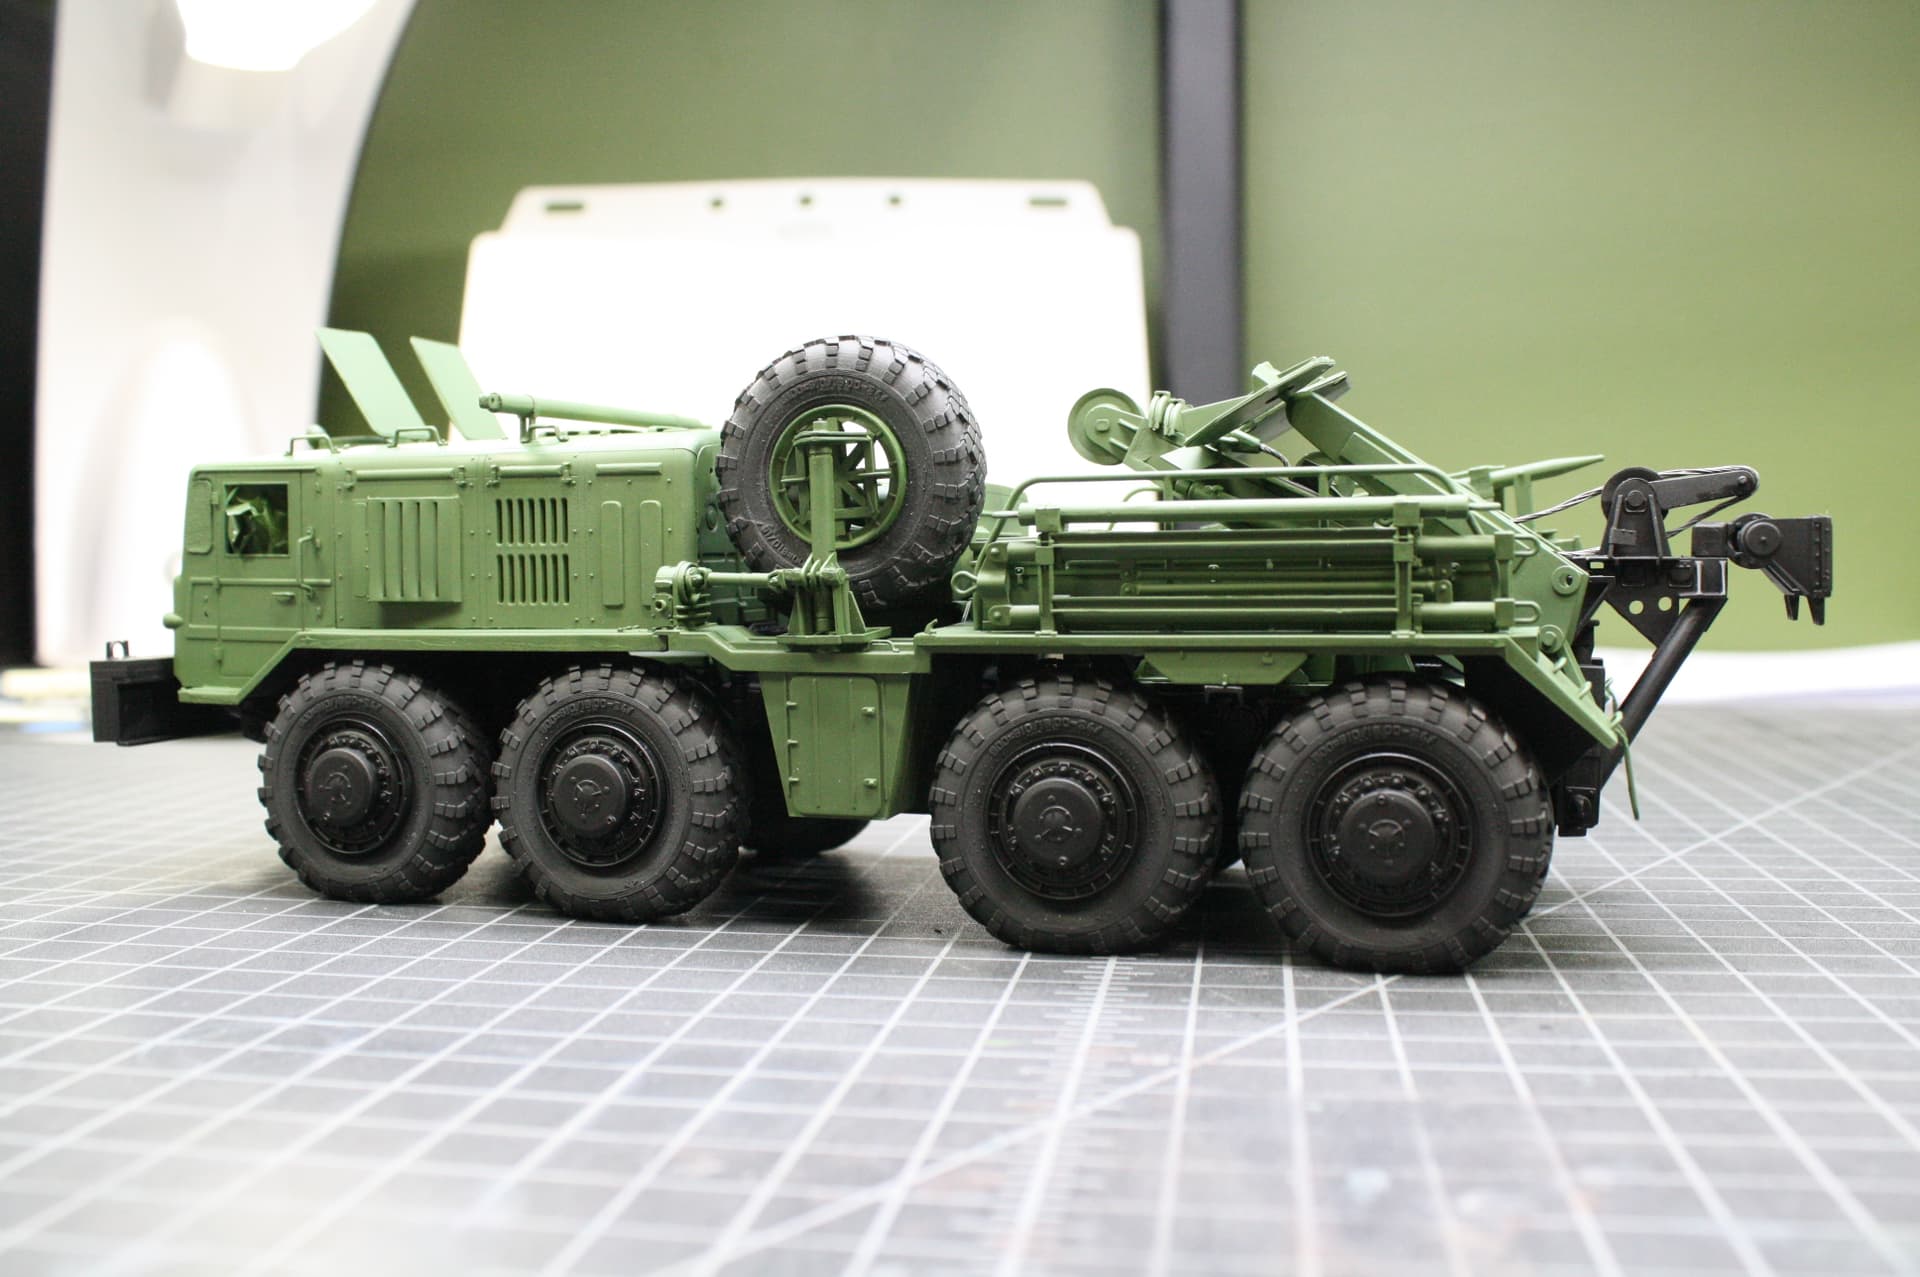
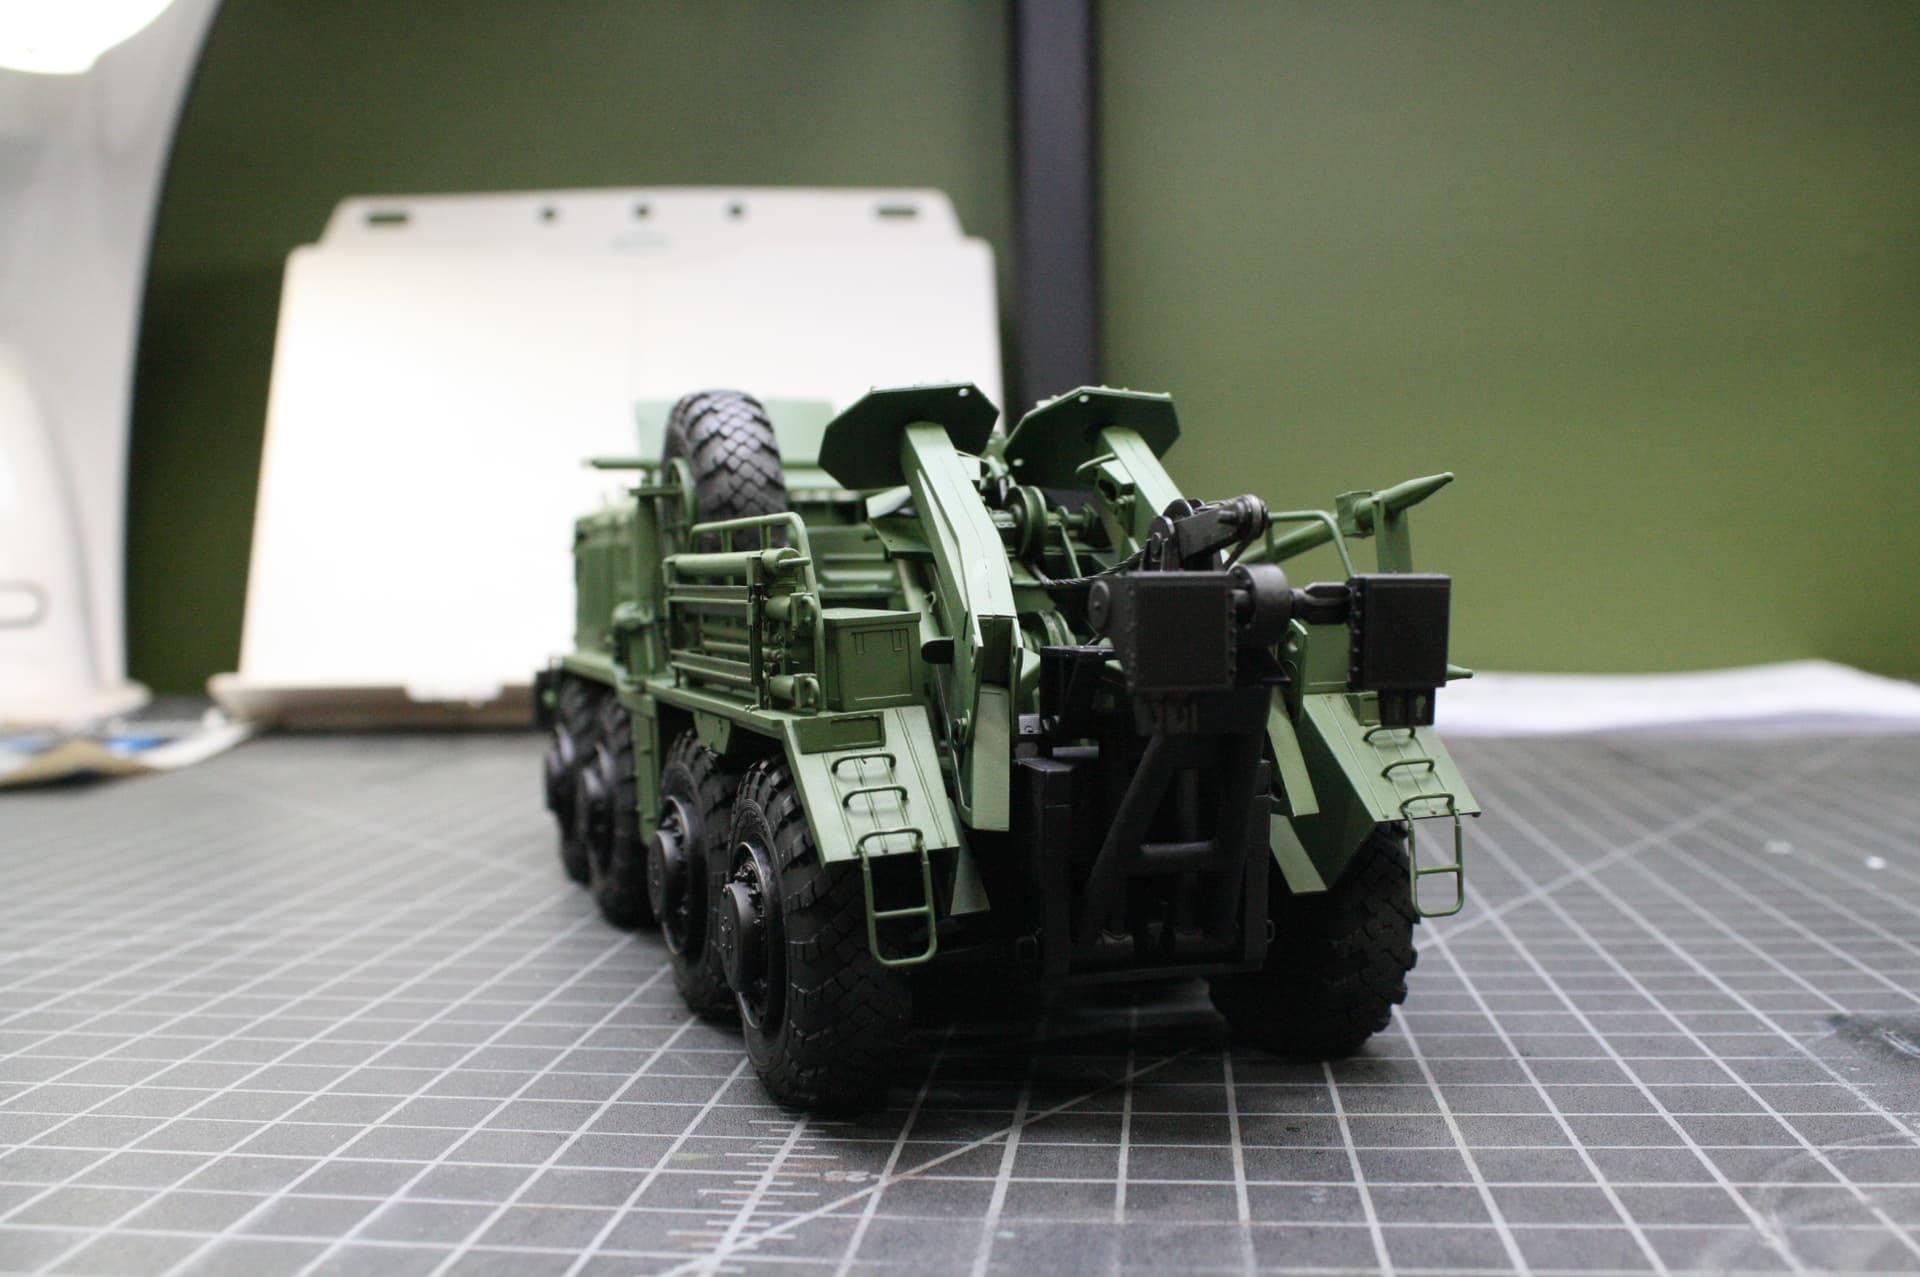

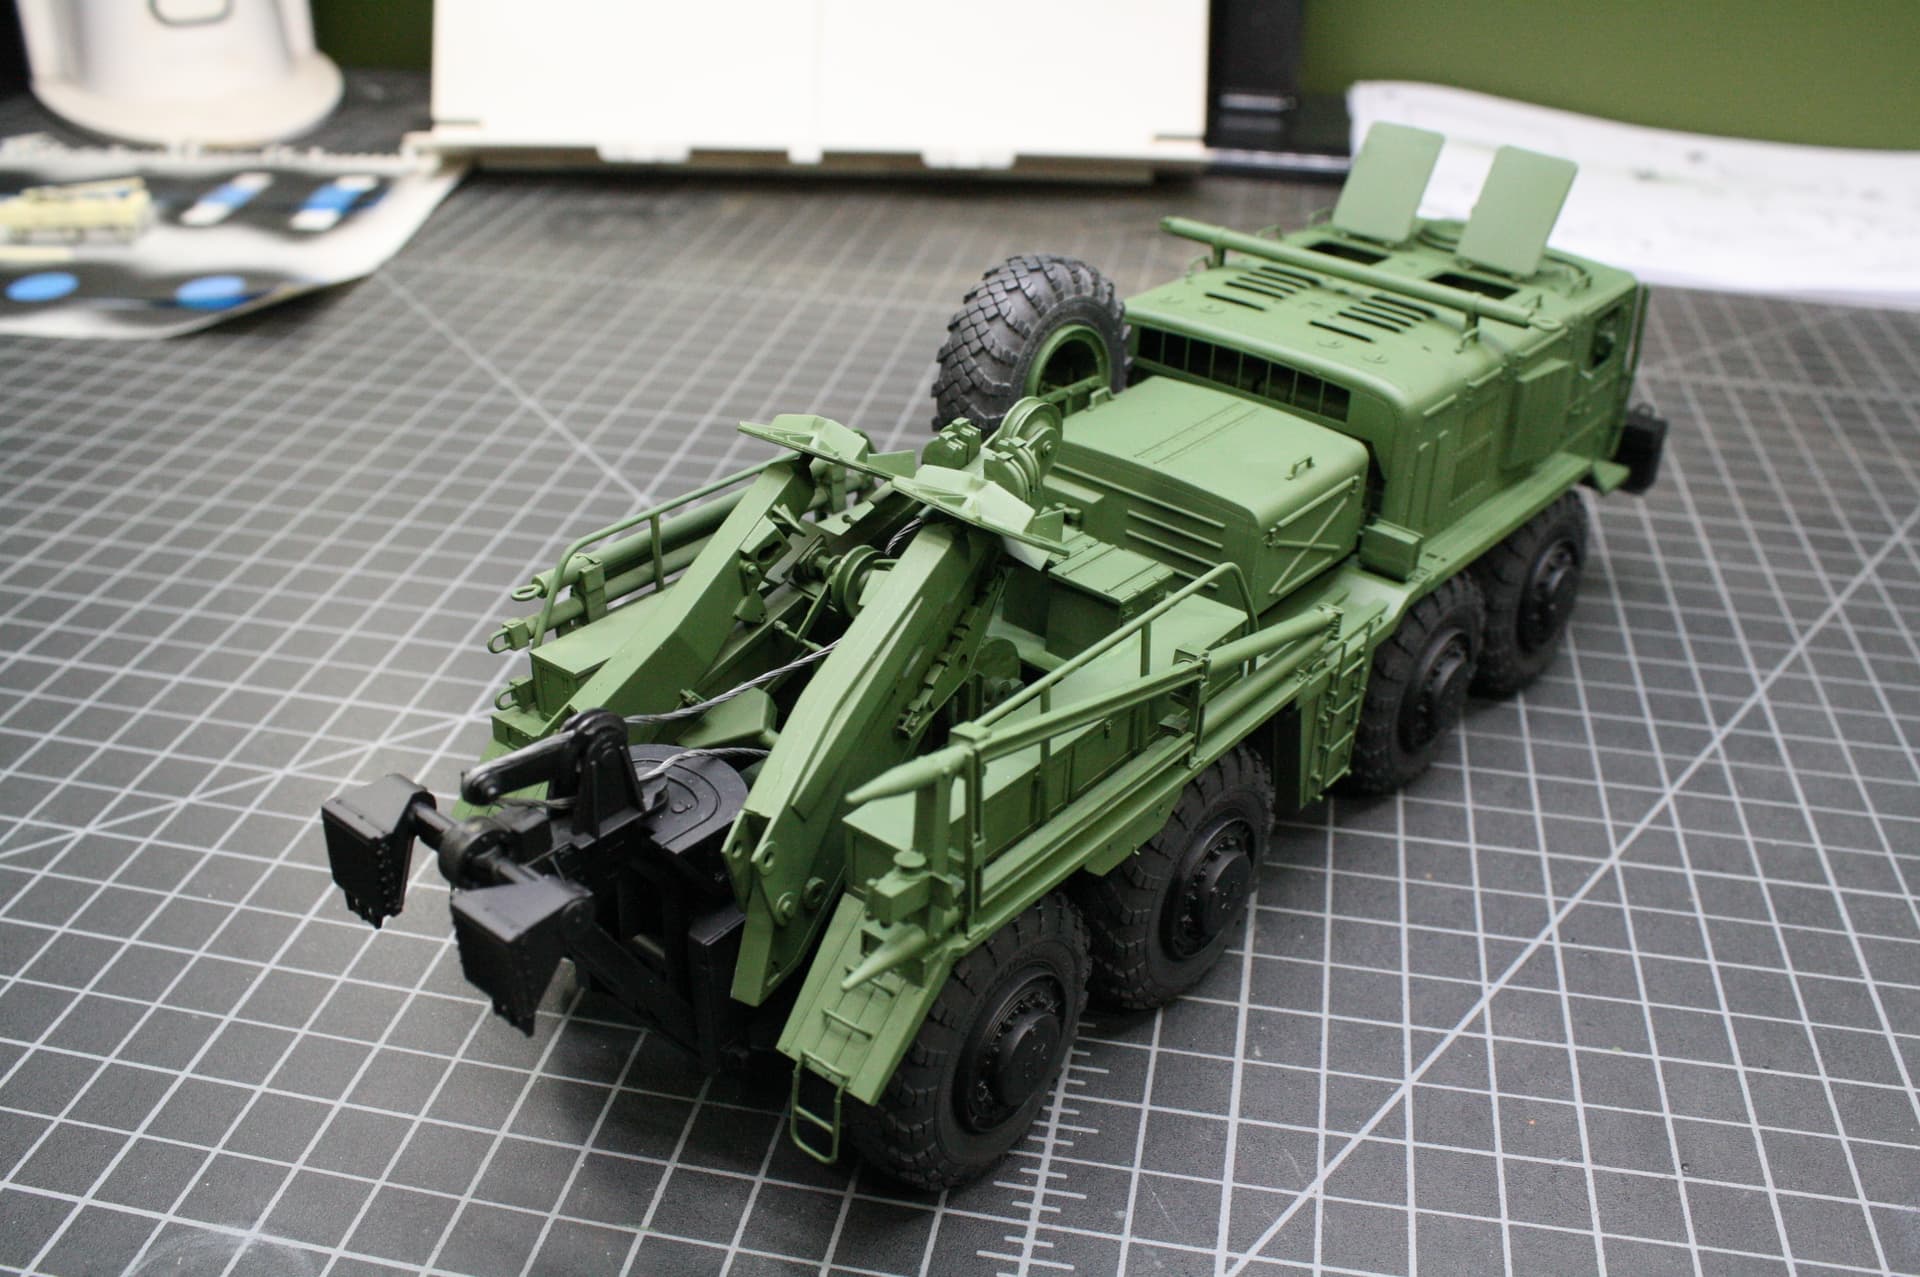
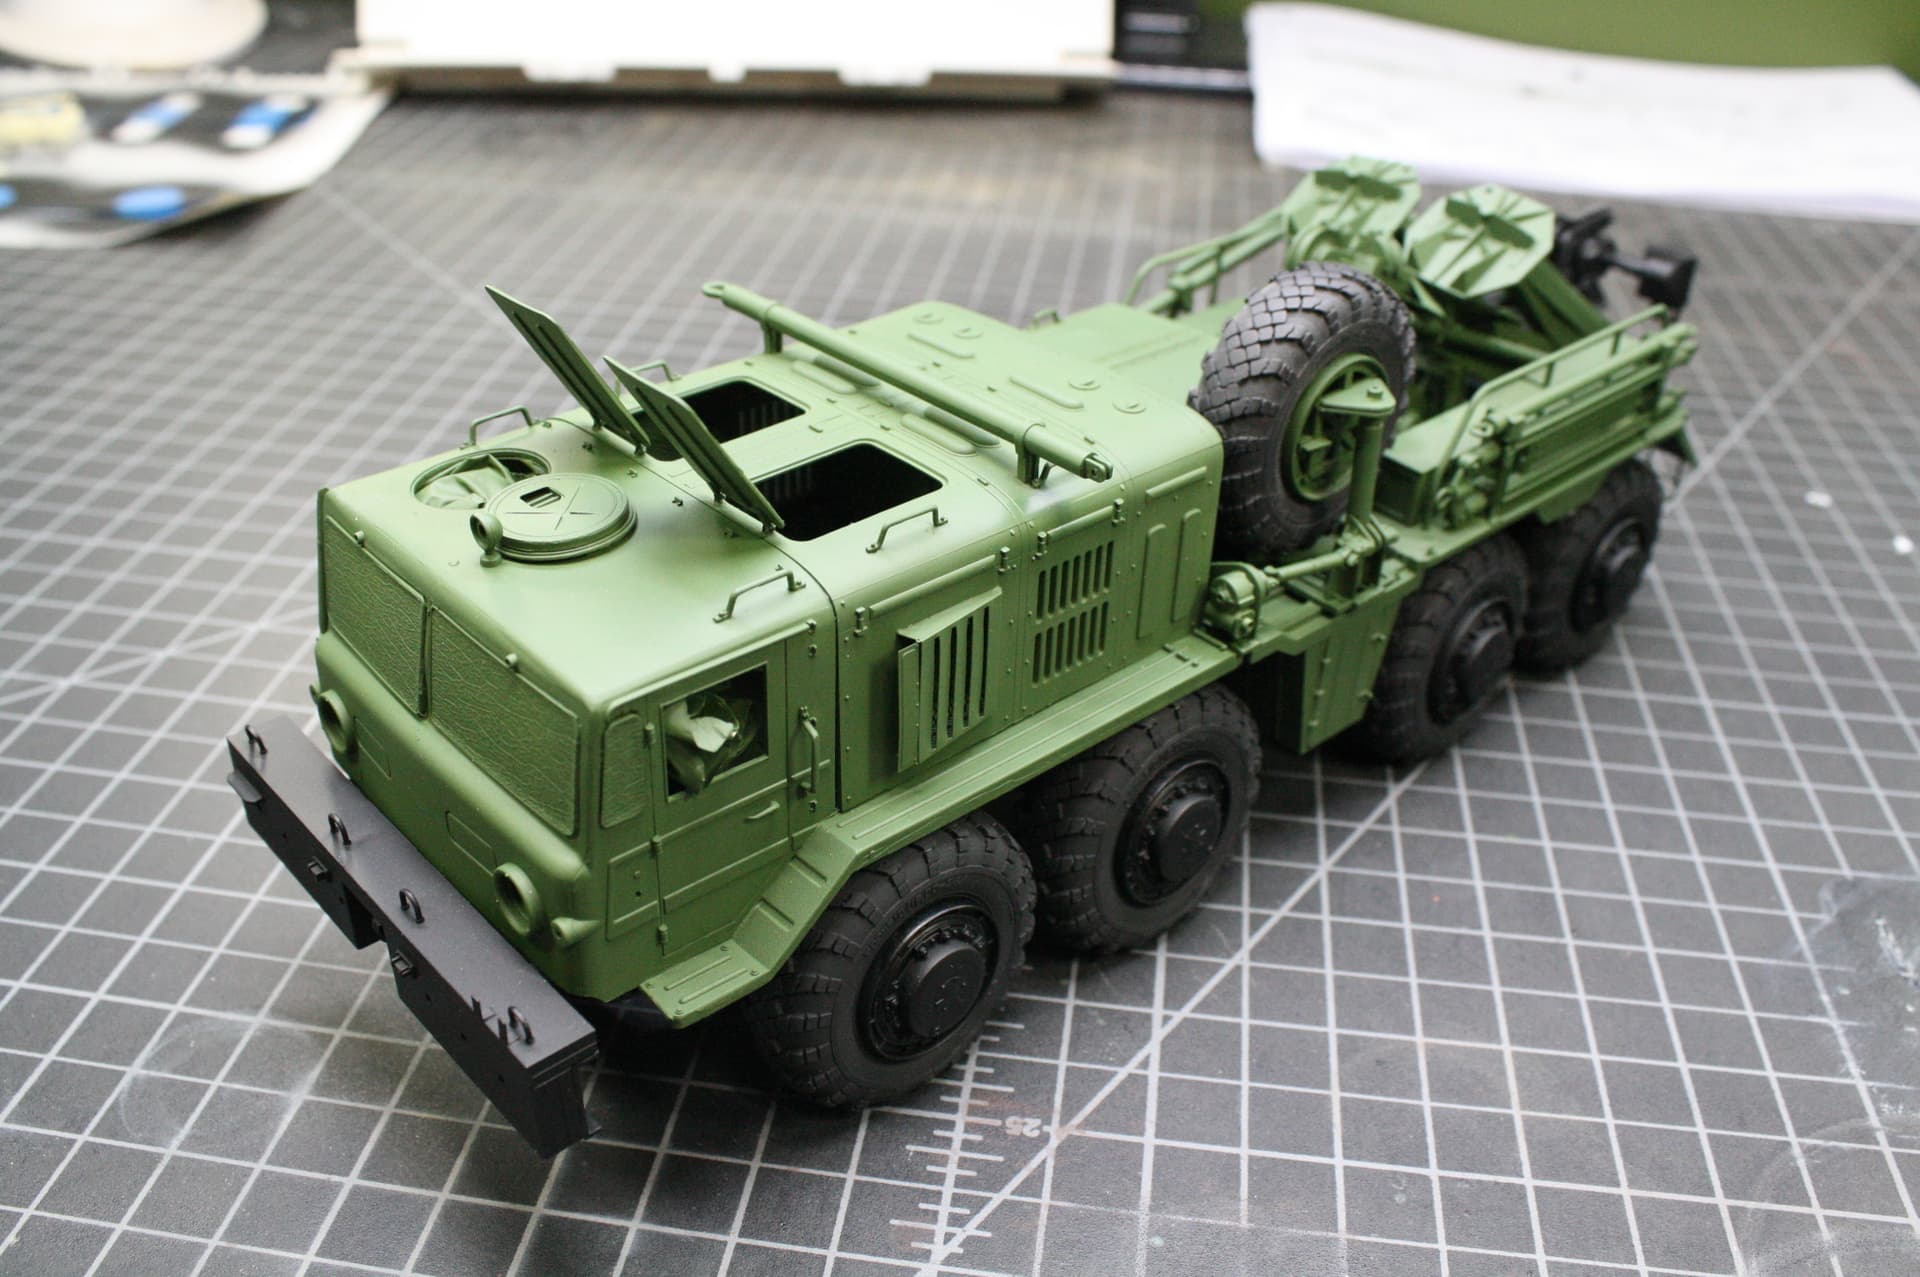
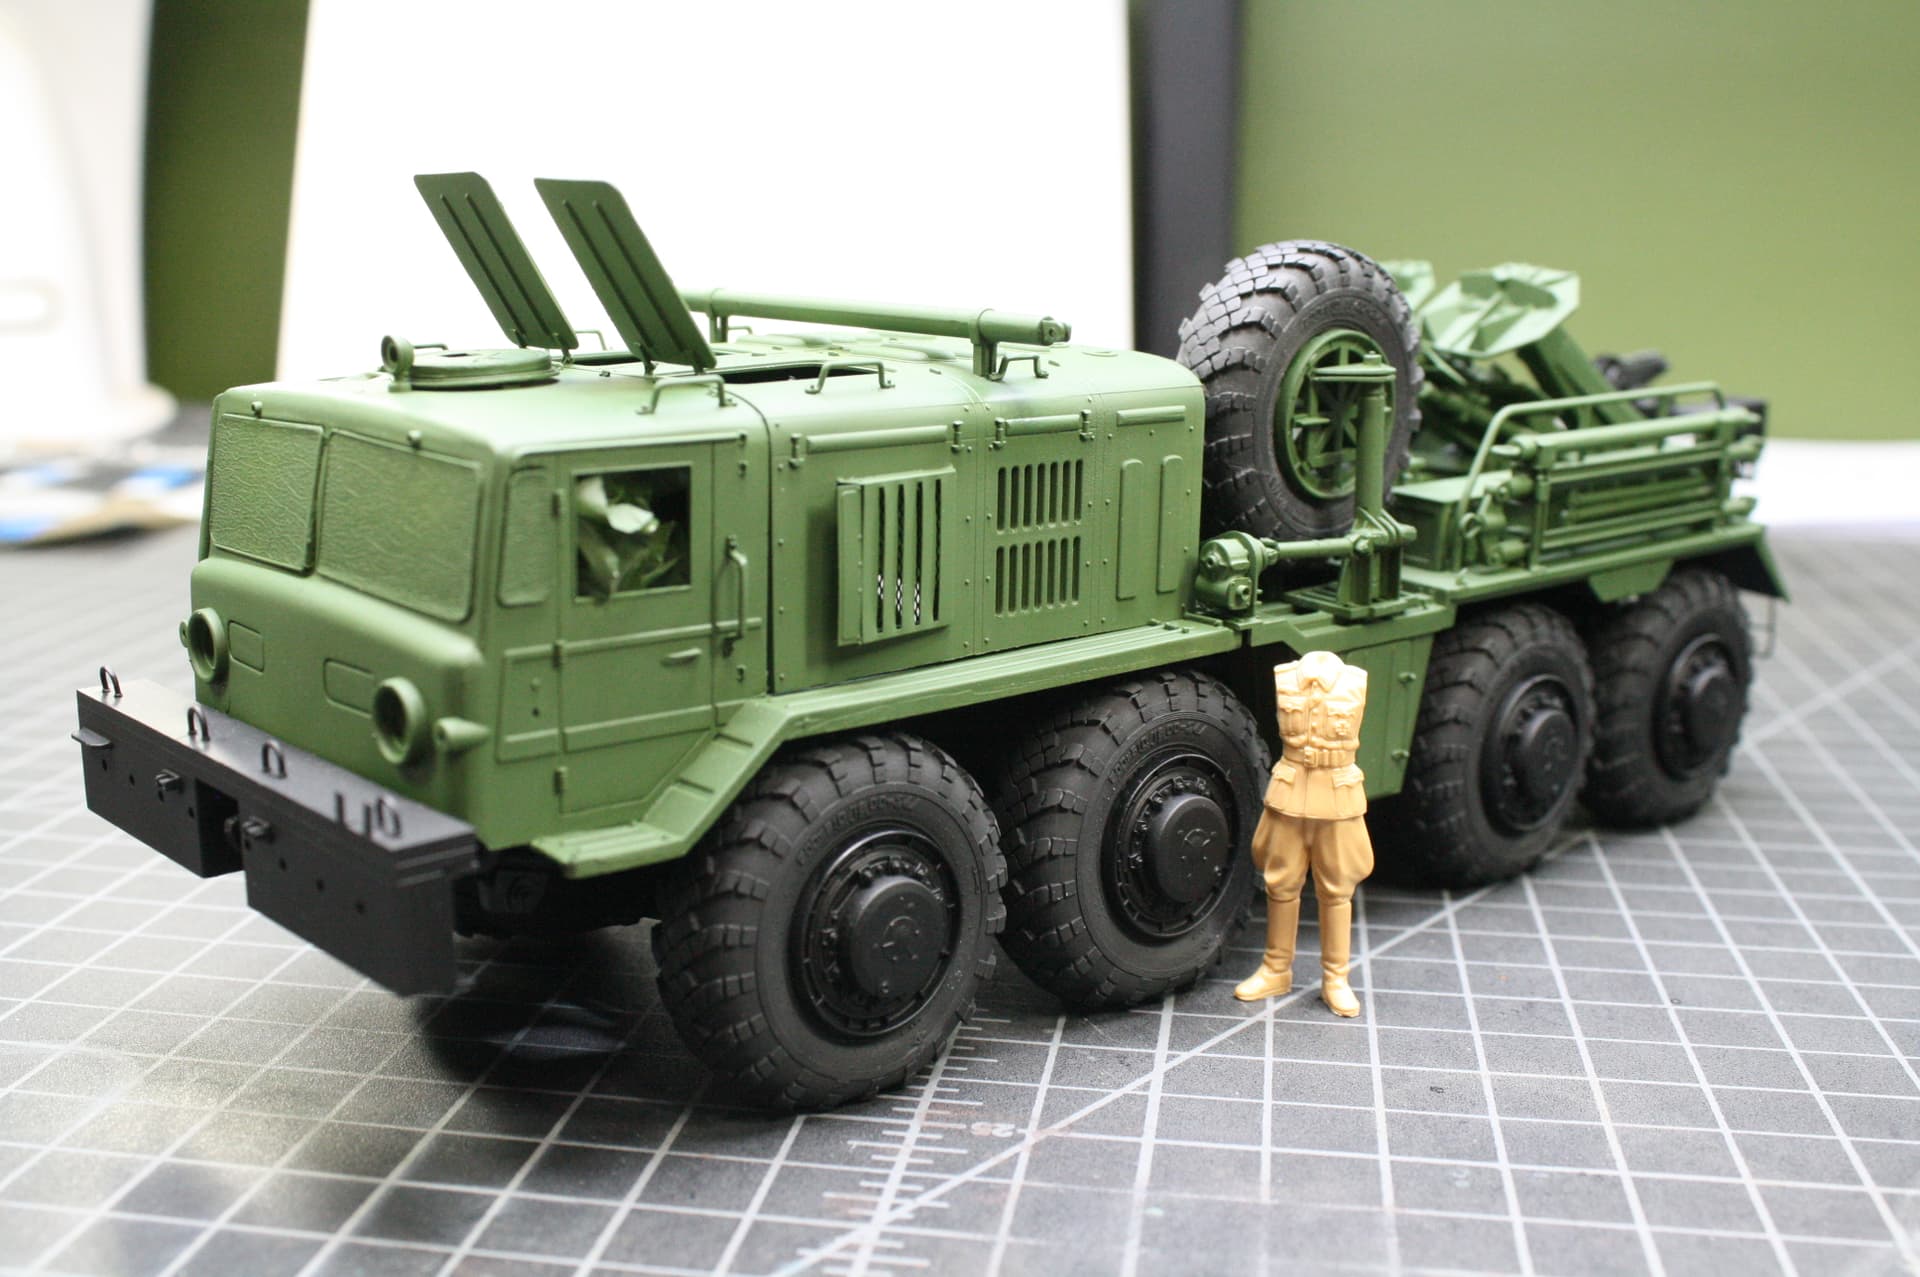
I threw a figure in there so you could see just how huge this model is. This is one big truck. I still have to populate the engine bay. I have the engine and radiators built but not installed yet. Then it will be a few tiny finishing details, and gloss/decals/gloss time.
See you when I drop the engine…
10 Likes
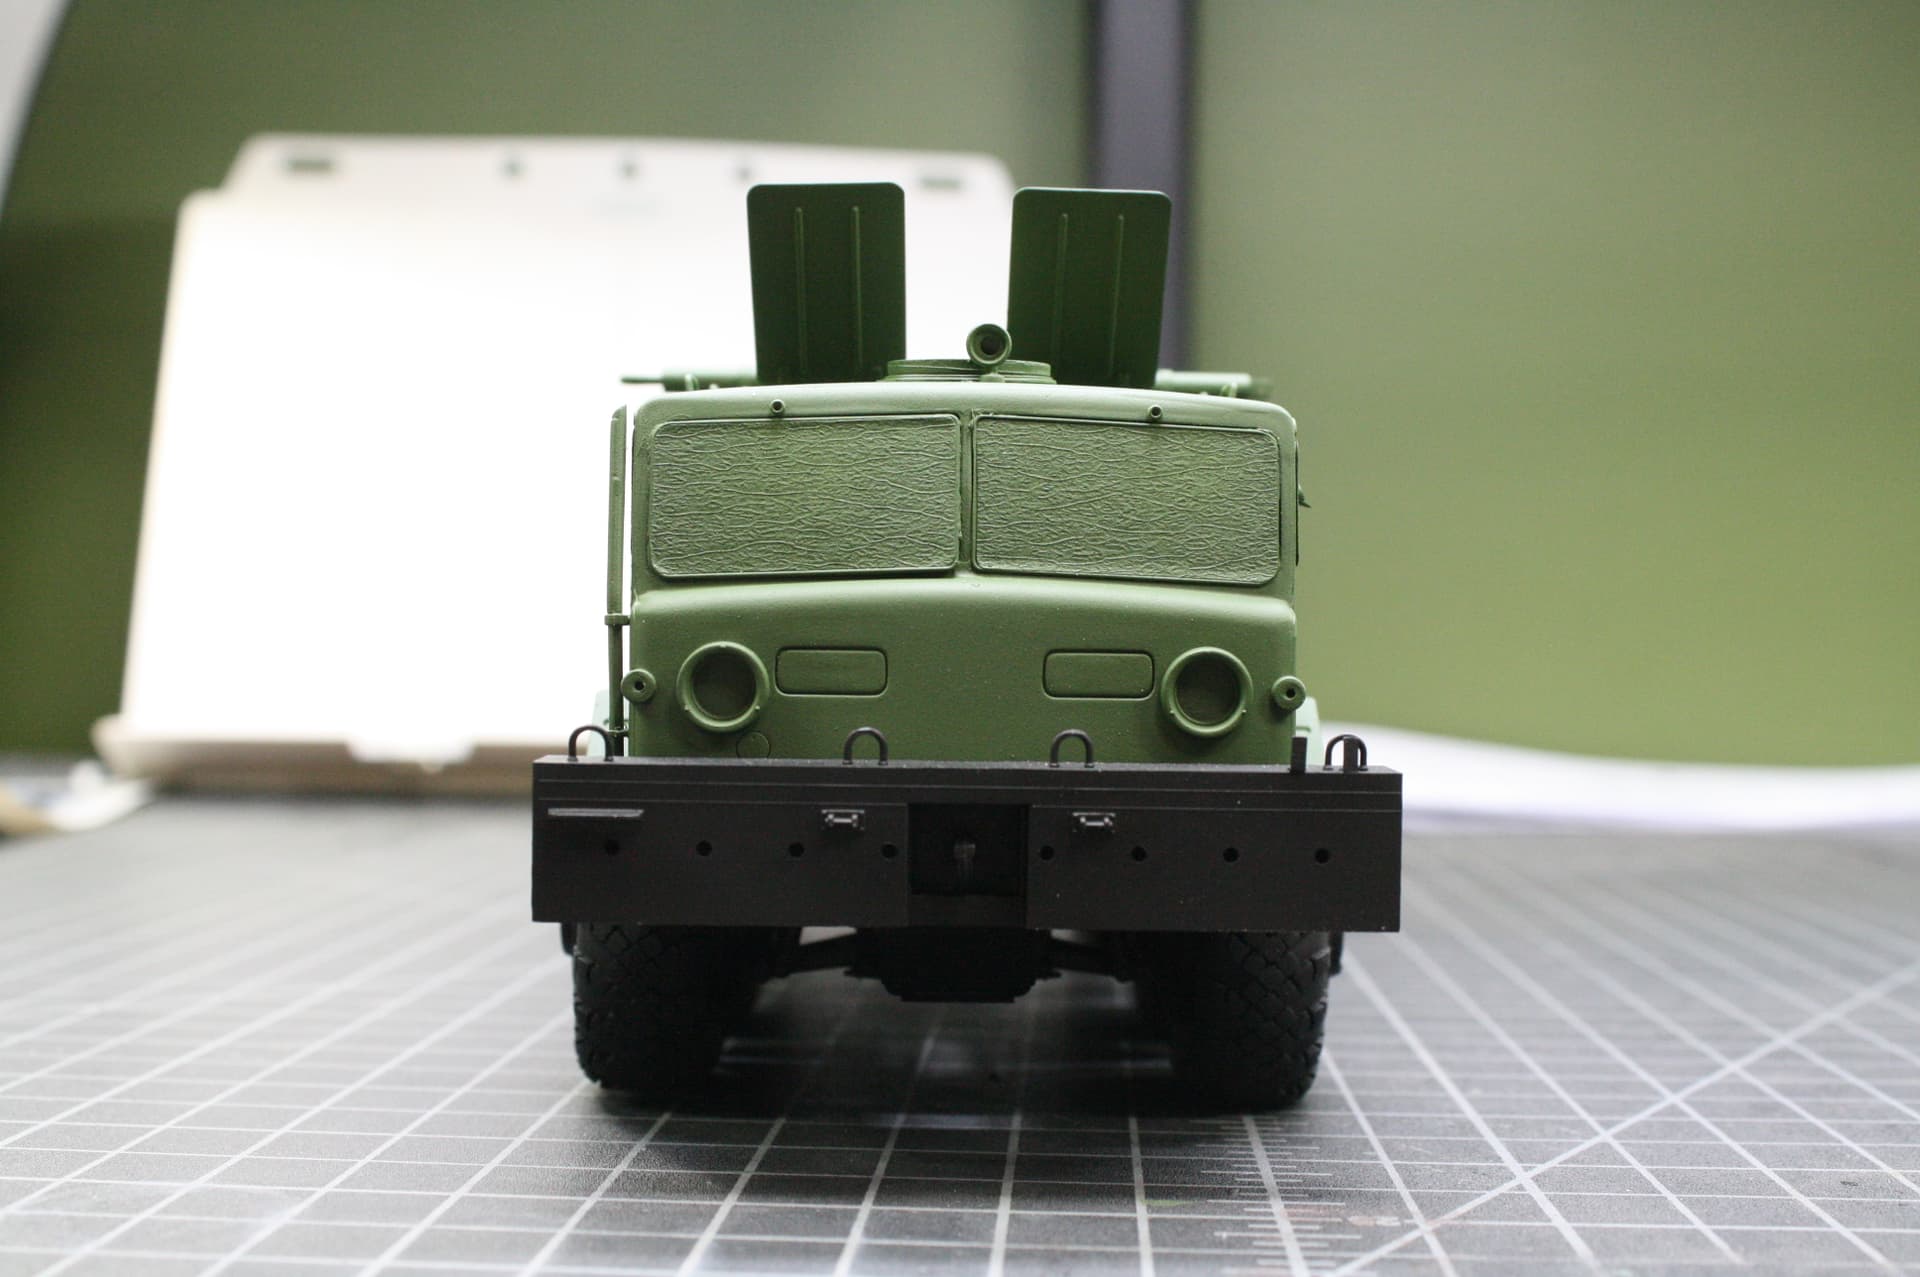
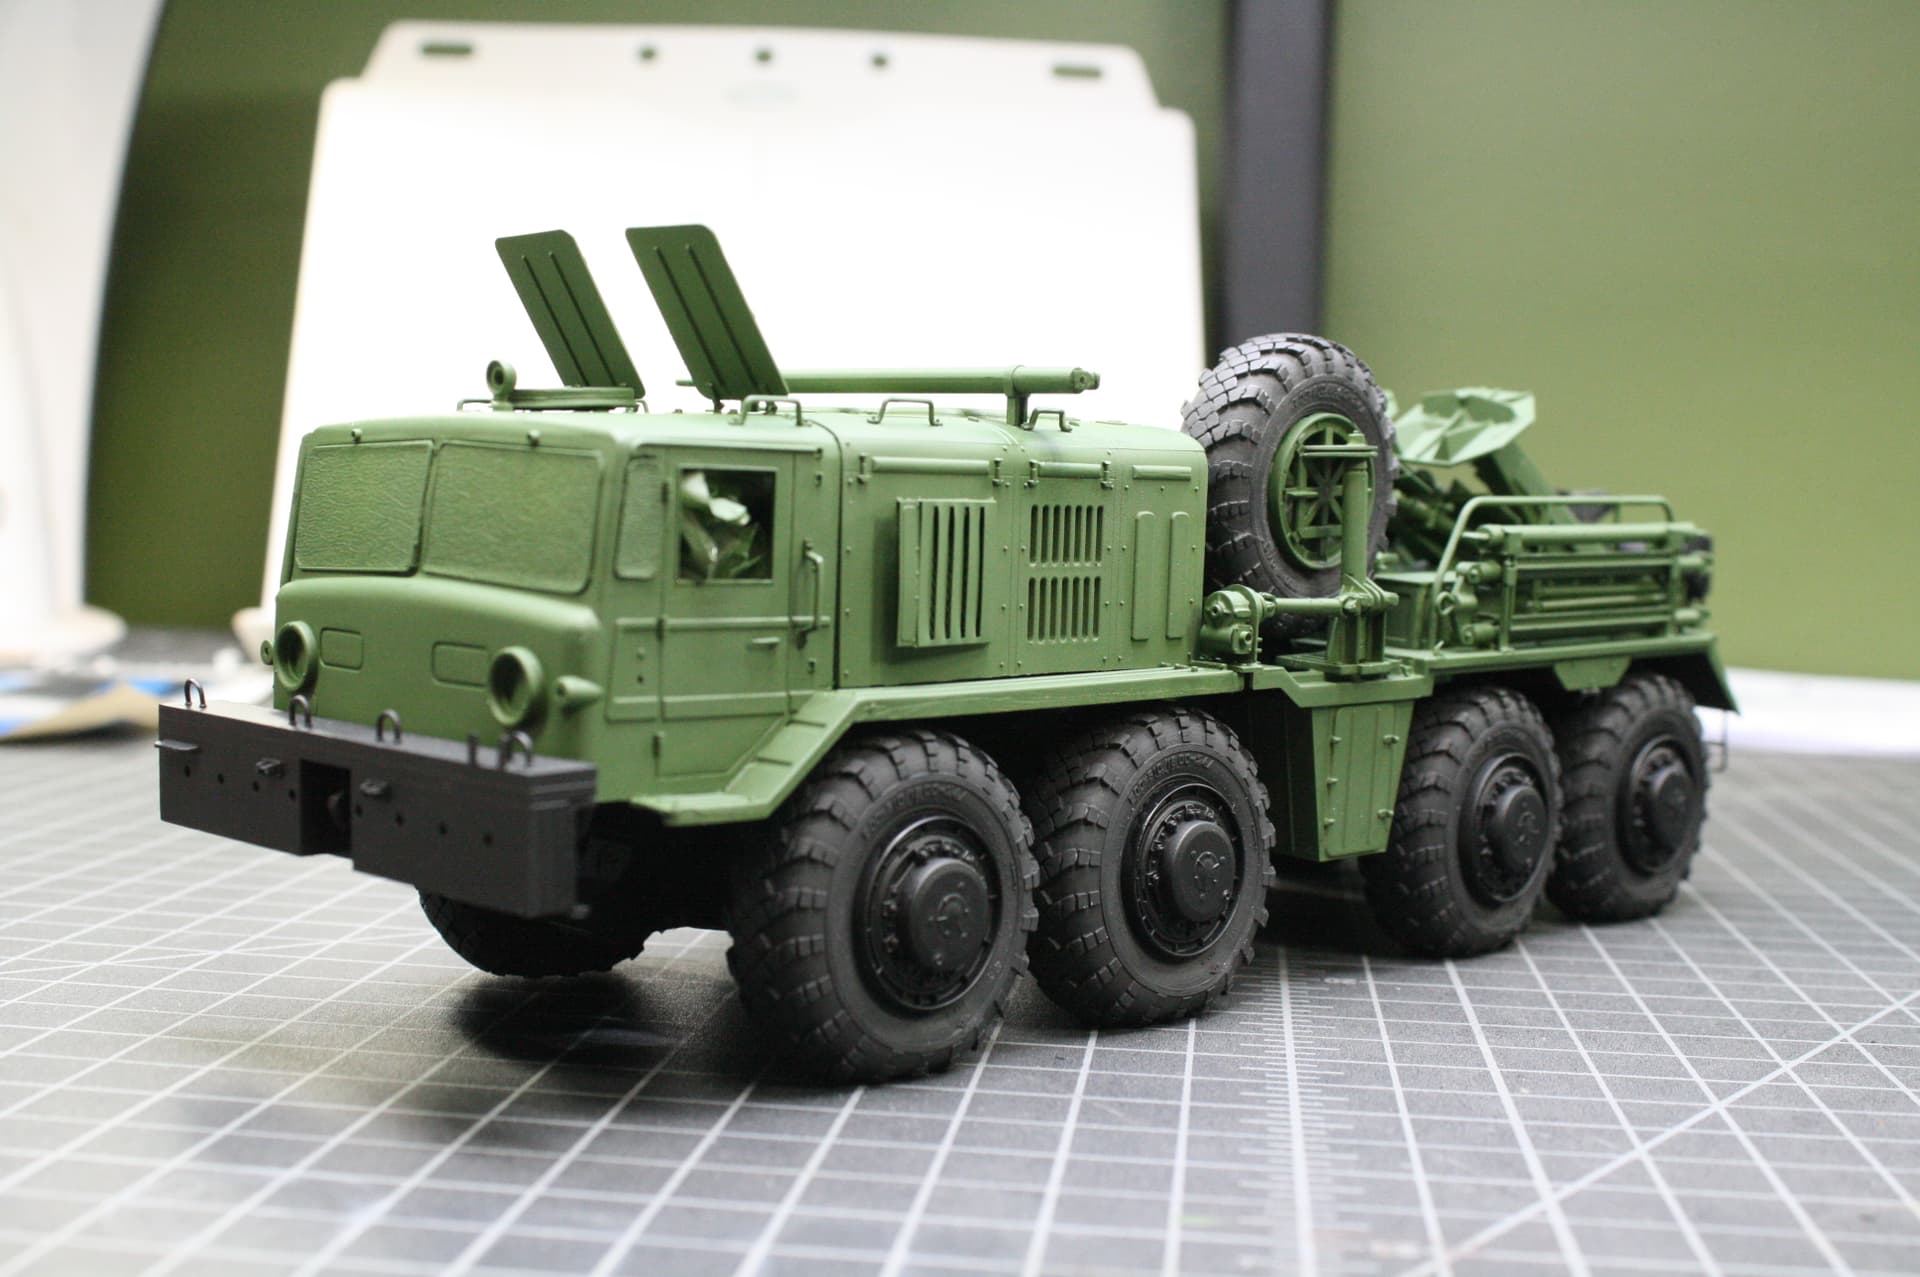
This is looking amazing Matt. You’re doing a truly epic job here on an epically sized wagon. Some beautiful detailing around that anchor area at the rear and how they fold up.
The tyres are showing what value they were… They look great with the hubs in place.
That spare looks perfect. You nailed that with the surgery you did 
Can’t wait for the next instalment mate … Well done, and hope the car issues got sorted out
2 Likes
Thank you John, and the car is good now!
1 Like
One word for you: Amazing!
This is such a sick looking build Matt!
3 Likes
Thanks Ezra! It’s taken on a life of it’s own!

Very nice . Even with just those few different colours it gets a new look … It’s coming together really well Matt
1 Like
Thanks John!
Looks awesome. Gonna be a real shame to cover up all that purdy paint work with all the mud, grease and filth that goes with being a wrecker.
1 Like
Thank you Don. Yeah, I’ve been considering that. I still don’t know how I’m going to approach the weathering, and how grimy I’m going to do it. It should be greasy, huh?
1 Like
Not if it’s new or one shown on Red Square for a parade…just saying
2 Likes
That’s true too, John. Good point.
The world really is your oyster with this one.
You really can run the spectrum from Red Square to looking like one of those T34s they keep digging out of bogs.
Short of parade square though, there’s no way that beast is going stay spotless. I think it’ll look good with some dust and hydraulic/oil stains around the machine spaces. Give it that lived in look without obliterating that nice paint work.
4 Likes