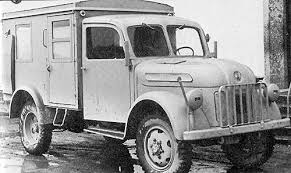
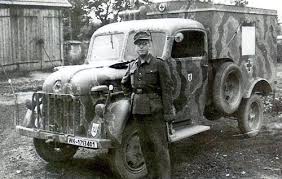
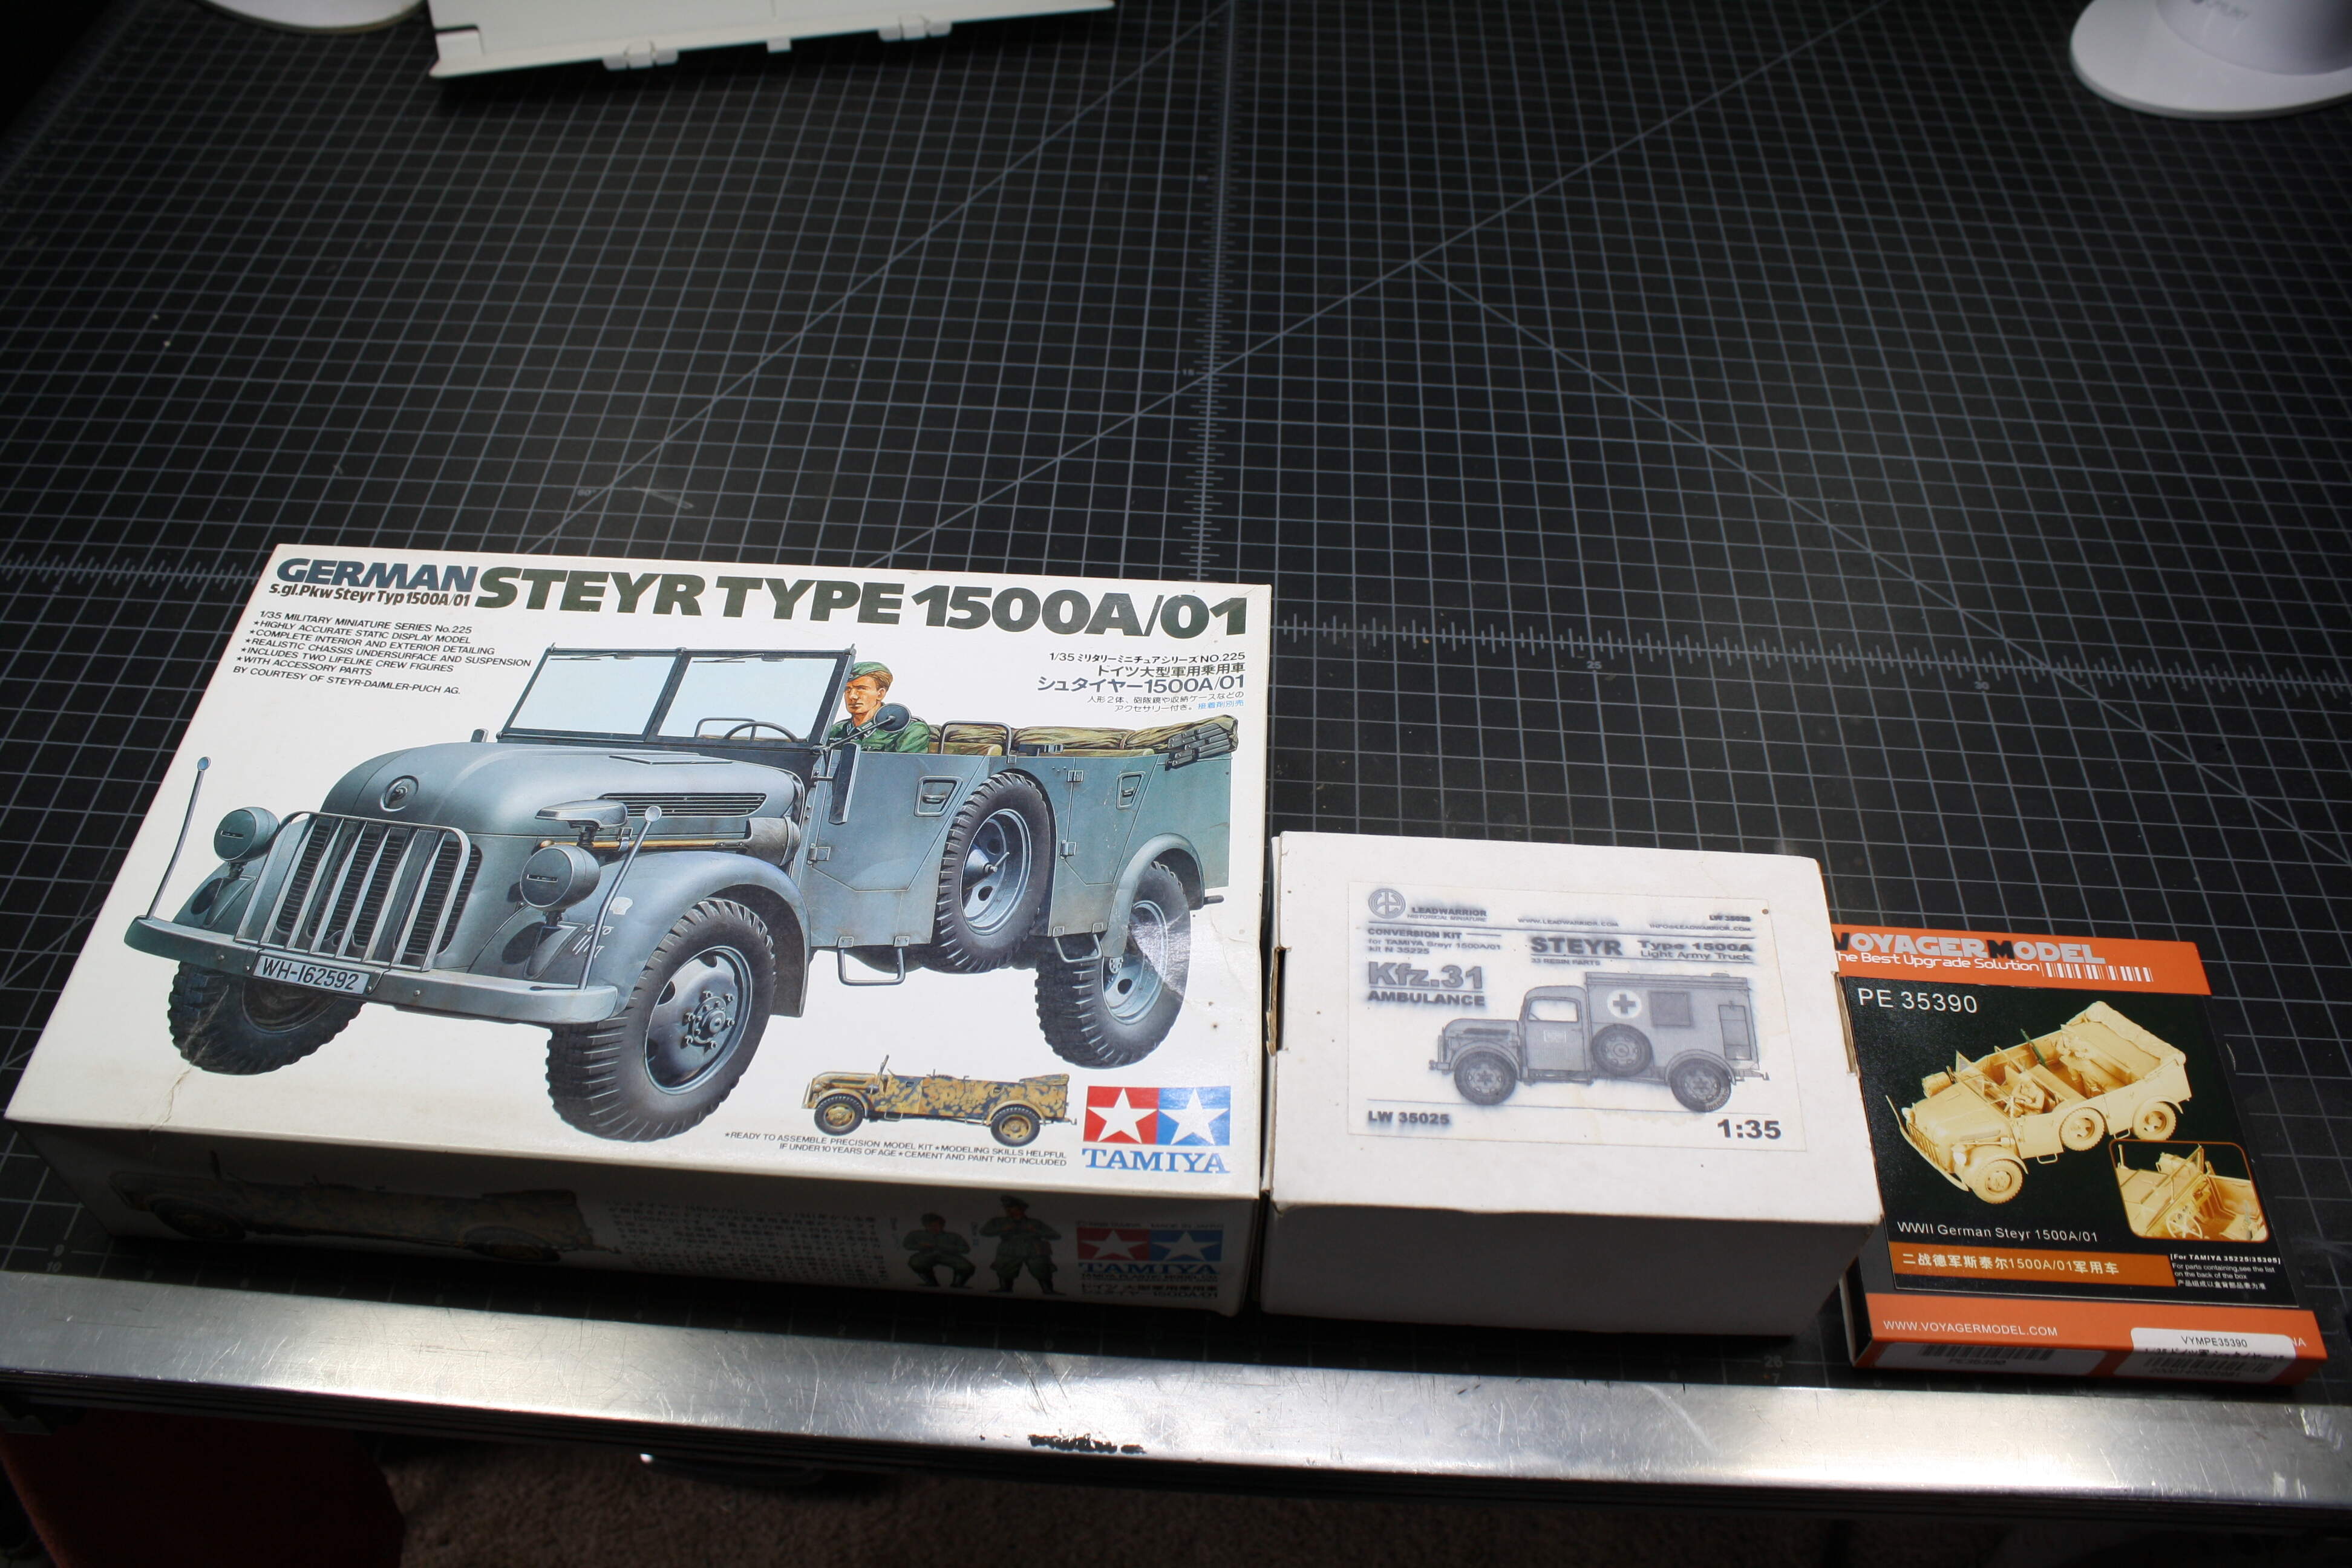
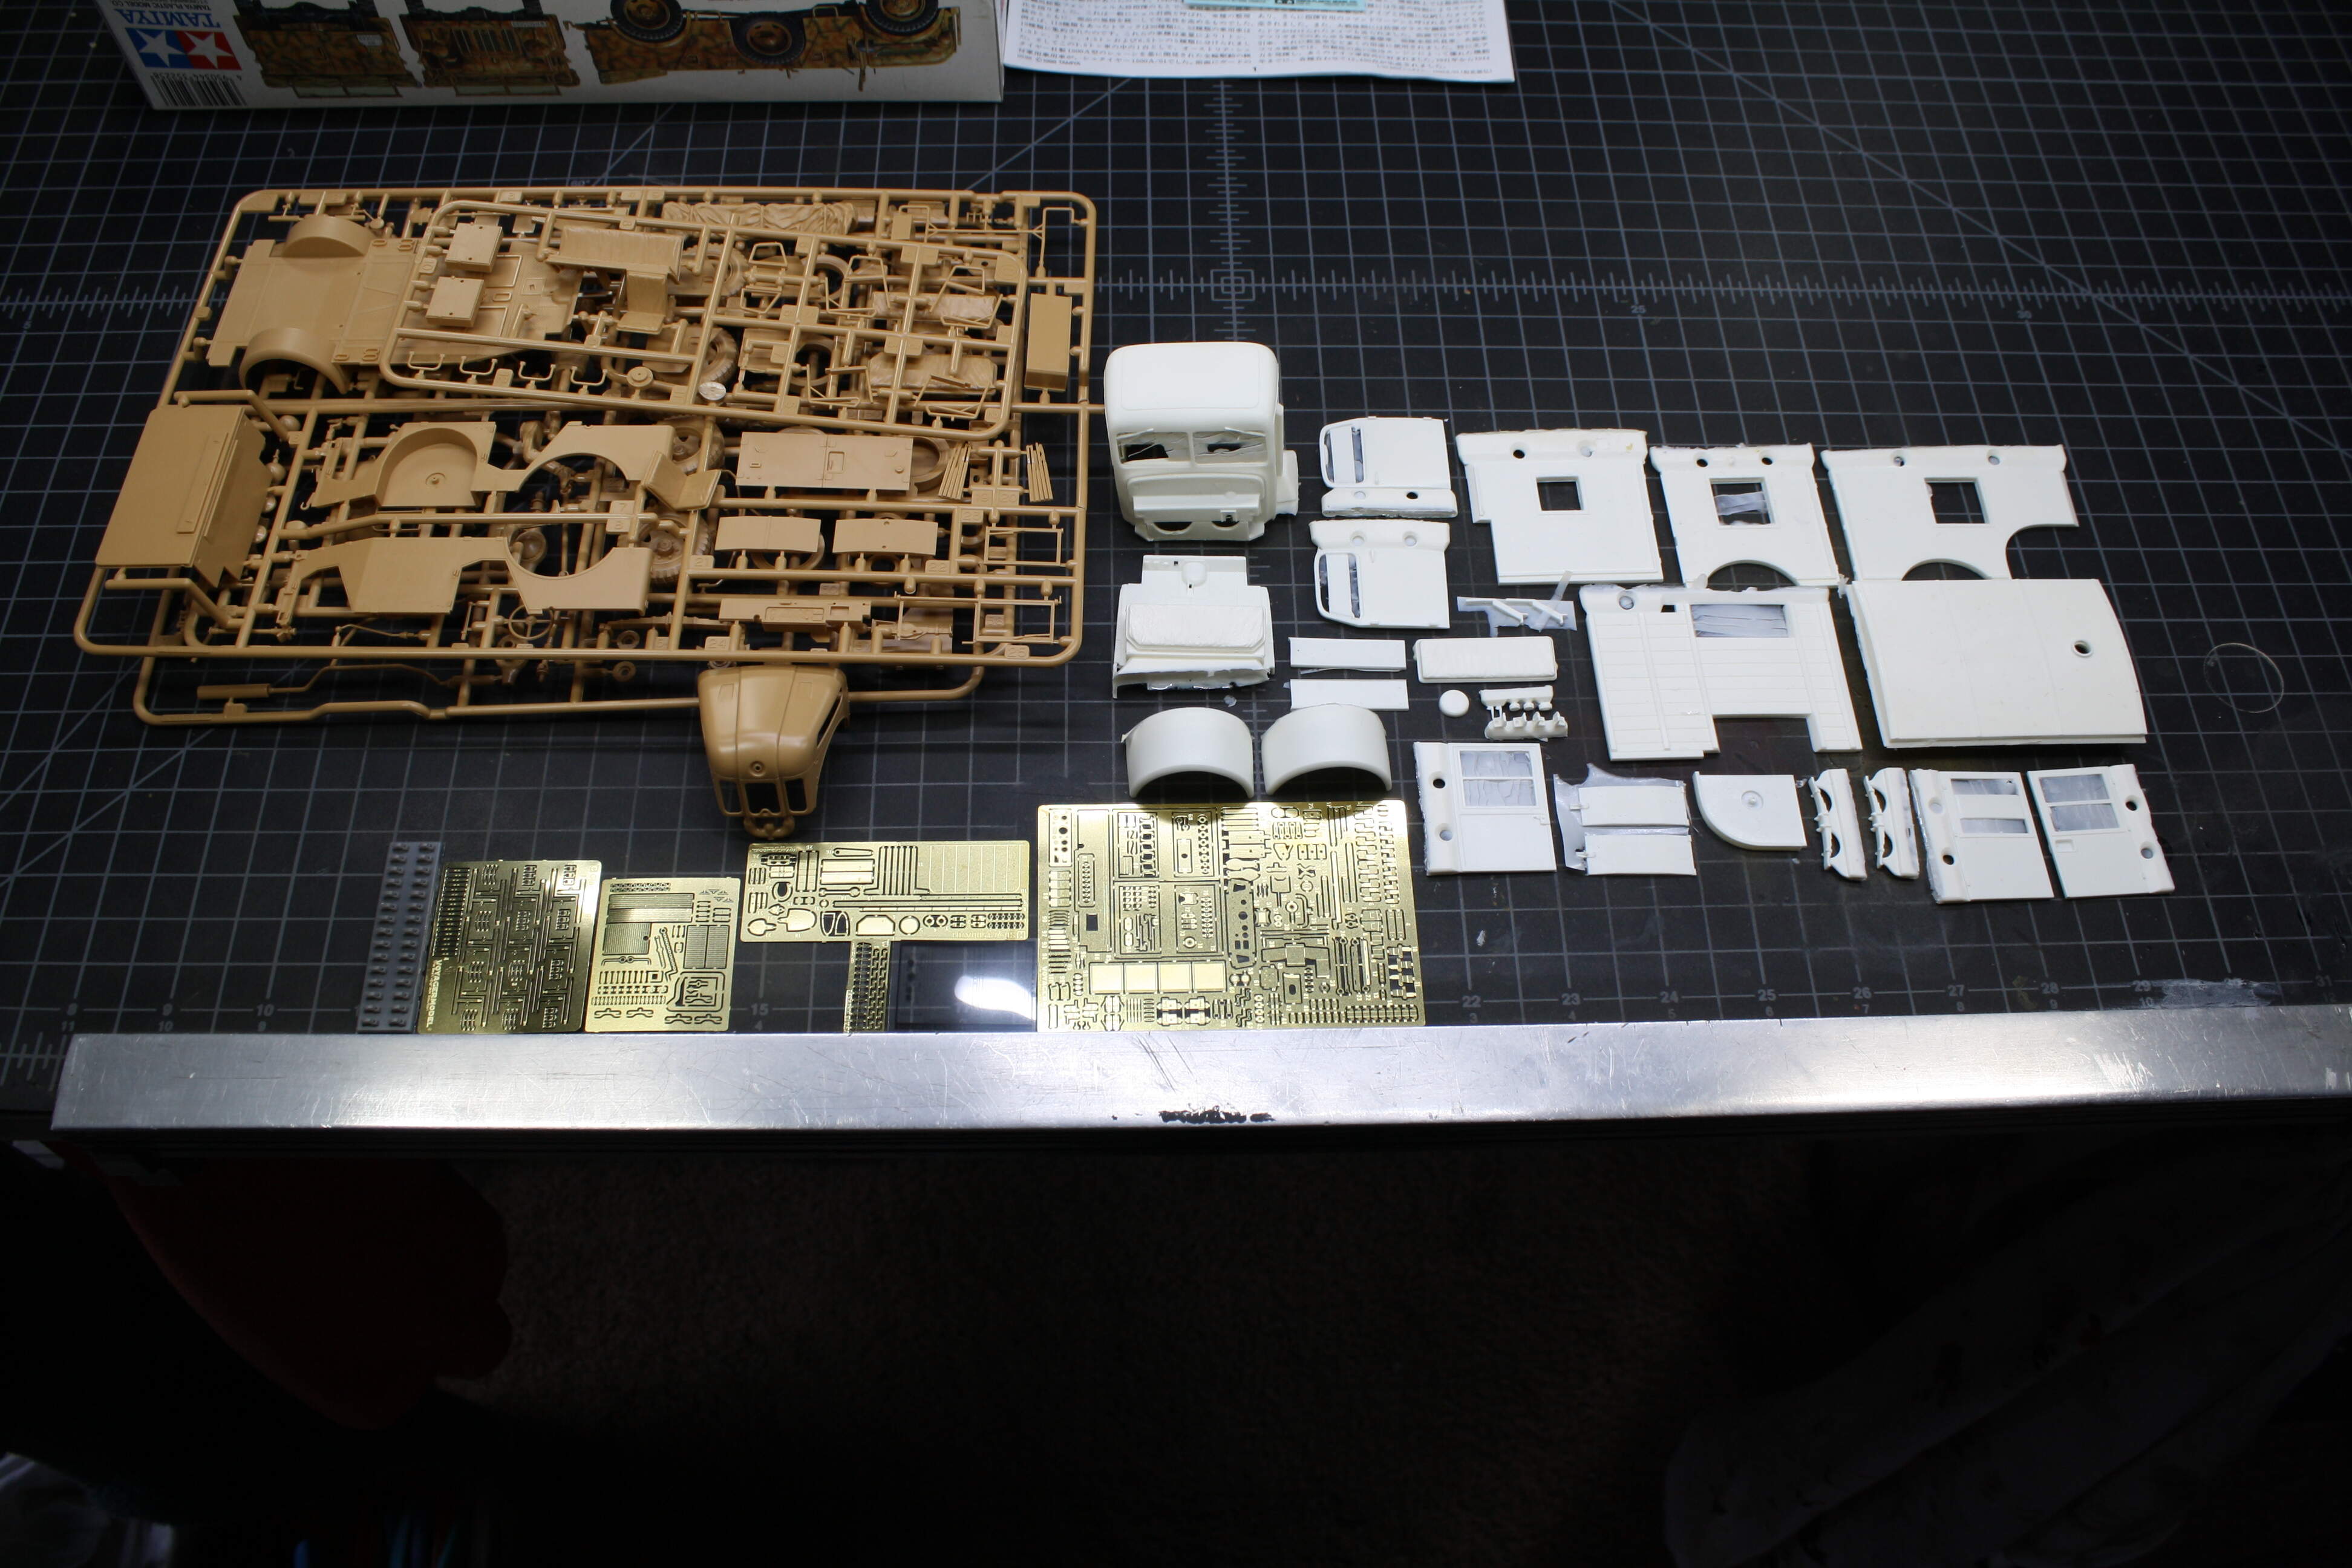
Well, 15 years on Armorama and I’ve never done a blog so here goes. I’m always too focused on my builds to think to stop and take photos or remember to explain what I’m doing but I suppose I’ll try it. I have a penchant for military ambulances and I needed something for the AMPS Major Conversion Category so I pulled these kits from the stash. I will be building the Steyr Type 1500A Kfz. 31 Ambulance. I have the Tamiya Steyr #35225, the Leadwarrior conversion kit # 35025, the full Voyager PE set # 35390, MJ Miniatures 3D printed tool clasps, Accurate Armor red cross decals, and Archer Fine Transfer vehicle markings. I know it’s a lot of stuff, but I really wanted to do it up right. Here’s a couple of shots of the real thing:
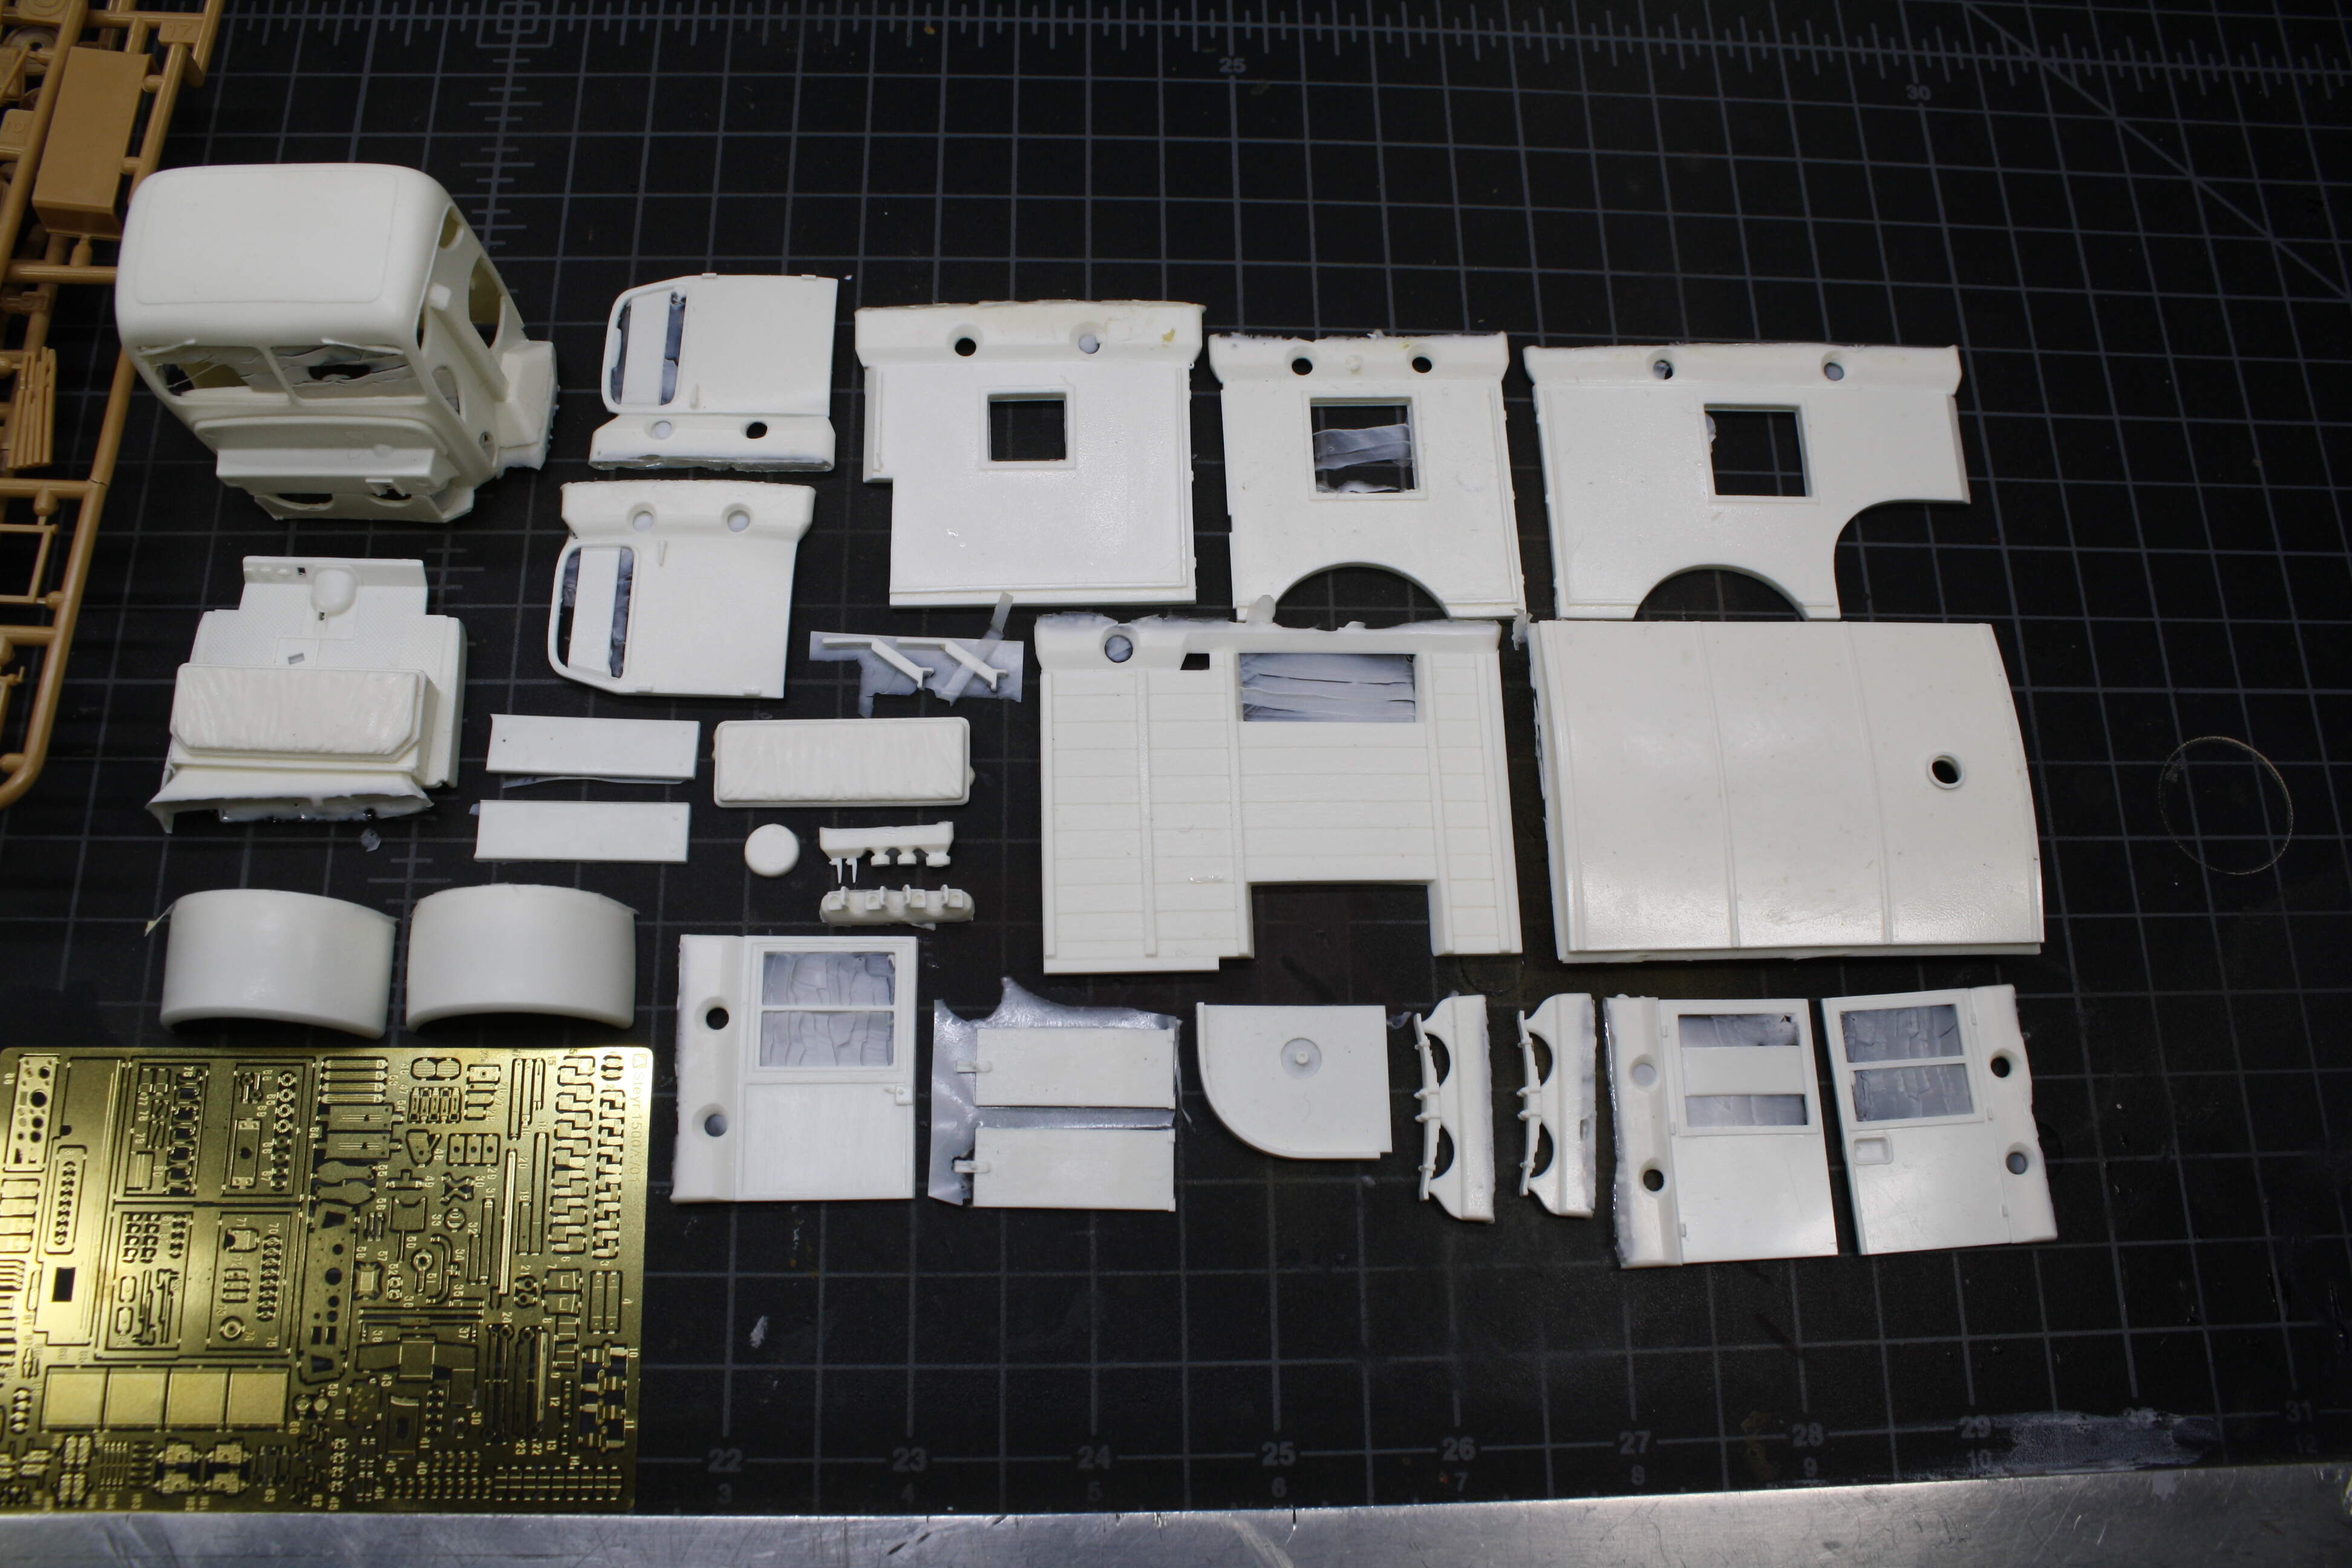
A closer look at the Leadwarrior resin kit. The resin is well cast, with hardly any open bubbles to fill. The parts look great, but time will tell if they fit together!
The MJ Miniatures 3D printed tool clasps. These are absolutely beautiful, fine little pieces and I will never in my life assemble a PE tool clasp again. But they are delicate and a bitch to cut off. Too fine to use a razor saw, you have to score them off, which takes some time, and do it inside a baggie, because the last score launches them ballistically. My breakage rate has been around 30% but I still think they’re worth it.
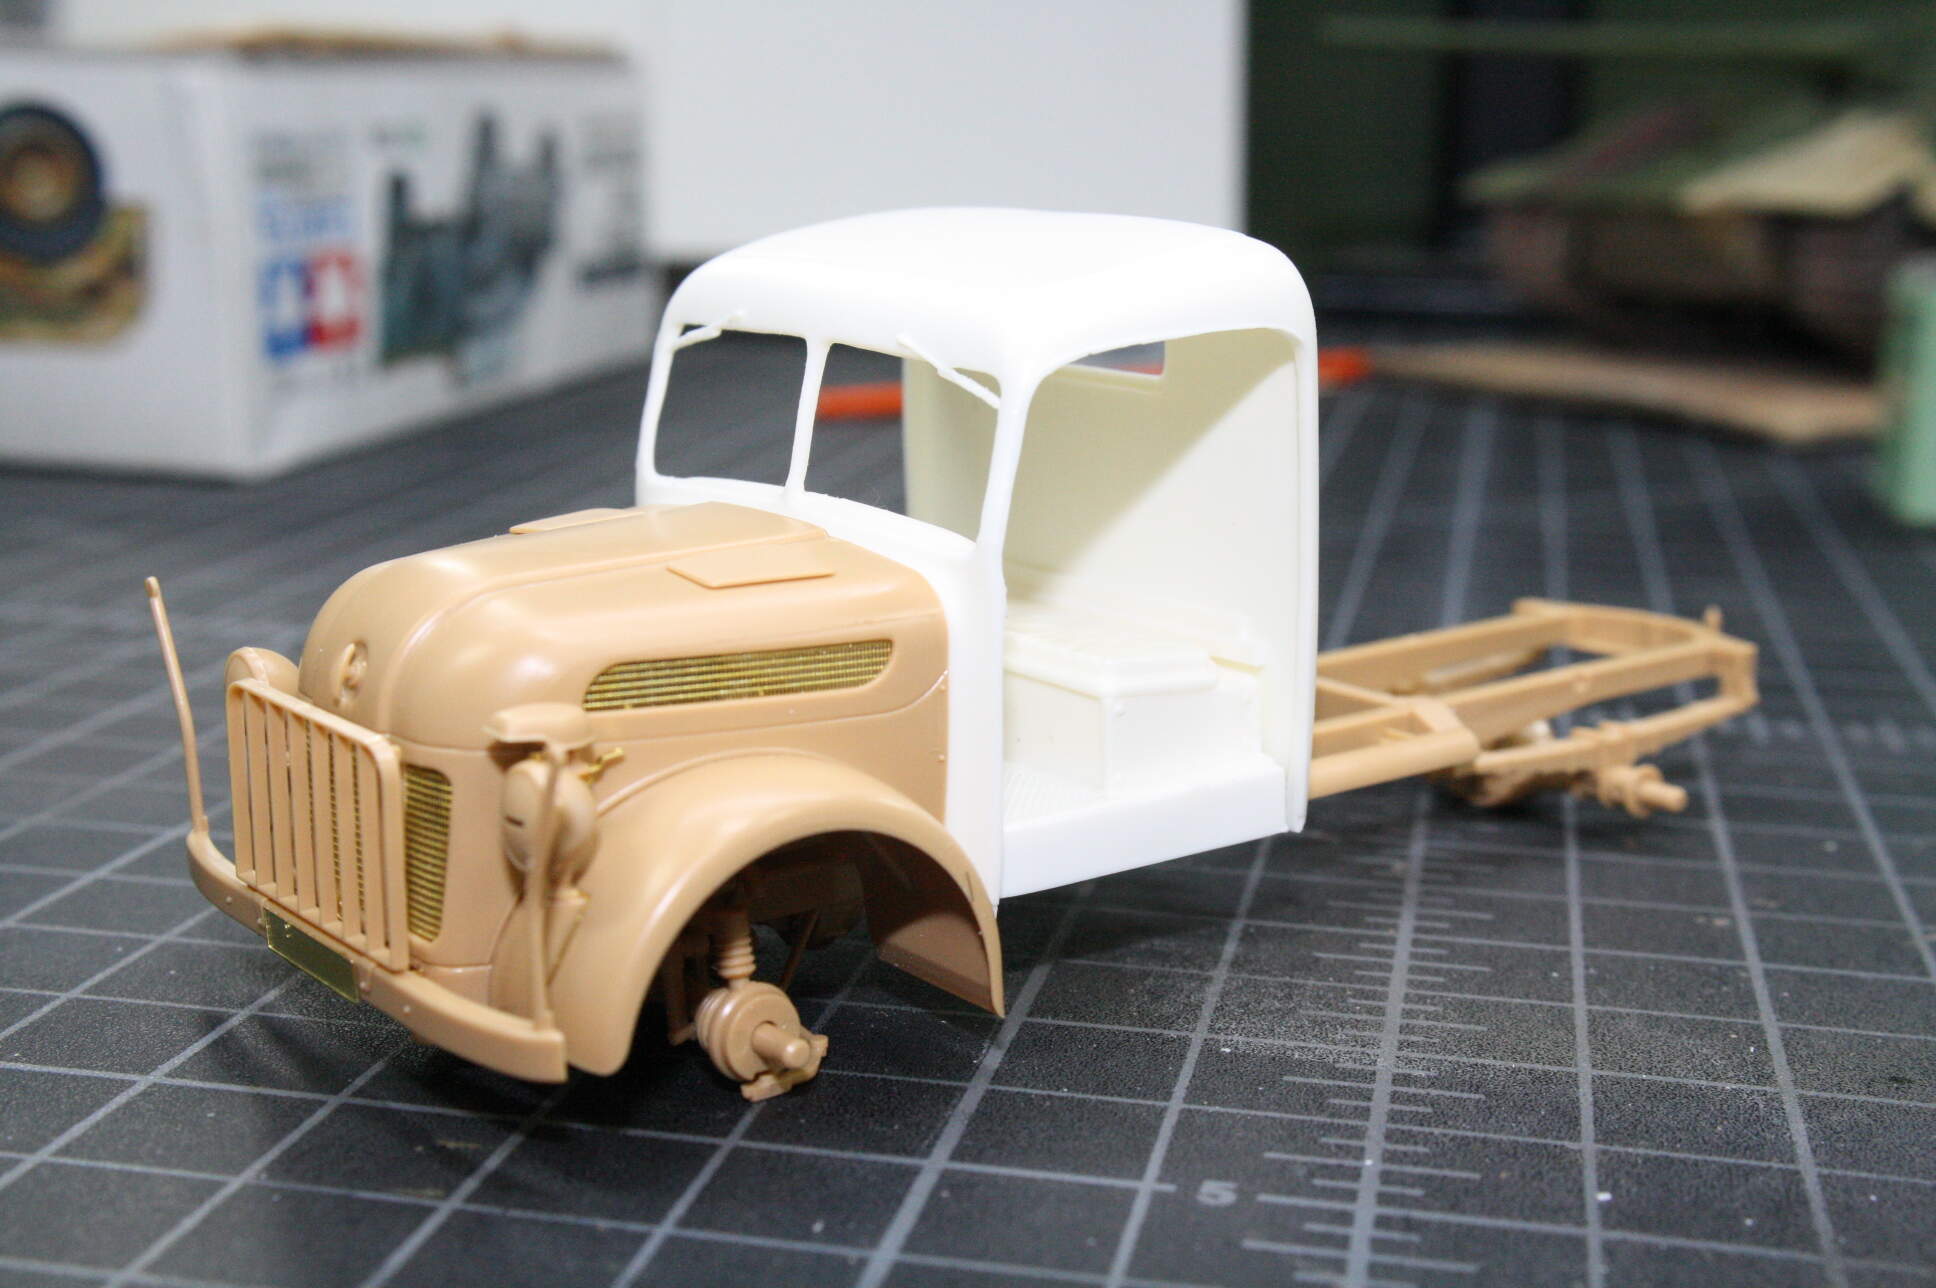
Day1 was mostly enjoyable with the assembly of most of the Tamiya components of the model, removal of parts that will be replaced by PE, and installing the grills. The hood is just dry fit. Watched “A Bridge Too Far” today, too.
No! You’re totally on your own, they don’t even provide templates. I have Evergreen .005 clear to use. I’m really not looking forward to doing those windshields! That might be a kit-stopper right there!
Start by making paper templates. Easier to cut and a LOT cheaper.
The final adjustments can be done with a fine file or sandpaper stick.
Easier to file down a very small amount than trying to cut
You might want to try a micro-saw blade like the Tamiya photo-etch ones to cut the MJ clamps off the carrier. It’s what I use and I have yet to lose or break any of the tool clamps.
Regards, Bob
I’ve been eyeballing Leaswarrior’s Steyr 1500A conversion sets for quite sometime now!
Plan to build a Steyr 1500A based Kfz.17 someday- like the ones fielded in my country’s Armed Forces during WWII.
Am slowly building up a refference collection for radio sets and equipment, used in this Funkraftwagen, and will follow your build with utmost interest!
Thanks guys, I’m glad I have some interest.
Robin, I plan to make templates. Might be the only way to preserve my sanity.
Bob, thanks for the tip on the PE razor saw, I’ll have to get one. Removing those clasps was a PITA.
Dan, I’m resorting to putting a piece of .5mm Evergreen rod along the bottom of the windshield, because there’s no other way to keep the glass in!
I hardly ever use the handle but I don’t remove any plastic from the sprue with any other method. I might use a sprue cutting for removing a large gate in the way but that’s it.
Kind of a slow day as far as noticeable progress goes. Spent most of the day with the razor saw carefully cutting off pour plugs. Nothing says “YOU’RE DONE NOW” like slipping with the saw and gashing a $60 resin kit that you’ve got 90% cleaned up. That you saved up for. That you ordered from overseas. That you waited 2 months to get. Yeah, slipping with the saw is FUBAR.
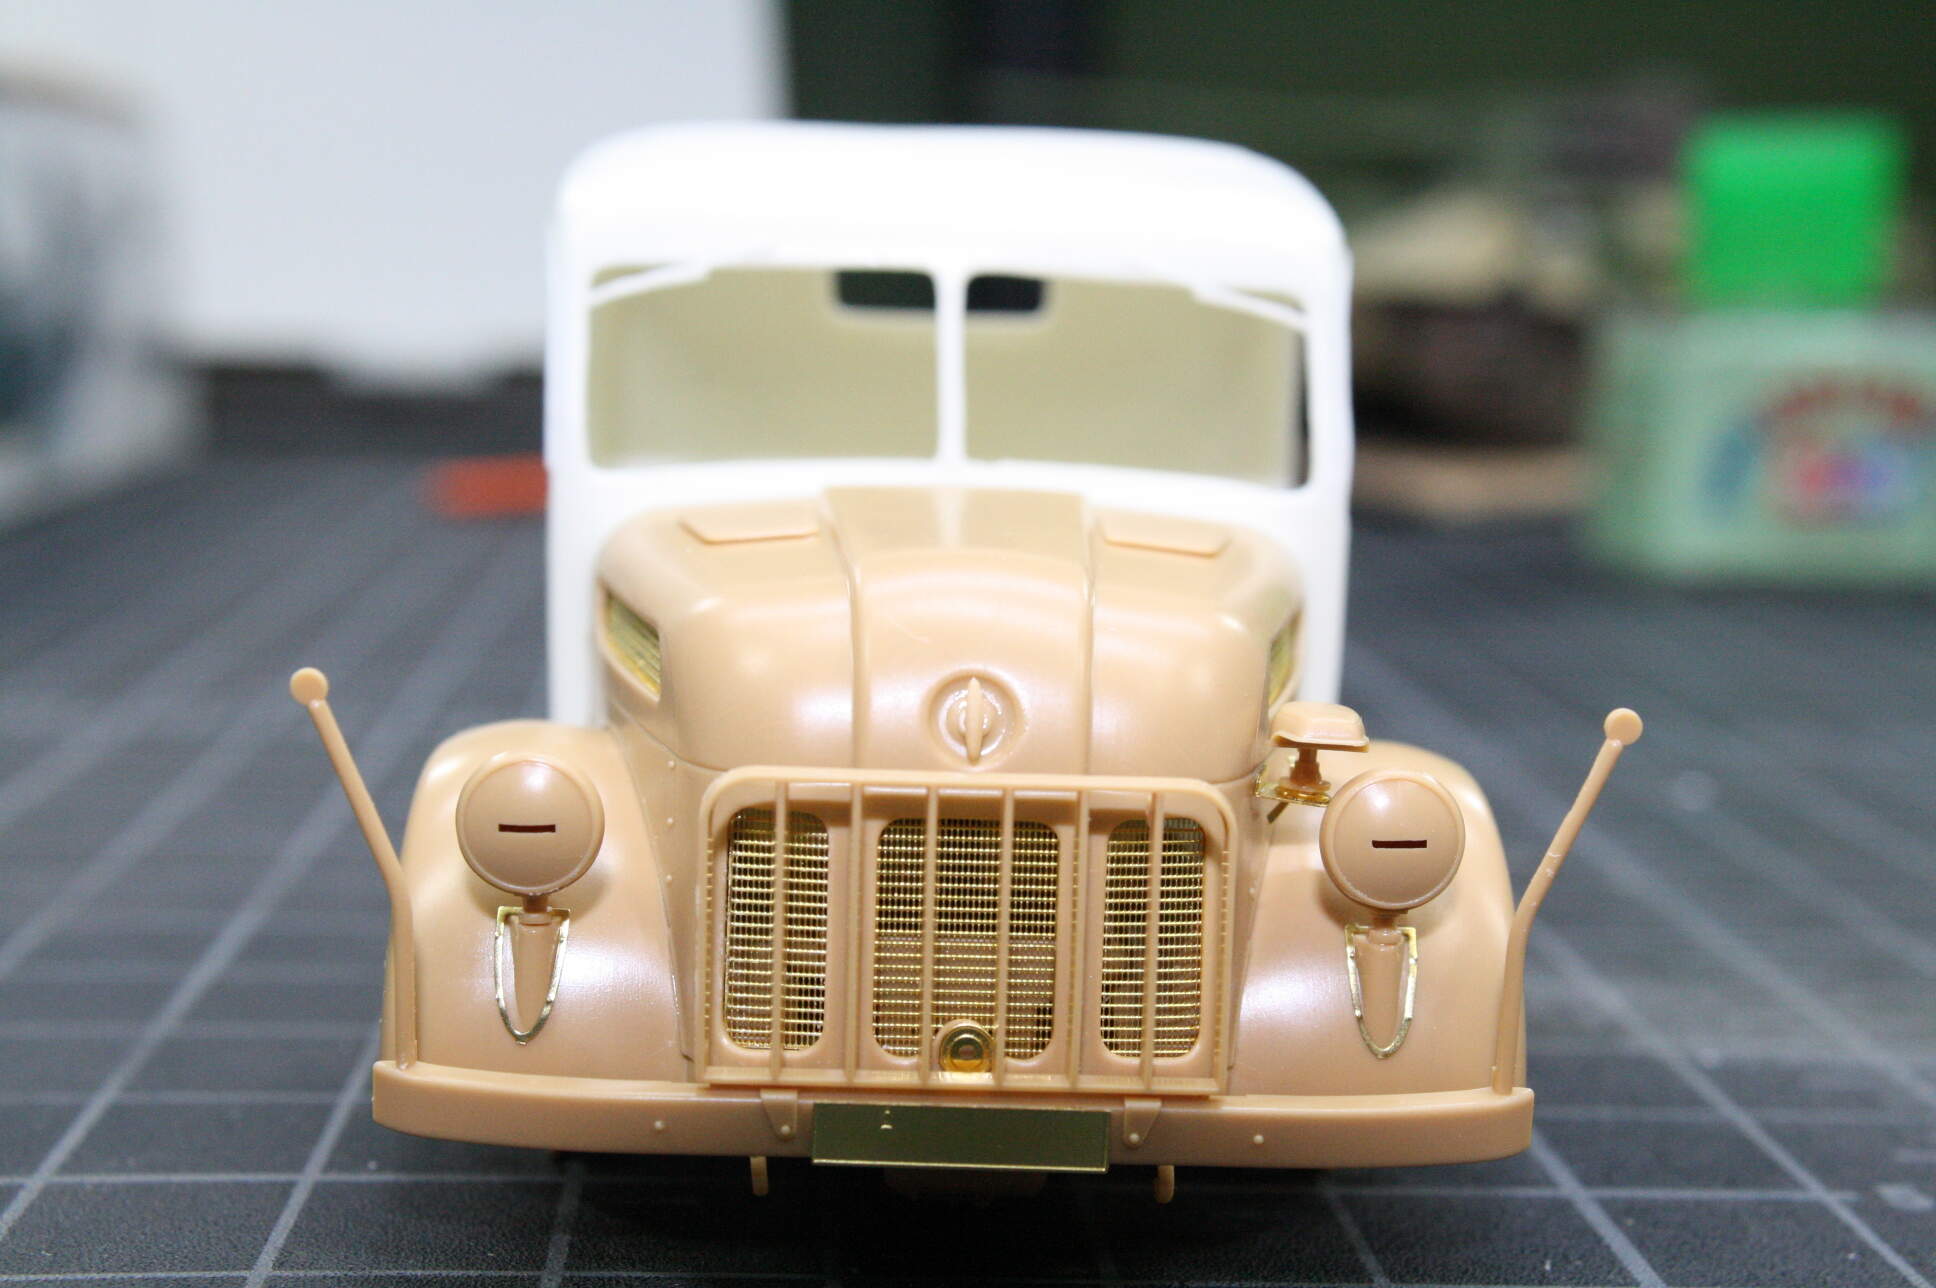
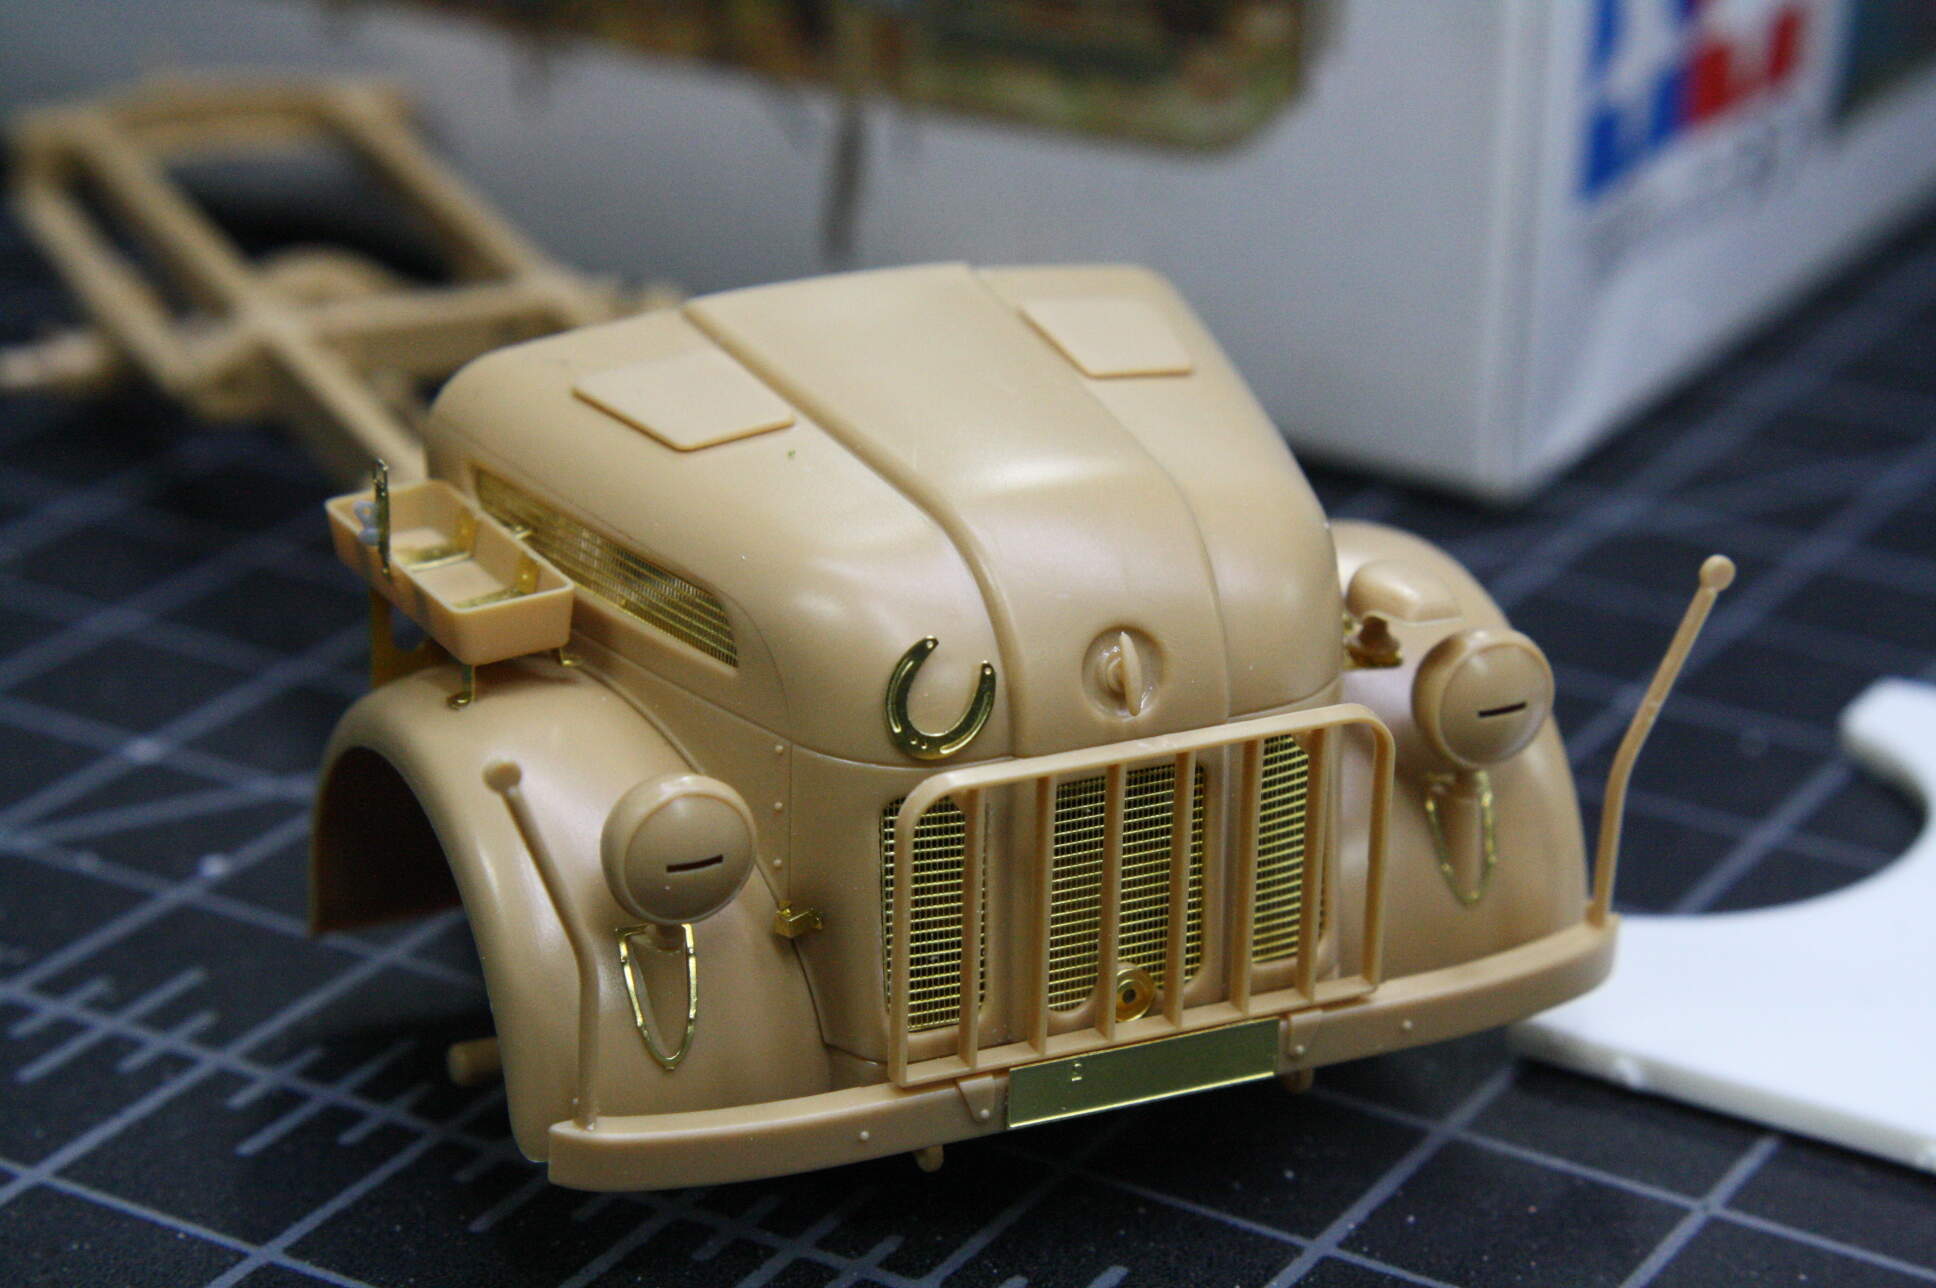
I added the PE bumper mounts so I could add the bumper. The PE set includes a grill guard, but with a little thinning, the Tamiya guard looked very nice. Voyager’s guard was 8 or so parts which all had to end up parallel, which seemed too much like herding cats to me. I added several other small PE parts to the hood and fenders before adding the lights.
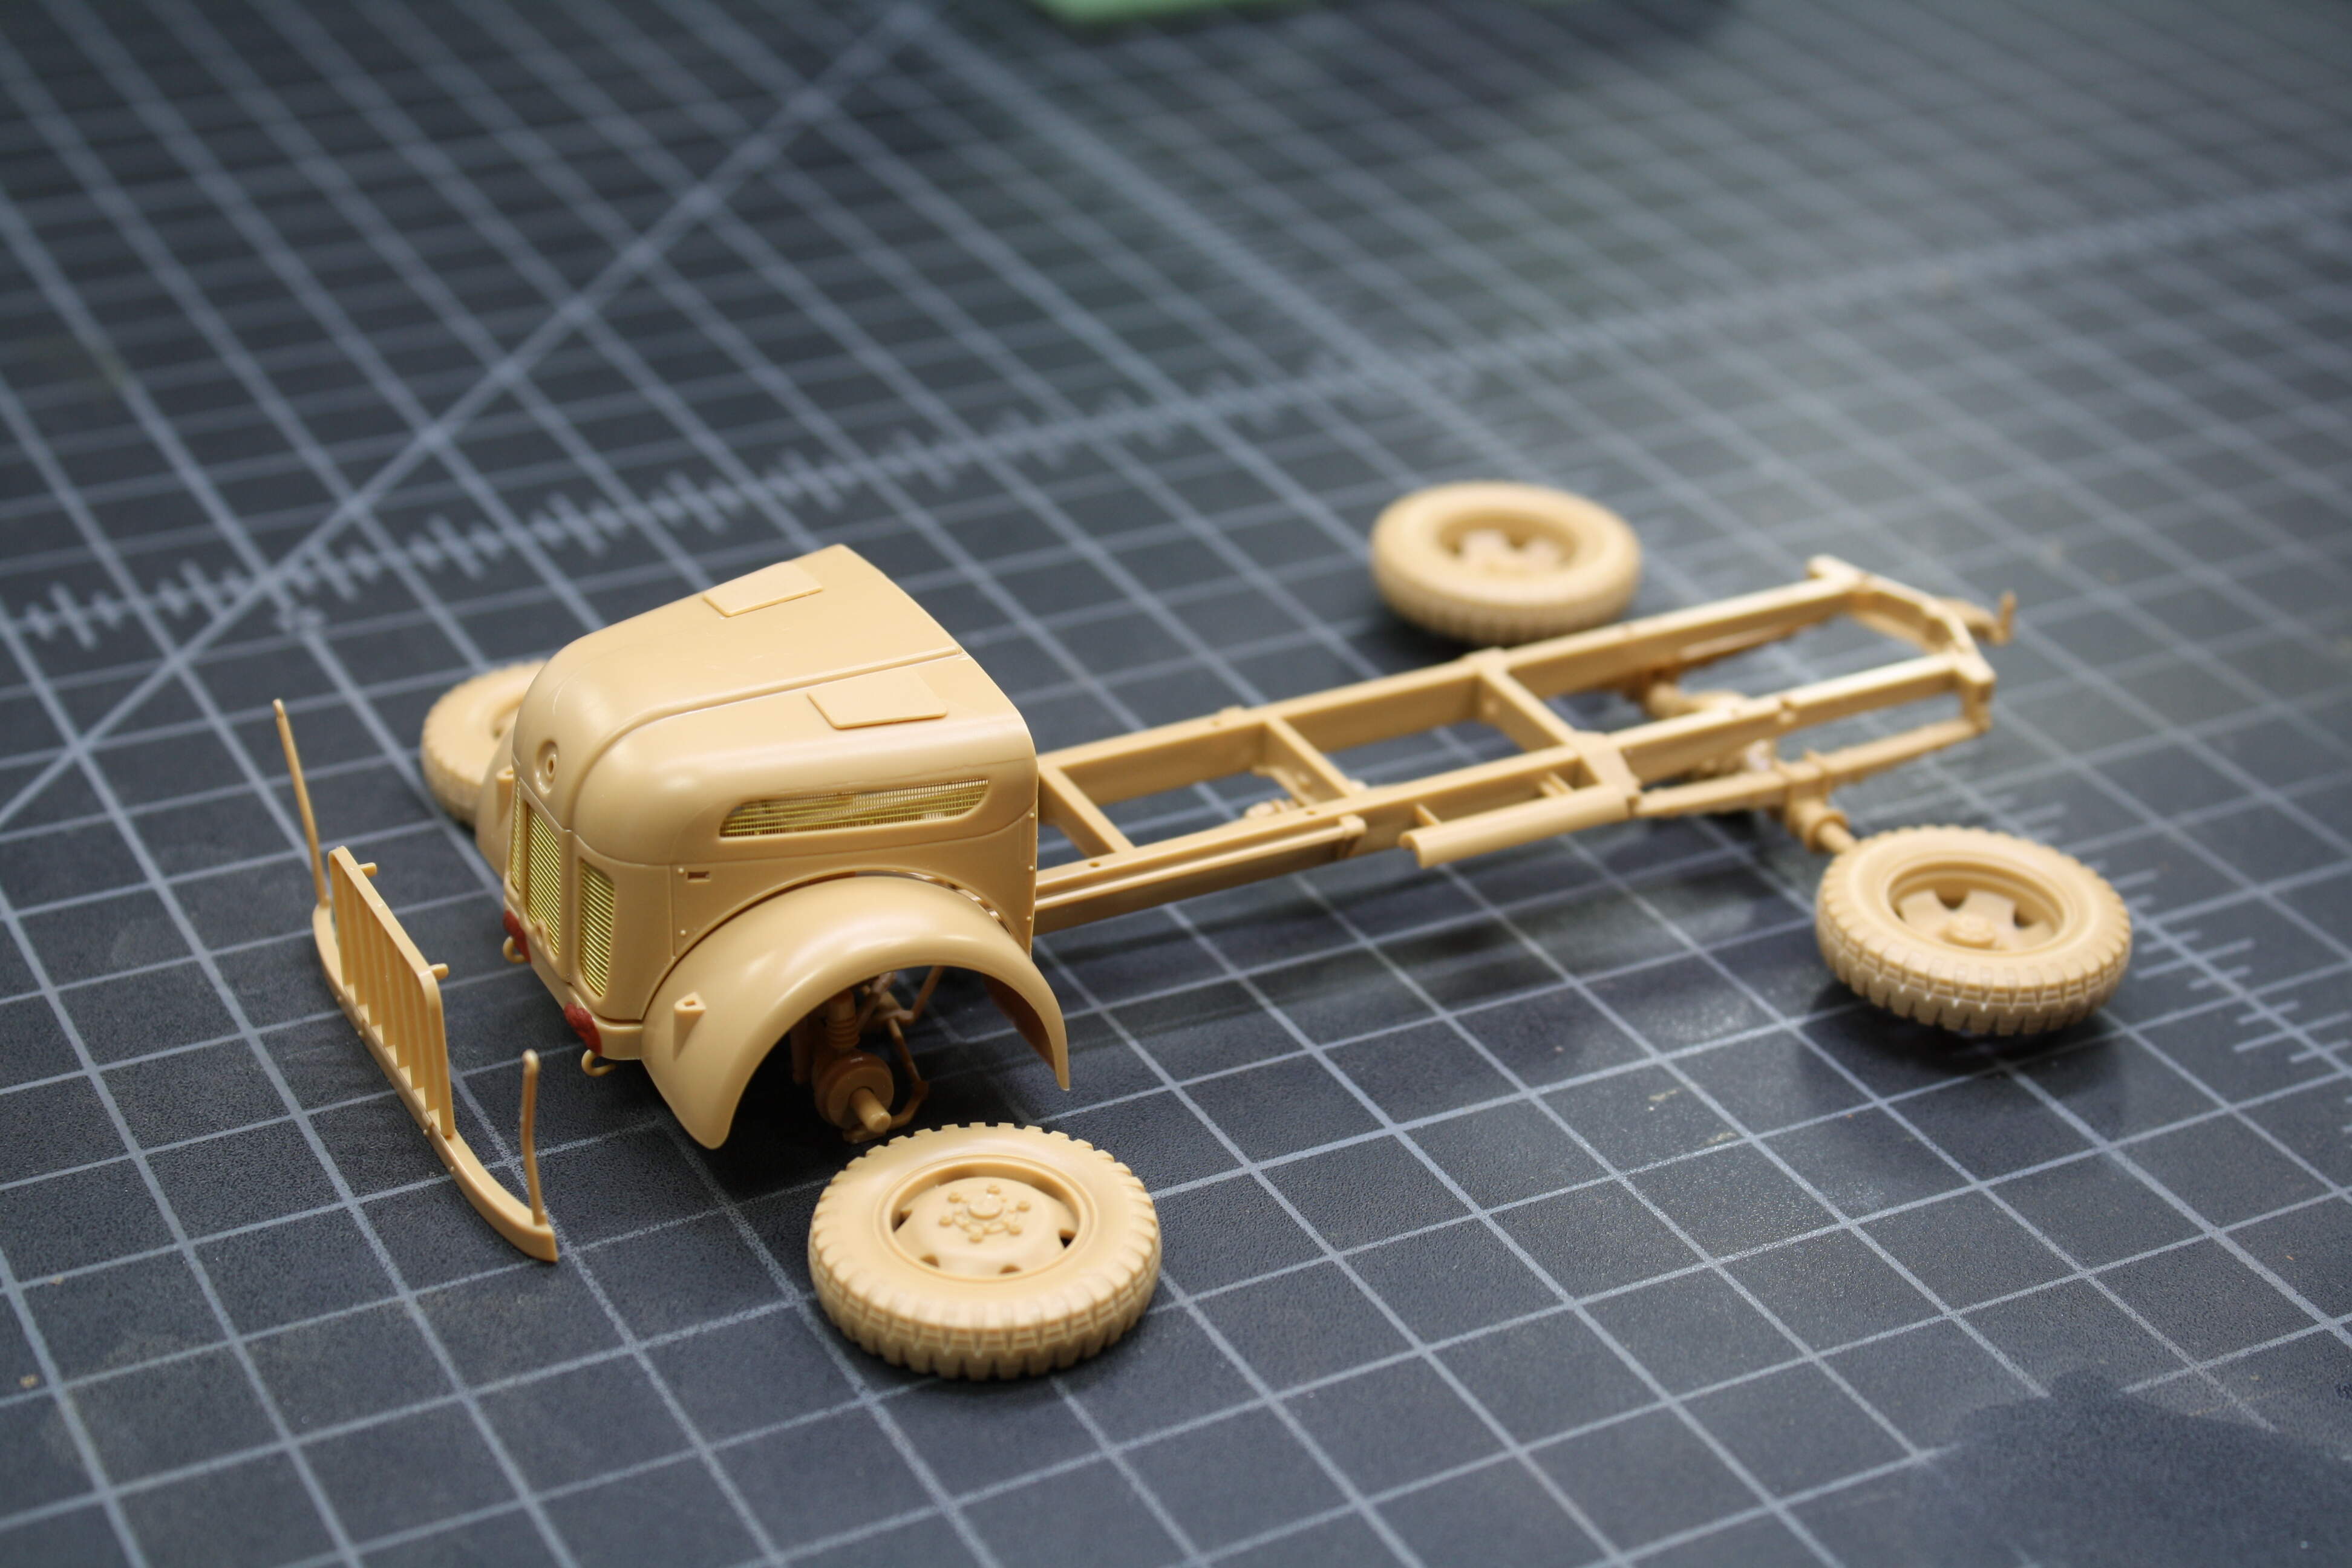
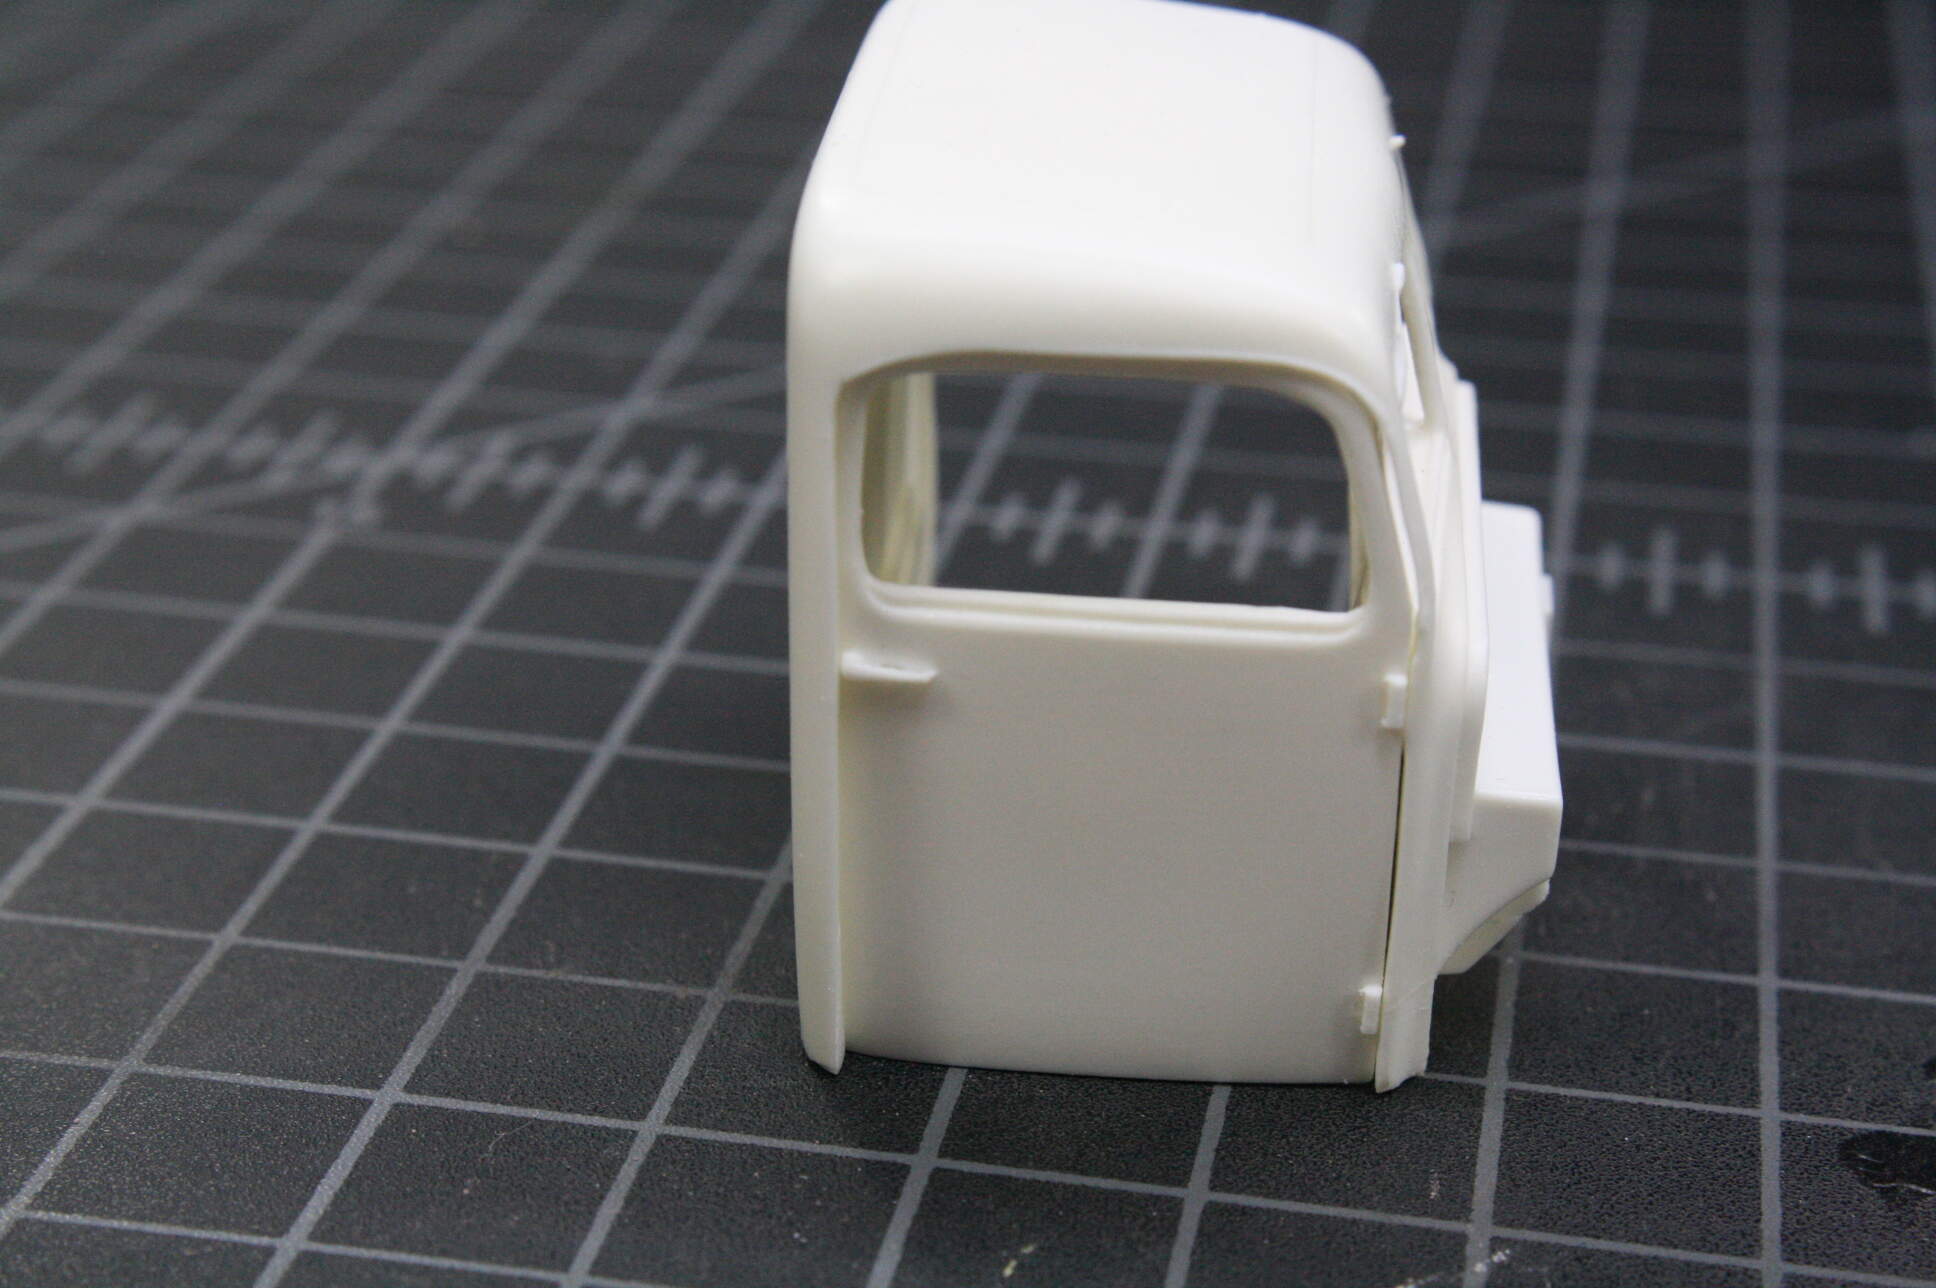
I also dry fit the cab, which FIT! That’s a good sign! I have gotten resin conversion kits before where nothing fit the doner kit! Resin shrinks when it dries and it all was too small.
I cut the tool clasps from the block. My LHS didn’t have PE razor saws so I had to order them.
Here’s the progress I made today freeing parts from pour plugs.
I also finished all the photo etch for the hood. 8 parts for the jerry can holder! Voyager is getting as bad as Aber! And yes, I see that gap under the bracket. I don’t know how it wound up short. I have a teeny little square of Evergreen to go underneath it. I was happy that Voyager included a horseshoe. Wouldn’t you want an ambulance with a horseshoe on it?
Thanks Dan! I searched my tracks and tires bin and was bummed when I didn’t find any for the Steyr. I got happy when I opened the Tamiya box. Instead of finding the expected vinyl tires, Tamiya has molded styrene one piece tires that you glue a back insert into. The inserts fit so well that a line of Mr. Surfacer 500 and a little sanding made them up to specs with any resin tires I could buy AM. So I decided to go with the kit tires.
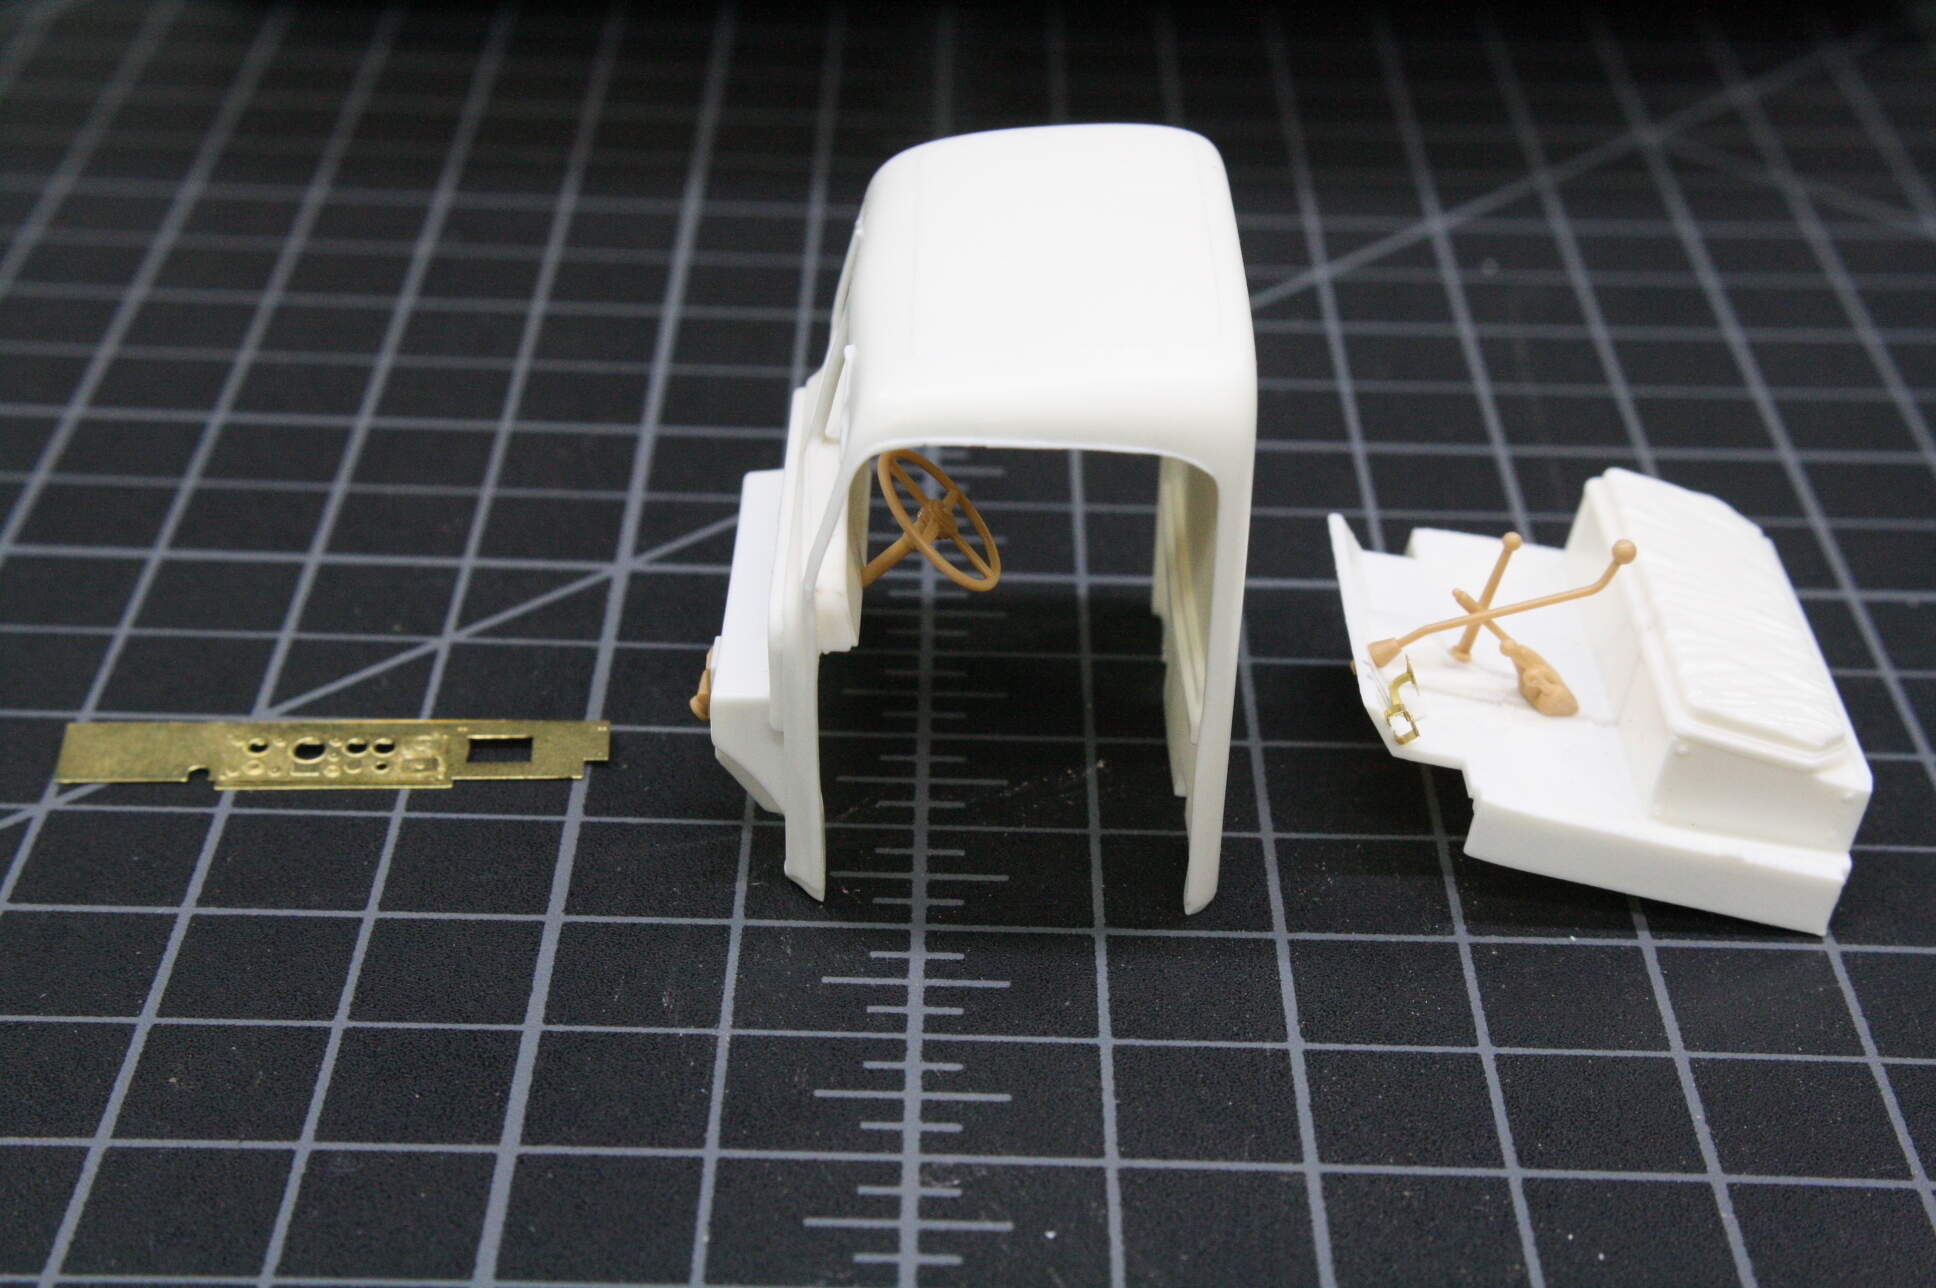
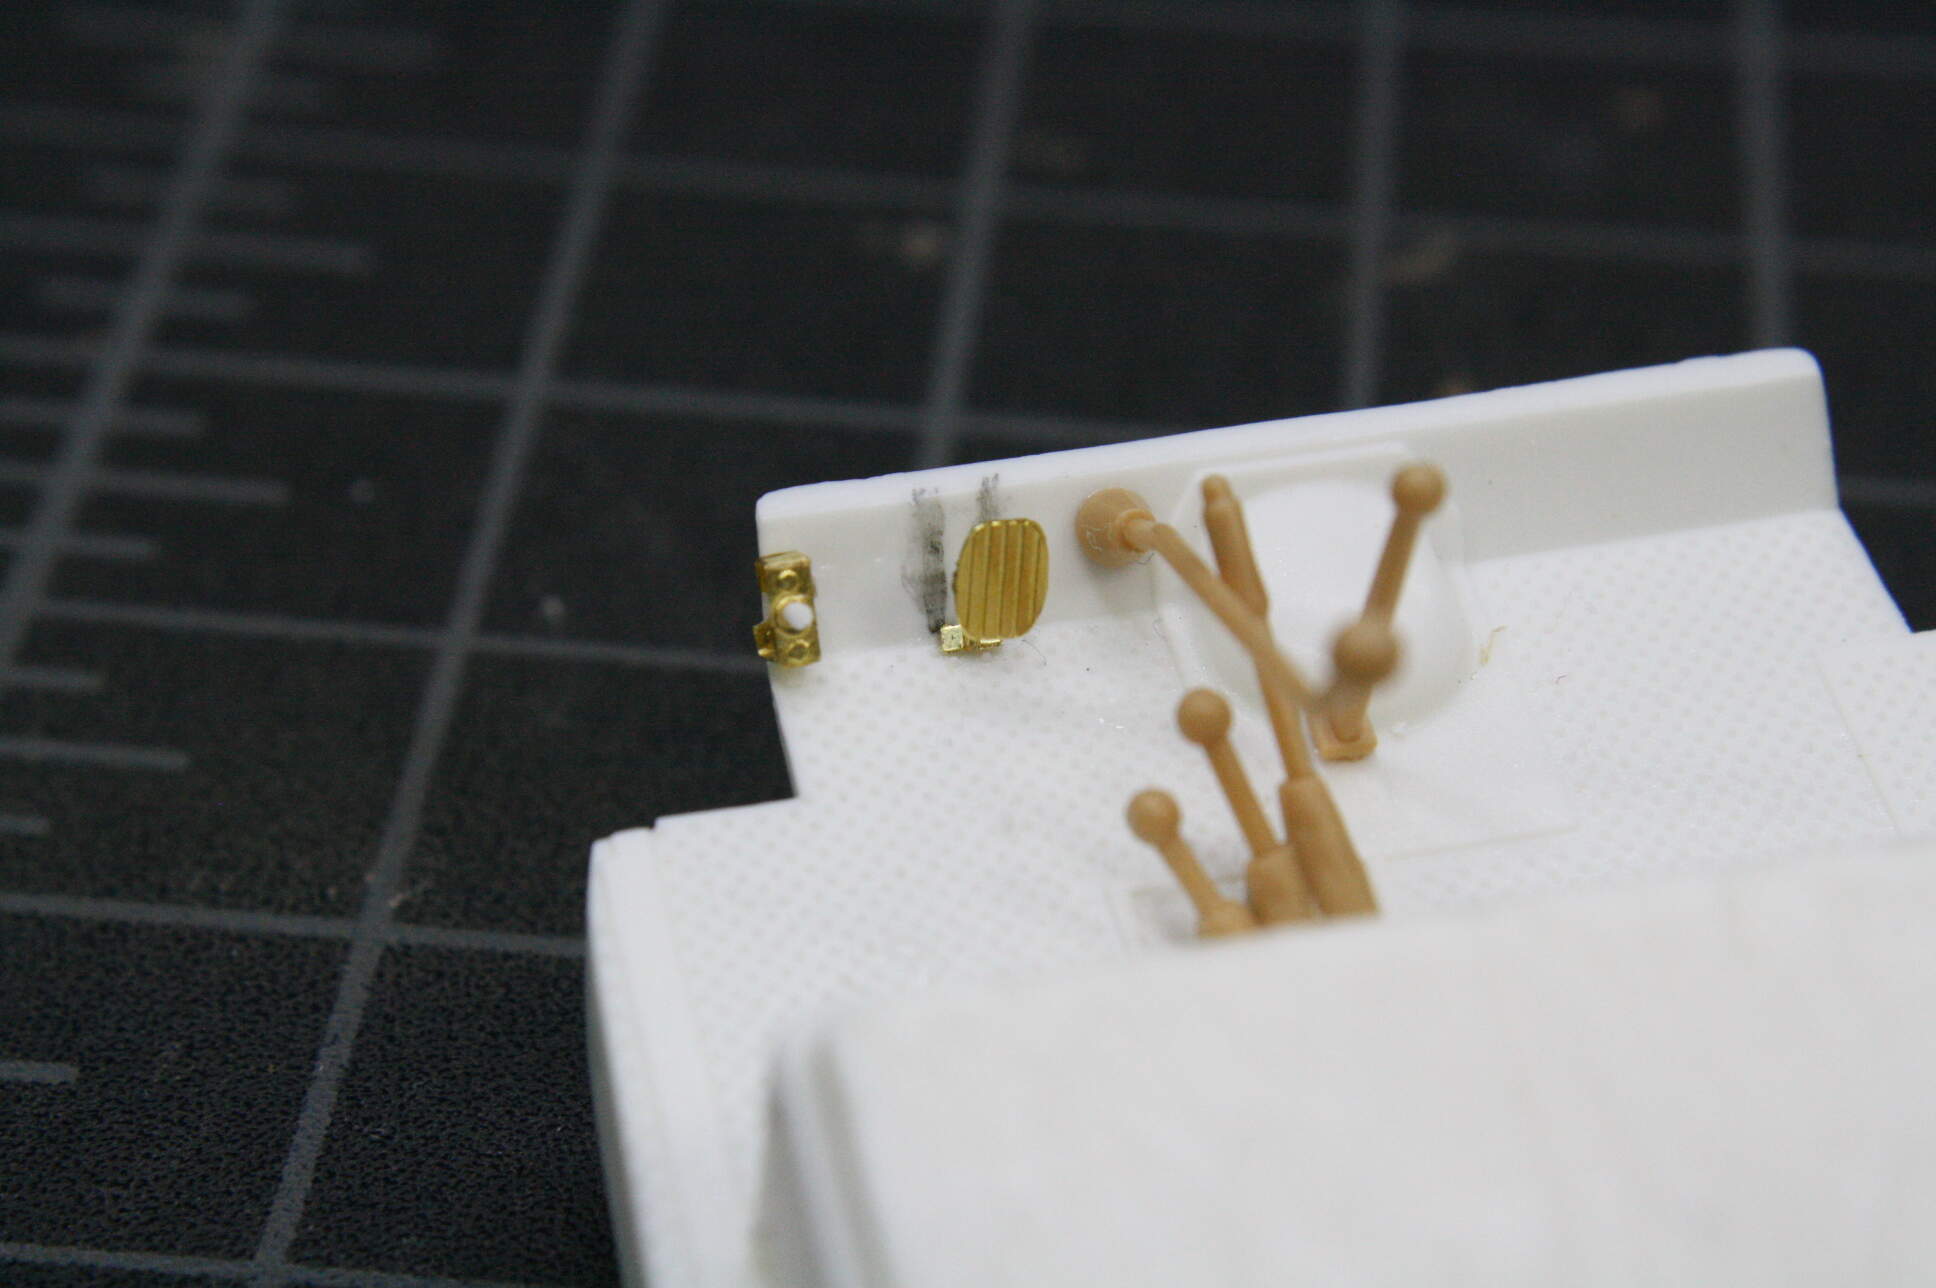
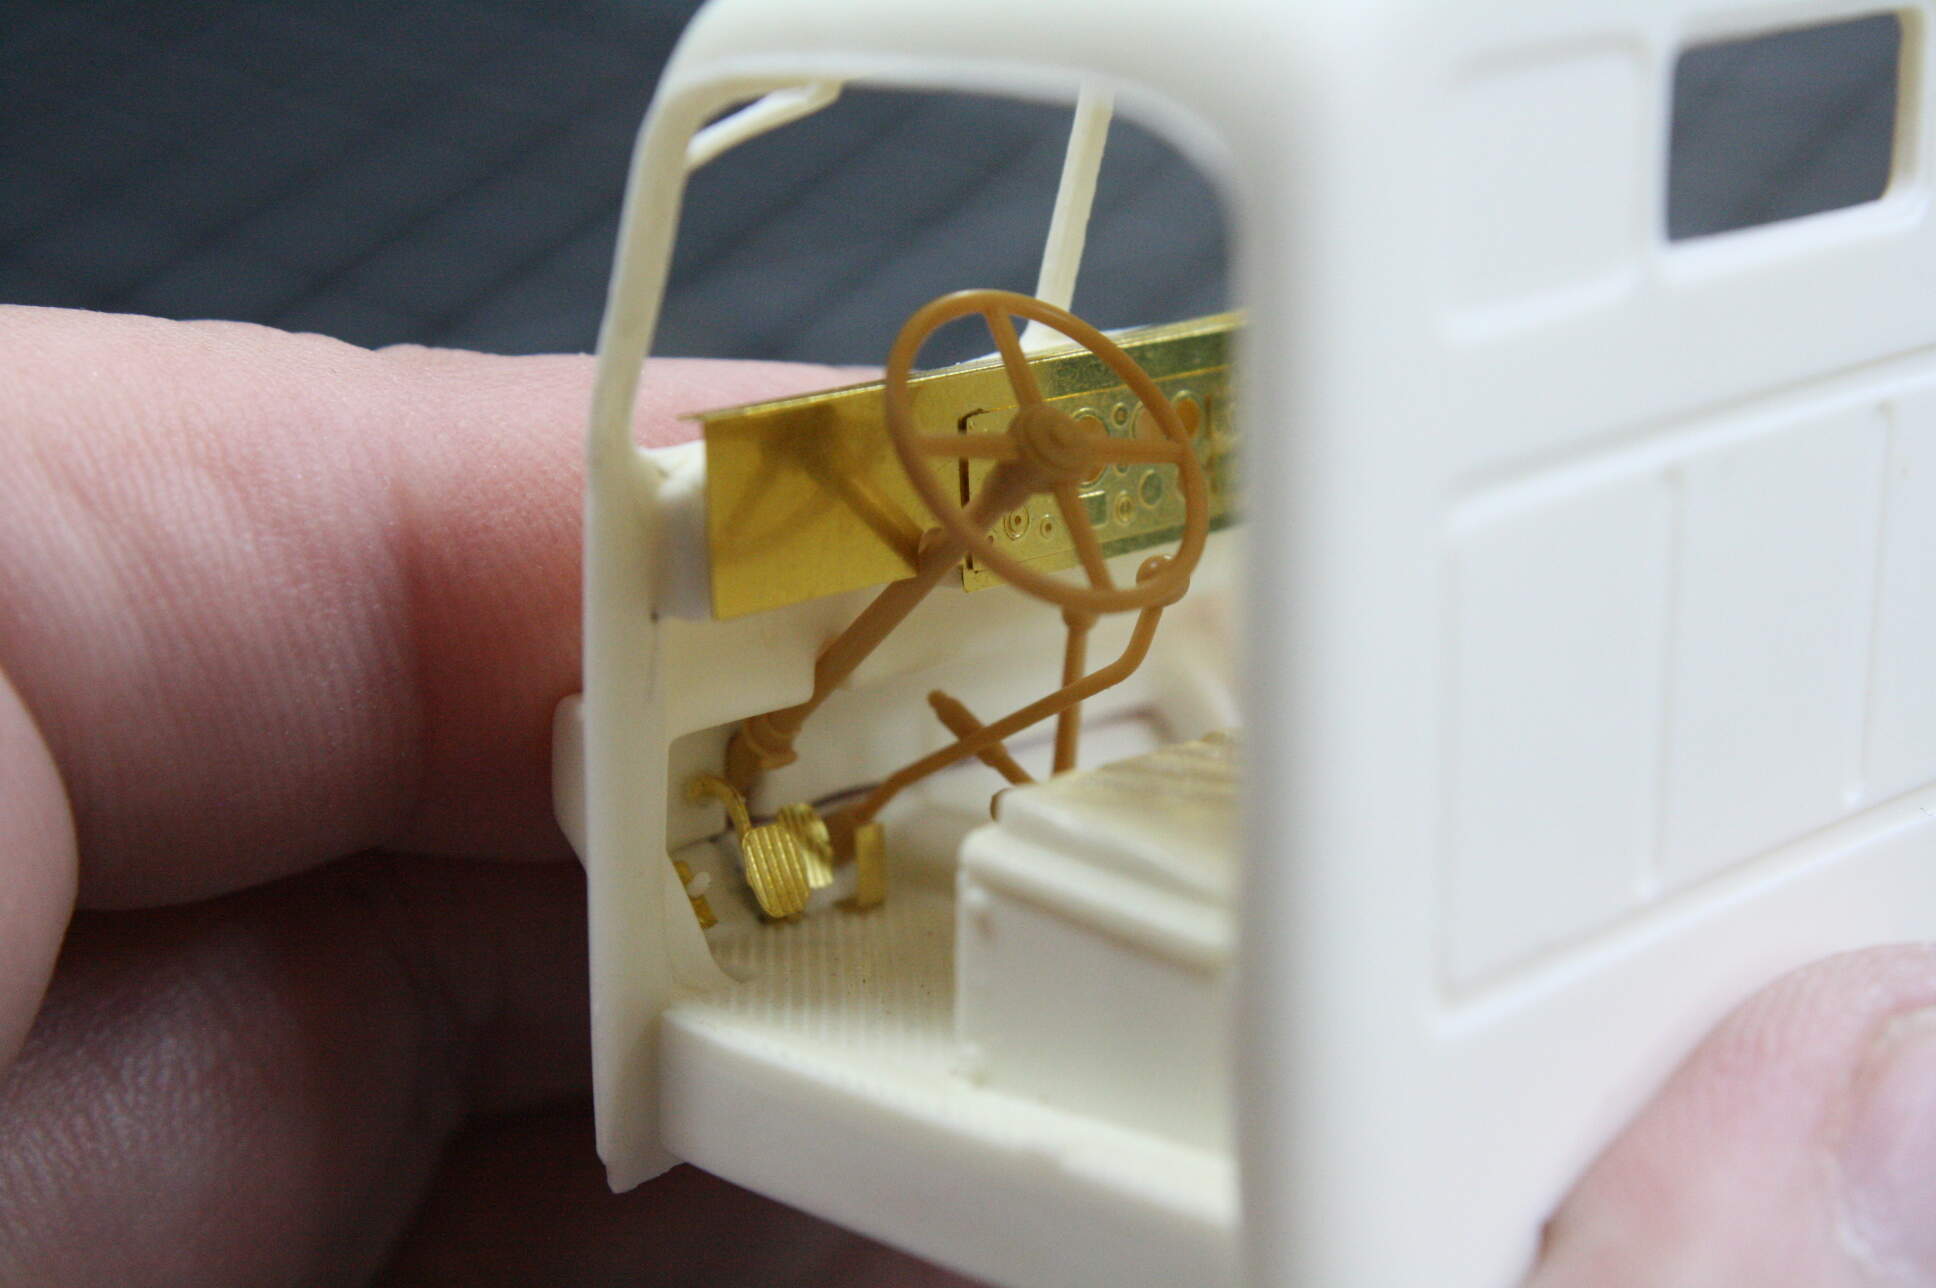
So now we start with assembling the resin kit itself. The cab cleans up well but the doors are a little small. Could have been my sanding during cleanup. I’m not blaming Leadwarrior. Now I need to beef up the doors around the edges where they need it. To do this, I go to my favorite modeling putty - Bondo Spot Putty. I’ve used Tamiya and Deluxe Perfect Plastic Putty and nothing works better than Bondo. It also sticks to styrene, resin, and PE. And it’s about $6 for a tube that will last you 20 years as long as you don’t build Lindberg kits! Sands easy and glass smooth, too. Oh, and for those that don’t work on cars, Bondo is an auto body product. You can get the spot putty at Wal-mart or any auto parts store. So while I was waiting for the putty to dry, I had a lot of PE work to do for the cab interior. Dash, starter, and pedals. Lots of teeny parts!